Fix: No Internet, Secured Error on Windows 11
Resetting your router is the easiest workaround
6 min. read
Updated on
Read our disclosure page to find out how can you help Windows Report sustain the editorial team. Read more
Key notes
- Connectivity issues normally occur after an abrupt power outage or issues with your ISP.
- Luckily, Windows has a built-in troubleshooter, but it can sometimes be insufficient.
- We found various ways to restore your connection, so keep reading to troubleshoot this error.
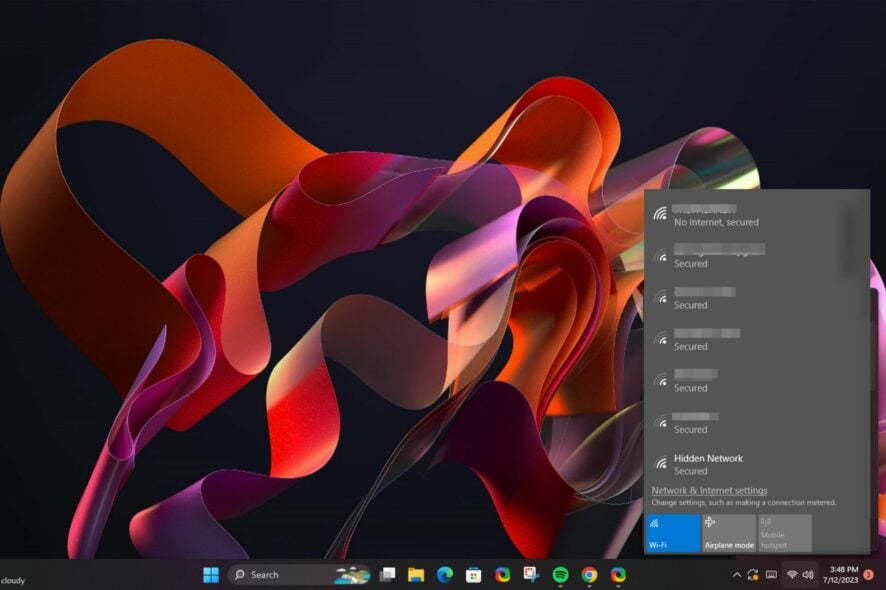
Sometimes, you will see that your computer says everything is fine, but, at the same time, it just cannot recognize whether there is any internet connection.
If you’re lucky, internet access for some websites will work normally, but this will be short-lived. You need to get to the root cause of the problem and address it f you want a working and stable connection.
Why does my PC say no internet, but secured?
- Your Internet Service Provider (ISP) might be having issues with their service.
- You may have installed a firewall on your computer which blocks any access to the internet.
- Your antivirus software may have detected proxy servers on your computer and flagged the connection.
- It’s possible that your network adapter might be malfunctioning.
How do I fix no internet, secured on Windows 11?
Start off with the following preliminary checks:
- Ensure that all the cables are connected properly and there are no loose connections in your system.
- Check for issues with your ISP by connecting to a different network.
- Make sure Windows is up-to-date.
- Switch from a wireless connection to an Ethernet cable and restart your router.
1. Run network troubleshooters
1.0 Run the Network adapter troubleshooter
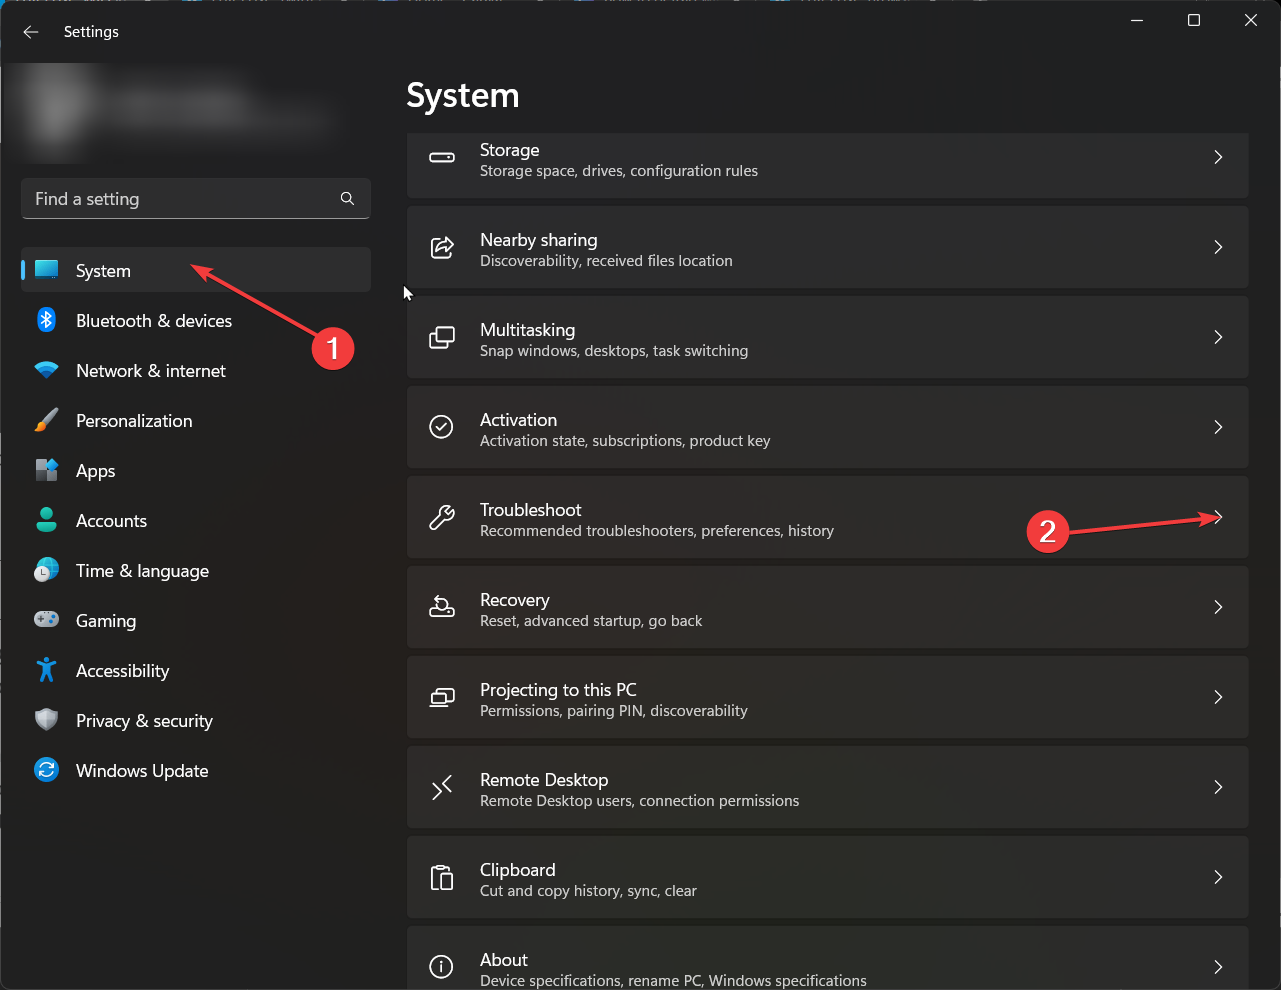
- Hit the Windows key and click on Settings.
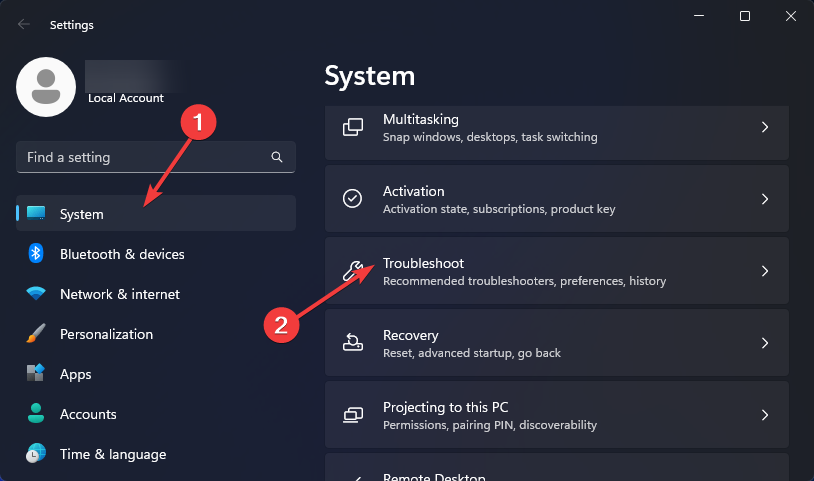
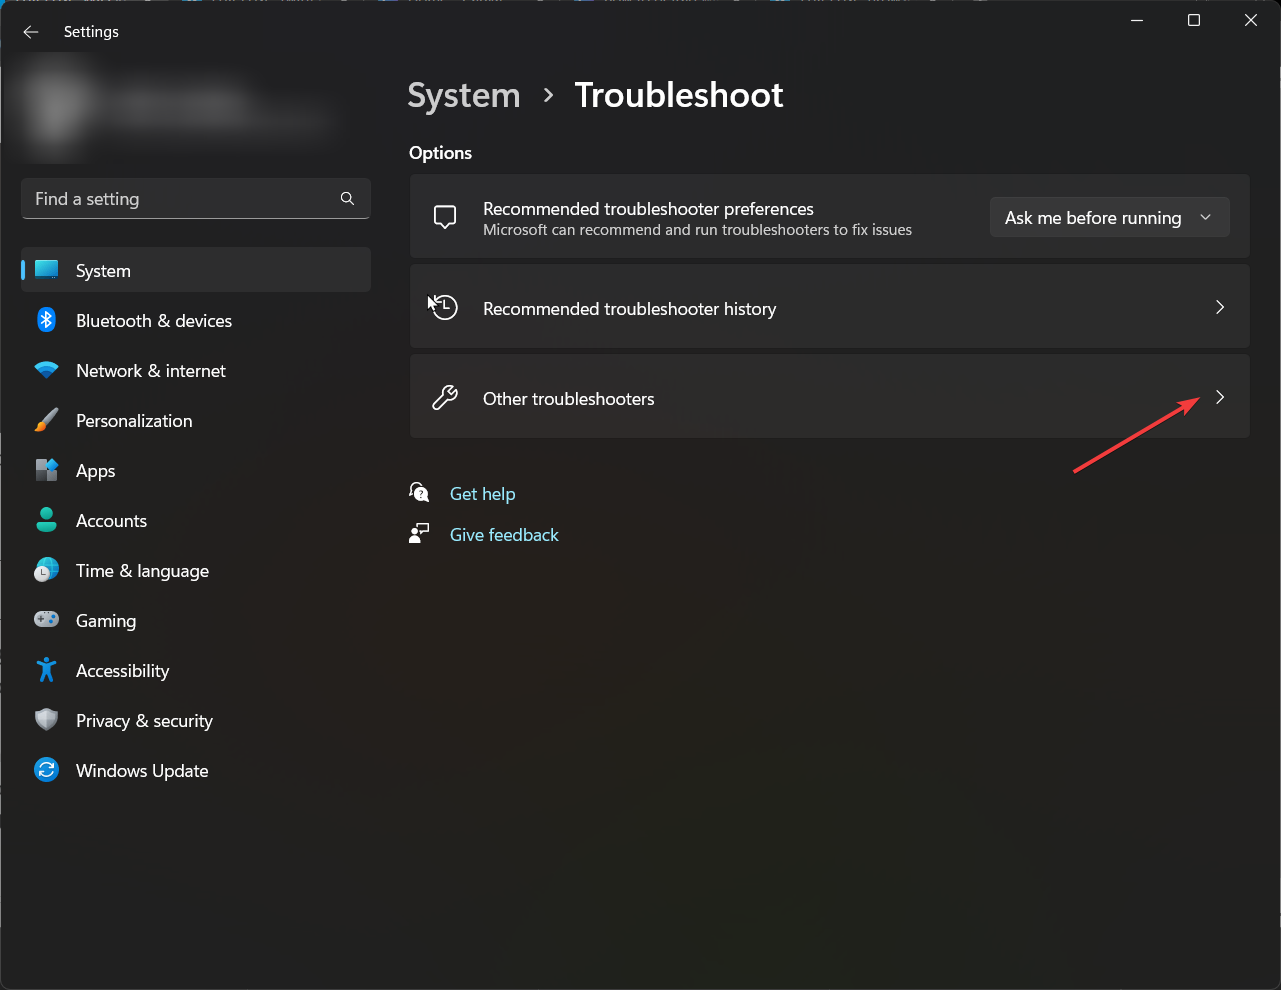
- Click on System, then select Troubleshoot.
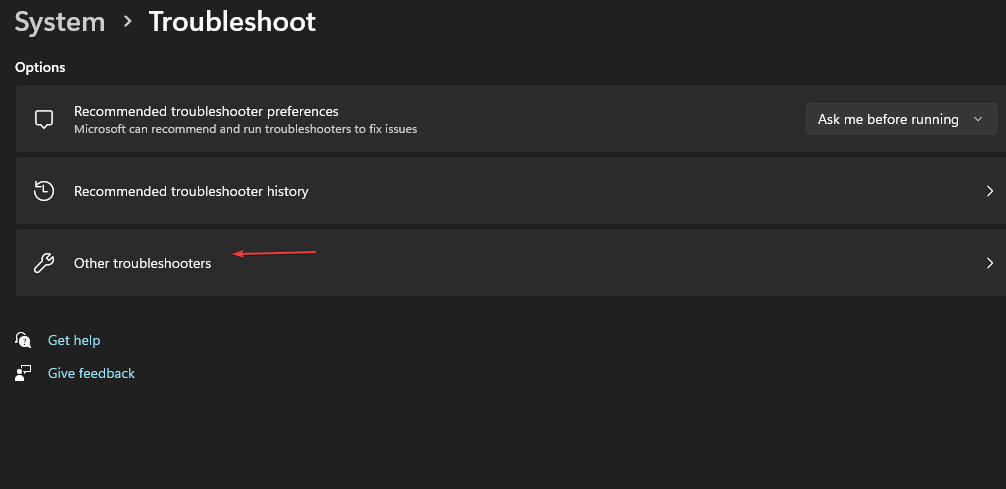
- Select Other troubleshooters.
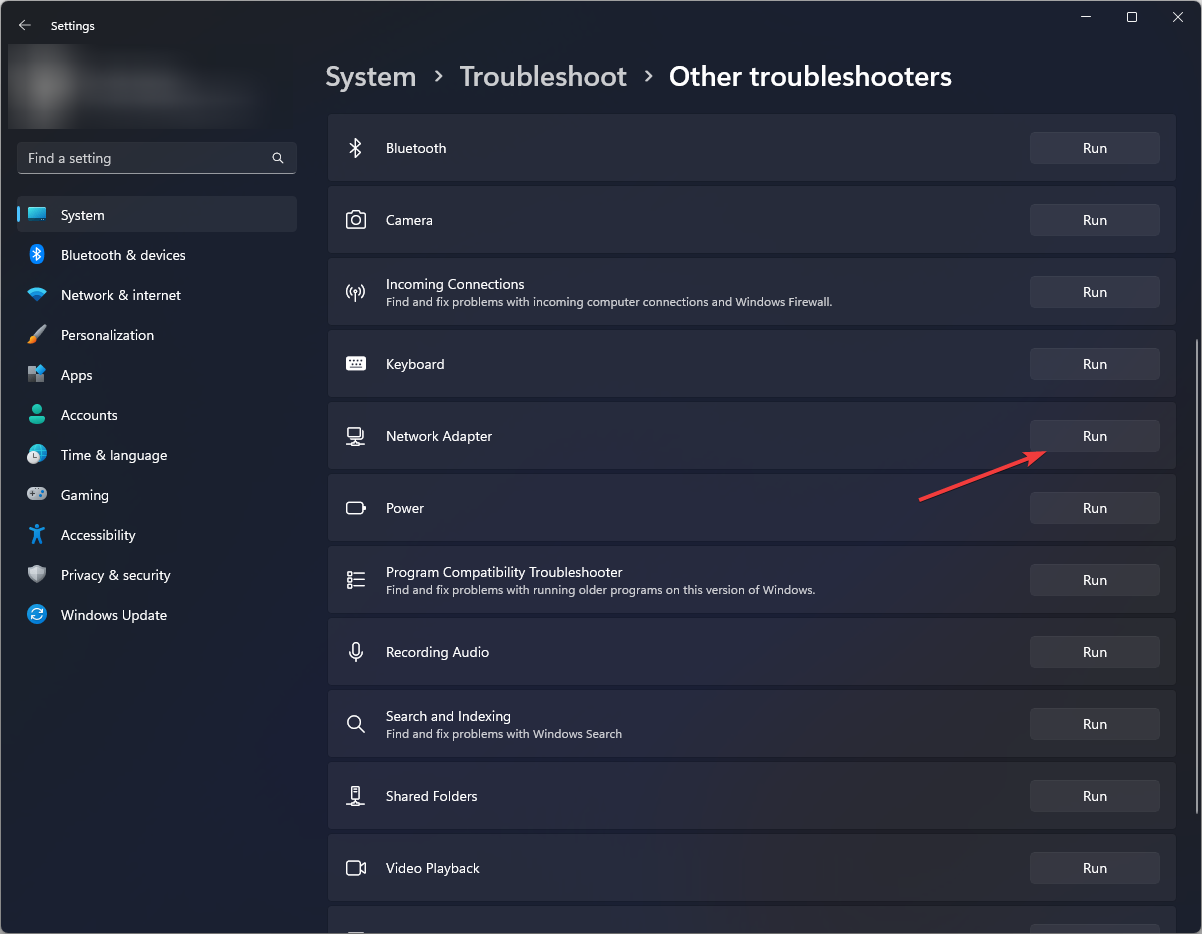
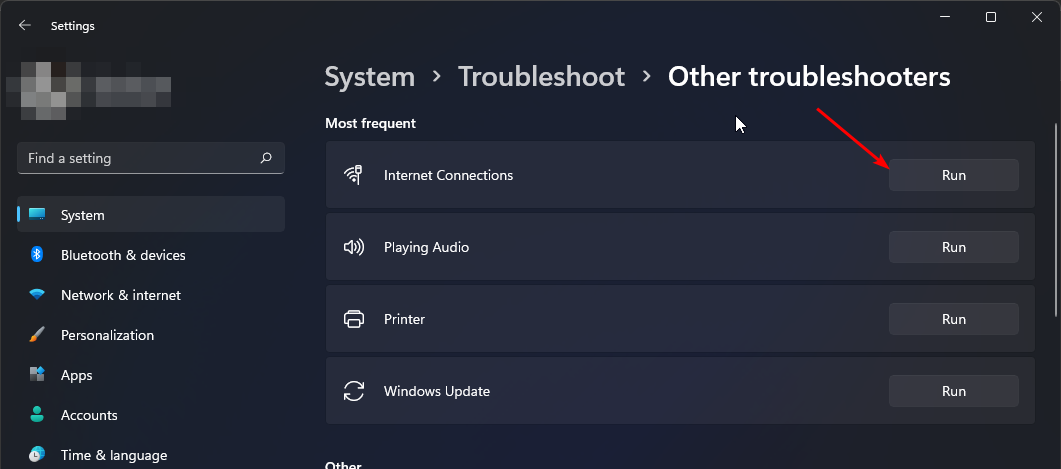
- Locate the Network Adapter troubleshooter and click on the Run button next to it.
1.1 Run the Internet Connections troubleshooter
- Hit the Windows key and click on Settings.
- Go to System, and click Troubleshoot.
- Now click Other troubleshooters.
- Locate Internet connections, and click Run.
- Follow the onscreen prompts to complete the process.
2. Disable your antivirus temporarily
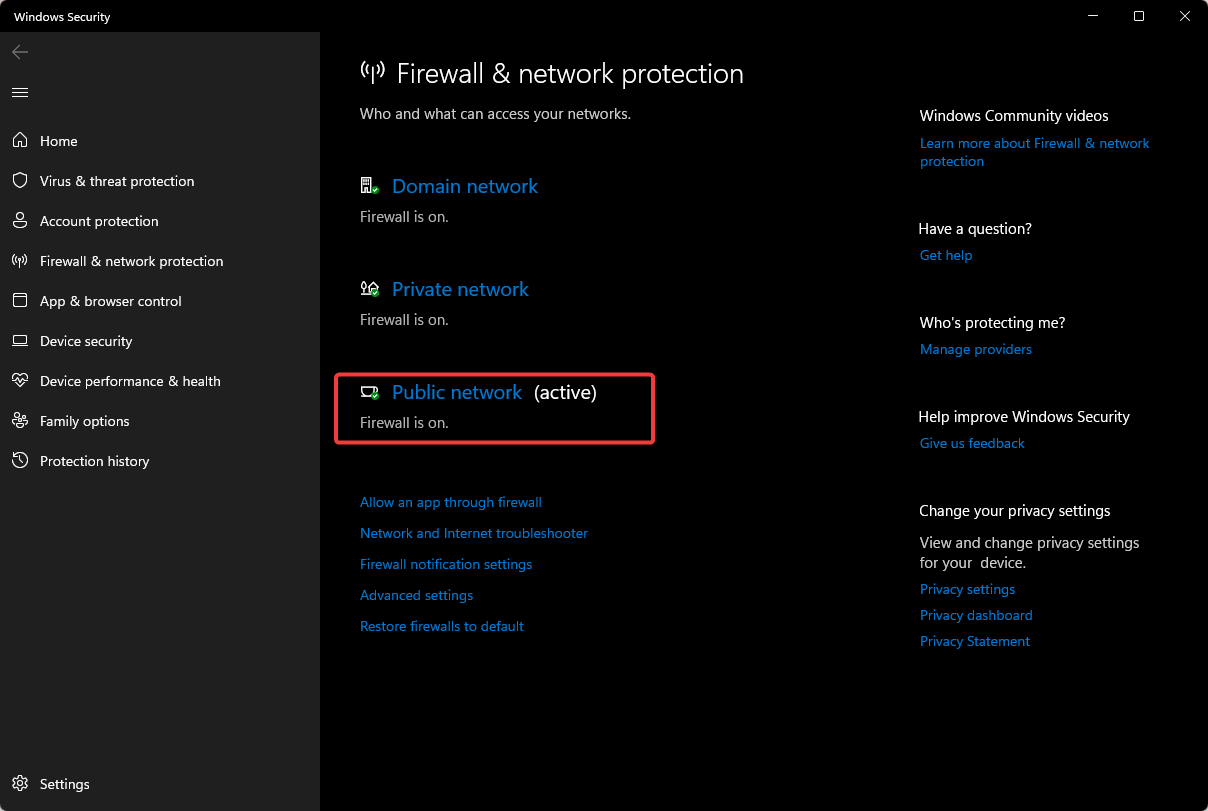
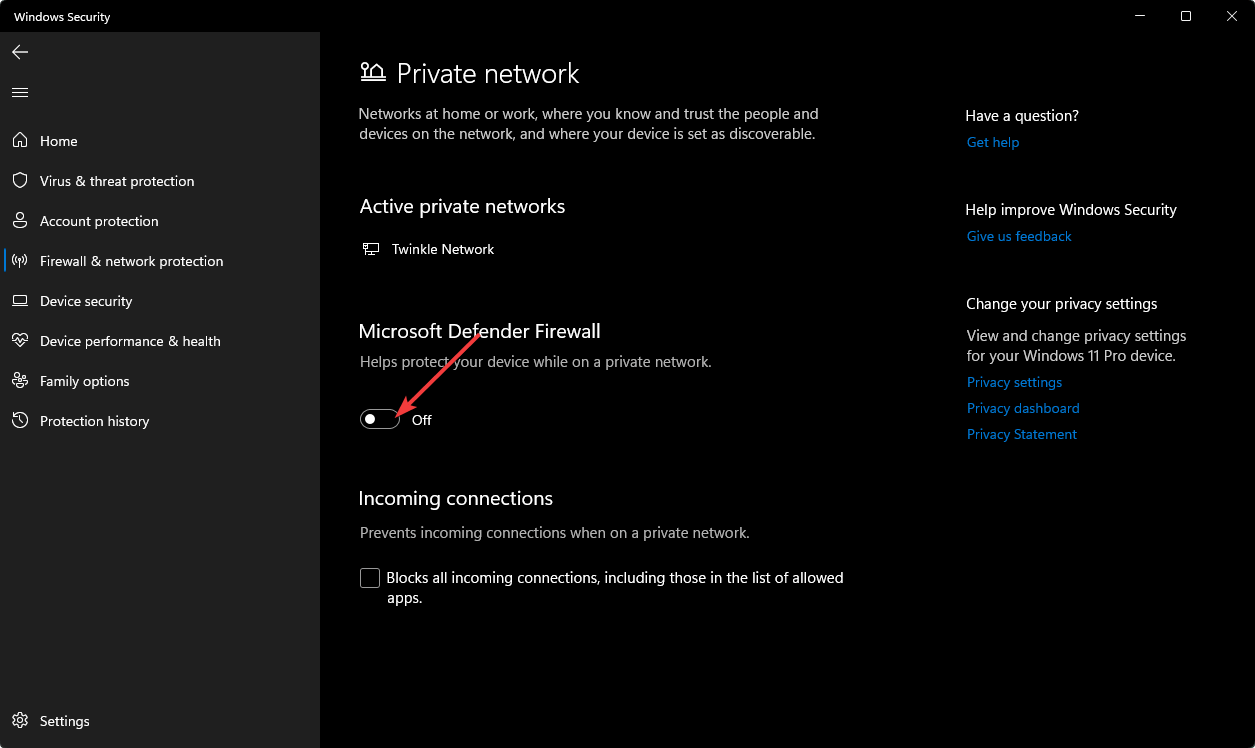
- Hit the Windows key, type Windows Security in the search bar, and click Open.
- Click on Firewall & network protection, then select Public network.
- Locate Microsoft Defender Firewall and toggle the off button.
3. Update your Network driver
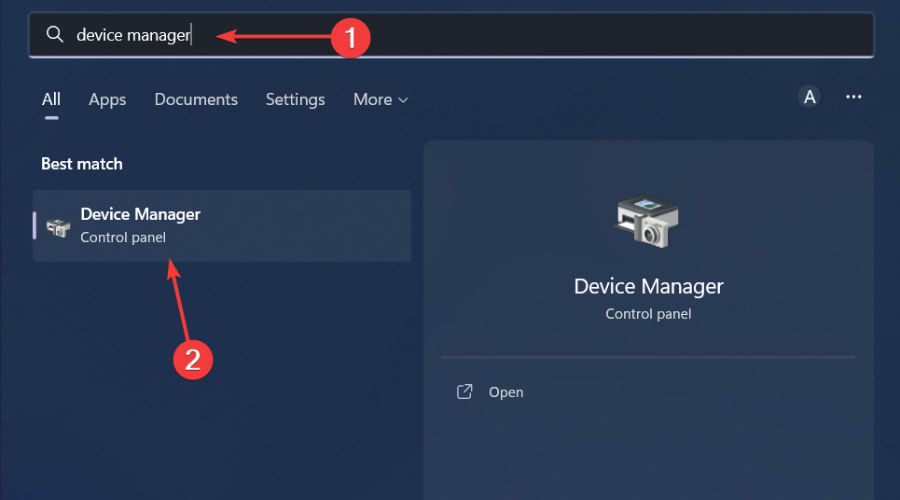
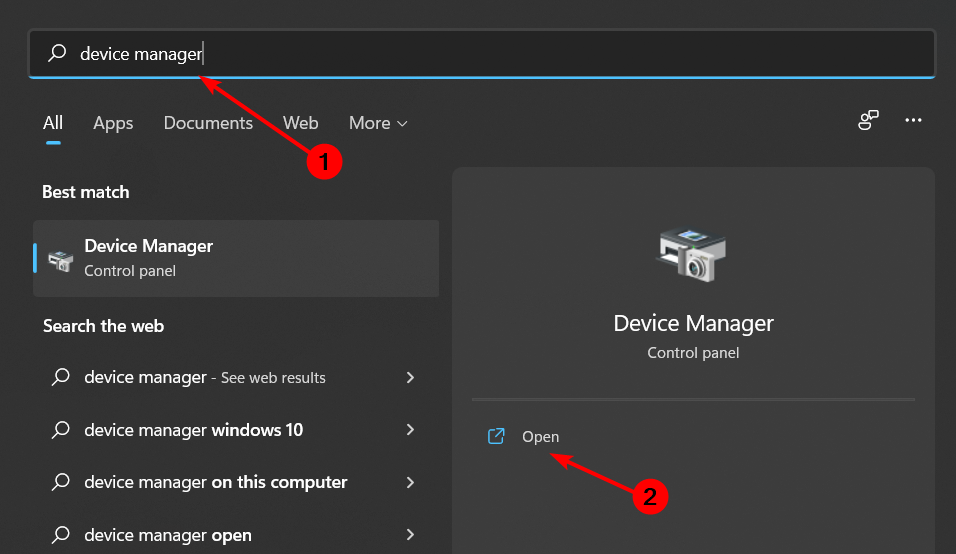
- Hit the Windows key, type Device Manager in the search bar, and click Open.
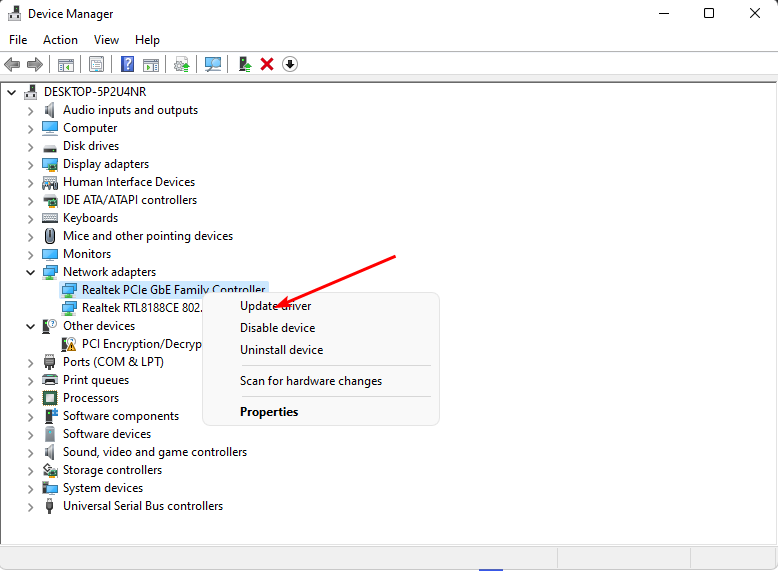
- Navigate to your Network adapter, right-click on it, and select Update driver.
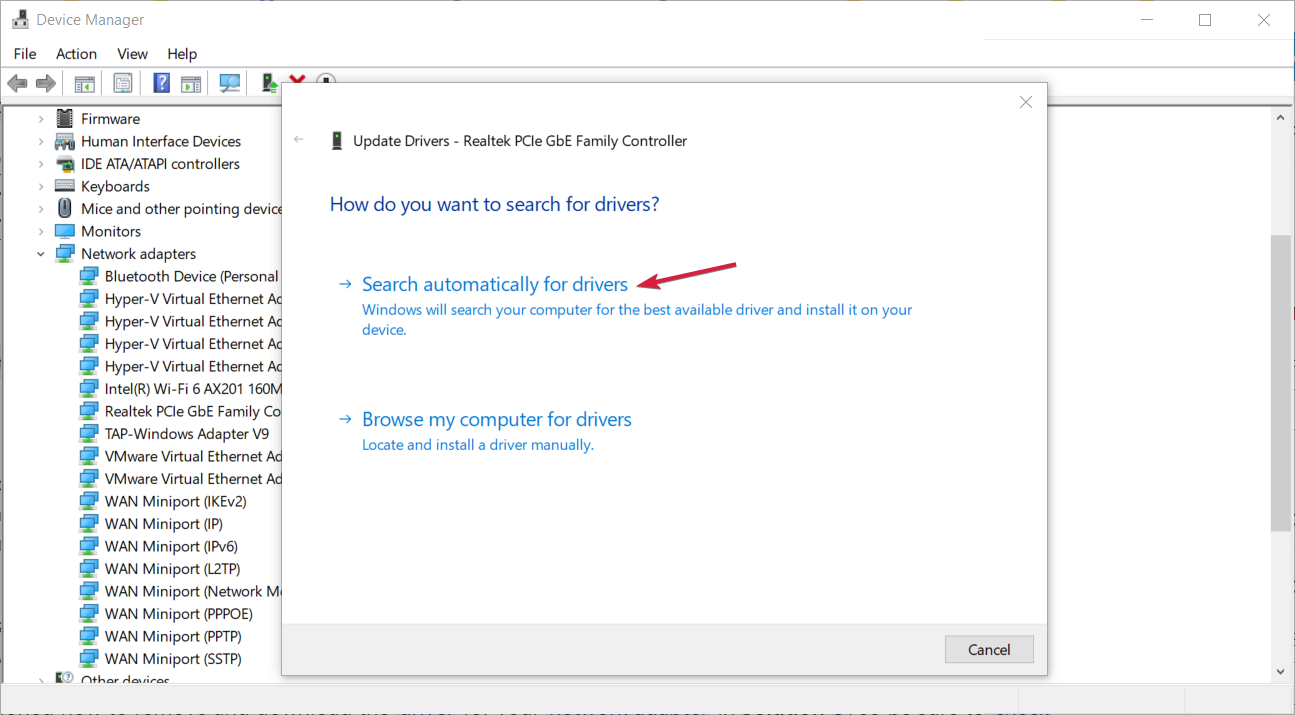
- Select Search automatically for updated drivers.
- Download and install the Outbyte Driver Updater app.
- Launch the software and wait for the app to detect all incompatible drivers.
- Now, it will show you a list of all outdated drivers to select the ones to Update or Ignore.
- Click on Update & Apply Selected to download and install the latest versions.
- Restart your PC to ensure the applied changes.

Outbyte Driver Updater
Maintain your device healthy by letting OutByte Driver Updater find the latest driver options.4. Reinstall your Network drivers
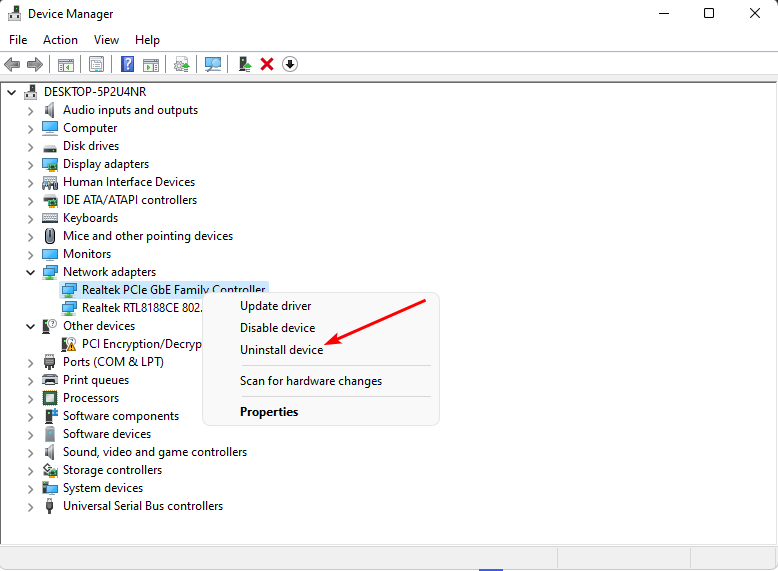
- Click on the Start Menu icon, type Device Manager in the search bar, and click Open.
- Navigate to your Network adapter, right-click on it, and select Uninstall device.
- Confirm Uninstall in the next confirmation dialog.
- Restart your PC, and your drivers will be automatically reinstalled.
5. Scan for viruses
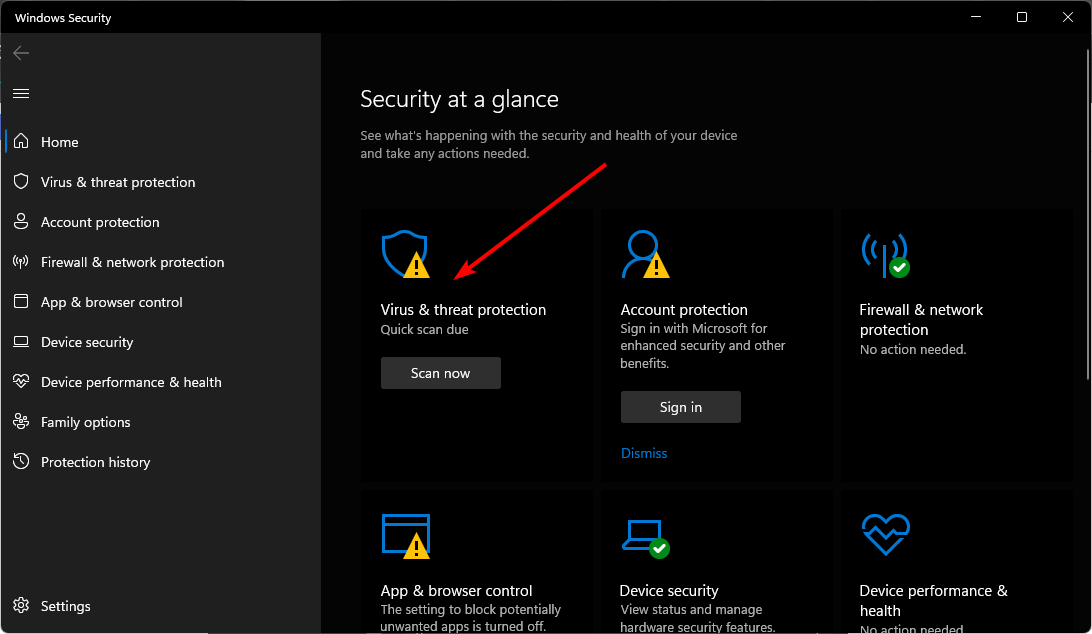
- Click on the Start Menu icon, search Windows Security, and click Open.
- Select Virus & threat protection.
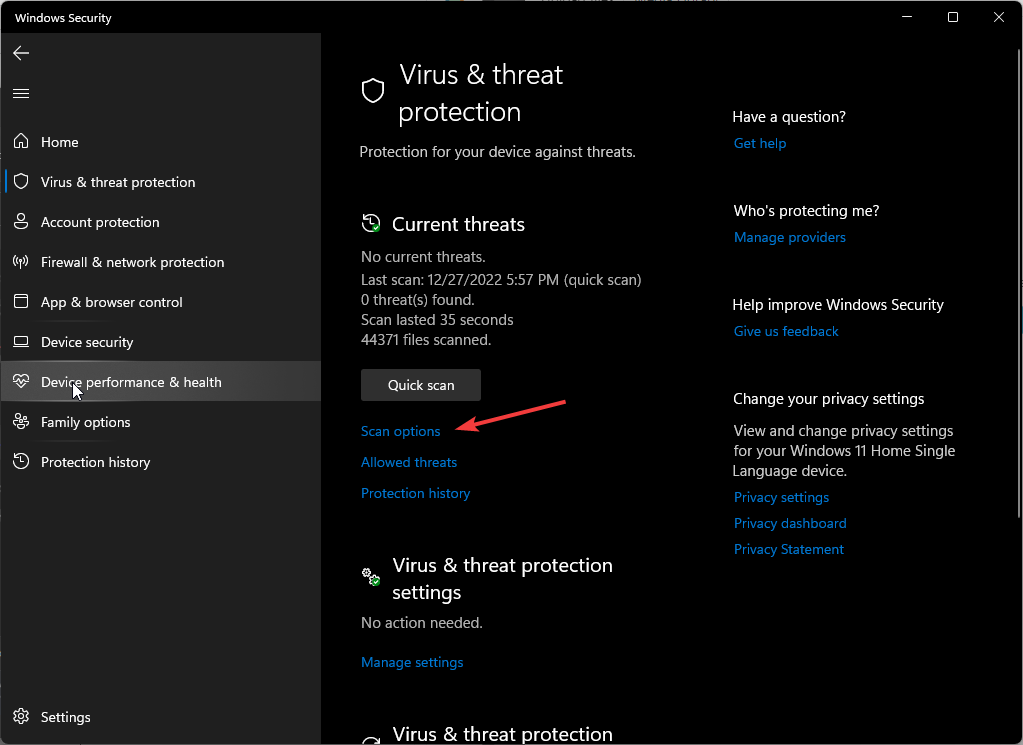
- Next, press Quick scan under Current threats.
- If you don’t find any threats, proceed to perform a full scan by clicking on Scan options just below Quick scan.
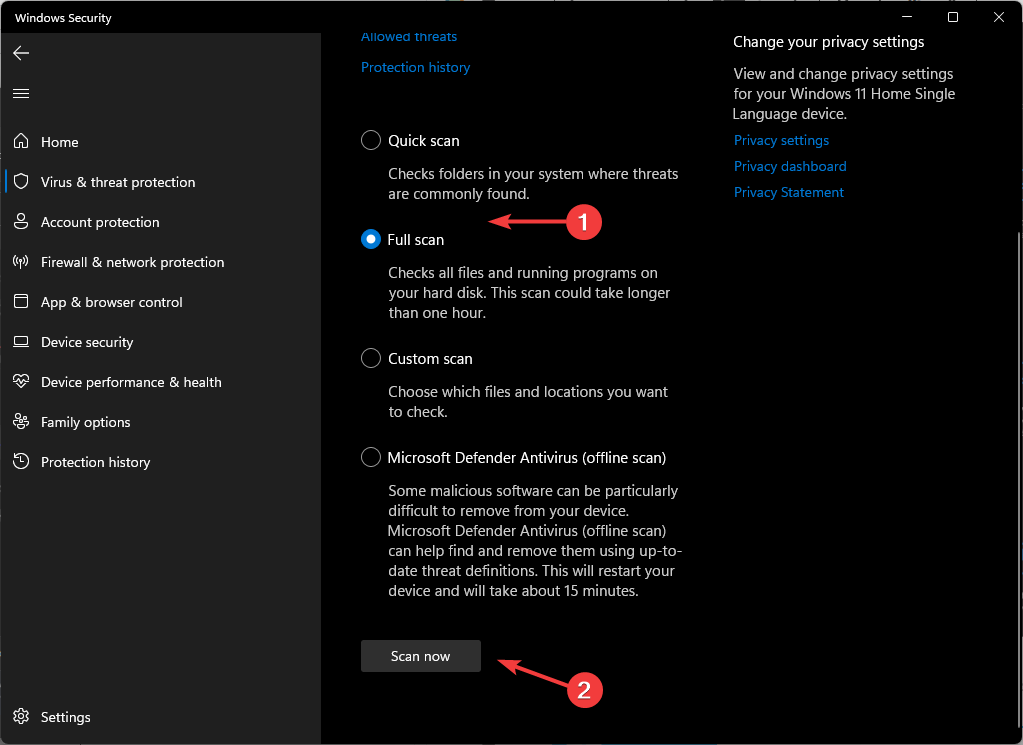
- Click on Full scan, then Scan now to perform a deep scan of your PC.
- Wait for the process to finish and restart your system.
6. Disable your VPN
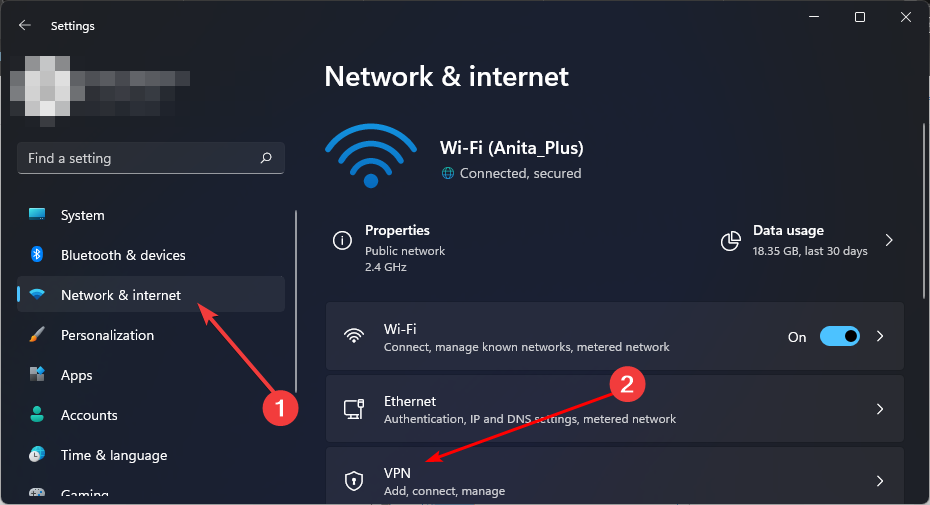
- Press the Windows key and select Settings.
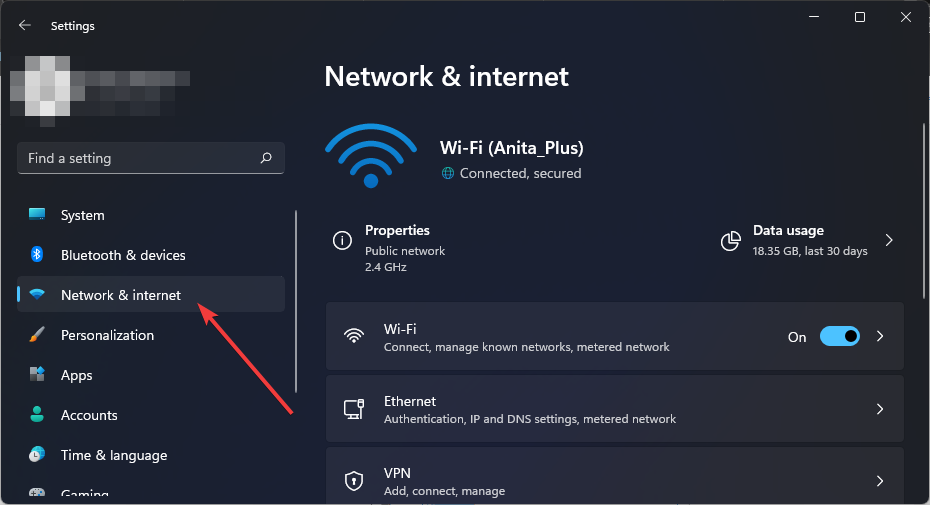
- Next, select Network & internet and click on VPN in the right-side menu.
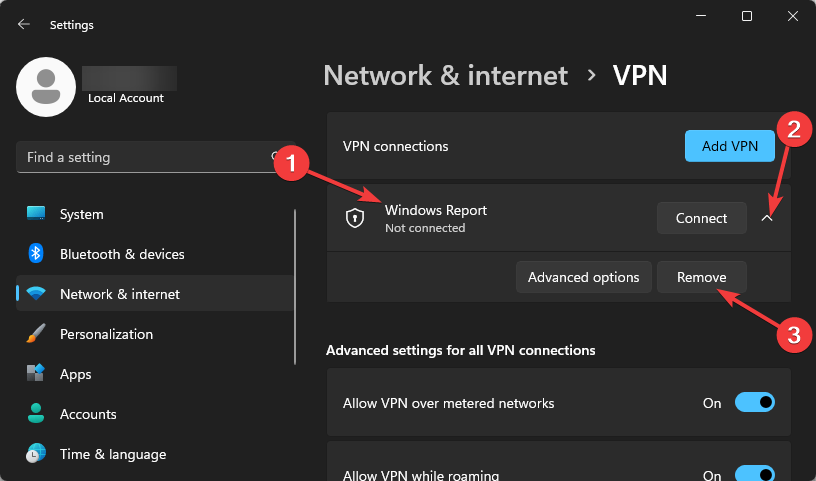
- Select the VPN connection you want to disable, click on the drop-down and select Remove.
7. Disable your Proxy
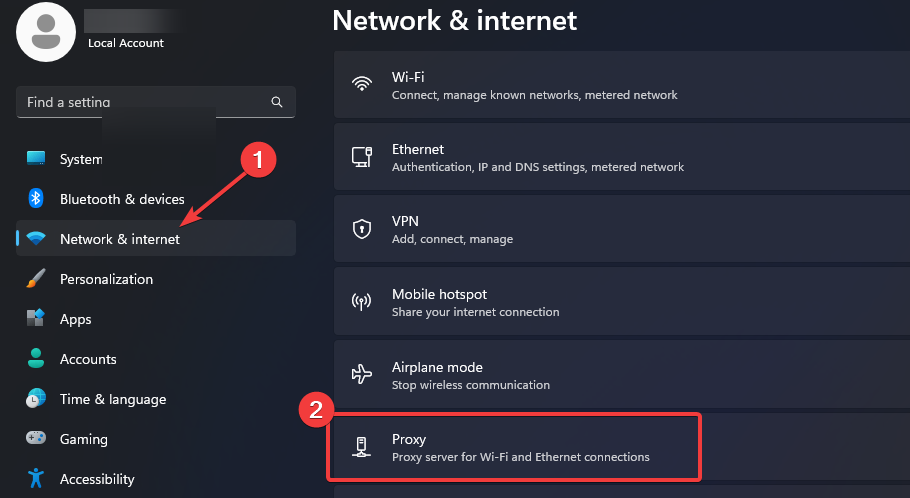
- Press the Start Menu icon and select Settings.
- Click on Network & Internet on the left pane, then scroll down and click Proxy on the right pane.
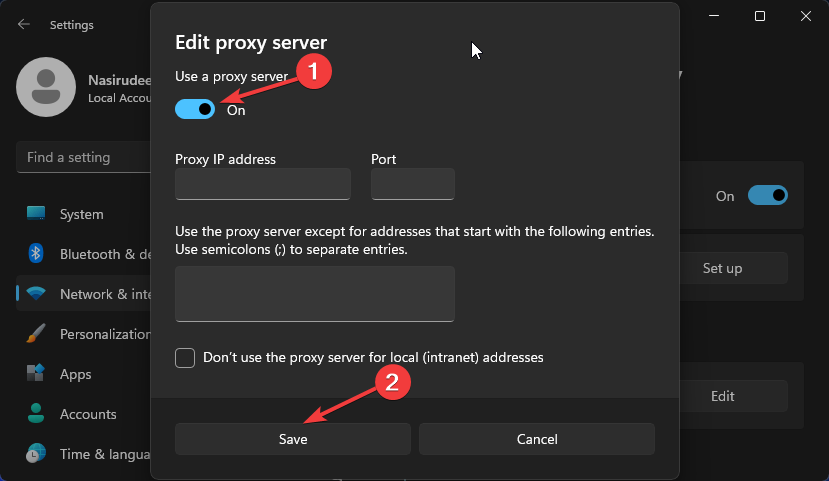
- Select Edit next to Use a proxy server option in the Manual proxy setup section, toggle off Use a proxy server, and click on Save.
8. Downgrade your network band
- Click on the Start Menu icon, type Device Manager in the search bar, and click Open.
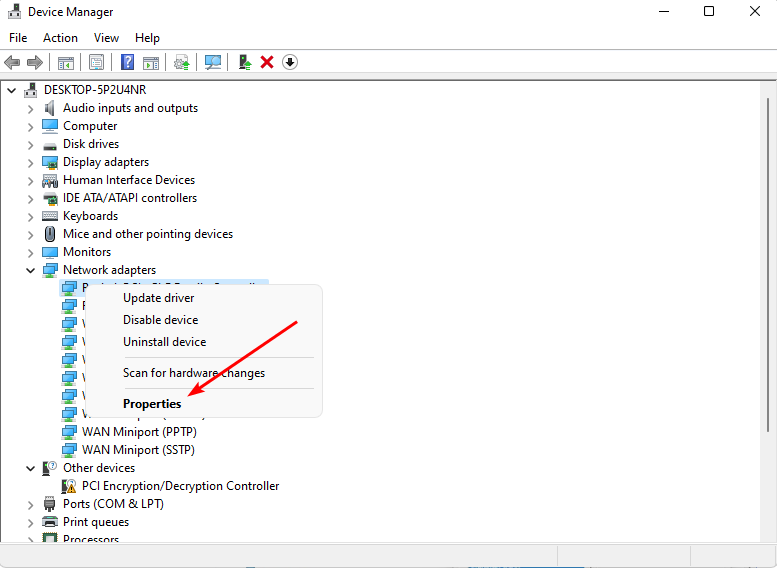
- Navigate to Network adapters and double-click to expand.
- Right-click on your network adapter and select Properties.
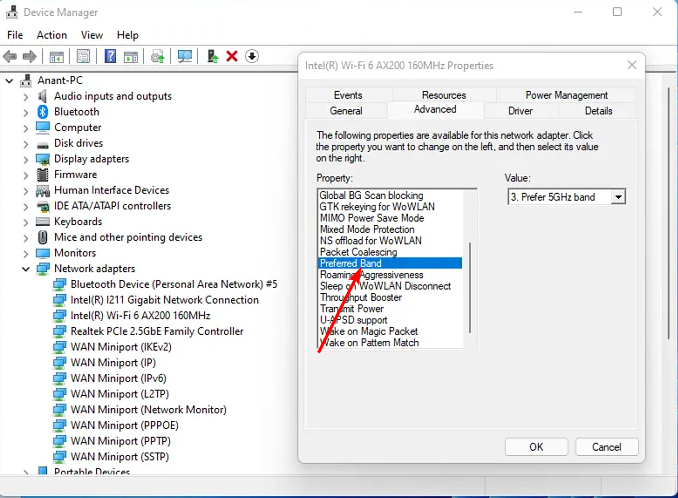
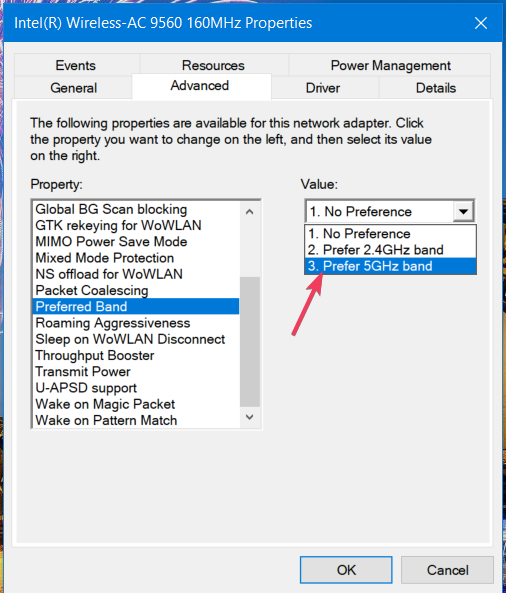
- Click on the Advanced tab and locate the Preferred Band.
- In the Value drop-down menu, select Prefer 2.4GHz band then hit Enter.
- Restart your PC.
Giving your PC more bandwidth is usually better to get the best possible performance from your network. But for very old PCs that can’t handle the higher speed, you might want to consider downgrading for optimal performance.
9. Disable IPV6
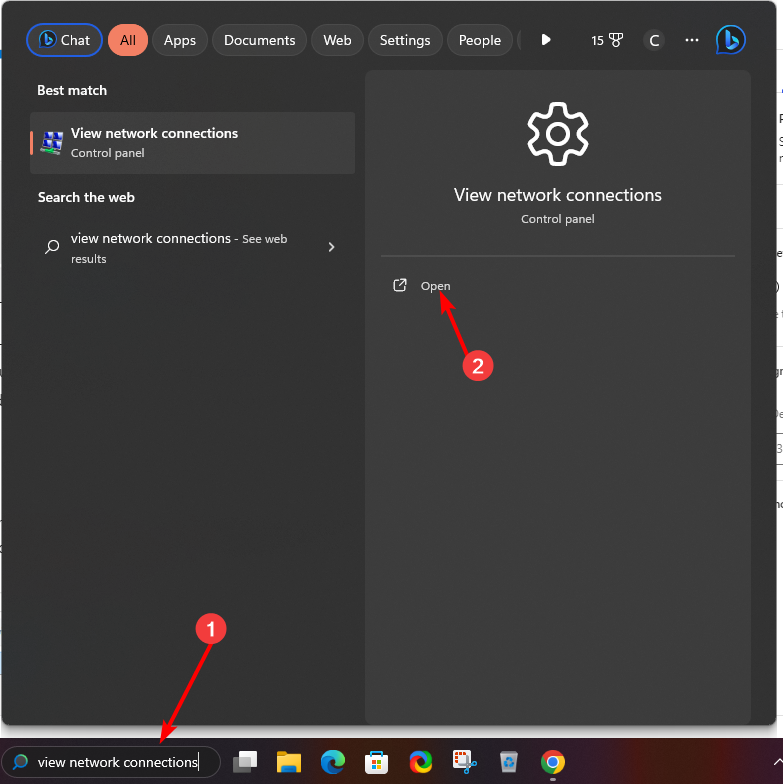
- Click on the Windows Search icon, type View network connections, and click Open.
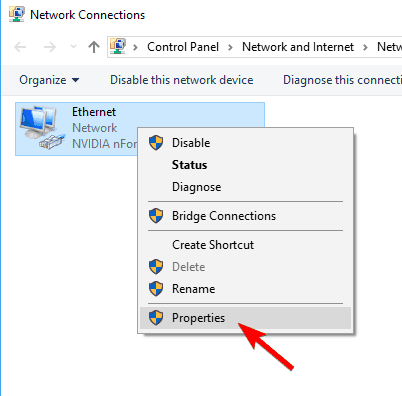
- Locate your network connection, right-click it, and choose Properties from the menu.
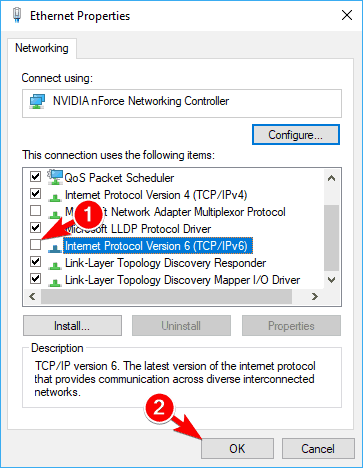
- Locate Internet Protocol Version 6 (TCP/IPv6) and uncheck it. Click on OK to save changes.
10. Reset TCP
- Hit the Windows key, type cmd in the search bar, and click on Run as administrator.
- Paste the following commands individually and hit Enter after each:
netsh winsock resetnetsh int ip reset - Lastly, close the Command Prompt window and restart your PC.
11. Perform a Network reset
- Hit the Windows key and click on Settings.
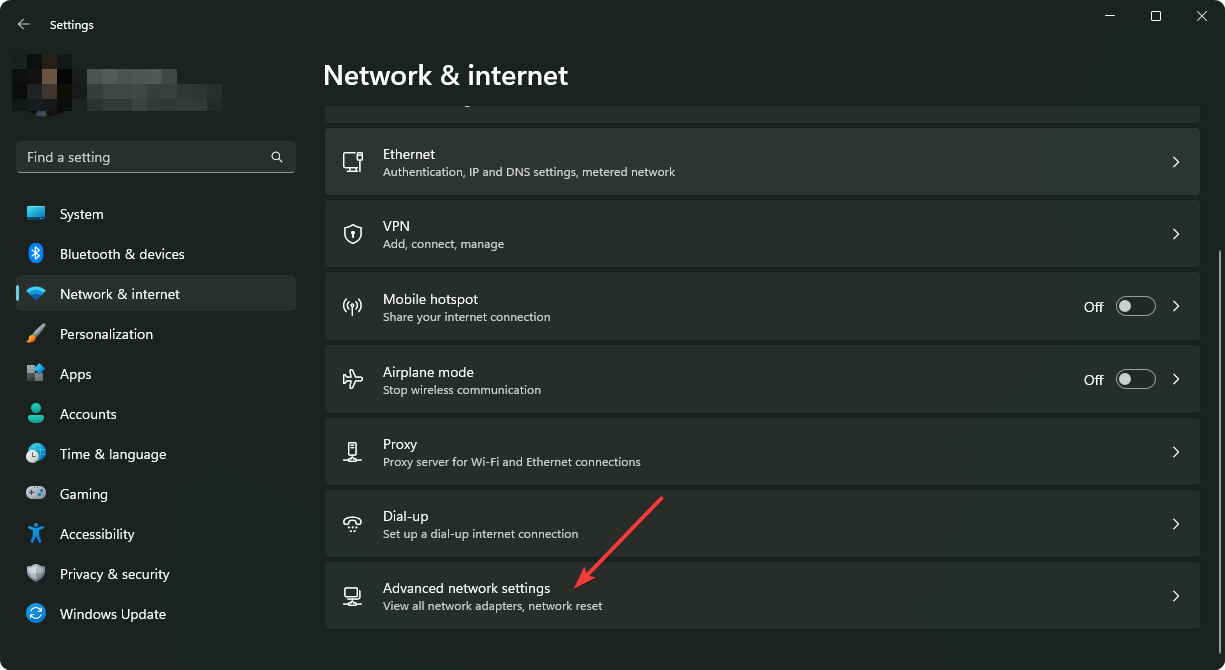
- Navigate to Network & internet.
- Select Advanced network settings.
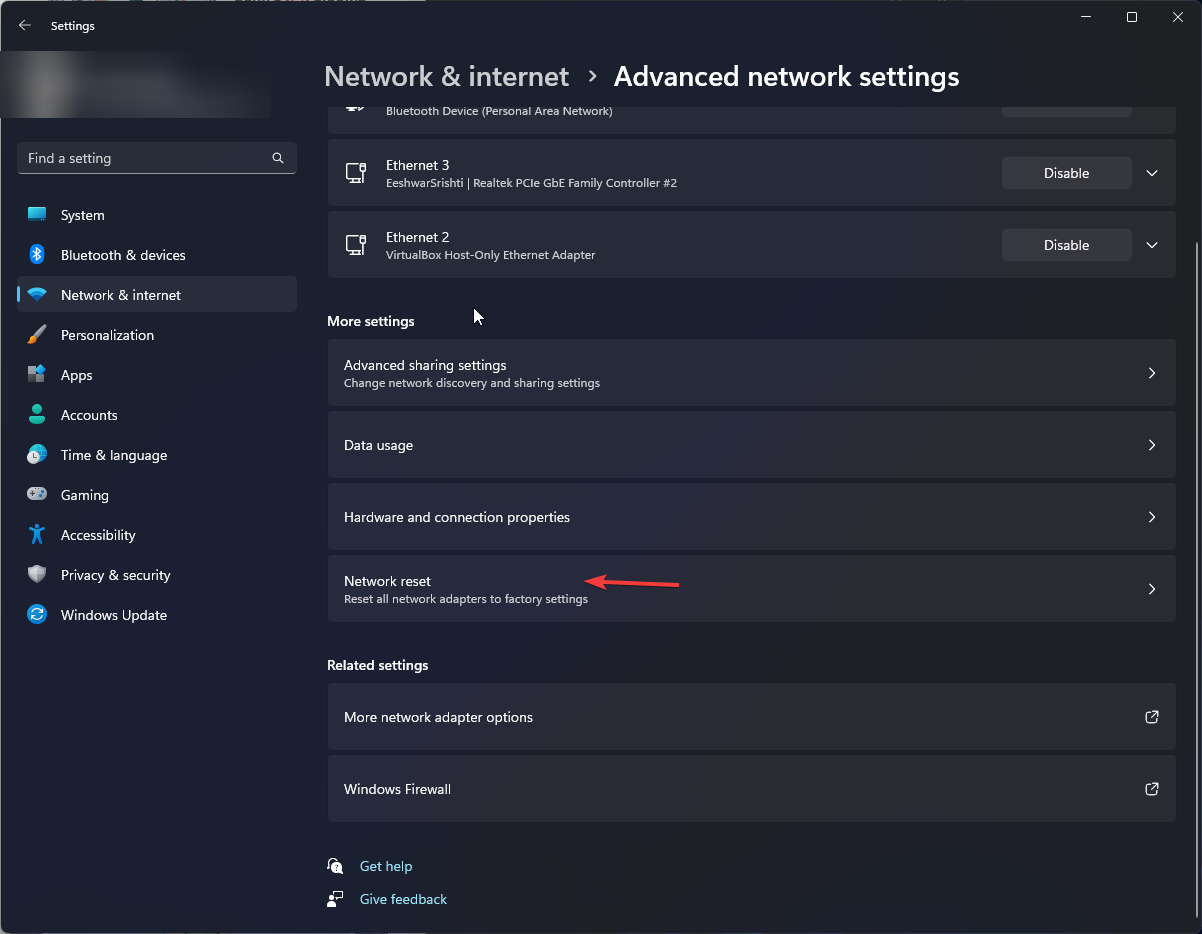
- Click on Network reset.
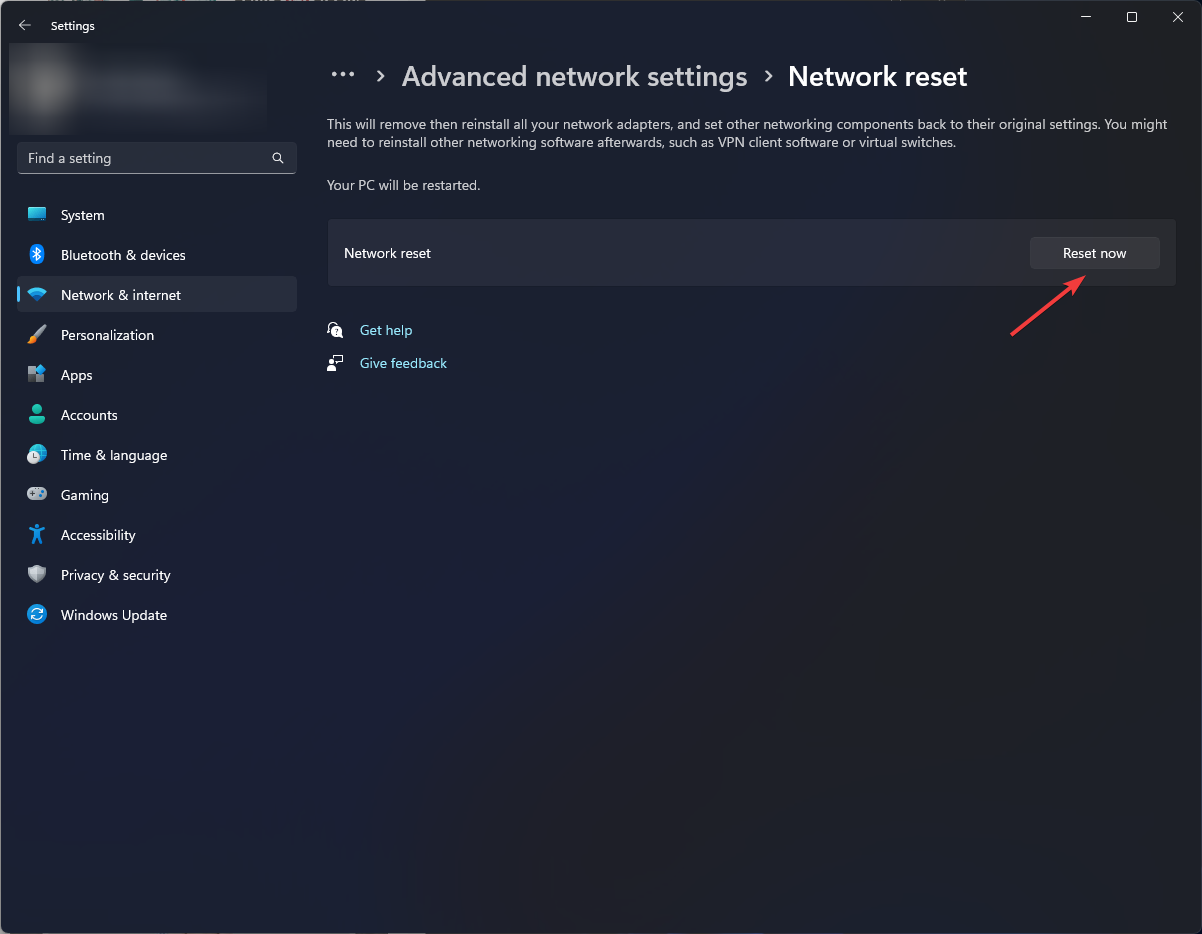
- Next, hit the Reset now button.
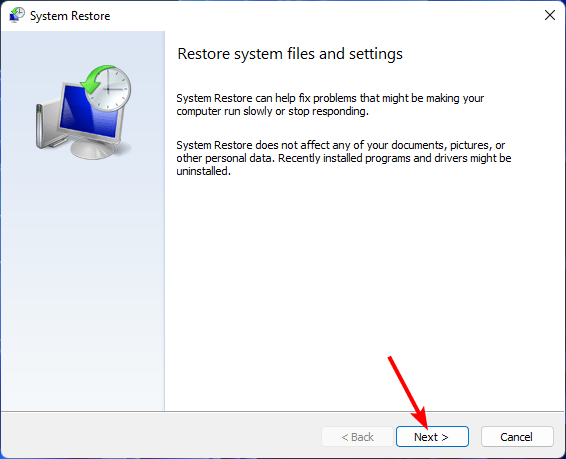
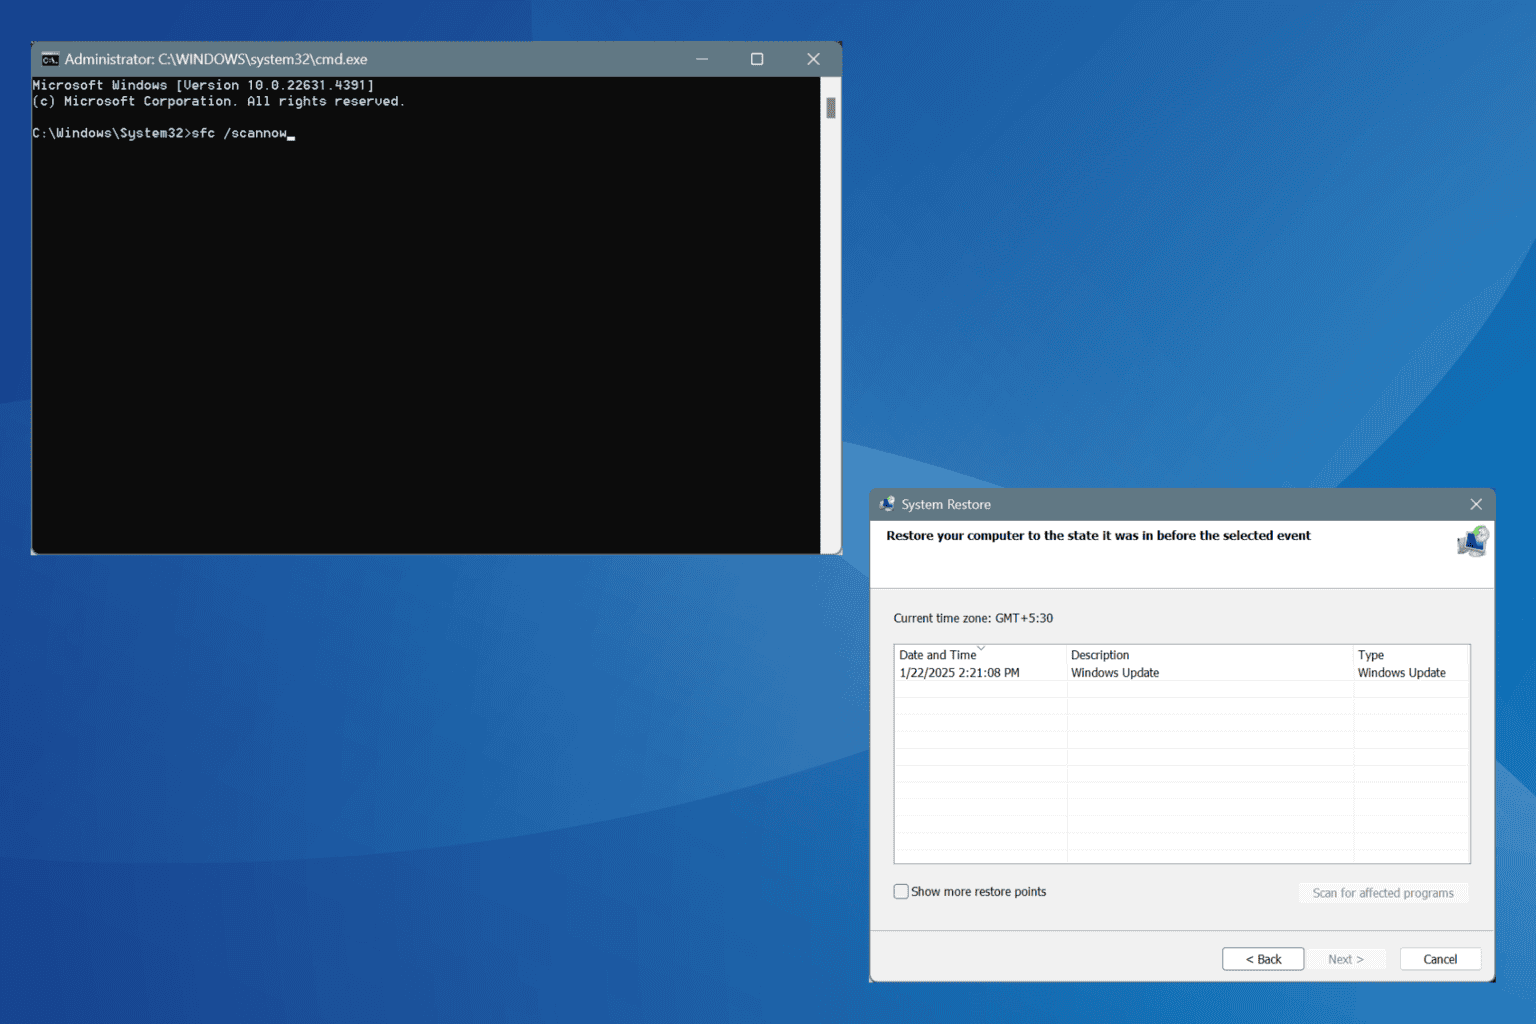
12. Perform a System Restore
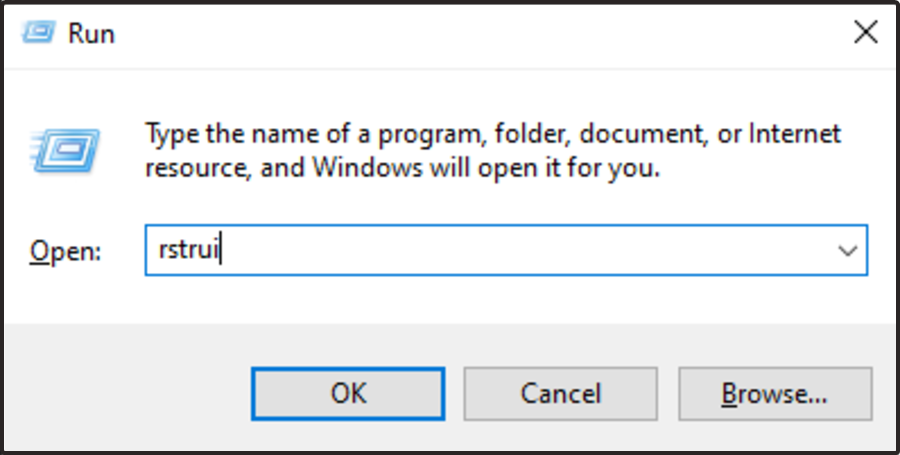
- Press the Windows + R keys, type rstui, and hit Enter.
- The System Restore window will open. Click on Next.
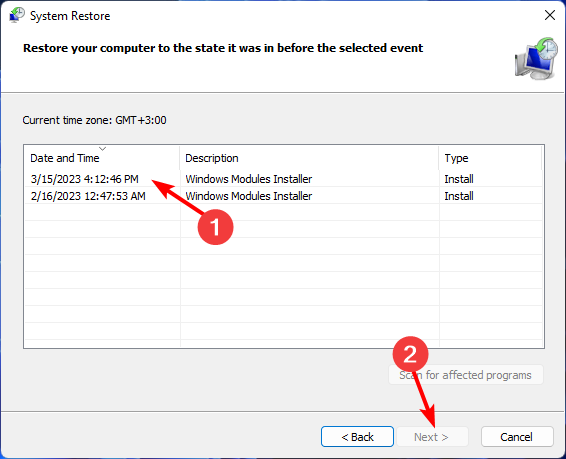
- Select the restore point you wish to revert to and click on Next.
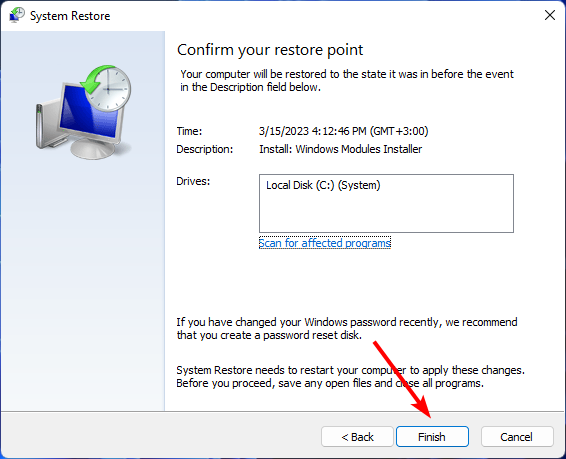
- Now click on Finish.
This should be a last resort if all the above steps fail. It will come in handy if you had a corrupt update or your PC has failed to recover from a malware infection.
What can I do if my PC says no internet, secured, but the internet works on Windows 11?
Your connection saying no internet but working may not seem like a problem, but from what a majority of users report, the Wi-Fi network only works on select sites and apps.
You may fail to get critical updates because your system has not registered a working connection. In addition, you’ll also not get the Wi-Fi action is needed message when you connect to strange networks, putting your device at more risk.
It’s probably an IP issue, so try resetting your router or perform a clean boot. Hopefully, you’ve been able to address this issue. And if you happen to run into the same no internet, secured error message on your Windows 10, refer to our expert article for quick fixes.
That’s all we had for this guide, but do leave us your thoughts and comments on follow-up questions or additional fixes.





User forum
0 messages