Windows Security Not Opening in Windows 11: How to Fix it
Resetting the security app using PowerShell should fix this issue
5 min. read
Updated on
Read our disclosure page to find out how can you help Windows Report sustain the editorial team. Read more

When you install Windows 11, Windows Security or Windows Defender becomes the default antivirus and security solution. It is one of the most excellent remedies available, and it is effective in most circumstances.
Nevertheless, one of the most frequently encountered concerns has been that the Windows 11 Windows Security is not opening or functioning as expected after an upgrade or random upgrade.
Why is my Windows Security not opening on Windows 11?
The reasons Windows Security settings are not opening or launching on Windows 11 after upgrading are close to close. Below are the popular reasons:
- Glitches with the app: One of the reasons Windows security is not loading on Windows 11 is some glitches preventing it from opening. The solution here is to reset the app.
- Faulty system files: If the system files meant to load the Windows Security apps are faulty, the app won’t open. You need to repair the system files to fix this.
How can I fix the Windows 11 Windows Security not opening issue?
1. Reset using PowerShell Command
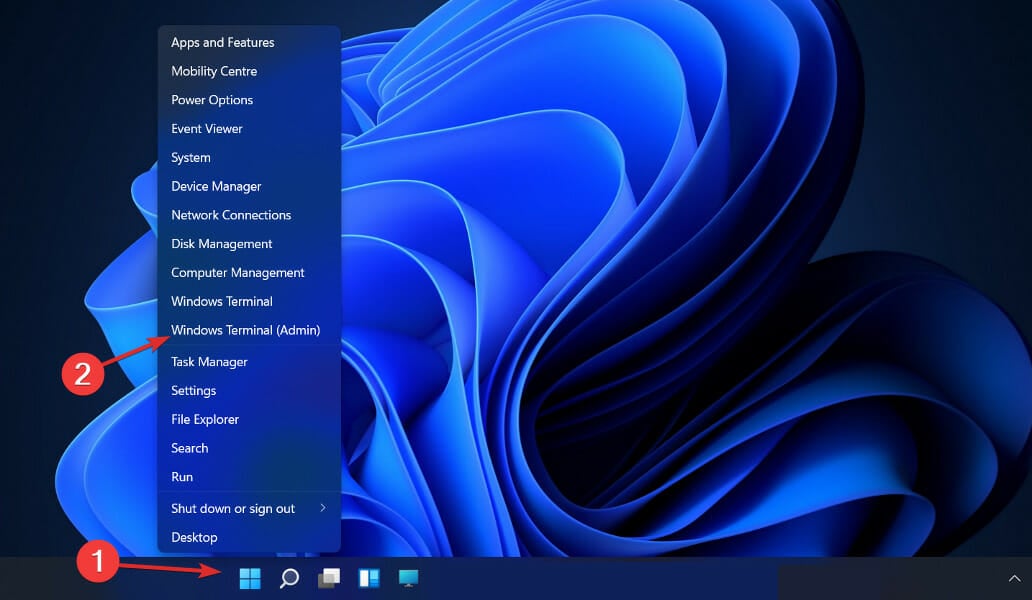
- Right-click on the Start icon and select the Windows Terminal (Admin) option.
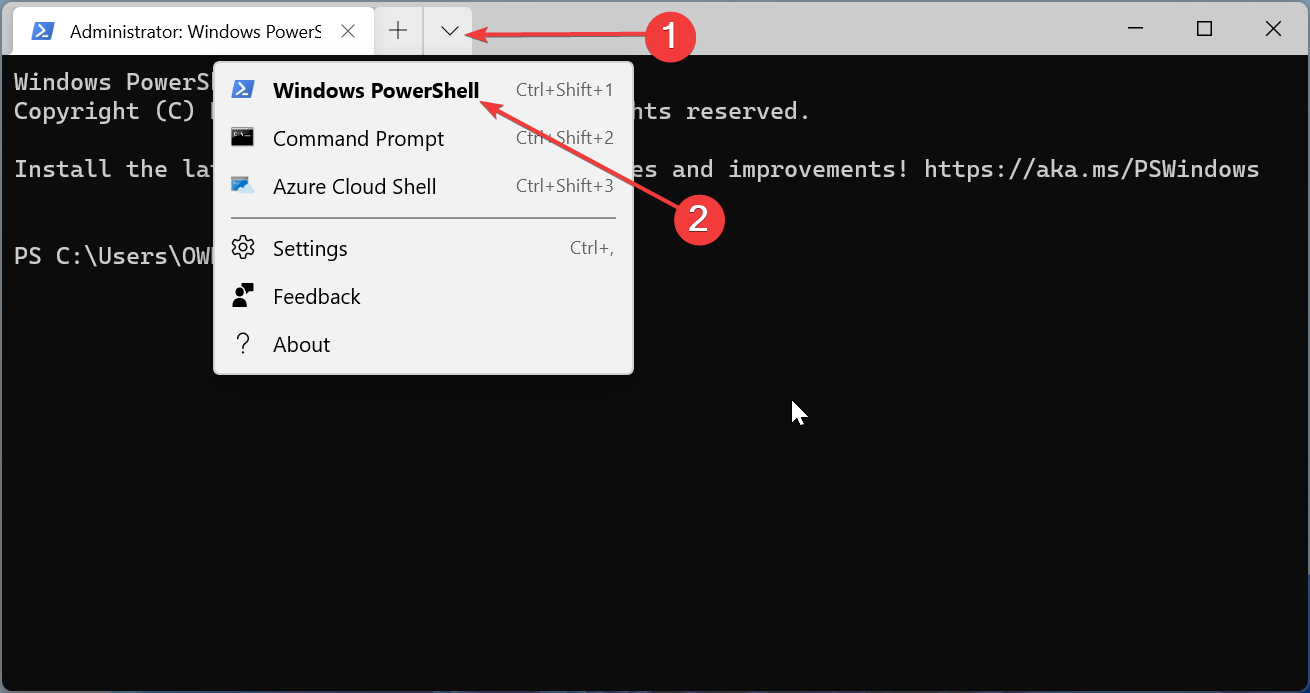
- Click the dropdown at the top and select the Windows PowerShell option.
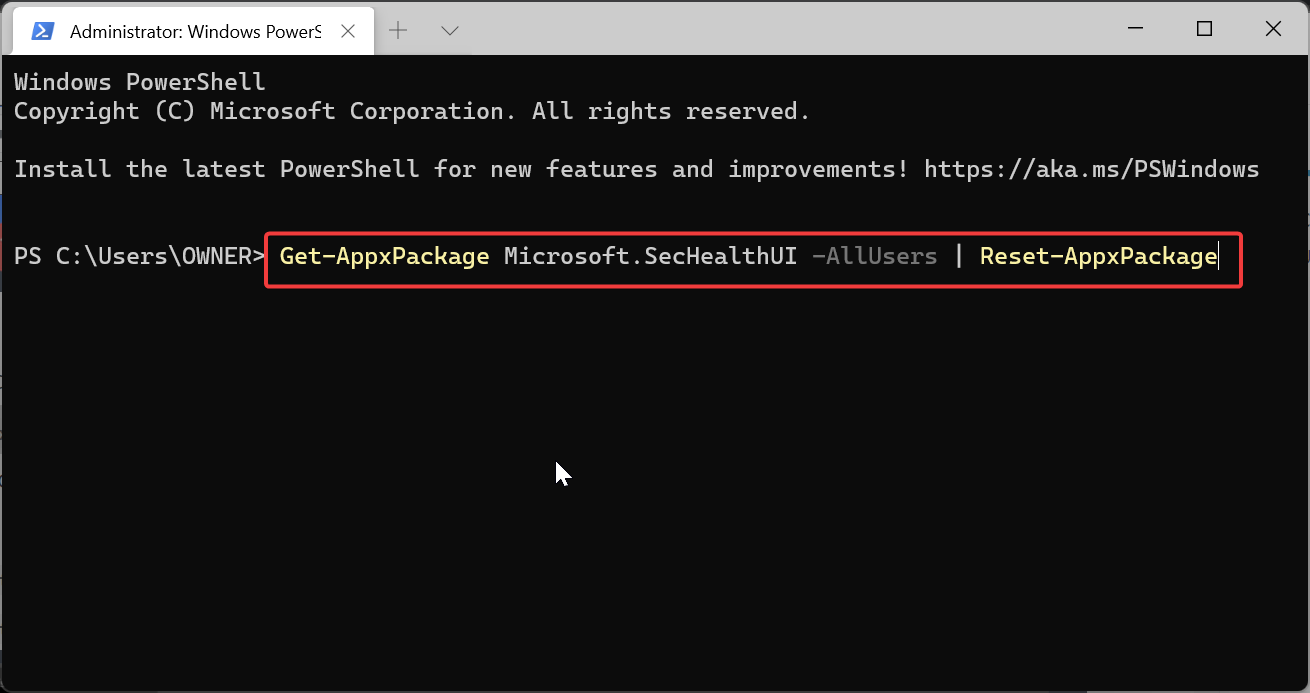
- Copy and paste the command below and hit Enter:
Get-AppxPackage Microsoft.SecHealthUI -AllUsers | Reset-AppxPackage - Restart your PC and check if the Windows Security app is now working.
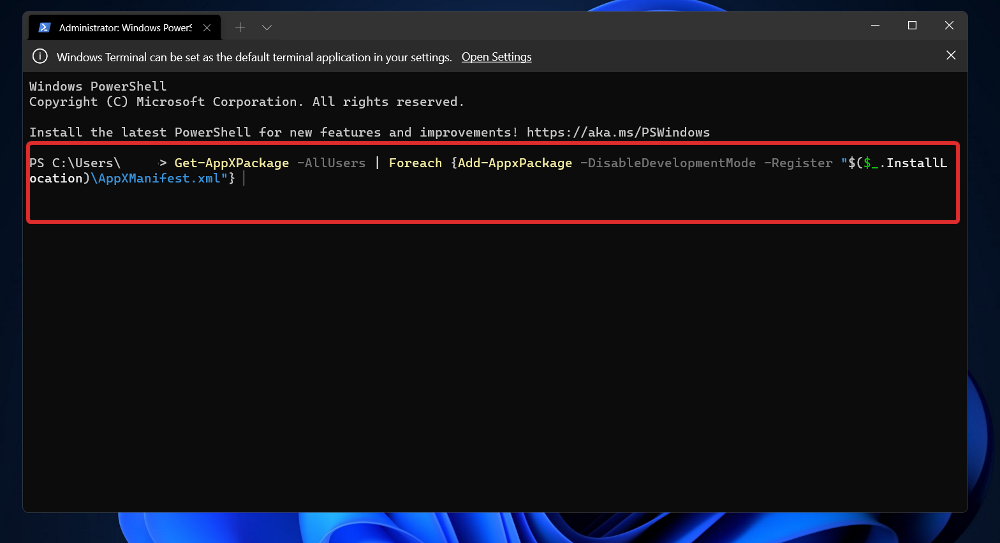
- If it does not work, type the command below and hit Enter to reinstall the app:
Set-ExecutionPolicy UnrestrictedGet-AppXPackage -AllUsers | Foreach {Add-AppxPackage -DisableDevelopmentMode -Register "$($_.InstallLocation)\AppXManifest.xml"}
You need to reset the app if Windows Security is not working or Windows Defender is not opening. The command below has worked for many. You can reinstall the app using the second command if resetting does not work.
2. Repair the app
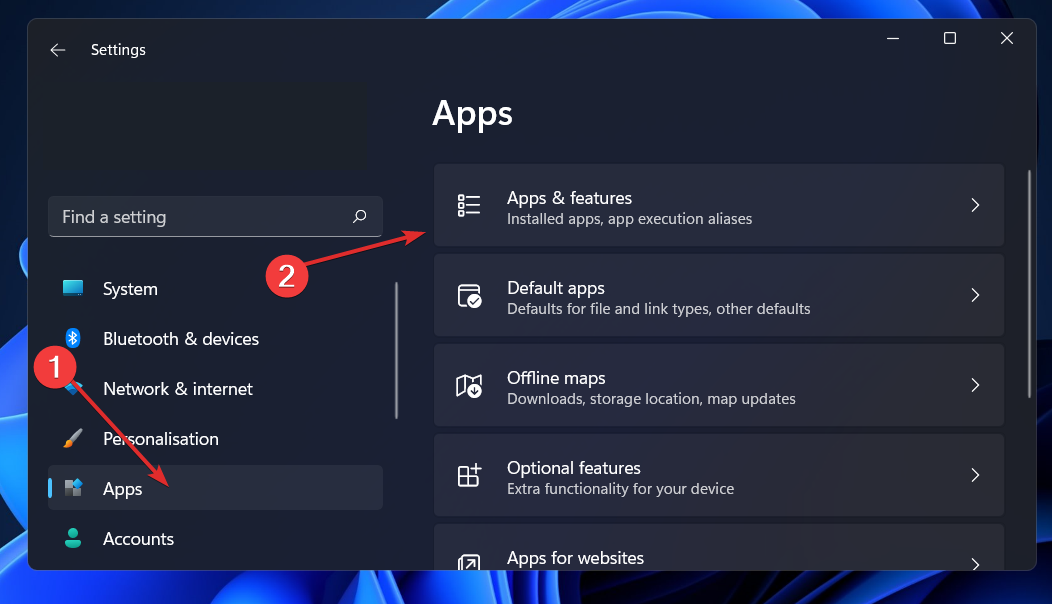
- Press the Windows key + I to open the Settings app, choose Apps in the left pane, followed by Apps & features.
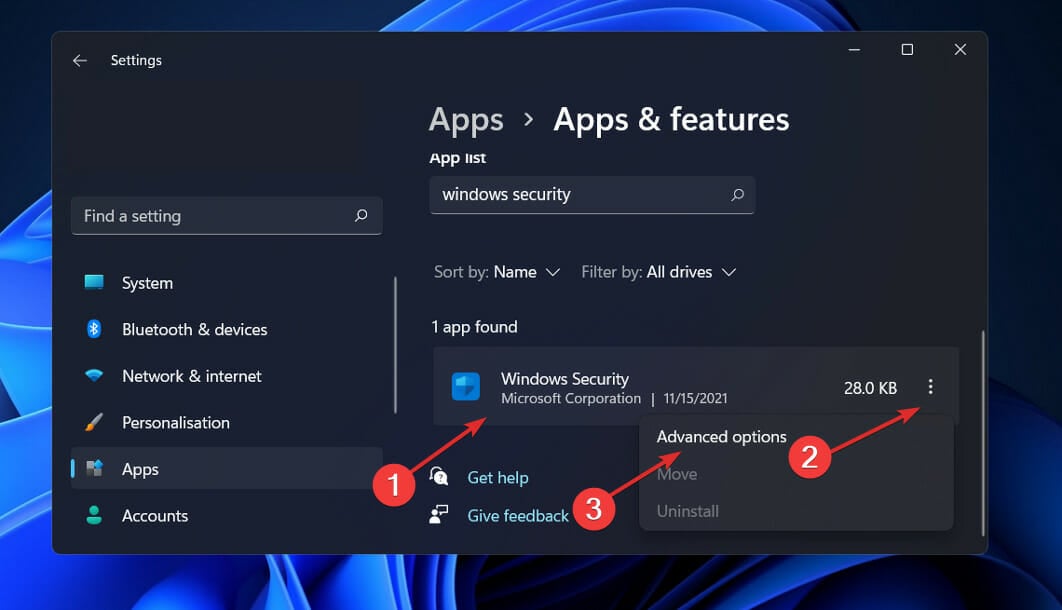
- Once you are inside the Apps & features window, search for Windows Security in the search bar from the top, and click on the three-dot menu next to it, followed by Advanced options.
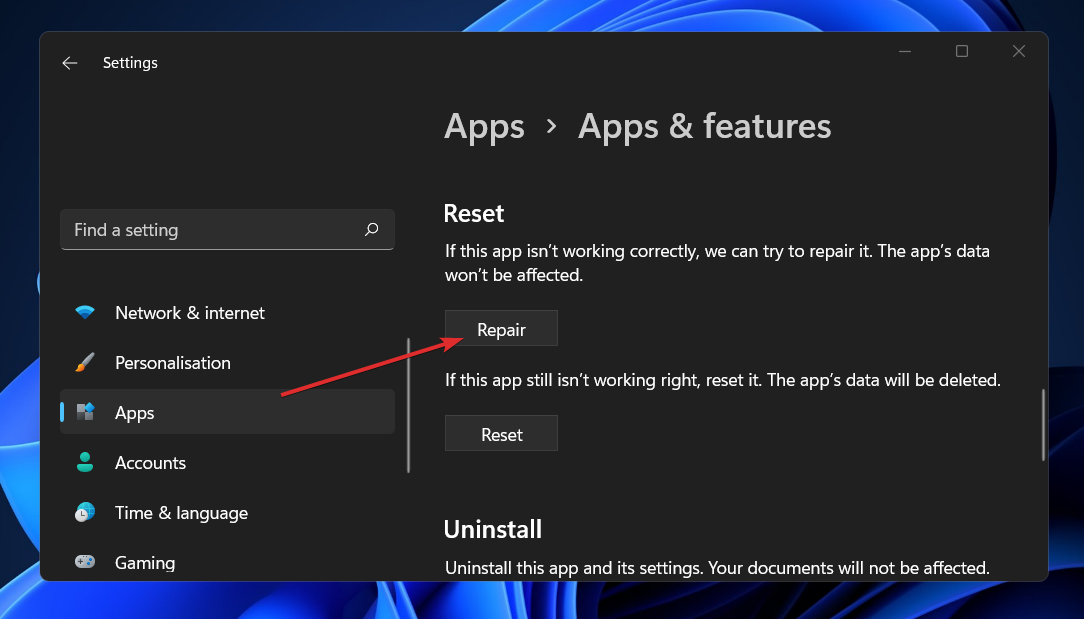
- Scroll down until you find the Reset section, then click on the Repair button to start the repairing process.
Allow the Repair process to finish before rebooting your computer to guarantee your changes are applied. Then, by starting Windows Security, it lets you see if its functionality has been restored.
3. Reset the app
- Press the Windows key + I, go to Apps in the left pane, followed by Apps & features.
- Once inside the Apps & features window, search for Windows Security in the search bar, and click on the three-dot menu. Now click on Advanced options.
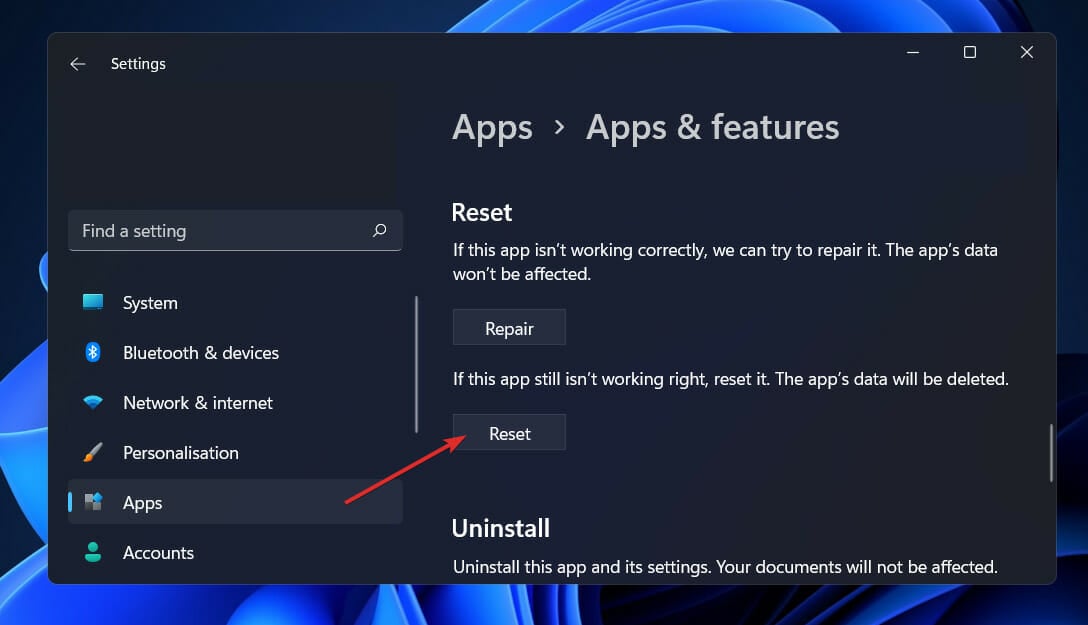
- Scroll down until you meet the Reset section, then click on the Reset button.
4. Run SFC
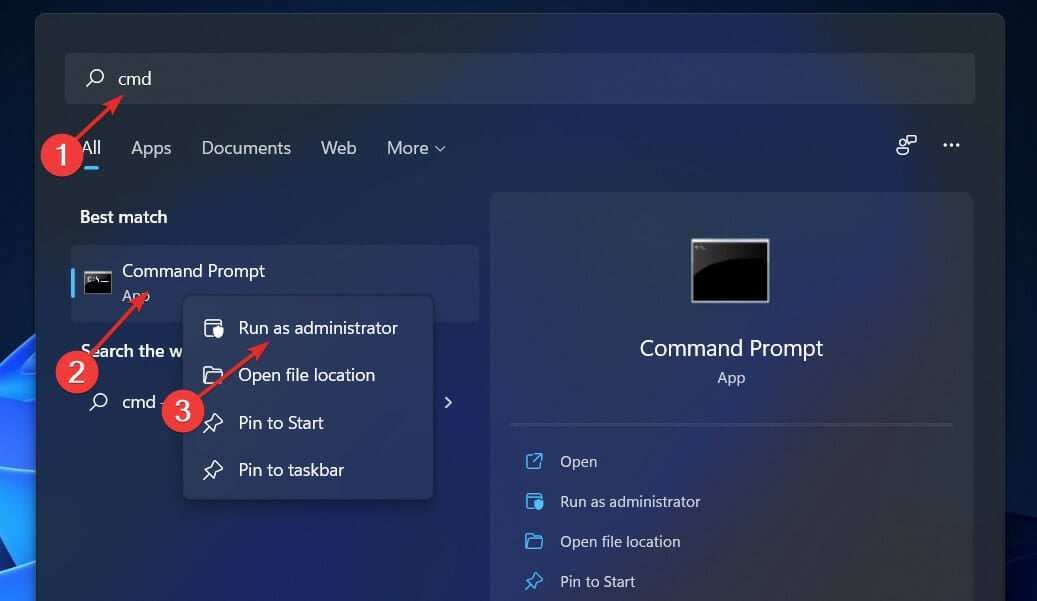
- Press the Windows + S key to open the Search bar, then type cmd, right-click on the most relevant result shown to you, and run it as an Administrator to get full privileges.
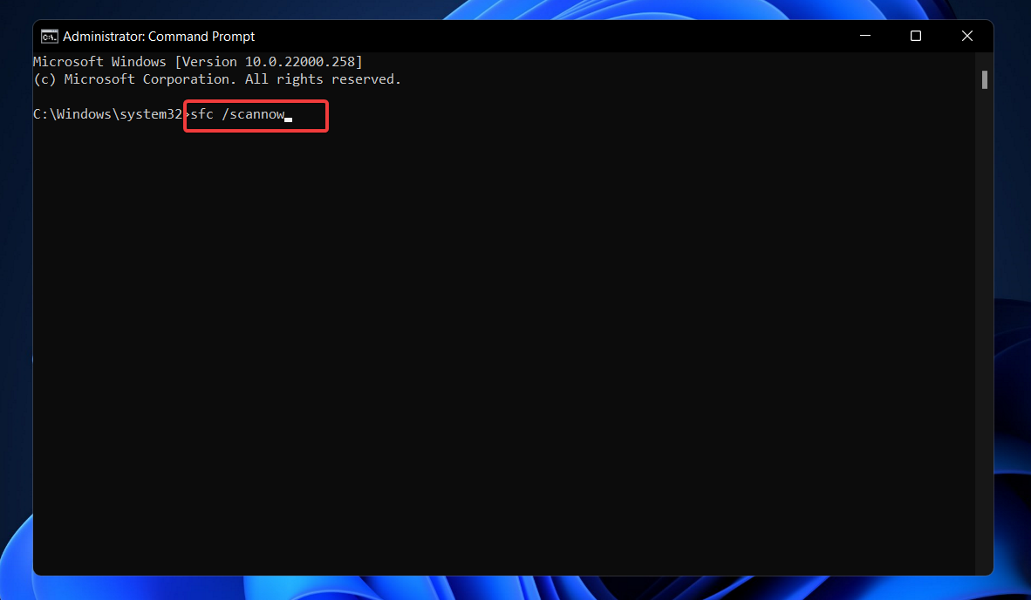
- Type in the following command and press Enter to start the process:
sfc /scannow
The process may take some time to finish, so you may need to restart your computer. SFC will automatically find and restore corrupted files and folders. If that does not help, you can try using specialized repair tools, which are much more advanced than Windows built-in tools.
5. Run DISM
- Press the Windows + S key to open the Search bar, then type cmd, and right-click on the most relevant result to run it as an Administrator.
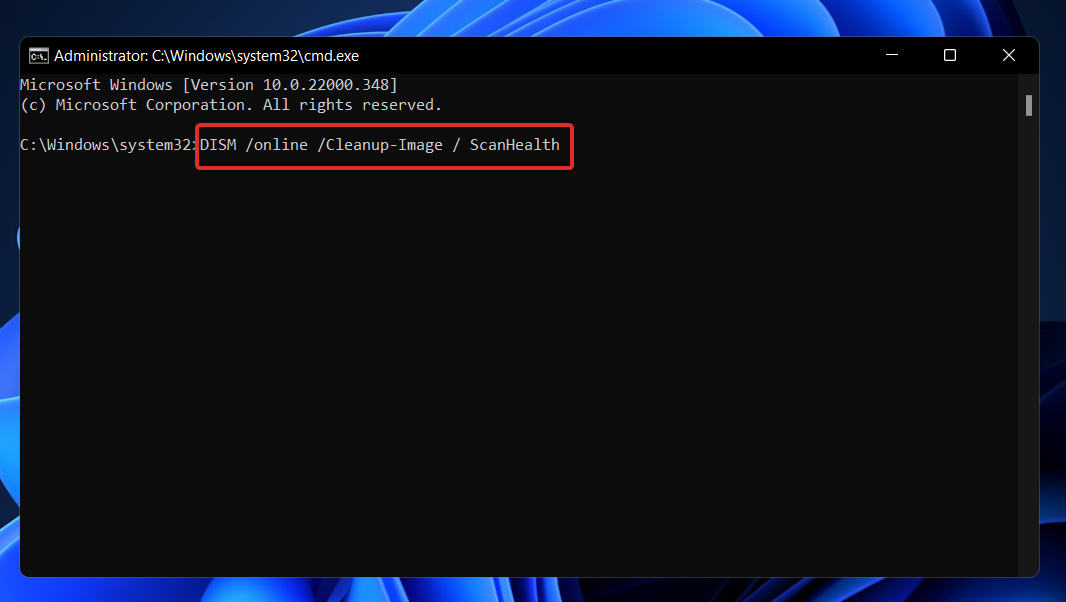
- Paste or type in the following commands and press Enter after each:
DISM /online /Cleanup-Image /ScanHealthDISM /Online /Cleanup-Image /RestoreHealth
Continue to be patient until the process is finished. Be advised that the process could take up to ten minutes to finish. Once you’ve completed this step, restart your computer to ensure the changes take effect.
6. Disable your antivirus
- Click the expand arrow from your taskbar and right-click on your antivirus icon. Now choose Avast shields control followed by Disable for 10 minutes to stop it from interfering.
- If you have other antivirus programs installed, you can temporarily disable the app following the same steps as above or similar ones with a few differences.
With the fixes above, you should be able to fix the Windows Security not opening on Windows 11 issue. If you want to use a third-party tool, check out our post on five of the best antiviruses for Windows 11.
Alternatively, you can look at our article on the best antiviruses with low CPU usage for Windows 11.
If you want to know how to turn on Dev Device protection on your Windows 11 computer, we have a detailed guide to help you with that.
In case you have more issues, don’t miss our guide on how to reinstall Windows Security on Windows 11 for more solutions.
Let us know in the comments section below which solution worked best for you in solving the Windows 11 Windows Defender not working issue and which antivirus software you prefer.





User forum
0 messages