ACPI BIOS ERROR: 10 Ways to Fix It
Disabling the AHCI from the BIOS can solve this issue for good
5 min. read
Updated on
Read our disclosure page to find out how can you help Windows Report sustain the editorial team. Read more

Blue Screen of Death errors such as ACPI_BIOS_ERROR on Windows 11 or any other version can be serious since they will restart your computer every time it appear.
This is due to your BIOS settings, and to fix it, you just need to follow the steps from this guide.
How can I fix the ACPI_BIOS_ERROR?
1. Remove your SSD and update your BIOS
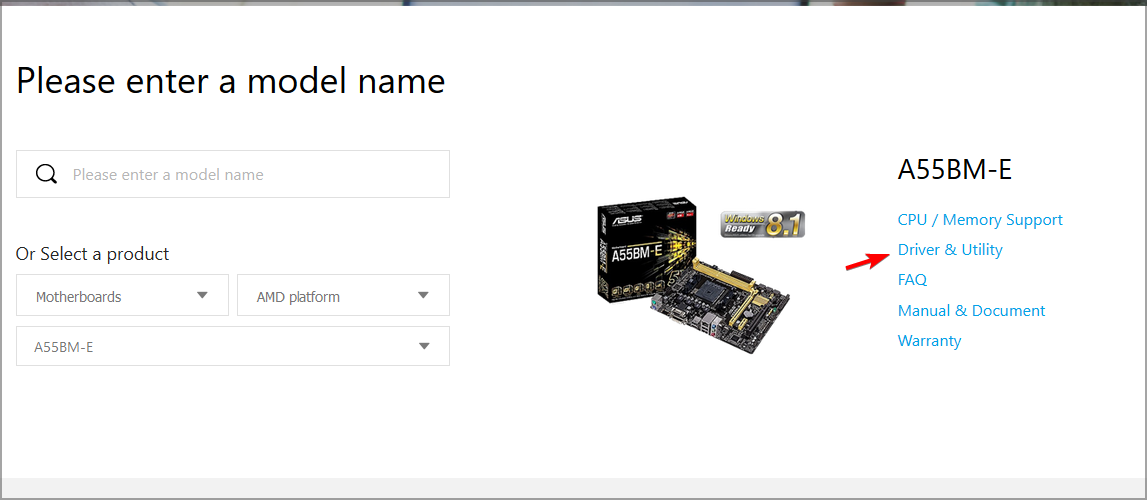
- Visit your motherboard manufacturer’s download page.
- Select your motherboard model and choose Driver & Utility section.
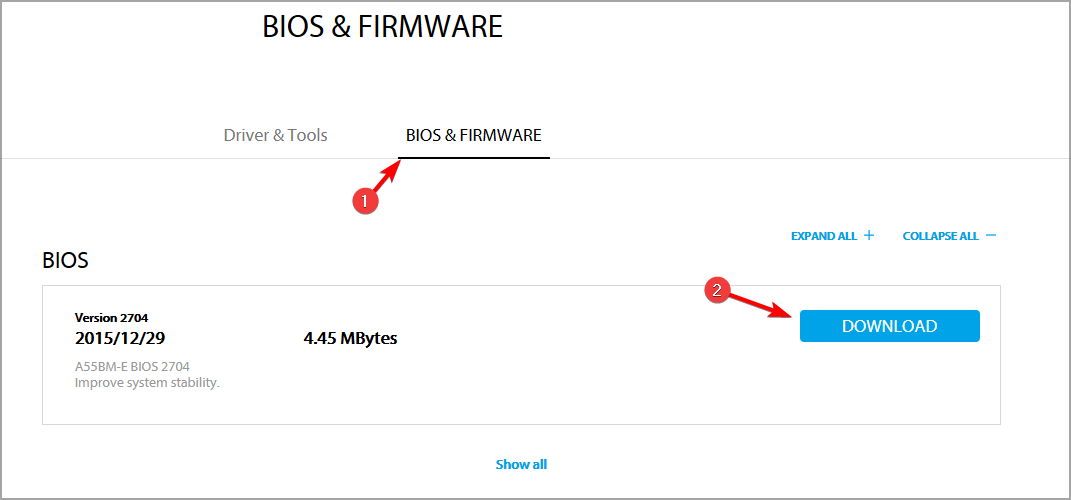
- Navigate to BIOS & Firmware section. Select the latest version of BIOS and click on Download.
- After downloading the file, move it to flash drive.
- Restart your PC and keep pressing F2 to access BIOS.
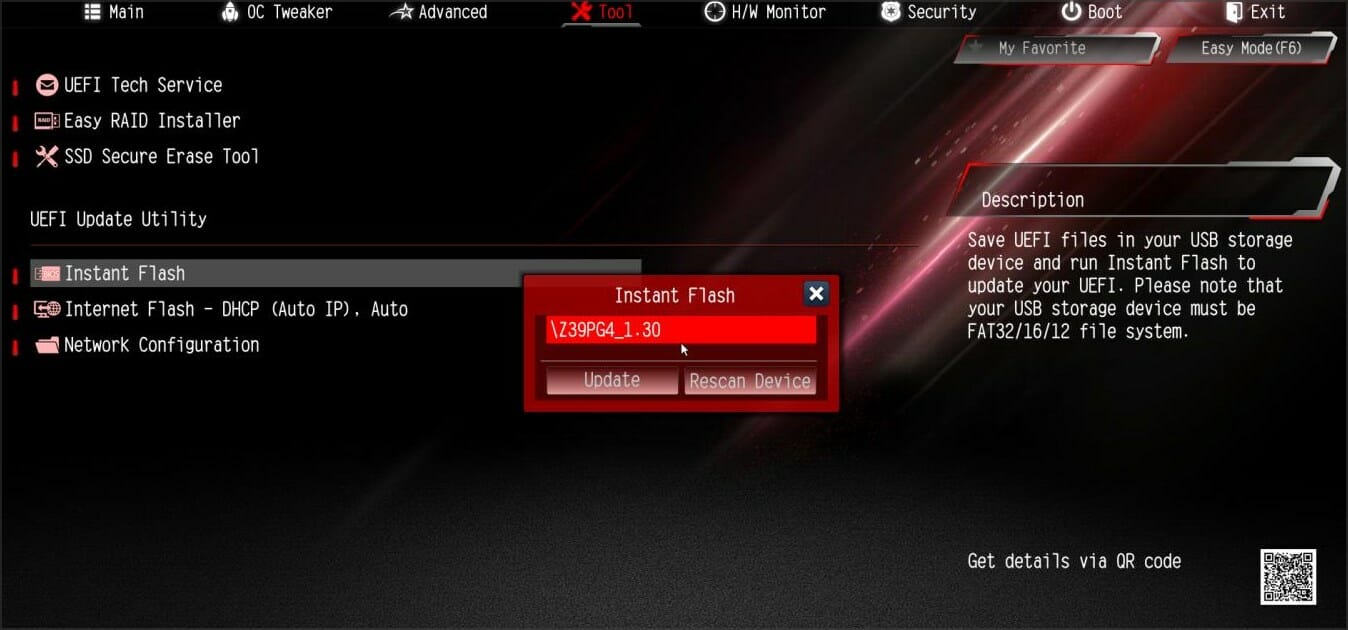
- Select the Instant Flash option and select the file you downloaded from the USB drive.
- Wait for the process to finish and don’t interrupt it.
For Samsung laptops:
 NOTE
NOTE
- Locate your SSD drive and disconnect it.
- Start your laptop and you should see a prompt asking you to press F4 to start Recovery Mode.
- Press F4 and quickly reconnect your SSD drive.
- Choose the option to restore and wait for the process to complete.
- Run SW Update software and install the BIOS update.
You can also use specialized software to fix these types of issues without having to update your firmware.
2. Enter BIOS and disable AHCI
- While your PC boots, press F2 to enter BIOS.
- Navigate to Integrated Peripherals.
- Locate the AHCI Mode and set it to Disabled.
For more information on BIOS, we suggest that you check our how to access BIOS guide.
3. Use a third-party BSOD fixer
One easy way to fix any BSoD error is by installing specialized software. This scans your device for corrupted system files or harmful files from other software.
Afterward, it shows you a list of all of them. You can choose to restore these files with a couple of simple clicks. The program does everything for you.
4. Update your drivers
- Visit your motherboard’s website.
- Select your model and go to Driver & Utility.
- In the Driver section, download the latest drivers for all components.
- Now install the drivers and check if that solves the problem.
Do keep in mind that you need to perform these steps for all hardware components that you have on your PC. For more information, visit our how to update drivers guide. To make this process faster and easier, you can always use driver updater software.
5. Set the ACPI mode to S1 in BIOS
- While your PC boots, keep pressing F2 to enter BIOS.
- Locate the ACPI mode and set it to S1.
- Save the changes.
 NOTE
NOTE
6. Disable the jumper JPME1 and reflash BIOS
- Turn off your PC and disconnect it from the power source.
- Open the computer case.
- Locate the JPME1 jumper and disable it.
- After doing that, reflash your BIOS.
Owners of the X9DAI motherboard reported that disabling the JPME1 jumper and reflashing the BIOS fixed this issue for them. Do keep in mind that this solution might not work for other motherboard models.
7. Uninstall the Microsoft ACPI Compliant driver
- Press Windows key + X and select Device Manager from the list.
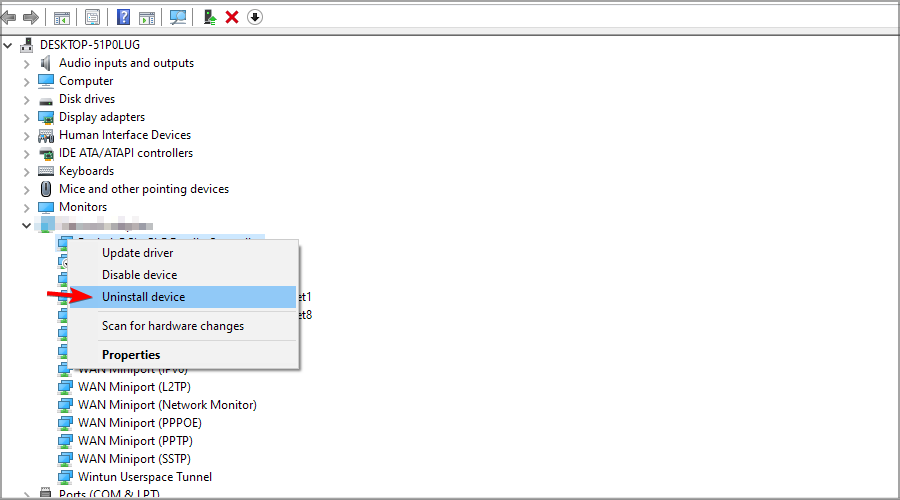
- When Device Manager starts, locate the Microsoft ACPI Compliant Control method battery.
- Right-click it, and choose Uninstall device.
- Click the Scan for hardware changes button and let Windows 10 install any new drivers.
- Restart your PC.
A few users reported that uninstalling the Microsoft ACPI Compliant Control method battery driver fixed the ACPI_BIOS_ERROR BSOD error on certain laptops, so you might want to try it.
If you cannot access Windows 10 normally, you might have to perform these steps from Safe Mode. To enter Safe Mode do the following:
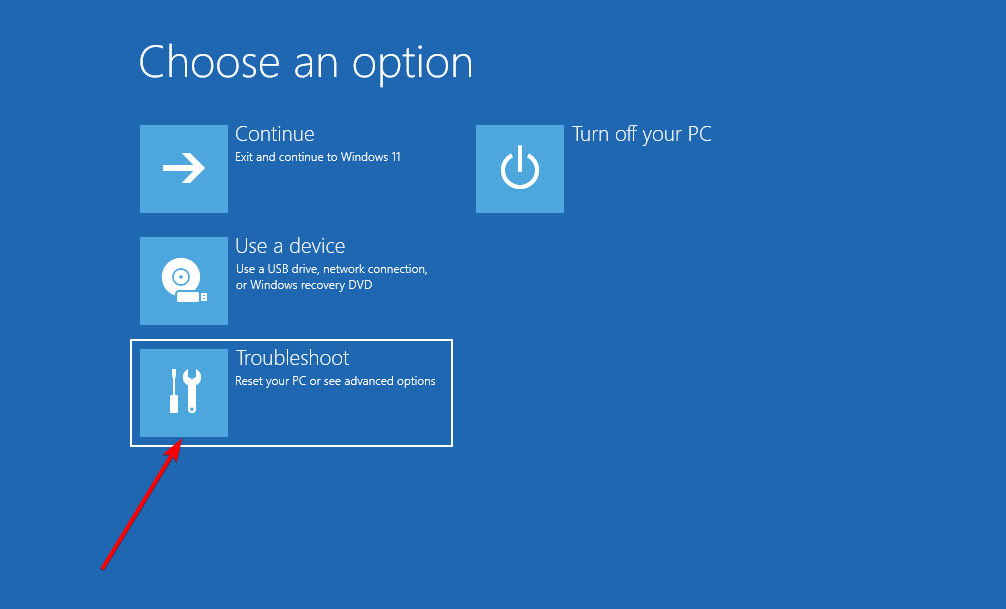
- Restart your PC during the boot sequence a few times.
- This should start Automatic Repair.
- Select Troubleshoot.
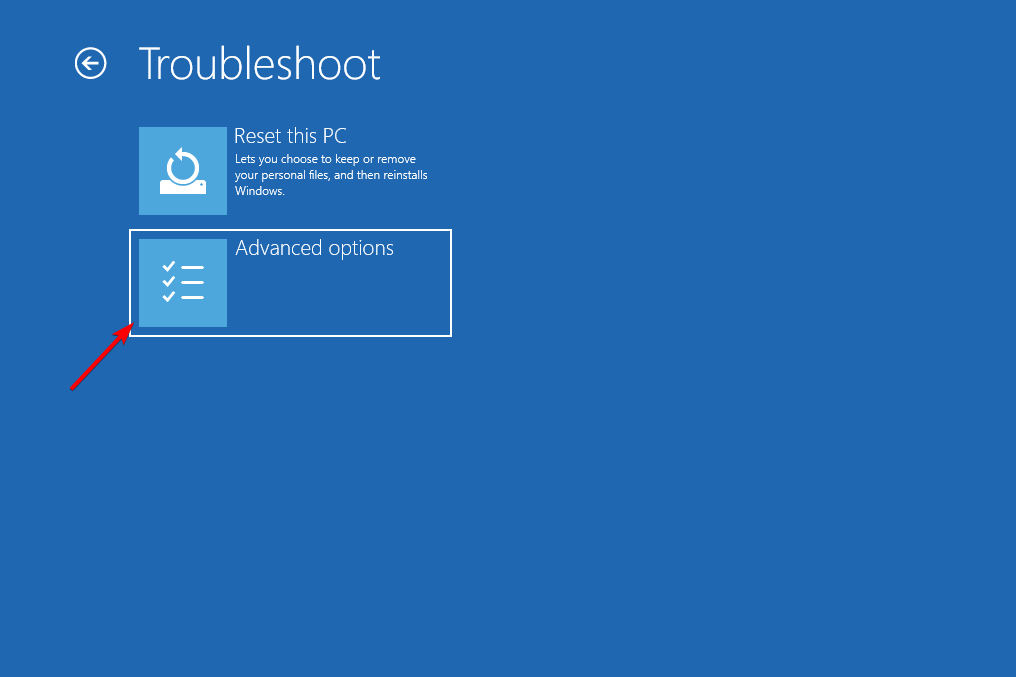
- Navigate to Advanced options.
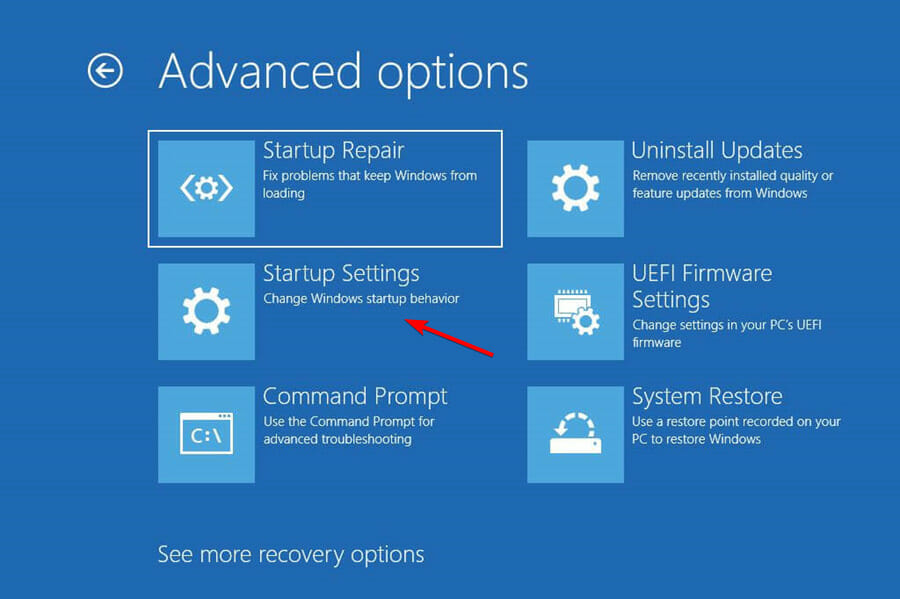
- Then, select Startup Settings and click the Restart button.
- Once your computer restarts, you’ll see a list of options. Press 5 or F5 to enter Safe Mode with Networking.
8. Install Windows 10 in UEFI mode
- Connect the bootable USB flash drive to your PC and restart your computer.
- While your computer boots press F11 to select a boot device. Bear in mind that your motherboard might be using a different key, so be sure to check the motherboard manual for detailed instructions.
- You should see a list of options. Select UEFI: Your USB Flash Drive.
- Follow the instructions to complete Windows 10 setup.
To do this, you’ll need a bootable USB flash drive with Windows 10 on it. You can easily create a bootable USB flash drive with Windows 10 on it.
9. Remove the overclock settings
- While your PC boots, keep pressing F2 to enter BIOS.
- Navigate to Overclocking section.
- Now reset all overclocking settings to the default.
If you’re using overclocking software, you should also disable all overclock settings and check if that helps.
10. Reset BIOS to default
- Restart your PC.
- While the PC boots, keep pressing F2 to access BIOS.
- Go to the Exit section and choose Restore Defaults.
- Save changes and restart your PC.
Is ACPI_BIOS_ERROR serious?
This is a Blue Screen of Death error, and as such, it will always crash your PC and force it to restart, causing you to lose any unsaved data.

Luckily, the error isn’t usually caused by hardware failure, but there might be certain incompatibilities that are causing this issue to appear.
Should I turn off ACPI?
ACPI is a useful feature, and there are no benefits to disabling it. If you choose to turn it off, your power consumption will go up.
In addition, heat emission will increase thus reducing the lifespan of certain hardware components.
This isn’t the only error you can get, and many reported ACPI.sys error and ACPI_DRIVER_INTERNAL error, but we fixed those in separate guides.
That’s about it. We’ve listed lots of solutions for you to try. As always, for more questions or suggestions, let us know in the comments section below.







User forum
0 messages