How to Enable Winodws 10 Auto Login: 2 Easy Ways
Adjust your user settings to log in instantly to your PC
2 min. read
Updated on
Read our disclosure page to find out how can you help Windows Report sustain the editorial team. Read more
What if you don’t want any security layers in between and want to auto-login in Windows 10? It can come in handy when your computer won’t let you type your password or if you simply don’t want to type it by hand.
This is fairly simple to set up and in this article, we walk you through the steps to enable auto login in Windows 10.
How can I enable auto login in Windows 10?
1. Configure User Accounts settings
1. Press Windows Key + R to open the Run dialog.
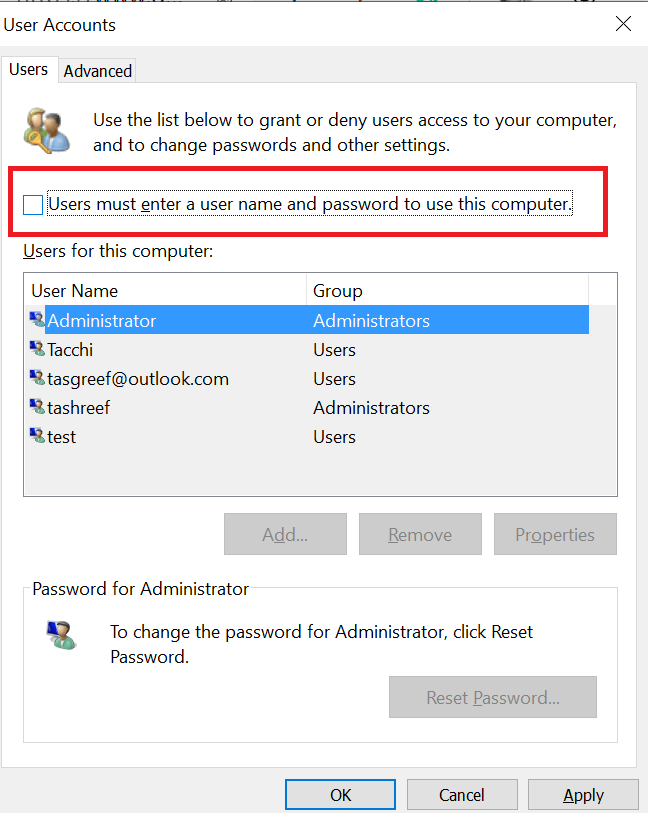
2. In the Run dialog box, type netplwiz and click OK. This will open the User Accounts window.
3. Uncheck the Users must enter a user name and password to use this computer box.
4. Click Apply.
5. When prompted to user credentials, enter the username and password to disable password-based login. You may have to enter the username and password twice.
6. Click OK to save and exit the window.
7. On the next restart, you will be able to log in without entering a password for you account.
You can remove the necessity to input a password every time you open your PC by disabling the login credentials. This can be done from the User Accounts menu in Control Panel.
A few users reported that the checkbox from Step 3 is missing on their PC. If that’s the case, you can get it back by doing the following:
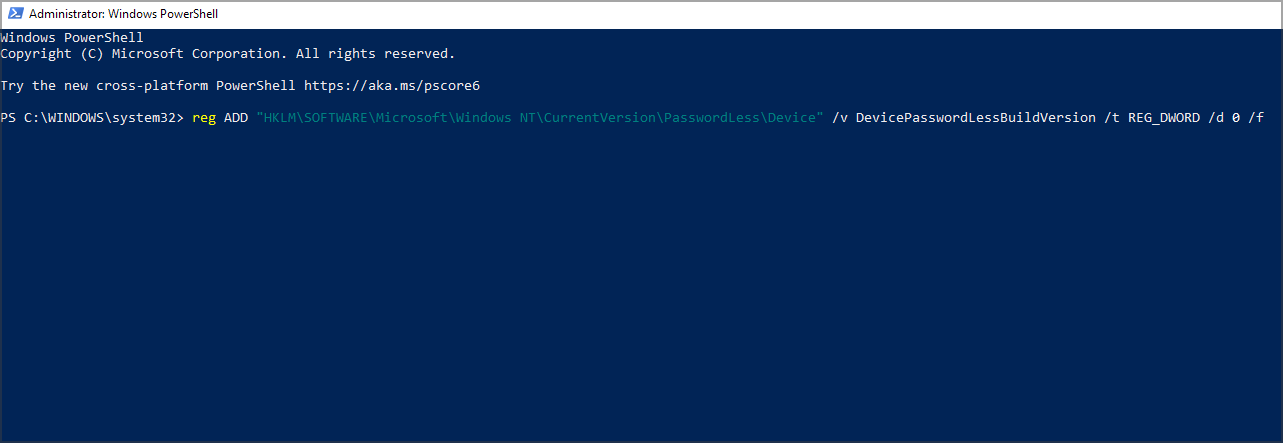
- Press Windows key + X and select Windows PowerShell (Admin).
- Now run the following command:
reg ADD “HKLM\SOFTWARE\Microsoft\Windows NT\CurrentVersion\PasswordLess\Device” /v DevicePasswordLessBuildVersion /t REG_DWORD /d 0 /f - Once the command is completed, repeat this solution again, and the checkbox should be available.
2. Edit the Registry Editor
- If the first method did not work and Windows 10 still asks for a password during login, try this registry hack.
- Before making any changes to the registry, create a system restore point. It will allow you to restore the PC to normal if something goes wrong.
- After creating a restore point, proceed to next steps.
Edit registry files
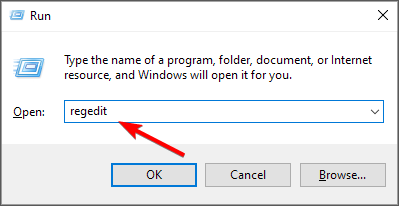
- Press Windows key + R to open Run.
- Type regedit and click OK to open the Registry Editor.
- In the Registry Editor navigate to the following location:
HKEY_LOCAL_MACHINE\SOFTWARE\Microsoft\Windows NT\CurrentVersion\Winlogon - Next, locate the following values in the right pane:
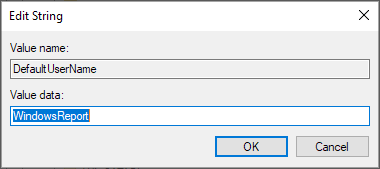
- DefaultUserName
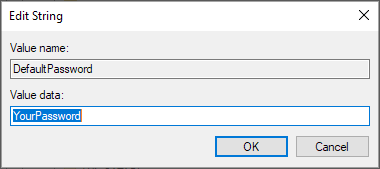
- DefaultPassword
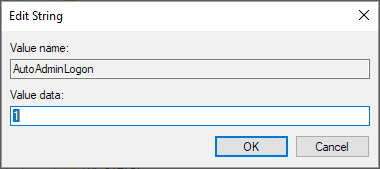
- AutoAdminLogon
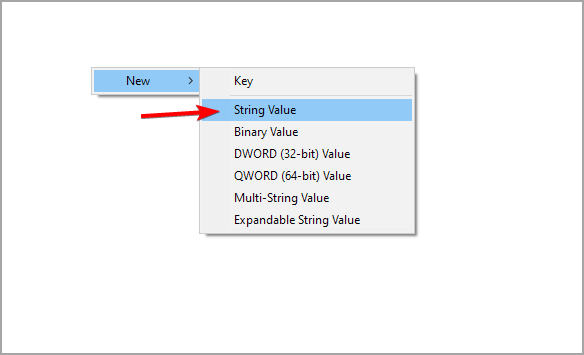
- In case you can’t find one or more of these values, you need to manually create them. You can do that by right-clicking the right pane and expanding the New menu. Now choose String Value.
- Name the newly created String Values accordingly.
- Next, double-click each to edit them. You need to set the Value data as follows:
- Close Registry Editor and restart your PC.
 NOTE
NOTE
Setting up auto login in Windows 10 is fairly simple. However, some users reported that they can’t log into Windows 10 at all, and we covered that issue in a separate guide.
We hope that our solutions helped you enable auto login on your PC. Let us know in the comments section below if you have any questions about this topic.



User forum
3 messages