Microsoft 365 Insiders get a sneak peek at OneNote's ink annotation upgrades
Move your ink annotation with your picture anywhere you like
2 min. read
Updated on
Read our disclosure page to find out how can you help Windows Report sustain the editorial team. Read more
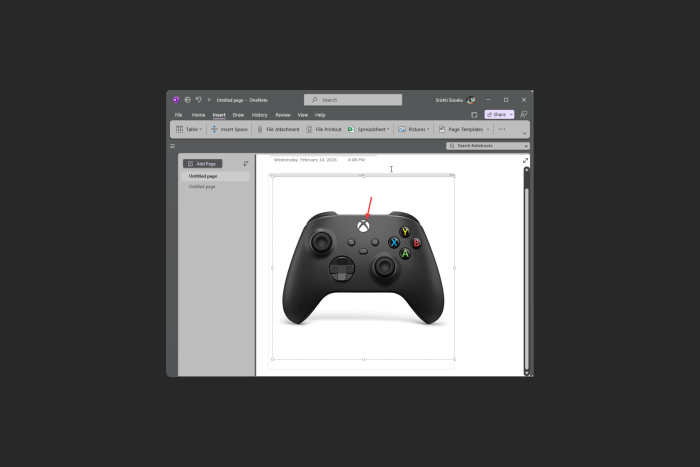
Recently, Victoria Chen, the product manager on the Office AI team, made an announcement about an improvement to OneNote on Windows. It allows you to relocate ink annotations alongside the PDF printouts and images they are linked to.
This change was introduced as a lot of users have given feedback that annotating images or PDF printouts in OneNote was challenging. The ink didn’t move with the image, and using the Lasso tool every time was time-consuming and not easy.
However, with this new update, Microsoft 365 users can move both image and annotation together. Moreover, any ink touching and outside of the image will stay on the image or PDF when you move them, ensuring the ink annotations & picture are together.
Let us see how it works
Open OneNote, go to Insert, then click Picture or Insert, then select File Printout to add an image or PDF printout. Ink the image, then tap on the image to select it and ink using a digital pen, touch, or your mouse. Now, move the selected image anywhere you like.
Here are some tips to use the feature:
- Tap outside the PDF printout or picture to unselect it
- To choose the underlying PDF printout or image, first tap to select both annotations and image, then tap it again to select the image only.
- Select the image and drag the corners of the selection box to resize both the image and ink annotations.
The feature is now available for Microsoft Insiders in the Beta Channel who are running version 2402 (Build 17407.15010) or later. Also, this OneNote feature is currently only available on Windows 10, or 11.
What do you think about this new change? Share your thoughts in the comments section below.





User forum
0 messages