How to Control Your Windows 10 PC with Your Voice
4 min. read
Updated on
Key notes
- You can control your PC using only your voice.
- To do so, you need to configure Voice Recognition settings.
- We created a guide to help you voice control your Windows 10 device step-by-step.

Well, aren’t the input methods nowadays changing or what? A decade ago, most users would find mouse and keyboard the peak performance of input devices, but it seems that the next obvious step forward lies in voice recognition.
It’s all about the smart digital assistants and their usability in various devices, like smartphones, cars, and, of course, Windows PCs.
By following the emerging trends, we decided to provide you with a few ways to control your Windows 10 PC with simple voice commands.
No pointing device is needed here, just a microphone and a few tweaks. So, if you’re determined to roam through the user interface and complete various tasks with nothing but a voice, make sure to check the explanation below.
Here’s how to set the voice control on Windows 10
1. Use Speech Recognition
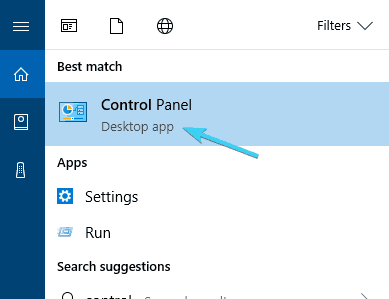
1. In the Windows Search bar, type control and click on the first result to open Control Panel.
2. Select Large icons from the View section.
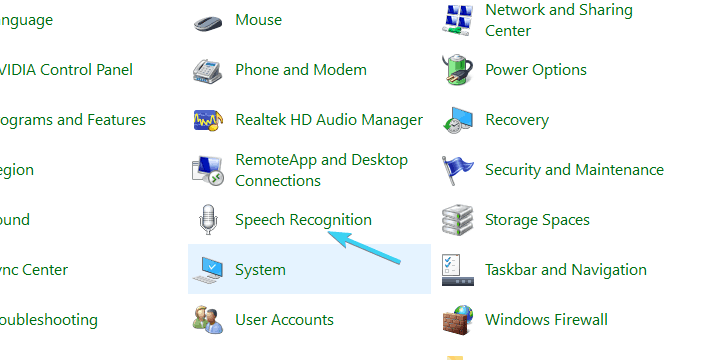
3. Scroll down and open Speech recognition.
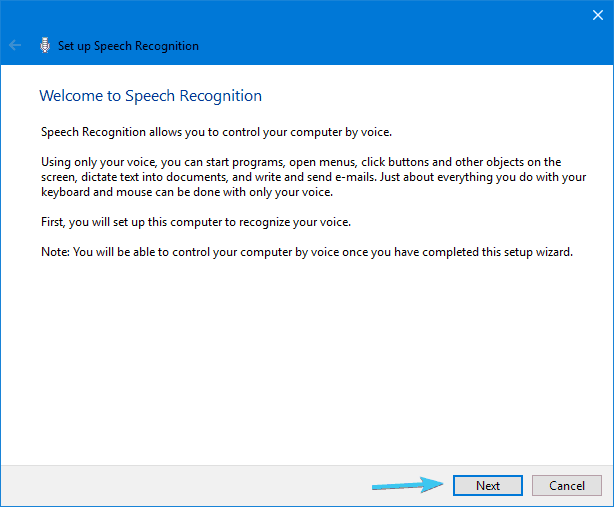
4. Click on the Start speech recognition to start the process.
5. Press the Next button.
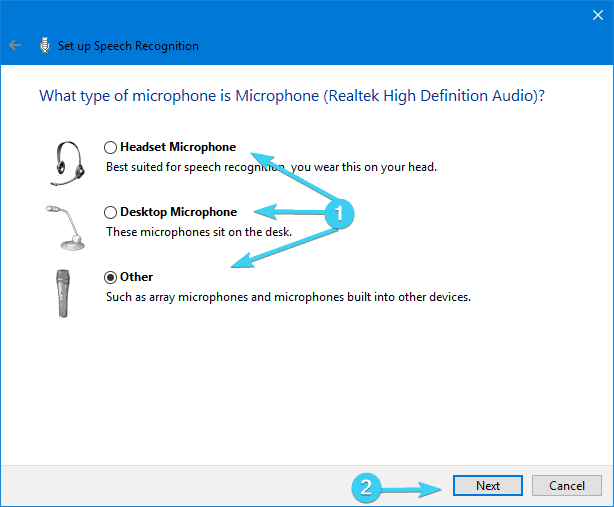
6. Select your Microphone setup and click Next > Next.
7. Read the displayed sentence in order to confirm that your mic is up and running, and then click Next.
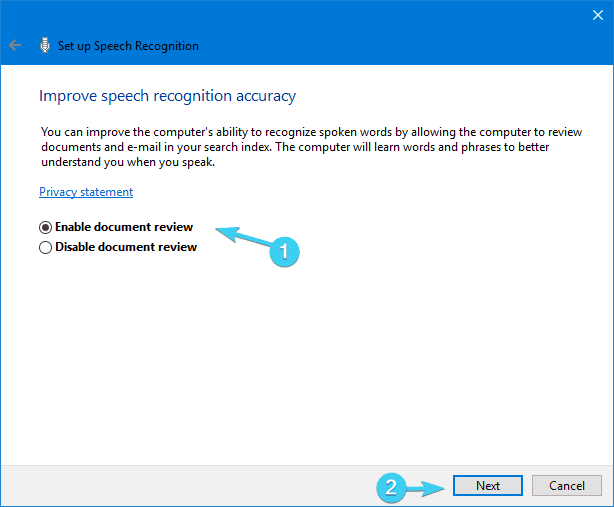
8. The next screen offers you an option to improve the recognition accuracy by enabling Document review. We advise you to enable it.
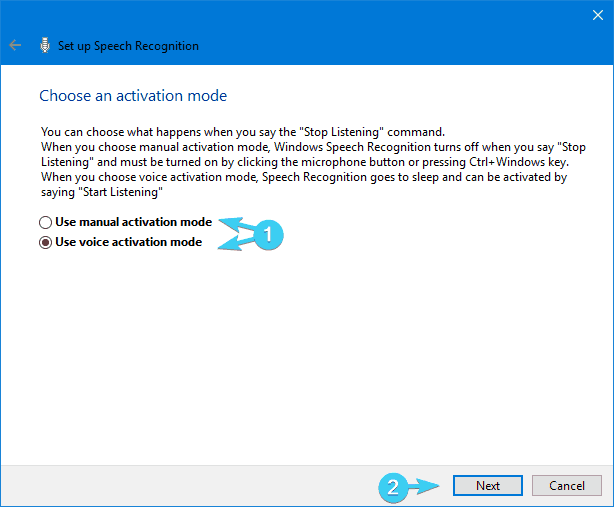
9. On the next screen, you can choose one of the two activation modes:
- Manual mode – Speech recognition stops when you say ”Stop listening”.
- Voice activation mode – Speech recognition is on hold and it starts the moment you say Start listening.
10. Once you’ve decided which mode suits you better, click Next.
11. Now, you can print or just take a glimpse of all available commands in the Speech reference screen. It basically leads to this webpage.
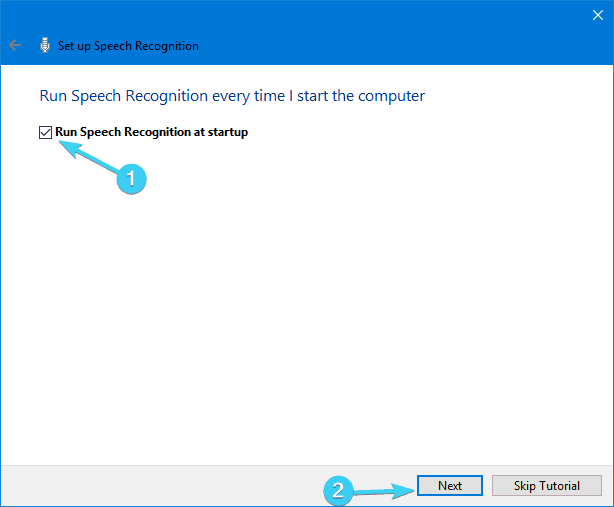
12. Check the Run speech recognition at startup box and click Next.
13. Now start the tutorial and that should do it. After that, you should be able to use speech recognition without issues.
Speech recognition isn’t a Windows 10 exclusive, and it dates back to Windows 7. Nonetheless, this handy feature is more than welcomed on the latest Windows version because Cortana tends to misbehave. It’s originally introduced as an ease of access feature, to improve overall usability for users with physical issues.
If you’re not sure how to configure Speech Recognition and use it later on, make sure to follow the steps we provided below.
This feature is quite often overlooked and we decided to correct the injustice and enlist Speech recognition in this list.
Over time, it found its place in mass use due to experimental and ted futuristic approaches. You know, like smart assistants do now.
As a side note, due to interference between Cortana and Speech recognition, we advise you to use one or another. Below we explained how to configure Cortana, so you can try out both and choose the one that suits you better.
2. Microsoft Assistant a.k.a Cortana
In order to meet the expectations and prove itself competitive with the likes of Apple, Google, or Amazon, Microsoft introduced its native smart assistant, Cortana.
In the early stages, Cortana was widely regarded as one of the best artificial assistants out there, but that status dropped after Microsoft Mobile lost the final battle with Android and iOS. Nonetheless, with Windows 10, and we’re referring to the PC version here, Cortana kind of got better and it’s a viable option nowadays.
With Windows 10 as a service, we can expect Cortana to improve over time. And if you’re keen to run your Windows 10 PC with nothing but voice commands, it might come in handy.
- READ ALSO: Cortana will let you install Windows 10 using only voice commands
Here’s how to enable and configure Cortana for future use on Windows 10:
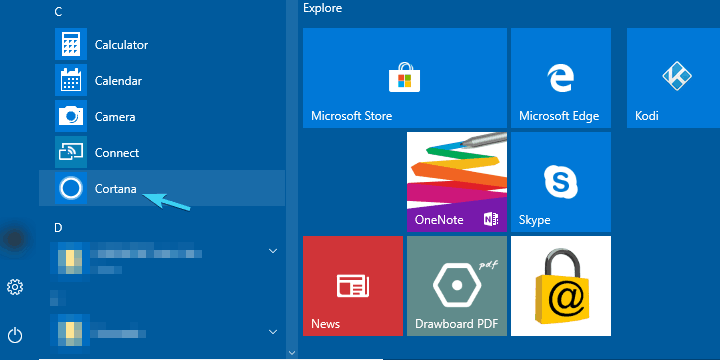
- Click on the Start Menu and open All apps.
- Look for Cortana and open it.
- Toggle the ”Use Cortana” option.
- Click ”Yes” or ”No, thanks” depending on whether you want to let Cortana track your data in order to improve (get to know you better) or not. It’s your choice.
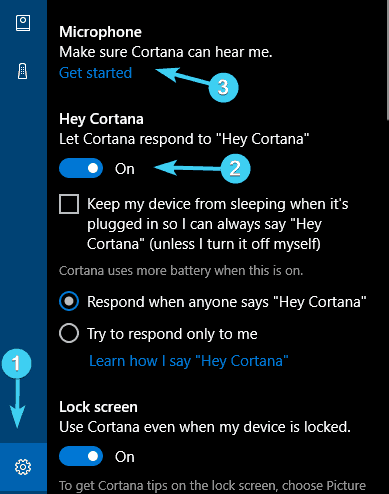
- Now that we enabled Cortana, press Windows + S and click on the cog-like settings button positioned on the left side.
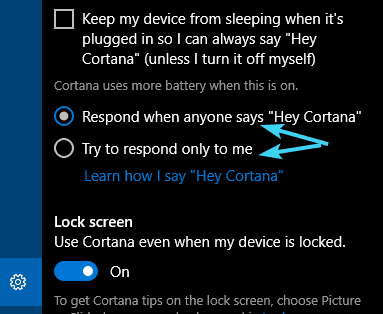
- Toggle on ”Hey Cortana” and configure your microphone. You can let Cortana react when anyone says ”Hey, Cortana” or you force it to react only to your voice.
- Exit settings and command something to your newly-configured digital assistant.
You can find the list of available commands and tasks Cortana can perform in this article.
3. A collection of third-party programs
Besides the built-in Speak recognition and Cortana, some users might turn to a third-party alternative. Since this is a software category in a state of constant growth, there are various speech recognition solutions in the market compatible with Windows 10. The only question is what are your needs and wants.
Some of them, like Dragon NaturallySpeaking, specialize in fast-paced dictation and voice-to-text in general. Others, like Voice Attack, are there for voice-controlled multitasking and in-game controls (yes, you can reload your weapon in CoD with a voice command). And then there’s VoxCommando that’s mostly used in multimedia programs like Kodi or iTunes, but it can also be used for automated home devices.
So, if Speech recognition or Cortana haven’t met your preferences, you can try them out. Here’s one great article about the top 5 speech recognition third-party programs, so make sure to check it out.
With this, we can wrap it up. Don’t forget to share your experience with speech recognition in general, or talk about individual programs you’ve tried, both built-in and third-party. You can do so in the comments section below.





User forum
0 messages