SMTP Port Problems on Windows 10/11 [Step-By-Step Guide]

Email clients often use the SMTP port to download your emails from the server, but sometimes issues with the SMTP port can occur.
These issues will prevent you from receiving emails, so today we’re going to show you how to fix problems with the SMTP port on Windows 10.
What can I do if I have SMTP port problems? The simplest fix is to add a port number during the configuration. Usually, the issue is triggered by a faulty configuration. If that doesn’t work, then uncheck SSL encryption and add :1 after the port number.
For more info on how you can do that, check the guide below.
How can I fix SMTP port problems on Windows 10?
1. Add a port number during the configuration
Many users reported that Windows Mail app isn’t working for them because they can’t configure SMTP port. This can be a big problem, especially if your email provider requires that you use a specific port for SMTP or POP.
However, there’s a way to deal with this issue. To fix the problem, you just need to add your email account again along with the required port.
This is rather simple, and you can do it by following these steps:
- Open the Mail app. You can do that by pressing Windows Key + S and typing mail. Now choose Mail from the list of results.
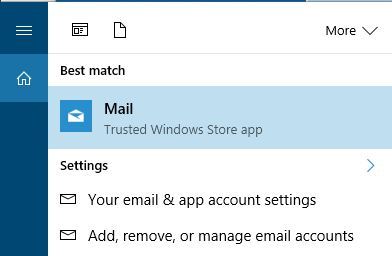
- Click the Settings icon.

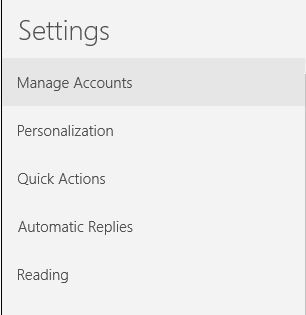
- Choose Manage Accounts from the Settings pane.
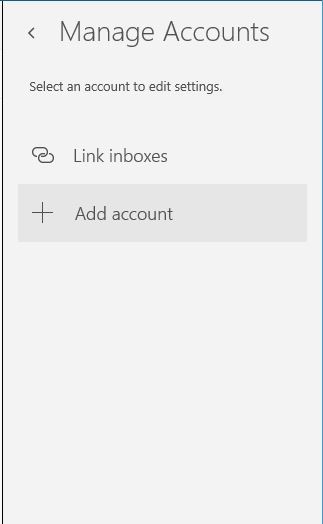
- Now click Add account.
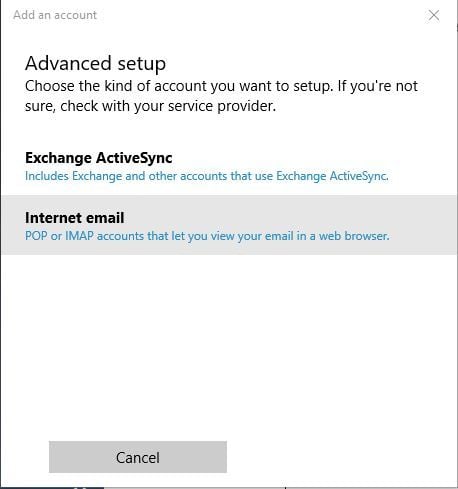
- Scroll down and select Advanced setup.
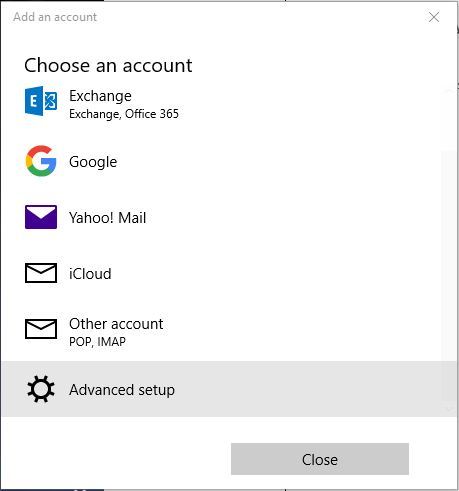
- Choose Internet email option.
- Enter the required data. If you need to use a specific port, be sure to add the port number. For example :211, at the end of the SMTP server address. Keep in mind that we used 211 as an example, so be sure to use the port number that is given to you by your email provider.
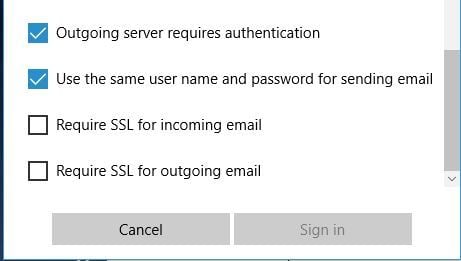
- Optional: If required, turn on SSL for incoming and outgoing email.
- Save changes.
After adding your account again and entering the port number manually, the problem with the SMTP port will be completely resolved.
2. Uncheck SSL encryption
SSL encryption is useful if you need to protect your data from malicious users, so it’s no wonder that many websites use this feature.
However, some issues with SSL can occur and to fix the problem with the SMTP port, you need to disable SSL for your account.
To do that, follow these steps:
- Add your account to the Mail app like we showed you in the previous solution.
- When the account configuration window appears, scroll all the way down and uncheck Require SSL for incoming email and Require SSL for outgoing email options.
- Save changes and you should be able to send and receive emails without any problems.
Disabling SSL can be a security risk, so use this solution only as a temporary workaround. As we already mentioned, SSL protects your data from malicious users, so it’s always recommended to use it.
3. Change the port address
In Solution 1 we showed you how to add a new email account with a specific port, but sometimes you need to change the SMTP port to fix the problem.
Users reported that the issue was resolved after using :465 or :2525 as a SMTP port. Although these ports work for some users, it’s recommended to use the ports that were given to you by your email provider.
4. Add :1 after the port number
A few users reported that you can fix the problem with SMTP port on your PC simply by adding :1 after the port number. By doing so, your SMTP address will look like smtp.example.com:2525:1.
Of course, be sure to use the SMTP address and port number assigned to you by your email provider. By adding :1 after the port number, you’ll force the client to use an SSL connection.
As we already mentioned, SSL connection will encrypt your data and keep it safe from malicious users.
5. Remove your email account and add it again
According to users, issues with the SMTP port are fixed in one of the updates. If you still have the problem, you need to remove your account and add it again.
This is rather simple, and in order to do it, you need to follow these steps:
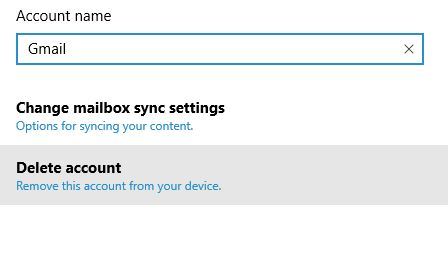
- Right-click your email account in the Accounts section.
- Choose Account settings from the menu.

- Choose Delete account from the menu.
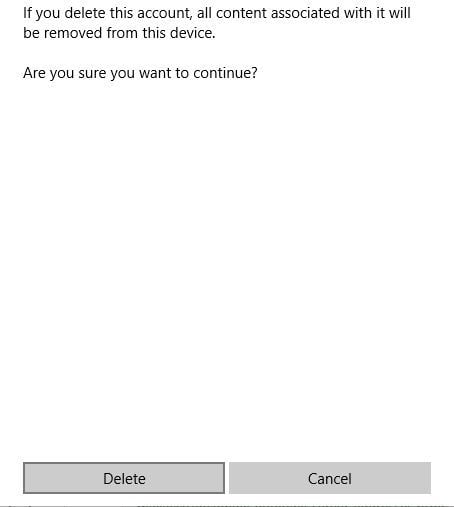
- Confirmation message will now appear. Select the Delete button to delete your account.
After deleting your account, you need to add it again by following the similar steps to the ones we used in Solution 1. After your account is added again, issues with the SMTP port should be resolved completely.
Problems with the SMTP port will prevent you from receiving emails, but you should be able to fix these issues by using one of our solutions. You can also enable SMTP server for Office 365 for your organization.
If you bumped into another viable solution that helped you solve the SMPT port problems on Windows 10, please leave it in the comments section below along with any other questions you may have.
Read our disclosure page to find out how can you help Windows Report sustain the editorial team. Read more


Improve this guide


User forum
0 messages