Skype Share Screen Not Working: How to Enable It
Ensure camera permissions are enabled for screen sharing
Key notes
- Screen-sharing is an essential feature for collaborating platforms such as Skype when it comes to presentations.
- If you're unable to share your screen, it is possible that you have an outdated app or haven't enabled camera permissions.
- In such a case, ensure you're running the latest app version and grant the necessary permissions.

Skype screen sharing is a feature that allows you to share the screen of your computer with other Skype users. It’s a great way to collaborate on projects, show off your desktop, or have fun.
However, sometimes it may not work as expected. Screen sharing may be unavailable, especially if you use an incompatible version. If you’re in a similar predicament, we unpack various ways to ensure you can share your Skype screen again.
Why is my Skype screen sharing not working?
There are a handful of reasons you may be unable to share your screen on Skype. Below are some of the most common ones:
- Unsupported version of Skype – If one party has an older software version, it might not be compatible with screen sharing. Only select versions of Skype support screen sharing.
- Weak connection – If one of you has a weak signal or the internet connection is slow, it may prevent Skype from working properly.
- System/hardware requirements – Your computer may not have adequate hardware or system requirements to support screen sharing.
- Insufficient permissions – If you’ve tried to share your screen without having granted your webcam or access, then you may not be able to share. In some cases, your webcam is not working.
- Your firewall may be blocking the connection – If you have a firewall or anti-virus software installed on your computer, it may be blocking Skype from accessing your webcam and microphone.
- Bugs in the software – Sometimes bugs in software can cause problems like this, so make sure that you update all of your software before trying anything else.
- Unsupported OS – Make sure that you’re using a supported operating system. Screen sharing only works on select platforms.
How do I enable screen sharing on Skype?
Before you attempt any of the slightly technical solutions below, we recommend you try the following:
- Verify that you have adequate bandwidth and that your network connection is stable and working correctly.
- Make sure your computer meets the minimum system requirements before trying to enable this feature in Skype.
- Check on Skype’s status page whether there’s communication on the disruption of services.
- Close any background apps or processes that may be hogging the bandwidth. You can also choose to limit bandwidth.
- Check for any available Skype updates.
- Reboot both computers and restart Skype again before attempting another session.
1. Turn on camera permissions
- Hit the Windows key and click on Settings.

- Navigate to Privacy & security then scroll down to App permissions and click on Camera.

- Toggle Camera access on.

- Also under Let apps access your camera, ensure Skype option is On.

2. Disable the firewall temporarily
- Press the Windows key, search Windows Security and click Open.

- Click on Firewall & network protection then select Public network.
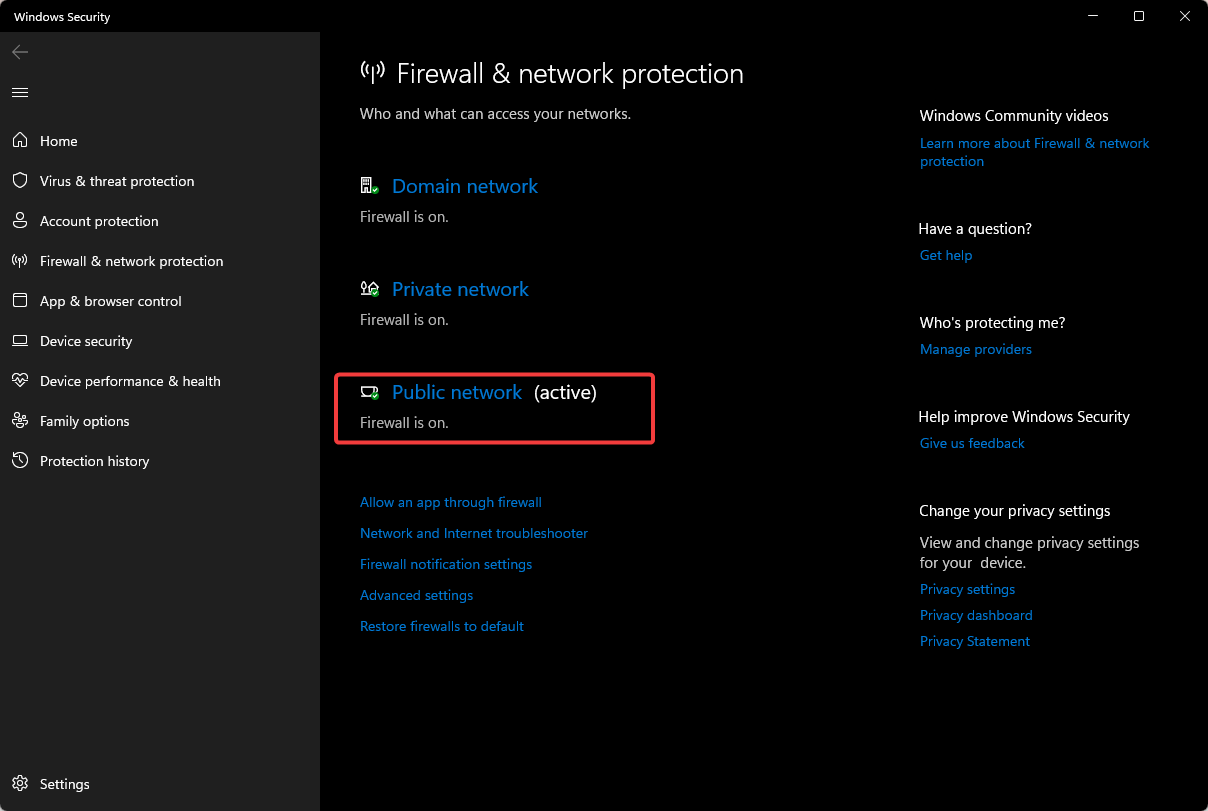
- Locate Microsoft Defender Firewall and toggle the off button.
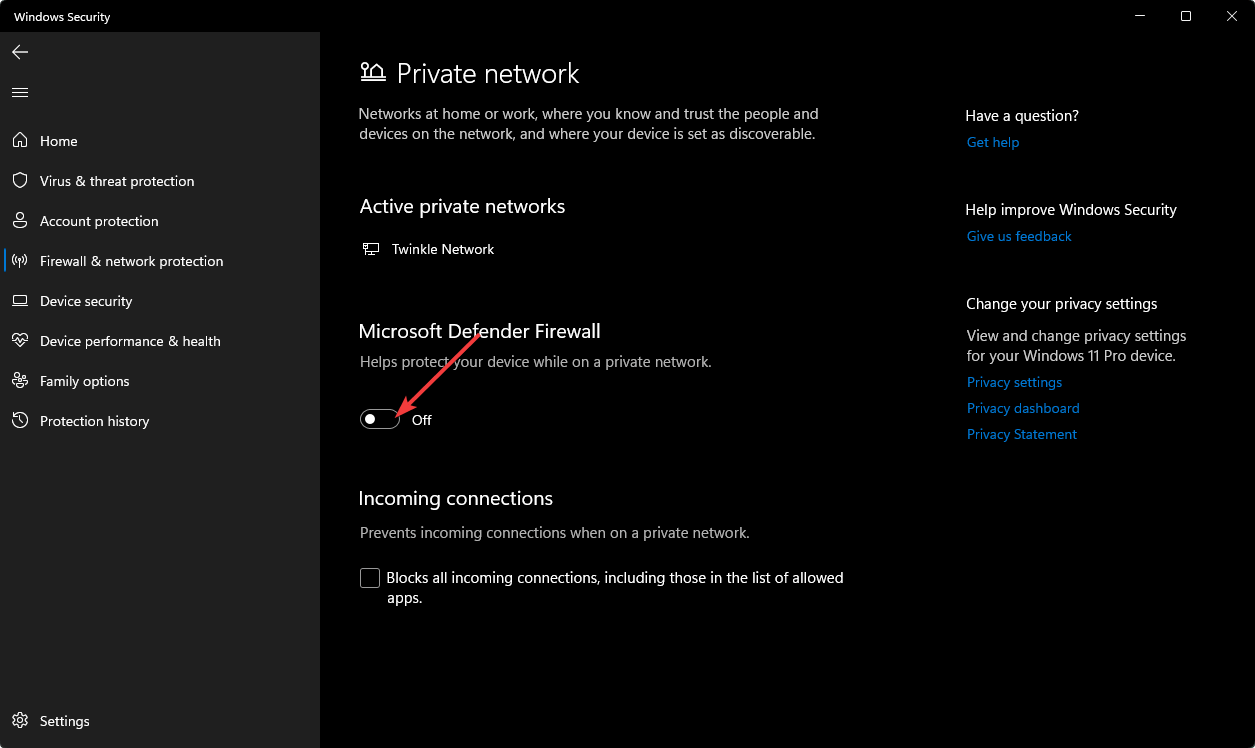
If you have an antivirus enabled, you should also disable it temporarily and then try reconnecting.
3. Check for Updates
- Hit the Windows key and select Settings.
- Click on Windows update, then select Check for updates.
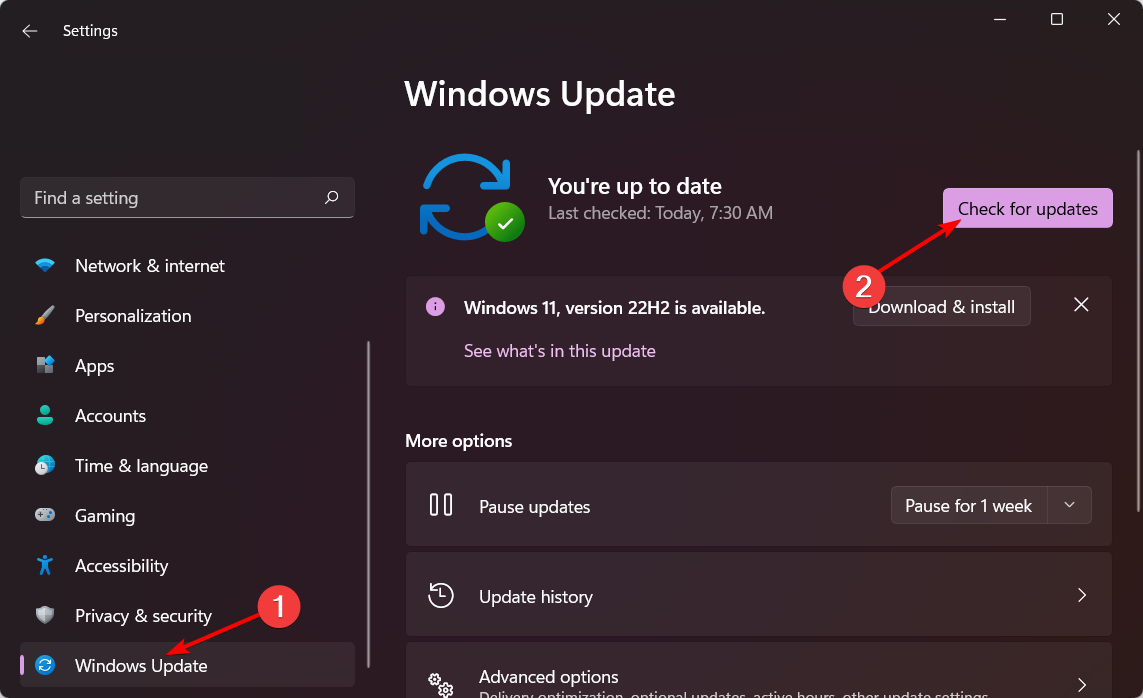
- Download and install if any are available.
4. Run a virus scan
- Press the Windows key, search Windows Security, and click Open.
- Select Virus & threat protection.
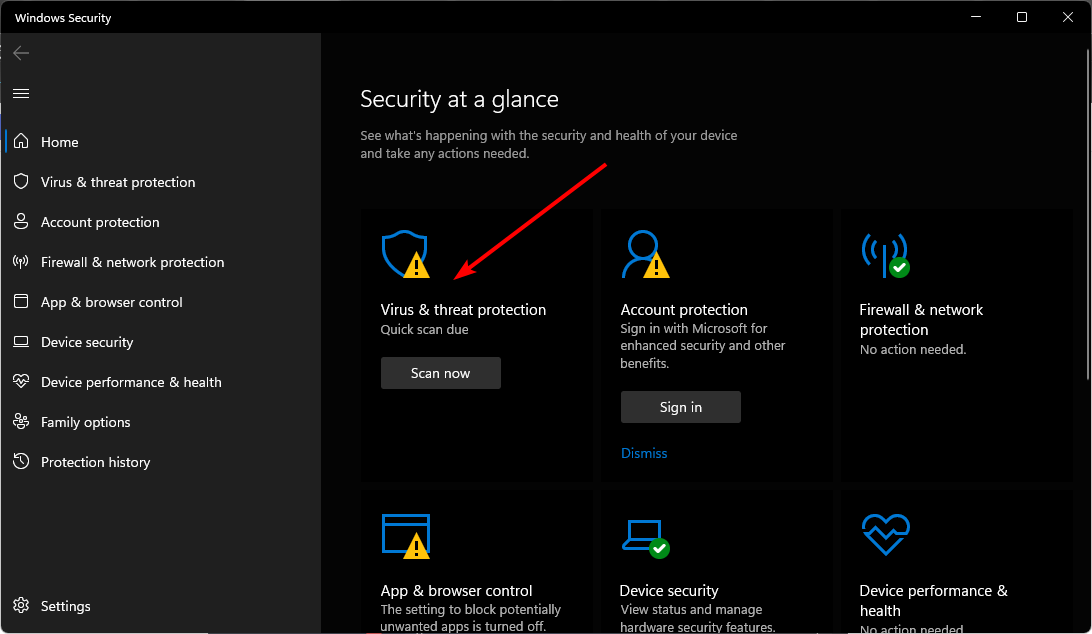
- Next, press Quick scan under Current threats.
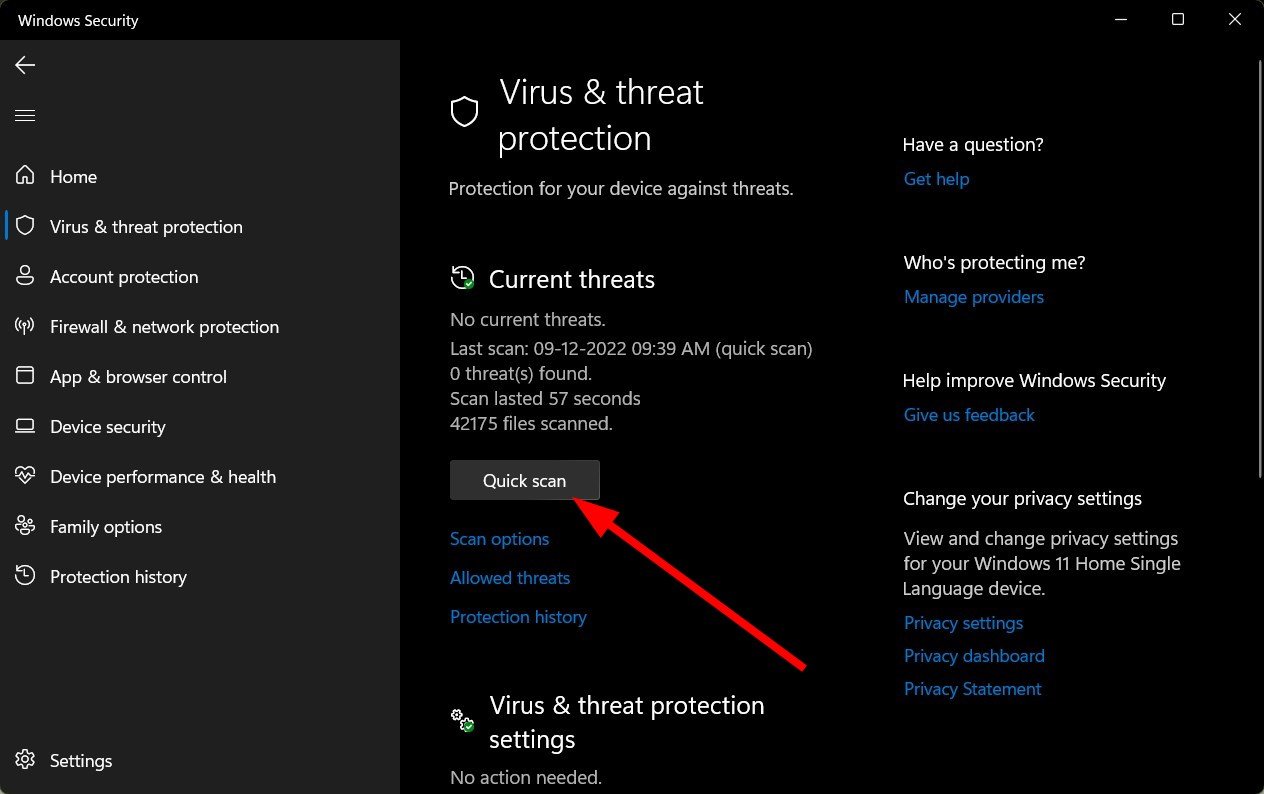
- If you don’t find any threats, proceed to perform a full scan by clicking on the Scan options just below Quick scan.
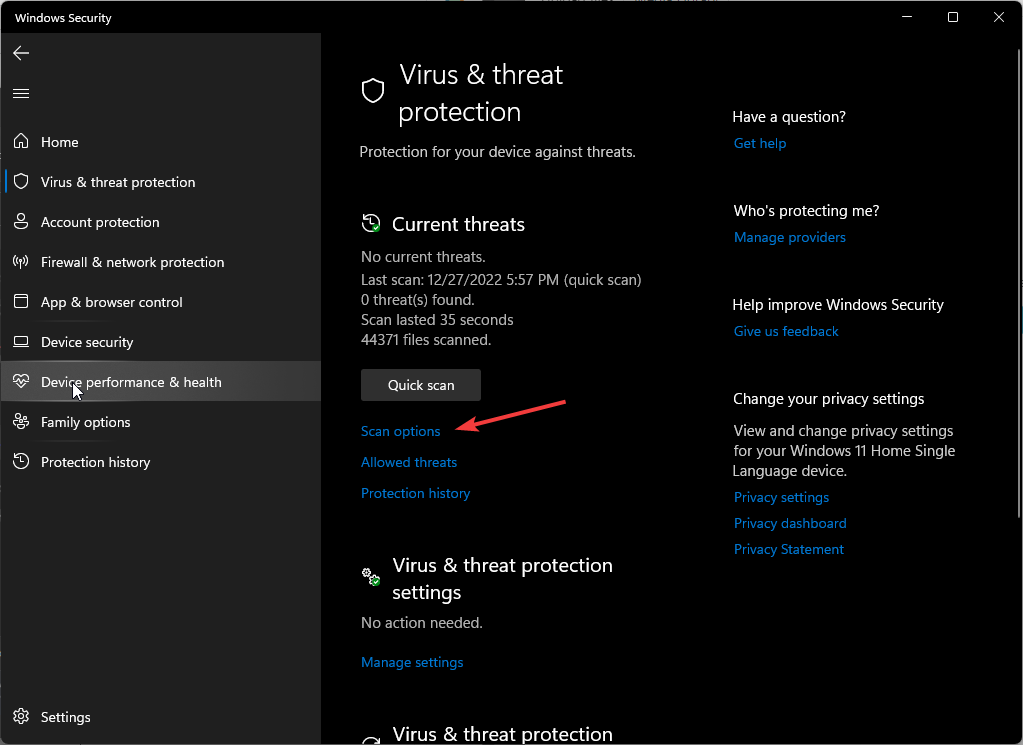
- Click on Full scan then click on Scan now to perform a deep scan of your PC.
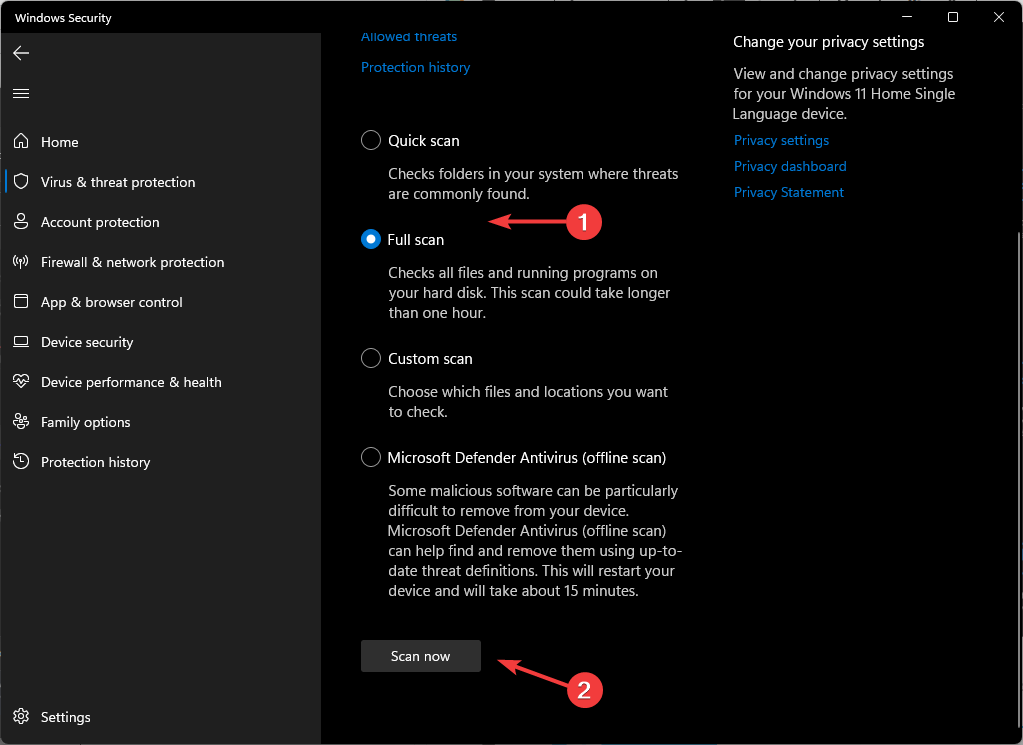
- Wait for the process to finish and restart your system.
Also, perform a virus scan if you have a third-party antivirus enabled to ensure you cover all the bases. There may be some vulnerabilities that Windows Security may miss as it is not as comprehensive.
Thus, an antivirus solution we strongly recommend is ESET NOD32 because it has an advanced scanning option and multilayered security, including antivirus, antispyware, and ransomware shield, which will keep your PC safe from digital threats at all times.
5. Reinstall Skype
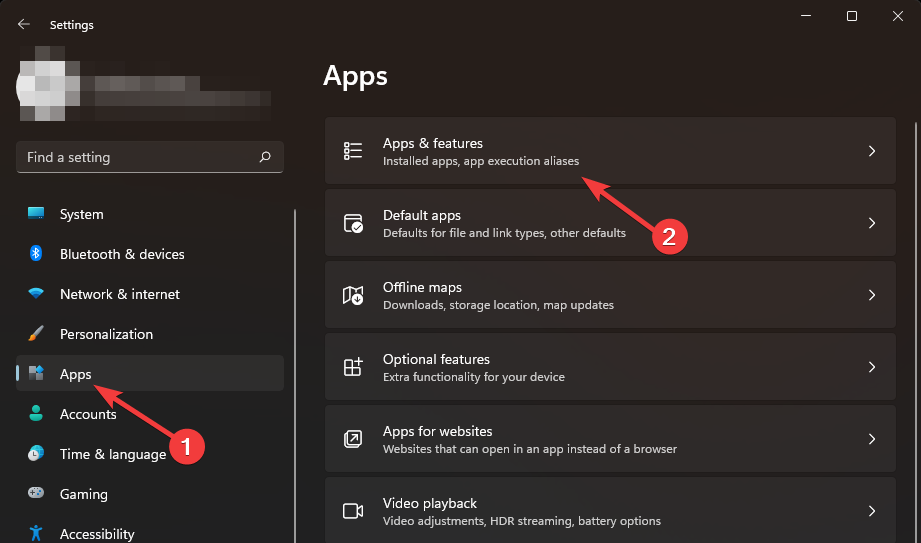
- Hit the Windows key and select Settings.
- Click on Apps on the left pane then select Apps & features on the right pane.
- Find Skype, click on the three ellipses and select Uninstall.

- Launch the Microsoft Store app, search for Skype, and click Install.
You may also run into an issue where Skype fails to make calls but worry not, as our expert article has the solutions.
If Skype keeps crashing, we also have answers in our guide detailing why this happens and how to fix it. While you’re still here, you may be interested in screen-sharing tools that promise to be worth your while.
We’d love to hear from you, so please let us know in the comment section below what solution worked for you.
Read our disclosure page to find out how can you help Windows Report sustain the editorial team. Read more


Improve this guide


User forum
0 messages