How to fix Windows 10/11 rollback loop
![]() 10 min. read
10 min. read
![]() Updated on
Updated on
Share this article

Improve this guide
Read our disclosure page to find out how can you help Windows Report sustain the editorial team Read more
Key notes
- A rollback is an operation where you return your system to a previous state. This is usually an advanced option chosen by somebody who knows specifically what they are doing.
- If Windows gets stuck during a rollback, we suggest rebooting, trying out some Command Prompt instructions or doing an in-place upgrade. Read on to find our more.
- The reason you chose to do a rollback might be related to an update that went bad. Here's how to stop automatic updates in Windows 10.
- Are there any other problems with your computer? We have an awesome Windows 10 errors hub with answers to many issues.
Since Windows 10 is a free upgrade Microsoft has left you the ability to roll back to the previous version of Windows if you’re not pleased with Windows 10. Unfortunately, a number of users reported that the rollback process is stuck on Windows 10 and that users are unable to revert back to an older version of Windows.
Windows 10 rollback stuck: How to fix it?
Not being able to rollback to the previous build of Windows can be a big problem, and speaking of issues, here are some common problems reported by users:
- Windows rollback loop after update – According to users, sometimes you might get stuck in rollback look after a new update. To fix that, be sure to try some of our solutions.
- Windows 10 rollback stuck on restarting – Sometimes your rollback can get stuck on restarting. If that’s the case, it might best that you leave your PC and let it finish the rollback.
- Windows 10 downgrade stuck – In some cases, your PC might get stuck while downgrading. This can be a big problem, but you might be able to fix it by using the Legacy boot feature.
- Windows 10 rollback stuck boot loop, black screen – If this problem appears, you might be able to fix it by running a couple of commands in Command Prompt.
- Windows 10 rollback not working – If the rollback process isn’t working, one way to fix is to perform an in-place upgrade. By doing that, you’ll force Windows to update to the latest version and fix the problem.
Solution 1 – Force a restart or shutdown
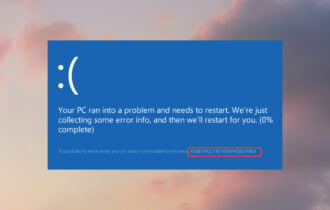
A number of users reported that they are unable to roll back from Windows 10 and that they are getting stuck on a blue screen with a loading icon. This can be a big problem if Windows 10 isn’t working for you and if you want to revert to the older version. Few users reported that you can fix this problem simply by forcing a restart or a shutdown.
According to users, the rollback process is stuck and the hard drive indicator doesn’t show any activity. After the restart, the indicator will start blinking again and the rollback process should start working without any problems.
Solution 2 – Use Legacy Boot
Several users reported that the rollback process was stuck due to UEFI mode. According to the users, there was a problem with booting from a flash drive and DVD and that can sometimes prevent the rollback process.
To fix this issue you need to enter BIOS and change the Boot Mode from UEFI to Legacy. To do that follow these steps:
- While your computer boots keep pressing the F2 or Del on your keyboard to enter BIOS. Some versions of BIOS use a different key, so you might have to repeat this step a few times before you find the right key.
- Once you enter BIOS you’ll need to find Boot Mode and change its value from UEFI to Legacy. If you can’t find this option be sure to check your motherboard manual for detailed instructions.
- Save changes and try to perform the rollback again.
Solution 3 – Use a hard drive image to restore your system
If you are familiar with hard drive images, you probably have a backup hard drive image created. If you don’t use any backup software, then you most likely don’t have a backup image of your hard drive, so you can skip this solution.
If you created your hard drive image before upgrading to Windows 10, you can simply back up your system by using that hard drive image.
Once again, this solution only works if you created a hard drive image before upgrading to Windows 10.
- Press Win + R key.
- Type rstrui and click OK. This will open System Restore.
- There’s a Show more restore points box that, if checked, will show a lit of other restore points.
- Couldn’t find any restore points? Learn how to create a system Restore Point
Yes, you can through this process called a Rollback that we discussed in this article. Missing rollback option? Check out our guide.
Solution 4 – Leave your computer running for a couple of hours
Sometimes rollback process can take a couple of hours to complete, and users reported that rollback will be completed after a few hours if you wait patiently. In some cases, the rollback process might encounter a restart loop, but leaving the computer for a few hours can sometimes fix the problem according to some users.
Solution 5 – Use Command Prompt
According to users, if your PC is stuck during the rollback process, you might be able to fix it by running a couple of commands in Command Prompt.
Since you won’t be able to boot to Windows, you’ll need to start Command Prompt outside of Windows and run the necessary commands. You can do that by following these steps:
- Restart your computer a couple of times while it boots.
- You’ll now be presented with a list of options. Select Troubleshoot > Advanced options > Command Prompt.
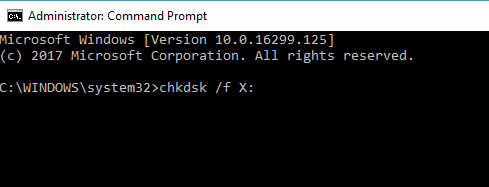
- After the command prompt starts, run chkdsk c: /f command.
- The scan will now start and check your hard drive for errors. This process can take a while, so be patient.
Once the scan is finished, try to access Windows 10 again. If the problem is still there, you might need to run a couple of additional commands. To do that, follow these steps:
- Repeat the steps above to open Command Prompt.
- Once you open Command Prompt, run the following commands:
- bootrec /fixmbr
- bootrec /fixboot
- bootrec /rebuildbcd
- bcdboot c:windows /s c:
After the commands are executed, check if the problem is still there.
Solution 6 – Perform an in-place upgrade
In case you’re not familiar, the in-place upgrade process will force Windows 10 to update to the latest version while keeping all your files intact. To perform an in-place upgrade you’ll need the following:
- an empty USB flash drive (at least 8GB in size)
- another working computer
To fix this problem, first, you need to download Media Creation Tool on another PC and run it. Now follow these instructions:
- Connect the USB flash drive to another PC.
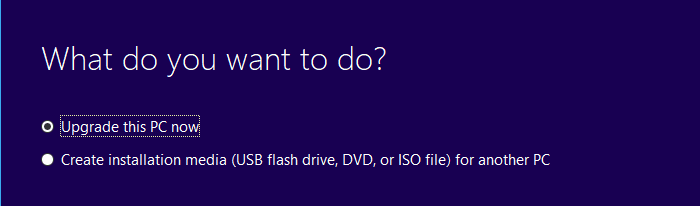
- Choose Create installation media (USB flash drive, DVD or ISO file) for another PC option. Click Next to proceed.
- Make sure that you select the version that matches the version on your other PC and click Next.
- Select USB flash drive and click Next.
- Choose your flash drive from the list and click Next to proceed.
Now, wait while the Media Creation Tool creates a bootable media. After creating a bootable media, you can switch back to your PC. Connect the USB drive to the affected PC and do the following:
- When your PC boots, you’ll be asked to choose between several versions of Windows. Select any version you want and your system should boot in Safe Mode.
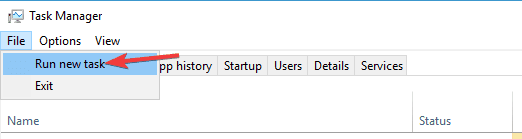
- When your PC boots, press Ctrl + Shift + Esc to start Task Manager.
- In Task Manager, choose File > Run New Task.

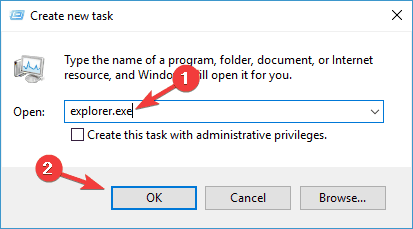
- Enter explorer.exe and click OK.

- Now you need to open your flash drive and run setup.exe file.
The setup process will now start. To upgrade your PC and keep your files, you just need to do the following:
- Wait while the setup prepares the required files.
- Select Download and install updates (recommended). This isn’t mandatory, and you can always download updates later if you want. Click Next to proceed.
- Follow the instructions on the screen until you reach Ready to install screen. Choose Change what to keep.
- Make sure to select Keep personal files and apps. Now click Next to proceed.
- Follow the instructions on the screen to complete the setup process.
Once you finish the setup, you should have the latest version of Windows installed, and everything should be exactly as you left it.
If Choose what to keep option isn’t available, it means that the ISO file isn’t the same as your version of Windows, so you’ll need to download a new ISO file, or continue and lose all your files on your system drive.
Solution 7 – Reinstall Windows
Sometimes the only solution is to reinstall Windows completely, and in order to do that, you’ll need Windows installation media. Bear in mind that reinstalling Windows will delete all files from your C drive, therefore we urge you to back them up.
If you cannot access Windows 10 due to a certain problem, you can always boot your PC from a Live Linux CD, and use Linux to find and back up your files.
To reinstall Windows 10, you just need to do the following:
- Connect Windows 10 installation media to your PC and boot your PC from it.
- Choose Install now option.
- Enter your product key and click Next. If you don’t have your product key, you can activate Windows 10 later.
- Select the version of Windows you want to install and click Next.
- Now select your system drive and press Next. Keep in mind that your system partition might not be always labeled, so be extra cautious while picking the partition.
- The installation process will now start. Follow the instructions on the screen to complete it.
Once the installation is finished, the problem should be resolved completely. Now you just need to move your files from the backup and you’re good to go. Keep in mind that this is a drastic solution, so you should use it only if other solutions can’t fix the problem.
This brings us to the end of this guide. But before we add the last punctuation mark, there are two important things we’d like to mention.
Exit and continue to Windows rollback loop
This is by far the most annoying and frequent issue that Windows 10 users may encounter. The OS initially asks users to exist any programs in order to go back to Windows. But this rarely works.
However, if you encounter this problem, try to shut down or restart your PC. Sometimes, this might help with the glitches and fix your problem. But in most cases, this error message stays on the screen even after users restarted or shut down their computers several times.
Choose an operating system Windows rollback
If the rollback attempt is successful, you will be asked to choose a previous operating system to go back to for the rollback. Usually, this is a restore point previously created.
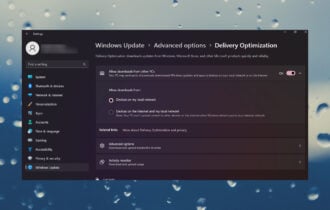
But shortly after the rollback, Windows 10 might automatically search for updates. If you don’t want to repeat the whole rollback process all over again, don’t forget to disable automatic Windows 10 updates as soon as the rollback is completed.
Well, the rollback process can sometimes get stuck, and if that’s the case, we suggest that you try all solutions from this article.