Black Screen with Miracast on Windows 11 [Solved]
Make sure another program doesn't block the wireless connection
5 min. read
Published on
Read our disclosure page to find out how can you help Windows Report sustain the editorial team. Read more
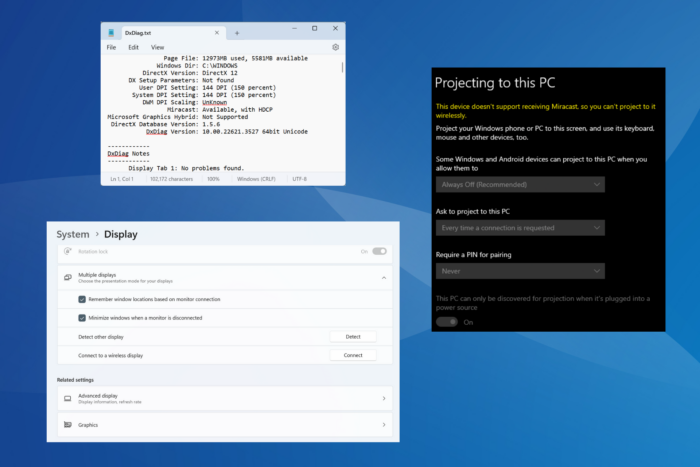
Often, when you are wirelessly screen sharing using Miracast on Windows 11, the display turns black. Switching to a wired connection may fix the problem, but that brings in cables, something that Miracast, a wireless screen mirroring protocol, claims to get rid of!
Miracast, also commonly known as HDMI over Wi-Fi, shows a black screen due to using an incorrect projection mode, misconfigured network settings, corrupt or outdated graphics driver, or conflicts created by other software.
Before you start troubleshooting, make sure both the PC and the other display are connected to the same Wi-Fi network, and that both devices support the Miracast standard. Also, remember that the Windows 11 N edition doesn’t support wireless screen mirroring.
How do I fix a Windows 11 Miracast black screen?
1. Change the projection mode
- While connected to the other display using the Miracast wireless protocol, press Windows + P to view the projection modes.
- Now, if it’s set to PC screen only, switch to Duplicate. This will project the computer’s screen to the TV or another display.
Also, if the computer screen is black while using a wireless display, you may have set the Second screen only projection mode. Using Duplicate or Extend will ensure that both displays remain functional with Miracast wireless screen mirroring.
2. Update the graphics driver
- Press Windows + X to open the Power User menu, and select Device Manager from the list of options.
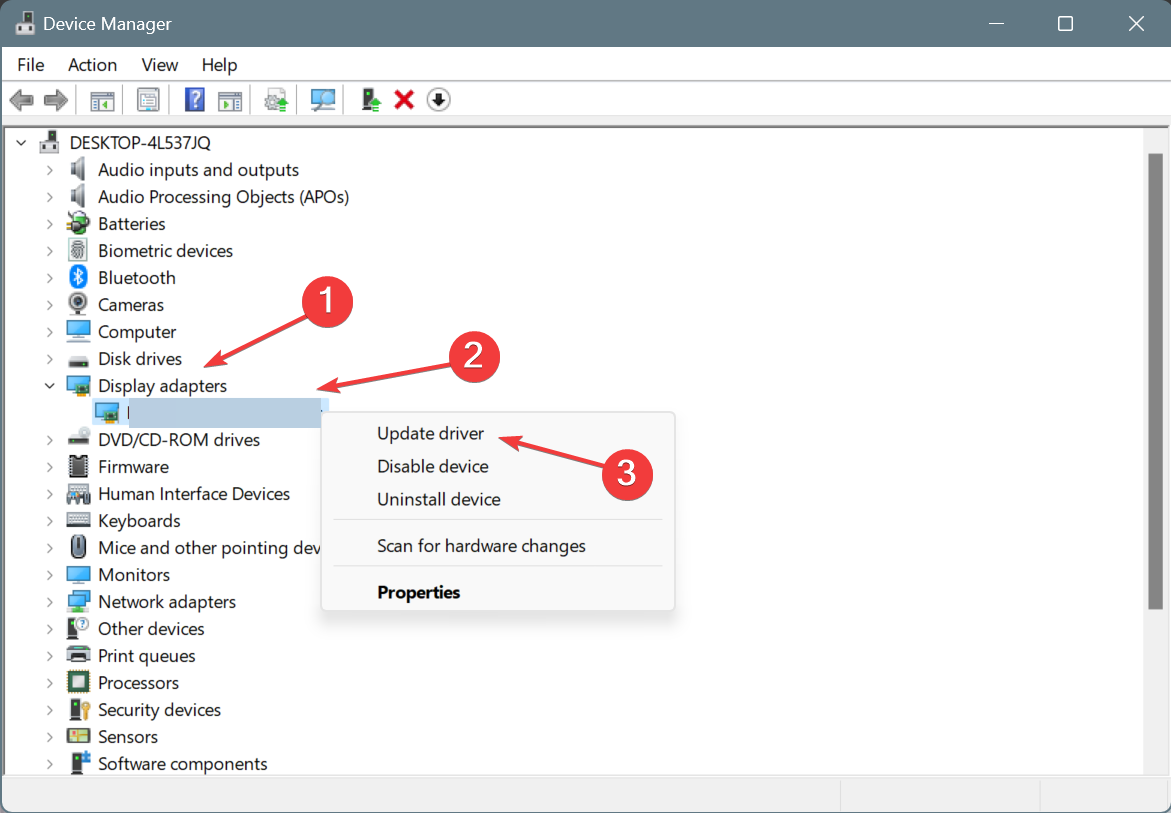
- Expand the Display adapters entry, right-click on the graphics adapter, and select Update driver.
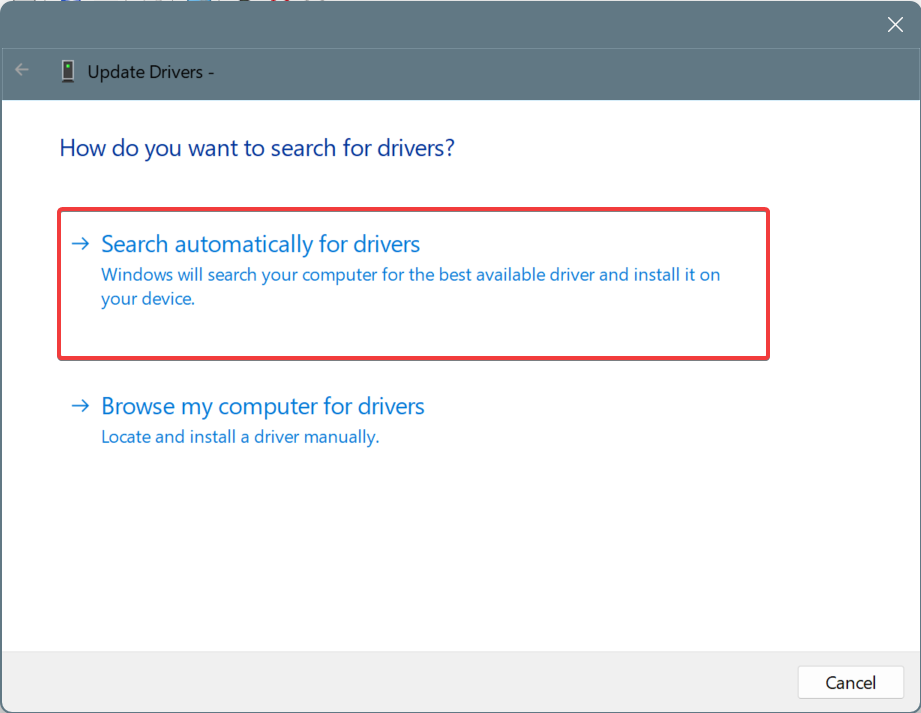
- Choose Search automatically for drivers and wait for Windows to install the best locally available version.
- Once done, restart the computer and check for improvements with Miracast.
Updating the graphics driver often helps fix issues triggering black screen with Miracast on Windows 11. Also, while you are at it, update the network adapter drivers.
If Windows can’t find a newer version, check the manufacturer’s website and manually install the driver. Here are the direct links:
3. Reset the network settings
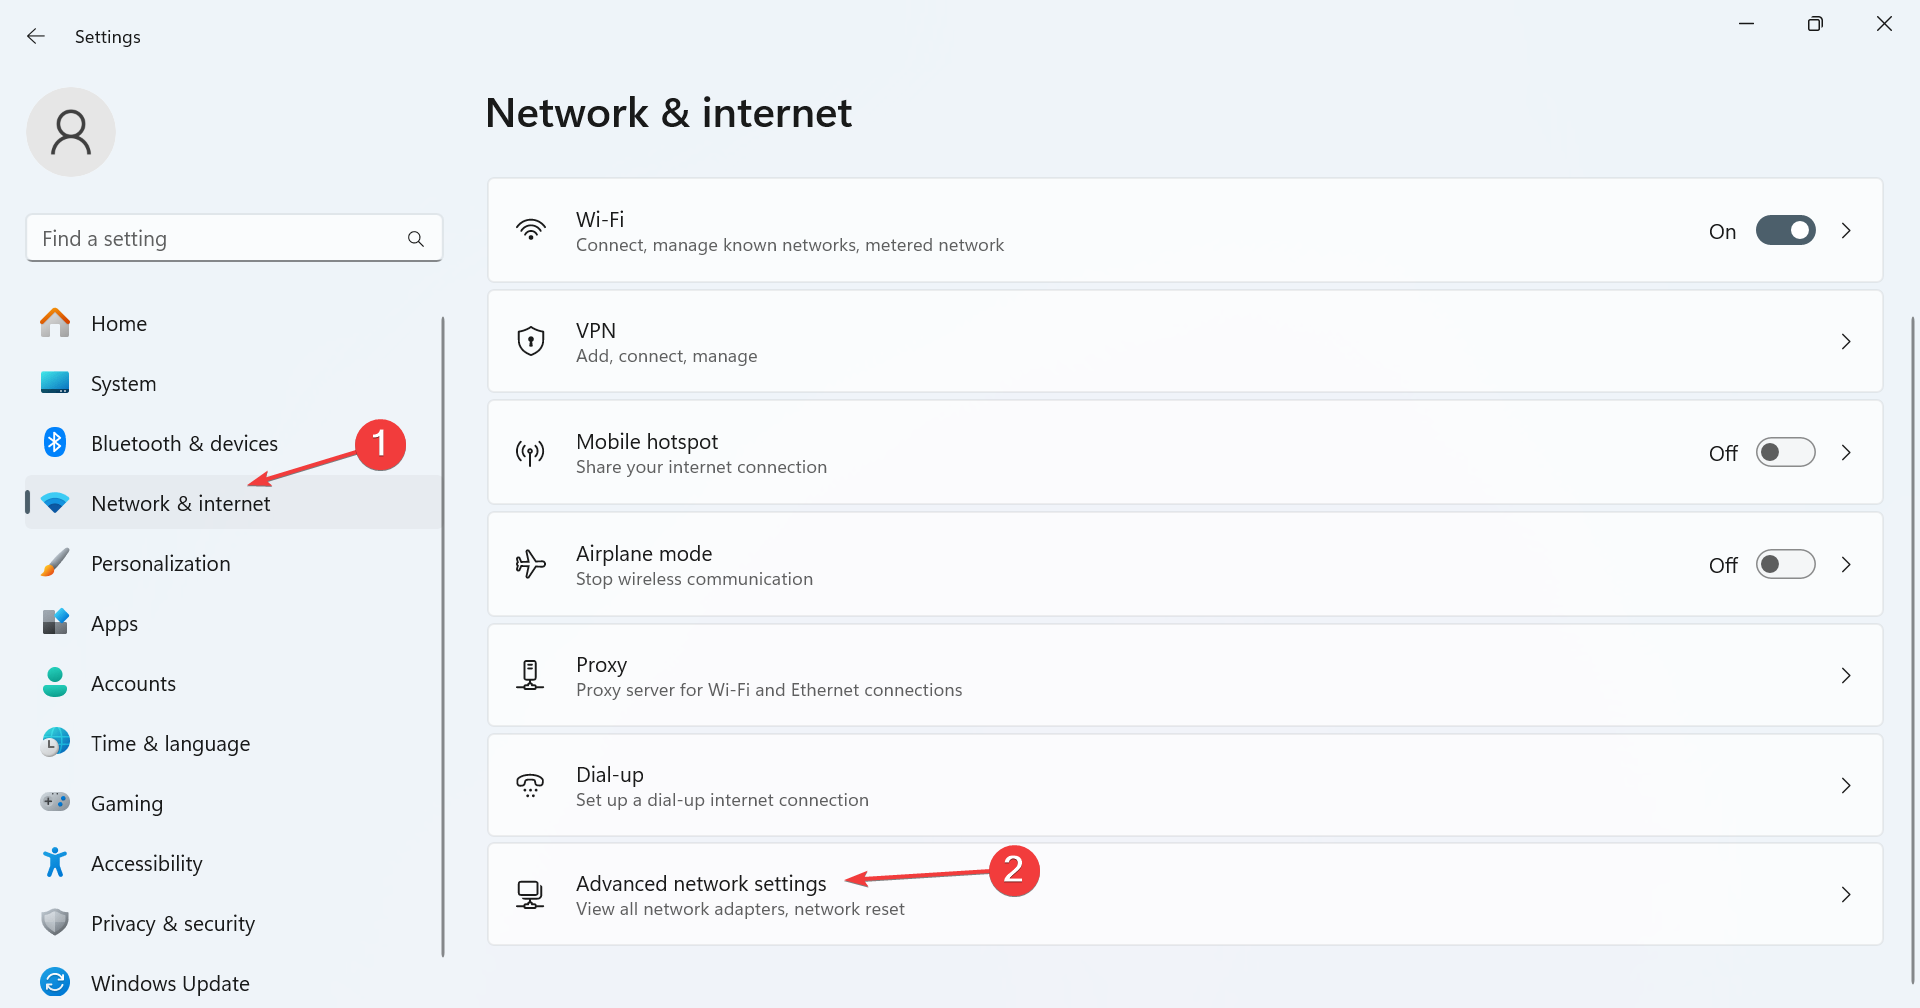
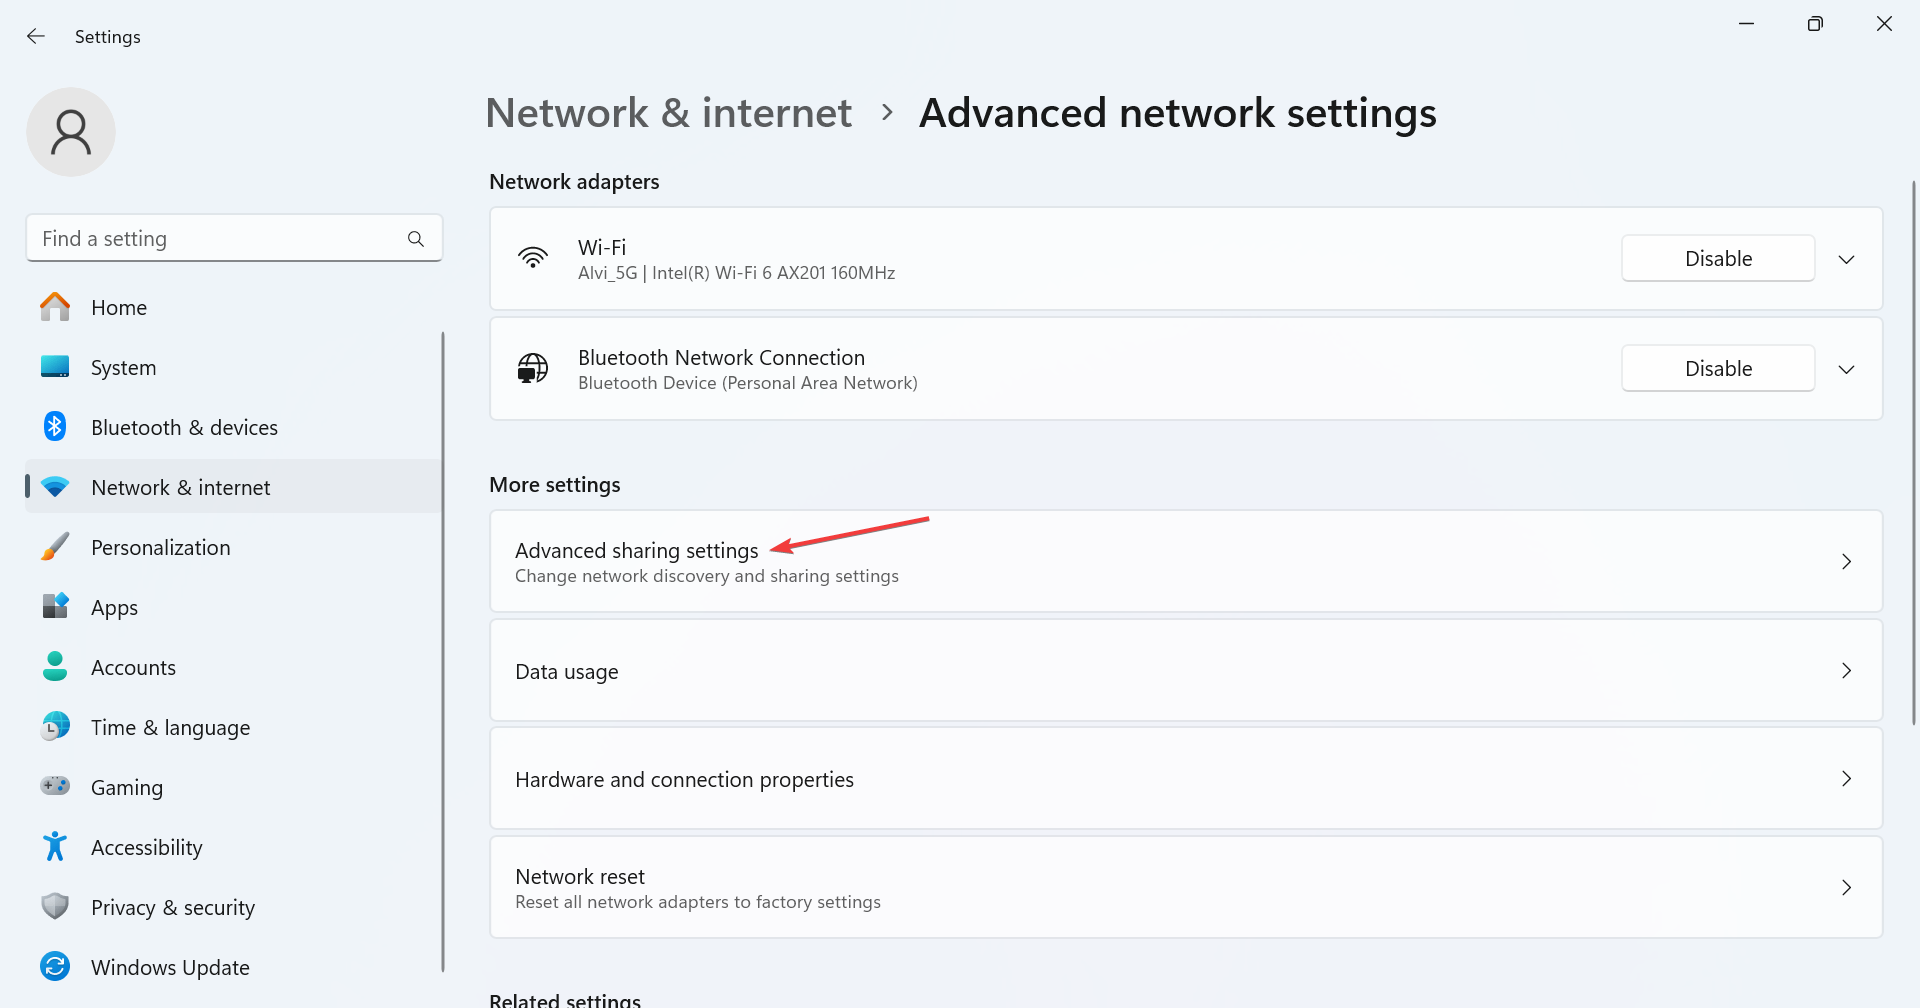
- Press Windows + I to open Settings, go to Network & Internet from the navigation pane, and click on Advanced network settings.
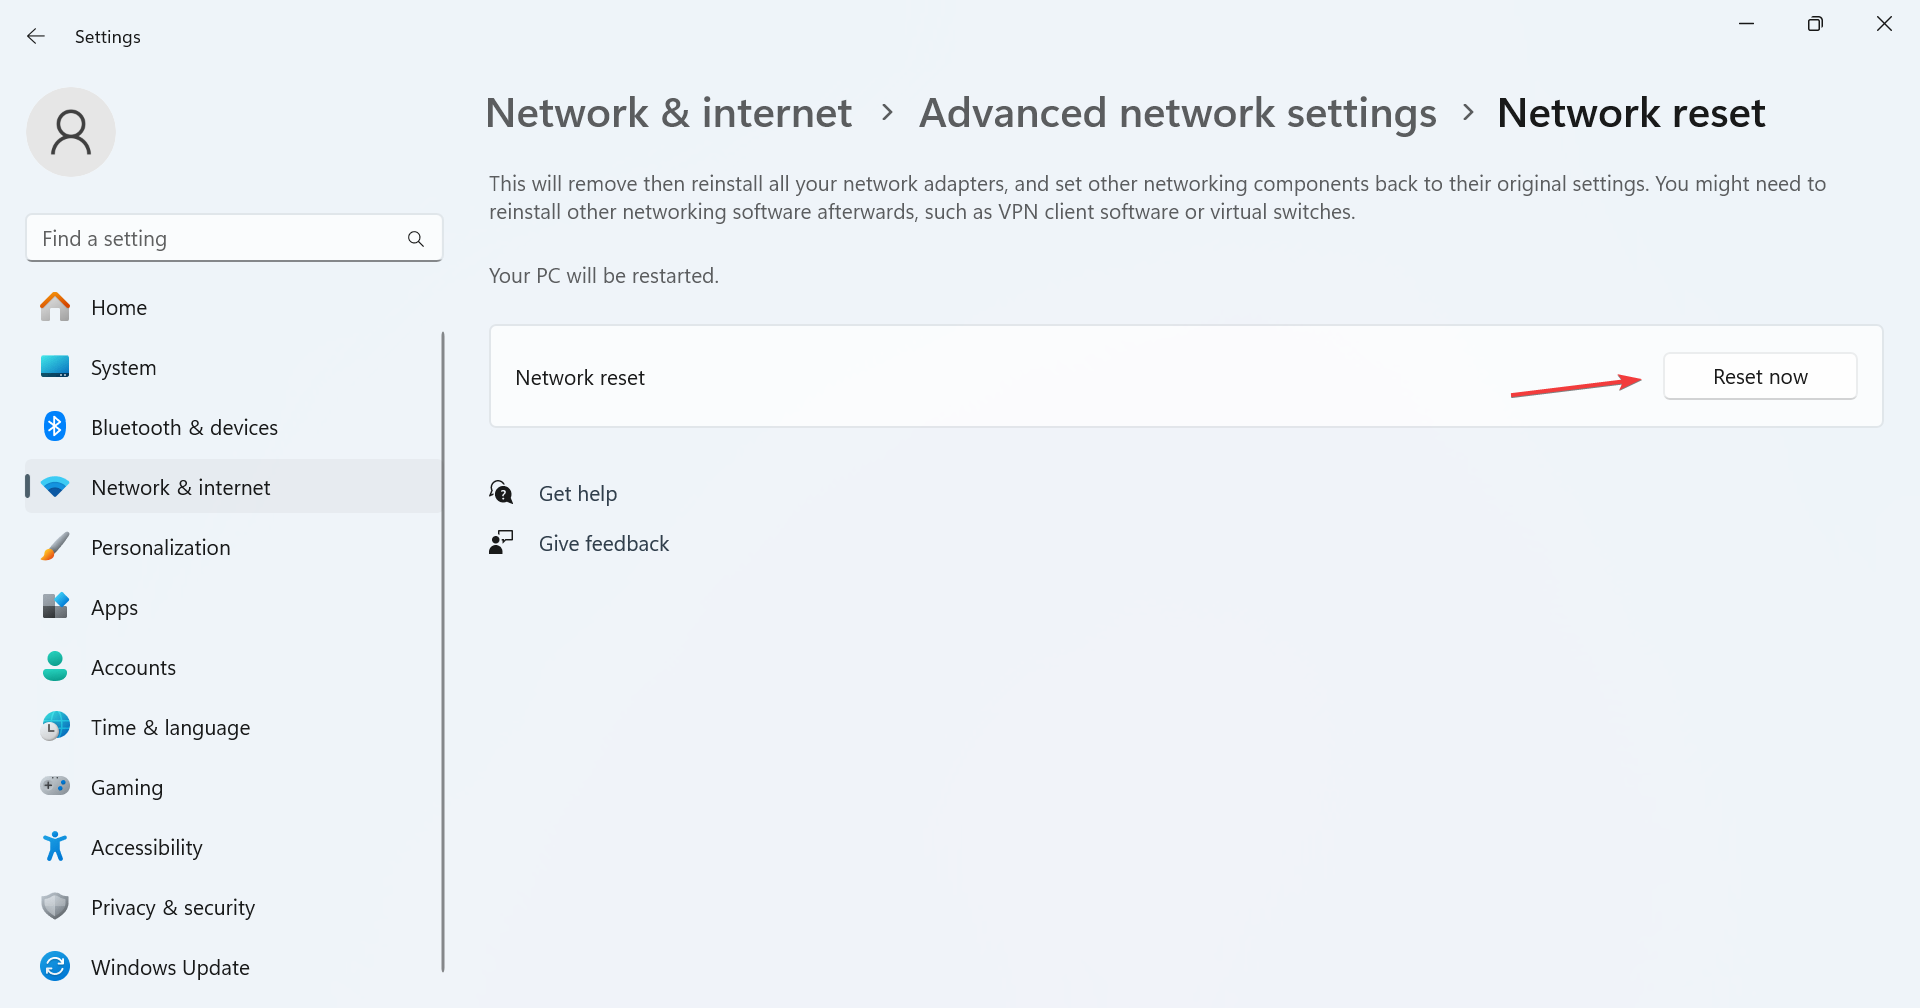
- Click on Network reset.
- Click the Reset now button.
- Finally, click Yes in the prompt and confirm the change.
- Reboot the PC for the changes to come into effect and again connect wirelessly to the display.
4. Reconfigure the network settings
4.1 Enable network discovery
- Press Windows + I to open Settings, go to Network & Internet and click on Advanced network settings.
- Click on Advanced sharing settings.
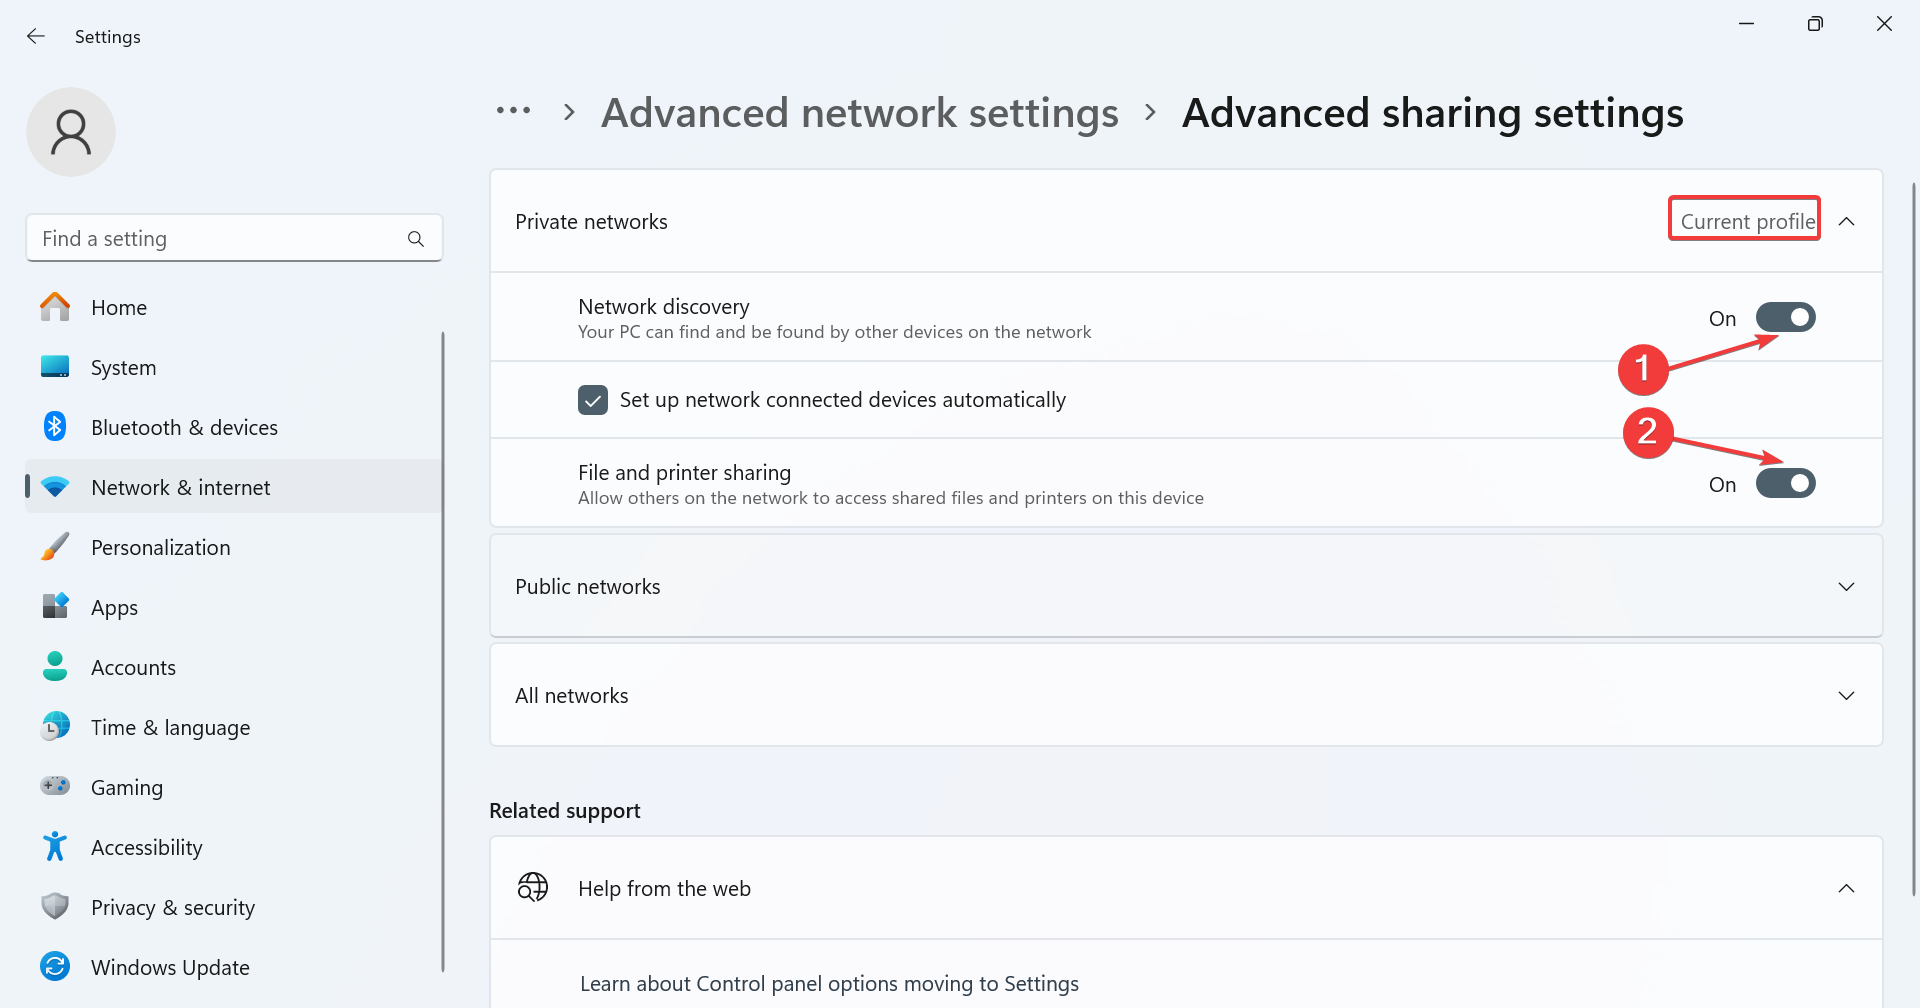
- Expand the network type that says Current profile next to it, and then enable the toggles for both Network discovery and File and printer sharing.
4.2 Whitelist Cast to Device functionality in Windows Firewall
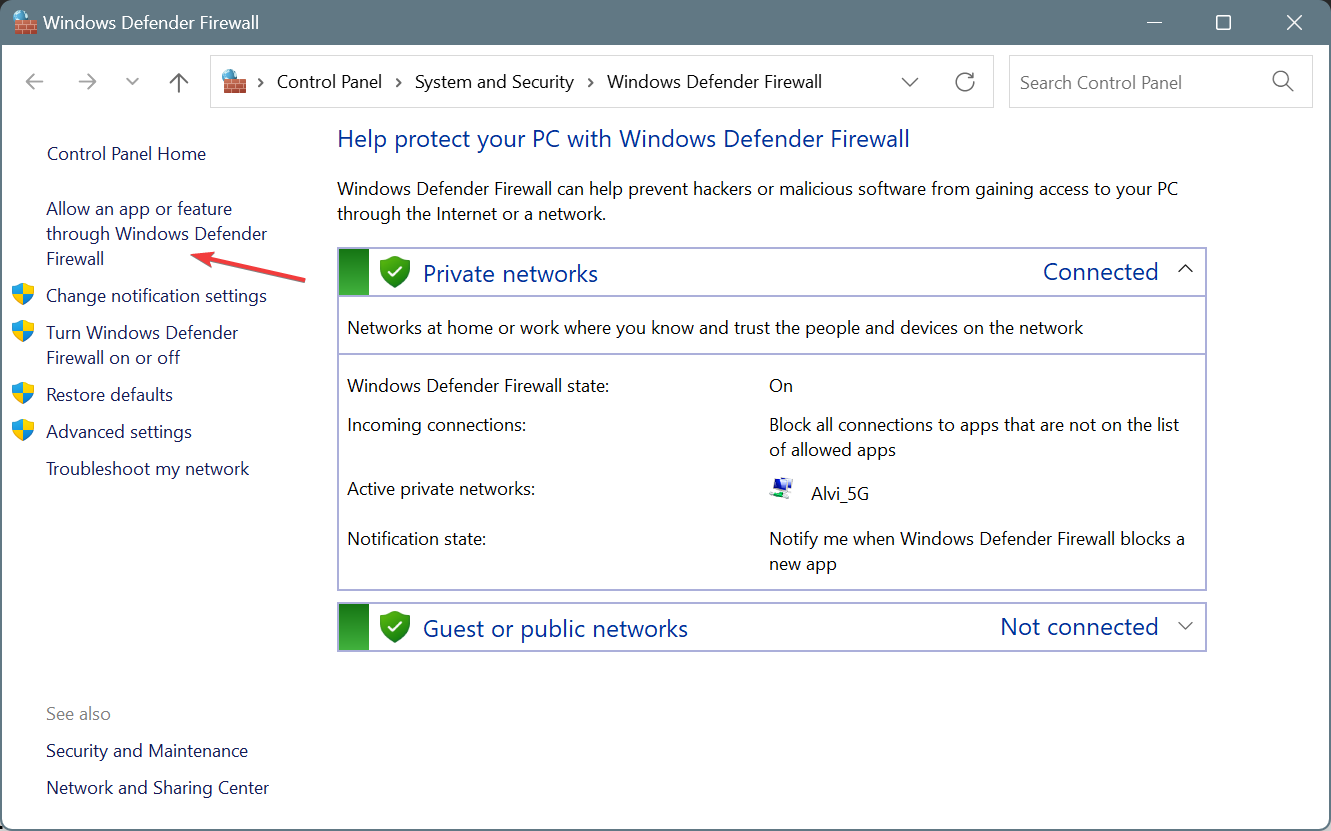
- Press Windows + S to open Search, type Windows Defender Firewall in the text field, and click on the relevant result.
- Choose Allow an app or feature through Windows Defender Firewall from the left.
- Click the Change settings button.
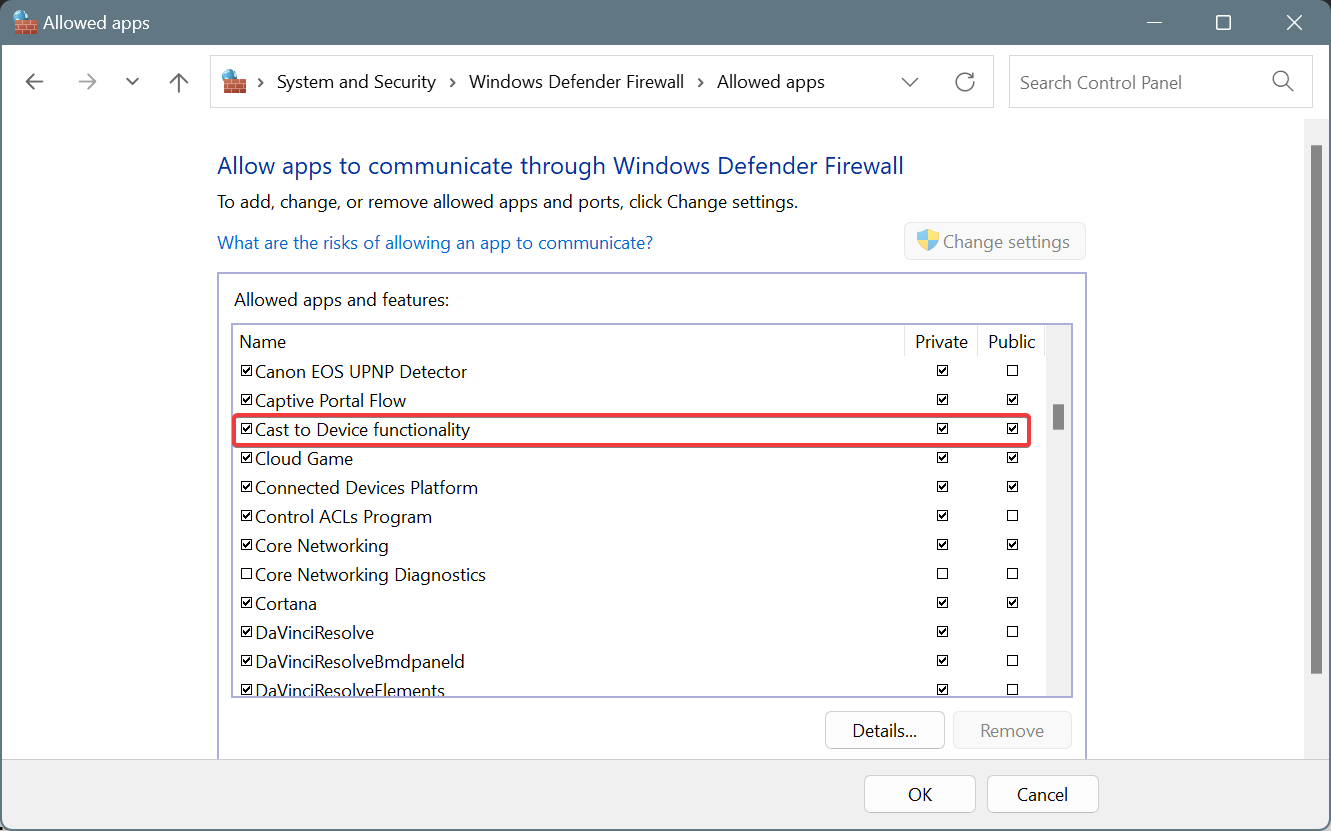
- Locate the Cast to Device functionality entry, and make sure it has a checkmark under both Public and Private.
- Click OK to save the changes, then restart the computer and check for improvements.
Often, the built-in Windows Defender Firewall can block connection attempts with other displays, thus causing a black screen while using the Miracast standard on Windows 11. Also, for the device’s visibility, Network Discovery must be turned on. And this section does both!
5. Install the Wireless Display optional feature
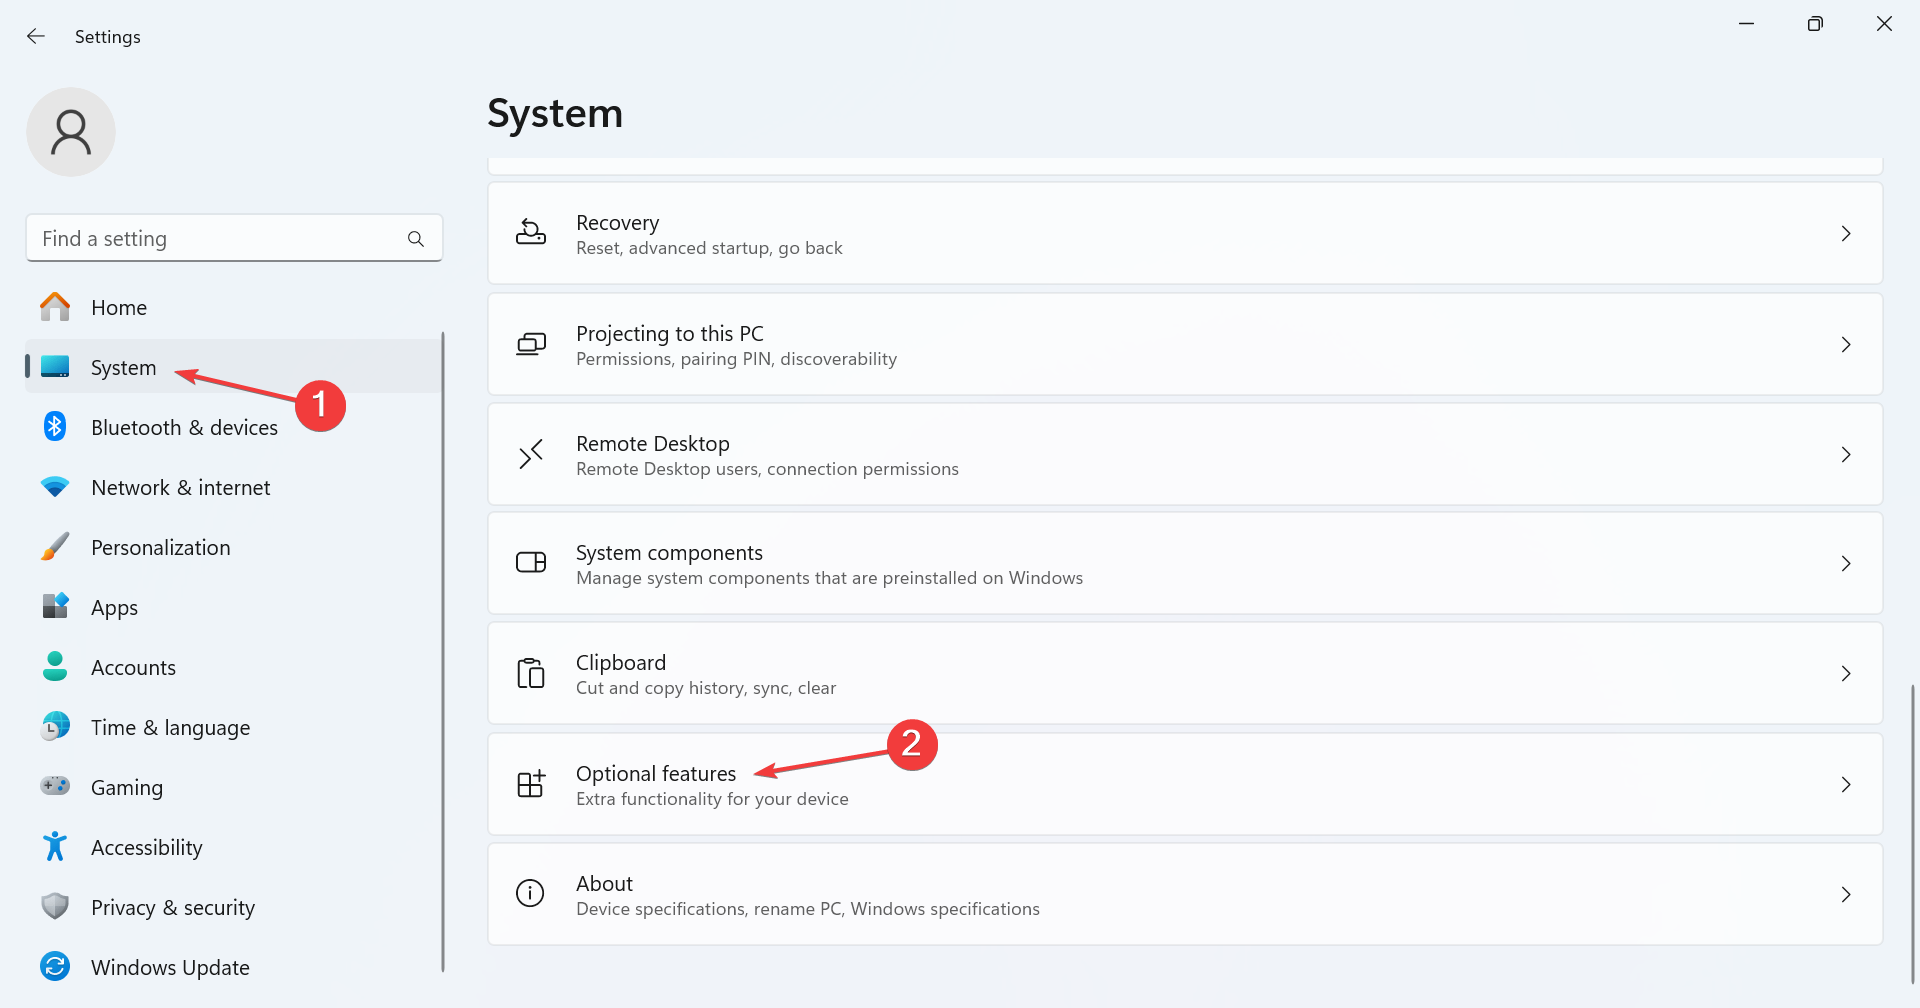
- Press Windows + I to open Settings, go to System from the left pane, and click on Optional features near the bottom.
- Click the View features button next to Add an optional feature.
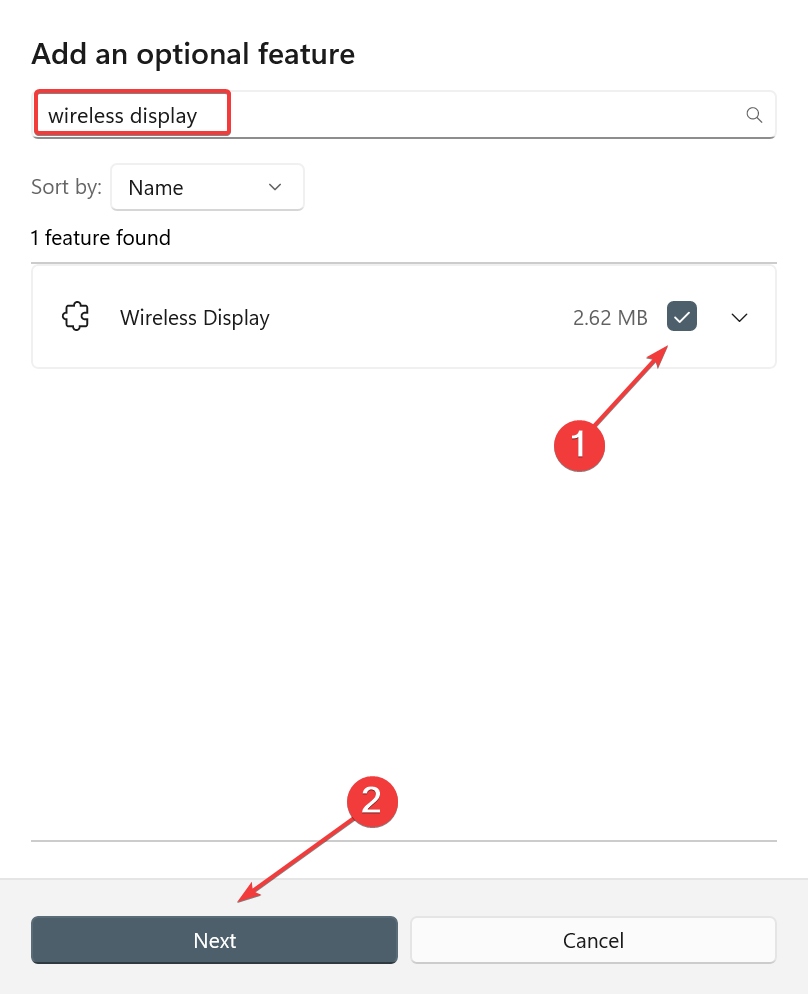
- Search for Wireless Display, tick the checkbox next to the entry with the same name, and click on Next.
- Now, click on Add to install the feature.
- Once installed, restart the computer and check if you still get a black screen while the mirroring displays.
6. Remove any conflicting apps
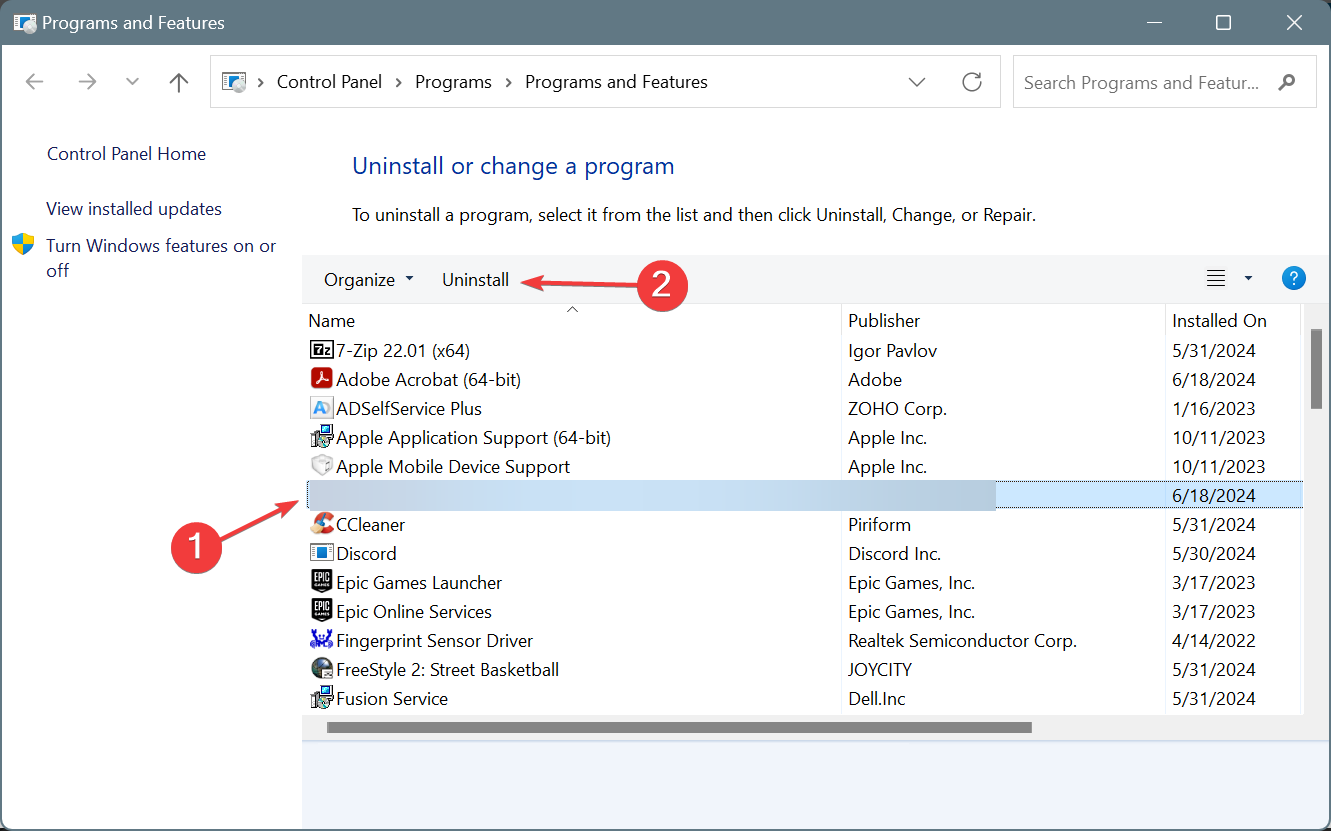
- Press Windows + R to open Run, type appwiz.cpl in the text field, and hit Enter.
- Select any app you installed around the same time the issue first appeared, and click on Uninstall.
- Follow the on-screen instructions to complete the process.
- Restart the PC and check for improvements.
If you have been seeing a black screen with Miracast in Windows 11 or 10 ever since the start, it could have to do with the installed antivirus. A few found ESET Internet Security to be responsible for the issue!
I recommend you first disable the third-party antivirus, and if that works, uninstall the program and then switch to an effective antivirus solution.
7. Use third-party screen mirroring software
If nothing else works, you can always use a top-rated screen mirroring software. The best ones will help get rid of the black screen and allow you to connect wirelessly to a display using Miracast on Windows 11.
Besides, if you are having trouble with screen mirroring, we have a dedicated guide that explains the steps to set up screen mirroring between Windows 11 and a TV!
Which fix worked for you? Share with our readers in the comments section.



User forum
0 messages