You'll Need Internet For This: How to Bypass This Error
Can be easily fixed just by resetting the Microsoft Store
5 min. read
Updated on
Read our disclosure page to find out how can you help Windows Report sustain the editorial team. Read more
Key notes
- You'll need internet for this is a Microsoft Store error corresponding to some kind of connection error.
- The thing about this error is that it can appear even if your computer is connected to the internet.
- To fix this error, you may need to do several things, like reinstalling the Microsoft Store.
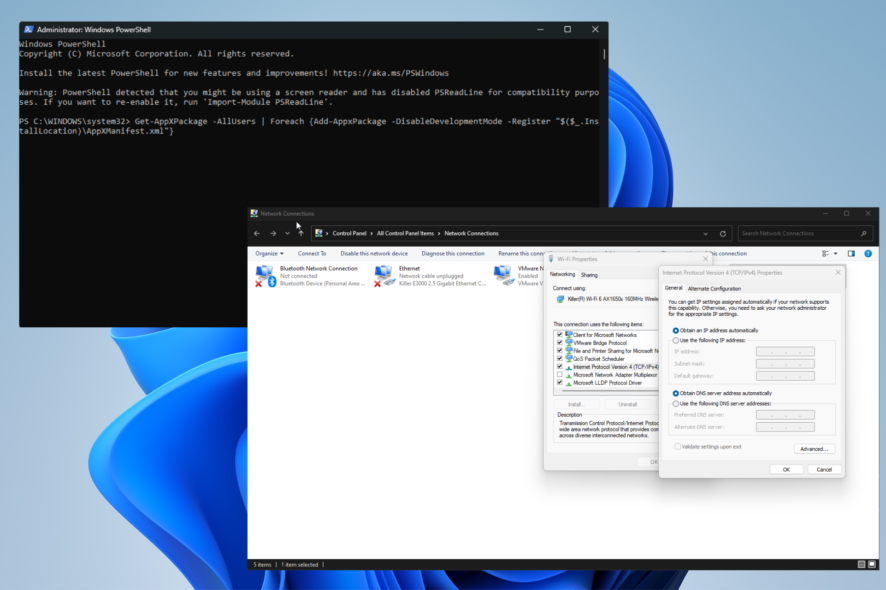
Also known as Error Code 0x800704cf, You’ll need internet for this is an error message that appears whenever you try to do certain Microsoft-related tasks like launching the Microsoft Store.
And it can appear even if you’re computer is already connected to the internet. You can try reconfiguring your Wi-Fi adapter, but if that doesn’t work, there are numerous solutions you can try.
What causes this error to appear in the first place?
Before getting into the solution, let’s go through what causes the Error Code 0x800704cf to occur in the first place. So if it ever happens again, you’ll know exactly how to address it.
- Files on your computer are corrupt – Corruption can cause all sorts of hardware problems, so you must clear it all out with an SFC scan or run the DISM tool.
- There’s a problem with the network adapter – Your network adapter could interrupt service. That’s why you should disable it momentarily to troubleshoot connectivity issues properly.
- Your computer lacks the latest Windows 11 update – Microsoft typically rolls out numerous fixes in Windows Updates, so it’s important to stay up to date with them.
How can I bypass the You’ll need internet for this error?
Luckily, there are many different ways to get around Error Code 0x800704cf. If one solution doesn’t work, you can always try something.
- The first thing that you should do when encountering this problem is to reboot your computer. Doing this simple action will address the problem most of the time.
- Since this error typically revolves around the Microsoft Store, try signing out of your account and then signing right back in. It’ll refresh the app.
- Run the Windows Store Troubleshooter. You can find the tool by launching the Settings menu, then going to the bottom of the Other Troubleshooters section in the Troubleshooter tab.
- Double-check network problems on your network. Microsoft has a set of instructions on how to do this on their website. The company recommends briefly disconnecting your Wi-Fi.
- Use a PC repair tool to fix missing or corrupt files. Windows 11 does have a native repair tool, but it’s not very good. You’re better off using a third-party tool.
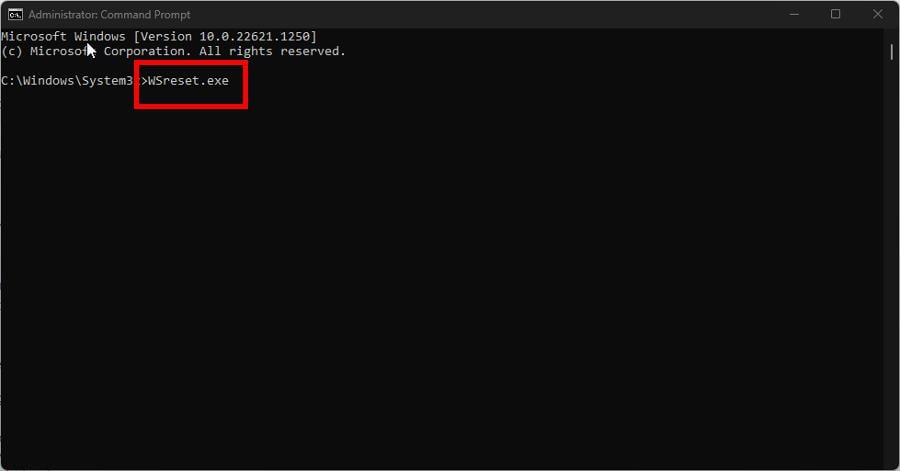
1. Reset the Windows Store via Command Prompt
- Bring up the Command Prompt in the Windows Search bar and select Run as administrator.
- Type in the following command and hit Enter on your keyboard:
WSreset.exe - After running the command, the Microsoft Store should immediately open. If it doesn’t, reboot your computer.
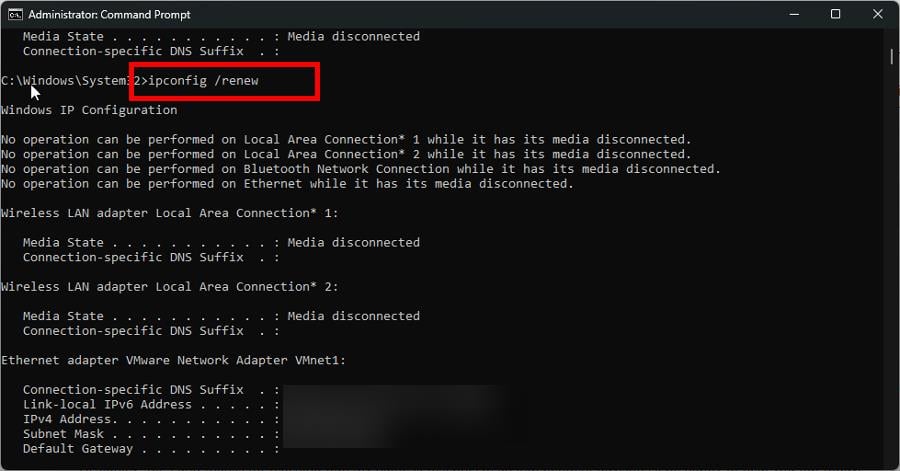
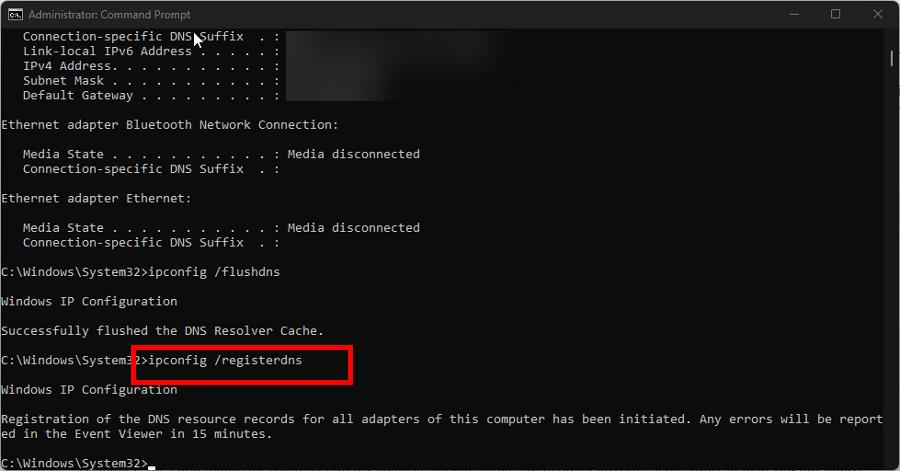
2. Flush DNS
- Just like in the previous solution, bring up the Command Prompt and run it with administrator permissions.
- Type in the following commands and press Enter after each one:
ipconfig /releaseipconfig /renew - Next enter the following:
ipconfig /flushdnsipconfig /registerdns
There are other ways to flush out the DNS cache on Windows 11 that don’t involve the Command Prompt. It’s useful to know this in case you don’t have admin-level permissions on your computer.
Be sure to check out our guide on the alternate ways to reset DNS on Windows 11.
3. Obtain an IP address from DHCP
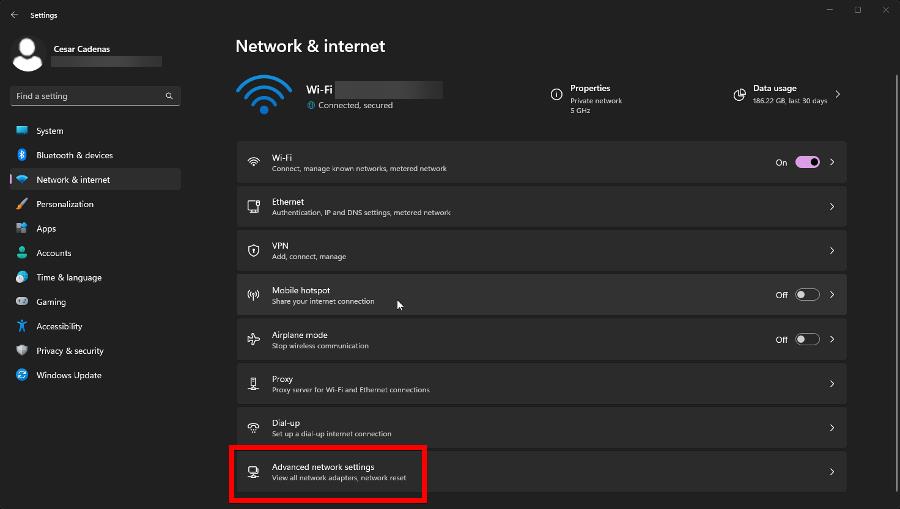
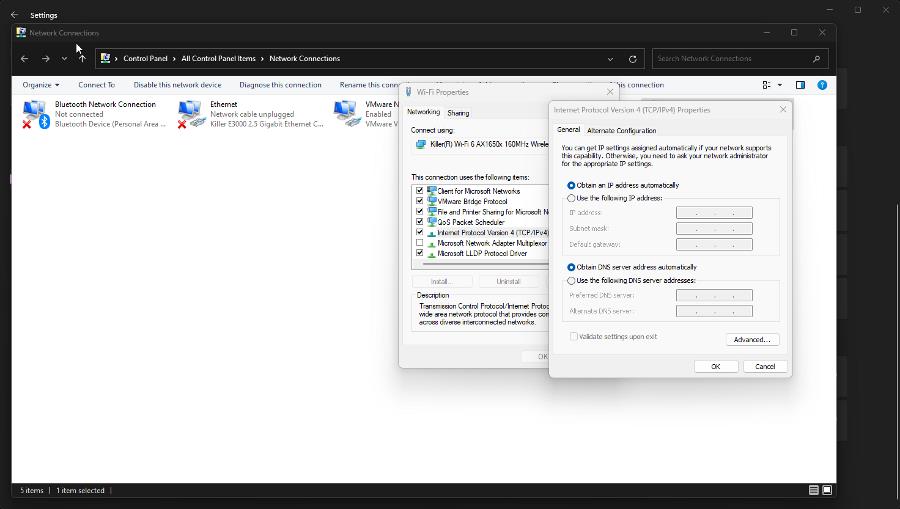
- Launch the Windows Settings menu and go to the Network & Internet tab.
- Select Advanced network settings.
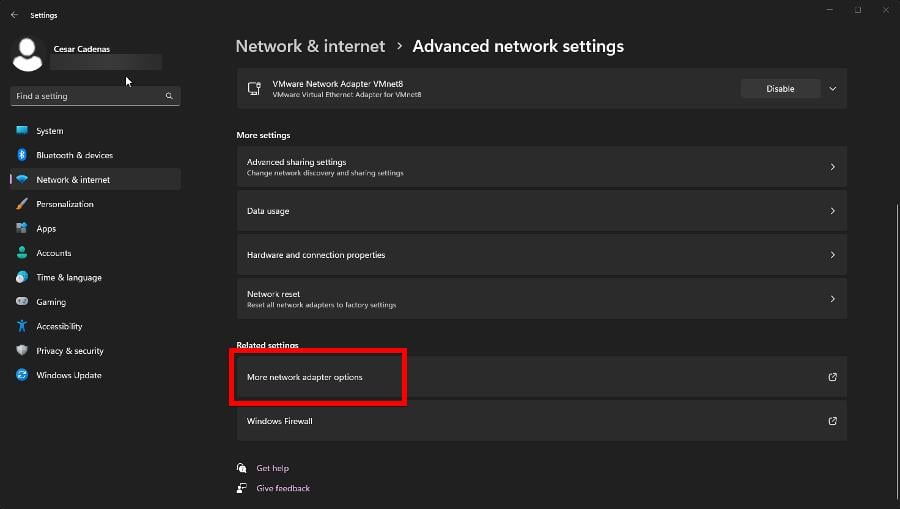
- Scroll down and click More network adapter options.
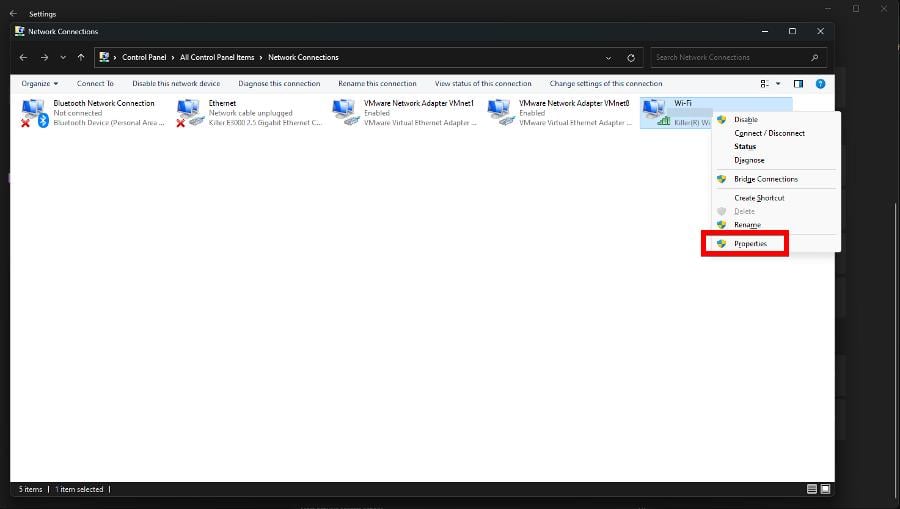
- Right-click Wi-Fi. Select Properties.
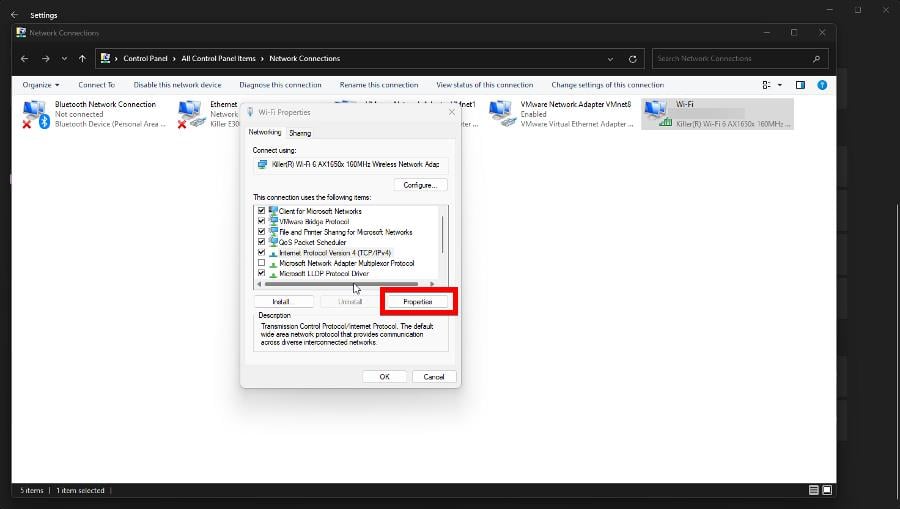
- Highlight Internet Protocol Version 4 (TCP/IPv4), then click the Properties button.
- Toggle Obtain an IP address automatically. Select OK.
4. Re-register Microstore Store apps
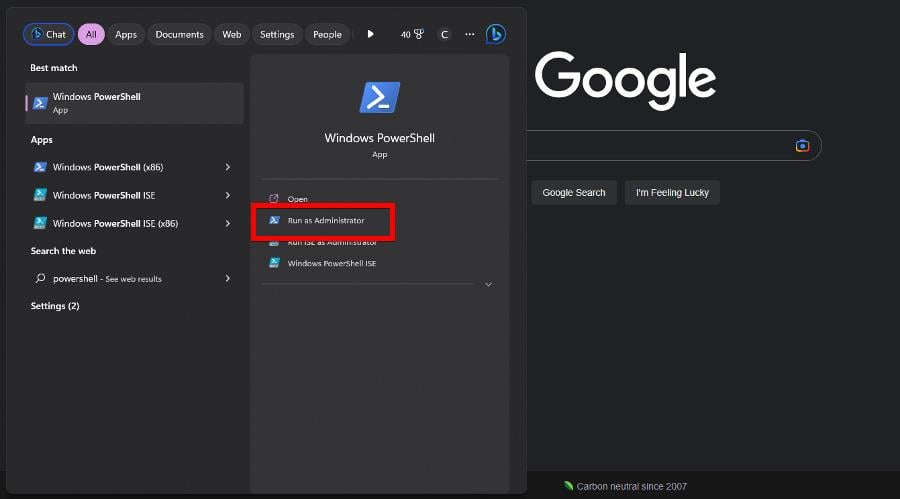
- Bring up PowerShell in the Windows Search bar and select Run as administrator.
- Copy and paste the following command into PowerShell:
Get-AppXPackage -AllUsers | Foreach {Add-AppxPackage -DisableDevelopmentMode -Register "$($_.InstallLocation)\AppXManifest.xml"} - The command should begin running automatically. If not, hit Enter on your keyboard.
- Once done. restart your computer.
5. Reinstall Microsoft Store
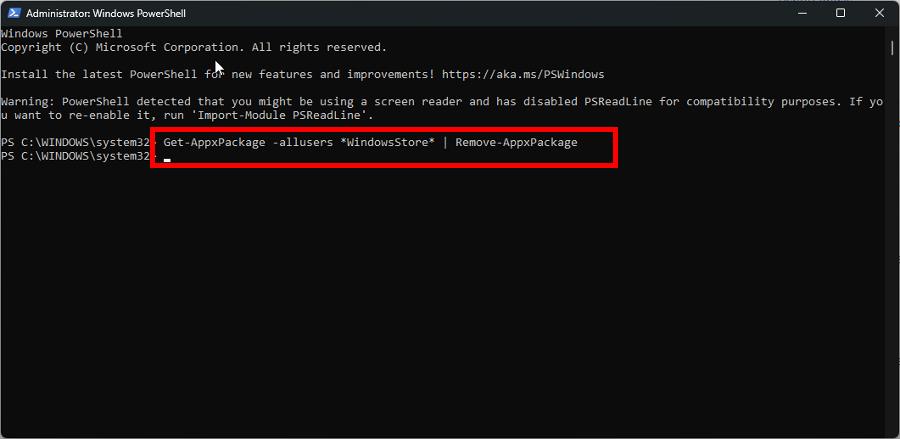
- Like in the previous solution, launch PowerShell with the same administrator permissions.
- Enter the following command into PowerShell to first uninstall the Microsoft Store:
Get-AppxPackage -allusers *WindowsStore* | Remove-AppxPackage - Next, copy and paste the following command into PowerShell:
Get-AppxPackage -allusers *WindowsStore* | Foreach {Add-AppxPackage -DisableDevelopmentMode -Register “$($_.InstallLocation)\AppXManifest.xml”} - The command should run automatically. If it doesn’t, press Enter on your keyboard.
6. Enable built-in admin account
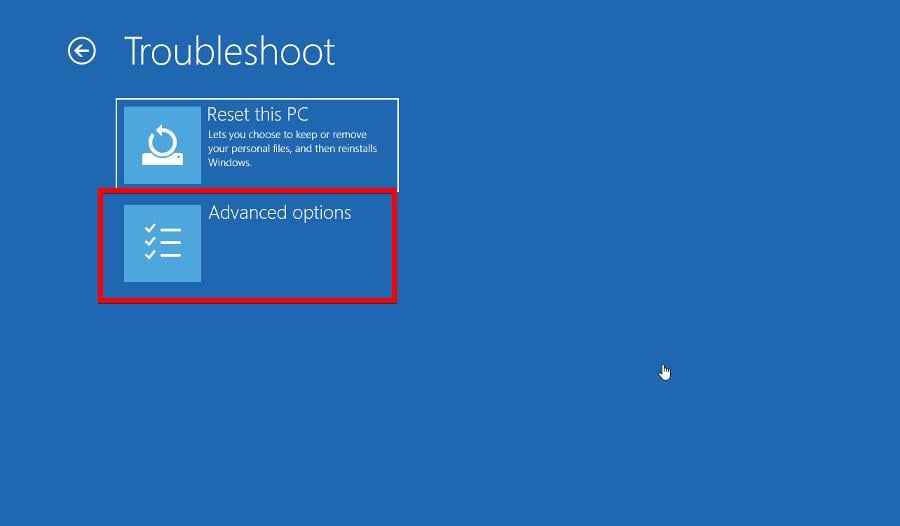
- Press and hold the Shift key, then restart your computer. This will reboot your machine in Advanced Startup Mode.
- On the first page you see, select Troubleshoot and then Advanced options.
- Under Advanced Options, select Command Prompt.
- Enter the following command:
net user administrator /active:yes - Exit the Command Prompt to restart your computer.
- A new profile with your name with administrator-level permissions is now available. Log in as normal.
This solution is meant for people who don’t have administrator-level permission on their user account and want to do one of the previous solutions.
Once created, it’s recommended that you copy files from your old account to the new one. Microsoft has a series of instructions on how to do this on their website.
What can I do if I run into Error Code 0x80073cfc?
Error Code 0x80083cfc relates to a problem where you cannot download Xbox games onto your PC. It relates to Error Code 0x800704cf, as it can also affect the Microsoft Store.
To fix this problem, you must download two specific software: Xbox Identity Provide and Microsoft Gaming Services.
Speaking of video games, you should also learn how to address the Xbox app not detecting Gaming Services. Without this software, the Xbox app will get stuck on the loading screen.
It is a little tricky to fix, however. You’ll have to delete key Gaming Services files on the Registry Editor, which can be confusing to navigate. If that doesn’t work, try resetting the Xbox app.
Feel free to comment below if you have questions about other system errors. Also, leave comments about reviews you’d like to see or information on other Windows 11 functions.





User forum
0 messages