How to Install Generic PnP Monitor Driver for Windows 11
4 min. read
Updated on
Read our disclosure page to find out how can you help Windows Report sustain the editorial team. Read more
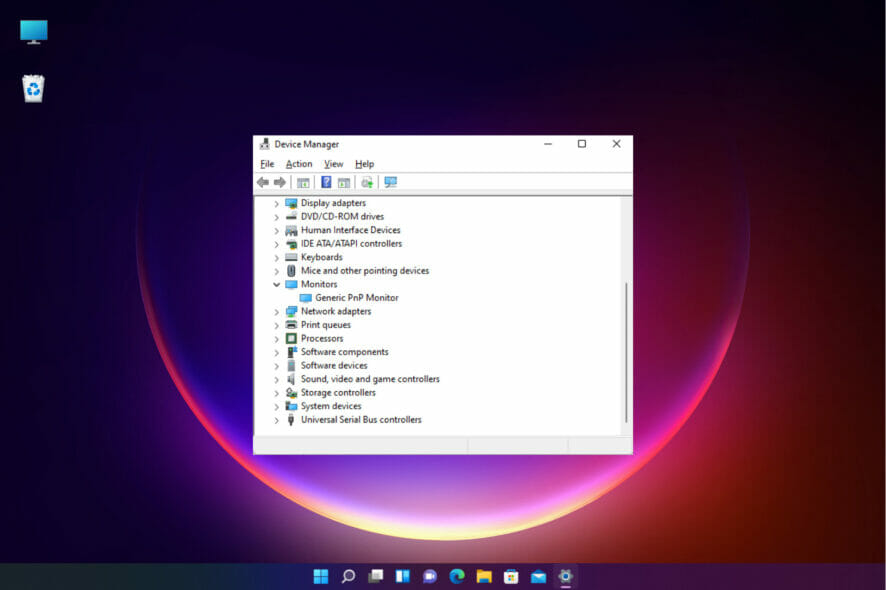
If you recently upgraded to Windows 10 or 11, you may need to download the Generic PnP monitor driver on your PC.
PnP stands for Plug and Play which allows you to add or remove external devices without any need to configure or install the appropriate drivers manually.
Below are a few ways to download and install your Generic PnP monitor driver on Windows 10/11.
How do I install a Generic PnP monitor driver on Windows PC?
1. Install all available Windows Updates
- Press the Win + I keys simultaneously to launch the Settings app.
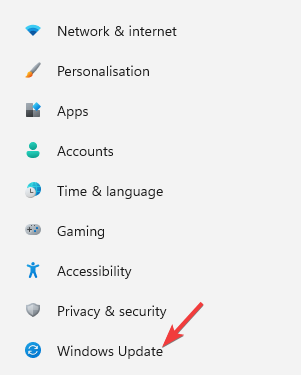
- On the left side of the pane, scroll down and click on Windows Update.
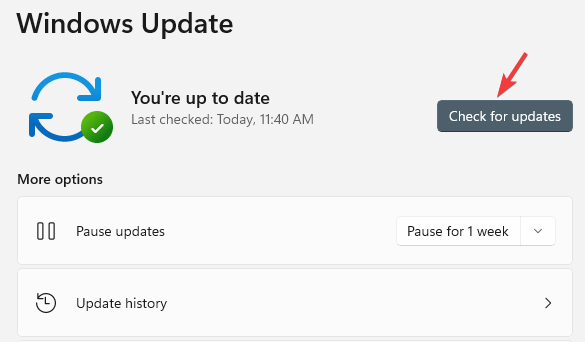
- Now, navigate to the right side and click on the Check for updates button.
- Windows will now start looking for any available updates.
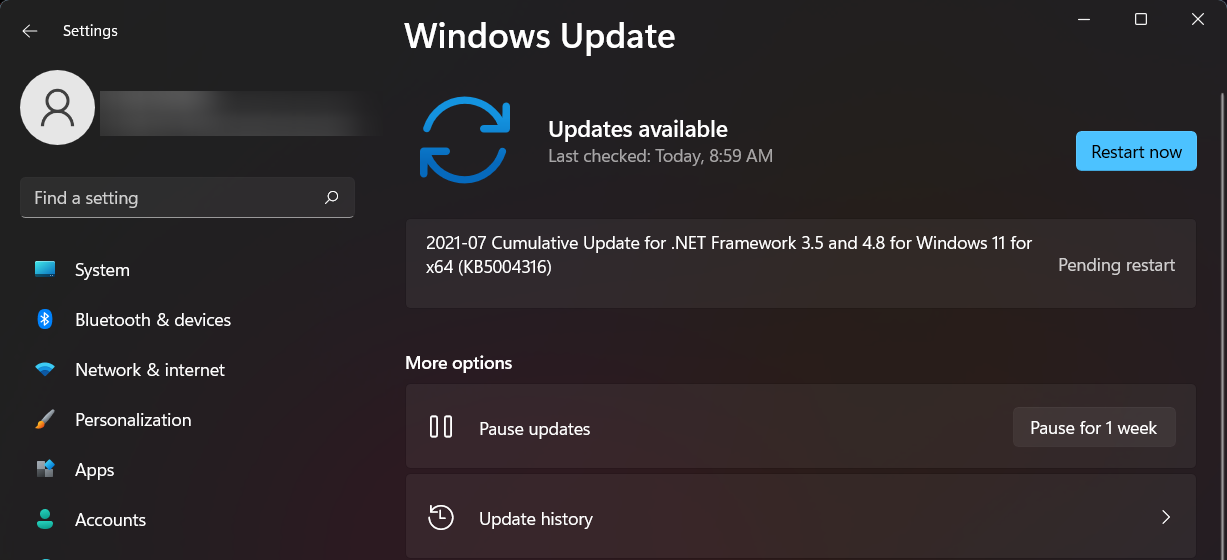
- If available it will install them automatically and display a prompt to Restart now or later.
- You can choose to restart your PC immediately or after your work is completed.
Now, go to Device Manager and check if you have the latest Generic PnP Monitor driver downloaded.
2. Update the monitor driver
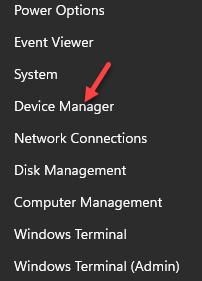
- Right-click the Start button and select Device Manager.
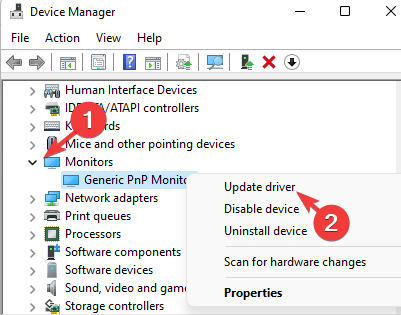
- In the Device Manager window, expand Monitors, right-click on Generic PnP monitor driver, and select Update driver.
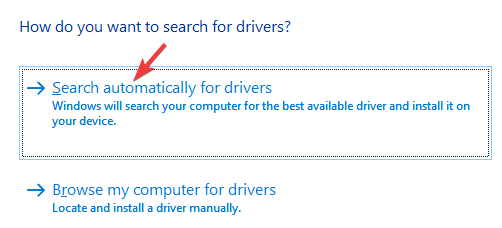
- Click on Search automatically for drivers.
- Windows will now start detecting any latest versions of the driver and if available, it will automatically install the Generic PnP monitor driver update.
To ensure you install the right generic PnP latest drivers, a driver updater software such as PC HelpSoft Driver Updater is used to download and install the suitable and compatible drivers for your PC.
Furthermore, a solution like PC HelpSoft Driver Updater does more than just download and install drivers, it also manages them by troubleshooting, backing up, and restoring them.
3. Update the Display adapter’s drivers
- Right-click on the Start button and select Device Manager from the menu.
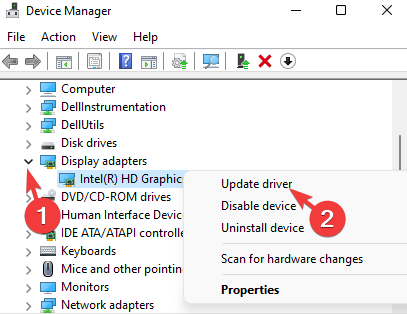
- Go to the Display adapters section and click to expand. Right-click on your graphics card and select Update driver.
- Click on Search automatically for drivers.
- If available, Windows will install the driver automatically.
Once done, close Device Manager and restart your PC to check if the monitor looks good.
4. Reinstall the Generic PNP monitor driver
- Right-click on the Start menu and click on Device Manager in the list.
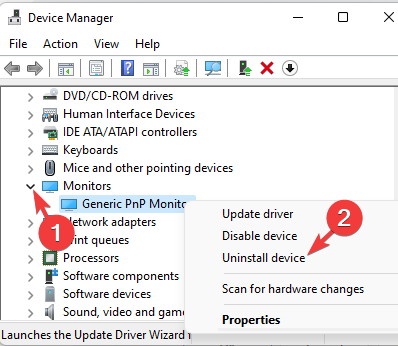
- Here, expand the Monitors section.
- Next, right-click on Generic PnP monitor and select Uninstall device.
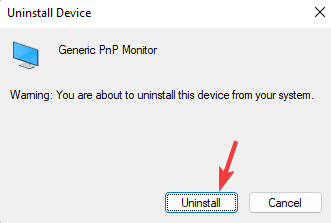
- Press Uninstall again to confirm.
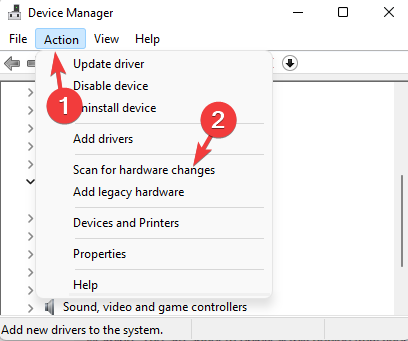
- Now, go to the Action tab and click on Scan for hardware changes.
- Windows will now detect the actual monitor (instead of the Generic PnP monitor) and install the driver accordingly.
- Next, turn off your monitor and disconnect it from the PC and remove the video cable of your PC.
- Wait for 2 to 3 minutes, attach all the cables and the monitor once again, and reboot your PC.
After successfully reinstalling the latest driver for the Generic PnP monitor, you should see the real monitor now.
 NOTE
NOTE
Nevertheless, there will be no issue with uninstalling the driver as Windows will install the device when it reboots!
5. Install the Generic non-PnP monitor driver
- Right-click on Start and select Device Manager.
- Navigate to Monitors and expand the section.
- Right-click on the Generic PnP monitor device and select Update driver.
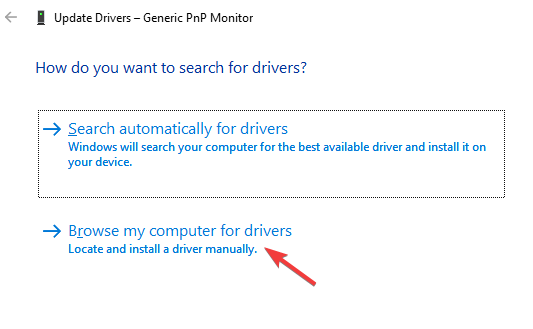
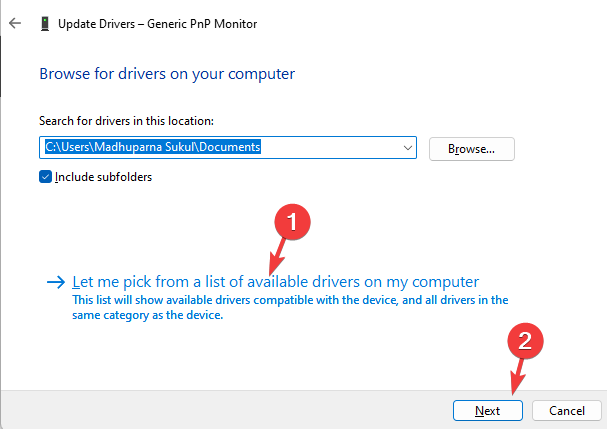
- Click on Browse my computer for drivers.
- Next, click on Let me pick from a list of available drivers on my computer.
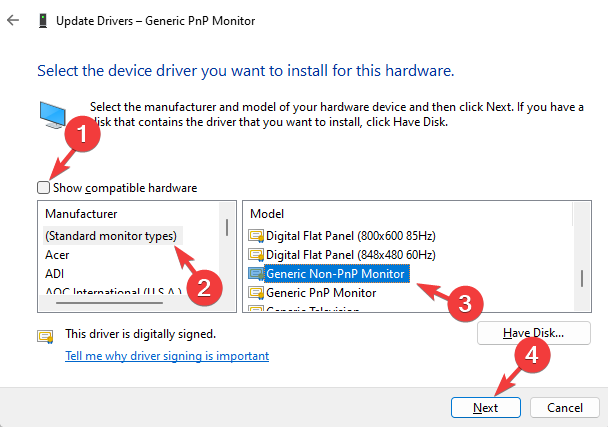
- If you see the Generic Non-PnP monitor driver listed under Model, select it and press Next.
- Once installed, restart your PC and you should now see the Generic Non-PnP monitor driver in the Device Manager.
- Alternatively, you can uncheck the box next to Show compatible hardware and select Standard monitor types on the left.
- Now, on the right side, select Generic Non-PnP monitor from the Model list and press Next.
- It will take a few seconds for the driver to be installed.
Once done, reboot your PC and the Generic PnP monitor driver download on Windows 11 should be successful now.
Troubleshooting PnP driver issues
If you encounter issues like a blurry display, limited resolution options, or the Generic PnP monitor driver instead of the correct monitor, ensure the video cable is properly connected and clean the cable ports.
Reconnect the cable securely. If the issue persists, try removing and reconnecting your GPU. Also, replacing the video cable may help.
Moreover, if you are facing any driver download issues or have discovered other ways to download and install the Generic PnP monitor driver, let us know in the comments box below.





User forum
0 messages