How to Reset Virtual Memory on Windows 11 [Easy Steps]
Key notes
- If you are having problems with the currently configured page file, learn how to reset virtual memory in Windows 11.
- You have both options, either to manually set the virtual memory size or let Windows manage it.
- Also, find out if virtual memory is as good as the installed RAM.

If your computer doesn’t have enough RAM or it’s always full, you can rely on virtual memory to offload inactive files from the physical memory. But, if that doesn’t go too well, you may need to reset virtual memory in Windows 11.
We have often seen our computer lagging, and the most likely scenario is the high RAM usage in Windows 11. There are a bunch of ways you can lower the RAM consumption, but it might hamper your experience. And, this is where virtual memory comes to aid.
There are times when the need to reset virtual memory in Windows 11 arises, and therefore, a proper understanding of the concept and the process is imperative, and we have discussed both in the following sections.
How does virtual memory work and why do I need to reset it?
Virtual memory works very similarly to the physical RAM on your computer. The difference between the two is that files are first loaded to the RAM, and if it gets full, the inactive ones are then offloaded to the virtual memory, also called the page file.
While the RAM is a separate piece of hardware, virtual memory is stored on the hard drive. So, while you can increase the former by adding more chips, increasing the latter only takes up free storage on the drive.
For those who have low RAM installed or run high resource-consuming applications, setting up virtual memory is quite beneficial. If you are unsure how to do that, check our guide to learn how to increase virtual memory in Windows 11.
Also, it’s important to mention that Windows is more than capable of handling the allocation of the page file. Though, if you don’t see desirable results, there’s always the option to manually configure it.
But oftentimes, the configured page file may not be optimal or you may not have gotten it right. In which case, we recommend you reset the virtual memory in Windows 11 and then either let the OS handle it or increase the page file size, as the case may be.
How can I reset virtual memory in Windows 11?
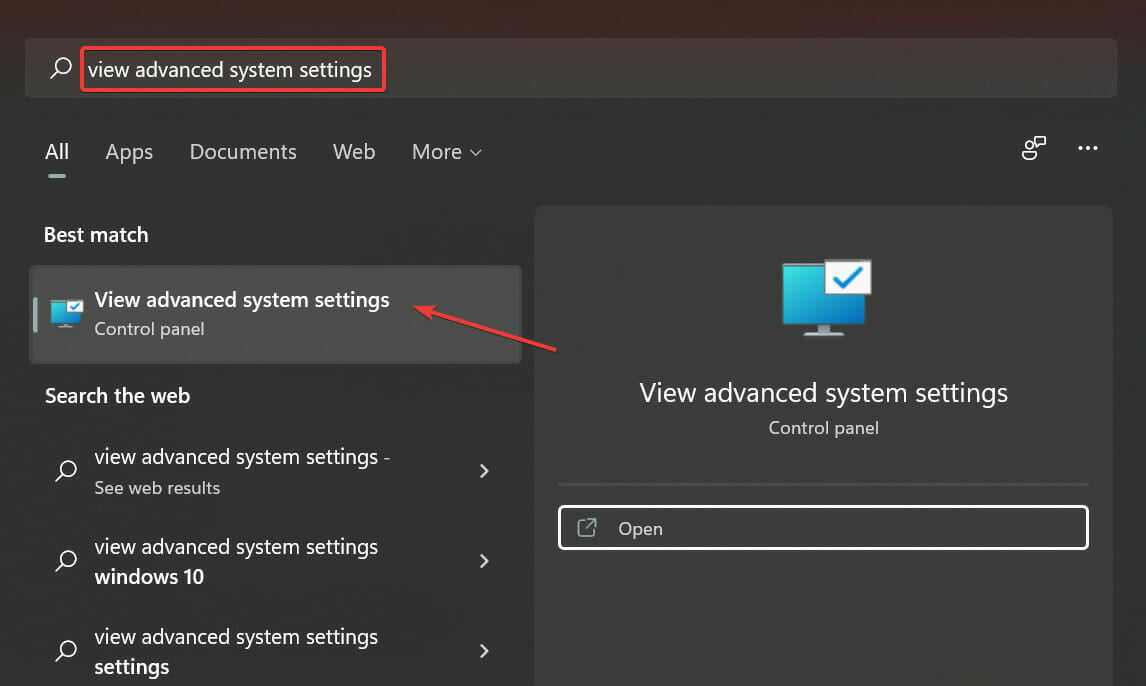
- Press Windows + S to launch the Search menu, enter View Advanced System Settings in the text field, and click on the relevant search result that appears.

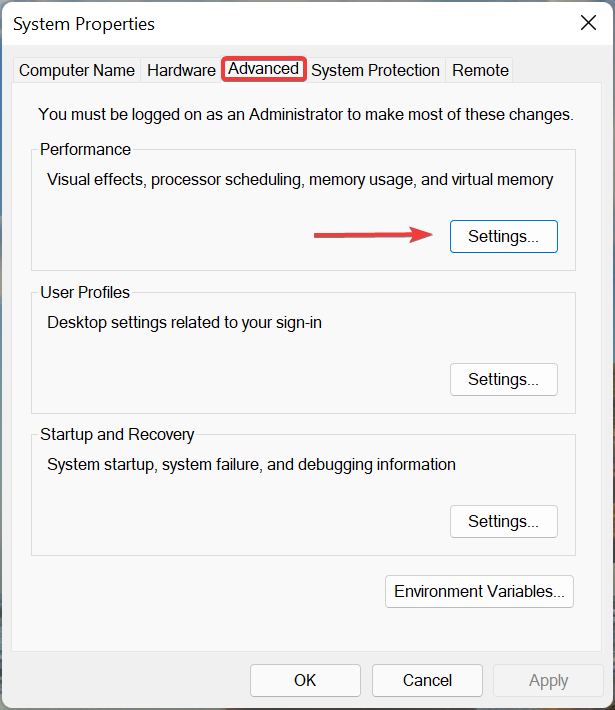
- Click on the Settings button under Performance.

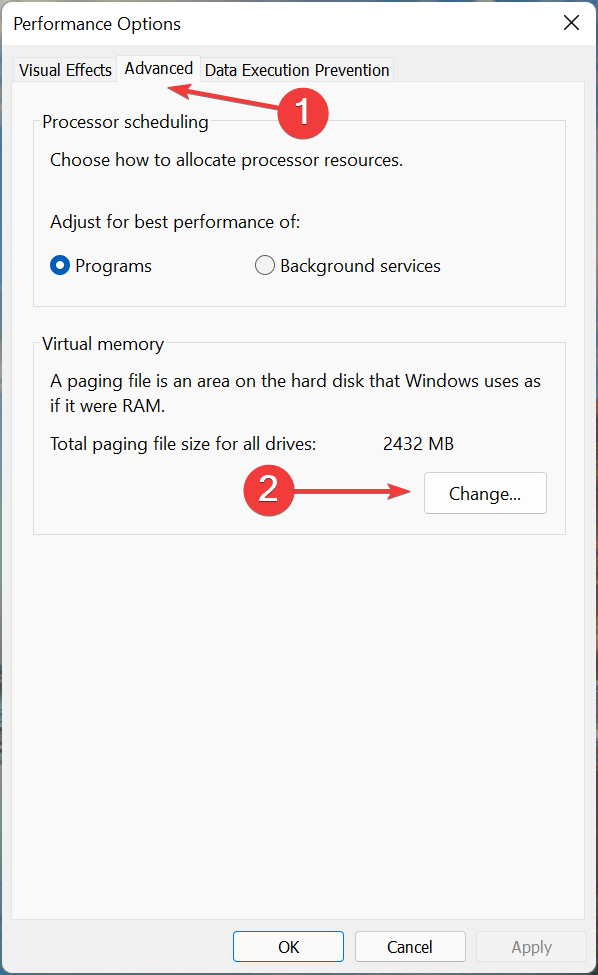
- Next, naviagte to the Advanced tab in Performance Options window and click on the Change button.

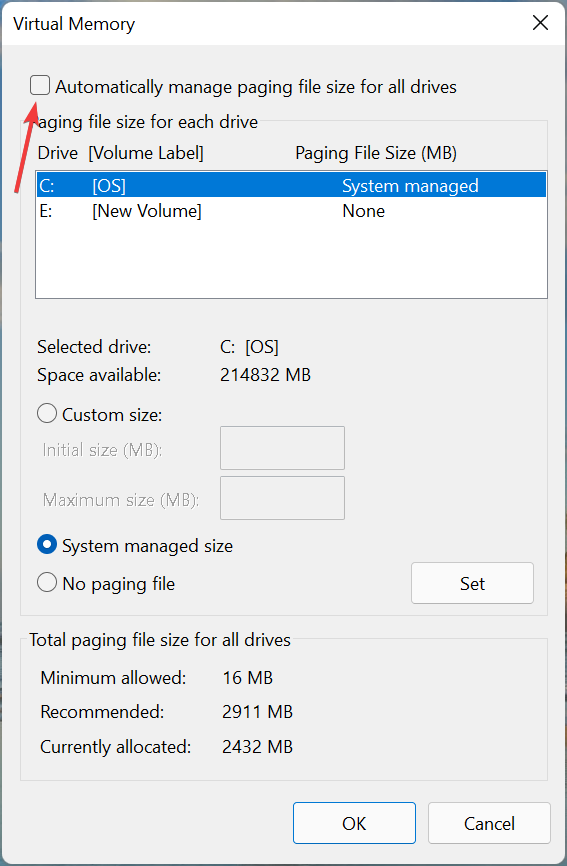
- Now, untick the checkbox for Automatically manage paging file size for all drives on the top.

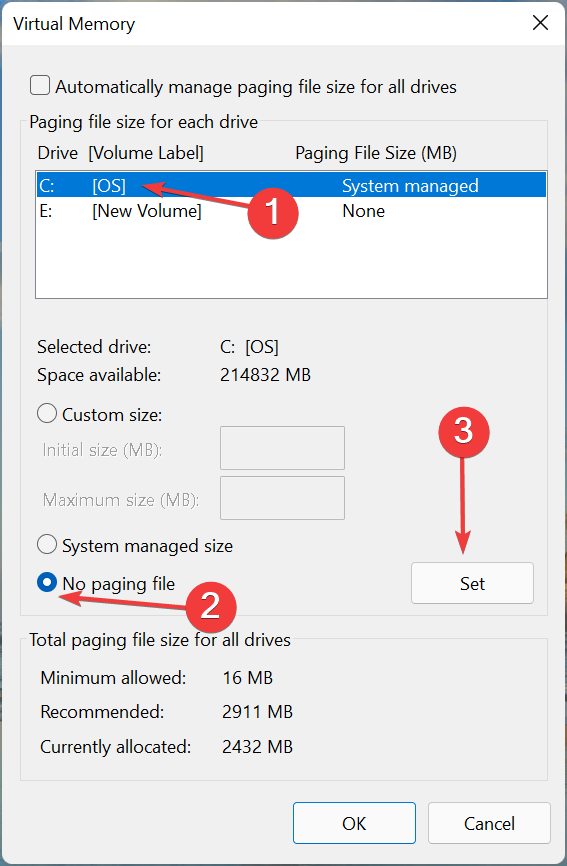
- Select the drive from the list where the paging file is located, select the No paging file option, and click on Set.

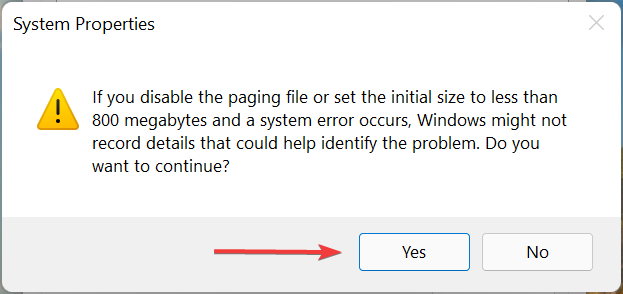
- Click Yes on the confirmation prompt that appears.

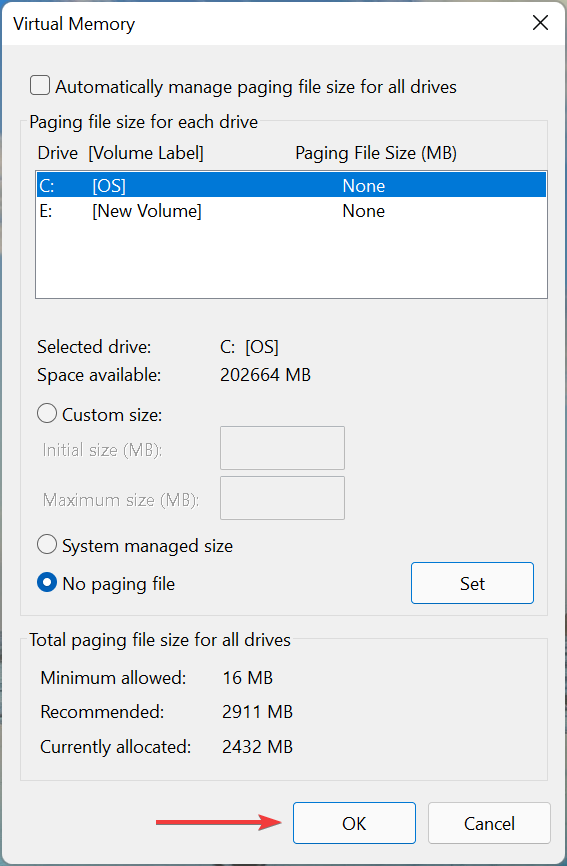
- Once done, click on OK at the bottom for this and the other windows as well to save the changes, and then restart the computer for these to come into effect.

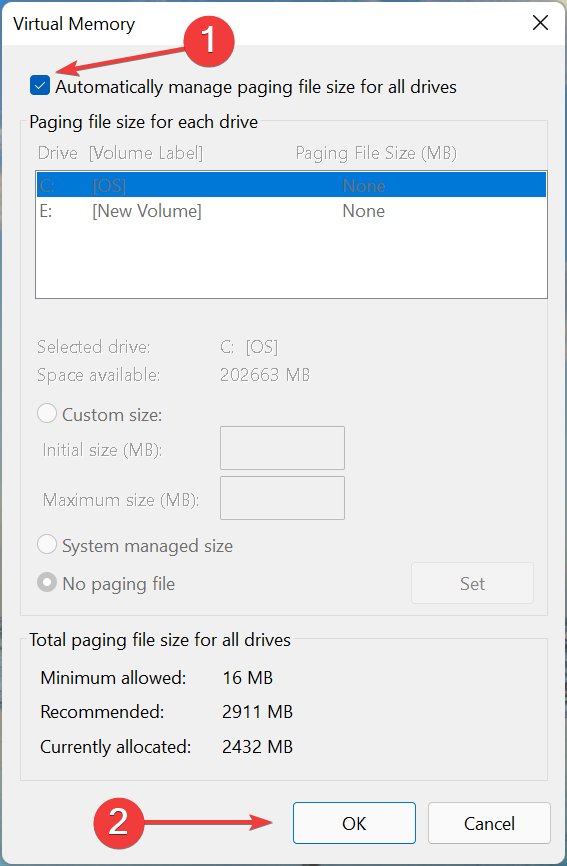
- After the computer restarts, again open the Virtual Memory window, tick the Automatically manage paging file size for all drives checkbox, and click on OK at the bottom.

- Finally, once again restart the computer for the new changes to come into effect.
The first seven steps here will reset the virtual memory in Windows 11, while the last two will let Windows manage it from now on. In case you want to just reset it, skip the last two steps.
But, do remember that it’s recommended to have a certain storage space allocated to virtual memory to keep the RAM free, thereby improving the system’s performance.
Is virtual memory as good as physical memory/RAM?
By now, many of you might be wondering if virtual memory is as good as the installed RAM and if the former can replace the latter. The answer is No.
While they both perform the same function, i.e., to temporarily store files, RAM is considerably faster than virtual memory.
To understand this, let’s take an example. Say, you have multiple apps running, of which some are minimized, and have not been checked in a while. When you open them, it will take a little longer, which indicates that there had been offloaded to virtual memory.
So, if you try to work with minimum RAM and high virtual memory, the system performance would be poor.
The page file can help reduce the load on physical memory by helping offload programs and prevent them from crashing. But it certainly cannot replace physical memory.
The previous sections will help you understand how to reset virtual memory in Windows 11. But, to calculate the optimal virtual memory (1.5-3 times the installed RAM), you need to find out the available RAM on the computer.
Besides, check what do to if Windows 11 is not using all the available RAM to boost the performance and execute tasks a lot quicker.
Tell us the size of virtual memory on your computer and the available RAM, in the comments section below.
Read our disclosure page to find out how can you help Windows Report sustain the editorial team. Read more


Improve this guide


User forum
0 messages