Microsoft updates Q3 FY20 guidance as coronavirus outbreak to impact Windows OEM and Surface revenues

Yesterday, the markets took a dive as fears of a spreading coronavirus shook investor confidence in international business. As the spread of the virus makes its way into parts of central Asia and Europe, more areas are being quarantined and as a result, businesses are beginning to feel the impact of a reduced chain of supply.

Among the many businesses with international interests and investments is Microsoft, which issued an update to its Q3 FY20 guidance.

At the end of January, Microsoft prepared investors on an earnings call for a quarter where its More Personal Computing division would pull in a reasonable $10 to $11 billion in revenue. During that call, Microsoft explained the projections were taking into account growing concerns about the relatively nascent COVID-19.

Now it seems things have gotten a bit dire with regards to its supply chain and the company is alerting investors that its projection will like slip for the quarter.

Microsoft declined to pinpoint a number in their press release about the updated guidance and instead offer this statement,

Although we see strong Windows demand in line with our expectations, the supply chain is returning to normal operations at a slower pace than anticipated at the time of our Q2 earnings call. As a result, for the third quarter of fiscal year 2020, we do not expect to meet our More Personal Computing segment guidance as Windows OEM and Surface are more negatively impacted than previously anticipated. All other components of our Q3 guidance remain unchanged.

As expected, Microsoft plans to continue to conduct business in accordance with the World Health Organization (WHO) guidelines as well as “ensure the health and safety of our employees.”

The world continues to grapple with the expediency in which COVID-19 is spreading and its direct and indirect effects on global business. We should expect to see many more of these types of adjustments in the coming days.

Sysprep audit mode can’t be turned on? Try these methods

Microsoft’s System Preparation Tool allows the admins to duplicate, test, and deliver new installation for Windows operating systems based on an established installation. On the other hand, the Audit Mode allows the admins to perform all these actions without entering the welcome screen.

However, some users have reported the Sysprep audio mode can’t be turned on error while trying to use the Audit Mode feature in Windows 10.

This error usually occurs if the installed Windows release has a glitch which is preventing the tool from completing the operation or some of the system files are corrupted.

In this article, we discuss how you can fix the Sysprep audit mode can’t be turned on error in Windows 10.

How do I fix Sysprep audit mode can’t be turned on error?

1. Install Windows Cumulative update

Sysprep audit mode can't be turned on
  1. If the issue is prevalent, Microsoft will release an update to fix the problem.
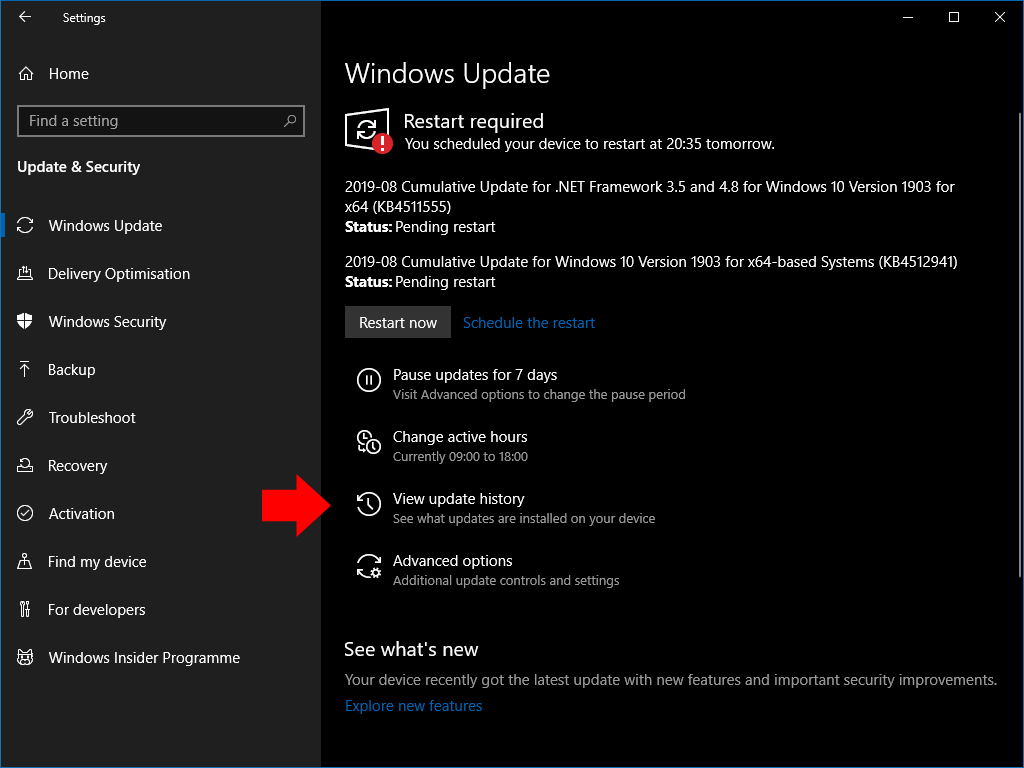
  2. To install the updates, click on Start > Settings.
  3. Updates and Security.
  4. Click on Windows Updates.
  5. Windows will search for new updates and show all the available updates.
  6. Begin with installing any pending Cumulative updates for Windows.
  7. The update requires a restart to apply the changes. Reboot the computer and check for any improvements.

2.  Replace the Spopk.dll file

Sysprep audit mode can't be turned on
  1. If you check the error log, you may find enough information to understand what is causing the problem.
  2. However, some users have reported that replacing the spopk.dll file in the Windows installation directory has resolved the error.
  3. However, you need to find the spopk.dll file from another Windows 10 computer and replace it with the one in your current system. Here is how to do it.

Take ownership

  1. To replace the file, you may need to take ownership of the spopk.dll file and grant permission to replace the file.
  2. Open File Explorer and navigate to the following location:
    C:WindowsSystem32
  3. Locate and right-click on Spopk.dll file and select Properties.
  4. Now you need to take ownership of the file.
  5. After taking the ownership, right-click on Spopk.dll and select Properties.
    Sysprep audit mode can't be turned on
  6. Open the Security tab.
  7. Select the username you want to give permission.
  8. Under Permission for Users check Full control box under Allow.
  9. Click Apply > OK to save the changes.

Replace the Spopk.dll file

Sysprep audit mode can't be turned on
  1. On another Windows 10 computer, open the File Explorer.
  2. Navigate to the following location:
    C:WindowsSystem32
  3. Copy the Spopk.dll file and save it in a flash drive.
  4. Now move the Spopk.dll file to the following location in your new machine:
    C:WindowsSystem32
  5. Windows will ask you if you want to replace the file, click Yes.
  6.  Once successfully replaced, run the Syspreparation tool and check for any improvements.

3.  Pause Windows 10 updates

Sysprep audit mode can't be turned on
  1. Click on Start and select Settings.
  2. Go to Updates and Security.
  3. Open the Windows Updates tab.
  4. Click on the Pause update for 7  days option.
  5. Now proceed with the System Preparation Tool and check for any improvements.

4. Use third-party software for damaged DLLs

You can use a trusted program to scan your PC and repair or replace the Windows files that have been damaged. This can be a time-consuming task, so a specialized tool that can perform this process automatically is recommended.

Damaged DLLs are often the culprits for various Windows errors, so it is essential to keep them in check.

If you’re having trouble opening the Setting app, take a look at this article to solve the issue.

The Sysprep audit mode can’t be turned on error can occur due to many reasons. In this article, we have listed a couple of solutions to help you resolve the issue, regardless of what caused it.

If you have any other questions or suggestions, leave them in the comments section below and we’ll be sure to check them out.

New Spain data center becomes test bed for Microsoft and Telefonica’s expanded partnership

Microsoft recently announced that it’s leveraging a new “global strategic partnership” with Telefonica to jointly develop “go-to-market plans” for regions the company does business.

Last year during Mobile World Congress 2019, Microsoft took the veil off its newfound relationship with the international telecommunications giant, Telefonica.

Highlighted during this year’s announcement was Microsoft’s opening of a new datacenter region in Spain. Microsoft’s new data center comes at a time where the company looks to help expedite Spain’s “digital transformation.”

With a data center in Spain, Microsoft will no be able to more reliably deploy its Azure, Microsoft 365, Microsoft Dynamics 365, and Power Platform apps to businesses in the region.

To help jumpstart the proliferation of Microsoft’s cloud service provisions in the area, Telefonica S.A. will start leveraging Microsoft technologies internally, according to a joint press release from the companies.

As part of Telefónica’s digital transformation, the company will use the Microsoft cloud for its own internal operations, pursuing efficiency, flexibility and scalability improvements, optimization of operations and cost reductions. Telefónica has also deployed Microsoft 365 to its global employee base to enable more seamless communication and collaboration across the 14 countries in which it operates. As a strategic partner for its multi-cloud strategy, Microsoft will train hundreds of Telefónica employees on Microsoft Cloud services.

Beyond the high minded rhetoric and internal dogfooding is a plan from both Microsoft and Telefonica to address the evolution of “critical sectors such as government, health, education, travel, manufacturing, retail, finance, insurance and more,” in Spain, while also addressing the social and economic transformation that is currently taking place.

More concretely, Microsoft and Telefonica customers will be empowered with low latency security and bandwidth support of 5G, edge computing and Industry 4.0 technologies once the rollouts begin.

Satya Nadella’s three-day trip to India: Everything you need to know

Microsoft CEO Satya Nadella is in India for a three-day visit as the company hosted its Future Decoded summit in two legs in Mumbai and Bengaluru.

On day one in Mumbai, at the CEO Summit, Satya addressed a gathering of over 150 industry leaders. He also met with leaders from Banking, Financial Services, and Insurance and manufacturing industries on the sidelines of the summit. On day two in Bengaluru, at the Tech Summit, Satya addressed a gathering of over 700 technologists, developers, and industry leaders.

The event was live-streamed across 7 tech campuses and 21 satellite campuses for over 35,000 campus attendees and was streamed online and via a leading television broadcaster for an estimated 700,000 viewers.

On the third day, Satya met a gathering of over 250 students and educators at the Young Innovators Summit organized by Microsoft India in Delhi. In a conversation with Anant Maheshwari, President, Microsoft India, Satya spoke about the role that technology will play in transforming the education ecosystem over the next decade and outlined the opportunity students have today to solve some of the world’s most pressing problems with technology.

While in Delhi, Satya Nadella also met Ravishankar Prasad, the Minister of Communications, Electronics & Information Technology, Government of India as well as Piyush Goyal, the Minister of Commerce & Industry.

Tech Capability

In his keynote, Satya mentioned that Microsoft was committed not only to expand access to technology but also to help organizations of all sizes build their own digital capability. This would help every organization create more independence – not dependence on Microsoft – as their own tech company and with their own tech capability.

“Whenever I speak to CEOs in other industries, I always say you will never be cool by association. Just because you do a press release with us you are not going to be cool. You have to build your own tech capability and solutions that are inclusive.”

– Satya Nadella

Laying out his vision for tech intensity as a driver for economic growth, he urged the gathering of India’s top business leaders to ensure everyone benefits from this growth.

Digital India

Anant Maheshwari, President, Microsoft India

Before Satya Nadella’s keynote in Mumbai, Anant Maheshwari kicked off the event and shared some numbers about the tremendous opportunity for India.

India’s IT industry is growing at $180 billion annually and is home to the world’s third-largest startup ecosystem. Microsoft, of course, wants to participate at both ends of the spectrum. In India, Microsoft has built a robust ecosystem with more than 300,000 enterprises as customers serviced by about 9,700 partners.

Maheshwari added that India has 4.2 million developers in the country and some 650 million people who are less than 25 years of age.

Trust & Security

“Technology must drive more inclusive economic growth. To do this you need core trust in technology, whether it is privacy, ethics around AI, cyber–that’s going to be huge,” Satya said in Mumbai. In an interview with the Economic Times, Nadella spoke in support of regulation for the use of artificial intelligence and data localization. “As technology becomes much more pervasive, just like we have regulation in food safety like we have the Federal Aviation Authority for air traffic and so on, we will always have regulation for things that are very mission-critical in our lives and society,” he said.

“There needs to be trust in technology that you all create, whether you are a retailer or a healthcare company. Trust comes down to four attributes: privacy, responsible AI, digital safety and security. It is trust in privacy, trust in AI that you apply. Trust has to be human right. AI has to be ethical.”

– Satya Nadella

Security is a crucial part of Microsoft’s tech stack, which includes endpoint security, security services from the cloud, security intelligence, and threat protection.

Nadella called the economic losses due to cybercrime as “one of the most stunning issues of our times.” He stated how the company is focused on its operational security posture in real-time apart from building the security products.

Nadella gave the example of an incident in north India where 11,000 users were targeted for bitcoin mining. “Our operational security posture gives us that early warning signal and then we go inoculate these 11,000 users, using, in this case, Microsoft Defender. That ability to see in real-time, as an attack happens and then to remediate it—is that combination of both the security product and the operational security posture–both coming together,” he said.

In conversation with Asia’s richest person

Satya Nadella and Mukesh Ambani

At the Mumbai CEO Summit, Satya Nadella was in a fireside chat with the chairman of Reliance Industries Ltd., a Fortune Global 500 company and India’s most valuable company by market value. Ambani is the richest man in Asia.

Nadella also spoke about how Microsoft was looking to empower small businesses in India in their cloud journey with Jio. Jio, a wholly-owned subsidiary of Reliance Industries, is the leading telecommunications service provider in the country. Microsoft and Reliance had announced a 10-year technology partnership last year to accelerate India’s digital transformation. The strategic effort aims to enhance the adoption of data analytics, AI, cognitive services, blockchain, Internet of Things, and edge computing among small and medium enterprises.

Ambani termed the nascent partnership between the two companies as the “defining partnership of the decade”. Between Jio and Microsoft, Ambani aimed to deliver the full stack of services to propel India forward in the coming decade. Due to the scale of the two companies, the partnership can make a deep sectoral impact and prove to be disruptive for competitive businesses.

India, Ambani said, has all the components in place to “grow and march forward” and become the world’s third-largest economy and a “premier digital society” within the next decade. India became the fifth-largest economy last year according to the International Monetary Fund.

Gaming in India

During his conversation with Ambani, Satya Nadella touched upon gaming, almost unexpectedly. Ambani said that while it isn’t very big in India at the moment, there is a huge potential and it can become bigger than music, movies, and television shows put together. “Akash is very interested in this,” Ambani said referring to his son Akash Ambani who is the Chief of Strategy for the Jio business.

The conversation subtly moved towards Microsoft’s Project XCloud and Jio’s broadband readiness and may have just given a glimpse into Jio’s next bet – online gaming. Could there be a partnership brewing?


Microsoft also made a couple of announcements on the sidelines of the Future Decoded summit.

The company launched the 100X100X100 program for B2B SaaS startups in India. The initiative will bring together 100 committed companies and 100 early and growth startups that have enterprise-ready solutions to offer. These participating companies will commit to spending $100K over a course of 18 months on solutions provided by the SaaS startups.

Microsoft India also announced a collaboration with SBI Foundation to create opportunities for youth living with disabilities in the Banking, Financial Services, and Insurance sector. Launched in 2015, SBI Foundation is the CSR arm of State Bank of India, India’s leading public sector bank.

Here’s what Microsoft Teams desperately needs that Slack already has

Over the past few months, I’ve written about Microsoft Teams extensively for our Office 365 coverage here at OnMSFT. With its popularity on the rise, I’ve even compared Teams to Slack side-by-side in more ways than one. There’s no doubt, I am a big defender of Teams, and there’s a lot that I really like about the collaboration service, but there is also a lot that I don’t like.

Yes, Microsoft has plenty of cool stuff planned for Teams in the future, but as someone who uses both Slack and Teams on a daily basis across two different jobs, there’s a lot that Microsoft could learn from when looking at Slack. Here’s a look at what Teams needs that Slack already has.

A Microsoft Store and MacOS App Store version of the app

Many months ago, Microsoft experimented with a version of Teams that was downloadable through the Microsoft Store on Windows 10. However, it was only available on Windows 10S devices, and since then, the app has been pulled. That means the only current way to download and use Teams on Windows is to run the executable file on Windows or use it through the web.

This is a big difference from Slack and is the primary area where I think Teams needs a big improvement. Currently, Slack can not only be found in the Microsoft Store, but it’s also available on Apple’s MacOS App Store. That means it’s much easier to download the app and get up and running with it when you boot up or buy a new device. Updates are also much easier to manage, too, as you can update Slack right alongside the other apps in your respected OS. Granted that Windows is a Microsoft product, it’s quite a shame that there is no native Windows 10 app for Teams.

Integration with Windows 10’s Notification Center

I’ve said before that notifications in Microsoft Teams are much cleaner when compared to Slack. You have one “Activity” area that shows you your replies to messages, likes on messages, mentions, and even your own activity. However, there is one problem, as that is just the in-app notifications. Currently, notifications outside of Teams are a huge mess.

Other apps in Windows 10, such as Slack, integrate with Toast Tiles and the Windows 10 Notification and Action Center. If you get a reply to a message or any other action in Slack, you’ll get a notification that appears in the corner of your screen, and then right inside Action Center, even if you missed its momentary in-app pop-up. Currently, this is something that Teams does not do. It has its own way of showing notifications, in the bottom corner of the screen. It bypasses the Windows notifications system in favor of its own, and that’s a huge shame. Again, Teams is a Microsoft product, and it doesn’t even play nice with Windows 10’s own features.

Support for signing in and switching between multiple accounts

Even though Slack and Teams are used by millions of people on a daily basis, some of those people use collaboration services from multiple and different accounts. For instance, you could be signed into Slack for one job, and then switch it over for another job,  without having to sign out. This is one of the most controversial areas of the Slack vs Teams debate, and it’s where Teams desperately needs to learn from Slack.

Currently, with Slack, you can easily sign out and switch between workspaces with a sidebar that appears to the side of the app. This is something that isn’t at all possible in Teams. In fact, it has been requested by many users since 2017, and Microsoft has yet to put it to action. That means someone who has multiple jobs that use Teams will have to keep each separate. Typically, that means signing into one instance of Teams on the web, and another through the app. It’s quite a shame that this has to be used as a workaround and you can’t switch between accounts with the touch of a button.

More emoji reactions, and custom emoji reactions

These days, emojis are everywhere, even in the workplace. You use them as simple ways of reacting to messages to send a quick and efficient point. Personally, I love the thumbs up emoji (just ask my editor,) and I was quite happy when Teams expanded its emoji reactions to six. Sure, you can use a wide range of emoji in a message, but in Teams there are only six available for quick reactions; “thumbs up,” “love,” “sad,” “angry,” “surprised,” and “angry.”  These emojis do get the job done, but when compared to Slack, it’s really behind.

On Slack, you have an endless way of reacting to messages. You’re able to click an “add reaction” button and choose from a library of emojis. There’s even a search box that lets you find the one that’s just right for your situation or thought. And, if admins allow it, you even can upload and create your own custom emoji. At my other job, we have an emoji with our company logo. A copy editor on the team even tells us to reply with our own emoji of choice, so he knows when an important message has been seen. Emojis are great, and its yet another place where Teams needs improvements.

The ability to chat with yourself

Finally, there’s the ability to chat with yourself. This is something that I use constantly with Slack. It lets me have my own in-app space to make notes, leave images and lists. I find it an excellent way to transfer files between my devices too, such as screenshots or images I use for my stories. It’s a feature that isn’t available in Teams, and I have no idea why. Perhaps Microsoft wants users to go with OneDrive, Outlook, and its other products instead, but having s apace to chat with yourself is quite convenient, and I do hope one day it comes to Teams too.

…And so much more!

These are just a few features that I think Microsoft Teams desperately needs that Slack already has. As Teams becomes more popular, Microsoft really needs to listen to feedback from the community and build a better app. Features like private channels, multi-window capability, more integrations with Outlook and Teams, are all on the way soon. However, to make Teams the perfect solution, Microsoft might as well need to focus on the basics first.

How to fix “logged in with a temporary profile” errors in Windows 10 (February 2020 update)

Windows 10 users have lost access to their user profiles after installing the February 2020 cumulative update, KB4532693. Released on February 11, what should have been a routine quality update has reportedly caused data loss for some and missing profiles for many others.

After installing KB4532693, you may see a “You have been logged in with a temporary profile” message after reaching the desktop. Your desktop will be empty, your user profile files missing and your customised Windows settings reset to defaults.

Microsoft’s response to this issue has once again left much to be desired. Despite confirming the symptoms to several media outlets, it has not updated the “Known issues” on KB4532693’s support page; neither has it pulled it from distribution. This means you may want to consider pausing updates on your device if you haven’t already received it.

Microsoft finally provided a workaround in a forum post late last week. It said it is “aware” that some users may get logged into a temporary profile after taking the update. According to that post, booting once into Safe Mode should then result in everything returning to normal.

Microsoft Windows 10, Settings, Windows

You can carry this out with the following steps:

1. On the Windows 10 login screen, click the Power icon in the bottom-right, then press “Restart” while holding the Shift key (follow our separate guide to entering Safe Mode if this doesn’t work).
2. Once Safe Mode starts, use the Start Menu to restart your PC again. This time, Windows will reboot back into normal mode and your user profile should be restored.

The root cause of this problem appears to be down to the way in which KB4532693 makes changes to the system. The installer appears to create a temporary user profile while it’s applying the updates. In some circumstances, that temporary profile doesn’t get removed once the installation finishes, so you end up getting logged into it instead of your account.

Unfortunately, much remains unknown about the exact circumstances in which the bug occurs. Microsoft even admitted as much in its latest set of instructions. It requested feedback on the steps provided as “it helps Microsoft in identifying the root cause.” That strongly implies that engineering teams are still investigating the problem, two weeks after the update was first released.

There’s a distinct possibility that the steps above won’t work for you. Even if they do, you may still find there is data missing from your profile. Should that be the case, use File Explorer to visit the “C:Users” directory.

How to view installed updates in Windows 10

Look for a folder with the name of your profile (for Microsoft accounts, it’s the first two characters from each of your name and surname, joined by an underscore) suffixed with a “.bak” or “.000” extension. If it exists, this appears to be a backup of your user profile directory taken before KB4532693 installed.

You should be able to copy the contents of this directory back into your regular user profile folder (without the “.bak” extension) to restore your files. Alternatively, there are some reports that simply uninstalling the update might put everything back to normal.

User reports online suggest that even this may be insufficient in some cases. There are a number of credible reports that your user profile folder may be missing altogether after KB4532693, with no backup directory available. Once again, the circumstances in which this data loss occurs remain unclear. The most straightforward solution in this instance may be to restore from a backup if available.

Microsoft’s approach to this incident has done little to reinforce user confidence in the company. Far from being a straightforward quality update, this month’s cumulative release has cost some users several hours of their time, while a minority few seem to have suffered data loss.

Microsoft has yet again taken a piecemeal approach to acknowledging and resolving the problem, with fragments of information posted across multiple support forums and media outlets. It comes after the equally flawed KB4524244 release for Windows Server, which was pulled from distribution after it left some machines unbootable.

Leaked Surface Duo “peek” video may reveal launch date

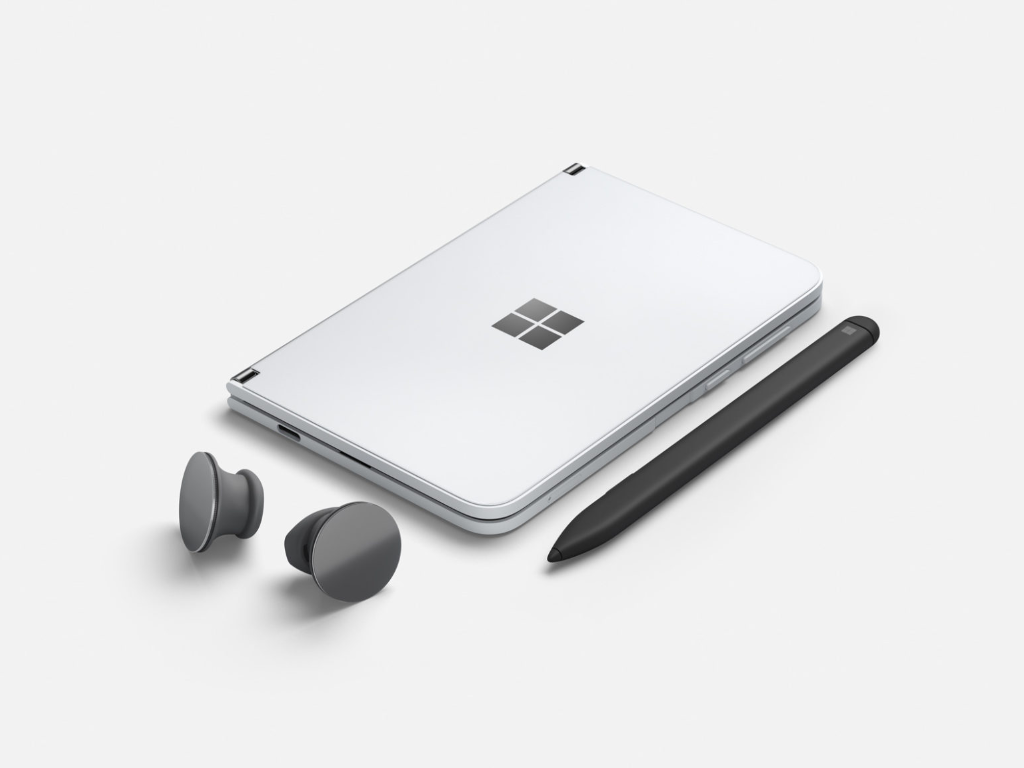
Microsoft’s Surface Duo is potentially one of the most exciting new devices coming out this year, not only because it’s an entry into the new foldables market, but because it’ll be the company’s first attempt back into the mobile phone market since it discontinued Windows 10 Mobile in January. And as more teasers are leaked, we’re always learning more about the device coming later this year.

A new video of one of the devices new features was leaked by WalkingCat on Twitter, which allows users to get a “peek” of their notifications and the time by simply opening the device slightly. A user could also see a glance of an incoming call in this fashion, and then fully open the device to accept or reject it.

https://twitter.com/h0x0d/status/1232666325580832768

Interestingly, the date on the device displays 06/18/2020, which could be a hint of the planned date of an official showing later this spring. Even so, many of Microsoft Surface renders on the company’s website show June 18 as the date on the product’s displays, so it’s still unlikely.

Are you excited for the Surface Duo folding Android device? Let us know what you think so far in the comments area below.

Windows 10 Start Menu may lose its Live Tiles according to new report

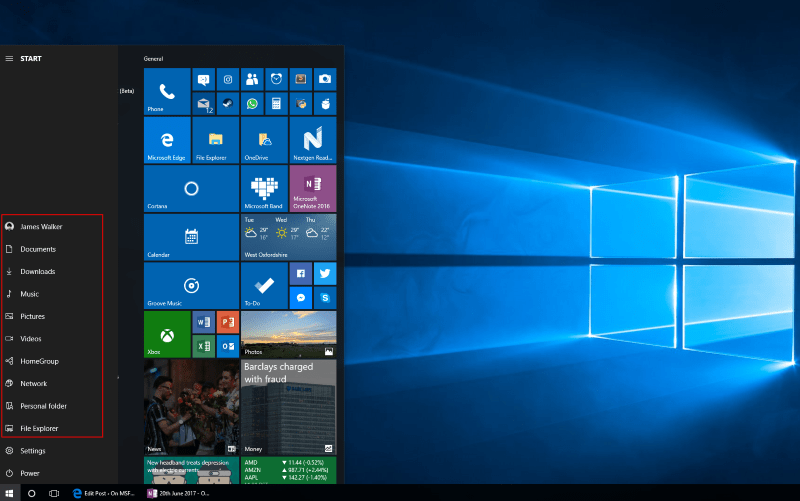
Live Tiles used to be one of the distinctive features of Windows Phone, but Microsoft bringing them to Windows 8 and later Windows 10 didn’t really have the same kind of impact. The Windows 10 Start Menu still allows users to customize it with Live Tiles that can display useful pieces of information such as recent emails or calendar appointments, but Microsoft’s upcoming Windows 10X OS won’t support Live Tiles at all.

As you may recall, Microsoft accidentally shipped last year a Windows 10 preview build that came with a redesigned Start Menu with no Live Tiles. We haven’t seen this new UI in recent Windows 10 preview builds since then, but Live Tiles may be on the chopping block if we believe a new report from Windows Latest.

Windows 10 Insider build showing new look tiles from last July

“People familiar with the development told us that Microsoft is planning to replace live tiles with icons in a future update after Windows 10’s 20H2 release,” the report says. “We’re expecting Windows 10’s live tiles to go away at some point in 2020/2021, possibly with Windows 10’s 2021 update since 20H2 is said to be a minor release and hints could drop in the preview builds later this year.”

Live Tiles have been around on the desktop since 2012 and the release of the Windows 8, and after all this time this would still be surprising to see them disappear on Windows 10. While it may not be a complete dismissal of this recent report, Brandon LeBlanc from the Windows Insider team expressed some doubts on Twitter yesterday about Live Tiles going away on Windows 10.

Do you think it’s time for Microsoft to move away from Live Tiles, or do you think they still have a purpose on Windows 10? Sound off in the comments below.

Fix We can’t install this printer right now error in Windows 10

While connecting your printer to the network you may encounter printer error 384. The full error reads: We can’t install this printer right now. Try again later or contact your network administrator for help.

Several users have reported similar issues in the Microsoft community forum:

We have tried to install and printer to this printer that used to work until patch Tuesday.  I can only print from the server itself, any help or a patch that can be removed that caused the issue?

This error can occur if you have multiple printers using the same print port on Windows. In this article, we discuss how to fix printer error 384 in Windows 10.

How can I fix printer error 384?

1. Change printer port

we can't install this printer right now 384 error
  1. Press Windows Key + R to open Run.
  2. Type control and click OK to open Control Panel.
  3. Click on Hardware and Sound.
  4. Select Devices and Printers.
  5. Right-click on the printer you are facing issue with and select Print Properties.
  6. In the Properties window, open the Ports tab.
  7. Here you need to assign the right port to the printer.
  8. Repeat the steps for other printers on your network as well. Open and assign a different port.
  9. Save the changes and close the Control Panel.

This error can occur if you have multiple printers connected to the same network and both of them are assigned the same port. Follow the above steps to assign different ports to see if that resolves the error.

2. Update printer driver

  1. Go to the printer‘s manufacturer’s website.
  2. Enter your printer model.
  3. In the download page check if a new version of the driver is available.
  4. Download the latest drivers for your printer and install them.

Did you know that the majority of Windows 10 users have outdated drivers? Be a step ahead using this guide.

An easier solution would be to use third-party software with an in-built driver update manager that downloads and installs the latest drivers automatically.

Plus, the whole process will run automatically to efficiently update any old drivers from your PC. Thus, you only need to select your printer driver and let the software do the rest.

You should therefore consider this driver update tool and have optimized driver devices constantly.

⇒ Get Fortect Driver Updater

3. Remove and reinstall the printer

we can't install this printer right now 384 error
  1. Press Windows Key + R, type control and click OK.
  2. In the Control Panel, go to Programs > Programs and Features.
  3. Click on Sound and Hardware.
  4. Open Devices and Printers.
  5. Right-click on your printer and select Remove device.

Alternatively, you can also remove the printer in Windows 10, though Start > Devices > Printers & Scanners. Select your printer and click Uninstall.

If you need more info on how to uninstall programs and apps in Windows 10, check out this awesome guide.

Remove printer driver

printer network error
  1. Click Start and select Settings.
  2. Select Device.
  3. Open Printers and Scanners tab.
  4. Scroll down to Related Settings.
  5. Click on Print server properties.
  6. Open the Driver tab in the properties window.
  7. Locate your printer driver and click the Remove button.

Remove printer software

Printer network error
  1. Click Start and type control.
  2. Click on Control Panel.
  3. Go to Programs > Programs and Features.
  4. From the list of programs, select your printer software.
  5. Click Uninstall and click Yes if prompted by UAC.

Install printer

printer network error
  1. Go to your printer manufacturer’s website.
  2. Download the latest driver software for your printer and install it and reboot the computer.
  3. Next, go to Start > Setting > Device > Printers and Scanner.
  4. Click on Add a printer & scanner.
  5. Select your printer and follow on-screen instructions to install the printer successfully.

The We can’t install this printer right now 384 error occurs if the computer has assigned the wrong printer port to the printer. If changing the printer did not work, try the other fixes from this article.

If you have any other questions or suggestions, don’t hesitate to reach in the comments section below.

Microsoft starts rolling out its new Edge browser to Windows Insiders in the Release Preview Ring

Microsoft’s new Chromium-based Edge browser launched last month as an optional download, but the company is now moving to the next stage of rolling it out to a wider audience. Indeed, Microsoft has just announced that it is now rolling out the new Microsoft Edge automatically to Windows Insiders enrolled in the Release Preview ring.

As a reminder, this move is part of Microsoft’s “measured roll-out” approach to bringing Edge to Windows 10 users. The company originally explained this in a January blog post, where it said that this is best for those who prefer not to install Microsoft Edge manually. It also said that, eventually, the browser will roll out to all Windows 10 users via Windows Update a future update to Windows 10. As a result, this small rollout to Release Preview Insiders should be a good test for Microsoft’s internal systems.

Keep in mind that once the new Microsoft Edge rolls out to you, you will be able to keep your passwords, favorites, and basic settings from the legacy version of Microsoft Edge. This automatic rollout will also keep your default browser in place if it is set to something other than Microsoft Edge.

Unlike the legacy Microsoft Edge, though, this new browser is not linked to featured Windows 10 updates. This means it is not only much faster, but you will get updates every six weeks. You can keep on top of all the Microsoft Edge news by checking out our news hub here.

New optional updates are available for Windows 10 version 1809 and older

As February is coming to a close, Microsoft has released new optional updates for Windows 10 versions 1809 and older today. If you’re still running version 1809 of the OS (or the October 2018 Update), you can install the build 17763.1075 which brings improvements for Windows Hello, battery life improvements when your PC is in Modern Standby mode, and more. You can check out the highlights of this optional update below:

  • Updates an issue that prevents the speech application from opening for several minutes in a high noise environment.
  • Improves the accuracy of Windows Hello face authentication.
  • Updates an issue that might prevent ActiveX content from loading.
  • Improves the battery performance during Modern Standby mode.
  • Updates an issue that prevents you from taking a screenshot of a window.
  • Updates an issue that adds an unwanted keyboard layout as the default after an upgrade even if you have already removed it.
  • Updates an issue that prevents users from reactivating their copy of Windows using the product key stored in their Managed Service Account (MSA).
  • Updates an issue that prevents some applications from printing to network printers.

Keep in mind that all these fixes for Windows 10 version 1809 will be included in next month’s Patch Tuesday update. It’s also worth reminding that this version of Windows 10 will reach end of support for Home and Pro users in May, and if you have yet to upgrade to a newer version of the OS Microsoft will soon automatically initiate the update process on your PC. New optional updates are also available for Windows 10 versions 1803, 1709, and 1607 today, though these patches are only available for Enterprise and Education users.

Unable to Access Wi-Fi on VirtualBox? Try These Methods

Oracle VirtualBox is a free open source virtualization software that allows the users to run virtual machines on Windows and other platforms. However, if you are using a Wi-Fi connection, you may not be able to access it on VirtualBox.

This is because VirtualBox by default does not support Wi-Fi connectivity unless the users have a USB Wi-Fi adapter installed. However, as a workaround, you can bridge to a Wi-Fi network card on the host.

In this article, we discuss how to enable Wi-Fi on VirtualBox to access the Internet on your virtual machine.

How do I fix Wi-Fi errors on VirtualBox?

1. Bridge Wi-Fi network adapter

WiFi error on VirtualBox

  1. Start VirtualBox if it’s not already running.
  2. Open VirtualBox Manager.
  3. Select the machine you cannot get internet on in the left pane.
  4. From the top menu, select the Settings button.
  5. From the left pane, click on Network under the Settings window.
  6. Next, switch to Bridged Adapter in the Attached to the drop-down menu.
  7. Now you need to select the name of the network adapter you are currently using on the host machine.
  8. Under the Advanced section, make sure the machine is set to use Dekstop Adapter Type.
  9. Make sure Promiscuous Mode is sent to Allow VMs under Advanced section.
  10. Again under the Advanced section, make sure Cable connected option is checked.
  11. Click OK to save the changes and exit the settings window.
  12. Restart VirtualBox and open a web browser and you should be able to access the internet now.

After configuring the VirtualBox settings, you can access the Wi-Fi network on your virtual machine. If the issue persists, get the MAC address information of your network adapter and enter it in the MAC address filed of the guests’ network configuration dialogue box.

Here is how to get the MAC address of your host machine’s network adapter.

WiFi error on VirtualBox

  1. Click on the Internet Access icon in the taskbar.
  2. Select your WiFi network and click on Properties.
  3. Scroll down to the Properties section.
  4. Note down the Physical address (MAC):
  5. Enter the MAC address in the VirtualBox‘s network configuration dialogue.

2. Enable and Disable Network Adapter

WiFi error on VirtualBox

  1. Right-click on the network for the virtual machine in the taskbar (bottom right corner).
  2. Toggle the switch to disable Connect Network Adapter option.
  3. Wait for a minute or two.
  4. Toggle the switch again to enable Connect Network Adapter option again.
  5. Try to access the Internet.

This will only work if the Wi-Fi connection was working earlier and suddenly stopped.


3. Run network troubleshooter

WiFi error on VirtualBox

  1. Press Windows Key + R to open Run.
  2. Type control and click OK.
  3. Click on Network and Internet.
  4. Click on Network and Sharing Center.
  5. Choose Change Adapter Settings from the left pane.
  6. Right-click on the Virtual Network Adapter and select Diagnose.
  7. Follow the on-screen instructions to complete the troubleshooting process.
  8. Click on Apply the recommended solutions/changes if prompted.
  9. Try accessing the internet from your virtual machine and check for any improvements.

You can’t open Control Panel? Take a look at this step-by-step guide to find a solution.


4. Set NAT adapter

WiFi error on VirtualBox

  1. Start VirtualBox if not running.
  2. Click on Settings and select Network Settings.
  3. In the network adapter add the following:
    “BOOTPRO=DHCP“
  4. Check the Allow internet sharing option in the host machine adapter.
  5. Try to access the Internet and check if the Wi-Fi is working.

To be able to access Wi-Fi on your virtual machine, you need to make some tweaks to your host and the guest system. Follow the steps in this article to resolve any Wi-Fi-related issues that you encounter with Oracle VirtualBox.

If you have any other questions or suggestions, drop them in the comments section below.

READ ALSO:

Ori and the Will of the Wisps launch event set for March 5th in LA

Microsoft is giving away tickets for its Ori and the Will of the Wisps launch event on March 5. The company will give away 80 tickets among 40 winners, with each one getting an extra ticket to accommodate a guest.

The Los Angeles event will have plenty to offer, including hands-on with the game before its release, digital art, game soundtrack music from a live pianist, as well as the chance to meet the game’s developers and co-founders Thomas Mahler and Gennadiy Korol.

Microsoft will pick winners at random, you’ll need to enter before the deadline on February 28. Additionally, you’ll need to be at least 21 to enter and be able to cover your own travel expenses and accommodations, as the contest will only award two tickets per winner.

Ori and the Will of the Wisps is the successor to the critically-acclaimed Ori and the Blind Forest released back in 2015 on Xbox One and Windows. It’s set to be available for Xbox One and Windows 10 on March 11, and will be available for free on Xbox Game Pass for both consoles and PC from day one.

Will you be entering the contest for the event on March 5? Have you pre-ordered the game? Let us know in the comments area below.

New “Smart Delivery” feature for Xbox Series X will also be supported for physical discs

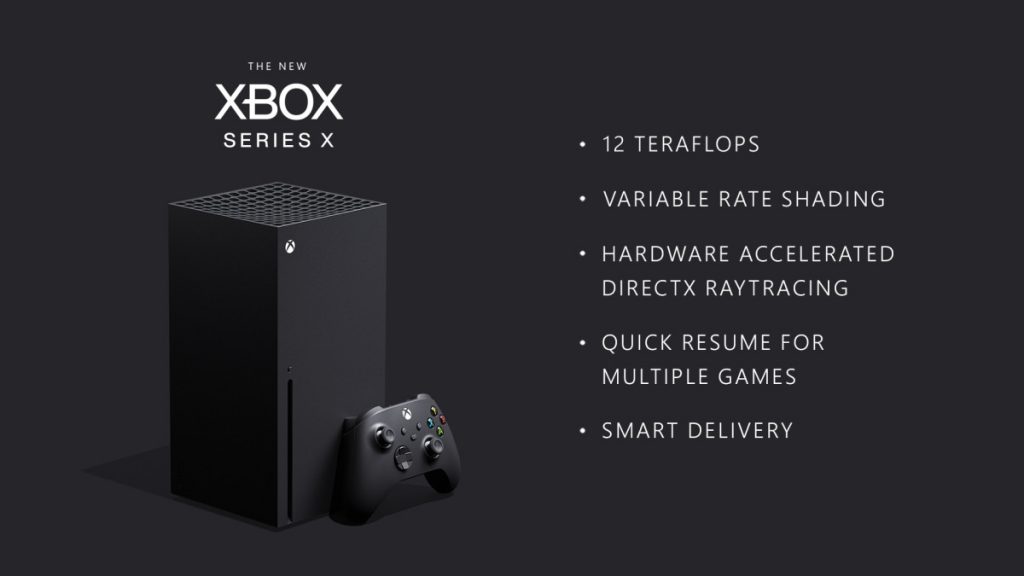
Yesterday, Microsoft made headlines by sharing new details about its Xbox Series X console. Xbox head Phil Spencer confirmed that the next-gen Xbox will deliver 12 teraflops of computing power, support hardware-accelerated ray tracing and other groundbreaking features including a patented form of Variable Rate Shading.

The head of Xbox also unveiled a new “Smart Delivery” feature that will allow game developers to provide free Xbox Series X upgrades for existing and upcoming Xbox games. “This technology empowers you to buy a game once and know that – whether you are playing it on Xbox One or Xbox Series X – you are getting the right version of that game on whatever Xbox you’re playing on,” explained Spencer.

Microsoft is committed to supporting Smart Delivery for all of its first-party games, and Cyberpunk 2077 developer CD Projekt Red also confirmed to be on board yesterday. Microsoft’s initial announcement for Smart Delivery didn’t really specify if the feature would only be supported for digital games purchased on the Xbox Store, but a Microsoft spokesperson has since told Polygon that “Physical discs of Xbox games can  support Smart Delivery if the developer or publisher decides to  implement the technology.”

This is great news for Xbox gamers who still prefer purchasing physical games, and we’re looking forward to seeing how support for Smart Delivery will be explained on video game packaging. However, there’s still some uncertainty regarding PC versions of Xbox Play Anywhere games that will support Smart Delivery. Will the digital licence also provide access to the Xbox Series X upgrade for free when the Xbox Play Anywhere game is played on the next-gen Xbox? “We look forward to sharing more specifics in the future,” the Microsoft spokesperson said to Polygon.

Batman: The Enemy Within and Sonic Generations highlights Xbox Games with Gold for March

As February nears its end, Microsoft has announced March’s Games with Gold, with all four games being exclusively to those subscribed to Xbox Live Gold or Game Pass Ultimate. Just as the company always does with its Games with Gold promotion, it’s giving away access to two Xbox One titles, and will additionally give away two Xbox 360 games that ware backward compatible with the newer generation consoles.

Beginning in March, Batman: The Enemy Within complete collection for Xbox One will be available for free until the end of the month. And for the first half of the month, the Xbox 360 game Castlevania: Lords of Shadow 2 will be free for the first half of the month.


Beginning March 16 until April 15, the Xbox One game Shantae: Half-Genie Hero will be freely available for user to download. Sonic Generations for Xbox 360 will also be available for free starting March 16 until the end of the month.

Shantae: Half-Genie Hero
Developer:
WayForward
Price:
$19.99


Sonic Generations
Sonic Generations
Developer:
SEGA
Price:
$19.99

In addition to next month’s Games with Gold, this week’s Deals with Gold has also been announced. A few notable titles include four DOOM titles each for for 70% off, and Borderlands 3 Super Deluxe Edition for just $49.99 (normally $99.99).

Borderlands 3: Super Deluxe Edition
Developer:
2K
Price:
$19.99

If you haven’t done so already, you should check out this month’s Games with Gold deals before they’re gone. Right now, you can still grab TT Isle of Man, Call of Cthulhu, and Star Wars Battlefront before next month’s freebies are available.

Which games are you most excited for? Feel free to let us know what you think in the comments area below.

How to embed Office 365 documents on a website

Embedding is the way of the internet. You can do it with Tweets, YouTube videos, links, and so much more. But did you know you also can embed an Office 365 document on a website or blog too? In this guide, we’ll show you how you can do just that.

To get started, you’ll first need to put your Office 365 document on OneDrive. You can do this by logging in and visiting OneDrive.com, and clicking the Upload button at the top of the screen. Once done, you’ll want to right-click the icon for the file and look for the option that says Embed. You’ll want to click on the blue Generate button. You also can look for the Embed option at the top of the bar under the OneDrive header, it will be the second icon from the left, next to Version History.

Keep in mind, that by embedding, anyone who visits your blog or website will be able to view it, regardless if they have an Office 365 or OneDrive account. After you click that blue Generate button, you will receive a message in a sidebar on the right of the screen, as seen above. You’ll see a preview of the document, along with a box that has the HTML code that will let you embed the document.

To end, you’ll want to copy that code, and then head to where you want to embed it. In our case, we’re embedding the document in a WordPress blog post. You can do that by clicking “Text” and then pasting in the code. You’ve now got an Office document right on your blog! Once your blog post or website is live, you should see the document appear in a widget in a similar matter to a print preview. We’ve got a sample above, for your viewing pleasure. You’ll have controls to bring the document full-screen, change the zoom level, or additional options to download, save as PDF, and more.

Embedding Office documents like this is not only a time-saver, but it is quite convenient. Your readers won’t need to click a separate link to see the file on OneDrive, or won’t have to have Office installed on their computers. The Office 365 document will be right there, in full-context and without the need to download, right on your website. Do you think this will be useful for you? Let us know in the comments below.

How to identify counterfeit Microsoft software

Using genuine Microsoft software helps you avoid scams, malware and unexpected license deactivation. Unfortunately, there remains a strong “grey market” for Microsoft product keys and installation media. If you’ve got concerns about the authenticity of a “genuine” product, there are some simple steps you can take to determine whether it’s safe to use.

Digital keys

Nowadays, Windows is normally distributed as a digital download. You should always download Windows 10 from Microsoft’s official website. This ensures you don’t unwittingly obtain a modified version which could contain malware or install extra third-party software.

Unless you’re installing Windows 10 on an existing PC, you’ll still need to purchase a genuine product key to activate your installation. The safest place to purchase Windows digitally is Microsoft’s own store.

Product Key dialog

Alternatively, you should opt for a reputable retailer that you know and trust. Even here, you may need to exercise caution – in recent years, Amazon, for example, has had its marketplace infiltrated by grey market sellers offering illegitimate keys at heavily reduced cost.

When purchasing a standalone product key, always ascertain the identity of the seller and consider whether the cost seems price seems too good to be true. Windows 10 Home has a retail price of $139. Keys listed for $10 on the internet stand a high chance of being fake or fraudently obtained. While many may initially work as normal, non-genuine keys can be revoked by Microsoft which would put your software into a deactivated state.

Physical media

It is still possible to purchase Windows 10 in a physical retail package, depending on your region. Microsoft now provides Windows 10 on a USB drive, replacing the DVDs used for prior versions of the operating system.

A genuine Windows 10 installation USB will contain an embedded hologram which can help you verify its authenticity. As you tilt the USB, you should see “vibrant color and 3D effects” appear within the blue-moulded tip of the drive.

Importantly, the hologram should be embedded within the plastic. A label stuck on top is a key indicator that the drive is a counterfeit. Other Microsoft software distributed via USB, such as Office 2016, will bear a similar embedded hologram.

When purchasing older software on CD or DVD, you should tilt the disc and look for holographic effects within its inner hub. As with newer USBs, the hologram must be embedded within the disc. Holographic labels affixed to the disc are used by scammers to attempt to hide their fraud.

Some Microsoft DVDs contain additional security measures. Once again, these are embedded within the physical disk and are not attached as labels. There may be a holographic band around the disc hub, matched by a thinner one along the outer rim of the disk.

The inner band should contain an arrow symbol pointing to the outside of the disk. Following the arrow, you should meet an inward-pointing arrow on the outer band. The two arrows should be in direct and unerring alignment.

Holograms aside, one of the easiest ways to identify counterfeit Microsoft media can be by looking at the outer package. Common mistakes include basic spelling errors, poor grammar and blurry images. Faint colours or generally poor print quality should also act as a warning that the contents may not be authentic.

Reporting a fraud

Should you suspect a fraud, you can get more help and advice on Microsoft’s “How to Tell” website. This includes a form you can use to report a suspect purchase.

Microsoft Counterfeit Software Report form

Microsoft requests information on the product you bought, where you bought it from and the type of media involved. You’ll also be asked whether the seller claimed that the software was genuine and what the listed purchase price was.

You can optionally supply personal information which Microsoft can use to request follow-up clarifications on particular details of your report. Microsoft’s website says it uses fraud reports to “investigate and take appropriate action” against counterfeiters.

Microsoft is adding a “Garage” for “doers, not talkers” to Dublin, Ireland facility

Microsoft will include a dedicated “Garage facility” for employees at its One Microsoft Court building in Dublin, Ireland, which is currently being renovated.

The company is continuing its motto of being for “doers, not talkers”, as the space will be used for employees to collaborate on various experiments. The facility will include two core areas, including a hub for conversations, hackathons, workshops for employees to explore and create innovations. A makerspace will additionally serve as an equipment zone for employees to explore their creative projects and learn along the way.

Microsoft Garage is home to a growing number of projects, including a sketching app for Windows 10, a vocabulary builder for Android, and others. Some of the company’s more focused apps, including Microsoft Launcher, actually started out as Garage projects.

What do you think about the new space? Feel free to leave a comment below.

November 2019 Update now running on 22.6% of Windows 10 PCs in new AdDuplex survey

The propagation of the Windows 10 November 2019 Update is continuing at a steady rate according to AdDuplex’s latest data. The company’s new survey of more than 90,000 Windows 10 PCs shows that the November 2019 Update now has a 22.6% usage share, up from 15.2% last month.

Interestingly, the pattern of the last update cycle seems to be repeating — the bulk of the growth comes from people upgrading from an OS that was one release behind (October 2018 Update) and not the last release,” AdDuplex explained.

Last month, Microsoft announced that the November 2019 Update was now available for all Windows 10 users who manually check for updates. The company has also started to automatically upgrade users still on the October 2018 Update to the latest Windows release, as the October 2018 Update will reach end of support in May 2020 for Home and Pro users.

The November 2019 Update will likely become the most popular version of Windows 10 by the time Microsoft releases its successor later this spring. Windows 10 version 2004 (20H1) will likely be released in April or May, but you can already install it by joining the Windows Insider Slow Ring.

Mega Man Zero/ZX Legacy Collection is now live on Microsoft’s Xbox One consoles

The latest Mega Man Legacy Collection release, Mega Man Zero/ZX Legacy Collection, is now available to play on Microsoft’s family of Xbox One consoles.

This new collection features six classic Mega Man video games from Mega Man Zero 1 through to Mega Man ZX Advent in their original presentation but fully playable on Xbox One with Xbox Achievements, a new save feature, and bonus features for long-time fans of the Mega Man franchise.

Here’s the official game description and trailer:

Mega Man Zero/ZX Legacy Collection brings together six classic titles in one game: Mega Man Zero 1, 2, 3, and 4, as well as Mega Man ZX and ZX Advent.

In addition to the original games, this package includes an artwork gallery, music player, special filters, and much more. Casual Scenario Mode and a Save-Assist feature are available for those who would like to enjoy the story at their own pace. Players can also try their hand at the new leaderboard-based Z Chaser Mode, an exclusive new mode created just for this set of games.

Capcom has been re-releasing all of the classic Mega Man games on modern consoles such as the Xbox One since 2015 with the release of the Mega Man Legacy Collection 1. That bundle was followed up with the second Legacy Collection in 2017 and then the Mega Man X Legacy Collection later that same year.

Are you a Mega Man fan and have you been buying these re-releases? Let us know in the comments below and then follow us on Pinterest and Twitter for more Xbox gaming news.

Xbox Smart Delivery feature explained: what does it mean for Xbox Series X?

The transition to the next generation of consoles should be quite different from what we experienced in the past, with both Sony and Microsoft committed to support backward compatibility on their next-gen consoles. Because the PlayStation 5 and Xbox Series X will both use the same x86 architecture as the PS4 and Xbox One consoles, supporting backwards compatibility should now be much easier than before.

In a blog post on Xbox Wire this morning, Xbox head Phil Spencer shared more details about Microsoft’s plans for Xbox Series X backwards compatibility, as well as cross-gen experiences for games that will ship on both Xbox One and Xbox Series X. First of all, Spencer reiterated today that Xbox Series X will support four generations of games.

Our commitment to compatibility means existing Xbox One games, including backward-compatible Xbox 360 and original Xbox games, look and play better than ever before. Your favorite games, including titles in Xbox Game Pass, benefit from steadier framerates, faster load times and improved resolution and visual fidelity – all with no developer work required. Your Xbox One gaming accessories also come forward with you.

We already know that Xbox Series X should be able to run all existing Xbox One games, with better framerates and other minor improvements. This shouldn’t be much different from existing Xbox One backwards compatibility, with Xbox 360 and OG Xbox games running better on Xbox One consoles, with some titles even supporting 4K graphics on Xbox One X. As you can see in the video below, the Xbox 360 version of Halo 3 enhanced for the Xbox One X looks quite beautiful in 4K, but it’s still not as good as the Xbox One remaster included in Halo: MCC, which runs at at 60 FPS with better detailed 4K graphics.

Following the release of the Xbox One X in 2017, we’ve also seen game devs release Xbox One X enhanced versions of their existing and new Xbox One games. With a new console generation incoming, it’s still not exactly clear if we’re gonna see game devs enhance their existing games for the new consoles free of charges, or if we’re going to see another wave of paid remasters.  Things should also get more complex for new cross-gen games that will ship on both 8th gen and 9th gen consoles, but that’s exactly where Microsoft’s new Smart Delivery technology for Xbox Series X comes into play. Spencer explained:

This technology empowers you to buy a game once and know that – whether you are playing it on Xbox One or Xbox Series X – you are getting the right version of that game on whatever Xbox you’re playing on. We’re making the commitment to use Smart Delivery on all our exclusive Xbox Game Studios titles, including Halo Infinite, ensuring you only have to purchase a title once in order to play the best available version for whichever Xbox console they choose to play on. This technology is available for all developers and publishers, and they can choose to use it for titles that will be release on Xbox One first and come to the Xbox Series X later.

With Smart Delivery, Microsoft will allow game developers to release Xbox Series X upgrades for their games that will be free of charge for consumers. So, if you buy Halo Infinite on your Xbox One later this year and decide to upgrade to Xbox Series X later on, you’ll be able to play the Xbox Series X version for free.

It’s important to note that Xbox Series X upgrades for Xbox One games should be much different than playing the the Xbox One version on Xbox Series X. With Xbox Series X upgrades, game developers will be able to leverage new features like Variable Rate Shading, higher framerates, hardware-accelerated ray tracing, Quick Resume, and more. In other words, we should go from minor improvements through backwards compatibility to a true next-gen experience.

Today, Cyberpunk 2077 developer CD Projekt Red announced that the much-anticipated game that will ship on current-gen consoles later this year will get a free Xbox Series X upgrade at some point. This is very good news for console gamers, especially since 8th gen consoles are really starting to show their age in 2020.

4K was probably the wrong target for this console generation, as there are still way too many games that are still capped at 30 FPS: late gen high-profile games such as Assassin’s Creed Odyssey, Red Dead Redemption 2, Metro: Exodus, Control, or even Microsoft games like Sea of Thieves or Crackdown (not the most photorealistic games out there) are all locked to 30FPS, and it would be really surprising if Cyberpunk 2077 didn’t come with a 30FPS cap either. Some games do offer a much more comfortable 1080p/60FPS option on Xbox One, but this is the exception rather than the rule. Truth be told, it’s just much better to play these games on PCs with unlocked frame rates.

Fortunately, the just-announced Xbox Series X upgrade should unlock faster framerates for games running on Xbox Series X, also allowing them to leverage all the aforementioned features such as VRS, ray tracing, and more. Again, this should be much different than playing Xbox One games on Xbox Series X.

Microsoft made it pretty clear today that it will be up to developers to support Smart Delivery for the digital versions of their games. If they do, this could be the end of console generations as we know it, with consumers no longer needing to repurchase their old games for newer consoles. However, we really doubt that lucrative remasters are going away.

Microsoft is willing to promote a forward-thinking approach with its upcoming first-party games, starting with Halo: Infinite later this year. The launch title for Xbox Series X will also ship on Xbox One, but Xbox fans will only need to buy it once or play it for free on Day 1 with Xbox Game Pass. Overall, Microsoft’s message today is that gamers should be confident to purchase digital games on the Xbox Store as these games will all run better on Xbox Series X, either via “simple” backward compatibility or via a much more significant Xbox Series X upgrade that will be free of charge. Compared to Microsoft’s confused messaging ahead of the Xbox One launch seven years ago, this is definitely a welcome change.

FIX: We can’t find the printer you’re trying to install

After updating the Windows OS, you may encounter some compatibility issues with connected devices such as printers and scanners. Recently, many Windows 10 users have reported error 1801 when printing.

Here’s how one user described the error on the Microsoft community forum:

My computer updated the windows and my printer is not connected now. When I go to add device it sees the printer, but I get this error message: “We can’t find the printer you’re trying to install. Check to see if the printer was renamed and try to install again or contact your network administrator for help”

If you are also troubled by this issue, here are a couple of troubleshooting tips to help you resolve it in Windows 10.

How can I fix printer error 1801 in Windows 10?

1. Disable firewall and antivirus

can't find printer error 1801
  1. Click on Start and select Settings.
  2. Go to Updates and Security.
  3. Click on the Windows Security tab from the left pane.
  4. Open Firewall and Network Protection.
  5. In the new window, click on your currently active network. You should see (active) text beside the network.
  6. Scroll down to the Windows Defender Firewall section.
  7. Toggle the switch to turn off Windows Defender Firewall.

If you’re having trouble opening the Setting app, take a look at this article to solve the issue.

Disable antivirus

  1. If you have a third-party antivirus installed, try to disable it temporarily.
  2. Right-click on the Antivirus icon in the system tray and select Disable/Turn off protection.
  3. If no such option preset, simply open the antivirus and disable the protection temporarily.

Disabling the antivirus and firewall can help you resolve the issue if the error is occurring while adding the printer to your network. Make sure to enable the firewall and antivirus once the issue is resolved.

2. Add the printer as administrator

Printer network error
  1. Press Windows Key + R to open Run.
  2. Type control and click OK to open the Control Panel.
  3. Right-click on Add Printer.
  4. Select Run as Administrator.

Running the add printer wizard with administrator rights can help you resolve the issue. However, do note that this is only applicable to an older version of Windows and the option is not available on Windows 10.

You can’t open Control Panel? Take a look at this step-by-step guide to find a solution.

3. Clean the registry entries

can't find printer error 1801
  1. Press Windows Key + R to open Run.
  2. Type regedit and click OK to open the Registry Editor.
  3. In the Registry Editor, click File > Export.
  4. Enter a name for the file and save it in a safe location. This will save a copy of your registry files as a backup.
  5. In the Registry Editor, navigate to the following location:
    HKLMSystemCurrentControlSetControlPrintEnvironments<PLATFORM>Drivers
  6. Now look for a key that matches your printer description.
  7. Right-click on the key and select Delete.
  8. Close the registry editor.
  9. Now try to add the printer and check for any improvements.

Can’t access the Registry Editor? Things aren’t as scary as they seem. Check out this guide and solve the issue quickly.

4. Update printer drivers

can't find printer error 1801
  1. Click Start and type Device.
  2. Click on Device Manager.
  3. Expand the Printer queues section.
  4. Right-click on your printer and select Update driver.
  5. Select Search automatically for updated driver software.
  6. Windows will scan and download any pending driver update.
  7. Once installed, reboot the computer and check for any improvements.

Windows can’t automatically find and download new drivers? Don’t worry, we’ve got the right solution for you.

If the issue persists, visit the printer manufacturer’s website and download the latest driver available for your printer. Install the driver and see if that helps.

You may also want to check for Windows updates. Microsoft tends to release updates to fix any issues caused by the update.

The printer error 1801 is a common occurrence after a Windows update. Follow the steps in this article to fix printer errors. Do let us know which method helped you resolve the error in the comments.

Also, don’t forget to leave there any other questions or suggestions that you may have.

How to turn on Dark Mode in OneNote on Mac, Windows, iOS, and Android

If you’re looking for an immersive space when taking notes in OneNote, you might want to turn on Dark Mode. This feature is available on the Mac, Windows, and iOS versions of the app, and will change the appearance of certain user interface elements so it will be easier on the eyes. The mode doesn’t actually change the properties of your pages and just changes the way things appear to look. That includes text colors, table cells, ink strokes, and text highlights.

If you’re already using a Dark Mode in your respected operating system, it should be turned on by default in OneNote. But, if not, in this guide, we’ll show you how you can turn on Dark Mode in OneNote across all the major platforms.

Windows 10

To turn on Dark Mode in the OneNote app in Windows 10, you’ll have to visit a few menus from within the app. You’ll want to head to the upper right corner of the OneNote app window, click Settings and More and then click Settings followed by Options. Once you do that, you’ll want to choose Color under the Options pane. You can select Light to keep the default mode, or you can choose Dark to enable Dark Mode. If you want, you also can choose Use my Windows Mode if you want OneNote to go with your existing color preference setting from Windows 10.

MacOS

With OneNote on MacOS, the story is a bit different. OneNote takes its appearance based on your system preferences in MacOS. If you want to use Dark Mode with OneNote, your Mac must be running with MacOS 10.14 or later. This means you don’t actually need to change any settings in OneNote. Instead, you’ll have to configure settings in your Mac. Here’s how.

To get started, you’ll want to click System Preferences in the Apple Menu. You’ll then want to click General and under Appearances, you’ll want to choose Dark. Now, the next time you boot up OneNote, it will be running in Dark Mode. Also, keep in mind that if your Mac is running macOS version 10.15 or later, you can also configure your Mac to automatically use Light Mode during the day, and Dark Mode at night. To do this, in the System Preferences dialog box, click General followed by Appearance and then Auto.

iOS and iPadOS

On iPad and iPhones, OneNote will also take its Dark Mode based on your system preferences. If you’re up and running with iOS 13 and iPadOS 13, the steps are the same on both iOS and iPadOS and you’ll want to make sure that you have the system-wide dark mode turned on. Here’s how.

First, head to the Settings app. You’ll then want to click Display and Brightness. Once you do that, under Appearance, you’ll want to select Dark to turn on Dark Mode. The next time you open up OneNote, it will show up in Dark Mode. Keep in mind, that when while OneNote is in Dark Mode, you can choose to switch the background of the page canvas from dark to light. To do this on iPadOS, tap on the View tab and then tap tap Switch Background. On iOS, tap the . . . button, and then tap Switch Background.

Android

Finally, there is Android. Turning on Dark Mode on OneNote for Android is a bit like MacOS and iOS. Unfortunately, there is no dedicated switch, and your device will have to have a Dark Mode feature for it to work. This means that you’ll have to be running Android Pie or higher, which is not compatible with all Android phones. Turning on Dark Mode in Android will vary based on your device maker, but here’s how we did it on our Pixel 3XL running stock Android 10.

Head to the Settings app, and then click Display. Once there, look for the Dark theme option, and switch the toggle switch to on. You can then open OneNote, and see that the app has switched into a Dark Mode. The list of notebooks’ search results and the bar along the bottom of the screen will change to the black color.

Dark Mode all the things

OneNote isn’t the only Microsoft app to support Dark Mode. We’ve previously explained how you can enable Dark Mode in Edge, OneDrive, and even in Office 365. Are you a fan of Dark Mode? Let us know in the comments below.

12 teraflops confirmed: Xbox head Phil Spencer shares more hardware details about Xbox Series X

As the video games industry is currently gearing up for the Game Developer Conference in San Francisco next month (depending on flu virus concerns, that is), Xbox head Phil Spencer has just given us an update about the next-gen Xbox. As you may now, Spencer unveiled the Xbox Series X back at The Game Awards Ceremony in December, but at the time the exec chose not to go into details about the console’s specs.

Well, in a new post on Xbox Wire, Spencer pretty much confirmed the previous leaks about the Xbox Series X specs, and shared some interesting new details about the new console. “Compared to the previous generation, Xbox Series X represents a superior balance of power and speed in console design, advancing on all technological fronts to delivering amazing, dynamic, living worlds and minimize any aspects that can take you out of the experience,” explained Spencer.

Here’s what you can expect in the Xbox Series X:

  • The console will deliver 12 teraflops of computing power (twice the power of the Xbox One X), thanks to AMD’s latest Zen 2 and RDNA 2 architectures.
  • Xbox Series X will also support hardware-accelerated Raytracing, which will provide more photorealistic graphics in games.
  • Microsoft has also developed a patented Variable Rate Shading (VRS) technology that will allow game devs to prioritize GPU usage for some game elements like characters or environmental objects.
  • A next-gen SSD will also dramatically cut loading times, and a new Quick Resume feature will also let you pause multiple games in the background and then pick up where you left off almost instantly.
  • Just like the Xbox One X, Xbox Series X will support Auto Low Latency Mode on TV that supports it, as well as Variable Refresh Rate on monitors that support AMD’s Freesync technology.
  • Variable Refresh Rate is also coming soon to TVs with the new HDMI 2.1 norm that the Xbox One X already supports.
  • Spencer also detailed for the first time a new “Dynamic Latency Input” (DLI) feature which will improve Microsoft’s proprietary Xbox Wireless protocol by synchronizing input immediately with what is displayed.

It’s worth noting that Spencer didn’t mention 8K today, though 8K support was mentioned for Xbox Series X last year. However, the Xbox head confirmed that Xbox Series X will support all four generations of games (via Backward Compatibility), and make games from previous generations play better than before with better framerates, graphics, and faster loading times.

Spencer also mentioned for the first time a new “Smart Delivery” technology which seems to be an evolution of Xbox Play Anywhere. With Smart Delivery, consumers will be able to play an Xbox game once and play it on either Xbox One or Xbox Series X at no additional cost.

This technology empowers you to buy a game once and know that – whether you are playing it on Xbox One or Xbox Series X – you are getting the right version of that game on whatever Xbox you’re playing on. We’re making the commitment to use Smart Delivery on all our exclusive Xbox Game Studios titles, including Halo Infinite, ensuring you only have to purchase a title once in order to play the best available version for whichever Xbox console they choose to play on. This technology is available for all developers and publishers, and they can choose to use it for titles that will be release on Xbox One first and come to the Xbox Series X later.

Microsoft is trying to end console generations with Smart Delivery, though it will be up to developers to support that vision. It’s also worth noting that Phil Spencer didn’t mention Windows 10, even though Microsoft’s latest Xbox exclusives all ship on Xbox One and Windows 10 at the same time with Xbox Play Anywhere support. Few developers actually embraced Xbox Play Anywhere during this console generation, and it remains to be seen if more of them will embrace Microsoft’s vision for cross-gen experiences with Smart Delivery.

“We can’t wait to share more details about the new Xbox with you in the coming months,” said Spencer at the end of his post. We may get more details about Xbox Series X next month at the Game Developers Conference, where Microsoft will be present, but the company may prefer to keep its remaining secrets under wraps for a couple more months.

Microsoft partners with SBI Foundation in India for skilling youth with disabilities

On the sidelines of the Future Decoded summit, Microsoft India announced a collaboration with SBI Foundation to create opportunities for youth living with disabilities in the Banking, Financial Services and Insurance (BFSI) sector.

Launched in 2015, SBI Foundation is the CSR arm of State Bank of India, India’s leading public sector bank.

Through this collaboration, Microsoft and the SBI Foundation will equip youth living with disabilities with the technology and training needed to better prepare them for integration into the BFSI workforce.

The program will be driven in collaboration with various government organizations, industry skilling bodies, and non-profits and aims to upskill 500 youth for BFSI jobs in its first year.

The three-year program was launched by Jean-Philippe Courtois, Executive Vice President and President, Global Sales, Marketing and Operations, Microsoft and Rajnish Kumar, Chairman, SBI at the event.

At the event, Courtois said that with over 26 million people living with disabilities in India, it’s essential that we find new ways to use technology to enable everyone to fully participate in the 21st-century economy.

The goal is also to advance cross-industry advocacy efforts to drive inclusion for and hiring of people living with disabilities. As part of this partnership, Microsoft and the SBI Foundation will also develop an Artificial Intelligence (AI) powered marketplace that will enable the BFSI industry to more easily connect to people living with disabilities for upskilling and employment opportunities.

Fix printer system error 1797 with these solutions

When installing a printer driver or after rebooting your computer, you may encounter the printer error 1797. The full error reads System Error: 1797 The printer driver is unknown. Several users have reported similar errors in the Microsoft community forums:

I get a 1797 The printer driver is unknown error when I start/logon the computer. I have a networked printer Dell 3330 dn and windows 7 64 laptop, Please help

This problem can occur due to driver issues and can be resolved easily. In this article, we have listed all the possible fixes that will help you get past the issue.

How can I fix System error: 1797 The printer driver is unknown?

1. Run the printer troubleshooter

Fix printer system error 1797
  1. Click on Start and select Settings.
  2. Click on Update and Security.
  3. From the left pane, click on the Troubleshoot tab.
  4. Scroll down to Get up and running section.
  5. Click on Printer.
  6. Click on the Run the troubleshooter button.
  7. The troubleshooter will scan the device and detect the problems.
  8. Follow on-screen instructions and apply the recommended fixes.
  9. Try installing the driver (if required) and check for any improvements.

You’re having trouble opening the Setting app? Take a look at this article to solve the issue.

2.  Add the printer driver

Fix printer system error 1797
  1. Click on Start and select Settings.
  2. Go to the Printers and scanner tab.
  3. Click on Add a printer.
  4. Click on The printer that I want isn’t listed option.Fix printer system error 1797
  5. In the Find a printer by other options window, select Add a local printer or network printer with manual settings option.
  6. Click Next.
    Fix printer system error 1797
  7. Select Use an existing port:.
  8. Click the drop-down menu and select File.
  9. Click Next.
    Fix printer system error 1797
  10. Select Windows Update.
  11. Under Generic, you will see a number of PS printer listed.
  12. You may have to spend a little time finding the right match.

3. Update printer driver

Fix printer system error 1797
  1. Press Windows Key + R to open Run.
  2. Type devmgmt.msc and click OK to open the Device Manager.
  3. In the Device Manager, expand the Print queues section.
  4. Right-click on your printer with the error and select Update driver.
  5. In the next window, select Search for updated driver software automatically.
  6. Windows will look for any pending update for the driver, then download and install the driver.
  7. Once installed, restart the computer.
  8. Check if the System Error: 1797 The printer driver is unknown is resolved.

As an alternative, you have the option to update any drivers more efficiently using the service of a dedicated driver tool, plus optimizing your PC operating system at best.

⇒ Get Fortect Driver Updater

4. Restart services

Fix printer system error 1797
  1. Press Windows Key + R to open Run.
  2. Type services.msc and click OK to open Services.
  3. Locate the following services:
    RPC
    SSDP
    UPnP
  4. Right-click on RPC service and select Stop.
  5. Right-click again RPC service again and select Start.
  6. Repeat the steps for all the services.
  7. Next, look for HTTP service.
  8. If you have it, open the command prompt.
  9. Click Start, type cmd, right-click on Command Prompt and select Run as administrator.
  10. In the command prompt, type the following command and hit enter.
    net start http
  11. Close the command prompt and check for any improvements.

If you’re having trouble accessing Command Prompt as an admin, then you better take a closer look at this guide.

5. Disable Windows Firewall

Fix printer system error 1797
  1. Click Start and select Settings.
  2. Click on Updates and Security.
  3. Select Windows Security.
  4. Click on Firewall and Network Protection.
  5. Click on your currently active network.

  6. Toggle the switch to turn off the Windows Firewall.
  7. Now try to install the printer driver and check for any improvements.

Turn off antivirus

  1. Click the show hidden icons button (small arrow button) in the taskbar.
  2. Right-click on your Firewall icon and select Disable temporarily.
  3. Try installing the printer driver again and check for any improvements.

6. Run system file checker

Fix printer system error 1797
  1. Click Start, type cmd.
  2. Right-click on Command Prompt and select Run as Administrator.
  3. In the Command Prompt, type the following command and hit enter:
     sfc /scannow
  4. Restart the computer once the scanning is completed.

The System Error: 1797 The printer driver is unknown can occur due to corrupted drivers and other issues. Follow all the steps in this article one by one and let us know which fix helped you resolve the error in the comments section below.

Also, don’t forget to leave there any other questions and suggestions that you may have.

Fan-made concept gives Windows 10 a beautiful new look inspired by Fluent Design and Windows 10X

Microsoft recently gave the Windows 10 icons a new look, but one Windows 10 fan is taking it to the next level. In a new concept, Twitter user @vastglad recently showcased their own vision for Windows 10 with a new look inspired by Fluent Design and Windows 10X. The concept reimagines the Start Menu, app loading screens, and much more (via Tom Warren).

Seen above, the most interesting area of the concept gives the Windows 10 Start Menu an amazing new look. In @vastglad’s vision, we can see a more rounded Start Menu, with various sections for search, tasks, pins, and recent files. A bit similar to Windows 10X, there also appears to be a hub on the top of the Start Menu with the weather and a greeting for the user and a link to the settings. Overall, the Start Menu also has more touches of Fluent Design’s Acrylic effects, which really bring out the new-style Windows 10 icons Microsoft recently revealed.

Other areas of this concept highlight new splash screens for apps. Oddly enough, we see one for the Windows 10 Weather app. In this splash screen, the new icon for the Weather app appears on top of an acrylic window that features the Microsoft logo. Even the Weather app itself looks a bit different, in this concept, as it has a lighter look and touch, blending nicely with the rest of Windows 10. You’ll also likely notice the taskbar looks a bit different, with no search box or task view button. There are also more traditional icons for the network status, inking, sound, and the touch keyboard.

Concepts like these are not new and are quite fun. We’ve seen concepts for a new Windows 10 Task Manager, the battery meter, and even Windows 10 20H1. It obviously might not ever come to life, but they’re really cool to look at. What are your thoughts? Let us know in the comments below.

PowerShell Can’t Scroll up? 3 Ways to Fix it

One thing many complain about PowerShell is that it often can’t scroll up, or the scrolling is not working altogether. PowerShell might be incredibly versatile, but encountering difficulties with basic functions like scrolling makes some second-guess its very purpose.

This can be an issue that takes some serious time to get past for some PowerShell users. That’s why we’ve created this guide that will give detailed information on the matter!

What can I do when PowerShell can’t scroll up?

1. Increase the Screen Buffer Height

  • While in a PowerShell session, right-click the upper left corner, and select Properties.
  • Go to the Layout tab, and change the Height of the Screen Buffer Size.increase screen buffer size
  • Confirm the change by clicking OK.

First, you need to increase the the Powershell Screen Buffer Size. Just set it to something over 1000. The choice is all yours! Then, experiment with a value that works for you.

Remember, the value you set controls how far you can scroll vertically after a command has finished running. Finally, let us add something that might just sound like music to your ears. The larger the number, the further the scrolling can get before data is overwritten.

The maximum you can scroll on a PowerShell window, though, is no more than 9999 lines.

2. Use the More command

As you might already know, this legacy command-line tool pages the output one screen at a time. It was originally intended as a way to page through large text files, so all you need to do is run your command and pipe it to more:PS Scripts:> get-process | moreg

A break is found at the end of each page:
…
398 19 4796 11920 107 1.59 1628 OpenDNSUpdater
143 8 3196 10980 46 2.93 4896 OSPPSVC
767 73 176020 197744 820 29.23 4192 powershell
-- More --

Next, choose one of the following options:

  • Enter – it will advance one line of data at a time.
  • S – this will skip the next X number of lines.
  • Space bar – it will advance to the next page.
  • P – you will be prompted for the next X number of lines to advance.
  • F – it will display the next file or page of data.
  • Q – Quit.

If PowerShell can’t scroll up, this could be the way to go!

3. Make sure all actions are logged into the log file

If you want to enjoy extra space in a session, we have a quick tip for you. Open a new session, then run this command:Start-Transcript -Path "[YourPath]PowershellSession.log"

enter session

This will ensure all the actions you perform and see in the window are logged into the log file.

That’s all! If you earlier found that PowerShell can’t scroll up further, things should be running fine now.

If you enjoyed this tutorial, you’ll also like to read more about other fixes for some of the most common PowerShell errors.

How to Edit Windows Live Mail’s Signature in Just a Few Steps

Windows Live Mail and Outlook Express by default support email signatures. Adding an email signature allows you to embed a snippet of information with all the emails sent from your email account.

Now, what if you want to edit a Windows Live Mail signature? It’s actually pretty easy. You can edit the existing Windows Live Mail signature from the Options.

In this article, we show you how to edit and add Windows Live Mail signatures.

How can I edit the Windows Live Mail’s signature?

1. Edit the Windows Live Mail signature

  1. Open Windows Live Mail app.
  2. Click on File and select Options, then Mail.
  3. If you don’t see the File option, click on Tools and select Options.
  4. Open the Signatures tab.
  5. Here you can see all the previously created email signatures.
  6. Click on the signature you want to edit.
    • You can edit plain text signatures directly from the Live Mail editor.
    • If not, note the path and file name in the box.
  7. Open File Explorer and navigate to the path you noted earlier.
  8. Open the file in Notepad and make the changes.
  9. Save the file and exit.

2. Add a signature to Windows Live Mail

  1. Start Windows Live Mail.
  2. Click on File and select Options, then Mail.
    • On older versions, click Tools and choose Options instead.
  3. Open the Signatures tab.
  4. Select New from the Signatures section.
  5. Under the Edit Signature section, create your email signature.
  6. Click OK to save the signature.
  7. Open the Signature tab again and make sure the option Add signatures to all outgoing messages is checked.

3. Add a signature to an email

After composing an email message, you can select which signature you want to use:

  1. In the Compose window, go to Insert and click on Signature.
  2. Press and hold the Alt key if you can’t see the menu bar.
  3. Choose the signature you want to use and send the email.

While creating email signatures, make sure it is short and precise. Try to limit the email signature to a maximum of 3-4 lines to keep it professional.

If you don’t want to add a signature to replies and forwards, then follow these steps:

  1. Go to File.
  2. Select Options.
  3. Go to the Signature tab.
  4. Uncheck Don’t add signatures to Replies and Forwards option.

By following the steps in this article, you can add and edit email signatures in Windows Live Mail.

Do you prefer plain text or HTML enriched signatures? Leave your answer along with any other questions and suggestions in the comments section below.

Windows 10 news recap: new colourful icons for Microsoft’s apps, cracked Surface Laptop 3 screens being investigated, and more

Welcome back to our Windows 10 news recap, where we go over the top stories of the past week in the world of Microsoft’s flagship operating system.

Microsoft apparently removing ‘Offline Accounts’ settings for international Windows 10 users

It looks as though Microsoft may be continuing with its push to force Microsoft Accounts on Windows 10 users, as it furthers its removal of Offline Accounts, moving to international Windows 10 users.

Screenshot of Windows 10 setup

New colorful icons for Microsoft’s Windows 10 apps start rolling out to Windows Insiders

Microsoft’s own apps on Windows 10 are receiving a colour-filled refresh, currently rolling out to Windows Insiders.

Microsoft is now investigating cases of cracked Surface Laptop 3 screens

Following reports of Surface Laptop 3 screens spontaneously cracking, Microsoft has now said that it is investigating the reports, but it has not admitted that there is a fault in the production at this time.

That’s it for this week. We will be back next week with more Windows 10 news!

Windows 10 Preview Build 19569 fixes OneDrive issues

Windows Insiders play a critical role in ensuring that Microsoft releases high-quality software that caters to the requirements of all users. But their utility to the program suffers when a preview build causes some of their machines or system services to act up.

Microsoft’s latest Windows 10 Insider Preview Build addresses a couple of such issues.

Build 19569 solves OneDrive malfunction

OneDrive should not be a CPU-intensive application. After all, it is a hard drive on the internet that does not rely a lot on your machine’s processing power.

Nonetheless, a Windows upgrade error may cause the cloud storage service to demand more computing power than necessary. Some insiders discovered that after installing the previous build, but Microsoft has already addressed the problem.

We fixed an issue resulting in OneDrive not working and using an unexpectedly high amount of CPU for some Insiders on the previous build.

Incompatibility with third-party virtual machines (VMs)

It is not unusual for a Windows 10 update to fail because it is incompatible with an existing driver. That was the case when some insiders upgraded their OS only for SCSI drivers to malfunction.

As a result, some third-party VMs failed to work. The latest preview build has fixed that problem.

Still, it appears that Microsoft has not quite got on top of the driver incompatibility situation that its preview builds are causing. As such, other devices besides VMs may still be affected. The company is looking into the problem, though.

The green screen of death (GSOD)

Most PC users do not associate the GSOD issue with Windows. But some recent Windows 10 builds have been causing this error, which prevents their PCs from booting.

Driver or device incompatibility may cause the GSOD error. If you ever encounter the Windows 10 malfunction, here is a guide to  some practical solutions.

Start menu flaw

Microsoft has also fixed a Start menu problem that affected some insiders after upgrading their OS.

New Windows 10 icons

New colorful app icons are probably the most conspicuous feature that Build 19569.1000 introduced to Windows 10. Insiders in the First ring can test the new icon designs, which Microsoft will be rolling out over time.

If sampling prerelease Windows 10 features sounds exciting to you, check out the Windows Insider Program documentation to get started.


FIX: PowerShell is Not Showing the Full Output

While using PowerShell, there is very little tolerance for error. Even so, sometimes users discover that PowerShell is not showing the full output. If they don’t take quick measures, they’ll never stop it from truncating the output.

If that’s your case as well, don’t let this turn into an unexplored area that isn’t worthy of any attention. Here are some troubleshooting tips you may try instead.

What can I do when PowerShell is not showing the full output?

1. Pipe to Out-String and add the width parameter

pipe to Out-String and add the width parameter

You should first use this simple trick to rectify any column width problem. All you have to do is to go to Out-String and add the -Width parameter.

Keep in mind that the -Width parameter of Out-File cmdlet specifies the number of characters in each line of output. Any other characters will simply be truncated, not wrapped.


2. Pipe the results through the Format-List cmdlet

Format-List cmdlet

PowerShell’s default is to cut off the output to fit your screen. That’s precisely why you are currently seeing the ellipse. If you want to view complete information for an object, you should try piping the results of Get-Acl through the Format-List cmdlet.

As an example, the following command retrieves the security descriptor for the folder C:Scripts, then displays all info as a list:
Get-Acl c:scripts | Format-List


3. Change the $FormatEnumerationLimit value

$FormatEnumerationLimit

Another thing that’s really simple, once you know the answer, is how to fix the issue when the object you’re looking at is an array. In this case, PowerShell is only showing the first few entries in that array, rather than all of them.

To be more specific, you just need to change the $FormatEnumerationLimit value. If you type it on its own into PowerShell, then the current value will be returned. The default value of $FormatEnumerationLimit is 4, which can be limited when generating a large file.

Increase this value to something large enough to show more items. You may also change the value to -1 and be sure that it will output all entries in your collection from the very start.

So, the next time you feel overwhelmed when seeing that PowerShell starts to truncate the output, here’s a comprehensive troubleshooting guide that may be followed easily.

If you’re aware of another way to solve this problem, don’t hesitate to share it in the comments section below.

Enterprise adoption of Microsoft’s Azure in 2019 tripped up AWS growth last year

What was once thought of as the impenetrable giant in Amazon’s AWS market share seemed to be a bit under fire in 2019 by the continued enterprise adoption of Azure.

According to a market analysis report from Canalys, Microsoft’s Azure cloud business encroached on AWS’s market share growth in 2019.

Canalys reports that AWS went from 33.4% of the global market share in Q4 2018 down to 32.4% during the same timeframe in 2019 while Microsoft increased from 14.5% in Q4 2018 to 17.6% in 2019. Over the entirety of 2019, AWS sat at 32% while Microsoft grew from 14.2% to 16.9%.

Despite the seeming back and forth between AWS and Azure during 2019, the year turned out to be a relatively positive one for all cloud service providers, proving that there continues to be a high ceiling on revenue and profits for businesses in the near future.

“Competition among the leading cloud service providers continued to intensify. AWS still outpaced its competitors in real US dollar terms. Its business was US$2.4 billion bigger in Q4 than in the same period in 2018. Its investment in new enterprise sales and marketing resources combined with the general availability of AWS Outposts and the launch of AWS Local Zones will drive further growth.

Microsoft Azure’s growth rate was higher in the quarter, as it gained traction in enterprise accounts and benefited from its extensive channel reach. Microsoft stepped up its messaging to partners to drive Windows Server 2008 workloads to Azure as support comes to an end.

Google Cloud continued to make progress in penetrating new enterprise customers and developing its network of channel partners. It has substantially grown its internal enterprise salesforce over the last year and brought partners under its field organization for closer alignment.

Alibaba Cloud remained the leader in China as its growth re-accelerated. It aims to expand its enterprise customer base across the rest of Asia Pacific and Europe, where it is using two-tier distribution.”

The increased demand is evident by the Canalys’ summary of capital expenditures businesses reported in 2019 that include Alibaba, Amazon, Baidu, Facebook, Google, Microsoft and Tencent-collectively spending upwards of $60 billion in data center infrastructure for the year.

Interestingly enough, Canalys’ principal analyst Matthew Ball notes that despite the increasing market share of competitors in the industry, the biggest buyers in the sectors remain providers such as Amazon, Google, Microsoft, and others. With an 8% increase in spending, up from 2018, “cloud service providers will remain the largest buyers of servers and related components over the next five years.”

How to Change Windows Live Mail Settings with Ease

Windows Live Mail is a popular email client before Microsoft replaced it with the new Mail app. That said, the app is still popular among Windows users with many new users trying it as well.

If you are new to Windows Live Mail, you may want to make a few changes to the default app settings to tune it as per your preference.

In this article, we show you how to change Windows Live Mails settings to change the folder location, mail view, font color, account from POP3 to IMAP, change the mail notification sound, themes, and the display name.

How do I change Windows Live Mail settings in Windows?

1. Change Windows Live Mail folder location

  1. Launch Windows Live Mail.
  2. Press the ALT key to bring up the Menubar.
  3. Click on Options and select Tools.
  4. In the 2011 version of Live Mail, go to File > Options > Mail.
  5. Open the Advanced tab.
  6. Click on the Maintenance button.
  7. Again click on the Store Folder button.
  8. Click the Change button and select the folder where you want to save your email messages.
  9. Click OK to save the changes.
  10. Restart Windows Live Mail to apply changes.

2. Change Windows Live Mail view

Change Windows Live Mail folder location
  1. Start Windows Live Mail.
  2. Open the View tab and select Compact View.
  3. To add the folders to Compact view do the following:
    In Regular View: When you are in regular view, right-click on any folder/subfolders and select Add to compact view.
    In Compact view: When you are in the compact view, click the + icon and click on Add to compact view option. Select the item you want to access from the view tab and click OK to save the changes.

3. Change Windows Live Mail font color

  1. Launch Windows Live Mail.
  2. Click on File and select Options > Mail.
  3. In the Options window, open the Compose tab.
  4. Under the Compose section, click on the Font Settings button.
  5. On the Font window, you can select the font and font size.
    Change Windows Live Mail font color
  6. Under Color, click the drop-down menu to select the font color you want to apply to Windows Live Mail.
  7. Click Apply and OK to save the changes.

4. Change Windows Live Mail account from POP3 to IMAP

  1. Start Windows Live Mail.
  2. Right-click on your account from the left pane.
  3. Select Properties.
  4. Open the Advanced tab.
  5. Here change the STMP, IMPA or POP ports in this section. You can also specify the SSL settings.
  6. In the Properties window, open the Server tab.
  7. Enter your Outgoing server needs authentication.
  8. Also, change your IMAP and SMTP server addresses from the Server tab.
  9. Click Apply and OK to save the changes.

5. Change Windows Live Mail notifications sound

  1. Exit Windows Live Mail if running.
  2. Press Windows key + R to open Run.
  3. Type control and click OK to open Control Panel.
  4. Click on Hardware and Sound.
  5. Under the Sound section, click on the Change system sound option.
    Change Windows Live Mail notifications sound
  6. Under Program Events, select Windows and click on Desktop Mail Notification.
  7. Click the Browse button.
  8. In the Media window, scroll down and select one of the pre-downloaded sounds.
  9. Click Open.
  10. Click the Test button to hear the sound.
  11. Click Apply and OK to save the changes.

Apply sound to Windows Live Mail

Change Windows Live Mail notifications sound
  1. Open Windows Live Mail.
  2. Click File > Options > Mail.
  3. Open the General tab.
  4. Under Send / Receive Messages check Play sound when new messages arrive box.
  5. Click Apply and OK to save the changes.

6. How to change Windows Live Mail themes

  1. Windows Live Mail does not support changing themes. So any theme that you apply to your desktop will be applied to Windows Live Mail as well.
  2. To change the theme on your desktop, follow these steps.
  3. Click on Start and select Settings.
  4. Open Personalization.
  5. Click on the Themes tab in the left pane.
  6. Scroll down to the Change themes section and select one of the default themes.
  7. If you want to customize your theme, click on the Use custom themes button.
  8. Now you can modify the Background, Sounds, Color and Mouse cursor properties as per your preference.

If you’re having trouble opening the Setting app, take a look at this article to solve the issue.

7. Change Windows Live Mail display name

  1. Open Windows Live Mail.
  2. On Windows Live Mail go to Tools > Accounts.
    In Windows Live Mail 2012 go to File > Options  > Mails.
  3. In the Account window, click the Properties button.
  4. In Windows Live Mail, under User Information, enter your name in the Name field.
    In Windows Live 2012, in the Accounts window, select your Email account and click the Properties button.
  5. Under User, enter your name in the Name field.
  6. Click Apply and OK to save the changes.

Depending on whether you are using Windows Live Mail 2011/2012 or older version, some settings may vary. In this article, we have tried to cover all the basic settings that a new user would like to change on the Windows Live Mail client.

If you need help modifying other settings, leave a comment, and we will update the article with the necessary steps.

Microsoft apparently removing ‘Offline Accounts’ settings for international Windows 10 users

Once again, Microsoft is fiddling with the local accounts settings in Windows 10 and this new iteration is the company’s most flagrant attempt.

Back in late 2019, Microsoft began testing a Windows 10 startup process that would forego the tradition of offering an alternative to establishing a Microsoft Account during setup that involved users simply signing in with a Local/”Offline” account.

Instead of offering the option during the initial setup process, users would essentially be forced to create an MSA and the could retroactively disable their MSA and revert to a local account by going back into Account Settings once the OS was up and running. Another workaround to the MSA pandering is to simply boot the system up when offline or disable Wifi connectivity.

Screenshot of Windows 10 setup

There is recent evidence that Microsoft may be doubling down on this new approach and exporting the new tactic to regions outside of North America.

According to the German tech blog, Dr. Windows, Microsoft is rolling out, or at least A/B testing its Local/Offline startup omission to users in Germany.

Similar to its implementation in the US, Dr.Windows notes that users are given a reprieve on the MSA sign up after the initial boot-up of Windows, or by using the WiFi/Internet connectivity workaround.

Microsoft seems to be constantly trying to get Windows users comfortable with the idea of syncing their system settings with a Microsoft account by continuously tweaking the setup model in newer versions of its operating system, similar in fashion with Google and Chrome or Chromebooks and Apple with iOS and MacBook devices.

Push back on the idea of requiring a Microsoft ID/account to access Windows features typically has been vocal and swift with each subtle encroachment that Microsoft introduces getting roundly panned by its community.

In the lead up to Surface Neo and Duo devices that will presumably follow a similar linked ID or Account device setup, it’ll be interesting to see if Microsoft continues to push forward the requirement of an MSA to fully take advantage of the integrated hardware and software experiences.

Microsoft launches Global Social Entrepreneurship program – help and support for startups focused on social good

Microsoft is continuing its efforts to promote social good (and to promote the use of Microsoft technologies in those efforts), announcing today a new program aimed at startups focused on social projects like a smartphone-based cholera detection system, devices to skim trash from our oceans, and competitions that yield valuable artificial intelligence solutions from participating data scientists.

The new program, launching in 140 countries, will “actively seek to support underrepresented founders with diverse perspectives and backgrounds. The criteria to qualify for the program include a business metric that measures impact on an important social or environmental challenge; an established product or service that will benefit from access to enterprise customers; and a commitment to the ethical and responsible use of AI.”

Microsoft is offering social enterprises that join the program up to $120,000 in Azure credits, as well as technical support and guidance, including a dedicated program manager to help startups market and sell solutions, and to connect with potential customers. The Social Entrepreneurship program will also offer grants to participants focused on sustainability, accessibility, and skills and employability.

You can learn more about the program, and if you’re eligible, apply, at Startups.Microsoft.com/en-us/socialentrepreneurship