EASY FIX: PFN_LIST_CORRUPT BSoD in Windows 10 [9 Ways]
Rely on our tested & straightforward solutions to rectify the error
8 min. read
Updated on
Read our disclosure page to find out how can you help Windows Report sustain the editorial team. Read more
Key notes
- The PFN_LIST_CORRUPT error can occur due to memory issues, outdated drivers, and OS problems.
- Third-party software might also be to blame for getting this stop code.
- Begin by checking the health of your RAM, followed by your drivers, and then fixing your system files.
- Check all step-by-step methods to fix this BSoD below.
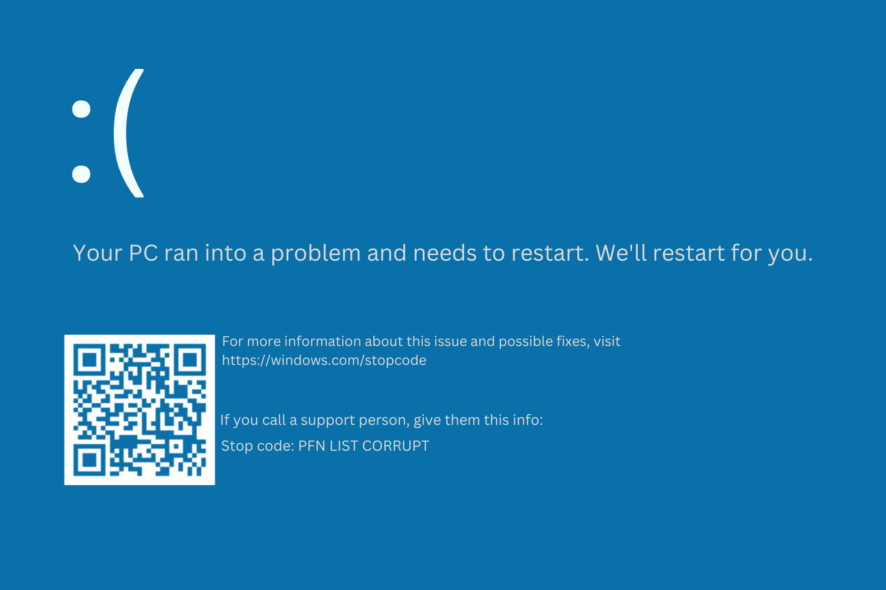
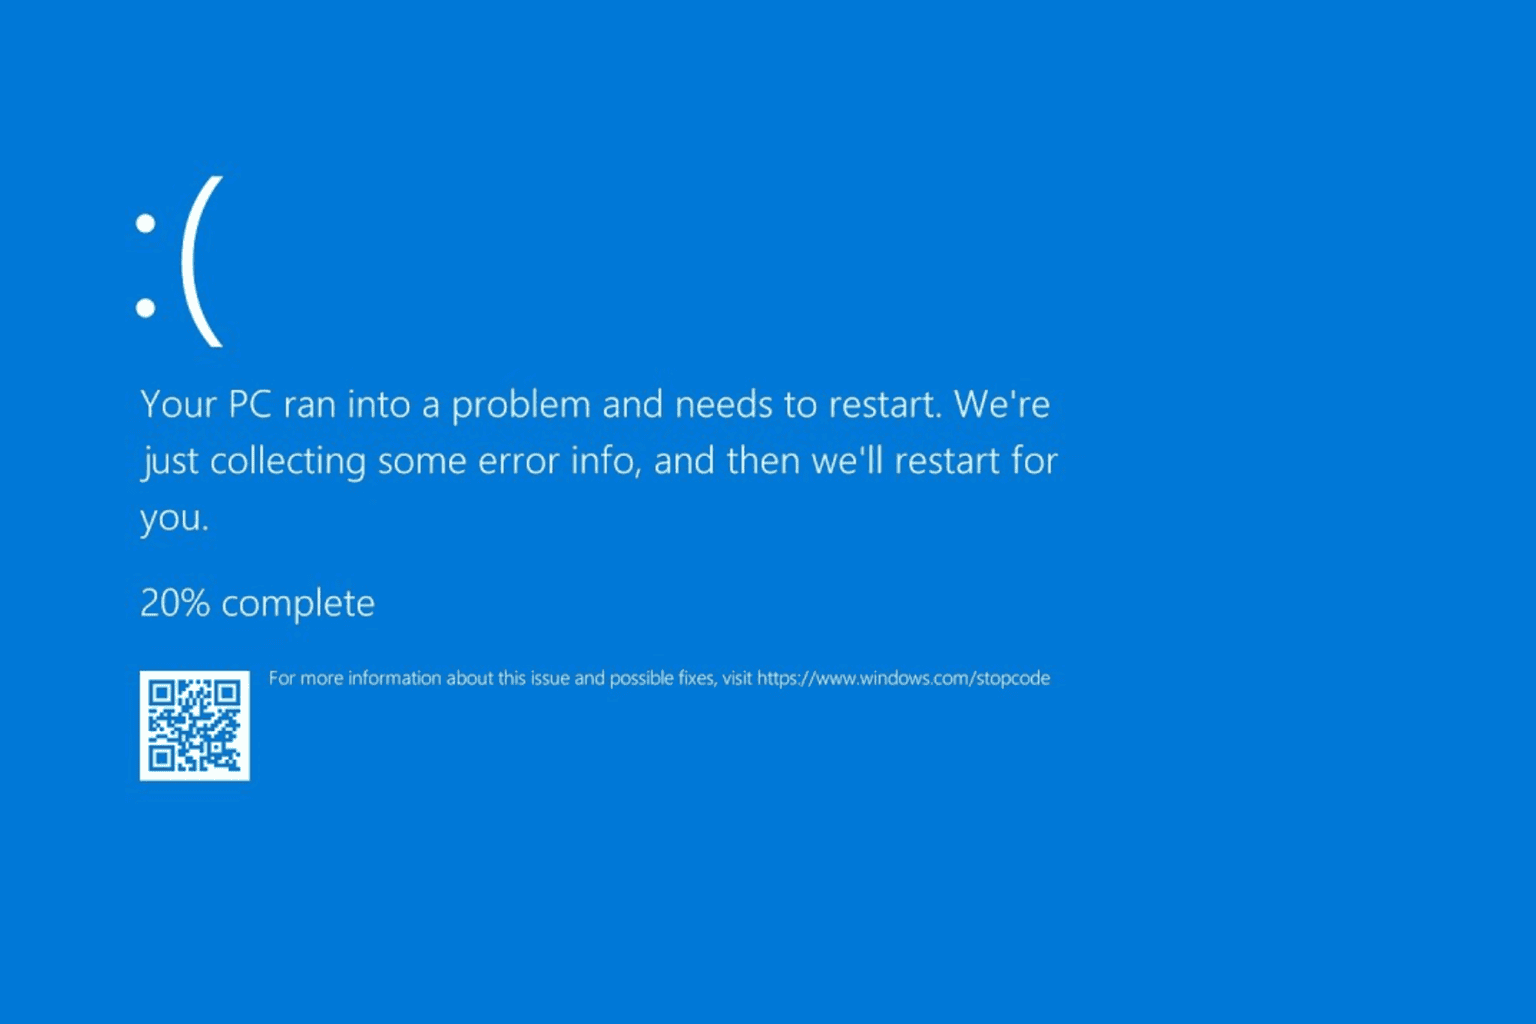
If your computer encounters a hardware failure or a major software problem, it will give you the infamous Blue Screen of Death error and restart itself.
These errors can sometimes appear on Windows 10 and are somewhat severe. Therefore, fixing them as soon as possible is crucial, either manually, or using a dedicated BSoD fixer.
What does PFN List Corrupt error mean?
The PFN List Corrupt error typically indicates a problem with the Page Frame Number (PFN) list in a computer’s memory management. This list keeps track of the pages in physical memory, and when it becomes corrupted, it can lead to system crashes or blue screen errors in Windows. Addressing this error often involves troubleshooting memory or driver-related issues.
Other instances of PFN_List_Corrupt BSoD are often encountered during games like Valorant, and it is commonly attributed to outdated drivers, so updating them is recommended. This error bears similarities to the Memory Management error, leading many to believe that faulty RAM might be the cause.
Another related problem is the Critical structure corruption BSOD experienced by gamers, but fortunately, solutions are available for these issues. Overclocking your PC can also trigger the error, so reverting to default settings is advised.
How can I fix PFN LIST CORRUPT BSoD error on Windows 10?
Before we move on to more advanced troubleshooting solutions, make sure to do the following:
- Remove your antivirus software and opt for a better antivirus that won’t negatively interfere with your OS.
- Uninstall the Philips Incenter Offline software as it is one of the most common causes of this BSoD.
1. Check your memory
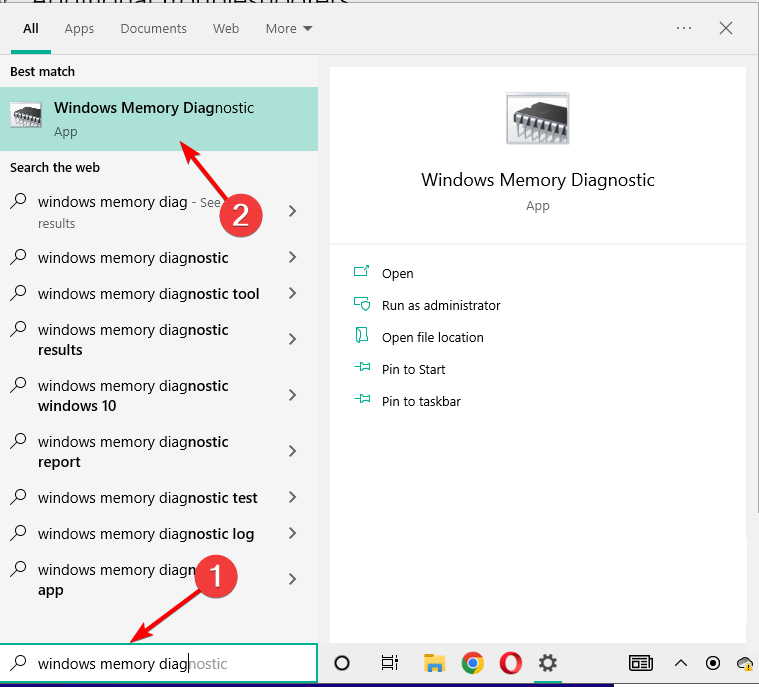
1. Press Windows then type Windows memory diagnostic and click to open the first result.
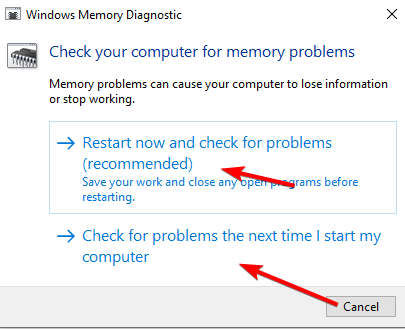
2. Choose either the Restart now and check for problems option, or Check for problems the next time I start my computer. We advise to choose the first in order to start the process right away.
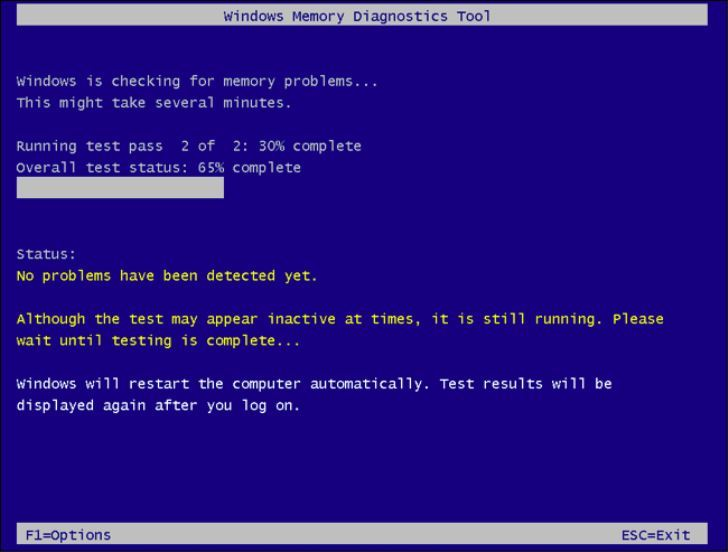
3. The Memory Diagnostics Tool will automatically start running tests on your PC’s memory. The system will also display the progress bar and the status notification during the process.
Once finished, your computer will reboot and return to the Windows desktop.
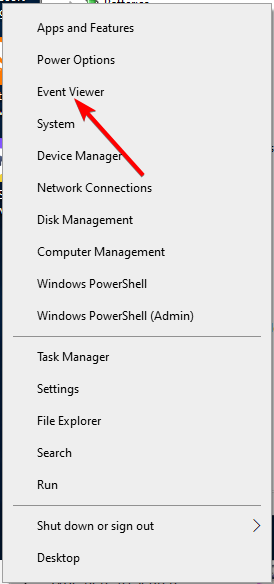
4. The system might not always display the results found, thus, right-click the Start icon and select Event Viewer.
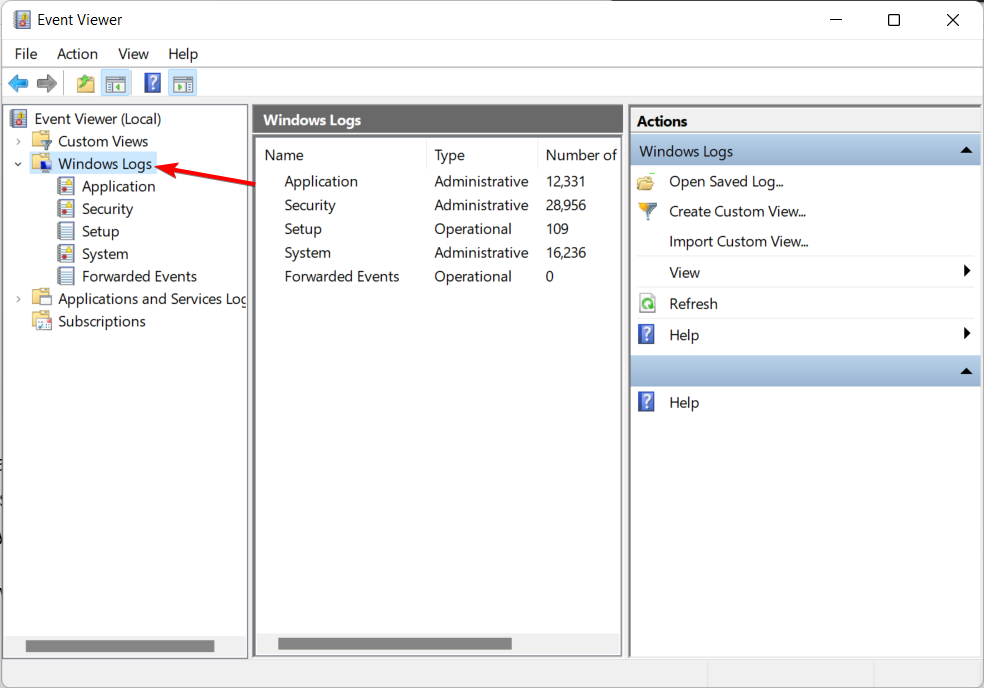
5. Click Windows Logs on the left side then select Filter if you have the option on the right side.
6. Input MemoryDiagnostic and select Find Next to see the results from the Memory Diagnostic Tool.
Through the use of the Windows Event Viewer, one is able to view a log of application and system messages. These messages may include failures, information messages, and warnings.
It is a useful tool for diagnosing and repairing a variety of problems that may arise with Microsoft Windows.
Therefore, if you encounter the stop code PFN LIST CORRUPT, you should check your memory info via Event Viewer before trying out other solutions.
Memory issues are a common cause of the PFN LIST CORRUPT BSoD, thus we recommend that you check your RAM’s health with additional third-party software as well.
2. Uninstall the problematic driver
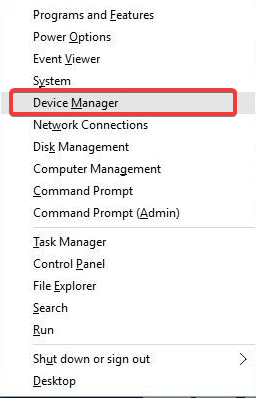
- Press Windows Key + X to open the Power User Menu and select Device Manager from the list.
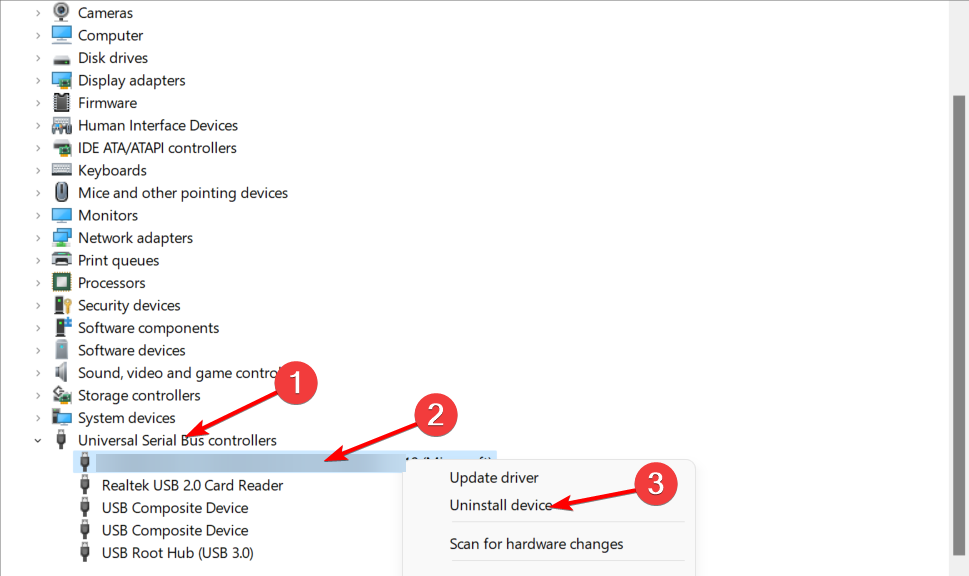
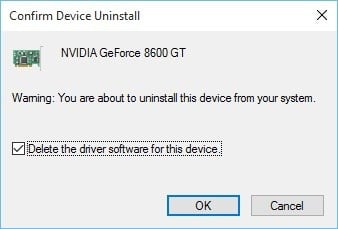
- Once the Device Manager starts, expand the Universal Serial Bus controllers section, right-click the Etron driver, and select Uninstall device.
- If available, check the Delete driver software for this device option and click OK.
- Restart your computer.
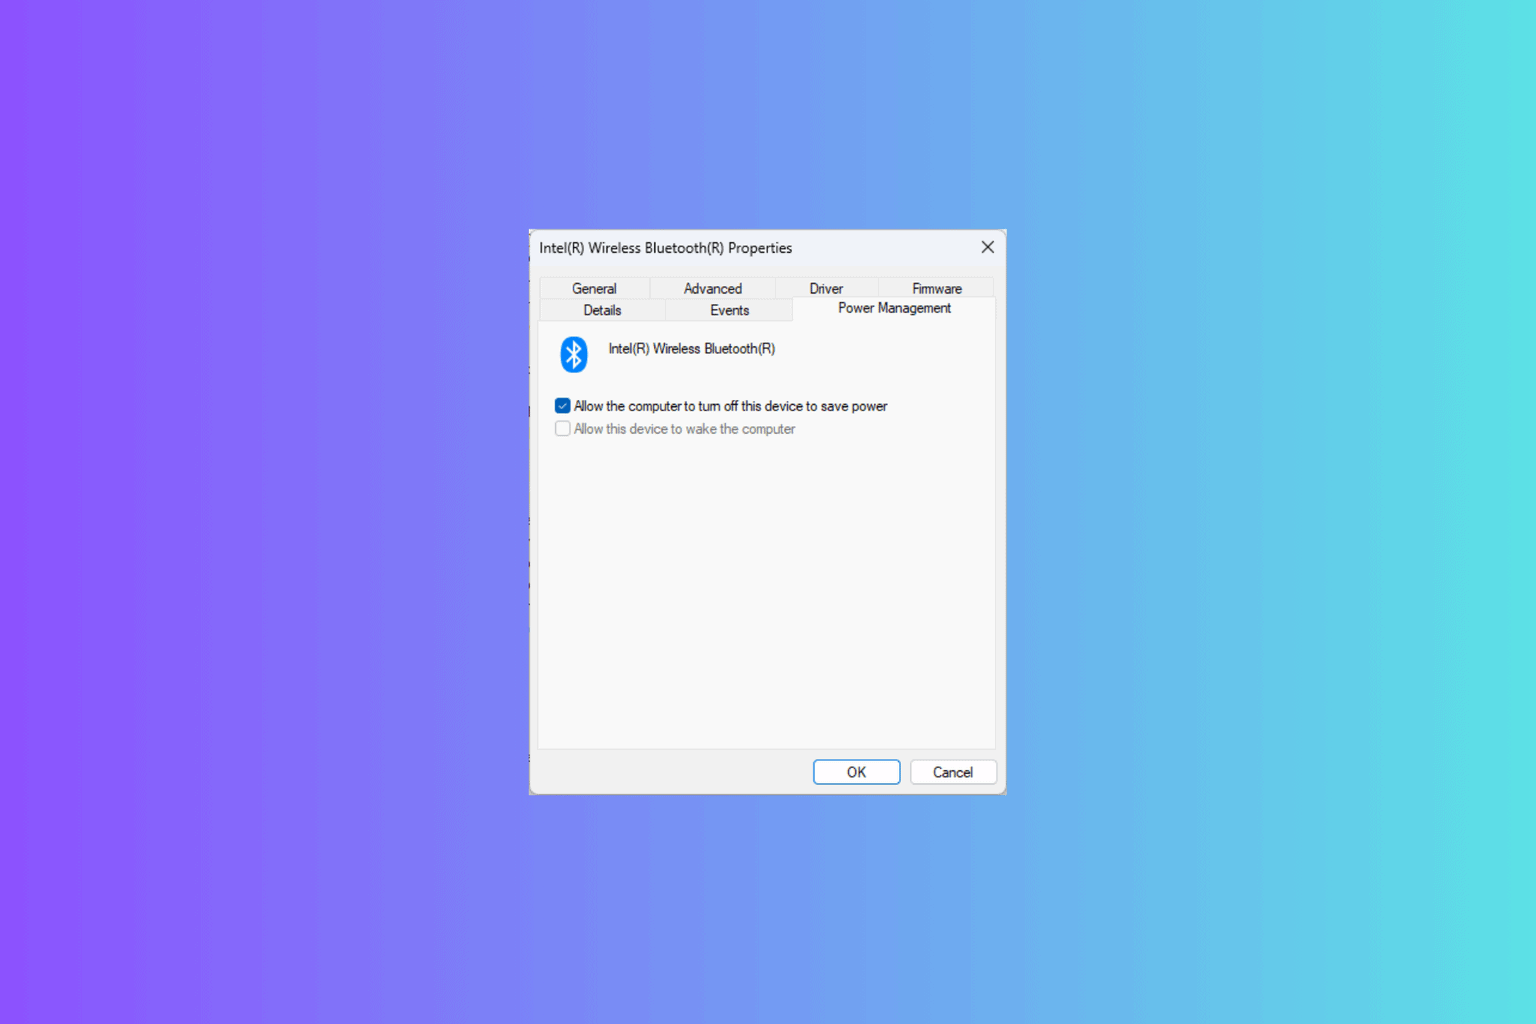
Bear in mind that almost any driver can cause this error, you might need to do a bit of research before you find a driver that is causing you this problem.
3. Update Windows 10
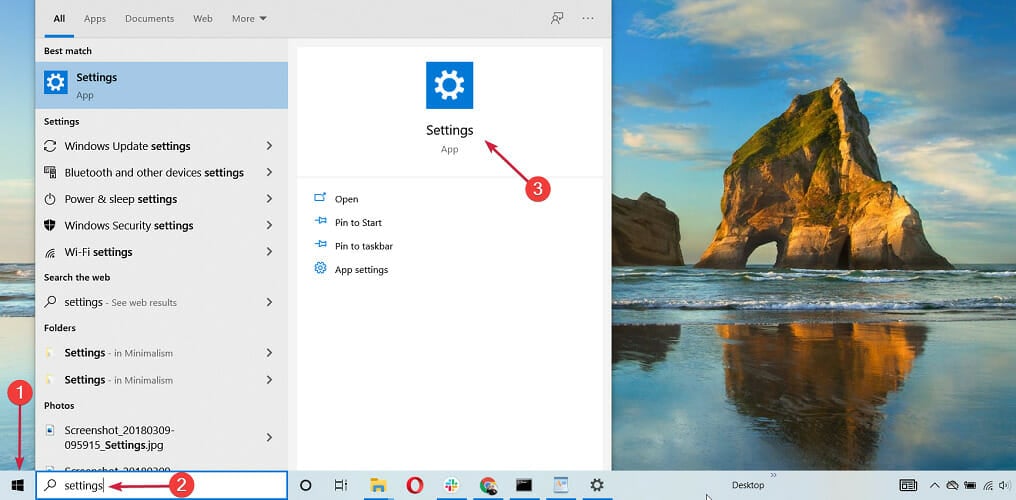
- Type Settings in the Search bar and select the top result.
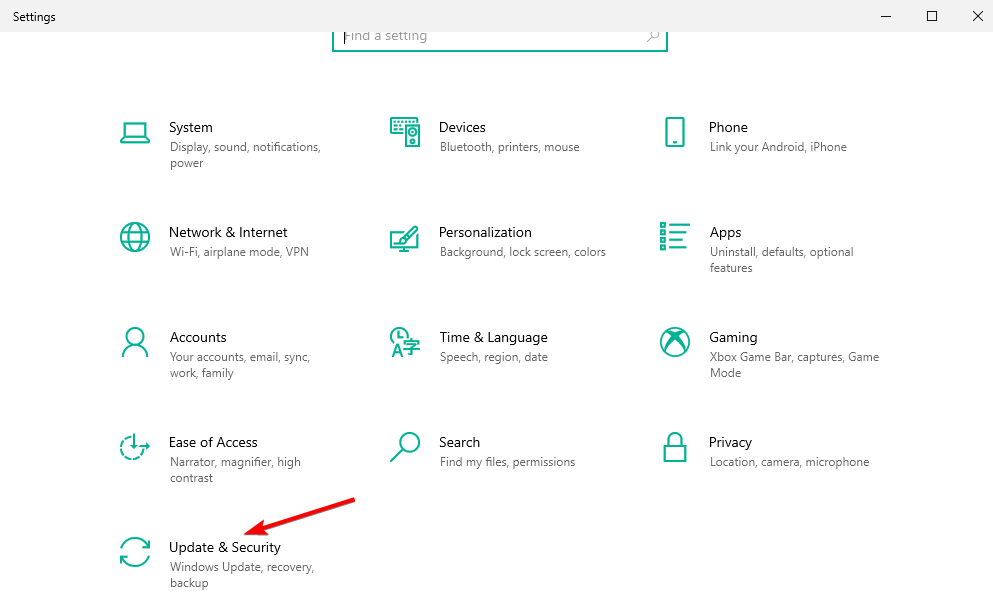
- Select Update & Security from the Settings list.
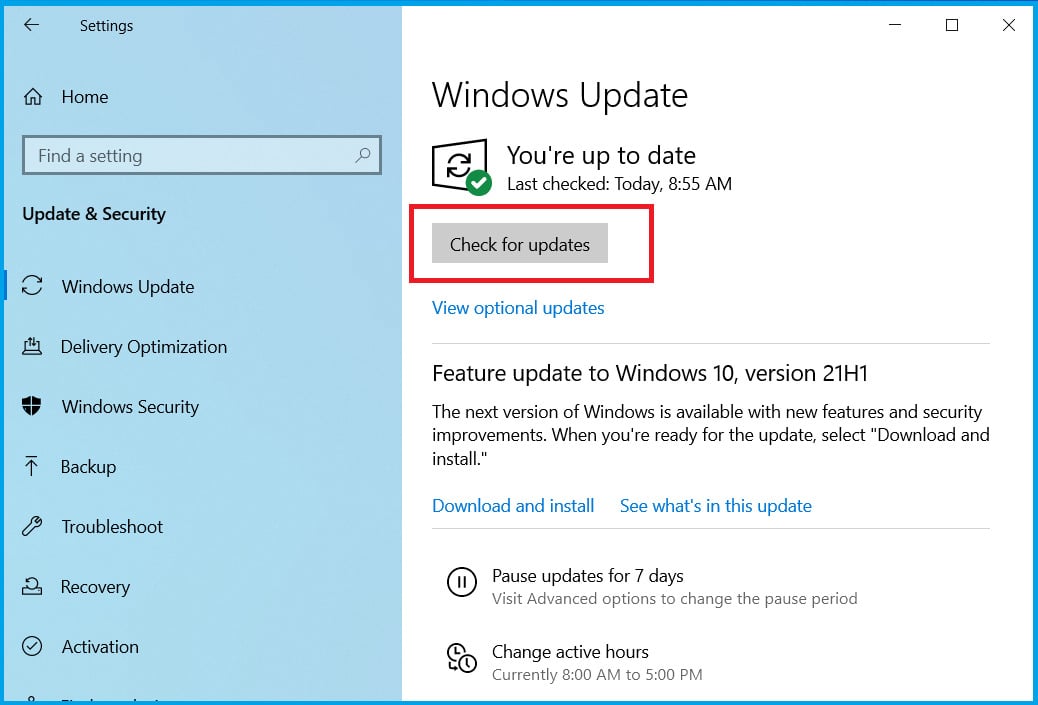
- Click on Check for updates to find new updates that you need to install.
Windows 10 isn’t a perfect operating system, and there are a few bugs and issues, so to fix any hardware or software issue, it’s crucial to run Windows Update regularly.
By downloading the latest updates, you’ll fix most of the hardware and software issues, which are both major causes of the blue screen PFN LIST CORRUPT error.
In addition to bug fixes, updates bring improved stability, security, and new features, so be sure to download them frequently.
4. Update drivers
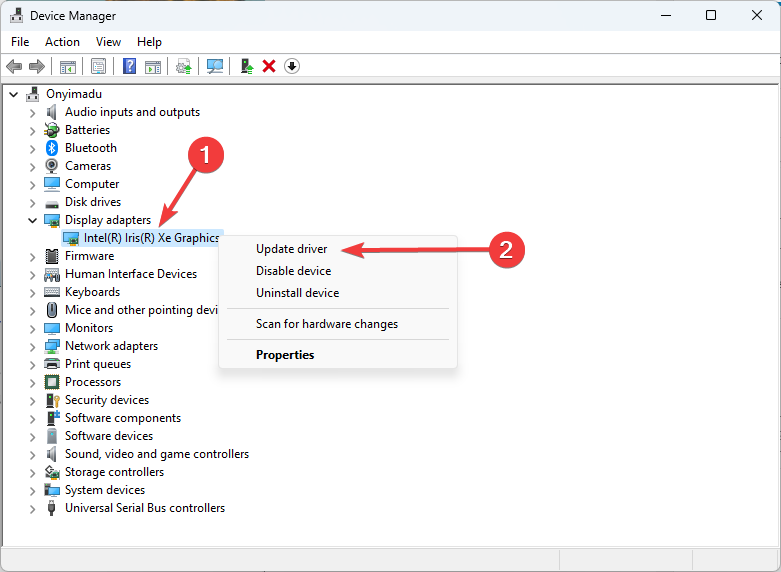
- Type Device Manager in the Windows Search bar.
- Select the drivers you want to update from the list, right-click on them and click Update driver.
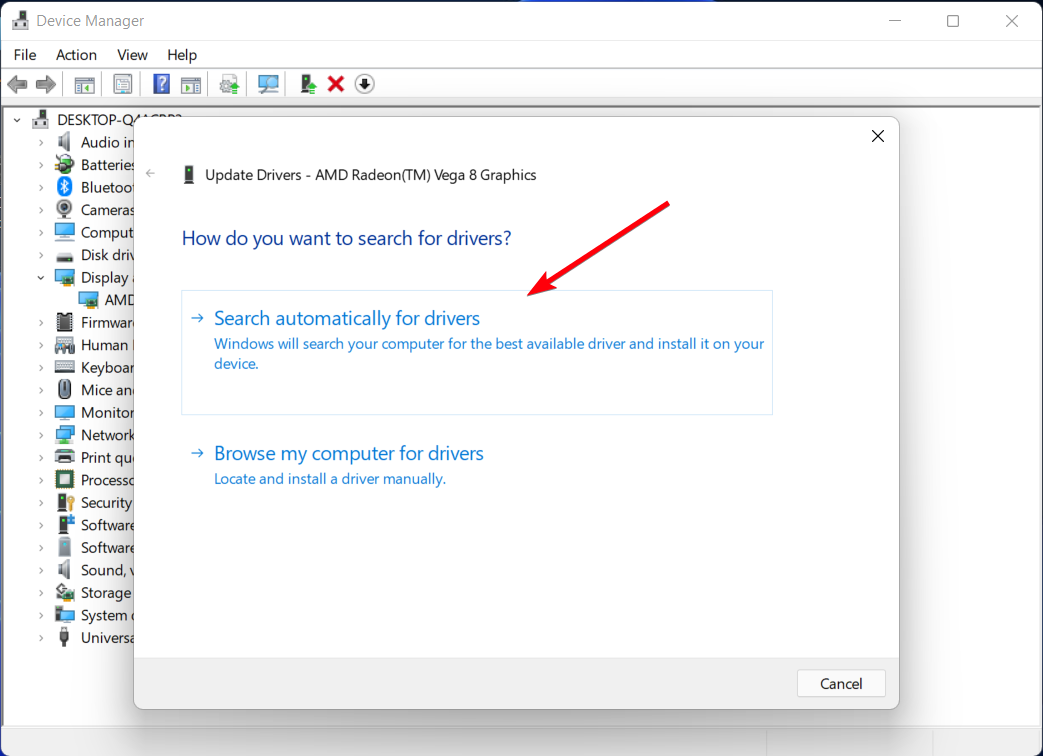
- Click on Search automatically for drivers to install the driver.
- Wait for the available drivers to be installed.
Searching for drivers on your own can be time-consuming. So, we advise you to use a tool automatically to do this for you.
Using an automatic driver updater will save you from the hassle of searching for drivers manually, and it will keep your system updated with the latest drivers.
Thus if you can’t follow these steps or it doesn’t work in your case, third-party software can instantly help you find your faulty drivers and fix them efficiently. Outbyte Driver Updater can easily perform this job.
This approved tool will find outdated and bad drivers and let you choose which ones you need to be updated.

Outbyte Driver Updater
Automatically update all drivers and keep your PC running without any errors.5. Run the BSOD Troubleshooter
- Open the Settings app by pressing Windows + I, and go to the Update & Security section.
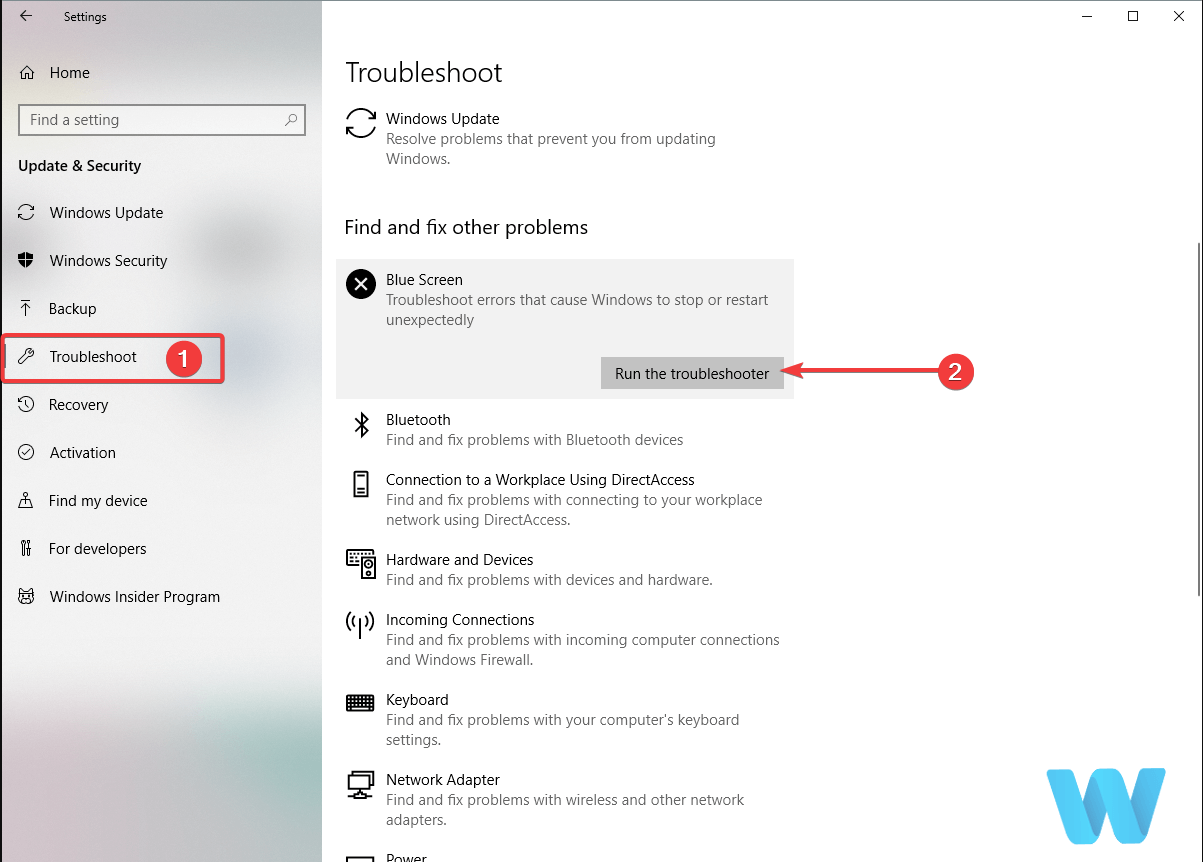
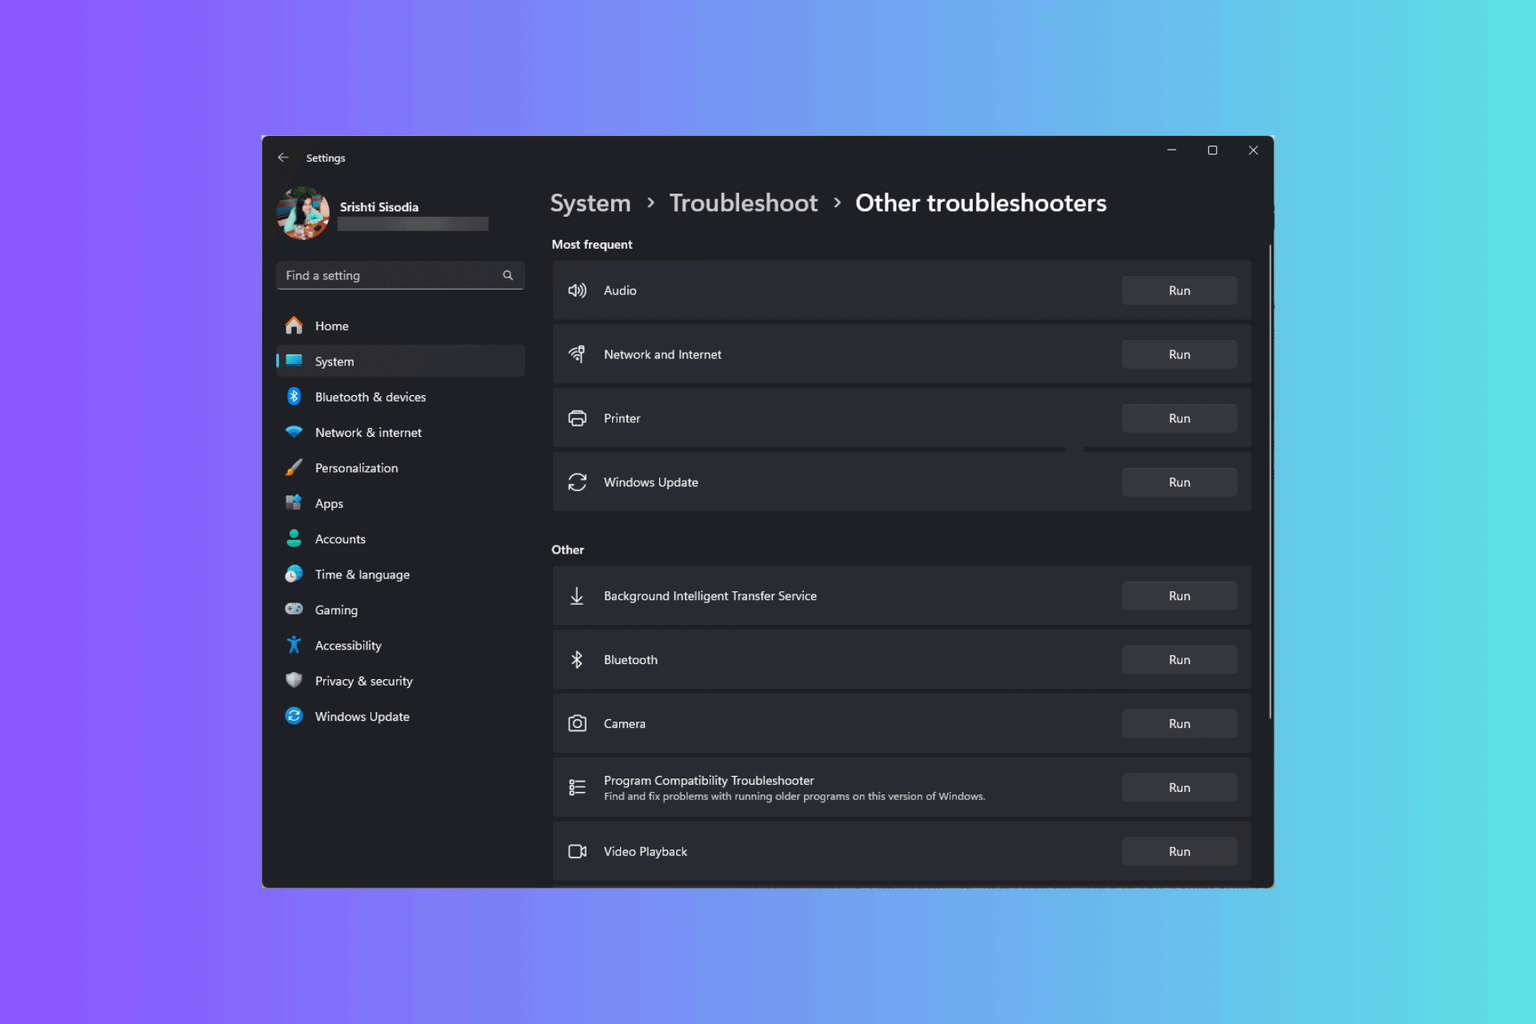
- Select Troubleshoot from the menu on the left, then select BSOD from the right pane and click Run the troubleshooter.
- Follow the instructions on the screen to complete the troubleshooting.
This is a part of Windows 10’s built-in troubleshooting tool that can be found in the settings. Hopefully, this tool can also resolve the stop code PFN LIST CORRUPT error.
6. Run the SFC scan
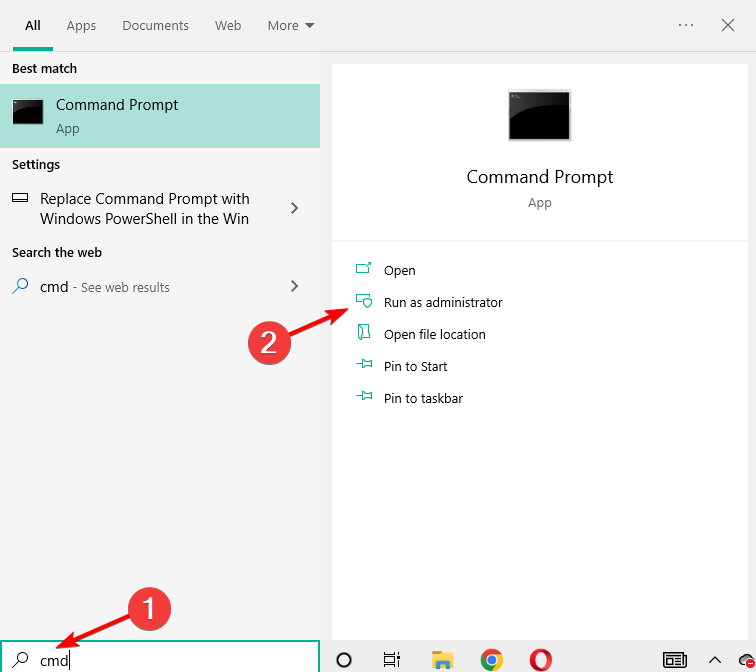
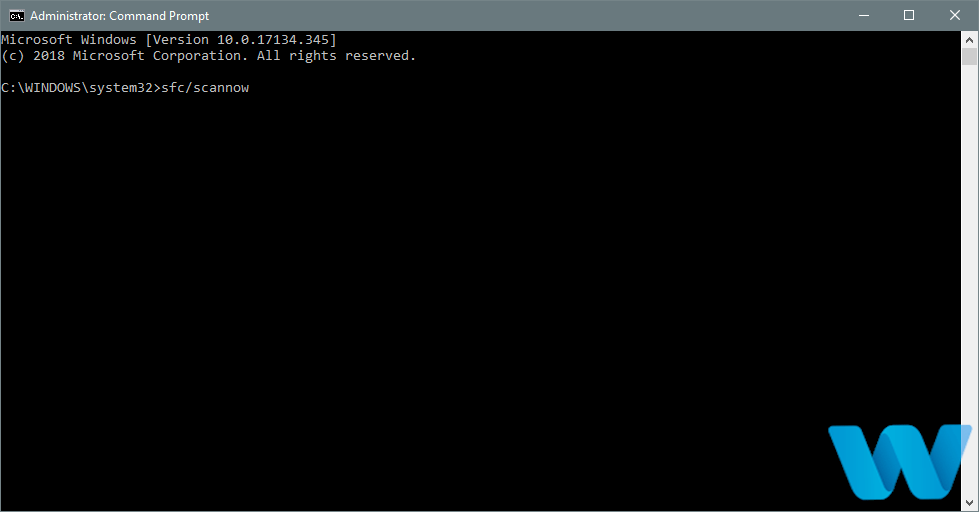
- Tap Windows then enter cmd and select Run as administrator.
- Enter the following line and press Enter:
sfc/scannow - Wait until the process is done (it may take a while) then close the Command Prompt and restart your computer.
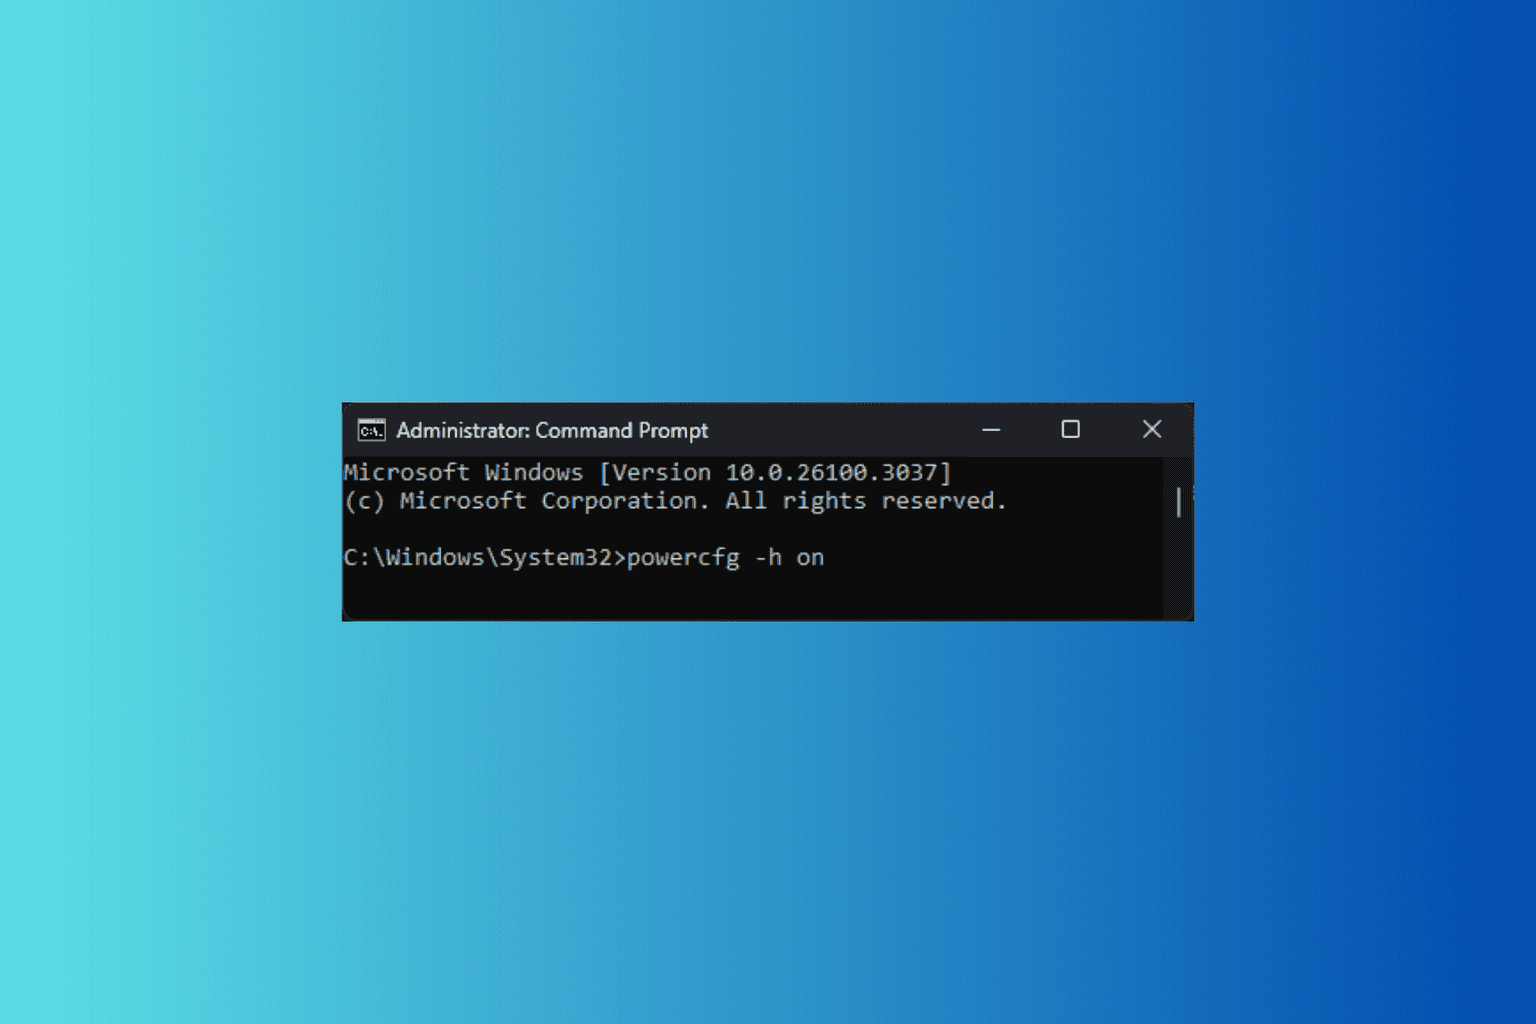
7. Run DISM
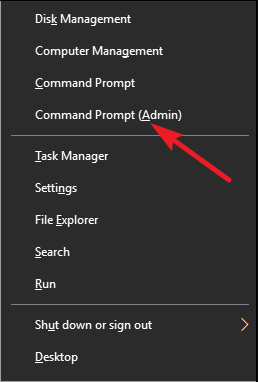
- Right-click Start and open Command Prompt (Admin).
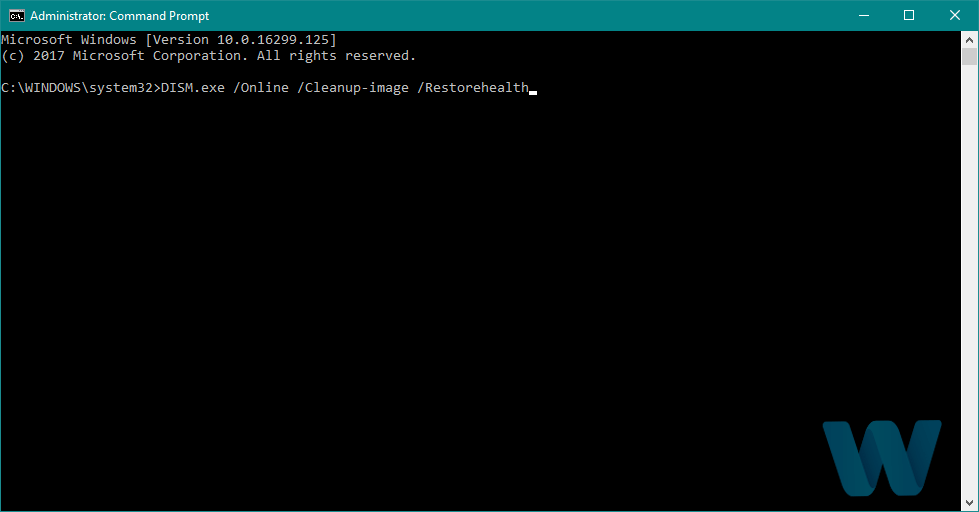
- Paste the following command and press Enter:
DISM /Online /Cleanup-Image /RestoreHealth - Wait until the scan is finished. Restart your computer and try updating again.
And the third troubleshooting tool we’re going to use is DISM. Deployment Image Servicing and Management (DISM) re-deploys the system image, resolving potential issues on the way.
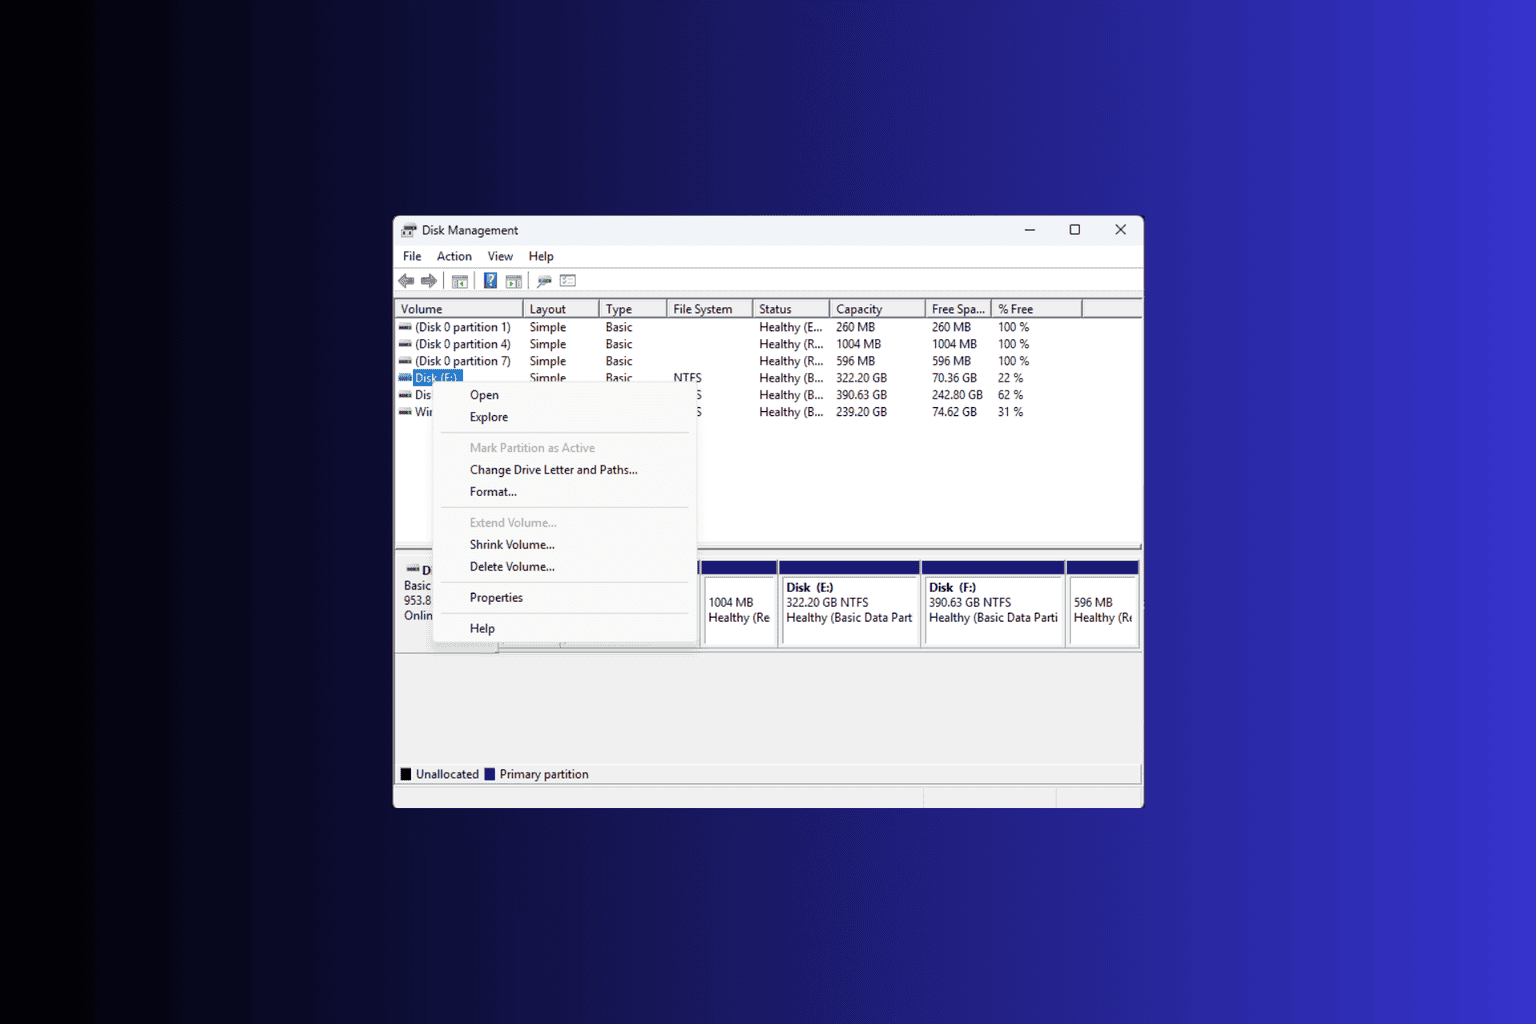
8. Check the hard drive
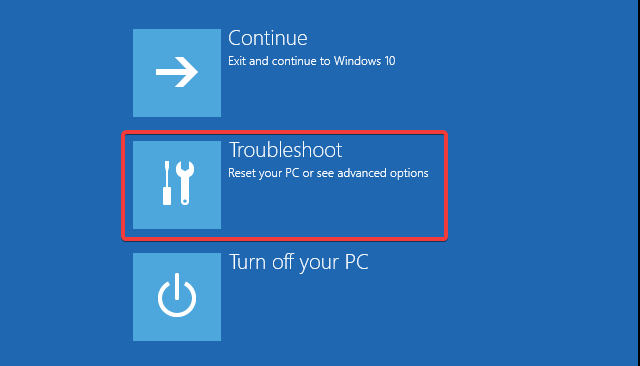
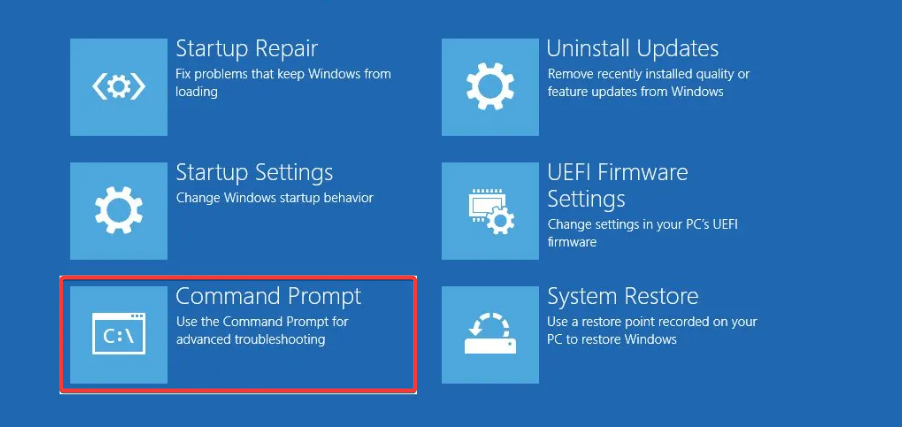
- Enter the Advanced Startup (Restart your computer while holding the Shift key).
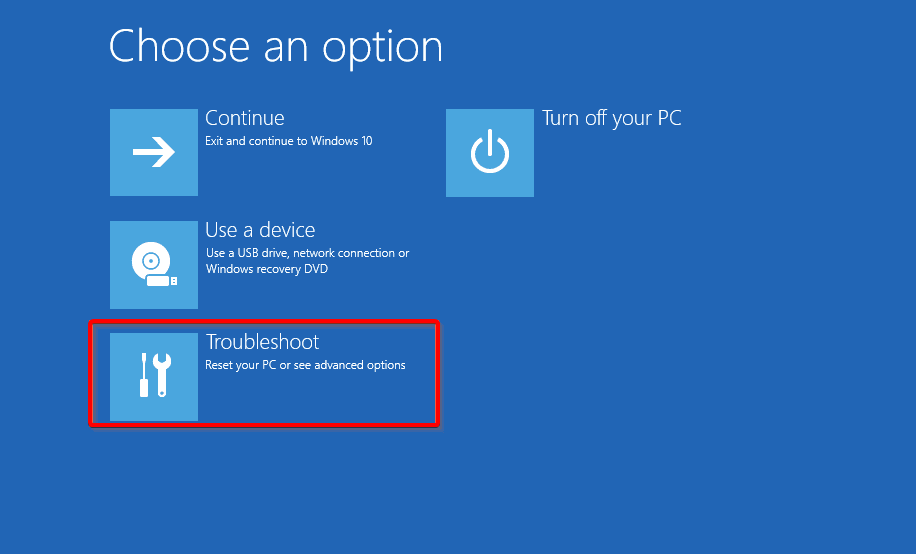
- Choose Troubleshoot, then Advanced Options.
- Select Command Prompt from the list of options.
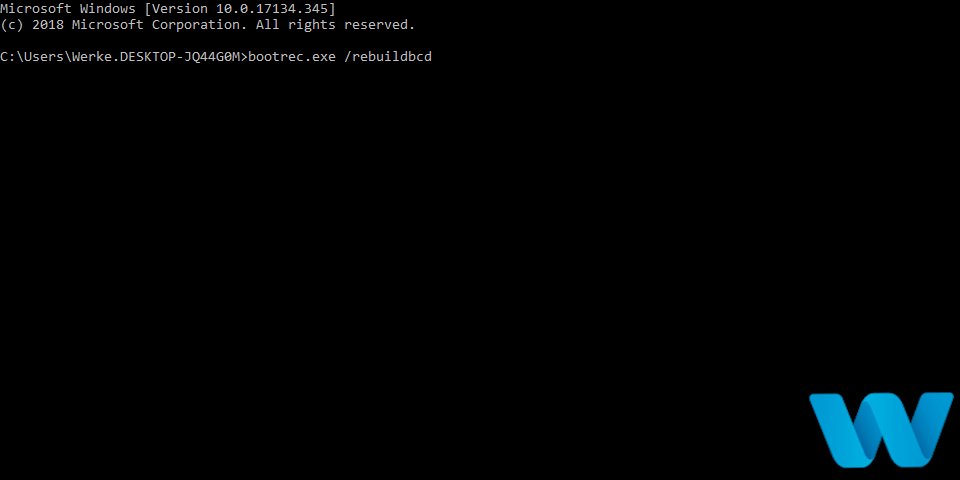
- When Command Prompt appears, enter the following lines and press Enter after each line to run it:
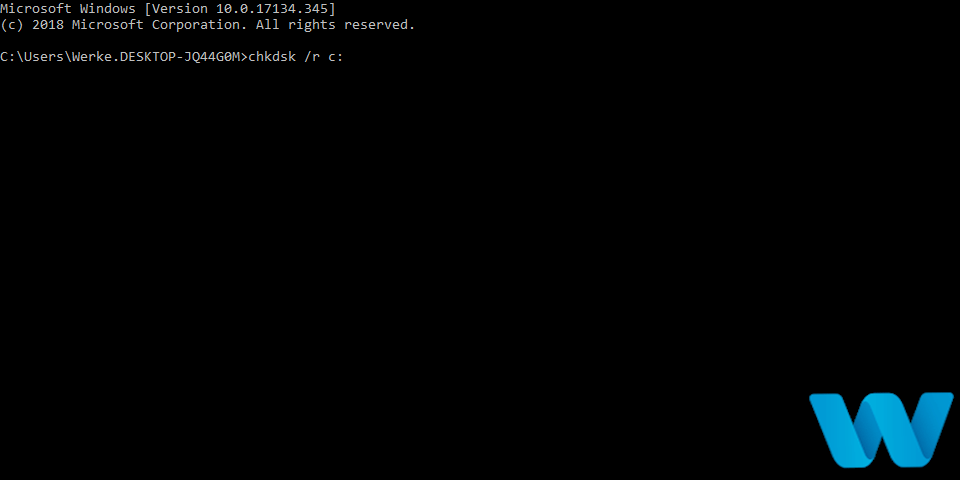
bootrec.exe /rebuildbcdbootrec.exe /fixmbrbootrec.exe /fixboot - Some users are also suggesting that you need to run additional chkdsk commands as well. To perform this, you must know the drive letter for all your hard drive partitions. Enter the following command and enter the letter corresponding to your hard drive partition:
chkdsk /r c: chkdsk /r d: - Restart your computer and check if the issue is resolved.
9. Disable Microsoft OneDrive
9.1. Use the Local Computer Policy panel
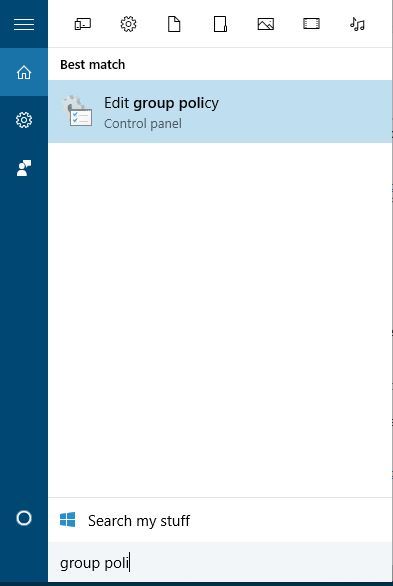
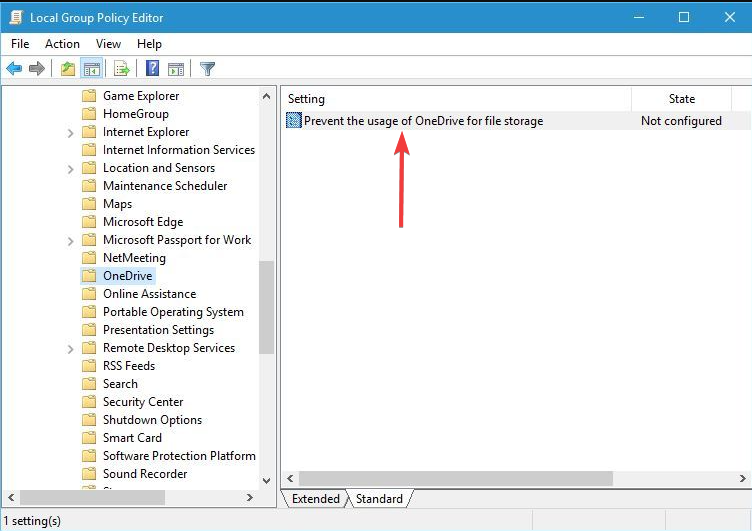
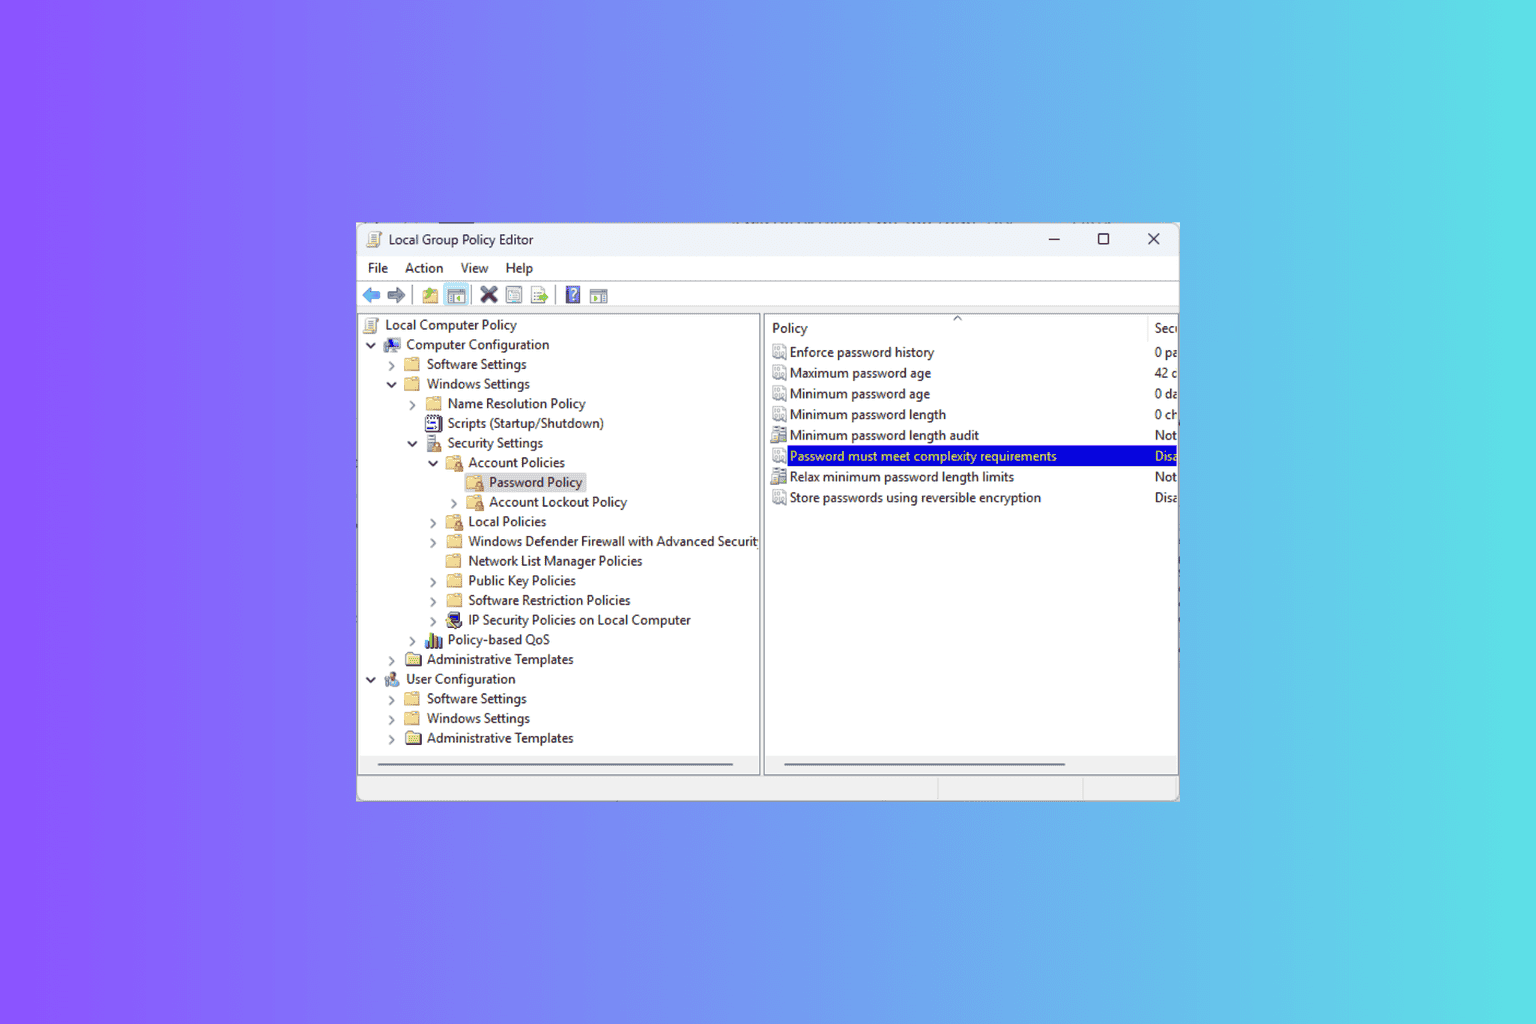
- Press Windows + S and enter group policy. Select the Edit group policy.
- When Local Group Policy Editor opens, navigate to Local Computer Policy, then access Computer Configuration.
- Choose Administrative Templates then click Windows Components and OneDrive.
- In the right pane, locate Prevent the usage of OneDrive for file storage and double-click it.
- Select Enabled and click Apply and OK to disable OneDrive.
9.2. Use the Registry Editor
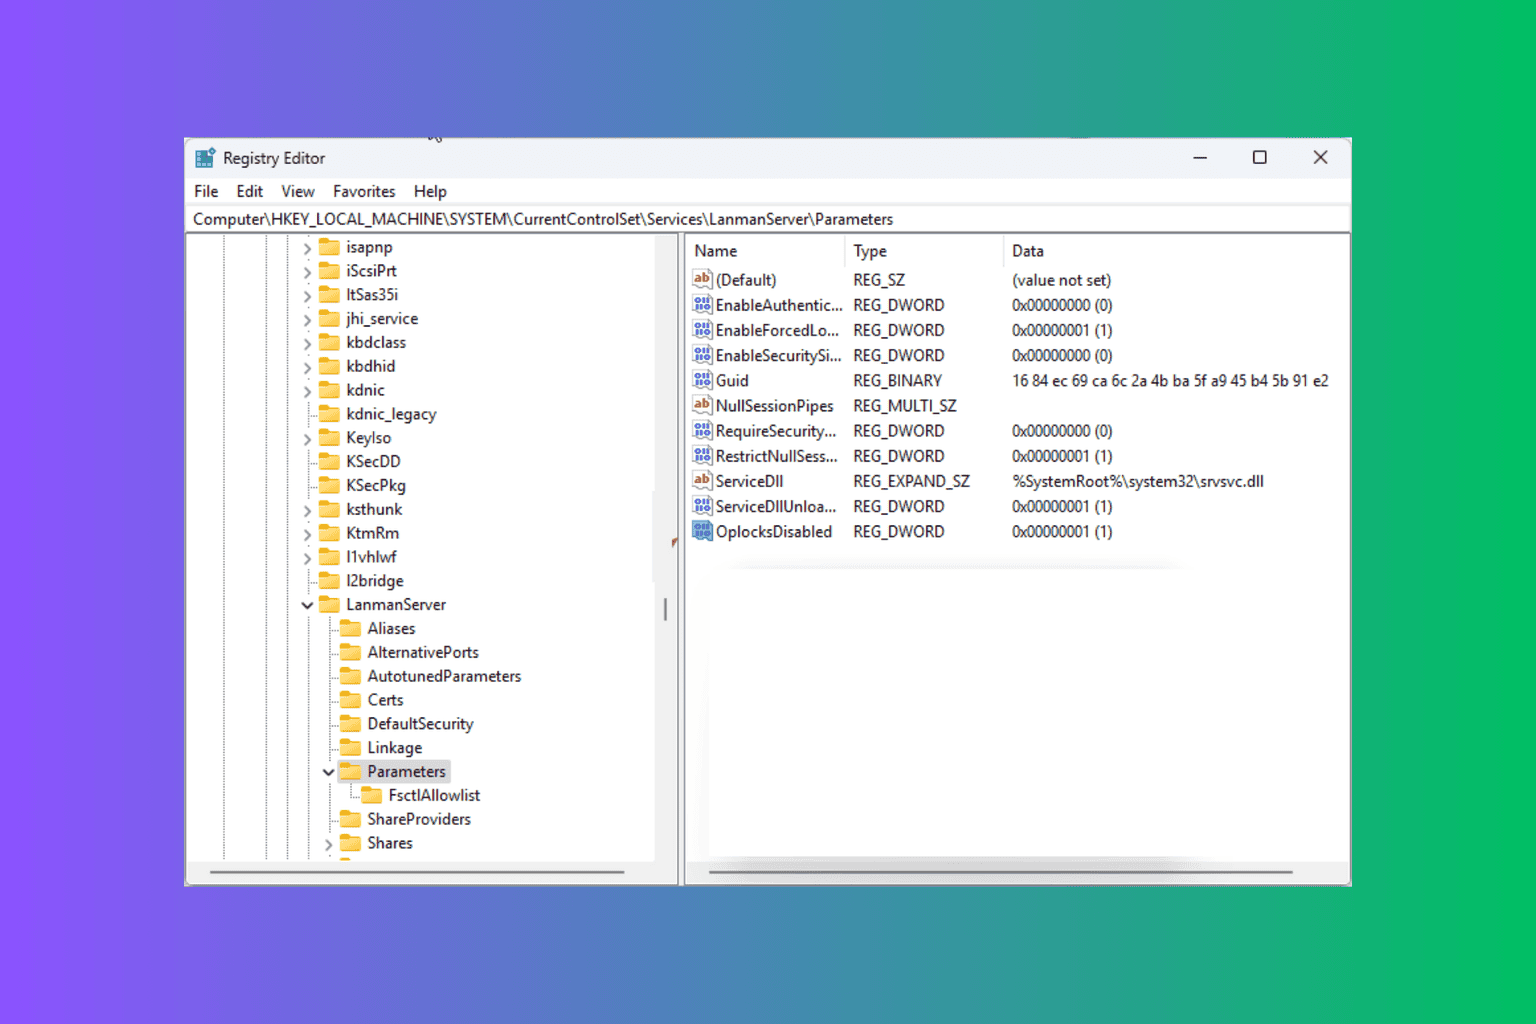
- Press Windows Key + R and type regedit. Press Enter or click OK to start Registry Editor.
- Once Registry Editor starts, you need to navigate to the following key in the left pane:
HKEY_LOCAL_MACHINE\Software\Policies\Microsoft\Windows - Expand the Windows key and search for OneDrive. If the key doesn’t exist, go to the next step to create it.
- Right-click the Windows key and choose New then Key. Enter OneDrive as the name of the key.
- Select the OneDrive key. In the right pane, right-click and choose New then DWORD (32-bit) Value. Enter the code below as the name of the new DWORD:
DisableFileSyncNGSC - Double click the DisableFileSyncNGSC and change its Value data to 1. Click OK to save changes.
9.3. Use Safe Mode
- Restart your computer a few times while it boots. This should start Automatic Repair process.
- Choose Troubleshoot, then Advanced options.
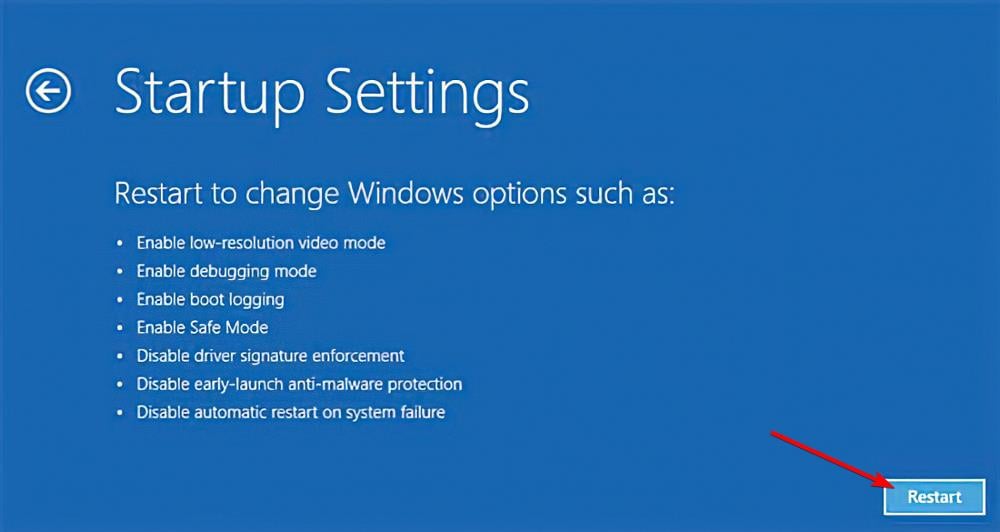
- Go to Startup Settings, and click the Restart button.
- Once your computer restarts again, you’ll see a list of options. Press F4 or 4 to select Safe Mode. Once the Safe Mode starts, disable OneDrive.
OneDrive was a part of the Windows Essentials suite for many years, but with the rising popularity of cloud storage, it became a default application on Windows 10.
OneDrive is a great tool that allows you to collaborate and share files with others, but unfortunately, several users reported that OneDrive can also cause PFN LIST CORRUPT error.
Why does PFN List Corrupt appear after GPU upgrade?
This error usually implies that you have upgraded to faulty hardware. And this is in fact the major cause of the issue on your computer.
Upgrading to a different GPU would fix the error. Alternatively, downgrading the device will also be a handy step in rectifying this error.
You should note that while this error may occur post-GPU update, users have also experienced the PFN list corrupt error when installing Windows 10. In this case, you will have to reset your OS.
In case nothing helps, you can always get help from a dedicated BSoD fixer.
We’d like to hear more from you on this matter so drop us a comment in the section below.






User forum
1 messages