How to Temporarily Disable Bitdefender (or Permanently)
Disable Bitdenfender to save system resources
5 min. read
Updated on
Read our disclosure page to find out how can you help Windows Report sustain the editorial team. Read more
Key notes
- You may need to disable Bitdefender temporarily or permanently if it causes incompatibility issues or raises wrong threats.
- Follow the methods listed in the guide to disable Bitdefender, depending on the situation.
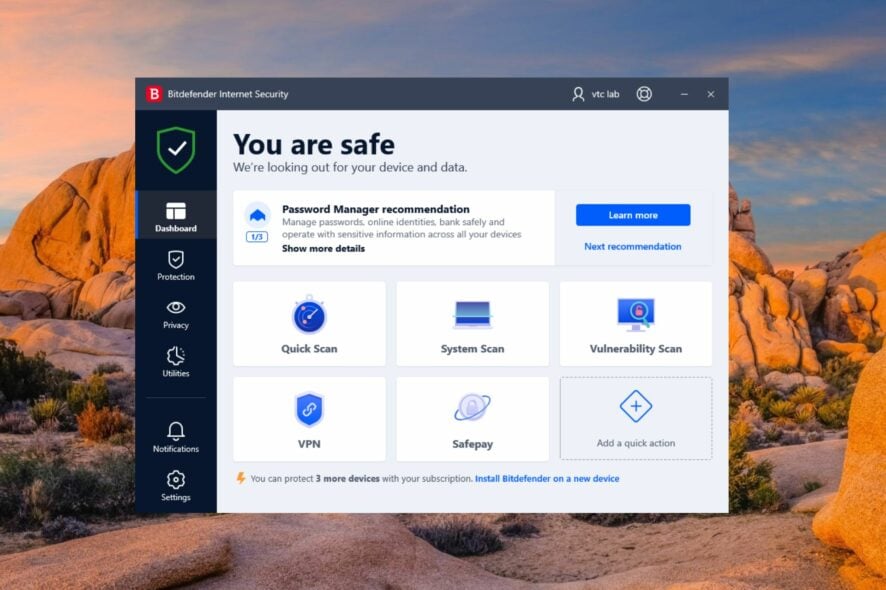
Thanks to the cutting-edge features and robust protection it offers, Bitdefender stands tall as a reliable antivirus solution amongst the top contenders.
However, there are certain situations when the tool becomes overprotective and wrongly considers a potentially safe file as a threat. In such a situation, disabling the Bitdefender temporarily or permanently becomes a necessity.
Why should I disable Bitdefender on Windows?
There can be several reasons why you might consider disabling Bitdefender. Here are some of the obvious ones:
- Software incompatibility – In certain cases, antivirus software like Bitdefender may conflict with other programs installed on your computer.
- System performance – While Bitdefender is designed to be resource-efficient, however, there are several reports about high CPU usage, particularly during scans or updates.
- Troubleshoot network connectivity – Antivirus software, including Bitdefender, employs various network protection mechanisms that can sometimes disrupt network connectivity.
- False positives – Bitdefender may occasionally identify innocent files or apps as potentially dangerous false positives. This may cause problems or disruptions when using particular software.
- System maintenance – When executing system maintenance procedures, installing software, or changing specific system settings, Bitdefender’s active protection may cause problems.
Having said that, let’s look at the different ways to disable Bitdefender to handle a security-related situation.
 NOTE
NOTE
How do I turn off Bitdefender temporarily?
- Press the Windows key, type bitdefender in the search bar on top, and select Bitdefender Total Security app from the search result.
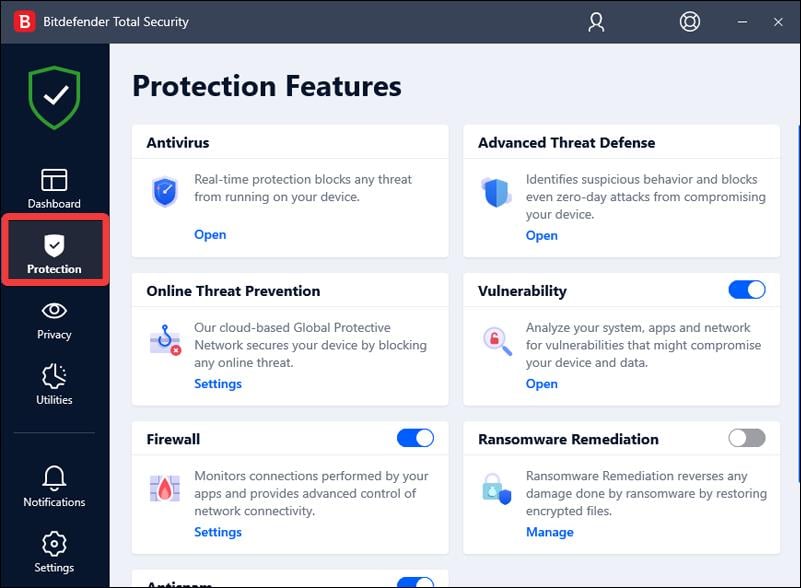
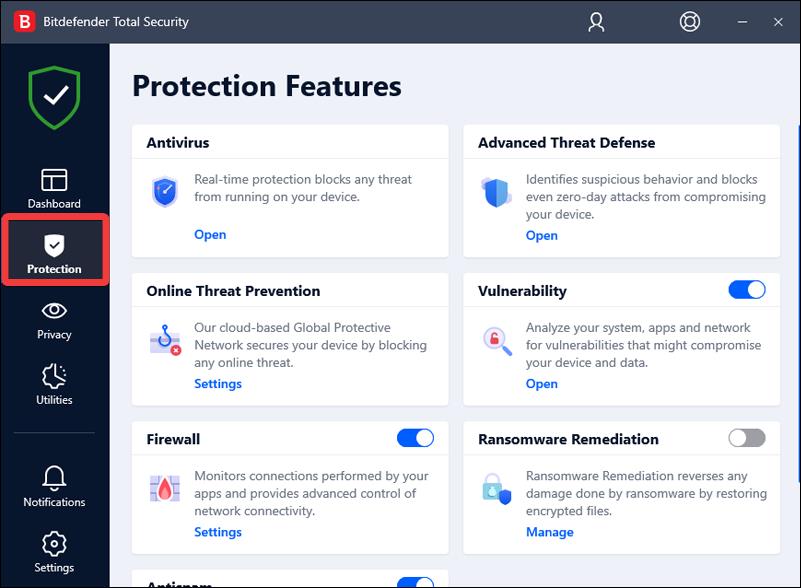
- Locate and choose the Protection option from the left sidebar of the main app interface.
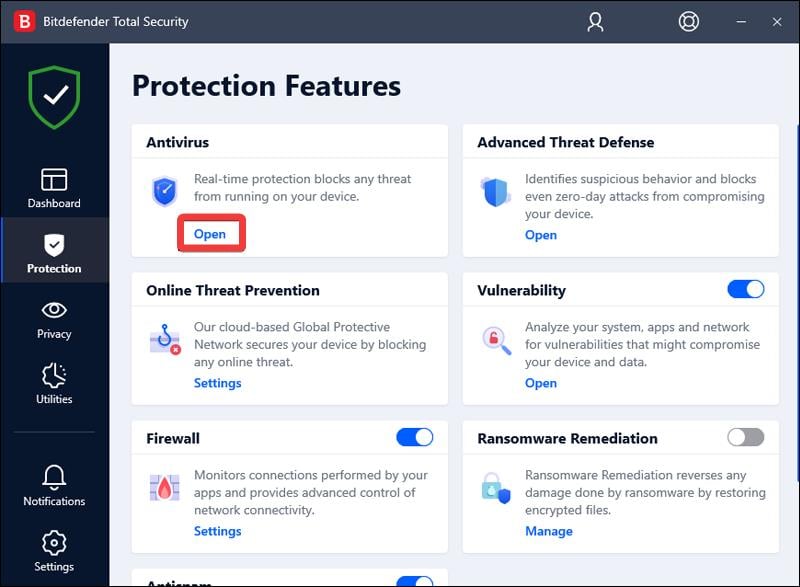
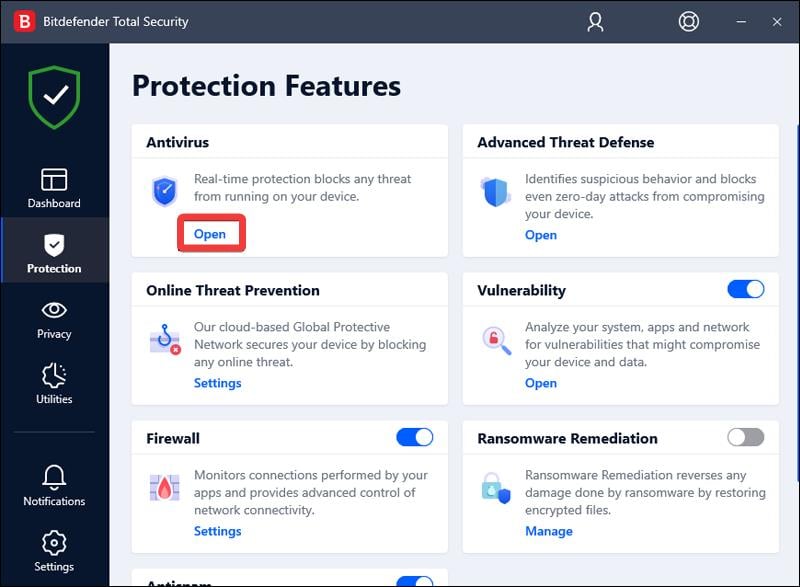
- Next, click the Open option listed under the Antivirus section of the Protected Features window.
- Switch to the Advanced tab and toggle Off the switch next to Bitdefender Shield.
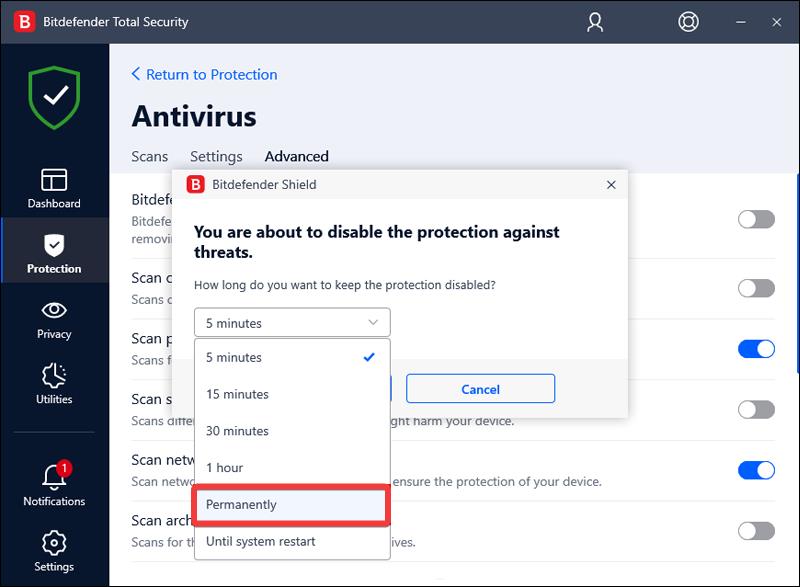
- Select the duration for which you wish to disable the Bitdefender protection in the pop-up that appears. Click OK to save the changes.
Bitdefender’s real-time protection and other security features should now be temporarily deactivated. You can verify this by checking the Bitdefender icon in the system tray, which might change its appearance to indicate that the protection is turned off.
After the selected time duration is passed, the Bitdefender protection shield will automatically be enabled.
How do I permanently disable Bitdefender?
- Launch the Bitdefender Total Security application on your computer.
- Choose Protection from the left side of the navigation panel.
- On the Protection Features window, select Open under the Antivirus section.
- Move to the Advanced tab and move the toggle for Bitdefender Shield in the Off position.
- Choose Permanently after expanding the drop-down in the additional window that appears and hit the OK button.
Bitdefender gives you the choice to disable the application permanently if the situation requires it. But remember to toggle on the protection once you’re done with the application to ensure your system remains secure against online threats at all times.
How do I disable notifications in Bitdefender?
- Launch the Bitdefender application on your system.
- Select Settings from the left navigation panel of the app interface.
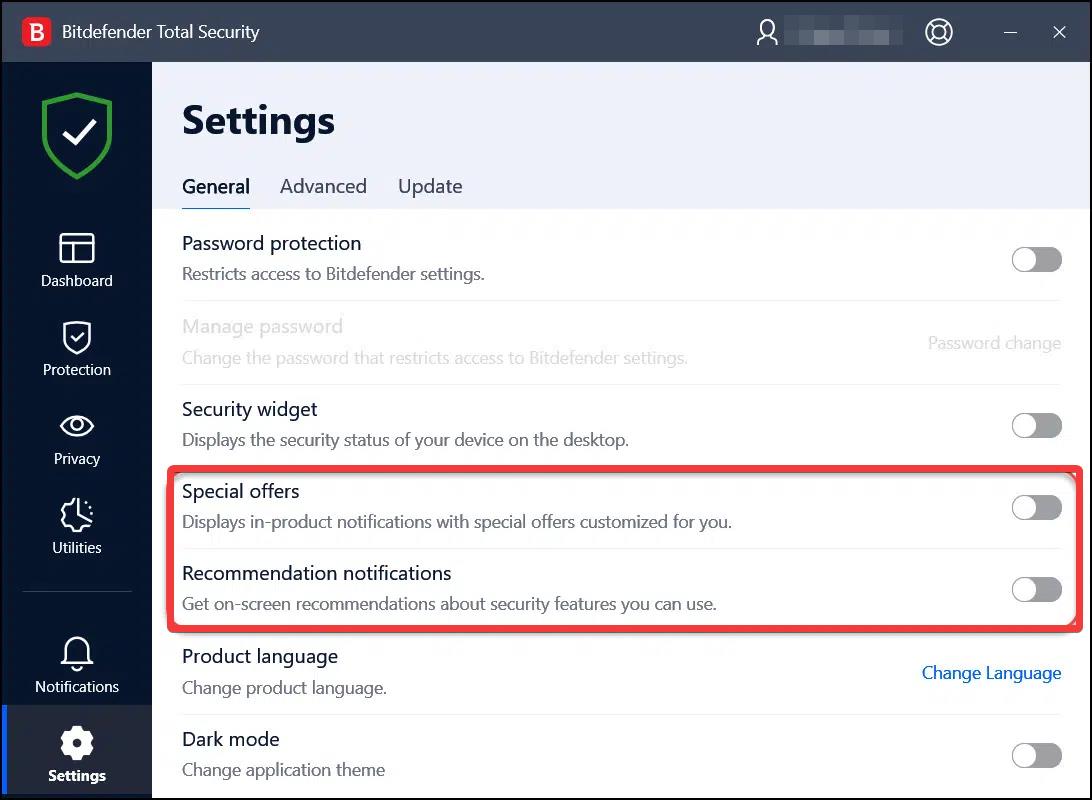
- In the General tab of the Settings window, toggle off the switch for Special Offers and Recommended Notifications.
If you are wary of the constant pop-ups, renewal offers, or USB scan notifications, you can disable the Bitdefender notifications to keep them at bay.
How do I disable Bitdefender VPN?
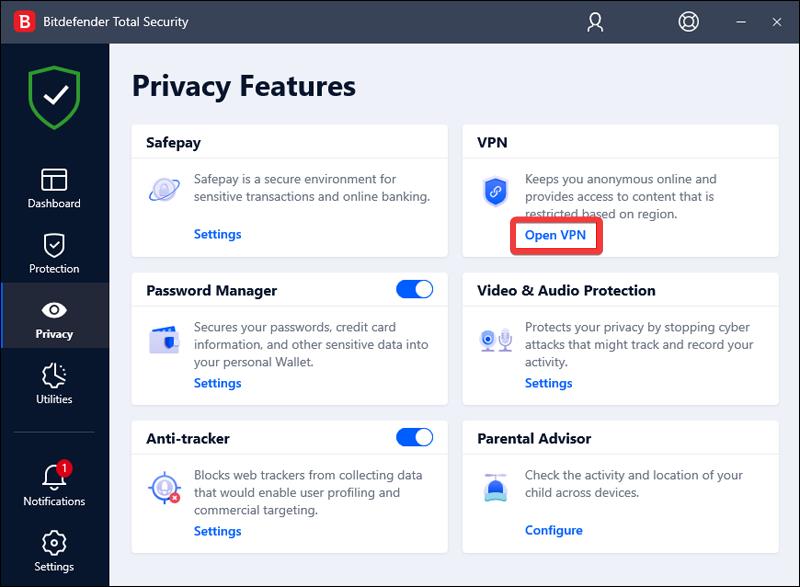
- Head to the Bitdefender app on your Windows PC.
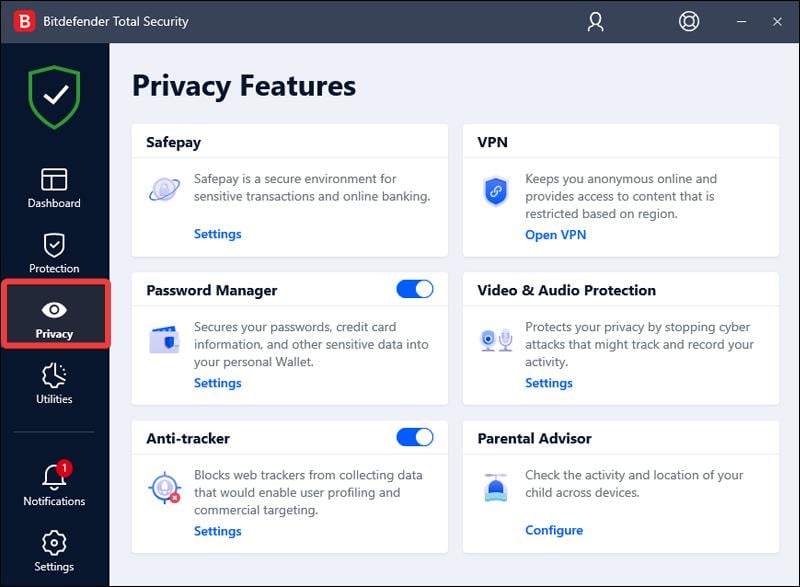
- Choose the Privacy option from the left sidebar of Bitdefender.
- Click Open VPN, present under the VPN section.
- If the VPN is currently connected, press the button to disconnect it.
And that’s it! To use the VPN later, follow the same steps and press the connect button this time.
When you purchase Bitdefender Total Security, the VPN service is a part of it. However, this package has a limited data allowance of 200MB daily if you haven’t purchased an additional subscription. Given the limitations of the data allowance, you may not want to keep the VPN enabled at all times.
How do I disable the auto-renewal in Bitdefender?
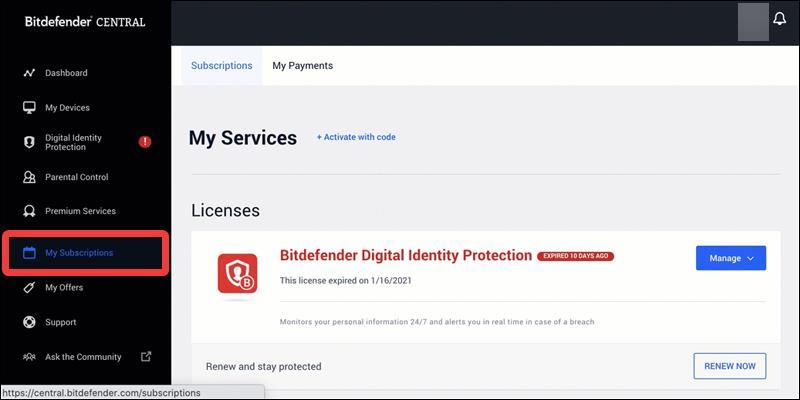
- Log in to the Bitdefender Central website using the email associated with your Bitdefender purchase.
- Navigate to the My Subscriptions section from the left navigation bar and switch to the My Payments tab on the right window.
- Locate the subscription that you need to modify, then click View Details next to it.
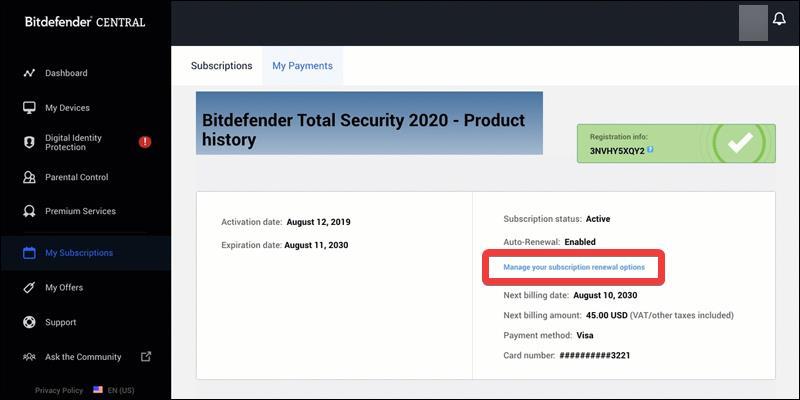
- Follow the Manage your subscription renewal options link, located on the next page displaying the purchase history.
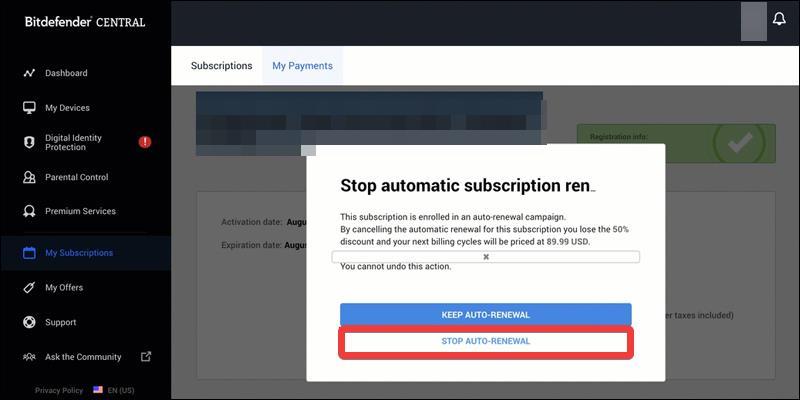
- Press the STOP AUTO-RENEWAL button on the overlay pop-up to disable the auto-renewal feature for your subscription.
After completing the above steps, you will receive an automatic email confirming that the change to your subscription renewal options was successful.
That’s pretty much about it! You can easily disable Bitdefender and related features by following the steps listed in the guide.
In case you are facing issues with Bitdefender installation on your Windows PC, this guide will help you bypass them.
For further queries and suggestions, do reach out to us in the comments section.





User forum
0 messages