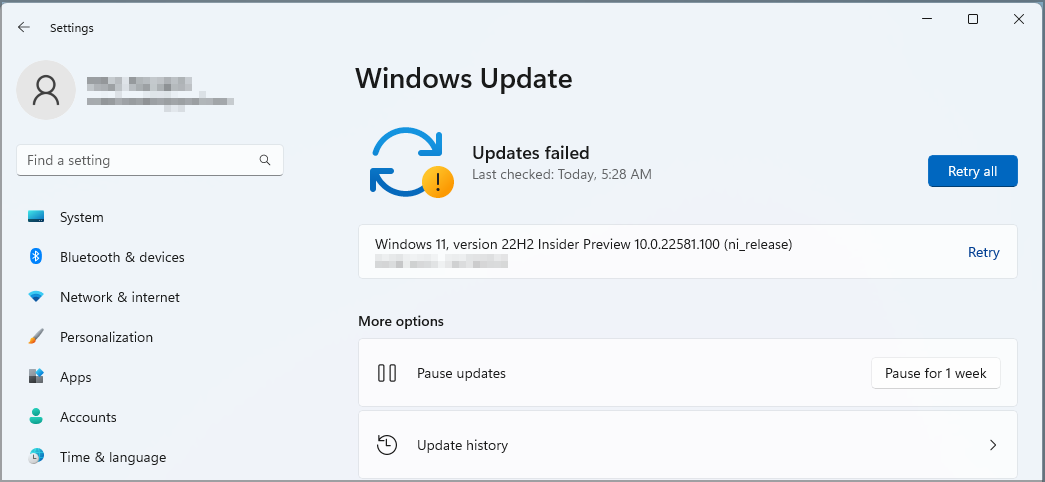
Install Error - 0x80242fff: What is it & How to Fix it?
This Windows Update error will be a thing of the past
Key notes
- In case you’re having issues with install error 0x80242fff on Windows 11, resetting update components can help.
- Another way to deal with this issue is to manually reset the required services.
- A built-in troubleshooter is also a great way to fix the 0x80242fff Windows 11 error on your PC.

Windows 11 is the latest, and like with any other operating system, issues will happen sooner or later.
Updates are essential as they come with features, and users should not ignore or stop them at all, but sadly, many reported install error 0x80242fff on Windows 11 while downloading updates.
There are several ways of getting away with the error. In this article, we will discuss several ways to correct it.
Why does 0x80242fff appear on Windows 11?
Most of the causes of error 0x80242fff are within the computer system. It includes corrupt files in the file system, inactive Background Intelligent Transfer Service, failed updates, and incorrectly installed updates and network settings.
This error disturbs many users during updates, and we already covered how to fix Windows Update errors on Windows 11, but for more solutions, we suggest you keep on reading.
How can I fix the install error 0x80242fff on Windows 11?
1. Reset Windows Update components
- Disconnect your network cable or disconnect from Wi-Fi.
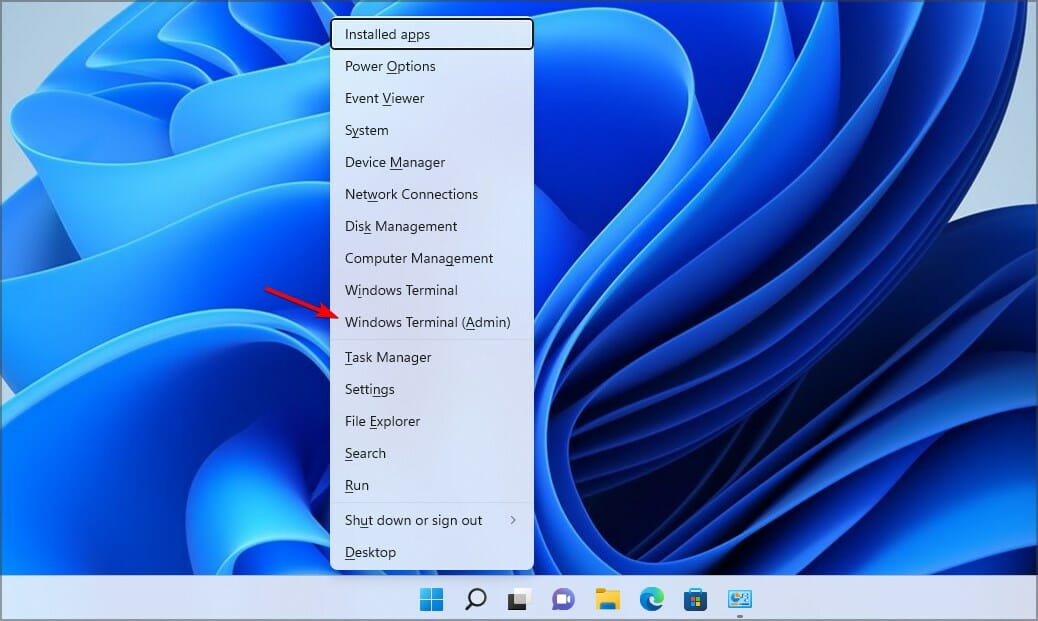
- Now press Windows key + X and select Windows Terminal (Admin).
- Run the following commands:
net stop wuauserv
net stop cryptSvc
net stop bits
net stop msiserver
ren C:\Windows\SoftwareDistribution SoftwareDistribution.old
ren C:\Windows\System32\catroot2 catroot2.old
net start wuauserv
net start cryptSvc
net start bits
net start msiserver
exit
- Connect the network cable or connect to a Wi-Fi network.
- Restart your PC and try to perform the update again.
2. Use a dedicated repair tool
System errors are likely to occur at some point, and there could be a number of perpetrators behind this malicious scenario.
There is an entire world of possibilities that can cause system glitches, ranging from broken or missing system files to outdated or otherwise damaged DLLs, conflicting settings, and program incompatibilities.
Assume you have problems with the Microsoft Store and Windows Update, even if you have a reliable internet connection, and you receive the install 0x80242fff error code. In that case, nothing beats running a full scan using a specialized repair tool and letting it repair each issue as it arises.
3. Restart the services
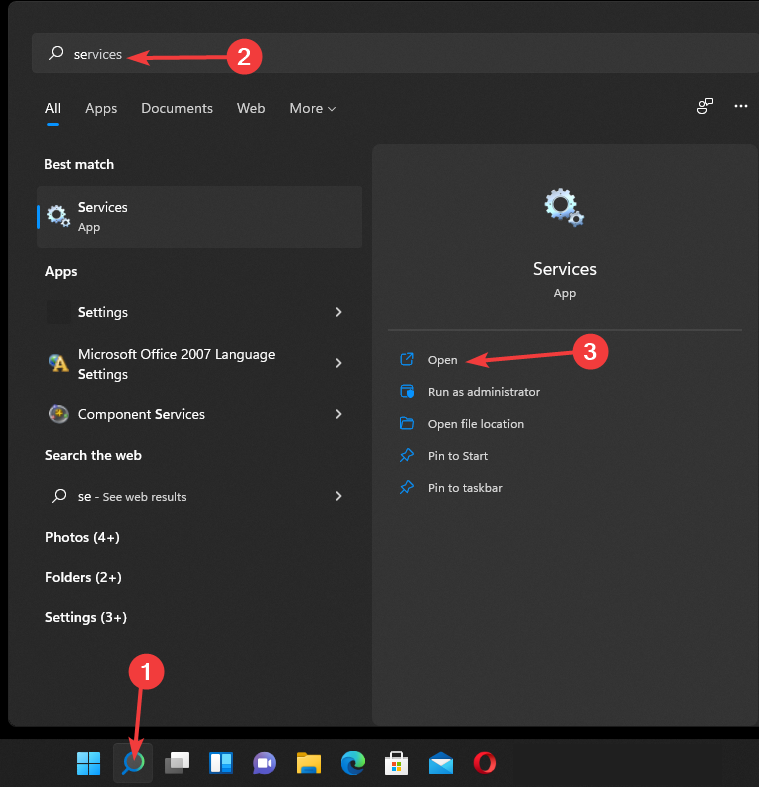
- Go to the Search box, type Services, and click Open.
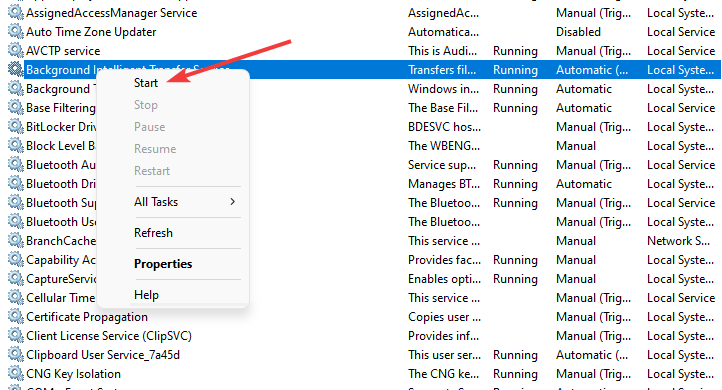
- Select the Background Intelligent Transfer Service.
- Double click on the service to open it and click the Start button. If the service is on, stop it and restart the service again.

- Repeat step 2 but this round select Windows Update.
- Click the Start button.
- Apply the same steps to Workstation.
- Restart your PC.


Starting this service makes sure that the updates run smoothly. Starting them gets rid of the error.
4. Run DISM and SFC commands
- Go to the Search box, type Command Prompt and Run as administrator.
- Run the following command: sfc /scannow
- Wait for the process to finish.
- Repeat step 1, run the following commands below, and hit Enter for each command:
DISM /Online /Cleanup-Image /CheckHealthDISM /Online /Cleanup-Image /ScanHealthDISM /Online /Cleanup-Image /RestoreHealth


These commands check the existence of any corrupt files and fix them.
5. Install the Windows Updates from the Microsoft catalogue
- Press Windows key + I to open the Settings app.
- Navigate to the Windows update option.
- Click on the Check for updates button. Note the KB of the updates pending.
- Go to the Microsofts catalog page.
- Enter the KB number of the update and press Enter.
- Click on the download button and install the executable file to get rid of the error.


6. Check Windows Updates Troubleshooter
- Press Windows key + I on the keyboard to open the Windows settings.
- Navigate to the System tab.
- Click the Troubleshoot options.
- Select Other troubleshooters.
- Click the Run next to the Windows Update to start the process.
- Follow the screen prompts to the end of the process. It will let you know the problems causing the error on your PC.


7. Perform an in-place upgrade
- Visit Windows 11 download page.
- In the Create Windows 11 Installation Media section click Download Now.

- Once the tool is downloaded, run it.

- Click Accept to proceed.

- Select Upgrade this PC now and click on Next.
- Follow the instructions on the screen to complete the process.
We have to mention that the upgrade process can take more than an hour, so be patient and don’t interrupt it. Once the process is finished, you’ll have a fresh version of Windows 11 installed.
What is the importance of PC updates?
Windows updates make our PCs safe from cyber-attacks and malicious users. Microsoft releases different versions of updates to minimize the security risks.
It also allows users to enjoy and test new features released through the updates.
We hope the above solutions solved install error 0x80242fff on Windows 11. In most cases, you need to reset the required components, and that’s it.
In case the problem is still there, you can take a look at our Windows 10 update error 0x80242ff guide for more easy-to-follow solutions. They may be applied by Windows 11 users, too.
This isn’t the only installation error you can encounter, and we also covered error code 801c03ed and error 0X8007013, so don’t miss out.
What method did you use to fix this problem? Let us know in the comments section below.
Read our disclosure page to find out how can you help Windows Report sustain the editorial team. Read more


Improve this guide


User forum
0 messages