Fix LiveKernelEvent 141 Hardware Error with 7 Tested Methods
Reinstalling your GPU driver will address the issue
Key notes
- The Live kernel event 141 is a hardware error that appears due to the failure of a PC component or by corrupted drivers and third-party software tools.
- That’s why troubleshooting all the hardware components, like the GPU and RAM, is essential.
- However, you could get away with reinstalling the video graphic drivers or initiating a clean boot.

If you recently experienced the LiveKernelEvent 141 error on your Windows 10 device, you are in the right place.
In this article, we will review why this malfunction can occur in the first place and try to fix it by using dedicated troubleshooting solutions.
What is LiveKernelEvent 141?
Right from the start, you need to know that the Live kernel event 141 error is a hardware error triggered by the failure of a PC component.
However, luckily, it can also happen due to corrupted drivers or because of specific third-party software.
LiveKernelEvent 141 is often caused by overclocking, RAM, NVIDIA, or ATI GPUs, but our readers have also encountered the problem while gaming, especially in Warzone.
What causes Live Kernel Event?
The LikeKernelEvent is a widespread hardware error that has a lot of other forms depending on the manifestation and the affected component.
That’s why we thought it’s essential to let you know about the most common such issues and that most of them can be fixed by using the solutions below.
- LiveKernelEvent 117 – This problem usually happens due to the nvlddmkm.sys Nvidia video driver failure.
- Problem event name: LiveKernelEvent code: 141, LiveKernelEvent 141 hardware error, LiveKernelEvent 193, 124 – The issue is mostly caused by faulty or corrupt drivers but our solutions below will help you fix it.
- LiveKernelEvent 1A1 – If you get this error, the culprit is the PSU, so here’s how to fix PSU errors in Windows.
- LiveKernelEvent 1A8 – The issue might be caused by the Intel Wireless driver, and it often occurs on HP laptops, so reinstalling the driver should fix it.
- LiveKernelEvent 1B8 – Overclocking and the XMP profiles might be the likely source of the problem
Anyway, with the right solutions, you can address this hardware error 141, as well as the above ones, by using the steps below.
How do I fix the LiveKernelEvent 141 error?
1. Check your memory
- Click the Start button, type memory and click Run as administrator to start Windows Memory Diagnostic with full privileges.

- Now, click on the first option, Restart now and check for problems.

- After the restart, the system will run a diagnostic on your RAM modules and find any possible problems. Unfortunately, you will have to replace the damaged module(s) if it does.
One or more RAM modules can be responsible for the Windows hardware error code 141.
If you recently experienced the LiveKernelEvent code 141 error on your Windows device. The first step would be to check the integrity of the memory by using the Windows Memory Diagnostic tool, as shown above. This also helps with LiveKernelEvent Code 1a1.
Should you discover that the RAM works fine, you might still try one of the best RAM cleaners and optimizers that will help you get a faster Windows 10 PC and avoid future LiveKernelEvent hardware errors.
2. Run DISM and SFC scans
- Click the Start button, type cmd, and select Run as administrator to open Command Prompt with full privileges.

2. In the command-line, type the following command, and hit Enter:
sfc/scannow
3. After it’s done, type the following command and press Enter after each:
DISM /online /Cleanup-Image /ScanHealthDISM /Online /Cleanup-Image /RestoreHealth
4. When the procedure ends, restart your PC and see if the hardware error code 141 persists.
It’s very likley to resolve LiveKernelEvent error code using the detailed steps in the Command Prompt app that helps you detect and remove corrupted files or unwanted programs from your OS.
In case that did not help solve the Kernel 141 error, we recommend giving a try to a reliable repair program that is more advanced and can fix various PC issues.
Running these scans can also help you fix similar issues like LiveKernelEvent 144. To know more about this error, read this guide.
3. Turn off GPU overclocking or uninstall the overclocking software
- Press the Start button and select Settings from the menu.

- Now, click Apps.

- Look for the overclocking software you’re using, click on it and hit the Uninstall button.

- Follow the procedure for a complete uninstallation.
If you’ve overclocked your GPU or your CPU, something might have gone wrong and that triggered the code 141 hardware error.
The logical solution is to tweak the app you’re using for overclocking and stop the process but if that doesn’t work, try uninstalling it by using the steps above.
If the overclocking is performed at the BIOS level, you will have to change the settings from there. If you don’t know how to do that, our guide on how to access BIOS on a Windows 7,10, 11 PC will definitely help you.
4. Uninstall the video graphic drivers and reinstall them again
- In order to fix the hardware error LiveKernelEvent 141, right-click the Start button, type device manager and select the app from the list.
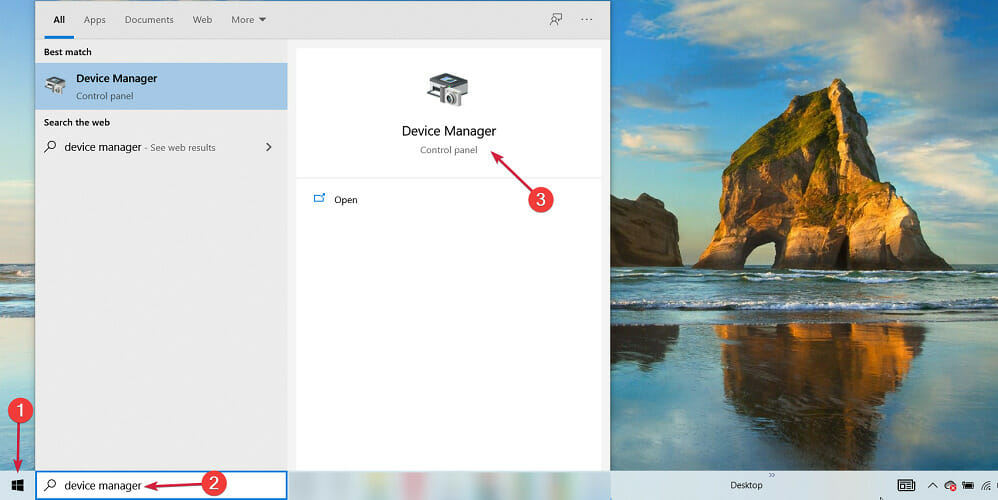
- Look for the graphics driver under the Display adapters section, right click on it and select Uninstall device.

- Now, you have the choice of restarting your device, and the system will automatically replace the driver or you can go to the manufacturer’s dedicated support page and download the correct driver.
If, after applying the steps from above you are still experiencing the LiveKernelEvent 141 hardware error you should reinstall the graphic cards drivers.
5. Disconnect external devices
Since there might be a conflict between specific drivers within the Windows 10 system, you should start the troubleshooting process by disconnecting the peripherals. Do that and check if the issue persists.
Afterward, you can reconnect your external devices, but when you do so also reinstall any associated drivers from scratch.
If needed, go to Device Manager first and uninstall these drivers (press Win +X hotkeys, click Device Manager, and select the drivers that must be uninstalled).
If you want to completely remove the drivers from your Windows 10 PC, consider using an uninstaller. Check out our list including the best uninstaller software available right now and fix the Kernel Event 141 issue.
6. Apply Windows 10 updates waiting for your approval
- Press the Win + I keyboard hotkeys then from System Settings click Update & Security.

- From the window that will be opened, under Windows Update you should be able to search for any possible updates.
- Note: if an update is already available it will be displayed automatically.
- Agree with the update process and just wait while the new firmware patch is flashed. In the end, restart your Windows 10 device.
If your system is not running on the latest available updates, you might receive the Live Kernel Event 141 in Warzone. So, check and apply the updates that might be waiting for your approval in the background.
In some instances, you won’t be able to update your system because there is no update button. We have a guide on what to do if the Check for updates button is missing so don’t panic.
7. Initiate a clean boot
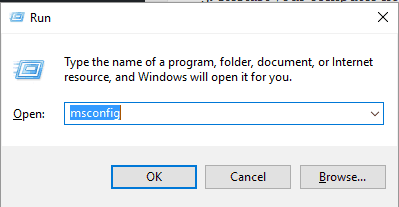
- Press Win + R and in the Run field that will be opened enter msconfig.
- Under System Configuration select the General tab.
- Look for the Selective Startup entry and uncheck the Load startup item option.
- Go to the Services tab and click on the hide all Microsoft services check-box and hit Disable all.

- Next, access the Startup tab and click on the Open task manager link.
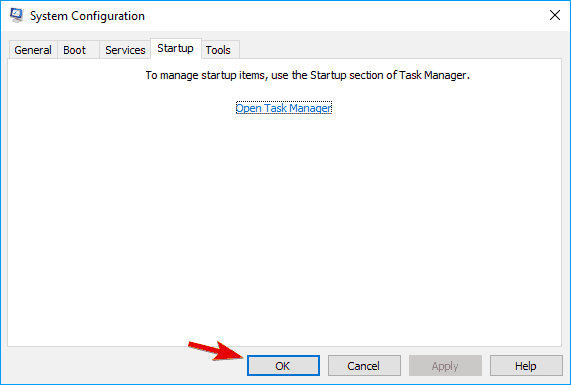
- From Task Manager disable all Startup programs. Save your changes and close these windows.
- Restart your Windows 10 system.
If a third-party app was causing the Live Kernel Event 141 Nvidia error now you can eliminate software conflicts that occur when you install a program or an update or when you use a process that’s not compatible with the Windows 10 OS.
You can start by removing any unnecessary startup apps on Windows. That will stop the third-party app from acting up again.
How do I fix the LiveKernelEvent 141 error in Windows 11?
- Press Windows + X then select Device Manager from the quick menu.

- Here, navigate to the Display Adapters section, right-click the driver you have installed and select Update driver.

Updating your graphics card driver will address the Live Kernel Event 141 error in Windows 11. Note that you need to keep your drivers up-to-date in order to have a well-functioning computer.
How is LiveKernelEvent diagnosed?
The LiveKernelEvent Code: 141 problem is most often associated with the graphics processing unit (GPU) of the machine that is afflicted.
Uninstalling the graphics driver and then installing a fresh copy of the program that has been kept up to date is the simplest solution to this problem.
Is live Kernel Event 141 a hardware error?
Live Kernel Event 141 is a hardware error that is usually caused by faulty drivers. This issue can also be due to problems with PC components.
So, it is important to follow the steps in this guide to troubleshoot your hardware components.
So, these are the troubleshooting solutions that can be applied to fixing the Windows 10/11 Live Kernel Event 141 error, assuming that there was no problem with your hardware that caused Windows to stop working correctly.
This isn’t the only error you can encounter, and we also covered LiveKernelEvent Code 1a8 and 1b8 in one of our other guides.
If you managed to address this issue using a different method, share your experience with us – we will then update this tutorial accordingly, giving you the credit for providing additional solutions.
You can get in touch with us quickly by using the comments section from down below. Thanks for reading!
Read our disclosure page to find out how can you help Windows Report sustain the editorial team. Read more


Improve this guide


User forum
0 messages