Fix: Windows 11 Monitor Detected but Not Displaying
This is triggered by connection issues from the External monitor
5 min. read
Updated on
Read our disclosure page to find out how can you help Windows Report sustain the editorial team. Read more
Key notes
- The Windows 11 monitor detected but not displaying is usually caused by a connectivity or driver problem.
- However, it may also be just a problem with your settings or the projection mode.
- Updating the drivers and your OS may also fix this display problem.
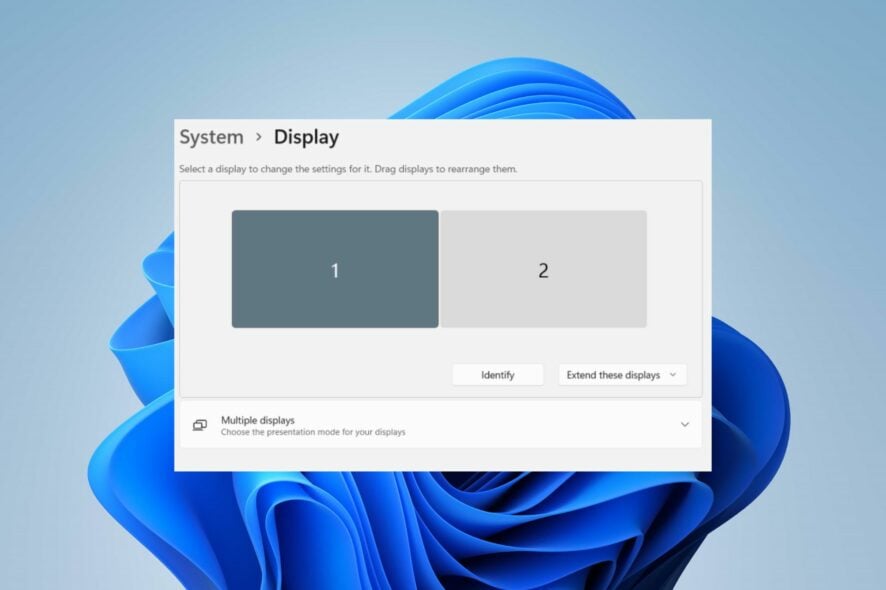
A computer with multiple monitors allows you to see more content, multitask and split your screen. However, many users report that Windows 11 monitors are detected but not displaying content, which can be very frustrating.
Another issue users report is Windows 11 not detecting the second monitor, making it impossible to connect and use it.
Why is the Windows 11 monitor detected but not displaying?
For many reasons, users may experience their Windows 11 monitor not displaying even when connected to their PC. Some factors liable to cause the issue are:
- Outdated graphics driver – If the graphics driver is not detected or outdated, it can cause problems with the devices connected to your PC due to bugs and compatibility problems.
- External monitor connection issues – There’s a possibility that the external monitor connection may be faulty, causing issues with it displaying on your PC.
- Outdated Windows OS – Windows updates often come with bug fixes and drivers, and if you don’t install them, many problems may occur, including the monitor issue.
Now that we know the causes behind this problem, let’s see how to get your monitor to display again.
How do I fix Windows 11 monitor that is detected but not displaying?
Before proceeding with any advanced steps for fixing the issue, try the following:
- Disconnect other external devices connected to your computer.
- Unplug the monitor from its power source and from your computer, then reconnect it.
- Restart Windows in Safe Mode and check if the monitors work properly.
- Inspect the connecting cables and see if they are properly plugged into the right ports and if they show signs of any deterioration and replace them if needed.
If you can’t fix the problem, proceed with the solutions below.
1. Change your Project mode
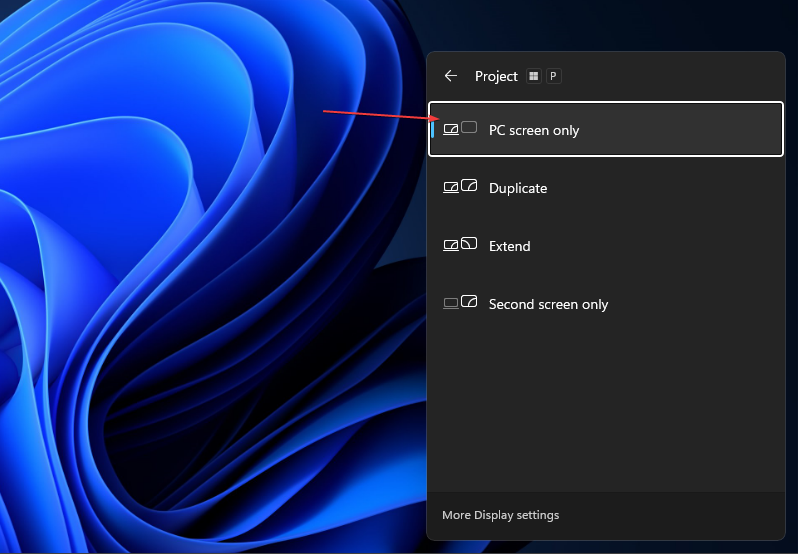
- Press Windows + P key to open the Project window, then select PC screen only.
- Disconnect the external monitor from your PC.
- Power off your computer and reconnect the monitor while the PC is still off.
- Power on your PC and press the Windows + P keys.
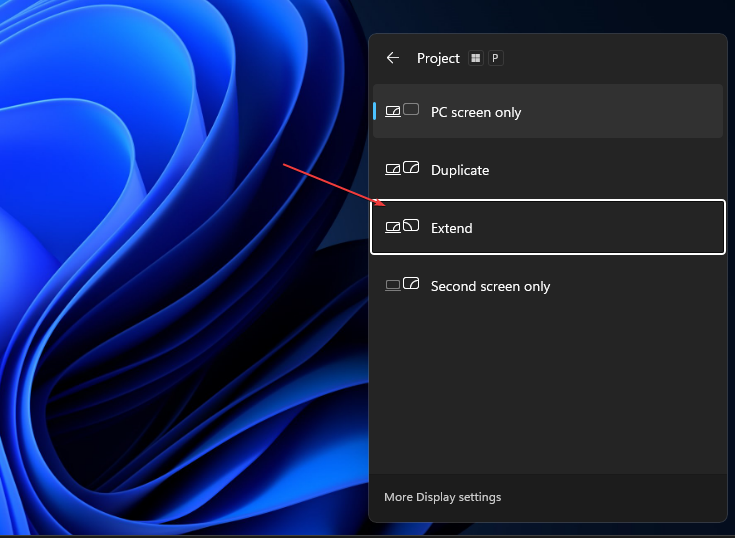
- Click the Extend option to check if the monitor is detected and displays as it should.
The above steps will refresh any external projection display device connected to your PC and resolve connection errors from other monitors.
Read what to do if you encounter problems with your monitor screen fading to black on your PC.
2. Change the settings for the external displays
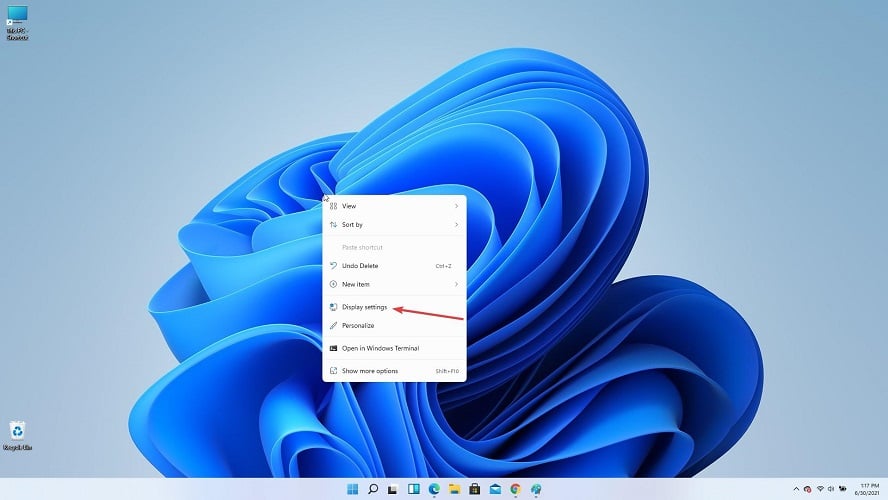
- Right-click on a free space on your desktop and select Display settings.
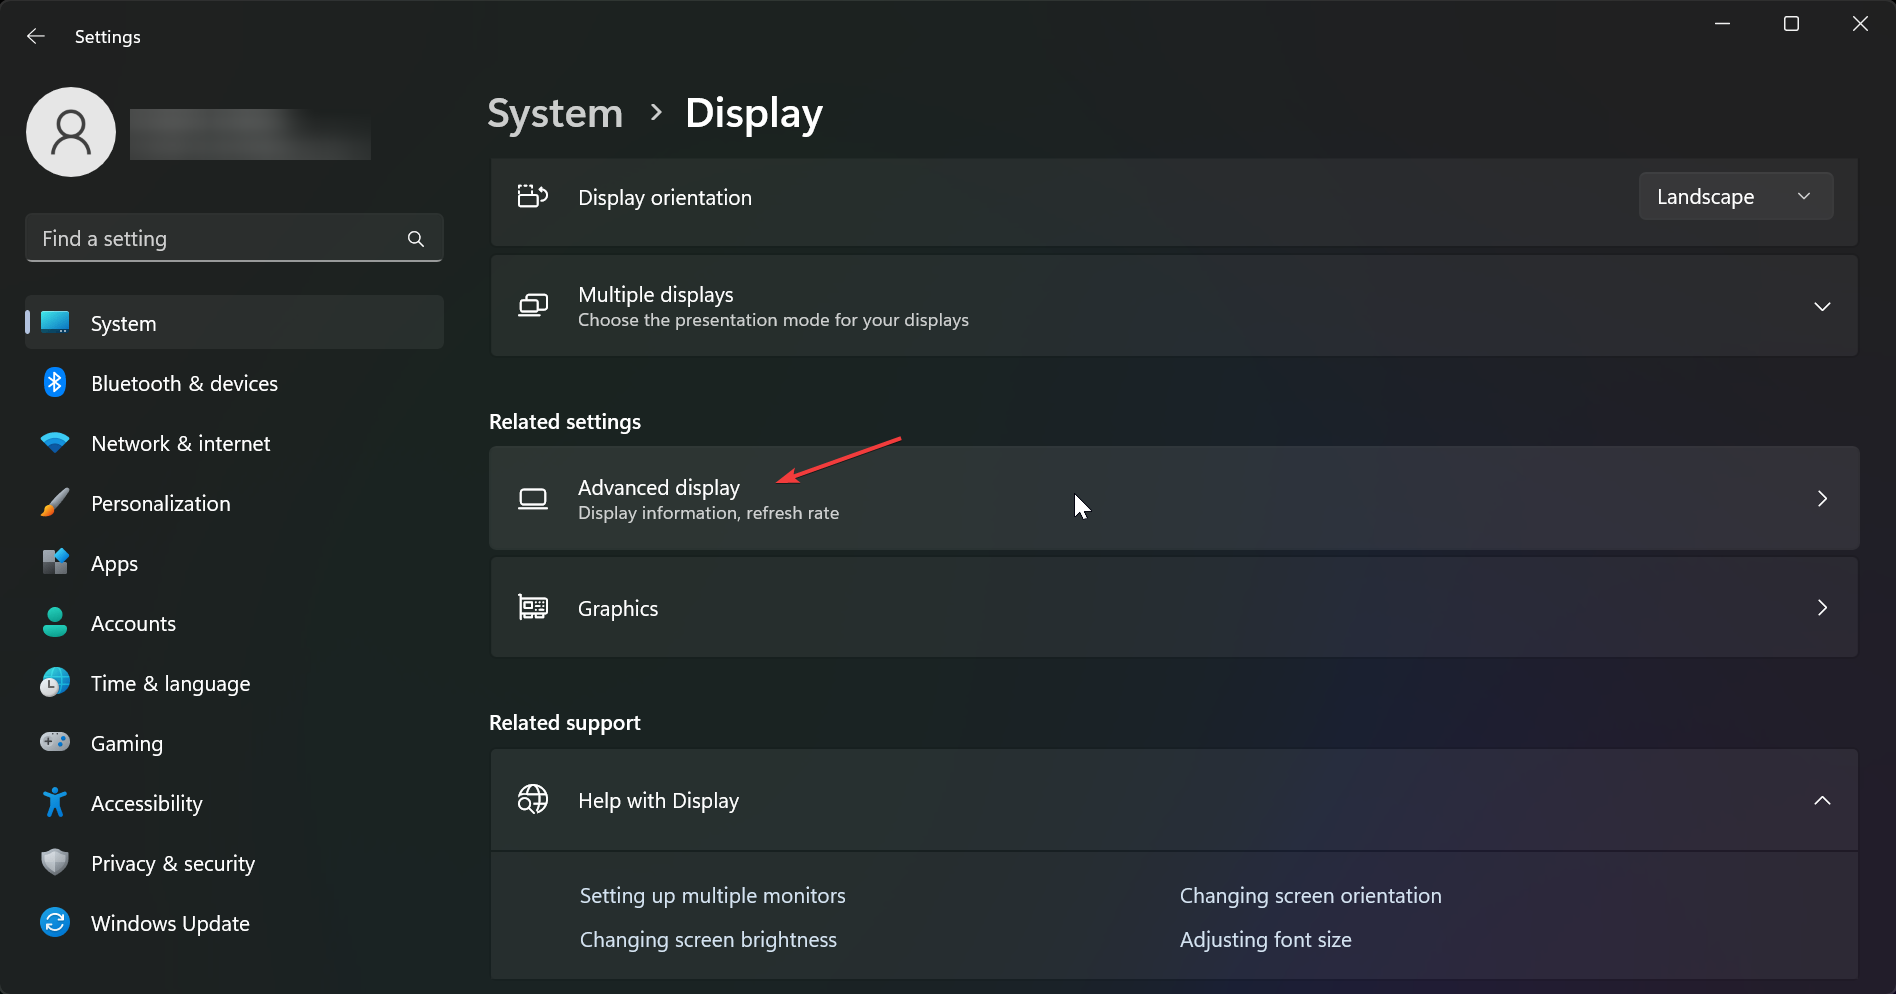
- Scroll down on the right pane and select Advanced display.
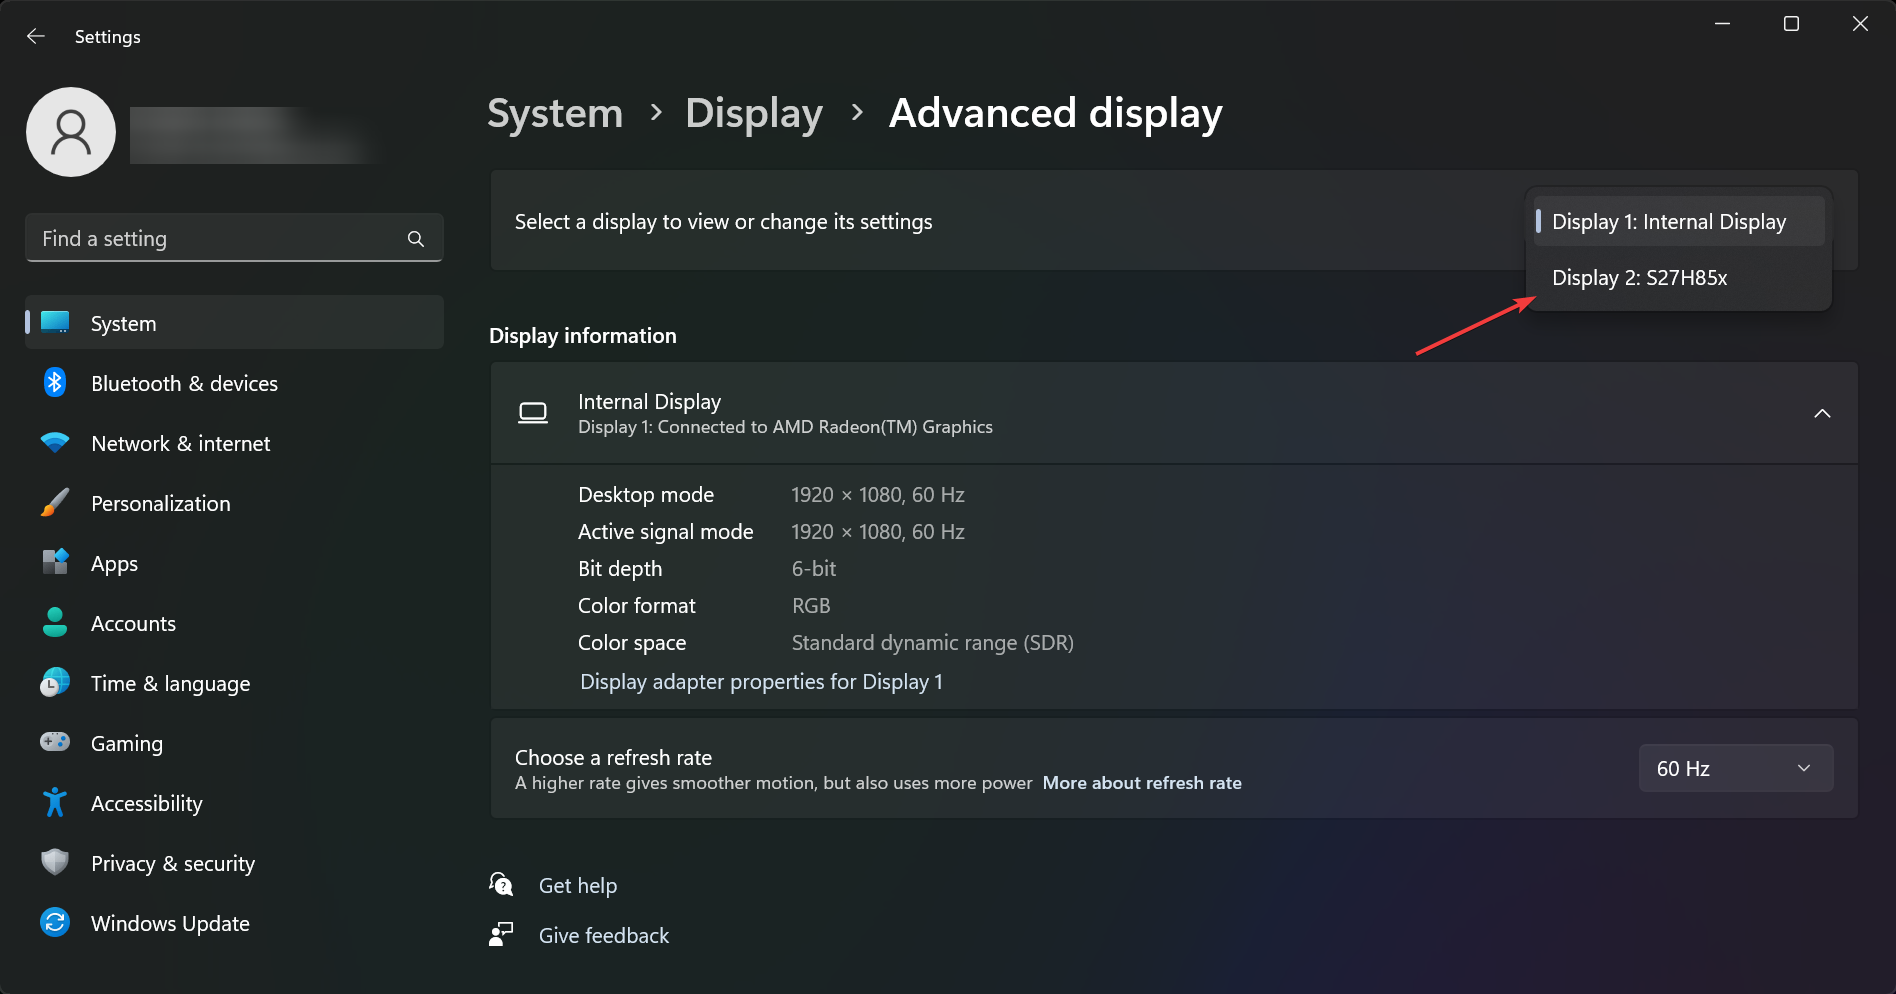
- Select the monitor that you are having a problem with from the top right corner drop-down menu.
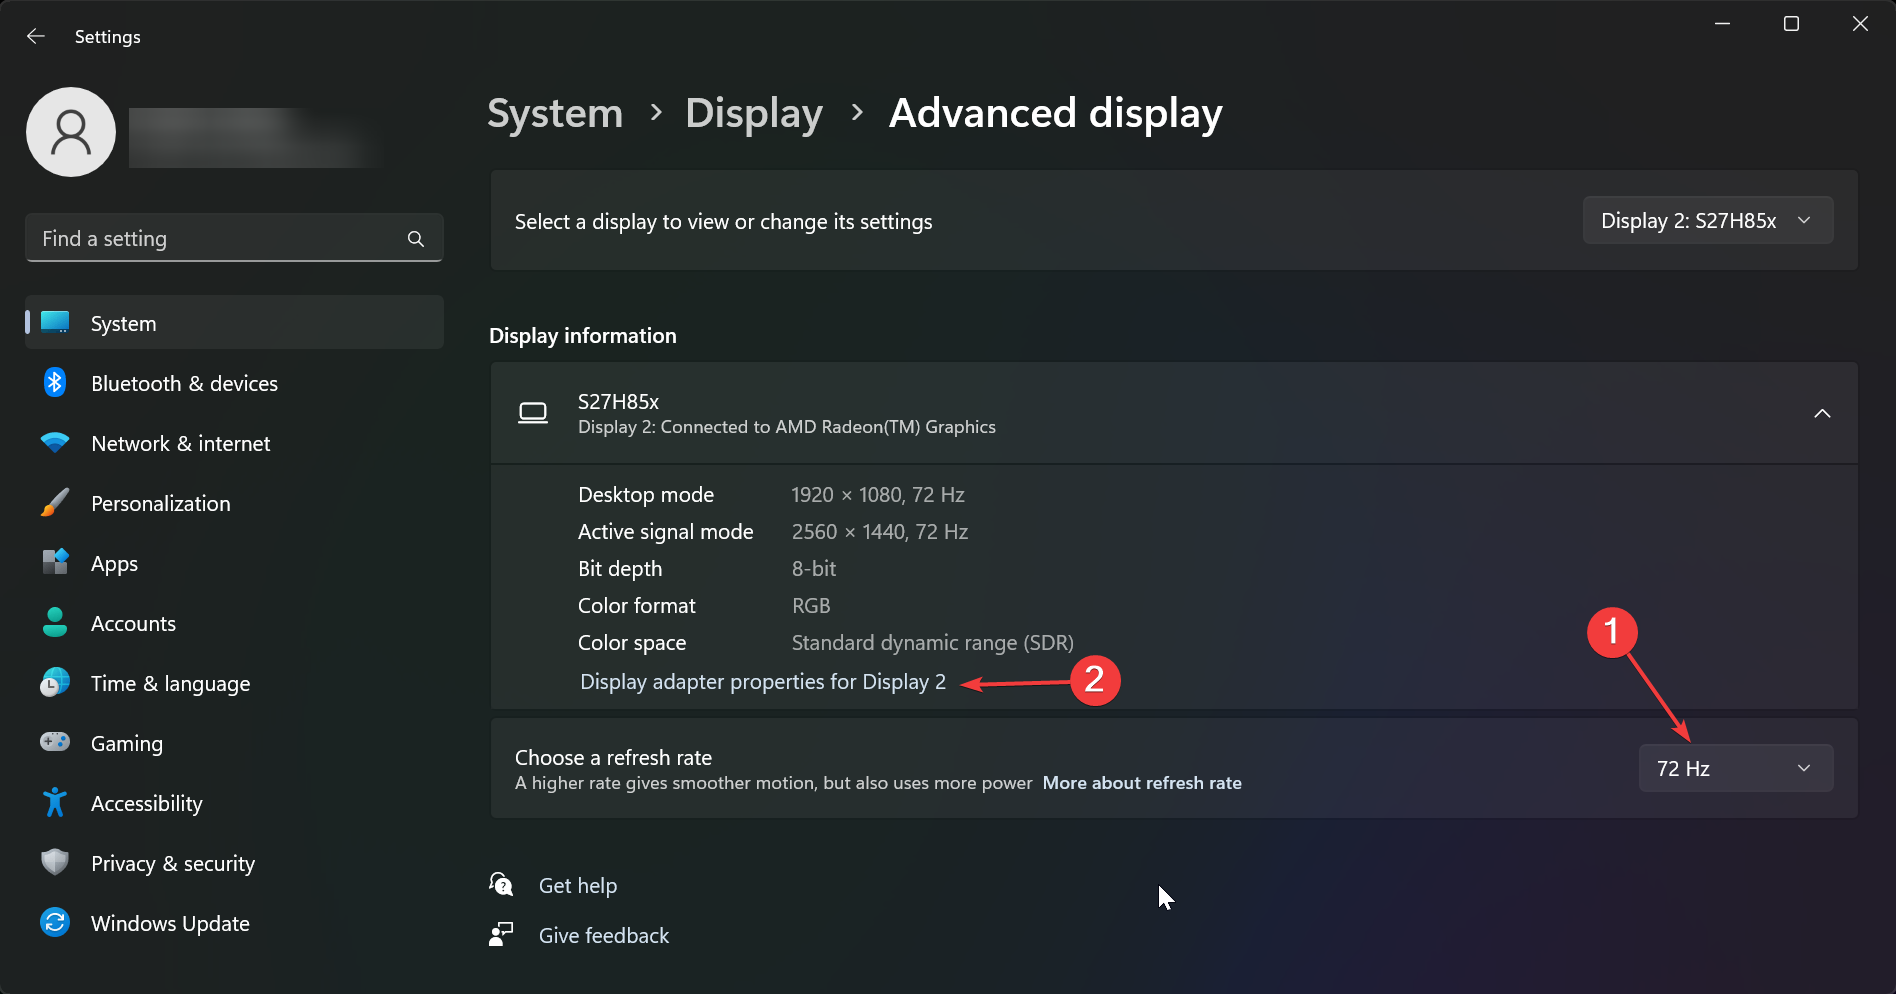
- Now, first make sure that the refresh rate is on par with your monitor and change it accordingly. If it is OK, click on Display adapter properties for it.
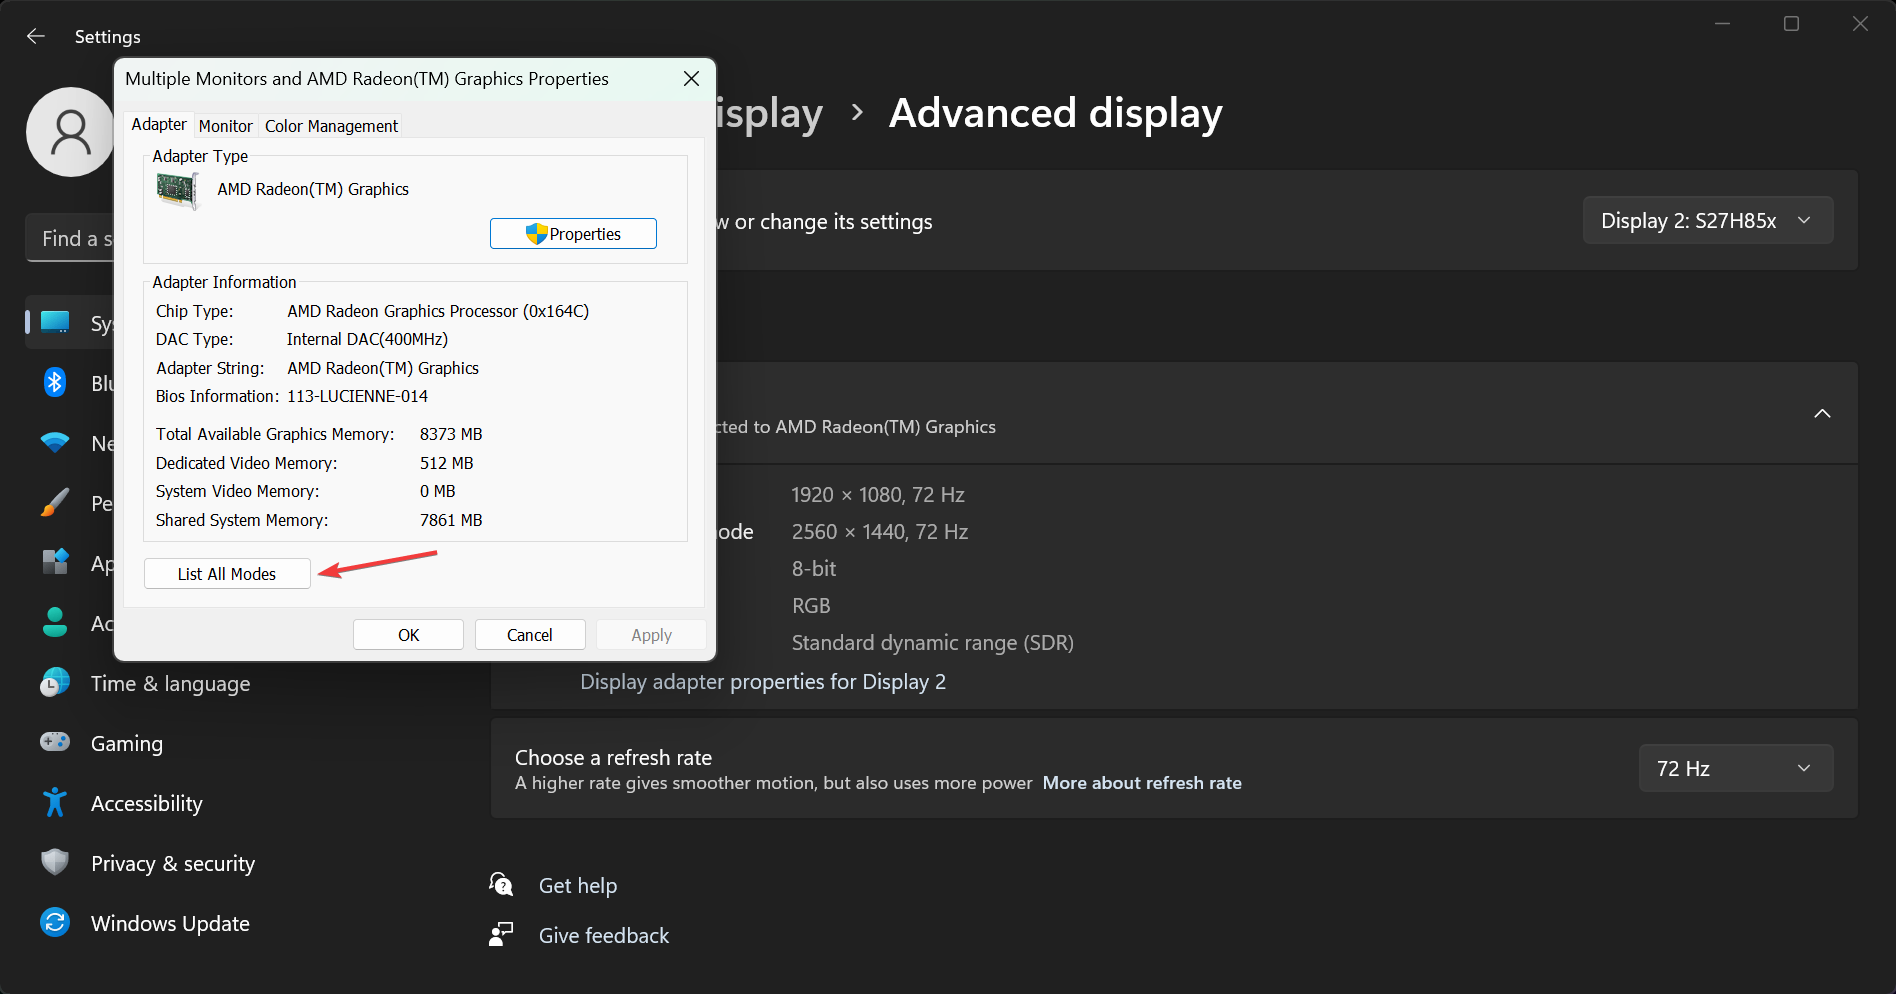
- In the new pop-up window, choose List All Modes and select a lower resolution and frequency and frequency that it’s now set.
- Play a little bit with these settings and see if the contents start showing up on your screen.
If you don’t have the correct drivers for your display adapter or monitor, they might set up the wrong default resolution and frequency for your displays.
Should this solution fix the problem, you will need to update the display driver. We have the solution below.
3. Enable multiple displays from the dedicated software
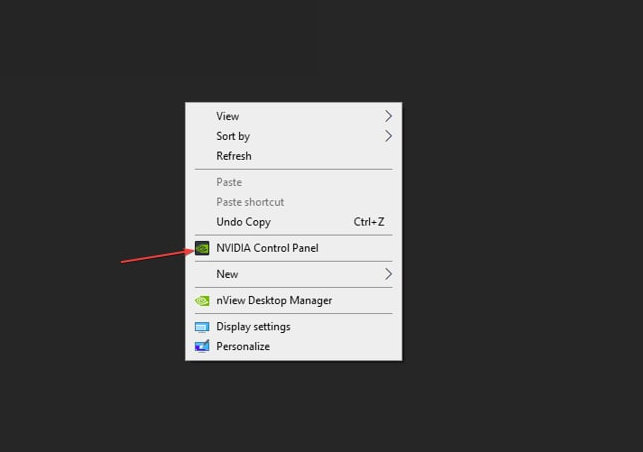
- Right-click on your desktop and open the NVIDIA Control Panel.
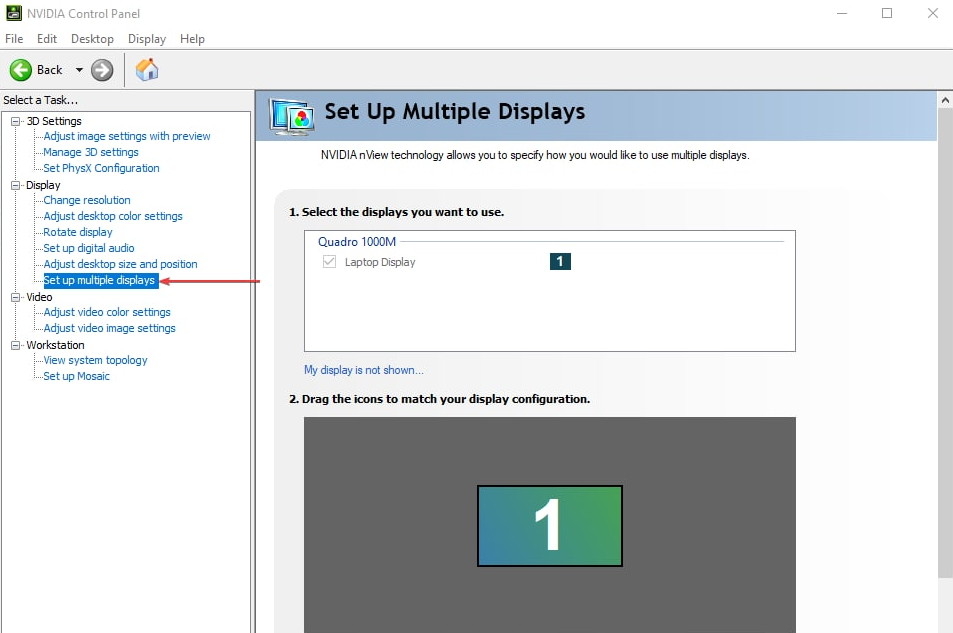
- Click Set up multiple displays on the Display tab.
- Check all the boxes for the monitor you want to use and save the changes.
- Restart your PC and check if the monitor displays.
Our example is for those with an Nvidia graphics card and software, but the solution is similar for AMD owners.
Enabling the multiple display option in the dedicated software lets your device detect external monitors and make them work smoothly. Check how to fix the Nvidia Control Panel crashing or not working on your PC.
4. Update your Graphics driver
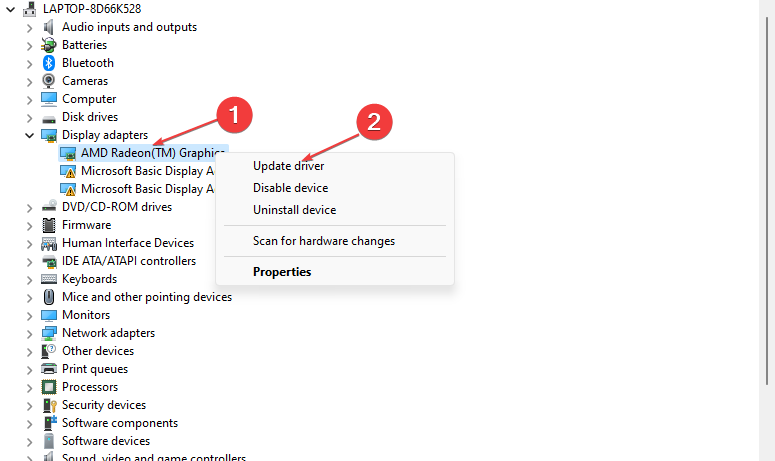
- Press Windows + R keys to open the Run dialog box, type devmgmt.msc, and click OK.
- Click the Display adapters, select the driver from the drop-down, and select the Update driver option.
- Click the Search automatically for drivers option.
- Restart your PC and check if the issue persists.
The graphics driver update will fix bugs affecting the monitor display and install the latest features to improve its performance. Read our detailed article on updating graphics drivers on Windows 11 if you have any issues.
Suppose you’re searching for a quicker updating alternative. In that case, you can opt for a specialized program like Outbyte Driver Updater to automatically find the latest updates for your outdated drivers, thanks to its large database.

Outbyte Driver Updater
Try this great app to update your drivers with the best versions immediately.Readers can also check our article about fixing external monitors not detected after sleep or not waking. Also, you can read our detailed guide about the third monitor not detected on Windows 11 and how to fix it.
Conclusively, this guide should help you if Windows 11 monitor is detected but is not displaying. Should you have further questions, then drop them in the comments section.





User forum
0 messages