Steam Needs to Be Online to Update: 8 Methods to Use
Yes, you can play games in Steam even if you are offline
5 min. read
Updated on
Read our disclosure page to find out how can you help Windows Report sustain the editorial team. Read more
Key notes
- Steam needs to be online to update in Windows 10/11, and, likely, the platform won't work correctly.
- Changing the compatibility mode for the app is one of the best solutions you can try.
- Because they can interfere with Steam, we recommend disabling Windows Firewall and your antivirus software.
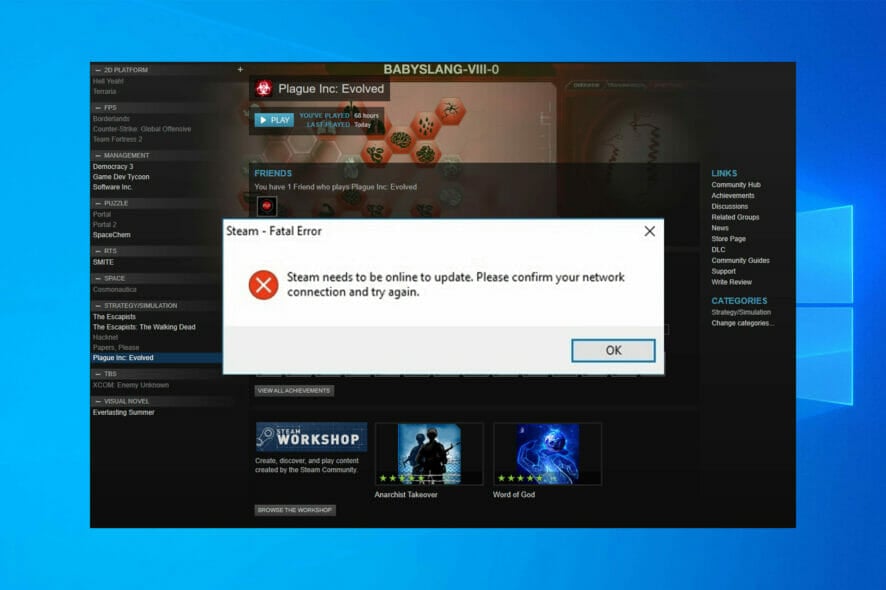
Many Windows 10 users use Steam regularly, but a few reported an error message saying that Steam needs to be online to update. It seems like this can happen on both Windows 10 and 11.
This strange problem will prevent you from playing your favorite games, so we understand how annoying it can be.
Fortunately, a few solutions are available, and we’re discussing them below. Before discovering them, we consider properly presenting some of the most common causes that can lead to the problem.
Why does Steam needs to be online to update error appear?
Different user experiences show a few common reasons for encountering this issue. Ranking on the top of this list are the following:
- Local client connection issues – If Steam fails to connect with the local client, you might get an error message regarding your Internet connection.
- Restricted online components – Another issue that users reported is Unable to initialize Steam API, and if this happens, it means that certain online components aren’t accessible to you.
- Access rights – Sometimes you might have permission errors, and if that happens, you’ll encounter this Steam access denied error; however, all these issues can be easily resolved.
With these significant triggers in mind, some solutions have proven effective.
How can I fix Steam needs to be online to update error?
1. Run Steam in Compatibility mode
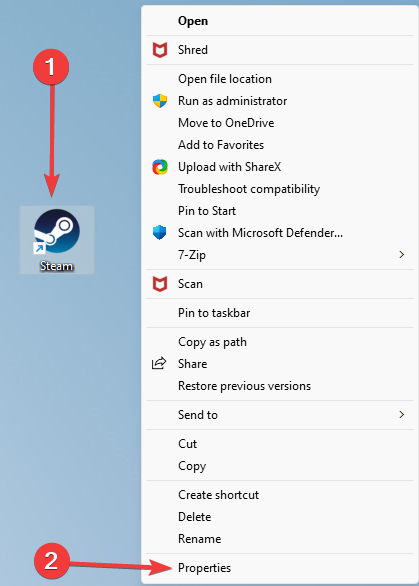
- Right-click the Steam shortcut and select Properties.
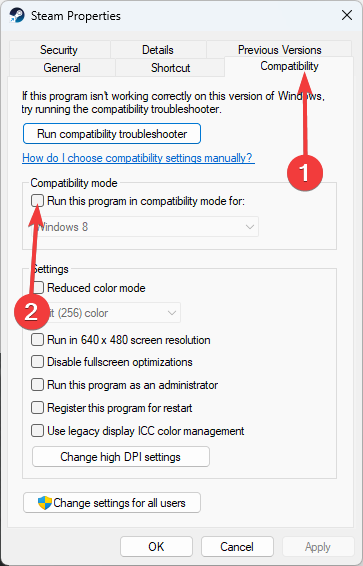
- Go to the Compatibility tab, then checkmark the Run this program in compatibility mode for box.
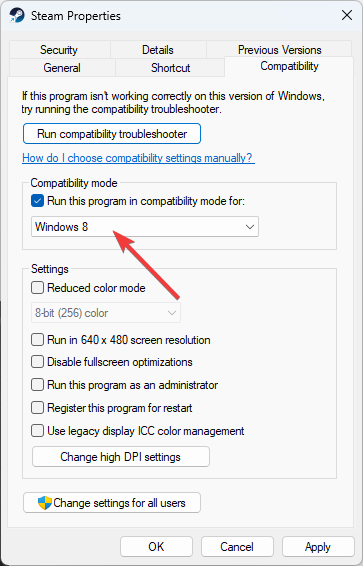
- Now, choose Windows 8 from the list of options.
- Check Run this program as an administrator option.
- Try starting Steam again.
2. Disable the Windows Firewall
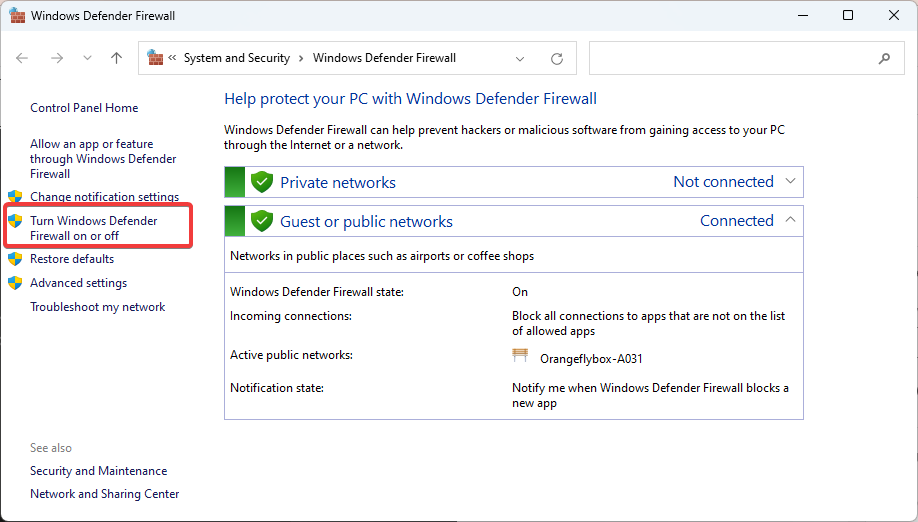
- Press the Windows + S keys, type firewall, and select Windows Defender Firewall from the result list.
- Click on Turn Windows Defender Firewall on or off.
- Select Turn off Windows Firewall (not recommended) for private and public network settings.
- Click OK to save the changes.
Disabling the firewall isn’t recommended, so after you’ve updated Steam, turn on Windows Firewall again.
To prevent data Internet connection-related errors in Steam, it’s also advised to see if Windows Firewall is blocking a port or program.
3. Delete files from the Steam folder
- Right-click on your Steam shortcut, then choose to Open file location.
- There, delete all files except these: Steam.exe and Steamapps folder.
- Restart your computer.
- After your computer boots, go to Steam’s installation directory and run Steam.exe.
4. Use the Registry Editor
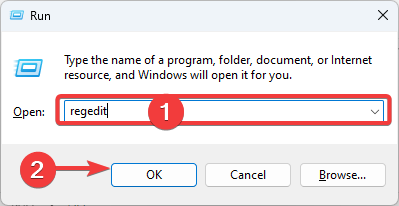
- Open the Windows Run dialog box by pressing Windows + R combination.
- Type regedit, then click on OK.
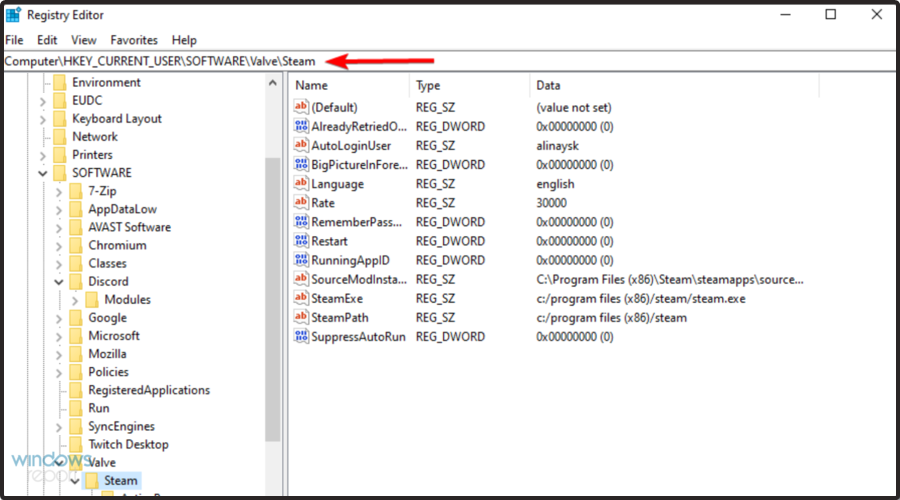
- Go to the following key:
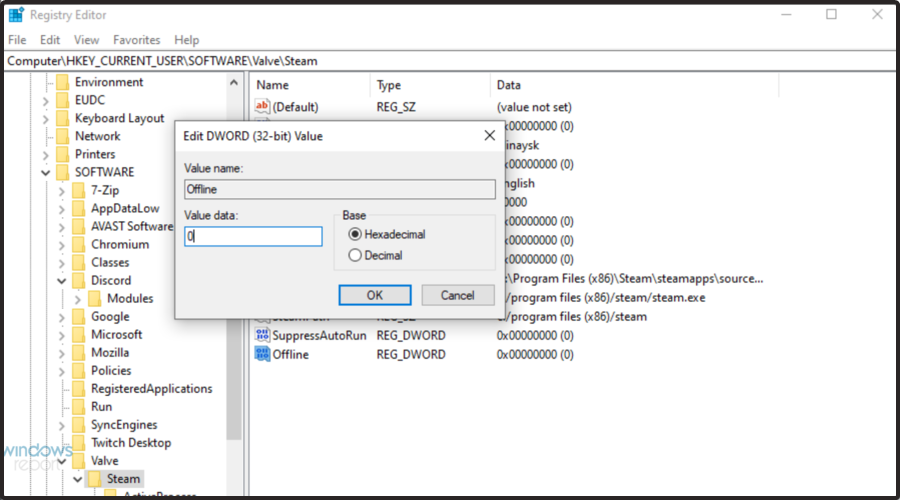
HKEY_CURRENT_USER\Software\Valve\Steam - In the right pane, click on Offline DWORD.
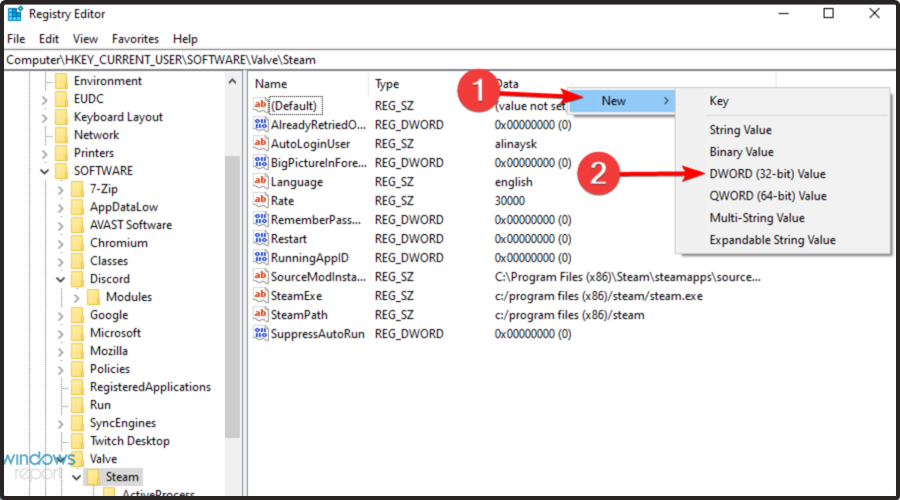
- If not available, right-click the right pane choose New, and select DWORD (32-bit) Value.
- Set the name to Offline, then double-click on it.
- Set its Value Data to 0 and save the changes.
- Close the Registry Editor, restart your computer, and check if the problem is resolved.
5. Temporarily disable your antivirus
If you’re using Norton, visit our uninstall guide for Norton Antivirus for more information.
In case you’re running McAfee, read our guide on how to remove McAfee antivirus for more information.
For those who are unsure how to perform the process in your particular case, we recommend visiting the manufacturer’s official website for info regarding this subject.
We suggest using the best antivirus software to avoid potential Steam problems.
6. Copy the Steam files from another computer
- Connect a flash drive on a working PC and copy all files from Steam’s installation directory except the Steamapps folder.
- Connect the USB flash drive to the initial PC and paste all the files to your Steam installation directory.
- When asked to overwrite files, click on the option to replace them.
- Run Steam.exe to check if the issue is resolved.
7. Add the -tcp parameter to the Steam shortcut
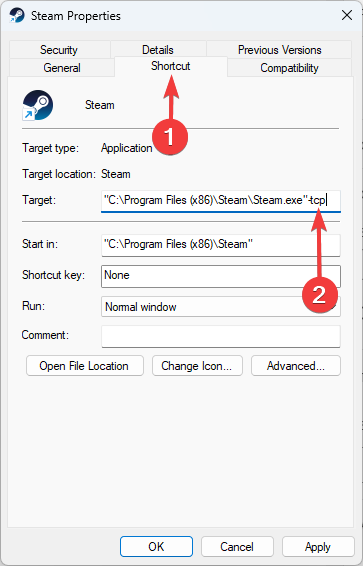
- Locate the Steam shortcut and right-click it. Choose Properties from the menu.
- Go to the Shortcut tab and, in the Target section, add -tcp after the quotation marks.
- Click Apply and OK to save the changes.
- Go to the Compatibility tab and check Run this program as administrator.
- Run the shortcut and check if the issue is resolved.
8. Turn off your Proxy
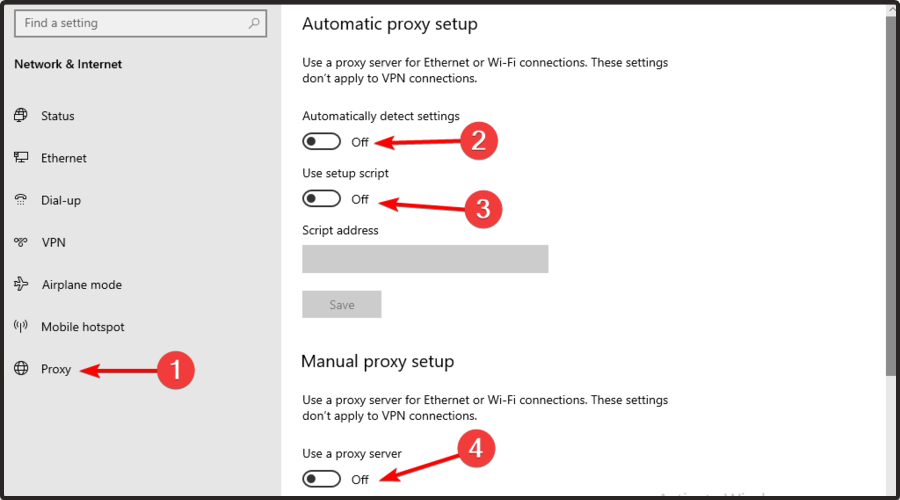
- Use the following hotkey to open Windows Settings: Windows + I
- Now, go to the Network & Internet section.
- Select Proxy from the left pane, and in the right pane, disable all options.
If you’re unfamiliar with proxy and how it works, read our proxy vs. VPN guide to learn more about it.
The Steam needs to be online to update error can cause lots of problems with your gaming, but we hope that our solutions were helpful to you.
Note that these solutions for Steam needs to be online to update will also work on a school computer.
If you’re aware of an alternative solution, leave it in the comments below. Also, leave any other questions, and we’ll check them out.









User forum
10 messages