Fix: Python Runtime Error

Programming is pretty fun, but at some point, when you try to run the program, unfortunately, and inevitably, errors will show up. So, causing, understanding, and fixing errors is integral to programming.

There are three significant types of errors that you can get in Python, but here we will talk about how to solve Python runtime errors.

A run-time error happens when Python understands what you are saying but runs into trouble when following your instructions.

How can I fix the Python runtime error?

So you’ve written everything correctly. In other words, your syntax is correct, but Python still doesn’t understand what you’re saying. Let’s have a simple example of a Python runtime error:

  • print(solution)

If you try to run this simple line, you will receive a runtime error simply because you didn’t define the solution variable. The line doesn’t make sense.

To understand better that conundrum, let’s make an association with English grammar. Let’s take this sentence, for instance.

  • Please eat the door.

Grammatically, there is absolutely no problem with this sentence. Everything is there; we have all the syntax elements correct.

But when you are trying to understand the sentence, when you piece up the words, it doesn’t make sense because you know you can open and close the door, even shut it or taking it out but eating it?

In programming, this will be called a run-time error because it shows up before you start the program. There are a few types of runtime errors. In this article, you will learn how to solve them.

1. Use an undefined variable or function

This can also occur if you use capital letters inconsistently in a variable name:

callMe = “Brad”
print(callme)

Traceback (most recent call last):
  In line 2 of the code you submitted:
    print(callme)
NameError: name 'callme' is not defined

In this case, the program returned the undefined variable error. You defined the variable callMe, but you tried to print another variable, callme. You must use the variables precisely as you define them, case sensitive.

2. Dividing by zero

Guess what? Python cares about math, and dividing by zero makes no sense in math. 

print(1/0)

Traceback (most recent call last):
  In line 1 of the code you submitted:
    print(1/0)
ZeroDivisionError: division by zero

So this line returns a runtime error as Python can read it properly, but when it comes to executing it, he refuses to do so as it has no mathematical sense.

3. Use operators on the wrong type of data

print(“you are trying to add text and numbers” + 20)
Traceback (most recent call last):
  In line 1 of the code you submitted:
    print("you are trying to add text and numbers" + 20)
TypeError: can only concatenate str (not "int") to str

This line returns the runtime error because you try adding text with numbers, crayons, oranges, chairs with pigeons, etc. It just doesn’t make sense to perform operations with different types of variables.

You also need to know that Python runs the program in two steps. It first checks the syntax and if the syntax is correct, it goes to the second step of executing the program. That’s where he stumbles on possible runtime errors.

To better handle errors such as these in the future, we have a great guide on how to use try-except-print in Python for error handling.

If you are facing another issue with Python, such as python setup.py bdist_wheel did not run successfully; we have a separate guide to how to use it.

In case you’re having problems with Python, we also have a guide on _xsrf argument missing from post error, so feel free to check it out. Our latest guide covers Cannot open shared object no such file or directory error, so don’t miss it.

Before you leave, why not check our latest guide and see how to fix python27.dll is missing error? If you encounter the Python error OXZEP7 software, follow our step-by-step fixes to resolve it quickly.

We hope this guide answers all your questions, but if you have any others or you run into other problems, please throw them down in the comments section below, and we will get back to you.

How to rearrange items and pins in the Microsoft Team sidebar for a more custom look

There’s a couple of ways that you can customize Microsoft Teams. You can add new apps, try a dark theme, enable read receipts, and more.  Another method, though, is to rearrange the items in the sidebar or pin different things to match your own tastes. This will let you put the focus on the aspects of Teams that you use most, be it the calendar, chat, Planner, or any other app or service for Teams. In our latest Office 365 guide, we’ll show you how you can do that.

Step 1: Find and Pin the apps or features you want

Before getting started, there are some notes to better help you understand what a “pin” does in Microsoft Teams. First off, there is the definition of a “pin” itself. Pins are just shortcuts to certain apps and key aspects of Teams like chat or activity.

The Microsoft Teams Sidebar will only show you a certain number of pins all at once. Once you reach above a threshold, other pins go into an overflow area, accessed by clicking the … on the bottom of the screen. You can pin an app or a Teams feature by clicking the … at the bottom of the screen, find your app, right-click it and then choose Pin. Pins should also save across the web and desktop versions of the app so you don’t have to change them manually.

Step 2: Rearrange your pins by clicking and dragging them

Once you’re pinned the apps or aspects of Teams that you want to use in the sidebar, you’ll be able to rearrange them. You can do this by simply holding down your click on the icon for the pin you want to move, and then dragging it up or down in the list. You should see a line appear, showing you where it will be “dropped” once you let go of your click. This will allow you to put it in your own order and put a better focus on whatever you want to use more often.

It’s really as simple as that. There are no menus to navigate or extra buttons to press. Just simply hold down, and drag. If you’re unsatisfied with how your pins are looking, you always can unpin by right-clicking and choosing Unpin. 

There’s so much more Teams can do for you!

Pins are just one cool area of Teams. There is a lot more that Teams can do, including background images during calls, keyboard shortcuts, online presence, and much more. Our dedicated Teams news hub has you covered, so feel free to check it out for additional Teams news articles, how-tos, guides.

FIX: MapleStory runtime error abnormal program termination

MapleStory is a free-to-play, 2D, side-scrolling massively multiplayer online role-playing game. However, sometimes the game displays the runtime error abnormal program termination during the launch.

Several users have reported similar issues in the official MapleStory. This error can occur due to a corrupted Microsoft Visual C++ installation or a glitch in the Nexon launcher.

If you are also troubled by this error, here a couple of troubleshooting tips to help you resolve the MapleStory runtime error abnormal program termination error in Windows.


How do I fix the MapleStory runtime error?

1. End maplestory.exe process

  1. When the error occurs, and you get a black screen, do the following.
  2. Press Ctrl + Alt + Delete on your keyboard.
  3. Select Task Manager from the options.
  4. In the Task Manager, open the Process tab.
  5. Select maplestory.exe and click End Task.
  6. Close the Task Manager and restart MapleStory.

Ending the MapleStory.exe process from the Task Manager and then restarting the game seem to have resolved the error for many. If the issue is resolved, repeat the steps 3-4 times before proceeding with other steps.


2. Reinstall Microsoft Visual C++

Uninstall Microsoft Visual C++

runtime error abnormal program termination


  1. Press Windows Key + R to open Run.
  2. Type control and click OK to open Control Panel.
  3. Under Programs, click on Uninstall a program.
  4. Select Microsoft Visual C++ 2015.
  5. Click on Uninstall and click Yes to confirm the action.

Reinstall Microsoft Visual C++

runtime error abnormal program termination


  1. Download the latest version of Microsoft Visual C++ 2015 Redistributable update.
  2. Run the installer and install the package.
  3. Reboot the computer and relaunch MapleStory.

One of the common reasons for the runtime error when launching MapleStory is an outdated Microsoft Visual C++ version installed on your computer. Reinstalling the same seems to have resolved the issue for many. If the issue persists, do the following.

Install DirectX End-User Runtime Web Installer

runtime error abnormal program termination

  1. Go to the DirectX End-User Runtime Web Installer page and click the Download button.
  2. Run the installer and follow on-screen instructions to install runtime libraries.
  3. Reboot the computer and check if MapleStory runs without any error.

3. Reinstall Maple Story with a patcher

runtime error abnormal program termination

  1. Download the MapleStory game client. 
  2. Next, download the MapleStory Manual Patcher.
  3. Once both the files are downloaded, open Control Panel.
  4. Press the Windows key, type control, and click on Control Panel.
  5. Next, click on Uninstall a program.
  6. Select MapleStory and click Uninstall. Click Yes to confirm.
  7. Once uninstalled, restart the computer.
  8. Open File Explorer and navigate to the following:
    • C:Program Files
  9. Locate and delete the WIZET folder.
  10. Install MapleStory, but don’t run it yet.
  11. Install MapleStory manual patcher.
  12. Run MapleStory and check for any improvements.

The MapleStory runtime error abnormal program termination can occur due to several reasons. The Nexon developers recommend installing the latest Visual C++ 2015 Redistributable package to fix the issue.

However, if the issue persists, follow other steps in this article to fix the problem.


[wl_navigator]

FIX: Logitech SetPoint runtime error

SetPoint is customization software for Logitech mice. Some SetPoint users have posted on Microsoft’s support forum about a Logitech SetPoint runtime error shown in the shot directly below.

That recurring runtime error arises when the SetPoint software is running, and it causes the program to restart. If you’re wondering how to fix that runtime error, check out some of these potential resolutions for it.


How do I fix the Logitech SetPoint runtime error?

The SetPoint runtime error logitech setpoint runtime error

1. Install missing Visual C++ libraries with Visual C++ Runtime Installer

Some users have said they’ve fixed the Logitech SetPoint runtime error with the Visual C++ Runtime Installer. That software will reinstall existing Visual C++ runtime libraries on your PC and install all missing ones.

Click Download Now on Visual C++ Runtime Installer’s Softpedia page to get the installer for that software. Close any other open software before utilizing this command-line utility.

When you have that software up and running, press the Y key to confirm and install Visual C++ runtime libraries.

Visual C++ Runtime Installer software logitech setpoint runtime error


2. Delete the msvcp110.dll file

Another confirmed fix is to delete the msvcp11.dll file for SetPoint.

  1. To do that, launch File Explorer, which you can do by pressing the Windows key + E hotkey.
  2. Open the SetPointP folder in Explorer, which the default path for is: ProgramFiles > Logitech > SetPointP.
  3. Select the msvcp110.dll in the SetPoint folder.
  4. Click the Delete button on Explorer’s Home tab.The Delete button logitech setpoint runtime error

3. Run Logitech SetPoint in compatibility mode

Some users have also confirmed that running Logitech SetPoint in compatibility mode can resolve the runtime error.

  1. First, open File Explorer’s window.
  2. Next, open your SetPointP folder.
  3. Right-click the setpoint.exe and select Properties.
  4. Click the Compatibility tab shown in the shot directly below.
    Compatibility tab logitech setpoint runtime error
  5. Click theRun this program in compatibility mode for check box.
  6. Select Windows 7 on the drop-down menu.
  7. Select the Apply option, and click OK to exit.

4. Clean boot Windows

Runtime errors can arise from conflicting programs.

  1. To ensure there aren’t any programs conflicting with SetPoint, press the Windows key + R hotkey.
  2. Type msconfig in the Open box, and click the OK button. Then the MSConfig window will open from which you can configure a clean boot to fix program conflicts.
  3. On the General tab, select Selective startup.
    Selective startup radio button logitech setpoint runtime error
  4. Uncheck the Load startup items check box to deselect that option.
  5. Next, select the Load system startup and Use original boot configuration options if they’re not selected.
  6. Click the Services tab shown directly below.
    The Services tab logitech setpoint runtime error
  7. Select the Hide all Microsoft services option, and then press the Disable all button.
  8. Select the Apply button.
  9. Click OK to close MSConfig.
  10. Thereafter, a dialog box opens. Click Restart on that dialog box window.
  11. If SetPoint runs ok after cleaning booting, you’ll need to figure out what program or service is conflicting with it.

5. Reinstall SetPoint

As a final fix, try reinstalling SetPoint.

  1. Type appwiz.cpl in Run’s Open box and click OK to open the uninstaller window.
  2. Select Logitech SetPoint in the software list.
    The uninstaller logitech setpoint runtime error
  3. Select the Uninstall option, and click Yes on any confirmation prompts.
  4. Restart Windows when you’ve uninstalled Logitech SetPoint.
  5. Click Download SetPoint on the program’s webpage to get the installer for latest software version.
  6. Then reinstall SetPoint with the setup wizard.

Those are some resolutions users have fixed the Logitech SetPoint runtime error with. In most cases, the issue is due to missing Visual C++ runtime components or an incompatible msvcp110.dll for the software.

So, installing missing Visual C++ runtime libraries and deleting SetPoint’s mscvcp110.dll are the most probable fixes.


[wl_navigator]

FIX: Hulu playback failure error code runtime -2 -5

Hulu is a U.S. based video-on-demand service that offers TV shows and movies on subscription. However, at times when watching a TV show or Live TV, Hulu displays the playback failure error code runtime -2.

The error can occur on streaming devices such as Fire TV, Roku device as well as your smart TV. Hulu doesn’t seem to have any official statement on the playback failure as of yet and only recommends some common troubleshooting tips to fix the problem.

If you are also troubled by this error, here are a couple of troubleshooting tips to help you resolve the Hulu playback failure error code runtime -2.

How do I fix the Hulu playback failure error code runtime -2?

1. Clear cache and data

Hulu Playback failure Runtime error -2

Android TV 

  1. Open Settings.
  2. Go to Applications.
  3. Select Hulu from the list of apps.
  4. Select Clear Cache and data.
  5. Once the data is cleared, launch the Hulu app and check for any improvements.

Android phone and tablet

  1. Open Settings from the home screen.
  2. Go to Apps > Hulu > Storage.
  3. Tap on Clear cache and Clear data.
  4. Tap Yes if asked to confirm the action.

Apple TV 

  1. Apple TV does not offer an option to clear the Hulu app cache.
  2. To clear the cache, uninstall and reinstall the app.

Fire TV and Fire TV Stick

  1. Open Settings.
  2. Go to Application and select Manage Installed Applications.
  3. Select Hulu from the list of apps.
  4. Select both Clear Cache and Clear Data.

Clearing the cache can help you fix the playback failure error in the Hulu app. If you are using any other device, refer to the Hulu‘s official page.

2. Perform a power cycle

Hulu Playback failure Runtime error -2
  1. If the issue persists, try performing a power cycle.
  2. Power off the device you are using to watch Hulu.
  3. Power off the modem and router.
  4. Unplug the equipment from the power source.
  5. Leave all the device idle for a few minutes.
  6. Connect all the devices back to the power sources.
  7. Restart your modem as well as your TV/stream devices.

 Check your connection 

  1. If the issue persists, you may want to check your internet connection as well.
  2. Hulu recommends running a speed test and comparing results with its recommendations.
  3. You can check the internet speed test using a web browser on your TV or the apps on your smartphone.

3. Check for app and system updates

Hulu Playback failure Runtime error -2

Android phone & tablet

  1. Open Google Play Store.
  2. Search for the Hulu app.
  3. Tap on the Update button to install the available updates.

Android TV

  1. On the Home Screen, open Apps.
  2. Select Google Play Store.
  3. Open My Apps and check for any pending updates for Hulu.

Fire TV and Fire TV Stick 

  1. Open Settings.
  2. Go to Application.
  3. Select Manage Installed Applications.
  4. Select Hulu.
  5. Download and install any pending updates for the app.

4. Reinstall Hulu

Hulu Playback failure Runtime error -2

For Android phone and tablet

  1. If the issue persists, try reinstalling the app.
  2. Open Settings > Apps.
  3. Hulu.
  4. Tap on Uninstall.
  5. Reboot the device.
  6. Open Play Store and reinstall the app.

Fire TV and Fire TV Stick

  1. Open Settings from the menu.
  2. Go to Applications > Hulu > Uninstall.
  3. Turn off the device for 1 minute.
  4. Turn on your Fire TV and reinstall Hulu.

Roku 

  1. From the Roku home screen, highlight the Hulu app.
  2. Press the asterisk * button on the remote.
  3. Select Remove channel.
  4. Once uninstalled, reboot the Roku device.
  5. Reinstall the Hulu app from Channel Store.

5. Try an alternative streaming service

Some of the content available on Hulu can also be accessed through Disney+. If you continue to face issues with the Hulu app, you can give Disney+ is a streaming service that could be a good alternative for your preferences.

  1. Go to the Disney+ website
  2. Pick a subscription plan.
  3. Enter your details and create your account.
  4. Start browsing the library.

⇒Get Disney+

The Hulu playback failure error code runtime -2 error code can occur due to several reasons. We have listed the general troubleshooting steps that can help you to fix the error while streaming Hulu contents.

FIX: Xbox One controller runtime error

Xbox One controller is fully compatible with your Windows 10 system out of the box. However, at times after connecting the controller, you may encounter the Xbox One controller runtime error.

The error occurs occasionally but still annoying. Several users have reported this error in the Microsoft community forum.

This error started popping up after I started using the XBOX ONE controller on Windows 8.1.
I had the driver’s from Mayor Nelson’s blog installed a long time ago, but only after ACTUALLY plugging the controller in via micro USB cable this error occurs.

This error can occur due to incompatible drivers or issues with the Visual C++ package. Follow the steps listed in this article to fix the Xbox One controller runtime error in Windows.


How do I fix the Xbox One controller runtime error?

1. Install Xbox One controller PC driver

Xbox One controller runtime error

1.1 Uninstall Xbox 360 drivers

  1. Press Windows Key + R to open Run.
  2. Type control and click OK to open the Control Panel.
  3. Under Programs, click on Uninstall a program.
  4. Select Microsoft Xbox 360 drivers from the list of installed programs.
  5. Click on Uninstall. Click Yes to confirm the action.

1.2 Install Xbox One controller driver

  1. Once the drivers are uninstalled, download the latest version of Xbox One Driver.
  2. Run the installer to install the driver.
  3. Once the driver is installed, reboot the computer.
  4. Connect your Xbox One controller and check if the error is resolved.

Note that, Microsoft has stopped providing the direct download links for its Xbox One controller as it comes pre-installed with Windows 10. However, you can still manually download the drivers from third-party sources with a little research.


Xbox One error 0x87e107d1: Here’s how to fix it


2. Perform a clean boot

Xbox One controller runtime error

  1. Press Windows key + R.
  2. Type msconfig.msc and click OK.
  3. In the System Configuration window, open the Services tab.
  4. Check the Hide all Microsoft services box.
    • This will hide all the essential Microsoft services so that you don’t disable any of them accidentally.
  5. Once all the Microsoft services are hidden, click the Disable all button.
  6. Keep the System Configuration window open.
  7. Press Ctrl + Shift + Esc to open Task Manager.
    Xbox One controller runtime error
  8. Open the Startup tab.
  9. Disable all the apps enabled in the Startup tab and close the Task Manager.
  10. In the System Configuration window, click Apply and OK to save the changes.
  11. When prompted, click on Restart now.

Windows will now restart with bare minimum Windows services. Try connecting the Xbox One controller to the PC and check if the error occurs.

If the error does not occur in the Clean Boot mode, it is possible that third-party software is triggering the error. You need to find and remove the software to fix the issue.

Make sure you disable Clean Boot by enabling all the disabled services and reboot the computer before proceeding with other troubleshooting steps.


3. Update Microsoft Visual C++

Xbox One controller runtime error

  1. Go to the Microsoft Visual C++ download page.
  2. Click the link to download the latest version of Microsoft Visual C++.
    • Make sure you select the right edition of the software (32/64bit).
  3. Run the installer and follow on-screen instructions to finish the installation.
  4. Reboot the computer and connect your Xbox One controller.
    • Check if the runtime error is resolved.

3.1 Update Windows OS

  1. Press Windows Key + I.
  2. Go to Update & Security.
  3. Download and install all the pending updates for your Windows build.

The latest build of Windows 10 comes pre-installed with the latest Xbox One controller drivers. So, installing the updates can fix the issue with your controller.


4. Run System File Checker tool

Xbox One controller runtime error

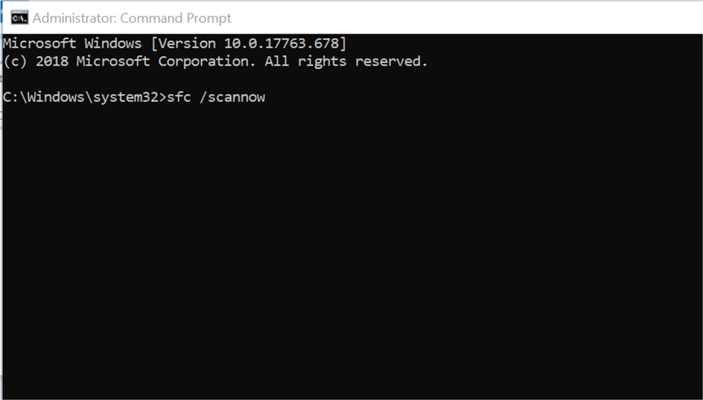
  1. Press the Windows key and type cmd.
  2. Right-click on Command Prompt and select Run as Administrator.
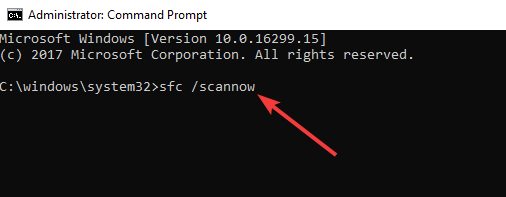
  3. In the Command Prompt window, type the following command and hit enter:
    • sfc /scannow 
  4. When the scan is complete, the System File Checker tool indicates whether integrity violations were found.
  5. If integrity violation are found, the System File Checker tool will allow you to fix the issues.
  6. Once the issues are fixed, reboot the computer and check if the error is resolved.

The Xbox One controller runtime error can occur due to several reasons. To fix the problem, start by installing the latest Xbox One controller drivers. If the issue persists, try other steps in this article to see if that helps.


[wl_navigator]

FIX: Orcs Must Die Unchained runtime error

Orcs Must Die is an action-tower defense video game that takes a more modern approach with a third-person viewpoint. That said, several users have reported the game to be buggy resulting in the Runtime time error when launching the game.

I just started up the game and got a runtime error saying to contact the support team what can i do to fix it ?

The developer recommends installing the latest version of Microsoft Visual C++ error. However, the error can also occur due to corrupted Steam files.

In this article, we have listed a couple of troubleshooting tips to help you fix the Orcs Must Die Unchained runtime error in Windows.


How do I fix the Orcs Must Die Unchained runtime error?

1. Verify integrity of Steam files

Orcs Must Die Unchained runtime error

  1. Launch the Steam client. Right-click on the  Steam app icon in the System Tray and select Library.
  2. In the Game Library tab, right-click on the game title.
  3. Select Properties.
  4. Open the Local Files tab.
  5. Click on Verify Integrity of Game Files button.
  6. Steam will validate the Steam files and show a success message.
  7. Click Close.

Relaunch Steam and try to launch Orcs Must Die Unchained and check for any improvements. If the issue persists, repeat the steps again for a few times. Verifying the integrity of Steam files a few times has helped some users resolve the issue.


Fix Steam error failed to load web page [error 310]


2. Disable Use Desktop Game Theatre in Steam

Orcs Must Die Unchained runtime error

  1. Launch the Steam client.
  2. Open the Game Library tab.
  3. Right-click on your game title and select Properties.
  4. In the General tab, uncheck Use Desktop Theatre while SteamVR is active option.
  5. Click Close.
  6. Relaunch Orcs Must Die Unchained and check if the runtime error is resolved.

3. Reinstall or update Microsoft Visual C++

Orcs Must Die Unchained runtime error

  1. Go to the Microsoft support page to download Visual C++.
  2. Scroll down to the Visual Studio 2015, 2017, and 2019 section.
  3. Click the vc_redist.x86.exe file link to download the latest version of Visual C++ to your computer.
  4. Make sure you select the correct version that is compatible with your Windows edition.
  5. Run the installer and follow on-screen instructions to complete the installation.
  6. Reboot the computer before launching the game.

Once installed, launch Steam and open the game with the runtime error and check for any improvements. If the issue persists, uninstall and reinstall Visual C++.

3.1 Remove and Reinstall Visual C++

Orcs Must Die Unchained runtime error

  1. Press Windows Key + R to open Run.
  2. Type control and click OK.
  3. In Control Panel, go to Programs > Programs and Features.
  4. From the list of installed apps, select Visual C++ 2017 or 2015.
  5. Click on Uninstall > Yes to confirm the action.
  6. Once uninstalled, visit the Microsoft Visual C++ download page and download the installer.
  7. If you have the installer downloaded, you don’t need to download it all again.
  8. Follow on-screen instructions to complete the installation.

If the issue persists, uninstall Visual C++ 2010 (both 32-bit and 64-bit) version, restart the computer and reinstall Visual C++ 2010 again to see if that helps you resolve the issue.

The Desktop Theatre Mode allows the users to play any Steam game with their Vive VR headset. However, the feature is most likely causing issues with the game launch resulting in a runtime error. Disable the feature and that should fix the problem.


[wl_navigator]

Microsoft news recap: 75 million daily active Microsoft Teams users, Build 2020 free to attend online, and more

Microsoft news recap is a weekly feature highlighting the top Microsoft news stories of the past week. Sit back, grab some coffee, and enjoy the read!

Microsoft Teams now has more than 75 million daily active users

As more and more businesses turn to remote working in the face of the global pandemic, Microsoft Teams was able to cross the 75 million daily active users milestone this month.

Build 2020 will reportedly be free to attend online (updated: free registration now open)

Microsoft’s annual Build conference is going online this year. What’s more, it will be free to attend, with registrations now open.

New details about Surface Earbuds and new Surface headphones leak

Information on Microsoft’s upcoming audio devices, Surface Earbuds and Surface headphones, has leaked. A manual for the Surface Earbuds is reportedly listed on an FCC listing, and gives information on touch gestures, whilst a separate report shows that the Surface headphones could support Bluetooth 5.0, have 20 hours of battery life, and more.

Microsoft rebrands Visual Studio Online as “Codespaces”

This month has seen the announcement that Visual Studio Online will be rebranded to become Visual Studio Codespaces. Amongst the news, Microsoft is also lowering the pricing for Codespaces Azure Compute.

Visual Studio Codespaces

That’s it for this week. We’ll be back next week with more Microsoft news.

How to Fix Hl1000 Error Code in Spectrum: 4 Easy Ways

Are you also dealing with the Spectrum On Demand error hl1000? We got you covered

The hl1000 error is most likely a sign of a wrong startup attempt of your device or a data issue on the receiver. Sometimes, an outdated version of the app itself may mess things up.

Let us point you toward some working solutions.

How can I fix Spectrum On Demand error hl1000?

Note icon NOTE
The steps detailed here are specifically for the Android operating system, and the steps vary a bit based on the device. Nevertheless, they should work.

1. Restart both your receiver and your streaming device

  1. First of all, sign in to your Spectrum account using the ID and password of the associated email account.
  2. Select the Services tab.
  3. Choose the TV tab.
  4. Select Experiencing Issues? next.
  5. Finally, choose the option saying Reset Equipment.

2. Reset the receiver data

  1. Press the Menu button on the original remote control. This will immediately open a new menu window.
  2. Select the Settings and support tab and press the OK button.
  3. Up next, go to the Account overview section and select it.
  4. Find the Equipment section and tap the OK button to choose it.
  5. Finally, go to the Reset data option and press the OK button to select the same.

In case you already restarted both your receiver and your streaming device to no avail, try resetting the receiver data as well.

Chances are it wasn’t configured correctly from the start, yet the above steps will fix the issue in no time.

3. Check for any new Spectrum TV app updates

  1. Select the Apps option on your TV.
  2. Choose the Google Play Store option.
  3. Click on the Settings option and select the Auto Update Apps.
  4. Finally, click on the Auto Update Apps at any time and wait for the process to be completed.

If you’re still having trouble, your next troubleshooting attempt would be to update the Spectrum TV app. Check to see if the Spectrum On Demand error hl1000 persists even after the TV is updated.

Perform the same on your Android/iOS smartphone, Xbox One, or Roku device.

4. Reinstall the app

  1. Enter the Google Play Store and search for Spectrum TV.
  2. After locating it, click on the Install button to start the download procedure.
  3. Once the installation process is over, sign in to the Spectrum TV account by providing the necessary username and password.
  4. Confirm that the issue has been fixed.

If you have encountered the Spectrum remote volume not working error, it could be due to an outdated app version; read this guide to learn more.

The evidence you’ve gathered should have narrowed down possible root causes and helped you fix the Spectrum On Demand error hl1000 for good.

If interested, you can check out the Spectrum internet charges and the professional installation charges to sort it out; read this guide to learn more.

Don’t hesitate to drop us a line in the comments if you’re aware of any other working solutions.

Fix Spectrum error code WUC-1002 with ease

Spectrum has a great arsenal of bundles and standalone telecom services for those looking for popular cable networks and high-speed Internet. What about the Spectrum error code WUC-1002?

You never saw it coming. However, that bold message stating Service Unavailable. We’re sorry, something didn’t work quite right. Please try again. If you contact us, please provide this error code: WUC-1002 is there to stay.

Once you encounter it, chances are you cannot stop yourself from developing theories related to the root cause of the issue.

To save you the trouble, let us be clear from the start that the problem is reported to occur while you attempt to stream multiple contents at the same time.

Moreover, it’s also related to trying to access a channel that you are not subscribed to. Now that you’ve gathered basic background info, let’s see how to make the Spectrum error code WUC-1002 go away.

How can I fix Spectrum error code WUC-1002?

1. Make sure the channel you are trying to view is part of the package

great Spectrum packages

This may sound childish, but double-checking that the Spectrum package you are subscribed to includes the channel you are trying to access cannot hurt.

Spectrum does offer a wide range of package options, so it’s only natural to get confused.

Moreover, do note that your viewing package must include not only the exact channel but precisely the same viewing resolution too.

If you discover nothing suspicious in this regard, you may also restart the channel.


2. Reboot your Spectrum receiver

how to reboot Spectrum receiver

If you’re experiencing this issue regularly and you’ve already ruled out the possibility of an entitlement error, this is another fix confirmed to work by users encountering the Spectrum error code WUC-1002.

You may also try to reboot your receiver by unplugging the power cord. Then, allow at least 60 seconds before plugging it back in.

Don’t hesitate to also reboot your streaming device.


3. Reinstall the Spectrum TV app

install the Spectrum TV app

If the procedures you tried made no difference, you should take into consideration uninstalling and installing the Spectrum TV app again.

In order to do that on your Roku device, go to the Channel Store and locate the Spectrum TV application. Then, hit the Install button.

After the installation process is complete, you may launch the Spectrum TV channel using your ID and password. Don’t forget to click the Agree button on the licensing terms page.

Since the Spectrum TV app is available for a variety of smartphones and tablets running on Android 5.0 or higher, Roku, iOS, and Amazon devices, consider applying the appropriate installation steps.

These are a few methods that should get the Spectrum error code WUC-1002 fixed in no time.

If you do have further questions regarding this subject, don’t hesitate to use the comments area below.

[wl_navigator]

Get Microsoft Internet Checkers on Windows 10/11

checkers

Play the Checkers game in Windows 10 with the best apps by bringing back Internet Checkers.

Pretty much like Outlook Express, Microsoft has decided not to support Internet Checkers in Windows 10, . We’ve also talked about the disappearance of Windows Live Messenger in Windows 10, . is the first operating system from Microsoft to support touchscreen, so playing checkers can become a real fun activity. However, sadly, Microsoft has decided not to support Internet Checkers inside , Windows 10 or Windows RT, so we are being left with quite a few options to get it back.

What you need to understand is that Internet Checkers is GONE from Windows 10, by default and will never return, most likely. It’s pretty hard to imagine that Microsoft will bring it back, but who knows.

 internet checkers

The single solution that we here, at WindowsReport have found, to play Internet Checkers in Windows 10, exactly as it was in Windows 7 is to download it from the BetaArchive forum, but we can’t guarantee that it will work for sure. You’ll just have to deal with the fact that it no longer works and try the following alternatives.

Personally, I can guarantee you these are some awesome checkers apps and you won’t regret a single minute having tried them. However, we will be working on a post to cover even more similar apps, so stay tuned.

Checkers alternatives to Internet Checkers in Windows 10

Thanks to the Microsoft Store that is constantly populated with more and more apps, we can find a lot of good apps, only if we search good enough. We did this for you and compiled a list with some of the best checker apps so you won’t be nostalgic for Internet Checkers. Here they are:

Internet checkers games

If you’re into puzzle and mind games, then most likely you’ll also enjoy our collection of chess apps for Windows 10. We hope that you’ll find the checkers apps for Windows 10, good enough and that you’ll be able to get over the lack of support for Internet Checkers. It might sound stupid for some, but I know how can one get “attached” to something, even if we’re talking about a game here.

From new Edge features to natural language queries in Excel, here’s our recap of the Microsoft 365 April updates

Microsoft has published its monthly roundup of all the new features and changes to Microsoft 365, including the official rebranding of Office 365 for consumers that happened on April 21. Many of this month’s updates focus on helping companies and users stay connected, productive, and secure as many users transition to working remotely full-time.

Microsoft Edge improvements

Microsoft Edge received multiple updates this month including InPrivate Search with InPrivate browsing, which will not record Bing searches when a user is browsing in an InPrivate window. When using InPrivate mode, Bing also won’t allow you to sign into your Microsoft account so that your searches won’t be saved to Bing or the Microsoft browsing history.

Microsoft also announced several upcoming Edge features like smart copy that lets users select content and it into a document or e-mail with the same formatting, and new vertical tabs to make it easier for users to organize their existing open tabs. Microsoft Edge will also add some notable security improvements with a new Password Monitor, which will let users know when their passwords may have been compromised and appears to be similar to Firefox’s Monitor service.

MIcrosoft Edge
New copy and paste between tabs with smart copy

Excel adds natural language queries, Outlook gets calendar improvements

For Excel users, the new natural language queries are now generally available on the ribbon inside the Ideas pane. Once added, the new natural language query option lets any user search for data using natural language by simply opening the “ideas” pane in Excel and entering a question in the query box. Excel

New natural language queries in Excel

Outlook will also receive a new feature in the calendar settings that lets the user end meetings early to help avoid creating upcoming scheduling conflicts. The goal of the new calendar feature is to try to give users 5, 10, or even 15 minutes back from every meeting.

Yammer for Teams and mobile app update

In terms of what’s new this month, Microsoft has placed a lot of emphasis on the new Yammer Communities app now available for Microsoft Teams. In addition to their new integration with Teams, Microsoft also released a redesigned Yammer mobile app that brings a new experience for live events, comments, and improved upload times.

Yammer for Microsoft Teams
New Yammer integration for Microsoft Teams


Visio adds new features

For Visio users, the web app received multiple improvements and capabilities. Users can now replace a specific shape in a diagram with a different one while allowing the user to retain the connectors, formatting, and everything else the original shape had. There is also a new feature to add images to diagrams across documents, as well as a pinch-to-zoom gesture to make it easier to focus on a specific part of a diagram.

MIcrosoft Visio
Visio for the web received several new updates.

Microsoft 365 Premium

Microsoft 365 Business Premium now includes a full Azure AD Premium P1 license that gives businesses greater flexibility when it comes to letting employees access work apps securely. “With this addition, customers will now get features like Cloud App Discovery, application proxy, dynamic groups, and more, which help employees maintain secure access to work apps from home,” the company explained.

MIcrosoft 365 Premium
New remote work capabilities with Microsoft 365 Business Premium

As more companies embrace employees working remotely, Microsoft added a new feature to the Microsoft 365 usage reports that will let let businesses see more into employee activity including calendar and app activity. There’s also a new card in the usage report homepage that specifically looks at how remote work tools are being used during this time, such as whether e-mail or Teams usage has increased or decreased.

MIcrosoft 365 usage reports

With Microsoft announcing this week that Microsoft Teams now has 75 million daily active users, Microsoft is committed to improving the applications and services for remote workers, and this month’s updates add new user experiences, integrations, and security improvements to make working remotely just a little easier.

The Game Awards creator announces Summer Game Fest digital event with support from Xbox, other publishers

Geoff Keighley a former video games journalist known for creating The Game Awards ceremony announced a new 4-month digital event named Summer Game Fest today. With E3 being cancelled this year, the Summer Game Fest aims to bring video games fans “a season of breaking news, in-game events, and free playable content.”

Keighly will serve as a curator for the event, which will act as a hub for major game announcements planned for this spring and summer. The organizer has managed to get the biggest game publishers and board including Microsoft, Sony, Bethesda, Activision, EA, Square Enix, and more. Interestingly, Xbox is one of the partners that will give fans access to some playable demos during the event, though details are still unclear at this time.

The cancellation of E3 2020 in June has certainly left a big void to fill this year. IGN, one of the biggest video games website moved first by announcing its own Summer of Gaming event in June, and it will be interesting to see if IGN’s initiative could be overshadowed by Keighley’s four-months long Summer Game Fest.

PSA: Wunderlist is shutting down on May 6, but you can import all your tasks into Microsoft To-Do

Earlier this year, Microsoft announced its plans to sunset Wunderlist, the task manager app it acquired in 2015 that has now been replaced by Microsoft To-Do. Wunderlist will finally shut down on May 6, and the Redmond giant has started sending emails to Wunderlist users to remind them to import their tasks into Microsoft To-Do as soon as possible.

If you have yet to make the transition to Microsoft To-Do, here’s a step by step guide to help you import your Wunderlist tasks into the app:

  1. Download the Microsoft To Do app on Windows 10 or macOS
  2. Sign in with your Microsoft account, or create one if you don’t already have one
  3. Go into Settings, and click on the Wunderlist button to import your tasks

Microsoft To Do now offers plenty of power-user features including list sharing, subtasks, folders, reminders and due dates, file attachments, as well as a dark mode. Since Microsoft has recently added Microsoft To Do to the Microsoft Mobile Apps and Experiences org, you should expect this app to get even more attention in the future.

Even though Wunderlist will stop syncing tasks starting May 6, users will still be able to migrate tasks and lists into Microsoft To Do until June 30. Do you think Microsoft To Do has already surpassed Wunderlist, or will you miss using the latter? Let us know in the comments below.


‎Microsoft To Do
‎Microsoft To Do
Price:
Free

Schools can now use Microsoft Teams for free to hold host virtual graduation ceremonies

In response to more schools and universities banning all in-person and drive-through graduation ceremonies amid the COVID-19 outbreak, Microsoft has announced a free limited-time virtual graduation plan for schools, allowing students to celebrate their graduation on Microsoft Teams during the lockdown. The company announced the limited-time offer for the holders of a Microsoft Office 365 A1 faculty license on its Educational blog yesterday, adding that the offer would be only valid until July 1.

“Users with the Microsoft Office 365 A1 faculty license, which is free for educational institutions, will have the ability to host and broadcast Teams live events for a limited time. That means users with A1 faculty licenses can host a virtual graduation, alumni summit, or any live event for up to 20,000 attendees, at no extra cost,” the company explained.

To cope with the increasing need to communicate virtually, the software giant has also extended the maximum length of live events to 16 hours, along with the ability to hold 50 concurrent live events through May 2020. Furthermore, Microsoft understands that graduations and celebrations come in various forms. The company suggested a couple of ways you can celebrate your accomplishments:

  • Celebrate with photos and videos: Use FlipGrid, PowerPoint or Microsoft Sway for a simple online celebration.
  • Create a pre-recorded digital graduation: A pre-recorded event may be ideal if you are not considering a live event or if you’ll have attendees in multiple time zones.
  • Host a digital graduation with Microsoft Teams live events: If a live event is preferred, consider incorporating both live and pre-recorded content including speeches by faculty and students, graduate slideshows, and even musical or other artistic performances.

With this virtual graduation opportunity, Microsoft has once again proved that it has students in mind during these unprecedented times. Even though a virtual event may not be as exciting as a physical gathering, it’s hopefully a good enough initiative for the thousands of students expected to graduate this year.

Microsoft opens up about how Teams made the 2020 NFL Draft successful

In a new blog post, Microsoft is opening up about how its Teams service made the three-day-long 2020 NFL Draft possible. The company explained the major hurdles faced by the league due to the Coronavirus, and how Microsoft was in a unique position to help ensure teams could still pick from their pool of upcoming stars for the new NFL season.

According to the blog post, using Microsoft Teams and other Microsoft products to ensure the NFL draft could go on in virtual form was “the ideal solution.” The company highlighted its seven-year partnership with the league, which has helped NFL teams “transform their technology both on-field and off.”

More importantly, though, the post explains the technical aspects of how Teams was used during the April 23-25 event. There were apparently 32 separate private Teams channels within the NFL organization for each NFL team, where guests could join. Each club was then able to communicate from within their own organization and also with the NFL in this private channel, without seeing the other clubs’ activities. In Microsoft’s words:

“Each club would be given access to a form, where they could fill in the draftee’s name, college and other information. If the team “on the clock” submitted incorrect information, the club’s private channel would be notified of the error; if everything was in order, the NFL would authenticate the pick, then a Microsoft tool called Power Automate would automatically post it on the private “Head Table” channel and simultaneously relay it to Commissioner Goodell’s Surface tablet so the pick could be transferred to the paper card and announced on-air.

To ensure Teams was able to handle all this traffic, Microsoft spent a few weeks with a team of people from the NFL to do a dry run and a mock draft of 100 people. “Teams is a very flexible collaborative tool, It was a coming together of Microsoft Teams as the shell, private channels for security, Forms for a simple way to submit the picks, and Power Automate to make sure all this routing is enforced,” said Jeff Teper, Microsoft Teams corporate vice president.

Microsoft’s post also explains how some NFL teams like the Jaguars and the Kansas City Chiefs easily became familiar with Teams. The app was apparently used behind the scenes by these teams before the draft, too, with features like screen sharing, meeting recordings, and more coming handy.

The 2020 virtual NFL Draft was watched by over 15.6 million people. It was an all-time high, up 37% from 2019, passing the NFL’s previous high of 12.4 million viewers in 2014.

Kingdom Come: Deliverance, Yakuza 0, and Sonic Mania are free to play with Xbox Live Gold this weekend

Xbox Live Gold and Xbox Game Pass Ultimate members can enjoy another Free Play Days event this weekend. The open-world RPG Kingdom Come: Deliverance, the action-adventure game Yakuza 0 and the retro platformer Sonic Mania are all free-to-play through Sunday, May 3 at 11:59 p.m. PDT.

All three games are also discounted during the event, and all your progress will be saved if you decide to purchase them. However, it’s worth noting that both Kingdom Come: Deliverance and Yakuza 0 are currently free to play with Xbox Game Pass.

Microsoft’s Xbox Free Play Days event have been pretty regular in the past couple of weeks, and the company seems well aware that more people have been playing games at home since the beginning of the coronavirus pandemic. Earlier this week, the company announced that the number of active Xbox Live active users had grown to nearly 90 million during the past quarter.

Microsoft explains how to work with multiple Edge profiles

Microsoft built the new Chromium-based Edge to stand out in different areas, including security and privacy. Today, the company is talking up the browser’s ability to support multiple user profiles.

It has actually gone ahead and published something of a how-to guide regarding that feature. If you downloaded Edge for both personal and business or official use, continue reading.

Multiple Edge profiles help to separate browsing data

Microsoft said that the objective of creating multiple profiles in Edge is to separate browsing data.

The feature comes in handy when you need to work from home using your personal device from time to time. It ensures that your private browsing data does not mix up with official data when you are accessing business or company files.

Microsoft Edge’s “Profiles” feature is a great way to do this, whether you’re switching between work and personal browsing, juggling your job and freelancing business, or managing your tasks as an admin alongside other responsibilities.

How to set up more than one user profile

To create multiple profiles in Edge:

  • Locate the profile icon to the right of your browser’s address bar and click it
  • Click add profile
  • Click add on the confirmation window that comes up

Each profile you create will get a desktop icon. Clicking the icon opens a window separate from other user profiles.

Also, each profile icon functions as any other Windows 10 app shortcut. So you can pin it to your Taskbar for quicker access.

How to transition between profiles

There are three ways to manually do this:

  1. You can open any user profile by clicking on its desktop or taskbar shortcut, or
  2. Go to the profile flyout and click the appropriate profile icon, or
  3. Copy and paste the address edge://settings/profiles to the URL bar and access the profiles page

Accessing websites through the right user profile

Microsoft has already updated Edge with an automatic way to switch between private and business profiles. The feature prompts you when you are about to open a website link or access a web portal in the wrong profile.

The other option is to set a default profile. This capability is available to users of Edge 81 and higher.

Edge is playing catch up to more established browsers like Chrome and Firefox. It is gaining popularity because of its unique features, though. Plus, Chrome extensions can work in the new Chromium-based Edge. So, it is already popular among some Chrome users.

Assassin’s Creed Valhalla video game listing goes live for Microsoft’s Xbox One consoles

The Microsoft Store listing is now live for the Xbox One version of the Assassin’s Creed Valhalla video game just a day after its full official reveal.

While this latest entry in the Assassin’s Creed franchise isn’t available to pre-order digitally just yet, this listing does re-confirm that it will support HDR10 and 4K Ultra HD when played on an Xbox One X console and there is an official game description which offers some further details.

In Assassin’s Creed Valhalla, become Eivor, a legendary Viking raider on a quest for glory. Explore England’s Dark Ages as you raid your enemies, grow your settlement, and build your political power.

  • Lead epic Viking raids against Saxon troops and fortresses.
  • Dual-wield powerful weapons and relive the visceral fighting style of the Vikings.
  • Challenge yourself with the most varied collection of enemies ever in Assassin’s Creed.
  • Shape the growth of your character with each choice and carve a path to glory.
  • Explore a Dark Age open world, from the shores of Norway to the kingdoms of England.
  • Personalize your experience by growing your clan’s settlement.

The listing, as expected, doesn’t show a release date but the game has been confirmed for a 2020 holiday release on both the Xbox One and next gen Xbox Series X.

Are you excited for Assassin’s Creed Valhalla or are you unimpressed with what you’ve seen so far? Share your thoughts with the community in the comments below and then follow us on Pinterest and Facebook for more Xbox gaming news.

Assassin's Creed® Valhalla
Developer:
UBISOFT
Price:
Free

Fix: Blackberry Link not working [Windows 10, Mac]

BlackBerry Link, previously known as BlackBerry Desktop Manager, or BlackBerry Desktop Software, is software used on desktop computers so as to communicate seamlessly with BlackBerry 10 devices.

BlackBerry Link is easy to set up and use, but when it’s not working on your Windows 10 computer, it may be more of a drag than its usual hassle-free nature.

If you’re experiencing BlackBerry Link issues, you’re in the right place.

Prior to using any of the solutions below, please check on the following issues which may hinge upon the effectiveness of the solutions:

  • What is the version of BlackBerry Link software on your computer?
  • How is your BlackBerry device connected to your PC – via USB cable, or Bluetooth?
  • Do you have third-party security on your computer?
  • What status does your device show in the Device Manager on your computer? Is there a yellow triangle next to it? This may indicate a problem.

Here are solutions to fix the BlackBerry Link when it isn’t working on Windows 10.

1. Rename the iTunes file

In case you updated iTunes and then tried to use BlackBerry Link but it opens with the error: BlackBerry Link has stopped working, rename the iTunesPrefs.xml file, and then re-launch BlackBerry Link.

Here’s how to rename iTunesPrefs.xml file:

  • Turn on Show Hidden Files and Folders
  • Navigate to C:Users<userid>AppDataRoamingApple ComputeriTunes
  • Rename the iTunesPrefs.xml file to old

Once completed, turn off Show hidden files and folders.

Note: renaming the file may affect the iTunes application’s functionality such as iTunes sync, which won’t be available within BlackBerry Link.

Here’s how to uninstall and then re-install the latest version of BlackBerry Link:

  • Right click Start
  • Select Run
  • Type appwiz.cpl
  • Press Enter
  • In Programs and Features, select BlackBerry Link (or BlackBerry Desktop Software)
  • Click Change/Remove
  • On the Install Shield Wizard, select Remove
  • Click Next
  • Under Uninstall Options, select Remove all user settings for BlackBerry Link
  • Click on Ok
  • Click Finish
  • Restart your computer

Download and install the latest version of BlackBerry Link after you restart your computer.

Follow the on-screen instructions to complete installation, then check whether the BlackBerry Link works.

3. Check your device’s status on Device Manager

Here’s how to do this:

  • Right click Start
  • Select Device Manager
device manager drivers
  • Go to the USB device you are experiencing issues with
  • Right click on it
  • Select Properties
  • Click General tab
  • Check Device Status box to see if it has detected problems with your device

In addition, to handle your drivers more efficiently and install or update old drivers from your PC, you have dedicated driver update software that can perform the job automatically in no time.

⇒ Get Fortect Driver Updater

4. Run the Hardware Troubleshooter

Sometimes this error can be generated in Device Manager due to one of these reasons:

  • Device Manager can’t start the BlackBerry device
  • One of the drivers needed by your device doesn’t start
  • Device Manager has less sufficient information to recognize the error from the device’s driver

If you’re experiencing problems with BlackBerry Link, then run the Hardware and Devices troubleshooter to resolve the issue. This checks for commonly occurring issues and ensures any new device or hardware is correctly installed on your computer.

Here’s how to go about it:

  • Right click Start
  • Select Control Panel
  • Go to View by option on the top right corner
  • Click the drop down arrow and select Large icons
control panel large icons
  • Click Troubleshooting
  • Click View all option on the left pane
  • Click Hardware and Devices
hardware troubleshooter windows 10
  • Click Next

Follow the instructions to run the Hardware and Devices troubleshooter.  The troubleshooter will begin detecting any issues, and you can use the troubleshooting report’s suggestions to resolve the issue.

5. Remove Kaspersky program

Sometimes the BlackBerry Link may not work owing to Kaspersky 2014 blocking access to your BlackBerry device. In this case, remove Kaspersky 2014, then upgrade to Kaspersky 2015.

6. Upgrade Microsoft.NET framework

If you upgraded to BlackBerry 10 OS version, and the BlackBerry Link is not working, your PC and device may no longer connect to each other.

This indicates a problem with the current version of the Microsoft.NET framework that causes BlackBerry Link not to work when the program’s regional settings are set to some languages.

The solution here is to upgrade the Microsoft.NET framework to version 4.5 or a later version.

Did any of these solutions work for you? Let us know in the comments section below.

BackgroundTransferHost.exe [Windows process explained]

Backgroundtransferhost.exe is a service process that syncs Windows settings across devices that share the same Windows account. The service can download and upload quite a bit of data. So, some users prefer to turn off backgroundtransferhost.exe’s syncing as it can hog system resources. One user stated in a Microsoft forum post:

Every time I turn on the PC or wake it up from the standby a file called Backgroundtransferhost.exe starts to download a large file. I have a slow internet connection (512 Kb/s) and with this speed sometimes it takes up to 15 minutes to finish… What is that and how to stop it?

How Can Users Reduce Backgroundtransferhost.exe’s System Resource Utilization?

1. Turn Off Sync Settings

  1. Turning the Sync settings option off is one way to deactivate Backgroundtransferhost.exe. Open the search utility by pressing the Windows key + S hotkey.
  2. Enter ‘sync settings’ in the search box.
  3. Click Sync your settings to open the window in the snapshot directly below.Sync settings option backgroundtransferhost.exe
  4. Then turn off the Sync settings option.

2. Block Backgroundtransferhost.exe With the Firewall

  1. Users can also try blocking Backgroundtransferhost.exe syncing with the Windows Defender Firewall. To do that, open Windows 10’s search utility.
  2. Enter the keyword ‘firewall’ in the text box to search for Windows Defender Firewall. Click Windows Defender Firewall to open its Control Panel applet.Windows Defender Firewall window backgroundtransferhost.exe
  3. Click Allow an app or feature through Windows Defender Firewall on the left of the window.firewall app settings backgroundtransferhost.exe
  4. Press the Change settings button.
  5. Click Allow another app to open the window shown directly below.Add an app window backgroundtransferhost.exe
  6. Then click the Browse button.
  7. Select Backgroundtransferhost.exe in the Windows > System32 folder, and click the Open button.
  8. Press the Add button.
  9. Then deselect the left checkbox for Backgroundtransferhost.exe in the Allowed apps and features list.
  10. Press the OK button.

3. Turn Off the Time Broker Service

  1. Users have also confirmed that turning the Time Broker service off, via the registry, can drastically reduce Backgroundtransferhost.exe’s system resource utilization. Open the Registry Editor by pressing the Windows key + R, entering regedit in Run, and clicking OK.
  2. Open this registry path:
    HKEY_LOCAL_MACHINESYSTEMCurrentControlSetServicesTimeBrokerSvc
    The TimeBroker key backgroundtransferhost.exe

    .

  3. Select the TimeBrokerSvc key, and double-click the Start DWORD to open the window shown below.The Edit DWORD window backgroundtransferhost.exe
  4. Select the Hexadecimal option if it’s not selected.
  5. Enter ‘4’ in the Value data box.
  6. Click the OK button.
  7. Then restart Windows.

So, that’s how users can turn off Backgroundtransferhost.exe’s syncing or the Time Broker service to reduce Backgroundtransferhost’s system resource utilization. Note that uninstalling antivirus utilities might also reduce Backgroundftransferhost’s system resource utilization.

Zoom quietly reframed its 300 million daily user claim as Microsoft boasts 75 million during earnings report

Following Microsoft’s  latest FY20 Q3 earnings report yesterday, among the questions asked by investors interested future outcomes for the company was one that addressed the 300 million pound elephant in the room that’s manifested itself as a competitor productivity communications service, Zoom and how Microsoft plans to combat its goliath like mindshare.

While the question was expertly fielded by the combo of CEO Satya Nadella and CIO Amy Hood who tag-teamed an answer about commitment to Teams and its relative explosive growth of 70% year over year, the mindshare reference to Zoom’s market presence does highlight yet another misconception perpetrated by Zoom’s less than scrupulous tactics.

Shortly before Microsoft got on the mic today to announce that its latest productivity communications platform Teams racked up 75 million daily active users, would-be competitor Zoom held a victory lap for roughly a month with a rather impressive 300 million daily active user count.

While Microsoft’s 70 percent spike month over a month may seem modest in the shadow of Zoom’s 300 million claims, it seems Zoom may have mistakenly misrepresented their initial user accolades. Senior editor at The Verge Tom Warren shines some light on a quiet edit made to the Zoom blog just a few days ago, deleting the “more than 300 million daily users” claim and updated the reference to read “300 million daily Zoom meeting participants.” While it’s a subtle semantic correction, the distinction is quite vast.

Daily users and daily meetings are counted differently and most communication services draw a line between the two as they often represent the number of individuals participating in usage of the service versus the number of times the platform is pinged by an individual. 300 million meetings a day isn’t anything to scoff at but it is a bit different than confirming 75 million distinct users a day.

As of now, Zoom is keeping its daily user numbers close to the vest as it presumably attempts to leverage every new opportunity its COVID-19 related mind share has brought it. In the same vein, Microsoft is pushing Teams as the face of its productivity communications tool and leveraging its relative growth, and a 70 percent spike over the past three months is a good indicator that its gambit is paying dividends for investors.


Microsoft rebrands Visual Studio Online as “Codespaces”

Microsoft is continuing to refresh, refine, and update its products at a rapid pace. Today, Microsoft announced that Visual Studio Online would now be known as Visual Studio Codespaces, and the company will also be dropping the price of the service by up to 50% along with new options to run Codespaces inside lower-performing virtual machines.

The new rebranding is set to begin in the next few weeks and will include a new tagline saying that “Codespaces are simply the most productive place to code.” According to Microsoft’s blog, many developers and users of Visual Studio Online indicated that the service was much more than simply an editor in the browser, and the changes announced today were a direct result of that feedback. “One of the most consistent things we’ve heard is that the ability to create cloud-hosted dev environments is having a positive impact in more ways than we had thought,” the company said today

Lower Pricing

Starting on May 19th, Microsoft will lower the price of Codespaces Azure Compute resources with new pricing tiers that provide more resource flexibility to run smaller Codespaces:

  • Basic (2 cores, 4 GB of RAM) instance type for those who want to try remote development for the first time. Basic instances will be reduced from $.24 per hour to $.08 per hour.
  • Standard (4 cores, 8 GB of RAM) Linux instance type will be reduced from $.45 per hour to $.17 per hour.
  • Premium (8 cores, 16 GB of RAM) will go from $.87 to $.34.  Codespaces may also incur a storage charge of $.0088 per hour for the 64 GB SSD storage, which can be billed down to the second.

Remote Development

Over the past month, Microsoft has been working to make remote development even better for its users. In addition to today’s news that gives users more flexibility in picking their sizes, Microsoft has also made significant improvements related to their self-hosted environment capabilities. Anyone can now register any machine to Visual Studio Codespaces and either connect to it using Visual Studio Code or Microsoft’s browser-based editor.

Another new remote feature Microsoft recently added was a new “bring-you-own” Dockerfiles or images to Codespace. A user can configure Codespace to point to an image from a registry like Docker Hub or placing a custom Dockerfile in a local repo.

Anyone can begin using Visual Studio Online today, and we expect that there will be more news in May during Microsoft’s virtual Build conference in May.

Assassin’s Creed Valhalla is the latest confirmed cross-gen title for Xbox One and Xbox Series X

Following the official announcement yesterday, Assassin’s Creed Valhalla got its first cinematic trailer today, which includes an Xbox logo right at the beginning of the video. Ubisoft may well have a marketing deal with Xbox for this game, which will likely be showcased during the May 7 Inside Xbox episode that will focus on next-gen games reveals. A reply from the official Ubisoft Twitter account to today’s Inside Xbox announcement suggests that it will be the case.

Assassin’s Creed Valhalla will apparently expand the RPG mechanics introduced in Assassin’s Creed Origins and Assassin’s Creed Odyssey, with the ability to choose a man or woman character, get some romance possibilities, and forge political alliances. It’s been confirmed today that the game will be released on Xbox One and Xbox Series X in Holiday 2020, but Reddit user jnborwn925 also saw today on the game’s Best Buy listing today that it will support Smart Delivery.

Assassin’s Creed Valhalla confirmed to use Smart Delivery for Xbox One and Series X via Best Buy from xboxone


With Smart Delivery, Microsoft is allowing developers of cross-gen games like Assassin’s Creed: Valhalla to deliver the right version of that game on whatever Xbox console you’re playing on. In other words, you’ll only need to buy the game once and your console, whether it’s an Xbox One or an Xbox Series X, will download the version of the game that’s optimized for your hardware.

Back in February, CD Projekt also confirmed that its upcoming Cyberpunk 2077 game will also support Smart Delivery. “Gamers should never be forced to purchase the same game twice or pay for upgrades,” the company said at the time.

It’s nice to see that Ubisoft and CD Projekt Red are on the same page, though Ubisoft is a much bigger developer and it’s not clear yet if all upcoming Ubisoft games will support Smart Delivery. It also remains to be seen if other big publishers such as EA, Activision, or Rockstar Games will also support Microsoft’s gamer-friendly initiative.

Microsoft Teams gained custom backgrounds, new Yammer app and more in April, here’s our recap

The month of April is coming to a close, which means it is now time to take a look back at everything that was new in Teams for the fourth month of the year. From background blur, features for video chats, new IT admin options, and more, here’s a look at everything that was added to Teams recently.

As always, we will be starting with the stuff you care about most: meetings and calling. On this front, Microsoft added a lot of features that helps Teams better compete with Zoom. These include an increase in the number of simultaneous videos in Teams, a Raise Hands features background effects, and more.

First off, Microsoft increased the number of simultaneous videos in Teams meetings. It went up from 4 to 9, allowing users to get a better view of who is in the meeting stage. In addition, Microsoft also announced a new raise hands feature, which allows meeting attendees to identify that they’d like to speak. This feature will be rolling out early next week.

Moving on, Teams also picked up a background effects feature, which lets you customize your video backgrounds with pre-selected images. As a result, it also became possible to “unofficially” set your own custom background, too. As for the mobile apps, Teams on iOS finally picked up the option to blur backgrounds, and live captions during meetings became available for iOS and Android versions of the Teams app.

The rest of the new features for calling in Teams includes a new ability to end the meeting for all participants. This ties in with a new option that lets meeting attendees share system audio in Team events, and record 1:1 chats. Microsoft also temporarily raised default limits until July 1, 2020 for live events hosted in Teams, Stream, and Yammer. This is designed to support organizations impacted by the Coronavirus.

Looking at just the new chat features, Microsoft finally introduced a long-promised new Yammer app for Microsoft Teams. This new app allows users to enjoy the Yammer experience right inside Teams, and stay connected with what’s happening across their organization. Finally, there are some new badges for the praise feature in Teams. Courage, Oprimisigm, and Inclusive, these badges are themed for those who really are making a difference in these challenging times.

Although the bulk of the features this month were for end-users, IT Admins also got some new stuff to play with. For one, a new Meetings dashboard in the Microsoft Teams admin center was introduced. This dashboard provides insights about usage, user feedback, health, meeting details, devices, and more from one central hub. Microsoft says this feature will be coming soon.

Other features wrapping up the month include the ability to Improve voice quality with local media optimization for direct routing, and more ways for admins to control profile picture settings on Teams. Smaller features include batch policy assignment and some more ways to control meetings, such as lobby settings. There also was the introduction of new analytics and reports experience for the admin center. Microsoft says this will provide administrators insights into the usage of Teams apps in their environment allowing them to manage risk and make informed decisions.

Microsoft will finally showcase Xbox Series X games during May 7 Inside Xbox episode

Xbox fans, it’s time to mark your calendars: Microsoft has just announced that it will finally showcase Xbox Series X games on the next Inside Xbox livestream scheduled on Thursday, May 7 at 8AM PT. The brief announcement teased a “first Look next-gen gameplay from our global developers partners, and it will be interesting to see if some new third-party games will be revealed during the show.

So far, we’ve heard about a couple of upcoming cross-gen titles that will be ship on both Xbox One and Xbox Series X, and the list includes the first-party game Halo: Infinite, CD Projekt Red’s Cyberpunk 2077, and Ubisoft’s Assassin’s Creed Valhalla. These three games will also support Smart Delivery, meaning that you’ll only need to buy them once and your Xbox One or Xbox Series X console will download the version of the game optimized for your console.

With 12 teraflops of computing power, support for 120 FPS, hardware-accelerated ray tracing, and other technologies like variable rate shading, the Xbox Series X is expected to deliver a true generational leap. However, it’s really up to game developers to make good use of this new powerful hardware, and we’ll soon have a better idea of what to expect of next-gen Xbox games.

It’s worth noting that Sony has yet to announce a similar event for PlayStation 5 games, so Microsoft is once again the company that’s moving faster. The Redmond giant was the first to announce its new console during the Game Awards Ceremony in December, and it was also first to reveal the full specs of the Xbox Series X in March. Let’s hope that the games we’ll see next week will not disappoint.

New PowerToys for Windows 10 update brings auto-update feature and other improvements

It’s been a couple of weeks since Microsoft released a minor update for PowerToys with some bug fixes for Windows 10 users, but a new version is finally available. The latest update packs a highly anticipated automatic update option, as well as important updates to FancyZone.

Here is the full changelog for PowerToys version 0.17:

  • PowerToys can now update itself #1686
  • FancyZone can now snap to two zones (still experimental since it doesn’t support restoring the app to two zones)
  • Per machine installation fixed, non-admin user will be able again to use PowerToys after the regression in 0.16.
  • Fixed most of the FancyZones Virtual Desktop bugs.
  • Fixed several FZ bugs including proper handling of taskbar position.
  • PowerToys icon in the Start menu will always show ????

To see the latest features of PowerToys, you need to head over to the GitHub releases page to download the latest version. For anyone interested to play around with PowerToys, don’t forget to check out our hands-on with the version 0.16.

Fix: Dropbox not syncing in Windows 10/11

Dropbox is a pretty solid service that rarely causes problems to users. However, there might be some situations when the service will give you headaches anyway.

One of the most annoying problems not just with Dropbox, but with basically any cloud-storage service, is when the Desktop client stops syncing.

Various factors can cause Dropbox‘s sync to stop working. This is a serious problem that needs to be addressed as soon as possible and we’ve prepared a few solutions that might help.

What to do if Dropbox for Windows 10 is not syncing

  1. Disable your Antivirus
  2. Unlink Dropbox
  3. Make sure you’re properly connected to the internet
  4. Delete Dropbox cache
  5. Modify the Dropbox location (for advanced users)
  6. Try installing Dropbox from the Windows Store
  7. Check your firewall and add Dropbox to the exception list
  8. Disable your antivirus/Add Dropbox to the exception list
  9. Run the App Troubleshooter
  10. Uninstall the latest update

Solution 1 – Disable your Antivirus

Having an antivirus program installed on your computer is beneficial in terms of security, but it can be harmful to other aspects of your computer. It’s known that antiviruses often conflict with various Windows features and third programs and Dropbox is on the list, as well.

The first thing you should do is pause your antivirus for some time and see if Dropbox is able to sync. If you notice that syncing works without problems when the antivirus is turned off, either uninstall the antivirus (and switch to Windows Defender, which is something Microsoft would love you to do) or whitelist Dropbox in the antivirus.

Also keep in mind that that some system optimization software, like TuneUp, can delete Dropbox while optimizing Windows. In that case, reach to TuneUp support for help and further instructions.

On the other hand, if you determine that neither the antivirus or optimization programs are responsible for the syncing problem, move on to the next solution.

Solution 2 – Unlink Dropbox

It may happen that your Dropbox settings are corrupted. One of the most effective ways of dealing with this issue is unlinking your computer from your Dropbox account and linking it again. That way, the settings will reset and the problem can be solved.

Here’s what you need to do to unlink and link accounts:

  1. Sign into your account on dropbox.com.
  2. Click your name at the top of any page to open the account menu.
  3. Click Settings.
  4. Select the Security tab.
  5. In the Devices section, click the X beside the name of your computer to unlink it.

To link your computer back to your Dropbox account, just sign in with the Desktop client. It should do all the work for you on the first sign in.

If unlinking/linking your computer doesn’t get the job done, try some other solutions listed below.

Solution 3 – Make sure you’re properly connected to the internet

Obviously, the sync can’t function well if you’re not properly connected to the internet. So, just in case, make sure everything’s fine with your internet connection. In case you notice any problems, try solving them by using workarounds from  this article, and then try to sync Dropbox again.

Solution 4 – Delete Dropbox cache

Just like it’s the case with antivirus programs, the piled up cache can cause problems with your Dropbox client. So, if none of the solutions from above worked well for you, try clearing the cache. In case you don’t know how to do that, follow these instructions:

  1. Open the file Explorer.
  2. Go to your Dropbox folder, and go to the cache folder (you can also access the folder by entering %HOMEPATH%Dropbox.dropbox.cache in Search).
  3. Select all by pressing Ctrl+A.
  4. Press Delete and confirm, to remove everything from the folder.

Now, try to sync your files with Dropbox again. Does this resolve the issue?

Solution 5 – Modify the Dropbox location (for advanced users)

In case none of the settings from above worked for you, try a more advanced solution. You’ll have to can remove your settings by hand using an administrative account. This should reset Dropbox and resolve the syncing problem. If you’re not sure what you’re doing, ask someone else for help in order to avoid doing even more damage.

Here’s exactly what you need to do:

  1. Quit Dropbox. To do so, click on the Dropbox icon in the system tray, then the gear icon in the notifications panel, and select Exit Dropbox from the menu.
  2. Now, right-click the Start Menu, and select Command Prompt (Admin)
  3. Copy and paste the following lines into the command prompt, one at a time, and press Enter after each one:
    • icacls “%HOMEPATH%Dropbox” /grant “%USERNAME%”:(F) /T
    • icacls “%APPDATA%Dropbox” /grant “%USERNAME%”:(F) /T
    • icacls “%LOCALAPPDATA%Dropbox” /grant “%USERNAME%”:F /T
    • icacls “%PROGRAMFILES%Dropbox” /grant “%USERNAME%”:F /T
  4. If the location of Dropbox folder is not C:UsersYourUserDropbox path, modify the first command to point to it. Example: icacls “D:Dropbox” /grant “%USERNAME%”:(F) /T
  5. Now, restart Dropbox, and see if anything changed

Solution 6 – Try installing Dropbox from the Windows Store

You probably prefer the regular, win32 version of Dropbox, but there’s also a UWP version, and it’s quite good. Additionally, UWP apps (should) work better in Windows 10, so you really have nothing to lose.

Just head over to the Microsoft Store, download and install the UWP version of Dropbox, and see if you have more luck with this app.

Solution 7 – Check your firewall and add Dropbox to the exception list

Since Dropbox is not a first-party program, there’s a chance Windows Firewall will block it. If that’s the case, you don’t really need to fully disable the Firewall to make Dropbox working. You can just add it to the exceptions list. Here’s how:

  1. Go to Search, type firewall, and open Windows Defender Firewall. 
  2. Go to Allow an app or feature through Windows Defender Firewall. 
  3. Scroll down through the list of apps, and find Dropbox.
  4. Make sure to check both Private and Public.
  5. Save the changes and restart your computer.

Solution 8 – Disable your antivirus/Add Dropbox to the exception list

The same thing applies to your antivirus solution. If Dropbox still keeps closing, maybe your antivirus simply blocks it. To prevent that, go to your antivirus’ settings, and add Dropbox to the list of exceptions.

Solution 9 – Run the App Troubleshooter

If you’re having problems with the UWP version of the app, you should run the built-in app troubleshooter to potentially resolve the problems. Here’s how to run Windows 10’s App Troubleshooter:

  1. Go to Settings.
  2. Navigate to Updates & Security > Troubleshoot.
  3. Click Windows Store Apps and choose Run the troubleshooter.
  4. Wait for the troubleshooter to finish the process.
  5. Restart your PC.

Solution 10 – Uninstall the latest update

As we said above, you never know with Windows updates. So, it’s also possible for a Windows update to disrupt your system, and break some apps or programs. If installing the latest updates didn’t get the job done (or even made the problem worse), let’s flip the philosophy and uninstall the latest Windows update. Here’s how:

  1. Go to Settings > Updates & Security > Windows Update
  2. Go to Update history > Uninstall updates.
  3. Now, find the latest update installed on your computer (you can sort updates by date), right-click it, and go to Uninstall
  4. Restart your computer

We hope at least one of these solutions helped you to address your issues with Dropbox syncing. If you have any comments, questions, or know some solutions we didn’t list here, make sure to let us know in the comments below.

Streets of Rage 4 joins Xbox Game Pass for Console and PC on its launch day

If 2017’s Sonic Mania was a love letter to fans of old-school Sonic games, another cult-classic franchise from the Sega Megadrive era is coming back to life today with Streets of Rage 4. The new side-scrolling beat ’em up game is out on Xbox One, PlayStation 4, Nintendo Switch, and Windows today, and Xbox Game Pass subscribers can play it for free on launch day.

If an official announcement is likely imminent, a Microsoft France employee in charge of communications for Xbox teased the game’s arrival on Xbox Game Pass yesterday, and we can confirm that the game is already available to download from the Microsoft  Store. The game supports Xbox Play Anywhere and Xbox Live Cloud saves, so you can play it on both Xbox One and PC

There aren’t many games like Streets of Rage these days, and most reviews have been highlighting the addictive gameplay, extensive roster of characters, and excellent soundtrack. Streets of Rage 4 supports 4-players local multiplayer, as well as two-players online co-op.

The addition of Street of Rage 4 is definitely a nice surprise for Xbox Game Pass subscribers ahead of the arrival of Red Dead Redemption 2 in the catalog on May 7. If you have yet to subscribe to Xbox Game Pass, we remind you that you can get one month of Xbox Game Pass Ultimate for just $1.

Streets of Rage 4
Streets of Rage 4
Developer:
Dotemu
Price:
$24.99

Microsoft announces new “Teams certified devices” including headsets and rooms accessories

While Microsoft remains committed to delivering the best video conferencing experience during these unprecedented times, this week the software giant has expanded its Teams devices ecosystem with a series of new Microsoft Teams certified devices. The latest additions include speakerphone, headsets, cameras, phones, and Teams rooms accessories that work seamlessly with Microsoft Teams.

One of the key highlights of this range is the Lenovo ThinkSmart View Teams phone, which is much more than a “phone” with its built-in screen. The ThinkSmart View features a high-quality speaker and microphone, along with a wide 8″ HD display. Apparently, this device has the capability to transform your personal or common area space into a conference room to streamline the calling and meeting experience. Microsoft’s blog post highlights its capabilities as follows:

ThinkSmart View reduces downtime in meetings with one-touch join, supports face to face interaction in portrait or landscape layout, and assures conversation privacy with a camera shutter and a microphone mute switch.

Lenovo phone

Microsoft launched its device Certification Program earlier this year, with the intent to offer a high-quality experience with third party devices when used with Microsoft teams. All these devices have been designed to ensure that they are easy to set up and use to meet your growing video conferencing needs.

If you are interested to learn more, we invite you to check out Microsoft’s support website for details about these Teams certified devices.

Xbox head Phil Spencer reiterates that Project xCloud will come to Xbox Game Pass later this year

During Microsoft’s FY2020 Q3 earning calls yesterday, CEO Satya Nadella announced that Xbox Game Pass, Microsoft’s gaming subscription service had crossed more than 10 million subscribers. Even though the software giant previously mentioned that it had “millions” of Xbox Game Pass subscribers, yesterday was actually the first time that the company shared some actual numbers.

Xbox Game Pass for Console launched almost three years ago in June 2017, and what has often been described as a “Netflix for video games” is having real momentum. In a blog post on Xbox Wire today, Xbox head Phil Spencer shared some interesting facts about how Xbox Game Pass subscribers have been engaging with games and other gamers on Xbox Live since the beginning of the coronavirus pandemic

“We’re still early on this journey, and in the last two months we’ve seen how important gaming can be to our community. Since March, Xbox Game Pass members have added over 23 million friends on Xbox Live, which is a 70% growth in friendship rate. Game Pass members are also playing twice as much and engaging in more multiplayer gaming, which has increased by 130%,” Spencer said.

If Microsoft already said that Xbox Game Pass members play more games than the rest of Xbox One owners, the Netflix comparison could become finally true once the subscription service integrates with Project xCloud, Microsoft’s cloud gaming platform currently in public preview. After an integration of Xbox Game Pass with Project xCloud was first teased at X019 back in November, Phil Spencer reiterated today that “Later this year our cloud game streaming technology, Project xCloud, will come to Game Pass—so you and your friends can stream and play the games you love together on your devices.”

It’s still not exactly clear if all Xbox Game Pass games will be playable on mobile devices and Windows 10 PCs via Project xCloud. Moreover, Microsoft still isn’t saying if this will all be free for Xbox Game Pass members, or if the premium Xbox Game Pass Ultimate tier will be required for Project xCloud.

For now, the Project xCloud public preview just hit three new European countries this week, with eight more to follow next week. The service already works great on Android, but the iOS version is currently restricted to Halo: The Master Chief Collection. Screenshots of the PC version of Project xCloud leaked a couple of weeks ago, but the Xbox team has yet to announce when the game streaming service will be available on Windows 10.

We’ve Got an Update for You: What is it and How to Fix

You may have recently encountered the We’ve got an update for you message. This prompt, unique to Windows 10, is a grain of sand in the desert of recent changes that Microsoft is trying on the Windows platform.

This, in no subtle way, tells you there is a significant update for Windows, and you should install it as soon as possible.

What does We’ve got an update for you prompt mean?

Microsoft changed its release strategy for its flagship product – the Windows Operating System.

got update

They moved further away from the traditional model of big numbered releases every few years to smaller updates less than a year apart.

This is where this prompt comes in. It is Microsoft’s way of grabbing your attention and telling you that you should update your Windows.

It is a small part of their overall strategy of keeping all Windows users up-to-date. Another, perhaps more obvious, change was making it much harder for users to disable Windows updates.

How can I remove the We’ve got an update for you prompt?

You can circumvent the prompt and stop it from appearing in a few ways. Those usually involve preventing Windows from downloading updates automatically.

It should be noted that this includes significant risks; you shouldn’t do it without the proper knowledge of the downfalls.

Mainly how it will affect your computer’s security because you won’t get the security patches that Microsoft rolls out automatically.

If you still want to go with it, feel free to read our articles: Disable Windows 10 automatic updates: tips and tricks.

You can also check our guide on how to block Windows 10 Creators Update from installing.

In this article, we not only looked at the new prompt in Windows 10, but we also looked at the underlying reasons behind Microsoft showing us that prompt.

We hope it was informative. Please tell us your stories with this prompt in the comment section, and has it caused you any nuisance?

PROCESS HAS LOCKED PAGES error in Windows 10/11 [FULL FIX]

There is a wide range of BSoD errors available, and what is common for all these errors is that they crash Windows 10 and restart your computer in order to prevent damage.

These types of errors can be troublesome, therefore today we’re going to show you how to fix the PROCESS HAS LOCKED PAGES error.

How can I fix PROCESS HAS LOCKED PAGES BSoD error?

  1. Make sure that Windows 10 and its drivers are up to date
  2. Run the BSOD Troubleshooter
  3. Run the SFC scan
  4. Run DISM
  5. Check the hard drive
  6. Delete the problematic software
  7. Install the older version of the drivers
  8. Downgrade your BIOS
  9. Delete Cubase Application Data
  10. Reset Windows 10

How do I fix PROCESS HAS LOCKED PAGES error?

Solution 1 – Make sure that Windows 10 and its drivers are up to date

Windows 10 isn’t a perfect operating system, and with certain hardware and software, some issues can appear. Fortunately, Microsoft usually fixes these issues through Windows updates.

These updates bring improved security as well as new features, but most importantly, these updates fix many hardware and software issues that can cause BSoD errors such as PROCESS HAS LOCKED PAGES.

If you wish your computer to be error-free and stable, be sure to update Windows 10 frequently.

Although Windows updates can fix many problems, it’s also important that you keep your drivers up to date.

If a certain driver is out of date or corrupted, Windows 10 won’t be able to use that device, and you’ll get a BSoD error.

Since drivers can be a cause for BSoD errors, we urge you to update your drivers as often as you can.

Updating drivers on Windows 10 is simple, and you can do it directly from Device Manager. To update your drivers, do the following:

  1. Press Windows Key + X to open Power User Menu. Select Device Manager from the list.
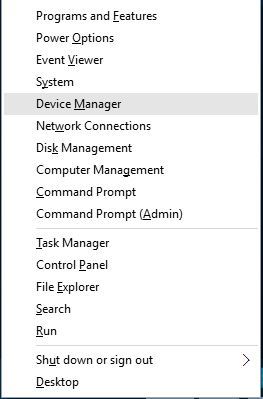
    device-manager
  2. When Device Manager opens, find the driver you want to update, right-click it and choose Update Driver Software.
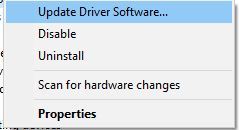
    update-driver-software
  3. Select Search automatically for updated driver software. Windows 10 will now download and find the best driver for your device.
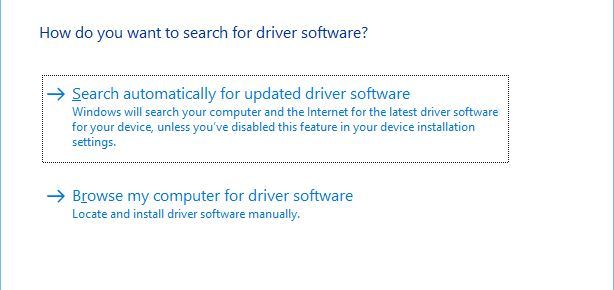
    browse-my-for-driver-software
  4. Repeat this step for all drivers that you want to update.

Update drivers automatically

Searching for drivers on your own can be time-consuming. So, we advise you to use a tool that will do this for you automatically.

Using an automatic driver updater will certainly save you from the hassle of searching for drivers manually, and it will always keep your system up to date with the latest drivers.

Fortect Driver Updater will help you update drivers automatically and prevent PC damage caused by installing the wrong driver version. It stays up to date with the most recent changes, preventing the system from triggering latency, system failures, and BSoD issues.

It really keeps your system running smoothly by installing or updating its necessary drivers. Fortect Driver Updater scans the computer, creates a status report, does the update, and the system returns to its original state.

After several tests, our team concluded that this is the best-automatized solution.

Solution 2 – Run the BSOD Troubleshooter 

If updating your drivers didn’t get the job done, we’re going to try Windows 10’s built-in troubleshooting tool.

This tool can be used for resolving all sorts of problems inside the system, including BSOD errors.

Here’s how to run Windows 10’s troubleshooting tool:

  1. Open the Settings app.
  2. Head over to Update & Security section.
  3. Select Troubleshoot from the menu on the left.
  4. Select BSOD from the right pane and click Run the troubleshooter.PROCESS HAS LOCKED PAGES Windows 10 error
  5. Follow further instructions to complete the troubleshooting process.
  • What is IO operation?

Solution 3 – Run the SFC scan

The next troubleshooter in line is the SFC scan. This tool checks for corrupt system files, and repairs them, if possible. So if a corrupt system file is the cause of the PROCESS HAS LOCKED PAGES error, this tool will likely resolve it.

Here’s how to run the SFC scan in Windows 10:

  1. Go to Search, type cmd, and open Command Prompt as Administrator. 
  2. Enter the following line and press Enter: sfc/scannowPROCESS HAS LOCKED PAGES Windows 10 error
  3. Wait for the scan to complete.
  4. If the solution is found, it will be applied automatically.
  5. Restart your computer.

Solution 4 – Run DISM

And the third troubleshooter we’re going to try here is DISM. This tool re-deploys the system image, and resolves potential issues along the way. So, it’s possible that running DISM will also resolve the PROCESS HAS LOCKED PAGES error.

We’ll walk you through both standard and the procedure that utilizes the installation media below:

  • Standard way
  1. Right-click Start and open Command Prompt (Admin).
  2. Paste the following command and press Enter:
    • DISM /Online /Cleanup-Image /RestoreHealthPROCESS HAS LOCKED PAGES Windows 10 error
  3. Wait until the scan is finished.
  4. Restart your computer and try updating again.
  • With the Windows installation media
  1. Insert your Windows installation media.
  2. Right-click the Start menu and, from the menu, choose the Command Prompt (Admin).
  3. In the command line, type the following commands and press Enter after each:
    • dism /online /cleanup-image /scanhealth
    • dism /online /cleanup-image /restorehealth
  4. Now, type the following command and press Enter:
    • DISM /Online /Cleanup-Image /RestoreHealth /source:WIM:X:SourcesInstall.wim:1 /LimitAccess
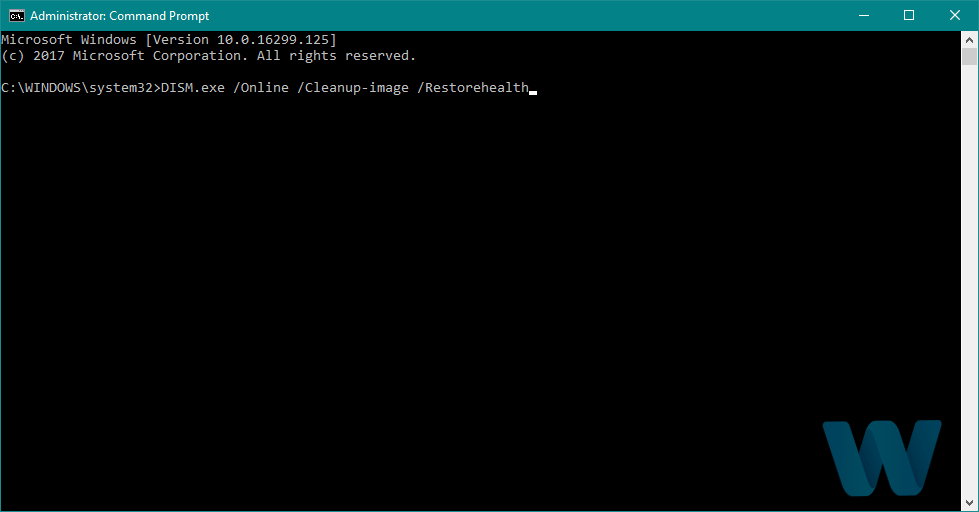
  5. Make sure to change an X value with the letter of the mounted drive with Windows 10 installation.
  6. After the procedure is finished, restart your computer.

Solution 5 – Check the hard drive

If there’s a problem with your hard drive, BSOD issues are quite possible. To check if that’s the case, run the chkdsk command. This command will scan all your partitions for potential problems. If the solution is available, this tool will also apply it.

Here’s how to run the chkdsk command in Windows 10:

  1. Enter the Advanced Startup (Restart your computer while holding the Shift key).
  2. Choose Troubleshoot > Advanced Options.
  3. Select Command Prompt from the list of options.
  4. When Command Prompt appears, enter the following lines and press Enter after each line in order to run it:
    • bootrec.exe /rebuildbcdPROCESS HAS LOCKED PAGES Windows 10 error
    • bootrec.exe /fixmbr
    • bootrec.exe /fixboot
  5. Some users are also suggesting that you need to run additional chkdsk commands as well. To perform these commands, you need to know drive letters for all your hard drive partitions. In Command Prompt you should enter the following (but remember to use the letters that match your hard drive partitions on your PC):

    • chkdsk /r c:

    • chkdsk /r d:


    This is just our example, so keep in mind that you have to perform chkdsk command for every hard drive partition that you have.


  6. Restart your computer and check if the issue is resolved.

Although updating drivers from Device Manager is simple, some users claim that this method isn’t always reliable. According to them, Device Manager doesn’t always download the latest drivers, therefore it’s better to download drivers manually.

In order to do that, you just have to visit your hardware manufacturer’s website and download the latest drivers for your device.

Solution 6 – Delete the problematic software

Often certain software can cause PROCESS HAS LOCKED PAGES error and in order to fix this issue, it’s advised that you find and uninstall the problematic software.

According to users, the common cause for this problem can be tools such as IOBit Password Folder, so if you’re using the aforementioned tool, be sure to remove it.

Users also reported that this error can be caused by USB Disk Security antivirus, so you might have to remove this tool in order to fix this problem.

It’s worth mentioning that almost any third-party antivirus software can cause this problem, so be sure to completely remove any installed antivirus programs that you have. To completely remove an antivirus program, you need to use the dedicated uninstaller tool.

Many security companies have these tools on their website, so be sure to download one for your antivirus software.

Solution 7 – Install the older version of the drivers

Although using the latest drivers is always recommended, sometimes the latest drivers might have certain issues that can cause BSoD errors such as PROCESS HAS LOCKED PAGES to appear.

Blackmagic Intensity Pro owners reported that they had certain problems with latest drivers, and in order to fix the Blue Screen of Death errors, they had to uninstall the latest driver and switch to the older version. To uninstall a certain driver, do the following:

  1. Press Windows Key + X and select Device Manager from the list.
  2. Locate the problematic driver, right click it and choose Uninstall from the menu.
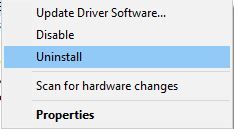
    uninstall-driver
  3. If available, check Delete driver software for this device and click OK.
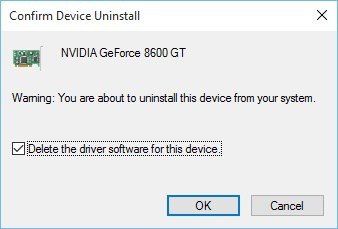
    confirm-uninstall-driver
  4. After the driver is deleted, restart your computer.

When you restart your PC, Windows 10 will automatically install the default driver. If the default driver works and the system is stable, you can continue using it. You can update the driver if you wish, but be sure not to download and install the same problematic version.

Solution 8 – Downgrade your BIOS

Updating BIOS is always useful since it allows you to use new features and new hardware with your motherboard, but according to the users, there might be some problems after updating BIOS.

According to them, the PROCESS HAS LOCKED PAGES error started appearing after the BIOS update, and the only solution was to downgrade BIOS to the older version.

Downgrading BIOS is an advanced procedure that can cause permanent damage to your PC if you’re not careful, therefore use extra caution if you decide to perform it. In addition, be sure to thoroughly check your motherboard manual for detailed instructions.

Solution 9 – Delete Cubase Application Data

Few users reported PROCESS HAS LOCKED PAGES BSoD error while launching Cubase, and in order to fix this error, it’s required that you delete all the files from the Cubase Application Data folder. To do that, just do the following:

  1. Go to Cubase installation directory and locate Cubase Application Data folder.
  2. Open the folder and delete all files from it.
  3. Repeat the steps for all previous versions of Cubase that you have installed.

Bear in mind to perform these steps only for older versions of Cubase that you don’t plan to use anymore.

Solution 10 – Reset Windows 10

If the PROCESS HAS LOCKED PAGES error is caused by software, you can fix the problem by performing Windows 10 reset. Bear in mind that you need to create a backup for your files because Windows 10 reset will delete all files and folders from your C drive.

In order to perform Windows 10 reset you might also need Windows 10 installation media, so use Media Creation Tool to create a bootable USB flash drive. To reset Windows 10, do the following.

  1. Restart your computer while it boots in order to start Automatic Repair.
  2. Select Troubleshoot > Reset this PC.
  3. Select Remove everything > Only the drive where Windows is installed > Just remove my files. Click the Reset button.
  4. Follow the instructions and wait for reset to complete.

If the BSoD error appears even after Windows 10 reset, it means that the error is caused by faulty or incompatible hardware, so be sure to check your hardware and replace any faulty hardware components.

Come to our BSoD troubleshooting Hub if you need any assistance with other BSoD errors.

PROCESS HAS LOCKED PAGES BSoD error can be a major hindrance, but we hope that you managed to solve it by using one of our solutions. Share your thoughts in the comments below!

Microsoft reveals strong growth in Xbox Live, Game Pass, and xCloud user numbers in Q3 earnings call

During Microsoft’s FY20 Q3 earnings call earlier today, the company’s CEO, Satya Nadella, revealed that the number of active Xbox Live users has grown to nearly 90 million worldwide.

Microsoft ceased reporting on specific Xbox Live numbers back in 2019, instead opting for reporting on growth percentages which can sometimes be misleading. The reveal of an actual number suggests a growing confidence in the growth of the company’s gaming platform which is a good sign with the Xbox Series X console launching later this year.

For a sense of how much Xbox Live has grown, back in the FY16 Q4 earning report, Microsoft stated that they had reached 55 million active Xbox Live users. That’s 35 million new users in around four years. Not bad for an established service that’s been around since 2002.

Most of the growth appears to have happened over the past year though as in the FY19 Q4 report, the last time numbers were reported, Xbox Live was said to have 65 million active users.

It’s important to state, though, that these Xbox Live numbers don’t necessarily indicate a growth in Xbox One console ownership or usage as the Xbox Live service is also used in some video games such as Minecraft which can be played on Sony’s PlayStation 4, the Nintendo Switch, and on mobile devices. Ori and the Blind Forest, which launched on the Nintendo Switch recently, likely increased Xbox Live numbers a bit as perhaps did the free-to-play Microsoft Solitaire and Gears Pop titles which are now available on iOS and Android smartphones and tablets.

Xbox Game Pass numbers were also published in the FY20 Q3 report with the video game subscription service now sporting over 10 million individual subscribers across the Console, PC, and Ultimate variants. This is the first time Xbox Game Pass subscriber numbers have been released which also suggests strong confidence in this relatively new initiative as well.

Specific numbers weren’t released for the Project xCloud game streaming service, which is understandable as it’s still in testing, but there are apparently hundreds of thousands of users already using it.

Overall, Xbox content and services revenue is said to have increased 2% this past quarter.

For details on the rest of Microsoft’s FY20 Q3 earnings and how they were affected by the COVID-19 pandemic, check out our coverage here and then follow us on Twitter for more Microsoft and Xbox news.

FIX: Subst.exe not working in Windows 10/11

subst.exe windows 8.1

Some users have reported that they are getting problems with running Subst.exe in Windows 10. Here’s how the complaint sounds like:

I have a batch file that I’ve been using since windows xp, all the way up through windows 8.1 beta. Since I installed the full 8.1 this week, the batch file quit working: SUBST.EXE L: c:developmentclientname

I tried right/click run as administrator, and it sorta works…interestingly…with MSAccess XP. But MSOffice 2010 products don’t recognize the drive letter in the File Open dialog box, and Windows Explorer doesn’t display the L: drive.

However, if I go to a command prompt and type L: and press enter, it recognizes and goes to the L: drive…. I tried running the command line directly from command prompt (admin) and same results…

How can I fix subst.exe batch file stopped working in Windows 10?

  1. Run SFC scan
  2. Stop switching between MSAccess XP and MSAccess 2010
  3. Disable your antivirus/firewall
  4. Create a new user account

The thread is still open on the Microsoft community forums and we’re keeping a keen eye on it, in the eventuality that a working solution will be provided.

Meanwhile, here are some solution suggestions that may help you fix the problem.

1. Run SFC scan

Those who are affected by this should try first a System File Check just to make sure all system files are in place.

If this doesn’t work, then you can go ahead and from an admin command prompt, type sfc /scannow to start. After that, just follow the instructions and restart.

sfc scannow

2. Stop switching between MSAccess XP and MSAccess 2010

For some, the issue has been generated by the fact that users switch often between MSAccess XP and MSAccess 2010, so if you’re doing the same thing, stop.

3. Disable your antivirus/firewall

Sometimes, your antivirus software may block .exe files from running on your computer. You can turn off your antivirus tool, as well as your firewall , and check if the Subst.exe file now works.

Don’t forget to enable your antivirus and firewall protection after you completed the tests.

4. Create a new user account

Other users suggested that creating a new user account may fix this problem. While this solution works only in rare cases, do give it a try as it may help you fix the problem.

To learn more about hidden files, we also have a guide that explains what is NcsiUwpApp, so you might want to visit it.

So, just in case you know additional working fixes, do let us know and we’ll inform those affected.

5 Best Layered Image Editors [Online + Desktop]

Nowadays you don’t really need a cutting-edge camera to take stunning shots, your trustworthy, daily companion also known as the smartphone should suffice considering the fulminant enhancements they received in the past few years.

However, you will need solid photo editing software if you want to perfect your pics and really make them shine before sharing them with the entire world.

Since we’re talking about crisp, pro-looking photography, you might have thought of introducing layers to your editing skills in order to really take your artwork above and beyond.

Using layers in digital image editing is great for complex, composite pictures because they allow you to separate the different elements that compose the big picture and edit them individually without altering other layers.

Above all things, layering is about control allowing you to use special effects on one element, and let’s say, vector graphics on the other without them interfering (unless you want them to in which case you can go for a transparent layer).

If you’re looking for the best photo editing software that can handle all the layers, you don’t want to miss our amazing guide below.

What app can I use to layer pictures?

Adobe Photoshop – Used by million artists

Adobe Photoshop

Powerful and complex, Adobe Photoshop is unmatched in photo editing, prevailing as the tool of choice for composite pictures with masks and layers.

With the very best imaging and graphic design software, the number of extra layers, layer effects, and layer sets you can add to an image is limited only by your imagination…. or your RAM capacity.

You work with layers in the Photoshop Layers panel and the organization facilities are remarkable: you can use groups to arrange your layers in a logical order, you can nest groups within other groups and even use groups to apply attributes and masks to multiple layers simultaneously.

Let’s quickly go through its key features:

  • Photoshop layers for non-destructive editing
  • Video layers (use video layers to add a video to an image, then mask the layer, apply layer effects, paint on individual frames, etc.)
  • Convert a background into a Photoshop layer or convert a Photoshop layer into a background
  • Duplicate a Photoshop layer or group within an image
  • Create a new document from a Photoshop layer or group
  • Smart Object layer (scale, skew, or reshape a Smart Object without directly editing image pixels)

⇒ Get Adobe Photoshop

Corel Graphics Suite – Most creative graphic designs

design graphics with Corel Draw

Create HDR photos from your RAW images, adjust color and tone, eliminate imperfections, and correct perspective with Corel PHOTO-PAINT’s layer-based photo editing tools.

Integrated into CorelDRAW Graphics Suite, your all-in-one photo editing and graphic design suite, PHOTO-PAINT offers professional editing tools to retouch and enhance your photos to perfection.

Using complex layers and masks, you can modify any element of a composite picture without affecting other objects. It’s that simple!

Let’s quickly go through its key features:

  • Work with Objects (edit independently layered elements without affecting other objects or the background of an image)
  • Use Clip masks (edit the properties of a group of objects without modifying the objects within it by creating a clip mask)
  • Non-destructive effects (apply, modify and experiment with effects on an object, all without altering it)
  • Create complex compositions (powerful, non-destructive layer-based editing)
  • Perform precise corrections (clone, sharpen, remove red-eye with powerful retouching and restoration tools)
  • Modify images with a variety of drawing and painting tools like lines, shapes, and brushstrokes)
  • Add special effects (apply a wide range of transformations to images)

⇒ Get CorelDRAW Graphics Suite now

Capture One Pro – Free editing tutorials

Capture One Pro_image editor with layers

Capture One is a powerful and intuitive photo editing software with an opulent range of incorporated layers, perfectly crafted to adjust and create wonderfully intricated composite images.

Apply up to 16 layers and control the impact of your local adjustments with the highest precision.

The tool guarantees the sharpest image quality thanks to its custom color and lens profiles, compatible with all major cameras, and cutting-edge noise reduction for high ISO shots.

Let’s quickly go through its key features:

  • Powerful editing tools including masking, layer, and color tools
  • Full creative control with numerous adjustment options
  • Smart interface (fully customizable workspace and keyboard shortcuts for an efficient workflow)
  • Organization tools (Sessions and Catalogs to organize files based on themes or projects)
  • Tethered capture (review your photos live)

⇒ Get Capture One Pro’s

GIMP – GNU image manipulation

GIMP_image editor with layers

GIMP is a free open-source image editor with a predilection for facilitating composite images creation through its enhanced layers feature.

You can use layer masks to adjust the opacity of a layer and use layers to isolate specific tones in your images.

Besides the complex editing tools, you can easily integrate third-party extensions with the GIMP app for a custom-tailored experience and enhanced productivity.

Let’s quickly go through its key features:

  • High-quality image results (powerful retouching and restoring tools)
  • Programming algorithms (multi-language support: C, C++, Perl, Python, Scheme)
  • Cutting-edge color management features
  • Print-ready design (a key component in Desktop Publishing)
  • Extensibility & Flexibility

⇒ Get GIMP’s official page

PicMonkey – Complete image editing

picmonkey

PicMonkey is a great photo editing and design tool with a high focus on layers usage.

Photos, graphics, text, and background color can be easily edited thanks to its enhanced layers feature called the Layers palette.

Anything from grouping and ungrouping layers, applying effects to grouped layers, duplicating a layer or group of layers to reordering, flattening, and deleting layers can be achieved directly from the aforementioned palette.

Let’s quickly go through its key features:

  • Powerful design tools (versatile text tools, vector graphics, and effects)
  • 1000+ templates to choose from
  • Photo Editing tools (stunning filters and effects)
  • Layers palette to efficiently work with layers
  • Detailed and interactive tutorial guides

⇒ Get PicMonkey

That concludes our list of best image editors with layers, conceived to help you elevate your artwork and create slick photography with gorgeous depth and a larger-than-life gradient appearance.

Then again, get more revolutionary and inspirational ideas for tools that can ease up your tasks from our Design Software page.

Are you ready to take your photo editing skills to the next step? Let us know in the comments section below.