Dues Ex: Invisible War is an older game, and as such, it has some issues running on Windows 10. However, you can easily fix that.
In this guide we’ll show you how to play Deus Ex: Invisible War on Windows 10, and how to run the game without any issues.
How can I run Deus Ex Invisible War on Windows 10?
1. Run the game in Compatibility Mode
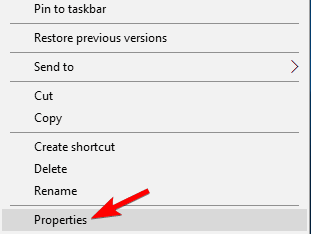
Right-click the game’s exe file and choose Properties.
Go to Compatibility tab.
Enable Run this program in compatibility mode for and select older version of Windows.
You might want to experiment with different settings, but many reported that using Windows XP compatibility mode let them run Deus Ex Invisible War on Windows 10.
2. Adjust your resolution
Adjust the game’s resolution and try to start it again.
Switch to the windowed mode and try to run the game again.
These are a couple of useful tricks that have worked for some users, so we suggest that you try them out.
3. Run the game with a single core
As soon as you start the game, minimize it and open Task Manager. You can do that with Ctrl + Shift + Esc shortcut.
Go to the Details tab, right-click the Deus Ex process and choose Set affinity.
Make sure that only CPU 0 is checked and click OK.
Keep in mind that this is just a workaround, so you’ll need to repeat it every time you want to play Deus Ex Invisible War on Windows 10.
4. Download the game from GOG or Steam
Good Old Games is an online community that created a digital distribution platform for older PC games. They adapt older games such as those from the 90’s to and let them work on modern operating systems.
Deus Ex: Invisible War won’t run properly on Windows 10 in native version, and if you have any issues with it, we suggest getting the gaem from GOG Games.
Clear everything in the input field. Usually, only say will be displayed.
Enter one of these commands: "Set Human bCheatsEnabled True" "Set DeusEx.JCDentonMale bCheatsEnabled True"
Now the cheats will be enabled. You can use the following cheats:
Command:
Effect:
allcredits
Get 10,000 credits
iamwarren
Activate EMP field
augadd
Installs a specific augmentation
set CurrentLevel
Set specific skill to a certain level
allaugs
Get all basic augmentations
allskillpoints
Get all skillpoints
allskills
Master every skill
allweapons
Get all weapons
legend
Opens a secret menu
playersonly
Freezes everything expect player
allenergy
Full energy
allhealth
Full HP
allammo
Full ammo for all weapons
tantalus
Kill current target
killall [name]
Kills specific NPC
open
Open specific level
summon
Create specific object
spawnmass [amount]
Spawns multiple objects
god
God mode
invisible
Invisibility
behindview
Toggles between first and third person view
fly
Flying mode
ghost
No-clip mode
walk
Disable fly and no-clip
setjumpz
Set jump height
amphibious
Breather under water
opensesame
Unlock door or panel
setfriction
Sets friction
slomo
Slow motion
Deus Ex: Invisible War is a great game that many users wish to play on Windows 10. Since it’s an older game, it suffers from certain issues, but hopefully this guide helped you fix those issues.
If we missed any solution that worked for you, share it with us in the comments section.
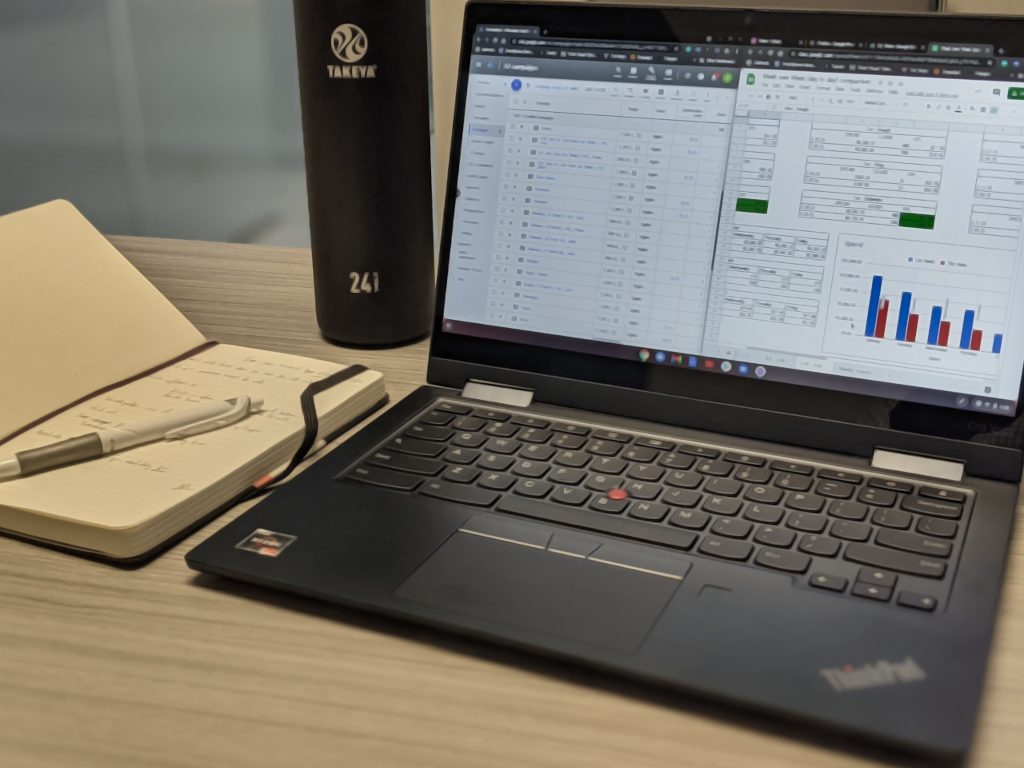
Lenovo sent me a ThinkPad C13 Yoga Chromebook last week and after 7 days of playing with it, I can immediately see the appeal of the operating system for the average computer user and, I have already found some problematic threads that I’ve already started to pull at in ChromeOS.
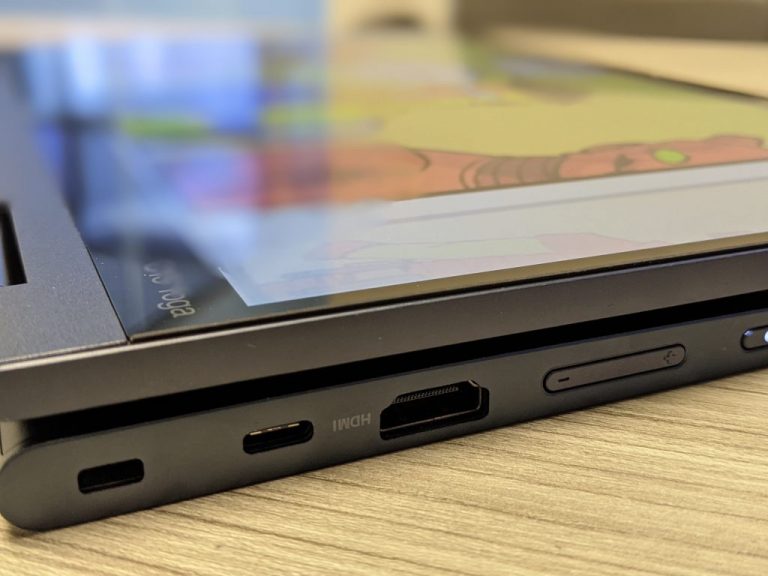
Out of the box, Lenovo delivers a solid piece of computer hardware that feels like a mesh of its other Yoga lines. Where the consumer version of Lenovo’s Yoga line makes use of aluminum chassis and reduced I/o support while ThinkPads opt for their flagship carbon fiber casings and robust connectivity, the C13 actually uses an aluminum build but with the design prowess and port support of a ThinkPad. The C13 comes with the ThinkPad Kensington Lock, two USB-C 3.2, two USB-A 3.2, and a mini-SD card slot.
Due to its aluminum construction, it’s got relative weight to it at around 3 pounds, which makes it as heavy as any other Yoga or ThinkPad offerings from 2020. The other things that were immediately notable were the speaker placement which led to poor sound experience during my initial testing.
The particular model I received is sporting 8GB of RAM, an AMD Ryzen 5 Pro 3500C chipset, and 256GB of SSD storage, so it’s meeting my standard Windows 10 usage on paper. The screen is a bit muddled and doesn’t get as bright as I would like, but it gets the job done, especially when the scaling out the box is a bit over the ‘larger’ setting which takes up unnecessary screen real estate.
Aside from familiar hardware, the Lenovo C13 Yoga is also being marketed as a lightweight enterprise tool powered by ChromeOS. When going through the signup process for ChromeOS for the first time, I was met with several more windows than the last time I checked out ChromeOS, but it was a pleasant walkthrough of some new features in Chrome.
Perhaps, it’s just the system getting used to downloading and processing a bunch of new caches, but the fan on this thing kicks in pretty quickly and loudly for a lot of things I’ve been doing. As a Chromebook novice, I’ve noticed the fans kicking in on this Chromebook fairly early into my review seems a bit troubling, but we’ll see.
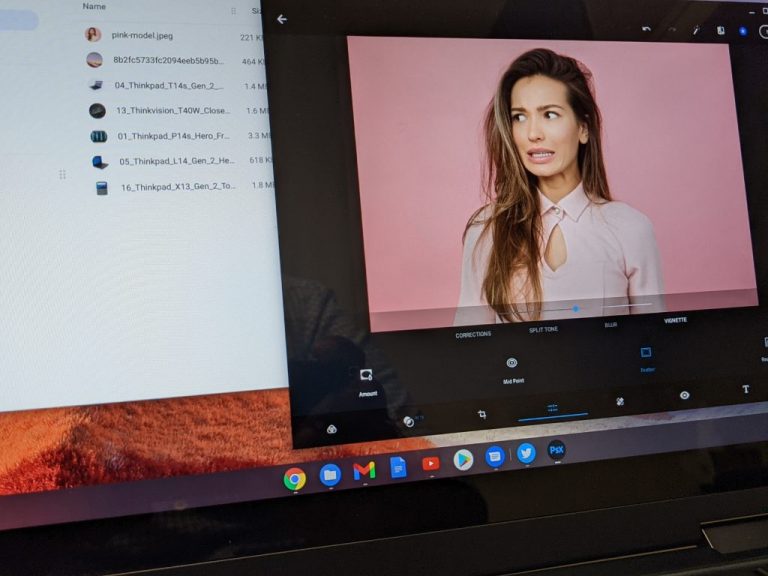
As a Pixel user, the C13 feels like an extension of my phone in both good and bad ways right now. I love that most of my apps were automatically loaded on the device but it’s very apparent that the app experience on ChromeOS needs a lot of tweaking. Some apps can’t be reshaped – looking at you Instagram, and I’m without some of my often used .exe apps such as Gimp, Google, and Microsoft Ads editors that I need for bulk edits to marketing efforts. I’m sure I’ll find some workaround through extensions or PWA’s but right now, it’s been a hassle as I’ve started to move my workflow over to this new device.
As of right now, I’m enjoying getting used to the Chrome operating system more so than the hardware it’s on, and that’s in large part because Lenovo is providing a solid mid-range enterprise experience, I believe a large portion of office workers have experienced at some time in the last seven years.
Despite the spotlight being on Google regarding anticompetitive business practices here in the US and abroad, Microsoft felt it was time to step back in the antitrust arena to offer its two cents on the matter. According to Axios reporting, Microsoft president Brad Smith will be appearing before a House antitrust subcommittee next week to answers questions about tech and the evolution of antitrust legislation.
The House Judiciary antitrust subcommittee has been holding hearings for over a year on how to best address the blending of direct and indirect monopolies and their inherent anticompetitive effects on markets. Inviting Smith, who has been a vocal advocate of more stringent legislature to address antitrust behavior, is another step by the House subcommittee to draft relevant laws going forward.
Axios reporting also points out something we’ve been reporting on for years: Smith’s appearance next week may not be a straightforward advocacy project but also serves as a lobbying effort to subtly undermine its search engine rival’s current market dominance. Microsoft and its Bing search engine have the luxury of being in the minority position in search, and legislature guided by Microsoft would seemingly help benefit the company as it continues to compete against Google.
Interestingly enough, committee members are also keeping an eye on how Google, Facebook, and Australia sort out their revenue sharing efforts for news, search, and social media sites as a possible tent pole for future legislation in the US.
Maxthon is a customizable Chromium browser with some novel features.
The latest Max 6 version, released near the end of 2020, is one you can utilize Chrome’s dark mode extensions and themes on.
However, you can also turn Maxthon darker with some of its built-in settings.
Quick tip:
Opera One is undoubtedly one of the most customizable browsers, which is jammed packed with handy browsing features and allows you to easily switch to the dark mode.
You can discover more of Opera One’s features on its sidebar. There you can access built-in WhatsApp and Facebook messengers, and other incredible features, such as the built-in AI.
Opera One
Easily transform this browser to dark mode while also keeping your privacy intact while exploring the web at great speeds!
First, click the Customize and control Marathon button near the top right corner of that browser’s window.
Click the Settings options to open that tab.
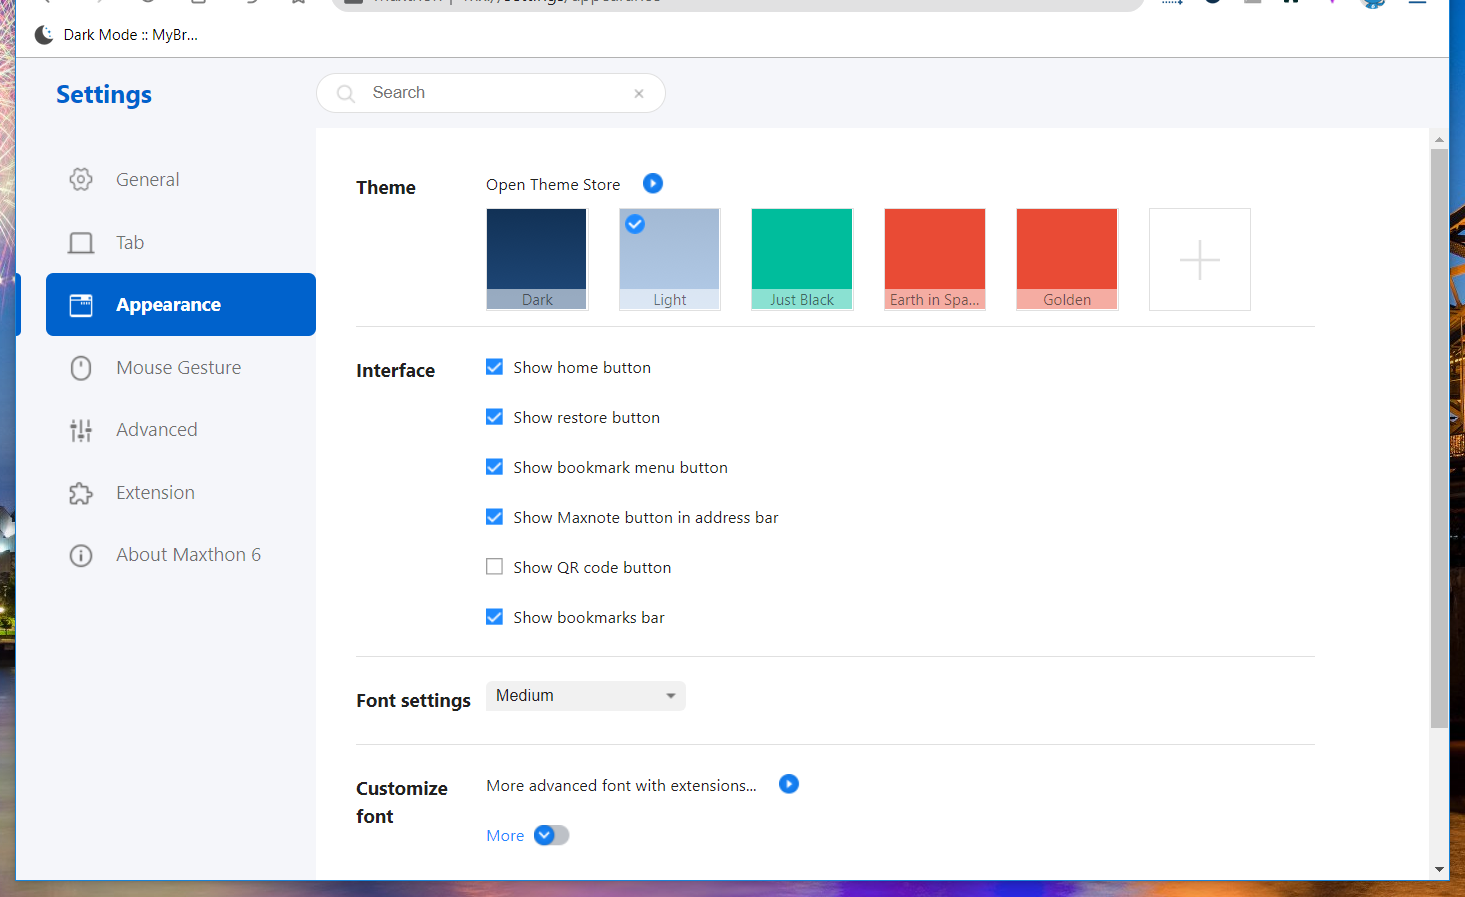
Select Appearance to open the options in the snapshot directly below.
Then click the Dark theme option to add black color to Maxthon’s tab bar.
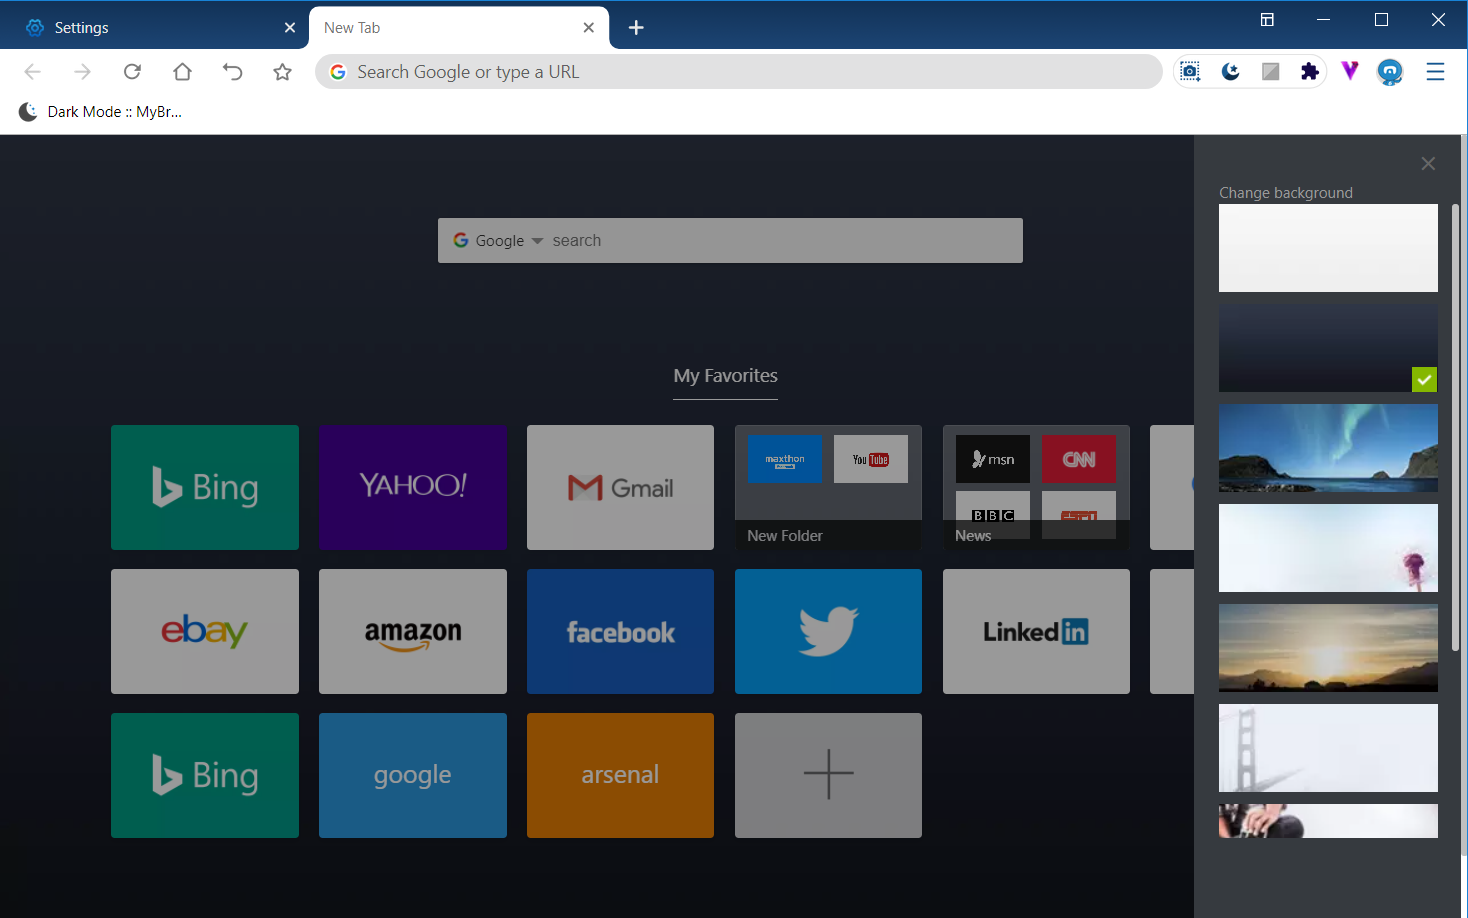
To add a dark color to Maxthon’s New Tab page, click the + button on its tab bar.
Click the cog button to open wallpaper options in the shot directly below.
Then select the black color to apply a dark background to the New Tab page.
2. Add the Just Black theme to Maxthon
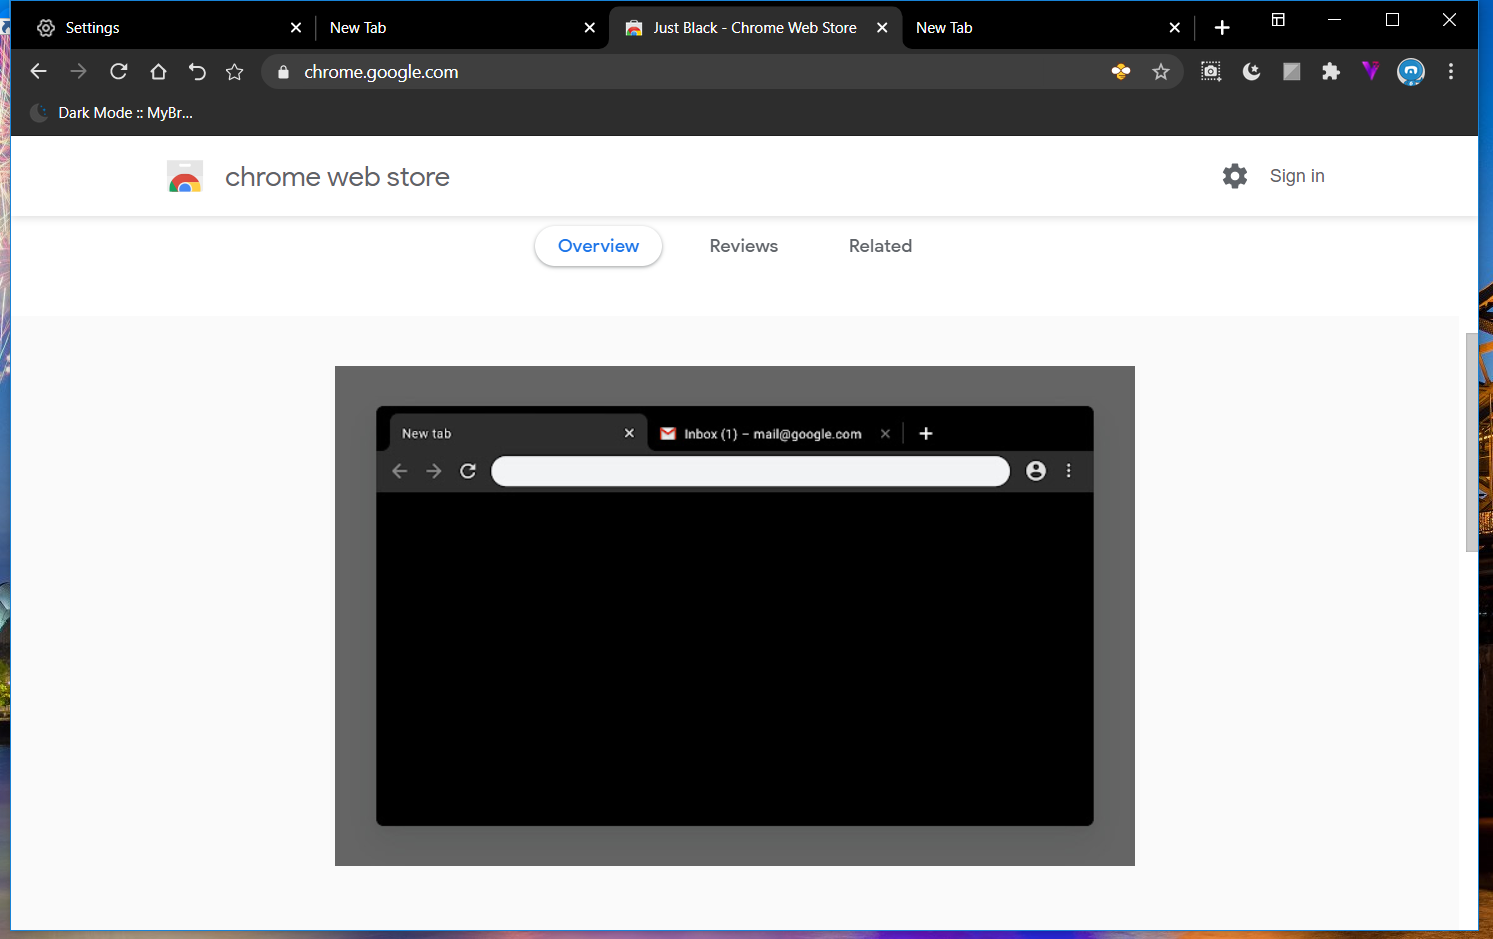
Alternatively, you can add the Just Black theme to Maxthon, which will also apply a black color to the browser’s bookmarks and URL address toolbar.
Open the Just Black theme page on the Chrome Web Store in Maxthon. Then press the Add to Chrome button there to apply the theme shown directly below.
3. Activate dark webpages with Super Dark Mode
To apply a dark mode to webpages in Maxthon, open the Super Dark Mode extension page.
Click the Add to Chrome button to add the Super Dark Mode extension to Maxthon.
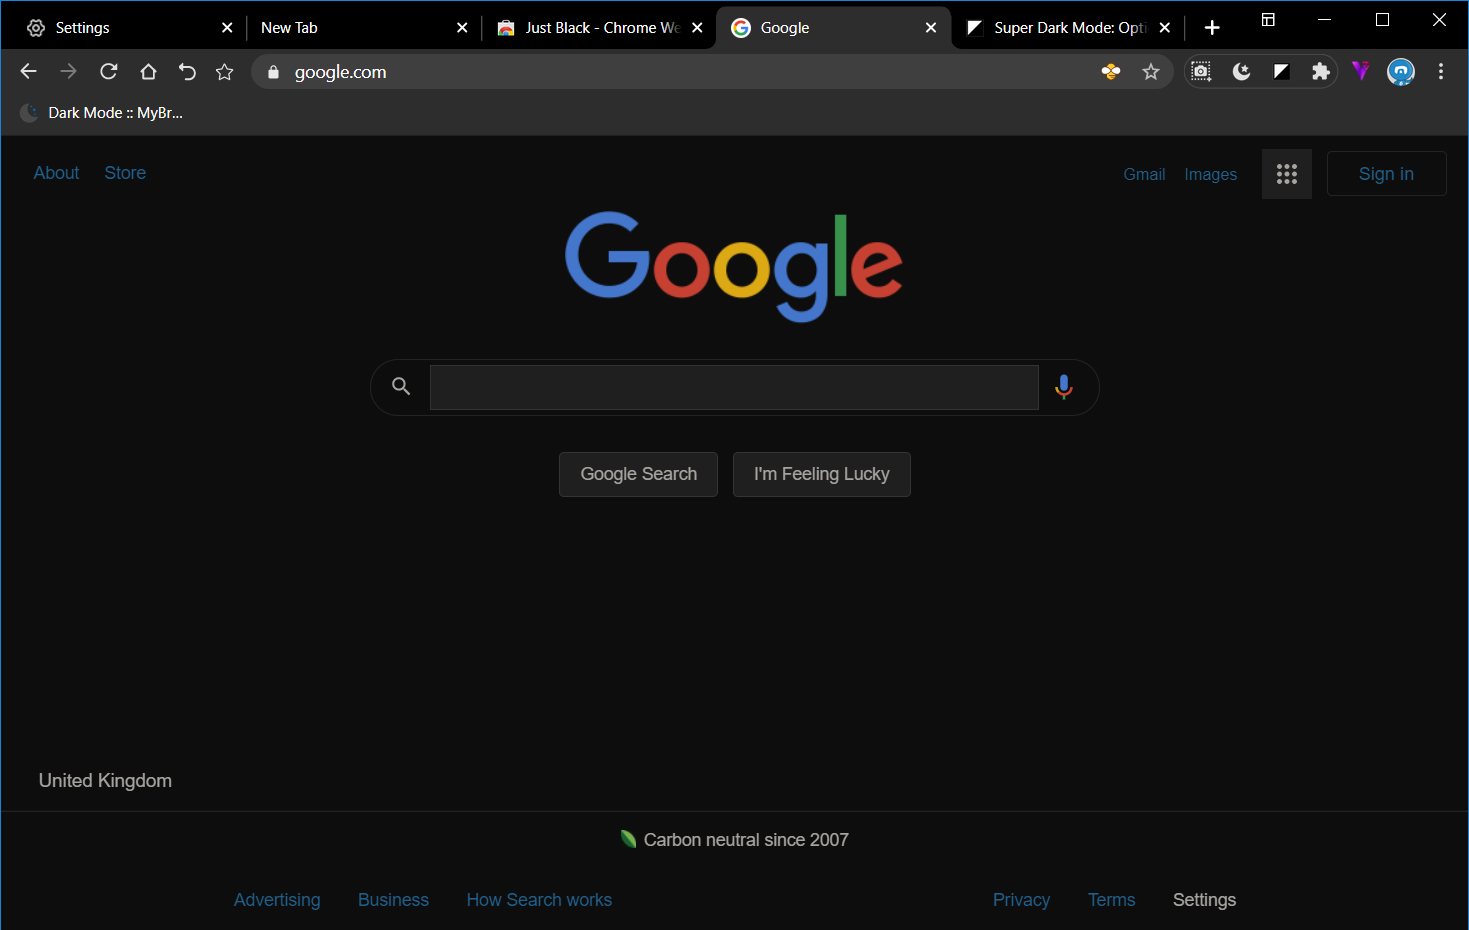
Open the Google search engine in a browser.
Then click the Super Dark Mode extension button on Maxthon’s URL toolbar to turn on its website dark mode, which will add a black background to Google as shown in the screenshot directly below.
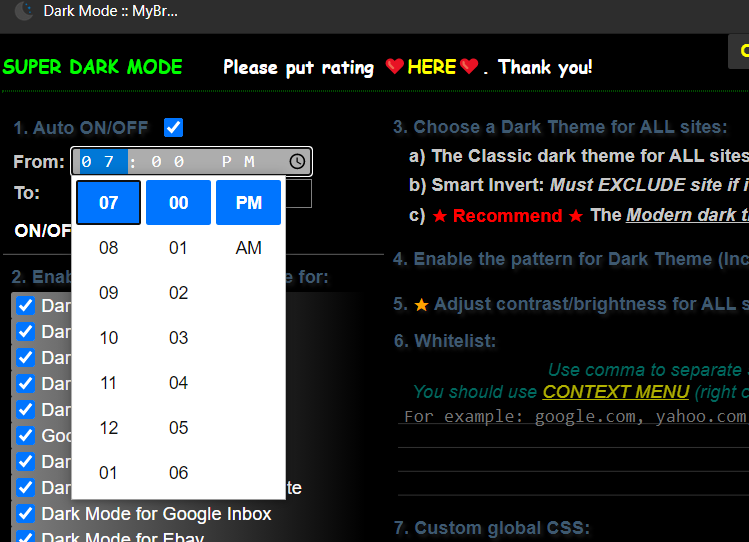
Right-click the Super Dark Mode button and select Options to open the tab shown directly below.
You can change the dark brightness for pages by dragging the Adjust contrast bar to the left and right.
To schedule the dark webpage mode, click the Auto ON/OFF checkbox.
Then click the clock icon on the right side of the From box to select a start time.
Click the click button for the To box to choose an end time for the dark webpage mode.
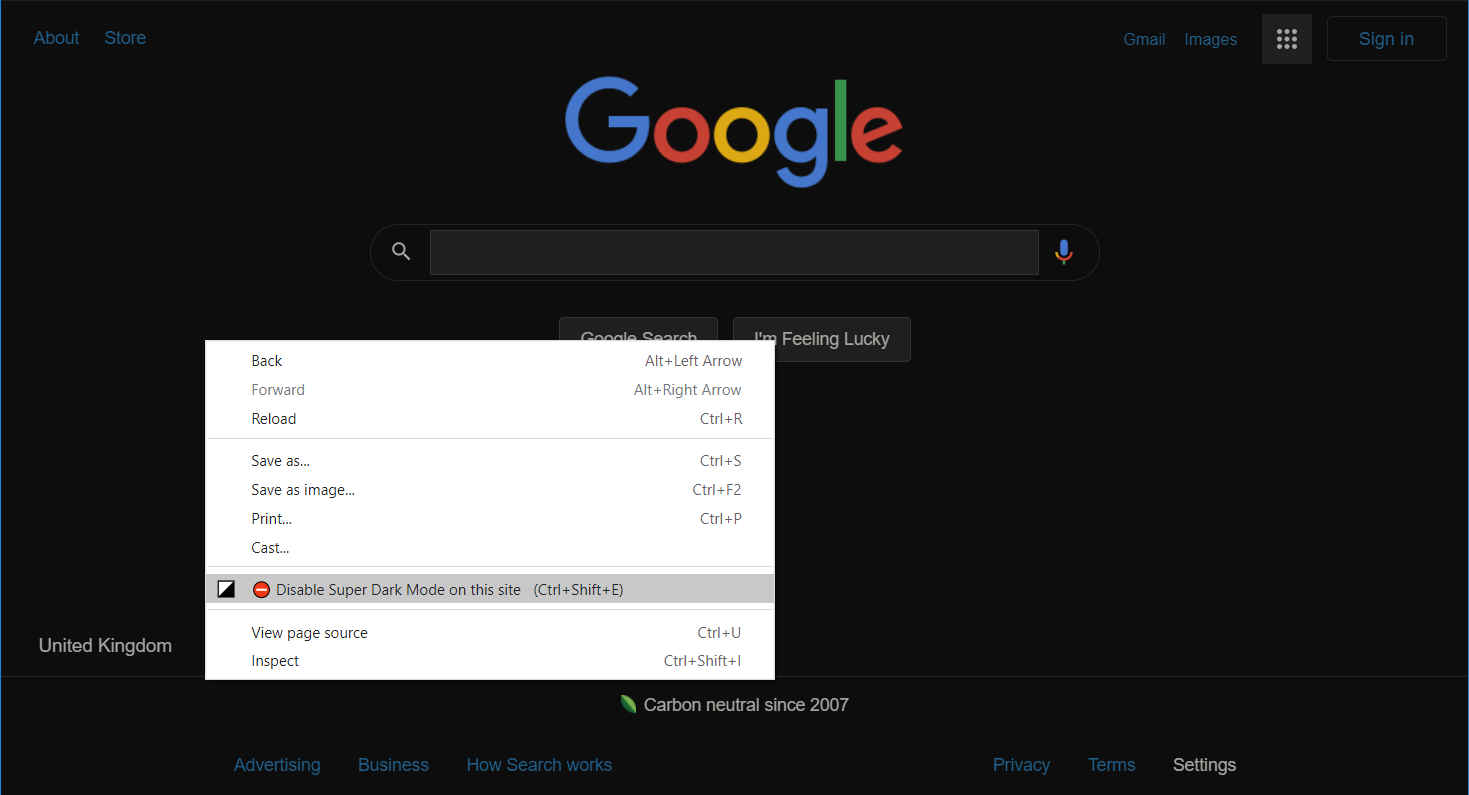
To exclude a website from the dark mode, right-click a page on the site and select the Disable Super Dark Mode on this site option.
You can re-enable the dark mode for an excluded website by right-clicking a page on it and selecting Enable Super Dark Mode.
So, that’s how you can apply a dark theme to the Maxthon browser and websites open in it. Doing so will give you an extra dark browsing experience that can save battery on laptops.
Microsoft is tweaking the Bing search experience in a lot of big ways. In a March 4 blog post, the company detailed some steps and new changes for how it is “evolving” its Bing search experience so that it is much more “intuitive and engaging.”
As seen in the video below, a lot of the changes are centered around making Bing more visually rich, so that you can find information quicker, without sorting through a lot of text. Indeed, that means the biggest change would be making search pages less static and more adaptable.
Microsoft says you can see these improvements when looking for recipes, as Bing now aggregates the content of the most relevant recipes and presents it in a single view on the search results page. You’ll see recipe pictures as well as calories per serving and user review, or even a how-to video on a hover of your mouse.
An expanded view will also show more information like ingredient lists or nutritional information. A similar experience will also pop up for DIY projects, and creative projects, with the addition of visual search, to search an image for certain things.
In addition, Microsoft is also tweaking Bing so that the carousel experience now has a “hover over” feature. The company says this should help you see more high-level information to avoid crowded results. Hovering over carrousel results will expand it out for more detailed information, especially when searching for books or documentaries.
Capping out the changes is what Microsoft is calling “infographic-inspired experiences.” This means that Bing will now provide both style and information when you search for broad topics or local experiences and answers. You won’t see text results and blue links, but rather a more detailed view and infographic of broader topics like “Kenya” or “Giraffe.”
All these features are now available on Bing here in the United States, and there could be more on the way soon. Microsoft is promising that you should “stay tuned in the coming months for more visually immersive experiences across the web.” Check these features out now and let us know what you think in the comments below.
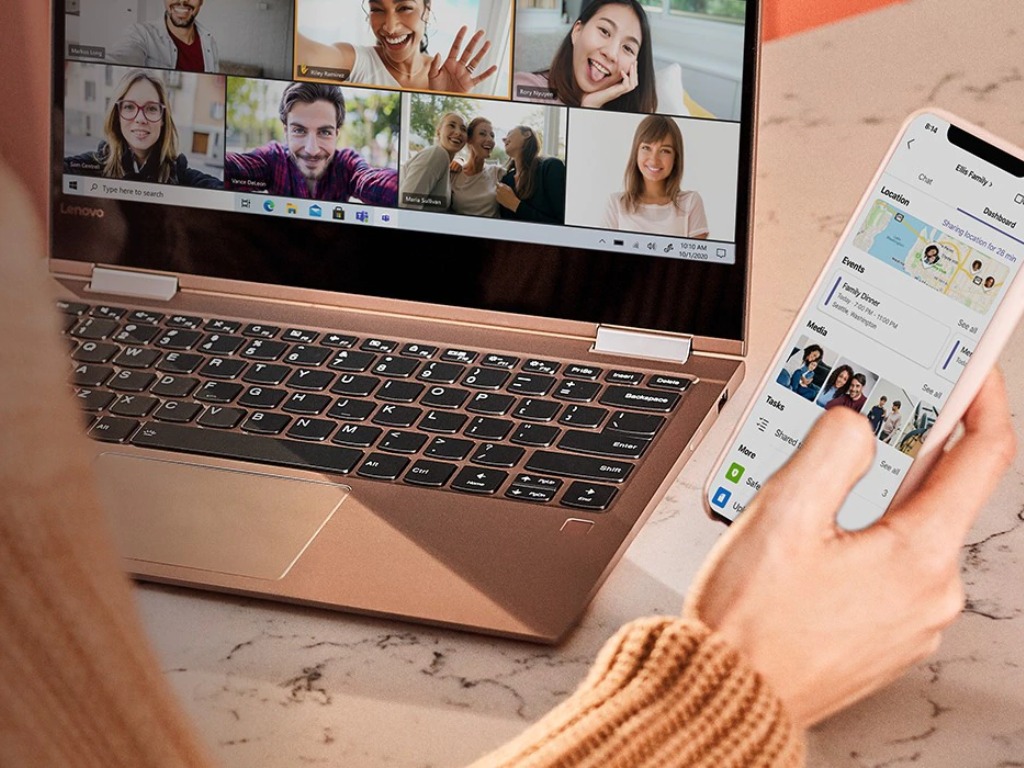
It’s been almost a year since Microsoft unveiled a new consumer experience in Microsoft Teams during a Microsoft 365 digital event on March 30, 2020. Teams is still one of the fastest-growing Microsoft apps in recent years, and its growth has been accelerating since the beginning of the COVID-19 pandemic which led to the rise of remote work.
Microsoft first started rolling out personal features in Microsoft Teams on iOS and Android last year, but the consumer experience is now available on the web and it’s currently rolling out in the Windows and macOS desktop apps. I noticed the option to log in with my personal account in the Microsoft Teams app this week, though my colleagues at OnMSFT have yet to see this option.
Microsoft Teams for Consumers should not be confused with Microsoft Teams free, which Microsoft launched a couple of years ago to compete with Slack. Both experiences require a personal Microsoft account, though, and I think there will definitely be some confusion.
With Microsoft Teams free, you get the same Teams experience as Microsoft 365 commercial customers, with your own organization that can welcome up to 500,000 members. Microsoft Teams for Consumers has a very similar UI, but the experience focuses on chats, video meetings, and shared calendars, leaving the channel system out of the picture.
I already tried Microsoft Teams for Consumers on mobile and the web, the desktop experience is pretty much identical. The left panel has shortcuts for notifications, chats, and apps, though Calendar is the only app that is showing for me. I’ve been able to chat with friends that also logged in in Teams with their personal Microsoft account, and video meetings are also available.
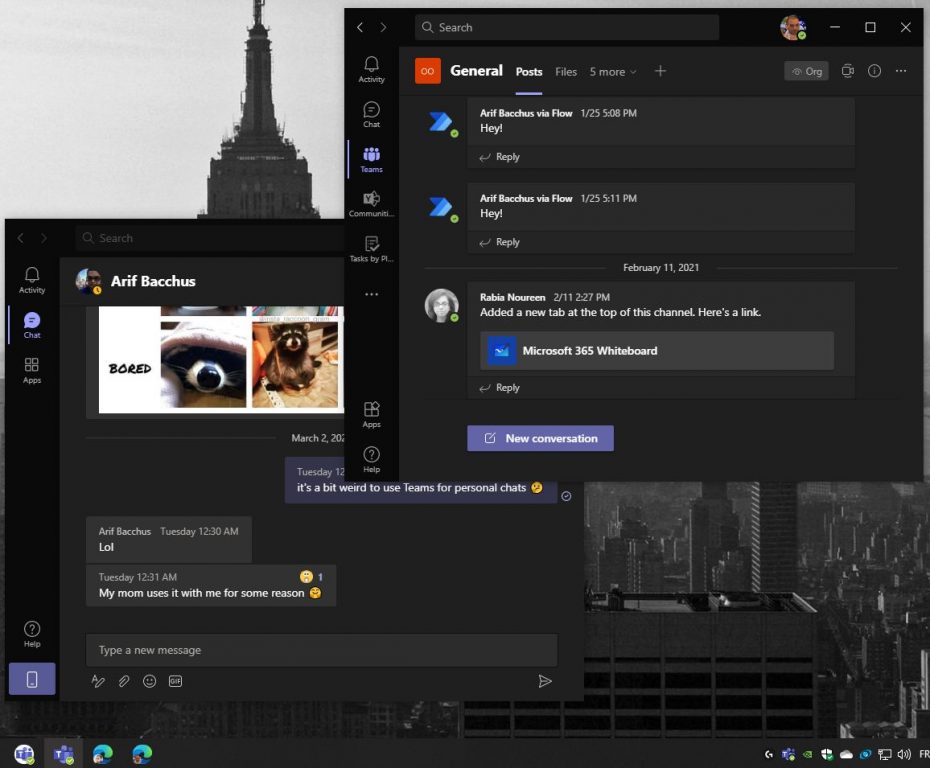
You can see separate taskbar shortcuts for Microsoft Teams Personal and the “regular” Teams app.
Microsoft Teams for Consumers is a pretty solid messaging app, with support for group messages, message reactions, GIFs, and you can also start a group chat with friends who haven’t downloaded the app yet. But it can also do much more than that, with the possibility to edit shared calendars, assign tasks to people, access cloud storage right from your group chats, and more. Every group comes with a dashboard where you can see everything shared within a group.
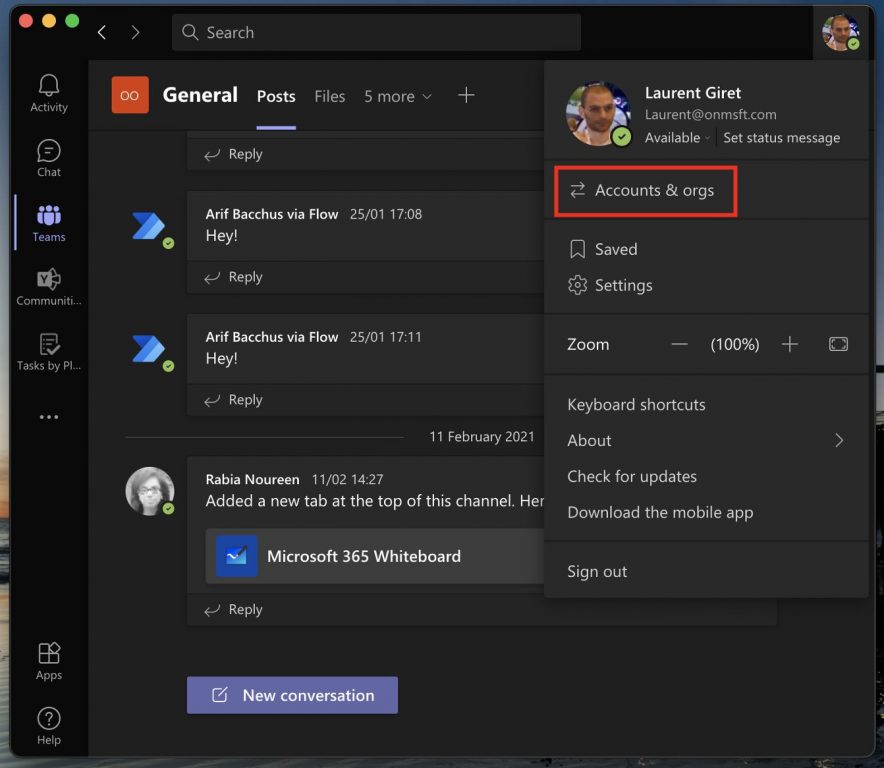
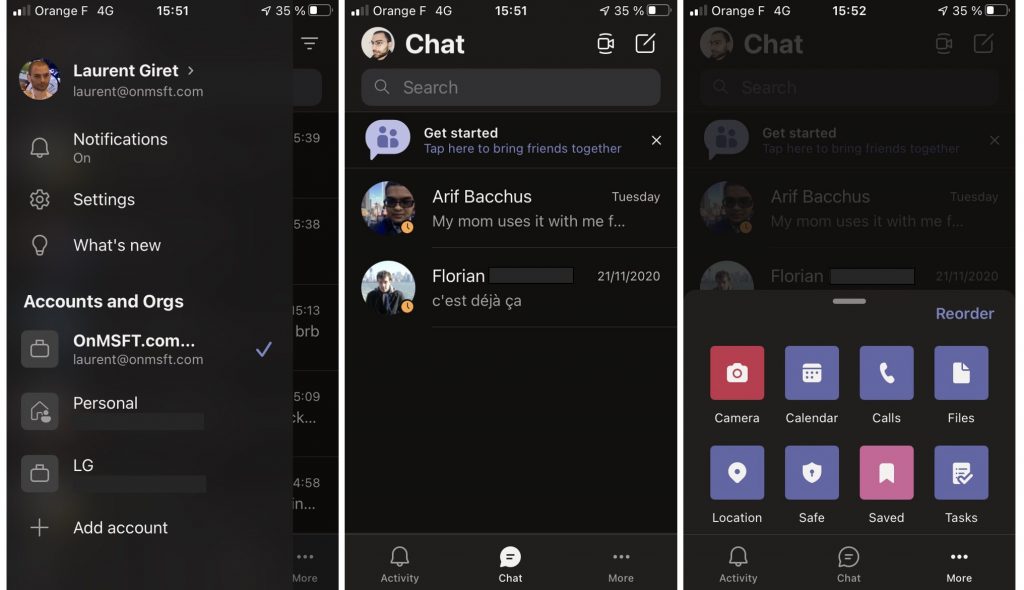
On mobile, Microsoft Teams for consumers lets you find your friends on Teams by syncing your phone contacts, and people will be able to find you on Teams by using your phone number or email address associated to your personal Microsoft account. However, using the same app Teams with both your Office 365 account and your personal Microsoft account is a hassle. Switching accounts is done by clicking your profile picture on the top left corner of the app, and this nowhere near as seamless as having different email inboxes in Outlook.
On mobile, you need to switch between your Office 365 and your personal Microsoft account.
Using Microsoft Teams personal features on the desktop is much more convenient as the app will actually open a separate window for your personal Microsoft account. On Windows, you can pin Microsoft Teams Personal on your taskbar, so you can use the app with your personal Microsoft account without opening the regular app with your Office 365 account. It’s similar to how you can pin shortcuts to your different Edge profiles, but macOS currently doesn’t support this.
Overall, Microsoft Teams for Consumers is pretty solid, and I find it currently easier to use on the desktop or the web than on mobile devices. I understand why Microsoft would like Teams to become that’s not just for work, and I’m sure some users will be happy to have a single app to interact with colleagues, friends, and family, but that’s not me. Apps like WhatsApp, Facebook Messenger, or Instagram already have over 1 billion users, and teenagers and young adults certainly won’t replace them with Microsoft Teams.
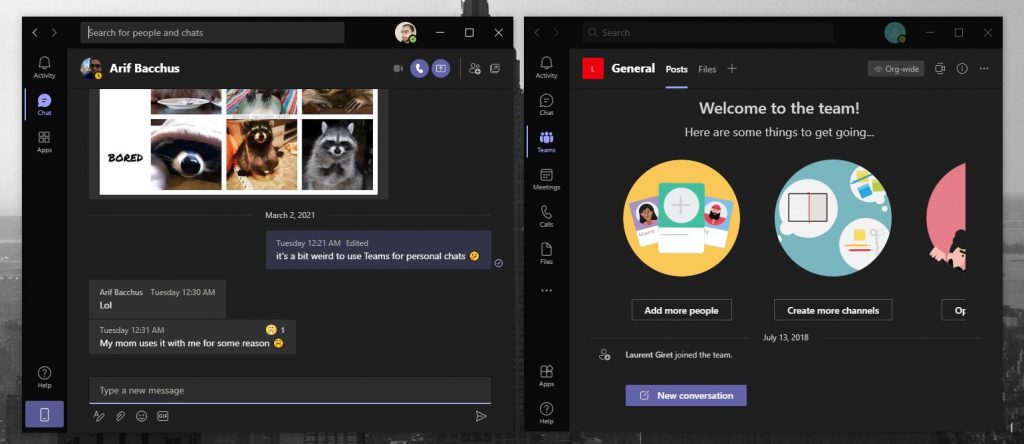
Make sure not to confuse Microsoft Teams for Consumers (left) and Microsoft Teams “free” (right).
In some way, I wish Skype evolved into a consumer version of Microsoft Teams. This could have prevented the confusion I mentioned before between Microsoft Teams free and Microsoft Teams for consumers (pictured above), which both work with a personal Microsoft account. Anyway, that won’t be happening.
Skype went through several redesigns in recent years, and it’s no longer the juggernaut it once was when Microsoft acquired it. The software giant seems to believe that Skype and Microsoft Teams for consumers can coexist, and it will be interesting to see if personal features in Teams will take off. For now, though, I think Teams will remain an enterprise-focused platform that is getting more and more complex as times goes on.
Have you already tried Microsoft Teams for consumers? If so, let us know in the comments if you’re excited to be able to use Teams to chat and collaborate with friends and family.
Microsoft’s annual IT and developer conference officially ended today on March 4, and it was a busy couple of days. Microsoft used the all-digital event as the stage to announce several updates for Teams, Outlook, and other Microsoft 365 apps and services. They even announced Mesh, a brand new social mixed reality platform. We’ve been keeping up with the news all week long, and here’s a look at what you might have missed.
We’ll begin our recap by starting with Microsoft Teams. Since Teams has been on the boom due to the pandemic, Microsoft is bolstering up the collaboration service with lots of new features. The first of those are improvements for Live Events in Teams, where Teams can now be used to create interactive webinars for up to 1,000 attendees. Teams Live Events will also support webinars with up to 20,000 attendees later this month. You can have a look below for the other new features coming to Teams, as announced at Ignite 2021.
PowerPoint Live is now generally available in Teams. The feature combines slides, notes, and meeting chat in a single view to help make presentations easier for speakers and presenters.
Dynamic View for Teams meetings is coming next month. The feature makes meetings more engaing and adjusts elements of meetings, such as the ability to display different modes such as charts, chats, etc next to video feeds.
Teams is getting improved security thanks to invite-only meeting controls. Also coming is end to end encrupion in one to one calls.
It is becoming possible to share channels outside of an organization, through a feature known as Microsoft Teams connect.
Microsoft Lists is getting custom list templates in Teams, as well as rich-test editor, the ability to add comments or @mentions and create rules, and other new features.
The final of the new Teams feature is the ability to export webinar contacts, useful for Dynamics 365 marketing. Also coming to Teams are some of the new Microsoft Viva modules, such as Viva Connections, which should be rolling out more broadly now.
Windows 10 usually gets a backseat at Microsoft Ignite, but this year, there was a bit of news about the operating system which we want to recap. First off, there’s the big news about Power Automate becoming free for Windows 10 users. This tool comes with 370 prebuilt actions that help you build flows across different applications. As our own Benjamin Akhigbe explained, it “enables you to build your own scripts to automate time-consuming repetitive tasks.”
In addition to the Power Automate news, Microsoft also announced that Windows 10 in cloud configuration has been integrated into Microsoft Endpoint Manager, which will make it even easier to provide a secure device configuration tailored for worker needs. The news comes after Windows 10 in cloud configuration overview and setup guide was made available for download on Feb 2. That allows administrators to apply a uniform, secure and easy-to-manage cloud-based configuration of Windows
10 Pro or Enterprise devices.
We’ll end the Windows 10 section with a look a what’s ahead for the operating system. Indeed, Surface and Windows Chief Panos Panay appeared to “tease” the upcoming versions of Windows. In a fireside chat session at Ignite, he hinted that he has not “talked about the next generation of Windows” and that he is “so pumped” for it. He even mentioned that “it’s going to be a massive year for Windows.”
To be fair, though, his session was mainly about current Windows features, but the exec did appear to slip his tongue about the future a bit, though not confirming any rumors we’ve heard so far about Sun Valley or Windows 10X.
Next up are the changes for Outlook as announced at Ignite 2021. The first is the introduction of Outlook Board view in Outlook Calendar. This is designed to help make your calendar easier to manage. The feature is now available for everyone, and has a free-form view, combining calendars, files, reminders, and to-do lists in one place. Microsoft also rolled out what it is calling “suggested times” in Outlook for iOS and Android, too. The feature is all about AI and finding times for meetings. Finally, Outlook on Mac is getting support for more email account types and shared calendars.
For most people, Microsoft Mesh was the biggest news out of Microsoft Ignite 2021. This was one of the more unique parts of Ignite, as this portion of the keynote could have been viewed in AltSpace VR in Mixed and Virtual Reality. Indeed, featuring Alex Kipman, Microsoft used Ignite 2021 as the stage to unveil Mesh. It is Microsoft’s new Mixed Reality Platform designed to allow people in different physical locations to join collaborative and shared holographic experiences across many kinds of devices.
Mesh is designed for companies and businesses to let their teams joined shared virtual spaces for collaborative meetings, where everyone will appear as virtual avatars. The target audience is enterprise and commercial users, too. Mesh is coming as a HoloLens app, but it can also be accessed through a new version of AltSpace VR, which is Microsoft’s VR platform. Alex Kipman detailed that solutions built through Mesh by developers could come to Windows Mixed Reality, PCs, Macs, Smart Phones, and Oculus, too.
Azure Power Platform, and more
Of course, Ignite is all about the Cloud and Azure, so there were several other news stories around these Microsoft products, too. With Power Platform, Microsoft announced Power Fx, which is their new first low-code programming language. They also announced new AI capabilities for Power Virtual Agents, updates for Power BI Premium, Power Automate Desktop. With Azure, Microsoft announced a new hardware and software platform called Azure Percept, which should make it easier for Microsoft’s customers to develop AI solutions.
Of course, we covered Ignite 2021 in-depth, so check out our hub for all the other stories you might have missed! And be sure to watch the OnPodcast this Sunday, as we’ll be recapping Ignite once more!
You are a small business owner or an employee of an organisation just getting started with Power Automate Desktop on Windows 10? Microsoft announced on Tuesday at it’s Ignite 2021 summit that it is making it’s Power Automate Desktop free for all Windows 10 users.
This article focuses on getting started with Microsoft Power Automate Desktop for your Windows 10 machine, that enables you to be a console and flow designer for those first time users. The console enables you to create and handle flows, while you are in the development environment of the platform as a flow designer. Let’s learn how user friendly, low code application empowers coders and non-coders alike to optimize their workflows by automating repetitive and time consuming manual tasks in Power Automate Desktop.
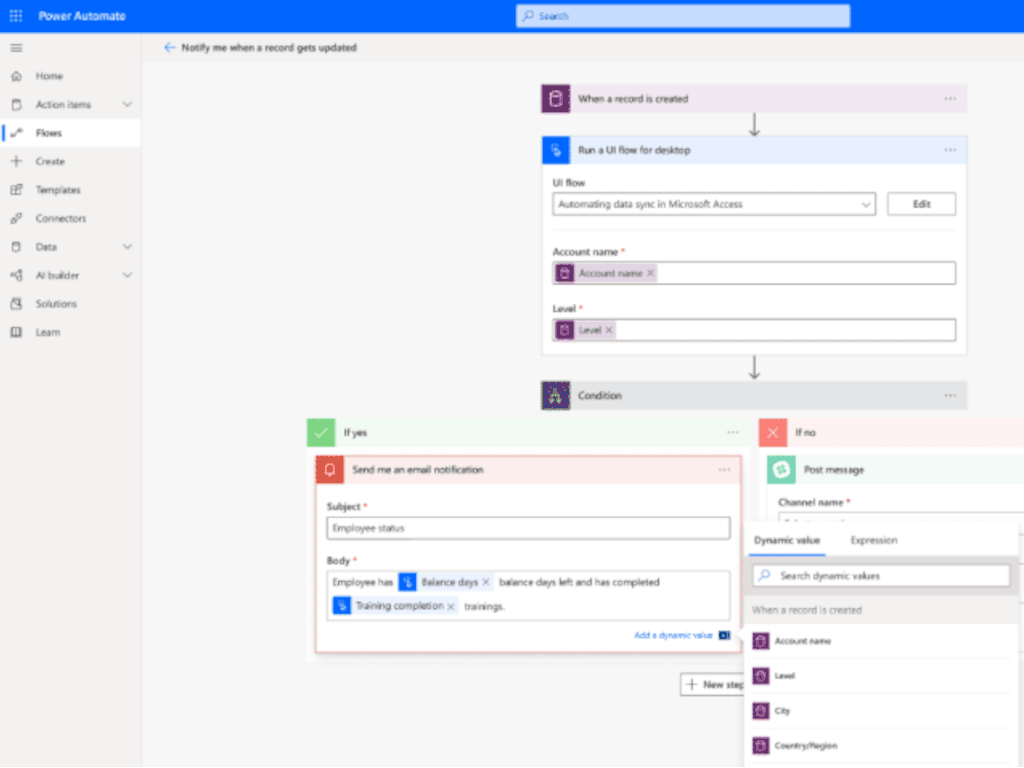
Interacted interface of Power Automate Desktop on Windows 10 – Courtesy of Microsoft.
Automate everyday tasks and free up time for more important efficient work
Power Automate Desktop using low code RPA (Robotic Process Automation) with no coding required that gives users their time back for more important efficient work by automating “busy work “of repetitive manual, time consuming tasks that typically consumes the finite hours in each workday.
RPA makes it possible to automate workflows across modern and legacy applications on your desktop by recording the actions such as the mouse and keyboard clicks on the desktop environment. It works like Macros work on Microsoft Office, recording the repetitive actions on desktop across multiple apps such as SharePoint, Excel, Outlook, and many third party apps as well as websites that enables users to replay the automation whenever is needed.
In a common scenario we see the need to scale and automate large scale creations of weekly, monthly, quarterly, and annual reporting in business operations. With Power Automate Desktop, you can automate the consolidation of data across multiple sources such as database, webpages, Excel files, PDFs, and more to auto generate a report based on requirements.
Start automating everyday tasks with no coding required
It’s easy to get started and around with Power Automate Desktop and build first desktop flow the series of steps that automate a specific action or task using either prebuilt drag and drop actions or recording desktop flows to run later. An intuitive drag and drop visual designer provides more than 400 actions that runs on your desktop environment, a recorder that capture the clicks and mouse actions, as well as robust authoring experience to edit and modify recordings.
Extend automation further with Power Automate
In addition to capabilities with what users get with the free Power Automate Desktop for Windows 10, Microsoft enables to extend it one step further with even more capabilities in the Power Automate per user with the Attended RPA plan. With this, enables automation across an organisation, which suits medium to large businesses that share and collaborate across flows. That even has access to even more than 400 built in connectors through cloud flows, that can identify bottlenecks in the business processes with process advisor which is in preview. That extract data from documents in AI Builder, and manage and control flows with a centralized governance concept.
In order to take advantage, with the RPA adoption, Microsoft has introduced a limited time offer. Starting on April the 1st 2021 and available till September 30th 2021, Power Automate per user plan with attended RPA will be available for $15 per user per month. Limited time offer would be only available to eligible customers in commercial large businesses, US government and governments across the globe through volume licensing (VL), cloud solution provider (CSP) and web direct channels etc.
Large and established companies like Coca-Cola Bottling Company United (Coca-Cola United) are taking advantage of additional RPA capabilities in Power Automate today to reduce the errors and streamline their order management.
Summary
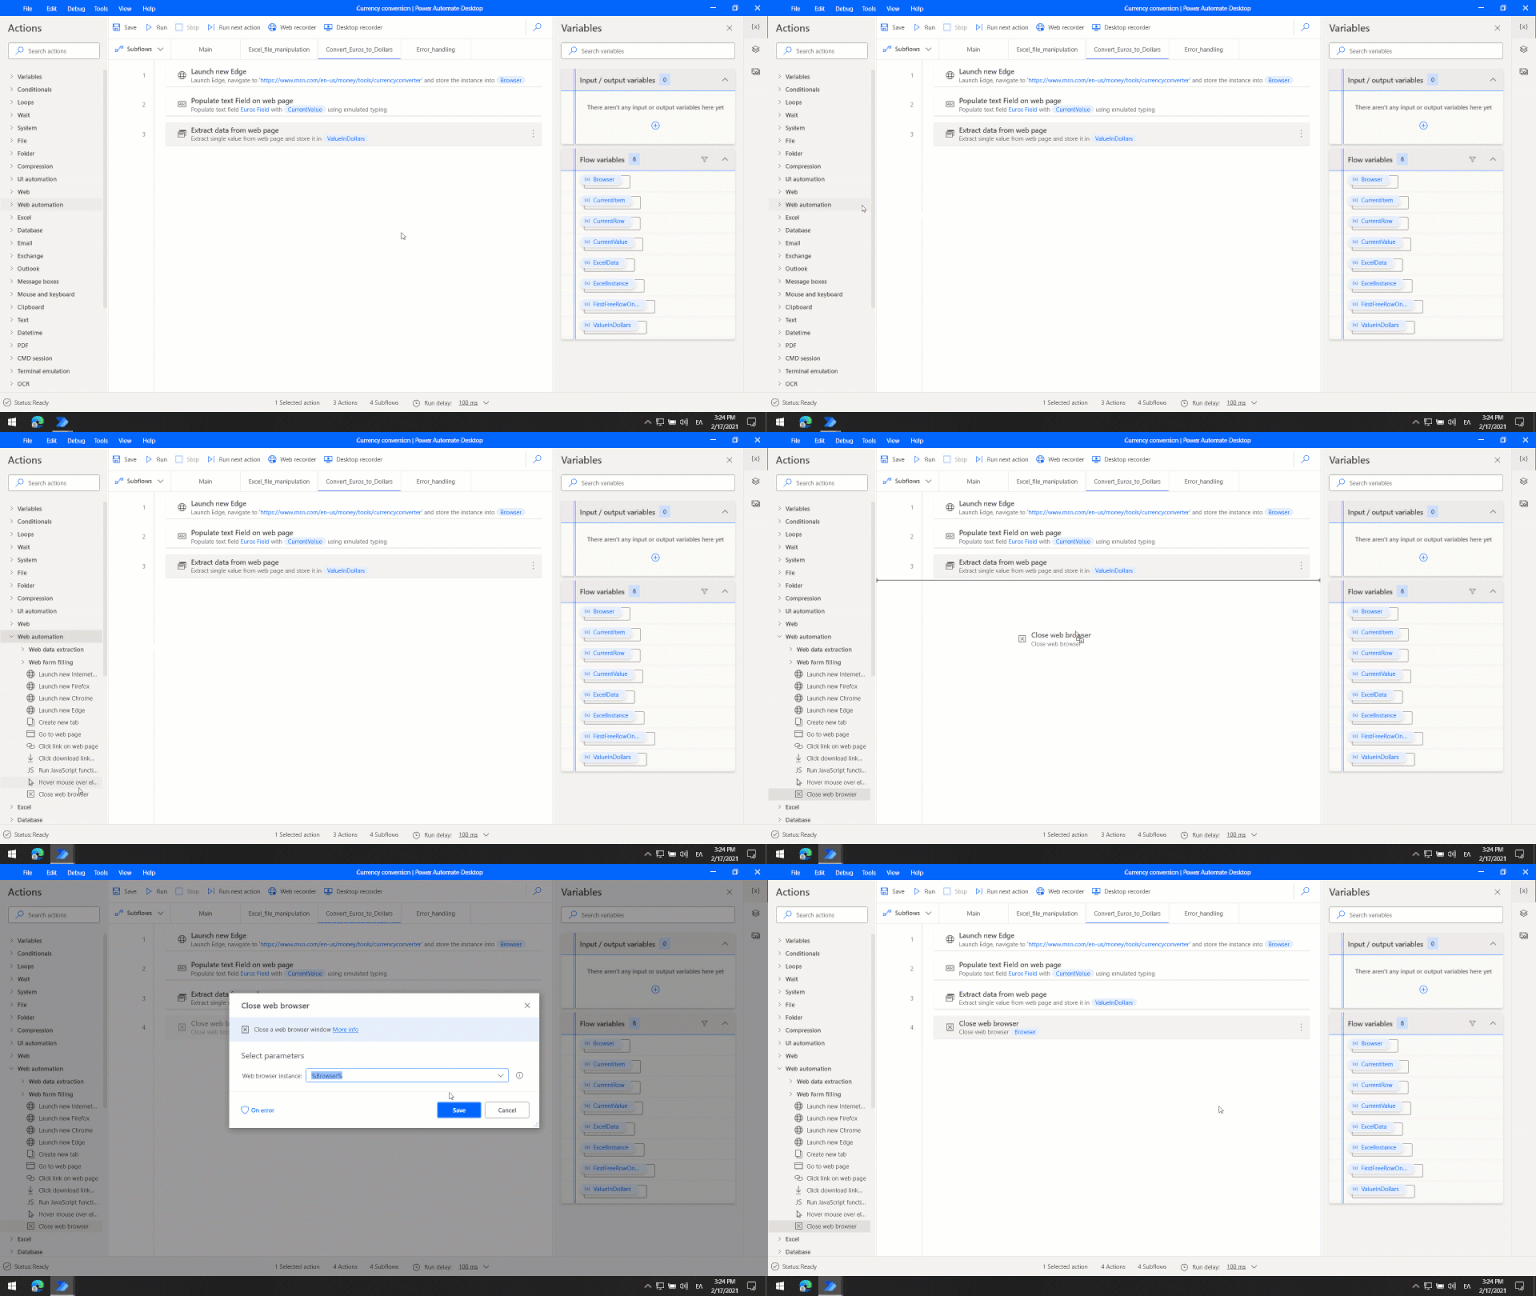
The Power Automate Desktop platform consists of the two core components, the console and the flow designer. These core functions provide all the essential tools to manage and develop flows. It enables users to pass data to and from the Power Automate platform, creating unlimited automation potentialities by using the input and output variables feature.
Although there are a few pretty good photo editing apps for Windows 10, the undisputed photo editor king is Abode Photoshop.
If you want to get the job done properly, then this program will help you. However, as many of you know, Photoshop is not the easiest program to use, and even experts have not discovered all its secrets yet.
But, if you want to benefit from some of the features that Adobe Photoshop offers, and at the same time have an easier time using the program, then you should use the Adobe Photoshop Express app for Windows 10.
If you are looking for a free photo editing software for Windows 10, know that this awesome app brings the best of Photoshop in an easy to use and free package.
Adobe Photoshop Express app for Windows 10
What is Adobe Photoshop Express?
Adobe Photoshop Express is the best free photo editor for Windows 10. Although it does lack features compared to its older brother, Adobe Photoshop, it still packs a punch when it comes to photo editing.
First off, you might want to know how much you have to pay for this app. After all, Adobe’s products are at the top end of the price spectrum.
Well, you’ll be delighted to know that the Adobe Photoshop Express app for Windows 10, is free to download from the Windows Store, and it comes with most of the features.
Users who want to edit their photos more thoroughly and add some premium effects will have to buy the premium features such as the Reduce Noise feature or the Looks gallery.
Nevertheless, even with the free tools at your disposal, you will be able to do some editing, although not even close to the extent that the desktop version of Photoshop offers.
This Windows 10 app is more suited for simple color adjustments, contrast, or adding certain effects to the picture.
We highly suggest checking out Adobe Photoshop, the industry-leading photo editor on the market. If you love the Express version of this app, you’ll adore the other one.
Moreover, you don’t even need to pay a dime for it. The software has a free trial period, so you can actually test it and decide for yourself if it’s worth your money. So give it a go and dive into its plethora of features.
Adobe Photoshop
Create the most astonishing photos and edit images in every way you can think of with Adobe Photoshop!
The app is pretty simple and straightforward to use. In its main menu, users will see three main options:
They can open images from their local folders and edit them.
They can open their Adobe Reveal account, where they can upload photos and share them via Facebook or Google+.
They can take a picture with their in-built camera device and edit it.
In terms of editing tools, Photoshop Express for Windows 10, has quite a few for its users to work with.
The first tools you see are:
Crop pictures
Correct colors,
White balance
Change exposure
Image autocorrect.
More awesome features
The editor has another feature called Looks, which consists of different filters that give images a certain effect.
Another feature of the app is to remove Red Eye from pictures, which is a great tool for those who take lots of pictures with their phones or tablets, as they can remove those imperfections directly on their device.
Last but not least, there is an Auto-Fix option that calculates all the parameters of the image and applies all the features to make the image look more presentable.
After the editing process is complete, users will have the option to save their work either to a local folder or share it on social networks.
The app allows saving to a device in jpeg format, but there is no option to save files as PSD, so they can later be edited in the desktop version of Photoshop.
We hope that future versions of Photoshop Express will have this option so that further editing can be carried out on a full version of the program.
Note: You can click on the View Original button at any point during editing to see how your image has evolved and to compare them in case you want to see the improvements.
Overall, the Adobe Photoshop Express provides users with some much-needed photo editing options that will allow everyone to correct photos and add effects.
The best part of the Windows 10 Photoshop app is that it is very easy to use and with only 1 or 2 taps, your photos will look better than ever.
Drones are the latest fad among the videographers. Be it a wedding video shoot or for your personal Vlog on YouTube and Facebook, audience and clients highly prefer drone videos these days.
But, just having a drone to capture 4K footage is half the job. To make the most of the drone footage, you need to polish it using a video editor before making it live.
A videographer may have different requirements from a video editor than a video logger – as a result, it is safe to assume that no one video editor may cater to the needs of different people.
Which is why we have had a look at the best video editors that can help you produce stunning video footages captured from your drone.
In this article, we present you the best software to edit drone footage that can be used by both professionals and beginners.
Adobe Premiere Pro is the industry standard for video editing and is one of the well-known software from Adobe.
The Premiere Pro does not offer a perpetual license for the copy, and you have to rely on the monthly or yearly subscription plans to use the tool.
This means if you don’t plan to renew the subscription you will certainly lose access to your older edits and projects within the cloud.
Other than that, Adobe Premier comes equipped with all the basic and advanced video editing features that are essential to creating a stunning video from drone footage.
Adobe supports multiple-monitors which allows you to hookup up to 3 monitors easily making it easier to preview the videos before the rendering process.
From 8K resolution to virtual reality, Adobe Premiere Pro can handle any footage without any issues.
The latest version of Premiere Pro comes with precise and simple color grading tools for accurate color touches along with an improved audio function embedded into the Essential Sound panel that lets you remove background noise and reverb for professional-grade results.
The new Motion Graphics templates let you add infographics with drag and drop functionality to make an informative video.
There is also end-to-end VR 180 support to create a more immersive experience for your VR headsets and online platforms.
Despite its non-linear workspace, Adobe Premiere Pro is among the best video editors used by TV studios to YouTube creators alike.
Download the free trial that works for seven days but offers all the features without any limitations to test the software.
Pros
Easy to learn and use
Multi-platform support
8K video support
Excellent color grading options
Cons
No perpetual license
Adobe Premiere Pro
Premiere Pro is the industry-leading video-editing software for social sharing, TV, and film.
PowerDirector is among the most popular drone footage video editors available today. Cyberlink, the developer of PowerDirector, has added new tools to the video editor over the years, and today it is equipped with a huge arsenal of editing tools that can compete with other industry grade video editors.
The user interface is not the easiest of the lot and that is one part where we think it can improve. Apart from that, PowerDirector offers all kind of editing tools that includes support for 4K and 3D videos, tons of effects, multicam editing features and motion tracking tools.
PowerDirector comes in three version – PowerDirector Ultra, Ultimate and 365. The last one is a subscription-based model and costs around $48.99 for a year.
Cyberlink has included a feature called Express Projects that let’s you pick ready-made templates with effects, transition, animation, and music and add it to your drone footage.
It also has tools to edit action camera footage, color adjustment tools, one-click color correction, Color Match feature to standardize color through different clips, and other color grading options.
It also comes with tools to customize text, theme designer for animated slideshows, ability to add subtitles, ability to add a hand-drawn overlay, animated objects as overlays and Green Screen removal feature.
PowerDirector is an excellent video editor and the fact that it offers the fastest preview and rendering options makes it an ideal choice to edit drone footage.
PowerDirector 365
PowerDirector 365 allows you to create compelling content with useful new effects, streamlined interface, and best-in-class editing tools.
Just like all the other Corel multimedia software, the VideoStudio Pro also offers excellent set of required tools for video editing while keeping the user interface clean and simple.
It comes equipped with multicam editing, motion tracking support, 4K, and 360-degree video support as well as video masking feature. You name it, and VideoStudio Pro has it.
Corel has equipped the video editor with over 1500 filters and effects for video enhancement. You can begin with the ready-made templates or start from the scratch by editing on the timeline and add photos, videos, and audio to your drone footage or simply combine them in a video.
The latest version of VideoStudio Pro comes with resize and crop video tools, split screen video templates that can be used to create promotional videos, new lens correction tools, stop-motion animation to capture animation frame by frame and Pan and zoom feature.
The earlier mentioned 360-degree video support means you can import videos from a 360 camera to the editor and later upload it to YouTube directly.
Just like the previous version, file formats are not an issue for VideoStudio Pro, but the latest version comes with XAVC-S so that you can export the video onto the SD card and play it directly on your camera.
Corel VideoStudio is a well-designed and powerful video editing software that comes with support for 4K and 360-degree video combined with an affordable price tag makes it a top choice for professional and home users alike.
Pros
Intuitive user interface
Support for 4K Ultra HD videos
360-degree video and Motion tracking support
Excellent set of editing tools
Cons
Average performance
Limited video overlay tracks
Corel VideoStudio Pro
Loaded with easy to use tools and with lots of fun features, Corel VideoStudio is your editor for everyday adventures.
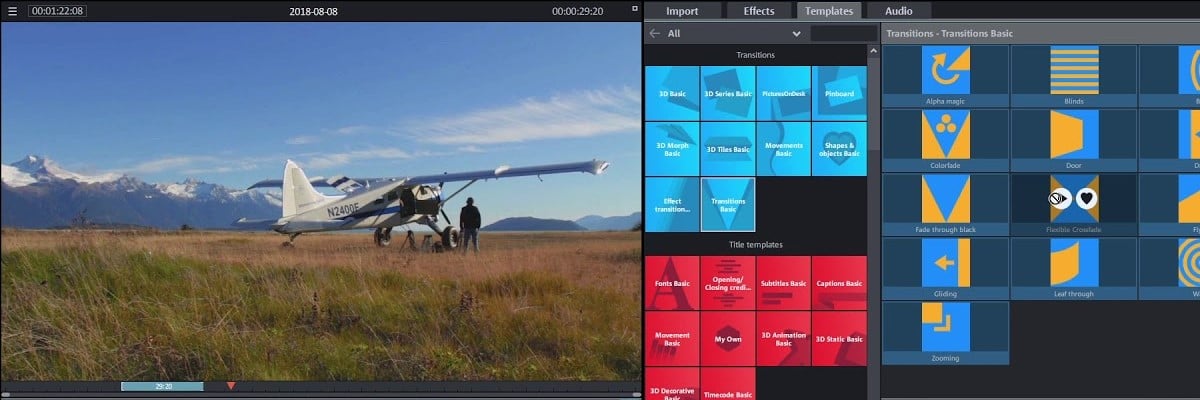
Magix Movie Edit Pro is a complete video editing package that comes with essential and advanced video editing tools while offering an intuitive user interface allowing for better productivity and an easy learning process.
Magix Movie Edit Pro can be used to create intros and outros for the videos using the ready-made templates. There is a new title animation feature that lets you add finishing touches to the videos and also add slow motion and fast motion effects by modifying speed.
The tools offer over 1500 effects and music tracks to select from. For green screen addicts, Movie Edit Pro supports the Chroma keying feature to make it all possible.
Magix has also improved the workspace with new controls offering precise editing tools. You can rearrange, delete and reorder the tracks on the timeline with ease as well.
Besides, you can match colors for multiple videos in the same group with match color option. For the export, Movie Edit Pro supports multiple formats including support for direct upload to YouTube, Facebook, and Vimeo.
Magix Movie Edit Pro comes with tons of effects and music tracks while offering an excellent set of editing tools. The beginners can learn to use the basic editing functions quickly; however for the difficult procedure, one needs to spend a good amount of time to learn all the tricks it has on offer.
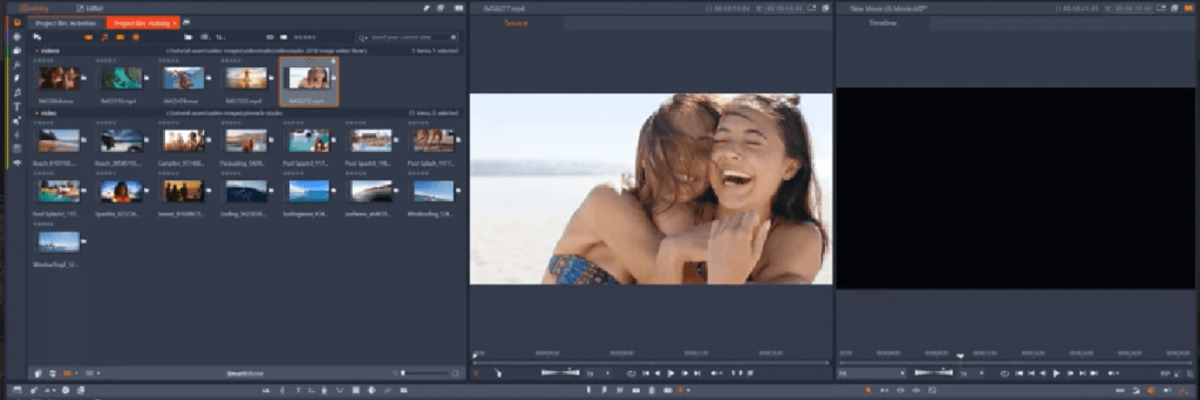
Pinnacle Studio is our last recommendation in this list, but that doesn’t mean it is the least of the lot. Pinnacle Studio offers a great combination of usability, performance and essential video editing that can be used and mastered by even beginners while the advanced users will figure out the working in no time.
Pinnacle Studio offers ready-made templates if you want to render a video without putting much effort into editing quickly. Or you can edit the raw footage on the multi-track timeline and experiment with included 1500+ filters and effects.
You can work with features like multi-camera video editing and split-screen video feature. The built-in MultiCam feature enables you to record the screen as well as webcam simultaneously for creating tutorial videos.
The selective color feature lets you highlight a single-colored object from a picture while keeping everything else in black and white.
Other features in this tool include stop-motion animation, green screen (Chroma keying) feature, time remapping for slow and fast motion video effects as well as an audio editor.
Pinnacle Studio has one of the best rendering speed among the video editors. When combined with its price tag and the features like MultiCam screen recording, it can be used for more than just video editing.
For professionals content creators it is important to have a good drone but what’s equally important is to have a powerful video editor that is easier to use yet offer all the effects and templates that will help you produce a studio-grade video.
We have tried to find the most accessible yet affordable tools for this guide that can help both the professionals as well as home users who use drones to capture fun and family moments and wants to make it special with adding some cool effects.
What do you think? Which is your preferred software for editing drone footage? Do let us know in the comments below.
Video editors worldwide have had a reputation for being hard to master, costing a lot of money, and being hardware-intensive software that will melt budget PCs.
Putting that aside, we would like to perform a short review on Wondershare, the latest version of a critically acclaimed video editing software, now with more tools than ever before.
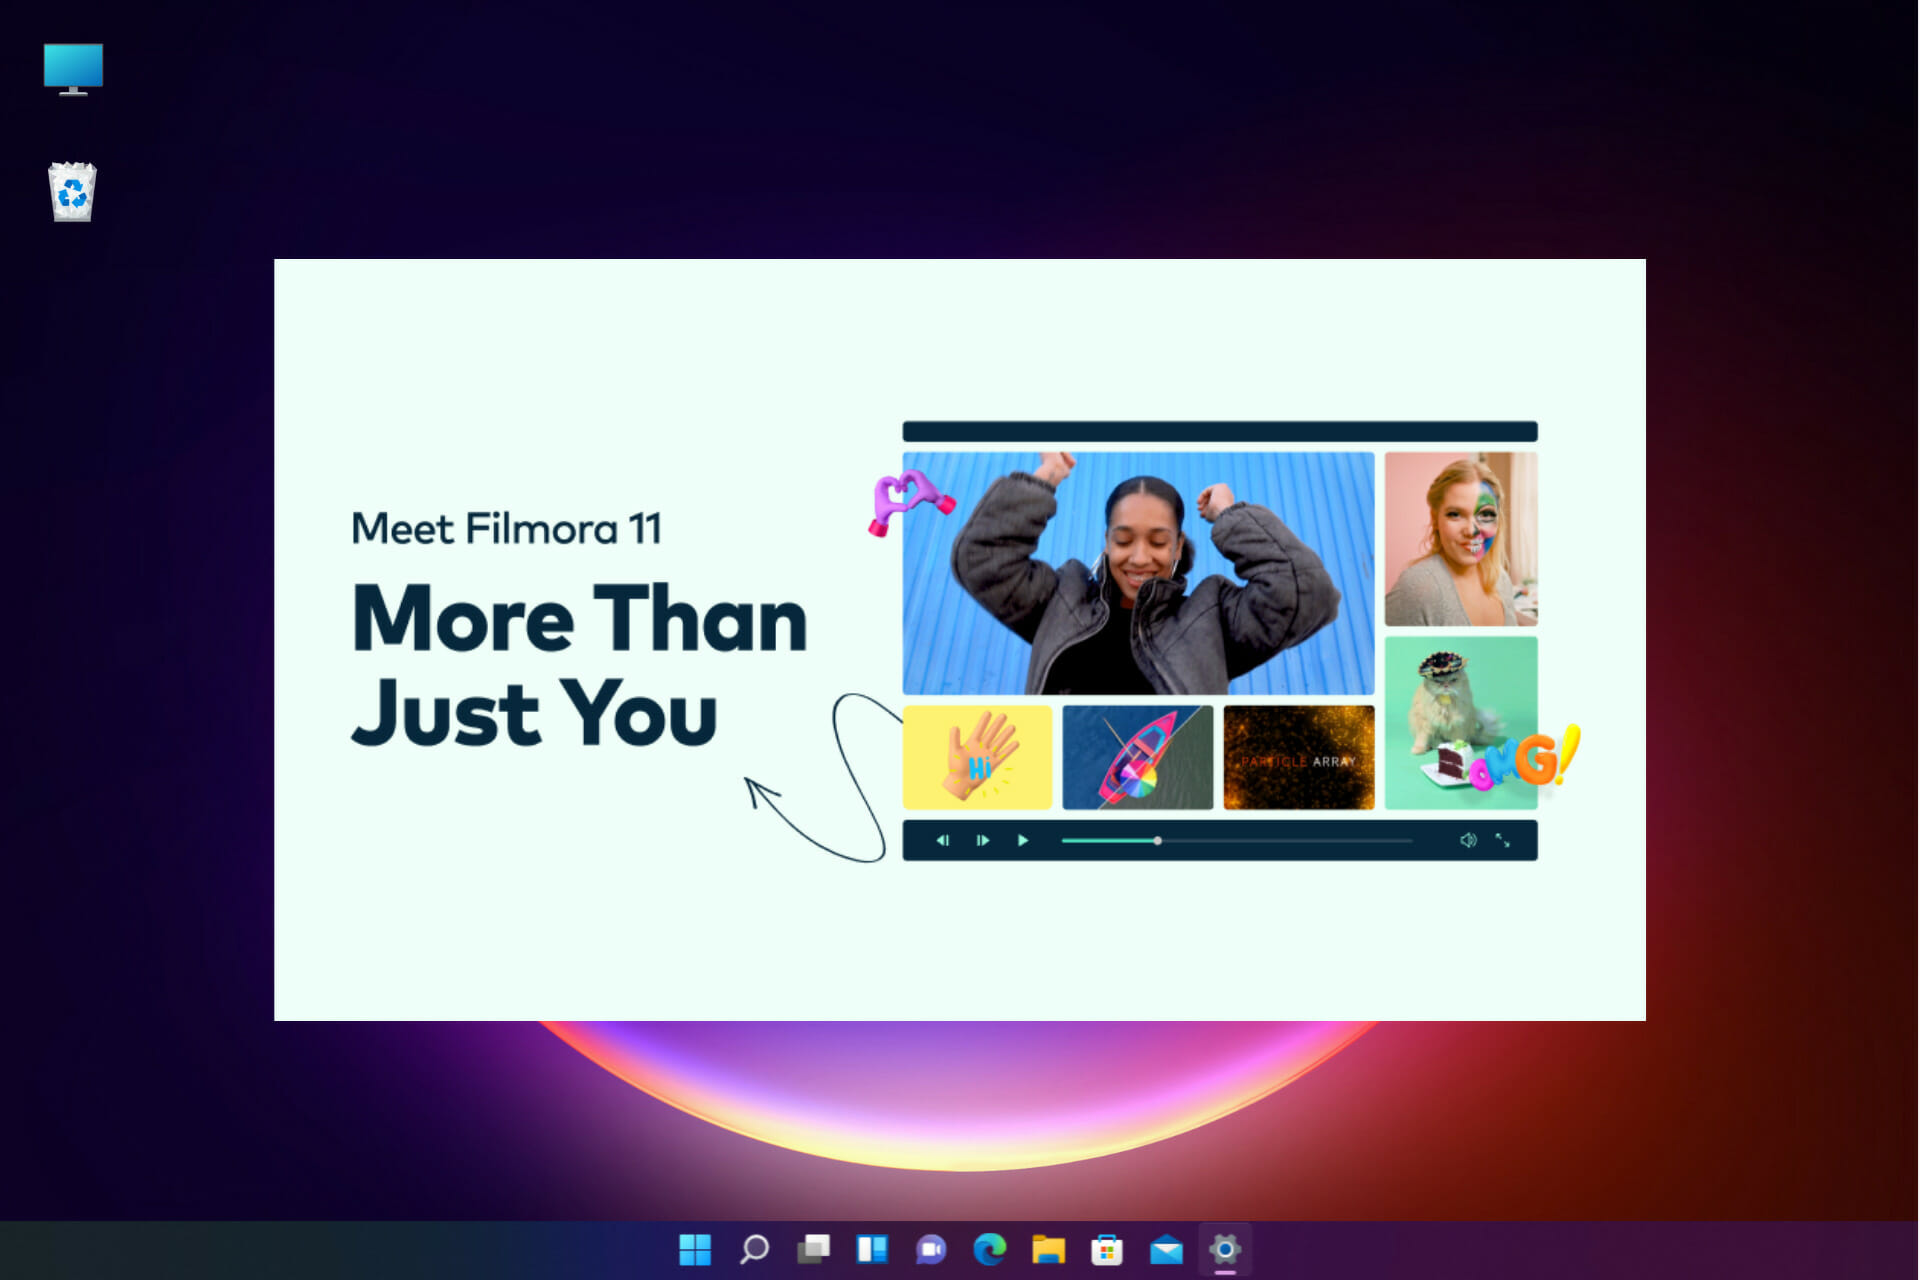
We will be looking over the software to see what it has to offer, what new updates version 11 brings, and whether or not investing in it is truly worth it, so continue reading below to find out more.
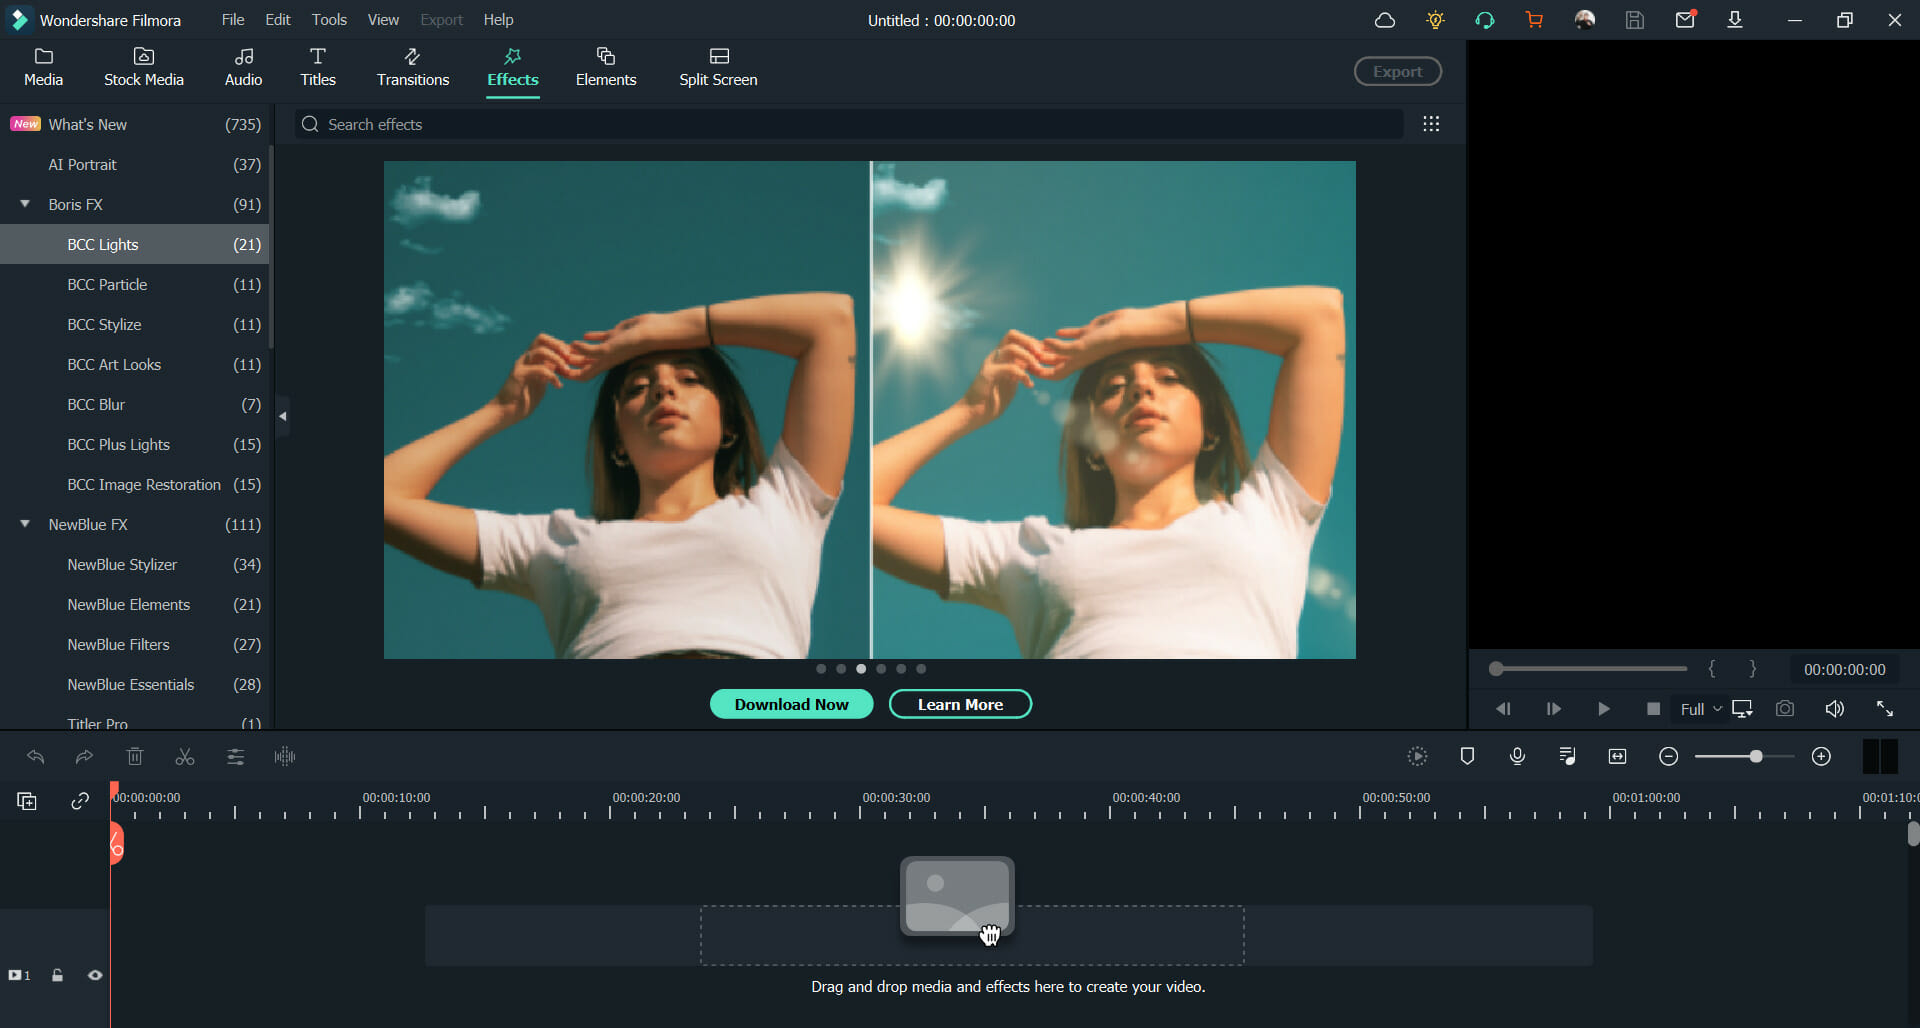
The improved Filmora 11 comes with many cool options like new FX, Speed Ramping, Instant Mode, Audio Beat Sync Masking, a myriad of templates, over 10 million stock media files, and more.
What are the new features of Filmora 11?
1. FX Plug-ins
Filmora has new cooperation with Boris FX and NewBlue, so you can use the professional add-on video effects from them like 3D title, and motion blur to your videos in Filmora 11.
That will make editing cinematic videos a breeze and will certainly add that wow factor to your creations.
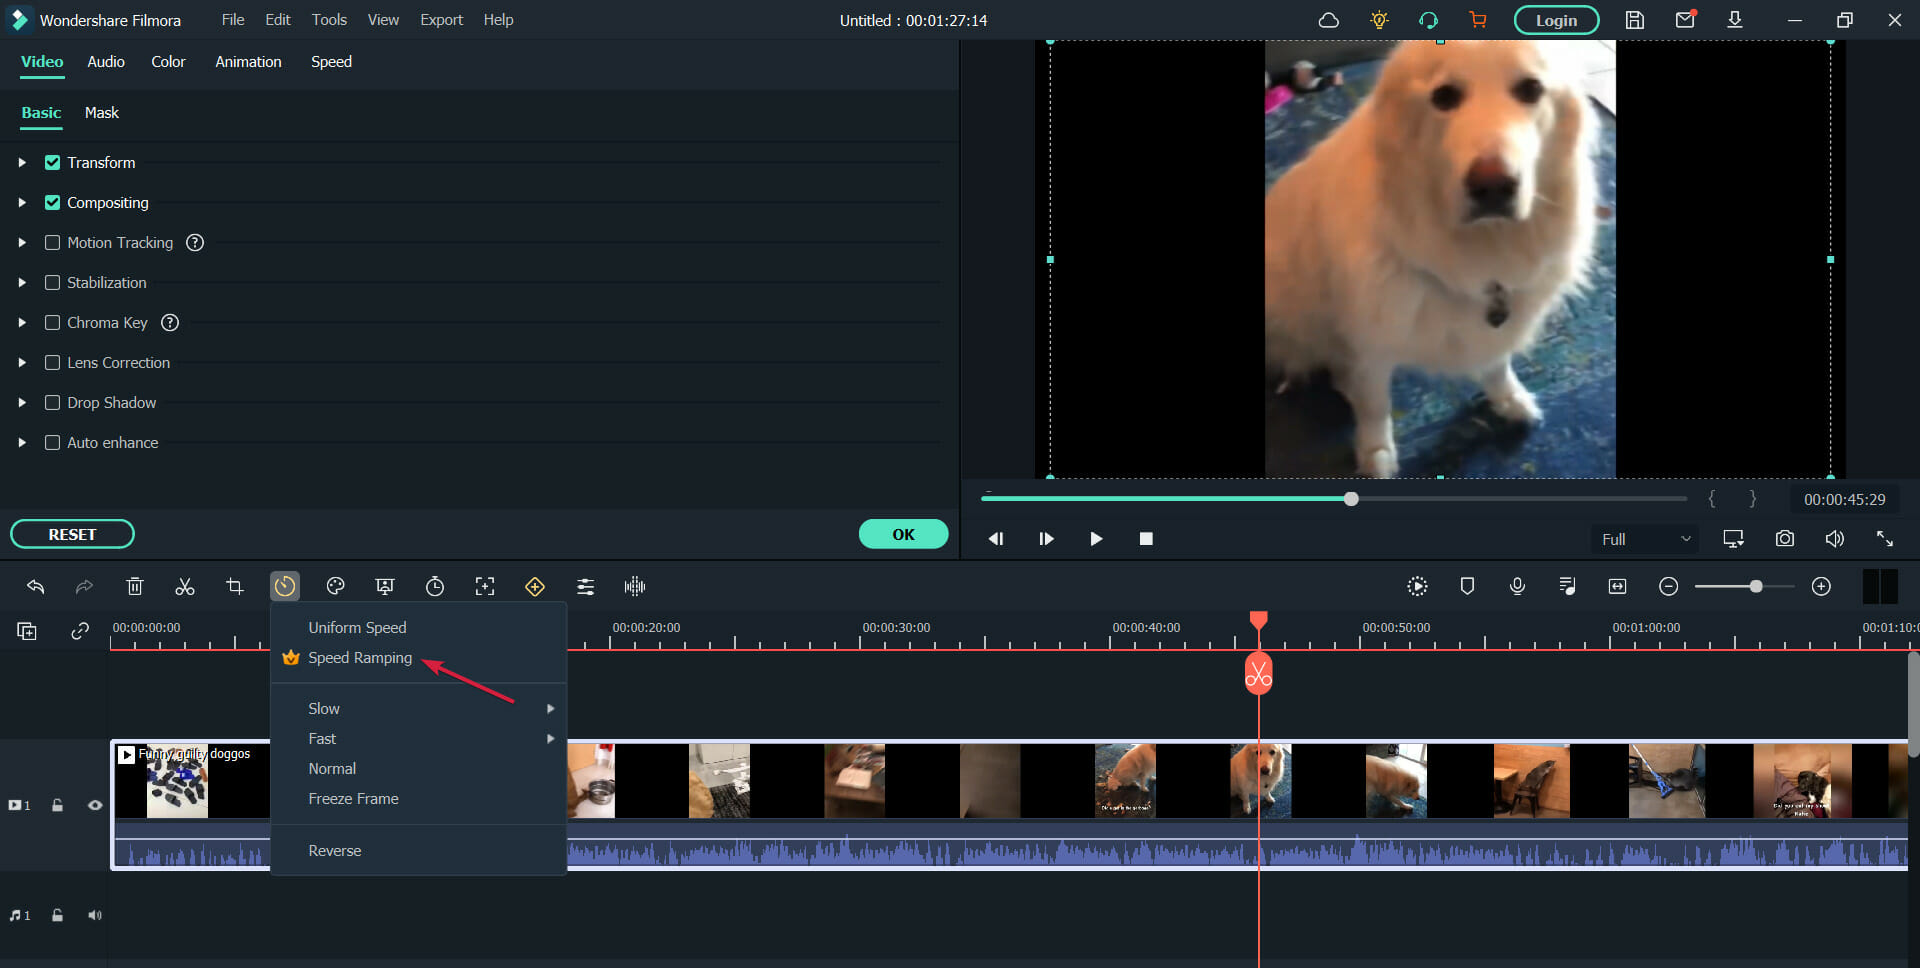
2. Speed Ramping
Slowing down or speeding up frames in a video is a really complex stunt for any video editing software, but with Filmora 11, you can achieve it with just a few clicks.
You get six presets for Speed Ramping that cover pretty much all the situations, but you may adjust them or create your own presets in a fraction of the time needed for other software.
When you alter the speed of the clip, most video editing software will also affect the sound behind it. The neat trick is that Filmora 11 can maintain the audio pitch throughout the duration of the effect, leaving the sound intact.
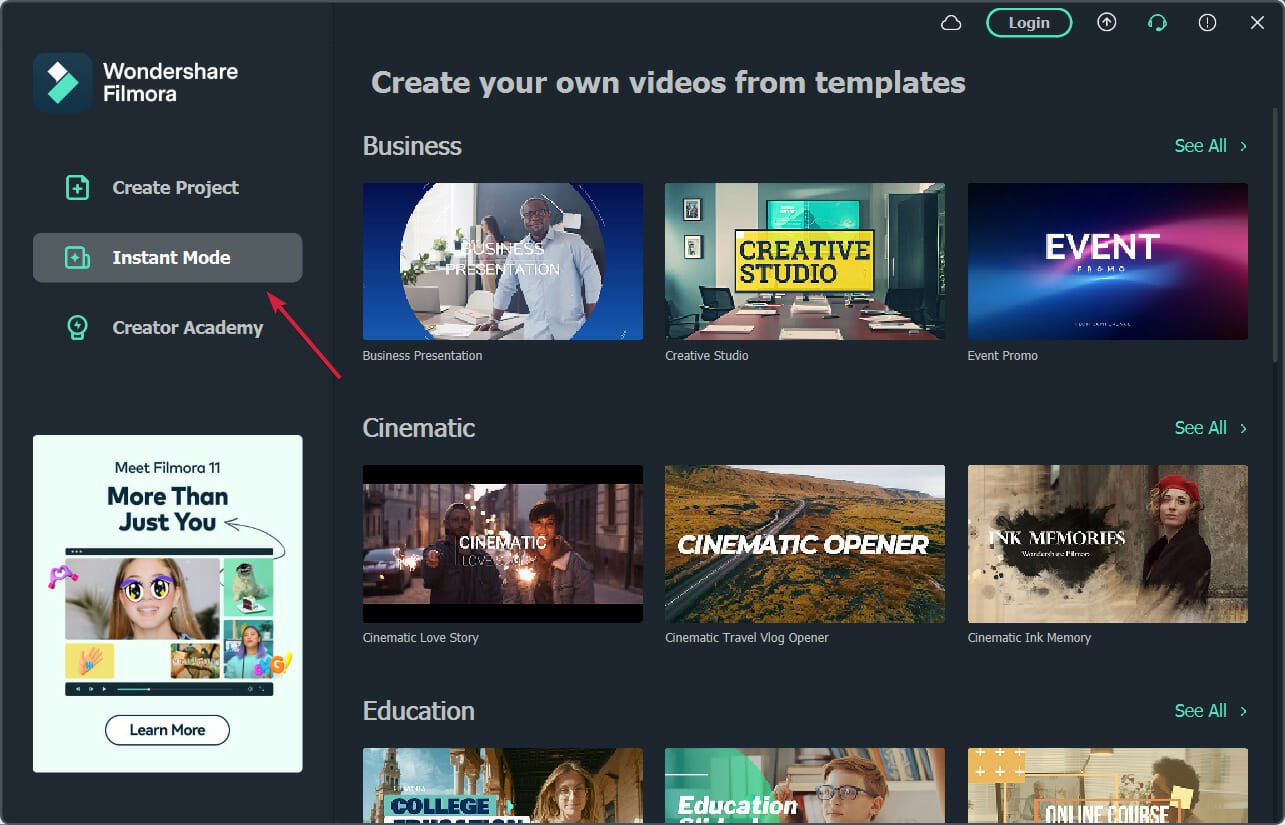
3. Instant Mode
Instant Mode is a Windows-only feature that allows you to produce a video complete with all the elements, including titles, highlights, effects, and more, in less than 5 minutes.
All you need to do is to pick one of over 115 templates available, and add your media, and the software takes care of everything automatically.
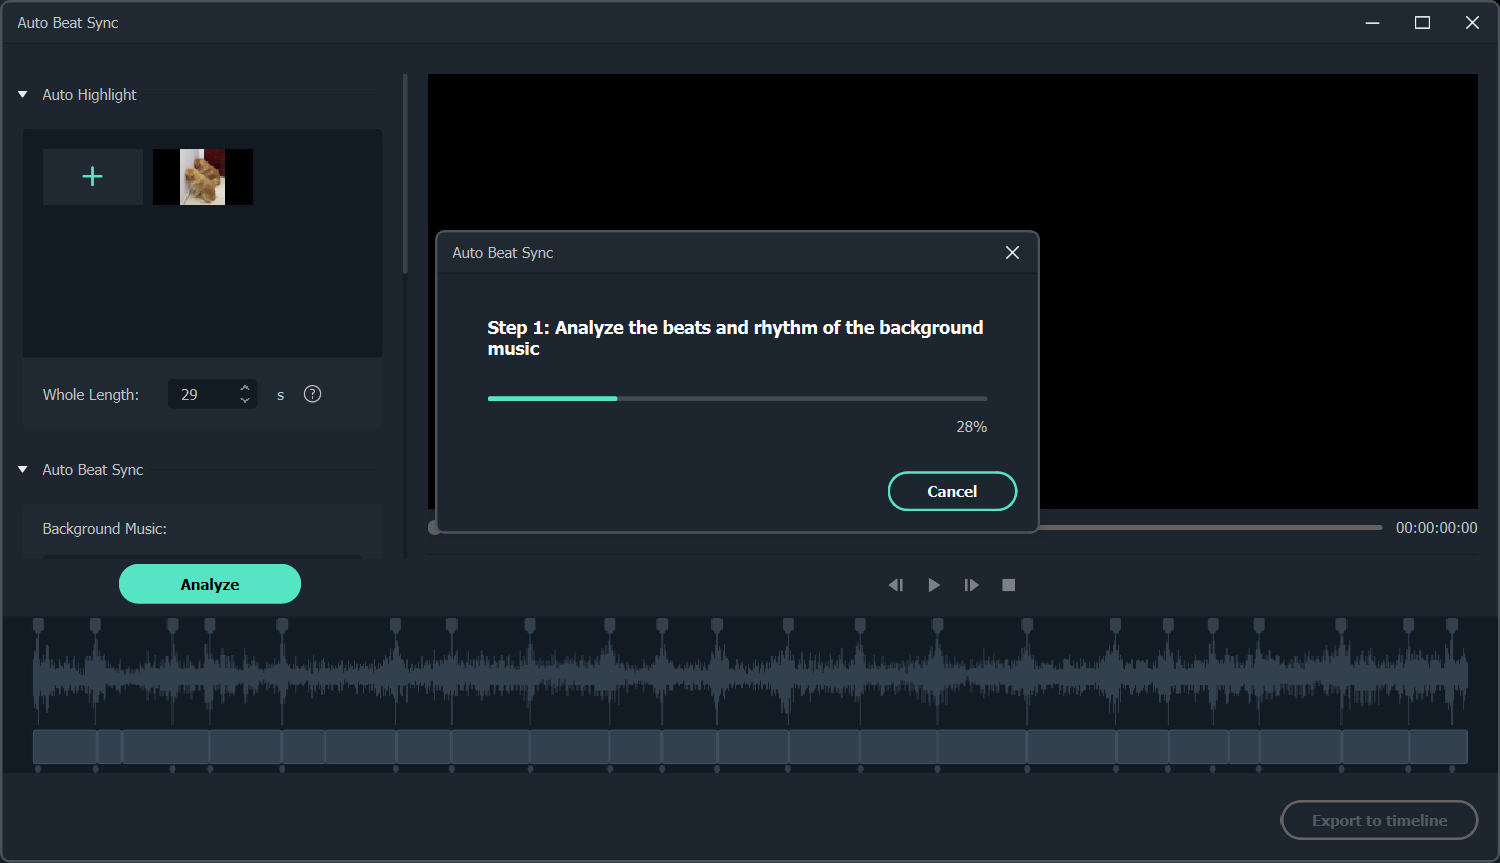
4. Auto Beat Sync
Filmora 11 has a new great feature called Auto Montage Maker, which uses the Auto Beat Sync tool to match the video footage with the music clips, analyze beat points, and then add video effects or switch the view.
The technology also detects any bad frames of the footage, which are too dark, overexposed, or with jitter, and deletes them automatically to quickly get a video matched music.
We also need to mention the Auto Synchronization feature that is used to align the audio and video captured by different cameras in the same scene.
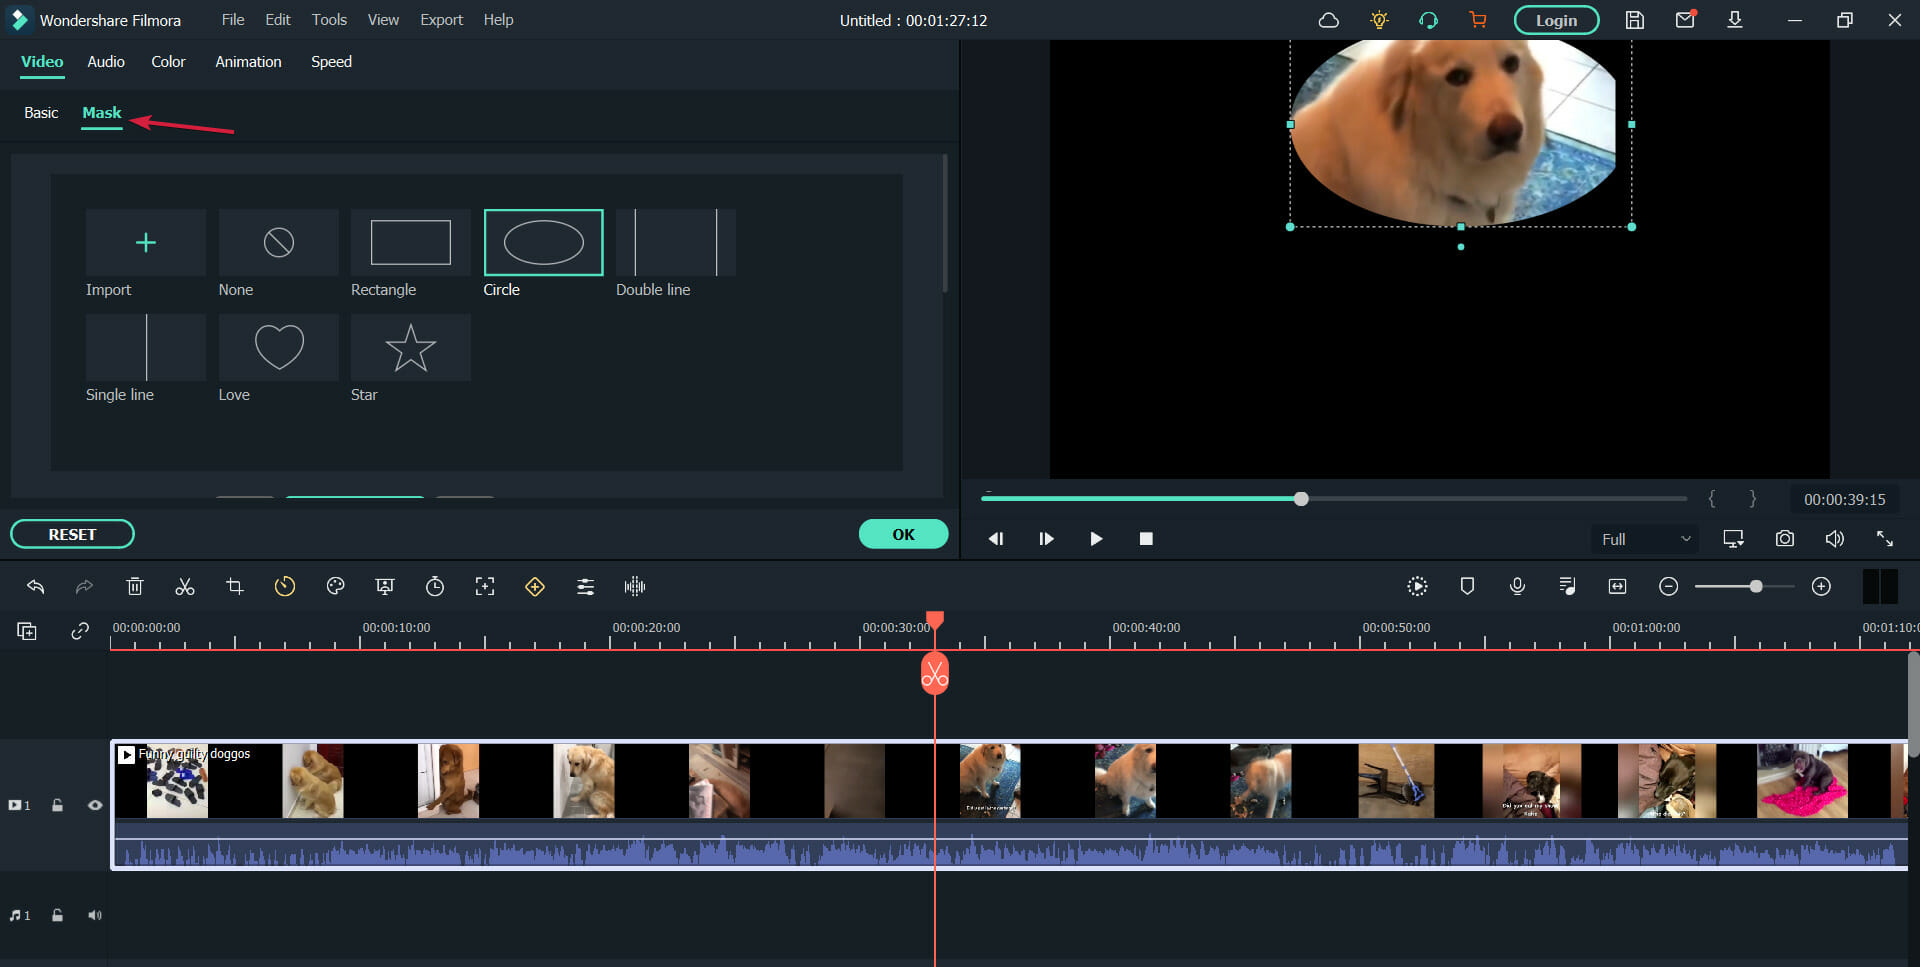
5. Masking
Maybe you don’t want everyone to see all the objects in a frame or a part of the video. That’s where Filmora 11’s masking feature or the many overlays available come in handy.
Choose from the many shapes available, including rectangles, triangles, hearts, and more to hide the elements you don’t want in the video.
You can move the mask around the frame, and adjust its size and orientation with simple mouse movements.
Other new features include access to a library of over 10 million stock videos, an increased number of templates, and the Wondershare Drive.
The latter will allow you to upload and share project documents, templates and export videos. That also helps you access your projects from another PC and continue your work.
What are the other key features of Filmora?
Back in 2020, we had our hands on Wondershare Filmora X, and back then they managed to make an amazing impression with what their product had to offer.
Given the high standards posed by version X, Wondershare Filmora 11 really had to reinvent itself if they wanted to stay on top of their game, which they did with flying colors.
1. Motion Tracking
This neat feature lets you attach an element to a moving object in your video without making it look unnatural.
We all know how videos can look cheap when you see objects moving around that obviously don’t belong to the original background. That’s why it’s the most crucial element added in Filmora X.
Filmora made this tool extremely easy-to-use, although there are current limits to how efficiently you can use it, as objects that have a high contrast compared to their background will be tracked better.
2. Keyframing
Keyframes can now be used to edit videos so that you can change their position, rotation, scale, and opacity, and add animation effects to liven up the videos.
You’ve probably seen a lot of keyframing especially in YouTube videos, and while we did spend a little time getting the hang of the feature, we found ourselves working with the tool just for fun.
Currently, keyframing can be used to take video elements and rotate, scale, move or alter their transparency. We await to see what future updates will bring.
3. Color Match
Color matching is yet another new feature brought in version 10, and in terms of importance, it goes somewhere near motion tracking, since this effect can mean the difference between an amateur and a professional video.
Stitching together several clips together will now seem seamless once you use this new feature to match the colors accordingly.
There are plenty of color parameters that can be fine-tuned, like white balance, color enhancement, and 3D LUT.
Thankfully enough, you get to preview every single change you make, which is indeed a time saver as the tool does need a bit of practice getting used to.
4. Audio Ducking
If you want to create videos where dialogue is an important element, then this tool will let you automatically fade music so that the words will be easier to comprehend.
This neat tool will probably make social media users flock towards Filmora X, since their videos are usually ones that consist of them talking into the camera, with the occasional background music causing disturbance.
The tool itself was very easy to use, and I managed to reduce background music from a video with 2 clicks and by moving a slider.
There are, however, some limitations from what we saw, since audio ducking doesn’t seem to be all that efficient if the background music is very lyric-predominant, such as rap or hip-hop, but the difference is minor.
5. Silence Detection Add-on
This tool is something we were really interested in trying once we read about it in the changelog, especially since awkward moments of silence are especially bad for presentation videos.
In simple terms, this tool lets you automatically cut out moments of silence or low volume of videos.
All you need to do is select a video that has audio, and then input the parameters that need to be followed, such as minimum silence duration, the volume threshold for the silence to be considered silence, and the softening buffer for transitioning between cropped segments.
Wondershare Filmora 11 – a price plan for every pocket
Filmora 11 is available in a free version as well, and while many of you may be used to free versions of video editors that are full of restrictions in terms of access time or available features, this doesn’t apply here.
The free version of Wondershare Filmora 11 is available for an unlimited amount of time, grants you access to all of its features and tools, and there is no limit to how big the videos can be when using it.
The only limitation, which is quite understandable (and amazing for being just the one) is the fact that all exported videos will have a watermark applied to them.
This unlimited access to all the power that Filmora offers is a great way of letting users know what they can truly do with the product and also lets them better judge whether the investment is worth it or not.
Reference:
Speaking of investment, Wondershare Filmora 11 is available starting from $49.99 USD per year. For those who are interested in advanced effects, plug-ins, and Wondershare Drive, the subscription is $18.99 USD per month.
Wondershare Filmora 11
Powerful for advanced users, and accessible to beginners, Wondershare Filmora X has it all!
Once you are done installing the program, using it will be a piece of cake, since the interface is optimized in such a way that even beginners will get a hang of it in no time at all.
Of course, this can still prove challenging for some, and Filmora comes with plenty of built-in tutorials that are meant to show the user around the interface, familiarizing him with all the tools that are at his disposal.
In fact, Wondershare took extra steps in creating these tutorials, to the point where they designed them to be interactive, engaging, and even rewarding, by designing them to look and feel like challenges with rewards at the end.
These challenges cater to users of all levels, and they are separated based on their difficulty in different categories:
Get Started
Grants you a free video effect pack
Advanced Challenge
Grants you 7 days of access to the Filmstock Standard Library
Get Creative
Not exactly a set of challenges, but it grants access to their online libraries of tutorials.
Completing these challenges is actually quite rewarding, so even if you know how to use the program already, not taking advantage of the extra freebie would be a shame.
Once you’ve passed this phase and have truly accustomed yourself to what Filmora can offer, you can finally appreciate what a vast toolset it provides users.
Not only does the smooth interface keep the elements and buttons to a minimum, but one can also appreciate the responsiveness of the program itself.
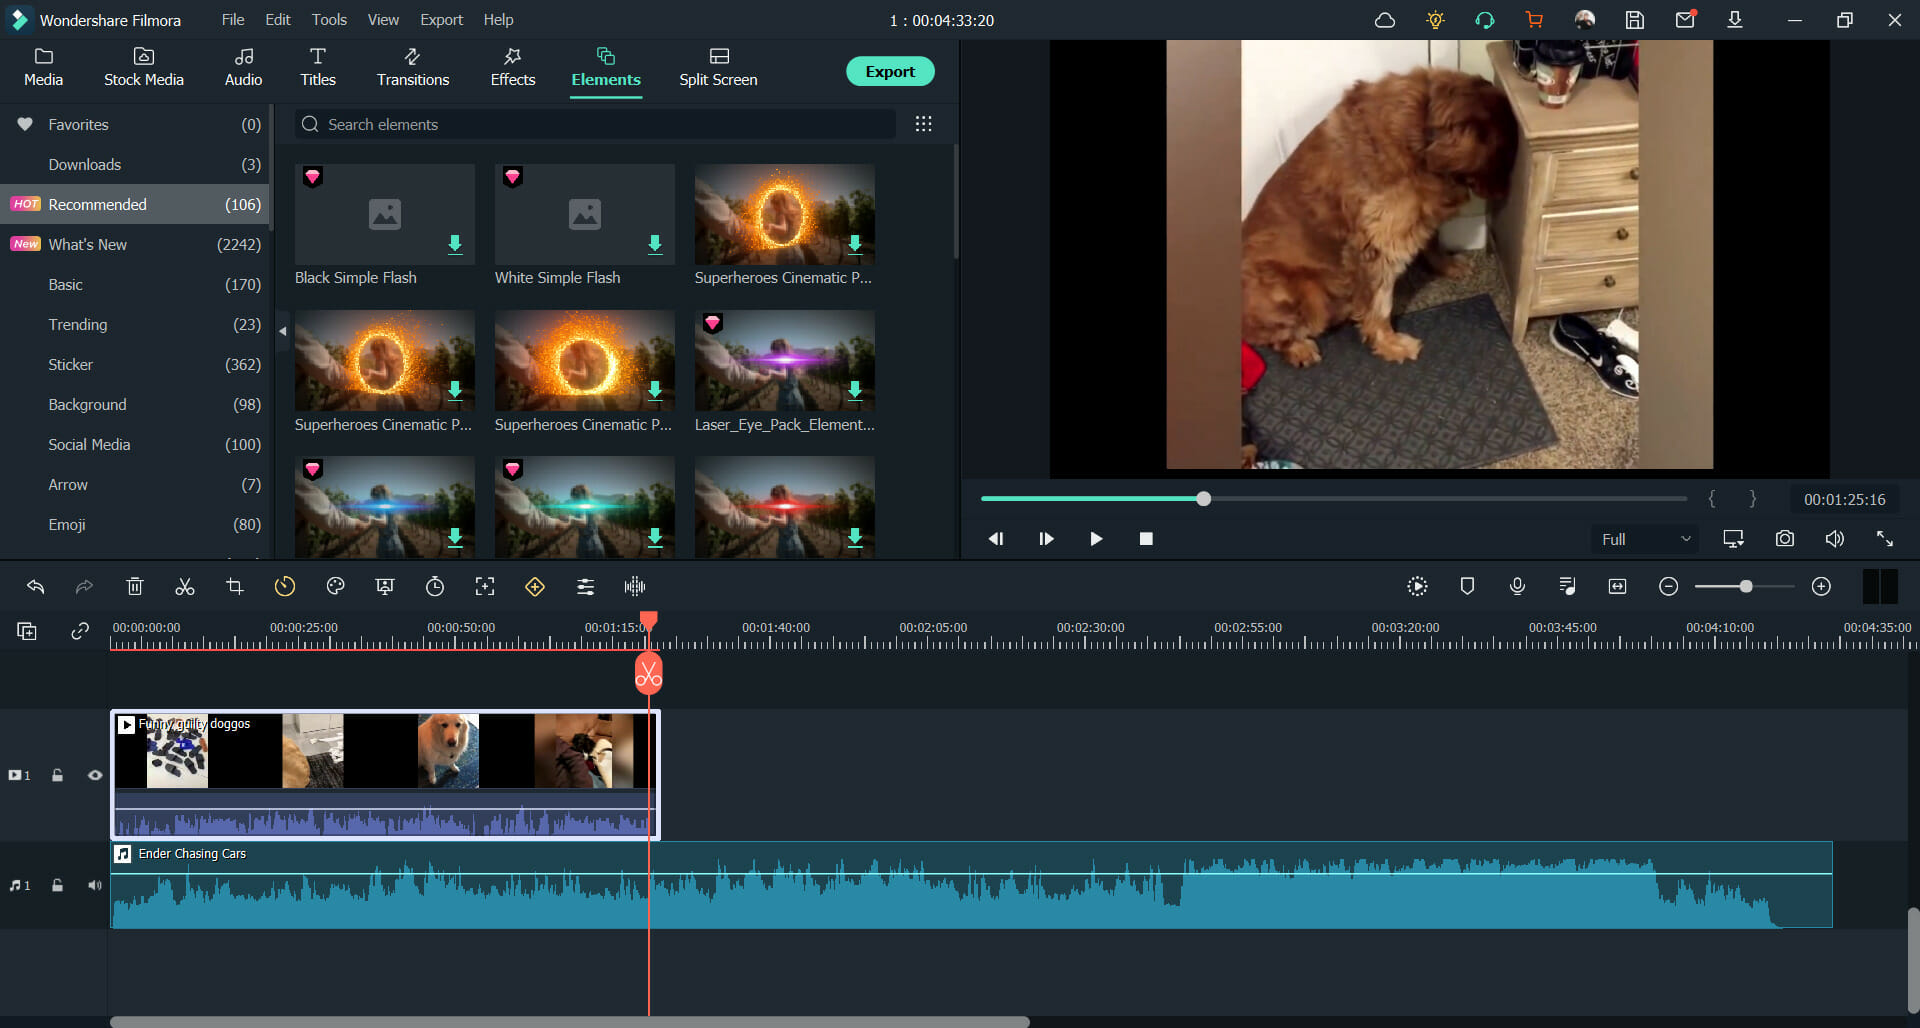
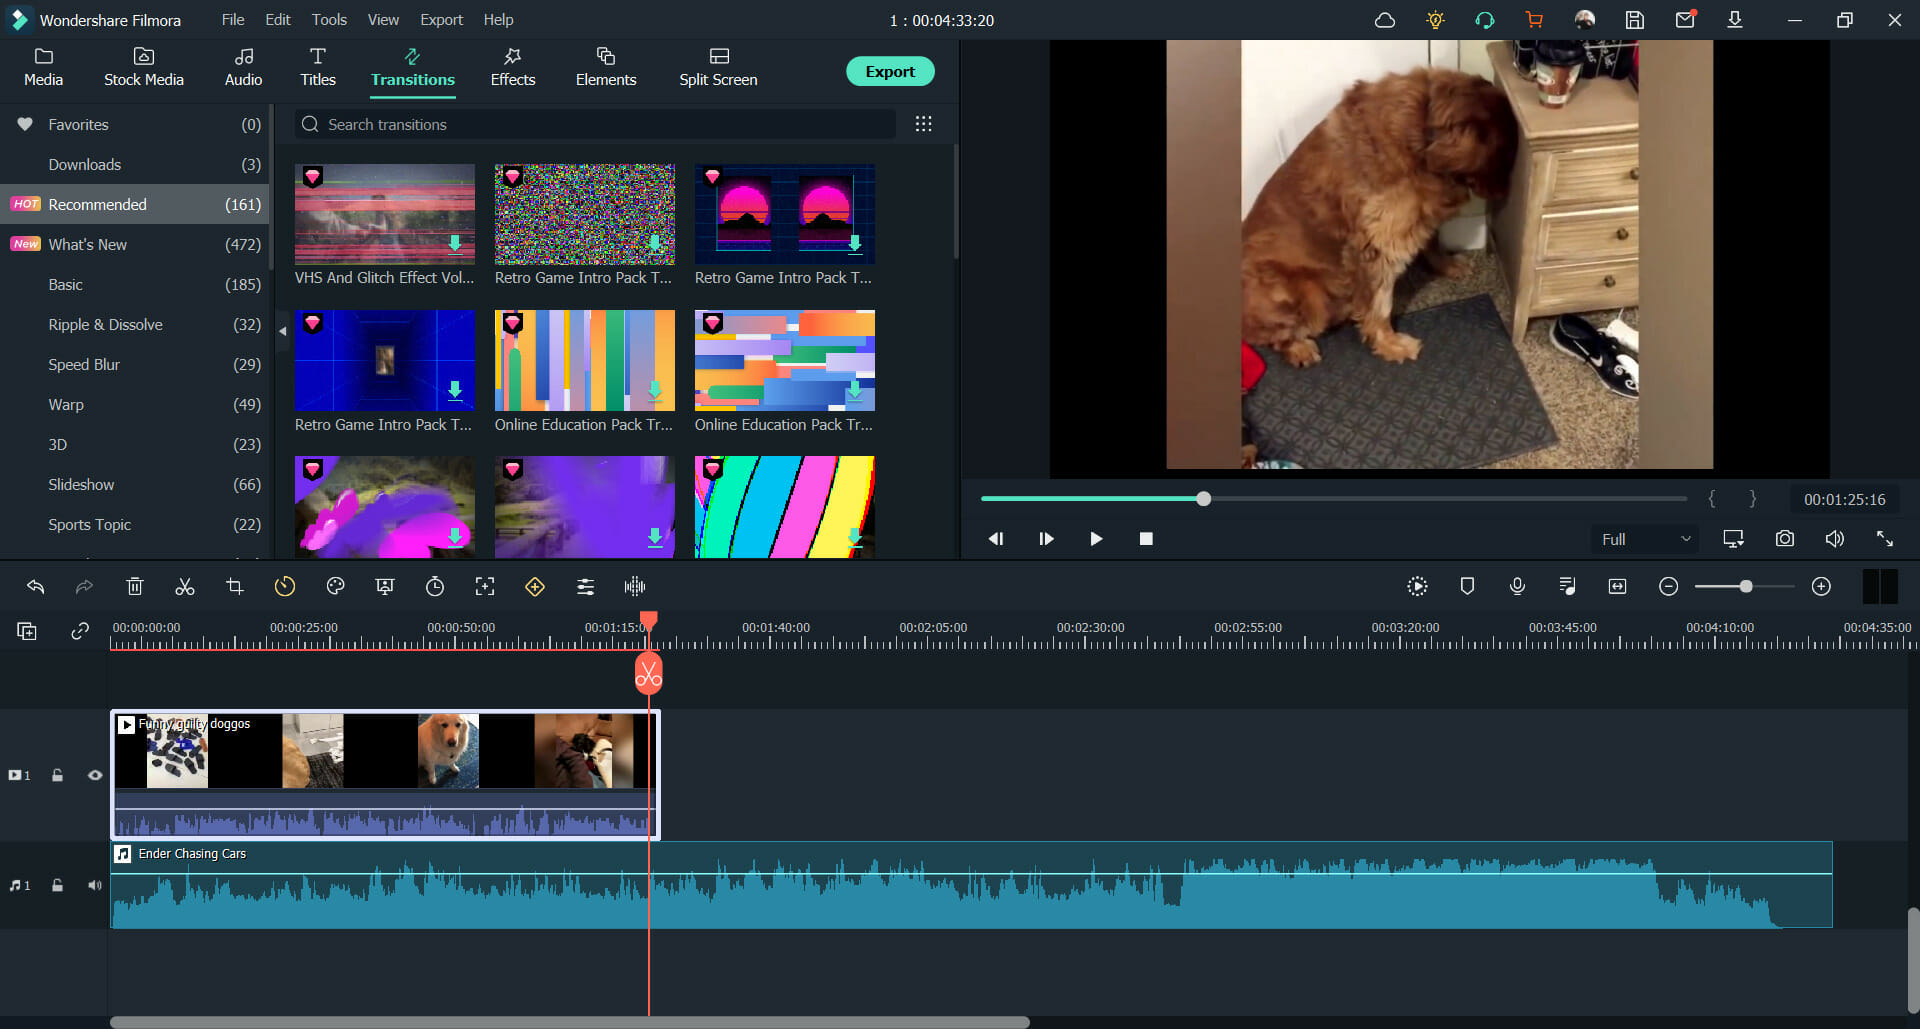
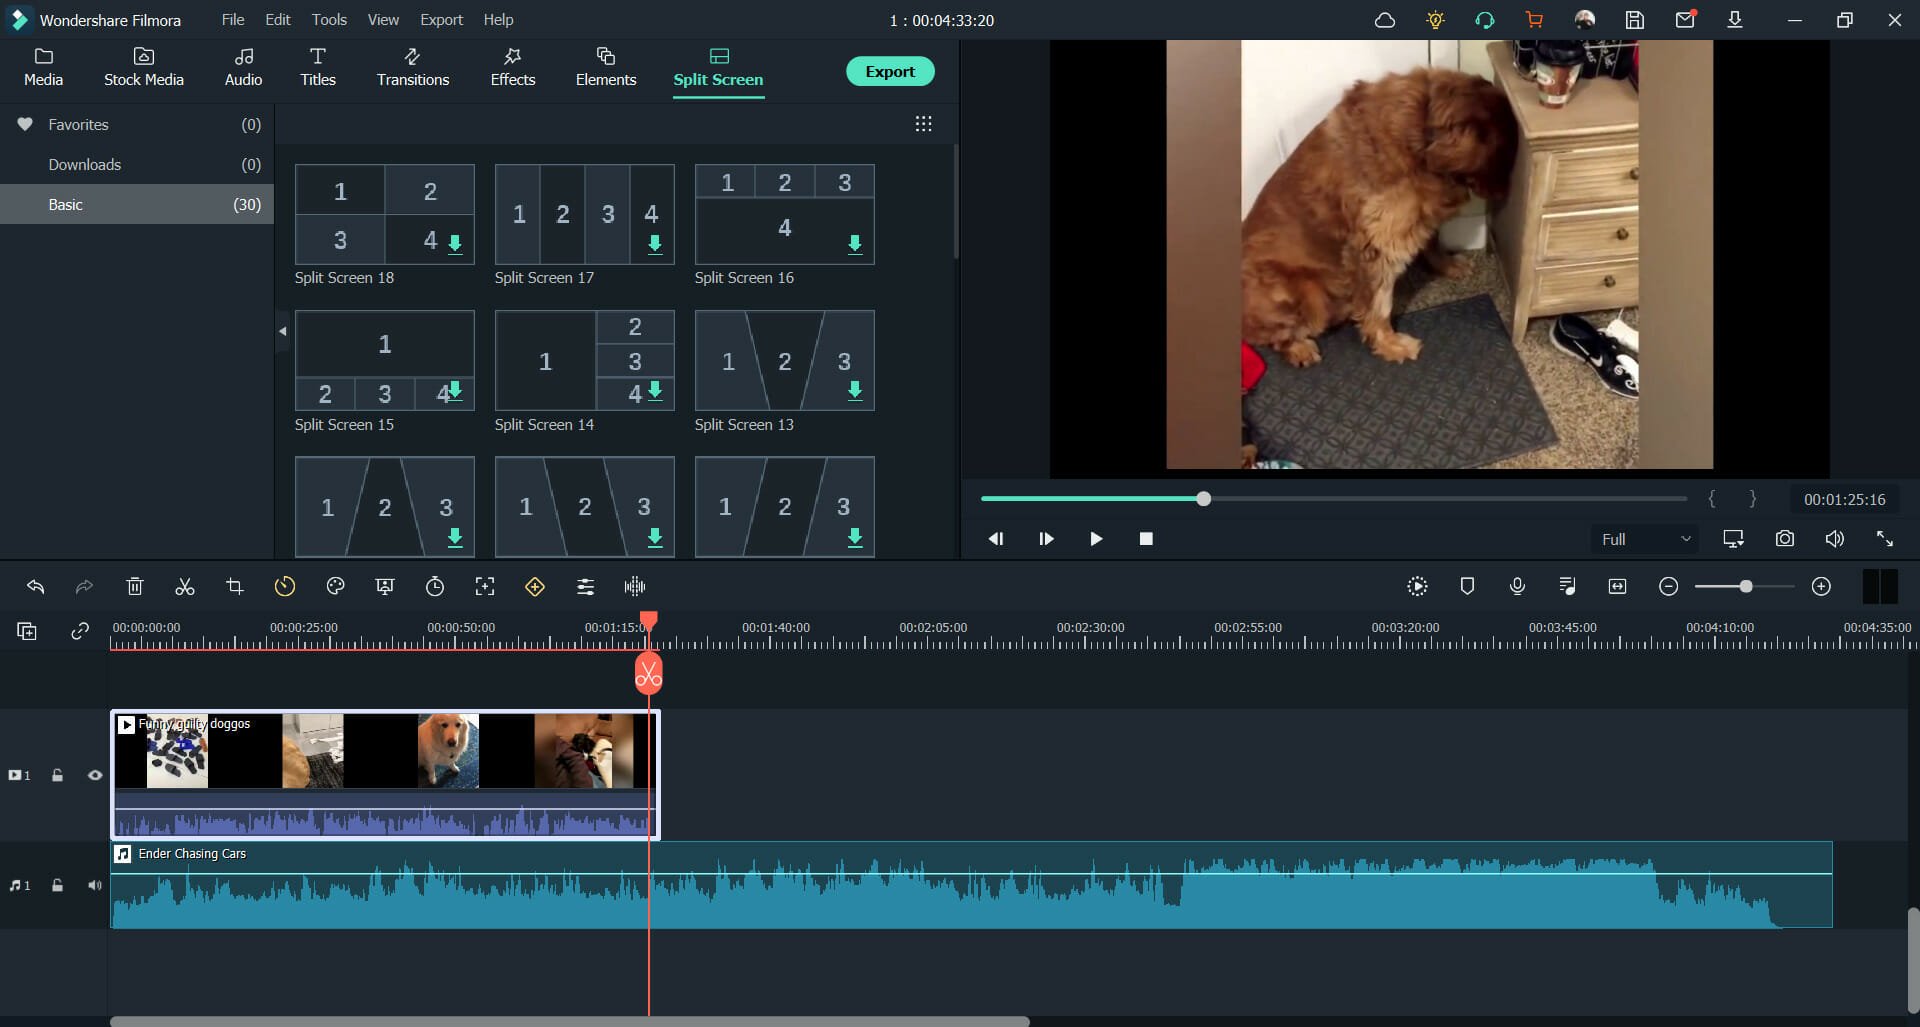
Besides, you have an entire library of elements that you can use to enhance your videos, such as:
Audio samples
Title editing
Transition effects
Video effects
Graphical elements
Split-screen templates
All of these assets total in the hundreds, and the only true limits of what you can do with the videos is strictly tied to your imagination.
Of course, you also have access to the more basic tools, such as video trimming, cropping, and resizing, but these have become somewhat standard to all video editors.
Closing thoughts on Wondershare Filmora
Pros
Available as a free version with pretty much no restriction
Great for both beginners and advanced users
Constantly updated with new effects
Interactive tutorials with rewards
Smooth and intuitive interface
Cons
The cost of their subscription make the Perpetual plan seem like the obvious choice
As far as we’re concerned, Wondershare Filmora 11 does justice to its previous incarnations, and the program did manage to reinvent itself in a way that makes buying it worthwhile.
Of course, you don’t need to take our word for it, go and download the free version, try it, and see for yourself whether the program truly has everything you need or not.
Have you tried Filmora 11 yet? If so, let us know what you think about it by leaving us your feedback in the comments section below.
Windows 10’s Alarms & Clock app, the free one that comes pre-installed on all Windows 10 devices, updated this week with one of its biggest updates in a while.
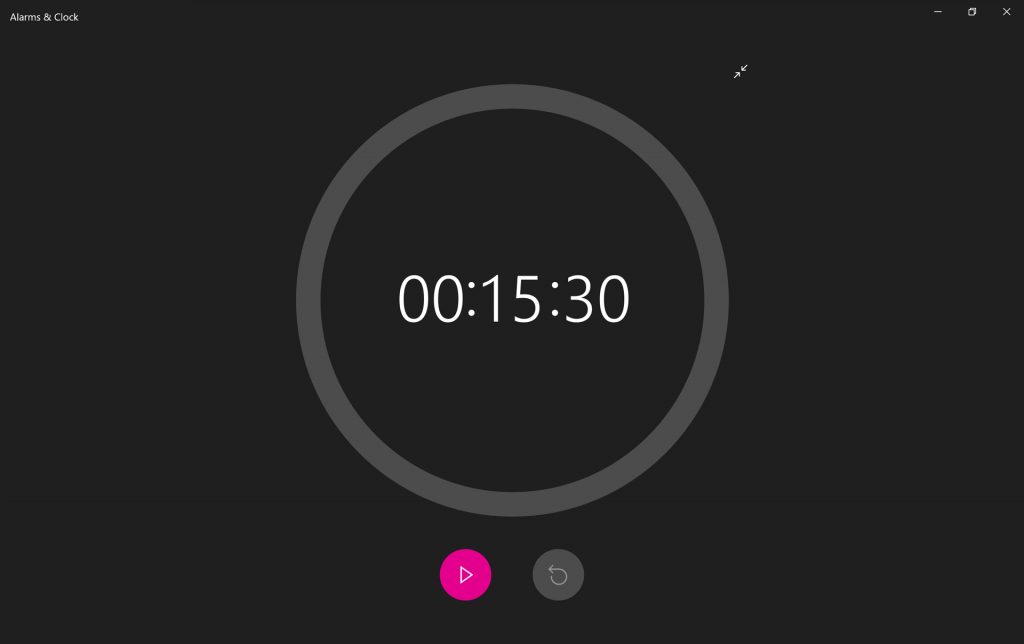
This update, which brings the app up to Version 10.2101.28.0, refines the overall design allowing for much larger font and adding a fullscreen option for the Timer and Stopwatch functions.
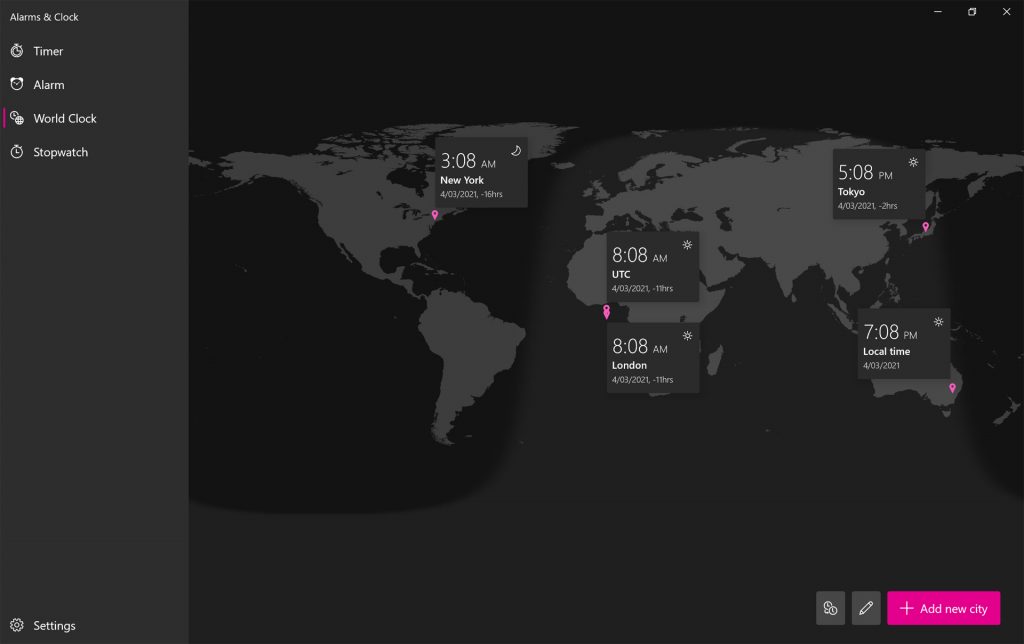
The World Clock also gain some improvements with the addition of weather icons and current date for each city location which should come as a relief to those who still get confused by time differences when traveling or planning a meeting.
The Alarms & Clock app menu was also moved to the left side of the screen and the app now better adjusts when resized.
Many users are using PDF format for document sharing, but sometimes PDF files can be protected or in read-only mode.
To edit these files you’re going to need a read-only PDF converter, and in this guide we’re going to show you the best tools for the job for both Mac and Windows.
Being the most popular and used tool for Portable Document format files, Adobe Acrobat allows users to perform advanced file management.
Thus, using this solution from Adobe, you will be able to view, create, manage, manipulate and print different files.
Using Adobe Acrobat repeatedly, you will be able to save your PDF file as read-only file with ease. You can also easily convert from PDF and to PDF format.
Adobe Acrobat has more useful features, such as extensive editing, text recognition, and much more. If you want to make PDF read only, this is the right tool for the job.
Icecream PDF Converter is a great tool for converting different files into the PDF format. Now you can use any Word, jpg or epub and quickly convert it into PDF.
Another feature of this read only PDF converter allows you to take different files and join them into a single document. The Icecream PDF Converter contains a built-in PDF reader that supports files that are password-protected.
We also have to mention Icecream PDF converter’s OCR feature that recognizes text, allowing you to create editable Word documents.
When it comes to file conversion, Icecream PDF Converter is one of the best tools for the job, so be sure to try it out.
A performant read-only PDFconverter, Nitro PDF your ideal tool for converting PDF files into Word, Excel or PowerPoint formats, and vice versa.
Nitro PDF will also retain the format of your files by maintaining the aspect of your images, fonts and formatting.
Also, when using an Outlook plugin, you are able to convert emails, attachments, and email folders into PDF, and archive important files for future usage.
Wondershare PDFelement is an PDF software that allows you to create PDF forms and documents. Edit, create forms, annotate, convert and protect your files with ease.
This software is available on multiple platforms, so it’s a great option if you want to make PDF read only on Mac or Windows.
If you need a PDF editor that works on multiple platforms, supports PDF forms and annotations, then PDFelement might be the right choice for you.
Mac PDF Converter Ultimate is another great tool that can make PDF files read only on Mac. It was designed to convert PDF files into editable text documents.
Using this software you can easily convert PDF files to ePub, text, Excel, HTML and other file formats.
You can also use MacPDF Converter Ultimate to convert a PDF file into image-related formats such as jpg, png or gif.
The software also has advanced OCR technology, so ti works with scanned PDF files that are image-based.
If you’re looking for the best read-only PDF converter, Adobe Acrobat is the best tool you can use for this purpose.
However, other entries on our list aren’t too far behind in terms of functionality, so be sure to consider them as well.
Before leaving, don’t hesitate to check our latest guide on the best fill & sign PDF tools that you can use.
Many Windows users reported that their VPN was blocked by Webroot antivirus. If you experienced the same issue, Windows Report will show you how to fix this problem.
The VPN blocked by Webroot problem prevents VPN users from making a VPN connection whereby anytime they attempt to switch on their VPN service, they get halted in the process.
Founded in 1997, Webroot is one of the powerful antivirus programs with excellent web filtering capabilities.
Although there are several antivirus programs on the market as well, some antivirus tools come with VPN services, while others are overprotective such as Webroot, and block VPN connections.
Windows Report has enlisted the best workarounds to fix the VPN blocked by Webroot issue. You can try out any of the solutions so as to fix the problem.
What can I do if Webroot blocked the VPN?
1. Temporarily disable Webroot
Locate the Webroot SecureAnywhere icon in your system tray.
Right-click on the system tray icon and then click on the Shutdown Protection option.
Follow the prompts to shut down the Webroot protection.
You need to consider temporarily disabling Webroot in order to use your VPN service. This should enable your VPN to bypass the VPN blocked by Webroot issue.
Note: After using your VPN, it is essential that you repeat these steps and activate Webroot protection afterward. This will protect your system from malware and viruses.
Alternatively, you can also disable SSL port (443) monitoring which is what some VPN services use to initiate the connection.
Webroot might block this port as a security measure. Therefore, you should disable SSL monitoring for the port exclusion.
Meanwhile, you can do this by disabling the Web shield & Filtering option in the Webroot program.
2. Change your VPN
While there are numerous VPN service providers out there; some of them are not compatible with Webroot. This is due to technicalities involved with the applications’ processes; therefore, you need to change your VPN.
Our recommendation goes to the best VPN, a world-class solution that is renowned for its versatility as it is for its well-rounded, comprehensive security, and privacy-oriented features.
This highly flexible VPN solution is perfectly suited to blend in seamlessly with multiple systems, devices, browsers, and software such as Webroot.
And its adaptability stretches beyond apps compatibility all the way to its impressive network of servers.
Boasting 22,228 gateways with global coverage, this tool routes your traffic through encrypted VPN tunnels, making sure that your data is secured and inaccessible to prying eyes.
This generous server pool also means that buffering, latency, or slow, faulty connections are left in the past.
Instead you get to enjoy lag, ISP throttling, and geo-restrictions free connections to fast and reliable servers anywhere in the world regardless of your physical location.
Speaking about speed, you also benefit from unlimited bandwidth and lightning-fast download speeds to get the most of your web experience and never worry about snoops, hackers, or unwanted attention.
Your browsing is anonymous, your IP address hidden and your online identity protected by multiple layers of privacy.
Private Internet Access
Don’t let overprotective Webroot compromise your online privacy – team up with PIA!
Select Add an exclusion and add your VPN client software.
You need to exclude your VPN software from Webroot protection settings. This automatically resolves the VPN blocked by Webroot issue.
Normally, this should resolve the VPN blocked by Webroot problem; however, some VPN software use the port 1723 for TCP, and ports 4500 UDP and 500.
Therefore, you need to add your VPN in Windows Firewall Advanced settings. See how you can do that in the next solution.
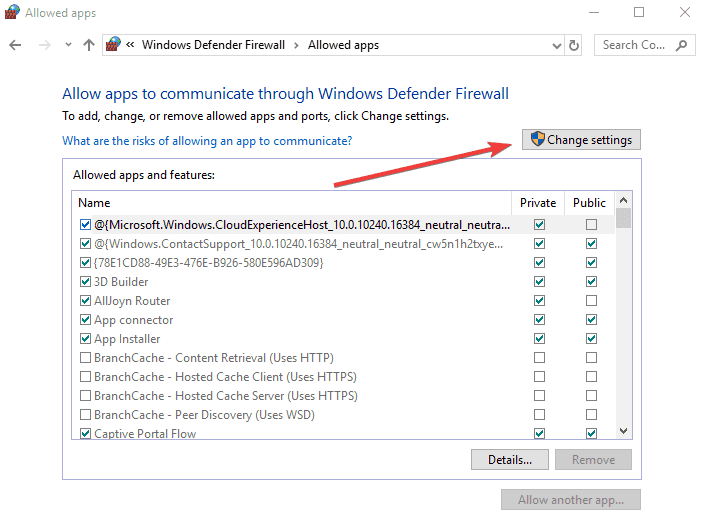
4. Add Exception in Windows Firewall
Go to Start, type Allow a program through Windows firewall and then hit the Enter key.
Click on the Change Settings option.
Now, Click on Allow another program.
Select the VPN software you want to add or click Browse to find the VPN software, and then click OK.
Check if you can connect to your VPN.
However, if you still experience the VPN blocked by Webroot problem, you proceed to the solution.
5. Reinstall the VPN client software
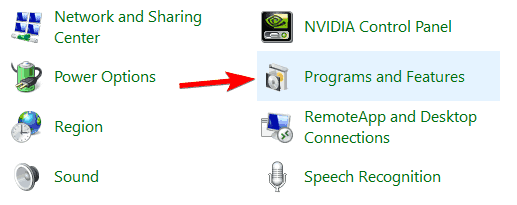
Type Control Panel in Windows search and press Enter.
Select Programs & Features.
Find your VPN from the list of programs and select Uninstall.
In the Setup Wizard, click you’ll get a notification after a successful uninstall, so click Close to exit the wizard.
If the VPN is still listed as available after uninstalling it, press Windows key + R to start the Run app.
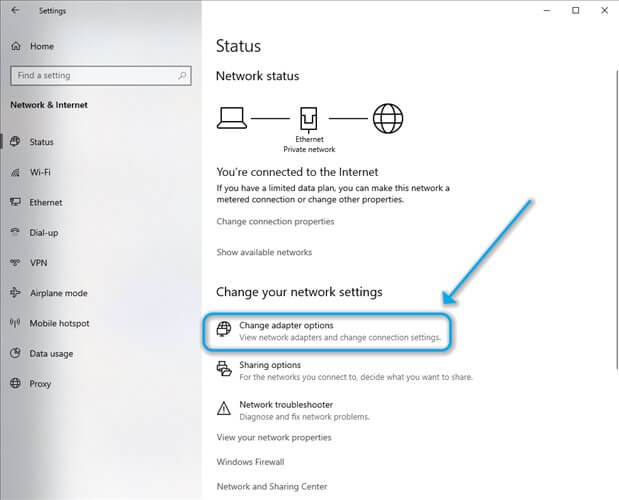
Type ncpa.cpl and press Enter to open the Network Connections window.
Under Network Connections, right-click on the WAN Miniport labeled with your VPN.
Select Delete
Go to Start, type Network Connections, and press Enter. Right-click a VPN connection and use the Delete option.
Select VPN. If you see your VPN as available, delete it.
Some Windows users reported that they were able to resolve the VPN blocked by Webroot issue simply by reinstalling their VPN client software.
After completing the uninstall operation, proceed to install the VPN client software afresh using the executable file provided for you by the VPN service provider.
6. Add Rule for PPTP
Start Control Panel as indicated in the previous solution.
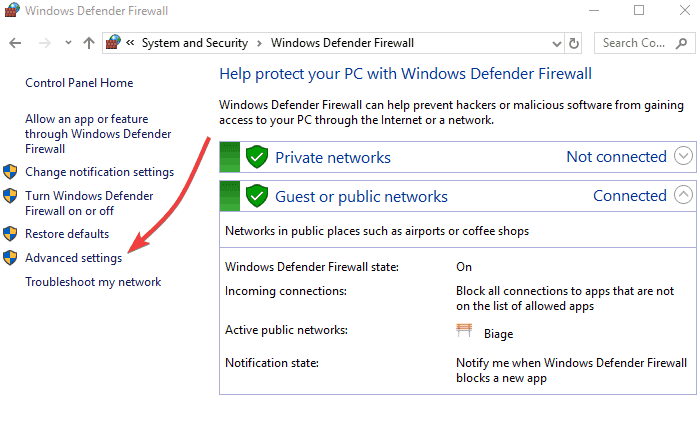
Now, go to Windows Firewall and select Advanced Settings.
Search for the Routing and Remote Access (under Inbound Rules and Outbound Rules)
Another way of resolving the VPN blocked by Webroot issue is by enabling the PPTP rule.
For Inbound Rules: right-click Routing and Remote Access (PPTP-In), select Enable Rule.
For Outbound Rules: right-click Routing and Remote Access (PPTP-Out), select Enable Rule.
7. Change Antivirus
Webroot antivirus might be incompatible with your VPN software thereby resulting in the VPN blocked by Webroot problem.
In order to resolve this issue, you can consider replacing Webroot with another antivirus that is compatible with your VPN.
The antivirus recommended below offers the best protection but it is also less prone to any errors or interference with your system or any other software, including your VPN.
If you are still experiencing a VPN blocked by Webroot issue, then we highly recommend that you should contact either your VPN service provider or Webroot for advanced troubleshooting procedures.
Conclusively any of the aforementioned solutions should be able to fix VPN blocked by Webroot problems. So, ensure you try out any of the workarounds in order to fix the VPN problem.
We do appreciate it if you share your experience with us. Let us know how it worked in the comments section below.
Bitdefender originally focused on dedicated antivirus software and later decided to also offer a VPN in their software package.
Some of their current antivirus packages include Bitdefender Antivirus Plus, Bitdefender Total Security, and Bitdefender Internet Security.
The company recently added the VPN feature to its current antivirus packages.
Bitdefender VPN is spectacular, although, there are lots of things to improve on as a standalone VPN service. However, it is ideal for users with existing Bitdefender packages as it gives you secure and anonymous browsing.
Here’s what to expect from Bitdefender VPN:
Support for OpenVPN, L2TP/IPsec, and IKEv2 (new) VPN protocols
Secured Wi-Fi, especially on public networks
Compatible all major OS
Unblock geo-restricted content
Hide your IP address
Decent encryption
Bitdefender VPN
Encrypted traffic and IP hiding for complete Bitdefender-powered online anonymity. (Subscription plan includes antivirus as well).
Once you’ve downloaded and installed Bitdefender VPN, nobody will have access to your online activity logs.
In other words, advertising agencies won’t be able to profile you so as to serve you personalized ads. Your ISP won’t be able to spy on you and then sell your browsing history to third-parties, as most of ISPs do.
Bitdefender VPN servers
Bitdefender VPN offers a limited amount of servers for subscribers to access. This could be because they are relatively new in offering VPN services.
Yet in our view, this is a disadvantage depending on where you are; the available servers are far away and this can make the speed of the VPN connection much lower.
In addition, there could be congestion of servers which could cause a drop in performance. Notwithstanding, BitDefender servers did quite well on testing offering decent speeds for streaming and browsing.
Privacy and security
It is quite unclear what the privacy and security measures are of the Bitdefender VPN service. For instance, it is unclear what encryption is utilized by Bitdefender or what privacy policy Bitdefender uses.
When we checked the terms and conditions, it was stated that the VPN does not forward users’ contact data or internet data to third parties.
But it is unclear to us whether users’ internet usage logs are stored. However, for the sake of simplicity, we assume that Bitdefender VPN does not keep logs.
As a service that guarantees the privacy of its users, we believe that this information must be transparent. This applies both to openness in the encryption that is used and openness in the logging policy that is used.
The fact that Bitdefender does not do this ensures that low points are scored in this review.
Bitdefender is available for all known operating systems most especially Windows OS. If you want to use Bitdefender VPN on other devices, such as a router, it is not possible despite the OpenVPN protocol that is used.
The necessary data to set up a connection with the Bitdefender OpenVPN servers is missing; hence, it is advisable to get the Bitdefender Box to secure these devices.
Installing BitdefenderVPN is simple when you install it on its own or install any BitDefender package; the VPN functionality is automatically added.
Windows Installation
If you are an existing Bitdefender customer, the appearance of the software will not be unknown to you. In the main screen, you can choose privacy on the left side.
In that overview, there is then the option to select VPN. Meanwhile, if you use either the free or premium VPN, you have the option of connecting to any VPN on the server list.
In the Bitdefender settings screen, you also have the option to automatically start the VPN connection when Windows starts up. This is an easy and convenient option.
Bitdefender Premium VPN Pricing
The free version of Bitdefender VPN can be used if you have a subscription to a Bitdefender software package such as Bitdefender Total Security suite.
However, there are many restrictions applied to this free VPN. Hence, you do not have a free server choice in the free version.
In addition, there is also a 200MB data limit. This data limit is virtually unworkable, as it is easily consumed when browsing.
The free version of Bitdefender VPN is sufficient if you want to use it, for example, to check your mail at the airport or for safe internet banking.
To access Bitdefender premium VPN package you will need to upgrade to an extra package. The price for using the VPN servers is in itself very reasonable.
It is true that you have already paid for other features in the main package of Bitdefender; hence, if you need only the VPN service, then this is a costly service.
At the time of writing, the extra costs for the Premium VPN package are $ 49.99 every 12 months. But due to the cost of the Bitdefender package, you pay at least $ 73.98. This is still a reasonable price for a total security package.
Bitdefender VPN and geo-restricted sites
Sometimes, people want to stream media, watch online TV/radio, play online games, and even browse on some websites but they get restricted.
This may be due to geo-restrictions locks placed by the website owners. However, the only way to bypass this restriction is by using a VPN.
For example, it is not possible to watch the American version of Netflix in the Netherlands normally but with a VPN, you can easily spoof your location.
Because Netflix is trying to block VPN connections, it is always important to know whether your chosen VPN provider can indeed unblock access to the American version of Netflix.
Bitdefender can bypass imposed geo-restrictions on such major streaming sites.
Bitdefender is still just starting up which is seen in the number of servers offered and their server speed. The cost of upgrading to the service is high considering the features they currently offer.
You are still obliged to purchase other Bitdefender suite packages before you can use the VPN services.
However, it is still a good service to use if you have an existing BitDefender subscription and want more privacy and anonymous browsing.
Valheim is an incredible fast-trending survival game with a 95% approval rate on Steam which is great for an early access title.
But we can see how that can happen because the gameplay is great and the graphics helps a lot too.
However, like any other starting game out there, Valheim came with its share of bugs and one of them is that users’ games are not saving after logging out and that translates into hours of lost play.
I’m not sure why but whenever I log out of Valheim my game does not save. It goes to a black screen and does not do anything.
When on the black screen it shows that I am still in the game and I’ll still get the notifications that I can eat more and other related alerts.
The only fix for this for me is to go into cheat mode and manually save. Does anyone have a fix for this problem? I lose many gameplay hours because of this issue.
The Valheim not saving error is really frustrating because sometimes you spend a lot of time and effort to get a special item only to find out in the next session that all was for nothing.
So, it seems that this issue mostly occurs in single-player mode when you are offline. When you play online, the game server saves the state periodically.
There is no official fix for this issue yet, but we have found a few solutions that can get you over this problem until the next update.
How can I fix the Valheim not saving problem?
1. Save the game from your console
Press F5 to open up the game console.
Type save (all lower case letters) and press Enter.
That will save your game so do that before logging out.
That’s it! Next time you open your game you will have your progress saved but you need to remember to do that every time before logging out.
Navigate to the following folder: C:/Users/Username/AppData/LocalLow/IronGate/Valheim/characters
Locate the charactername.fch.old file (replace charactername with the actual name of the character).
Right-click the file and select Properties.
Uncheck the read-only attribute and click OK.
It seems that this problem is caused by the fact that a file named charactername.fch.old (replace charactername with your actual character name) somehow gets the read-only attribute.
This means that the game cannot overwrite it with new data and that’s why your game is not being saved. The solution is to remove the read-only attribute from the file.
However, this trick doesn’t work every time because some users complained that the read-only attribute comes back after a while.
Unfortunately, this is by far not the only Valheim bug out there. For instance, many gamers complained about screen shaking but you can fix that issue easily.
You should also consider installing the latest Valheim mod that can fix a lot of other issues with the game.
Buggy or not, Valheim is among the top 5 most popular games in Steam so a few issues won’t stop you. Anyway, it would be excellent to have an official copy by hitting the button below.
Valheim
Valheim is one of the most popular games on Steam so get on with this incredible survival adventure.
Have you succeeded in fixing your Valheim not saving issue using our solutions? Do you have any other tweaks that can also help other fellow games? Leave us a comment in the section below.
Roundcube is a free and open-source solution for webmail that is based on a desktop-like interface. Unfortunately, many users reported Roundcube connection to storageserverfailedmessage.
What does connection to storageserverfailed mean?
This error message is related to Dovecot, and if you see it, it means that Dovecot isn’t running on the server.
However, this issue can be resolved by using one of the solutions bellow.
How can I fix Roundcube connection to storage server failed error?
This solution is useful if the index files are for older versions of this software. As a result, they don’t work together with new Dovecot versions.
This solutions can come in handy if you’ve updated Dovecot recently and you are encountering issues.
After deleting all Dovecot index files, the software will notice they are missing, and create them again. Before doing anything, be sure to create a backup.
This is a simple solution, and it should help you with Connection to storage serverfailed in Roundcube on Ubuntu.
2. Add commands to Dovecot’s .conf file
Locate the following file: /etc/dovecot/dovecot.conf
Add the following lines: mail_max_userip_connections = 15 remote 127.0.0.1 { mail_max_userip_connections = 40>; }
You must apply this solution if Dovecot has reached his per-IP limit. You will be able to recognize this situation if you receive the following message:
imap-login: Maximum number of connections from user+IP exceeded (mail_max_userip_connections=10)
Try this solution if you encounter Roundcube connection to storage serverfailed error in Debian.
3. Increase imap process limit
Edit the following file: /etc/dovecot.conf
Navigate to the section service imap-login{
Set a higher limit in that section.
You will view the following error message that requires to use this solution and increase the imap process limit:
master: Warning: service(imap-login): process_limit (100) reached, client connections are being dropped
After making these changes, check if the Roundcube connection to storage server failed message is gone.
4. Verify logs
Verify Apache logs
You must search for the following lines that show the error:
Ensure that you have the following command: dovecot=1
Run the following commands: cd /usr/local/directadmin/custombuild ./build todovecot /etc/init.d/directadmin restart
If the /etc/virtual/domain.compasswd is not in the right format, this will cause the Roundcube connection to storage server failed error. This file should have 7 columns that are separated by colons.
When you notice the /etc/virtual/domain.compasswd file has only 2 columns and 1 colon, it will be necessary to input the ./buildtodovecot command.
Roundcube connection to storage serverfailedis an error related to Dovecot, but hopefully, you should be able to fix it with our solutions.
Did you find a solution on your own? If so, feel free to share it with us in the comments section.
CyberGhost is a highly reliable VPN service that gives you an easy way to hide your internet activity and personal information.
It is a well-known provider that offers different subscription plans, perfectly tailored to cater to every audience, from long-term commitment seekers (we are talking about the 3-year ultra-advantageous plan) to a 1-month subscription.
One thing is for sure though, all editions of CyberGhost offer VPN ultra-fast servers without bandwidth limitations.
CyberGhost isn’t exactly a small VPN provider, as of 2017 they have over ten million users. Also, the VPN service supports Android, iOS, Mac OS, and Windows devices. But routers, gaming consoled, and smart TVs are not to be left out either.
Unlike other VPN clients, CyberGhost does not ban P2P sharing on its servers. When it comes to torrenting, P2P, and streaming, it’s hard to get your hands on a more performant tool to access geo-restricted content and unblock websites, streaming services, gaming, and more.
Why do I need a VPN like CyberGhost?
There are many ways you can make use of a reliable VPN service like Cyber Ghost. Below are some of the major advantages of using a VPN service.
1. Enhanced Security
Typically, people turn to VPN services as a way to use the internet in a safe matter. In other words, encrypted VPN servers will prevent prying eyes from stealing your personal information, bank account number, passwords, etc.
Your computer is especially vulnerable to hackers when you use WiFi at an airport, coffee shop, etc. WiFi in public areas tends to have poor security, allowing hackers to hijack your PC and steal valuable information.
Speaking of Wi-Fi security, we have a dedicated article on how to protect your computer when using public Wi-Fi. Check it out and apply the recommendations listed there.
However, a VPN service is a great tool to ward off hackers. And CyberGhost is one of the best services on the market to provide this type of protection. The reason behind this is that the company offers some of the best encryption technologies a VPN service can provide.
All subscription plans from this provider offer AES 256-bit level of encryption, which means that you do not have to worry about hackers when transferring or downloading sensitive personal or business information.
CyberGhost VPN
Enhanced security, supreme privacy, and unlimited entertainment, that’s what you get with Cyberghost!
Geo-targeting delivers advertisements or content on a website or program based on the user’s location. Take, for example, Netflix, the movie streaming application, it shows different content based on which country you are in.
For instance, Netflix users in the United States may have more content than Netflix users in China. However, if you use a VPN service like CyberGhost, you can access Netflix content from any country as long as the provider has servers there.
This feature does not just work for Netflix. Some websites like Facebook and Google are blocked in countries like China. However, if you use a VPN, then you can bypass these location restrictions.
There are certain types of VPN services that are specifically built for gamers. A VPN can reduce ping, which in turn improves reaction time, by avoiding congested pathways to the server of the game you are playing.
If a game does not have servers located in your area, then you most likely will want to get a VPN.
A good VPN provider like CyberGhost can literally make a previously unplayable online game, playable. We recommend CyberGhost because they are well known to be one of the fastest providers available.
4. Unlimited Bandwidth
Unlimited bandwidth means that you can upload or download as much data or information as you want on a VPN server, at any given period of time.
Now not all VPN services provide unlimited bandwidth. But all plan types from CyberGhost do.
Why choose CyberGhost over other VPN providers?
CyberGhost provides everything you need in a VPN, including top-of-the-line security, numerous servers, and reduced ping. While the interface is fairly basic, there are advanced options that will satisfy more experienced users.
If you have little or no experience with VPN servers, you can always start by using one of the free-trial servers. Once you get an idea of how beneficial a CyberGhost VPN service can be, you can move on to a more complex plan.
If you decide to upgrade, you will be glad to know that CyberGhost offers highly competitive pricing, especially if you purchase a three-year plan at once. You can refer to the picture below to see how much the premium subscription costs.
What are the differences between the plans from CyberGhost?
There are 4 different types of plans offered by CyberGhost, starting with 1 month up until a 3-year subscription. The information below will help give you a better idea of the differences between each version.
All billing plans include great VPN features such as access to over 6479 servers spread across 90+ countries worldwide, ultra-fast speeds, and unlimited bandwidth that guarantees to take buffering out of the picture.
Moreover, all editions have a great advantage allowing you to protect up to 7 devices simultaneously with just 1 subscription. Of course, excellent, 24/7 live support is available for all users at all times.
However, if you want to get more bang for your buck, the 3-year plan grants the biggest savings and is fully refundable for 45 days.
Unlike its competitors, CyberGhost offers a whopping 45-day money-back guarantee to allow you to thoroughly test the VPN’s features and be 100% convinced this is the right VPN for you.
That is how sure they are that they’re on to a great product, and we couldn’t agree more.
Cyberghost VPN compatibility
Cyberghost VPN is compatible with the following Windows versions:
Windows Vista
Windows 7
Windows 8.1
All Windows 10 versions
It is worth mentioning this tool comes with a series of pre-configured profiles that are fully optimized for most usage scenarios.
For example, if you’re in a hurry, you can select the streaming or downloading mode, and the VPN will automatically take care of the rest.
If you are looking for the best VPN service without bandwidth limits, unrivaled fast servers, and high-end encryption, then we highly recommend CyberGhost.
It has several features that set it apart from other providers. In addition, they have a great support system and versatile plans. What’s there not to like?
At Microsoft’s Ignite 2021 yesterday, the company announced that its enterprise level tool Power Automate Desktop is now free for all Windows 10. Power Automate Desktop is what Microsoft defines as an “attended Robotic Process Automation” solution which is a macro recorder on steroids. It comes with 370 prebuilt actions that help you build flows across different applications and the best part is that it enables you to build your own scripts to automate time consuming repetitive tasks which saves time and money.
Last September, Microsoft launched Power Automate Desktop based off Softomotive technologies which the company acquired back in early 2020. Since, the acquisition Microsoft has extended the technology and deeply integrated it into its own stack.
Those who want to give Power Automate Desktop a try can download the tool from Microsoft in the coming weeks under Microsoft Insider Builds for Windows 10 first. Then, eventually it will be generally rolled out to Windows 10 built in, all the way to the standard cheaper Windows Home version. Until now, a license per user for the tool would typically set you back at least $15 per month.
“We’ve had this mission of wanting to go democratize development for everybody with the Power Platform,” Charles Lamanna, the CVP of Power Platform engineering at Microsoft, told me. “And that means, of course, making products which are accessible to anybody — and that’s what no-code/low-code is all about, whether it’s building applications with Power Apps or automating with Power Automate. But another big part of that is just, how do you also expand the imagination of a typical PC user to make them believe they can be a developer?”
This move Microsoft has made which Lamanna believes reduces the licensing friction and sends a message to Windows users that they can build bots and automate tasks as well.
““The way we’ve designed it — and the experience we have, particularly around the recording abilities like a macro recorder — makes it so you don’t have to think about for loops or what is this app I’m clicking on or this text box — you can just record it and run it,” he said.”
Learn more about the now free Power Automate for Windows 10 here and let us know what you think about this move from Microsoft making Power Automate Desktop free for users in the comment section below!
Last month, Microsoft announced Viva, the company’s new employee experience platform that leverages Teams and other Microsoft 365 services. The company detailed four modules in preview, including Viva Insights, Viva Learning, Viva Topics, and Viva Connections. However, at launch, Viva Topics was the only module that became generally available for customers.
Now, Viva Connections is another Viva module that will hit general availability later this month. This means that it will now be available to customers as an add-on to their existing Microsoft 365 and SharePoint plans at no additional costs. Microsoft believes that Viva Connections is “a gateway to your digital workplace,” and it lets employees see a curated list of content from their company.
“Microsoft Viva Connections, one of the four Viva modules, is your gateway to a modern employee experience. It is personalized and appears in the apps and devices your employees already use every day, such as Microsoft Teams. Viva Connections provides a curated, company-branded experience that brings together relevant news, conversations, and other resources,” the company explained.
While the Teams desktop update for Viva Connections has begun rolling out this week, but the company noted that mobile users would need to wait a bit more to receive it. The mobile experience is still in the works, and it’s coming this summer. Meanwhile, Microsoft plans to release a summer update to enhance the desktop experience, focusing on IT admins and deployment improvements.
If you’re interested to learn more about this module, you can check the dedicated “Introducing Microsoft Viva Connections” session out. Additional details about Microsoft 365 and SharePoint licensing options are available on this page.
Aukey is a brand that is known for its chargers, dongles, cables, and more, but after my review of the Aukey EP-T32 Wireless Earbuds a few weeks ago, the company proceeded to send me the EP-N7 for review, too. Catered for more day-to-day use rather than sports and fitness, Aukey’s latest earbuds are a nice alternative to Apple’s AirPods. And, best of all, at $65, these earbuds are budget-friendly and won’t break the bank.
Charging case and battery life
As usual, I’ll begin by mentioning the charging case as well as the battery life for these earbuds. Unlike the EP-T32 Wireless Earbuds, the case with the EP-N7 is a lot more compact. It manages to fit in the palm of my hand and is even smaller than Apple’s own AirPods case. The case itself also has a brushed plastic feel, which is pretty cool as it makes it feel a bit more premium. I easily slid the case into my jeans pocket when I went for a daily walk.
The pairing is the same as all other Aukey earbuds. When the earbuds are in the case, and the lid is opened, the earbuds will enter a pairing mode. Taken out, it will connect to the last paired device. The earbuds can be powered off at any time by holding on the touch controls and putting them back in the case. Again, it is pretty seamless, but you only can pair the earbuds to one device at a time. Bluetooth will need to be turned off on one device if you want to hand it off to another.
Now, for the battery life. Aukey promises up to 25 hours of battery life when on the go. After wearing the earbuds when editing our OnPodcast podcast, watching it the next day, and then while working the following day, I estimate that the battery is a little bit closer to 20 hours.
Battery life is not too much of a hassle, though, as the EP-T7 sports support for USB-C fast charging. The case can fully be recharged in 1.5 hours. There is no wireless charging, however, which is a bit of a letdown. It reminds me of the original AirPods, which didn’t have wireless charging on board.
As for what’s included in the box, you get three different size ear tips, as well as a short USB-C cable, and an instruction manual. I’ll have more on the tips later. But keep in mind that the earbuds fit snugly in the case, just as Apple’s AirPods do. There are magnets to pull the buds into place, keeping them snug in the case and at home when you’re not using them.
The fit, the sound, the noise cancellation
But what about the fit? These earbuds are, overall, quite light and comfy. That means the EP-T7 is easy to fit in your ears, without “dragging down.” or causing discomfort. I was able to keep the Aukey in my ears for my close to 5-hour workday without having to constantly adjust or move the earbuds around.
Visually, the stem of the Aukeys are black, and are small in length, giving it a slim profile when in your ear. There are also three sizes of silicone ear tips (small, medium, and large) to pick from. I choose the small ear tips, which create a more solid seal to my ears to keep out the outside noise. I loaned the earbuds to my mother for some photos for my review, and she also preferred the smaller tips, too. I think a smaller tip creates a better seal for optimum noise cancellation, as I’ll get into next.
Regardless of which tips you choose, the sound quality is great. Of course, it won’t be on the same level as AirPods, but for the $65 price, the EP-N7 does not disappoint. Aukey is using 8mm titanium dynamic drivers with AAC/SBC audio coding technology onboard the EP-N7. These are the same as what you find in their other earbuds, but I do think the quality is noticeably better on the EP-N7 than on other Aukey products.
The increase in audio quality is thanks to the hybrid active noise cancellation on board the earbuds, as well as the tight seal with the small ear tips. The tech behind this means the two microphones are able to work together to give you the best audio quality. Basically, the external and internal noise cancellation microphones work in combo to cancel out up to 35DB of ambient noise, according to Aukey. The microphones also work with a transparency mode, too.
To test active noise cancellation, I was sitting in the room with my parents while they were watching TV. The EP-N7 managed to cancel out the noise from the TV in the background, as well as their ongoing conversation, keeping me in my musical vibes.
And, when I was ready to switch back to paying attention to them, I tapped the earbuds to activate the Transparency Mode, which allowed me to join back in the conversation while still listening to the music. It’s very reminiscent of what I usually do with my AirPods, where you don’t need to take off the earbuds to have a conversation.
In testing the microphone quality, I gave my friend in Los Angeles a Facetime call. Normally, I’d use my AirPods for such calls. She noticed no difference in my voice, telling me it sounded like I was in the room with her. I just think it’s a shame I could not control the volume with the earbuds. I needed to constantly reach down to the phone to change the volume.
But, overall, in my audio tests, I really enjoyed how the Aukeys are able to make rock music sound great. I noticed a slight elevation in the vocals of ACDC’s Back in Black. In other songs, the earbuds balanced out treble and bass, though the mids aren’t as great. I noticed this when listening to Tyla Yaweh’s All the Smoke. I still think that if you like balanced music, then the EP-N7 will work well for you.
A final note here comes on the IPX5 rating. Aukey promises that IPX5 water resistance protects against sweat and rain. I didn’t test these in the rain or when working out, as the pandemic limits my travel, but knowing that the EP-T32 wireless earbuds also sport the same resistance, it’s reassuring.
The touch controls
To end my review, I’ll touch on the touch controls of the EP-N7. The controls are very reminiscent of what you get with Apple’s AirPods. You can tap or pause on either earbud to play or pause music. Double-tap the left earbud to go to the previous track, double-tap the right earbud to go to the next track. You also can answer or end calls by tapping either earbud or triple tap the earbud to get to your voice assistant of choice.
Overall, the controls are simple. It helps that there’s a round touchpad on the earbud, too. This makes it clear where you need to touch to accomplish your task. I just wish the touchpads had volume control, like Microsoft’s Surface Earbuds.
Enter our giveaway!
Overall, the Aukey EP-N7 is solid and will offer you a solid alternative to AirPods. The earbuds produce good sound for the price, the battery life is decent, and there’s great active and passive noise cancellation. Just keep in mind there’s no aptX codec support, and no volume touch controls, and no wireless charging. You’ll have to spend more on more premium earbuds for this.
If you’re seeing the error code 4c7 inside Microsoft Teams, you are not the only one experiencing this issue. A wide range of users with different setups has complained about seeing this error.
The problem is caused by users trying to sign in to Microsoft Teams from a corporate network where Active Directory Federation Services (ADFS) is running.
This will not allow you to log in, and will also display the follwoing error message:
Modern authentication failed here, but you’ll still be able to sign in. Your status code is 4c7.
This setting is not enabled by default for deploying ADFS on the Intranet, so it needs to be activated manually. Read on to find out exactly what to do to activate it.
How can I fix the 4c7 error in Microsoft Teams?
1. Enable Forms Authentication
Open the ADFS Microsoft Management Console.
Click the Authentication Policies option found inside the panel to the left of your screen.
Under the Actions section, select Edit Global Primary Authentication from the right-side menu.
Click on the Intranet tab, and choose Forms Authentication.
Select Ok to apply the settings.
To solve this issue once and for all, you will need to enable Forms Authentication by using the ADFS Microsoft Management Console (MMC).
You can find this snap-in on the computer where the local Active Directory is located.
Plus, you can always have the alternative in mind. Take a closer look at our dedicated guide to the best collaboration software for small businesses, and find the right one for your needs.
Navigate to Settings, and search for Microsoft Teams.
Activate it for user types, and click Save.
Microsoft Teams is part of the Microsoft Office 365 suite and is intended for team collaboration of members. Of course, companies have control over the applications that are offered to employees.
Therefore, when you see the 4c7 error code in Microsoft Teams, it is good to check if Teams was accidentally disabled.
In this quick fix article, we explored the best way to deal with the Modern authentication failed here, but you’ll still be able to sign in. Your status code is 4c7error message inside Microsoft Teams.
We hope that this guide managed to solve your problem and that now you can log into your Microsoft Teams account without any issues.
Please feel free to let us know if you found this guide helpful. You can do so by leaving a comment in the section found below this article.
After about eighteen hours of confusion, we’re finally getting the real story behind what Microsoft’s latest visual update to its app store represents. Midday yesterday the Twitter handle @Alumia_Italia posted a gif that showed a visually improved version of the Update settings area in the Microsoft app store which included a new pinned icon, improved cursor highlights, new drop-down menus, a progression circle, and a secondary compact viewing option of the store as well.
For an app that’s seen incremental improvement over the past two years, the visual improvements have understandably been seen as a big deal, to the point of being misidentified as an entirely new effort from Microsoft.
The internet ran with the theory that, ahead of the long rumored ‘Sun Valley’ visual refreshed expected in the Fall, Microsoft would also be extending its redesign efforts to building an entirely new app store experience. The theory that Microsoft would introduce a new app Store to coincide with its reported ‘Sun Valley’ update was short-lived.
No. A new Microsoft Store app is not rolling out. It's simply an *update* (like we normally release) to the existing Store app in Windows 10 with improvements. The Store now displays the same whatever the size of the window and has an updated progress ring. That's it. https://t.co/INXFROEtHe
Fortunately, Microsoft isn’t tossing the baby out with the bathwater, (I don’t even know how that became a saying) instead, according to vocal Windows Insider Program team member Brandon LeBlanc, it’s merely an update to the current store. LeBlanc’s response to the confusion does downplay some of the visual differences that are very apparent in the gif, but ultimately reinforce the common sense of the Windows team which probably doesn’t want to have to redo a ton of work on its app store that’s both in Windows 10 and its Xbox, especially leading up to a design refresh of its flagship operating system.
— Aggiornamenti Lumia (@ALumia_Italia) March 2, 2021
While LeBlanc reiterates that what people were reporting on is only a minor update to the Store, it should be pointed out that many if not most have yet to actually receive or test this latest iteration of the app Store. In fact, he adds an addendum to his earlier clarification by explaining that it’s rolling out and “It’s a normal update to Store with some improvements…”
The update is on Dev channel, but not offered to all Dev insiders yet. I call it a staggered flight ????
— Aggiornamenti Lumia (@ALumia_Italia) March 2, 2021
For anyone interested in getting some hands-on time with the new look and feel of the Updates Settings in the Store, @ALumia_Italia footnotes that it’s an update on the Dev channel of the Windows 10 Insider program is not being offered to all Dev Insiders but is being held as a staggered rollout. So, if enroll your device into the Dev Insider channel and cross your fingers basically. LeBlanc does not mention that it’s a test of any sort, so seems eventually this minor update should hit all devices at some point.
Lenovo announced its ThinkPad X1 Fold over a year and a half ago, and since then, nothing meaningful has occurred in the space. Sadly, Microsoft abandoned the sector of foldable screen support with its famed Windows 10 X being put on ice, and as much as partners such as Lenovo tried to accommodate the absence with its own patchwork digital services, foldable screen interest has reduced to a simmer of its former interest level.
Unfortunately, Lenovo was either saddled with excess hardware or didn’t get the industry memo that full-scale foldable workstations are taking a hiatus for now. Yet here we are with the ThinkPad X1 Fold, and while I think in many ways the hardware is ahead of its time, without the software layer in place, reviewing this device was a disjointed experience.
Design
Starting at $2,499 and $2,749 for the review unit I tested, the Lenovo ThinkPad X1 Fold is admittedly a niche device aimed at seeding the market for lower-cost alternatives in the future. With that being said, every dollar spent is reflected in the design, materials, and architecture that went into completing the Fold’s final offering. Despite experimenting with temperamental OLED display technology, the X1 Fold feels every bit as sturdy, reliable, and environmentally tested as any other ThinkPad device. In most ways, the X1 feels sturdier than a Microsoft Surface Pro, even when the keyboard cover is attached, and that’s thanks in large part to its casing. The outer portions of the X1 Fold are a thicker plastic material covered in what I think is faux leather. The leather could be real, and that might account for the extra nickels and dimes added to the final purchasing price.
The leather covering acts as a flexible skin for the X1 Fold which slides in and out of place when the device is folded or not. In addition to being a single slab of protection for the Fold, the leather cover also doubles as a built-in kickstand. About one-seventh of the leather protector folds outward to help prop up the X1 Fold in a semi-horizontal orientation. The integrated design takes what Microsoft did with the Surface Pro one step further. Instead of having to attach a secondary cover to protect the screen as well as engineer another mechanical moving part, Lenovo combined both functions into a slick single point of user friction. Unfortunately, the X1 Fold’s origami only works in landscape or vertical orientations, when in vertical perspectives, users are reliant on the folding of the screen to prop up portions of their view.
In 2021, screens are increasingly becoming bezel-less but the X1 Fold leans hard into its bezels, almost flagrantly. However, when holding the device, it’s apparent why the bezels remain. In addition to almost cartoonish bezels at this point, Lenovo also coated the X1 Fold’s in a rubberized foam-like material that helps users firmly keep a grip on the 2.2lb tablet computer while also protecting the screen from smacking itself when it’s folded onto itself or dropped, both potential situations further highlight the foresight and attention paid to the X1 Fold’s hardware.
On the outer brim of the device are the power button, volume rocker, and two USB-C ports that sit catacorner to one another towards the bottom right corner of the device. According to Lenovo, both USB-Cs can push 10Gbps and one can be used as a display portal to connect to the X1 Fold to a second monitor. Aside from the gen 2 USB-C 3.2 ports, the X1 Fold sacrifices connectivity for portability. There are no other ports, and the placement of the current I/O really discourages the use of dongles to extend connectivity.
Keyboard
I wanted to review this separately from the main hardware of the Lenovo X1 Fold because, well, it’s its own engineering marvel. While it’s a bit cramped for how I’m accustomed to using a keyboard, the fact that it connects through Bluetooth rather than pogo pins is something that should be standard in 2021 for detachable PCs. I get that introducing Bluetooth connectivity introduces another failure point, but having used several Surface Pro keyboards, having a pogo pin setup isn’t always a guaranteed experience either. Lenovo list the keyboard on its site as the optional: Lenovo Fold Mini Keyboard, but just like the Surface Pro, it’s implicitly needed and comes in the box thankfully.
Once again, Lenovo flexes its engineering prowess by subtly adding magnetic connectors to the bezel of the X1 Folds screen that helps secure the keyboard in place when tucked into the folded device. The entire carrying setup of the X1 Fold is seamless and intuitive. Furthermore, the keyboard becomes ultra-handy when touch typing becomes exhaustive. In the L-shape fold of the X1 Fold, you can split the screen between a 9.7-inch viewable area and a 9.7-inch typing experience. Some people can make use of the onscreen keyboard but with some of the software glitches that come with this version of Windows 10 on the Fold, it’s just more convenient to toss the keyboard on the screen and begin typing. When a user is done with the keyboard just leave it on top of the screen and fold the X1 around it and everything fits nice and snug in place. My only complaint is that the keyboard uses a micro-USB as a port for connecting power.
The disjointed charging experience is noticeable upon the first charging session. The computer portion of the X1 Fold uses USB-C while users need to scrounge around for a micro-USB to charge the keyboard. One last note about the keyboard is that unlike the Surface Pro, it can’t be positioned beyond a flat 180 degrees, so lap typing or typing on anything other than a completely flat surface is practically out of the question.
Hardware
The Lenovo X1 Fold comes with configurations of up to 1TB PCIe M.2. SSD storage is great for quickly uploading files if you can find a USB-A to USB-C converter. There is also an 8GB LPDDR4X 4267MHz memory that comes equipped. Sadly, due to some software issues, I’ll talk about shortly, every bit of that 8GB crawls on the X1 Fold. Intel chucked a Core i5-L16G7 chip into the X1 Fold capable of up to 3.00 GHz Turbo Boost with 5 cores, 5 threads, and 4MB Cache as well as integrated graphics. The battery on the X1 Fold is about average for a detachable device. Lenovo claims up to 10.4 hours of battery use when testing video playback and while that might be true, I was getting 6 hours steadily for regular computer use. Thankfully, there is a 50Wh battery in the device as well as Rapid Charge Technology onboard.
As for the guest of honor, the screen, Lenovo uses a 13.3-inch QXGA foldable 2K OLED, DCI-P3 95% touch, and pen-enabled panel that can push upwards of three hundred nits of brightness. It’s not the brightest panel in 2021 or even in 2019 when it was first engineered but it gets the job done and does it looking like a normal screen when it’s fully unfolded. Perhaps, because of its foldability, the screen does not feel like normal glass to the touch but instead a smooth plastic and it becomes further pronounced when the device is folded and the crease in the middle is visible.
Experience
The actual hardware experience of the X1 Fold is the most intuitive of all detachable or foldable devices in the market, in large part due to its chunky book-like design. The feel in the hand is very reminiscent of a leather-bound book that invites the folding and unfolding of the device. Closing the X1 Fold also comes with a muffled but satisfying click when the two magnet points on opposite bezels connect. Opening and closing the X1 Fold is a treat amongst itself and could constitute a stress-relieving activity (albeit an expensive one) thanks to the smooth hinge process that allows for a measured fold and unfold experience each time. I’m not sure how the folding mechanism would hold over time, but I did a cursory fold test of over three hundred folds in a single sitting and the device responded the same throughout the process.
Speaking of the X1 Fold’s folding experience, it began and ended with opening and closing the device for me. Other reviewers were able to persevere operating the device in an almost seated-L position to get work done, but the crease obscured too much of the viewing for me to concentrate on my work. I found myself simply opening the device-wide to take full advantage of the 13.3-inch screen. I understand the selling point is the folding nature of the screen, but nothing in Windows really takes advantage of that mechanism and in practice, it really only served as a neat new way to condense my workstation.
While it may seem like a negative, having the X1 Fold unfurled in all of its 13.3-inch glory also worked in forcing me to use Windows 10 in tablet mode often. When I wasn’t banging out articles, triage emails, or writing ad copy, I found myself using the Fold in tablet mode 80 percent of the time. Which was a newish experience for me, even coming from a Surface Pro 7 Plus. While it’s not the lightest tablet-PC on the market, the leather on the back feels more inviting to the touch than other alternatives, and being able to quickly snap it close without having to scurry for a keyboard cover just reinforced my tablet use of the device.
However, that’s where things mostly fell apart for me.
I’m not sure who to assign blame here, so I won’t, but the Windows 10 experience on the Fold is janky at best and often unusable at worst. Rotation recognition on the X1 Fold is spotty and slow which means that if you found a position to consume media in, don’t lose it because there is a decent chance you may need to restart the device to get back to that orientation. If you’re not fighting the gyroscope, you might numb your fingers double and triple pressing touch points on the screen because they’re registering a touch. A quick but risky fix for the lack of touch response in a particular app could be rotating the app to place the touchpoint in a spot the screen is recognizing at the time, but we know how that could end.
More disappointing than some software glitches with Windows 10 is that Microsoft doesn’t seem to be working on its tablet-mode at all. As an Insider, I could weather the development storm of a broken tablet experience if I had some assurance that a solution is in the works. The X1 Fold was designed specifically with Microsoft’s original dual-screen Windows 10X vision in mind but the software company, unfortunately, pulled the rug from underneath its partner. Worse yet, it’s retooling that Windows 10 X for a single screen experience going forward which ostensibly obsoletes the X1 Fold out of the box. Lenovo attempts to cover up the lack of Windows 10X with its own mode-identifying software that will float windows to the middle of the screen and allow a user to toss it to one of the corners in the desktop. However, Windows 10 tablet mode relies heavily on a vertical split-screen paradigm when windowing. For a device that folds in the middle, Microsoft needs to rethink windowing as well as the gestures of the operating system when touch is the primary interface.
Thankfully, touch and type aren’t the only inputs. Lenovo includes a pen with the X1 Fold that has a better registration rate on the screen, so I found myself navigating the OS mostly with a pen that I had to remind myself not to bite as I fidgeted during work hours.
Summary
The technology behind the folding aspect of the X1 Fold is fascinating, but actual productivity from this device is middling, especially for its price. At close to $3,000, users are paying a $1,500 premium for the convenience of being able to fold up their laptops in a semi-new way. With only 8GB and a Core i5 chip, it’s not meant to be a workhorse or even a mainstream creativity device for mass adoption. Couple those points with this janky Windows 10 experience, the X1 Fold at best is an engineering reference device.
On the other side, it’s a ThinkPad with a high price tag which means it’s destined for some executive’s desk who might say why don’t we have our company email client outfitted for my shiny new toy. With that being the case, hopefully, the X1 seeds the land for a flourishing batch of foldables in the future. Lenovo is only half of this equation with Microsoft being the other who needs to figure out Windows 10 X or its Sun Valley update. Windows 10 needs to revisit its tablet mode in a major way that addresses the future of intuitive touch-first thin clients that connect to its robust cloud platform. If it doesn’t it could end up watching some other company capitalizing on its early Windows 8 work.
This is a four part piece feature story on my Windows Development journey; the good, bad and ugly. This is the final Part 4 of my Windows development journey which focuses on how Windows app development has changed, and what I would do differently today.
How Windows app development changed
Windows app development has changed from a desktop PC centric environment to a mobile first, cloud first world in the world of global servers and online consumption. Traditional app development has peaked, the most popular app category gaming has peaked, business model has changed on how apps are monetised.
App development models has changed from desktop oriented to some lightweight web based, cloud backend PWA apps that is popularised under Microsoft competitors such as Chromebooks which is now being considered to be part of the “New Windows” under Windows 10X platform. This shift of mobile first and cloud first has accelerated further during covid-19 where quarantines and lockdowns has affected many during the crisis. Therefore, app developers have had to adjust. This is to accommodate the changing ties as well to support the users in different app categories that has shifted from the traditional dominated social media apps and gaming to essential and emergency apps for mostly health, basic needs and vital supplies.
Adjustments were pretty quick in coming. Websites and app developers had taken note and adapted to the changing situation. Such as up to date covid-19 news for students, workers and small business owners making adjustments to changing environment in the workplace. Larger emphasis on e-commerce for online shopping to virtual classrooms in time of lockdowns and quarantines.
The boom in contact tracing apps that has emphasis of the phone, where most users use as a communication and information tool today rather than a Pager device, PDAs or a Pocket PC from 20 years ago. These types of mobile focused apps leaves traditional desktop PCs and tablets in the dust with no mobile first world use. Education apps on the rise due to staying indoors which has been the call of the medical community. Because of this, some schools have chosen to close their doors. This is to due to the amount of socializing involved inside campus.
Fortunately for students, education centric apps have been around for while. Apps like Microsoft Teams for virtual classrooms, Canvas for homework projects etc. have been serving the education sector for a while now. The diversity of learning modes and styles allows for more innovation due to students having different learning styles.
Food and beverage delivery apps has increased in consumption with people staying indoors. Have forced establishments to adjust that depended on foot traffic. Now, that has shifted leading them to create online app services that cater to their customers. Since, stores have now increased priority with online presence. Food delivery demands have allowed some of the more fortunate establishments to survive. Some of the establishments in the market have even grown during the crisis.
The necessity of delivery and logistics industries have allowed industry to survive. With social distancing rules implemented, the necessity of delivery services became more obvious for more people. Utilising delivery apps allow business establishments to even smaller brick mortar retail businesses with shorter hours to stay active for longer. Meaning they can maintain a higher rate of sales compared to physical presence. Peer-to-peer delivery also allows small online businesses to survive. These are businesses that depend on online traffic to make sales.
What I would do differently today with Windows app development
I would focus on creating not only a hobby for myself. I would create a tool that people would mostly likely use in situations such as covid-19 that could have a huge impact on many industries to reverse businesses that were put on hold during the crisis.
Because app developers essentially develop tools. Due to the crisis, people are more dependent and more appreciative on these tools. Be it for their everyday needs or the future of their children.
Have a long term mindset with these apps because the long term effects of these apps mean that their utility does not end with the pandemic. Things under app development will change post covid-19 and would not go back to where it was pre-covid 19.
Windows app developers need to specifically focus on education where it comes at a great responsibility when access to schools is limited for many. To fill that role, Windows app developers have to consider the needs of both students and teachers.
App development model has changed too where data, analytics will play a role in a more inter-connected environment with the world of cloud and servers. This is where web based lightweight apps comes to play such as PWA in harnessing data, people’s behaviour and interaction with the app that is useful for teachers monitoring students, doctors monitoring their patients etc.
Summary
At the end of the day, having a robust application that is data driven, contextually aware, basic in nature and lightweight for the changing data driven web based app world such as PWA. Bring opportunities for new developers with new tools and some tools that mostly stayed the same in native. However, the most fundamental changes of Windows app development, and app development in general is the end users needs whether it is a student, patient, doctor, teacher, worker or parents etc.
This is the area and opportunity as a Windows developer should focus on building tools people need from education to logistics that can have an impact and can change how things are done in changing times under covid-19.
Inspired by my Windows development journey? Learn more about Windows development here. Share your experience with Windows app development in the comments below!
If most of your work is done online and you need to schedule meetings with other people, you really should do yourself and your client a favor — ditch the back and forth emails by using an online calendar or appointment scheduling tool. We promise you that this will make both your lives much easier.
Scheduling software will allow you, your secretary and your associates to view and access the master calendar and schedule time efficiently to meet with your customers and colleagues.
Check out the tools that we have prepared for you because each one has its unique cool features.
SimplyBook.me is an online booking system that works for most service-based industries like beauty salons, fitness centers, consultants, schools, medical centers, and more.
What differentiates SimplyBook.me from other booking systems is that it is based on custom features. So you can pick the custom features that you would like to include in your booking system and then pay accordingly.
The clients, the ones booking the service, will always get sent booking reminders either by email or sms, which will reduce no-shows.
With the system, users can also connect with Facebook, Instagram or Google and thereby add a Book Now button there to allow clients to book an appointment from those channels or even offer the clients to book via a branded mobile app.
It is super easy to manage all bookings and clients. Users can download the admin app, and be notified every time a new booking comes in.
You can see the calendar for the day, access clients, and of course add, change or delete a booking if needed. Here you can see a list of their most popular custom features:
Facebook/Instagram integration
Instagram photo gallery sharing
Google My Business integration
Coupons & Gift cards
Related Resources
Accept payments
Video Meetings
SimplyBook.me
Schedule tasks and manage your time in a more efficient manner with this great productivity tool!
Transwide is a cloud-based solution. It features a suite of integrated modules that offers all the necessary tools for carriers to source, plan, settle, execute, and analyze all kinds of operations.
Transwide’s appointment scheduling app is twSlot and it offers a platform for planning and visibility with loading and unloading activities. It is available as a standalone app or as part of a broader Transwide suite.
Transwide is the ideal option for users who want to automate their transportation and logistics operations and processes with minimum risks and achievable deployment objectives.
Here are its most important features:
It is an excellent tool for scheduling loads, and it’s very user-friendly.
It reduces phone calls to carriers, and it improves tracking.
Its support, implementation, and sales staff have offices in more locations, and they are trusted partners with over 200 companies on four continents.
The tool’s downside as noticed by users involves the fact that the screen changes a bit slowly.
Acuity is a cloud-based appointment scheduling software solution that offers business owners the opportunity to manage their appointments online. The tool is ideal for the needs of small and midsize business and individual professionals.
Its most important and useful features include the following:
It allows users to automate appointment bookings by offering a real time view of their available time.
It can automatically sync calendars according to users’ time zone.
It can send regular alerts and reminders to users about their appointments and schedules.
The scheduling feature of this tool includes customizable intake forms, embeddable calendars, third party application calendar synchronizing, and group scheduling for workshops.
The tool provides a free basic module, and it’s also available as a monthly subscription.
The downside of the tool is the fact that the company plan doesn’t cover a lot of users, so the corporate package is not suitable for businesses with lots of employees. Other users have complained about the lack of an app to go along with the tool because the website seems a bit confusing.
DocMeIn is a cloud-based appointment scheduling solution that is perfect especially for the needs of medical and healthcare service practitioners. The tool is ideal for small and midsize healthcare setups and individual practitioners as well.
Here are its key-features:
The tool provides color-coded calendars and a drag-and-drop interface for managing appointments.
It can schedule recurring appointments at intervals that are defined by the users.
It allows users to configure flexible business hours including breaks and days off.
It reminds customers of pending appointments via SMS, emails, or voice calls.
It lets users automatically recall meeting invitations and enable import or export of data into Microsoft Excel or Google Drive.
The tool offers integration with third-party calendar management solutions including Google Calendar, Microsoft Outlook and more.
Most users who have used the tool appreciated it greatly, and the only minus seems to be the fact that it’s a standalone program so it cannot be integrated into a billing program.
Schedulista is a cloud-based scheduling app that lets users schedule and reschedule appointments online, generate notifications and manage customer information as well.
The most important features of this tool are listed below:
It provides SMS-based reminders.
It allows online payment processing via credit card integration.
Users can customize their working hours, and the software will use this to authorize appointment bookings.
The tool offers social media integration, side-by-side calendar views, data export in CSV format, analytics and reporting and role-based access permissions.
Schedulista provides integration with third-party apps including Microsoft Outlook and Google Calendar.
Users have noticed a few mysterious error messages sometimes, but other than that, the tool turned out to be extremely helpful.
OnSched is also a cloud-based scheduling app that provides users the possibility to book appointments online, to automate marketing campaigns, to capture and segment customers data and engage with their clients by providing custom deals based on usage.
Check out the tool’s essential features below:
It provides SMS and email reminders and also a dashboard for reporting and analytics.
The tool provides automated marketing capabilities that include managing appointment wait lists, multi resource logins and also configuring deals.
The tool offers advanced reporting and analytics capabilities including a suite of standard reports, email digests of daily activities and the ability to create custom visual reports.
The tool is ideal for pros in IT services, massage, car rentals, consulting and healthcare segments.
This is an employee scheduling solution that helps users create, view and edit schedules in real-time. It is accessible from any device including Windows Phone mobile devices.
Here are the key features of the product:
It also features a carousel card view that lets users see schedules in 3D.
It offers one-time and recurring appointments, customizable time scales and automatic reminders.
The tool deploys as a desktop app for ease of installation and upgrade.
The service is perfect for small to midsize businesses that have fewer than 100 employees and that are in any industry.
A downside of the service according to its users is the fact that once you delete something there is no undo button available and this can be quite annoying in case you have made a mistake.
PetalMD Softwareis an online appointment scheduling platform that is best used by small and midsize health care practices of all kinds including hospitals, clinics, and individual departments.
Here are its essential features:
Physicians can offer online booking from their websites, and they can give their patients lots of booking options, and this will result in a reduced number of phone calls.
The tool can sync with the user’s existing EMR to avoid double booking.
The tool sends automated reminders to patients to reduce no-shows.
The tool also provides walk-in appointment management and open slots can be provided in case of last-minute bookings either online or over the phone.
The service is available on a subscription basis, and there’s a fee charged for every appointment booked.
BookSteam – Manage customer and client contact info
BookSteam is an online appointment scheduling tool that provides business and customer-facing functionalities for clients and customers to schedule their appointments online. Businesses can manage these appointments on the backend.
Check out the most important features of this solution:
It creates a custom website for businesses that will show business details, a list of services, client reviews, and a “book now” button for accessing and scheduling appointments.
It allows companies to collect and manage customer and client contact info appointment data and history.
The service uses email and text reminders to keep customers up-to-date and connected, even while they’re on the go.
It allows clients and staff members to receive instant notifications for a scheduled appointment.
Users enjoy using this app and the only minus most of them have found is the fact that they think that customers should be able to book multiple staff in one room instead of separate schedules. You can try the service for free for a month.
Timely is targeted at individual pros and also small to midsize businesses such as hair salons, beauty salons, health clinics, personal trainers, therapists and so on.
Here’s a list of the most useful features of this service:
Users can run their appointment schedules from anywhere.
Users can generate reports and then send notifications and reminders as well.
More features include calendar management allowing users to book and rebook their appointments, manage recurring bookings, and more.
The service provides automated SMS and email reminders.
With this service, you’ll get integration with third-party apps such as Google Calendar, Xero, and more.
The service’s minuses include the following: it doesn’t support calls, it cannot have different times zones for various calendars, and you also have to pay extra cash for text alerts and new appointments.
For businesses providing appointment-based services to their customers, tracking the status of those appointments is vital as it will optimize operations and attract more clients.
Appointment scheduling software will help your business achieve high goals by enabling users to manage reservations, schedule appointments and take bookings.
After browsing through the list of tools above, you can choose whatever tool fits your business’ needs best.
A new app called Alexa for Xbox has been discovered in the Microsoft Store app store. While Microsoft’s Xbox One and Xbox Series X (and S) consoles already have built-in support for the Alexa virtual assistant that allows for basic voice commands for controlling media playback and turning the console on an off, this app appears to bring the full Alexa experience to Xbox users, essentially turning their TV into a giant screen for viewing Alexa-related content.
According to the description and screenshots on the Alexa for Amazon app page, the app will allow users to listen to music and view Smart Camera footage on screen in addition to managing a variety of Alexa tasks such as editing shopping lists, etc.
While the app page is live in the Microsoft Store, the app itself doesn’t appear to have been activated yet as claiming it on the web version of the store didn’t trigger a download on my Xbox Series X console. The Alexa for Xbox app also doesn’t appear to be discoverable on consoles yet either even when searching for its full name. It will likely launch soon though.
Vuzix announced today that their M400 and M4000 smart glasses have now added support for Microsoft Teams video conferencing.
“Microsoft Teams is a widely used video conferencing applications with approximately 115 million average daily users as of October 2020 and a user base that spans a wide array of enterprise market verticals,” Vuzix’s president and chief executive officer said in a statement. “Offering hands-free Microsoft Teams interoperability with our M400 and M4000 Smart Glasses, this implementation will enable Vuzix to address a new and significant segment of enterprise customers that wish to use Microsoft Teams as their platform.”
Vuzix is a company that’s heavily invested in both augmented reality technology and smart glasses hardware. Their M400 and M4000 smart glasses are part of the Longevity Series of products targeted at companies for long-term usage. While impressive, they’re definitely not intended for the casual consumer with the M400 costing $ 1,799.99 and the M4000 going for $2,499.99.
A special webinar focusing on Microsoft Teams integration with Vuzix smart glasses is set for 2:00 PM (ET) tomorrow, March 4th. Those interested can register here.
The LenovoBatteryGaugePackage.dll is a file that will sometimes become the source of an error.
There can be instances when, at the computer startup, the user will receive a message stating LenovoBatteryGaugePackage.dll is missing or not found.
Read the next section and learn how to solve the issues with the LenovoBatteryGaugePackage.dll on your PC.
How can I fix LenovoBatteryGaugePackage.dll is missing error?
1. Uninstall Lenovo Vantage and Lenovo System Interface Foundation
Press Windows key + R to open Run, type in appwiz.cpl, and hit Enter.
In Programs and Features find Lenovo Vantage (LV), and choose Uninstall.
After the process has ended, navigate back to Programs and Features.
Locate Lenovo System Interface and Foundation, and choose Uninstall.
After both Lenovo utilities have uninstalled, restart your computer.
Download Lenovo System Bridge and Lenovo System Update.
Install both utilities and ensure every Lenovo component is fully updated.
Restart the computer again.
These elements are legacy components that have been replaced by the producer with Lenovo System Bridge and Lenovo System Update.
If you have them available in your operating system, this can cause the error LenovoBatteryGaugePackage.dll is missing or not found.
To completely remove certain software, it’s advised to run a PC scan using cleaning software such as CCleaner. The tool will be able to detect and remove any residual files and registry entries.
2. Apply the Lenovo solution
Visit the download section from Lenovo’s website.
Download the Battery Gauge app.
Open it using WinZip.
After extracting the files right-click Fix-Battery_Gauge.bat and select Run as administrator.
Select Yes for granting administrative privileges in the User Account Control (UAC) section.
Apply the fix, restart the computer, and verify if the problem has been solved.
This solution applies if you have installed the Lenovo Vantage Toolbar on your computer, but have not updated it.
As a result, Windows 10 will display the LenovoBatteryGaugePackage.dll error.
In this regard, Lenovo has released a script that must be run with admin access to repair the registry and solve the problem.
3. Restore the DLL file
Most of the time, DLL-related errors can be resolved if you use specialized software, as it’s the safest method.
By choosing repairing tools, you gain ample capacity to find missing DLLs and repair broken ones from your PC.
With a comprehensive scan of your system, dedicated software automatically detects the issues with your system files and replaces them right away with functional ones.
Plus, it will also optimize your operating system with cleaning tools and other useful processes present within the app.
4. Edit permissions
Open File Explorer and navigate to the following location: C:ProgramDataLenovoImControllerPluginsLenovoBatteryGaugePackagex64
Locate and right-click on lenovobatterygaugepackage.dll, and choose Properties.
Choose Security, click Edit, and navigate to the permission screen.
Click Add, type in Everyone in the text box, click OK, and then Apply.
From Permissions for Everyone, select Full Control and then Allow.
Restart the computer and verify if the issue has been solved.
In some instances, a permission issue might prevent some user accounts to access the LenovoBatteryGaugePackage.dll, but after making these changes, the issue should be gone.
5. Update BIOS
Open the browser and navigate to Lenovo’s System Update page.
Locate the Where to download section and click Download tool now.
Enter your Lenovo PC serial number.
Click on System Update and wait for the download to complete.
Open the installer and click Yes when prompted by User Account Control (UAC).
Follow the setup process to complete the installation of the utility.
Install the BIOS update and every other pending update.
Once this setup is over, your computer will restart and the new BIOS version will be installed.
After you have entered your PC’s serial number, the Lenovo utility will identify the specific download for your particular model.
Fixing the LenovoBatteryGaugePackage.dll is missing or not found error is not as hard as you think, and you should be able to do it with our solutions.
If you found a solution that we didn’t mention in our guide, feel free to share it with us in the comments section.
Windows and various applications rely heavily on DLL files to work properly, and one of those files is downloader.dll.
Before we start fixing the issue, let’s familiarize ourselves with the DLL file in question.
What is downloader.dll used for?
Downloader.dll is associated with various applications, and in case you have any issues with this file, those applications won’t be able to run.
However, there’s a way to fix this issue, and if downloader.dll is missing on your PC, just use one of our solutions to fix it.
How can I fix the downloader.dll is missing/not found error?
1. Use a professional third-party software
When you encounter the Program can’t start because downloader.dll is missing from your computer error, this may be the consequence of file corruption.
These types of issues are usually complicated to fix manually, but there’s specialized software that can do that automatically.
2. Update Windows device drivers
Type in Device Manager in the taskbar’s search box and hit Enter.
Choose a category to verify the names of the devices.
Select and right-click on the device that needs an update.
Select Search automatically for updated driver software.
Choose Update driver.
Keep in mind that this method might not be the most effective one, so if you’re having issues with downloader.dll, it’s usually better to use a specialized software.
Type in Command Prompt in taskbar box, and right-click on the result.
Select Run as administrator and type in sfc / scannow
Hit Enter and wait until the scanning process has ended.
After you have performed these steps, you will be notified that Windows Resource Protection found corrupt files and successfully repaired them.
Otherwise, you will receive the message Windows Resource Protection found corrupt files but was unable to fix some of them.
The System File Checker is able to fix integrity errors only for those files that are not in use by Windows.
To scan those files already in use, you must perform some additional steps.
Scan files already in use
Press the Windows key, choose Settings, and then Update & Security.
Select Recovery, navigate to Advanced startup and click Restart Now.
Close Command Prompt and restart the computer.
After performing the scan, check if the problem with downloader.dll is gone.
4. Use System Restore
Press Windows key + R to launch Run, and type in rstrui.
Click OK, select Choose a different restore point, and click Next.
Check the box from Select more restore points for the list with dates.
Choose a date to restore Windows 10, click Next and then Finish.
When you will choose a date, be careful to select one before the downloader.dll error appeared. After you have followed these steps, your computer will restart.
After rebooting with the restored version of your operating system, Program can’t start because downloader.dll is missing from your computer error should be gone.
When you encounter the error about the download.dll file, there are several tested solutions that can fix it.
Be sure to try all of our solutions, and let us know which one worked for you.
Using a VPN has been proven to eliminate or at least curb privacy issues when we go online. A VPN creates a secure tunnel that all your traffic is routed through.
However, sometimes even foolproof solutions such as VPN can fail. Even the best corporate VPNs are flawed.
For instance, an alarming number of users complain that Edge, the popular net browser signed by Microsoft, suddenly stops working when using a VPN.
The issue seems to arise most often on Windows 10, but Windows 11 users also experience it.
In the following sections, we’re going to see what can be done in this situation. But first, you have to make sure of the following:
ExpressVPN is an excellent VPN service that passed all of our tests with flying colours. In case you can’t make Microsoft Edge connect to the Internet while using a VPN, try giving ExpressVPN a try. We experienced no such issue and we bet you won’t, either.
Not only it doesn’t trigger errors, but it also provides you with an unmatched level of security and privacy, offers high-speed servers, and can unblock a broad variety of geo-restricted services.
ExpressVPN
Keep your VPN connection up all times, with no hiccups with this fast, reliable, and modern VPN!
In conclusion, if you’re having trouble with your VPN connection on Microsoft Edge, try the hassle-free solutions above and get back to viewing your favourite websites in no time.
And, if you’re having trouble with slow VPN connections, don’t panic since you can easily fix those, too. It’s nothing out of the ordinary since even corporate VPNs are sometimes slow.
As we’re getting closer to the public release of Windows 10 version 21H1, Microsoft has started pushing the update to all Insiders in the Beta Channel. Until now, Insiders could opt in to install the first 21H1 build 19043.844 that was released on February 17, but that’s changing starting today.
“21H1 is now being offered as a recommended update to all Windows Insiders in the Beta Channel. Insiders who previously didn’t choose to install 21H1 will now automatically receive 21H1 in the Beta Channel,” the Windows Insider team said today.
21H1 is now being offered as a recommended update to all #WindowsInsiders in the Beta Channel. Insiders who didn’t choose to install 21H1 will now automatically receive 21H1 in the Beta Channel. Details here: https://t.co/Gq4ltkv3XG ^BLB
Windows 10 21H1 is another service pack-like update just like the version 20H2 was. The only new feature is the multicamera support for Windows Hello, and this update will also bring performance improvements for Windows Defender Application Guard.
Microsoft is planning bigger changes later this year for Windows 10 version 21H2. Earlier today, Microsoft’s Panos Panay said during an Ignite 2021 session that “it’s going to be a massive year” for Windows, and there have been some rumors about an upcoming Windows press event coming soon. With the first Windows 10X devices expected for this Spring, we hopefully won’t have to wait too long to see what’s next for Windows.
The bcp47mrm.dll is a DLL file that has critical importance for your operating system, making it work properly. Whenever it is missing from your computer, Windows will show you an error message.
As with many other dllfiles, bcp47mrm is usually installed on your computer by software or a game that requires it.
What is bcp47mrm.dll used for?
The presence of bcp47mrm.dll in your operating system allows Windows to function properly. This is a common feature for dll files. Also, there are certain games or software programs that require this specific file.
However, issues with this DLL file can occur, and in today’s guide, we’ll show you how to fix them.
How can I fix bcp47mrm.dll missing error?
1. Use professional software
When you encounter DLL file-related errors, this is proof that there might be issues with your registry. There are instances when your Windows 10 registry files are corrupted, missing, or need to receive updates.
Any of these potential scenarios will launch if the bcp47mrm.dll is missing from your computer error.
Can I automatically fix missing DLLfiles in Windows 10?
Many users are usually tempted to download the missing dllfile from different websites.
However, there is a better and faster way to automatically fix the missing DLLfiles.
Using a specialized tool to find your missing DLL files will do the job. You can employ an effective repairing software that can find the bcp47mrm.dll file and install it properly on your computer.
2. Restart the computer
Press and hold the Power button for 5 seconds.
Wait 30 seconds and push the Power button to turn the computer on.
The easiest way to solve the bcp47mrm.dll error is to restart your computer. Your device may have cache problems, and a restart should automatically fix that issue.
This is the simplest solution that can help you if bcp47mrm.dll is missing from your computer.
3. Perform a driver update
Type in Device Manager in the search box and press Enter.
Select a category from the device list to check the one that needs an update.
Right-click on it and select Update driver.
Choose Search automatically for updated driver software.
Alternatively, you can download bcp47mrm.dll by using driver update software. This software is designed to automatically download and install missing drivers, so it’s worth checking out.
Updating your drivers is essential to keep your system healthy and running smoothly, so with the best driver update tools you can actually protect your PC from system problems.
Plus, you can manage all your drivers from the same platform and update or find the missing ones with ease, in a few clicks.
The process is almost entirely automated, and you will just select what drivers need to be updated or installed in your system.
4. Scan for malware
Malware files are any type of program that was designed with the purpose to cause damage to computers. In this category, we may encounter worms, viruses, trojans, and any other harmful programs.
If your computer has been infected with malware, that can cause the bcp47mrm.dll error to appear. Using a dedicated program for malware removal should help you solve this problem.
Users are now able to protect their devices, data, and privacy from their homes or on the go. Always be a step ahead in terms of cybersecurity and protection using professional antivirus tools.
The bcp47mrm.dll missing from your computer is an error that can be fixed by using several approaches.
Install a third-party solution that will replace any damaged files, perform a forced restart on your computer or update your Windows device drivers.
Did our solutions work for you? Let us know in the comments below!
Big news: Panos Panay is pumped! Today at a mini session at Ignite, Microsoft’s Chief Product Officer for Windows and Devices, joined Roanne Sones in a “fireside chat” about Windows. While much of the quick 15 minute session centered on current features of Windows, Panay couldn’t resist letting slip a little hint at the future:
Look I have not talked about the next generation of Windows and what’s coming next, but I can tell you I am SO PUMPED.”
Panay went on to say that “it’s going to be a massive year” for Windows. As we know, both Windows 10X and a refresh of Windows code named “Sun Valley” are slated to arrive this year, and although Microsoft has been largely quiet about either or both, that could soon change.
As we noted earlier, Tom Warren over at The Verge is hearing about a Windows-focused event coming soon:
there's not going to be a lot of Windows news at Ignite this week. There's a session with @panos_panay, but Microsoft is planning to hold a dedicated Windows press event soon
The Windows Experience Blog did try to keep the fires burning with a recap of Windows sessions happening at Ignite, but it’s clear that Microsoft wants to keep the focus on Microsoft Mesh, the Power Platform, security, and Azure this week. From the sound of things, however, the focus could soon turn to Windows, and indeed the beginning of a “massive year.”
There are many ways to create a memorable avatar, but the best one is by using software that can create an avatar from a photo.
If you wish to create your own personalized avatars independently from social media websites, then you should consider using specialized software.
We have prepared the best software recommendations that you can use to create avatars. Read the next section and learn what are the best programs for this task.
What is the best software to create avatar from photo?
Develop your skill in composition, photo editing, digital painting, graphic design, and animation. Use Photoshop to master all of these artistic skills and use iPad and desktop to bring your ideas to life.
Use live streaming together with Photoshop not only to learn new skills but to share your projects too. Turn a portrait into a masterpiece and improve the quality of expressions with this professional Adobe software.
Create awesome images using features such as removing objects, retouch, and recolor. Transform a simple image into art using Photoshop’s intelligent new features and smart editing tools.
Enrich your images and improve what your camera can do using your imagination. Just use Photoshop’s one-click selection, combined with unlimited layers and easy masking functions.
Photoshop is an amazing tool, and it’s the best app to create avatar from photo if you’re skilled enough to use it.
Adobe Photoshop
Use Adobe Photoshop, the world’s best photo editing software to create amazing avatars!
Maya Software is another app that can create avatars from photos. However, the original purpose of the software is computer animation, modeling, simulation and rendering.
If you want to learn how to create complex characters and awesome avatars, try out Maya Software. You can use it to create expansive worlds and amazing effects.
Sharpen your photo editing skills using Maya’s engaging animation tools and bring characters to life. Use Maya software for modeling to shaping 3D objects and scenes.
Go beyond creating an avatar for your social media account and learn how to create realistic effects, such as explosions. Learn about Maya Software’s unique tools and features and create excellent visual content.
Maya Software
Use Maya, a software created especially for 3D computer animation, rendering, simulation and modeling to create amazing avatars.
Avatar + Anime Maker is an app that can create avatar from photo with ease. Use this face changer application to create funny, cute, or scary anime faces.
Built as a very user-friendly app, Avatar + Anime Maker contains everything you need. Create stunning pictures using the instant blending of an anime face mask, hairstyles, beards, and various awesome stickers.
Create your ultimate avatar by setting a mask, dragging it to rotate left or right, and scaling it horizontally or vertically. Choose what to use from a rich gallery of masks, faces, emojis, and many more.
Avatar + Anime Maker
This great face-changer app that allows you to modify your pictures and create funny or scary avatars.
Avatoon is an interesting app that can create avatars from photos without hassle. You will be amazed by the end result: an awesome custom hand-drawn portrait.
Every step of the process was designed to be very simple. Initially, you must upload your photo and fill out a short form. As soon as your new portrait is ready, Avatoon team contacts you and sends you your new avatar.
You will receive your cartoon drawing in a vector format that can be redimensioned to any size you desire.
Use Avatoon pictures for more than a simple profile picture for social media accounts, and insert them in your project for a better impact on your viewers.
This is a friendly mobile app that transforms pictures into art using several editing features. It will be very easy for you to crop photos, create a transparent background, and retouch portraits for you and your friends.
Befunky allows users to create their desired avatars using only a few simple steps. This software to create avatars from photos also contains different filters allowing you to customize your photos.
Creating an avatar is simple, as long as you use good software to create an avatar from photo. In this guide we showed you our top picks, so be sure to check them all.
What is your favorite avatar making software? Let us know in the comments below.
PUBG Lite is the free version of the popular game PlayerUnknown’s Battlegrounds. The Lite edition is quite frankly the best way to experience PUBG without paying a dime.
Although free services are a great ramp for increasing user base, the main focus doesn’t revolve around them. Therefore, sometimes, free users might experience issues that premium/paid users don’t.
One of the most common errors PUBG Lite players complain about is the PUBG Lite is unavailable in your regionerror. What makes it more annoying is that it appears to occur entirely random.
While some players experience it at launch, other have this issue immediately after finishing a game, or while configuring their settings. It doesn’t seem to follow a pattern, either. Fortunately, you can bypass geoblocks quite easily and we’ll show you exactly how.
How to fix PUBG Lite is unavailable in your region error?
Private Internet Access is a stable, efficient VPN that can help you keep your privacy safe while playing PUBG Lite.
Additionally, it can help you eliminate or curb ping issues and even spoof your location to avoid the infamous PUBG Lite is unavailable in your region error.
Private Internet Access
Did you get the PUBG Lite is unavailable in your region error? PIA can help you avoid it by spoofing your location.
This VPN service has a network of over 3,000 servers distributed all around the world, covering 66 locations in 46 countries.
Note: if you’re seeing the same error after enabling the VPN, disconnect from the server you chose and select another one. You might want to use a different location, as the error is apparently location-related.
2. Configure your time zone correctly
Hit the Win key on your keyboard
Type Location privacy settings and select the option from the menu
Make sure that you’ve enabled Location for your PC and that apps are allowed to access it
Hit the Win key on your keyboard once more
Type Change the date and time and click the option with the same name
Toggle the following options to ON:
Set time automatically
Adjust for daylight saving time automatically
Set time zone automatically
Check that the auto-set time zone is real and accurate
Launch PUBG Lite and check if you still get the error
Note: the time zone configuration method won’t work with a VPN. VPNs usually spoof your location and assign you different times (and sometimes even dates) based on your virtual location.
Conclusion
To wrap it up, if you’ve had enough of region errors while playing PUBG Lite, using a VPN such as Private Internet Access (buy here) might be your strongest bet.
This service can help you spoof your location so that the game won’t trigger any errors due to client-server time zone/date discrepancies.
Even if PUBG Lite starts acting up while you’re connected to your favorite VPN server, you can still fix the issue easily by choosing a different server.
The process doesn’t take too long and it’s also very intuitive and user-friendly.
More so, using a VPN might even eliminate ping-related issues and will also give you a privacy boost.