NewsGuard and Microsoft team up to make NewsGuard free for Microsoft Edge users, Bing integration

NewsGuard, a service that rates journalism to separate reliable journalism from those who publish false or misleading content, has announced that it has reached a new partnership with Microsoft.

As part of the new partnership, Microsoft has agreed to continue to sponsor NewsGuard’s news literacy program, which allows more than 700 libraries to provide NewsGuard to their patrons across multiple countries around the world.

This partnership benefits Microsoft Edge users. The partnership will mean that users of Microsoft’s web browser, Microsoft Edge, will be able to access NewsGuard’s ratings for free from within Microsoft Edge on mobile and desktop, avoiding the normal $2.95 per month fee that applies to other web browsers.

Microsoft’s search engine, Bing, will now receive a “real-time feed of NewsGuard data”.

Finally, departments across Microsoft will now be able to make use of and implement NewsGuard in their products and services. Some examples of projects that are underway include Microsoft’s Defending Democracy Program, and those who work in Microsoft Research to fight misinformation.

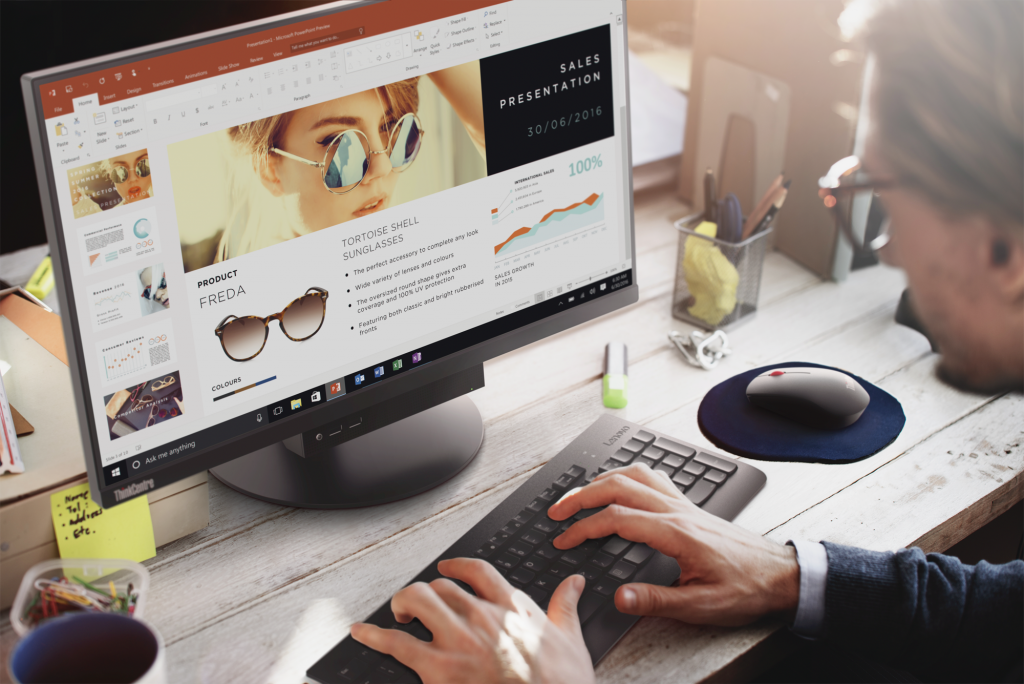
New Lenovo ThinkCentre desktops and laptops with 10th Gen processors unveiled as more people work from home

Despite several states beginning to roll out phase one of reopening areas amid an ongoing COVID-19 pandemic, many businesses are allowing its employees to choose their safest work environment and for some, that means continuing to work-from-home, fortunately, Lenovo is rolling out new ThinkPad devices to help build-out home offices or help update reopening ones.

Unveiled late last week, was the ThinkPad P-14 and P-15 laptops and updates to the ThinkCentre desktop portfolio with 10th Gen Intel Core vPro Processors.

Today, Lenovo announced the latest ThinkCentre desktop portfolio featuring a blend of powerful technologies including high-performance 10th Gen Intel® Core™ processors with optional 10th Gen Intel® Core™ vPro® processors available in selected models. Offering businesses full flexibility for their desktop needs with Tower, Small Form Factor (SFF), All-in-One (AIO), and Tiny form factors, the updated ThinkCentre M70, M80, and M90 series are designed to meet the complex computing and business continuity needs in today’s changing world. Lenovo is also updating the Tiny-in-One solution (TIO) with the 4th generation TIO22 and TIO24. These solutions offer innovative display plus optional Tiny desktop models for a versatile modular all-in-one PC.

The new ThinkCentre’s are designed for modulation, allowing customers to buy either a PC tower or a “Tiny” desktop that can be attached to the back of a 21.5-inch monitor for a minimalistic workspace.

Each form factor comes with the updated 10th Gen Intel Core vPro processor, refined standby technology, USB Type-C, HDMI, DisplayPort, and VGA port options. Beyond the hardware, the ThinkCentre’s will also sport Lenovo’s ThinkShield compliance software to offer state-of-the-art digital security solutions that run alongside any proprietary business options your company may want to apply.

For those, a bit more mobile or pressed for space at home, the ThinkPad P14 and P15 (updates to the P43 and P53 lineup) will also usher in 10th gen processors and configurations up to Core i7-10810u chips for boosted clock speed work of up to 4.9GHz. The P14 and P15, like its predecessors, offer performance suited best for designers using AEC or CAD applications which is why Lenovo is also stuffing an NVIDIA Quadro graphics card in them as well as up to 2TB of onboard storage to quickly access medium to large renders for clients or managers.

Projects, workbooks, presentations, and demonstrations built with the P14 and P15 can all be viewed on their 4K UHD displays calibrated with X-Rite Pantone Factory color calibration and enhanced with Dolby Vision HDR.

For those interested, some of last week’s updates will be available for purchase as early as later this month.

  • ThinkCentre M70 series is expected to be available from June 2020, starting at $649 for M70t Tower, $629 for M70s SFF and $499 for M70q Tiny
  • ThinkCentre M70a AIO is expected to be available from June 2020, starting at $749.
  • ThinkCentre M80 series is expected to be available from June 2020, starting at $759 for M80t Tower, $739 for M80s SFF and $879 for M80q Tiny.
  • ThinkCentre M90 series is expected to be available from June 2020, starting at $839 for M90t Tower, $819 for M90s SFF and $909 for M90q Tiny.
  • ThinkCentre M90a AIO is expected to be available from June 2020, starting at $1029.
  • ThinkPad P14s is expected to be available from May 2020, starting at $1599.
  • ThinkPad P15s is expected to be available from May 2020, starting at $1579.

While Lenovo isn’t sharing the details just yet, the company is priming its customer audience with a hint at X1 Carbon Gen 8, X1 Yoga Gen 5, and new T, X, and L-Series laptops updates planned for later in the year.

Windows 10 news recap: 32-bit Windows 10 will no longer ship to OEMs, firmware updates galore, and more

Welcome back to our Windows 10 news recap, where we go over the top stories of the past week in the world of Microsoft’s flagship operating system.

Microsoft will no longer ship 32-bit versions of Windows 10 to PC OEMs starting with the May 2020 Update

Starting with the May 2020 Update for Windows 10, Microsoft will no longer be shipping 32-bit versions of Windows 10 to OEMs.

Surface Pro 4 gets new firmware updates to improve system stability

A new firmware update is available for the Surface Pro 4 to improve system stability.

Surface Book 2 and Surface Go/LTE devices get new firmware updates

On the back of the Surface Pro 4 firmware update, the Surface Book 2 and Surface Go have also received new firmware updates.

That’s it for this week. We will be back next week with more Windows 10 news.

Microsoft news recap: Swiftkey gets rebranded, Outlook getting suggested replies, and more

Microsoft news recap is a weekly feature highlighting the top Microsoft news stories of the past week. Sit back, grab some coffee, and enjoy the read!

New report shows all game streaming platforms except Microsoft’s Mixer saw massive growth in April

In April, all game streaming platforms except Microsoft’s Mixer saw a large jump in growth, according to a new report. Whilst the majority of game streaming platforms saw growth during the pandemic, Mixer is lagging behind with the smallest level of growth.

Microsoft's Mixer website
Microsoft’s Mixer website

Swiftkey rebrands to Microsoft Swiftkey keyboard on Android and gets Emoji 12.0 support

Microsoft’s Android keyboard app, Swiftkey, has been rebranded as Microsoft Swiftkey keyboard. At the same time, it has also received an update to add support for Emoji 12.0.

SwiftKey keyboard on Android

Outlook on the web is getting suggested replies and text predictions features

Following in the footsteps of Google’s Gmail suggested replies to emails, Microsoft is now adding suggested replies and text predictions to Outlook on the web, helping you compose emails quickly.

Microsoft publishes full Build 2020 session catalog

The full schedule for Build 2020 has now been published. This year, Build 2020 will be digital and is free to attend.

That’s it for this week. We’ll be back next week with more Microsoft news.

What is NativeDropBoxAgent and what does it do?

NativeDropBoxAgent is a preinstalled app on Motorola devices running on Android. It has no practical function or use.

Since it comes with the main software, it can’t be uninstalled or deactivated. 

Note that there is no connection between NativeDropBoxAgent and the well-know cloud storage app Dropbox.

Actually, issues with NativeDropBoxAgent occur even when the users don’t have Dropbox installed and are not using it on a regular basis.

Commonly reported problems with NativeDropBoxAgent are short battery life, general slowdown, and reduced memory space.  

Also, if you have an antivirus installed, it oftentimes finds NativeDropBoxAgent as potentially harmful, marking it as an unwanted application.

How can I stop NativeDropBoxAgent from running?

Force-stop the application

motorola phone with android

  1. Open the Settings menu.
  2. In the Apps menu, find NativeDropBoxAgent and open it.
  3. Click on Force Stop.

The system will warn you that it might misbehave or the action might affect other apps. Reactivation is possible, nevertheless.

Additionally, after performing this step, users mentioned visible improvement in their devices’ system performance as well as a positive adjustment in the device memory space.

It seems that there are no negative consequences of not actually using this app.


We hope that this article has answered your question about what is NativeDropBoxAgent and what it does on your system.

If you have any suggestions, don’t hesitate to contact us by using the comment section below.

[wl_navigator]

How to install Dropbox using the offline installer

The Dropbox desktop application is available for Linux, macOS, and Windows operating systems, and allows you to use cloud storage space to either share files, or store backups. That being said, many users have reported issues when installing it.

You don’t have to worry about any issues as in this article we provide the steps for an easy offline installation.


How do I download and install the Dropbox desktop app?

1. Actions needed to install Dropbox with admin rights

dropbox features

The Dropbox desktop app requires admin privileges to run with full functionality on your computer. This enables multiple different core features of Dropbox, including:

  • Sync icons that show the sync status of files and folders.
  • Right-click context menus for taking quick actions in Dropbox.
  • Access to Smart Sync.

For the vast majority of users, the desktop app is automatically installed with admin privileges. However, if you didn’t install with admin privileges you can follow the instructions below to do so.


2. Install the Dropbox desktop app with admin privileges

dropbox install

  1. Download the Dropbox application.
  2. Open the installer.
  3. Follow the instructions in the install wizard.
    • If you’re asked for an administrative username and password, enter them or contact your administrator to sign in.
    • If you’re not asked for an administrative username and password, you’re already an admin on your computer.
  4. Complete the installation and sign in to Dropbox.

3. Smart Sync and admin privileges

smart sync

Some Dropbox users will have access to Smart Sync. If you have access to this feature, check that Dropbox is installed with admin privileges on each computer where the feature will be used.

If you’re the admin on a Dropbox Business team, you can see which team members installed Dropbox with admin privileges. However, you can only do this before you enable Smart Sync.

Depending on the policies at your company, your team members may be able to install Dropbox with admin privileges on their own. If not, they may need the assistance of your IT team.


In today’s article, we compiled the simplest installation method with some other useful information that will enable you to use Dropbox without any issues in the future.

[wl_navigator]

FIX: Nexus Mod Manager is not set up to work with Skyrim

The Nexus Mod Manager (NMM), as the name suggests, is a software that allows you to effectively manage your Nexus game mods from a user-friendly hub.

A large number of users have reported encountering the error Nexus mod manager is not set up to work with Skyrim. This issue can cause a lot of frustration, especially for die-hard fans of the game series.

Here is what one user had to say about this issue on the Nexus Mods forum:

I want to strangle someone because the error message Nexus Mod Manager is not set up to work with Skyrim. If Skyrim is installed, rescan for installed games from the change games toolbar item. keeps popping up whenever I try to download a mod from Nexus with the Mod Manager. Whenever I try to download mods the damned error keeps popping up. Please help.

This issue seems to have appeared on a variety of system configurations, so a problem with the capability of your PC is out of the question. That being said, we took the time to find the most probable causes, and the best methods to apply in this case.

Read on to find out more details.


What can I do if the Nexus Mod Manager doesn’t work with Skyrim?

1. Rescan for installed games

  1. Open the Nexus Mod Manager app.
  2. Click on the Change Game toolbar.
  3. Select Skyrim from the list.
  4. Press Ok to rescan the caches from your installed Skyrim game.Nexus game rescan - nexus mod manager is not set up to work with skyrim

2. Make sure you’re using the right mods for your version of Skyrim

Skyrim versions - nexus mod manager is not set up to work with skyrim

Even though it might seem to be an obvious step, some users have simply solved their problem by using the appropriate mods for the version of Skyrim they have installed.

If you installed the older version of the game, download the mods from this Skyrim webpage.

In case you are using the newer version of the game, try downloading the mods you want from the official Skyrim Special Edition webpage.

Note: Skyrim and Skyrim Legendary Edition are the same game, while the latter comes bundled with all three DLC’s available for the classic release.


3. Remove the Nexus Mod Manager user configurations

Nexus mods screenshot - nexus mod manager is not set up to work with skyrim

  1. Open the Windows Explorer.
  2. Navigate to the following location on your hard drive: C:Users -> your username ->appdata -> local -> Black Tree Gaming ->somefolder ->mod ->version number
  3. In this folder, you will be able to find either one or multiple files.
  4. Delete all of them.
  5. Restart your computer for the changes to take effect.
  6. Open the Nexus Mod Manager app, and re-create your user based on personal preferences.
  7. Check to see if the mods work.

Is your Windows File Explorer crashing in Windows 10? Try these fixes


4. Make sure your firewall is not blocking Nexus Mod Manager

Allow application through Windows Defender Firewall:

  1. Press the Win+X keys on your keyboard and select Settings.
  2. Click the Update and Security button.Update and security - nexus mod manager is not set up to work with skyrim
  3. Select the Windows Security option from the menu to the left of your screen.
  4. Click the Firewall and network security option.
  5. Choose the option Allow an app through the firewall.
  6. Search for the Nexus Mod Manager in the list and allow both incoming and outgoing connections.
  7. Restart your PC and try running the mods again.

If you can’t access the Windows Firewall settings, it means you don’t have administrator rights. To find out how you can enable your Administrator account, have a look at this simple guide.


5. Reinstall the Nexus Mod Manager

To remove:

  1. Press the Win+X keys and choose Apps and features.
  2. Select the Nexus Mod Manager from the list.
  3. Press the Uninstall button.Uninstall Nexus Mod Manager - nexus mod manager is not set up to work with skyrim
  4. Click the Uninstall button again to confirm.
  5. Wait for the process to complete.

To reinstall:

  1. Download the Nexus Mod Manager by clicking the Manual button on the website.Download Nexus mode manager - nexus mod manager is not set up to work with skyrim
  2. Wait for the download process to complete.
  3. Open the installer and follow the on-screen instructions.

6. Use the Vortex app to manage your Nexus game mods

Vortex download page - nexus mod manager is not set up to work with skyrim

  1. Download the Vortex application.
  2. Install it by following the on-screen instructions.
  3. Try to manage your faulty Skyrim mods and check to see if the issue is resolved.

In today’s guide, we had a look at the most efficient methods to try out if you see the Nexus Mod Manager is not set up to work with Skyrim error message.

Don’t hesitate to share your experience with us, and also give us any suggestions as to how you managed to solve this problem.

To contact us, you can simply use the comment section found below this article.

[wl_navigator]

VS Code 1.45 brings UI accessibility updates and more

VS Code 1.45 comes with a host of feature enhancements that make life for programmers a lot easier. It includes GitHub integration, remote coding, and UI accessibility updates.

Some of the latest changes to one of the most popular code editors are a reflection of feedback that Microsoft has been gathering from users on GitHub.

VS Code 1.45 key highlights

UI accessibility and code readability

A few of the updates, such as better accessibility, are a quality of life boost.

The platform’s user interface is now a little easier to navigate. Partly, that is due to the ability to switch between tabs by simply scrolling the mouse wheel.

When you use the mouse wheel to scroll over editor tabs, you currently cannot switch tabs, only reveal tabs that are out of view. Now with a new setting workbench.editor.scrollToSwitchTabs, you can change the behavior to switch the active editor tab.

Also, coders can move across the workbench by pressing F6 to invoke the Focus Next Part command. The Shift+F6 command calls the Focus Previous Part function.

There is also some good news for fans of semantic code highlighting. They can now personalize the semantic colorization of codes in the latest version of VS Code editor. This feature enhances code readability.

GitHub authentication

VS Code 1.45 comes with automatic GitHub authentication.

Usually, GitHub Pull Requests and Issues make it possible for programmers to work  with the software development platform in VS Code.

With the update, it is now easier for them to share their source code to both private and public GitHub repositories. They do not need to set up credential management to get started.

Remote code development

VS Code remote development extensions are still a work in progress. Their purpose is to enable programmers to access all VS Code features in any container.

The feature is particularly useful when you are building an application in the Windows Subsystem for Linux (WSL) or on a remote device.

Feel free to leave any suggestions or questions in the comments section below.

[wl_navigator]

How to use Ideas in Excel 

How to change League of Legends name in 2 simple steps

League of Legends (LoL) is a super-popular multiplayer online battle arena(MOBA) game created by Riot Games for Microsoft Windows and macOS. As popular as it may be LOL doesn’t come without issues. 

Name changing in League of Legends on Windows 10 can sometimes be a difficult task, however, in the following article, we have all the details you need to perform this change.


How can I change my League of Legends name?

1. Pre-requisites if you have the same username on multiple servers

league of legends name change pre-reqs

  1. Check all of the accounts that might be blocking each other. If they are all attached to the same email account, you should have received an email listing them out for you.
  2. Log into your alternate accounts/PBE first on the website, and update them.
  3. Once all of your primary and secondary accounts are updated (again, don’t forget PBE), log back to your primary account. If you were the only person worldwide with that account name, you should be unblocked, so you shouldn’t get the pop-up anymore.

If you have signed up for League of Legends on multiple servers (including PBE), you will need to make sure that each account has a unique name. By completing the steps above you should be now able to change your Summoner Name.

2. Change the name from Store

change the name in lol

  1. Open the Store and click on the Account button (the profile with gear icon behind it).
  2. At the bottom of the displayed items list select Summoner Name Change.
  3. Type in your name and click the button Check Name.
  4. If your new name is available, select the purchase method (Riot point or Influence points) to complete the name change.
  5. Your new name will take effect once you log back into PVP.net and the forums.

Note: Any names deemed offensive will be altered by Player Support without a refund.

That is it. You should have a brand new name in the game. In case you know more about this topic or you encounter any other LOL issues,  please let us know in the comments below. Many of your fellow players will be grateful.

[wl_navigator]

FIX: Shell Infrastructure Host has stopped working

Windows 10 is known for encountering various update errors on computers with a variety of configurations. In this article, we’re going to talk about one particular problem – Shell Infrastructure Host has stopped working.

In some situations, you might be able to simply close the program, but it doesn’t help with this issue, as the dialog will just pop up again whenever it is clicked.

What is the Shell Infrastructure Host?

The Shell Infrastructure Host, also known as SIHost, is a core component of a Windows operating system (OS). The SIHost is required for coping with several graphical elements of your OS interface, such as Start menu visuals and taskbar transparency.

Main functions of Shell Infrastructure Host include:

  • It displays the applications in the Windows interface for you
  • It has control over some functions of the background behavior (such as wallpaper changing)

In today’s fix guide we will explore some of the best solutions to fix the SIHost issue. Read on for more details.


How can I fix Shell Infrastructure host has stopped working?

1. Run a System File Checker (SFC) scan to check for any file corruption

  1. From the desktop, press the Win+X hotkey combination and from the menu select Command Prompt (Admin).
  2. Click Yes on the User Account Control (UAC) prompt that appears, and once the blinking cursor appears, type SFC /scannow and press the Enter key.
    sfc scan
  3. System File Checker starts and checks the integrity of system files.

If this doesn’t fix the issue, try the next solution.


System file checker doesn’t work on your PC? Check out this simple guide


2.  Create a new user account and check if the SIHost issue persists

shell infrastructure host not working

  1. Go to Settings.
  2. Choose Accounts and then select Other User Accounts towards the left.
  3. Select Add an Account.
  4. Enter a user name and hit Next.
  5. Click on Finish.
  6. Sign out from the current Account and Log into the new account.
  7. Check if the issue is still affecting your system

3. Repair Visual C++ Redistributable for Visual Studio 2015

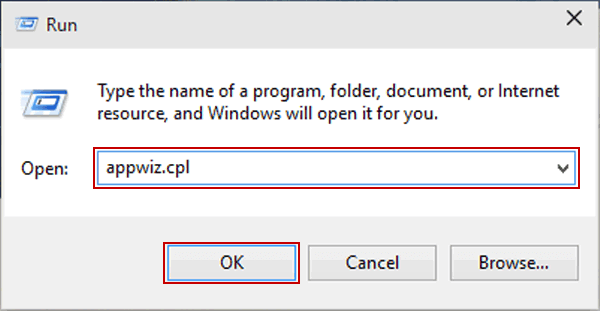
  1. To repair the Visual Studio package, press the Win key + R hotkey.
  2. Enter appwiz.cpl in Run, and press the OK button.
    appwizcpl command
  3. Select the latest Visual C++ Redistributable for Visual Studio package listed on the Programs and Features tab.
  4. Press the Change button to open the window in the snapshot directly below. (or right-click and select Change)
  5. Press the Repair button on that window.
  6. After the repair is complete just reset the PC.

Technically, this should solve the issue, if not proceed with the next method.


4. Reinstall Microsoft Visual C++ 2015 Redistributable Update 3 RC

  1. Download Microsoft Visual C++ 2015.
  2. Press the Download button on that page.
  3. Select either vc_redist.x64.exe (the 64-bit version) or vc_redist.x86.exe (for 32-bit systems), and press the Next button.
  4. If you’re not sure which installer to download, enter System in the Cortana search box. Click About your PC to open the window below, which includes system type details.
  5. Open the Redistributable for Visual Studio 2015 setup wizard to install the package.
  6. Then reboot the Windows OS.

If the Visual C++ repair didn’t fix the issue, reinstall Redistributable for Visual Studio 2015. That will most likely fix this issue. You can reinstall the Visual C++ Redistributable for Visual Studio package as described above.

[wl_navigator]

New browser and calculator inside Xbox Game Bar

If you’re a gamer, you probably use Xbox Game Bar, just because it’s really simple to access by pressing Windows + G keys, and it gives you access to some awesome features. Microsoft wants to expand the Xbox Game Bar, and the proof is the Widget Store inside.

The first widgets to populate the store were a streaming tool from XSplit, and Razer Cortex features. Of course, as you read this, developers are probably into making new ones.

Xbox Game Bar has new widgets: calculator and browser

Well, have you ever wanted to browse for something really quick while playing a game? Maybe just to make a point or settle a bet? How about a short calculus on how to make the perfect headshot in an FPS game?

Microsoft thought that you need those right away because they were included in the Widget store.

New browser and calculator in Xbox Game Bar

Browsing during games

Of course, the more useful of the two is the simple browser. It’s powered by Bing, of course, and it doesn’t have tabs or fancy features but you’re just looking for a chea…walkthrough or helpful solutions, or just a little bit of webchat, the basic browser is perfect. And it only uses a fraction of the resources of a full-fledged one.

Useful calculus

Aside from any light jokes about computing during games, a calculator may be really useful in MMOs and especially strategy games. Again, this calculator is very handy, and doesn’t really get in the way of your play.

You can get the widgets from the Widget Store (Beta) inside Xbox Game Bar app, or directly from the Microsoft Store. Hit the links below.

[wl_navigator]

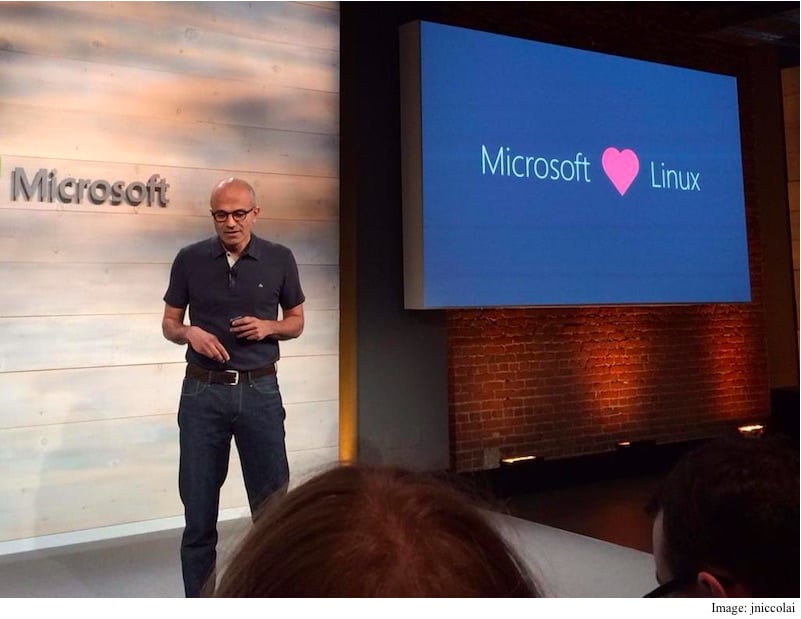
Microsoft’s Brad Smith says company was “on the wrong side of history” regarding Linux

Microsoft has gone a long way since former CEO Steve Ballmer infamously called Linux “a cancer”. Actually, Microsoft has embraced Linux in a pretty big way in recent years, helping the company attract more of the developers that Ballmer chased back in the day.

During a recent chat hosted by MIT’s Computer Science and Artificial Intelligence Lab (via The Register), Microsoft President Brad Smith acknowledged that the company “was on the wrong side of history when open source exploded at the beginning of the century and I can say that about me personally.” The Microsoft veteran, who joined the company before it was hit by antitrust litigations in the nineties added that “The good news is that, if life is long enough, you can learn… that you need to change.”

Indeed, Microsoft did change: Azure, the company’s cloud computing platform has been supporting various Linux distributions for many years. Microsoft also used a Linux-based OS for its Azure Sphere platform for IoT app development. In recent years, Build 2016 was another big “Microsoft loves Linux” moment with the introduction of the Windows Subsystem for Linux.

If 2020 is still not the “Year of Linux on the desktop,” Microsoft did the right thing by embracing Linux, which really helped to make Azure and even Windows more relevant than ever. The Windows Subsystem for Linux 2 (WSL2), which Microsoft announced last year, is actually one of the big new features coming in the Windows 10 May 2020 Update later this month.

DirectX 12 Ultimate on Windows 10: 2 new amazing features

DirectX 12 Ultimate is here, and it’s the culmination of the best graphics technology for PC and Xbox Series X.

And if you a PC graphics hardware with the DX12 Ultimate logo or an Xbox Series X, you can be sure that your hardware is guaranteed to support all the next generation graphics hardware features, including DirectX Raytracing, Variable Rate Shading, Mesh Shaders, and Sampler Feedback.

DirectX 12 Ultimate comes with major new features

Apart from enhanced features for the DirectX Raytracing and Variable Rate Shading, Microsoft added new major features such as Mesh Shaders and Sampler Feedback.

Microsoft also announced that its PIX graphics optimization tool and the open-source HLSL compiler will provide game developers with the ability to get the peak performance out of the entire ecosystem of DX12 Ultimate hardware.

Next-gen games will still run on older hardware

DX12 Ultimate will not impact game compatibility with existing hardware which does not support all the features of DX12 Ultimate. In other words, the next-generation games that use DX12 Ultimate features will still run on non-DX12 Ultimate hardware.

DX12 Ultimate makes the PC ecosystem strictly better with no adverse effect on hardware that doesn’t support DX12 Ultimate.

DX12 Ultimate will unify graphics platform for PX and Xbox

By unifying the graphics platform across PC and Xbox Series X, DX12 Ultimate serves as a force multiplier for the entire gaming ecosystem. Microsoft anticipates that when Xbox Series X releases, there will already be many millions of DX12 Ultimate PC graphics cards in the world, setting a rapid adoption of the new features.

And when Xbox Series X will bring a wave of new console gamers, PC will likewise benefit from this.

What’s new in DirectX Ultimate?

DirectX Raytracing 1.1

DXR traces paths of light with true-to-life physics calculations, which is a far more accurate simulation than the heuristics-based calculations used previously.

DXR 1.1 adds three major new capabilities:

  • GPU Work Creation now allows Raytracing.
  • Streaming engines can more efficiently load new raytracing shaders as needed when the player moves around the world and new objects become visible.
  • Inline raytracing is an alternative form of raytracing that gives developers the option to drive more of the raytracing process, as opposed to handling work scheduling entirely to the system (dynamic-shading).

Mesh Shaders

Mesh shaders allow developers to build more detailed and dynamic worlds than ever before.

Sampler Feedback

Sampler Feedback enables better visual quality, shorter load time, and less stuttering by providing detailed information to enable developers to only load in textures when needed.

[wl_navigator]

Raise your hand feature starts rolling out in Microsoft Teams

Microsoft has started rolling the new “Raise your hand” feature for Microsoft Teams meetings, which allows participants to notify the meeting organizer and other attendees that you would like to speak or add to the ongoing conversation. Microsoft confirmed that the feature is now live for Mac, Windows as well as the Web clients:

We are happy to announce that this feature has started rolling out to the general public. We plan to complete the rollout by end of this week. This feature is available for Windows, Mac and Web clients. Mobile (iOS/Android) will be coming soon.

As soon as you raise your hand, an icon will appear next to your name beside the mute icon. The meeting organizer can then address your question at their convenience. It is worth noting that Microsoft Teams allows both the presenter or the attendee to lower individual hands in the meeting.

The functionality is pretty much useful for educational institutions and large companies that deal with hundreds of participants in a single meeting. Due to the nature of remote classes or webinars, teachers and hosts have to mute the meeting participants to concentrate without being distracted by the background noises. Previously, there was no way for the meeting attendees to notify their hosts about a question without interrupting the whole session for everyone else. The ‘Raise hand’ feature now offers a seamless way to raise your doubts or questions during Microsoft Teams meetings.

Do you think that the new Raise hand feature will make it easier for everyone to keep up with the discussion without getting disturbed? Sound off in the comments section below.

Xbox co-founder J Allard gets back into gaming with a new $249 console, the Intellivision Amico

Xbox co-founder J Allard is joining Intellivision as a Global Managing Director. As noted in a post on GeekWire, Allard will join the team to help launch the Intellivision Amico, a $249 family-friendly console set to be released in October 2020. For those unfamiliar, Intellivision was a console released by toy company Mattel in 1979. At Microsoft, Allard co-founded the original Xbox, Xbox Live, Xbox Live Arcade, and the Xbox 360.

In a press release, Intellivision CEO Tommy Tallarico announced the addition of Allard and his role with the Intellivision Amico team.

“In his new role at Intellivision Entertainment, Allard will provide invaluable insights to support the final development of Amico – the new console designed to make video gaming accessible to all. His expertise and deep knowledge in user experience, operating systems, game certification, and building ecosystems will help Amico stay true to its mission to bring family and friends together again with fun games that everyone can play.”

Here is a look at a gameplay trailer for the upcoming Intellivision Amico console.

Since leaving Microsoft in 2010, Allard has been hard at work at Project 529, a Vancouver community-powered bike anti-theft company. The Intellivision Amico is planned to be released in October 2020 with pricing for the system starting at $249 with games for the console being priced at under $10 each.

Microsoft Surface Earbuds unboxing and quick impressions: Comfy and unique

When Microsoft first revealed the Surface Earbuds in October 2019, I was a bit skeptical. After all, there were tons of alternatives from Apple, Samsung, and Sony. But, deep inside, I had hope. Microsoft was taking a different route with Surface Earbuds.

Instead of copying and pasting Apple’s Airpods, Microsoft came up with a unique design for its wireless earbuds and added some unique integrations with Microsoft 365, too. Now finally available (and priced cheaper at $200) I am glad I held off and waited for Surface Earbuds. In my brief day with the buds, they seem to have everything I longed for. Here are my quick impressions as to why.

Attention to detail

The minute I unboxed my Surface Earbuds, I was excited. Microsoft paid a lot of attention to detail with the packaging. Everything is bundled together in the box in a careful and thoughtful way. It’s something I normally won’t mention this at all in a quick impressions review, but I think deserves a section just for the way things are bundled in the box.

Lifting the lid of the Surface Earbuds reveals the Surface Earbuds charging case wrapped in plastic and a message in the tray that reads, “everyone’s ear is as unique as their fingerprint.” I found that cute, as I remember that Microsoft mentioned to me at the October Surface event that the Surface Earbuds can fit 95% of all human ears.

Anyway, putting that charging case to the side and lifting the housing up then reveals a leaflet that is folded in a way that will show you step-by-step quick-start directions. There’s then the USB-C charging cable, and the replacement ear tips underneath, with an additional manual bundled together with legal terms. There’s no charging brick, as Microsoft probably assumes you already have one with your PC or phone.

For the price that they are, the unboxing experience is quite satisfying. I’ve never been this happy opening up a Microsoft Product before, be it the Surface Pro X, the Surface Laptop 3, or even the Surface Go.

Charging case

But going back to the actual product, the highlight has got to be the Surface Earbuds charging case. Unlike Google’s Pixelbuds or Apple’s AirPods, this charging case has a unique look. It isn’t really that compact and takes on what I like to call an oval-like “traffic light” shape. There’s a good reason why.

While this shape makes it larger and a bit heavier than most charging cases for wireless earbuds on the market, I think it’s all about battery life. Microsoft says this case can hold up to 24 hours of battery, which is enough to charge the Surface Earbuds (that hold 8 hours of battery) three times.

That’s really appreciated, as since these are intended for productivity and Office use, you don’t want to be constantly attached to a charger. You can use the Surface Earbuds in confidence knowing it will always have a charge when you need it. It’s something I experienced myself, as in two days of use, I haven’t yet charged the case since I initially received the product.

Elsewhere, the case is thoughtfully designed. While the top lid is a bit thin, it still makes a satisfying click noise when you push it closed. The Earbuds also pull right into the case when you rest them above their enclosure, thanks to magnets, making another small satisfying clicking noise.

There’s a LED light inside the case which lets you know when you’re pairing, or when you need to charge the case. You also have USB-C connectivity for charging, and a pairing button on the bottom. It’s a nice clean design that fits just right with the rest of the Surface lineup.

Fit, look, and feel

The most important thing of all, though, is how the Surface Earbuds fit, feel, and look. This has been one of the most controversial areas of the Surface Earbuds, being mocked for a “bad 90’s like earrings design,” but in my time so far, I do think this is where they are best.

Included in the box installed on the Earbuds are the “medium” tips, but I swapped it out for the small to create a better fit in my ear. Swapping it out is as easy as pulling the tip out, and pulling them back on top of the buds, sort of like a pair of rubber gloves. You’ll know when the fit right as you’ll hear a “click” noise when it snaps right.  Fitting the buds in your ears, meanwhile, is as easy as placing it in your ear canal, and then “screwing” it upwards to secure it. This makes it so that they won’t fall out.

With the right silicone ear tips in place, the Surface Earbuds feel will feel really natural in the ears. I’ve tried Apple’s Airpods before and they always create a “pain” sensation on the insides of my ear canal after an hour of use. With the Surface earbuds silicone tips, I never experienced this feeling. It slots right into my ears and just feels so natural. I’ve worn them for a full 5-hour writing shift without feeling any pain, and it felt like a natural part of my ears.

The looks, though, while being called ridiculous by some, has a good purpose. When in your ears, the large “earring” like touch surface gives you quick access to controlling music. While busy typing away on my keyboard, I was easily able to move my hands upwards to the earbuds and stop, pause, or play music. The gestures are quite intuitive, with each side of the buds having unique controls.

On Android, triple tapping even summons Spotify by default. And, long-tapping with summon your digital assistant of choice (So far in my testing, that’s Cortana on Windows, Google Assitant on Android.) It’s quite the experience as the Earbuds play nice with any product you own, regardless if it’s from Microsoft or not.

Pairing and audio is great

Finally, there’s is the audio quality and pairing process. This is just as you expect it from a Surface product. On compatible Windows 10 PCs, pairing on Windows is seamless. Out of the box, just open the lid of the Earbuds charging case, and when Bluetooth turned on, Windows 10 will Swiftpair to it, asking you to accept and connect. You can also download the Surface Audio app, too, to update the Earbuds, and enjoy the equalizer and other settings.

Without going into too many details, I’ll also say the audio quality is great. Most of my EDM, pop, and electropop music sounded great, even at low volumes. The bass isn’t as strong as I had hoped, but the Earbuds do have good quality when it comes to songs with lyrics.

Just keep in mind, the Surface Earbuds is NOT noise canceling like Apple’s Airpods Pro, and there’s a reason why. As I’ve said before, these are not meant to be noise canceling. They just rest in your ears and don’t go directly into your ear canals to cancel out sounds around you. If you want that experience, you should buy the Surface Headphones 2.  Essentially, Microsoft envisions you wearing the Surface Earbuds all day, out and about in the office or at home so you can still hear the world around you.

But, I did find that some of the ear tips do create somewhat of a “tight” seal around your ears to lock out just a tiny bit of the sounds around you. Overall, though, when wearing the Earbuds, you’ll still hear some of the outside world. Be it your own voice when talking on a call, or the chatter in the room you’re in, and even typing on your keyboard.

Full review soon

I’ve only spent two days with Surface Earbuds so far, so there’s a lot that I did not get to play with yet. I’ll be looking into the Microsoft 365 integrations, listening to more music, and testing the Earbuds out on Skype and Teams calls later this week, so be sure to keep tuned to OnMSFT for an in-depth review soon!

Here are 10 great Microsoft Garage projects you probably didn’t know about

Microsoft highlighted this week 20 Microsoft Garage projects that have been honoured in the company’s “Garage Wall of Fame“. Over the years, several Microsoft Garage projects have turned into real success stories, with one recent example being the Microsoft Launcher on Android. But several Microsoft Garage projects have also focused on improving accessibility, such as the Seeing AI mobile app that helps the visually-impaired navigate the real world.

For those unfamiliar with Microsoft Garage, this is basically an initiative to encourage problem-solving and experimentation among Microsoft employees and interns. The company is inviting its workforce to find creative solutions to small or big problems, and the results are often interesting.

Because it’s a bit hard to keep up with all the creative projects born in the Microsoft Garage in recent years, here’s a list of 10 interesting Microsoft Garage projects that we think you should definitely know about.

3D Models in Office

If you like to play 3D content in the Office apps, you may be familiar with the feature called 3D Models in Office. Starting with the Windows 10 Creators Update, this project introduced the ability to add 3D models into PowerPoint, Word, and Excel, and makes it easier for you to rotate, animate, resize, and morph the 3D objects.

Azure Quickstart Center

Azure has become one of Microsoft’s most important products in recent years, but getting started with it may not be that easy. Fortunately, this step-by-step guide has been built into the Azure Portal to help customers create, configure, and manage cloud workloads. The Azure Quickstart Center improves customers’ onboarding experience with various guides, and it also offers online courses to help customers with the cloud deployment process.

Eye Control for Windows 10

People with disabilities can use an eye-tracking technology called Eye Control for Windows 10, which has been created in collaboration with the ALS Association and the nonprofit Team Gleason to improve accessibility on Windows 10. Eye Control allows everyone to use their eyes for operating an on-screen mouse, keyboard, and text-to-speech experience with a compatible eye-tracker, and you can see how it works in the video below.

FindTime

FindTime is basically an add-in for Outlook that eliminates the need to check calendar availabilities to schedule meetings across companies. Microsoft says that it helped thousands of professionals to streamline and automate the scheduling process since launch.


Mobile Sharing and Companion Experiences for Microsoft Teams Meetings

Mobile Sharing and Companion Experiences for Microsoft Teams Meetings enables meeting participants to seamlessly use their PCs and phones together. The companion mode allows you to join Microsoft Teams meetings from two devices (desktop and mobile). It allows attendees to control PowerPoint presentations, share photos, a live video stream, or their screens from their mobile phones.

Presentation Translator for PowerPoint

The Presentation Translator PowerPoint add-in offers multi-language support for displaying live subtitles in PowerPoint presentations. It serves as a vital tool for deaf or hard of hearing people within a classroom or meeting, and encourages the participation of audiences in discussions.

Mouse Without Borders

For people who like to control multiple PCs with a single mouse and keyboard, the Mouse Without Borders app is the solution for your needs. The free app allows users to control up to four computers at once with a single mouse and keyboard, making it possible to copy text or drag and drop files across PCs. It has been downloaded by millions of users since launch and continues to be one of the popular projects in the developer community.

Watch For

This AI-powered computer vision system makes it possible to discover and analyze live video content with the ability to surface interesting parts of a livestream in real-time. It’s worth mentioning that the livestream esports search results on Bing, as well as Mixer’s HypeZone channels are powered by this tool.

Microsoft Launcher

The Microsoft Launcher is an Android launcher that enables cross-device experiences between your Windows 10 PC and Android phone. What started as the Arrow Launcher went to become an essential app for Android users living in the Microsoft ecosystem, and even though the UI looks nothing like Windows Phone, the design and UX are very good overall. The card-based view provides quick access to your mails, calendar, recently opened web pages and documents. And with built-in support for Microsoft tools like Office and Sticky Notes, it’s a good alternative to other Android launchers.

Seeing AI

Seeing AI is a free iOS application that helps low vision and blind people by narrating the world around them. The application leverages the power of AI to provide an audio description of people, objects, scenes, and text to people with visual impairments. The project was unveiled back at Build 2016 by Saqib Shaikh, a Microsoft employee who appears in the above video to explaining how Seeing AI helps blind people to understand who is around them.

Almost all tech companies today claim to value innovative ideas, but Microsoft encourages its employees to take it to another level by providing them technological resources and physical space to experiment. A lot of great products came from the Microsoft Garage over the years, if you’re interested to learn more, we invite you to check out the company’s recent celebration of the Garage Hall of Fame.

Xbox’s Killer Instinct fighting game given new life after EVO esports event moves online

This year’s Evo esports fighting game event may have been cancelled due to the COVID-19 pandemic but it’s now been replaced by a purely digital version called Evo Online.

The announcement was made via the official Evo Twitter account earlier today where it was also revealed that Xbox Game Studios’ Killer Instinct would be returning to the tournament for the first time in four years.

The Killer Instinct fandom has always been extremely passionate and active, even though the title hasn’t received any content updates in several years, so this isn’t exactly a resurrection of a dead game as some would assume.

Its sudden inclusion is interesting though with a likely explanation probably being Killer Instinct’s strong support for online matches, something that’s definitely needed now that Evo is moving online, at least for this year.

Lending credence to this theory is the fact that Super Smash Bros Ultimate was planned to be a part of the original Evo 2020 event but is not part of Evo Online at all. Nintendo’s fighter is very popular with real-world esports events but is notorious for its lag and connectivity issues when played online due to Nintendo’s online service which are significantly behind those offered by Microsoft and other companies. Killer Instinct’s online matches are powered by Microsoft’s cloud services which are much more reliable.

Killer Instinct was a Day One launch title for Microsoft’s Xbox One console back in 2016. It’s a free-to-play fighting game loosely based on the two original Killer Instinct games with a mix of returning and original characters, 4K visuals when played on an Xbox One X console, Xbox Achievements, a powerful music score, a large number of unlockables, and guest fighters from franchises such as Halo and Battletoads.

Unfortunately, Windows’ Clippy never made it to the game.

The game is available on both Xbox One consoles and PCs via either Windows 10 or Steam and can be played with all content unlocked for free as part of an active Xbox Game Pass subscription. Killer Instinct is also one of the first video games to be playable via Project xCloud, Microsoft’s cloud streaming platform.

Are you a Killer Instinct fan? Let us know if you’re hyped for its return to Evo in the comments below and then follow us on Pinterest and Facebook for more Xbox gaming news.

Killer Instinct
Killer Instinct
Developer:
Xbox Game Studios
Price:
Free


FIX: Microphone not working in Windows 10

You’re probably using Skype on your computer almost on a daily basis, or at least one other application that requires a microphone.

Many users are complaining that their microphone isn’t working on Windows 10, so if you’re one of those unfortunate users, we might have a solution for you.

What can I do if microphone stops working in Windows 10, 7?

Table of contents:

  1. Check if your microphone isn’t disabled
  2. Check if your microphone isn’t muted
  3. Uninstall and reinstall the default driver
  4. Boost the sensitivity of your microphone
  5. Run Hardware troubleshooter
  6. Change the default format of your microphone
  7. Run the SFC scan

Fix: Microphone not recording in Windows 10, 8.1, 7

1. Check if your microphone isn’t disabled

Sometimes these issues occur if your microphone isn’t set as default or if it’s disabled, and here’s a way how can you quickly enable your microphone and set it as default.

  1. Make sure your microphone is connected to your computer.
  2. Right-click the volume icon in the bottom right of the screen and select Recording devices.
  3. Click on empty space in the window and then click on Show disconnected devices and Show disabled devices.
  4. To check if your microphone is enabled select Microphone and click on Properties, and you’ll be able to see if it’s enabled or not. If it’s not enabled, enable it.
  5. From there you can also check if your microphone is set as a default audio input device.

2. Check if your microphone isn’t muted

Right-click on the Sound icon in the bottom right of your screen and choose Volume Mixer from the menu.
When Volume Mixer opens, find the Microphone slider and raise it up to 100%. Also, make sure that nothing is muted.
Close Volume Mixer and click on the Sound icon again and choose Recording devices and test your microphone.

If there’s no activity in the volume level indicator, you might need to boost the sensitivity of your microphone.

3. Uninstall and reinstall the default driver

  1. Open the Device Manager. You can do this by clicking Start and typing devmgmt.msc in the search field.
  2. In Device manager find Sound, video and game controllers, and double-click the entry of your sound card.
  3. Click the Driver tab and then click Uninstall.
  4. Restart your computer and your Windows should load with default drivers.
  5. If the problem persists, download the latest drivers for your sound card/motherboard.

3.1 Update drivers automatically

If you don’t want to go through the hassle of updating your microphone drivers manually, there is a tool that will do the work for you automatically.

Utilizing advanced software will quick the job in total safety and will prevent any PC damage caused by updating the wrong version of the driver.

The software will check your PC’s hardware and peripherals for possible driver upgrades with only a few clicks. The utility will start operating automatically after installation, so you won’t have to look for a shortcut or the source folder.

In just a few seconds, Fortect Driver Updater will scan your system for any faults or missing drivers and generate a report. Use one to save yourself some valuable time.

⇒ Get Fortect Driver Updater

4. Boost the sensitivity of your microphone

  1. Right-click the Sound icon in the bottom right of your screen and choose Recording.
  2. Double click on the Microphone.
  3. Microphone Properties window should open, and you’ll need to go to the Levels tab and move the microphone slider to 100%. Also, check if your microphone isn’t muted while you’re there.
  4. Slowly move Microphone Boost slider to the right and test the microphone by gently tapping on it.
  5. Click OK and test your microphone.
  6. If your microphone still isn’t working open Microphone Properties and click on the Enhancements tab.
  7. Check the Disable all sound effect.
  8. Press Apply and then OK and test your microphone again.

5. Run Hardware troubleshooter

If you’re still having problems with your microphone, let’s try the hardware troubleshooter that’s built-in inside Windows 10. Here’s how to run it:

  1. Go to Settings.
  2. Head over to Updates & Security > Troubleshoot. 
  3. Select Hardware & Devices, and go to Run the Troubleshooter. Troubleshooting hardware
  4. Follow further on-screen instructions and let the process finish.
  5. Restart your computer.

6. Change the default format of your microphone

  1. To do this right-click the Sound icon in the bottom right of your screen.
  2. Then select Recording.
  3. Double click the Microphone to open Microphone Properties.
  4. In Microphone Properties window go to Advanced.
  5. Under the Default Format choose any of the 16-bit options.
  6. Click Apply, then OK.

7. Run the SFC scan

And finally, if none of the previous solutions resolved the microphone issue, let’s put your computer through a (not so) quick SFC scan. This tool will scan your computer for potential problems and interferences, and solve them if possible.

Here’s how to run the SFC scan:

  1. Go to Search, type cmd, and open the Command Prompt as Administrator.
  2. Type in the following command, and press Enter: sfc/scannow
  3. Wait for the process to finish.
  4. Restart your computer.

If your microphone isn’t working on Windows 10 we hope that at least one of these solutions was helpful to you. As you can see, most of the issues can be fixed by playing with Recording settings.

This issue is rather similar to the one covered in our microphone is not showing up in Device Manager guide, so don’t hesitate to check it out.

If the problem is caused by the sound driver then the best solution is to use the default Windows driver or to wait for the manufacturer to release a specific Windows 10 driver for your audio device.

A+ VCE not working: Error loading file [Fixed]

Many users reported not being able to open files in A+ VCE.

The error message Error opening file, if the problem persists, please report to … with the copy of this file or a pointer to its location pops up when trying to load a file.

In the following guide, we’ll take you through a series of solutions meant to fix this annoying issue.

How to fix A+ VCE not working error loading file

  1. Run the Windows App troubleshooter
  2. Do a Windows Store reset
  3. Make changes through Powershell
  4. Create another user
  5. Reinstall the program

1. Run the Windows App troubleshooter

The Windows App troubleshooter‘s role is to detect Windows Store apps that don’t work and automatically find fixes for these errors.

Running the troubleshooter should help you to fix this annoying A+ VCE error. If you’re running the latest OS version, you can quickly launch the troubleshooter from the Settings page.

run windows store app troubleshooter

To launch the troubleshooter on older Windows 10 versions, follow the steps listed below:

  • Press the Start button and open the Control Panel
  • Click System and Security
  • Under the Security and Maintenance select Troubleshoot common computer problems
  • Click Hardware and Sound > Windows Start Apps
  • Select Advanced > check if Apply repair automatically is selected, if not, have it selected
  • Click Next and wait for the troubleshooter to detect issues
  • After the process is done > click Close
  • Restart the PC and check if the issue was solved.

2. Run Windows Store reset

Try doing a Windows Store reset using the command prompt. To do so, follow these steps:

  • Press the Start button
  • Type in the search box command prompt > right click on the search result and select Run as administrator
  • Type WSreset.exe in the command prompt and press Enter on your keyboard
  • Reboot your computer

3. Make the changes through Powershell

Some users fixed the issue by inputting a specific command in Powershell, granting access to A+ VCE.

Attempting this fix requires you to follow these steps:

  • Press the Start button
  • Type in the search box powershell > right click on the search result and select Run as administrator
  • Type in the command presented below and press enter:

Get-AppxPackage -allusers Microsoft.WindowsStore | Foreach {Add-AppxPackage -DisableDevelopmentMode -Register “$($_.InstallLocation)AppXManifest.xml”}

4. Create another user

Try creating another Windows user and open A+ VCE from the newly created user.

Follow these steps to create a second user:

  • Press the Start button > open Settings
  • Go to Accounts > click Family & other people
  • Select I don’t have this person’s sign-in information > choose Add a user without a Microsoft account
  • Enter username, password and other required information > click Next
  • After creating the new user, you need to give it administrator privilege, as follows:
  • Press the Start button > open Settings
  • Go to Accounts > click Family & other users
  • Select the new account name > click Change account type
  • Go under Account type > choose Administrator and click OK
  • Restart your computer and sign in with the newly created user

5. Reinstall the program

If nothing goes your way, your last resort would be uninstalling the program and reinstalling it back.

Uninstall the program from the Control Panel as with any other program.

To perform this task follow the next steps:

  • Press the Start button > open the Control Panel
  • Go to Programs and Features
  • Find A+ VCE in the list, select it > press Uninstall

Reinstall the program using Windows Store and see if it works.

Sometimes, the uninstaller is not doing a really good job of removing all files and reverting any other changes that might have happened during the installation process.

You can make use of a cleanup software capable to uninstall unnecessary files from your computer, erasing any program completely.

CCleaner is the proper solution for this task because it will uninstall any applications and clean temporary files or cookies from your system. Plus, it doesn’t leave residual files from the uninstalled software.

Hence, the tool can help you repair A+ VCE not working error efficiently and open your files without problems.

⇒ Get CCleaner

These are the solutions that we found work best. We hope that they helped you out. If you know other working solutions, please share them in the comment section below.

How to use Onedrive’s direct share option

OneDrive is a proprietary cloud service developed by Microsoft for the Microsoft Office Suite, however, you don’t need to pay in order to use it.

Admittedly, a subscription would bring you more advantages, but the bottom line is that it is one of the few Office products that you can use, to some extent, for free.

One of the reasons OneDrive is so popular is because it is constantly updated with new and improved features.

One good example of that is an update that allows OneDrive users to directly share a document with other contacts.

Before this particular update, users would have to first save the file to OneDrive and then go to the share dialogue to share the file with anybody else.

The new feature was first made available in Fast ring of the Office Insider program, running version 2006 (Build 12827.20000) or later

The guide below will show you exactly what you need to do in order to efficiently use this new direct share method.


How do I use OneDrive’s new direct share option?

Note: This can be done both from the desktop client and from the web client

  1. Open OneDrive
  2. Save whatever progress you have made with a document or folder
  3. Give the file a name
  4. Select a Save location
  5. In the Choose Collaborators filed, input the names of the contacts you want to share your files with
  6. As you type, OneDrive will suggest contacts from the list of those you have synced with OneDrive
  7. Add as many contacts as you want
  8. Press Save
    • By doing this, you will both save the document in its current state, and also send it to the selected contacts.

Because of this, the direct share method should only be used if you are currently done with the document, and not if it is still a draft in the works.

By following these steps, you should be able to use OneDrive‘s new and improved direct share option to improve the level of collaboration between you and your colleagues.

If you found this tutorial to be of use, leave us your feedback through a message in the comments section below, and we will continue to bring you more interesting guides.


[wl_navigator]

Column Contains Blank Values [Power BI Error Fixed]

Power BI Service and the Desktop client allows the users to have a dashboard scheduled to refresh daily using the table.

If you happen to have any blank rows in the table, you may see Column contains blank values and this is not allowed many-to-one relationship.

Several Power BI users have reported a similar error in the Power BI Community forum.

I have a dashboard scheduled to refresh daily, but each time I get an error that says:
Column in Table contains blank values and this is not allowed for columns on the one side of many-to-one relatioship for coulmns that are used as the primary key of a table.
I went to this table and edited the query to Remove Blank Rows, but I still get the error every time I try to refresh the data.

Follow the steps listed in this article to troubleshoot this error in Power BI service and desktop client.

How can I fix the power BI error blank values?

1. Delete Invalid Relationship Between Data Sets

  1. At times Power BI may automatically create relationships between the queries that are being used to drive the data in the reports. Here is how to fix this.
  2. Launch Power BI Service.
  3. Go into Manage Relationships.
    power bi error blank values
  4. Make sure that there is a relationship listed.
  5. Now check all the Form and To relationship that is available in the Active section.
  6. You need to delete any invalid From and To relationships between separate data sets.
  7. If you have two very different queries pulling data from separate source identical columns names then Power BI will generate a relationship between them which would be invalid. The error should resolve after you have deleted the invalid relationship.

2. Disable Include Relationship Columns Option

power bi error blank values
  1. In the window where you enter the server name, click on Advanced Options.
  2. Now uncheck Include Relationships columns option.
  3. Now check if the error occurs again as it should stop Power BI from identifying related columns resulting in the error.

3. Other Solutions to Try

power bi error blank values
  1. Try to clean the trailing and leading spaces in your data in PQ Transformation.
  2. On Power BI Desktop, go to File > Options. Click on Settings and Options. Now uncheck all the options under Relationships.
  3. Try to edit the load query and replace the blanks with some useful info such as document creation date or time etc.
  4. Go to the table that is referenced in the error message and try to sort your column in ascending/descending order.
  5. Remove and recreate the query. As a last resort, you can try to create and build a new query after deleting the older one.

Fix Intel Optane memory pinning error on Windows 10/11

Intel Optane memory is a smart technology that keeps track of your frequently used apps, documents, pictures, and videos and remembers them after shutdown.

This way, it increases the PC responsiveness and significantly cuts down your waiting time in Windows 10. But sometimes, this technology can trigger certain errors that can be quite annoying.

What is Intel Optane memory pinning error?

That’s the case with the Intel Optane memory pinning error, as one user describes it:

Hi, I recently began getting this error at seemingly random times (at least I haven’t been able to figure out a definite trigger yet).

And here’s the OP’s screenshot:

Intel-Optane-memory-error
It seems that this is connected to Intel Rapid Storage Technology and the error can be triggered even if you don’t have any Optane memory installed.

Another user stated that the error surfaced up with the latest Windows 10 updates:

My Dell started throwing this error notification after the recent Windows 10 update. When I checked Dell updates I saw there are 2 related Intel drivers available for download. Hoping that will fix it.

What causes Intel Optane memory pinning error?

Intel Optane maximizes your computer’s speed by caching and indexing all your most used applications, pictures, music, and other files. This is particularly useful when you’re using an old slow mechanical drive.

Intel Optane gives off the illusion that your hard-drive is reading faster.

The Intel Optane Pinning Service Extension not having access to the iaStorAfsServiceApi.dll is what causes the memory pinning error.

DLL stands for Dynamic Link Library. It contains important information, functions, and code to help processes or programs run smoothly.

After a major Windows update, Windows tries to reinstall all your system devices with drivers that match them the best. As we all know, sometimes this process can get a little wonky.

There may be a version mismatch or a compatibility issue.

As a result, Windows throws an error and leaves your device half installed.

This means that files and libraries such as the iaStorAfsServiceApi.dll were not copied across correctly when Windows was trying to reinstall the device drivers for the Intel Optane.

How do I fix Intel Optane memory pinning errors

Now that we understand what it is, we can take steps to fix it. The most efficient way to do this is to find the missing DLL and make sure that Optane Pinning Service has access to it.

Unfortunately, while this may be the most efficient way, it is not the easiest. So here, we’ve included three different solutions you can use to solve this error.

1. Repair the Intel Optane Explorer Extension

  1. Run Programs and Features
    The easiest way to do this is to open the run dialog (win + R), type Appwiz.cpl into the open text field, then click on the OK button.
  2. From the list of programs, look for one labeled Intel Optane Pinning Explorer Extensions.
  3. Once you’ve found it, right-click on it, then select Repair from the short context menu.
  4. Once the repair process is complete, restart your computer.

2. Uninstall the Driver

The first solution should have fixed your problem but if it did not, then try this:

  1. Run the Device Management console (Device Manager).
    Once again, the easiest way to do this is by opening a run dialog, typing devmgmt.msc into the text field and then clicking on the OK button.
  2. Scroll through the list of devices, until you find the field labeled Software components and expand it.
  3. Right-click on the Intel Pinning Shell Extensions field and then select Uninstall Device from the context menu.
  4. A dialog should appear. On this dialog, ensure that the Delete the driver software for this device checkbox is ticked and then click on the Uninstall button.
  5. Once the process is complete, restart your computer.

3. Uninstall the Intel Optane Explorer Extension

If all else fails, uninstall the Intel Optane Explorer Extension. Follow solution 1, until you reach step three. Instead of clicking on the ‘Repair’ option, select the Uninstall option. You may be prompted to restart your computer – don’t.

Instead, close the dialog and go back to the list of programs. Look through the list to see if you can find any other software associated with Intel Optane. Uninstall anything you can find and then restart your computer.

It’s important to note that this might disable your computer’s Intel Optane system acceleration. If you want to re-enable it, you can download the drivers and software from Dell or Intel (depending on your PC’s manufacturer).

With the help of the above guide, you should be able to solve the Intel Optane Memory Pinning Error on Windows 10.

If you want to prevent this error from occurring in the future, you can disable the Intel Optane module from your computer’s BIOS settings before updating Windows next time.

Either way, we hope you’ve found this article to be helpful. Please do not hesitate to share your experience or point out a blind spot on our side in the comment section below. As always, thank you for reading.

  • Does my computer have Intel Optane memory?
Type Device Manager in Windows search, then click on it in the results. Now locate and expand Disk drives. If it shows Intel Optane…, the computer has Intel Optane memory.
  • Does Optane speed up SSD?
Optane speeds up systems by keeping their frequently accessed files. However, you will only see a notable difference for HDDs as SSDs are already very fast. Are you looking for an SSD? Here’s a list with the best 1TB and 2TB SSD.

[wl_navigator]

Hardware-backed PC security to thwart Thunderspy attacks

The concept of hardware-backed PC security is gaining momentum day by day. It is an outcome of industry stakeholders rethinking their cybersecurity strategies.

That is why, in the war against cyber attacks, Microsoft is pushing for a multi-faceted approach. The company argues that traditional anti-malware software or firewall defenses are inadequate today.

Therefore, it is advocating for the use of multiple strategies built around hardware-backed security or secured-core PCs. This approach is more effective in the prevention of Thunderspy or similar attacks.

What is a Thunderspy attack?

Thunderspy is a type of hacking that exploits direct memory access (DMA). A recent report by scientists at the Eindhoven University of Technology shows how it works.

The end-game for Thunderspy is data theft or other types of illegal code execution at the system kernel level. To achieve that, the attacker has to breach kernel security by exploiting Thunderbolt weaknesses.

First, the hacker connects a malware-infested device to a PC via the Thunderbolt hardware interface.

Then, the Thunderspy hacking tool disables Thunderbolt firmware’s security features.

In a successful attack, the malware bypasses Windows system security measures like sign-in. It then becomes possible to steal, spy, or manipulate data without restrictions.

The threat is so scary that an attacker does not need to know your password to breach your PC.

It appears that Thunderspy is not a remote code execution (RCE) attack. Thus, it requires the malicious actor to have physical access to the target device.

Secured-core PCs

Microsoft is talking up secured-core  tech as the backbone of hardware-backed PC security.

These personal computers have built-in hardware and firmware that protect them from Thunderspy or similar DMA infringements.

For starters, hardware-backed PCs support Kernal DMA protection. This security layer makes it difficult for Thunderspy malware to read or write to system memory.

The devices also leverage the Windows Defender System Guard and hypervisor-protected code integrity (HVCI).

You can always leave your questions or suggestions in the comments section below.

[wl_navigator]

Windows 10 build 19628 introduces DoH encryption

Windows 10 insider preview build 19628 now supports the DNS over HTTPS (DoH) protocol. This feature is not available to all users yet as Microsoft only released it to insiders in the Fast ring.

The change is part of the general improvements and a single fix that this update introduces.

Initial support for DoH

DoH is somewhat a controversial protocol. It is an internet standard whose purpose is to address specific security and privacy vulnerabilities affecting traffic over the web.

Its critics argue that it is not the best approach to the preservation of user privacy. They even offer alternatives like DNS over TLS.

Nonetheless, Microsoft is one of the tech firms that consider DoH useful in the encryption of DNS queries. So, it is offering the tool to enhance the privacy of web traffic for users of Windows 10.

DoH is a new feature in Windows 10, and no insider has tested it before. Still, you have to first activate it because it is not available by default.

We’re adding initial support for DNS over HTTPS, so that you can opt into using encryption when Windows makes DNS queries.

It appears Microsoft recognizes the fact that not everyone might be ready to start using a new feature that has data security and privacy implications.

It is giving insiders the choice of sitting out on the beta testing phase of the DoH protocol in Windows 10.

Other updates in Windows 10 preview build 19628

Microsoft said it fixed a problem that prevented some PCs from updating.

We’ve fixed an issue causing some devices fail to update with error code 0xc0000409.

The 0xc0000409 bug rears its ugly head from time to time when insiders are trying to upgrade their PCs to a more recent build. The issue has some fixes you may want to try just in case it persists, though.

Don’t hesitate to share your feedback or any questions in the comments section below.

[wl_navigator]


New Dynabook business laptops sport 10-gen Intel vPro chips

It will not be long before you can buy one of the Dynabook business laptops with Intel vPro microchips. The company announced that these devices will be available before the end of the second quarter this year.

This announcement coincided with the introduction of the new 10-gen Core vPro processors from Intel.

Laptops built for business

The use of vPro processors on Dynabook Portégé X Series and Tecra A Series should help deliver some powerful devices for business applications. Besides, the laptops come with superior WiFi connectivity and stronger security.

Dynabook appears to be targeting enterprises that prioritize things like PC performance. Addressing chip security makes sense too considering that processors are always a target for hacking.

Portégé X30L-G

The Portégé series has a deep history, but one thing about it that has not changed is its portability. It has always been superlight. The X30L-G carries on the tradition, with Dynabook terming it as the lightest 13.3-inch laptop in the whole world.

The device weighs 1.92 pounds, and it starts at $1,373.99.

Other Portégé laptops with a 10th gen Intel Core chip are X30-G, X40-G, and X50-G.

Tecra A30-G

The Tecra A series includes the A30-G laptop, which starts at $444.99. Although it has the same display size as the X30L-G, it is heavier, weighing 2.65 pounds.

It is still the thinnest and lightest in the Tecra A family.

One of its top features is Wi-Fi 6, which meets the 802.11ax next-gen standard for connectivity. It also includes USB-C, another faster data transfer standard.

Tecra A40-G is the other notebook in this series that has an Intel vPro chip. It starts at $399.99.

So, if you are looking for a low-end laptop, the Tecra series is an ideal choice.

Intel is building its next-gen processors to support business functions that demand high computing power. Robust and faster communication and cybersecurity are also a vital goal.

If these processors deliver on their promise, most PC makers will be racing to put them on their devices.

[wl_navigator]

Fix: Error 451 Unavailable Due to Legal Reasons

451 unavailable due to legal reasons is an error status code you receive when attempting to visit HTTP pages that your government blocked.

There are many reasons why this could happen, depending on the laws of your country, website content, and policy violation: copyright, privacy, gambling, drugs, religion, politics, blasphemy, or something else.

If you get the 451 unavailable due to legal reasons error when trying to access specific web pages, you can fix it using the solutions described below.

How can I fix error 451 unavailable due to legal reasons?

1. Use a VPN

  1. Download Private Internet Access
  2. Install PIA on your computer and launch it
  3. Click VPN Server and select a country from the listThe main window of Private Internet Access
  4. Press the large power button to connect to the VPN serverPIA is connected to Netherlands
  5. Try visiting the blocked page in your web browser

The best way to fix HTTP error 451 unavailable for legal reasons is by using a VPN service to defeat censorship. And we can’t think of a better app than Private Internet Access (PIA).

Developed by Kape Technologies, PIA can help you unblock websites and freely navigate the web without worrying about censored pages. It has over 3,200 servers in 45 countries and exclusive DNS servers.

In case you especially need uncensored worldwide content, then with this VPN, you can access content from around the globe. Plus, there are no bandwidth limits, so you can stream at high speed.

Private Internet Access doesn’t have a free trial, but you receive a 30-day money-back guarantee.

Private Internet Access

Solve connection errors and unlock geo-blocked pages with this powerful VPN solution.
Check Price Visit Website

2. Use HTTPS instead of HTTP

Since the error 451 unavailable for legal reasons occurs when using the HTTP protocol, try using HTTPS instead. If the page has an SSL certificate, your request will force the HTTPS page instead of loading the HTTP version.

HTTPS Everywhere forces your browser to load only HTTPS pages

If this solution works for you, consider installing HTTPS Everywhere, a browser extension that forces pages to load HTTPS if they exist.

3. Change your DNS servers

  1. Go to Network Connections, select your network interface, and click Properties
  2. Select Internet Protocol Version 4 (TCP/IPv4) and press PropertiesChange the properties of your IPv4 network
  3. Select Use the DNS server addressesChange your DNS server addresses
  4. At Preferred DNS server, write 8.8.8.8 (Google Public DNS)
  5. At Alternate DNS server, write 8.8.4.4 (Google Public DNS)
  6. Press OK and try to access the blocked page

Instead of Google Public DNS, you can also try OpenDNS (208.67.222.222 preferred, 208.67.220.220 alternate) and Cloudflare (1.1.1.1 preferred, 1.0.0.1 alternate). Those are free and public DNS servers.

In some cases, governments can block DNS requests instead of specific IP addresses. To test this theory, you can change your DNS servers and try to get past error 451 unavailable due to legal reasons.

Have DNS issues? Check out this article to see how to quickly fix them.

4. Use a proxy server

A proxy server redirects your browser traffic to another IP address. So you can use it to hide your true IP address and switch to another one not blocked by your government (in another country).

It’s worth a shot if you want to fix HTTP error 451 unavailable for legal reasons.

Use a free proxy server to bypass error 451 unavailable due to legal reasons

Try accessing the blocked page using a free online proxy service like Hide.me Proxy, Hidester Proxy, and Croxy Proxy. But there’s a small chance that your government has already identified and blocked those public IP addresses.

Have trouble connecting to the proxy server? Check out this article to fix proxy connection issues in no time.

5. Use Tor

  1. Download Tor Browser and install it on your PC
  2. At startup, click Configure and enable Tor is censored in my countryRequest a bridge to browse the web if Tor is censored in your country
  3. Select Request a bridge from torproject.org and click Connect
  4. Try accessing the censored site in Tor BrowserBrowse the web anonymously with Tor

Tor is an anonymous network specifically designed to help users bypass censorship. You can download the Tor web browser and mask your actual IP address to bypass error 451 unavailable due to legal reasons.

However, Tor can be intimidating for casual users. It can also become painfully slow to securely browse the Internet, especially if you turn on all advanced settings for maximum security.

It can be really frustrating to keep getting HTTP error 451 unavailable for legal reasons whenever you’re trying to access websites blocked by your government. But the five solutions above should do the trick.

We suggest using the VPN option if you had to pick only one. Private Internet Access is the best VPN that can help you defeat government censorship.

And for other related errors like HTTP error 302, refer to our detailed guide for fixes.

The new Alienware Aurora R11 gets water cooling

Dell announced the new Alienware Aurora R11, the first PC from Alienware to feature PCI-e liquid cooling graphics. It’s available with up to an NVIDIA GeForce RTX 2080 SUPER and up to a 10th Gen Intel Core i9 10900KF. Also, you can choose to load up an AMD Radeon VII graphics if you prefer AMD systems.

What’s new about Alienware Aurora R11?

Dell sais that the Aurora R11 is less noisy and cooler than older devices. To be more precise, they say that you should see up to a 19.5% temperature reduction and 69.2% less noise.

You will be able to upgrade the Aurora R11 if needed without using any tools and overclock the system to tweak performance. 

Possible configurations

CPU

  • 10th Gen Intel® CoreTM i5 w/Turbo)
  • 10th Gen Intel® CoreTM i5 10th Gen Intel® CoreTM i7 w/Turbo Boost Max 3.0) 10th Gen Intel® CoreTM i9 w/Thermal Velocity Boost)
  • 10400F (6-Core, 12MB Cache, 2.9Ghz to 4.3GHz
  • 10600KF (6-Core, 12MB Cache, 4.1Ghz to 4.8GHz) 10700KF (8-Core, 16MB Cache, 3.8GHz to 5.1GHz
  • 10900KF (10-Core, 20MB Cache, 3.7GHz to 5.3GHz

GPU

Single Graphics Options

  • NVIDIA GeForce GTX 1650 4GB GDDR5
  • NVIDIA GeForce GTX 1650 SUPERTM 4GB GDDR6
  • NVIDIA GeForce GTX 1660 SUPERTM 6GB GDDR6
  • NVIDIA GeForce GTX 1660 Ti 6GB GDDR6
  • AMD RadeonTM 5600 6GB GDDR6 (OC Ready)
  • NVIDIA GeForce RTXTM 2060 6GB GDDR6 (OC Ready)
  • NVIDIA GeForce RTXTM 2060 SUPER 6GB GDDR6 (OC Ready)
  • AMD RadeonTM RX 5700 8GB GDDR6 (OC Ready)
  • NVIDIA GeForce RTXTM 2070 8GB GDDR6 (OC Ready)
  • NVIDIA GeForce RTXTM 2070 SUPER 8GB GDDR6 (OC Ready)
  • AMD RadeonTM RX 5700 XT 8GB GDDR6 (OC Ready)
  • NVIDIA GeForce RTXTM 2080 SUPER 8GB GDDR6 (OC Ready)
  • NVIDIA GeForce RTXTM 2080 Ti 11GB GDDR6 (OC Ready)
  • AMD RadeonTM VII 16GB HBM2 (OC Ready)
  • Liquid Cooled NVIDIA GeForce RTX 2080 SuperTM 8GB GDDR6 (OC Ready)

Dual Graphics Options

  • Dual NVIDIA GeForce RTXTM 2070 SUPER 8GB GDDR6 (OC Ready) with NVIDIA NVLink SLI Enabled
  • Dual NVIDIA GeForce RTXTM 2080 SUPER 8GB GDDR6 (OC Ready) with NVIDIA NVLink SLI Enabled
  • Dual NVIDIA GeForce RTXTM 2080 Ti 8GB GDDR6 (OC Ready) with NVIDIA NVLink SLI Enabled

Memory

2933Mhz Class

  • 8GB HyperXTM FURY DDR4 XMP at 2933MHz; up to 64GB (additional memory sold separately)
  • 16GB Dual Channel HyperXTM FURY DDR4 XMP at 2933MHz; up to 64GB (additional memory sold separately)
  • 32GB Dual Channel HyperXTM FURY DDR4 XMP at 2933MHz; up to 64GB (additional memory sold separately)
  • 64GB Dual Channel HyperXTM FURY DDR4 XMP at 2933MHz

3200Mhz Class

  • 8GB HyperXTM FURY DDR4 XMP at 3200MHz; up to 64GB (additional memory sold separately)
  • 16GB Dual Channel HyperXTM FURY DDR4 XMP at 3200MHz; up to 64GB (additional memory sold separately)
  • 32GB Dual Channel HyperXTM FURY DDR4 XMP at 3200MHz; up to 64GB (additional memory sold separately)
  • 64GB Dual Channel HyperXTM FURY DDR4 XMP at 3200MHz

The Aurora R11 starts at $1,130 and is already available for purchase. If you wait a little bit longer, until May 28, you will be able to buy more affordable configurations starting at $880.

[wl_navigator]

Raspberry Pi not showing up on network? Try these solutions

You’re used to seeing your Raspberry Pi as a capable device that helps you explore computing. This isn’t a viable option when Raspberry Pi is not showing up on the network at all.

Plenty of users describe how they’ve connected the network cable and both of the lights were showing up as usual.

They confirm that the cable itself works too, so there seems to be a deeper issue this time. Do you also feel that you’re out of options?

This tutorial will help you find out the reason why your Raspberry Pi isn’t anywhere to be found on the network.

What can I do if Raspberry Pi is not visible on the network?

1. Connect the Raspberry Pi computer directly to the switch

connect Raspberry Pi to the switch

Quite a few users discovered that their problem was related to some RJ45 ports. Long story short, they simply weren’t connected to the main switch, hence the devices from those ports had strange IPs.

To make sure that’s not your case as well, connect the Raspberry Pi directly to the switch and check if it finally shows up on the network.


2. Enable SSH on Raspberry Pi

Enable SSH

  1. Go to the Raspberry Pi configuration window from the Preferences menu.
  2. Click on the Interfaces tab.
  3. Select Enable SSH next.
  4. Finally, restart your Pi for the changes to be maintained.

SSH is disabled by default in Raspberry Pi, so it’s time to correct that. In order to do so, you’ll need to have an HDMI monitor plugged into your Raspberry Pi.

Then, feel free to enable SSH manually from the desktop GUI, as described above. If it is already enabled, move on to the next troubleshooting tip.


3. Make sure all wired and wireless devices are on the same network

wired connection

Within your local network, the router is responsible for way more than the IP address assignment. There are routers with an option to isolate Wi-Fi connected devices from wired ones.

Therefore, have a look at your router under Wi-Fi settings. Be particularly careful about any security settings like wireless AP/Client isolation.

Your goal here is to make sure both your wired and wireless devices are on the same network.


4. Manually set the IP of your Raspberry Pi

Raspberry Pi IP

Another solution that may work is making sure that your Pi doesn’t have the same IP as any other device on the network.

Users often describe how manually setting the IP of their Pi fixed the issue and the little device eventually showed up on their network.

Moreover, this will prove useful in the future too. After all, Raspberry Pi requires a static IP address if your wish is to access it with other devices over a long period of time.

We may only hope that this tutorial has helped Raspberry Pi to show up on the network. If you are aware of other working solutions, don’t hesitate to leave a comment in the section below.

[wl_navigator]

Windows 10 2004 optimized for Ryzen 4000 chips

Ryzen 4000 chips entered the scene at CEC 2020, where AMD showcased its next-gen mobile and desktop processing units. The chips may have come to the party later than their dominant counterparts like the Intel Core series. But they are early enough to leverage Windows 10 2004 support.

Microsoft updated Windows 10 processor requirements

The latest Windows Processor Requirements document confirms the compatibility of Ryzen 4000 processors with Windows 10 2004. Microsoft uses that page to reveal all the chips that its operating systems support.

Older AMD processors are in the updated list too.

Up through the following AMD 7th Generation Processors (A-Series Ax-9xxx & E-Series Ex-9xxx & FX-9xxx); AMD Athlon 2xx processors, AMD Ryzen 3/5/7 4xxx, AMD Opteron and AMD EPYC 7xxx.

Most major chip manufacturers have been aware of these processor specifications for a long while. So the latest inclusion does not catch any of them by surprise.

Also, multiple variants of Intel microprocessors are in the updated list. The company has a deep history in the manufacture of chips for different versions of the Windows operating system.

Its listed CPUs include the powerful 10th generation processors in the Intel Core series.

Pentium 4 and Celeron processors may be slow and not ideal for high-end, CPU-intensive applications. But they are still in use today. It, therefore, makes sense that Microsoft is not ending Windows 10 support for the older chips from Intel, in the meantime.

About missing processors

There is no mention of AMD Athlon 3000 in the Windows Processor Requirements list. Unsurprisingly, the document includes Athlon 200-series microchips.

If a processor model is not in the list, it can only mean one thing. Microsoft expects its maker (OEM) not to install it on a customer system running on Windows.

Still, any exclusion could be an error of omission. So, affected companies can contact Microsoft for clarification or the inclusion of their chips.

You can always get back to us with suggestions or questions in the comments section below.

[wl_navigator]

Microsoft to stop offering 32-bit Windows 10 to PC makers

Microsoft intends on doing away with 32-bit versions of Windows 10 at some point in a gradual phase out. Starting with Windows 10 2004, OEMs will be getting only 64-bit versions of the operating system.

64-bit architecture is the future CPU systems

Microsoft published minimum hardware requirements that OEMs in relationship with the company have to address. The company announced that it will stop releasing 32-bit builds of Windows 10 to device makers, beginning with version 2004.

“Beginning with Windows 10, version 2004, all new Windows 10 systems will be required to use 64-bit builds and Microsoft will no longer release 32-bit builds for OEM distribution.”

Microsoft’s decision is in line with the ever-rising demand and preference for high-performance CPU systems. That is why more and more gadgets are coming out with 64-bit processor architectures.

The main reason behind this trend is that 32-bit processors handle only a small amount of RAM. Their 64-bit alternatives are capable of utilizing much more system memory.

Unfortunately, 32-bit Windows 10 is unable to get the most out of modern 64-bit chips. So it makes sense that, in the long run, Microsoft will be focusing on building OS versions with 64-bit processor architecture in mind.

You can still use your 32-bit Windows 10, for now

In the meantime, you need not worry that your PC may be running on the 32-bit version of Windows 10. The change is only affecting newly manufactured devices that have not received any OS from Microsoft yet.

So, if your PC came with the 32-bit OS pre-installed, you will continue receiving support from Microsoft. That includes security updates and regular fixes from the company.

It still makes to prepare for that time when OEMs will not be making 32-bit chips anymore.

With Windows 10 32-bit also gradually dying out, other app and software developers will have little choice but to focus on building for the CPU architecture of the future.

Feel free to leave any feedback or questions in the comments section below.

[wl_navigator]

Decentralized Tachyon VPN now has 250,000 users worldwide

Blockchain-based ecosystem, Tachyon, has now 250,000 people using it’s VPN decentralized system, according to their Tachyon Protocol Weekly Report.

More than 100,000 global users joined Tachyon VPN in only one week and their own prediction over that fulminant growth is that they expect to reach one million users in July.

According to their Weekly Report, they are now accelerating the integration of the IPX Staking System to Tachyon VPN:

IPX will build the world’s first million scale traffic marketplace on a decentralized network powered by Tachyon Protocol.

Decentralized VPN could be the future

Decentralized internet was the business model of the blockchain startups until recently, but the (centralized) VPN service provider X-VPN  changed all that with their Tachyon Network, a blockchain-based decentralized internet protocol. 

All that was built in association with V SYSTEMS, a blockchain infrastructure provider that has the main focus on database and cloud services.

With X-VPN being considered to be one of the more popular centralized VPN service providers out there, there is no wonder that Tachyon got to be such a successful decentralized VPN system in such a short time.

The secret formula of success might be that the Tachyon VPN combines the features of blockchain, User Datagram Protocol (UDP), Distributed Hash Table (DHT), and cryptographic encryption, as described in their whitepaper published in late September.

What is the difference between centralized and decentralized VPN?

VPN is an acronym for Virtual Private Network and its role is to extends a private network across a public network. In other words, you can send and receive data across shared or public networks. It’s almost as if your device has a direct connection to the private network.

Initially, VPN technology was created to enables remote users and branch offices to access corporate applications and resources securely.

A VPN is like a direct tunnel between two messages, making sure that they are safe from the internet service provider. They are protected from the middleman. Also, a VPN will provide you with a different IP address. From an outside onlooker, you will appear as using the Internet from a different geographical location.

So if you want to access websites in certain countries that are censored or unavailable, you can bypass that using a VPN.

The problem with centralized VPN is that the hosts of more traditional VPN servers are centralized companies. And often, these servers are under the control of a commercial entity that charges for subscriptions and they sell data and bandwidth. You see where we’re getting at, right?

A decentralized and blockchain-based VPN is not controlled from a single point. The system is naturally impartial and comparatively more secure because it’s not controlled by a single entity. A decentralized VPN brings together the traffic of numerous computers and communicate using a peer-to-peer system.

So each computer functions like some sort of a server. And the help from blockchain technology enables the nodes to make decisions that will have an impact on the VPN. In other words, it is very difficult to hack a decentralized VPN.

Anyhow, Tachyon asked us to Please stay tuned! and that’s what we’re about to do next, to watch the interesting evolution of the decentralized VPNs.

Alan Wake is coming to Xbox Game Pass for Console and PC on May 21

Alan Wake, the cult-classic survival horror game released ten years ago, is coming to Xbox Game Pass for Console and PC on May 21. Developer Remedy Entertainment announced the news today during a 10th-anniversary livestream, and you can watch the snippet captured by Twitter user Nibellion below

As a reminder, Alan Wake launched as an Xbox 360 exclusive back in May 2010, with the Windows version coming two years later. It’s a game that truly showed Remedy’s storytelling expertise, and Alan Wake pretty much pioneered the episodic format later perfected by Telltale Games in games like The Walking Dead. Despite Remedy releasing the stand-alone Alan Wake’s American Nightmare in 2012, many fans have been hoping to see Remedy release a true sequel. Unfortunately, Remedy went to create a new IP called Quantum Break for Microsoft, followed by the cross-platform game Control last year.

Alan Wake game was actually published by Microsoft Studios, so adding it to Xbox Game Pass along with newer Xbox Game Studios titles makes complete sense. If you have yet to play this old gem, we remind you that you can get your first month of Xbox Game Pass Ultimate for just $1.

FIX: Black textures in Apex Legends

It’s no surprise that ever since Apex legends appeared in the gaming scene, a lot of other FPS Battle-Royale games have taken a brief nosedive.

This critically-acclaimed game developed by Respawn Entertainment and published by Electronic Arts has been very popular within the gaming community.

In fact, the constant patches that contain new features, fixes, and balance changes are a testimony to that.

However, not all updates go as smoothly, as some do manage to bring a few issues of their own.

For example, those of you that installed the recent Apex Legends System Override update may have noticed that the game now suffers from black textures or even missing visual elements.

These include black boxes or backgrounds on maps, sometimes over individual characters.

Fortunately enough, there are currently two reasons why the black textures bug may appear:

  • Missing game assets
  • Incorrect GPU settings

How do I fix black textures in Apex Legends?

1. Repair the game through the Origin launcher

  1. Open the Origin Launcher a
  2. Locate Apex Legends in your gaming library
  3. Right-click on Apex Legends
  4. Select RepairRepair Apex Legends
  5. Wait for the software to finish verifying, downloading, and installing the necessary files

2. Run the game in High-performance mode

  1. Make sure that both Apex Legends and the Origin launcher are closed
  2. Go to the Start Menu
  3. Type in Graphics settings and go to the first result
  4. Within Graphics settings, under the option to Choose an app to set preference, select Classic app
  5. Click Browse and navigate to the Apex Legends installation folderGraphics Settings
    • The default directory is C:Program FilesOrigin GamesApex
  6. Select the game’s executable file,  then click Add
  7. Click the Options button
  8. In the pop-up menu, select High performance, then click Save

Another thing you could try is running the game using Admin rights. However, this is only worth trying if you are running the game from a PC’s Guest Account and not the PC’s default administrative account.

Although this bug has been around for some time now and the solutions to solving it are pretty straightforward, you have to admit that being immersed in a photorealistic world and suddenly seeing black textures can be annoying.

Have you experienced the black texture issue while playing Apex Legends? Let us know how you handled it by leaving us a message in the comments section below.


[wl_navigator]

Microsoft publishes full Build 2020 session catalog

Microsoft has published today the full session catalog for its Build 2020 developer conference on May 19-21. The event is going all-digital this year, and the company is allowing everyone to register for free.

If a quick search for “Windows 10” reveals no less than 60 sessions focusing on the Windows Insider Program, Windows Terminal and WSL2, or PowerToys, we couldn’t find any sessions dedicated to Windows 10X, the new lightweight version of Windows 10 that Microsoft will now be adapting for single-screen devices.

One session titled “Unifying and evolving the Windows app platform” sounds quite promising. The description says “Learn how the Windows app platform is evolving and unifying Win32 and UWP so your present and future apps can easily target 1 billion+ Windows devices.” As Windows enthusiasts have been debating about the “death of UWP apps,” this particular session should be quite enlightening.

You can already register for sessions you want to attend, and overall Microsoft promises 48 hours of content. Let us know in the comments if you spot other interesting sessions in the catalog.