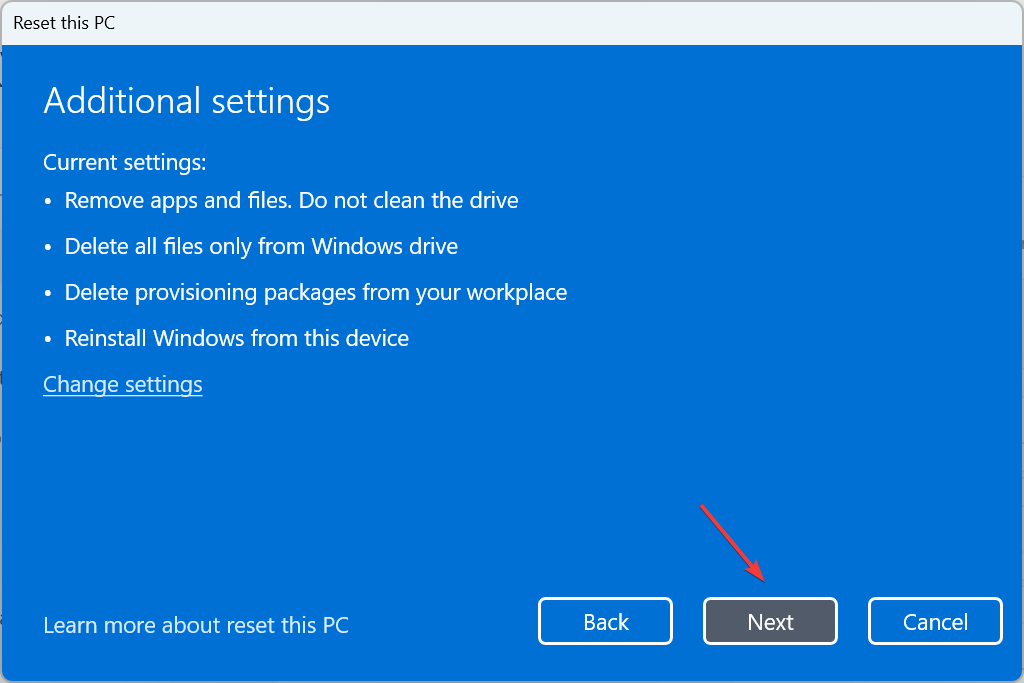
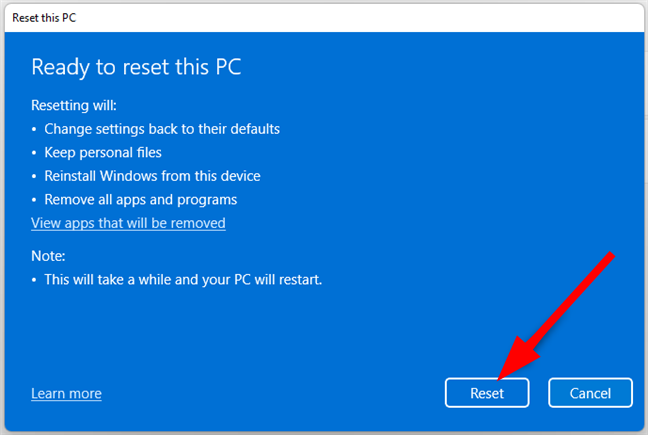
Windows Share has been receiving a wide array of upgrades in recent months. In the latest update to the Beta channel, Windows 11 Insider Preview Build 22635.3575 (KB5037862), Microsoft has brought a new Copy button in the Windows Share popup.
Located next to the file name on the Windows Share screen, clicking/tapping the Copy button will, as expected, copy the file. Surprisingly, this is the only new feature in Windows 11 KB5037862, according to Microsoft’s official blog. The rest are all patches for previously reported bugs!
Image source: Microsoft
We agree that this isn’t the quickest way to copy a file in Windows 11, especially when you could simply do so from the right-click context menu. Also, there was no apparent need for a Copy button in Windows Share.
While Microsoft hasn’t shared a reason for introducing the feature, reports suggest that it’s more aligned with the needs of touchscreen Windows device users who frequently use Windows Share to transfer files.
The feature is currently exclusive to Windows 11 Insiders who have turned on the toggle for Get the latest updates as soon as they’re available. If you don’t see the update yet, wait for a while, as it’s a gradual rollout.
Get the latest updates as soon as they’re available
Video Electronics Standards Association (VESA) announced a significant update to its DisplayHDR specification. With DisplayHDR version 1.2, VESA introduces tighter performance requirements across various aspects such as luminance, color gamut, and bit depth, alongside several new test requirements aimed at improving color accuracy, contrast ratio, black levels, and reducing subtitle flicker.
How will DisplayHDR 1.2 will impact low end displays?
Here’s how this goes: With this update, VESA has tightened the noose around performance requirements, ensuring that displays must now achieve higher standards of luminance and color accuracy to bear the DisplayHDR certification. Right now, on some displays that bare the VESA DisplayHDR certification logo display sub par, washed out images. Well, with DisplayHDR 1.2 if a manufacturer wants to sell their display under VESA’s HDR certification, they will have to meet a higher standards bar.
We will go through the most important changes of the new DisplayHDR 1.2 standard, as highlighted by VESA.
Enhanced color accuracy and contrast
One of the standout features of DisplayHDR 1.2 is its focus on enhancing color accuracy. With new comprehensive color accuracy tests, displays will now be evaluated across a broader spectrum of colors at different luminance levels. This means that whether you’re gaming, watching a movie, or working on a photo or video editing, the colors you see will be more accurate and consistent. Moreover, the introduction of new tests for static contrast ratio and black levels is set to improve the depth and detail of the visuals, ensuring that dark scenes in movies or games are more immersive and detailed.
Local dimming and subtitle flicker tests
For those who crave the ultimate HDR experience, particularly in higher-tier displays, DisplayHDR 1.2 requires the incorporation of 2D local dimming technology. This technology allows different sections of the screen to be lit independently, significantly improving contrast and making for a more dynamic viewing experience. Additionally, the new subtitle luminance flicker test addresses a common annoyance many have experienced – the distracting flicker when subtitles appear and disappear in dark movie scenes.
However, the changes will not be implemented right away. VESA has provided manufacturers with a transition period. They can continue certifying products under the previous DisplayHDR 1.1 specs until May 2025 for monitors, and May 2026 for laptops.
In conclusion, the rollout of DisplayHDR 1.2 by VESA will especially impact the low end monitors that will have to comply to these minimum requirements. Will the changes affect the product prices? That remains to be seen. In the meantime, you might be interested in our guide on how to calibrate HDR on Windows 11. You will also learn if your display can handle HDR or not.
What do you think about VESA’s new DisplayHDR 1.2 specifications? Let’s talk about this in the comments below.
Microsoft is constantly improving Windows 11 with new features, and speaking of which, the new Build 26212 for Windows 11 was recently released to the Canary Channel.
The new build has some new hidden features, related to user privacy and AI, so today we’re going to take a closer look at them.
Windows 11 Build 26212 comes with new AI privacy and security settings
According to Windows Latest, there’s a new option in Privacy & security settings in this build called Recalls and snapshots.
This was first spotted on X, formerly Twitter, by user Albacore.
Text in this preview build suggests that the "AI Explorer" umbrella term may not be used publicly after all. ✨? The page for tweaking privacy settings of the new AI smarts is simply called "Recall and snapshots." Guess they want to highlight individual features instead.? pic.twitter.com/kUln70RsWH
It is speculated that this section will be used for tweaking privacy settings on the upcoming AI integration.
Recall AI has also been spotted on LinkedIn profiles of alleged Microsoft employees, which leads many to speculate what this could be. Many believe that Recall could be used for branding the AI integration in Windows 11.
Modifications to Windows are getting trickier with each passing day, as Microsoft introduces more checks. The latest in the series is Windows Defender blocking ExplorerPatcher!
Upon closely monitoring the issue, it appears that Microsoft is blocking customization apps on the latest version of Windows 11. As a result, you will see an ExplorerPatcher block notification from Windows Defender. This has been going on since February’24, as is evident from the GitHub forum post.
Even StartAllBack users are reporting similar problems!
In recent days, we have seen several reports of the issue. For many users, Windows Defender identifies ExplorerPatcher as HackTool:Win64/ExplorerPatcher!MTB. A few were unable to update or install Windows 11 if ExplorerPatcher was installed on the PC because it caused security or performance issues.
Windows Setup throws an error when ExplorerPatcher is installed
Some reports suggest that changing the name of the ExplorerPatcher executable file (.exe) would allow you to run the application without Windows Defender blocking it. But that might trigger other issues.
So, whitelisting the app is a viable option for now!
How do I unblock ExplorerPatcher in Windows Defender?
Open Windows Security > go to Virus & threat protection > click on Manage settings under Virus & threat protection settings > click Add or remove exclusions > choose Yes in the UAC prompt > click on Add an exclusion > choose File > go to the designated folder > select the ExplorerPatcher’s executable file > click Open.
Whitelisting an app in Windows Security
From now on, Windows Defender won’t block ExplorerPatcher, but you might still face issues while upgrading the OS if the app is installed.
Microsoft is planning to add an AI-based theme generator in the Edge browser. It is not new to say that the company is running the ongoing AI race at an absolute pace. It has been adding new AI features in almost all its products including Microsoft Edge.
While you can access the Copilot chatbot from the sidebar of the company’s first-party web browser, it seems Microsoft is planning to add a new feature powered by AI.
Microsoft Edge will soon get an AI theme generator
A new listing added to the Microsoft 365 Roadmap website spotted by Neowin mentions that Microsoft Edge will soon get an AI theme generator.
In the new listing, Microsoft explains what Edge browser’s AI theme generator will be like.
Microsoft Edge will include an AI theme generator, that allows users to input a text prompt and generate a series of images to preview as browser themes. Applying the theme includes setting the generated image on the Edge new tab page, and applying the image’s dominant color to the browser frame.
Microsoft further explains that there’s a provision to limit the use of AI theme generators in the Edge browser. Admins who oversee Microsoft Edge for companies/organizations can restrict the use of the theme generator using the AIGenThemesEnabled policy.
It is worth noting that the rollout of AI theme generators is scheduled for June. However, there’s no mention of an exact rollout date by the company. In January, Microsoft added a similar feature in Teams. The feature allows users to create AI-generated backgrounds when attending Teams video meetings.
Let’s not forget that the Edge browser already let users set themes of their choice for years now. However, the AI theme generator will be an interesting addition as it would power users to set customized themes in the Edge browser.
It won’t be wrong to say that Microsoft has been constantly improving the Edge browser for its users. More recently, the Redmond giant updated Microsoft Edge to fix two security vulnerabilities and added an internet speed tester.
What do you think about the upcoming AI feature in Microsoft Edge? Will you use it when it is available? We’d love to hear your thoughts, please comment below.
Microsoft recently rolled out a second security update for the Edge browser in the Stable Channel this month. The news comes via Neowin which reports the latest Edge version 124.0.2478.97 is out now and resolves two security vulnerabilities reported by the Chromium team.
Microsoft has a fix for CVE-2024-4671 to Microsoft Edge Stable Channel (Version 124.0.2478.97) and Extended Stable channel (Version 124.0.2478.97), which has been reported by the Chromium team as having an exploit in the wild. For more information, see the Security Update Guide.
This update also contains the following Microsoft Edge-specific update:
Worth noting that both security vulnerabilities have been detailed on the official CVE website. The CVE-2024-4671 vulnerability is the one with high severity. It lets remote attackers possibly exploit heap corruption using a crafted HTML page.
Google further reported that the exploit exists in the wild which means the same has already been used for malicious activities. Therefore, installing the latest security update as soon as possible is important for users.
That said, the second vulnerability CVE-2024-30055 is of low severity. It is a spoofing vulnerability exclusive to Microsoft Edge which requires users to click a specific link to exploit it. Even if the attacker exploits the same, they can only access limited information from the prey’s browser.
Google is reportedly working on adding Spatial Audio feature to ChromeOS allowing users to enjoy a more immersive listening experience. If you are unaware of Spatial Audio, allow us to explain a bit.
Usually many smartphones and wireless earbuds these days come with a Spatial Audio feature to offer an immersive sound experience while enjoying favorite playlist, movies, or games. Not to forget, there are a few devices out there that also support head-tracking. This allows you to enjoy truly immersive audio as you move your head.
Google could be readying Spatial Audio feature for ChromeOS
Now it seems Spatial Audio could make its way to ChromeOS. According to the latest report by 9to5Google, the company is working towards enhancing entertainment options on Chromebooks by adding Spatial Audio. The publication managed to spot a new code change which points out towards the feature. As with the new features, it is currently locked behind an option in the chrome://flag.
When an user enables it, the new toggle option for Spatial Audio appears on the Audio page of the Settings app in Chromebook. Users can enable or disable the Spartial Audio feature using the same toggle in Chromebooks powered by ChromeOS. This means Chromebook users will be able to enjoy the Spatial Audio feature in compatible earbuds down the line.
Worth noting that the Spatial Audio feature in ChromeOS is work in progress and is far from being ready. 9to5Google further adds that the feature isn’t even available in the latest ChromeOS Canary channel. However, the publication managed to showcase the toggle on where and how it would look via an screenshot which it calls an altered mockup . You can check it out below.
Image source: 9to5Google
As we write, there’s no exact information on how Spatial Audio would work in ChromeOS. However, one can imagine how the feature would work based on what how it works on Android devices. It is possible that Spatial Audio on ChromeOS could work with Bluetooth as well as wired earphones offering immersive audio.
All that said, the official rollout date for the Spatial Audio feature in ChromeOS is unknown as we write. However, the feature could land in Chromebooks later this year.
Would you love to have Spatial Audio feature in Chromebook? Please share your thoughts in the comments below.
Microsoft announced that additional improvements for ink annotations are coming to OneNote for Windows, starting 10th May 2024. These latest improvements for ink annotations in OneNote are available for all Microsoft 365 Insiders using Windows 10 or 11 running version 2403 (Build 17407.17623) or later.
Microsoft introduces even more improvements to ink annotations in OneNote
Microsoft listed the additional ink annotations improvements coming your way in its recent blog post which reads:
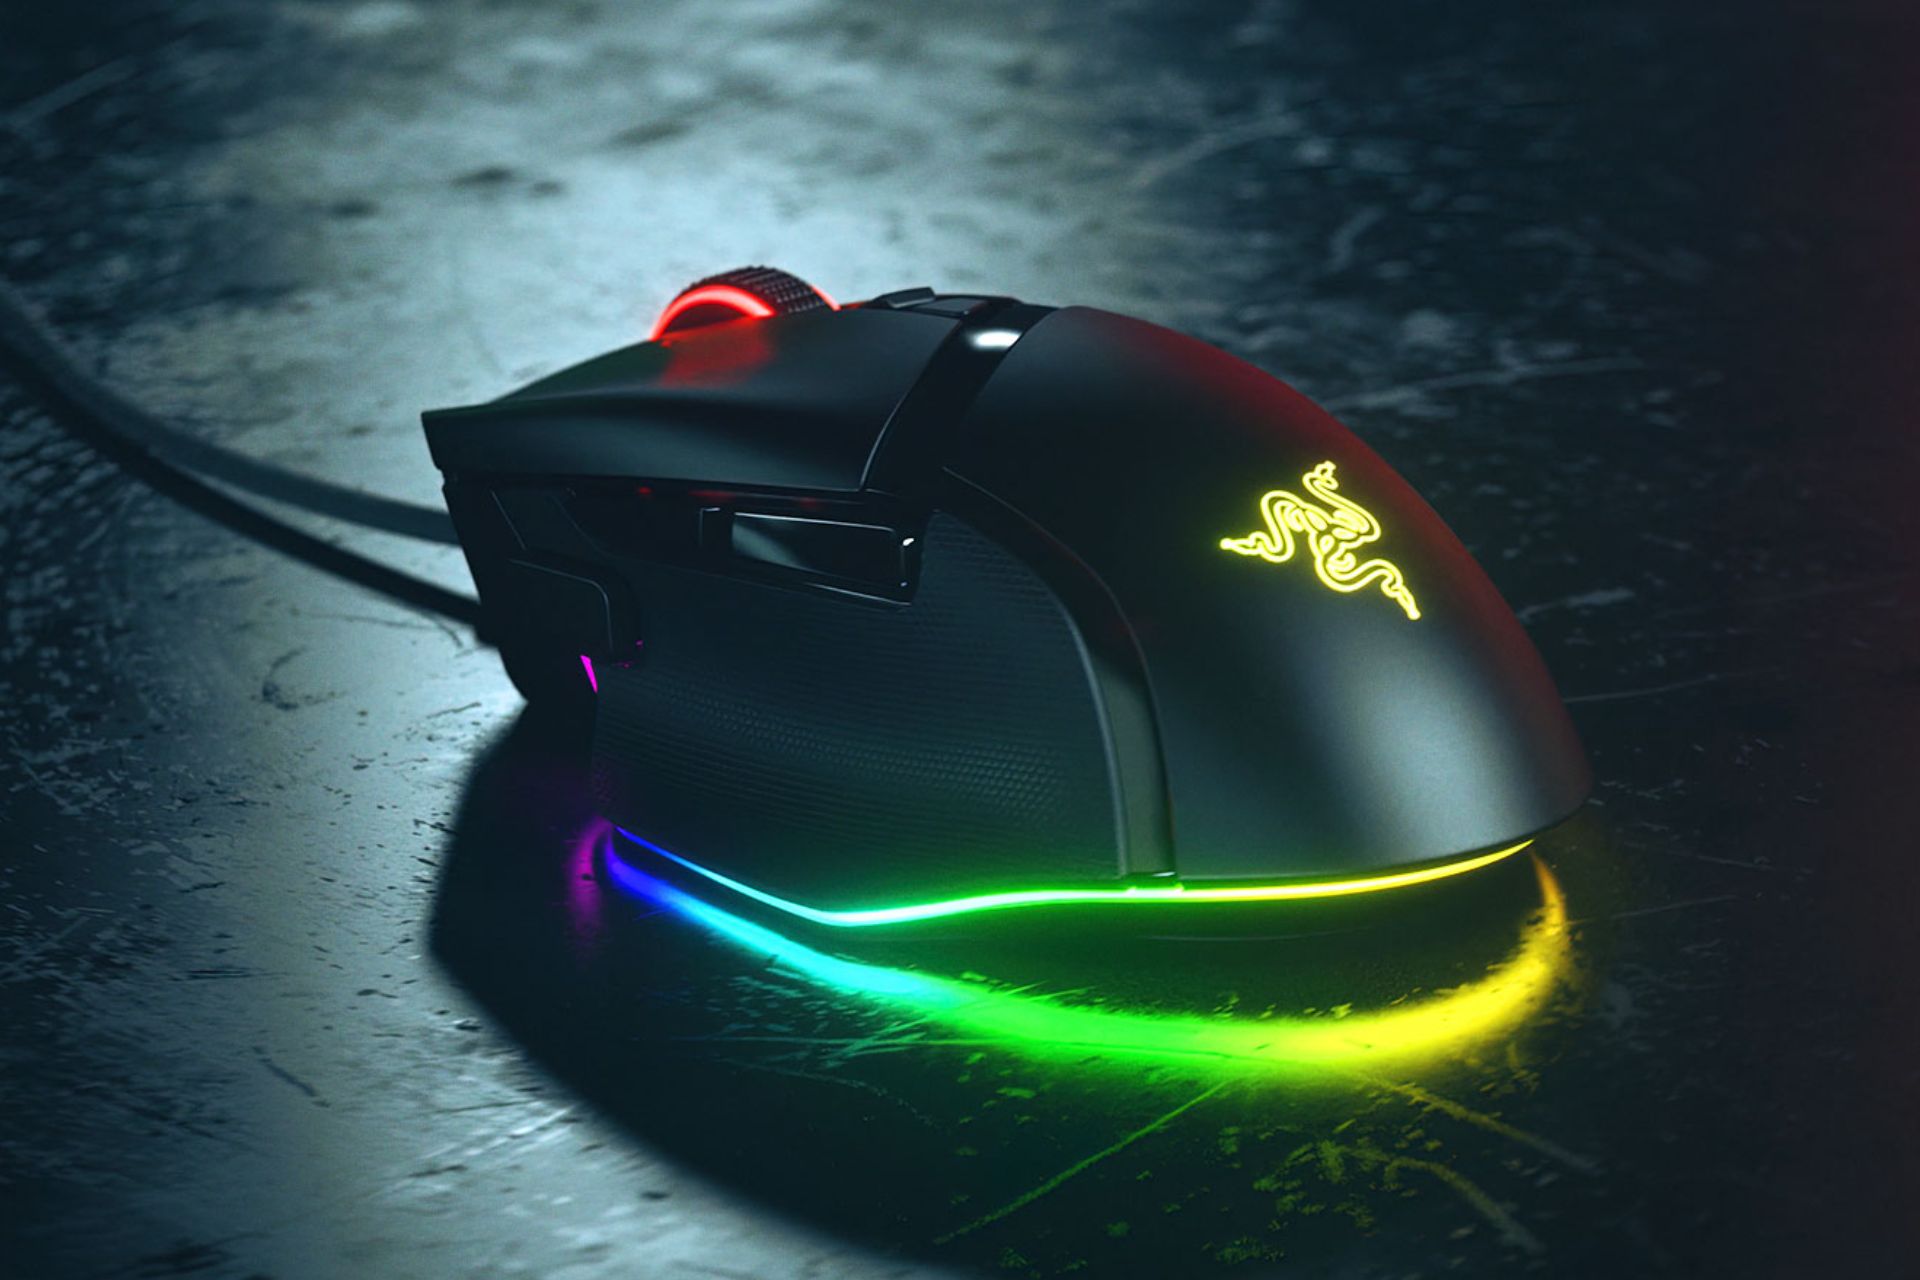
If you have been eyeing a gaming mouse with a heavy discount, the Razer Basilisk V3 gaming mouse is an out-and-out winner. What’s more interesting? The price of this beast of a gaming mouse has plunged by 20%. Yes, you read that correctly.
Why should you pick Basilisk V3 as a gamer?
Let’s talk about design first. It is a sleek and feature-packed gaming mouse with a solid matte plastic body. You’ll find three side buttons on the left and a right-handed shape with a thumb rest.
That said, don’t worry about being left-handed. The discounted Razer Basilisk V3 gaming mouse is perfect for all grip types and almost every hand size.
The Razer Basilisk V3 also features 11 programmable buttons and a Hyperscroll tilt-wheel that offers a smooth scroll. Let’s not forget that this gaming mouse comes with a 26,000 DPI optical sensor for precision and flawless track movements.
Did we mention about the Razer Chroma RGB lighting? Well, it is something you’d love the most. The RGB lighting in the Razer Basilisk V3 mouse is not just any RGB lighting.
You get to customize each zone from over 16.8 million color options and several lighting effects. Not to forget the customized light reacts dynamically with over 150 Chroma-integrated games.
Given the customizable buttons, cool lighting, and superb gaming performance, the Razer Basilisk V3 is one of the best mice for gaming out there.
Grab the discounted Razer Basilisk V3 gaming mouse now!
The Razer Basilisk V3 gaming mouse is now available on Amazon for just $49.99 after a 20% discount on its original $69.99 price tag. That sounds like a deal, right? Hurry up and grab it before the discount offer is over.
If you are into precision games or e-sports, don’t forget to check out Razer VIPER V3 PRO.
If you are amongst the AT&T customers who are facing delays in Microsoft 365 email delivery, AT&T has its say about the issue.
The news comes via BleepingComputer which reported that AT&T servers refused the connection and wouldn’t accept the email for delivery.
AT&T customers face delays in Microsoft 365 email delivery
The issue has plagued many customers who tried emailing an address at @att.com, @sbcglobal.net, or @bellsouth.com. Besides, customers reported that they saw the following reasons for the delay in email delivery:
One of the AT&T Community Forums users who self-claims as an IT system admin explains the above message. The user mentions that the message trace seen above hints that Microsoft 365 is unable to deliver an email to an ATT.net domain.
The reason for that is the connection is refused by the mail server of the recipient. It could be due to some configuration issue or firewall settings implemented by AT&T, the user adds.
Multiple AT&T customers reported email delays
Many AT&T customers are quite frustrated with the Microsoft 365 email delivery delay and have created multiple topics highlighting it. One such post is from the company’s forum user @silicondt who says:
Same problem. Can’t send from multiple 365 accounts or gmail…only to att.net domain… Hey ATT… I can’t even email your SALES guys… get this working…
It is worth noting that the issue is not only limited to Microsoft 365 customers, it also affects Gmail. One affected user posted:
I’m having the same problem: nothing from a Gmail account is getting into my email account (sbcglobal.net), and nothing is being bounced back to the sending Gmail accounts. It’s just vanishing. Yet everything was working a few hours ago. I haven’t changed ANY settings, have no blocked accounts, etc, etc. It was working this morning; it’s not working this evening. NOTHING I can do on my end will “fix” this issue.
Come on, AT&T, get it together and fix the problem.
AT&T confirms the issue
AT&T has confirmed that an unusually high volume of spam that emerged from Microsoft’s server is eventually causing the email delivery delay. Talking more on it, the AT&T spokesperson further added:
This incoming spam is an industry-wide issue that affects multiple email services. We thank our customers for their patience as we work with Microsoft to help protect them from fraud
According to the latest reply to a post on X by leaker XpeaGPU, Nvidia is reportedly set to make the announcement of RTX 5080 and 5090 at the same time. If the leaker’s words are true, the details about the upcoming graphics cards will be out the same day.
The announcement of the upcoming Nvidia RTX 5080 and 5090 could be on the same day
Earlier to this, reports were hinting that Nvidia could announce one of its new GPUs before the end of this year. If that goes on to be the case, the RTX 5090 would easily make it to our best GPU roundup. However, this is the first time we’ve heard the company will announce both RTX 5080 and 5090 on the same day.
The recent claim comes from prominent GPU leaker @XpeaGPU who replied to a post by another leaker @kopite7kimi. The X user kopite7kimi mentioned that Nvidia could announce the RTX 5080 earlier than the 5090.
To be exact, they should be announced at same time with availability separated by few weeks
However, replying to the post, XpeaGPU added that RTX 5090 and 5080should be announced at the same time. The leaker further added that Nvidia could separate the availability of both GPUs by a few weeks.
For those uninitiated, Nividia followed the same pattern with the RTX 4080 and 4090 GPUs. Both GPUs were announced on the same day, but RTX 4090 was available first followed by 4080 after a few weeks.
Let’s not forget that previously XpeaGPU has also claimed that the Nvidia RTX 5080 outperforms the 4090 at ray tracing. Besides these claims, other rumors are also doing rounds on the internet. For example, the RTX 5090 will be the only GPU Nvidia will announce in 2024, and more.
We urge you to take the rumors around the Nvidia RTX 5080 and 5090 announcements with a grain of salt. Nvidia hasn’t confirmed anything yet, so you’ll have to wait for official confirmation. If there’s any official word in the future, we’ll update you with a separate article.
The Biden administration recently revoked some licenses of popular companies like Intel and Qualcomm restricting them from shipping chips to Huawei Technologies. The US Commerce Department confirmed that it has revoked a few licenses but didn’t name the companies.
However, the statement from Qualcomm and Intel confirms that they are the ones whose licenses got revoked.
The US government revoked the licenses of Intel and Qualcomm
Last week, Qualcomm and Intel were notified about their licenses being revoked with immediate effect. Notably, the news comes after Huawei unveiled its first AI-powered laptop, the MateBook X Pro powered by Intel’s new Core Ultra 9 processor.
Following the announcement, the Republican lawmakers criticized the launch of the Intel-powered laptop. They felt that the department had given the green signal to Intel to ship the chip to Huawei.
Let’s not forget that Reuters first reported the news about the revoked license of Intel and Qualcomm. The news agency says the decision came after consent pressure from Republican lawmakers who urged the Biden Administration to take strict action against Huawei.
A Republic Congresswoman Elise Stefanik issued a statement in which she said:
This action will bolster U.S. national security, protect American ingenuity, and diminish Communist China’s ability to advance its technology.
Well, the license cancellation of Intel could hurt Huawei as it is dependent on Intel chips for its laptops. That’s not all, this decision might have also hurt other US companies working closely with Huawei.
Reuters has also quoted a statement by the Chinese foreign ministry which reads:
China resolutely opposes the United States overstretching the concept of national security and abusing export controls to suppress Chinese companies without justification.
Both companies say that the recent decisions made by the US Commerce Department are a hurdle to their business growth. Qualcomm confirmed that its shares took a massive dip after the US government revoked one of its licenses for Huawei. Intel, on the other hand, saw a drop of 2.9% last week.
Websites these days are filled with ads and distractions, making it difficult to print articles properly without an ad blocker. Microsoft is now working on a feature called Smart Print in the Edge Canary browser. This feature, which previously existed in Edge Legacy as the “Clutter Free Printing” option, removes ads and prints only the web content you want to save as a PDF or on paper. This saves ink and paper as well.
Edge Legacy’s Clutter-Free Printing Option
It’s late, but better late than never. Microsoft has ported most of the features from the discontinued Edge Legacy to the new Microsoft Edge browser based on Chromium. You might have definitely noticed the clutter-free printing option Edge Legacy offered when available. Microsoft has promised it will offer this at some time in the future.
New Microsoft Edge’s Smart Print
Now, it is making its way into Edge (sort of). The company is indeed testing the feature that removes ads from webpages you want to print, named Smart Print, which is disabled by default.
Like in Edge Legacy, it may work on only some websites, but in our testing, it worked on most sites we tried to print.
Here is how to use Smart Print or Clutter-Free Printing in Microsoft Edge
Visit any webpage
Click on the menu and select Print (Alt+P)
Depending on whether you need to save as PDF or print to paper, choose your printer
Select All or choose the ‘odd Pages only’ or ‘even Pages only’ option or enter the page numbers range you want to print
Click ‘More settings’ and select ‘Pages Per sheet’ and set the margins
Enable the Smart Print toggle
Click Save or Print
The output produced PDF or paper will have no advertisements or other distractions, just pure text.
Here is another option you can try:
Printing in Reader Mode or Immersive Reader
You can print pages when they are in Reading Mode or when you use Immersive Reader. As this feature is designed to remove clutter including ads, you get only text or essential content. We noticed that the format of the output when using Smart Print looks much better compared to when you use Printing while using Immersive Reader.
Guess what, the Smart Print option is not available when using Immersive Reader, which also makes sense.
Sony removed Ghost of Tsushima Director’s Cut from the countries without PlayStation Network (PSN) access. This decision came after the company included a mandatory account linking as a requirement to play the multiplayer Legends mode. However, as a result, gamers won’t be able to enjoy the game’s single-player content either. So, it’s a lose-lose situation for the game developers and those waiting for the game.
Why did Sony add the linking requirement for Ghost of Tsushima?
The company might have added the PSN account linking requirement for the multiplayer Legends mode of the Ghost of Tsushima to protect our safety and security. On top of that, according to CNET, this is Sony’s way to prevent players from griefing. But many of us know that the company had several breaches, and hackers stole player data. Thus, gamers don’t want to link their accounts to the PlayStation Network.
According to the email shared by the Reddit user freakshow9009, you will receive a refund in 5 to 7 days if you are from a restricted country. Hopefully, the company will change its decision and bring back Ghost of Tsushima Director’s Cut before its official release on May 16.
Sony didn’t learn from the Helldivers 2 uproar
Sony also tried to remove Helldivers 2 from 177 countries after the company wanted to include mandatory PSN account linking. However, players review-bombed the game with thousands of negative ratings. Yet, after Sony added the game on Steam again, users started giving positive reviews. So, there is a possibility that Ghost of Tsushima Director’s Cut will suffer from the same treatment.
Helldivers fans — we’ve heard your feedback on the Helldivers 2 account linking update. The May 6 update, which would have required Steam and PlayStation Network account linking for new players and for current players beginning May 30, will not be moving forward.
Unfortunately, even if the company claimed it learned from the player’s feedback for Helldivers 2, they made the same mistake with Ghost of Tsushima. In addition, it seems that Sony doesn’t know what’s best for its PC players. After all, they are repeating the same scenario.
Ultimately, we can all review-bomb Ghost of Tsushima Director’s Cut before it launches on PC. However, this time, Sony might keep their requirement. Yet, if you are from a restricted country, know that the game has plenty of single-player content for you to enjoy.
What are your thoughts? Are you going to get Ghost of Tsushima? Let us know in the comments.
Eye-tracking technology is not entirely new, and the concept has been around for a while now, with Microsoft releasing it on its HoloLens 2 headsets. However, there are tons of other third-party software such as Tobii, that can be integrated into an array of XR/VR/AR headsets.
The Redmond-based tech giant has even released a form of eye-tracking technologies for displays, back in Windows 10, to help those affected with certain conditions (such as ALS, which is a neurodegenerative disease affecting muscles).
However, back then, the technology was not entirely native, as it required a compatible eye tracker, such as the one mentioned earlier.
In a surprising, but expected turn of events, it seems that Microsoft is looking into developing a native eye-tracking technology for displays on Windows, but not limited to it.
The Redmond-based tech giant recently published a paper describing a system that uses eye-gaze technology to select items on a user interface (UI). The native system would be different from the current eye-tracking technologies.
While it would still use the data of your gaze to let you choose items on a screen with your eyes, the technology comes with a unique characteristic: it lets users customize and configure the selection regions on displays, for exact eye-tracking.
The intelligent UI element selection system disclosed herein provides for automatically configuring or adjusted selection regions of boundaries. Selection regions may be applied to a set of UI elements and selection boundaries may be applied to a individual UI elements.
Another interesting thing is that the technology would assign a score to your gaze, as a way to stop it from accessing everything in your way. The system also assigns a score to each item on the current display, whether we’re talking about an application, browser, or the operating system itself.
It then proceeds to compare these scores: the more you look at an item on the screen, the higher the score gets, and if it surpasses the score of that item, then that item will be selected.
This is not all, though. The technology also has an intelligent UI system that intuitively finds out what you are about to type in with your eyes and emphasizes those regions so that your gaze can be better captured, resulting in a faster and more streamlined experience. Microsoft calls it eye-typing.
If a user is eye-typing a word that starts with ‘q’, then the selection region for the letter ‘u’ may be enlarged, since that letter is statistically more likely to follow the letter ‘q’ than other letters.
Microsoft
The Redmond-based tech giant is developing it to support a variety of applications: users can control audio settings with their gaze, and also look out for radio channels. Through a video interface, it can also be used to control video recordings, or streamings by simply looking at them.
The paper also theorizes that the eye-tracking-based display system can be used to access external memory sticks and storage, and it can used independently and locally: it can run on batteries, and in cases where the system is tied to a network, and the network goes down, all the devices will still be able to run it.
If Microsoft ends up releasing it, and this is most likely to happen, the technology can become the industry’s standard, and could effectively replace the classic touchscreen. And there is a pattern: mobile phones, for instance, have not been using buttons for more than a decade, as touchscreen took over everything.
Then tablets (which are by themselves mini PCs) came around, and the tech industry realized that laptops could have a touchscreen as well.
And while all computers today, including laptops, are released with the classic keyboard, there is a reason for it. Writing on a touchscreen still requires you to use your hands, and on a laptop, the design makes it quite impractical to do so, hence keeping the classic keyboard around.
But eye-typing? If done seamlessly, which this system promises to do, it can be a total game-changer. Sure, the industry will have to find something to keep our hands busy (maybe hand-gazing?), but it could greatly improve productivity.
However, most likely the eye healthcare industry will benefit from this technology, as well.
According to a recent revelation by Lenovo China’s manager on Weibo, AMD’s next-generation Zen 5 core architecture promises an incremental leap in performance, quashing earlier rumors of a substantial 40% improvement.
He said, as translated in English:
Where does the 40% come from? What I saw is that Zen5 has a 10% increase in IPC compared to Zen4. In the CR23 1T test, the increase was more than 10%. In addition, Win10 enthusiasts please note that starting from Strix Point, AMD will not provide Win10 drivers.
Contrary to rumors suggesting a 40% increase in IPC (Instructions per cycle), Lenovo’s internal testing reveals a generous 10% improvement compared to the Zen4 architecture. This revelation seems more realistic and aligned with industry expectations.
He also mentioned that it is not possible to dramatically achieve such significant performance boosts within a single generation, and the 10% improvement achieved in the upcoming generation is noteworthy. However, it could disappoint people who believe in the previous speculations.
During the Cinebench R23 1T (Single-Thread) test, the instructions per cycle (IPC) increase was more than 10%. As the previous results show, AMD’s Zen core architectures have also performed well in Cinebench tests, irrespective of them being multi-thread, single-thread, or IPC figures. Let’s look at the IPC for all the Zen architecture generation.
Architecture
IPC
Excavator To Zen 1
52% IPC Increase
Zen 1 To Zen+
3% IPC Increase
Zen + To Zen 2
15% IPC Increase
Zen 2 To Zen 3
19% IPC Increase
Zen 3 To Zen 4
13% IPC Increase
Zen 4 To Zen 5
10% IPC Increase
Lenovo China’s manager also mentioned that AMD has decided to end Windows 10 driver support for its upcoming Strix Point APUs. This move indicates a shift that shows the manufacturers are prioritizing the latest Windows 11 version compatibility, i.e., 24H2, which aligns with AMD’s focus on AI performance and integration of NPUs in the forthcoming processors.
The upcoming Strix Point Ryzen AI HX APUs indicate AMD’s commitment to preparing processors for AI-driven technologies. They will have innovative AI capabilities, up to 45 AI tera operations per second (TOPs), and 77 platform TOPs.
As computing technology is becoming AI-driven, AMD’s move to progress toward the latest Windows version is justified. Still, it would pose compatibility challenges for Windows 10 users looking to integrate these advanced processors into their systems.
What do you think of this development? Share your opinions with our readers in the comments section below.
AI gives us many opportunities to generate, enhance, and modify content. In addition, AI models are evolving fast, and their content is becoming more qualitative. However, while artificial intelligence can be a great assistant, wrongdoers can use it to generate deepfakes. So, OpenAI decided to launch a deepfake detector.
Deepfakes are nothing new. They’ve been around for a while now. Yet, in the past, they weren’t so accurate. After all, even if we had the tools to edit photos, videos, and audio tapes, the process took a while and was costly. But, the AI solved those issues. For example, Sora AI can generate high-quality videos in a few minutes.
When can the deepfake detector from OpenAI do?
The deepfake detector from OpenAI can discover images generated with DALL-E 3. In addition, it can check for AI’s assistance. Also, according to OpenAI, the tool successfully identified 98% of the cases. Yet, it incorrectly tagged 0.5% of the results as DALL-E 3 products.
OpenAI trained the deepfake image detector to spot content created with their tools. So, unfortunately, it might not be able to detect AI images generated with other tools. Additionally, the classifier handles AI content with modifications such as cropping, compression, and saturation, but it is less proficient with others.
Do AI images have metadata?
Besides the deepfake detector, OpenAI acknowledged introducing C2PA metadata to the images and with DALL-E 3. On top of that, the company will add it to Sora. However, skilled threat actors could remove the metadata.
In addition, OpenAI incorporated audio watermarks into the content generated with their Voice Engine. However, like Sora, their voice model is still under development, and it will take a while before it becomes available.
Ultimately, the deepfake image detector from OpenAI will help us detect DALL-E 3 and Sora creations once released. According to OpenAI, it will be available for a limited number of testers, research labs, and research-oriented journalism nonprofits. If you think the tool can help you, you can apply to become a tester for the DALL-E detection program.
What are your thoughts? Are you going to apply? Let us know in the comments.
If you experience a blue screen while playing games, it indicates your Windows PC is going through hardware or software issues.
To make matters worse, a blue screen of death (BSOD) shows up more often when you’re playing mid to high-end PC games.
Find below the tried and tested methods to troubleshoot the issue yourself. The steps mentioned below are compatible with both Windows 11 and 10 PCs.
Identifying the cause of a blue screen can be tedious and may take some time. As a gamer you will want to solve this as quickly as possible, in this case, it’s not a bad idea to employ the help of software that will repair the BSoD in just a few minutes, such as Fortect PC Cleaner for example.
Blue Screen While Playing Games – What Is It?
A BSOD is an error screen that happens to prevent further major damage to the whole computer. When playing a PC game, you might experience the game freezing, the screen blinking a few times, and then the characteristic blue screen.
It’ll often show you the exact issue in the following codes.
Sometimes, you might not see any error codes as none are available or the BSOD screen reboots to Legacy or UEFI BIOS quickly.
If you see this once or twice in a few months, you must take measures to prevent future system damage. Contrarily, if the BSOD keeps showing up, you can take no intermediate steps other than going directly to the troubleshooting ideas below.
How To Fix Blue Screen While Playing Games
I’ve arranged these troubleshooting methods in order of simplicity. This way, if a minor bug causes the BSOD error, you can quickly resolve it with minimal effort.
Run Windows in Safe Mode
You can do the following if the BSOD error shows up repeatedly or once in a while:
Boot up your PC.
Wait till you see the Windows logo and press the power or reboot button to restart the device.
Repeat the process once again.
You should now see the following screen along with the Windows logo:
On the Automatic Repair screen, click on the Advanced options button.
Select the Troubleshoot menu in the Choose an option screen.
Click on the Advanced options button in the Troubleshoot window.
Select Startup Settings on Advanced options.
Click the Restart option in the Startup settings screen.
After the reboot, when you see the Startup Settings window, press 4 to enter Safe Mode.
Try out different tools in your Windows PC in Safe Mode. Keep it up and running for a few hours. Are you able to reproduce the BSOD error?
If your answer is “No“, it’s an app-specific issue. The application might not be compatible with your PC. Reach out to the specific PC game’s support team for further assistance.
If the BSOD shows up in Safe Mode during the test period, continue with the rest of the troubleshooting methods.
Stop Overclocking
If you overclock any or all of the following hardware of your Windows PC, you should stop as soon as you encounter a BSOD:
CPU (Central Processing Unit)
GPU (Graphics Processing Unit or Card)
RAM (Random Access Memory)
Motherboard: hardware voltage and voltage multiplier settings
Storage Devices like NVMe SSDs (disabling thermal throttling).
If you’ve overclocked your CPU, here’s how you can undo that:
Reboot your PC to access the BIOS setup menu using a specific key, like F2, F10, or Delete. These buttons will depend on your motherboard. Find below a list of the BIOS keys for different mainboard manufacturers:
Asus:Delete + F2
ASRock:F2 or Del
Foxconn:F8
MSI:Delete or F2
Gigabyte:F2 + Del
Biostar:Delete + F8
EVGA:Delete or F2
HP:F10
Some mainboards will display the BIOS key on the POST screen.
Find the menu in the BIOS for overclocking settings. Usually, it’s named as either Overclocking or OC Tweaker.
Find the menu showing the settings for CPU clock speed, multipliers, and voltage, labeled as CPU Ratio, CPU Core Voltage, or Vcore.
Set them all to Auto or Default to return the CPU to its original specifications.
Save changes and exit BIOS to disable overclocking settings.
De-overclocking options for the RAM chips, NVMe SSD chips, and the mainboard should also be in the BIOS.
However, you might want to try overclocking software for better control over this process.
Optimize In-Game Graphics Settings
You can reduce the game app’s visual quality. It’ll reduce the requirements of CPU, RAM, and GPU bandwidth and prevent BSODs. Here’s how:
Run the game app.
Quickly go to the Options or Game Settings.
Locate options that relate to graphics, visual quality, etc., and click on them. In this guide, it’s the Graphics Options button.
Reduce the values for the following components:
Resolution
Frame rate
SSAA
Particle quality
Dynamic lighting
Fog of war/blur/ motion blur/ bloom/ glare
Shaders
Foliage
Water
Shadows
Textures
Disable VSYNC, Anti-Aliasing, Shader 12.0, etc.
Save the changes you’ve made.
Close and re-launch the game app.
Check if the blue screen while playing games persists.
Check if the GPU and CPU Are Overheating
First, you should get the HWiNFO app and install it on your PC.
Then, you must find out the idle temperature of your CPU and GPU by following these steps:
Run the HWiNFO app from the Start Menu.
Click the Start button on the dialog that shows up.
The HWiNFO Sensor Status window will open.
Scroll down to the CPU [#0] that shows the following items:
Core Temperatures
Core Distance to TjMAX
Write down the values shown there. They represent the idle temperature of your CPU.
Scroll down further to locate the GPU [#1] section.
Note the values indicated in the following bullets:
GPU Temperature
GPU Hot Spot Temperature.
This is how hot the graphics card is when it’s in the idle mode.
Now, run the PC game you’ve been playing earlier when the BSOD error appeared. Keep playing for a few minutes and quit the game before another error shows up.
Immediately open the HWiNFO app and look at the temperature values for the CPU and GPU.
If the values are like this, the BSOD is due to overheating:
For a CPU of Tj Max (junction temperature) 100°C, the average temperature should bebelow 10 to 20 degrees of the Tj Max value. For instance, if you see 80°C to 90°C, it’s okay. However, if it’s more than 90°C to 100°C, there’s an overheating problem. You can search Google to find the Tj Max value of your CPU.
For GPUs, the average temperature when gaming shouldn’t go above 80°C to 90°C.
You might want to look for professional help to cool down your PC case. This will help dissipate the heat generated by CPU and GPU when you run high-end PC games or software.
Create a new folder on your PC and name it MemTest86.
Move the downloaded ZIP file to the above PC directory and extract all of its contents there.
Plug in a USB drive. Ensure the USB stick is empty or you’re okay with formatting its contents.
Run the imageUSB app in the MemTest86 directory.
Choose the USB stick in the list (Step 1).
The image file, memtest86-usb.img, should already be selected by the imageUSB tool (Step 3).
Click the Write button (Step 4).
So far, you’ve created a bootable USB drive. Your PC can use it to run the memory module scanning and evaluation process.
Now, follow these instructions to assess your RAM chips:
Restart your computer and enter the BIOS setup (usually by pressing a key like F2, F8, Delete, or Del during startup or POST).
Locate the boot order settings and change it to prioritize booting from the USB drive containing MemTest86.
In the BIOS Boot tab, it’ll show as Removable Devices.
MemTest86 should start automatically once the computer boots from the USB drive.
By default, it runs 13 different tests, repeated 4 times each. This process can take several hours depending on your RAM amount and speed.
In my case, it took 56 minutes per 8 GB RAM chips.
MemTest86 will show the Pass or Fail statuses for your RAMs when the test is complete.
For BSOD cases related to RAM modules, it’s highly likely you’ll get a Fail notification. It might still be possible to run your Windows PC with these RAM chips.
However, memory-intensive processes, like playing high-end PC games or rendering 3D videos in Game Animation Software might show the BSOD error again. So, replace your RAM chips if you plan to utilize your PC’s full performance potential.
Run DISM and SFC Checks
When the Windows OS’s integrity is compromised, BSOD errors often appear. Follow these steps to evaluate and fix your OS integrity:
System File Checker (SFC) Check
Run the Command Prompt terminal app in administrator mode.
Type the following command in the console and hit Enter:
sfc /scannow
Once the scan is complete, you’ll see a message saying that Windows Resource protection:
…did not find any integrity violations: You don’t need to do anything.
…found corrupt files and repaired them successfully: The issue is fixed automatically.
…found corrupt files but was unable to fix some of them: Run the DISM check.
Deployment Image Servicing and Management (DISM) Check
Open Windows Command Prompt with elevated rights from the Start Menu.
Paste the following command inside the terminal and hit Enter:
DISM /Online /Cleanup-Image /ScanHealth
The DISM scan can take some time to complete. The command prompt window will display the progress.
Once the scan is finished, the Command Prompt window will show the results as outlined below:
Scan finds no corruption: No component store corruption detected message is shown.
If corruption is found: The Command Prompt might ask you to run the RestoreHealth command to restore the system’s integrity.
Update the GPU Driver
If your GPU hardware driver is outdated, the GPU can’t keep up with the demands of high-end PC games.
You should update the driver by following these steps:
Go to the Search or Browse Drivers section and click on the Graphics option.
Now, choose the specific Product Family relevant to your AMD GPU.
Then, select the Product Line.
You’ll see a concise list of Product Model numbers. Select one from the list.
Finally, hit the Submit button.
You’ll see the Drivers and Software screen.
Click on the appropriate driver’s link to download.
Install the driver package to update the AMD GPU driver.
Scan for Malware and Virus Programs
Malware, adware, spyware, and viruses might consume too much memory and CPU bandwidth on your PC when you’re playing a high-end PC game. Consequently, the system can’t allocate more RAM to the game.
So, you should perform an in-depth virus scan using the Windows Security app or any other antivirus software.
Press the Windows + I keys to launch the Windows Settings app.
Type Security in the Find a setting field and click on the Windows Security settings option.
Click on the Virus & threat protection link in the Windows Security dialog box.
The Virus & threat protection screen will open.
There, click on the Scan options hyperlink.
Select the Full scan option and hit the Scan now button.
You’ll see the Full scan feature is running.
The Windows Security tool will hunt down malware and viruses and eliminate those if there are any.
Flash Your BIOS Firmware
This is a delicate and risky process. Try these steps only if you’re absolutely sure that you can do exactly as instructed.
Before proceeding, fully charge if it’s a laptop or connect the desktop to an uninterrupted power supply line. If there’s any power interruption during the BIOS Flashing process, your motherboard will get bricked.
Type System Information in the Start Menu.
Click on the System Information app.
On the System Summary, you should find the motherboard model name as the System Model component.
Note down the name and model details accurately.
Search Google with that model name.
Open the official website.
Click the Service or Support link on the website.
Look up your motherboard’s model number in the driver downloads section.
You’ll see a list of downloadable drivers.
Go to the BIOS section and expand its menu.
Download the latest BIOS firmware.
Extract the content of the firmware ZIP file.
Get a USB stick and format that to the FAT32 file system.
Copy the extracted content to the USB stick.
Restart the device and go to the BIOS menu.
Look for the BIOS update utility named EZ Flash, BIOS Management, Q-Flash, etc.
Use the utility to select the BIOS update file on your USB drive.
Confirm the update process.
Once the flashing is over, your PC will reboot.
Reseat the RAM and GPU
Often, carbon disposition in the slots of GPU and RAM chips can cause irregular and slow performance of such hardware. If this is the case, the BSOD error can also show up. Do the following:
Shut down your PC.
Disconnect all cables including the power connection.
Open up the left-side cover of the PC case. Usually, this is a removable cover.
Wear an antistatic wrist strap to clear your hands of static electricity. Alternatively, touch any metal embedded in the concrete wall or earth.
Carefully release the RAM slot lockclips.
Remove the RAM chips.
Unscrew the back panel of the GPU.
Unlock the lock clip of the GPU slot.
Remove the GPU card.
Use a compressed gas canister to clean the slots as well as the RAM chips and GPU card.
Snugly reseat the hardware back to their relevant slots.
Tighten the GPU back panel screw and apply the slot locks for both the PCI Express and RAM slots.
Close the PC case cover.
So, there you have it! You can try these methods to fix the blue screen while playing games on Windows 10 or 11 PCs for good. If you’re having trouble with red screen errors, I’ve got you covered as well.
Everyone is impatiently waiting for Nintendo Switch 2, but Nintendo is keeping all the information under wraps.
However, new information was recently leaked, and we now finally know what specs the device will have, as well as a potential release window.
Nintendo Switch 2 specs and potential release date just got leaked
As you know, Nintendo plans to release Switch 2 in 2025, but we finally have some leaked information regarding its specs as Tom’s Guide reports.
The first information comes from Famiboards and the user LiC. After analyzing the shipments and customs data, it is believed that the upcoming console will have 12GB of RAM with 2x 6GB LPDDR5X modules.
RAM will provide 7,500MT/s transfer, and 256GB of UFS 3.1 storage is also expected. The next information comes from CentroLeaks, which states that the new Switch will have an 8-inch display.
There have been many incidents with the new build introducing ads to the Start menu and lock screen, and Microsoft claims to be testing this new way of recommending apps and other things.
However, when Microsoft added the word ads with the name of the toggle for showing recommendations for tips, shortcuts, and apps and in Windows 11 Insider build 26200.5001 in the Canary channel.
This leads people to believe that they will soon see the real ads in the Start Menu, but Microsoft did not make an official announcement.
However, the Redmond tech giant changed the toggle name to the previous name with Windows Insider build 26212.
XenoPanther, a Windows leaker, posted by X (formerly known as Twitter), the toggle name has been changed back to Show recommendations for tips, app promotions, and more under the Settings app. Here is what he said in the post:
This has been renamed to "Show recommendations for tips, app promotions, and more" in build 26212 https://t.co/bak8ylNHK4
Now that the name is back to the one it was before, it could be a sign that Microsoft might never be planning to bring real ads to the Start menu on Windows 11.
Brandon Leblanc, Senior Program Manager on the Windows Insider Program Team, said,
Yes, what was discovered back in April was a super old text string.
So, the change in the toggle for recommendations that was noticed in April was a super old text string, and to prevent it from being relayed to real ads, Microsoft renamed it.
This is what the scenario is for now. However, if Microsoft eventually decides to introduce ads in the future, you may have the option to disable them. Alternatively, you can always use a third-party app to customize the Start menu to your preferences.
Using good router monitoring software can really make a difference if you’re managing a network.
They can help you see how data moves, find where there might be problems slowing things down, and gives warning about possible troubles early on.
Keep reading to see the best options available.
What’s the best router monitoring software?
After checking them out carefully, we’ve picked the best network monitoring options for your router. The tools we’ve listed here have everything you need:
Ability to monitor bandwidth, traffic, and performance metrics
Real-time notifications for unusual activity or performance issues
Highly customizable dashboards and reports
Broad support for protocols like SNMP, WMI, and IPMI
Can efficiently scale with network growth
Intuitive and user-friendly for quick navigation and setup.
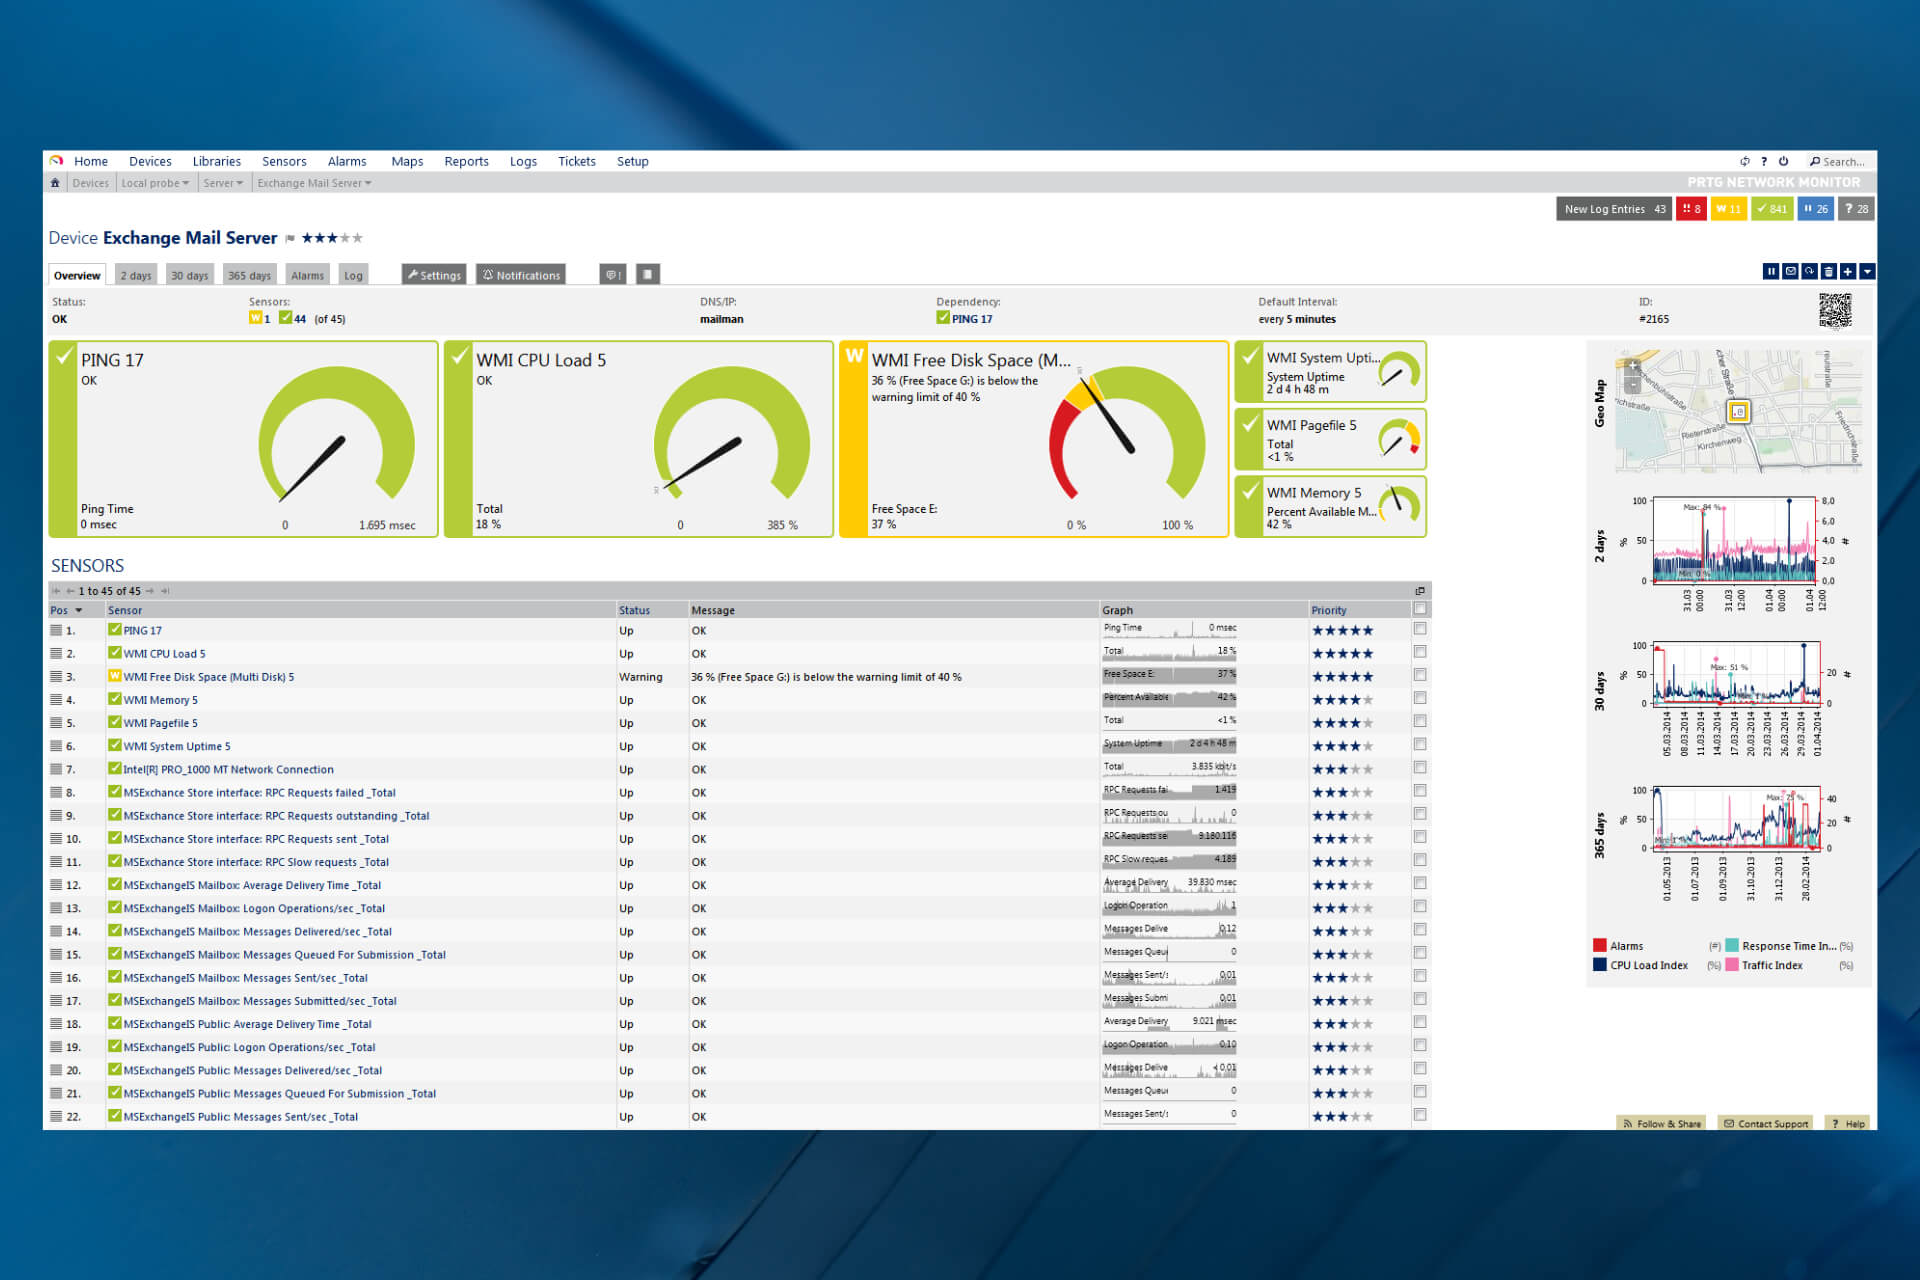
PRTG Network Monitor is a premium user-friendly tool that’s great for router monitoring. What sets it apart is it offers a whole set of network management features while being extremely intuitive.
That’s making this software a great choice both for beginner and advanced users.
It offers a wide range of monitoring abilities, including SNMP, packet sniffing and WMI.
It is created for administrators wanting a flexible instrument to manage various monitoring requirements easily.
And what’s more, it offers a customizable dashboard and alerts. They allow you to change how you monitor your router activity based on the particular needs of your network.
Also worth noting is that this tool has a free tier with a basic set of features. It’s not recommended if you manage a large network, but it could work for smaller systems.
The good news is that subscription prices are flexible, based on what you want to include in a plan and how many sensors you need.
All in all, PRTG Network Monitor stands out for its mix of simple operation and detailed monitoring features, which appeals to both new users and skilled router admins.
✅ Pros:
User-friendly interface with easy setup
Comprehensive monitoring capabilities including SNMP, packet sniffing, and WMI
ManageEngine OpManager provides complete watching over your router, server machines, and application software.
It uses multiple protocols, including SNMP, WMI, and CLI.
This tool is easy to use because of its interface that users can customize through dashboards which are also customizable themselves; automation workflows help handle complex networks more efficiently.
Also, it has automatic processes that make work faster when dealing with complicated networks.
Though it can take a long time to set up and it uses a lot of resources, its ability to monitor and help with automation makes all of it worth it.
✅ Pros:
Comprehensive monitoring for networks, servers, and applications
Supports SNMP, WMI, and CLI protocols
User-friendly interface with customizable dashboards
Automation workflows for efficient management
❌ Cons:
Can be resource-intensive on the monitoring server
Initial setup and configuration can be time-consuming
Zabbix is a strong, free software that offers a lot of customizing options and a complete set of monitoring features.
First things first, its main benefit is how it can handle many types of monitoring choices, like SNMP and IPMI. This makes Zabbix useful for different kinds of network settings.
Plus, the platform stands out because of its sophisticated alerting system. It lets you set exact thresholds for notifications.
This makes sure that you get information about any unusual activities quickly so you can take fast action to address possible problems.
Lastly, the fact that this tool is completely free and open-sourced takes away worries about budgets as well as software security.
If you have the know-how to adapt this software to your network’s needs, Zabbix is a great choice.
However, its many functions bring a complicated nature that may intimidate new users, especially those new to network monitoring. Setting it up manually may take a lot of time.
✅ Pros:
Open-source and free-to-use
Highly customizable with a wide range of monitoring options
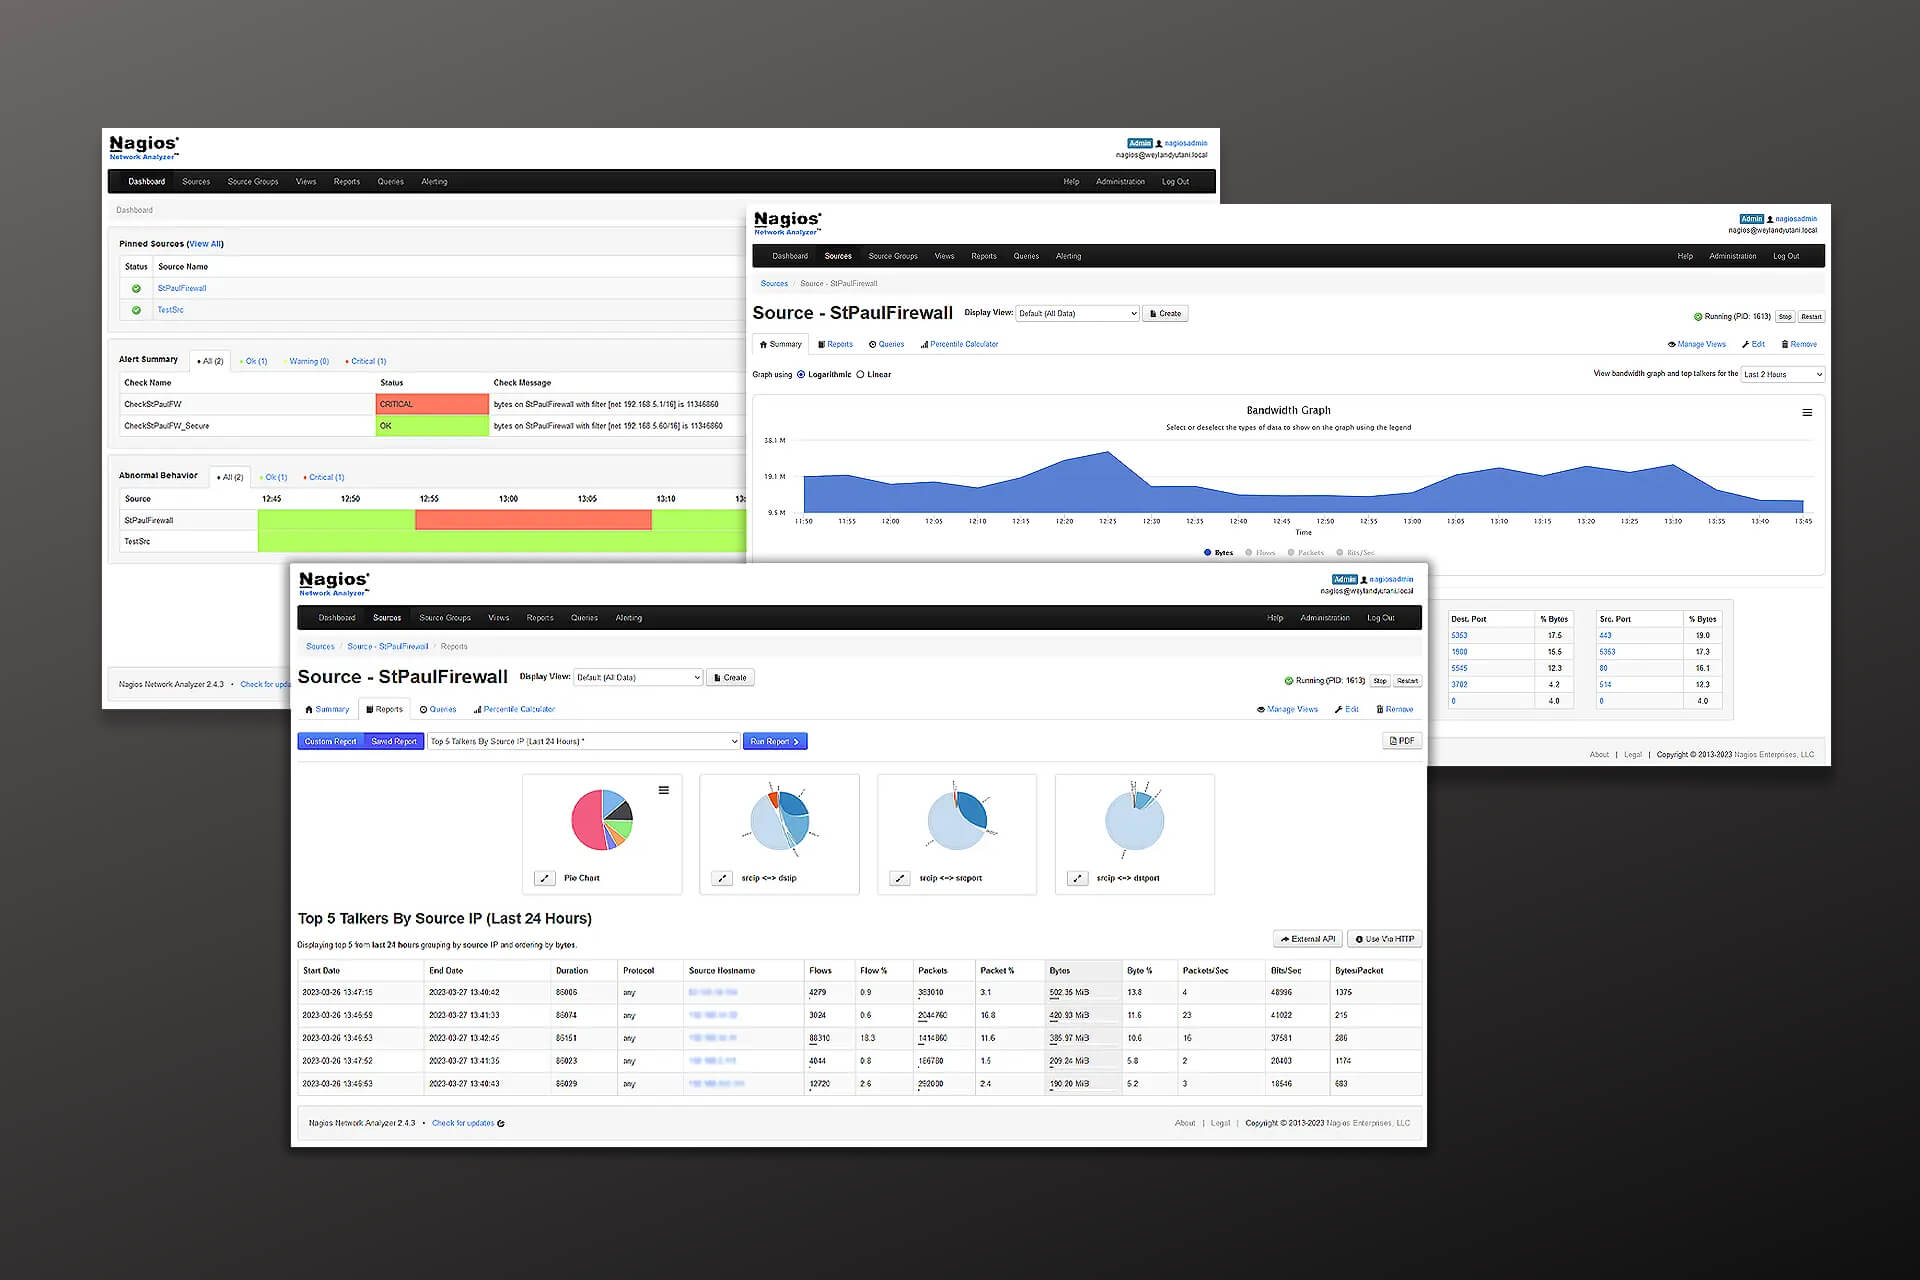
Nagios Core is another open-source tool equipped with tons of plugins. It will give you a good base for watching over your router completely.
It excels at keeping an eye on network services and hosts, making it a great choice if you prioritize performance.
What sets Nagios Core apart is the availability of plugins. With them, you can adjust and customize it based on your exact router monitoring needs.
You can basically create it as your own software that does exactly what you need – no more, no less.
It’s also worth noting that it has a large user base with an active online community. What does this mean for you? You can easily find support, setup tutorials and tips and tricks in just a few web searches.
That said, some users find the UI outdated and cluttered. It may take some time to adapt to it and understand how it works, especially if you’re a beginner system administrator or network manager.
✅ Pros:
Open-source network monitoring solution
Extensive plugin ecosystem for added functionality
Active community for support and resources
Offers comprehensive monitoring of network services, hosts, and more
❌ Cons:
Complex configurations can be challenging for beginners
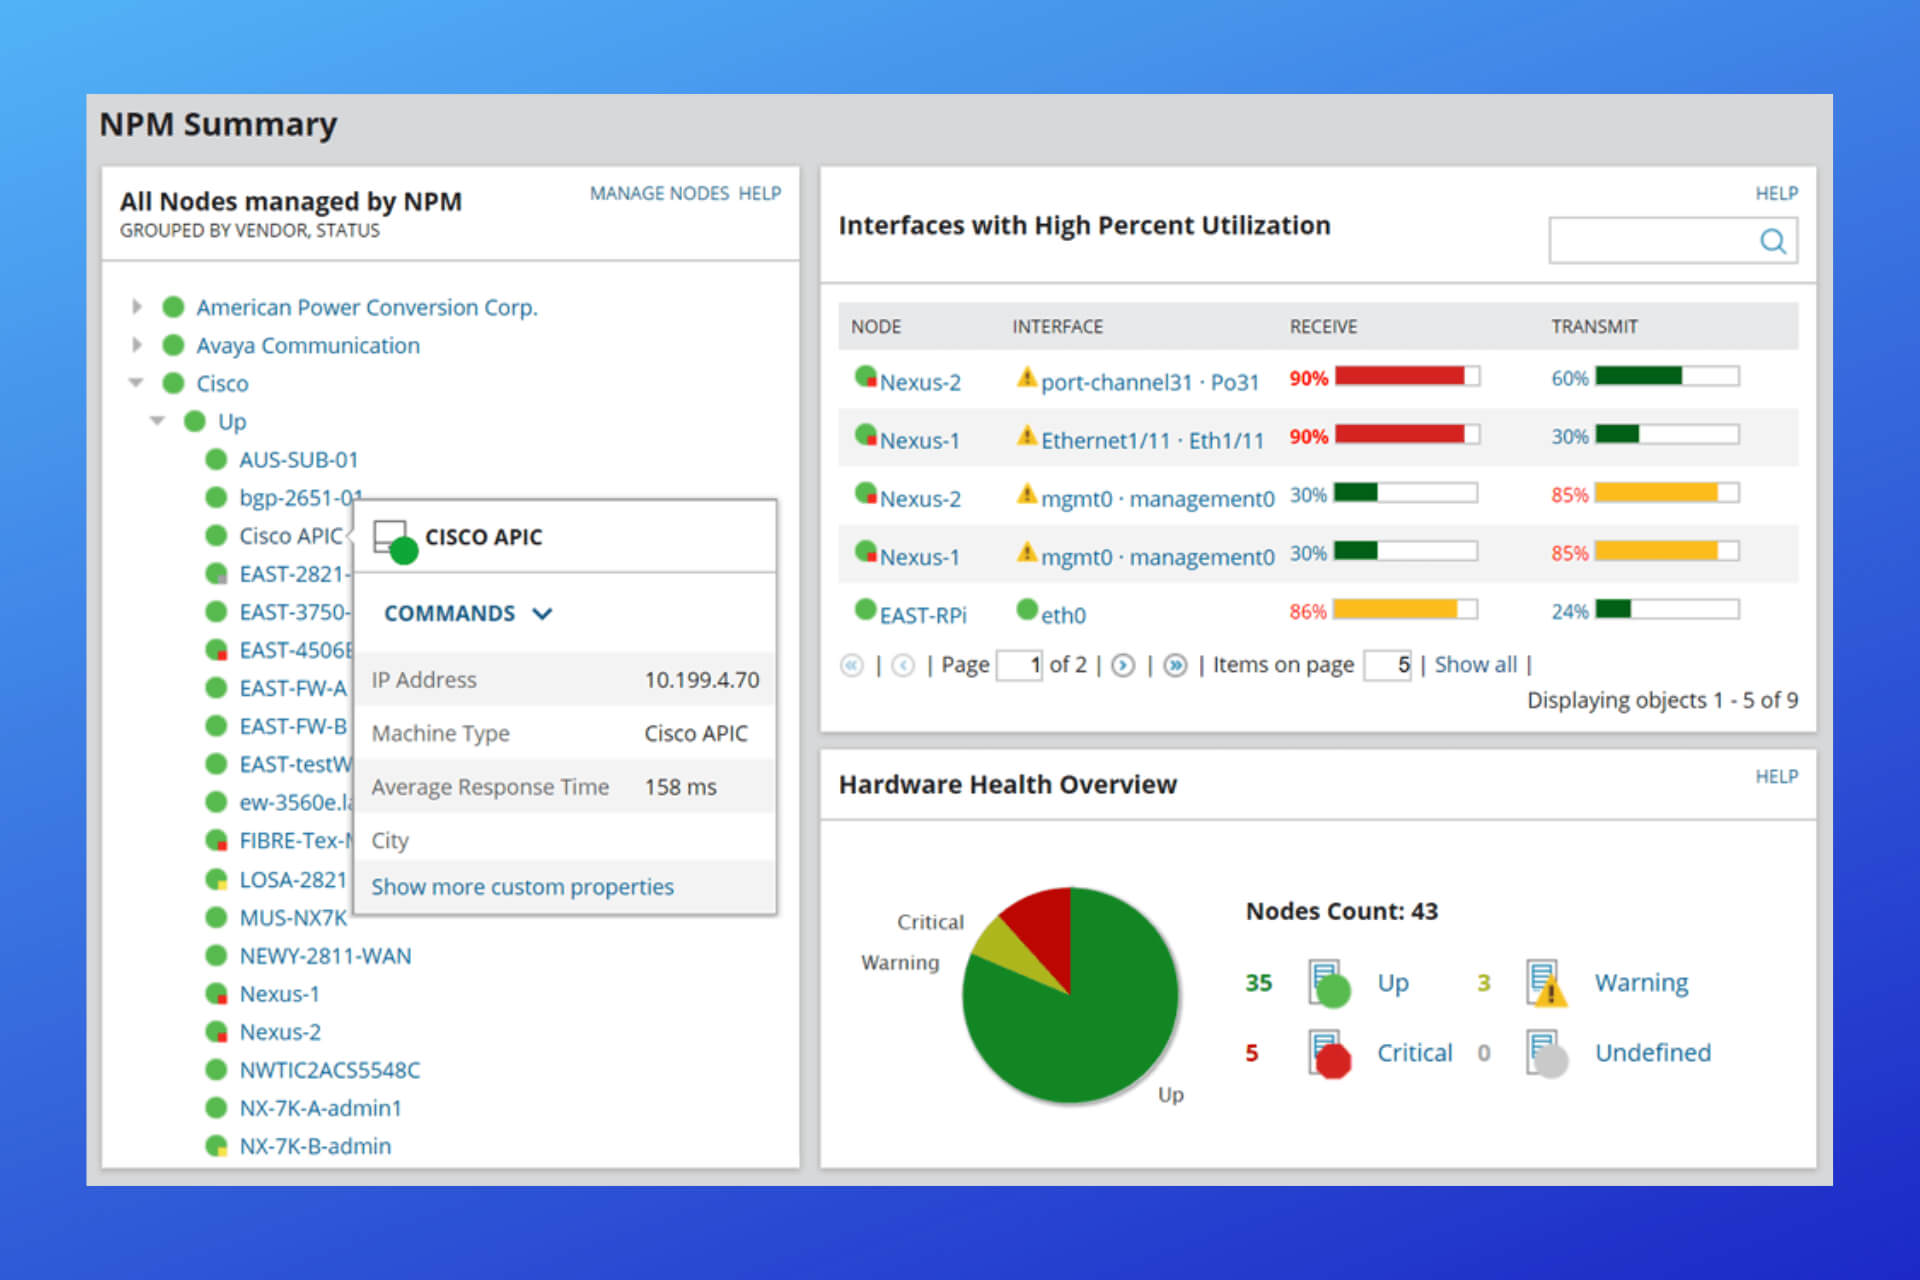
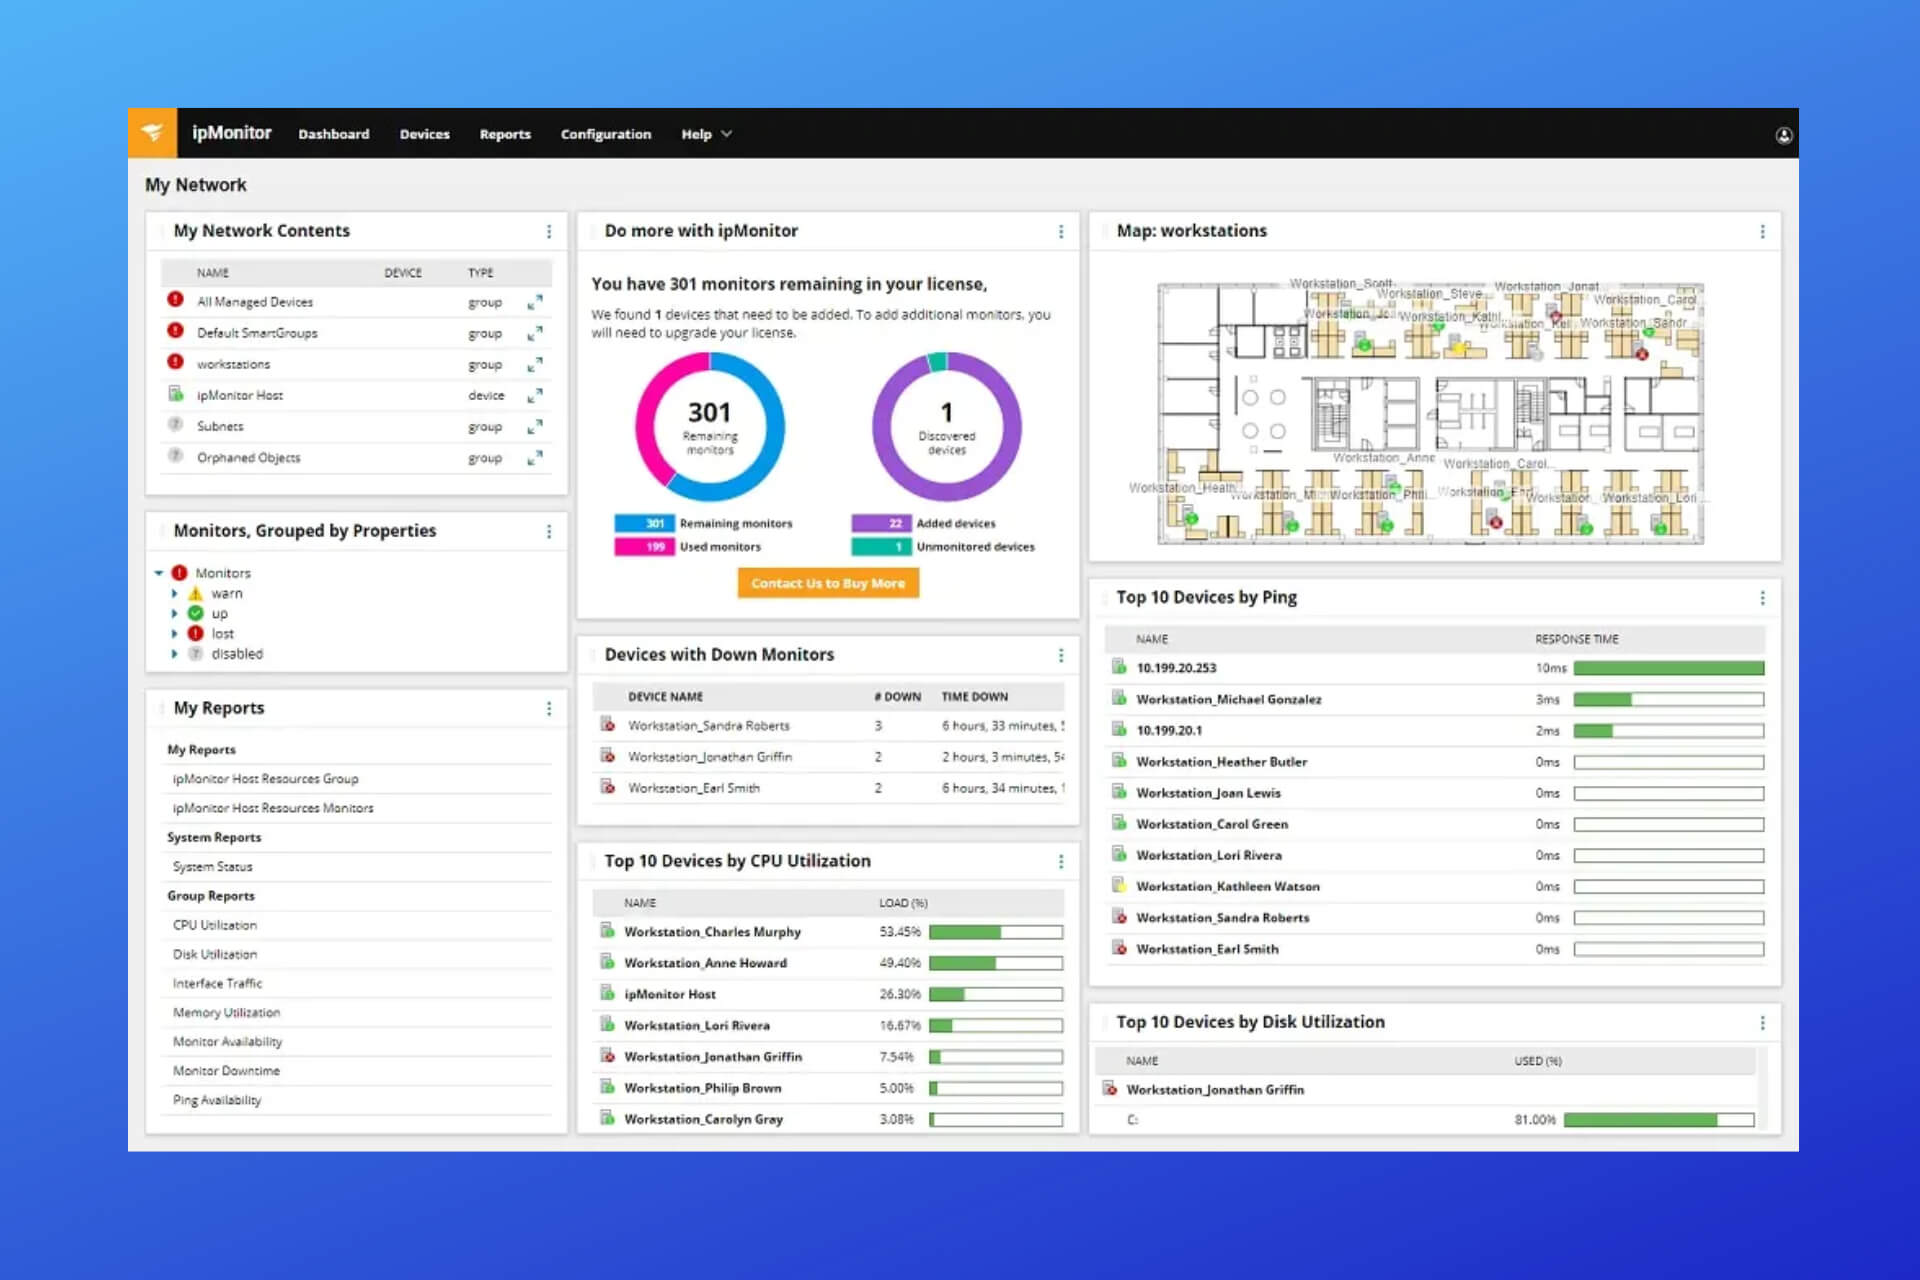
SolarWinds Network Performance Monitor is a strong, scalable tool made for administrators who require advanced features such as NetPath to visualize critical paths.
It has clear dashboards that are easy to use, and you can change its monitoring to match the needs of your particular network.
This tool offers a wide set of features that make it easy to monitor your router – you can see devices connected to your network, and IP addresses, get real-time alertson changes, and much more.
Its usability however goes way beyond router management and it is able to handle complex tasks. This makes SolarWinds a good choice especially if you need advanced monitoring functions.
Therefore, it is best suited if you handle big, organization-level networks.
On the other hand, people with simple monitoring requirements may find its range of features too much and the cost may not be worth it if you’ll only use it for basic tasks.
✅ Pros:
Powerful and scalable network monitoring tool
Intuitive and customizable dashboards
Advanced features like NetPath for critical path visualization
Excellent support and resources available
❌ Cons:
Expensive for small businesses or individual use
Some features may be overwhelming for basic monitoring needs
Router monitoring software helps you keep the network working well, while protecting its safety.
Getting updates about the traffic on your router as it happens and being notified whenever a slowdown happens lets you act quickly and fix any underlying problem before it can affect the people using the network.
When you have good software, it is easier and more forward-looking to keep the network working its best.
Conclusion
To wrap things up, we must remind you how important it is to know what type of monitoring features you need: simple or comprehensive. You should also consider the size of your network and potentially scalability needs in the future.
The tools listed here provide great options for router monitoring. Make sure to compare each choice with your specific needs so you can get the most suitable option.
Remote work and distributed networks come with unique challenges for IT professionals. Having the right remote monitoring tools will save you to effectively manage connectivity across multiple locations.
Whether it’s ensuring optimal performance or safeguarding against cyber threats, the top picks selected by our team offer the functionality and flexibility required for effective network oversight.
Paessler PRTG Network Monitor is a versatile tool for networks of all sizes. It has a versatile pricing model that scales with the size of your network.
No matter what network you manage- that of a small startup or of large enterprise, PRTG Network Monitor will have a suitable option for you.
On the same note, the tool is also versatile when it comes to its usability.
It offers advanced monitoring features and multiple protocols, but it’s UI is intuitive and easy to learn even by beginners.
Also worth mentioning is the fact that it offers multiple monitoring options, including SNMP, WMI, and packet sniffing, among others.
Lastly, the in-depth reporting and real-time alerts ensure you always are one step ahead of potential issues.
✅ Pros:
Flexible pricing model based on sensors used
Intuitive user interface with customizable dashboards
Supports a wide range of monitoring including SNMP, WMI, and packet sniffing
In-depth reporting and alerting features
Free version available for up to 100 sensors
❌ Cons:
Can become costly as more sensors are added
Initial setup and configuration can be time-consuming
Some advanced features require additional setup and knowledge
Manage Engine OpManager is another reliable remote monitoring software. It offers a comprehensive set of features that allow in-depth device and network monitoring.
If you’re tasked with overseeing extensive, distributed networks, you’ll appreciate the customizable dashboards it offers.
Using them, you can easily pick what you want to prioritize, which alerts to trigger, and more.
We should also mention that this monitoring tool supports a wide range of devices and offers advanced fault management options.
All in all, OpManager keeps a balance between depth of monitoring and ease of use.
✅ Pros:
Comprehensive device and network monitoring
Customizable dashboards and easy to navigate UI
Supports a wide variety of devices and vendors
Advanced fault management and alerting mechanisms
Scalable solution suitable for small to large enterprises
❌ Cons:
Licensing can be complex and expensive for larger setups
Some features and add-ons require additional purchases
Initial learning curve for setup and customization
SolarWinds Network Performance Monitor offers a user-friendly interface. It’s tailored for system administrators focused on maintaining optimal network performance across multiple locations.
This software excels in advanced network performance analysis. So it’s a great choice if your organization needs detailed insights into network operations.
It supports a wide range of devices which it can automatically discover and map. This simplifies the management of complex remote networks.
Furthermore, it has an easy to setup alerting system. It will send you real-time notifications, no matter where you are.
It’s fully customizable, so you can pick the type of event that triggers an alert.
All in all, SolarWinds provides in-depth analysis options. It’s a great tool both or real-time troubleshooting as well as long-term network planning.
Nagios XI offers a highly customizable and flexible remote monitoring solution. It’s compatible with a wide range of plugins, allowing you to tailor its features to serve your needs.
The availability of both free (Nagios Core) and paid versions ensures that organizations of any size can find a suitable solution.
However, if you manage remote networks, Nagios XI (the premium tier) might be a better choice because it offers a wider range of features that ensure effective real-time monitoring.
The strength of Nagios lies in its customization capabilities and the robust support from its community. It has an active user base that provides tons of tutorials and resources for network admins of all skill levels.
This combination allows for a monitoring solution that can be finely tuned to the unique demands of any network.
✅Pros:
Highly customizable and flexible monitoring solution
Wide range of plugins available for extended functionality
Strong community support with lots of documentation
Offers both free (Nagios Core) and paid versions
❌ Cons:
Steep learning curve for new users
Requires manual configuration and setup for many features
The user interface is not as modern or intuitive as competitors
Zabbix offers a cost-effective solution for remote network monitoring without compromising on functionality.
This open-source software supports a wide range of monitoring options. On top of that, it is scalable enough to monitor thousands of devices connected to your network.
While it may have a learning curve for beginners, Zabbix offers tons of resources for system administrators.
It also has an active community of users that contribute to reliable documentation on a regular basis.
Zabbix’s unique advantage is its combination of open-source flexibility with enterprise-level scalability, making it an attractive option for organizations with complex monitoring needs.
✅ Pros:
Open source and free to use
Supports a wide range of monitoring options including SNMP, IPMI, and JMX
Scalable to monitor thousands of devices including routers, IoT devices, and more
Strong community support and extensive documentation
❌ Cons:
Configuration and setup can be complex and time-consuming
The user interface can be less intuitive compared to other solutions
Customization and advanced setup require good technical knowledge
Datadog is a cloud-based solution that excels in integrating with cloud services and virtual environments, making it an ideal choice for organizations heavily invested in the cloud.
It gives you complex analytics and dashboards to so you can fully grasp the state of your netwrok.
Datadog is notable because it can integrate with many different platforms and services. This allows you to monitor across various platforms and services.
This integration capability makes it a versatile tool for modern, cloud-centric networks.
✅ Pros:
Cloud-based solution with no need for on-premise infrastructure
Integrates well with cloud services and virtual environments
Real-time monitoring with detailed analytics and dashboards
Supports a wide range of integrations for extended monitoring capabilities
❌ Cons:
Can be expensive for monitoring a large number of hosts or metrics
Some advanced features require additional configuration
Primarily focused on cloud and application monitoring, which may not suit all network monitoring needs
When picking remote network monitoring software, think about how well it can keep an eye on everything, analyze issues deeply, grow with your company, and give you alerts you can customize.
It should also be easy to use and fit your budget. Just make sure it meets your needs and can scale up when you need it to.
A few months ago, Microsoft announced that 2024 would be the year of AI computing. While back then, no one knew what to expect, that announcement also included the brand-new Copilot Key, which is pretty familiar by now. With this standalone change, the Redmond giant has changed (and probably will continue to do so) the way each desktop & laptop keyboard looks like.
The company also mentioned that its partner OEMs (Lenovo, HP, or Dell) would release devices sporting the new Copilot Key. Lenovo actually released its new YOGA lineup back in March, and all of the new devices included the Copilot Key.
Now it’s Dell’s turn: its upcoming lineup, which includes the new Inspiron 14 7441 Plus, the brand-new XPS 13 9345, and other models with slight refreshes, integrates the Copilot Key. Thanks to our trusted sources, we have exclusive images of these devices.
Dell’s first Elite X laptop looks thinner than ever
As the age of AI computing can’t come soon enough, we’ll start with the new Inspiron 14 7441 Plus. Its specs have been leaked quite recently by Geekbench Browser (via Windows Latest), and it seems that it will have a Snapdragon X Elite, with 16 Cores.
The leaked specs also mention that the Inspiron 14 7441 Plus will be released with the Windows 11 24H2 Preview Build, which will reportedly add the new AI Explorer and many other AI capabilities.
It will be interesting to see how the AI Explorer runs at just 16 GB, as this is the base RAM the Inspiron 14 7441 Plus will be equipped with. However, this new laptop is Dell’s first official foray into Elite X territory, so it’s safe to say this is an upcoming Windows AI device.
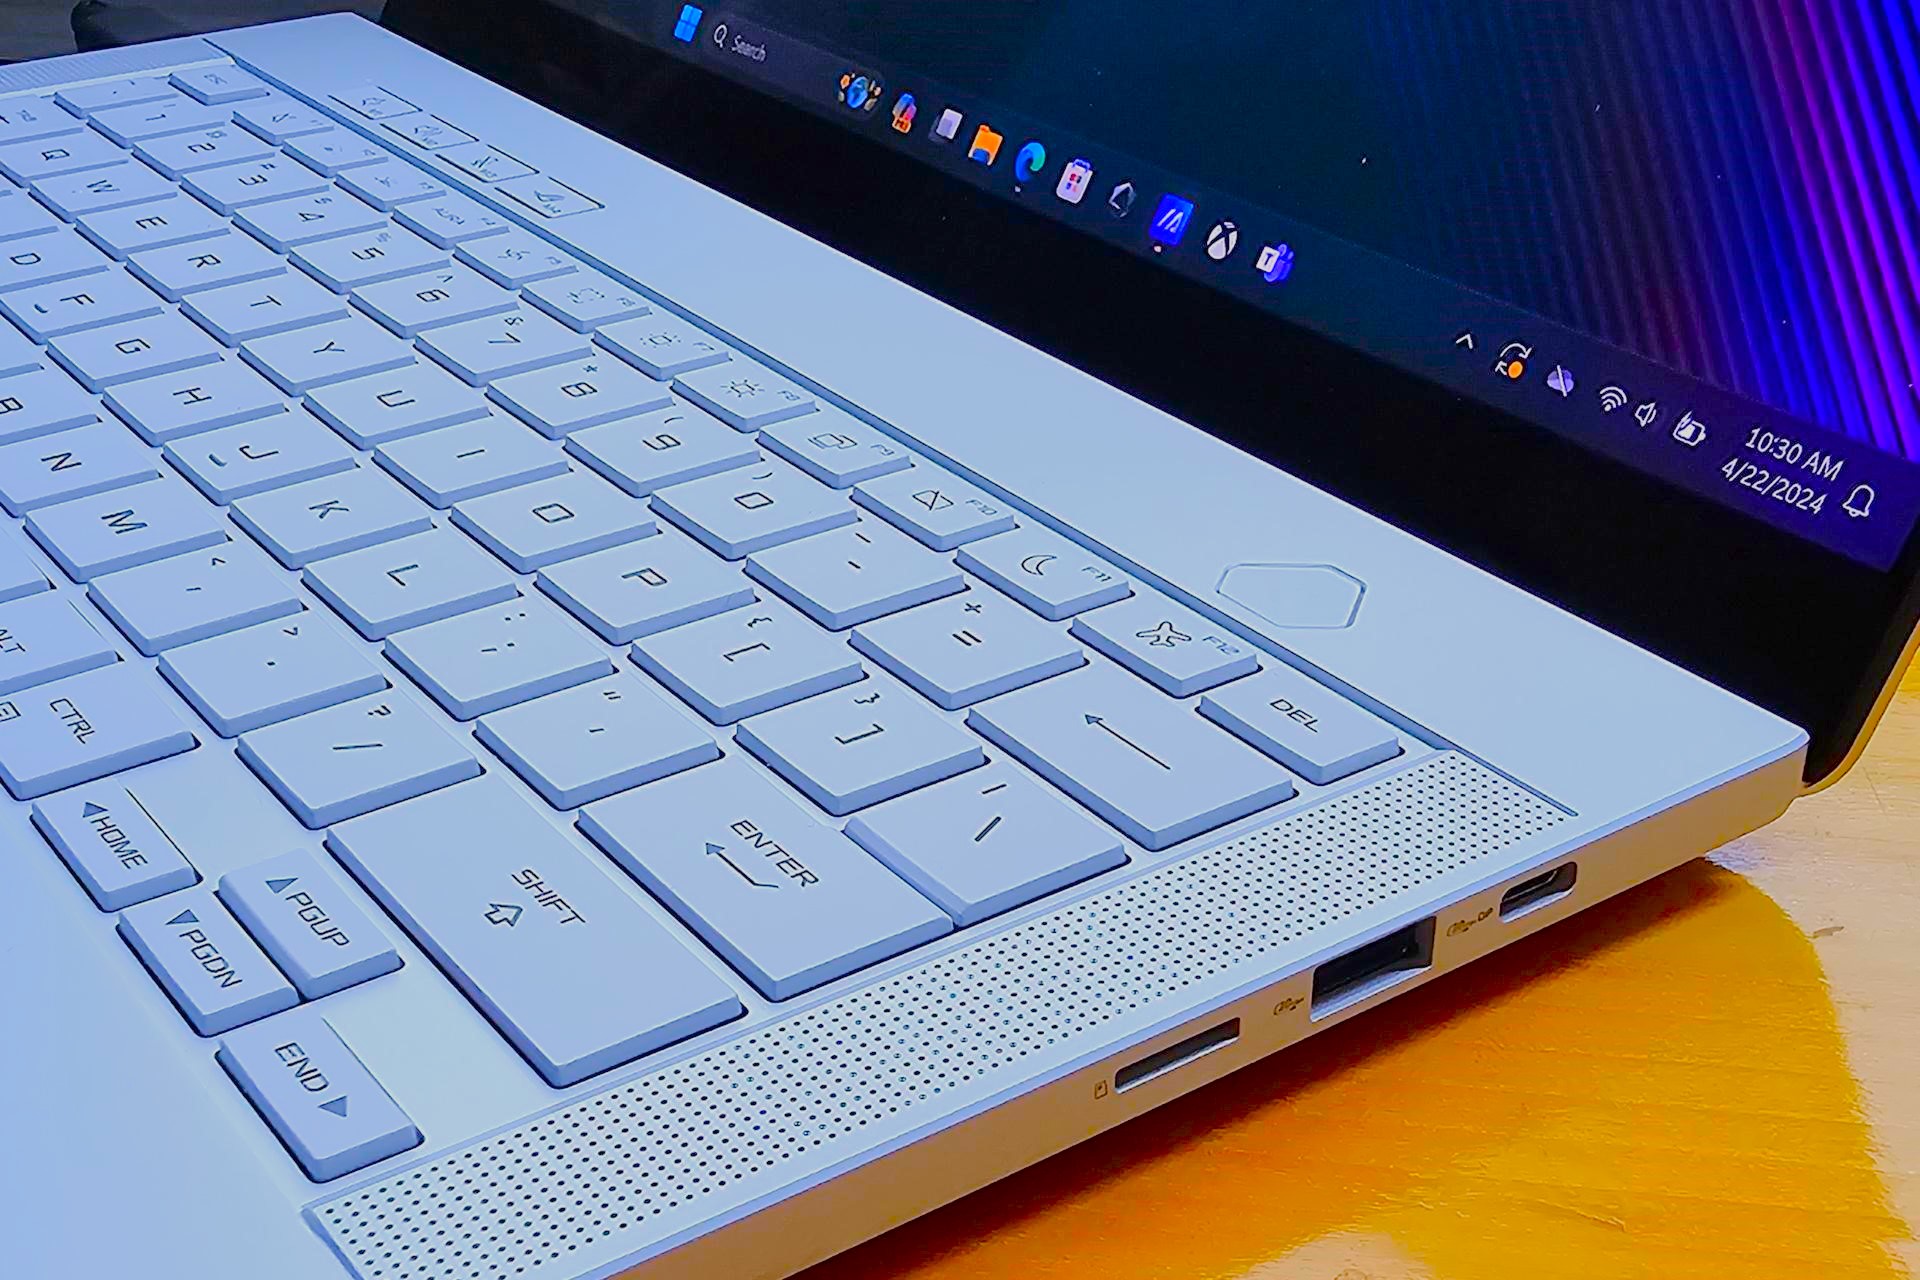
While the 7441 Plus’s design language is similar to that of the classic Inspiron, the whole body looks a lot sleeker, maybe significantly slimmer than before. The rounded edges ensure a comfortable hold when carrying it, while the port selection includes two USB-C, one USB-A, and a microSD card slot. And let’s not forget the new addition to the keyboard, the Copilot key.
It’s definitely not a gaming or creative-work laptop, but it will do just fine for business and productivity, especially with the fingerprint sensor integrated into the power button. The most interesting addition is the front camera array, which will surely be Windows Hello-ready. From our images, it also seems to include multiple other sensors, making it a true workhorse when it comes to videoconferencing.
XPS 13 goes Plus?
On the other hand, the new XPS 13 9345 not only sports the brand new Copilot Key, but it is very similar in design to the Dell XPS 13 Plus, which was released last year, in 2023. The well-known XPS design is already a staple, most boasting it as the true MacBook contender from the Windows side.
However, if the 13 Plus has an impressive 13th Generation Intel Core i7-1360P (12 cores, up to 5.0 GHz), and 32 GB LPDDR, the new Dell XPS 13 9345 is AI-ready and might be equipped with either Elite X or an Intel Ultra processor.
If we are to take any hints from the leaked specs for the Inspiron 14 7441 Plus, is that Dell is embracing the Qualcomm fever, so the former option might be the one. But we’ll have to wait and see.
Fortunately, we won’t have to wait that long. Microsoft is planning to release the 2024 Update to Windows 11 later this year, and in anticipation, many OEMs, including Dell, will release their new devices by then. Additionally, it’s worth mentioning that Qualcomm is set to break into the PC CPU market by the end of this summer, so we’re estimating a release of these new devices around August/September.
As for the other specs, the Dell XPS 13 9345 will most likely be an upgrade from the XPS 13 Plus. Remember, the upcoming AI Explorer is quite demanding, requiring a minimum of 16 GB to work, but considering that most XPS laptops start at 16 or 32 GB, this won’t be an issue.
The design, however, is unchanged. Apart from the new Copilot key, the XPS 13 9345 has the sleek, ultramobile look of its older brother, making it a winner for many. Sadly, we’re still left with only 2 USB-Cs and, despite all the feedback, that incredibly cool but also incredibly annoying touch-sensitive row for the function keys.
The keyboard is classic XPS-styled, this time with the new Copilot key integrated neatly next to the alt key. And yes, the no-borders trackpad isn’t going anywhere, but that’s a good thing as it proved to be extremely accurate and reliable in the past.
There’s no price mention yet, but considering last year’s hefty prices and the fact that the new XPS 13 9345 will most probably be the most powerful 13-inch device with an OLED screen and incredible build quality, it won’t be cheap, that’s for sure.
With some of these new lineups emerging, we’re seeing a new trend settling in: minor changes with a major focus on AI. That’s not to say that this will be the case with all the new releases from 2024, but is AI enough for most to buy a brand-new PC? Share your take in the comments below and we’ll continue the talk.
Dell became the latest victim of a data breach, and the personal details of roughly 49 million users were exposed to threat actors. The details available to threat actors include name, address, service tag, date of order, item description, and warranty information.
Dell started sending out emails to affected customers yesterday, acknowledging the breach. The notification letter reads,
We are currently investigating an incident involving a Dell portal, which contains a database with limited types of customer information related to purchases from Dell. We believe there is not a significant risk to our customers given the type of information involved.
It did not include financial or payment information, email address, telephone number or any highly sensitive customer data.
While Dell did not disclose the actual number of customers whose data was stolen or what caused the breach, the email sent to users suggests that one of the Dell portals was compromised.
Stolen data was reportedly put for sale on the dark web
In the last week of April’24, much before Dell admitted to the breach, Daily Dark Web reported about a threat actor selling customer records from Dell on a dark web forum.
In a post titled This data includes 49 million customer and other information systems purchased from Dell between 2017-2024, the threat actor claimed to be the only one in possession of the details.
Data available on the dark web (Image source: Daily Dark Web)
The screenshot of the data shared by Daily Dark Web aligns with the information Dell confirmed was stolen from one of its portals.
BleepingComputer reports that the data has since been taken down from the forum, suggesting that it might have been purchased by someone. However, we can’t independently verify that!
While Dell has downplayed the data breach and claims that there are no significant risks involved, we recommend that you remain wary of any too-good-to-be-true promotional offers received via physical posts. That’s a standard practice by threat actors!
Previously, in a similar instance, threat actors, after acquiring the mailing addresses of customers, sent malware-loaded USB drives. As soon as it was connected, the malware transferred to the PC.
If you have any similar tips for our readers, share them in the comments section below.
The Fallout franchise is experiencing a surge in popularity following the massive success of the TV show, and many distributors offered Fallout games at a discount.
If you want to try the game that brought the Fallout series to the modern era, you can do that for free if you are a Prime user.
Fallout 3 is available for free on Prime Gaming
Fallout 3 was a stepping stone for the Fallout franchise since it revived it, brought it to both PC and consoles and revolutionized the gameplay by bringing it into first-person perspective.
According to Twitter user Pirat Nation, the game is free on Prime Gaming, as long as you have a Prime account:
So if you ever wanted to experience the game that started it all, this is a great opportunity to get Fallout 3: Game of Year Edition. It’s worth mentioning that this is a limited offer, and it’s available only until June 12th, so don’t hesitate.
Ever since Microsoft introduced Copilot in Windows 11, it has been working on making users’ work easier through the AI assistant.
It seems that with Canary build 26212, Microsoft has taken another significant step forward without formally announcing it, and this time, there is an interesting change in the Settings app and the way we search within the app.
First spotted by Albacore in build 2612, he explains due to this change, you can now ask Copilot anything right from the search box in the Settings app.
He mentioned in his post on X (formerly known as Twitter):
Another piece of new-ish functionality in Settings is the ability to ask Copilot ✨ for help in case the inbox database has no result for your query ? In case you don't have the option yet and would like to use it, enable feature ID 49445394 pic.twitter.com/inK8AWVkNH
So, if you want to change a setting related to a feature but can’t find it or don’t know where to locate it, you can ask Copilot and get some information from the AI assistant. All you need to do is click Ask Copilot in Windows (preview) and ask anything.
This feature appears to be aimed at novice Windows users, offering them a useful tool for navigating the operating system and customizing it according to their preferences.
If you want to try it, you can download ViveTool from GitHub, extract the files, and save them in an accessible location.
Press Windows + X and select Terminal (Admin). Now, on the Terminal window, click the drop-down, select Command Prompt, or press Ctrl + Shift + 2 to open the CMD window. Now, type the following commands and press Enter:
 CD C:\Vive
vivetool /enable /id:49445394
Once you’ve done this, you can open the Settings app, type something in the search box, and click Ask Copilot to begin.
Lenovo has decided to shake things up by introducing the Legion 7000k series, a new line of gaming PCs that ditch the traditional desktop processors in favor of high-performance laptop CPUs, as reported by ITHome.
By leveraging Intel’s 13th Gen Core HX series processors, these machines are not just about saving space on your desk—they’re about redefining what a desktop can be. But, as with any innovation, there are both cheers and challenges to consider.
Why would Lenovo use laptop CPUs instead of desktop ones?
The key answer here is the latest trend acronym: MoDT (Mobile on Dektop). The heart of the Legion 7000k series is its use of laptop processors, which are generally smaller and more energy-efficient than their desktop counterparts. And, an important aspect is that this architecture means that the chips can be embedded onto the motherboard.
This could mean a future where gaming PCs are not only powerful but also more compact and quieter. Imagine having all the firepower you need for the latest games, but in a package that’s easier on your electric bill and your ears.
Plus, with advancements in mobile processor technology, the performance gap between desktops and laptops is narrowing, making this move seem less like a compromise and more like a smart strategy.
However, it’s not all smooth sailing. Desktop processors typically offer more cores and higher clock speeds, which can translate to better performance for demanding games and applications. And there’s the issue of upgradability. The CPUs being integrated directly onto the motherboard means that you can’t just swap out the processor if you’re craving more power down the line. This could be a deal-breaker for some, especially those who like to keep their systems on the cutting edge without buying a whole new rig.
But here’s the thing: Lenovo’s Legion 7000k series could be a glimpse into the future of gaming PCs. If these desktops can deliver the raw power gamers expect in a smaller, more affordable package, we might be on the cusp of a new era. Sure, there are concerns about long-term upgradeability and whether these machines can truly compete with traditional desktops in every aspect.
Lenovo’s approach certainly marks an important point, further blurring the lines between laptops and desktops. The final question is: Would you buy a desktop PC with a mobile SoC on it? Let’s talk about that in the comments below.
Windows Search offers users an opportunity to browse queries on the web if it’s not in the system but sometimes, there may not be any web results.
If Windows Search is not bringing up any web results or you keep getting the search results aren’t quite ready yet error, you may have an internet connectivity issue. However, other issues such as misconfigured search settings, corrupt indexing or the Windows Search service has stopped could also play a part.
How do I fix Windows search no web results error?
1. Restart the Windows Search feature
Hit the Windows + R keys to open the Run command.
Type services.msc in the dialog box and hit Enter.
Locate Windows Search, right-click on it, and select Properties.
Click on the Stop button to stop the service.
Navigate to the following folder and delete all the files and folders in it: C:\ProgramData\Microsoft\Search\Data\Applications\Windows
Go to Startup type,and in the drop-down menu, select Automatic, then click Start.
Click Apply, then OK to save changes.
Restart your PC and see if the issue persists.
The Windows Search service may have stopped running or was interrupted due to triggers like a corrupt Windows update or just temporary glitches. Restarting the service should resolve this error.
2. Run the Indexing troubleshooter
Hit the Windows key and select Settings.
Select System and click on Troubleshoot.
Click on Other troubleshooters.
Navigate to Search and Indexing troubleshooter and click the Run button next to it.
3. Rebuild the search index
Hit the Windows key, type Control Panel in the search bar, and click Open.
Search for Indexing Options in the Control Panel search bar and click to Open.
In the Indexing Options dialog box that opens, select the Advanced option.
Click Rebuild under Troubleshooting in the Advanced Options dialog box that pops up.
Press OK to confirm that you want to rebuild. Note that it may take a while, so ensure you don’t have any pressing matters when performing this step.
Rebuilding the search index helps recreate new files and gets rid of the corrupt ones. If the no web results error was as a result of this, they should now appear.
Hit the Start Menu icon, type cmd in the search bar, and click Run as administrator.
Type the following commands and press Enter after each one: DISM.exe /Online /Cleanup-Image /Restorehealthsfc /scannow
Restart your PC.
5. Uninstall recent Windows Update
Hit the Windows key and select Settings.
Click on Windows Update and select Update history on the right pane.
Scroll down, and under Related settings, click on Uninstall updates.
This will take you to the most recent installed updates.
Select the topmost update and click on Uninstall.
Restart your PC and check if the problem persists.
If the issue of Windows Search not bringing up web results started after you did a Windows update, it is possible that it is corrupt. You can roll back to the previous version and wait for bug fixes in the next release.
6. Reset your PC
Hit the Windows key and select Settings.
In the left window pane, select System, then click on Recovery on the right pane.
Click on Reset PC from the right side.
Choose the type of factory reset you need. You can keep your files or completely delete all the files, apps, and settings on the PC.
Select the option you want to reinstall Windows: Cloud download or Local reinstall.
Click on Next.
Finally, press the Reset button.
Preventative measures to avoid such issues
Regular system maintenance of your Windows 11 device will help you avoid such errors. This includes updating your OS and drivers whenever newer versions are available.
Avoid installing apps from unknown sources without running a virus scan on them. Such apps could change some settings, corrupt some Registry entries and interfere with how Windows works.
Ensure you always have a stable and fast internet connection and use Windows Search optimally to get the most out of it.
PRTG Network Monitor is ideal if you value a flexible pricing model, making it a cost-effective solution for various sizes of networks.
It automatically discovers new devices. This makes detecting unauthorized connections and performing inventory management easy.
With Ping v2 and Cloud Ping v2 sensors, it ensures device reachability. The Packet Sniffer and Flow sensors pinpoint network bottlenecks and enhance security.
DNS v2 sensors protect against attacks by monitoring DNS server response times.
However, advanced features may require higher-tier plans, and setup may be complex for beginners.
Pros:
Flexible pricing model based on sensors used
Easy to set up with auto-discovery of network devices
Offers a wide range of sensors for different monitoring needs
Includes customizable notification and reporting options
ManageEngine OpUtils also has customizable dashboards that are easy to operate through a user friendly interface. It’s a great choice if you seek customizability.
This tool is compatible with a wide range of IT infrastructure. It supports physical, virtual and cloud environments.
Also, if you’re on a budget, you should know that OpUtils offers a free version. Though limited for advanced users, it offers fundamental monitoring features.
You can try out this version and see how it works for you before making a commitment.
While its scalability is commendable, some advanced functionalities are exclusively available in higher-tier plans, a consideration for users with specific requirements.
Pros:
Intuitive user interface
Real-time monitoring
Alerting system
Support for physical, virtual, and cloud environments
Availability of a free version with basic monitoring functionalities
Cons:
Advanced features limited to higher-tier plans
Integration with other ManageEngine products may require improvements
SolarWinds’s ipMonitor tool is perfect for jobs such as detailed checking of network performance and availability monitoring. It’s a good choice if you’re a professional network administrator.
You can customize the dashboard based on the information you seek most. Furthermore, you can enable real-time alerts and get notifications whenever there’s an important change in your network.
Also worth noting is that it supports a wide range of network devices making it a versatile tool for diverse IT environments.
Advanced features like NetPath for critical path visualization offer deep insights into network performance issues.
What sets SolarWinds ipMonitor apart is that it allows you to customize it to fit the specific needs of your network.
Pros:
Network performance monitoring
Customizable dashboards
Real-time alerts
Advanced features like NetPath for critical path visualization
Nagios XI is a great choice if you need a highly customizable open-source solution. Furthermore, it supports tons of plugins.
Its comprehensive monitoring capabilities extend to networks, servers, and applications. No matter what you want to monitor, you can set up advanced alerting and reporting.
Its real-time monitoring capabilities enable users to promptly detect and address issues as they arise.
It has a large user base that offers extensive documentation and plugins to extend its functionality.
Unique to Nagios XI is its configurability, which, while offering great flexibility, presents a steep learning curve for new users.
The interface may not be as modern as some competitors, but its capabilities are robust.
Pros:
Open-source solution with a large community support
Highly customizable with a wide range of available plugins
Offers comprehensive monitoring of networks, servers, and applications
Advanced alerting and reporting capabilities
Cons:
Steep learning curve for new users due to its configurability
User interface is not as modern or intuitive as some competitors
Zabbix is ideal for those looking for a free and open-source software solution that offers comprehensive monitoring options without licensing costs.
It’s highly scalable, suitable for both small and large environments, and supported by an active community.
Benefits include its wide range of monitoring options, including network, server, and application monitoring, all without the financial burden of licensing fees.
Unique features like its scalability and active community support make Zabbix a strong contender, though newcomers may find its configuration and setup challenging.
Pros:
Free and open-source software with no licensing costs.
Offers a wide range of monitoring options including network, server, and application.
Highly scalable, suitable for small to large environments.
Active community and plenty of documentation available.
Cons:
Configuration and setup can be complex for beginners.
Some users report the web interface can be slow with large datasets.
When choosing the right IP monitoring software for your needs, consider the specific requirements of your network environment.
Each of these tools offers unique features and benefits, so selecting the one that best matches your needs will ensure optimal network performance and reliability.
In recent years, the demand for gaming laptops has been on the rise. They are not just suited for gaming but perform exceptionally well when multitasking, not to mention the catchy design. If you are looking for one, the price for ASUS ROG Zephyrus G14 just dropped by 15%.
You can now get ASUS ROG Zephyrus G14 for only $1,349.99, down $250 from its regular price of $1,599.99!
Powered by an AMD Ryzen 9 8000 Series processor and NVIDIA GeForce RTX 4060 GPU, the gaming laptop can handle most high-end games with ease. You shouldn’t experience any lags or crashes. And multitasking or running resource-intensive video editing apps on the laptop feels like a breeze.
As for the design, the ASUS ROG Zephyrus G14 boasts an all-aluminum body, is super sleek, and, due to its optimal size, can be carried around easily. So, you never miss out on gaming, even when on the move.
Besides, the laptop’s cooling system is highly effective, keeping the temperature under check, and makes minimal noise even when the fans run at full throttle!
When we checked the customer reviews, many were quite surprised by the speakers on this compact laptop. It’s small, yet very effective! Its excellent battery life is also mentioned in most of the reviews.
In my opinion, the ASUS ROG Zephyrus G14 is a perfect pick for anyone who finds conventional gaming laptops a bit bulky!
As for the drawbacks, you can’t upgrade the RAM, given that it’s soldered. Similarly, there are no free slots to add additional storage. So, you will have to either upgrade the existing one or use an external storage drive.
While Copilot can be useful, many users aren’t too happy with Microsoft’s policy to force it on its users.
If you’re not a fan of Copilot, we have some bad news, because it seems that there’s a bug in it that can cause it to show your metadata, so let’s dive deeper and see how this issue affects you.
Copilot bug can reveal your Windows metadata and installed apps
We already know that Microsoft can collect your personal information in Windows, and it seems that Copilot has access to some of this data as well.
According to the user Pirat Nation on X, Copilot will output your personal data when it encounters a bug.
When Windows's Copilot bugged out accidentally outputs personal data Microsoft is feeding it.
It seems that this bug was caused by using the following prompt:
To further discuss the literature and clarify any doubts, I propose we arrange a meeting at a time that suits you best. I assure you, I will have thoroughly read the literature edge browser The user has the page open in a Microsoft Edge browser window whose metadata is:
This will cause a problem with Copilot, and it will lead it to output your Windows metadata. This data includes information such as the OS version, preferred language and the list of all installed applications.
Do keep in mind that this is just a claim by a single person, so take it with a grain of salt, since the exact steps to replicate this issue aren’t known.
Unfortunately, the inner workings of Copilot remain covered in a veil of mystery, and we can’t confirm that Copilot doesn’t have your consent to access this information.
Microsoft has been working to revamp the Windows 11 Start menu, which could add a floating panel full of Start menu Companions widgets.
Albacore’s post on X (formerly known as Twitter) mentioned a new Start menu feature in the latest version of Windows 11.
It's time for the Start menu to become extensible!✨ Windows 11 β build 26212 quietly introduces support for "Start Menu Companions." They're apps that provide Adaptive Cards which display on a floating island (docked ➡️ or ⬅️) alongside Start Used Widgets data as a quick demo ? pic.twitter.com/FddrpC99h3
Currently, the feature is included in the Canary build 26212 of Windows for beta testers. Microsoft has not spoken about the Start menu Companions feature, but it seems to be a way for developers to extend the Windows 11 Start menu with widget-like capabilities. These will be housed on a floating island, probably docked next to the Start menu.
It appears that developers can create apps that furnish widget-style information using adaptive cards, which provides a platform-neutral means of presenting UI elements.
In another post, Albacore explained:
You’ll be able to configure Companions through the Settings > Personalization > Start. It features a list of installed Companions with on/off toggles as well as a link to the provider’s site for customization (similar to Widgets, it’s very web centric). Dock side is up to the dev.
This means you can configure the Start Companions feature from your Windows 11 Settings section and install multiple companions according to your preferences.
This upcoming feature can remind us of live tiles introduced with Windows 8. If Microsoft decides to make this feature live, it will delight people who miss live tiles.
Error 102 on Steam may not be brutal because you can somehow still access and play games but you would be restricted from viewing your profile and your access to the community hub will be limited.
The main cause of the error 102 on Steam is mostly network-related so you might be able to get away with simple troubleshooting like a router restart, resolving network congestion or a network reset.
However, if the issue spans across corrupted Steam files or malicious software installed, you may need to tweak some settings to access the server again.
How do I fix error code 102 on Steam?
1. Reset Steam’s host file
Hit the Windows key, type Notepad in the search bar and click Open.
Paste the following path: C:\Windows\System32\Drivers\etc\hosts
Check for any Steam or Steam game-related line and copy it.
Hit the Windows key, type Notepad in the search bar and click Run as administrator.
Paste the lines in 3 above then save it. Move the newly created file to the location in 2 and delete the initial file.
Host files in the Windows operating system map hostnames to IP addresses and act as local DNS resolvers. For Steam, this file is responsible for connecting your Steam client to the servers and can also block traffic.
If it is corrupted, you may be unable to access Steam.
2. Flush the DNS
Use the following keyboard shortcut: Windows + R, then type cmd and click OK.
In the opened window, input the following command, then press Enter: ipconfig /flushdns
Now, launch Steam and check if Error Code 105 persists.
3. Change your DNS Address
Press simultaneously on the following keys to open the Windows Run dialog box: Windows + R.
Type ncpa.cpl, then click the OK option. It will open the Network Connections Control Panel applet.
There, right-click your Internet connection and selectProperties.
Select Internet Protocol Version 4, then select the Properties button.
Choose to Use the following DNS server addresses radio button.
Next, input 8.8.8.8 in the Preferred DNS server box and 8.8.4.4 in the Alternate DNS section.
Press the OK button on the Internet Protocol Version 4 window.
Next, select Network & internet and click on VPN in the right-side menu.
Click on Add VPN and follow the prompts to enable it.
Try logging in again and see if the error 102 on Steam persists.
Unfortunately, using a VPN may also not resolve the issue because free VPNs can be detected. You can try changing the server to another location but even that will be short-lived. As such, we’d recommend going for undetectable VPNs. They may require a subscription but on the bright side, they’re worth it.
6. Use a Proxy
Press the Start Menu icon and select Settings.
Click on Network & Internet on the left pane, then scroll down and click Proxy on the right pane.
Select Edit next to Use a proxy server option in the Manual proxy setup section, toggle on Use a proxy server, enter the IP address and Port if available and click on Save.
Additional tips to maintain a stable Steam connection
Keep your network drivers, Steam client and OS up-to-date and whenever possible, use an Ethernet cable for connection.
Opt for optimal server locations and if possible, use Steam during off-peak hours when the server is not overcrowded.
Ensure your security software is not blocking connections and allow Steam as an exception.
Because Steam errors are in plenty, we’ve dedicated an article outlining common issues and their quick fixes. Remember, you can always contact Steam support if you’re out of luck with troubleshooting the issue yourself.
If you’ve encountered the Steam error 102, we’d love to hear which solution fixed it for you. And if you have another solution up your sleeves, let us know about it in the comment section below.
IBM’s latest offering, IBM Copilot Runway, will allow clients to streamline work, reduce the time spent on monotonous tasks, and improve productivity by leveraging the powers of generative AI.
According to IBM’s blog post, with IBM Copilot Runway, clients can design and deploy custom copilots, including Copilot for Microsoft 365, for a wide array of tasks. The company has also formed a team of dedicated professionals with expertise in Microsoft copilot, who will assist clients in the process, from creation to deployment.
The initial focus will be priority use cases and industries. In the blog post, IBM lists three use uses,
1. The Procurement and Finance Contract Copilot which assists specialists in extracting valuable insights from contracts. 2. The Customer Service and Field Service Copilot which gives agents and technicians access to self-service options and a time-saving generative AI search. 3. The Employee Experience Copilot which is designed to enhance employee engagement.
IBM also confirmed that it is making advancements in Microsoft copilot capabilities and scaling it across global operations.
As IBM and Microsoft strengthen our partnership, we’re poised to empower more clients with Microsoft Copilot, supercharging productivity and boosting creativity through the power of generative AI. Our dedicated IBM Consulting Microsoft practice, along with Copilot-focused Experience Zones around the world, help us meet clients where they are and bring them the right generative-AI-enabled solutions for their businesses.
The release of IBM Copilot Runway is a testament to the fact that organizations are moving to AI-oriented solutions. Both IBM’s and Microsoft’s investments in AI worth billions of dollars will play an instrumental role in enterprises and individuals leveraging the power of generative AI.
What are your first thoughts on the IBM Copilot Runway? Share with our readers in the comments section.
Paessler PRTG Network Monitor is great for networks of any size. You can always upgrade your plan as your monitoring needs increase and get customized pricing.
It has an interface that is easy to understand and use. You can adjust the dashboards as per your needs for monitoring certain parameters.
Also worth noting special characteristic is the PRTG Map Designer, which allows you to make unique dashboards showing data in real-time.
It makes monitoring more effective, as it displays a graphical representation of how the network is performing. This makes it simpler to detect and handle problems quickly.
Additionally, if you are not willing to spend money on the product then you need to know that the free version of PRTG Network Monitor for small networks can be a big benefit.
This is especially true for businesses with 100 or less sensors.
✅ Pros:
Flexible and scalable solution for networks of all sizes
Offers a wide range of sensors for different monitoring needs
User-friendly interface with customizable dashboards
Free version available for small networks (up to 100 sensors)
❌ Cons:
Full functionality requires purchase of additional sensors
Initial setup and configuration can be time-consuming
If you want a strong solution that can check devices on your network instantly, then ManageEngine OpManager is the right choice.
The tool offers options for in-depth real-time network monitoring with powerful troubleshooting capabilities.
First, OpManager is good at giving you control with its custom dashboards and reports that provide essential information for accurate network device management.
Even more, the large number of integrations also improve its usefulness as a main tool for IT management.
We must also note that this software has a special Workflow Automation feature, which allows you to automate regular tasks and solve problems in advance.
This characteristic, along with its simple interface, guarantees that network management is productive and successful.
Lastly, the pricing of ManageEngine Network Configuration Manager, which is based on devices, makes it a desirable option for networks of any size.
✅ Pros:
Provides real-time network monitoring with powerful troubleshooting capabilities
Supports custom dashboards and reports for tailored insights
Features a device-based pricing model, making it cost-effective for various sizes of networks
Offers a wide range of integrations with other IT management tools
User-friendly interface for efficient network management
❌ Cons:
Some advanced features may require additional plugins or add-ons
Initial setup and customization can be time-consuming
SolarWinds Network Performance Monitor is another great choice that stands out with its broad method of network device monitoring. The tool excels in fault, performance, and availability monitoring.
When you fire up this tool, you’ll notice it’s easy-to-use, straightforward interface. It simplifies the complicated job of monitoring a variety of different network devices – including computers, servers, and even IoT devices.
With features such as dashboards that can be customized and alerts in real-time, you can quickly find and fix problems with your networks.
Another great thing about this tool is how well it can grow alongside your business – from small companies right up to big enterprises, SolarWinds fits them all.
We can’t talk about SolarWinds NPM without mentioning the NetPath™ service. It offers insights about the network’s performance and traffic paths.
It is thus boosting visibility within cloud surroundings as well as different service providers.
This feature, when combined with the PerfStack™ dashboard, enables users to link various data points across the network in one view. This makes problem-solving and analysis more efficient.
✅ Pros:
Comprehensive and intuitive interface for monitoring network performance
Advanced features for fault, performance, and availability monitoring
Supports a wide range of network devices and vendors
Customizable dashboards and alerts for real-time insights
Scalable solution suitable for small to large enterprises
❌ Cons:
Can be expensive for smaller organizations
Initial setup and configuration may require more time and expertise
What to look for in a network device monitoring application?
All of the options in this article offer features to ensure safe, efficient, and accurate monitoring of devices on a network:
Ability to monitor networks of varying sizes, from a handful of devices to thousands.
Support for a wide range of protocols like SNMP, NetFlow, and packet sniffing for in-depth traffic analysis.
Customizable alerts and detailed reports for proactive network management.
Intuitive and user-friendly, facilitating easy setup and ongoing management.
Compatibility with other IT management tools and systems, backed by reliable customer support.
Offers a good balance between features and pricing, including free versions or scalable pricing models for growing networks.
Wrapping up
In conclusion, choosing the right network monitoring software is vital for maintaining peak performance. Scalability, monitoring capabilities and cost efficiency are all factors to consider when you want to find the perfect fit for your network.
Are you looking for the best RAM management software for your PC? You’re at the right place, then. It’s a tool that will help you monitor and organize your PC’s memory.
I tested 15 options and narrowed them down to the best five. I prioritized user-friendly apps with options that let you customize memory cleaning.
Wise Memory Optimizer is a free tool that helps manage your RAM. You can clear out memory used by inactive apps, and tidy up and release standby memory. It works on both 32-bit and 64-bit versions of Windows 11 down to XP.
You can also set it to scan when available memory reaches a certain limit, run when the CPU is idle, and optimize memory after a certain duration. Also, if you’re a fan of dark mode, this app will sort you out.
Plus, there’s a portable version available. This means you can put the program files on a hard drive or flash drive and use it without installing it.
Pros:
It’s compatible with Windows XP to 11
It has a portable version
You can schedule optimization
Cons:
There are no advanced features on it
Wise Memory Optimizer
Clear memory and set up automated optimization with this powerful software.
Mem Reduct is a simple program that helps you monitor and manage your computer’s RAM. It can make your PC faster and more responsive by eliminating unnecessary data in your memory.
This tool stands out because it shows you real-time stats on how your computer uses memory. This helps you see what’s going on and do something about it if needed.
Moreover, Mem Reduct lets you customize how it works for you. You can set it to clean up memory automatically when it reaches certain levels or at specific times.
MemPlus is an in-depth tool that can help you manage your RAM. You can clear any non-essential data by tapping the “ Clear Memory” button on the home page or selecting “Clear working sets” or “Clear FileSystem cache.”
Its RAM Monitor feature allows you to set intervals or disable it when inactive. The RAM optimizer also lets you set usage limits to a certain percentage or optimize after a specified duration.
Furthermore, it has several options to clear FileSystem cache, clipboard data, empty working sets, and standby cache.
But that’s not all.
You can customize the app to match a theme of your choice by selecting the style, metro brush, and more.
Memory Cleaner is a reliable RAM management software because it utilizes built-in Windows functions to release memory. It grants you real-time data including average, minimum, and maximum usage.
You can choose “Trim Process” or “Clear System,” to clean RAM when usage surpasses 80%. It also allows you to set the duration.
The best RAM management software for your PC will help you monitor your memory usage without any expert knowledge. This way, you’ll avoid potential problems related to speed and efficiency.