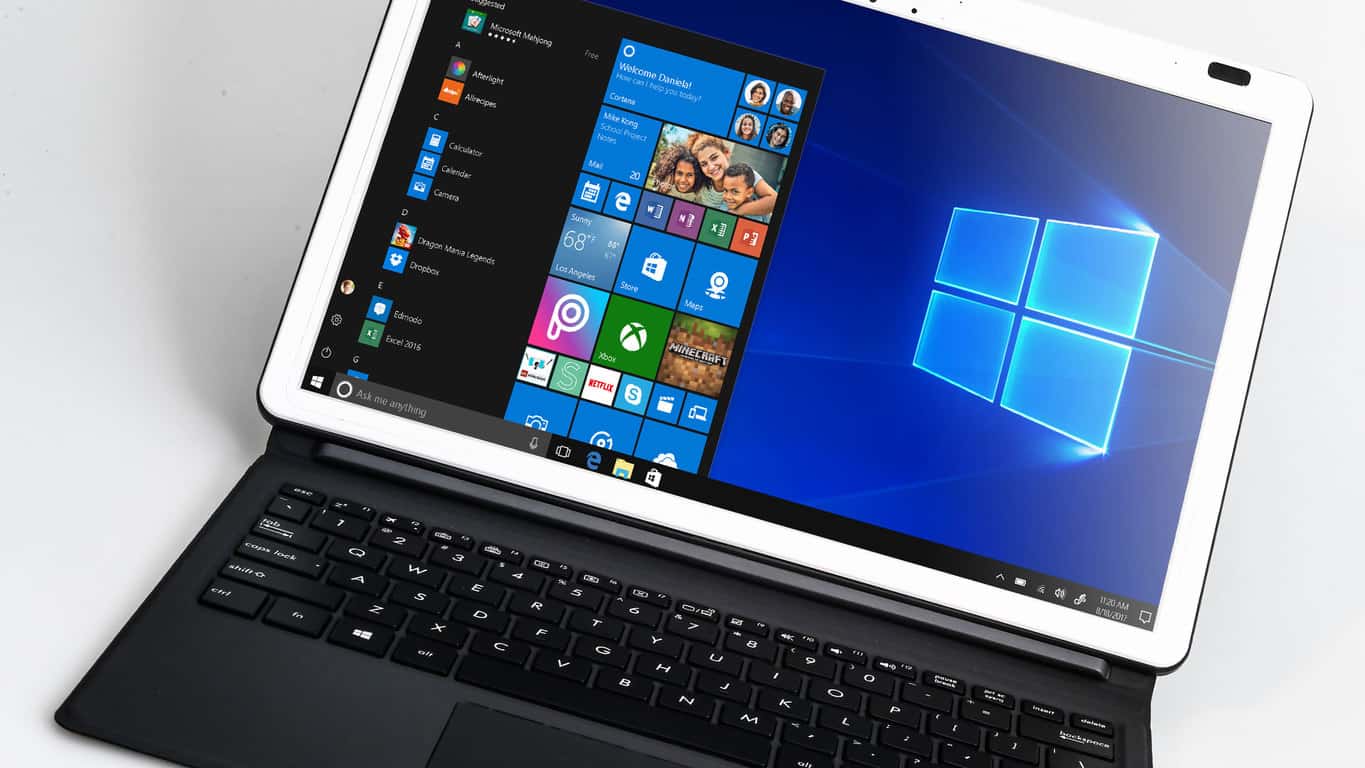
Windows 10 Twitter PWA updates with image tagging & other improvements

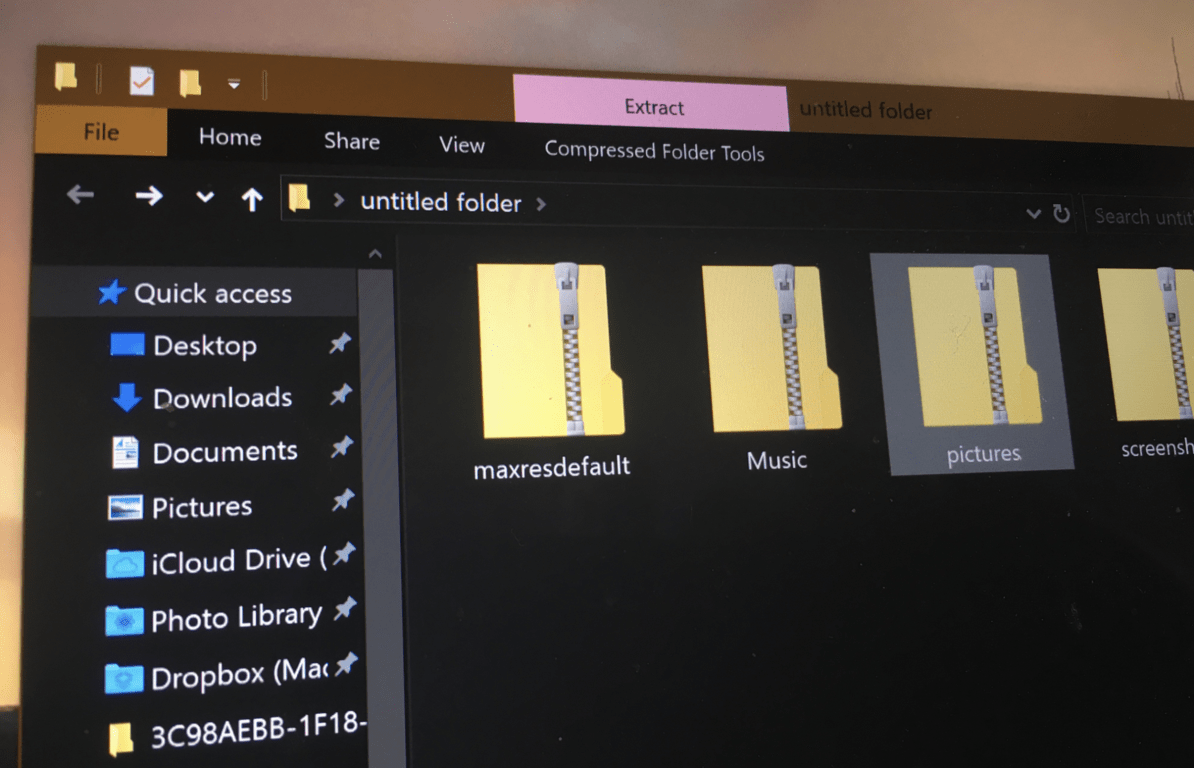
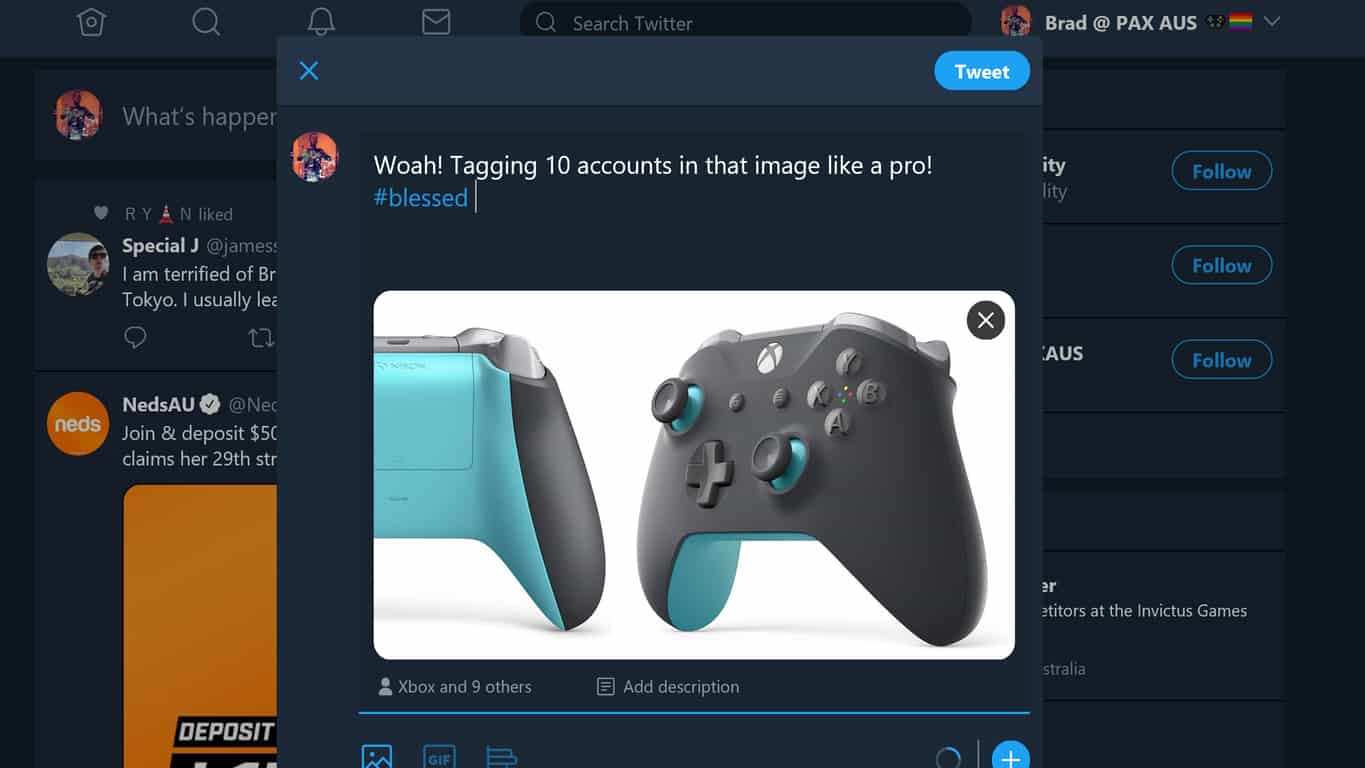
The Twitter progressive web app (PWA) updated this week with a host of performance improvements and the ability to tag up to 10 accounts in an attached image (see above image).

This update also moved the analytics icon in tweets in the Windows 10 app and began showing the notifications icon in a web browser tab when accessing the Twitter website in a browser.

Here’s the full release notes:

  • We added the ability to tag up to 10 people in a Tweet with photos.
  • Made a lot of performance improvements. More detail from one of our engineers in this Tweet!
  • On the widescreen experience we moved the analytics icon in the same line as the rest of Tweet actions to give you easier access to the feature.
  • We’ve added a whole set of improvements to the experience while viewing events on the Twitter website.
  • On desktop web, you’ll now be able to see the number of notifications you have on the browser tab.
  • You can now view your most recent searches from the search box.

The Twitter PWA is available to use on Windows 10 devices and Windows 10 Mobile Windows phones. It’s still not as fully-featured as its counterparts on iOS and Android but more features have begun to be added on an almost monthly basis.

Do you use the Twitter PWA on your Windows 10 device or do you prefer another option? Share your thoughts with the community in the comments below and then follow us on Twitter and Pinterest for more Windows news.

Twitter
Twitter
Developer:
Twitter Inc.
Price:
Free

Fixed: Windows Media Player Encountered an Error While Playing File

8 methods to fix Windows Media Player errors

  1. Fixing MP3 Playback
  2. Fixing AVI, WAV and MOV Playback
  3. Fixing RA, RAM and RM Playback
  4. Use the Windows Media Player Settings Troubleshooter
  5. Restore Windows to a Restore Point
  6. Turn Off Windows Media Player Network Sharing
  7. Reinstall Windows Media Player
  8. Play the Videos or Music in VLC Media Player Instead

Windows Media Player was once the default media player in all Windows platforms. However, the Groove Music and Movies & TV apps have replaced WMP as the default media software in Windows 10.

Nevertheless, Windows Media Player is still included with Win 10; and some users still utilize that software for video and music playback.

However, Windows Media Player doesn’t always play media files. A “Windows Media Player encountered a problem while playing the file” error message pops up for some users when they try to play music or video in WMP.

Consequently, the software doesn’t play the music or video for its users. If the same WMP error message pops up for you, check out some of the potential resolutions for it below.

Solutions to fix Windows Media Player errors

1. Fixing MP3 Playback

Some WMP users have stated that a “Windows Media Player encountered a problem” error message appears when they try to play MP3 files. Thus, the error message can pop up even when you try to play the most universal music file formats.

If the issue arises when you try to play an MP3, the file might be corrupted. As such, you might need to repair the file. You can fix MP3 files with the MP3 Repair Tool as follows.

  • Press the Download Now button on this webpage to save the MP3 Repair Tool ZIP to a folder.
  • Open the folder you saved the MP3 Repair Tool ZIP to, and click the Extract all button.
  • Click the Browse button to choose a folder to extract MP3 Repair Tool to.
  • Press the Extract button.
  • Open MP3 Repair Tool from the folder you extracted it to.
  • Select the folder that includes the MP3 you need to fix from the drop-down menu.
  • Then you can select the MP3 to repair.
  • Select the Remove option.
  • Enter the value 1 in the text box.
  • Press the Repair button to fix the MP3.
  • Alternatively, try downloading the MP3 again if you got it from a website. Open an MP3 website, and download the same music again.

2. Fixing AVI, WAV and MOV Playback

If the “Windows Media Player encountered a problem” error message pops up when you try to play an AVI, WAV or MOV video, your WMP software might be missing some codecs needed to play those file formats.

Installing a few codec packs might resolve the issue for those video formats. The XviD and Media Player Codec Pack are two WMP codec packs that support most media file and compression types.

Click XviD code v1.3.2 for Windows on this page to download Xvid, and press the Download button on this webpage to save the Media Player Code Pack installer to a folder. Then you can open the setup wizards for each codec pack to install them. Thereafter, restart Windows, open Windows Media Player and play the videos. This post provides further details for installing the XviD codec.

3. Fixing RA, RAM and RM Playback

The “Windows Media Player encountered a problem” error can also be due to incompatible media files. RA, RAM and RM are three RealAudio file formats that Windows Media Player used to play, but it no longer supports those file formats. So if you’re trying to play RA, RAM and RM files in WMP, or another unsupported file format, you’ll need to convert them to a compatible format. This page includes a list of WMP‘s supported file types.

The best video and audio formats to convert files to for WMP playback are probably WMV (Windows Media Video) and WMA (Windows Media Audio). You can convert videos to WMV files with the Online WMV video converter web tool at this page.

To convert files to WMA, check out this web tool. Then you can click the Choose Files and Start conversion buttons on those web tools to convert selected files to WMV or WMA.

4. Open the Windows Media Player Settings Troubleshooter

Windows includes a troubleshooter specifically for WMP. That is the Windows Media Player Settings troubleshooter that fixes WMP settings. So that troubleshooter might be worth noting when the software doesn’t play media files. This is how you can open Windows Media Player Settings.

  • Open Run with the Windows key + R hotkey.
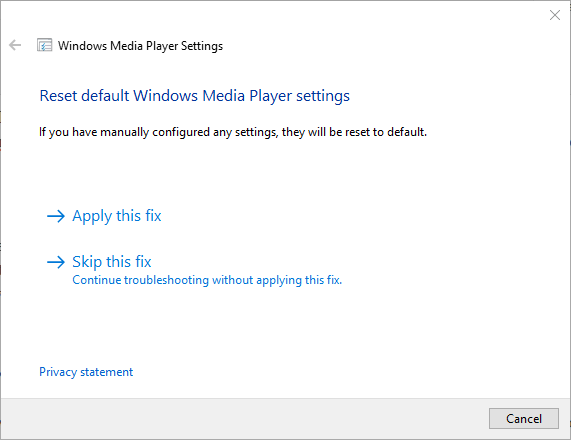
  • Enter ‘msdt.exe -id WindowsMediaPlayerConfigurationDiagnostic’ in Run’s text box, and press the Return key. That will open the troubleshooter shown directly below.
  • Click Advanced and select the Run as administrator option.
  • Press the Next button to go through the troubleshooter.
  • Press the Apply this Fix option to apply a suggested resolution.


5. Restore Windows to a Restore Point

Some users have fixed WMP by rolling Windows back to a restore point. That might remove recently installed software which could have changed audio settings. You can roll Windows back to an earlier time with System Restore as follows.

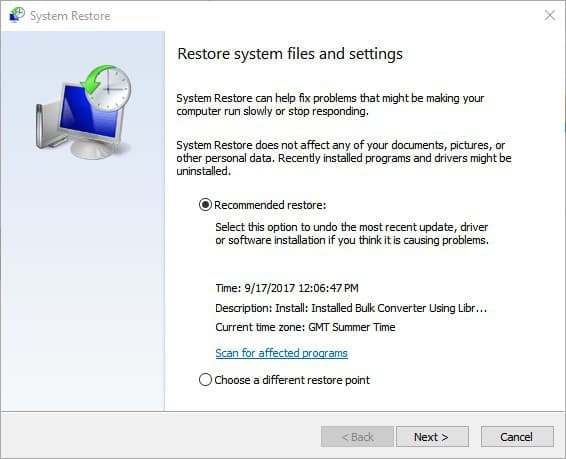
  • Enter ‘rstrui’ in Run’s Open text box, and click the OK button.
  • Select the Choose a different restore point option on the System Restore window, and click the OK button.
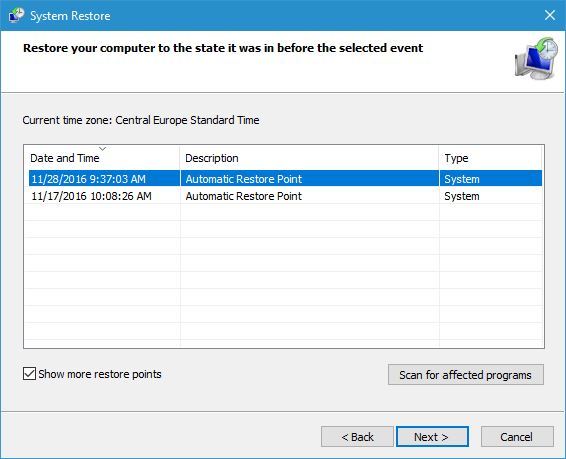
  • Click the Show more restore points check box to fully expand the list of restore points.
  • Select a date that will restore the OS to a time when WMP played all your music and videos.
  • Click the Next button.
  • Then press the Finish button to confirm your selected restore point and roll back Windows.

6. Turn Off Windows Media Player Network Sharing

  • Some WMP users have also confirmed that switching the Windows Media Player Network Sharing Service off can fix the media player’s music and video playback. To do that, open the Run accessory.
  • Enter ‘services.msc’ in Run’s text box and click OK to open the window shown directly below.
  • Double-click Windows Media Player Network Sharing Service to open the window in the snapshot directly below.
  • Click the Stop button if the service is running.
  • Then select Disabled from the Startup type drop-down menu.
  • Click the Apply and OK buttons.

7. Reinstall Windows Media Player

Reinstalling Windows Media Player is another potential fix for the software’s video and music playback. However, you can’t reinstall WMP in the same way as most other software. Instead, you’ll need to turn the software off and back on again as follows.

  • Right-click the Start button and select Run.
  • Enter ‘appwiz.cpl’ in Run, and press the Return key.
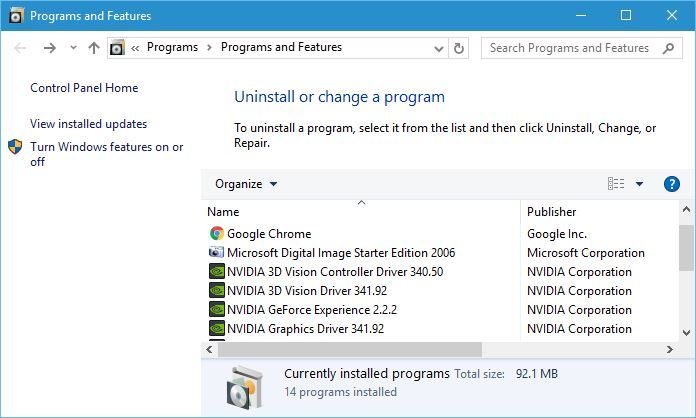
  • Then click Turn Windows features on or off on the left of the Control Panel. That will open the window shown directly below.
  • Double-click Media Features to expand that category.
  • Deselect the Windows Media Player check box.
  • A dialog box will then open. Click the Yes button on that dialog box to confirm.
  • Press the OK button to close window.
  • Restart your desktop or laptop.
  • Then open the Windows Features window again, and select Windows Media Player to turn it back on.

8. Play the Videos or Music in VLC Media Player Instead

Ok, this isn’t really a fix for the WMP playback error. However, VLC is a great alternative to Windows Media Player that plays almost all media file formats. VLC is the closest thing to universal media file player there is. So VLC media player will probably play most music and video formats that WMP doesn’t support. It’s a better media player than WMP, so you might as well check it out. Click the Download VLC button on this webpage to add that software to Windows.

Those resolutions will probably fix the “Windows Media Player encountered a problem while playing the file” error for most WMP users. If the error message appears when you try to stream media files, you might also need to check your net connection and that your WMP software is correctly configured for streaming. Also check that you’re not utilizing an outdated Windows Media Player version.

Here’s what’s fixed and still broken in Windows 10 19H1 build 18267

It’s now been a week since Microsoft last released a new Windows 10 Insider build, and the successor to the 19H1 build 18262 is here today. The preview build 18267 has just started rolling out to Fast and Skip Ahead Insiders (both rings have merged this month), and it brings Input and Accessibility improvements as well as a new Enhanced mode for Search Indexer.

This new build also fixes many issues related to the Settings App, Action Center, and inbox apps failing to launch. You can more details about general fixes and known issues below:

General changes, improvements, and fixes for PC

  • We fixed an issue resulting in Settings crashing when invoking actions on certain places, including under Windows Security.
  • We fixed an issue resulting in some Insider experiencing green screens with IRQL_NOT_LESS_OR_EQUAL in the previous flight.
  • We fixed an issue where the Action Center might suddenly appear on the opposite side of the screen before appearing on the correct side.
  • We fixed an issue resulting in the Action Center icon sometimes showing a number of unread notifications, however when you opened Action Center it would be blank.
  • We fixed an issue resulting in Settings crashes on launch for a small number of users.
  • We fixed an issue resulting in recently opened items sometimes showing in jump lists even though “Show recently opened items in jump lists” was disabled in Settings.
  • We fixed an issue where the Built-in Phrases Setting page for the Pinyin IME would hang for a time if you clicked any phase in the list.
  • We fixed an issue where Uninstall would still be shown as an option when right-clicking apps in Start if the group policy “Prevent users from uninstalling applications from Start” was enabled.
  • We fixed an issue where if you had an inbox app with a version number longer than 20 characters it wouldn’t be returned as a result if you searched for it.
  • We fixed an issue resulting in switching audio endpoints from the volume flyout in the taskbar not working in the last few flights.
  • We fixed an issue resulting in some users having issues launching inbox apps after updating to the last few flights.
  • We fixed an issue where if word wrap was enabled when using Notepad with a screen reader some words might unexpectedly be read out as two half words rather than one.

Known issues

  • Task View fails to show the + button under New Desktop after creating 2 Virtual Desktops.
  • Some users will notice the update status cycling between Getting Things Ready, Downloading, and Installing. This is often accompanied with error 0x8024200d caused by a failed express package download.
  • If you change Task Manager settings, the next time Task Manager is opened it will revert to default.
  • If you have a have a large number of OTF fonts, or OTF fonts that support the extended East Asian character set, you may experience some unexpectedly missing text across the system. We’re working on a fix. If you encounter this issue, navigating to the Fonts folder (c:windowsfonts) may resolve it.

Known issues for Developers

  • If you install any of the recent builds from the Fast ring and switch to the Slow ring – optional content such as enabling developer mode will fail. You will have to remain in the Fast ring to add/install/enable optional content. This is because optional content will only install on builds approved for specific rings.

Interestingly, Microsoft chose to release a new build today right when it also announced its FY19 Q1 earnings report. Microsofts starts its new fiscal year with significant Surface, Office 365, Azure and Xbox gains, and you can lear more on our dedicated post.

Microsoft produces ‘record’ FY19 first quarter earnings report with significant Surface, Office 365 and Azure gains

Once again, it seems Microsoft’s bet on the cloud has positioned the company for positive 2019 financial forecast. According to Microsoft CEO Satya Nadella when commenting on the company’s performance for FY19 Q1, “we are off to a great start in fiscal 2019, a result of our innovation and the trust customers are placing in us to power their digital transformations.”

Indeed, Microsoft’s FY19 Q1 earnings report shows a company with several wins in its revenue growth year over year including positive marks in operating income, net income, commercial cloud growth, and hardware.

By the numbers

During its Q1 earnings, Microsoft saw a year over year 19%, 24% and 15% growth in its Productivity & Business Processes, Intelligent Cloud and More Personal Computing divisions, respectively.

Consumer stuff

Aside from being a record first quarter for the company, Microsoft can point to specific instances of growth that include its Surface line of hardware contributing $1.037 billion to its revenue bottom line. While the recently announced Surface refreshes (the Pro 6, Laptop 2 and Studio 2) are not counted in this quarters revenue numbers, keeping the same industrial design probably eased the R&D pocketbooks, and boosted the revenue gains of older hardware.

Other more consumer-friendly offerings that helped this quarter were gains in Microsoft’s gaming division. Despite the haggard headlines of how the Xbox appears to be doing in the market compared to Sony’s generational mega-hit PS4, Microsoft has managed to continue to squeeze water from a stone. For Q1, Microsoft’s gaming division saw a revenue bump of 44% and a total of 57 million users who have signed up for the company’s digital subscription service, Xbox Live.

Office and the cloud

In less glamorous news, Microsoft’s Productivity and Business Process raised $9.8 billion in revenue this quarter, leading to an 18% growth year over year for the division. In the P&BP bucket is Microsoft’s expanded Office 365 platform that saw its subscriber numbers top 155 million resulting in a 35% growth in revenue YoY for Microsoft. Even though Microsoft has remained rather hands off on its LinkedIn acquisition, it did count the social networks revenue growth as increasing year over year to the tune of 33%.

Microsoft’s pride and joy Intelligent Cloud division continues to beat expectations and produce increased revenue numbers. For FY19 Q1, Microsoft’s Intelligent Cloud saw a 75% revenue hike for its Azure cloud, and the company’s Server products/cloud services also grew by about 28%.

Windows & Search

Lastly, Microsoft’s red-headed stepchild, Windows, was also superstar during this earnings period as its OEM Pro revenue grew a modest 8% in an overall industry stagnating quarter. The one blemish on this quarter could be Microsoft’s non-pro Windows OEM numbers, which were in decline of about 5% year over year as the consumer PC market saw serious competition in the low-end, no doubt driven by the recent US adoption of Chromebooks and other PC alternatives such as larger phones for everyday computing.

Microsoft’s Search advertising saw another quarter of growth of 17%, despite being a distant alternative to Google’s offering.

At the end of the day, Microsoft’s expanded and diverse portfolio is paying dividends for the company and its investors more specifically. On the back of this record quarter alone, Microsoft was able to return $6.1 billion to shareholders in the form of dividends and share purchases, which is, in itself an increase of 27% when compared to last year. While most companies are bipedal in their core revenue concentrations such as Google with Android & Search, Apple with the iPhone and Mac or Amazon and online shopping and AWS, Microsoft appears to be slowly building out multiple sustainable multibillion-dollar businesses year over year.

Microsoft introduces new dark mode in Sticky Notes 3.1, fails

Microsoft’s Sticky Notes app for Windows 10 is getting another fresh coat of paint today. The new version 3.1, which has started rolling out to Skip Ahead Insiders brings what the team calls a “full-on Dark Mode.” When you choose that mode, the app will now use a dark grey background color in the home hub for your notes, similar to the new dark colour that recently appeared in the Windows 10 Mail and Calendar apps.

While the new dark theme looks nice at first sight, there is definitely a problem with the blue colour that the app uses when you enable “Insights” in settings. This makes urls and dates actionable in the app, but it’s quite a big problem when simple words like “today” or “tomorrow” become almost unreadable because of a dark blue color. Turning off Insights immediately solves the problem, but you can see why the problem in the feature image above.

In addition to the new Dark Mode, Sticky Notes 3.1 also syncs your notes in the cloud even faster, and this should also apply to the new syncing feature with the OneNote app on iOS and Android. That’s pretty nice, but we hope Microsoft will fix the new Dark Mode before rolling out to all Windows 10 users.

Update: The team said today that’s it’s aware of the issue with blue links in Dark mode, and a fix will be released before the public rollout of Sticky Notes 3.1

Security researchers release Windows zero-day exploit proof of concept

A new vulnerability was recently discovered in Windows 10 (via BleepingComputer) involving the Microsoft Data Sharing Service. The exploit was discovered by the pseudonymous SandboxEscaper, a former vulnerability researcher, and allows system library files to be deleted, forcing Windows to attempt to search for new libraries. This potentially puts a hacker in a spot to push fake malicious libraries in place of real ones. A successful exploit was also performed by Will Dormann, who shows the vulnerability is only in Microsoft’s latest Windows 10 system, not Windows 8.1 or any older iteration of Windows.

Th vulnerability is present in both older and newer releases of Windows 10, including Microsoft’s recently pulled October 2018 Update, as well as Windows Server 2016 and 2019 operating systems. Luckily though, the exploit is difficult for hackers to take advantage of, according to SandboxEscaper and the risk is of “low quality,” although a successful hack can make the system completely unbootable.

Fortunately, the folks of 0patch have implemented their own fix for the issue which can be patched through their application, which available for download on their website. The application also provides patches for other system vulnerabilities, not just the one mentioned here. Microsoft regularly patches Windows, as well, and it may be best to just wait for the next official patch.

Want to know what Microsoft Search is all about? Here’s a quick overview

At Microsoft Ignite 2018, Microsoft announced Microsoft Search in Bing, and since then have had an overwhelming interest from companies who are interested in the search offering.  Microsoft has now shared how to enable the product so that more companies can use it and get familiar with how it works.

Microsoft Search gives you organizational results in a simple and familiar experience, including bookmarks, Q&A’s, site files, groups, people conversations, locations and embedding powerapps. This could become the first place anyone goes to get information.

The idea is that Search is used not just in the browser but across other devices like Windows 10 and on your mobile phone when you are logged in with your work credentials. Watch the video below to see how you enable it for your company. More information and FAQ’s here


Have you tried Microsoft Search? What do you think? Let us know in the comments below.


Microsoft continues to clean up light/dark themes with changes to Photos app

Microsoft has quietly pushed out an update to the Photos app for Windows 10. As spotted by the Microsofters, the new update includes visual improvements, mainly concerning those related to the UI consistency. Previously when selecting an image in Photos, the background would change from white to black. However now with the latest update, the app stays white most of the time.

Microsoft photos is now white when viewing a photo if dark mode is not enabled.

On the other hand, the background is still always black when editing a photo, possibly so that users can distinguish between whether they are viewing the photo or making (potentially unwanted) changes to it. However, the reasoning of this potential decision would ultimately be defeated if the consumers was using dark mode in Windows 10. Microsoft has been working to improve the not-quite-complete dark mode in Windows 10, including updating File Explorer to support the theme, so more improvements are likely to follow.

Those looking to see the new UI changes can update the app now by going to the Windows Store, hitting the ellipsis icon at the top-right, then hitting Download and updates. Clicking or tapping the blue Get updates button will enable the Store check and automatically download updates to all out-of-date apps.

Do you find these new UI updates to the Photos app more visually appealing? What do you think Microsoft can do to make its app better? Let us know in the comment section below.

Murderer trades location of victim’s body for an Xbox console

In what is likely to be one of the year’s most-depressing gaming-related stories, a man has traded the location of the body of a woman he murdered for an Xbox console and access to the prison’s correction programs.

The woman in question was Venus Stewart, his 32 year old wife who he murdered back in August of 2010. While charged with first-degree murder the following year and now serving a life sentence, the location of her body had remained a mystery until this week.

It’s unclear which Xbox console the man was given but here’s hoping it wasn’t an Xbox One X, Microsoft’s latest Xbox model.

LEGO Star Wars II and Tropico 4 are now backwards compatible on Xbox One

Xbox 360 video games, LEGO Star Wars II: The Original Trilogy and Tropico 4, are now both playable on Microsoft’s Xbox One consoles after being given backwards compatibility functionality earlier today.

LEGO Star Wars II: The Original Trilogy was the second LEGO video game made based on the popular Star Wars franchise and features characters and locations from Star Wars Episode IV through VI. Gameplay is very similar to modern LEGO video game titles however there is no voice acting beyond the occasional alien scream or droid beep.

LEGO Star Wars II: The Original Trilogy reunites the fun and endless creativity of LEGO with the epic story, heroic characters, and exciting action of the Star Wars universe. In this highly anticipated follow-up game, follow the tongue-in-cheek, brick-based action through all three epic films of the original Star Wars Trilogy.

Tropico 4, on the other hand, is a simulator video game that tasks the player with running their own island nation. The game deals with politics and social management and includes a single-player campaign that spans across 10 maps.

The world is changing and Tropico is moving with the times – geographical powers rise and fall and the world market is dominated by new players with new demands and offers — and you, as El Presidente, face a whole new set of challenges. If you are to triumph over your naysayers you will need to gain as much support from your people as possible. Your decisions will shape the future of your nation, and more importantly, the size of your off-shore bank account.

The Xbox One’s library of playable Xbox 360 and OG Xbox video games continues to expand on a fairly regular basis. Just earlier this month, Metal Gear Solid HD 2 and 3 were also given backwards compatibility.

Let us know what your favorite backwards compatible video game is on Xbox One in the comments below and then follow us on Pinterest for more Xbox content.

LEGO Star Wars II
LEGO Star Wars II


Tropico 4
Tropico 4
Developer:
Kalypso Media
Price:
$9.99

How to Disable Logon Screen Background in Windows 10


3 quick methods to remove logon screen background

  1. Download registry file to disable Log On background image
  2. Change the registry files yourself
  3. Use the Settings page

Windows 10 brought many changes, and one of these changes is the login screen. If you remember, Windows 8 and 8.1 used a solid color background for the login screen, and some users are quite used to it.

If you’re one of those users, we will show you how to disable Log On screen background image in Windows 10.
windows 10 logon screen picture
If you’re used to solid color on your login screen like in Windows 8, you can easily go back to it, and here’s how to do it.

Steps to remove the logon screen background on PC

Solution 1 – Download registry file to disable Log On background image

This is pretty straightforward solution. Download this zip archive and extract it. Then just double click the Disable Logon Background Image on Windows 10.reg to add it to your registry and that’s it. There is also a .reg file available if you want to revert the changes.

— RELATED: FIX: Windows won’t let me change my desktop background

Solution 2 – Change registry files yourself

This is a bit trickier solution, but if you don’t want to download any files, you’ll have to follow these steps. Don’t worry, it’s nothing too hard, but be careful because messing with Registry files can create some problems, so as long as you follow the instructions carefully you’ll be fine.

  1. Open Registry Editor by typing regedit in the Search field, or by pressing Windows key + R and typing regedit.
  2. Use the folder tree on the left to navigate to HKEY_LOCAL_MACHINESOFTWAREPoliciesMicrosoftWindowsSystem.windows system registry editor
  3. On the right side of the Registry Editor, click the right mouse button, select New, then 32-bit DWORD value and set its name to DisableLogonBackgroundImage. Double click it, and set its value to 00000001.
  4. That’s it, now close the Registry Editor and restart your computer and you should have solid color instead of background image while logging in.
  5. If for some reason you want to revert these changes, you just need to find DisableLogonBackgroundImage located in HKEY_LOCAL_MACHINESOFTWAREPoliciesMicrosoftWindowsSystem and set its value to 00000000 or just delete it.

Solution 3 – Use the Settings page

In the latest Windows 10 builds you can simply disable the logon screen background from your computer settings. We’ll list the instructions below:

  1. Click on “Windows Logo” key, type “Settings” and click on it
  2. Open the “Personalization” section
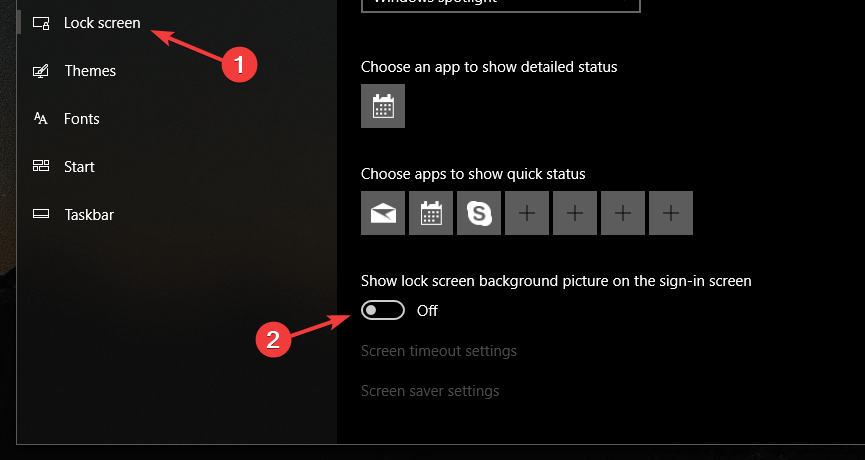
  3. In the left pane, click on Lock Screen
  4. In the right pane, turn off “Show lock screen background picture on the sign-in screen”

disable lock screen menu

That’s it if you have any other Windows 10-related issues you can check for the solution in our Windows 10 Fix section.

RELATED STORIES TO CHECK OUT:

5 solutions to fix high CPU usage in Safe Mode


Fix high CPU in Safe Mode with these solutions

  1. Check the hardware
  2. Check the drivers
  3. Scan for malware
  4. Run SFC and DISM
  5. Reinstall Windows 10

High CPU usage is a common problem on the Windows platform. On the previous iterations, it was mostly caused by certain system processes, especially flawed Windows Update process. However, they’re usually not present in the Safe mode, where only the essential services and drivers are starting with the system.

But, based on some reports, this isn’t the case for some users. They’ve experienced high CPU usage even in Safe mode.

Since we’re probably looking at a grave system issue, there are some advanced troubleshooting steps you’ll need to take. The list is below so give them a shot and tell us whether they helped you or not.

What to do if CPU is at 100% even in Safe mode

Solution 1 – Check the hardware

Let’s start with the hardware. If the problem was present only during the normal startup, we would completely focus attention towards the software. However, since it appears in the Safe mode, the mode where only the essential drivers and applications are loaded, we must encourage you to inspect hardware as well.

First, make sure that everything is properly connected, that your CPU or GPU aren’t overheating. Make sure to remove and plug-in RAM cards in their respective slots. Also, if you’ve changed your motherboard, disconnect and reconnect everything. Finally, make sure that the HDD is plugged in properly.

Solution 2 – Check the drivers

Now, after we can safely claim that the hardware isn’t causing abnormally high CPU activity, let’s move to the software part. Making sure that both your drivers and BIOS are up to date.

A faulty driver is in the direct connection to many hardware issues, as even the best hardware won’t perform as intended without the proper software support.

For that reason, we suggest checking all drivers and confirming that all are up to date. Also, it’s strongly advised to avoid the generic drivers provided by Windows Update for certain devices, especially the GPU. Make sure to visit the OEM’s official website and get the latest drivers installed.

An easier and more convenient solution would be to use a trusted third-party program that downloads and installs the latest drivers for Windows automatically. With an in-built download manager, the program will get the updates directly from the software, so you won’t have to open your browser.

We recommend this type of tool because it has powerful capabilities, including fixing corrupt drivers and providing robust reports about each driver after performing complex scans.

Solution 3 – Scan for malware

Presence of malicious software can be another reason why your CPU spikes to 100% even in the Safe mode. Malware comes in different shapes and colors, and some of them might use your system resources for mining cryptocurrency and similar backdoor activities.

That’s why it’s of utmost importance to have an up-to-date protection, either Windows Defender or a third-party antivirus.

For this kind of issues, we suggest performing a deep scan to get rid completely of the menacing malware presence. If you’re using Windows Defender, follow these steps to perform a deep scan:

  1. Open Windows Defender from the taskbar notification area.
  2. Choose Virus & threat protection.high cpu usage even in safe mode
  3. Choose Scan options.
  4. Select Windows Defender Offline Scan.
  5. Click Scan now.
  6. Your PC will restart and the scanning process will commence.

Solution 4 – Run SFC, DISM, and ChkDsk

Another possible reason for the resource leakage might lie in the corruption of the essential system files. That’s why we suggest running System File Checker and Deployment Image Servicing and Management to resolve possible corruption of system files. These tools work in a similar manner, but the best way to utilize them is when running in succession.

The same goes for the corrupt sectors in the HDD. If you’re HDD takes too much time to boot the system, the CPU might suffer. For that reason, we suggest using another system utility via the elevated Command Prompt.

Here’s how to run SFC and DISM, and then ChkDsk in Windows 10:

  1. In the Windows Search bar, type cmd. Right-click click on Command Prompt and run it as admin.
  2. In the command-line, type sfc/scannow and press Enter.
  3. After its done, type the following command and press Enter after each:
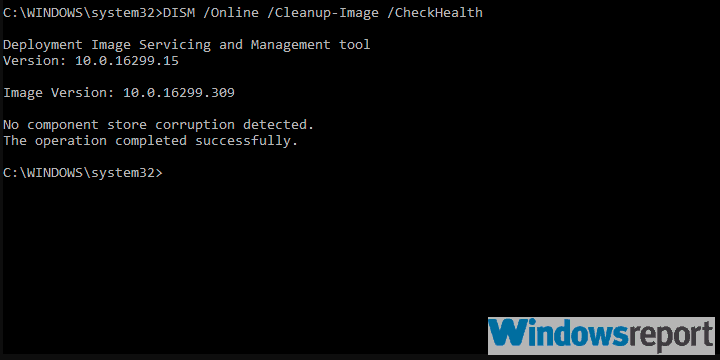
    • DISM /online /Cleanup-Image / ScanHealth
    • DISM /Online /Cleanup-Image /RestoreHealthhigh cpu usage even in safe mode
  4. When the procedure ends, restart your PC.

Solution 6 – Reinstall Windows 10

Finally, if you’re still experiencing high CPU usage, even when in the Safe mode, we suggest reinstalling the system. Moreover, the best step would be to completely format all drives and start from scratch. Of course, don’t forget to backup your data accordingly.

For this operation, you’ll be needing a USB flash drive with at least 6 GB. Also, you’ll need to download the Media Creation Tool and create the bootable drive.

Everything you need to know is thoroughly explained in this article, so make sure to check it out. If you need any additional help, post your questions below and we’ll gladly help you.

RELATED STORIES YOU SHOULD CHECK OUT:

FIX: Windows Calendar App Stuck on Syncing in Windows 10/11

The Calendar app in Windows 10 and Windows 8.1 is very useful not just for looking what day is today, but also for managing your tasks and appointments. But it won’t be very useful to you if you’re unable to sync your tasks, in that case, check out the solutions from this article.

windows calendar app wind8apps
Syncing problem with Windows Calendar usually occurs in Windows 8. However, we also found some reports that users had problems syncing their tasks with Windows Calendar app in Windows 10 as well. That’s not such a big surprise, because in Windows 10, a lot of people use Cortana to manage their tasks and appointments.

So, why this problem occurs so often in Windows 8 and less frequently in Windows 10? A lot of people who are not satisfied with the absence of the Start Menu (and it’s a huge amount of people) in Windows 8, use some third-party software for bringing back Start Menu, like Start Menu 8. And this is where the answer to your problem can be found.

3 solutions to fix Windows Calendar App sync issues

Solution 1: Remove third-party software

For some reasons, third-party Start Menu alternative blocks the syncing process of Windows Calendar app. So if you want to be able to sync your tasks with the Windows Calendar app, disable or remove third-party Start Menu program, and synching should work.

Solution 2: Switch to a different user account

If disabling the third-party Start Menu software didn’t get the job done, you can try to switch to another account, or maybe reinstall the Calendar app.

Some users also complained that after they uninstalled the Calendar app, they were unable to install it again, in that case, try some of the solutions listed in this article.

Solution 3: Fix Calendar sync issues on Windows 10

Sometimes, just resetting your Mail And Calender App will just solve your syncing problem. In some cases, disabling the Firewall program temporarily can fix this problem as well. You might try this method too.

Here’s how you can reset the Calendar app in some easy steps.

  1. Open Settings and click on Apps
  2. Look further for App & Features
  3. Select the Mail and Calendar and click on Advanced optionsmail calendar app advanced options
  4. Click the Reset button and then just click the button again to confirm.

reset mail calendar app windows 10

That would be all, disabling the third-party Start Menu software, switching to another account or simply resetting the app should solve the syncing problem.

If you have any comments or suggestions, or you maybe have another solution for this problem, write it down in the comments below.

RELATED STORIES TO CHECK OUT

US Labor Dept scrapped almost done deal with Microsoft on pay, promotions for women, wants tougher rules

The US Labor Department has been working to resolve claims that Microsoft discriminated against women on the job, but negotiations have hit a snag.

The Labor Department in July nearly did a deal until they turned an about face in an undisclosed deal without admitting to claims. Labor Secretary Alexander Acosta had concerns that the Office of Federal Contract Compliance Program was letting them off too easy. The pay issue has been going on for at least a decade according to the auditors, and Microsoft is seeking a resolution with the agency.

The OFCCP follow well-established procedures with regard to compliance reviews and is acting as pay sheriff in the Technology and Financial sectors today. To reach an agreement Labor will finalize the deal but have now complicated negotiations to complete and they don’t want it to go to court according to the department.

“Microsoft is committed to a diverse workforce, and to a workplace where every employee has the opportunity to succeed,” – Microsoft Spokesperson

There is no clear path forward and it didn’t help with Ondray Harris leaving the role in July and couldn’t discuss anything other than give caution that actual discrimination isn’t about the statistical disparity in pay and hiring data.

“When OFCCP believes it found something, you can’t take that to mean something was actually there,” Harris said. “Oftentimes, these things can go on for years and it becomes a battle of experts.”

We’ll keep you updated as we learn more.


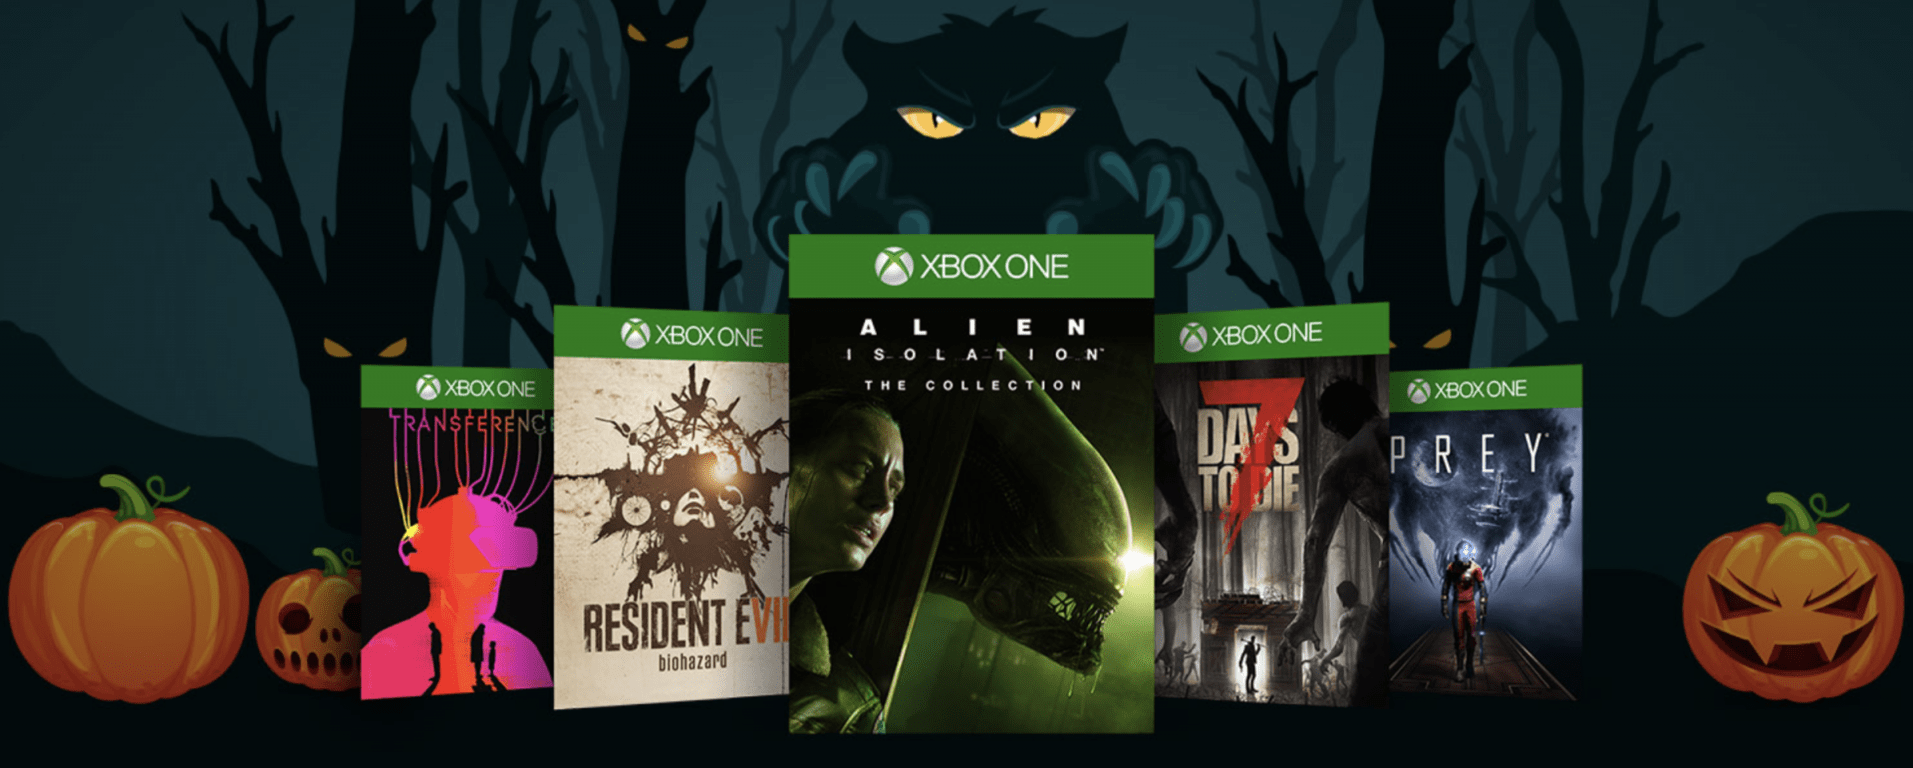
Save big on Xbox One horror games during this week’s Shocktober Sale

Now that Halloween is almost upon us, Microsoft has just announced a limited-time Shocktober sale featuring many popular horror video games franchises. Resident Evil, Dead Rising, Telltale Games’ The Walking Dead are all on sale, in addition to We Happy Few, Sea of Thieves, and State of Decay 2. Popular titles such as Fortnite and Plants vs. Zombies Garden Warfare are also discounted this week, and fans of IO Interactive’s latest Hitman game can also download an Halloween-themed Pack for free for a limited time.

In this week’s Deals with Gold, Microsoft has up to 75% off select titles for the Xbox One and 360 consoles. The main highlights are the RTS game Halo Wars 2, which is available with all of its DLC for just $30, but you also may want to check out the Final Fantasy IV Royal Edition, L.A. Noire Remastered, and the Kerbal Space Program Enhanced Edition, which are each half off right now for Gold members.

Last but not least, Microsoft also has a Fallout 4 sale ahead of the release of Fallout 76 on November 14. The Game of the Year Edition with all the DLCs is just $29.99 (50% off), but those of you who already own the game (or play it for free with Xbox Game Pass) can take advantage of a 40% discount on the game’s Season Pass.

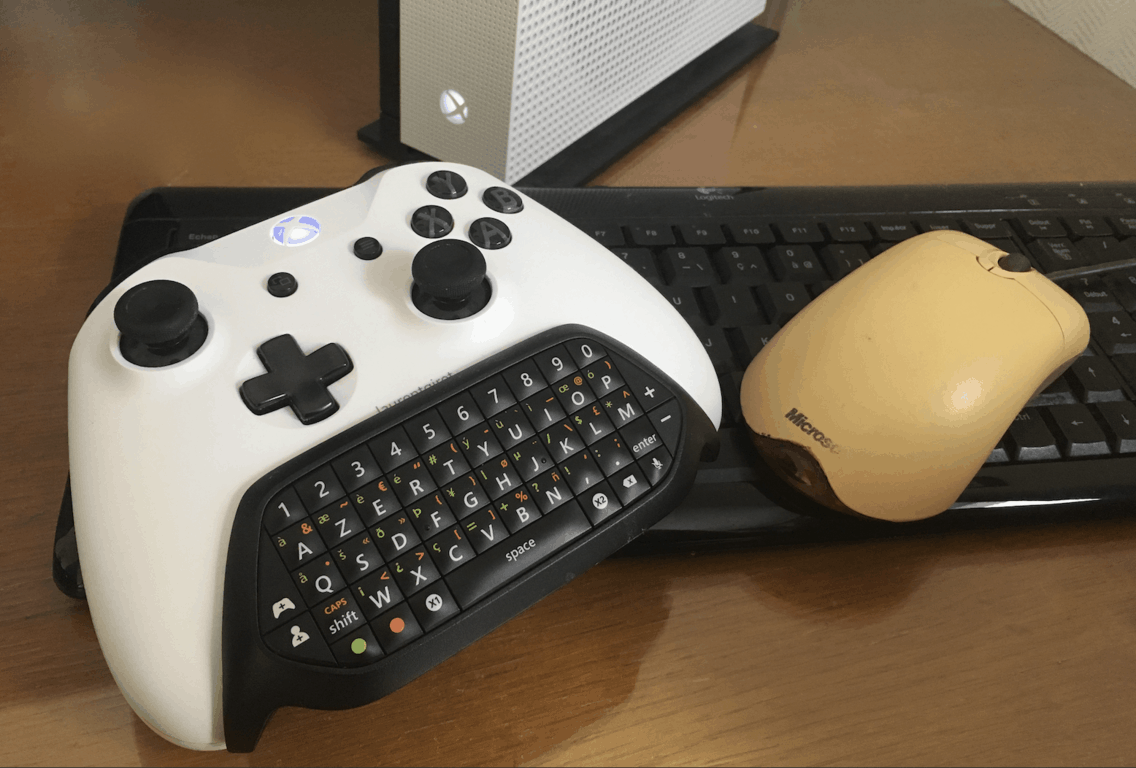
Select Xbox Insiders can now try mouse and keyboard support in Warframe video game

Mouse and keyboard support will be one main the features in the next Xbox One system update, and starting today Xbox Insiders in the Preview Alpha and Skip Ahead rings can try it in the Warframe video game. Brad Rossetti, Head of the Xbox Preview Program announced the news in a series of tweets yesterday.

For those unfamiliar, Warframe is a free-to-play third-person shooter that was released on the Xbox One back in 2014. For now, this is the only game that officially supports mouse and keyboard on the Xbox One, though Minecraft also allows Xbox One gamers to select mouse and keyboard as the primary input since the “Better Together” update.

The Xbox team previously explained that it will be doing all the platform work on the Xbox One OS, but it will be up to developers to implement mouse & keyboard support in their games. It remains to be seen if Xbox One gamers will soon be able to play popular shooters or RTS games with mouse and keyboard, but the Xbox team made it clear that developers will decide if gamers using keyboard and mouse will be able to play against players using an Xbox controller.

How to customise your Windows 10 PC’s manufacturer information

Windows 10 displays information about the make, model and name of your device within the Settings app and Control Panel system page. Usually, you won’t notice anything wrong with this information. However, if you’ve just reinstalled Windows or built your own computer, you might find all the values are showing as “To Be Filled By O.E.M.”

Of course, this has no impact on the functionality of your system. But if you’re anything like this author, you want to give your new self-build PC its own identity – so read on to find out how to change these values to something more useful.

This process does involve editing the Windows Registry, so we’ll leave a standard warning here: although we don’t see how tweaking manufacturer information can negatively impact your system, this isn’t officially supported by Microsoft and it may stop working in the future. Take care when editing the registry; unintentional, malformed or misconfigured edits can cause serious trouble.

Opening Registry Editor screenshot

To get going, open the Registry Editor (hit the Start button and type regedit). If you’re not an administrator, you will be prompted to reauthenticate as one.

Using the address bar at the top of the window, paste or type the following key:

HKEY_LOCAL_MACHINE\SOFTWARE\Microsoft\Windows\CurrentVersion\OEMInformation

Note that older versions of Windows 10 don’t have an address bar in the Registry Editor, so you’ll need to manually navigate through the folder-like structure to find the key.

Screenshot of editing Windows 10 OEM information in the registry

What you’ll see depends on whether your system already has manufacturer information. If it does, you should see several keys besides “(Default)” in the right pane which define different properties of your system. You can double-click these keys to edit their value after following the instructions below.

Screenshot of editing Windows 10 OEM information in the registry

If you’ve just installed Windows and Control Panel displays your manufacturer information as “To Be Filled By O.E.M,” you’ll probably just have the sole “(Default)” key. When following the instructions below, you’ll need to create new keys for each property – right-click anywhere in the right pane and choose New > String Value. Be careful to ensure its name exactly matches that of your intended property. You can then set its value by double-clicking it.

Screenshot of editing OEM information in the registry

The available properties are as follows:

  • Manufacturer – The manufacturer name to display for your device
  • Model – The model name to display for your device
  • SupportHours – Used to display manufacturer support information
  • SupportPhone – Used to display manufacturer support information
  • SupportURL – Used to display manufacturer support information
  • Logo – A path to a bitmap format image to use as your manufacturer “logo”; you’ll need to experiment with sizes and formats

Each of these properties is entirely optional – if you’re building your own system, you’ll probably want to omit the support-related ones.

Screenshot of editing Windows 10 OEM information in the registry

By way of example, let’s suppose you want your PC’s manufacturer to display as “On MSFT” and none of the keys currently exist on your system.

Screenshot of editing Windows 10 OEM information in the registry

Right-click in the registry editor window, and choose New > String Value. Name the key “Manufacturer” and then double-click it to set its value. Type “On MSFT.”

Screenshot of Windows 10 System information with custom details

After editing the keys, you’ll be able to open Control Panel > System and Security > System to see your new information – no reboot required.

FULL FIX: Cortana not turning off on Windows 10/11

Cortana is a snarky little digital assistant that Microsoft incorporated in Windows 10. Cortana represents the vision and direction Microsoft has for the future, where technology seamlessly works for you rather than you working with it. Cortana is a solid foundation – a tease for what’s to come – and it already supports multiple languages, and gives answers to some of your basic questions. She can tell you jokes, interesting facts, bring you the news that interests you, she will even sing for you if that is what you fancy.

As with any assistant – digital, or not – the more information she has on you, the better results she will be able to provide you with; your friends, where you are, where you live, your emails, your calendar appointments, your contacts – everything helps her be better at her job, but all of this comes at the cost of privacy.

Notice that we are talking about Cortana as if it is a person – and it might as well be; if not, she is the best we can do with our current technology and so she will only get better over time. However, it is still a digital assistant – and that means everything she hears goes through the mighty servers of Microsoft, and that might be troublesome for many people since privacy isn’t a cheap resource to throw away.

And so, you might want to turn Cortana off – which everybody, including Microsoft, understands – so there is a way to do it, and this guide will help you turn her off, in the hopes that one day she will be good enough that you wouldn’t be able to resist the convenience she brings.

What to do if Cortana won’t turn off?

Not being able to turn off Cortana can be a problem for some users. Speaking of issues, here are some Cortana problems that users reported:

  • Disable Cortana registry – One way to disable Cortana is to modify your registry. To do that, simply locate the Cortana key and set the AllowCortana DWORD to 0. In case you don’t have this value, you’ll have to create it manually.
  • Turn off Cortana completely – There are several ways to disable Cortana, but if you want to disable it completely, rename or move the Cortana folder and Cortana should be disabled.
  • Cortana won’t turn off – This is a common problem that many Windows users have. However, you should be able to solve it using one of our solutions.
  • Turn off Cortana using Group Policy – If you’re using the Pro version of Windows 10, you’ll be pleased to hear that you can disable Cortana simply by making a single change in Group Policy Editor. After doing that, Cortana should be completely disabled.

Solution 1 – Disabling Cortana – Normal method

  1. Open your Start Menu and type “Run” – your search results don’t matter here, what matters are the icons on the left sidebar.
  2. Click on the 2nd icon, that should open Cortana’s Notebook.
    disable turn off cortana 1
  3. Once you have the Notebook open, click on Settings.
    disable turn off cortana 2
  4. Now you have two options – you can disable Cortana completely, and remove all the features that it brings you; or you can just turn off the “Hey Cortana” feature so it will stop listening to you all the time.
  • To disable Hey Cortana, find it in Settings and click on the slider box next to it turn it off.
  • To disable Cortana as a whole, scroll to the top and click on the slider box under “Cortana can give you ideas, suggestions, alerts, reminders and more.”

Solution 2 – Clearing what Cortana knows about YOU

Now you know how to stop Cortana from listening to you all the time – and how to shut her down forever. However, if you do decide to completely turn off Cortana, you want to take one more step and remove all of the associated data from Microsoft’s cloud.  To do so, follow these instructions:

  1. Open the Cortana settings once again, as you did for turning off Cortana.
    disable turn off cortana
  2. Click the “Manage what Cortana knows about me in the cloud” link, this will open the Bing personalization settings in your browser.
    disable turn off cortana
  3. Scroll to the bottom and click “Clear“. This will remove all your data from the cloud that Cortana lives in.

If you enabled location sharing with Cortana, wipe the data from Bing Maps as well. If you also want to delete the data from Microsoft’s storage, you can start it by going to the ‘Start’ menu. Go to ‘Settings>Privacy and wipe it from there.

You can also delete your account by going to Start>Settings>Accounts. Once you’re done with this, the search section will still be the same. But you can’t use any services that Cortana offers.

Feel free to peruse the rest of the options if you want to clear data from other Microsoft services as well. If you’re this concerned about sharing data with Microsoft, you may also want to open the Start menu and head to Settings > Privacy to peruse all the other ways you may be sending information to Redmond, as well as the “Sync your settings” submenu in Start menu > Settings > Accounts.

If you miss Cortana after a few days and want her to come back – just go back to the same settings and re-enable her. It’s the same steps except you have to turn it on rather than off.

Solution 3 – Change your Local Group policy

If Cortana is not turning off, you might be able to turn it off by modifying your Group Policy settings. To do that, you just have to do the following:

  1. Press Windows Key + R and enter gpedit.msc. Now press Enter or click OK.
    Turn off Cortana completely
  2. In the left pane, navigate to the Computer Configuration/Administrative Templates/Windows Components/Search. In the right pane, locate and double-click Allow Cortana.
    Cortana won't turn off
  3. Select Disabled from the menu and click Apply and OK to save changes.
    Disable Cortana registry

After doing that, restart your PC and Cortana should be completely disabled.

Solution 4 – Modify your registry

Another way to turn off Cortana is to modify your registry. Some versions of Windows 10 don’t have Group Policy Editor, such as the Home version, and if that’s the case, you can disable Cortana using the Registry Editor. To do that, just follow these steps:

  1. Press Windows Key + R, enter regedit and press Enter or click OK.
    Turn off Cortana using Group Policy
  2. In the left pane, navigate to HKEY_LOCAL_MACHINESOFTWAREPoliciesMicrosoftWindowsWindows Search key. If Windows Search key isn’t available, right-click the Windows key and choose New > Key. Enter Windows Search as the name of the new key.
    Disable Cortana registry
  3. Navigate to Windows Search key. In the right pane, look for AllowCortana DWORD. If this DWORD isn’t available, right-click the right pane and choose New > DWORD (32-bit) Value. Enter AllowCortana as the name of the DWORD.
    Turn off Cortana completely
  4. Double-click AllowCortana to open its properties. Set Value Data to 0 and click OK to save changes.

After doing that, Cortana should be completely disabled on your PC. In order to apply changes, you might have to restart your PC, so be sure to do that.

Solution 5 – Rename Cortana’s directory

According to users, one way to fix Cortana completely is to simply rename its directory. By doing so, Windows won’t be able to activate it anymore and Cortana will be completely disabled. To rename Cortana’s directory, you just have to do the following:

  1. Go to C:WindowsSystemApps directory.
  2. Locate the Cortana directory. In our example, the directory is called Microsoft.Windows.Cortana_cw5n1h2txyewy, right-click it and choose Rename from the menu.
    Cortana won't turn off
  3. Simply add -old at the and of the directory name. Now you should get a dialog box saying that the folder is in use. This is perfectly normal. Do not close Folder in Use dialog.
  4. Open Task Manager. You can do it quickly by pressing Ctrl + Shift + Esc.
  5. Locate Cortana on the list, right-click it and choose End Task from the menu.
    Turn off Cortana using Group Policy
  6. Now go quickly to the Folder in Use dialog and click Try again button.
    Disable Cortana registry

After doing that, Cortana should be completely disabled from your PC. Keep in mind that this solution is a bit tricky since you have to be fast and click the Try again button before Cortana starts automatically. To enable Cortana again, simply rename the folder to its original name, and Cortana should start working again.

Solution 6 – Take ownership of Cortana’s directory and move it

If Cortana is not turning off, you might be able to fix this problem simply by moving Cortana’s directory to a different folder. To do that, you just have to do the following:

  1. Go to the C:WindowsSystemApps directory. Locate Microsoft.Windows.Cortana_cw5n1h2txyewy folder, right-click it and choose Properties.
    Turn off Cortana completely
  2. Go to the Security tab and click the Advanced button.
    Cortana won't turn off
  3. In the Owner section click Change.
    Disable Cortana registry
  4. In the Enter the object name to select enter the name of your user account. Now click Check Names button and click OK.
    Turn off Cortana completely
  5. Now check to Replace owner on subcontainers and objects and click Apply and OK.
    Cortana won't turn off
  6. Save changes.

After doing that, you just have to move the directory by doing the following:

  1. Move the Microsoft.Windows.Cortana_cw5n1h2txyewy to a different location. You should now see a Permissions dialog box. Don’t close the dialog box.
  2. Open Task Manager, locate the SearchUI.exe process and end it.
  3. Now go back to the Permissions dialog and give the required permissions.

After you move the Cortana’s directory, check if the problem is still there. This solution is a bit advanced, but you should be able to perform it by closely following our instructions.

There you go, these are some methods that you can use to disable Cortana on your PC. If you want to enable Cortana, you just have to revert changes and Cortana will be enabled once again.

FIX: Cannot Disable Automatic Windows 10 App Updates

The Automatic update feature of Windows 10 apps is very useful, because you don’t ever have to thing about updating them. But, it could be negative sometimes, because it could use your internet connection when you don’t want it to.

Luckily, you can easily disable automatic updates in Store settings. But what if something prevents your from doing that?

What to do if you can’t turn off automatic app updates in Windows 10

automatic updates window 10 store

Solution 1 – Connect to your Microsoft Account

I know this doesn’t sound like an actual solution to you, because you probably did this right after you installed Windows 10. But there are some people who prefer using a local account over signing it to Microsoft account.

If you use any app from Windows Store, you already connected it with your Microsoft account, and this solution (logically) doesn’t work for you. But if you only have pre-installed apps on your computer, and they are causing the automatic updates problem, and you didn’t connect your Microsoft account with Windows 10 and Windows Store, you should try to connect it.

I hope you’ll be able to turn off this feature, once you do that.

Solution 1 – Reset Windows Store

You can choose to receive automatic updates for your Universal apps in Settings section of Windows Store. However, if something isn’t working well with your Store, you maybe won’t be able to control the automatic updates.

So, if connecting to your Microsoft account didn’t work, you can try with resetting the store. Resetting Windows Store is very easy, all you have to do is this:

  1. Go to Search, type WSReset.exe
  2. Hit Enter and wait until the process is done.

That’s it, I hope these solutions helped you to solve the problem with automatic updates of your Universal apps. If you have any other Windows 10-related issues you can check for the solution in our Windows 10 Fix section.

Solution 3: Block all Windows updates

If nothing worked, you can block Windows 10 app updates by disabling the Windows 10 update service. There are several methods to do that and we already covered them extensively in previous guides.

So, if you want to learn how you can stop Windows 10 app updates by blocking the Windows Update feature, you can check out the guides below:

This is how you can import iTunes Libraries to Groove Music

Microsoft re-branded its Music app to  Groove Music some time ago, and it looks like a great music service now. But, some people are using some other music services, like iTunes, as well, and they might want to move their iTunes library into Groove Music.

So, in this guide, I’m going to show you how to do that in this article.

import itunes playlist into groove wind8apps

Microsoft wants new users for its new music app, so it featured an option which allows you to import your iTunes libraries into Groove Music with just a few clicks.

So, if you decided to switch from Apple’s music service to Microsoft’s, you don’t have to loose your time to organize your libraries and playlists, for whom you worked hard to create in iTunes.

You just have to follow these instructions, and you’ll have your iTunes library in Groove Music in a matter of seconds:

    1. Open Groove Music and open hamburger menu
    2. Open Settings (gear-like icon)
    3. Under Music on this PC, click on Import iTunes Playlists

This option will scan your iTunes account for the playlists and it will import all of them into your Groove Music app.

So, as I said, this is a great way to attract some new users into using Groove Music. And if Microsoft didn’t include this option, a lot of users wouldn’t even bother to create new playlists from scratch, instead, they would rather stick with their current music service.

Are you using Groove Music for your music streams, or you just prefer some old-fashioned ways, like YouTube? And if you do use the app, what are your impressions about Microsoft’s latest music streaming service? Tell us your experience in the comments.

UPDATE: Since the writing of this post, Microsoft decided to end support for Groove Music. You can still listen to your favorite playlists, but you need to export them to Spotify first.

For detailed instructions on how to do that, you can use this guide and you’ll be able to transfer your Groove Music playlists to Spotify in no time.

RELATED GUIDES TO CHECK OUT:

Xbox revives “Jump In” campaign with four new video ads

Going into a strong Fall line up of games including Forza Horizon 4, Red Dead Redemption 2 and Fallout 76, Microsoft’s Xbox team sees an opportunity to gin up its user base with a renewed promotion.

According to a press release from the Xbox team, its Jump In campaign of old is making a comeback and to ring in this new fan-oriented event, the gaming division released several new promotional videos highlighting its gaming community and the games being played on Xbox.

Holding true to the roots of Jump in from years past, it reminds us that gaming is all about human energy, community, and fun. It reminds us that we’re all born to play; that the very act of gaming is based on an intrinsic need. It’s how we learn, achieve and connect with others. Today, Jump in is an open invitation to all gamers and Xbox is committed to delivering more choice and to make gaming more accessible to more people with great games, new experiences, and more ways to play.

As the directory of Xbox integrated marketing Craig McNary notes, “gaming is better than ever.” In spite of decades-long branded console wars amongst Sony, Nintendo and Microsoft; gamers as a whole, are benefiting from a concerted effort on the part of all console makers, studio developers, and 3rd party distributors recently.

Microsoft’s resurrected Jump In campaign looks to refocus the attention paid to gamers and the various anecdotes that help to shape the overall community.

Microsoft and SWIFT are working together to bring cloud native payment solutions to Azure

Microsoft and SWIFT are making new ground at the Sibos 2018, the worlds premier financial services event, to bring a proof of concept to host SWIFT Infrastructure dubbed SWIFT (IaaS). This will enable native cloud payment transfers on Microsoft Azure to be fast, efficient and secure for banks, corporates, service bureaus, and other payment merchants.

SWIFT is the world’s trusted leading provider of secure financial messaging in more than 200 countries, across more than 11,000 institutions. The secure messaging is sent over the highly secure SWIFT network within each institution. Using Microsoft’s Cloud security and intelligence platform will improve the experience of SWIFT bank transfers. There is more than $1 Billion USD spent in security each year, and Microsoft Azure is paramount to all of the institutions so it makes sense to provide a robust system for the digital age.

Microsoft’s treasury department is piloting this proof of concept as the group manages over $150 billion in assets and supports over $400 billion per year in SWIFT based payments, supporting operations in over 190 countries. This is an exciting move for both Microsoft and SWIFT as the proof of concept is just the start as analytics, workflows and AI are the future for banks and corporates, and with this knowledge they can create reports with trends and insights of what they can do next for future growth.

Take a look at how it works for Microsoft’s Treasury

Qualcomm exec says Google Chrome is coming to Windows 10 on ARM next year

HP, Asus and Lenovo were some of the first PC OEMs to launch Windows 10 on ARM PCs powered by Qualcomm chips this year, and Samsung will follow soon with its new Galaxy Book2. So far, the first Always-Connected PCs have impressed with their much-better battery and always-on capabilities, but they also have received criticism for the subpar performance of emulated Win32 apps.

If Google Chrome is your favorite web browser, then a Windows 10 on ARM PC is probably not for you: That’s because Google Chrome has yet to be recompiled for 64-bit ARM processors, and the web browser is currently using the built-in Win32 app emulator on Windows 10 on ARM. This makes the app run much slower than Microsoft Edge or other apps that have already been compiled for Windows 10 on ARM.

Google Chrome is the most popular web browser worldwide, and Google can’t really afford to ignore the fact that more PC OEMs are slowly embracing Windows 10 on ARM. In an interview with Android Authority (via Neowin), Miguel Nunes, Qualcomm senior director of product management, said that an ARM port of Google Chrome is already in the works:

We’re still working with the different OEMs and designs. I expect you’ll see it probably around (the) second half of next year. Every OEM will decide whatever their launch timeline is, but we’re actively working on it.

Interestingly, Nunes didn’t mention Google in his statement, just PC OEMs. “It’s unclear what was meant when Nunes said Qualcomm was working with different OEMs for the initiative. One possibility is that the port will be launched on laptops from specific brands (at least initially) rather than general availability for all Windows 10 Arm laptops,” wrote Android Authority.

It would be quite unprecedented to see the ARM port of Google Chrome launch exclusively on some Windows 10 on ARM PCs, but if true, this would really show that this web browser plays in a different league. There’s no denying that Windows 10 on ARM won’t succeed with emulated Win32 apps that perform poorly, and it’s now up to Google and other app developers to embrace this new platform.

Xbox Game Pass gets scary with four new survival horror games ahead of Halloween

Microsoft has just announced a new Xbox Game Pass update ahead of Halloween, with four new games coming to the catalog today. The main highlights is the first-person survival horror game Outlast, which Microsoft previously offered as a free Games with Gold title back in December 2016.

The other interesting addition is the psychological horror game Observer (stylised as >observer_), which is another FPS set in a cyberpunk version of Poland. The two other survival horror games joining Xbox Game Pass today are the action-oriented Dead Island: Riptide Definitive Edition, and the stealth-oriented Hello Neighbor.

In addition to these four new games, Microsoft also announced a limited-time discount on Xbox Game Pass subscriptions: new subscribers can get three months of Game Pass for the price of one ($10), though be aware that this promotional offer is only available in the US, Canada (excluding Quebec), Australia and the UK.

Samsung updates display for its Windows Mixed Reality headset, introduces HMD Odyssey+

This year has been pretty quiet on the Windows Mixed Reality front, but Samsung has just announced a new version of its premium HMD Odyssey headset. Called the HMD Odyssey+, the new Windows Mixed Reality headset comes with the same dual 3.5-inch AMOLED displays with a combined resolution of 2,880 x 1,600, but with Samsung’s new Anti-Screen Door Effect (Anti-SDE) Display innovation that makes pixels less visible to the eyes.

In addition to the improved lenses, the HMD Odyssey+ should be more comfortable to use thanks to a wider eye box, a new Inter-Pupillary Distance (IPD) wheel, and a breathable anti-fog material on the face padding. The premium AKG audio technology with spatial sound support is also still there in the new headset, which weighs only 1.3 pounds

The Samsung HMD Odyssey+ will be priced at $499 and start shipping in the U.S. on October 22. It’s already available to purchase on Samsung.com, and it should appear soon on the US Microsoft Store. For those of you outside of the US, the new Windows Mixed Reality headset will be available “soon” in other regions including Korea, China, Hong Kong and Brazil.

Weeks away from US mid terms, we’re reminded of Microsoft’s expanded Defending Democracy Program with AccountGuard

Arguably, the US Congress is doing little to curb the recent onslaught of cyber terrorism aimed at the nation, especially in light of recent reports that Russia has once again targeted another national election cycle. While other nations are making middling progress to stem the levels of attack on their countries, internet savvy assailants are finding more ways to steal, leak and spread information or disinformation, depending on the desired result.

With just a couple of weeks before the US enters into its midterm elections, Microsoft is upping its effort to help patrol US political party protections.

To help curb the potential nefarious activity around the US 2018 midterm elections, Microsoft expanded its Defending Democracy Program to include a new tool called Microsoft AccountGuard.

AccountGuard is an additional free tool for any politically vested organization that already uses Office 365. AccountGuard is an extension of Microsoft’s own efforts to thwart meddling of the democratic process and ultimately results in additional state-of-the-art cybersecurity and protection of documents, email, calendar events, etc.

  1. Threat notification across accounts. The Microsoft Threat Intelligence Center will enable Microsoft to detect and provide notification of attacks in a unified way across both organizational and personal email systems. For political campaigns and other eligible organizations, when an attack is identified, this will provide a more comprehensive view of attacks against campaign staff. When verifiable threats are detected, Microsoft will provide personal and expedited recommendations to campaigns and campaign staff to secure their systems.
  2. Security guidance and ongoing education. Officials, campaigns and related political organizations will receive guidance to help make their networks and email systems more secure. This can include applying multi-factor authentication, installing the latest security updates and guidance for setting up systems that ensure only those people who need data and documents can access them. AccountGuard will provide updated briefings and training to address evolving cyberattack trends.
  3. Early adopter opportunities. Microsoft will provide preview releases of new security features on a par with the services offered to our large corporate and government account customers.

Back in August, Microsoft was able to successfully execute a court order to go after and disrupt the activities of six internet domains associated with the Russian government.

Last week, Microsoft’s Digital Crimes Unit (DCU) successfully executed a court order to disrupt and transfer control of six internet domains created by a group widely associated with the Russian government and known as Strontium, or alternatively Fancy Bear or APT28. We have now used this approach 12 times in two years to shut down 84 fake websites associated with this group. Attackers want their attacks to look as realistic as possible and they, therefore, create websites and URLs that look like sites their targeted victims would expect to receive email from or visit. The sites involved in last week’s order fit this description.

In lieu of Microsoft’s DCU most recent cybersecurity victory, the company maintains a vigilant outlook on upcoming cyber attacks for both national and international democratic processes.

We can only keep our democratic societies secure if candidates can run campaigns and voters can go to the polls untainted by foreign cyberattacks.

Hopefully, following the midterm elections of 2018, Microsoft will provide some numbers of attacks thwarted and also, how many campaigns chose to use its Defending Democracy Program as well as the new AccountGuard to measure its effectiveness.

For some voters, choosing a candidate who understands the necessity of cybersecurity is just as important as any other political campaign platform.

More problems for Windows 10 October 2018 Update as zip file extraction issues surface

It looks like the Windows 10 October 2018 Update still needs a bit more polish before it’s finally ready to ship to the masses. After Microsoft acknowledged and fixed the deleted files issue that caused some users to lose personal files after updating, it looks like the latest update for Windows 10 has another issue related to zip file extraction.

As many users of the October 2018 update have reported on Reddit (via MSPoweruser), this version of Windows seems to suffer from a strange issue when extracting files from a zip archive. If a user tries to extract files to a folder where files with the same names are already present, Windows 10 will fail to display a pop up window asking users what to do of the existing files. In addition to the missing overwrite confirmation, it seems that the file extraction fails without Windows 10 telling users about it. As a result, users may think that they have overwritten files in the folder, except it didn’t happen.

The bug apparently only affects the built-in zip functionality of Windows 10, and while it’s probably not as serious as the deleted files issue that surfaced earlier this month, this is still something that can potentially  lead to data loss. As noted by Microsoft MVP Rafael Rivera, this new bug has been previously reported by Windows Insiders over the past few months, but it seems that it may have slipped under Microsoft’s radar:

https://twitter.com/WithinRafael/status/1054233425421299712

We haven’t been able to reproduce the bug in the latest 19H1 build (18262), which is interesting. In the meantime, we recommend you to be extra careful when extracting zip files, and please let us know if you’re also seeing this bug on your PC running the October 2018 update.

Windows 10 news recap: latest Surface devices don’t bode well with iFixit, Windows 10 “19H1” update to counteract Meltdown/Spectre performance hit, and more

Welcome back to our Windows 10 news recap, where we go over the top stories of the past week in the world of Microsoft’s flagship operating system.

Windows 10 “19H1” update will address performance slowdowns caused by Meltdown/Spectre mitigations

After the revelations of multiple security flaws in Intel processors, a number of patches, such as Meltdown and Spectre, were released to patch the flaws. These patches, however, delivered a performance degradation on some machines. Now, Microsoft says the “19H1” update for Windows 10 will address this performance slowdown.

iFixit gives the Surface Laptop 2 a 0/10 repairability score, just like the original model

Microsoft is still not pleasing iFixit, with its second incarnation of the Surface Laptop scoring 0/10 for repairability, the same score obtained by its predecessor.

Microsoft gets another low score from iFixit for Surface Pro 6

Following on from the Surface Laptop 2, the Surface Pro 6 doesn’t fare much better with iFixit, achieving a repairability score of 1/10.

The latest Chrome update leverages its PWA platform on Windows 10

Chrome 70 for Windows 10 brings Progressive Web Apps (PWAs) to the desktop in an easy-to-reach manner for the average user. PWAs with Chrome act and work like native apps, but secretly work in a cut-down browser window.

That’s it for this week – we’ll be back next week with more Windows 10 news!

Microsoft news recap: EU approved GitHub acquisition, Heathrow Airport to make greater use of Microsoft technologies, and more

Microsoft news recap is a weekly feature highlighting the top Microsoft news stories of the past week. Sit back, grab some coffee, and enjoy the read!

Europe’s busiest airport turns to Microsoft technologies to look to the future

Heathrow Airport is looking to make greater use of Microsoft technologies, Europe’s busiest airport. It wants to make it easier for teams to communicate, while also enhancing passenger information, such as using Skype Bots to provide more flight information.

Microsoft turns its Mile-IQ acquisition into a new app, Spend

After acquiring Mile-IQ, Microsoft has launched a new app on to the iOS App Store, called Spend. Spend is designed to make it easy to track business expenses and see purchases.

It’s official, the EU has approved Microsoft’s acquisition of GitHub

While Microsoft’s acquisition of GitHub may have rattled a few heads, the EU has approved Microsoft’s takeover, clearing a major legal hurdle.

Microsoftl, GitHub

Bing works to improve web crawler efficiency

The team at Bing have announced plans to improve its web crawler efficiency, focusing on reducing the load impact it has on web servers it’s crawling, as well as fine-tuning the number of times and the depth in which it crawls websites.

Microsoft Edge & Bing on Surface Pro

That’s it for this week. We’ll be back next week with more Microsoft news.

Crackdown 3 will be at X018’s Xbox Fan Fest

Microsoft’s annual Xbox trade show, X, is back again. Taking place on 10-11th November, fans of Xbox will get a look at everything Xbox, including upcoming games and be able to get hands-on access. This year, the show is taking place in Mexico City.

Xbox Mexico has let loose that Crackdown 3 will be showcased at X018’s Fan Fest:

The announcement has raised hopes for Crackdown 3 sticking to its (new) release timeframe of February 2019, although, if the past is anything to go by, don’t keep your hopes too high.

Will you be going to X018? Are you happy to hear Crackdown 3 will be present?

Action Center Missing on Windows 10: 5 Ways to Restore it

Windows 10 brought a lot of novelties to the standard Windows interface. One of the features is Action Center, but some users are reporting that the feature is missing on their Windows 10 PC for some reason.

We made sure to shed some light on this problem and enlisted some solutions which should help you address it.

Why did my Action Center disappear?

There are various reasons that can cause the Action Center to be greyed out or completely missing on your PC. Below are some of them:

  • Corrupt system files – Oftentimes, this issue can be due to broken or missing system files. The solution to this is to repair these files by running some commands.
  • Wrong Group Policy Editor setting – At times, Action Center might be disabled in the Group Policy Editor. You simply need to enable it to enjoy the feature.

How can I restore Action Center if it is missing in Windows 10?

1. Make sure the Action Center shortcut is enabled

  1. Press the Windows key + I to open Settings.
  2. Choose Personalization.action center shortcut is missing windows 10
  3. Select Taskbar from the left pane.
  4. Click on Turn system icons on or off.action center shortcut is missing windows 10
  5. Make sure the Action Center icon is enabled.action center shortcut is missing windows 10

Firstly, let’s confirm that the Action Center shortcut in the notification area is enabled at all. You might’ve disabled it by mistake, or an update did it without your knowledge.

On the other hand, some users reported that the option was missing from the “Turn system icons on or off” menu. If that’s the case, move to the next

2. Run SFC and DISM

  1. In the Windows Search bar, type cmd, and select Run as administrator under Command Prompt.
  2. Type the command below in the command line and hit Enter to run it: sfc/scannow
  3. After it is done, type the following command and press Enter after each:DISM /online /Cleanup-Image / ScanHealth windows 10 update troubleshooter error 0x803c0103DISM /Online /Cleanup-Image /RestoreHealth
  4. When the procedure ends, restart your PC.

If a built-in system feature is missing, chances are that some of the associated system files got corrupted or incomplete. This might happen for various reasons, but our main suspect is a Windows update. It’s not unusual for updates to break certain system features.

If that happens, you can rely on System File Checker and Deployment Image Servicing and Management utilities. These are built-in, and you can run them through the elevated Command Prompt. Also, they work best when running in succession.

3. Check the Group Policy Editor

  1. In the Windows Search bar, type Group Policy, and open Edit group policy.
  2. Navigate to the path below in the left pane: User Configuration > Administrative Templates > Start Menu and Taskbar
  3. In the right pane, right-click on the Remove Notifications and Action Center settings and choose Edit.
    action center shortcut is missing windows 10
  4. Enable the setting and confirm changes.
  5. Restart your PC.

There are multiple ways to control system features besides the usual access via the Users Interface.  One of the options for advanced users is the Group Policy, used to regulate all important system features for security purposes.

And that’s where you can limit the access for other users to Action Center, as well. That’s why we suggest inspecting these options to find out whether the Action Center shortcut is disabled there.

4. Use the registry tweak

  1. In the Windows Search bar, type regedit, and select Registry Editor from the list of results.
  2. In the Address bar, copy-paste the following path and press Enter: HKEY_CURRENT_USER\Software\Policies\Microsoft\WindowsExplorer
  3. Right-click on the blank area in the right pane and choose New > DWORD (32-bit) Value.
  4. Name the DWORD DisableNotificationCenter, set its value to 1, and save it.

If the Action Center is enabled in Group Policy Editor, we’ll need to turn to the Registry. Seemingly, this was the most fruitful solution for the majority of affected users.

However, we strongly advise you not to meddle with the Registry if you don’t know what are you doing exactly.

In this case, we suggest accessing the Registry Editor and enabling Notification Center (Action Center) if it’s disabled.

5. Reset your PC to factory settings

  1. Press the Windows key + I to summon the Settings app.
  2. Open the Update & Security section.
  3. Select Recovery from the left pane.
  4. Under Reset this PC, click Get started.adaptive brightness windows 10 won't turn off

In the end, if the Action Center is still missing on Windows 10, we suggest resetting your system to factory settings. With this approach, you’ll get to keep your files while also addressing possible system issues which caused this error.

Nonetheless, we still suggest backing up your data from the system partition in case something goes awry.

And with that step, we can wrap it up. You should now be able to restore the missing Action Center on Windows 10 and add it to your Taskbar.

In case you have any alternative solutions for this problem, be so kind to share them with us in the comments below.

Deal: Xbox One X with Forza Horizon 4, Forza 7, Red Dead Redemption 2 and NOW TV for £399.99 in the UK

If you’re a fan of the Forza series, as well as Red Dead Redemption, enjoy watching NOW TV and are on the lookout for a new Xbox, then UK retailer GAME may have just the deal to tickle your gaming thumbs.

Coming in time to offer some Christmas savings, GAME is offering up an Xbox One X bundle that comes packed with extras. Not only will you receive Microsoft’s latest console, you’ll also get:

  • Forza Horizon 4
  • Forza 7
  • Red Dead Redemption 2
  • 2 months NOW TV Entertainment pass

The bundle itself is currently on offer, reduced by £109.99, making the bundle only £399.99. It is currently available for pre-order with free delivery, as well as offering up PayPal Credit as a finance option, giving an additional 4 months to pay off the full cost of the bundle.

You can view the deal on GAME’s website here.

You can now gift apps and Xbox Live avatar items through the Microsoft Store

Microsoft announced yesterday that it has extended digital gifting through the Microsoft Store to apps and Xbox Live avatar items, which comes in addition to digital games, Xbox Live Gold and Xbox Games Pass subscriptions. This has been one of the top-requested features from users, though some restrictions still apply.

First of all, digital gifting is still region-locked, which means that someone in the US can’t send a digital gift to someone in the UK. Additionally, it’s not possible to gift original Xbox avatar items, as well as Xbox 360 and original Xbox games. Microsoft says that most apps and avatar items should be available for gifting as of yesterday, October 19, with the rest coming by Tuesday, October 23.

Animation showing how to send an app as a gift

To send a digital gift from a Windows 10 PC, you’ll have to click the “…” button next to the Buy button on a store listing and select “Buy a gift.” This will open a pop up window where you’ll be able to enter the email address of the gift recipient. On Xbox One, you’ll be able to directly select your friends’ gamertags. Once you’re done, the Microsoft Store will send gift to recipients as soon as the transaction is complete, and there’s no schedule option as of today. Microsoft is still listening to feedback about how to improve digital gifting through the Microsoft Store, and you can share your suggestions in the Feedback Hub or the Xbox Ideas site.

Windows 10/11 clock is invisible? Here’s the fix

In spite of all changes Windows as a platform had over the years, the date and time always found their place in the notification area. Users got to get used to it standing in the bottom right corner of the taskbar and it still stands firm in Windows 10. However, some user reports state that the clock/date icon is either completely absent or barely visible.

We invested some effort to help you address this problem. The steps can be found below.

What to do if Windows 10 clock is invisible

  1. Disable small taskbar icons
  2. Change the theme
  3. Roll back the update or reset PC to factory values

Solution 1 – Disable small taskbar icons

Let’s start by checking if the clock icon is enabled in the first place. After we sort that out, and if the problem persists, move onwards through the list.

Here’s where to enable the clock icon in Windows 10 settings:

  1. Right-click on the Taskbar and open Taskbar settings.
  2. Under the “Notification area” section, click Turn system icons on or off.
  3. Make sure that the Clock is toggled on.Are Windows 10 Date and Time invisible? Here's how to sort this out

Have in mind that this isn’t a solution per se. This is, for better or worse, a workaround which helped some users restore the clock where it belongs. Now, it seems that we’re looking at a bug which, when the small taskbar buttons (for the extra space) are enabled.

The clock either completely disappears or the number’s font is too dark or transparent which makes it barely visible.

With that in mind, we suggest disabling the small format of taskbar icons for the time being. At least, until one of the upcoming updates deals with this issue.

Here’s how to disable small taskbar icons in Windows 10:

  1. Right-click on the Taskbar and open Taskbar settings.
  2. Toggle off the “Use small taskbar buttons” setting.Are Windows 10 Date and Time invisible? Here's how to sort this out

Solution 2 – Change the theme

Another way to deal with the invisible clock is changing the desktop theme. This doesn’t have to concern all personalization settings, so you can stick with the current theme of your choice. However, you’ll need to change the color of the Start, Taskbar, and Action Center in order to make the clock visible again.

For some reason, the automatic font switch for light/dark theme doesn’t work for some users. Thus, the clock is invisible in the notification area.

Here’s how to change the color theme in Windows 10:

  1. Right-click on the Desktop empty area and open Personalize from the contextual menu.
  2. Choose Colors from the left pane.
  3. Pick a color different from the current one.Are Windows 10 Date and Time invisible? Here's how to sort this out
  4. Disable Transparency effects.
  5. Now, scroll down and uncheck the “Start, Taskbar, and Action Center” box under the “Show accent color on the following surfaces” section.Are Windows 10 Date and Time invisible? Here's how to sort this out

Solution 3 – Roll back the update or reset PC to factory values

Finally, if the previous two workarounds haven’t got you far and the notification area clock is still invisible, we can only suggest relying on recovery options. At least, if you’re keen for a swift resolution. You might wait for a next update to fix this, but that can take some time.

And, since the recovery options allow you to keep your data, restoring your PC to factory values or rolling back to the previous update shouldn’t be a problem.

Here’s how to roll back to the previous version of Windows 10:

  1. Press Windows key + I to open the Settings app.
  2. Choose Update & Security section.
  3. Select the Recovery from the left pane.
  4. Under the “Go back to the previous version of Windows 10” option, click Get started.Are Windows 10 Date and Time invisible? Here's how to sort this out

And this is how to reset your PC to factory values:

  1. Press Windows key + I to open the Settings app.
  2. Choose Update & Security section.
  3. Select the Recovery from the left pane.
  4. Under the “Reset this PC” option, click Get started.Are Windows 10 Date and Time invisible? Here's how to sort this out

That should do it. If you have any alternative ideas on how to tackle this issue, feel free to tell us in the comments section below.

RELATED STORIES YOU SHOULD CHECK OUT:

How-to start with Microsoft Learn

Microsoft recently announced a new learning platform so you can educate yourself about Azure, PowerApps, Dynamics 365, Flow, PowerBI, with more coming soon to acquire skills to advance your career. This tutorial will guide you through your first steps through Microsoft Learn. Don’t worry since it’s all free!

First, if you have not set up a Microsoft Account, you would need to get one (skip this step if you already have one).

  1. Just click “Sign in” on this page and click “Create one!”, fill in your details, and you’re done.
  2. Now that we’re ready to start, click here, and sign in.

  3. Click “Start learning for free” OR “Select your role” – this will give you a good learning path to start with.

Bonus Tip: If you’re wondering what the cloud is and how does it work for your business, check this module first before your start – Cloud Computing Concepts.

Each module has units to complete and shows you how long it will take.

The first one, for example – Tour Azure services and features – has 10 units to complete and shows the approximate time in blue, although it may take you a little more time if you’re a beginner. It’s your best start with Azure, and even as an administrator myself, I picked up some useful tips.

What I also find useful is the XP points, and how much you earned on this module, and what level you are at.

So go ahead, click on your first unit and get started. Read along, and click “Next” at each step.

If Azure is not your cup of tea, you can try out other courses for free, for different roles – Azure Developer, Administrator or Solution Architect, Business User or Analyst. Power BI courses are part of the Business User or Analyst role path.


You can also browse the catalog for all courses, but make sure you keep it bookmarked since it will be updated on a regular basis.

Europe’s busiest airport turns to Microsoft technologies to look to the future

Heathrow Europe’s busiest Airport is about to get an upgrade with a third runway, and Microsoft is assisting with its technology. Around 78 million passengers passed through its terminals in 2017, and with a planned upgrade, we would expect to see at least 130 million.

Heathrow’s key strategies are big data and analytics as it’s a power user of the Microsoft Cloud which holds Azure, Power BI, Office 365 and Windows 10. 200,000+ passengers move daily through the airport, so they need to have a reliable system to cope with the load.

The airport also wants to get its teams to communicate more efficiently and connect all the data with Power BI. Power BI collects all the data, and you can create workflows for pretty much anything you can imagine, but first off, you need to know how the Airport runs and creates a model of the flows and behaviors.

Skype-based bots are something the team is looking into today: what if you could ask bots what is your gate number? And it could tell you. Maybe Cortana is the future of Heathrow as well. They also want to spot for disruption and keep the queueing down to a minimum by providing passengers with a more calming experience with machine learning. It is difficult to predict when passengers arrive at the airport, so knowing this early on is one of the key indicators in Power BI.

Samit Saini is using PowerBI Apps today at Heathrow to look at the data which the airport is over capacity.

“The next stage will be using artificial intelligence. Microsoft is a critical ally in our digital transformation.”

The future of the third runway is AI, passing through checkpoints without fiddling with your bits of paper, and showing your boarding cards will soon be a thing of the past as the facial recognition will be able to spot you.

Heathrow is in competition with other European countries for the best customer experience that it can provide. Its revenue is nearly hitting £1.4bn, and passenger numbers increased 2.5% from last year’s figures.

Power BI will produce visual dashboards for both frontline workers and passengers, which make for rich data about weather patterns if to open up more baggage desks, more food outlets or cleaners for spilled drinks.

Organization is key to Heathrow’s success, and with a leading technology company like Microsoft, it’s going to hit new heights!