Windows 10 Facebook app updates with design changes & fixes

While some Windows enthusiasts wait for the tidal wave of PWAs to come flowing in to the Windows Store from like-minded developers, there’s still a lot of native application development going for the platform.

The Windows 10 Facebook app just received a new update bringing the app to version 171.1861.39959.0.

While it’s not as feature heavy as some may want to bring the experience up to par with other platforms, today’s update does offer some UI parity.

Today’s changelog includes the following highlighted tweaks:

  • Renewed search bar (no more borders)
  • New notification icon (now bell-shaped)
  • All users can now send reactions to comments in the home (just hold on the comment to bring up the reactions)
  • The stickers section has been translated into all languages
  • It is now possible to add a biography from your profile
  • The profile icon in comments and groups is now spherical
  • Renewed the profiles page of their friends
  • Corrections and minor improvements

It should be noted that the update was first spotted by the Microsoft-centric Italian Aggiornamentilumia.it., and that the update may or may not have been rolled out in completion yet. Check the Microsoft Store beforehand to confirm.

Facebook
Facebook
Developer:
Meta
Price:
Free

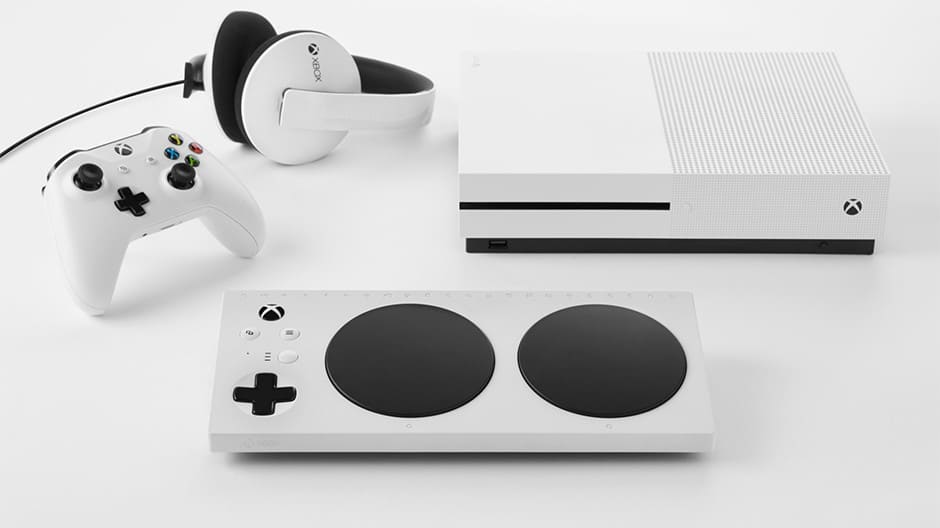
Microsoft’s Xbox Adaptive Controller officially launches today

Back in May, Microsoft took the wraps off the Xbox Adaptive Controller, a new accessory to make gaming more inclusive for those with disabilities. We’ve since seen the company highlight the accessible packaging for the controller, and today, it has been announced that the Xbox Adaptive Controller is officially available for purchase.

You can find the Xbox Adaptive Controller for $99.99 at both the Microsoft Store and GameStop Online. The controller feature 19 3.5 mm jacks for plugging external switches, buttons, mounts, and joysticks. The most prominent feature, though, is its two giant programmable buttons, and symbols along the top side to help gamers with disabilities find the right ports.

Other features on the controller include USB ports on the right and left sides for thumbsticks, and USB C and DC power ports. It is those features and design which makes the controller special, as explained by Gabi Michel, Xbox Adaptive Controller Program Manager.

“The Xbox Adaptive Controller is a product that was ideated and pioneered with inclusivity at its heart. We iterated on and refined it through close partnership with gamers with limited mobility and fan feedback, as well as guidance and creativity from accessibility experts, advocates and partners…”

You can learn more about the peripherals and other hardware available for the Xbox Adaptive Controller by visiting this link here. You also can check that same link for more general information about the new controller and the story behind its creation.


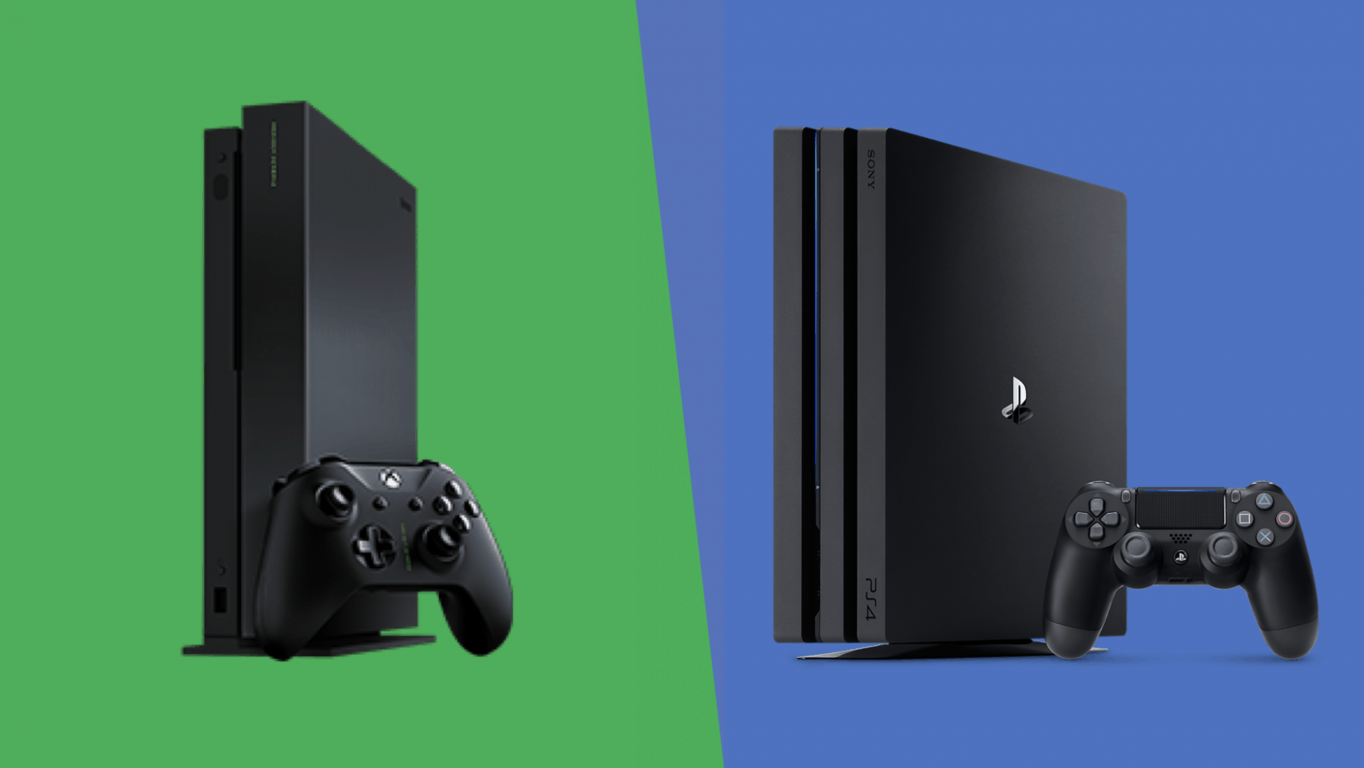
Sony “isn’t listening to gamers,” says Xbox exec after Fortnite crossplay complaints dismissed

Sony’s refusal to enable crossplay with other platforms on games like Fortnite and Minecraft is continuing to receive some heavy criticism from video games industry execs. This time, it’s Mike Ybarra, Corporate Vice President of Xbox Program Management at Microsoft, who just blamed Sony today for not “listening to gamers.”

In case you missed it, Ybarra was referring to recent interview of Sony’s CEO Kenichiro Yoshida with the Press Association, where the exec explained the company’s stance on crossplay:

On cross-platform, our way of thinking is always that PlayStation is the best place to play. Fortnite, I believe, partnered with PlayStation 4 is the best experience for users, that’s our belief. But actually, we already opened some games as cross-platform with PC and some others, so we decide based on what is the best user experience. That is our way of thinking for cross-platform.”

With the Playstation 4 remaining the leading 8th gen gaming console by a wide margin, Sony has no reason not to protect its walled garden. Still, like Ybarra said, the push for crossplay multiplayer across platforms is definitely happening. Back in July, EA CEO Andrew Wilson said that the company was thinking about enabling crossplay for its own games, which include the popular FIFA and Madden series. More recently, Pete Hines, Bethesda’s senior vice president of global marketing and communications explicitely said that the publisher wouldn’t allow Sony to block crossplay on The Elder Scrolls: Legend, Bethesda’s upcoming collectible card game.

So far, it seems that Sony isn’t really suffering from its gamer-hostile policy, and to be fair the company does support crossplay with PC and mobile devices on Fortnite (just not with gamers on Xbox One and Nintendo Switch). If the voices of video games industry exec isn’t enough to make the company change its mind about crossplay, it will ultimately be up to gamers to vote with their wallets and support the most gamer-friendly platforms out there.

Sticky Notes is set to become a modern client for Outlook Notes

After Microsoft shipped a major update for its Sticky Notes app last week, it seems that this UWP app may well become a very important app for the company. Indeed, the new cloud syncing feature introduced in Sticky Notes 3.0 means that notes not only sync across Windows 10 PCs, but they now also sync with Microsoft’s Outlook desktop app.

The synergy with Outlook on the desktop was discovered by OneWindows.es (via MSPoweruser), and this pretty much makes Sticky Notes a modern, task-focused app for managing Outlook notes. There is definitely some similarity with Microsoft To-Do, which has also recently become a modern client for managing Outlook Tasks.

For those unfamiliar, the Outlook desktop app has dedicated sections for Notes and Tasks (Tasks are basically notes with optional reminders), and those can sync to the cloud if you use an Outlook.com or Office 365 account. For most users though, using Outlook on the desktop to take notes is probably overkill, and Microsoft has already has more lightweight and elegant solutions including OneNote or even the legacy Notepad app.

The truth is, some consumers love the versatility of all-in-one apps like Outlook on the desktop, while others prefer lightweigtht and task-focused apps like the ones they use on their smartphone or tablet. And compared to OneNote, Sticky Notes does have some real advantages, including the fact that you can stick notes on your desktop. It’s also worth noting that OneNote for Windows 10 dropped support for local notebooks, and you also can’t use it without a Microsoft account.

In the end, it seems that Microsoft has created new modern apps for all the core features of Outlook on desktop: To-Do and Sticky Notes now complement People, Mail and Calendar, and all of these apps except To-Do come pre-installed on Windows 10. For now, Sticky Notes 3.0 is still only available for Skip Ahead Insiders, but we expect Microsoft to get serious about promoting this app once it becomes generally available.

Fix now Windows 10 Computer Keeps Shutting Down


What to do if Windows 8.1, 10 keeps shutting down or restarting?

  1. Fix Windows 8.1 keeps shutting down
  2. Fix Windows 10 keeps shutting down

Fresh from the Microsoft Community forums is one error where the Windows 8.1, 10 computers keeps shutting down after the user was forced to make the update to 8.1 or Windows 10. We try to come up with a fix.
After Forced Update to Windows 8.1, Computer Keeps Shutting Down [Fix]
As much as Microsoft wouldn’t try, there are plenty of errors that keep piling up especially for those that have made the upgrade from Windows 8 to Windows 8.1. It’s even more annoying the fact that some of them have been forced to upgrade and after that, they have started getting errors. No wonder why some many have started to hate Windows 8. Here’s what somebody has been recently saying on the support forums with regards to his Windows 8.1 PC shutting down after Windows 8.1 update:

I want to throw this computer with its Win 8 through the window.  How on earth does Windows get so complicated that it basically forces us to install 8.1 – which we didn’t want because we HATE Win 8. And now…  the Win 8.1 install won’t finish. The computer just keeps shutting down. This has been going on for over a day.  At some point in the 8.1 update it said the computer would need to restart to finish. It didn’t say You will need to restart it OVER and OVER and OVER…>

When we start it, it sits at an HP logo for a while, then it just SHUTS down. No message, no error, no nothing.  Like I said, we’ve done this over and over and over.  I tried to research starting it in Safe Mode. Hm, found out some more interesting information about the wonderful Win 8 – i.e. you can’t just hit F8 (or shift-F8) and boot up in Safe Mode. The detailed instructions on how to get it to boot in Safe Mode from pcsupport.about.com are cumbersome and take you to several more “links”. I’m beyond frustrated.

How to fix ‘Windows 10 PC keeps shutting down’ error?

Fix Windows 8.1 keeps shutting down

I’m trying to come up with some solutions that will help out those affected. If they won’t work, then I’ll keep looking for other fixes, but for now, this is all I know.

First of all, you will have to disconnect all the unnecessary external devices connected to the computer and check if the installation proceeds further. If you still have issues during the installations, try these steps:

Step 1:  If you are using any third-party antivirus software, you may uninstall it and check if you can upgrade to Windows 8.1.
Note: Even if you disable third-party antivirus, Defender will still be running in the computer. This will guard your computer from malware and virus.
Step 2: Install all the available updates.
Step 3: Install the updated drivers for the hardware.
Step 4: Perform a clean boot and then start the upgrade. Refer to this link – https://support.microsoft.com/kb/929135

Also, after checking the functionality in clean boot, follow the suggestions under “How to reset the computer to start as usual after troubleshooting with a clean boot”.

Fix Windows 10 keep shutting down

Run Power troubleshooter:

  1. Press ‘Windows Key’ + ‘X’
  2. In the Search box, tap ‘troubleshooter‘ and press ‘Enter’
  3. Select ‘Troubleshooting’
  4. Click on ‘View All’ and select ‘Power’
  5. Follow the Troubleshooter instructions

Restore Power Options Settings:

  1. Open Control Panel on your Windows PC
  2. Select and click ‘Power Options’
  3. Select and click ‘Change Advanced Power Settings’
  4. Select and click ‘Restore default settings for this plan’

READ ALSO: How to Disable Microsoft Confidential Watermark in Windows 8, 8.1

FIX: We’re sorry the page you requested cannot be found

If you just take a look around, there are less and less physical copies of any kind of software. The distribution for Windows 10 is only digital, with do-it-yourself bootable drive creation. After purchasing the license, you should be able to follow the download link and get your digital copy. Sadly, even this super-simplistic approach was somehow broken for some users. Namely, when clicking on the link, users were met with the We’re sorry the page you requested cannot be found error.

We provided a few workarounds to get your Windows 10 copy in no time. Make sure to check them out below.

Can’t download Windows 10 installation as the page cannot be found? Use these solutions

  1. Make sure the website isn’t restricted
  2. Use the Windows Upgrade Assistant
  3. Use the Media Creation Tool to upgrade directly
  4. Create a bootable media drive with the Media Creation Tool

1: Make sure the website isn’t restricted

If you’ve tried purchasing Windows 10 from the web store and the error occurred, there are some things you can do. Firstly, make sure that you’re in a region which allows purchases. The second concern we need to eliminate is a possible restriction on the website. Make sure that your system isn’t blocking the download firstly.

Furthermore, we suggest disabling the online protection temporarily. Especially if the security tool comes with the firewall of its own. Disable browser extensions as well. You can enable them later on. After that, try accessing the link again. If the problem is persistent — don’t worry. There are alternative ways to get your hands on Windows 10 installation.

2: Use the Windows Upgrade Assistant

Let’s get to alternatives. The first Microsoft’s tool is fully automatized and it even allows you to install Windows 10 directly from your desktop. It’s a simple procedure and it even provides the compatibility check to determine your system (Windows 7 or 8) is eligible for an upgrade to Windows 10. The complete process is intuitive but can be lengthy.

Follow these steps to install Windows 10 with the Upgrade Assistant:

  1. Get the Upgrade Assistant, here. Just click on the “Update now” button.we're sorry the page you requested cannot be found
  2. Run the tool as admin and follow the steps closely.

3: Use the Media Creation Tool to upgrade directly

Microsoft’s main tool for digital distribution of Windows 10 is the Media Creation Tool. This tool allows you to upgrade to Windows 10 directly from the UI or create an external bootable drive and install Windows 10 in a standard manner.

Either way, it’s the best and the easiest way (might be the only way) to get the installation files. The product registration comes in later, so you don’t need to worry about that. If you have the license, everything is smooth and fast.

The first way to upgrade to Windows 10 with the Media Creation Tool includes direct installation. The downloaded setup files are stored in the system partition and the upgrade starts immediately. You even get to keep the files from the previous (current) system installation.

Follow these steps to install Windows 10 with just the Media Creation Tool:

  1. Back up all your essential data to the non-system partition or an external drive.
  2. Download the Media Creation Tool, here.
  3. Run the tool and accept the Terms.
  4. Toggle the “Upgrade this PC” option and click Next.
  5. The tool will firstly download the setup files (it can take some time) and the installation should commence afterward.

4: Create a bootable media drive with the Media Creation Tool

Finally, the safest and the best way to install Windows 10 is with a bootable media drive. Especially a clean installation which includes formatting your HDD completely.

Lots of issues we covered here in a last couple of years were there because users have chosen upgrade over a clean installation. On paper, both stand firm. But, in practice, the problems emerge. Especially with the third-party programs, driver, and after major updates.

For that reason, we suggest creating the installation media and installing Windows 10 cleanly. The license is directly connected to your Microsoft Account you made the purchase with. So, just a simple log-in will activate Windows 10 upon the installation is completed.

Follow these steps to create a bootable USB drive and install Windows 10 with it:

  1. Plug in a USB flash drive with at least 6 GB of free storage space. Have in mind that the following procedure will format your drive, so backup your data.
  2. Download the Media Creation Tool, here.
  3. Run the tool and accept the Terms.
  4. Toggle the “Create installation media (USB flash drive, DVD, or ISO file) for another PC” option and click Next.we're sorry the page you requested cannot be found
  5. Select the Language and Architecture and then click Next.we're sorry the page you requested cannot be found
  6. Select the USB flash drive option.we're sorry the page you requested cannot be found
  7. Wait until the drive is created and you can safely boot from it and install Windows 10.

That’s a wrap. If you’re still having issues with installing Windows 10, make sure to check out our website for the solution or, eventually, contact Microsoft Support. Either way, tell us whether this was a helpful read in the comments section below. We’ll be thankful for your effort.

RELATED STORIES YOU SHOULD CHECK OUT:

Windows 10 news recap: Amazon might be working on a UWP Alexa app, user exposes zero-day vulnerability on Twitter, and more

Welcome back to our Windows 10 news recap, where we go over the top stories of the past week in the world of Microsoft’s flagship operating system.

Amazon could be bringing an Alexa UWP app to the Windows 10 Microsoft Store

A new report claims that Amazon is currently working on creating a UWP Alexa app and may bring it to the Microsoft Store on Windows 10. While Amazon has a Win32 version of Alexa, it’s yet to release any UWP version.

Microsoft mistakenly sends notification of a new Windows 10 Insider build to non-Insiders

After releasing a new Windows 10 Insider build to Fast ring Insiders, Microsoft began mistakenly notifying non-Insiders that a new update was available for their Windows 10 devices. The issue was later resolved following user reports and it didn’t become widespread.

Windows 10 Logo Generic Featured Image Hero

Microsoft is no longer accepting new enrollments into Surface Plus financing program

Microsoft’s Surface financing program, Surface Plus, is no longer accepting enrolments. No reason was given as to why the company has chosen to end its financing program.

Disgruntled user exposes unpatched Windows zero-day exploit via Twitter

A disgruntled user has exposed a zero-day Windows exploit that is unpatched, via Twitter. The exploit is local and uses the Windows task scheduler to elevate a program’s system privileges. Microsoft has acknowledged the exploit but has not yet released a patch.

Windows 10 Sign Logo NYC

That’s it for this week. We’ll be back next week with more Windows 10 news!

Microsoft news recap: Office 365 Home and Personal to get increased device limits, US suppliers required to provide 12 weeks paid parental leave, and more

Microsoft news recap is a weekly feature highlighting the top Microsoft news stories of the past week. Sit back, grab some coffee, and enjoy the read!

Office 365 Home and Personal about to get better with new device limits

Microsoft’s Office 365 subscription service currently has limits on the number of devices and users that can make use of the software per subscription. This week Microsoft announced that it is changing the limits, allowing installation on unlimited devices but only 5 users can be using it at any one time. Prices will remain the same at this time.

Microsoft’s SharePoint app gets revamped on iOS and Android

SharePoint has seen a large design and feature revamp on iOS and Android. The main changes have taken place in the way a search is performed, adding a new Find tab that combines searching for Links, People, Sites and Search. In addition, AI is being used to improve the search results experience and provide quick results.

Microsoft SharePoint redesign

Microsoft to require US suppliers to provide 12 weeks of paid parental leave

Microsoft is setting new requirements on its US suppliers. The new requirements will make it mandatory for them to provide at least 12 weeks of paid parental leave. The requirements are there to ensure its suppliers uphold Microsoft’s ethics. Microsoft admits that this may increase its costs as a result of suppliers seeing increased costs for paying 12 weeks of parental leave.

Chinese spies are “super aggressive” trying to recruit Americans on LinkedIn, says US intel chief

Business social network LinkedIn is reportedly being used in a “super aggressive” manner by Chinese spies to recruit Americans. The spies use fake profiles on LinkedIn. This report comes from a US intelligence chief.

That’s it for this week. We’ll be back next week with more Microsoft news.

What to do if Windows cannot find wuapp.exe

Earlier Windows platforms include a wuapp.exe file that opens Windows Update settings in the Control Panel. Users can open the Windows Update settings by entering ‘wuapp.exe’ in Run. They can also open the Control Panel’s update settings by selecting Windows Update in Internet Explorer.

However, the update settings in Win 10 are a little different. Microsoft removed the ‘wuapp.exe’ file from Windows 10. So Win 10 includes update options within the Settings app instead of Control Panel. As such, a “Windows cannot find wuapp.exe” error message pops up when users enter ‘wuapp.exe’ in Run. That error message can also pop up when users click Windows Update in older versions of Internet Explorer (IE 11 no longer includes a Windows Update option).

FIX: Windows cannot find wuapp.exe

  1. Set Up a Wuapp Batch File
  2. Add a Windows Update Shortcut to the Desktop

1. Set Up a Wuapp Batch File

So you can’t open Windows Update settings in Win 10 by entering ‘wuapp.exe’ in Run. That was undoubtedly a handy shortcut for opening update options. However, you can set up a batch file that will open the Window Update options in Settings when you enter ‘wuapp’ in Run, which will effectively restore the wuapp Run command in Win 10. This is how you can set up a wuapp batch file.

  • Right-click the Start menu and select Run.
  • Enter ‘Notepad’ in the Run‘s text box, and click the OK button.
  • Copy the this batch file content with the Ctrl + C hotkey: start “” ms-settings:windowsupdate.
  • Then paste the copied text into the Notepad text editor by pressing the Ctrl + V hotkey.

  • Click File > Save As to open the window in the shot directly below.

  • Select All Files from the Save as type drop-down menu.
  • Enter ‘wuapp.bat’ in the File name text box as shown below.

  • Select to save wuapp.bat to the desktop, and click the Save button.
  • Next, close the Notepad window.
  • Click the File Explorer button on the taskbar.

  • Click Desktop on the left of File Explorer.
  • Then click the small arrow beside the C: drive to expand its folder tree.

  • Select wuapp.bat in Desktop by pressing and holding the left mouse button. Then drag that file into the Windows folder on the left of the File Explorer.
  • When you drop the file into the Windows folder, a Destination Folder Access Denied dialog box opens. Click Continue to drop the wuapp.bat file into the directory.

  • Enter ‘wuapp’ in Run, and press the OK button. Now that will open the update settings shown directly below.

Add a Windows Update Shortcut to the Desktop

Alternatively, you can add a shortcut to the desktop that opens Windows Update. That’s a better shortcut than opening update settings with Run as you can add a hotkey to it. Follow the guidelines below to set up a desktop shortcut hotkey for Windows Update options.

  • Right-click your desktop and select New > Shortcut to open the window in the image below.

  • Enter ‘control.exe /name Microsoft.WindowsUpdate’ in the text box.

  • Press the Next button.
  • Enter ‘Windows Update‘ in the Type a name for this shortcut text box.
  • Press the Finish button to add the shortcut to desktop as in the shot below.

  • Right-click the shortcut and select Properties.
  • Select the Shortcut tab.
  • Click in the Shortcut key box, and press the W key. That will add a Ctrl + Alt + W hotkey to the shortcut.

  • Then press the Apply button, and click OK to close the window.
  • Now you can press Ctrl + Alt + W to open the Windows Update options!

So that’s how you can set up two handy shortcuts with which to quickly open update settings. As the batch file restores the wuapp Run command, that effectively fixes the “Windows cannot find wuapp.exe” error message. However, the desktop shortcut hotkey provides a slightly more direct way to open Windows Update options.

The return of the tease: Microsoft hints at new Windows 10 RS5 Insider build

For a while, it was quite the game: follow @DonaSarkar on Twitter, decipher the sometimes exceedingly cryptic hints, and learn the build number for a new incoming Windows Insider build. With RS5, the Windows Insider program moved away from the shenanigans, instead choosing to just drop builds, at sometimes seemingly random hours and days.

However, it looks like at least one Windows Insider team member has some nostalgia for the old ways, as today Jason Howard certainly appears to be teasing a new build on the way:

Recently Jason has been active on Discord as well, yesterday announcing the new Slow Ring build a few minutes before the blog post went up, so the era of the big tease may be back upon us once again.

Stay tuned, we’ll be keeping a close eye on the usual channels and will have the latest on a new Insider build as soon as it happens.

It’s official, the upcoming Redstone 5 update will be the Windows 10 October 2018 update

This Fall, the Windows 10 October 2018 update will succeed to the Windows 10 April 2018 update, the company announced today. “With this update, we’ll be bringing new features and enhancements to the nearly 700 million devices running Windows 10 that help people make the most of their time”, wrote Roannes Sones, Corporate Vice President leading the platforms team at Microsoft.

Microsoft has apparently abandoned for good more creative names like “Creators Update” for a simpler naming convention, and this is probably for the better. The “October 2018 update” is easy to remember for everyone, and hopefully Microsoft will stick with this formula for all major updates going forward.

The Windows 10 October 2018 (aka Redstone 5) is currently in the polishing stage, and it won’t bring a lot of new features to the table. The main highlights are probably related to Microsoft Edge (which only gets new features twice a year), including a handy option for disabling autoplay videos on the web, but there is also the new Cloud Clipboard for copy/pasting content across Windows 10 devices. Microsoft has also updated legacy components such as NotePad and the File Explorer, adding a dark theme option for the latter.

As usual, not all Windows 10 users will receive the October 2018 update at the same time, and Microsoft said earlier this year that it has started using artificial intelligence to “greatly improve the quality and reliability of the Windows 10 April 2018 Update rollout.” To avoid update fatigue, the October 2018 update will also leverage a new predictive model to avoid rebooting your PC to install updates when you’re busy.

Microsoft to require US suppliers to provide 12 weeks of paid parental leave

Microsoft is currently in a legal fight regarding a potential class action lawsuit regarding its handling of sexual harassment, discriminatory practices and handling of unpaid leave situations.

Perhaps, in a preemptive move to mitigate further outstanding employee criticism as the company navigates choppy legal waters, Microsoft is looking to build on its 2015 announcement of expanding its parental leave policies.

Announced yesterday, Microsoft will require its US suppliers to implement new paid parental leave policies.

It will require that suppliers offer their employees a minimum of 12 weeks paid parental leave, up to $1,000 per week. This change applies to all parents employed by our suppliers who take time off for the birth or adoption of a child. The new policy applies to suppliers with more than 50 employees and covers supplier employees who perform substantial work for Microsoft. This minimum threshold applies to all of our suppliers across the U.S. and is not intended to supplant a state law that is more generous. Many of our suppliers already offer strong benefits packages to their employees, and suppliers are of course welcome to offer more expansive leave benefits to their employees.

In a blog post on Microsoft On the Issues, the company goes into further detail on the importance of its suppliers following this referendum and some other statistical support for the extension of paid parental leave.

Three years ago, Microsoft made the announcement that it was expanding its campaign for paid leave to its suppliers but yesterday’s announcement now extends to the employees of those suppliers as well.

A move to umbrella paid leave for employees of suppliers is not without its costs. Microsoft is aware that requiring suppliers to abide by its new policy could be a potential strain on its working relationships and is looking for ways the company can help support the change.

Microsoft will work with our suppliers to understand the impacts of this change, and we will make these changes in a thoughtful way. We appreciate that this may ultimately result in increased costs for Microsoft, and we’ll put a process in place for addressing these issues with our suppliers. Our first step will be reaching out to our suppliers to discuss the impact of this policy change.

Ultimately, Microsoft’s new supplier-paid leave policy could become the minimum modus operandum for other tech business, and in the end, a good thing for all workers.

Testing for Dolby Vision on Xbox One begins today

Starting today, Microsoft has begun testing Dolby Vison functionality on its Xbox One S and Xbox One X video game consoles.

The testing of the feature has started with Xbox Insiders in the Alpha Skip Ahead and Alpha rings but will gradually roll out to other Insiders and, eventually, the general public in the near future.

Dolby Vision is essentially a technology that allows TVs to present media with brighter colors, darker blacks, and stronger contrast than usual. It doesn’t increase the image resolution but enhances the use of color to make what’s seen on screen more realistic and vivid.

To experience Dolby Vision content, a compatible television is needed as is media that actually supports the technology. Currently a variety of programs on Netflix support Dolby Vision such as Stranger Things and Altered Carbon.

Microsoft has provided detailed instructions for how to setup Dolby Vision on Xbox One S and Xbox One X consoles here.

Are you excited for Dolby Vison content on your TV? Let us know in the comments below and then follow us on Twitter for more Xbox news.

Prison Architect is now free on Xbox One consoles, Star Wars The Clone Wars coming soon

Prison Architect: Xbox One Edition is now free for a limited time for Xbox One console owners with Xbox Live Gold.

The game is an action strategy title that tasks the player with building and managing their own prison while making decisions that could define the prison as a place for rehabilitation or intense cruelty.

Here’s the official game description for Prison Architect: Xbox One Edition:

Take control of the building and running of a maximum security prison as the critically acclaimed lock-em-up arrives on Xbox One! Your Design, Their Fate. Will you build and manage a prison to create social order where it’s failed in the past, offering rehabilitation and peaceful coexistence amongst inmates? Will your prison disregard human rights, impose intentional harshness and be devoid of any notions of wellbeing and freedom? The choice is yours.

In Prison Architect you will see the impact of your grand design on the lives of your inmates; be it a utopic center for rehabilitation, a brutal Super Max Prison or anything in between. Even when all of your prisoners’ needs are met, remember one thing – it’s still a prison and no one really wants to be there.

The Xbox 360 video game, LEGO Star Wars III: The Clone Wars, is also expected to free for Xbox Live Gold subscribers within the next 24 hours but the discount hasn’t been activated as of the time of this writing.

The decision to give away LEGO Star Wars III: The Clone Wars could be tied to a bigger promotional strategy from Disney and Lucasfilm for The Clone Wars cartoon series which was recently given a renewal announcement. Star Wars Battlefront II has also begun promoting Clone Wars content with new Clone Trooper skins and the upcoming addition of Obi-Wan and Anakin Skywalker who will be voiced by the same actors that voiced them in The Clone Wars series.

Which video game are you most-excited to play for free this month? Share your thoughts with the community below and then follow us on Pinterest for more Xbox video game content.


LEGO Star Wars III
LEGO Star Wars III

Chrome and Firefox will display security warnings more often

Browser privacy and security warnings for internet users on web browsers will soon be on the high. Google Chrome and Mozilla Firefox users will experience an increase in the security messages they receive. Security messages such as “Your connection is not private” and “Warning; Potential Security Risk ahead” will be seen by internet users frequently on web browsers.

The web browser privacy issue

Mozilla, Google and other web browser owners have revealed plans to disregard all certificates by Symantec, issued in web browsers in 2017. In the past, several certificates were issued that did not comply with the standards of the industry.

Mozilla and Google are planning to distrust all certificates issued by Symantec starting from October 2018.

Google Chrome

When internet users of Chrome connect to websites that use Symantec certificate, they will get a display error message.

Google Chrome‘s notification reads:

Your connection is not private.
Attackers might be trying to steal your information from [SITE] (for example, messages, passwords, or credit cards).
NET::ERR_CERT_SYMANTEC_LEG

Mozilla Firefox

Plans are currently on the ground for Mozilla to distrust the Symantec Root Certificate in Firefox 63.

Different notifications will be displayed by Mozilla Firefox such as these ones:

Warning: Potential Security Risk Ahead

A potential security threat has been detected by Firefox and did not continue to [SITE]. If you visit this site, attackers could try to steal information from your passwords, emails, or credit card details.

Organizations, server administrators and websites organizations have until October to deal with the Symantec certificate issue. It is necessary for Symantec certificate to be replaced with a trusted certificate issued by a Certification Authority.

For more information on browser privacy and security, check out the guides below:

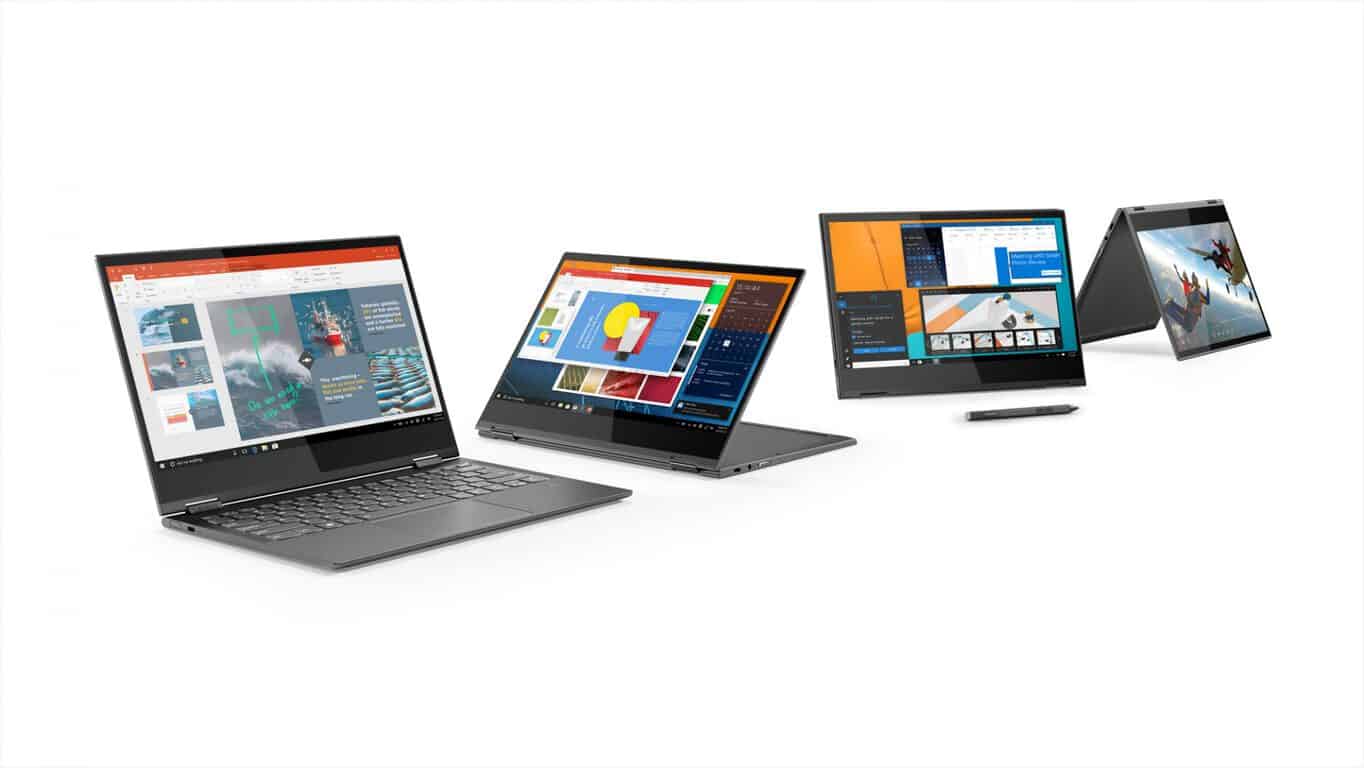
Lenovo goes all in on Windows on ARM with new Snapdragon 850 powered Yoga C630

When Microsoft announced the Always Connected PC (also known by us tech pundits as Windows 10 on ARM) Lenovo came on board the initiative with their Miix 630 convertible. That device received some mixed reviews, but many have also since complained about the overall instability and limitations of Windows 10 on ARM processors. Well, one year later, Lenovo is back at it again and is going all in on Windows 10 on ARM with the new Snapdragon 850 powered Yoga C630 all-in-one convertible.

The Snapdragon 850 was announced about three months ago at Computex in Taiwan. Compared to the last generation Snapdragon 835, this 8-core processor comes with 30 percent increase in performance, three times the AI performance, and a 20 percent increase in battery life and Gigabit LTE speed. This all will now get ported over into the Yoga C630 convertible— the industry’s first Windows 10 device to be powered by the Snapdragon 850. Specs are listed below.

  • Processor: Qualcomm Snapdragon 850
  • OS: Windows 10S
  • Dimension: 12.08” x 8.52” x 0.49” (306.8 x 216.9 x 12.5 mm)
  • Weight: Starting at 2.6lbs (1.2 kg)
  • Display: 13.3” FHD (1920 x 1080) IPS Touchscreen
  • Graphics: Qualcomm Adreno 630
  • Memory: 4 GB LPDDR4X | 8 GB LPDDR4X
  • Storage: 256 GB UFC 2.1| 128 GB UFC 2.1
  • Audio: Stereo speaker
  • Battery: Up to 25+ Hours Based on local video playback
  • IO ports: 2 x USB Type-C | Left port supports: USB 3.0/PD | Right port supports: USB 3.0/PD/DisplayPort| Audio Jack, 1 | Sim card holder
  • Features: Fanless design, Optional Lenovo Active Pen, Integrated FingerPrint Reader
Lenovo C630

All in all, this device is pretty promising, and it likely shows that Windows 10 on ARM is here to stay and give Intel a run for its money. Not only does the device look appealing with a thin and light soft touch polished metal design, but it also comes packed with plenty of power under the hood. Users should be able to enjoy the bump in processing power and battery life, and the convenience of being always connected with 4G LTE.

Office 365 Home and Personal about to get better with new device limits

If you’re an Office 365 subscriber, you’re about to get a lot more out of your subscription. Indeed, Microsoft has just announced big changes for Office 365 Home and Personal, one of which involves an increase in the device limits (via ZDNet.)

The changes were initially noted in a post to the Microsoft Tech Community Blog. Microsoft details that starting on October 2nd, Office 365 Home and Personal subscribers will be able to install Office on an unlimited number of devices. Subscribers also can be signed into their accounts on up to five of those devices at the same time.

This is a big change over the current system where Home subscribers can install only on 10 devices across five users, and Personal subscribers on one device across PC, Mac, and Tablet. There is no word yet on if this will impact Office 365 commercial subscriptions.

Microsoft is also changing up Office 365 Home, so that starting on October 2, the number of licenses will change from 5 to 6, with a Personal Office 365 subscription remaining at one license (but now across unlimited devices, signed into any 5 at a time). The price will still stay the same at $99.99 for Home and $69.99 for Personal, and you’ll get the same access to Word, Excel, PowerPoint, Outlook, and OneNote and 1 TB of OneDrive cloud storage.

To simplify account and subscription management, Microsoft is making it so that you can access your Office 365 subscription from the Microsoft Account home page. These changes will be rolling out automatically, so feel free to subscribe to Office 365 now if you’re not already up and running with the service. Office 365 Home retails for $99.99, Office 365 Personal for $69.99, and an Office Home and Student one-time purchase is $149.99.

EA delays Battlefield V launch by a month, new release date is Nov. 20

It looks like EA is pushing back the release of Battlefield V by a month to November 20, 2018. As noted by a MarketWatch post, EA is pushing some of its “net bookings” earnings from the Xbox One game to fiscal year 2020 instead of fiscal year 2019.

“Videogame companies use net bookings in lieu of net sales because it accounts for digital sales and in-store physical sales, among other things. EA is now expecting fiscal 2019 net bookings of $5.2 billion, down from prior guidance of $5.5 billion. About $115 million of that sum is driven by currency movements, which are also driving operating costs down. EA said it is backing its second-quarter operating guidance but is still evaluating the impact on fiscal year GAAP guidance. That information will be provided on the company’s next earnings call slated for Oct. 30. Shares were halted for the news, but have gained 22% in 2018, while the S&P 500 SPX, -0.23% has gained 9%.”

EA has not made an official comment on the reason why Battlefield V was delayed specifically. However, after looking at early pre-order numbers and receiving feedback from the Battlefield community, EA decided to move to the November release date. The move will help Battlefield V better compete with two other blockbuster games set to release in October 2018; Black Ops 4 and Red Dead Redemption 2.

Battlefield V is available for pre-order now, starting at $59.99 and will be released on November 20, 2018 on Xbox One.

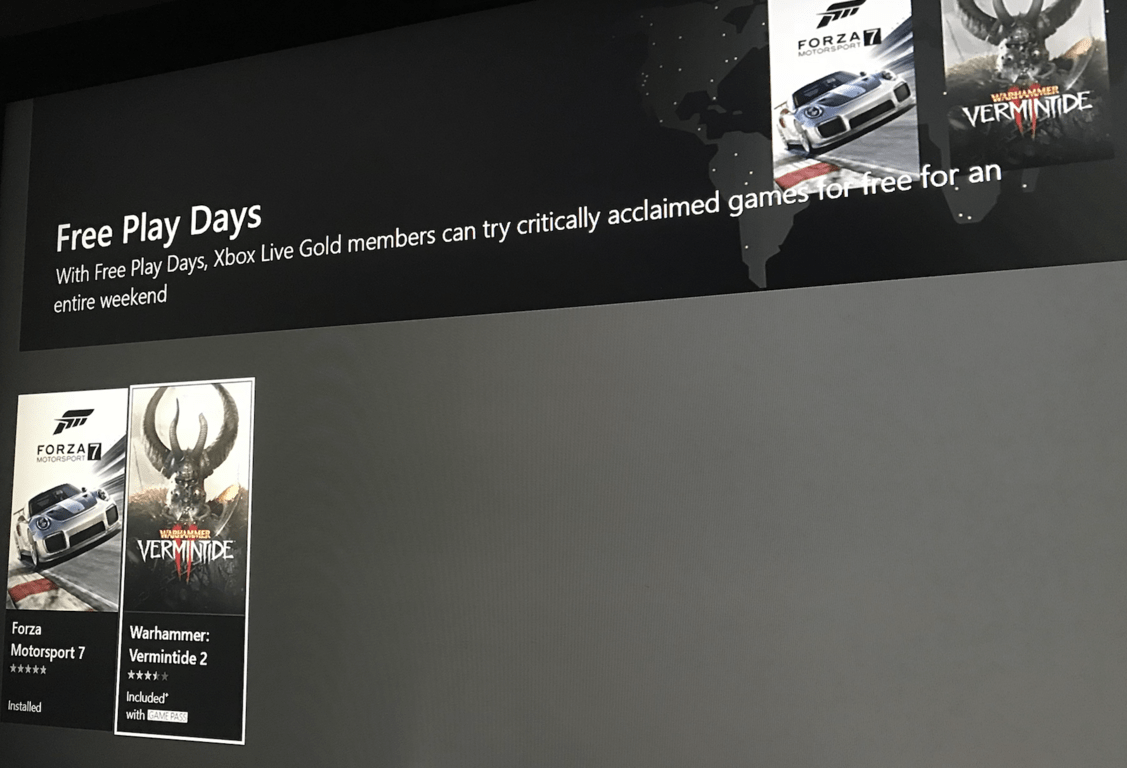
Forza Motorsport 7 and Warhammer: Vermintide II are free to play with Xbox Live Gold this weekend

Microsoft has just kicked off a new Free Play Days session for Xbox Live Gold members today, and for the first time ever Forza Motorsport 7 and Warhammer: Vermintide II will free too play through Sunday, September 2. Forza Motorsport 7 was released almost a year ago on Xbox and Windows 10, and it’s enhanced for the Xbox One X and also supports Xbox Play Anywhere.

As for Warhammer: Vermintide II, it was released on July 11 on the Xbox One and it’s currently free to play with Xbox Game Pass. Both games are currently on sale on the Microsoft Store for a limited time, with Forza Motorsport 7 Standard Edition being available for just $29.99.

In case you don’t have an active Xbox Live Gold subscription, we remind you can get 2 months of Xbox Live Gold for just $2 before the end of the month. Once you’re set up, you can start downloading both games on your Xbox One today and even try Forza Motorsport 7 on your Windows 10 PC, since that game also supports Xbox Play Anywhere.

Warhammer: Vermintide 2
Developer:
Fatshark
Price:
$29.99+


Deals With Gold, Spotlight, Publisher Sales have slashed Xbox One video game titles prices

There are three different promotional campaigns happening right now in the Microsoft Store for Xbox One and Xbox 360 video games.

The first campaign is the regular Deals With Gold sale for Xbox Live Gold Subscribers. Savings to look out for in the Deals With Gold titles are Aaero (now 60% off), Final Fantasy XV Royal Edition (60%), the Forza Horizon 3 Hot Wheels add-on (75%), Overwatch Legendary Edition (50%), and Soul Axiom (70%).

The second sale is the Spotlight Sale for all Xbox One owners. Deals to keep an eye on are Forza Motorsport 7 Standard Edition (40% off), R.B.I. Baseball 18 (30%), and FIFA 18 (80%).

The third sale is a Publisher Sale that sees a variety of titles discounted. Dead Rising 4 Deluxe Edition (40% off), Devil May Cry 4 Special Edition (70%), DmC Devil May Cry: Definitive Edition (67%), Marvel vs. Capcom: Infinite (60%), Resident Evil 6 (60%), Strider (80%), and Darksiders II on Xbox 360 (90%).

Are you planning to pick up any of these titles this month? Let us know in the comments below and then follow us on Twitter for more Xbox One news.


DmC Devil May Cry: Definitive Edition

How to Fix Surface Dial Driver Errors for Good

The Surface Dial is one of the most innovative Microsoft products in recent years. This puck-like immersive accessory is specially designed for the Surface Studio (and a handful of other eligible devices) to allow users a higher input level.

Of course, the device uses a wireless Bluetooth connection, and it’s rather simple to configure. However, the driver seems to be causing problems. Users reported various issues with the Surface Dial driver after a system update.

We enlisted some steps to overcome this hurdle, so check them out below. Hopefully, we’ll be able to fix it with some effort.

How to fix driver issues on Surface Dial?

1. Remove batteries from Surface Dial to reset it

Even though the driver error is present, physically resetting the Surface Dial is a good first troubleshooting step. After you’ve removed the batteries, you won’t need to re-pair the Surface Dial with your PC. The procedure is relatively simple and identical to that of some other consumer products that run on AAA batteries.

Follow these steps to restart your Surface Dial physically:

  1. Hold the Bluetooth button on the back of the Surface Dial until the light flashes three times.
  2. Open the battery compartment.
  3. Remove battery and wait for a few seconds. Put the battery back in but don’t put back the protective compartment.
  4. Restart your PC and make sure the Bluetooth stack is enabled.
  5. Hold the Bluetooth button again until the light flashes three times, and look for changes.

2. Delete pairing and pair Surface Dial with a PC again

Another step is to remove the pairing with your PC and pair two devices again afterward. This works for all Bluetooth-based devices, and Surface Dial is no exception. There might be a temporary stall, and re-assigning the device after unpairing should help you overcome it.

Follow these steps to unpair and pair Surface Dial with your PC:

  1. Make sure Surface Dial is On.
  2. Press Windows key + I to navigate to Settings.
  3. Choose Devices.surface dial driver error
  4. Under the Bluetooth & other devices section, enable Bluetooth.
  5. Delete Surface Dial from the list of paired devices.
  6. Now, press the Bluetooth button on the back of Surface Dial until the light flashes.
  7. On your PC, click the “Add Bluetooth or other devices” option.surface dial driver error
  8. Select Surface Dial from the list and pair the device with your PC.

3. Reinstall Surface Dial and Bluetooth drivers

Now, after we’ve dealt with the first two steps, let’s move to drivers. Even though drivers provided by Windows Update work most of the time, one update might break it all.

For that reason, we suggest reinstalling Surface Dial’s drivers, which should hopefully address the problem we’re concerned with. In addition, reinstalling Bluetooth drivers isn’t a bad idea, as well. Faulty Bluetooth drivers can impact the overall usability of Surface Dial.

Here’s how to reinstall Surface Dial and Bluetooth drivers in Windows 10:

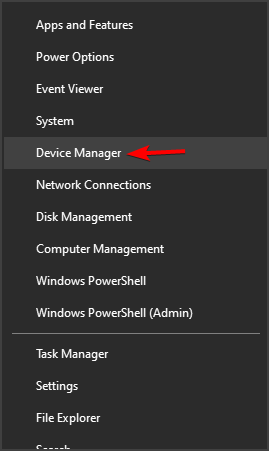
  1. Right-click Start and open Device Manager.
  2. Navigate to Bluetooth and expand that section.
  3. Right-click on your Bluetooth stack and choose Update driver. If there are no available updates, uninstall the device.surface dial driver error
  4. Do the same for Surface Dial (it should be under the Mice and other pointing devices).
  5. Restart your PC and wait until the drivers install.

Check to see if you have the most recent versions of your Bluetooth drivers all the time when you encounter such issues. There are third-party solutions, such as Fortect Driver Updater, that can perform this automatically for you.

To begin, download and install a driver downloader on your computer. In the utility’s main menu, scan for new updates. The program identifies your Surface Dial and searches its database for essential Bluetooth driver updates.

After identifying the driver, the tool will supply your PC with the most recent version. This is the quickest and easiest method for updating your Bluetooth faulty drivers when you don’t have a thorough understanding of how to do this.

4. Update Windows 10

The majority of Surface Dial problems started after the Windows Update, which broke the device drivers. Besides the Surface Dial driver, many other devices were affected by this sudden occurrence. However, allegedly, Microsoft provided fixes via Windows Update, so some later updates cleaned up the mess their priors made.

Follow these steps to update Windows 10 manually:

  1. Open Settings.
  2. Choose Update & Security.
  3. Under the Windows Updates, click Check for updates.surface dial driver error
  4. Install all updates and restart your PC.

5. Roll back to the previous version of Windows 10

Finally, if none of the steps helped you address the driver error on Surface Dial, we suggest rolling back your system to the previous version. This recovery option is the built-in part of Windows 10 and allows you to get back to an earlier release. Until, at least, they polish the latest one.

Here’s how to roll back your Windows 10 PC to an older major update:

  1. Press Windows key + I to open the Settings app.
  2. Choose Update & Security section.
  3. Select the Recovery from the left pane.
  4. Under the “Get back to the previous version of Windows 10” option, click Get started.surface dial driver error

If that doesn’t help, we strongly advise you to contact Microsoft Support and file a complaint. Even though the problem isn’t related to hardware, they’re still responsible for providing you with a resolution.

The Surface Dial has too many uses that you need to explore, so it must work.

With that said, we can conclude this article. In case you have any further questions or possibly an alternative way to resolve the issue at hand, do tell us. The comments section is just below.

How to enable Skype end-to-end encryption on PC

Just like Telegram, WhatsApp, and other messaging apps which provide end-to-end encryption for its users, Skype is naming the new feature Private conversations. It applies to, files, messages, photos and audio/video calls, though there are some limitations.

The encryption feature is entirely opt-in, for it to work, your correspondent will have to get Skype’s latest version. Also, the accessibility of encrypted conversations is one device at a time, which is not convenient for users.

If all conversations on the devices had the end-to-end Skype encryption like Apple’s iMessage, it would have been much better. However, this new encryption development by Skype is much preferable than no encryption at all.

Peter Skillman, Skype’s Director of Design wrote this on his Twitter page:

Private conversations! Enable you Skype users to have end-to-end Encrypted chats 4 text messages, files, and photos + calls w/ high security. Private conversations can only be accessed at one device at a time. Select the new chat button and then select “New Private Conversation”

How to use end-to-end Skype encryption

To start a new Private conversation, you can either click on Skype’s “New chat” button or by opening one of your Skype contacts profile and select “Start private conversation” (for this chat to have an end-to-end encryption, your contact will need to have updated his Skype app).

In addition to end-to-end encrypted conversations, Skype has also begun testing read receipts with Insiders of Skype. This feature is also going to be an opt-in feature, and it should be available in a few weeks’ time.

For more information on Skype’s latest feature, follow Peter Skillman, Director of Design for Skype and Outlook on Twitter to get fresh news and information about the new cross-platform Skype app.

To enjoy this end-to-end encrypted chats on Skype app, download the latest Skype version.

RELATED STORIES TO CHECK OUT:

Heading to PAX West in Seattle? Here’s what Xbox has planned for you

The PAX West gaming culture festival is coming back to the Washington State Convention Center in Seattle, Washington this week, and Microsoft will be here in full force with two separate booths for Xbox and Mixer. At the Xbox booth, attendees will be able to check out a cool lineup of upcoming games including The Division 2, Shadow of the Tomb Raider, Devil May Cry 5, NBA 2k19, as well the Xbox/Windows 10 exclusive Forza Horizon 4.

The Xbox team will also hold a Tomb Raider-themed scavenger hunt, bring an Xbox Games Pass vending machine an even have some exclusive Xbox Official Gear up for sale. You may also want to check out the PUBG Bus designed by West Coast Customs, and get the chance to win it or a variety of other prizes.

On the Mixer booth, you’ll be able to meet with some of the most popular Mixer streamers and partners, and win some exclusive swag by winning Fortnite matches on the HypeZone LIVE stage. Don’t worry, all the festivities including two panels about the Xbox Adaptative Controller and Mixer community building will be live streamed on Mixer.com/HypeZoneLIVE and Mixer.com/Mixer.


Pax West will kick off on Friday, August 31 and last through September 3, and you can still get Monday Only badges on the official website. Make sure to follow Xbox and Mixer on Twitter if you don’t want miss any of the action.

The Xbox Forums have now completely migrated to the Microsoft Community forums

Over the past few months, we’ve documented the slow move of the Xbox Forums over to the Microsoft Community forums. Today, on August 29, things have finally become official, and the move is now complete.

Microsoft acknowledges the official forums move over in a blog post, mentioning that it is a result of Xbox continuing to grow and evolve. The company also reminds users that the Microsoft Community forums feature the same ability to ask Xbox questions, chat about games, and get help. Additionally, there is the bonus of checking out the other communities about Windows, Office, Skype, and more.

For those new to the Microsoft Community Forums, you can still earn XP while using the Xbox area. Upvotes will give you 10 XP, a verified forums post 75 XP, replies 10 to 25 XP, and a gaming guide 75XP.  Microsoft also provides the following tricks and tips:

  • Make sure to sign in using your Microsoft account to the Microsoft Community forums to create new threads and replies, and you’ll even show up as an “Ambassador” when you do.
  • To get to Xbox Forums, navigate to “Categories” at the top left and scroll down to select “Xbox.”
  • Now, Microsoft Community forums has a lot of threads, so to browse different thread options, make sure to use the filter boxes to hone down your search options. There is even advanced filters to narrow down your search even more.
  • The first threads you see under “Featured” are sticky threads that apply to the hierarchy level you choose in the category, topic, and/or topic filter options.
  • Want to start a discussion or ask a question? No problem. Make sure to navigate to “Ask a question” at the top right-hand corner of the webpage and ask away.
  • When you start a new thread, you decide where it appears in the hierarchy and whether it’s a discussion tread or a question. Plus, you have the option to be notified when someone responds to your post.

You should also be reminded that the Xbox Forums for Ambassadors has also migrated over. You can find it by navigating to the “Private Categories drop-down and selecting “Ambassadors.” Once there, you will see a “Topic” drop down. Feel free to head to the Microsoft Community Forums now and check it out.

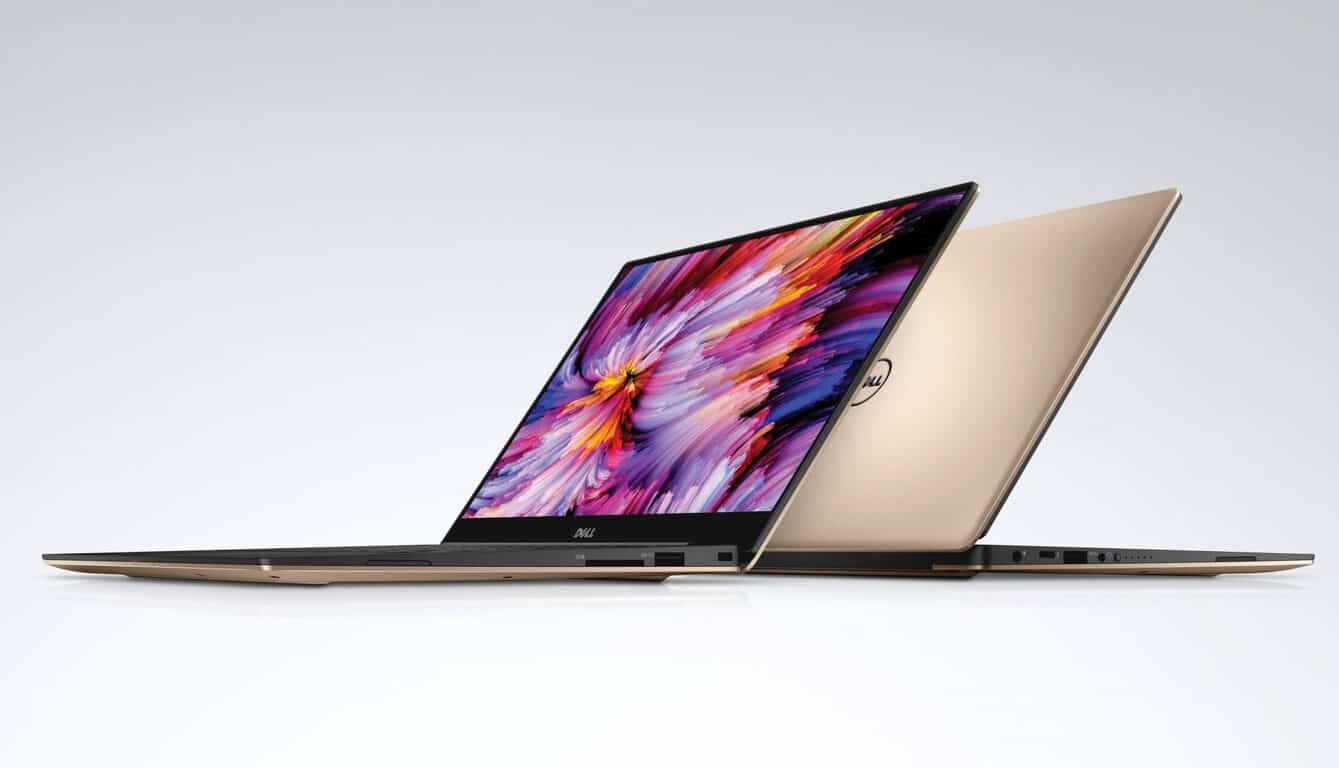
Dell updates their XPS 13 line of computers with new processors

When it comes to the laptop upgrades, it’s not always about thinning the chassis or widening the viewable screen ration. Sometimes, updating a laptop can be as simple and useful as just upgrading the processor powering an already well made device, and that’s just what Dell has done.

Dell’s widely popular XPS 13 2-in-1 device has just been updated with Intel’s latest 8th Gen Core i5 and i7 processors. Dell’s super portable laptop has just been juiced with processor that improves responsiveness at lower power consumption. The new 8th Gen processors also do well in performance bursts by making use of Dynamic Power Mode in Windows 10.

Fortunately, leaving the body relatively unchanged allows Dell to provide the updated XPS 13 2-in-1’s at an affordable price for consumers.

Dell has announced an entire line up of upgraded devices and for more information keep it locked here.

Bid now on this custom Shadow of the Tomb Raider Xbox One X to benefit charity

We’ve seen Microsoft come up with some cool custom Xbox One systems before, and now another one has just entered the picture. Indeed, you can now bid on a custom Shadow of the Tomb Raider Xbox One X to benefit charity.

Bids for the custom console are now open on eBay, with the leading price currently at $1,125. The console is decorated with custom Tomb Raider inspired designs and includes a matching Xbox Wireless Controller and also a digital download of Shadow of the Tomb Raider.

Proceeds will benefit Best Friends Animal Society, which is a nationwide animal rescue and advocacy organization, with spay neuter, TNR (trap neuter return), pet adoption and no-kill programs. There are also several other items which you can bid on, including three Xbox One X 1TB Shadow of the Tomb Raider bundles which are autographed by Camilla Luddington, the actress who plays Lara Croft.

The price might be out of reach for the average gamer, but it is still nice to see Microsoft and Square Enix teaming up to help benefit charity. Everyone else with emptier pockets might just have to wait until September 14, when the Shadow of the Tomb Raider game and the Shadow of the Tomb Raider Xbox One X bundles hits store shelves.

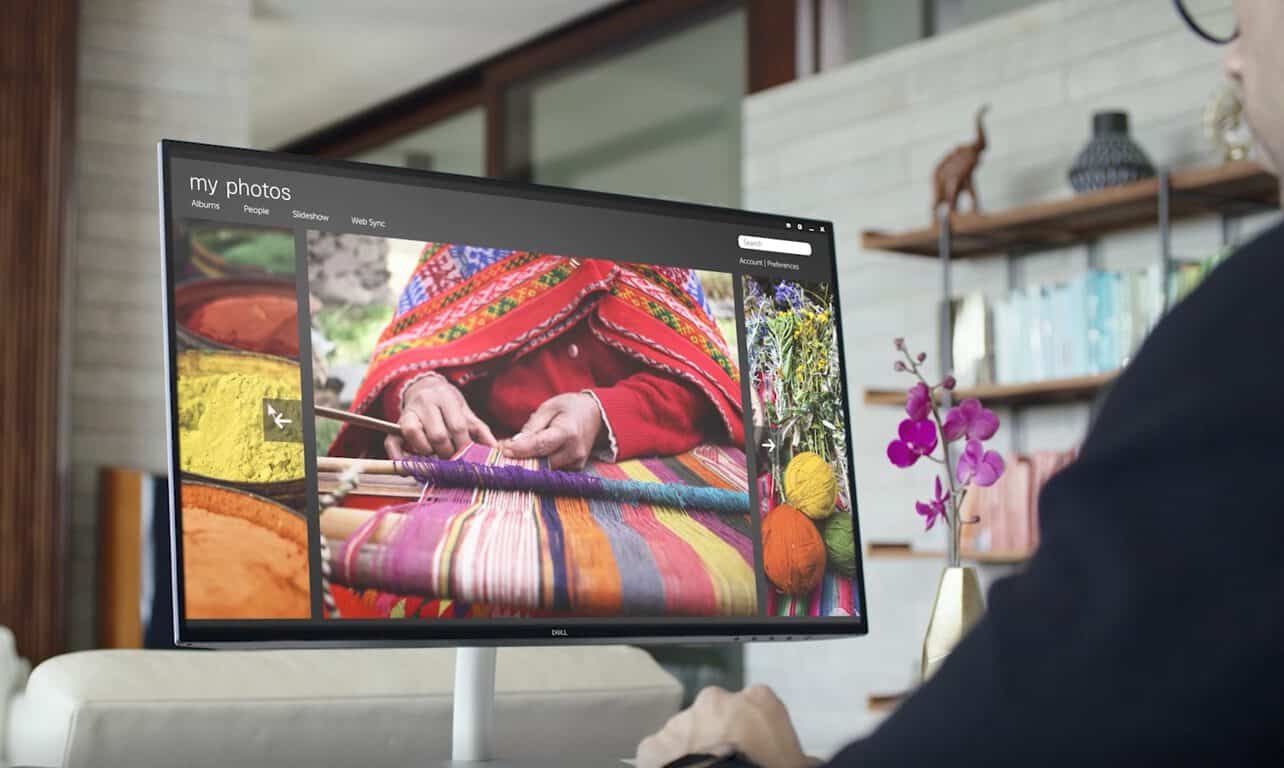
Dell 27 USB-C Ultrathin monitor announced, looks very cool

The Dell 27 USB-C Ultrathin monitor is the world’s brightest 27-inch USB-C ultrathin monitor. With 600 nits in peak brightness, the Dell 27 USB-C Ultrathin (S2719DC) is a premium HDR monitor with VESA-certified DisplayHDR 600 and integrated with Corning Iris™ Glass Light-Guide Plate (LGP) technology. Take a look at the monitor in action in this video.

As noted in a post on the Windows Blog, the monitor has a USB-C connection that can transfer video, data, and power, all from a single port. Dell’s cutting edge design is amazingly thin, just 5.5mm at its thinnest point. The Dell 27 USB-C Ultrathin monitor allows you to enjoy crisp images with Quad HD resolution (2560×1440) and Dell’s InfinityEdge display allows a wide viewing angle enabled by In-Plane Switching technology.

Microsoft, Windows 10, USB-C
The Dell 27 USB-C Ultrathin monitor back

The Dell 27 USB-C Ultrathin monitor shows you more than 99 percent sRGB and 90 percent DCI-P3 color coverage too. Other bonuses of the Dell 27 USB-C Ultrathin monitor include:

    • Connect your laptop to the monitor and charge up to 45W from a single source.
    • Quickly power up your devices with one of the USB downstream ports. And plug in to all your accessories on the other.
    • This TUV Certified monitor has a flicker-free screen with ComfortView, a feature that filters out harmful blue light emissions.

The Dell 27 USB-C Ultrathin monitor is the latest of new announcements made by Dell, Acer, and Intel, on new mixed-reality headsets, laptops, and more unveiled at IFA in Berlin this week.

Windows 10/11 system time jumps backwards [FIX]

Many Windows 10 users have encountered a weird system time issue recently where it set itself to the past at random intervals. Users report there is no particular warning prior to the system time change. Fortunately, one resourceful user managed to pinpoint the culprit to this issue and came up with a quick fix.

System time jumps back on Windows 10 PCs, how to fix it?

If system time jumps back on your PC, that can be an annoying problem. Speaking of this issue, here are some similar problems that users reported:

  • Computer clock going backwards – This is a relatively common problem that can occur, and if you encounter it, be sure to reregister Windows Time services.
  • Computer clock keeps jumping ahead – This issue can occur if your clock isn’t properly synchronized. Simply adjust your date and time and check if that solves the problem.
  • Computer clock always ahead – If your clock is ahead, it’s possible that your time zone isn’t correct. Check your settings and make sure that you’re using the correct time zone.
  • My computer date and time keeps resetting – This problem can occur due to third-party applications. If you have any application that affects your clock, be sure to remove it.
  • System time wrong – Sometimes your system time can be wrong due to your registry. However, you can fix that issue simply by making a couple of changes in the registry.
  • System time keeps changing, resetting – In some cases, your motherboard battery can cause this issue to appear, and in order to fix it, you might need to replace it.

Solution 1 – Restart your PC

Sometimes the simplest issue is the best, and if your system time jumps back, you might be able to fix the problem simply by restarting your PC.

Several users reported that restarting their PC temporarily fixed the problem for them, so you should definitely try that out. Keep in mind that this is just a temporary solution, and it might not permanently fix your problem.


Solution 2 – Reregister Windows Time services

According to users, this problem can occur due to issues with Windows Time service. Sometimes this service might have some problems, and in order to fix them, it’s advised to reregister the service. This is relatively simple to do, and you can do it by following these steps:

  1. Press Windows Key + X to open Win + X menu. Now choose Command Prompt (Admin) or PowerShell (Admin) from the list of results.
    Computer clock going backwards
  2. Now run the following commands:
  • Net stop w32time
  • W32tm /unregister
  • W32tm /register
  • W32tm /start
  • W32tm /resync /force

Solution 3 – Modify your registry

According to users, sometimes this problem can be caused by values in your registry. If your system time jumps back, you might be able to fix this problem simply by making a couple of changes in your registry. To do that, follow these steps:

  1. Press Windows Key + R and enter regedit. Press Enter and click OK.
    Computer clock going backwards
  2. Go to HKEY_LOCAL_MACHINESYSTEMCurrentControlSetServicesw32timeConfig and set UtilizeSslTimeData to 0 (zero).

After making these changes to the registry, your issue should be completely resolved.


Solution 4 – Remove problematic applications

According to users, sometimes third-party applications can interfere with your system and cause certain issues. If your system time jumps back, the issue could be a third-party application.

Several users reported that PC Auto Shutdown software caused this issue, so if you’re using this application, be sure to remove it. In fact, any other third-party application that has features related to time adjustment can cause this problem to appear.

To fix the issue, you should remove the problematic application completely. There are several ways to do that, but the most effective one is to use an uninstaller software. In case you’re not familiar, uninstaller software will remove the desired application and all its files and registry entries.

By using the uninstaller software, you’ll ensure that the application is completely removed from your PC. There are many great uninstaller applications, but one of the simplest to use is IOBit Uninstaller, so be sure to try it out.


Solution 5 – Make sure that Windows Time service is properly running

If your system time jumps back, the problem might one of your services. Windows Time service is in charge of your clock, and if there’s an issue with this service, your time might not be correct. However, you can fix the problem simply by making a few changes to this service.

To do that, follow these steps:

  1. Press Windows Key + R and enter services.msc. Now press Enter or click OK.
    Computer clock keeps jumping ahead
  2. Now locate Windows Time service and double-click it to open its properties.
    Computer clock always ahead
  3. Set Startup type to Automatic and then click Apply and OK to save changes.
    My computer date and time keeps resetting

After doing that, restart your PC and the issue with the system time should be resolved.


Solution 6 – Adjust your clock and time zone

If your system time jumps back, you might be able to temporarily fix this problem simply by readjusting your time and date. To do that, follow these steps:

  1. Right-click the clock in the bottom right corner and select Adjust date/time from the context menu.
    System time wrong
  2. Disable Set time automatically option. Now wait for a few seconds and enable this option again.
    System time keeps changing

This should automatically update your time and date. Alternatively, you can click the Change button and change the time and date on your own. In addition, make sure that your time zone is correct as well.

In most cases this is just a temporary solution, but it should somewhat help with this problem.


Solution 7 – Change the time synchronization server

Sometimes system time jumps back on your PC because the time synchronization server might not be working properly. If you’re having this issue, we strongly advise you to switch to a different time server.

This is pretty simple to do, and you can do it by following these steps:

  1. Press Windows Key + S and enter control panel. Select Control Panel from the list of results.
    Computer clock keeps jumping ahead
  2. When the Control Panel opens, go to Date and Time section.
    Computer clock always ahead
  3. Date and Time window will now appear. Go to the Internet Time tab and click Change settings button.
    My computer date and time keeps resetting
  4. Select a different server from the list and click Update now button. Now click OK to save changes.
    System time wrong

After selecting a different server, check if the problem is resolved.


Solution 8 – Check your battery

According to users, some of the most common causes for incorrect time on your PC is your motherboard battery. If you don’t know, your PC has a built-in battery that allows BIOS to save settings and keep the clock running while your PC is turned off.

However, your battery can get drained or damaged after a while, and if that’s the case, your PC won’t be able to keep track of time anymore, and you’ll end up with this kind of problem. However, you can check if your battery is the problem with ease.

To do that, simply enter BIOS and adjust your time and date from there. Now save changes and boot to Windows. If your date and time are still correct, turn off your PC and disconnect it from the power outlet.

Leave your PC like that for an hour or two. Better yet, leave it disconnected from the power outlet over the night. After leaving the PC unplugged for a couple of hours, turn it back on again. If the issue reappears, it’s rather likely that your battery is faulty.

To fix the problem, you’ll need to purchase a new motherboard battery and replace the faulty one. If you don’t know how to do that, or if your PC is under warranty, it might be best to contact the official repair center.

Incorrect system time can be a big problem, but we hope that you managed to fix this issue on your PC by using one of our solutions.


RELATED STORIES YOU NEED TO CHECK OUT:

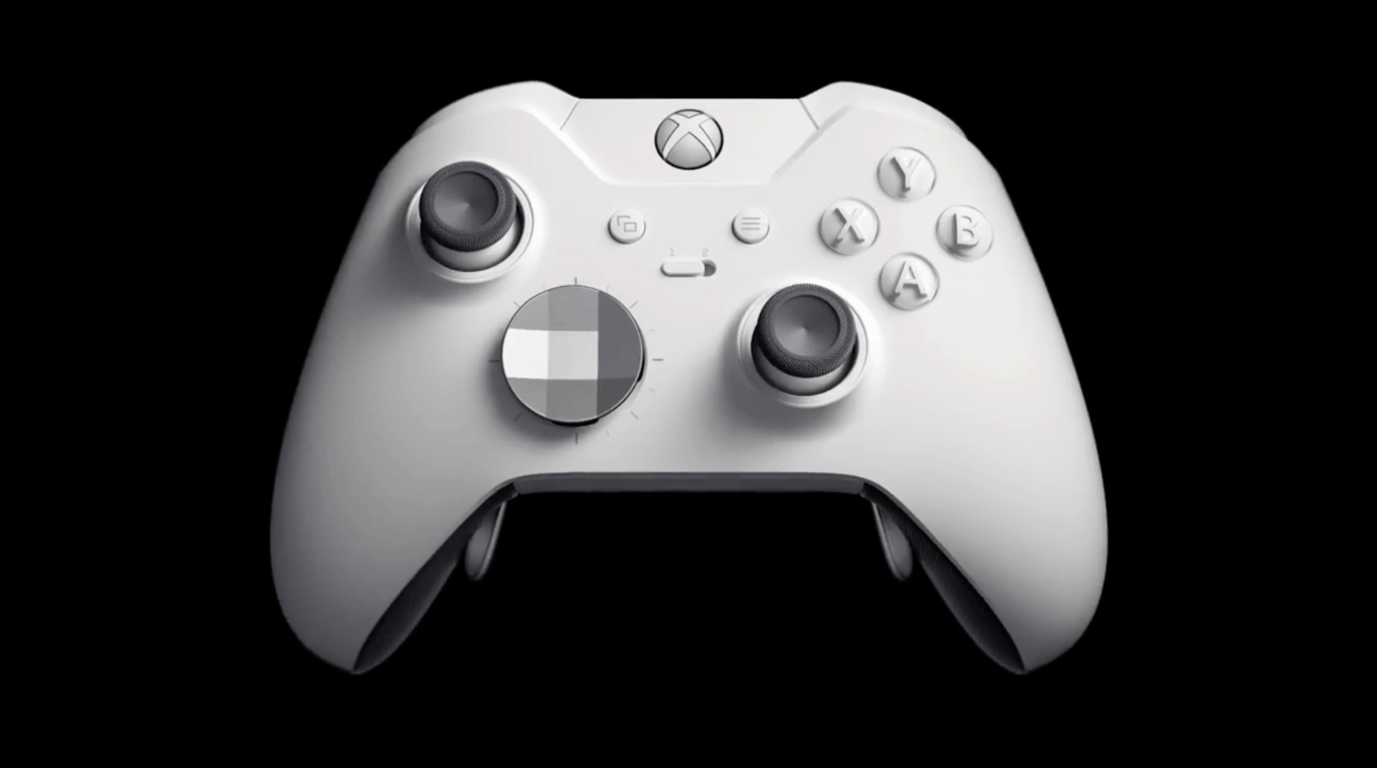
Microsoft rolls out a white Xbox Elite Controller

Even though Xbox fans can now create customized versions of the basic Xbox One controller with Microsoft’s Xbox Design Lab, the company has yet to offer custom design options for its premium Xbox Elite Controller. Until now, the $149 controller was only available in black, but Microsoft is launching today a White Special Edition that should go along well with a white Xbox One S.

There is really nothing special about this new white Xbox Elite controller, except its color. Microsoft has kept the same swappable components (thumbsticks, D-pads, and paddles), Hair Trigger Locks, Rubberized diamond grip and button mapping options through the Xbox Accessory app. And to be clear, this white Xbox Elite Controller uses the same Xbox wireless technology as the original model, and there’s no Bluetooth support like on the new standard Xbox controllers.

You can pre-order the $149.99 white Xbox Elite controller at the Microsoft Store today, and it will start shipping worldwide on October 16. If you always wanted to have a white Xbox One X, the company also announced an Xbox One X Robot White Special Edition Fallout 76 bundle today, which will be available worldwide starting November 14.

Xbox introduces three new “idea drives,” wants to hear from you

It was just four months ago that Microsoft opted to close the Xbox Feedback website in favor of a new Xbox Ideas website. The company then later launched “idea drives” as a new three-step process for consumers to submit specific Xbox themed ideas and features. Today team Xbox is following up by introducing three new “idea drives,” noting that they want to hear from you.

They’re themed towards three key Xbox features— Gamer Profile, Xbox Game Pass, and Family Settings and Child Accounts. Team Xbox wants to know how you can improve these three areas, be it highlighting achievements, finding new Xbox Game Pass titles, or managing family permissions. You can learn more and submit your own thoughts by checking out the Xbox Ideas Website.

As a reminder, once feedback is collected, it enters a voting phase, followed by the completion phase where Microsoft reviews requests for new features. This shows that the Xbox team is always listening to your wants and needs, so be sure to head to Xbox Ideas today if you’ve got a burning Xbox-themed suggestion or idea.

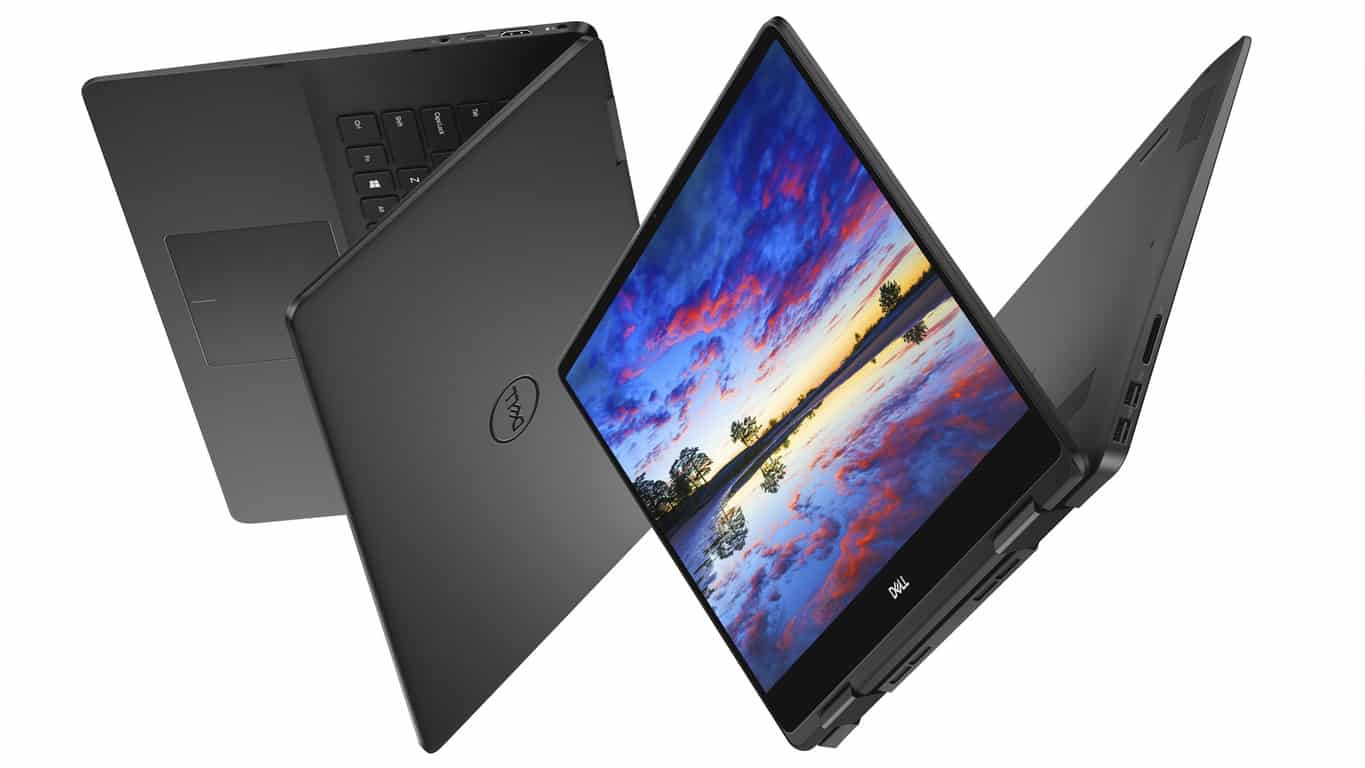
Dell announces new Inspiron 2-in-1 PCs with new Intel chips and Alexa support

Dell has announced a several new devices today which will ship with Intel’s new 8th Gen Intel Core processors.

The Inspiron 7000 2-in-1 devices (see above image) will come in 13, 15, and 17-inch sizes, will use the new U Series processor, and will come with option 4K UHD screens. The 13 and 15-inch models will feature a webcam with Temporal Noise Reduction which, according to Dell’s press release, will make it the “first PC-integrated USB camera to use this technology.” The 15 and 17-inch 7000 models will also make available optional NVIDIA GeForce MX150 and Intel OptaneTM Memory to boost graphics and memory respectively.

The Dell’s Inspiron 7000 2-in-1s will ship on October 2nd being “Alexa-ready” however Amazon’s virtual assistant isn’t expected to launch until a later date. The 13-inch model will start at $879.99, while the 15-inch will begin at $849.99, and the 17-inch at $1,099.99.

Inspiron 14 5000 2-in-1

The Inspiron 14 5000 2-in-1, which will be available in 5481 and 5482 models, will use the new U Series processor as well. The 5482 model will feature a USB Type-C port with a NVIDIA GeForce MX130 discrete graphics card being an optional extra. The 5481 Inspiron 14 5000 model will include a “full-size HDMI port, a full-size SD card reader, two USB 3.1 Generation 1 ports, one USB 2.0 port.”

Dell’s Inspiron 14 5000 2-in-1s are expected to launch on October 2nd this year with the 5482 model starting at $599.99 while the 5481 will be slightly cheaper at $459.99.

Do any of these new computers interest you? Let us know which ones in the comments below and then follow us on Twitter for more tech news.

Intel reveals 8th Gen Intel Core processors with Gigabit Wi-Fi speeds

Earlier today, Intel formally revealed their new 8th Gen Intel Core U-series and Y-series processors. Both chips are designed for 2-in-1 devices and light laptops and enable Gigabit Wi-Fi internet speeds which are described by Intel as being up to “12-times faster” than normal. The U-series chip also provides faster LTE speeds while both are said to offer processing speeds twice that of the average five year old computer.

“The new 8th Gen Intel Core processors extend once again our leadership in delivering exceptional performance,” Intel’s Christ Walker said in a press release. “Now with Gigabit Wi-Fi, we’ve enabled faster PC connectivity, added more intuitive voice experiences and enabled longer battery life needed for the next wave of mobile computing.”

The new U-series chip is designed to support “multiple voice services” with both Amazon’s Alexa and Microsoft’s Cortana being mentioned by name. It will also enable Dolby Vision HDR and Dolby Atmos functionality on compatible devices. The Y-series on the other hand is geared more towards improved touch and stylus functionality.

Devices featuring both processors will be available this fall according to Intel.

How to fix IntcOED errors in Windows 10/11

Intel Smart Sound Technology OSD driver is one of the most prominent reasons for system sound issues on so many Windows 10 laptops. It’s easily recognizable since it often causes sound issues and, eventually, even BSODs. Users who experienced these have found that the error is identified as “IntcOED”. Which, of course, points in the Intel Smart Sound Technology driver’s direction.

We provided a few solutions, hoping they’ll help you address the issue at hand. Start from the beginning and move onwards through the list.

How to fix “IntcOED” critical system error in Windows 10

  1. Run Sound Troubleshooter
  2. Update drivers
  3. Run SFC
  4. Try with DISM
  5. Disable onboard graphics and Intel Smart Sound
  6. Update BIOS
  7. Start the system in a clean boot
  8. Update Windows
  9. Reset your PC to factory settings
  10. Reinstall Windows 10

1. Run Sound Troubleshooter

Even though the possible instigator is uncertain, this is most certainly the Intel Smart Sound issue. The error appears mostly due to the failed integration of the Intel Smart Sound driver in Windows 10. And, since we already know how Windows 10 has issues with drivers, especially with some older hardware.

The first step you can take is to allow Windows 10 to fix the problem through the built-in troubleshooting tool. If you’re missing the sound, the obvious step is to run the Audio Troubleshooter. This might be a long stretch, taking into consideration how serious is the error at hand. But, it won’t cost you anything to give it a try.

Here’s how to run Play Audio Troubleshooter in Windows 10:

  1. Right-click on the Start and open Settings.
  2. Choose Update & Security.intcoed error
  3. Select Troubleshoot from the left pane.
  4. Expand the “Playing Audio” Troubleshooter.
  5. Click on the “Run the troubleshooter” button.intcoed error

2. Update drivers

In regular circumstances, this step should resolve the “IntcOED” error. Drivers are, as we already said, are the main reason for this more than unwelcome occurrence. Especially if you’ve upgraded to Windows 10 over Windows 7.

The official support for some devices is discontinued. But, this doesn’t mean that you won’t be able to get a fully functional driver. The trick is in avoiding Windows Update-provided drivers.

Follow these steps to install Intel Sound driver from the official source:

  1. Right-click on the Start button and open Device Manager.
  2. Expand the “Sound, video and game controllers” section.
  3. Right-click on Intel Smart Sound device and choose Uninstall device from the contextual menu.intcoed error
  4. Check the “Delete the driver software for this device” box.
  5. Download Inter Driver Update Assistant, here, and install it.
  6. Run the client and update all drivers.
  7. Restart your PC and look for changes.

Alternatively, you can use dedicated software. It will remove the risk of permanent damage caused by faulty driver installs.

A dedicated driver updater will scan find the perfect match for your specific hardware and install it to your PC.

The tool can also detect if you have any damaged or missing drivers and fix them as well. You can set it up to keep your drivers in check on a regular basis.

⇒ Get Fortect Driver Updater

3. Run SFC

Now, if the problem is still present even after you’ve set the driver straight, a possible system corruption might be at hand. When this happens, we suggest running the built-in utility via Command Prompt. This tool checks for potential corruption of system files and fixes them accordingly.

Follow these steps to run SFC in Windows 10:

  1. In the Windows Search bar, type cmd. Right-click click on Command Prompt and run it as admin.
  2. In the command-line, type sfc/scannow and press Enter.intcoed error
  3. If the SFC tool hasn’t found anything suspicious, don’t close the command-line.

4. Try with DISM

If SFC fails to find system errors, the Deployment Image Servicing and Management tool should help. This tool uses all available means to fix system errors. And its, like System File Checker, the built-in utility you can run through the elevated command line. It uses Windows Update to replace all files, so it takes fixing system errors one step further.

Here’s how to run DISM in Windows 10:

  1. In the command line, type the following commands and press Enter after each:
    • DISM /Online /Cleanup-Image /CheckHealthintcoed error
    • DISM/Online/Cleanup-Image/RestoreHealth
  2. Wait until the tool locates and resolves system errors. It might take some time.

5. Disable onboard graphics and Intel Smart Sound

Now, this problem appears almost exclusively on dual-GPU configurations where Intel is providing the onboard integrated graphics and sound control. However, the collision of drivers might create lots of issues.

For that reason, we suggest sticking to dedicated graphics (ATI or Nvidia) and Realtek HD Audio for the time being.

If you’re not sure how to disable the dedicated GPU on your dual-GPU laptop or PC, follow the steps we provided below:

  1. Open Device Manager.
  2. Expand the Display adapters section.
  3. Disable integrated onboard Intel graphics.
  4. Restart your PC and look for changes.

6. Update BIOS

Some users who have reappearing issues with IntcOED on Windows 10, resolved the issue by flashing the BIOS. Now, with the transition to a newer OS, you should always update your BIOS.

Just, a common user will rarely deal with the BIOS flashing, especially if there’s (and there is) a chance to brick your computer. We still suggest looking up your device and updating BIOS.

The procedure might differ for different manufacturers, as some offer updates in the BIOS/UEFI settings menu while others require special third-party tools to apply updates.

On the other hand, if the error possibly started after flashing BIOS, you should navigate to BIOS/UEFI settings and restore them to default values. This seemingly addressed the problem for more than a few users.

7. Start the system in a clean boot

Besides the obvious driver issues, there might be a third-party application that conflicts with Intel Smart Sound. This list is long, and we can’t say with certainty what exact program won’t work when combined with the aforementioned device. That’s why you can try a Clean Boot, and look for changes.

Here’s how to start Windows 10 in a Clean Boot:

  1. In the Windows Search bar, type msconfig and open System Configuration.
  2. Under the Services tab, check the “Hide all Microsoft services” box.
  3. Click “Disable all” to disable all active third-party services.intcoed error
  4. Now, select the Startup tab and go to Task Manager.
  5. Prevent all programs from starting with the system and confirm changes.
  6. Restart your PC.

8. Update Windows

Windows Updates and the way they’re administered in Windows 10 received a huge backlash from the user community.

However, this doesn’t mean that they’re not useful. Some users noticed that all initial system issues which appeared upon system installation were resolved with updates later on.

That’s a good reason to update your system. Even though they come in automatically, you should check for updates manually from time to time. Here’s how to do it:

  1. In the Windows Search bar, type Update and click “Check for updates“.intcoed error
  2. Click Check for updates in Settings.
  3. Wait until updates are installed and restart your PC.

9. Reset your PC to factory settings

If the error still appears, we can only suggest more radical measures. Before you move to a clean reinstallation of Windows 10, it’s worth trying some of the recovery options.

We suggest going for the “Reset this PC” option which allows you to start from scratch without losing your data. You can, of course, clear everything and start from a blank slate, but we keep that for the complete reinstallation.

Follow these steps to reset your system to factory values:

  1. In the Search bar, type Reset and open Reset this PC.
  2. Under the ‘Reset this PC‘ option, click Get started.intcoed error
  3. Choose to keep your files and apps and continue with the resetting process.

10. Reinstall Windows 10

Finally, if none of the previous steps worked out, clean reinstallation is the last resort. Of course, in this scenario, we suggest formatting your drive and starting from scratch.

In addition, restore your BIOS settings to default values. Before you start the procedure, make sure to back up all your data on external media.

Follow the steps from this article to install Windows 10 clean. After that, make sure to navigate to the official OEM site and install exclusively official drivers. In addition, as we’ve mentioned in step 2, use Intel Driver Update Assistant to get the latest Intel drivers for Windows 10.

With that said, we can conclude this article. In case you have some additional solutions to offer or something to ask, feel free to post those in the comments section below.

Windows Insider ISOs for build 17738, Windows Server 2019 17744 released

If you’re a developer or business-based Windows Insider, you’re up for some big treats all across the board. Microsoft has just pushed out new releases for various branches of the Insider program, and even a new SDK. Heading to Windows Insiders running Windows Server 2019 is build 17744, to developers SDK Preview build 17744, and to consumers, the ISO files for build 17738.
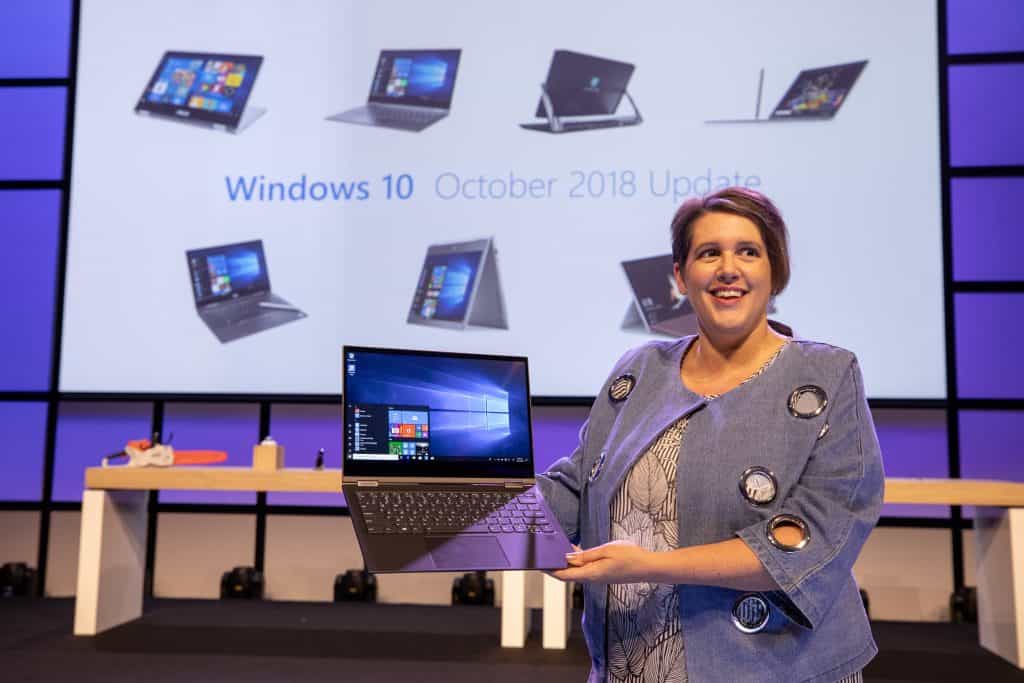
 

First off, there is the matter of the new ISO for build 17738. Microsoft originally promised these ISO files last week, and the company has now delivered. You can find the ISO files from the Advanced Preview section of the Windows Insider website. Keep in mind that build 17738 dropped on August 14, and doesn’t really come with any new features to note of. There are some bug fixes and known issues though, and you can read up on those here.

Next up, is Windows Server 2019 Insider Preview build 17744. Microsoft documents all the new technical features right here but takes note of several known issues and with transitioning systems running Server Code, and the incorrect format with the Italian language in the EULA. You can download this build from the Windows Server Insider Preview download page, or sign up here to get started.

Finally, there is Windows 10 SDK Preview Build 17744. As usual, this release doesn’t bring many new features and rather contains bug fixes. You can dive deeper into the changes over on the Windows Blog, but as usual, the SDK will only install on Windows 10 Insider Preview builds and with Visual Studio 2017 and greater. You can download from the developer section on Windows Insider website.

We have yet to hear teases about a new Fast Ring or Skip Ahead build this week, but we will be keeping our hopes up. September is right around the corner and development of Redstone 5 is likely almost over now, so a bug fixing build will likely be coming later this week.

Fix: Error 0x80070005-0x90002 in Windows 10

Since free upgrade period ended on July 29, only way to get Windows 10 is to perform the clean install. Many users reported error 0x80070005-0x90002 while using Media Creation Tool, so let’s see how to fix this error.

Error 0x80070005-0x90002, how to fix it?

  1. Try using Media Creation Tool on a different PC
  2. Update your drivers
  3. Run the SFC scan
  4. Run DISM
  5. Run the Update Troubleshooter
  6. Uninstall previous updates
  7. Remove your antivirus software
  8. Delete $WINDOWS.~BT folder

Fix: Windows 10 upgrade error 0x80070005-0x90002

Media Creation Tool is a popular tool that downloads Windows 10 ISO file and creates a bootable media in just a few steps. This is an official tool from Microsoft, and users worldwide use it to create Windows 10 installation media. Since this is the only tool that allows you to download Windows 10 ISO files and create bootable media, it’s easy to see how error 0x80070005-0x90002 can cause so many problems. Even though problems with Media Creation Tool can be troublesome, there are few ways to fix these problems.

1. Try using Media Creation Tool on a different PC

If your computer is giving you error 0x80070005-0x90002 while using Media Creation Tool, you might want to try using it on a different PC. Users reported that they are unable to create a bootable media with Media Creation Tool on their PC, but the issue was easily fixed after using the Media Creation Tool on a different PC.

According to users, you just need to choose an option to create a media for another computer, insert a blank DVD or USB flash drive and wait for Media Creation Tool to complete the process. After doing that you can use the bootable media on your PC to install Windows 10.

2. Update your drivers

  1. Right-click the Start button and select Device Manager from the list.device manager
  2. Go to the desired section and expand it.
  3. Right-click the component and select Update driver from the list of options.
  4. Select Search automatically for drivers.
  5. Do that for all the drivers you want to update.

It’s always a good idea to keep your drivers up to date. But this time, it may actually solve the problem you’re having. So, go and make sure all your drivers are updated.

In order to prevent PC damage by installing the wrong driver versions, we strongly suggest doing it automatically by using a driver updater tool.

An automatized solution will reduce your time spent and with just a few clicks the program will start scanning your PC for outdated drivers automatically.

3. Run the SFC scan

If none of the previous solutions managed to resolve the problem, we’ll seek help from troubleshooters. The first troublesooting tool we’re going to try is the SFC scan. This is a command-line tool that basically scans your computer for potential issues, and resolves them if possible.

Here’s how to run the SFC scan:

  1. Right-click on the Start Menu button, and open Command Prompt (Admin).
  2. Enter the following line and press Enter: sfc/scannow
  3. Wait until the process is done (it may take a while).
  4. If the solution is found, it will automatically be applied.
  5. Now, close the Command Prompt and restart your computer.

4. Run DISM

The next tool we’re going to try is DISM. Here’s how to run DISM in Windows 10:

  1. Open the Command Prompt as shown above.
  2. Enter the following command and press Enter:
    • DISM.exe /Online /Cleanup-image /Restorehealth
  3. Wait for the process to finish.
  4. Restart your computer.
  5. In case the DISM can’t obtain files online, try using your installation USB or DVD. Insert media and type following command:
    • DISM.exe /Online /Cleanup-Image /RestoreHealth /Source:C:RepairSourceWindows /LimitAccess
  6. Make sure to replace ”C:RepairSourceWindows” path of your DVD or USB.
  7. Follow further on-screen instructions.

5. Run the Update Troubleshooter

And finally, if the command line tools faild to resolve the issue, let’s try Windows 10‘s built-in troubleshooting tool. You can use this tool to fix various issues, including update problems.

Here’s how to run Windows 10‘s troubleshooter:

  1. Go to Settings.
  2. Head over to Updates & Security > Troubleshoot. 
  3. Select Windows Update, and go to Run the Troubleshooter. 
  4. Follow further on-screen instructions and let the process finish.
  5. Restart your computer.

6. Uninstall previous updates

There’s also a chance some previous update you installed prevents your system from receiving new ones. In that case, the best solution is to simply delete that update. Here’s how to do that:

  1. Go to Settings > Updates & Security > Windows Update.
  2. Go to Update history > Uninstall updates.
  3. Now, find the troublesome update (you can sort updates by date), right-click it, and go to Uninstall.
  4. Restart your computer.

7. Remove your antivirus software

Users reported that error 0x80070005-0x90002 can be caused by your antivirus software, therefore it’s advised that you disable it or remove it while using Media Creation Tool. Almost any antivirus tool or firewall can cause this error to appear, therefore be sure to remove all antivirus programs from your PC in order to fix this error.

Sometimes the easiest way to fix problems on your PC is to update all your drivers. Updating drivers manually can be a long and tedious process, but with this Driver Update software, you can quickly download all the necessary drivers thus fixing many problems.

8. Delete $WINDOWS.~BT folder

And finally, some users also reported that deleting the $WINDOWS.~BT folder resolves this problem, so we can try that, as well. Here’s what you need to do:

  1. Open File Explorer, and go to This PC > Local Disk (C:) (or whichever your system hard drive is).
  2. Now, click View and check the box that says Hidden Files.
  3. Find the folder named $WINDOWS. ~ BT.
  4. Rename it or delete it.

Error 0x80070005-0x90002 can cause big problems if you’re trying to create a Windows 10 bootable media, but we hope that you fixed this issue after using one of our solutions.

Call of Duty: Modern Warfare 2 is now backward compatible on Xbox One

Microsoft’s Major Nelson today announced that Call of Duty: Modern Warfare 2 is now backward compatible on Xbox One. This now completes the Modern Warfare saga, with all the original titles from the main series now being backward compatible on Xbox One devices.

Interestingly, the addition of Call of Duty: Modern Warfare 2 comes several months after it was revealed that the game was being remastered for next-gen systems. Anyway, backward compatibility means that you can dive back into the original game as it played on the Xbox 360. If you own a physical copy, all you need to do is insert the disc into your Xbox One and have it download to your hard drive. If you own the digital copy, you will see it appear in the ready to install section of the Games and Apps section of the Xbox One dashboard.

In the event that you don’t already own this game, you can get it at a discount right now for $14.99 instead of $19.99 with your Xbox Live Gold membership. It’s a solid experience and was marked by many as one of the best first-person shooters of all time.