Microsoft released the KB5040527 patch to Windows 11, and this non-security preview is intended for versions 22H2 and 23H2. It brings many fresh characteristics that should significantly improve the user’s experience.
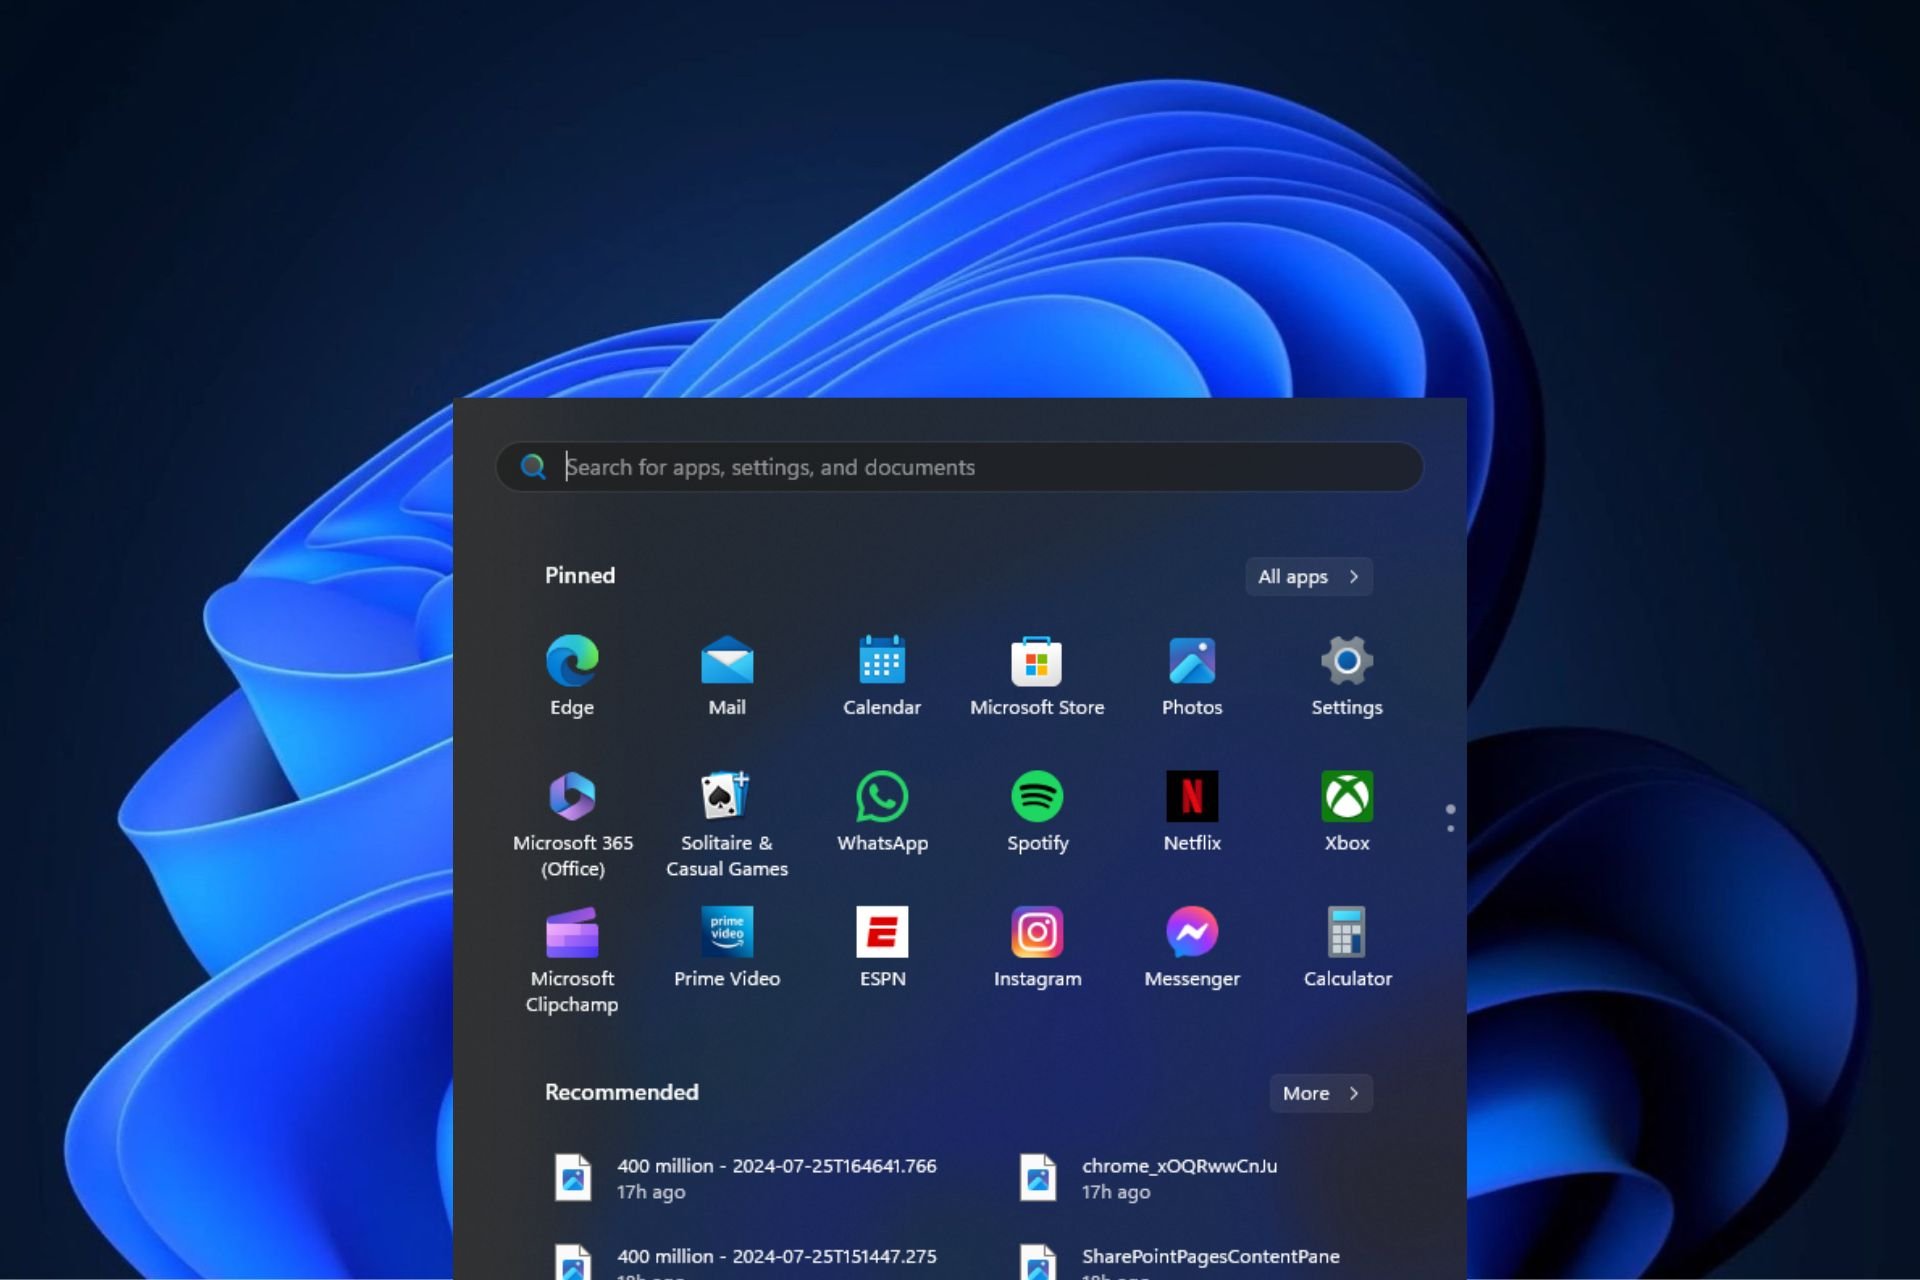
The most noticeable is the power to drag and drop pinned apps from the Start menu into the Taskbar and the awaited File Explorer Tab duplication, which the Redmond-based tech giant recently unveiled.
However, it doesn’t end there; a complete set of enhancements and repairs has been launched to smooth out all rough edges and make Windows 11 even more polished.
The update focusing on the Start menu and Taskbar functions is excellent news for those waiting to make their workflow more efficient. Just imagine how nice it would be to arrange your frequently used applications by dragging and dropping them or to navigate your apps on the taskbar with keyboard shortcuts.
Also, you can now duplicate File Explorer tabs for those who like doing many things at once. This is great because it helps manage files better without losing your place.
However, every update is not only about adding new features. The File Explorer has also been given some care, fixing problems such as memory leaks, incorrect responses, and errors that can pop up unexpectedly. This will make it run more smoothly and reliably. The desktop icons have been adjusted, too, solving the problem of wrong spacing, which could spoil your desktop’s look.
It’s good to know that Microsoft is gradually rolling out these features to users to ensure they experience a smooth changeover. So, if you haven’t gotten all the new features after installing KB5040527, be patient, as it might take a few days.
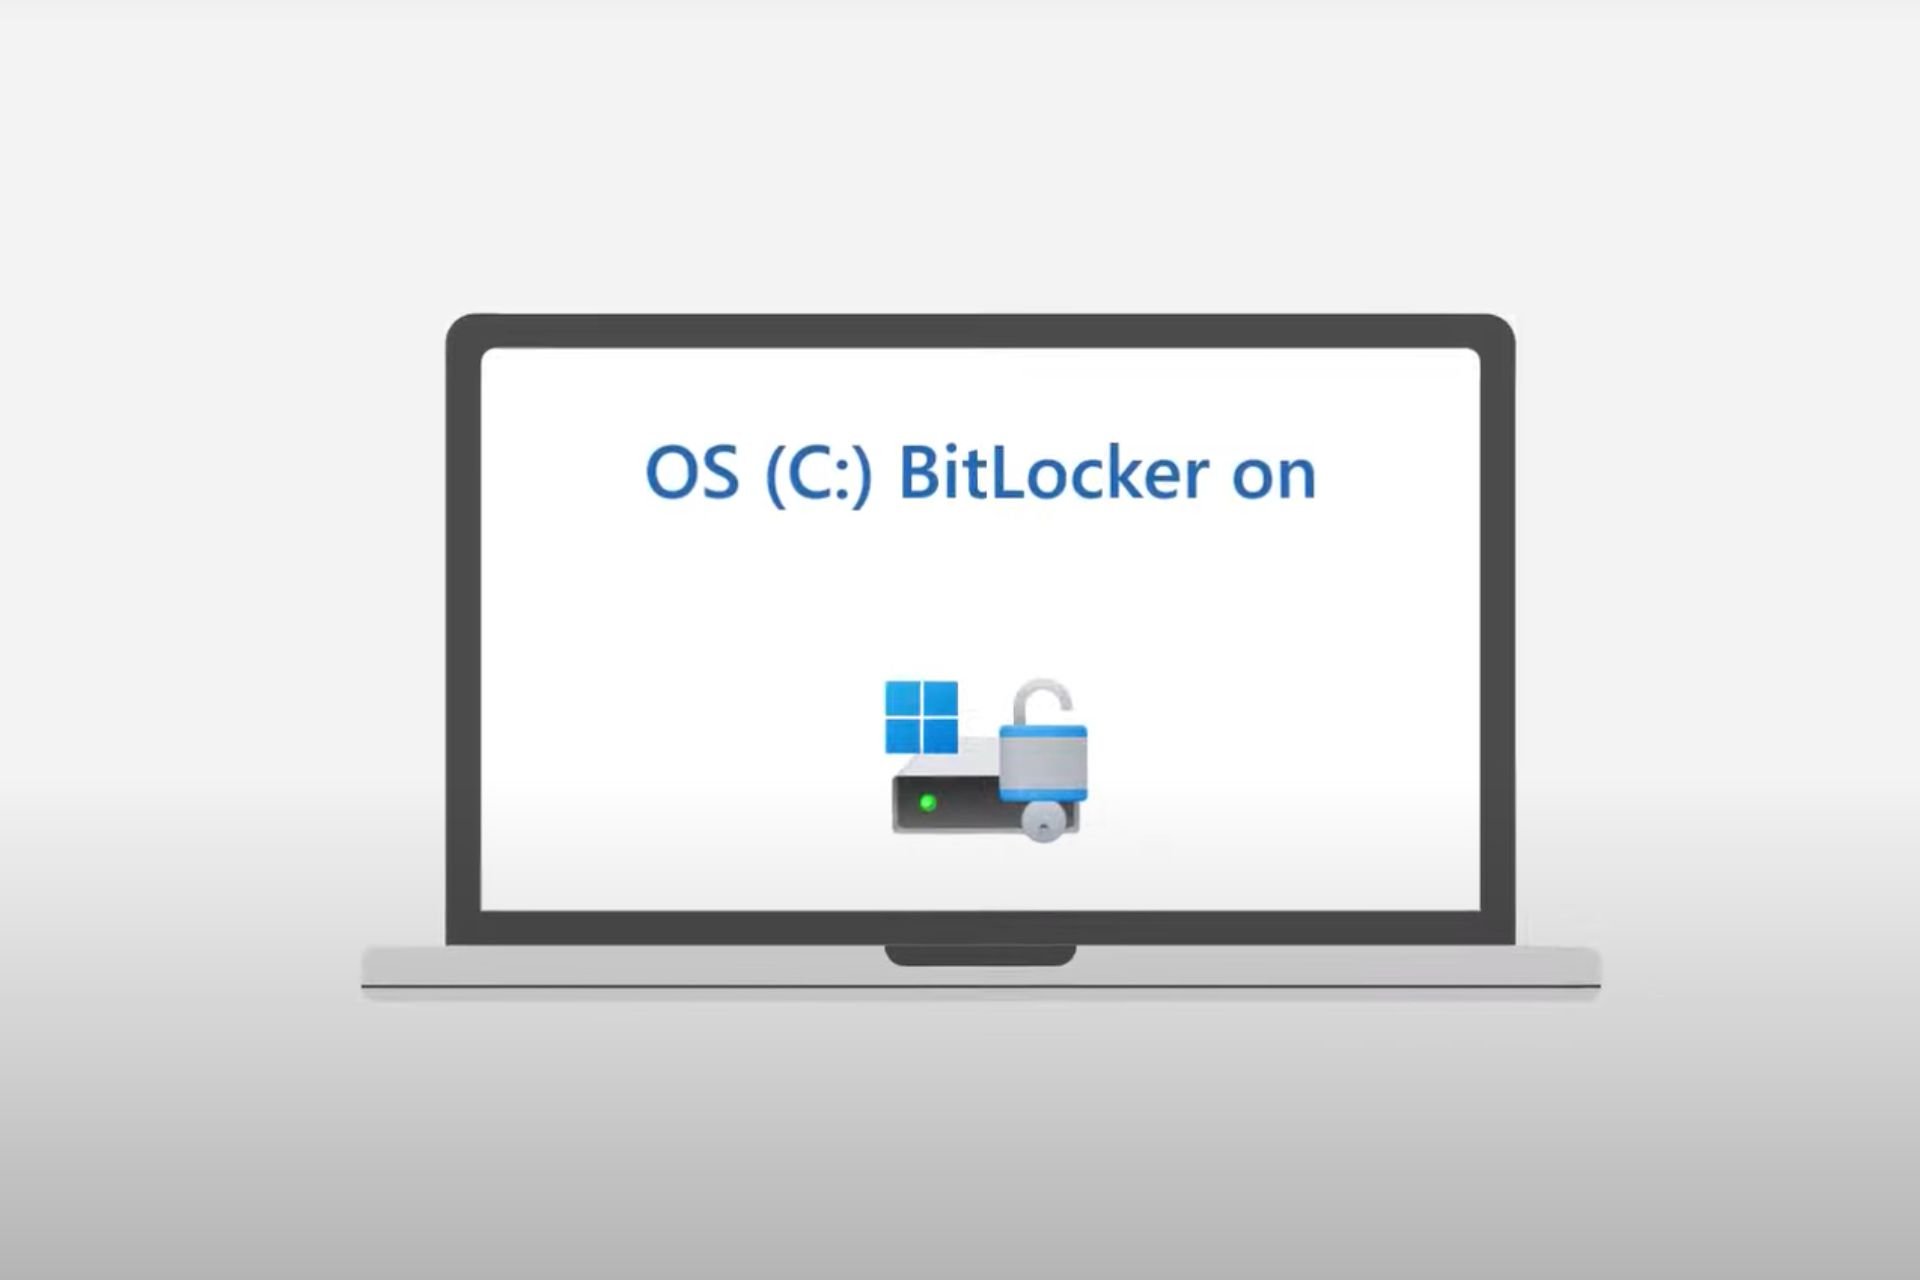
If you enjoy being at the forefront, it would be wise to check out when the update becomes accessible in your area. Also, you shouldn’t encounter the BitLocker recovery screen after updating your device, as Microsoft has fixed it.
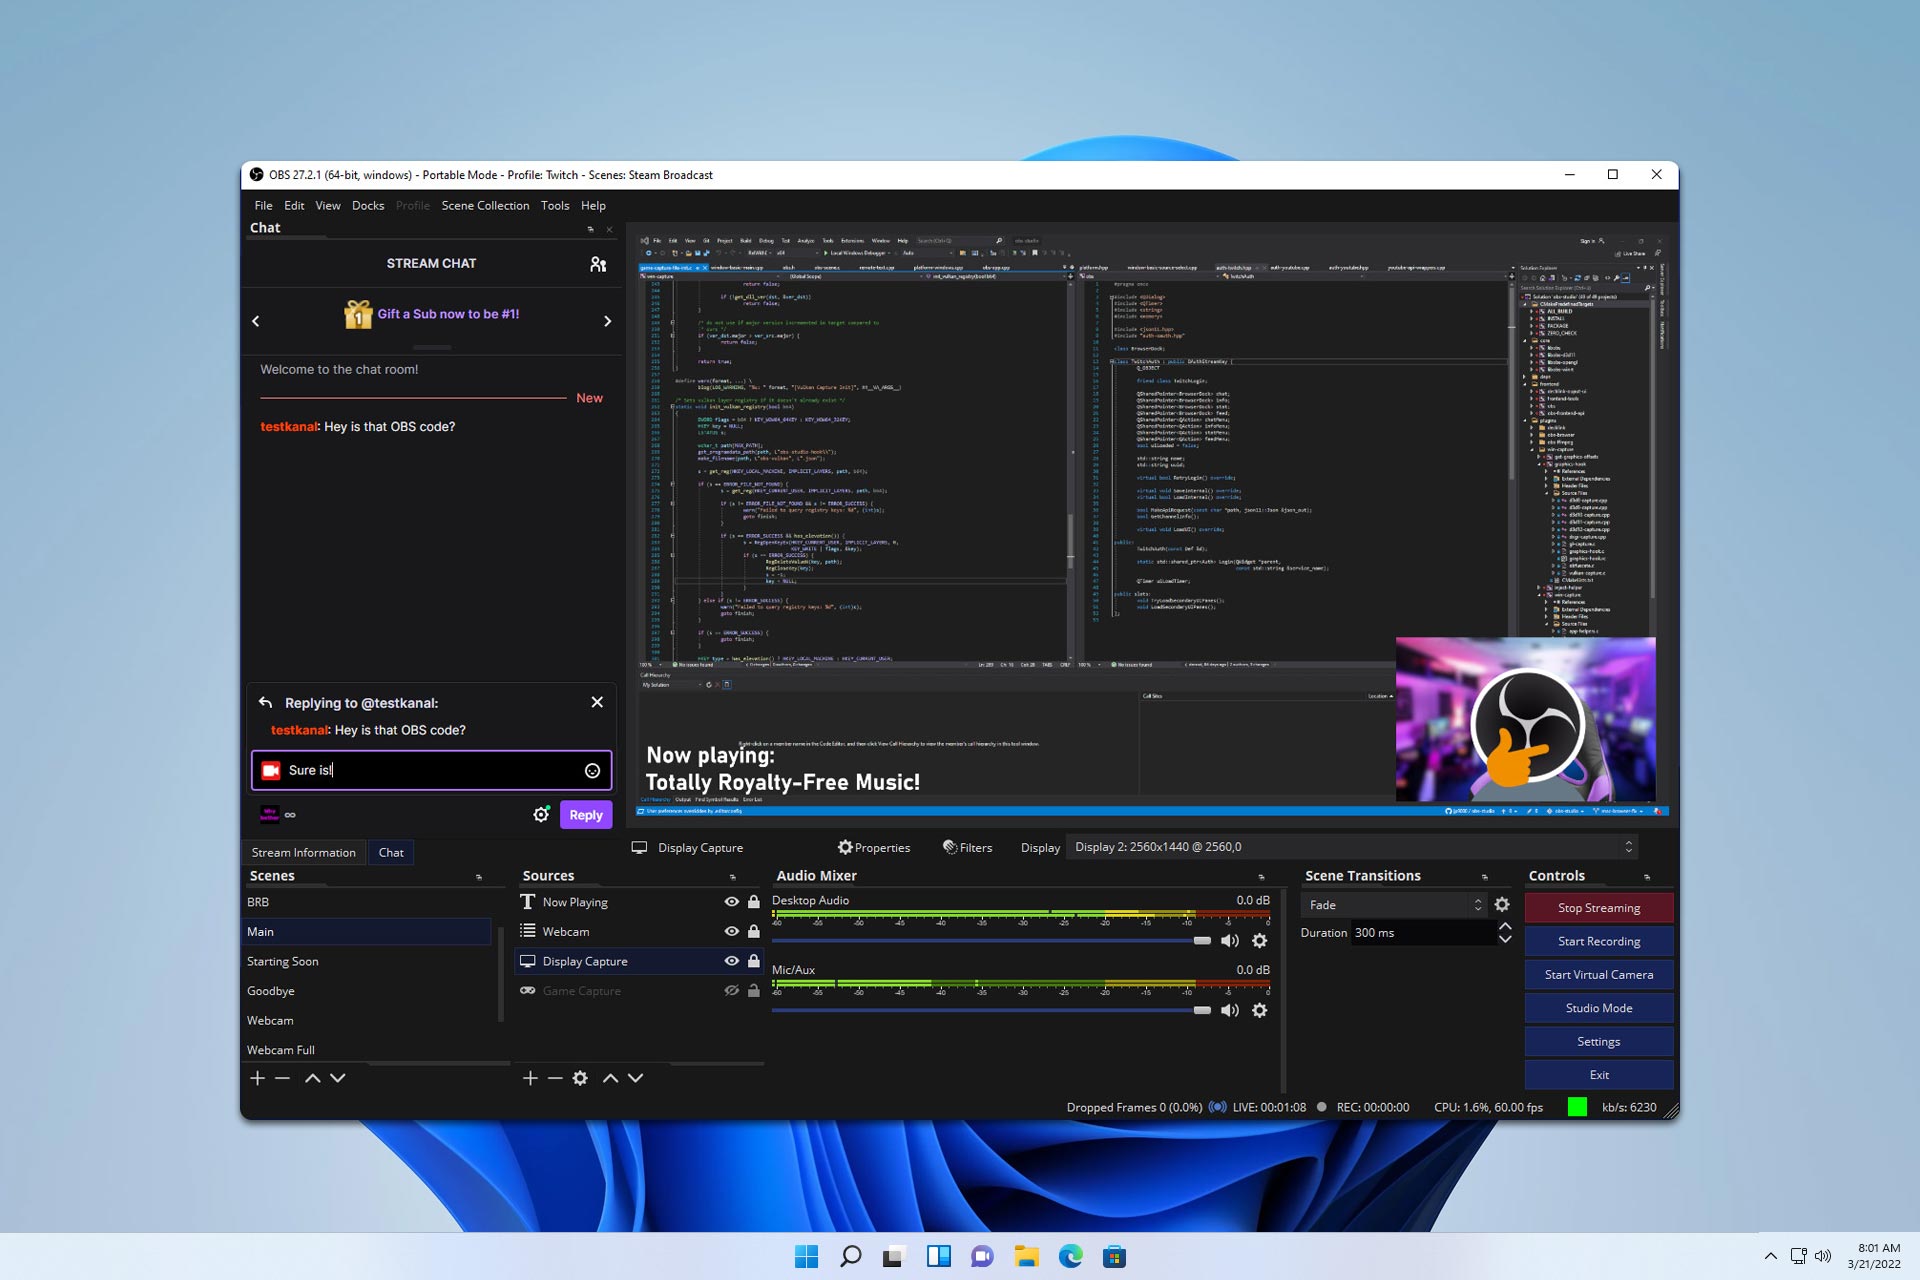
Struggling with capturing only game audio in OBS? You’re not alone. Many gamers and streamers face this challenge, but you can overcome this with our solutions.
How do I capture only game sound in OBS?
1. Use Application Audio Capture in OBS
Open OBS and go to Settings.
Navigate to the Audio tab.
Set all Global Audio Devices to Disabled.
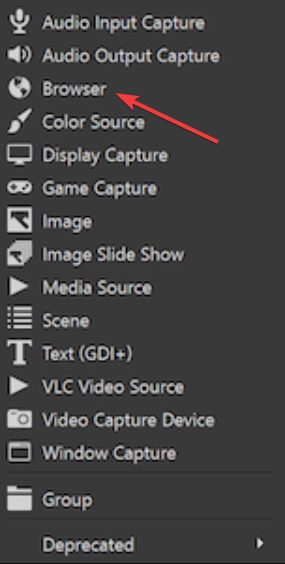
In OBS, add a new source by clicking the + icon under Sources.
Select Application Audio Capture.
Choose the game application from the list.
2. Use advanced audio properties in OBS
Add the game and other audio sources you are using.
Click the gear icon next to each audio source in the Mixer section.
Select Advanced Audio Properties.
Set the game audio to a specific track (e.g., Track 1) and other audio sources to different tracks.
In Output settings, ensure only the track with the game audio is selected for recording.
Open the Virtual Audio Cable control panel and create a new virtual audio cable.
Go to your computer’s sound settings. Set your game’s audio output to the virtual audio
Open OBS and go to Settings.
Navigate to Audio and set one of the Desktop Audio devices to the virtual audio cable.
In OBS, add a new Audio Output Capture source.
Select the virtual audio cable as the device.
Some users tend to use Voicemeeter instead, so you can try it as well.
By following these solutions, you can successfully configure OBS to record only your game audio, enabling a focused and distraction-free recording experience.
Microsoft has released its newest update to Windows 11: the Release Preview Channel build 26100.1297 (KB5040529). This update includes many exciting features that promise to significantly improve user experience.
KB5040529 contains numerous advancements—some were hinted at in earlier Beta, Dev, and Canary preview builds for those who like to be on top of things before they happen. Yet, what does this update truly offer? Let’s take a look.
To begin with, the lock screen is getting enhanced by new content types like sports, traffic, and finance. These join weather updates to give users a complete informational experience when they start their day—all in one place. One can activate this feature by going into the settings menu.
Next, the Start menu has a new account manager. This makes it simpler to quickly view your Microsoft account benefits and manage your account settings straight from this area. Also, you can now pin apps to the taskbar by dragging and dropping them from the Start menu—a minor but nice touch for improving usability.
File Explorer has not been forgotten in KB5040529. You can now drag files among breadcrumbs in the address bar, which could greatly simplify your file handling and navigation tasks. For those who love emojis like me, this new update includes Emoji 15.1 support – providing a fresh set of expressive characters for our digital communications.
The update also adds protection from accidentally closing the Windows Share window; now, clicking outside will not close it. KB5040529 also provides a feature to share directly into particular Microsoft Teams channels and group chats, generate QR codes for webpage URLs and cloud files, and allow you to send emails to yourself from within the Windows Share window. Plus, copying files from the Windows Share window just got easier.
If you are stressed about your digital footprints, Windows now backs up many of your sound settings. However, this only happens when the necessary options in Windows backup settings have been enabled. For gamers, a fresh Game Pass recommendation card will show up on the Settings home page if you are actively playing games on your PC.
The change goes beyond what users see and covers Task Manager. This includes changing the units for DDR speed from MHz to MT/s and solving a problem with USB devices. Now, Task Manager is more steady, reachable, and straightforward when moving around. This is because of updates in keyboard focus, tab key navigation, text scaling, and other areas.
KB5040529 has included PC Manager and polished the Widget icons on taskbars to remove any pixelation or fuzziness for people using devices in China. Now, OneDrive can be utilized as a RemoteApp within Azure Virtual Desktop, and support for packet drop collection in Windows nodes has been enhanced, making troubleshooting easier.
However, the update is not without some problems. KB5040529 mentions a few issues, such as trouble selecting a group from the aimed domain for Item Level Targeting in Group Policy Preferences and occasionally errors occurring with Local Security Authority Subsystem Service failing.
In a world full of questions, where the internet is our primary source of answers, OpenAI has taken a significant step by introducing its prototype search engine, SearchGPT. This new tool is designed to change how we look up information online. Picture yourself asking a question and receiving an answer that feels like chatting with your friend—this is what SearchGPT wants to offer. The goal is to give fresh responses from the web, including clickable links for more information, creating an active and quick search process.
The announcement from OpenAI is a little unexpected. When they did their media update in May, it was said there were no plans for a search engine, and the focus would be on revealing the GPT-4o AI model. Now, we see SearchGPT being introduced, but it is done in a quieter way than what some people might have guessed or imagined. SearchGPT aims to improve the internet search experience by letting users interact in a talk-like way, constructing context with every question.
OpenAI has established an official page for people who are excited to explore this fresh search encounter, where they may put their name on a waiting list to test out SearchGPT. The number of people chosen for initial entry is not specified, but the possibility of incorporating SearchGPT attributes into the AI model ChatGPT is thrilling. This action might significantly affect how we interact with artificial intelligence during our routine searches, providing us with more individualized and stimulating methods to find information.
Very interestingly, this announcement is close to Microsoft’s announcement about a new AI generative model for some Bing users and Google’s introduction of AI Overview answers into its search engine. It shows that the competition to improve search features using AI is intensifying. The method of OpenAI, concentrating on conversational engagements and giving proper credit to original material, might make SearchGPT special among such rivals.
SearchGPT could be a way for internet publishers to attract more people to their content. It claims that using clear and direct attribution in line with links for sources will ensure original content creators are given proper credit. Also, websites that usually do not provide access to AI model training, like ChatGPT, might choose to allow their information to become available through SearchGPT. This may enhance the possibility of reaching a more extensive audience base for these sites.
SearchGPT has the potential to change how we search on the internet. Its main strength is understanding conversational questions and creating context, which might make searching online feel more like natural human conversation. While we anticipate more advancements and broader availability, SearchGPT will undoubtedly bring a lot of excitement about altering our digital interactions.
If you want to prevent people from connecting USB devices and protect your data,, you need to turn off USB storage on your Windows computer. In this guide, we will discuss some of the easiest methods to do so. Read on!
How can I turn off USB storage ports on Windows 11?
1. Using the Registry Editor
NOTE
This method works if a USB storage device is installed on your computer; therefore, changing the registry can ensure the device will not work when anyone connects.
Press Windows + R to open the Run window.
Type regedit and click OK to open the Registry Editor.
First, you should back up the registry entries to import them if anything goes wrong. Go to File, and select Export from the context menu. In the following window, type in the file name and click Save.
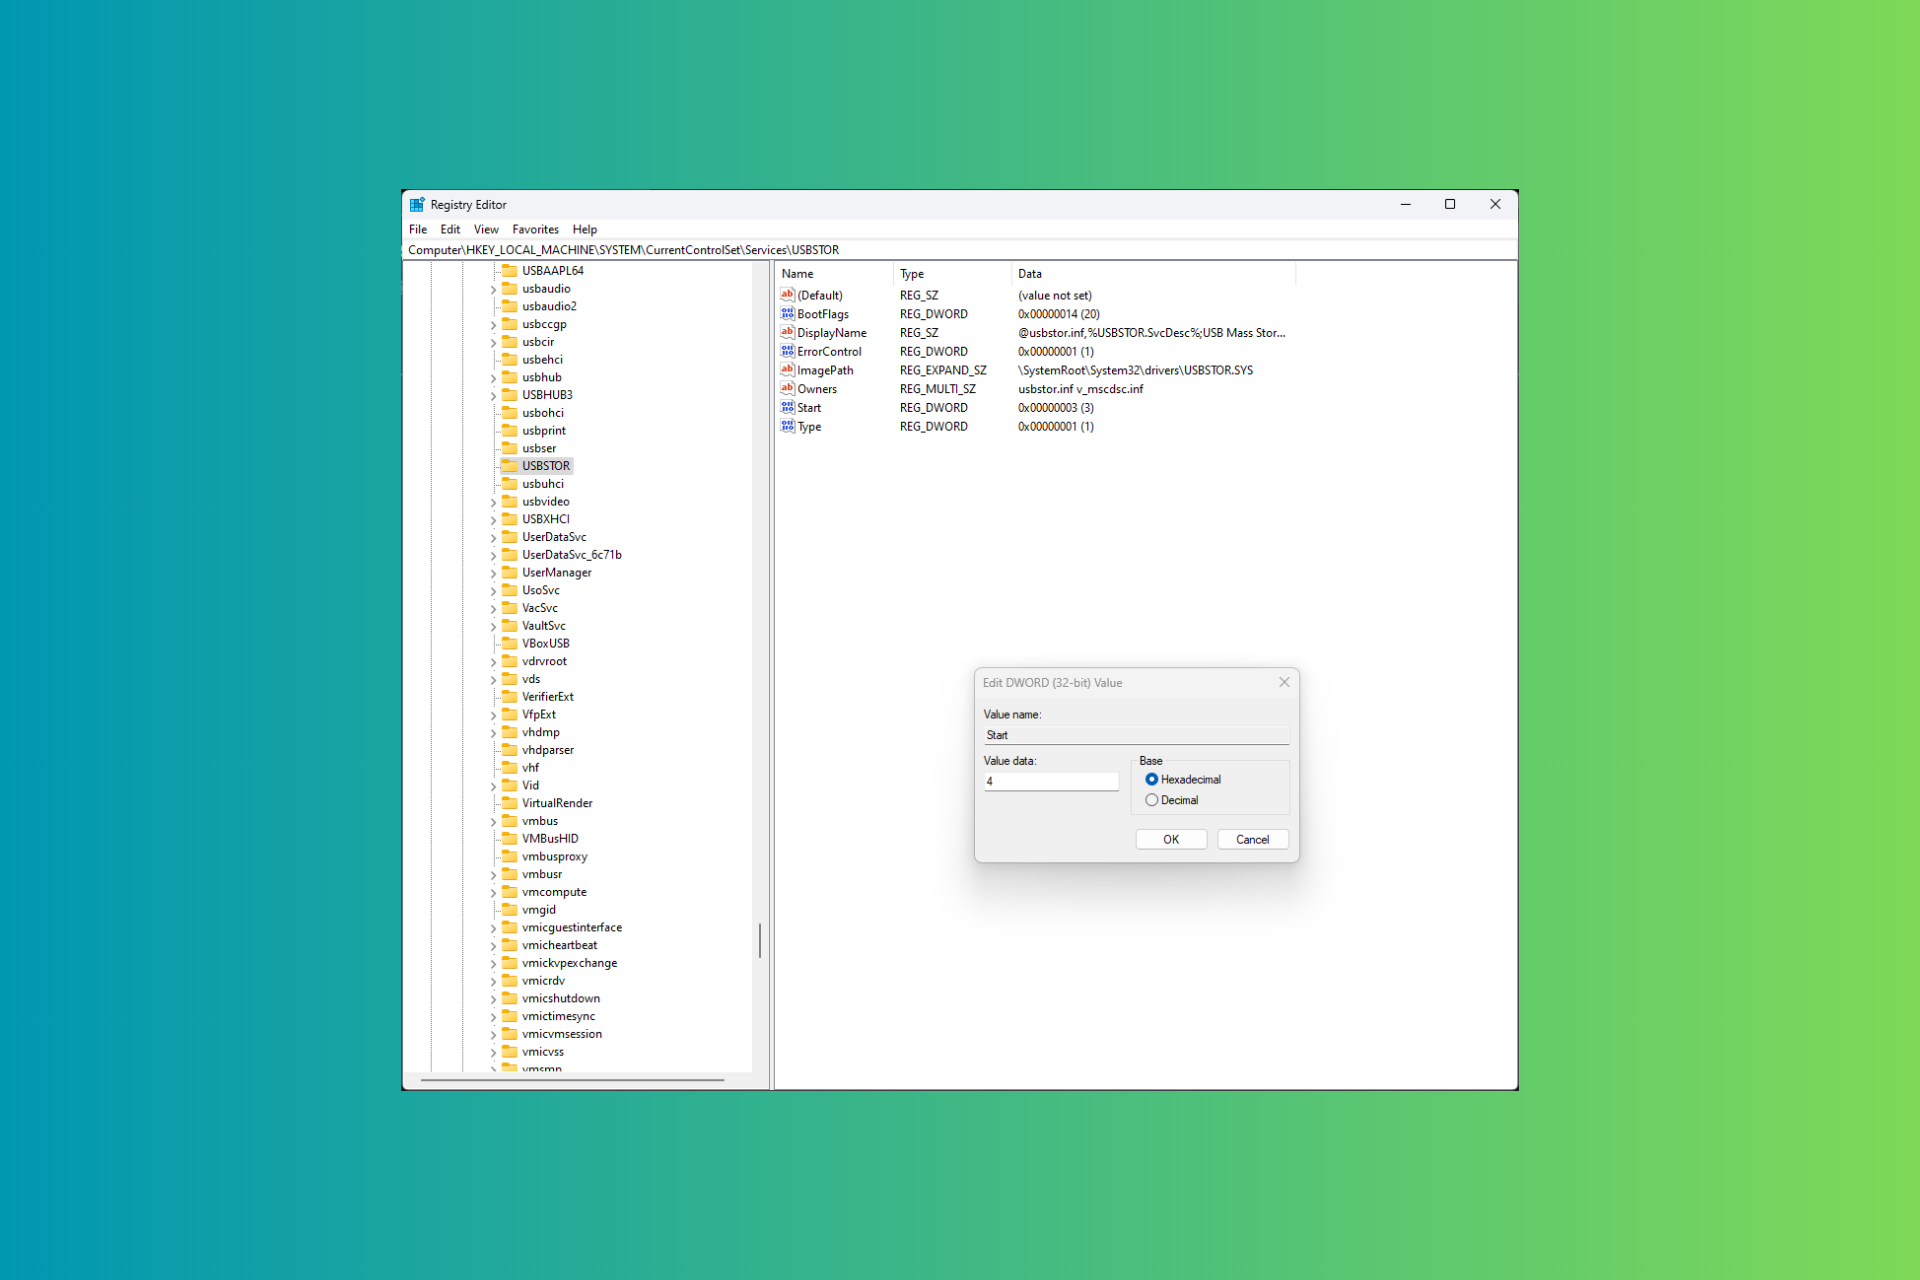
Navigate to this path:Computer\HKEY_LOCAL_MACHINE\SYSTEM\CurrentControlSet\Services\USBSTOR
From the details pane on the right, locate Start DWORD and double-click it.
For Value data, replace 3 with 4, select Hexadecimal, and click OK to save the changes.
Close Registry Editor and restart your computer.
2. Using the File Explorer
NOTE
If the USB storage device is not already installed on your computer, you can deny permissions to %SystemRoot%\Inf\Usbstor.pnf and %SystemRoot%\Inf\Usbstor.inf files for a user or group and the local system account.
2.1 Add user or group to deny permissions
Press Windows + R to open the Run window.
Type %SystemRoot%\Inf and click OK to open the Inf folder in Windows File Explorer. Alternatively, you can follow this path: C:\Windows\INF\usbstor.pnf in Windows File Explorer; however, don’t forget to replace C with the system drive letter of your computer.
Right-click the file and select Properties from the context menu.
Go to the Security tab.
Under the Group or user names section, click Edit or Advanced.
Click Add to add the user or group that you want to prevent from accessing USB ports.
Type the name of the user or group and click Check Names to verify.
Click OK.
2.2 Set deny permissions for the user/group you add
Once the user or group is added to the Group or user names list, select it and click the Deny checkbox next to Full Control.
Click OK to apply the changes.
2.3 Add System account to the Deny list
In the Usbstor.pnf properties window, go to the Security tab, locate and select SYSTEM account from the Group or user names list.
Click the Edit button.
Click Add to add the SYSTEM account if it is not listed.
Next, click Check Names, then hit OK.
Now select SYSTEM, and under the Permissions list for SYSTEM, Select Deny for Full Control option.
Click OK and OK to close the window.
2.4 Set Deny Permissions for Usbstor.inf
Navigate to this path: C: WINDOWSInfusbstor.inf in Windows File Explorer. Remember to replace C with the system drive letter.
Right-click Usbstor.inf and select Properties from the context menu.
Go to the Security tab and follow the steps mentioned in 2.1, 2.2, and 2.3 to deny permissions to access USB storage devices on the computer.
3. Using the Group Policy Editor
Press Windows + R to open the Run window.
Type gpedit.msc and click OK to open the Group Policy Editor.
Navigate to this path: Computer Configuration\Administrative Templates\System\Removable Storage Access
From the right pane, locate the Removable Disks: Deny execute access setting. Double-click it to open its properties.
Select Enabled, click Apply, then OK to save the changes.
Now look for Removable Disks: Deny read access, and Removable Disks: Deny write access settings, and follow steps 4 and 5.
Type devmgmt.msc and click OK to open the Device Manager.
Locate Universal Serial Bus controllers and click it to expand the category.
Right-click on all the entries one by one and select Disable device for each entry. Click Yes to confirm the choice.
5. Using BIOS
Save your work on the computer and restart your computer.
Press the designated key to enter the BIOS/UEFI setup during the startup process. Usually, the keys are F2, F10, Del, or Esc. If unsure, you can type in the manufacturer’s name and search for it online.
Once in BIOS, navigate the menu with the arrow keys on your keyboard.
Locate USB Configuration. You can find them in categories like Advanced, Integrated Peripherals or Onboard devices.
Look for options like USB Ports, USB Controller, and USB Legacy Support, and using the arrows, choose Disabled for the setting.
Press F10 to save and exit the BIOS to restart your computer normally.
If prompted, click Yes or OK to save the changes.
How can I turn off USB storage ports on Windows 10?
You can follow the steps mentioned above to quickly disable USB storage ports on your Windows 10 computer.
To conclude, you can disable ports on multiple computers using the Group Policy Editor. However, you can follow the Registry Editor to turn off removable storage access for individual devices.
If you want to enable the ports blocked by your administrator, you can use any of the methods mentioned above and reverse-engineer the steps. If you still need help, follow this guide.
Changing the theme on Slack can change the appearance of your workspace. You can choose from the predefined themes or create a custom theme by selecting the colors of your choice. In this guide, we will discuss how to change the appearance of Slack.
How do I change the Slack theme?
1. Select a predefined theme
Launch Slack and click your Profile picture from the sidebar.
Choose Preferences.
On the Preferences window, click Themes from the left pane.
Look for Slack themes, and choose the one you like.
Click X, then click Save changes to let the changes apply.
2. Create a custom theme
Launch Slack and click your Profile picture from the sidebar.
Click Preferences from the menu.
On the Preferences window, click Themes from the left pane.
Go to the Custom theme tab.
For Theme colors, select colors for both System navigation and Selected items or click Surprise Me to get a different theme.
Once done, click X, then click on Save changes.
If you just want to change the theme to dark mode or system-wise, follow steps 1-3. Under Colour mode, you will get three options: Light, Dark, and System. Click the option according to your preferences.
While choosing a custom theme, you can also select whether you want the windows to be in a solid color or have a gradient. To do so, follow steps 1-4, place a checkmark next to Window gradient and click X, then click on Save changes.
If you want to learn more about the best Slack themes available, we have a separate guide for you.
Launch Slack and click your Profile picture from the sidebar.
Click Preferences from the pop-up menu.
On the Preferences window, click Themes from the left pane.
Go to the Custom theme tab.
Click the Share button under Custom theme to copy your theme.
Go to any conversation, paste your theme into a message, and press Enter.
The recipient can click Apply Slack theme to use it on their interface.
How can I import a legacy theme?
Launch Slack and click your Profile picture from the sidebar.
Click Preferences from the menu.
On the Preferences window, click Themes from the left pane.
Go to the Custom theme tab.
Click the Import button.
On the Import theme pop-up, enter the theme string in the Paste in a theme string box and click Apply.
You can select a predefined theme or create a custom theme for your workspace on Slack. In case your Slack won’t open, it could be due to corrupt Slack data files, outdated app or operating system, or third-party app interference; to fix it, you need to run Slack as admin, check Slack’s server, read this guide to learn more.
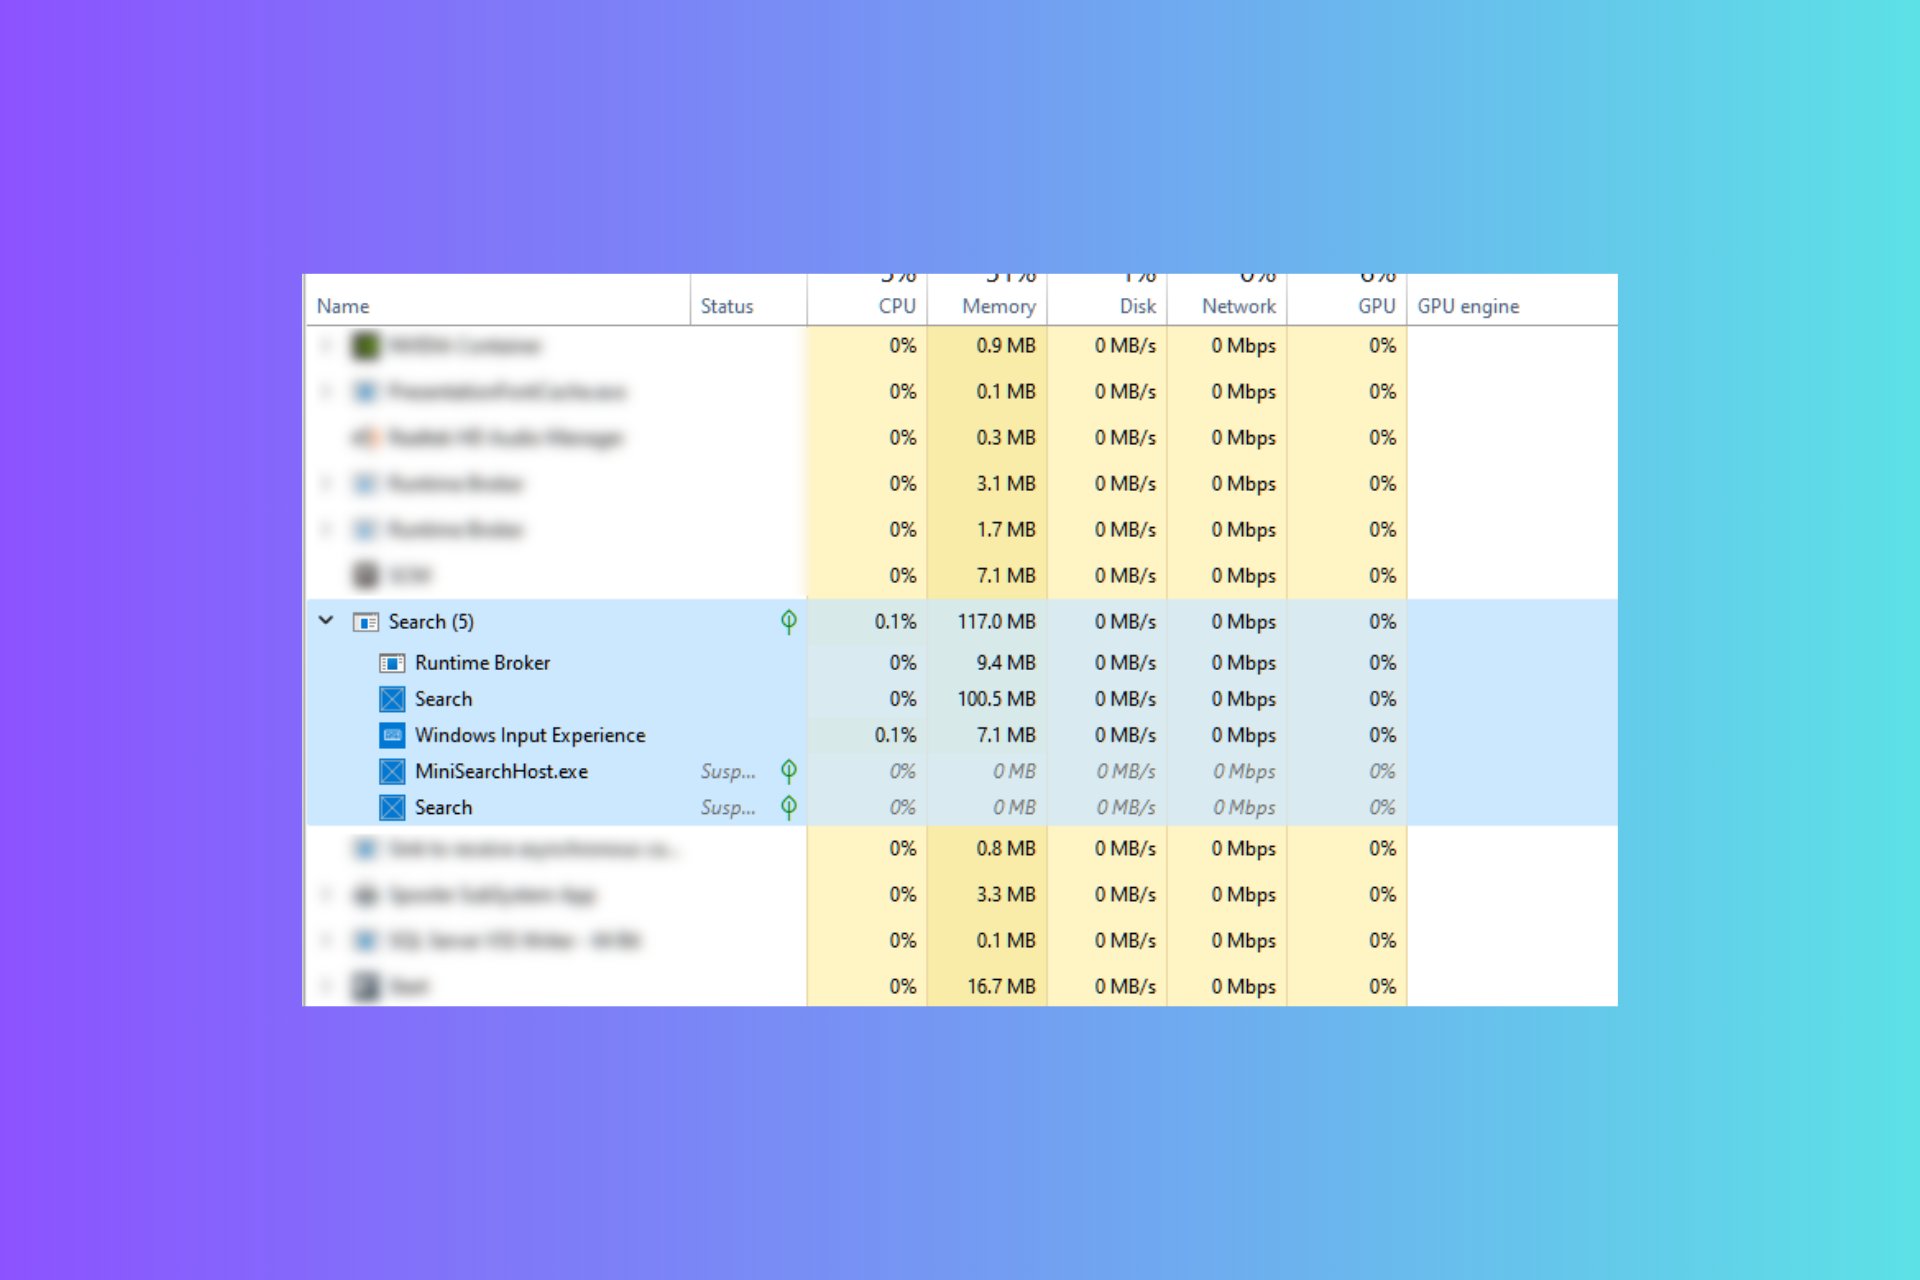
Windows Input Experience is a process that handles user inputs from human interface devices like mice, physical or virtual keyboards, touchscreens, and more. However, if you experience instances of the process using high memory, it could affect your computer’s overall performance.
This occurs generally due to memory leaks, faulty updates, outdated or incompatible drivers, background services, corrupted system files, or software interference. In this article, we will discuss how to fix the high memory usage caused by the Windows input experience.
What is the function of Windows Input Experience?
It runs in the background without any user interface and initiates with the system boot-up.
Performs essential tasks, including managing hardware devices, running scheduled tasks, and providing several system functions.
It helps the Windows operating system receive input, which tells the computer how you move the mouse and the keystrokes on your keyboard.
How do I fix the Windows Input Experience high memory usage?
1. Reboot the Input Experience Services
Press Windows + R to open the Run window.
Type services.msc and click OK to open the Services window.
Locate TextInputManagementService, right-click it, and choose Restart from the context menu.
2. Uninstall Language packs
Press Windows + I to open the Settings app.
Go to Time and Language, then choose Language & region.
Under Preferred languages, go to the language you want to delete, click the three-dot icon, and choose Remove from the context menu.
Reboot your computer to let the changes take effect.
You can also disable it using Windows PowerShell; follow these steps to do so:
Press the Windows key, type powershell, and click Run as administrator.
Copy and paste the following command to get the list of installed language packs along with their language tags and hit Enter: Get-WinUserLanguageList
To uninstall a language, type the following command and replace language_tag with the tag for the language you want to uninstall and press Enter: Uninstall –Language <language_tag>
On the right pane, under the On-screen keyboard, access keys, and Print screen, locate the On-screen keyboard and ensure it is toggled off. You can also press Windows + Ctrl + O to disable it.
Once done, press the back arrow next to Settings to navigate to Accessibility. Now, look for the Narrator option.
On the following page, ensure the Narrator option is toggled off.
However, if you are unable to use your keyboard on Windows 11, follow the above steps to enable the on-screen keyboard. For further solutions to the issue, read this guide.
Remember, it is an essential service and can be found under Computer\HKEY_CURRENT_USER\Software\Microsoft\input; however, as it is one of the core parts of Windows, you can’t disable it even from the Registry Editor.
In case you are unable to type in Windows Search bar, it could be related to corrupted Windows updates or a damaged user profile; to learn more, check out this detailed guide.
If you have any questions or suggestions about the topic, feel free to mention them in the comments section below. We will be happy to help!
Earlier this week, Microsoft released the latest build to the Windows 11 Canary Channel, where the Redmond-based tech giant unveiled many new changes, enhancements, and improvements.
Spotted by tech enthusiast @phantomofearth and later added to the official changelog of the build, the update also provides some improvements to your mouse settings. If you think the better mouse pointer accuracy is too much, a button can now switch it off. Also, there’s another new thing where you can alter the way your mouse scrolls in direction. It’s all about making your computer work how you want it to.
The new scrolling direction and enhance pointer precision mouse options in Settings (latter was previously only in the old mouse dialog) have started gradually rolling out alongside build 26257. Rollout is not mentioned in the blog post. pic.twitter.com/ujRX41fFJi
Even in the build, the new Windows 11 mouse settings are gradually rolling out, but if you don’t want to wait for them any longer, you can enable them with a third-party app, such as ViveTool, by using the following command (credits to @phantomofearth):
vivetool /enable /id:51190751
The new settings will probably be released to the stable Windows 11 channel in the following weeks to months, as they are part of the upcoming Windows 11 24H2 update.
Inserting an Excel file into a PowerPoint presentation as an icon can be quite handy, especially when you want to keep your slides neat and organized. Whether you prefer a manual method or an automated script, here are some effective ways to achieve this.
How do I insert an Excel file into PowerPoint as an icon?
1. Manually insert Excel file
Open PowerPoint.
Go to the slide where you want to insert the Excel file.
Click on the Insert tab in the Ribbon. Choose Object in the Text group.
In the Insert Object dialog box, select Create from file. Click Browse and navigate to your Excel file.
Check the box for Display as icon.
Click OK.
2. Embed Excel file in PowerPoint using VBA
Open Excel.
Press ALT + F11 to open the VBA editor.
Click Insert > Module.
Copy and paste the following VBA code into the module: Sub EmbedExcelInPowerPoint() Dim pptApp As Object Dim pptPres As Object Dim pptSlide As Object Dim pptShape As Object Dim excelFilePath As String
' Set the file path of the Excel file excelFilePath = "C:\path\to\your\excel_file.xlsx"
' Create a new PowerPoint application Set pptApp = CreateObject("PowerPoint.Application") pptApp.Visible = True
' Create a new Presentation Set pptPres = pptApp.Presentations.Add
' Add a slide Set pptSlide = pptPres.Slides.Add(1, 1)
' Embed the Excel file as an icon Set pptShape = pptSlide.Shapes.AddOLEObject(Left:=10, Top:=10, Width:=400, Height:=300, _ ClassName:="Excel.Sheet", FileName:=excelFilePath, DisplayAsIcon:=True)
' Rename the icon pptShape.OLEFormat.Object.IconLabel = "My Excel File" End Sub
Modify the excelFilePath variable to point to your Excel file’s location.
Run the macro by pressing F5.
These solutions provide a range of options, from manual processes to automated scripts, ensuring you can embed Excel files into PowerPoint slides as icons efficiently. To avoid future issues, always double-check file paths and save your work frequently.
If you’re looking for something simplistic, we also have a guide on how to draw on PowerPoint slide, so, so you might want to check it out. Also, don’t miss out latest guide on how to insert Excel to Word.
Microsoft’s latest development is a “new content pane” for SharePoint pages and news that helps simplify the content creation process for commercial users.
This change could be revolutionary for businesses seeking to keep their workers updated with current affairs and progressions. After introducing co-authoring to the platform, SharePoint authors now have a central hub, which makes creating lively and interesting pages easier.
The main part of this update is the content pane’s toolbox, which everyone can easily use. Its purpose is to make it simple for authors to explore and add different kinds of content, such as web links, images, and templates. Imagine having all your tools within easy reach—you are prepared to make your creative ideas real. Plus, adding configuration tools and design ideas further enriches the authoring experience.
In a blog post, Microsoft explains how people who enter edit mode on a page or news post can see a series of icons that guide them through the new pane. The initial icon is for the toolbox, the entry point to an array of resources for enhancing SharePoint pages. And if you’re after more, the “See more/all” section in the toolbox shows further content categories to explore.
The update also brings improved section tools, making including and adjusting sections on your pages easier. You only need to click a plus symbol to select the kind of section you wish to add, and all required instruments, such as moving, editing, copying, or removing sections, are arranged neatly in the section toolbar.
It is even more thrilling that this update is only the start. Microsoft will introduce the SharePoint content pane update for its Targeted Release clients shortly, with a broader roll-out scheduled for September 2024. The Redmond-based tech giant also prepared additional features, like extra pane categories such as design ideas and page details, user customization abilities, etc.
The SharePoint content pane update is very helpful. It gives users an easy way to see and change settings in their web parts, making controlling how these parts work on a page more straightforward. Now, customers who use Microsoft 365 will have a better experience when creating web pages with the new content pane design in SharePoint Online. Thanks to this helpful feature, users can quickly find the settings they need and make changes without difficulties.
Streaming quality can make or break your viewer’s experience, and one key aspect to get right is the keyframe interval in OBS Studio. Let’s dive into how you can master the OBS keyframe interval to ensure perfect streaming quality.
How do I set Keyframe Interval in OBS Studio?
1. Set the recommended Keyframe Interval
Launch the application by clicking the OBS icon on your desktop or Start menu.
Click on the Settings button on the bottom right-hand corner of the OBS Studio window.
In the Settings window, click on the Output tab from the left-hand side menu.
Ensure you are in Advanced output mode by selecting it from the dropdown at the top of the Output settings.
Locate the option labeled Keyframe Interval and set it to 2. This is the commonly recommended setting for most streaming platforms to balance quality and latency.
This will help your stream maintain a good quality while ensuring that the viewers experience minimal delay. It’s a balanced setting approved by many streaming platforms like Twitch and YouTube.
2. Adjusting Keyframe Interval for different content types
Start the application by clicking the OBS icon on your desktop or Start menu.
Click on the Settings and click on the Output tab.
Select the Advanced output mode from the dropdown at the top.
Keyframe Interval based on content:
For static scenes (e.g., news desk or talk show): Set the keyframe interval to 2 seconds.
For dynamic content (e.g., sports events): Set the keyframe interval to 1 second.
This adjustment allows you to optimize your stream based on the type of content, ensuring the best quality and performance tailored to what you are broadcasting.
3. Custom Keyframe Interval for high FPS recordings
In OBS Studio, enter Settings ang go to Output.
Switch to the Advanced output mode.
In the Keyframe Interval field set the following values:
For high FPS recording (e.g., 240 FPS): Set the keyframe interval to a value based on your needs. For instance, setting it to 1 will insert a keyframe every 240 frames. You can also use 0.5 for every 120 frames.
If you set the Keyframe Interval to 0, this lets OBS automatically adjust the keyframe interval based on the encoding settings and stream requirements.
Custom settings can optimize performance and quality for specific recording setups, particularly useful for high FPS recordings, balancing file size and quality.
Additional tips for OBS Keyframe Intervals
Test different settings: It’s advisable to test different keyframe intervals and monitor the quality and performance of your stream.
Monitor CPU usage: A shorter keyframe interval can increase CPU load. If your system struggles, consider lengthening the interval or upgrading hardware.
Consider bitrate and resolution: Keyframe interval is just one of the many factors affecting stream quality. Balancing bitrate and resolution is also crucial.
Setting the correct keyframe interval can significantly improve your streaming quality and viewer experience. Adjust these settings based on your specific needs and the type of content you are broadcasting.
Now that you know how to set the OBS Keyframe Interval,
Imagine a search engine that doesn’t just locate what you want but also comprehends and predicts the subtleties of your query.
This is precisely what Microsoft intends to accomplish with its AI-dependent Bing generative search characteristic, which a restricted number of users can currently utilize. This fresh method combines big and small language models to create precise answers full of context and detail.
For example, if the question is “What is a spaghetti western? “Bing can give an artificial intelligence-produced summary that delves into history, important instances, etc.; it’s made more comprehensible with links for further investigation and sources provided by this tool.
The aspect of this update that stands out is Microsoft’s dedication to a healthy web ecosystem. They have carefully refined the Bing generative search, ensuring it satisfies users’ demand for knowledge and aids the wider online community by directing people to websites. This equilibrium holds great importance in an era where search engines greatly influence how we explore and engage with content on the internet.
In a blog post, Microsoft says it takes time to introduce this feature slowly, gather user input, and improve the experience. This methodical process demonstrates Microsoft’s commitment to creating new things and ensuring these changes improve user experience.
This is another important step in evolving the search experience on Bing and we’re eager to get feedback throughout this journey. We are slowly rolling this out and will take our time, garner feedback, test and learn, and work to create a great experience before making this more broadly available.
Microsoft
Feedback from early users could greatly impact the direction of future Bing search journeys, possibly establishing a fresh benchmark for how we interact with knowledge across the internet.
In this era where the internet is the primary place for nearly everything, what Microsoft has done might change our usual hopes from search engines. Combining top AI technology with a design that focuses on users, Bing answers our queries and adds value to our learning journey.
Bing turned 15 this year, and 2014 might be the year this search engine finally gains the popularity it always deserved.
What do you think about the new generative search?
Ever wondered how to convert your old monitor into a TV? Whether you want to save money or repurpose an unused monitor, this guide will walk you through the steps to transform it into a functional TV.
How can I convert a monitor to a TV?
Use a TV tuner, streaming box, or any other HDMI device
Use a TV tuner, receiver, streaming box or any other device with HDMI output.
Next, use an HDMI cable to connect the TV Tuner to the HDMI port on your monitor.
Power on both your TV tuner and monitor and the picture will now appear.
Additional tips
If you use a VGA or DVI monitor, you’ll need a HDMI to VGA/DVI adapter.
In case your monitor doesn’t have speakers, you’ll need to use HDMI audio extractor. Connect the TV tuner or streaming box to an audio extractor, and then HDMI cable from the extractor to the TV. You’ll also need to connect the audio cable to a set of speakers.
Ensure your monitor is HDCP compliant to avoid issues with content protection.
Adjust the output resolution of your devices to match the native resolution of your monitor (e.g., 720p or 1080p).
Following these steps, you can effectively convert any computer monitor into a functional TV, making the most out of your existing hardware without significant additional investment.
Wondering how to block someone on Skype? It’s pretty simple! Whether you’re dealing with spam or harassment or want privacy, it can improve your experience on the platform.
Today, I’ll walk you through the steps to block and unblock a contact on Skype. So, let’s get started!
How To Block Someone on Skype
Follow the below steps:
Open Skype and tap the contact you want to block, then click on their profile.
Scroll down to access the Block contact button and tap on it.
Click Block.
How To Unblock Someone on Skype
You can also unblock someone with these steps:
Tap on your profile picture or initials, scroll down the menu, then select Settings.
The Settings tab will pop up. Tap Contacts, then select Blocked contacts.
All the contacts you’ve blocked will appear. Tap Unblock.
Blocking or unblocking someone on Skype lets you maintain control over your conversations. The steps are similar on the mobile app, too.
If you are a fan of Age of Mythology, this weekend, there’s a special opportunity for everyone to enter the mythic realms of the new Retold game for free. Yes, and there’s no need for exclusive club memberships.
The game’s developers are organizing a stress test party, and you are one of the guests. They don’t only want fun but also want to test their servers before launching them into the market. Now, if you’ve been excited to see how the classic game looks after being remastered, this is the time.
According to the official announcement, starting July 26, you can participate in specific three-hour periods for three days. Picture this – an immersion into a universe where gods and heroes are seen fighting, all within your Steam account. And what’s better than that? This is the schedule:
Friday, July 26 – 5:30 am PT (8:30 am ET / 12:30 UTC) to 8:30 am PT (11:30 am ET / 15:30 UTC)
Saturday, July 27 – 5:30 am PT (8:30 am ET / 12:30 UTC) to 8:30 am PT (11:30 am ET / 15:30 UTC)
Sunday, July 28 – 5:30 am PT (8:30 am ET / 12:30 UTC) to 8:30 am PT (11:30 am ET / 15:30 UTC)
You can participate in the battle without having the game. Go to the Age of Mythology: Retold Steam store page, press the Request Access button and check your inbox for a message with approval.
However, do not forget it’s not just fun and games. it is fun and games, but the developers also search for annoying bugs that could crawl out during the test. They have already written down several recognized problems, such as missing translations and an odd villager, yet your sharp eyes might spot something fresh.
Not all localization is present for supported game languages.
Brightness options are not yet available in the Settings options.
It has been observed that the player is unable to access the “Villager Priority” menu during a skirmish or campaign match after exiting the tutorial.
Steam Deck Users will be unable to join multiplayer matches hosted by non-Steam Deck users.
Villagers may get temporarily stuck between other villagers when gathering in narrow spots.
Villagers may get periodically stuck in the dropoff animation in rare cases.
Villagers may poorly distribute across trees when tasking a larger group onto a single tree.
Building Rally Points are not visible.
Units may rarely get stuck when pathing near corners of buildings.
Player colors may mismatch on the Spectator mode panels.
If you are playing games on a Steam Deck, remember that there might be some issues when attempting to join matches arranged by those who do not own a Steam Deck.
Keep a special note of September 4th. This is when Age of Mythology: Retold will have its opening ceremony on PC and Xbox Series X|S, also becoming available on Xbox and PC Game Pass. So, if you are an experienced tactician or simply interested in the excitement, this weekend provides an excellent preview of what’s coming next week.
Who can say? Maybe you will get lost in a world full of myths and legends.
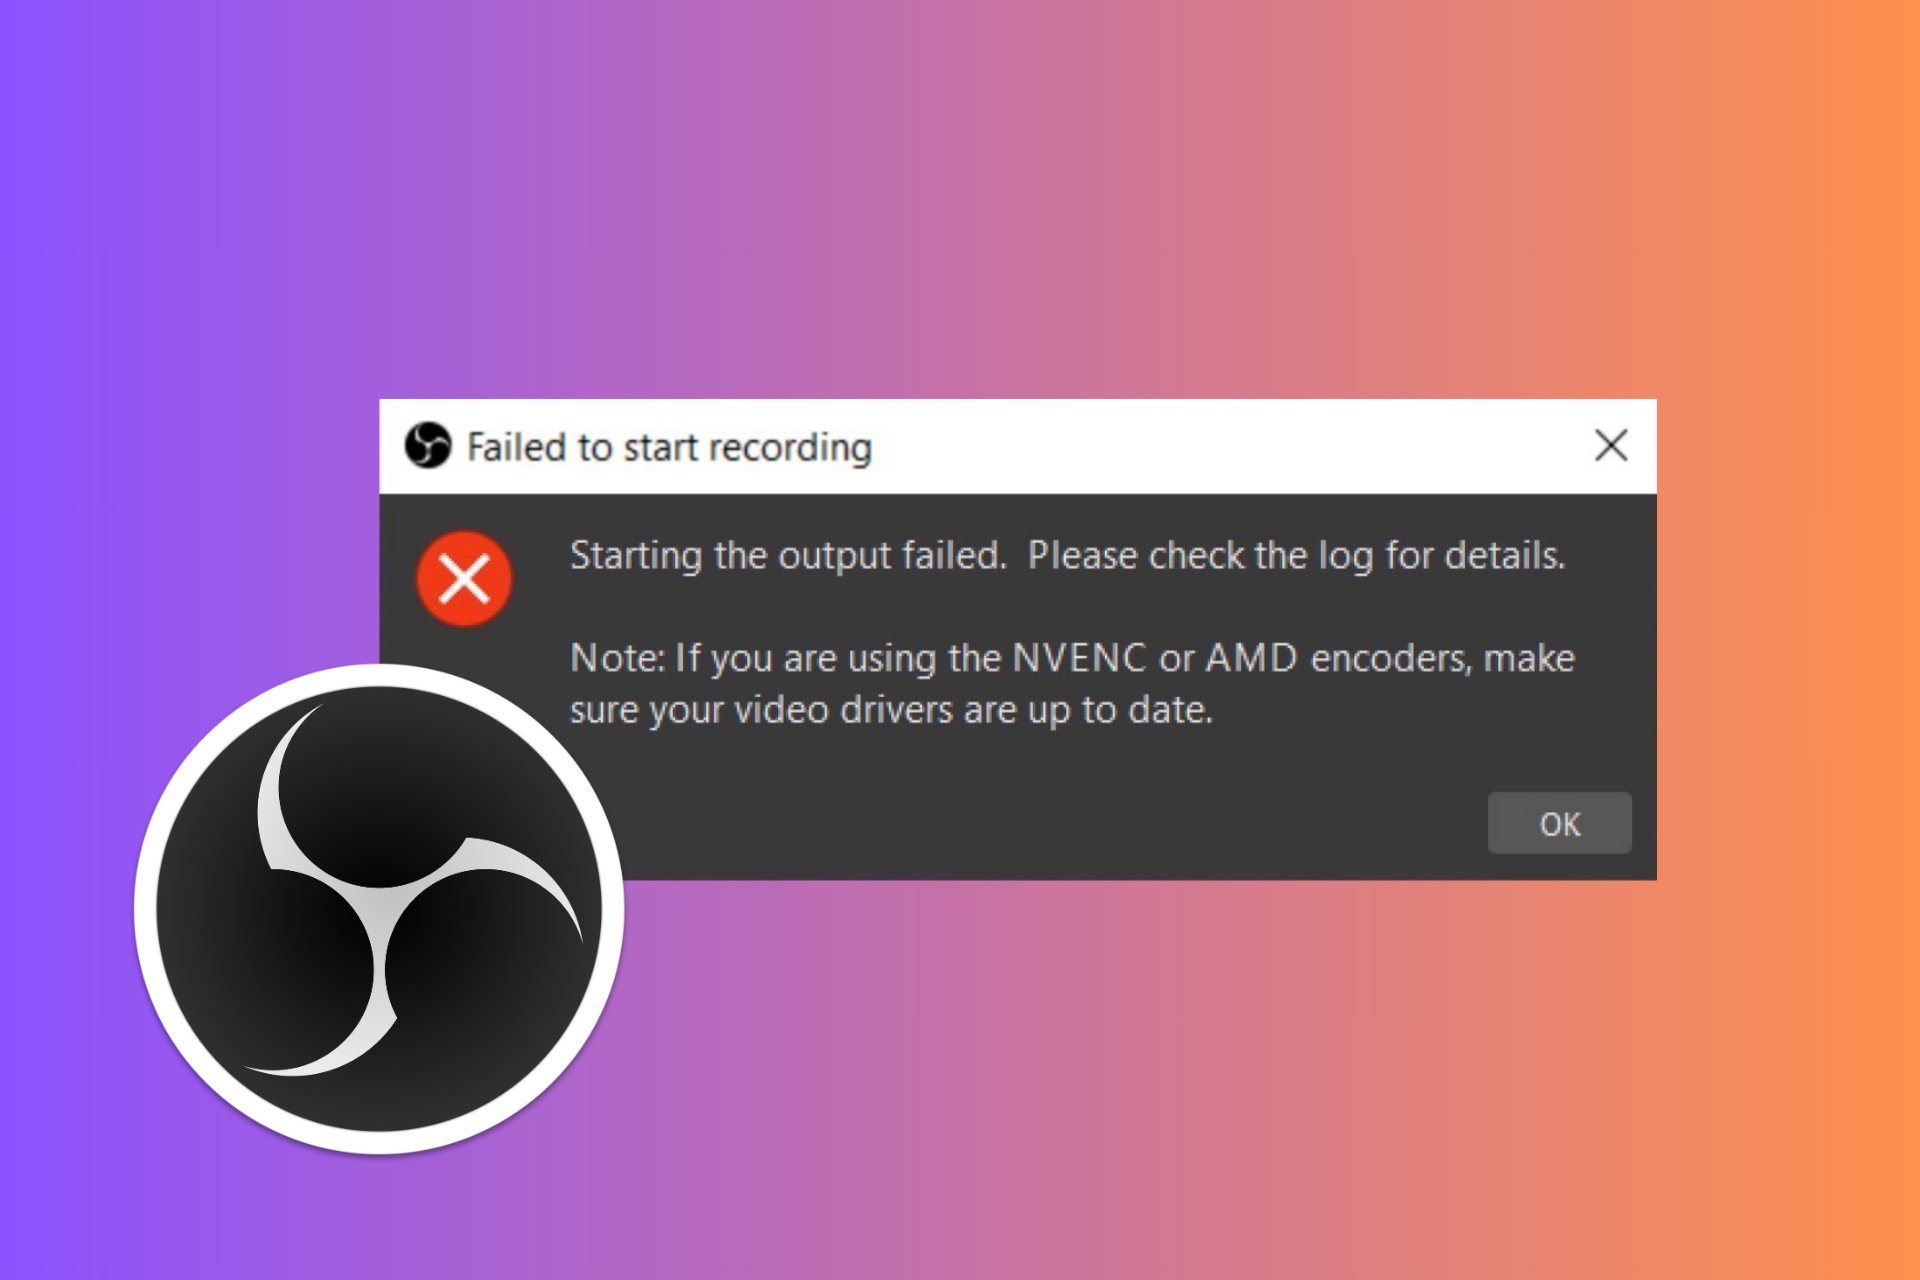
The OBS Starting the output failed error usually shows up when you start recording. The problem is mostly due to problematic NVENC or AMD drivers or missing codecs, but the solutions below will help you fix it quickly.
How do I fix the Starting the output failed error in OBS?
1. Update your video drivers
Press Windows + X on your keyboard or right-click the Start menu and select Device Manager from the menu.
Look for the Display adapters section and expand it.
Right-click your graphics card (e.g., NVIDIA, AMD, Intel).
Choose Update driver.
Select Search automatically for updated driver software and follow the prompts.
Updating your video drivers can resolve compatibility issues with OBS and ensure that your hardware can properly utilize NVENC or AMD encoders.
If you prefer quicker alternatives, you should try a reliable driver updater. One of the most recommended tools is Fortect Driver Updater. Once you install it, it will start scanning to find outdated or malfunctioning drivers and automatically update them with the latest driver options.
Start OBS Studio from your desktop or start menu and go to Settings.
In the Settings window, click on the Output tab on the left.
Under the Streaming section, find the Encoder dropdown menu.
Change it from NVENC or AMD to Software (x264).
Still in the Output settings, select the Recording tab.
Again, change the Encoder to Software (x264) if it is set to NVENC or AMD.
Changing the encoder to Software (x264) can bypass issues with hardware encoders that may not be supported or properly configured.
3. Run OBS as administrator
Find the OBS Studio shortcut on your desktop or Start menu.
Right-click on the OBS shortcut and select Properties.
Go to the Compatibility tab and check the box next to Run this program as an administrator.
Click Apply, then OK.
Running OBS as an administrator can prevent permission-related issues that may interfere with recording or streaming.
4. Set GPU to 0 in OBS Output
Start OBS Studio from your desktop or start menu and open its Settings.
In the Settings window, click on the Output tab on the left.
In the Encoder settings, find the GPU option.
Change the value from 1 to 0.
Click Apply, then OK.
Setting the GPU to 0 ensures that OBS uses the primary GPU for encoding, which can resolve issues with output failure.
By following these steps, you should be able to fix the OBS Starting the output failed error and get back to your streaming or recording activities. To prevent future issues, keep your drivers updated and regularly check for OBS updates.
Creating index cards in Word can be a bit tricky if you’re not familiar with the layout settings and options available. If that’s the case, keep on reading to learn how to make index cards in Word with ease.
How do I make a 3×5 index card in Word?
1. Create index cards using layout settings
Open Microsoft Word and start a new blank document.
Click on the Layout tab on the ribbon at the top of the screen. Choose Orientation and select Landscape.
Click on Size and choose More Paper Sizes.
In the Paper Size dropdown, select Custom Size.
Enter the dimensions for your index cards (e.g., Width: 5 inches, Height: 3 inches for 3×5 index cards).
Click on Margins and set your desired margin size to control the whitespace around the edges of the card.
Type the content you want on your index card. To create another card, press Ctrl + Enter to insert a new page.
You can also use Go to File > Save As and choose Word Template to save this design as a template and reuse it.
2. Use envelopes & labels printing settings
Open Word with a blank document, and click on the Mailings tab in the top toolbar.
In the Mailings tab, click on the Labels button.
A new window will open. Go to the Labels tab and click Options.
Select Index Cards from the list. If not available, create a new custom label with the desired dimensions (e.g., 3×5 inches or 4×6 inches).
Fill in the text or content you want on your index cards.
3. Create a manual layout with table cells
Open a new document in Word.
Click on the Insert tab, select Table, and choose the number of rows and columns based on how many index cards you want to fit on one page.
Right-click on the table and select Table Properties.
Set the dimensions of each cell to match the size of your index cards (e.g., 5×3 inches).
Click inside each cell and type or insert the content for each index card.
4. Download and use templates
In Word, Click on File and then New.
In the search bar, type flashcard or index card.
Browse through the available templates and select the one that fits your needs.
Once the template is loaded, you can customize the text, colors, and layout to suit your requirements.
5. Print multiple index cards on a single sheet
Create a single card layout following the steps in solution 1. Make sure you save the design as a template.
Copy the entire card content.
Paste it multiple times within the same document to fit multiple cards on one sheet.
In the current era of rapid digital transformation, Microsoft has made a big move by joining forces with Lumen Technologies. This cooperation aims to boost Microsoft’s network foundation to manage growing AI and cloud computing requirements, as the Redmond-based tech giant has been having issues with managing AI data centers for a while now.
As artificial intelligence is changing our everyday lives and how businesses run, having strong network capacity and abilities becomes more crucial.
Microsoft’s selection of Lumen to strengthen its network infrastructure is a smart decision because it helps them handle the increasing necessity of data centers, primarily caused by progress in AI technology.
Lumen Technologies started in 1930 and has gone through many changes. Now, this company is ready to give Microsoft a network solution made just for them. They want to offer dedicated access to existing fiber in their network and install new fibers along old and fresh paths.
This infrastructure ready for AI should improve connectivity between Microsoft’s data centers by providing the necessary network capacity, performance stability, and speed. This is crucial as data demands soar.
However, the collaboration is not only for upgrading network infrastructure. Lumen will also adopt Microsoft’s cloud and AI technology to simplify operations, decrease technology expenses, and enhance offerings for its worldwide customer group.
By transferring and updating its workloads to Microsoft Azure and employing Microsoft Entra solutions in security aspects, Lumen expects a notable improvement in its cash flow and customer experience.
When it comes to optimizing your OBS settings, understanding how to configure Max B-Frames can significantly impact your recording and streaming quality. Let’s dive into the essential adjustments you can make to enhance your OBS setup.
How do I set Max B-Frames for high FPS recordings in OBS?
1. Ensure optimal keyframe interval for high FPS
Open OBS Studio and navigate to Settings in the bottom-right corner.
Go to the Output tab.
Set Keyframe Interval:
If you are using the Simple/Standard output mode, understand that the keyframe interval is set in seconds. With a 240 FPS recording, setting a keyframe interval of 1 second will insert a keyframe every 240 frames, and setting it to 2 seconds will insert one every 480 frames.
For higher frequency keyframes (e.g., every 1/2 second or 120 frames), you need to use the Custom FFMPEG Output.
By adjusting the keyframe interval, you can control the frequency of full reference frames, which can improve seekability and quality at the cost of increased file size.
2. Adjust the Max B-Frames for quality
Open OBS Studio and go to Settings.
Go to the Output tab.
Set Max B-Frames to 0:
For the highest quality when utilizing a quality-based rate control (such as CQP), set the Max B-Frames to 0. B-frames are highly compressed and can reduce overall quality.
If you are using a bitrate-based rate control (like CBR), you may want to keep some B-frames but keep it minimal (e.g., 1-2).
Fewer B-frames can lead to higher video quality, especially in high motion or complex scenes, but it may increase file size.
What is the best value for B-Frames in OBS?
1. Optimal B-Frames for Variable Content
Open OBS Studio and click on Settings.
Go to the Output tab.
Set Max B-Frames to 2. The setting is ideal for general content as it balances quality and resource usage.
Using 2 B-frames is typically best for a variety of content types, minimizing performance hits while maintaining quality.
2. Adjust based on content type
Open Settings in OBS Studio and go to the Output tab.
Adjust Max B-Frames Based on Content:
0 B-Frames for fast-moving, high-action content.
2 B-Frames for medium motion content.
4 B-Frames for static, low-motion content.
This approach allows you to tailor your encoding settings to the specific needs of your content, maximizing quality without unnecessary resource usage.
You should note that raising Max B-frames can improve compression efficiency and potentially quality, especially in low-motion scenes, but it may also increase the computational load. Follow the following link to set up OBS if you have a low-end PC.
By understanding and applying these solutions, you can fine-tune your OBS settings to achieve the best possible recording and streaming quality for your specific needs. Always remember to test your settings and monitor performance to ensure the best results.
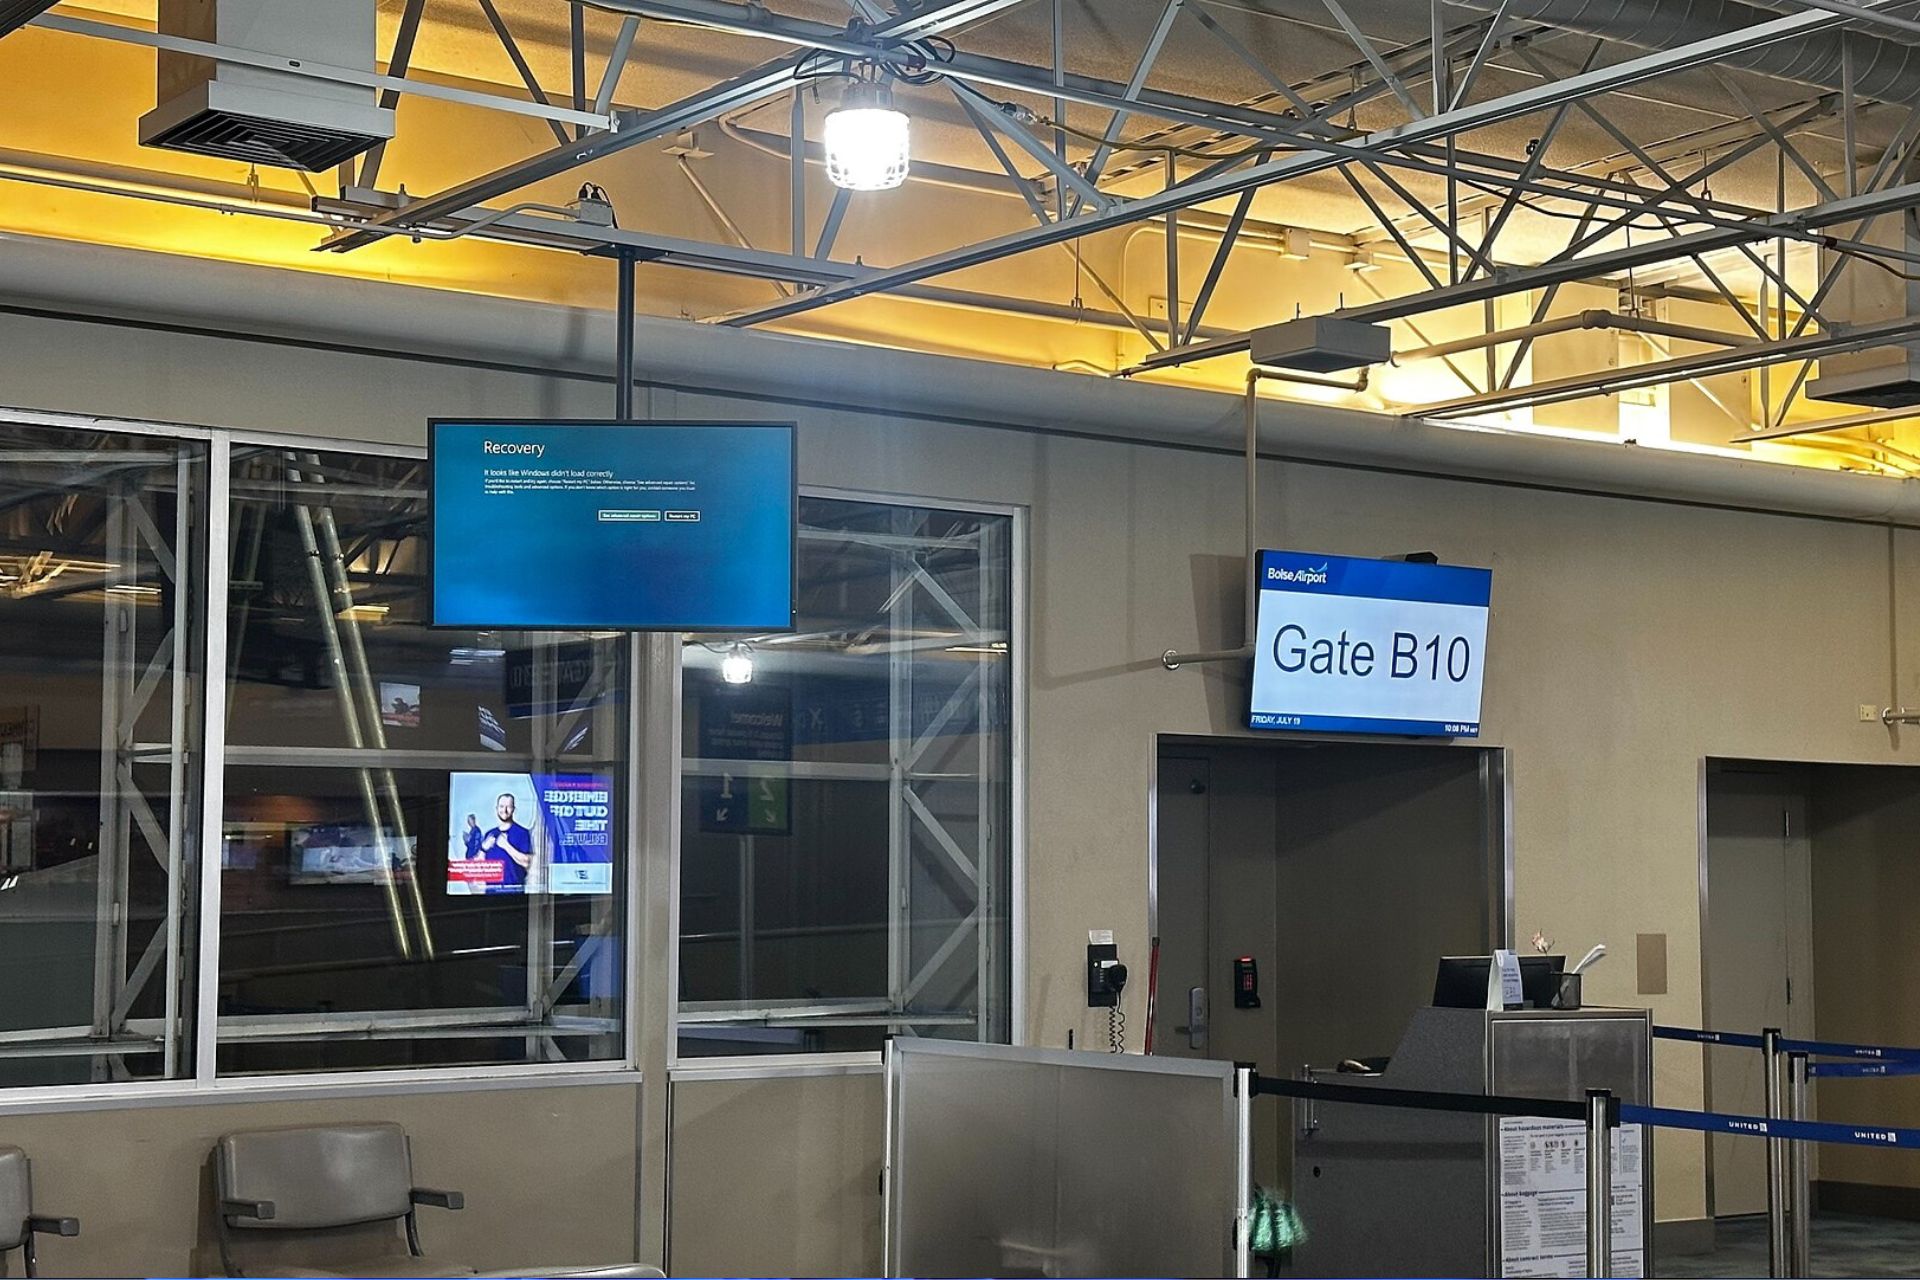
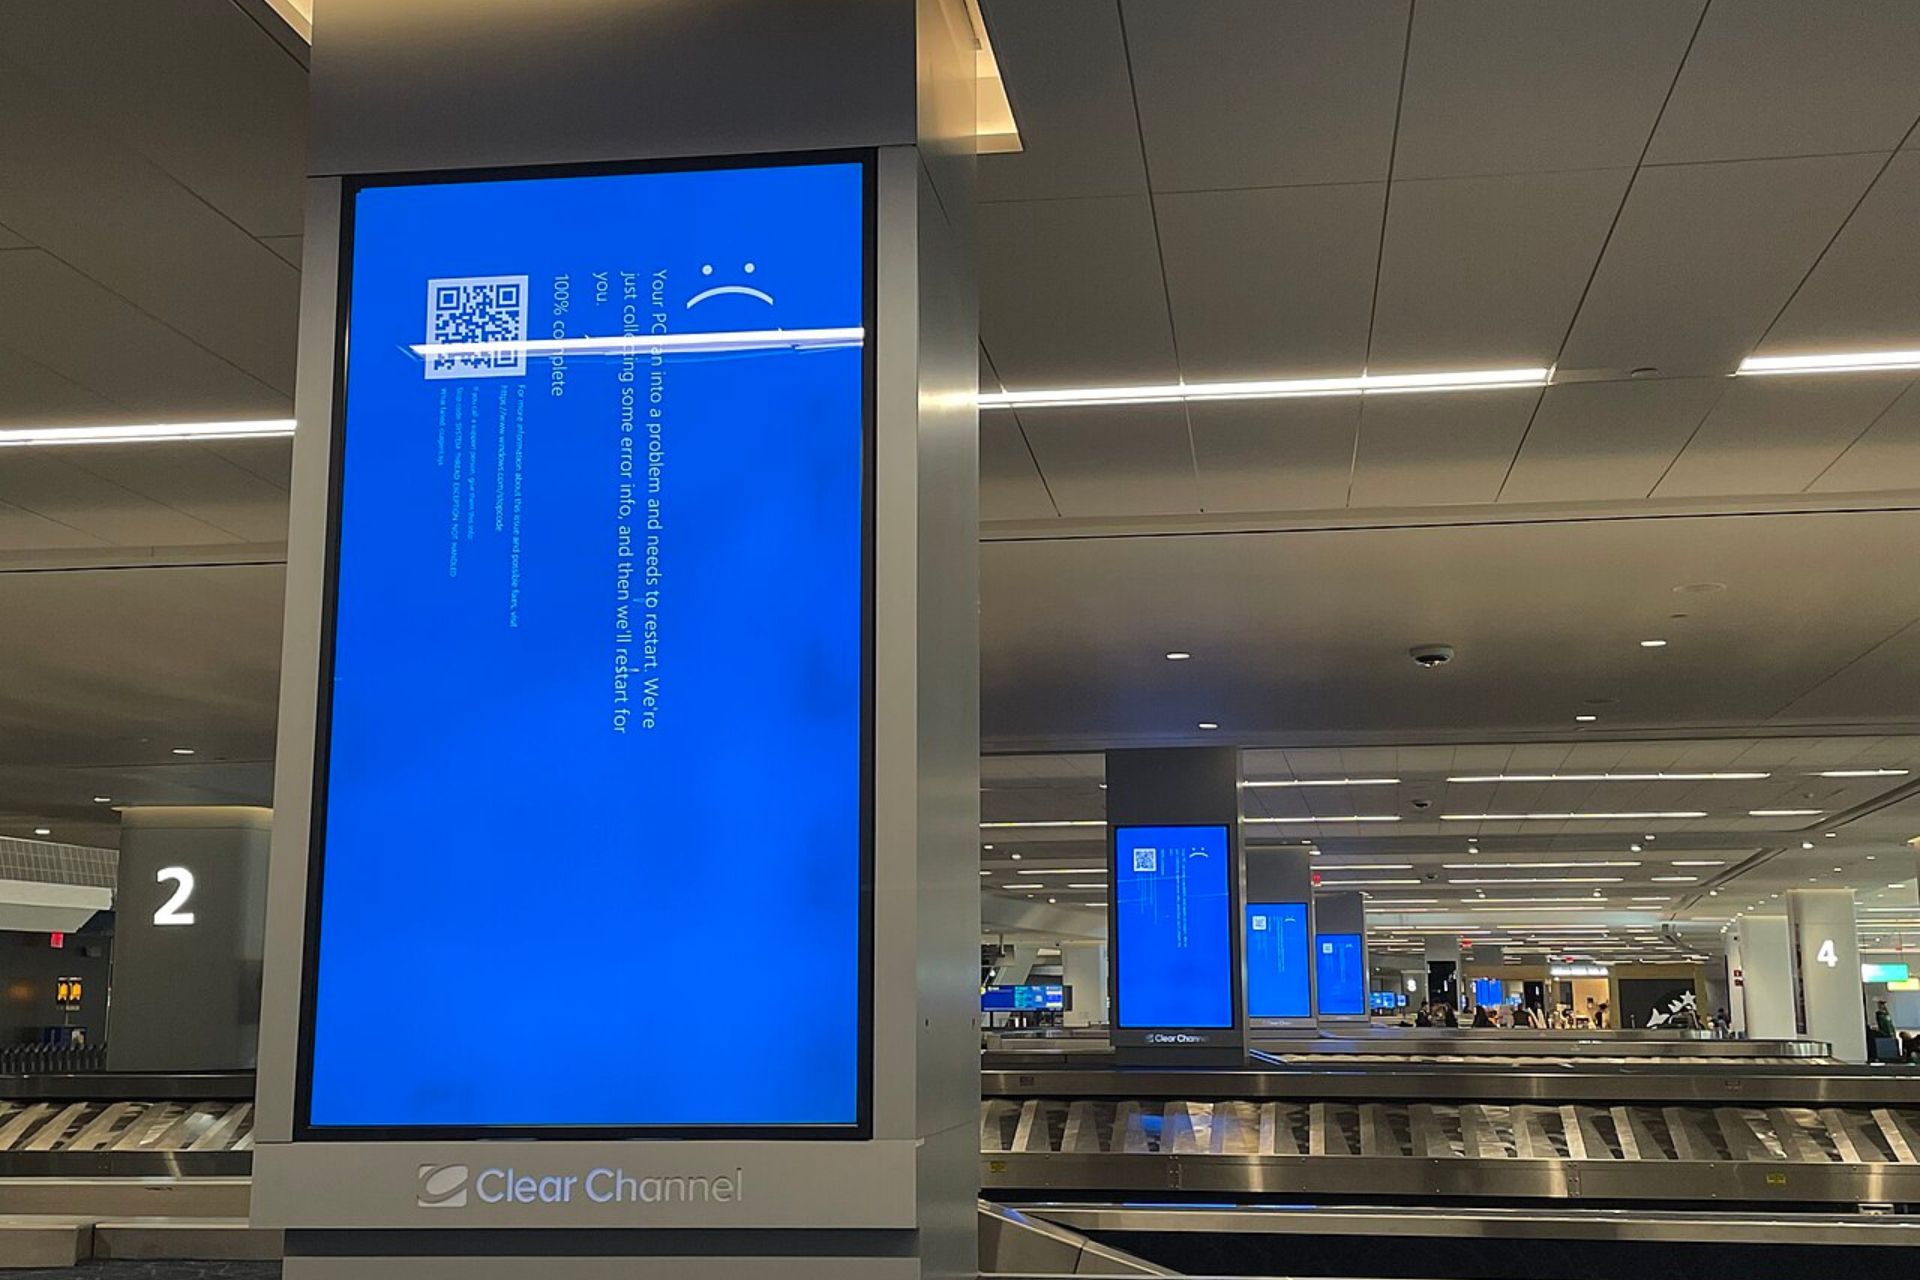
Crowdstrike, a big name in cybersecurity, released an update that caused a large-scale shutdown instead of improving security as intended. This affected millions worldwide on their computers, with serious impacts like flight delays and hospitals stopping surgeries.
According to the latest report, as an act of restitution, CrowdStrike offered a $10 Uber Eats gift card as a peace offering to its partners and customers inconvenienced by the outage. The gift card was sent as an appreciation present to a few high-level executives in CrowdStrike. The company’s chief business officer, Daniel Bernard, contacted them directly by emailing this gift.
However, this, too, was messy. Users encountered another problem: some people who got this present found difficulties using their given gift cards because they were getting error messages saying that their code had been canceled due to very frequent use, which Uber considered fraudulent activity or abuse.
Even though the number of Windows PCs that experienced problems was less than one percent of all computers, the faulty update still had a significant effect. It caused issues in important businesses and systems for an extended period.
CrowdStrike has been making active efforts to fix this situation by regularly giving updates on how they diagnose and solve what caused the outage. Both George Kurtz, CEO of CrowdStrike, and Shawn Henry, who serves as their chief security officer, have publicly apologized for this incident, stressing their dedication towards being transparent with customers while also stating that they will take steps necessary so similar incidents don’t happen again in future times to come.
A $10 Uber Eats coupon for millions of dollars lost over several hours seems like a fair trade, right?
Outlook can delete your search history for privacy or organizational reasons. Whether you’re using it on your desktop or mobile device, clearing your history can help you maintain a clutter-free and organized workspace.
Below, I’ll show you how to achieve this in just a few steps!
How To Delete Outlook Search History
I covered two methods depending on the device that you’re using.
On PC
Here’s what to do:
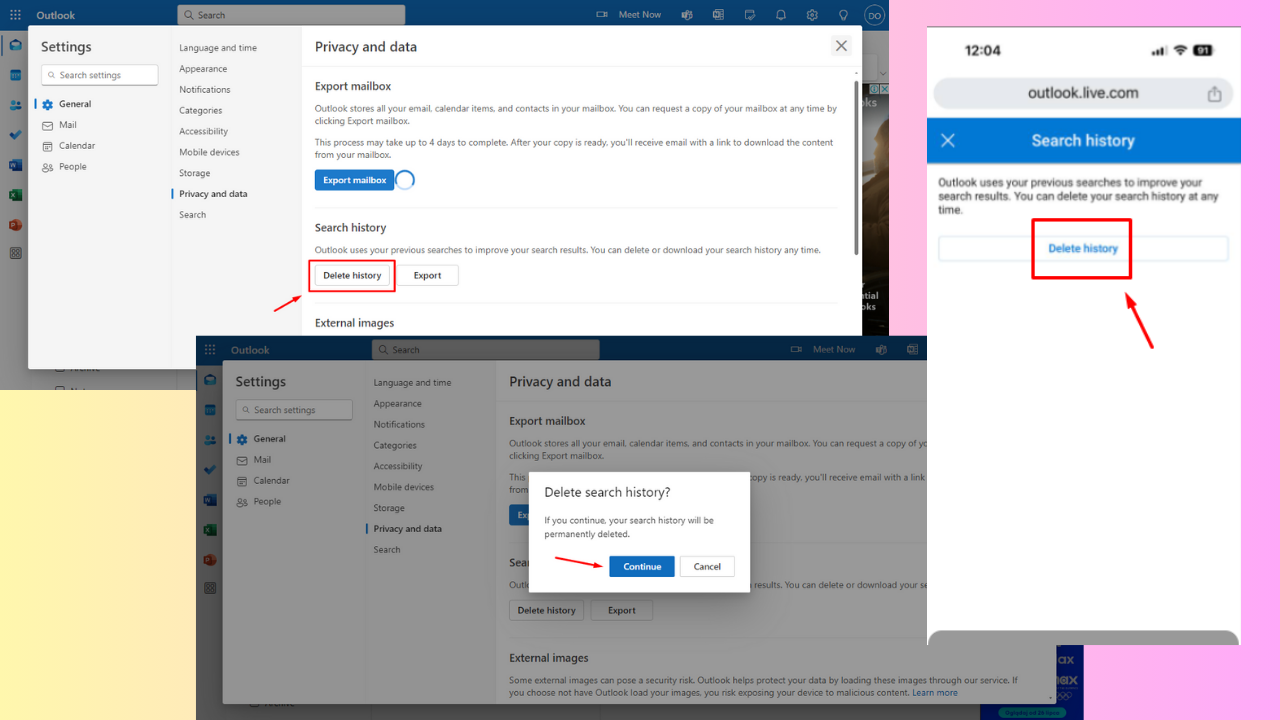
Log into your Outlook account and tap on the settings icon in the top right corner of your screen.
Click General and select Privacy and Data.
Under search history, click Delete history.
Tap Continue to confirm you want to delete your search history. However, note that the data will be permanently erased.
That’s it! Simple, right?
On Mobile
Follow the below steps:
Log into your Outlook account and click the menu button on the top left corner of your screen.
It’s not a secret that Microsoft has continuously contributed to Chromium. This began when they switched to the Blink engine for the Edge browser. A recent development indicates Google’s reliance on the Edge browser to track abuse campaigns that redirect Chrome users to alternative browsers.
Google has noticed an abuse campaign that redirects Chrome users to other browsers. In response to this, the company is working to improve Chrome security by adding Microsoft Edge to the “BrowserDialogs.ExternalProtocol.Scheme”. This addition allows for better tracking and monitoring of external protocol usage, providing valuable insights into potential abuse.
External protocols allow web browsers to handle specific actions triggered by URLs (e.g., opening email links with the mailto: protocol). However, these protocols can be exploited for malicious purposes, leading to unauthorized redirections or abuse.
To address this, the Chromium project has introduced a new histogram bucket within the BrowserDialogs.ExternalProtocol.Scheme
“Add microsoft-edge to BrowserDialogs.ExternalProtocol.Scheme. Due to an abuse campaign (b/352704072), we’d like to get an upper bound on abuse that redirects users to alternative browsers. This CL adds a histogram bucket to BrowserDialogs.ExternalProtocol.Scheme to provide that bound.” the commit spotted by Windows Report reads.
This commit focuses on including Microsoft Edge in the list of supported external protocol schemes. These schemes define how applications handle specific links or commands. By tracking how often external protocols trigger actions within Edge, Chrome developers gain valuable insights into how these features are being used.
To stop bad websites from tricking users into switching to other browsers, Google is working with Microsoft. They’re keeping track of how often websites try to redirect users from Chrome to other browsers, like Edge. This helps them find and fix problems before they affect many people.
By watching how websites behave, Google can protect users from harmful websites and make sure they stay safe online.
By actively monitoring external protocol usage in Edge, developers can quickly identify and address any suspicious activity, minimizing the risk of exploitation. Users benefit from a more secure browsing environment. Malicious redirections, a common tactic used by attackers, become less likely, leading to a safer browsing experience with Chrome.
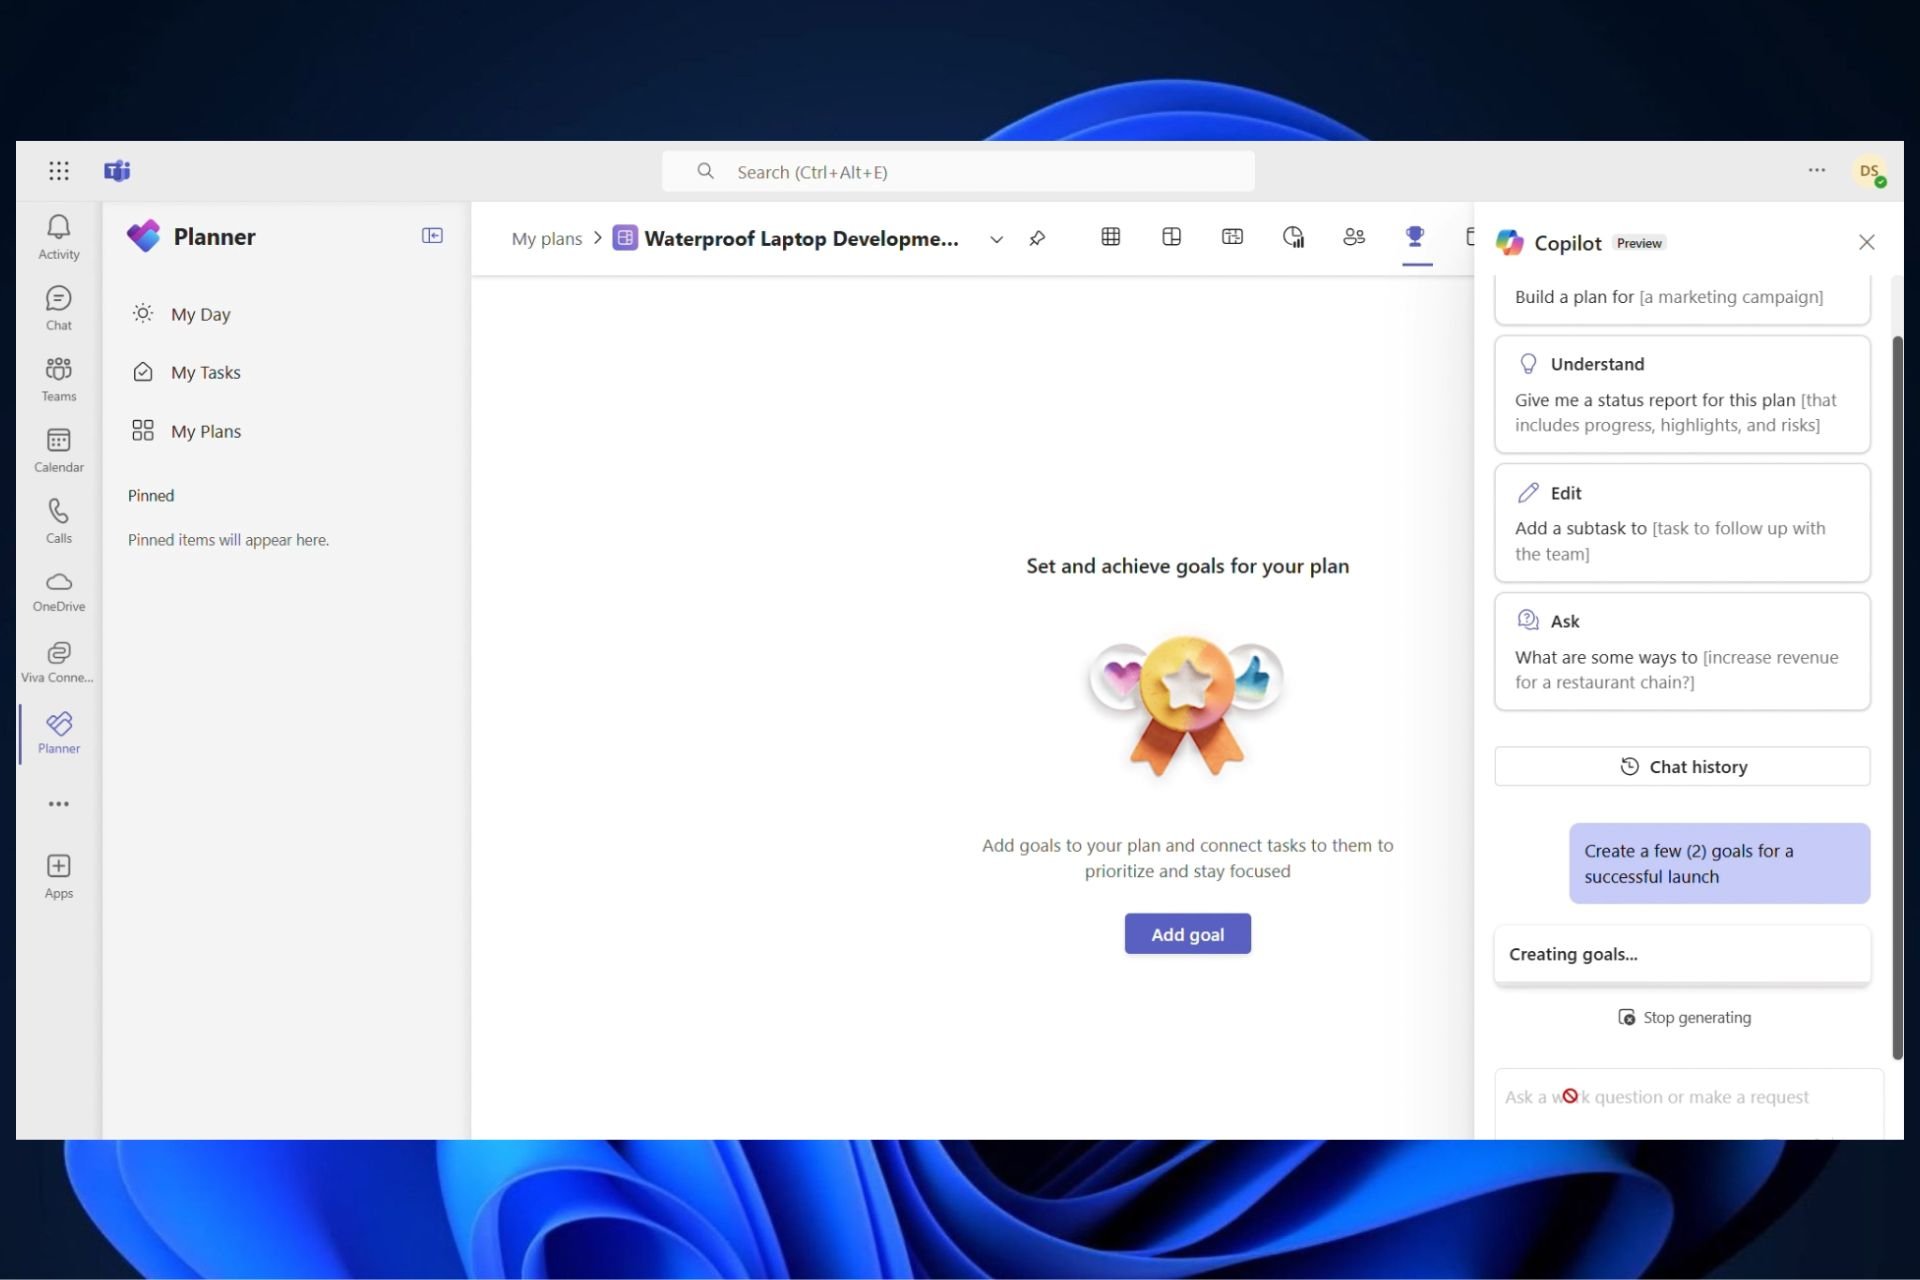
After teasing it a while ago, Microsoft released a preview edition of its Copilot generative AI assistance for the Planner application in Teams. Now, it is available to users with either a Project Plan 3 or Project Plan 5 license in the platform.
In a blog post, Microsoft says you can also more reliably go back to previous chats, attach subtasks to a main task, and link tasks with particular goals and buckets. Microsoft also added suggested prompts to make asking questions and getting answers smoother than silk.
• The ability to return to previous chats and improved reliability in answering questions about progress, due dates, and assignments • Enhancements in adding subtasks and linking tasks to buckets and goals • New suggested prompts to highlight question and answer capabilities
Microsoft
The Redmond-based tech giant is also preparing to introduce a feature that will assist users in creating a new plan with only one text command.
In the coming weeks, users can expect the ability to build a plan – including goals, buckets, and a work breakdown – with a single prompt.
Microsoft
And for those inquisitive minds who don’t have a Project Plan license, there is an opportunity to try it out with a 30-day free trial. Access the Planner application in Teams and select the sparkling diamond icon.
And now you may ask, what happens with the feedback? Microsoft has it all sorted out. You can give your thoughts straightaway using the new Planner app inside Teams or visiting the Planner Feedback Portal.
We are still unsure about Copilot’s availability and price for Planner, but we expect Microsoft to share more details on the matter in the following weeks.
Adding alerts to your OBS Studio setup can significantly enhance your streaming experience by making it more interactive and engaging for your audience. Whether you’re celebrating new followers or thanking donors, these alerts provide real-time feedback that keeps your viewers hooked.
How do I add alerts in OBS Studio?
1. Choose and configure an alert provider
Select an alert provider:
Visit a site like Streamlabs, StreamElements, or NerdOrDie to choose the provider that best suits your needs.
Follow the sign-up process on their website and connect your streaming account (Twitch, YouTube, etc.) to their service.
Configure the alert overlay:
Go to the alert configuration section on the provider’s website.
Customize the alerts by choosing event types (follows, donations, subscriptions), images, sounds, and display settings.
Save the settings, and the provider will generate an Alert URL for you.
With this setup, you can have customized alerts like new followers or subscribers displayed on your stream. This makes it engaging and interactive for your audience.
2. Add the Alert Overlay to OBS Studio
Open OBS Studio
In the Scenes panel, select the scene you want to add alerts to.
In the Sources panel, click the + button and select Browser.
Name the new source (e.g., Alerts) and click OK.
In the new window, paste the Alert URL you got from your alert provider into the URL field.
Adjust the width and height to fit your stream layout (e.g., width: 800, height: 600).
Click OK to save the new source.
This will integrate your customized alerts directly into your OBS scene, ensuring your viewers see them in real-time.
3. Test and adjust alerts
Go back to the alert provider’s website.
Use their built-in test functionality to trigger a test alert.
Look at your OBS preview window. The test alert should appear in the scene where you added the Browser source.
If the alert does not appear, recheck the Alert URL and make sure it’s correct.
Testing ensures that your alerts are correctly set up and will appear during your live stream, giving you the confidence that everything is working as intended.
4. Troubleshoot visual issues
In OBS Studio, go to Settings and then Advanced.
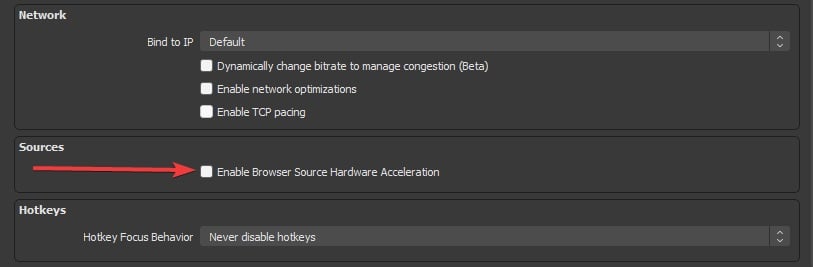
Uncheck the Enable Browser Source Hardware Acceleration option and click Apply and OK.
Click on the alert Browser Source in your Sources list.
Use the red bounding box to reposition and resize the alert overlay as needed.
Disabling hardware acceleration and adjusting the source can fix issues where the alerts are not visually appearing, ensuring they show up properly during your stream.
5. Resolve audio but no visual issues for OBS alerts
Copy the Alert URL from your alert provider.
Open a web browser and paste the URL in the address bar to see if the alert visuals appear there.
Right-click the Browser Source in OBS and select Properties.
Ensure the width is set to 1920 and the height is 1080 (or the resolution you stream at).
Testing the URL in a browser and adjusting dimensions ensure that the alerts are correctly sized and positioned, solving issues where only audio plays without visuals.
By following these step-by-step solutions, you can effectively add and troubleshoot alerts in OBS Studio, making your streams more interactive and engaging for your audience.
In the past week, a stormy disruption blew over the digital world. Around 8.5 million Windows PCs globally were affected by this disturbance. It wasn’t just a little software problem; it turned into a complete crisis that caused many systems to show the dreaded Blue Screen of Death (BSOD), all thanks to an update with bugs from CrowdStrike Falcon sensor software.
Think about how much chaos there was when businesses had to cancel many flights—even Delta and other airlines experienced sudden digital paralysis because they couldn’t use their computers properly. Crowdstrike Falcon, one of the top expert companies in cybersecurity meant to protect from malware and cyberattacks, was caught up in this unanticipated outage.
The main problem was found in a Rapid Response Content update, particularly in an InterProcess Communication (IPC) Template Type. This template type did not undergo proper vetting during testing, which caused an out-of-bounds memory read and exception that Windows could not handle, leading to system crashes. This reminds us how slight errors can cause worldwide disturbance within our digital ecosystem.
In answer, Microsoft and CrowdStrike rushed to offer solutions and tools for recovery, trying to bring back order from the confusion. CrowdStrike released a fresh “Remediation and Guidance Hub” in the hopes of making the recovery process smoother, testing fresh methods to accelerate affected systems’ return to normality.
The cybersecurity company also conducted a preliminary review after the incident, highlighting steps taken during this period of confusion and ways they plan to avoid similar situations in the future. This means making Rapid Response Content testing more advanced and using a slow deployment method to detect possible problems before they cause damage.
This CrowdStrike-Microsoft outage event was a serious reminder for the affected people about how our digital world’s connections can lead to unexpected problems. It highlights why we need strict testing and checking systems, particularly when many users rely on these platforms for stability and safety.
As CrowdStrike attempts to restore its users’ confidence in their services, the technology community is observing with anticipation. They desire that this occurrence will motivate better protection against software upgrades’ unpredictability.
Microsoft has released a fresh build of Windows 11 for Insider members in the Canary Channel, along with some neat features likely to improve the user experience. One notable alteration includes duplicating a tab in File Explorer, which could be seen as a minor but impactful change for handling files and folders in Windows 11.
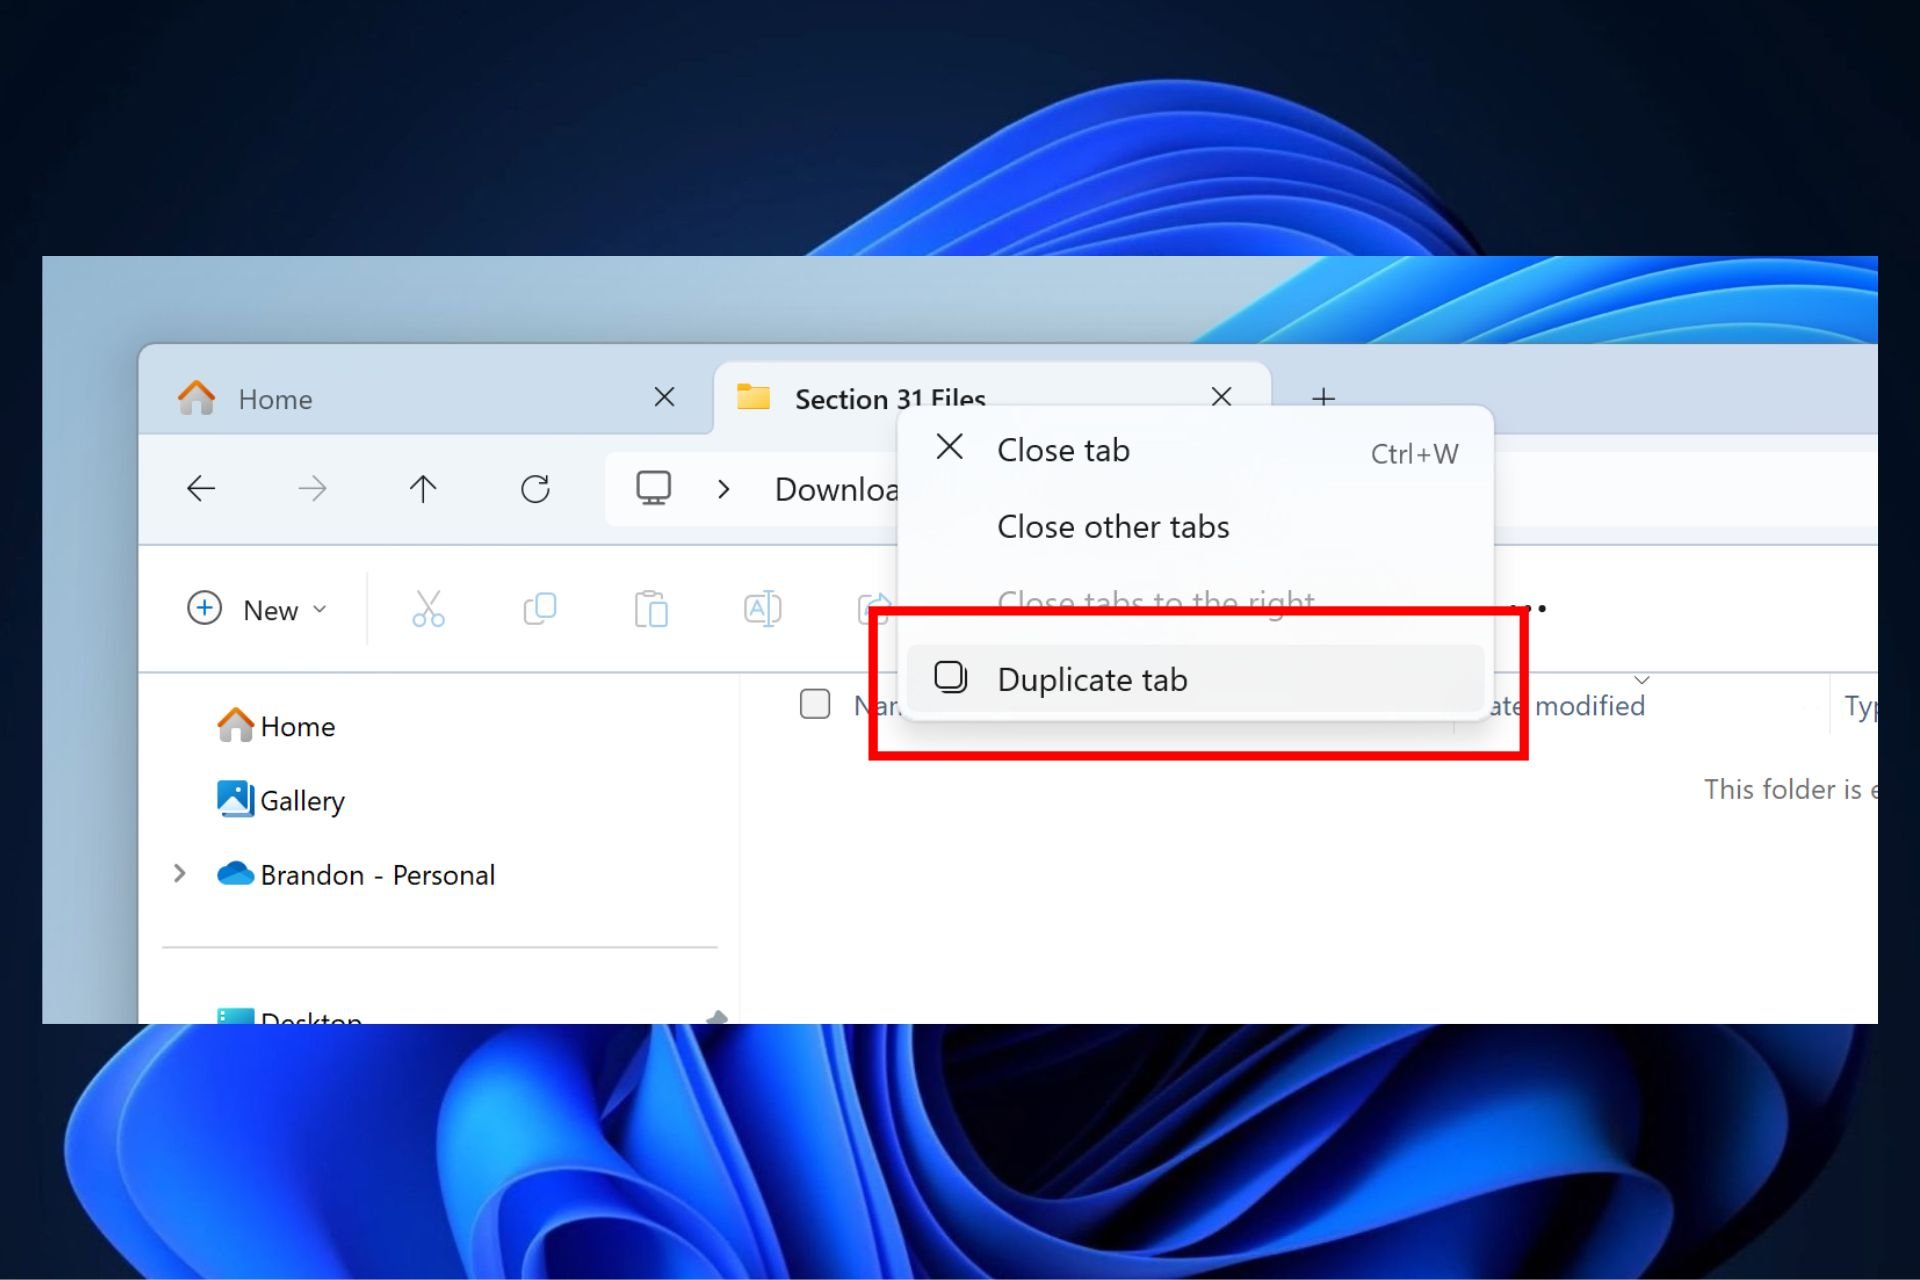
This is good news for people who enjoy keeping their digital workspace neat and organized. A fresh feature lets you right-click on a tab in File Explorer, giving the option to duplicate it easily. This could save time and clicks for users working with many directories simultaneously.
Aside from letting users duplicate File Explorer tabs in Windows 11, Microsoft has also enhanced its services, such as developer tools and networking improvements. For example, the netsh wlan show networks command now properly displays Wi-Fi SSIDs with Unicode characters.
However, it’s not just about adding new things. Microsoft has also concentrated on resolving problems that already exist. They have fixed a bug causing some Insiders to experience errors in the latest builds, mentioning KERNEL_SECURITY_CHECK_FAILURE as the source of this issue. Additionally, they have made alterations to improve how the address bar dropdown in File Explorer functions predictably more and ensure that pop-up windows within Settings align correctly.
Yet, everything is not perfect. Microsoft is currently studying some problems. For instance, there have been reports of Insiders getting trapped on older builds and Windows Sandbox not starting because of an error. They’re also looking into a bug where the emoji panel does not show up correctly, and another problem is that Task Manager’s performance graphs show wrong colors in dark mode.
For those who are excited to use these updates, it should be known that the builds released in Canary Channel are not final versions. This means that the features and experiences included can still change, be removed, or replaced; there is no guarantee they will become available for everyone to use.
If you’re diving into the world of streaming or recording with OBS (Open Broadcaster Software), you might have come across the term Multipass Mode. This feature, available when using the NVENC encoder, can significantly improve your video quality by optimizing bitrate allocation. Let’s break down what OBS Multipass Mode is and how you can unlock its full potential.
What is OBS Multipass Mode and what is it for?
Multipass mode in OBS (Open Broadcaster Software) is a feature available when using the NVENC encoder. This mode allows the encoding process to be performed in two passes rather than one, optimizing the allocation of bitrate to different parts of the video for improved quality.
1. What are the available Multipass Modes?
Single Pass Mode
In single pass mode, the encoder estimates the required QP (Quantization Parameter) for each macroblock and encodes it immediately.
This mode is faster and consumes fewer resources, making it suitable for real-time streaming where encoding speed is critical. Using single pass mode is beneficial when you prioritize speed over encoding efficiency. It ensures that your streams are processed quickly, which is crucial during live broadcasts to avoid lag.
Two-Pass Quarter ResolutionDescription
In the first pass, the encoder runs at a quarter resolution to capture larger motion vectors as hints for the second pass. In the second pass, the encoder uses these hints to optimally distribute bits across the frame.
This mode offers an optimal trade-off between quality and performance and is generally recommended for most users. Two-pass quarter resolution mode helps in achieving better video quality without putting too much stress on your GPU. It’s ideal for situations where you want a balance between quality and performance.
Two-Pass Full ResolutionDescription
The first pass runs at full resolution to gather detailed statistics for the second pass, which then uses this data to achieve optimal bitrate distribution across the frame. This mode provides the highest quality at the cost of more GPU resources and time.
Choosing the two-pass full resolution mode is best when the utmost video quality is needed, and you have sufficient GPU resources to handle the extra load. This mode ensures the highest possible fidelity for your streams or recordings.
2. Setting up Multipass in OBS
Click on the Settings button located in the lower right corner of the OBS main window.
In the settings window, go to the Output tab.
Ensure that the Output Mode is set to Advanced to access the detailed encoder settings.
Under the Streaming or Recording section, select the NVENC encoder from the Encoder dropdown menu.
Find the Multipass Mode dropdown and choose your preferred option (Single Pass, Two-Pass Quarter Resolution, or Two-Pass Full Resolution).
Setting up multipass mode allows you to tailor your streaming or recording for better quality and performance based on your hardware capabilities and requirements.
3. Testing and adjusting for optimal performance
Start a test recording or stream using the selected Multipass Mode settings.
Use Task Manager (Ctrl + Shift + Esc) or a monitoring tool to check the GPU and CPU load during the test.
After the test, review the recording or stream playback to assess the video quality.
If you notice performance issues or unsatisfactory video quality, tweak the Multipass Mode or other encoder settings accordingly.
Testing and adjusting your settings ensures that you achieve the best possible balance between video quality and system performance.
Using the Multipass Mode in OBS can significantly enhance your streaming or recording quality, providing flexibility to match your specific needs and hardware capabilities.
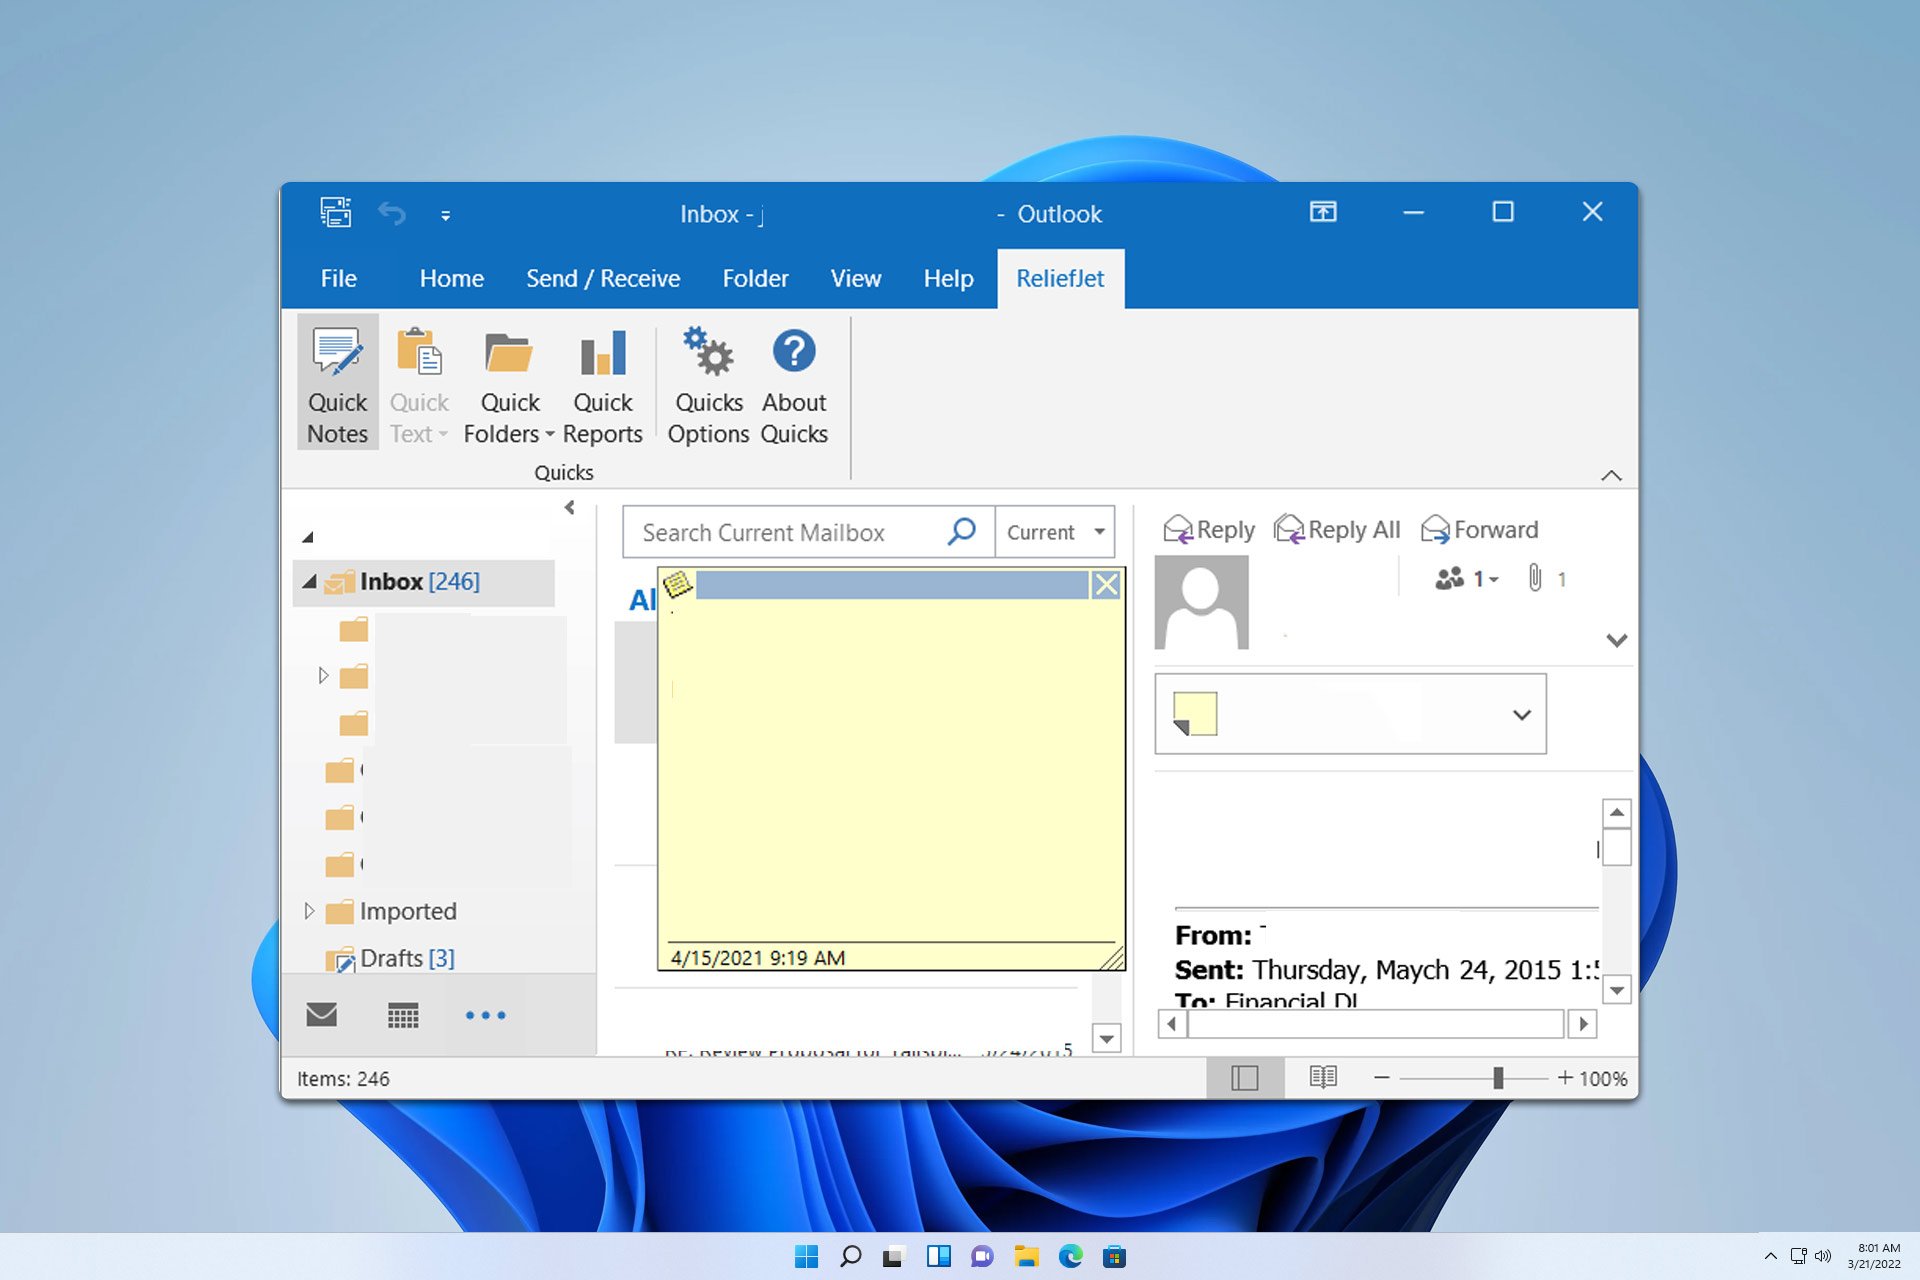
It’s frustrating when your Outlook notes go missing, especially if you rely on them for important information. Fortunately, there are several methods to recover your lost notes, and we’ll show them in this guide.
What can I do if my Outlook notes are missing?
Before we try anything else, try switching to the old version of Outlook. You can switch to the legacy version from the Help menu or toggle New Outlook from the top right if available.
1. Change Outlook start settings
In Outlook, go to File and select Outlook Options. Next, choose Advanced.
Select Outlook Start and Exit. Set it to Notes folder.
Save changes and restart Outlook.
When restarted, you should open directly in the Notes folder and see the Notes icon in the navigation panel.
Right-click on Notes and select Pin.
Now you can go back to Outlook Start and Exit settings and reset it to default and Notes will remain pinned and easily accessible.
2. Use the More Apps icon
In Outlook look for the list of shortcuts left of File.
Click the More Apps icon, represented by 4 little boxes.
In the sidebar, look for a folder called Notes. It should be in the same section where the Inbox and Sent Items folders are.
Click the folder and you’ll see all your notes.
Drag the Notes folder to the favorites for quick and easy access in the future.
Missing notes in Outlook can be a problem, but we hope that you managed to restore them using these steps. If you want to learn more about notes, we have a great guide on how to sync Outlook notes with iPhone, so don’t miss it.
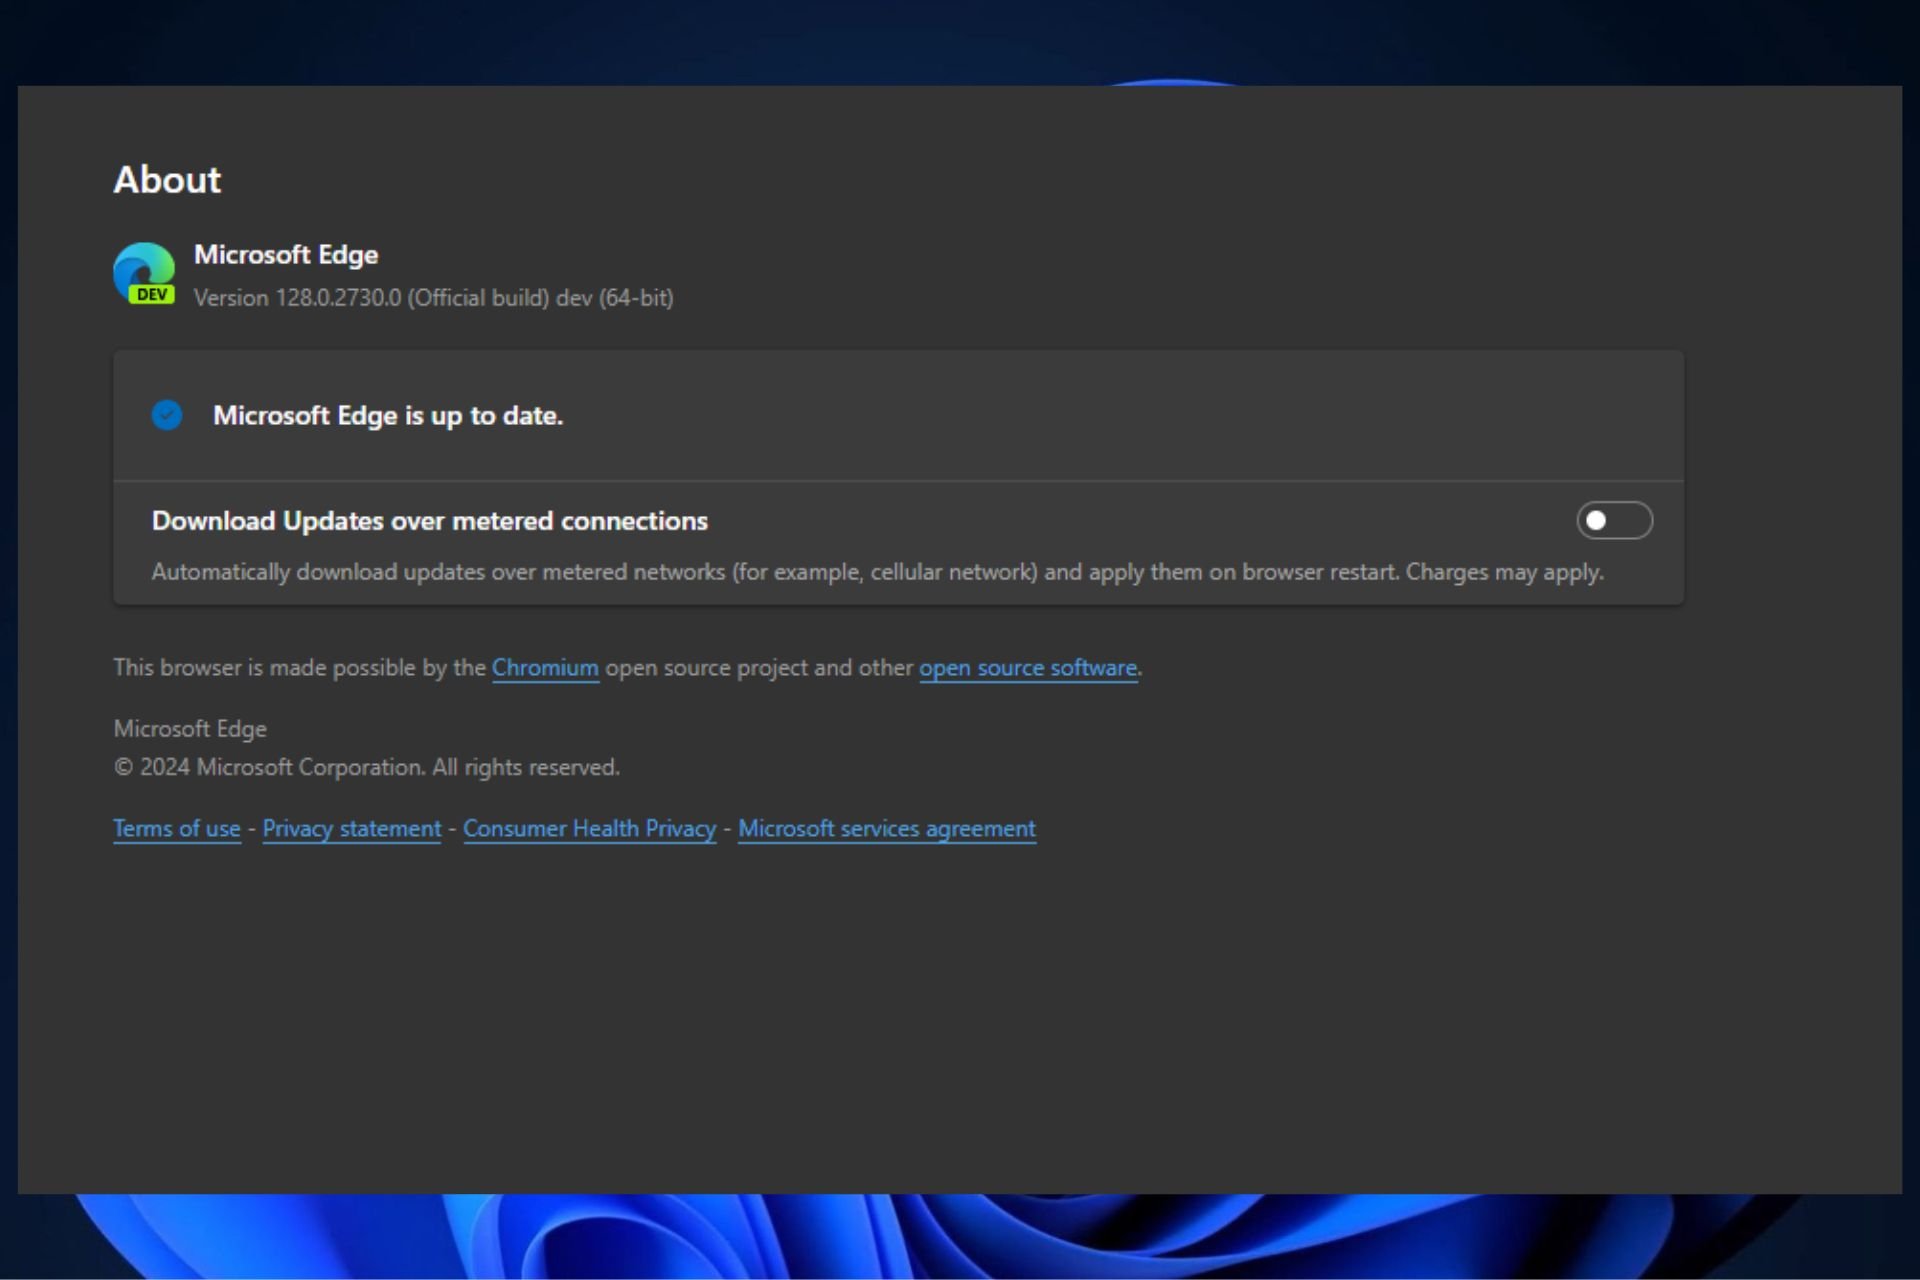
Approximately a week has passed since Microsoft released the latest update to Microsoft Edge’s Dev Channel. Another update, which brings the Edge browser to version 128.0.2730.0, is now out. It brings some cool improvements, fixes, and features to improve your browsing experience.
There’s a fresh icon in footer elements for convenience lovers, especially for autofill suggestions. There are also enhancements in reliability. When you had experiences like trying to sign in to an AAD account on Android, which caused a crash, or starting your device again and then playing a YouTube video that made it crash, all those problems are now fixed.
Have you ever experienced the UI overlapping issue when doing AAD login or discovered that the search button icon is unclear in high contrast mode? These problems have been resolved now. And, if you can recall those times when you would open up the same group in your browser and a few tabs would magically vanish, or instances where buttons would overlap on smaller screens, all of those problems have been resolved as well. Gone. Not anymore.
Mac users will no longer see the FRE page skipped and the browser not responding when it starts up. Android users are lucky: the Sign-In page’s layout and color scheme match other pages. Remember that strange Immersive Translate panel? It doesn’t show up in the middle of the screen anymore. Gone.
This change was not only for Android users but also for those who use iOS. The ‘Continue’ button has been shifted to a better place on the implicit sign-in page, and now it’s easier to rearrange items in single-point mode from the All-menu page. Moreover, no empty account information will be displayed if you click ‘sync settings’ on the implicit sign-in page.
Adding a timer to OBS Studio can be a game-changer for your streams, helping you keep track of time and engage your audience more effectively. Here are some simple steps to add a countdown timer in OBS Studio using different methods.
How do I add timer in OBS Studio?
1. Use the countdown script in OBS Studio
Open OBS Studio and create a scene or select the one you already have.
Go to the Sources panel and select Text (GDI+) from the menu.
Name it Timer and set its characteristics.
Now, go to Tools from the upper menu and select Scripts.
Next, click on the + button that will automatically open the scripts folder in OBS Studio.
Select the countdown.lua script and click Open.
In the next window, set the counter time value, then below, in the Text source menu, select your Timer that you created in step 2.
Now, the timer will appear on the screen and you can place it wherever you want on the screen by dragging it with your mouse.
2. Using Stagetimer
Visit Stagetimer to create a free timer and copy the Viewer link generated.
Open OBS Studio and create a new scene or select an existing one.
In the Sources panel, click the + button and select Browser.
Paste the URL of the timer in the Properties window. Adjust the width to 1200 and the height to 400.
Click OK to close the properties window.
Resize and position the timer as needed.
Double-click the browser source you created to open the properties window.
Add ?only=timer to the URL to isolate the timer. For example: https://stagetimer.io/r/JX151NX9/?only=timer
Right-click on your source in the Sources panel and select Blending Mode, then choose Additive.
This method helps you embed a customizable countdown timer in OBS, which can be isolated and made transparent for better integration into your stream.
Extract the .zip file and follow the README instructions to install the plugin in OBS.
Add a new browser source in OBS and configure it using the provided settings.
Adjust font, color, and size as needed from the plugin settings.
Use the control dock to start, stop, or reset the timer.
Customize message and days options if available.
This method offers a straightforward way to add a customizable countdown timer with simple controls and settings.
These methods provide various ways to add and customize countdown timers in OBS, enhancing your streaming experience by keeping your viewers informed and engaged.
AI is continuously evolving and we have since moved from text generation to image generation and here’s where Ideogram AI comes in.
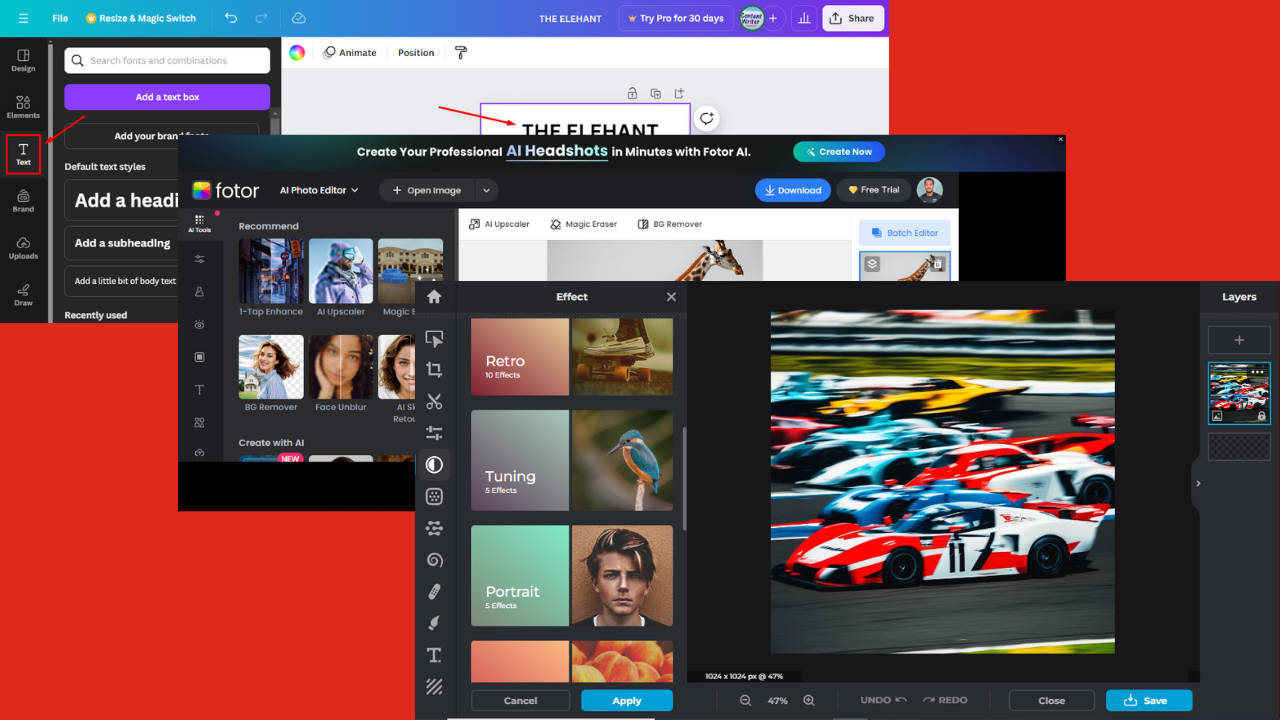
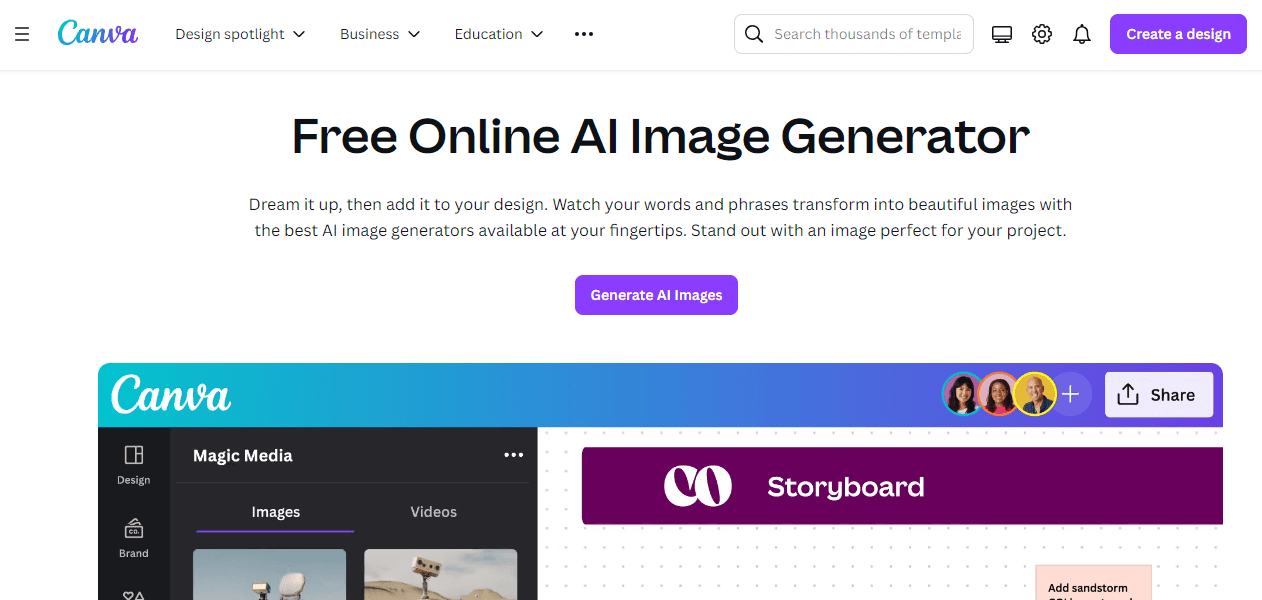
Of course, there are a bunch of text-to-image AI generators like Fotor AI and OpenAI’s DALL-E 3, but something about Ideogram AI makes it stand out.
What is Ideogram AI and how do I use it?
Overview
Ideogram AI is a tool used to generate photos, illustrations, paintings, animations and many other images. It is a free-to-use tool and all you need to do is sign up and start generating images.
What are the key features?
Image generation – Ideogram AI is an image generation tool. You have to give a brief description and you’ll get about four results to choose from. The more descriptive you are, the better the results.
Different sets of image styles – You are at liberty to choose from a wide variety of image style set you wish to reflect on your generated image. For instance, if you want an illustration, animation or painting, you can select them and then generate the image.
Image orientation – You can select the aspect ratio of your image depending on your setting.
Magic prompt– Idogram AI has a magic prompt which uses your original prompt and optimizes it to produce enhanced versions of the same image.
Negative prompt To prevent your AI tool from straying away from your intended outcome, you can include keywords that need to be excluded from the final image. This is however an advanced nature available on an upgraded plan.
Remix and upscale images – If the initial image generation is missing some aspects or is not of your desired quality, you can remix it by adding more context or upscaling the image to a higher resolution. This is however only available on upgraded plans. On the bright side, you can always download the image and use one of the best photo editors to fine-tune your image.
Community library – All free users have access to the community library where other users have already generated their images.
How to use Ideogram AI
Navigate to your browser and go to Ideogram AI’s official site. If you haven’t already, sign up or otherwise, log in.
You’ll land on the homepage with a search bar at the top where you’ll input a text of the image you want to generate then hit Generate. You can also select whether you want it to be a painting, animation or illustration.
Wait for the tool to complete the wait time and there you’ll have your image(s).
If you don’t like the image, you can refine it by adding or deleting context and upscaling it if you want higher quality.
Alternatively, you can scroll through the gallery under Explore and see if there’s an image matching the one you want. You can use that instead of using your limited credits for the day.
What are the pros and cons of using Ideogram AI?
Pros
Free to use – Most AI tools charge for the image generation feature so Ideogram AI is a breath of fresh air for offering this free of charge.
Easy-to-use interface – The Ideogram AI tool is simple and easy to use. You login and can start generating right away.
High-quality images – The tool generates high-quality images with the option to upscale even further up to 2K resolution. You can also download the images in a compressed JPG format.
Magic prompt – The Ideogram tool utilizes a magic prompt that enhances 2 or more out of 4 of the images generated. You can also switch it on or off.
Access to community images – Once you become a creator on the platform, you have access to a wide database of images generated by other creators. This saves you your daily prompts since they’re limited.
Wait time – The most annoying thing about image generation is the thirty-second wait time. All images are subjected to this regardless of your subscription plan. This can be time-consuming if you have to generate lots of images in a short span of time. For a faster generator, Koala AI promises to be faster.
Inaccuracy – While the tool does generate high-quality images, a lot of non-general images return highly inaccurate results. For instance, the below response asked for a popular public figure but the facial features do not match the real person.
Limited prompts – As a user on the basic plan, you’re limited to 10 image prompts per day. This means you have to use them sparingly or upgrade to one of the paid plans.
Advanced features are subscription-based – Although the free Ideogram AI version does the job, if you wanted access to more advanced features to refine your image, you’d have to upgrade your plan.
From the above, you can already see the pros outweigh the cons. The good thing is that you’re not limited to one AI tool and you can even use them simultaneously. If AI tools are your thing, we also have another tell-all article about Vertex AI and how it can be beneficial to you.
That’s all we had about the Ideogram AI tool but if you’ve explored it and have any other features, advantages or disadvantages you think are worth mentioning, let us know in the comment section below.
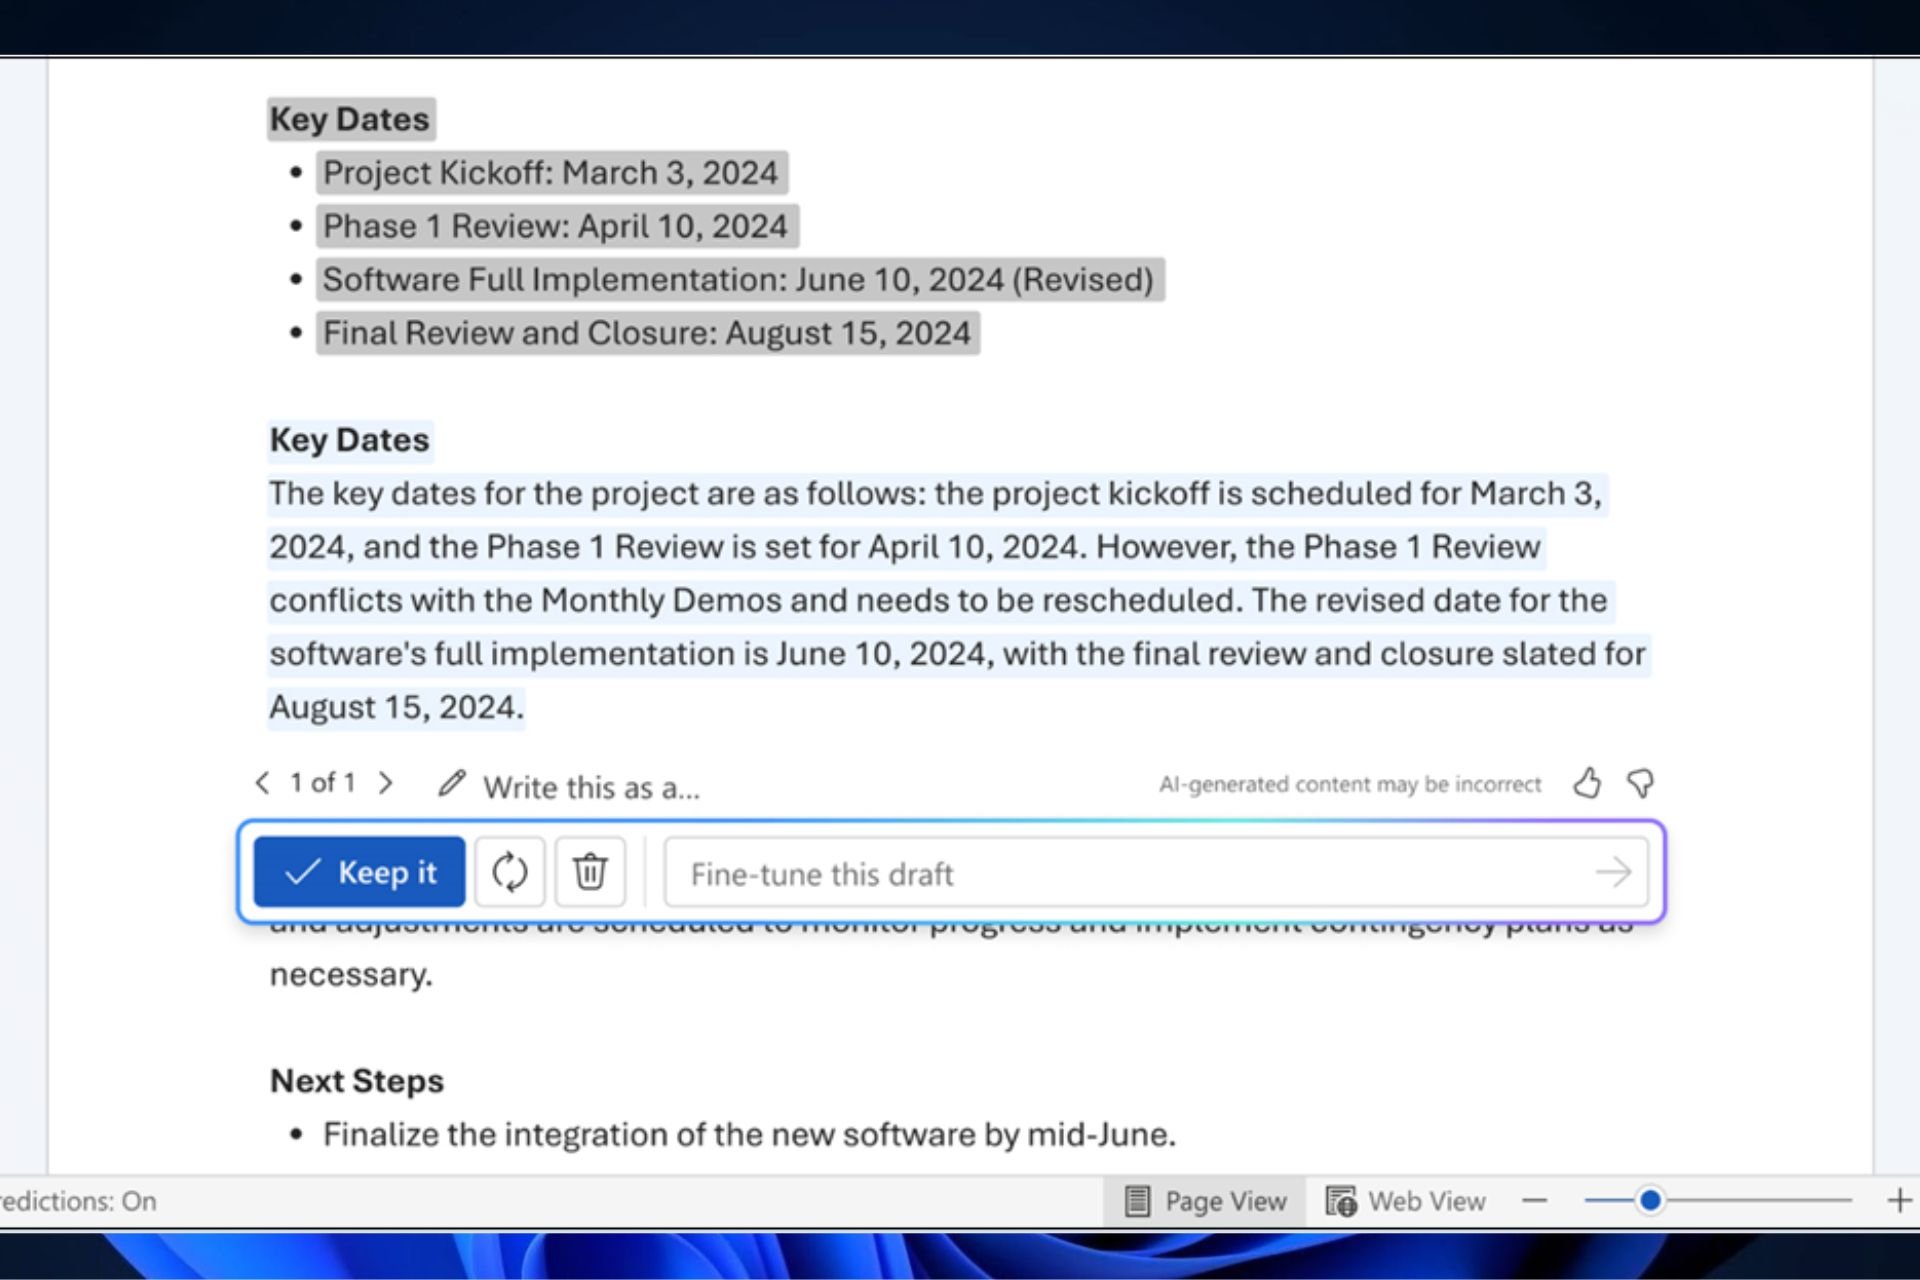
Remember when we told you Microsoft would update its Word platform with a Draft with Copilot feature that helps you get your writing done? In their latest blog post, the Redmond-based tech giant announced its availability. The Draft with Copilot is designed to make drafting and refining text a breeze, whether working from a Windows PC, a Mac, or directly on the web.
Imagine you’ve poured hours into creating content, only to realize it needs a bit more polish or a complete overhaul. It’s a daunting task. Draft with Copilot is here to make that process a lot less intimidating. By selecting a portion of your text and using the Copilot icon, you can ask for refinements, expansions, or even translations of your content. It’s like having a personal assistant always ready to help you refine your work.
Here’s how it works: open your document, highlight the text you want to improve, and click the Copilot icon. Type in what you need, hit Generate, and voilà! Copilot will serve fresh content based on your prompt. Not quite right? No problem. You can keep tweaking until it’s perfect.
You might wonder, “What can I do with this?” Well, a lot. You can convert bullet points into a smooth paragraph, translate text into another language, or tailor your content for different audiences. Draft with Copilot can even reorganize your text to make it more transparent and engaging. The tool can replace original text with Copilot’s suggestions or integrate content from other files.
To dive into this feature, you’ll need a Copilot license. It’s rolling out to Word for the web and Current Channel users on Windows and Mac. If you don’t see it yet, don’t worry. These things take time to ensure a smooth experience for everyone.
Draft with Copilot is about making your Word document creation process smoother and more efficient. Whether you’re refining existing content or starting from scratch, it’s a tool that promises to elevate your writing game. Let us know your experience with it.
IT managers will have an easier job starting next year, in February, when Microsoft plans to enhance device inventory for Windows devices within Intune.
According to the latest entry in the Microsoft 365 Roadmap, the Redmond-based tech giant will change the Intune platform, providing it with even more context and details regarding the system’s Windows devices.
What does this mean for IT managers? They will gain more inventory information, which they can manage according to their tasks and plans.
Gain more inventory information about your Windows devices. Choose which device properties you want to collect from which device and then view that information for your devices.
Microsoft
Ultimately, this enhancement will allow IT managers to obtain information about devices that need to be updated or gain even more context when a cyberattack occurs, for example.
However, this new feature will be added to Microsoft Intune only in February 2025, so it will take some time to arrive. Speaking of Intune, Microsoft recently enhanced the platform to allow managers a new method to roll out Windows feature updates.
Browsing for a decent free AI image generator? These online tools use artificial intelligence to produce high-quality images with ease. However, finding a reliable one can be time-consuming.
Luckily, this list can help you out with that! After testing over 25 tools, I identified six that stood above the rest performance-wise.
I picked each platform for its unique features and impressive visuals that don’t require extensive design skills. Let’s have a look!
Canva is a popular graphic design platform known for its user-friendly interface. It also stands out for its templates, which allow you to select from different styles. This makes it easy for users to start quickly, even without design experience.
Moreover, you can enter a five-word description for any image you want to generate. After you describe it, Canva creates four images, with the option to generate more or create a video.
But that’s not all.
You can easily add text and upload images and elements to projects by dragging them into place. This feature is handy for creating complex designs without spending too much time on them.
Pros:
It has a user-friendly interface.
Free version.
Extensive library of templates and design elements.
AI-powered design suggestions for improving layouts.
Several selections of stock images, icons, and fonts.
Cons:
Some advanced features require a paid subscription.
Fotor is a comprehensive photo editing and design tool with several AI-powered features. One of its standout features is the ability to convert text to images and images to images.
Fotor also has a user-friendly interface.
This app adjusts various aspects of the photo, such as brightness, contrast, and saturation, to produce a more polished and professional look. Fotor’s retouching tools are another highlight, offering features such as background removal, a magic eraser, and an upscaler. They make it easy to enhance portraits and create flawless images without editing skills.
Another essential feature is its collage maker, which allows users to combine multiple photos into a cohesive design. You can also add text, effects, and filters and modify the image. Best of all, you can edit images in batches to save time.
Pros:
It has a free version.
AI photo enhancer for automatic image improvement.
Comprehensive collage maker with customizable templates.
Retouching tools for portrait enhancement.
Offers several design elements and templates.
Cons:
Some features are only available in the premium version.
It can be less intuitive for users unfamiliar with photo editing.
Pixlr is another reliable AI image generator for beginners and professionals. You can create photos from texts or add images and edit them to make them personalized. You can also select the shape, style, color, lighting, and composition.
Another highlight is its intuitive interface. This ease of use allows you to quickly edit and enhance your images, even if you have little to no experience with photo editing software.
After the tool has generated images, you can pick one and edit it further using different features. It allows you to add text, drawings, effects, retouch, and more. You can customize your image by adding captions, quotes, or other text elements with various fonts and styles.
Additionally, you can apply various effects to enhance the overall look, such as filters, color adjustments, and artistic overlays. The retouching tools are handy for refining details and correcting imperfections.
Pros:
It has a free version.
Easy to use.
Offers advanced photo editing tools similar to professional software.
AI-powered tools like background removal and automatic enhancement.
Deep Dream Generator is a special AI image tool that can turn regular photos into dream-like pictures. It uses a neural network that has learned from millions of images to create its unique style. You can either prompt it to create an image or upload a photo, and it edits it according to your preference.
Its AI models let you apply the artistic style of one image to another. This can produce many effects, from subtle enhancements to dramatic transformations.
Deep Dream inspires creativity and experimentation. By turning everyday photos into extraordinary works of art, this tool encourages users to explore new artistic possibilities.
Pros:
Easy to use for beginners and experts.
Style transfer feature for artistic effects.
Customization options for effect strength and detail.
Encourages creativity and experimentation.
Cons:
Limited control over certain aspects of the generated images.
Freepik AI Suite is a complete set of creative AI tools designed to streamline and inspire the design process. Its powerful AI Image Generator allows users to create stunning visuals from simple text-to-image prompts or by uploading an image as the starting point. Images can also be used as style or composition references, enabling the generation of new visuals that perfectly match the desired aesthetic.
Beyond prompting, it offers a lot of settings to fine-tune the results. This includes a huge library of effects that define colors, lighting, shot style, framing, etc. Moreover, you can add individual objects and characters, instead of relying solely on prompts.
Hundreds of styles are also available, though the majority require you to purchase a plan.
What makes Freepik AI Image Generator stand out the most is the ability to choose the AI model. Free users get access to Mystic, Google Imagen, Flux, and GPT, while paid users also get Seedream and Ideogram 3.
Pros:
Lots of impressive styles and effects.
Choose the AI model that suits your project the best.
DeepAI is a powerful suite of AI tools for image generation and enhancement. Its generator can create high-quality images from text descriptions. This feature is handy for generating custom visuals.
Its easy-to-use interface ensures these advanced features are accessible to users of all skill levels. In addition to image generation, DeepAI can help you remove the background if it’s not pleasing or if you want to change it.
Pros:
Powerful image generation from text descriptions.
Has a free version.
Tools for image colorization, super-resolution, and style transfer.
Easy-to-use interface for advanced features.
Versatile applications for both creation and enhancement.
Cons:
The quality of generated images can vary.
Some advanced features require a subscription.
Limited design elements compared to other platforms.
I selected these AI image generators based on their ease of use, range of features, and overall effectiveness in creating high-quality visuals. Here are the criteria I considered:
UI design and user-friendliness.
Variety of design templates and elements.
Availability of advanced editing tools.
AI-powered features for enhanced creativity.
The range of tools available in the free version.
Quality of generated images.
Versatility for different design needs.
So, now you’re much closer to finding your ideal free AI image generator! Whether you need a user-friendly design platform like Deep Dream Generator or a powerful photo editor like Canva, there’s an option to suit your needs. Explore these tools and discover how they can suit your creative projects.
Many people are looking for the Internet Options in Chrome, but after the latest updates, you can no longer access them from Google Chrome. The Internet Options feature was associated with Internet Explorer. You can still find it as Internet Properties in Windows.
What internet options can I access in Chrome?
Accessing proxy settings from Chrome
Open Chrome, click on the Menu button (three dots) and select Settings.
Go to System from the left pane and click on Open your computer’s proxy settings.
This will open the Windows proxy settings window.
This is the only internet setting you can open from Chrome. If you want to reach other settings related to websites, you can go to the Site Settings page under Privacy & security in Chrome.
How do I access the Internet Options?
As we mentioned in the beginning, you may still access the Internet Options or Internet Properties from Windows and they affect all browsers, including Chrome.
To do that, click the Start button, type internet properties and press Enter or click on the app from the results.
From here, you can set up all the related internet options that will apply to all browsers.
So, to recap the information, you can’t access the Internet Options in Chrome. You can access the proxy settings page. The Internet Options app can be started directly from Windows.
Sometimes, when you switch on your Windows PC, do you see a BitLocker recovery screen instead of the usual login screen? You are not alone in this situation. Microsoft recently dropped the July 2024 Patch Tuesday updates for different versions of Windows, and it seems they have carried a headache with them. After a routine update, if your PC is starting into a BitLocker recovery screen, Microsoft has confirmed that it’s due to a bug related to BitLocker.
Now, if you are concerned about the safety of your PC, this problem is more likely to impact you if you have chosen the Device Encryption option. Therefore, if a BitLocker recovery screen suddenly appears on your device, there isn’t cause for immediate distress. Microsoft has provided an alternate solution requiring the input of your BitLocker recovery key, which can be obtained by signing into a portal for the BitLocker recovery screen with Microsoft account details.
But what if you are in this situation and do not even know where to find your recovery key? Well, Microsoft has thought about that, too. They provide a webpage with step-by-step instructions on how to find the BitLocker recovery key in Windows. It can be a little troublesome, indeed – yet at least some method is available to get your computer functioning again.
The affected platforms consist of various Windows client and server versions, so it’s not just one or two impacted versions. Microsoft is looking into the problem and assures that it will provide updates when more details are provided.
For now, if you are dealing with this problem, following the workaround steps should assist you in moving past the BitLocker recovery screen. If this does not affect your situation, it could be beneficial to confirm whether Device Encryption is activated on your computer and consider the advantages and disadvantages of maintaining its activity. This is particularly important when considering the flaws that appear following an update.
It is a little troublesome, but the solution given shows that there’s hope. We hope that Microsoft will release a remedy quickly so we can all return to our regular PC-starting process without any unexpected issues or surprises.