Windows 11 Snipping Tool’s OCR capabilities will get a handful of shortcuts to make them easier to use. Spotted by Windows enthusiast @phantomofearth, the new Windows logo key + Shift + R will be made the shortcut for recording while using the tool.
Snipping Tool's OCR text actions are getting a keyboard shortcut: Win + Shift + T. A new toolbar which works on the desktop, similar to the existing capture bar, is coming as well. pic.twitter.com/aEETqAvxEC
At the same time, Snipping Tool will also be getting a new toolbar that works similarly to the existing capture bar, as per the insider’s words. Here’s how it looks:
The new Snipping Tool capabilities were found in the latest builds to the Windows Insider Program.
At the same time, the Redmond-based tech giant recently enhanced the Snipping Tool in Windows 11 with some useful capabilities, such as the one that allows users to copy information from tables in screenshots.
The rgss301.dll file is associated with RPG Maker and is used by games developed using the series. When the file is corrupt or missing, you will get an error, and the affected app/game will fail to load or crash soon after. The error message reads, System\RGSS301.dll could not be found.
App and games affected by the rgss301.dll corrupted or not found error include RPG Maker VX Ace, RGSS Player, and Hylics, amongst others.
Before you proceed, install pending game updates, disable any third-party antiviruses, and remove recently installed apps that might conflict with the game or Windows. For most of you, this should fix things in no time!
What can I do when RGSS301.dll is missing?
Tip
While several websites claim to host the DLL, I don’t recommend you download RGSS301.dll from any unreliable sources. Such files are often bundled with malware that can harm the PC.
1. Move a copy of RGSS301.dll to the game’s directory
Your primary approach when encountering the RGSS301.dll error should be to manually place a new copy of the file in the affected game’s System directory or the path listed in the error message. This would ideally be under: C:\Program Files (x86)\Steam\steamapps\common
To do that, plug a USB flash drive into another PC > go to the System folder of the same game > copy the DLL to the flash drive > connect the USB drive to the affected PC > move the file into the System folder of the affected game’s directory > reboot the PC to apply the changes.
2. Run the affected app/game in compatibility mode
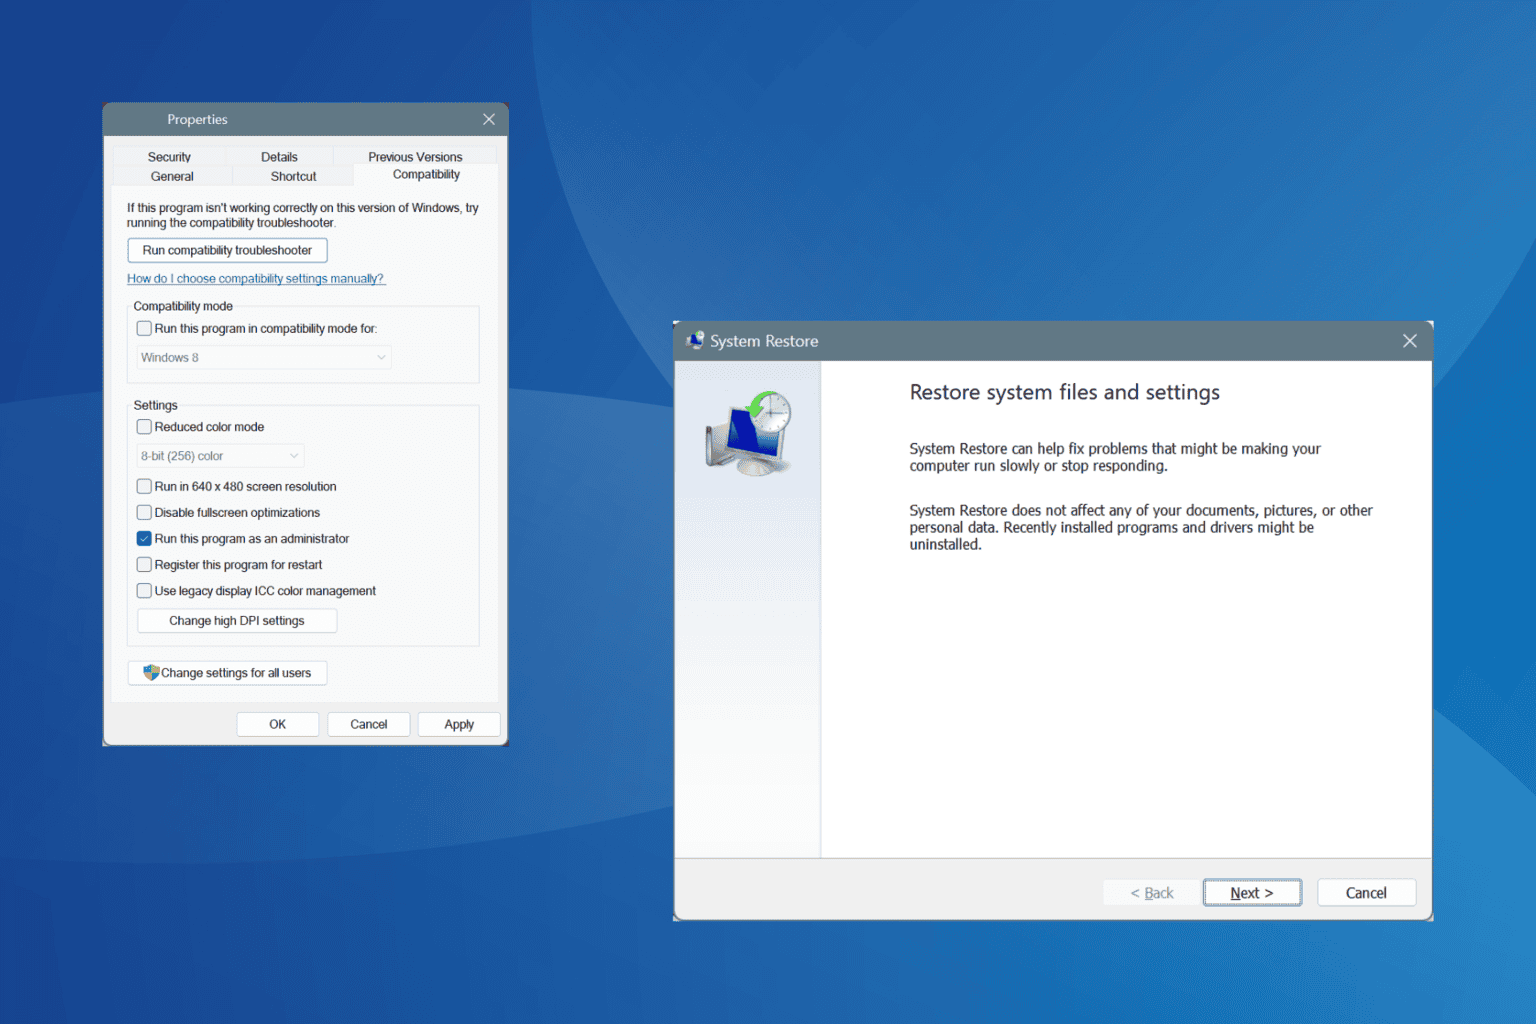
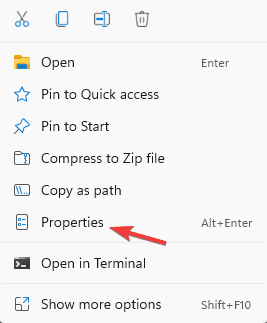
Right-click on the affected app’s launcher (.exe) file, and select Properties.
Tick the Run this program in compatibility mode for checkbox, and select an older iteration of Windows from the dropdown menu, the one the app was originally designed for.
Click on Apply and OK to save the changes, and then check for improvements.
If this doesn’t work, select another Windows iteration and try again.
3. Reinstall the affected app
Press Windows + R to open Run, type appwiz.cpl in the text field, and hit Enter.
Select the affected app/game from the list, and click on Uninstall.
Follow the on-screen instructions to complete the process and then restart the PC.
Now, install the game from an official source.
If a quick removal doesn’t work, some leftover files and Registry entries might be to blame. So, use a top-rated software uninstaller to get rid of all these, and then reinstall the game from the developer’s official website or a reliable channel. The latter, too, is critical because pirated copies of games often have RGSS301.dll missing.
4. Perform a malware scan
Press Windows + S to open Search, type Windows Security in the text field, and click on the relevant result.
Click on Virus & threat protection.
Click on Scan options.
Select the Full scan entry and then click on Scan now.
Wait for the scan to complete and check for improvements. It will take 15-30 minutes.
5. Whitelist the affected app in your antivirus
Press Windows + S to open Search, type Windows Security, and click on the relevant result.
Click on Virus & threat protection.
Click on Protection history.
Select Quarantined Items from the Filters dropdown menu.
If RGSS301.dll is listed here, restore the file.
Now, go back to the previous page, and click on Manage settings under Virus & threat protection settings.
Click on Add or remove exclusions.
Click the Add an exclusion button, and select Folder from the list of options.
Next, go to the game’s directory, choose it, and click on Select Folder.
Finally, reboot the PC, and you should not get any RGSS301.dll missing errors anymore.
If the previous solutions didn’t work, your antivirus may have quarantined RGSS301.dll, and, as a result, it’s not available in the game’s System directory. So, you will have to restore the DLL and add an exclusion for the entire game folder.
Besides, for a few, the DLL was flagged during the download itself. In this case, I recommend you scan the file for threats using an effective antivirus solution and keep it only if the DLL is safe.
Before you leave, find out how to restore all missing DLLs and prevent such errors from reappearing!
For any queries or to share more fixes with our readers, drop a comment below.
Microsoft has released a beta update for Windows 11, including improvements to the operating system’s file-sharing features. The changes are included in the Windows 11 Insider Preview Build 22635.4445, now available to Windows Insiders in the Dev and Beta channels.
The most notable change in Build 22635 is the addition of new share buttons in various parts of the Windows 11 UI. Spotted by @phantomofearth, you can share files directly from the Start menu, the taskbar, and the jump lists that appear when you right-click the icons of apps like Microsoft Word and Adobe Photoshop.
The new sharing options are hidden by default in Build 22635, but users can enable them with the help of a third-party app called ViveTool. (The app allows users to access hidden or experimental features in Windows 11.)
You’ll need to run two commands (credits to @phantomofearth):
vivetool /enable /id:45738940
vivetool /enable /id:46493758
It’s unclear when the new sharing buttons will be available to all Windows 11 users, but given that they’re already present in a beta build, we’d guess that it won’t be too long before they’re widely available.
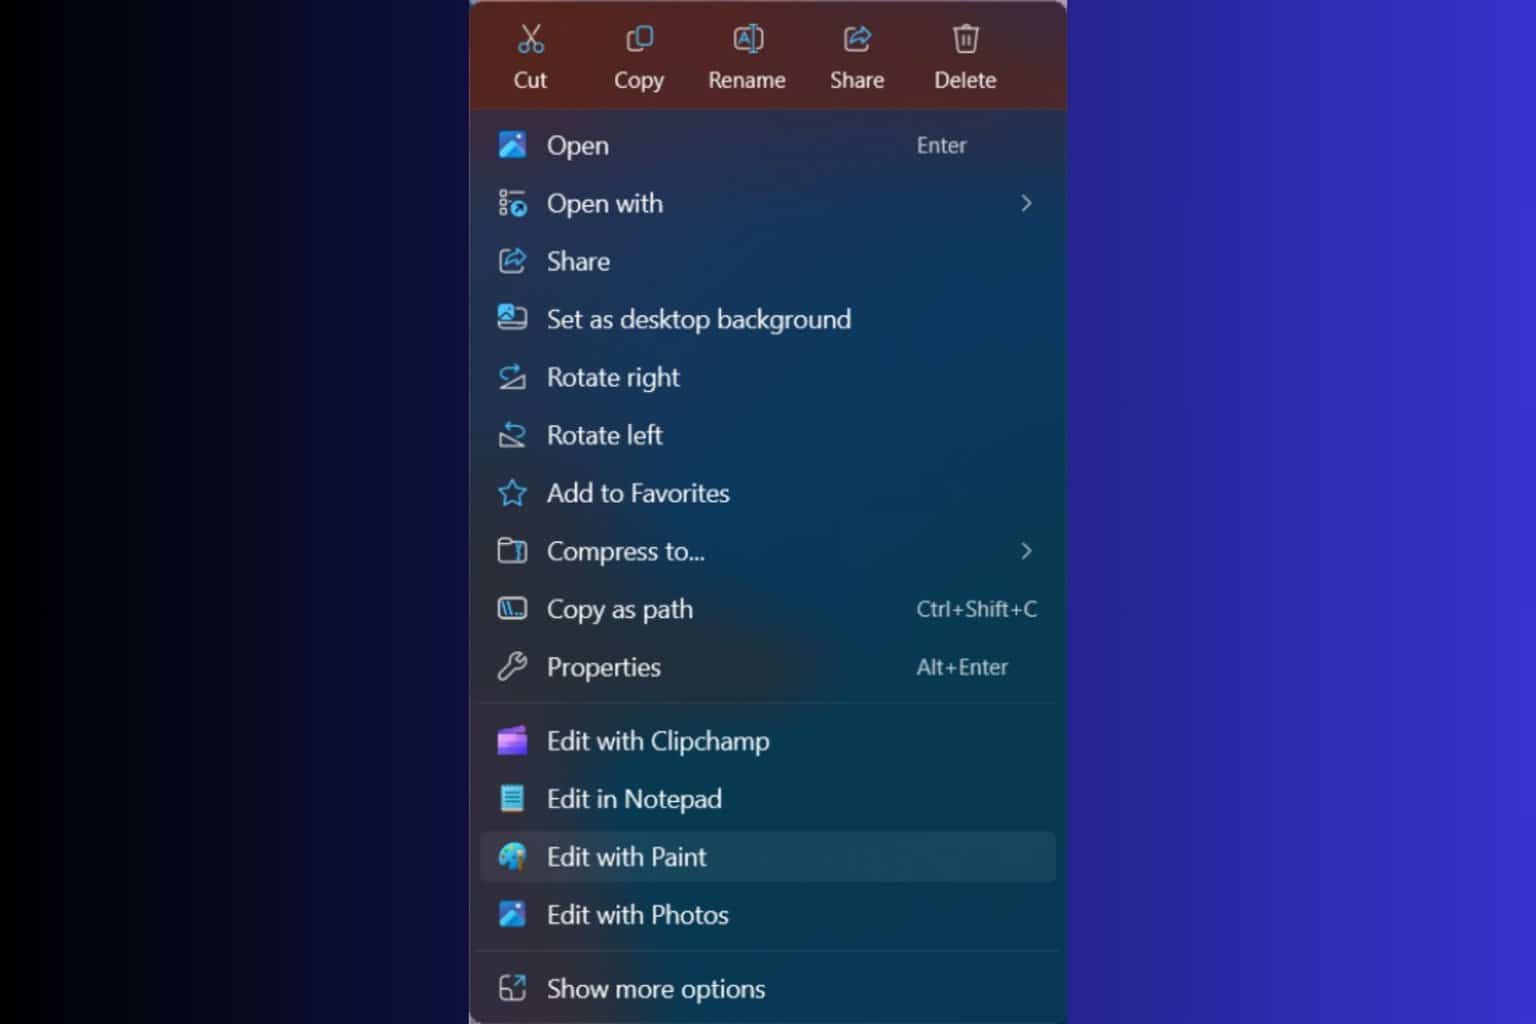
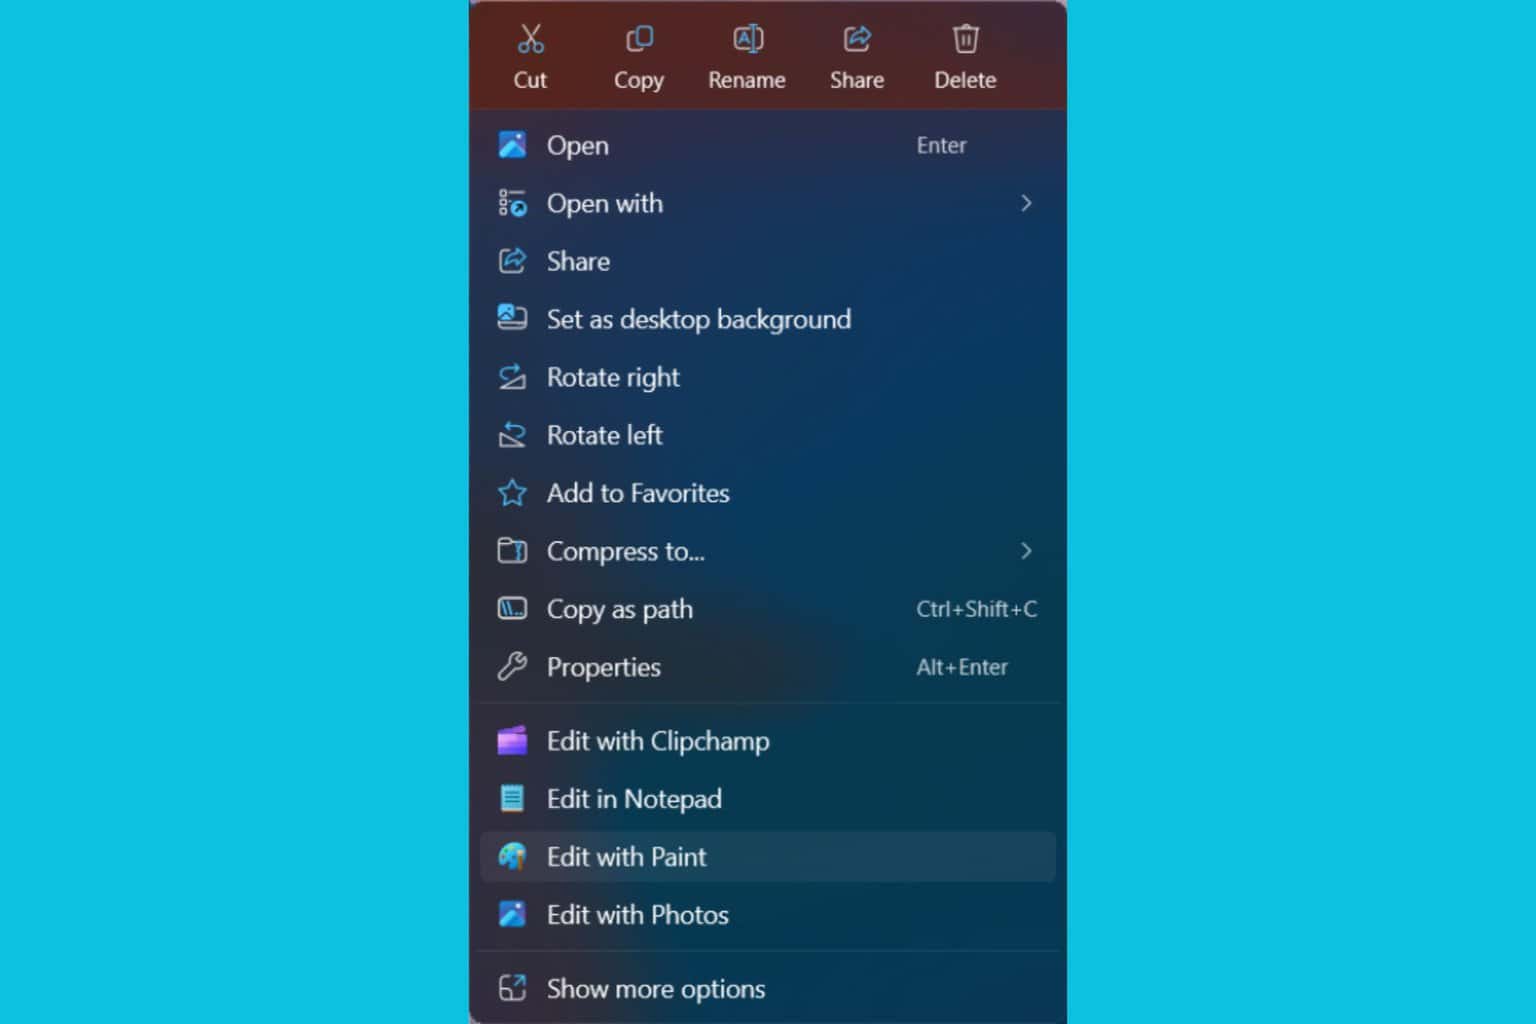
Recently, we reported by a new Edit with Paint feature in Windows 11 and other redundant options that are clittering File Explorer’s context menu. The new Edit with Paint option is right now available only for Insiders, but we expect it soon on the stable version. If Microsoft still pushes it forward, you should know that you can remove it easily.
How do I remove Edit with Paint from the context menu?
The solution to remove Edit with Paint option from File Explorer’s context menu is not that simple because it involves editing the Registry and adding a new value.
So, you need to open Registry Editor and go to the following key HKEY_CURRENT_USER\Software\Microsoft\Windows\CurrentVersion\Shell Extensions.
Here, create a new key and name it Blocked, then add the String value {2430F218-B743-4FD6-97BF-5C76541B4AE9} inside. The change will take effect instantly and the right-click context menu should not include the Edit with Paint option when you right-click an image.
If these instructions are hard to follow, we also created a guide on how to remove Edit with Paint from Windows 11 that provides full step-by-step instructions.
You already have the Open with option in the right-click context menu, so Edit with Paint not only that it doesn’t make sense, but it also clutters the already full menu.
If you’re an Insider, you will also probably see the Edit in Notepad when right-clicking an image which is even weirder. But that’s another story for another time.
What do you think about removing the Edit with Paint in Windows 11? Let us know in the comments below.
Recently, Microsoft added the Edit with Paint feature in Windows 11 for Insiders among other options that clutter the menu. When you right-click an image, you will see the Edit with Paint option. If you want to get rid of it, here’s how to remove Edit with Paint from the File Manager context menu on Windows 11.
How do I remove Edit with Paint from the context menu?
Edit the Registry
Press Win + R, type regedit and press Enter to launch Registry Editor.
Here, first click on File > Export to save a copy of your Registry.
Navigate to the following key: HKEY_LOCAL_MACHINE\SOFTWARE\Microsoft\Windows\CurrentVersion\Shell Extensions
You will find 2 keys there: Approved and Cached.
If you have a third key called Blocked, expand it.
Now, click Edit > New > String value and apply the following value name: {2430F218-B743-4FD6-97BF-5C76541B4AE9}
If you don’t see the Blocked key, add it using New > Key on an empty space inside the Shell Extensions key and create the new String value as instructed in step 6.
You don’t need to restart your PC to apply the changes, so you can open File Explorer and right-click on an image to see if you still get the Edit with Paint option.
The solution above will remove the Edit with Paint option from the File Explorer context menu for all the users in Windows 11. If you want to remove it just for the current user, use the following key in Registry editor: HKEY_CURRENT_USER\Software\Microsoft\Windows\CurrentVersion\Shell Extensions
How do I restore the Edit with Paint option from File Explorer’s context menu?
If you change your mind and you really need the Edit with Paint option, go to the HKEY_LOCAL_MACHINE\SOFTWARE\Microsoft\Windows\CurrentVersion\Shell Extensions key and delete the Blocked key or the string value inside.
We remind you that the Edit with Paint option is available right now only for Insiders. If you don’t see it, there is no point in adding this string value to the Registry. However, make sure to bookmark this guide in case Microsoft decides to push it forward and include it in the stable version of Windows 11.
Did you manage to remove the Edit With Paint option from the right-click context menu? Let us know in the comments.
The latest Valve Steam client update introduces several new features, including gameplay recording. However, according to the update’s release notes, while Windows 7 and 8 users can still run the Steam app on their machines, they cannot install the latest update.
This version of the Steam client will no longer run on Windows 7 or Windows 8. Users on these OS versions will not automatically update to this new version of the Steam Client. See the Windows 7 and Windows 8 Support FAQ for additional details.
Valve clarifies on the page in question that while you can still use the existing version of Steam on Windows 7 and 8, the company will not provide support if something goes wrong, and “functionality will be further limited in the future.”
That’s because Steam is ditching support for these Windows versions entirely.
Steam is designed to work on modern versions of Windows and is currently not supported on Windows XP or Windows Vista. We’ve found that other software that we use (such as the Chrome web browser) has also stopped supporting Windows 7 and Windows 8, and new features in Steam rely on security updates introduced in Windows 10.
The move isn’t shocking. Microsoft officially ended extended security updates for Windows 7 in January 2023, and Google said last year that it would cease support for Chrome on Windows 7, Windows 8, and Windows 8.1 on January 15, 2024.
Still, some gamers remain on Windows 7. According to the Steam Hardware and Software Survey, nearly 0.28% of Steam users are on Windows 7. The only way for those users to get support for the latest versions of Steam is to upgrade to Windows 10 or Windows 11, as Microsoft no longer allows Windows 7 and Windows 8 users to update to Windows 10 for free.
Microsoft’s latest decision has sparked some discussion within the Windows community. They encourage users to bid farewell to the well-known Mail & Calendar app on Windows 11. You might wonder why. It is purely for security improvement purposes.
The big technology company is shifting its attention to the new Outlook Web app, and this choice has sparked many conversations.
Microsoft’s reason for this shift seems fairly simple: according to the Redmond-based tech giant, the Outlook Web app provides more security than older versions. However, like with any alteration, there are feelings of eagerness mixed with some raised questions.
Outlook for Windows is for everyone – regardless of what email service you use. There is no subscription needed for personal email accounts to use Outlook for Windows and it provides a multitude of features that Mail and Calendar doesn’t include, such as rich message editing, the ability to use Copilot, and reminding you of important conversations. Outlook for Windows also supports Modern Authentication. We are also working on new features in the coming months that will improve Junk Mail filtering and help users better protect themselves from malicious mail. We encourage all remaining users of the Mail and Calendar apps on Windows to move to Outlook for Windows as soon as possible.
Microsoft
Microsoft’s strong promotion of the Outlook Web app is not solely focused on security but emphasizes its economic advantages. Using this application does not incur any cost, as it is entirely free, particularly for personal email accounts.
Nonetheless, there exists an element that Microsoft does not thoroughly clarify: ads. Certainly, unless you possess a Microsoft 365 subscription plan, the fresh Outlook for Windows will incorporate advertisements. It’s a modification with some users contemplating whether the benefit is worth the exchange.
Regarding the ads introduction, Microsoft is certain that the new Outlook has more features, like being better and linked with Copilot, which is their AI creation. But there’s a problem—you need an internet connection for this app to work well.
When it comes to recognizing its limits, Microsoft is trying to incorporate a few offline abilities into the Outlook Web app so people can access email, calendar, and contacts even without internet availability.
According to the support page, a timer has been set for the Mail & Calendar app in Windows 11, which will say goodbye on December 31, 2024. Microsoft chose to gradually phase out this app because it wanted to provide a superior user interface and features—its old UWP app framework restricted something it felt.
Support for Windows Mail, Calendar, and People will end on December 31, 2024. We’re currently in the process of moving existing users to the new Outlook for Windows. After December 31, 2024, users will no longer be able to send and receive email using Windows Mail and Calendar. Any local emails, calendar events, and contacts stored in Mail, Calendar, and People will remain exportable following the steps in Export emails and contacts from Windows Mail or People and import to new Outlook.
After retirement, the application will no longer be available in the Microsoft Store; it is time for users to welcome the new Outlook Web application with open arms.
But Microsoft isn’t just making this change. They are also dedicated to improving the new Outlook Web app by including features that users have been requesting, like COM add-ins and “.PST” file support. This shows how confident Microsoft is about the future of email and calendar management in Windows 11’s new Outlook Web app. So, are you all set to switch, or are you still sitting on the fence?
The CRYPTO_LIBRARY_INTERNAL_ERROR BSoD (Blue Screen of Death), with error code 0x00000171, appears due to an internal error in the crypto libraries.
This usually happens when you incorrectly overclock the PC, a BIOS update fails, changes are made to the hardware, or the CPU, PSU, or motherboard malfunctions. In 60% of the cases so far, affected users had to replace the hardware, but you shouldn’t do that just yet!
Before you proceed, disconnect non-critical hardware, install pending Windows updates, scan the PC for malware, disable overclocking (if any is applied), make sure the CPU, PSU, and motherboard connections are in order, and verify whether the RAM sticks are properly seated in their respective slots. For most of you, this should do the trick.
How can I fix CRYPTO_LIBRARY_INTERNAL_ERROR blue screen?
Press Windows + X to open the Power User menu, and select Device Manager.
Expand the entries here, right-click on the devices listed underneath individually, and select Update driver.
Click on Search automatically for drivers and wait for Windows to install the best locally available version.
Similarly, update all the drivers and then reboot the PC.
For some users, the CRYPTO_LIBRARY_INTERNAL_ERROR Windows blue screen started after installing a buggy driver. So, you will have to update the drivers again and get the latest version with a patch for the bug!
If Windows can’t find a newer version, head to the manufacturer’s website, locate the new releases, and then manually install the latest drivers.
2. Roll back recent driver updates
Press Windows + S to open Search, type Device Manager, and click on the relevant result.
Expand the entries, individually right-click on the devices, and select Properties.
Go to the Driver tab, and click on the Roll Back Driver option if it’s not greyed out.
Select a reason for rolling back the update or enter one in the text field, and click Yes to confirm.
After rolling back all recent driver updates, reboot the PC and check for improvements.
3. Reset BIOS
Turn off the PC, then turn it back on, and as soon as the display lights up, repeatedly hit F1, F2, F10, F12, Esc, or Del, depending on the system manufacturer, to access the BIOS.
Now, look for the Default, Load Default, or Reset entry, and select it.
Choose the appropriate response in the confirmation prompt.
Finally, boot Windows and verify whether CRYPTO_LIBRARY_INTERNAL_ERROR is fixed.
If the BSoD appeared after reconfiguring the BIOS or a failed BIOS update, resetting the BIOS will quickly get things up and running. Remember, since this is a critical process, I recommend you don’t change any other settings in the BIOS!
4. Test the RAM modules
Press Windows + S to open Search, type Windows Memory Diagnostic, and click on the relevant result.
When Windows Memory Diagnostic can’t find any faults, I recommend using Memtest86+, an advanced memory-testing tool that runs a wide array of scans on individual RAM sticks and detects even the smallest of problems.
If any issues are reported, you must replace the faulty module, and this should fix the CRYPTO_LIBRARY_INTERNAL_ERROR BSoD!
5. Reinstall Windows
If the previous solutions fail, you can always reinstall Windows to rule out all software-based underlying causes for the BSoD.
To reinstall Windows, connect a formatted USB flash drive to another PC > go to Microsoft’s official website > download the Media Creation Tool > use it to create a bootable Windows USB > plug in the flash drive into the affected PC > change the boot order to the USB drive > run the Windows setup > reinstall the OS.
Reinstalling Windows from a bootable USB
After reinstalling Windows, run the PC for a few days and verify whether the CRYPTO_LIBRARY_INTERNAL_ERROR blue screen reappears!
6. Replace faulty hardware
If a Windows reinstall fails to fix things, it’s mostly likely the CPU or motherboard to blame for the BSoD since you have already tested the RAM modules, and everything turned out fine.
In case you have another CPU and PSU, test them and check whether Windows now boots without throwing an error. For some users, connecting the PC to an unprotected power source damaged the components, which, in turn, triggered CRYPTO_LIBRARY_INTERNAL_ERROR
7. Contact the manufacturer’s support
When nothing else works, the last option is to contact the manufacturer’s official support or visit a local shop. For 2 out of 5 users, the CPU was malfunctioning, which was promptly replaced by the manufacturer.
Even if the connections or other components are triggering the blue screen, a professional will have better tools to diagnose and fix the problem.
Remember, the CRYPTO_LIBRARY_INTERNAL_ERROR is commonly caused due to hardware faults, but you can’t rule out software-based problems. A comprehensive approach will help you best tackle the issue.
Microsoft has been working on lock screen widgets for Windows 11 over the last year. In the latest Windows 11 build, these widgets show weather, traffic, sports scores, and more information. However, there aren’t any customization settings for the lock screen widgets in Windows 11. Users can either enable all of them or none at all.
However, XenoPanther (@xenopanther) recently discovered on X that the latest Language Experience Pack (LXP) for Windows 11 Build 27747 contains new strings that suggest Microsoft is planning to let users customize the widgets shown on the lock screen, similar to how you can customize the widgets in the taskbar.
There are new strings such as “Your widgets,” “Manage the widgets on your lock screen,” “Add widget” and “Add widgets to your lock screen,” as seen in the screenshot below:
27747 LXP additions
The ability to customize the widgets on your lockscreen is now mentioned Your widgets Manage the widgets on your lock screen Add widget Add widgets to your lock screen
Microsoft may also want to let users add third-party widgets to the lock screen. Currently, in Windows 11, third-party widgets are only available in the Widgets board, but it seems Microsoft may also want to allow them to be placed on the lock screen.
Are you looking forward to being able to customize the widgets shown on the Windows 11 lock screen? Let us know in the comments below.
Windows 24H2 still has a lot of bugs and one of them was triggered by Voicemeeter. The third-party app was causing a MEMORY MANAGEMENT BSoD due to a driver compatibility issue. Microsoft knew about the problem and temporary blocked the 24H2 update for the systems running the Voicemeeter app.
Well, we have good news because according to a recent update to Microsoft’s official bug documentation, if you update the app that contains a new driver, you will be able to update your system to Windows 11 24H2.
Therefore, Microsoft lifted the block, but you still need to update Voicemeeter to versions 1.1.1.8, 2.1.1.8, or 3.1.1.8, that come with the updated vbvoicemeetervaio64_win10.sys driver version (3.3.1.9).
Voicemeeter’s developer, VB-Audio, issued a guide on how to proceed with this update. Note that it’s very important to reboot your device after updating it. After that, if everything is OK, you will see the Windows 24H2 update in Settings > Windows update.
We also need to mention that you can also fix this problem by completely uninstalling Voicemeeter and reinstall a fresh copy. However, you will also lose the settings you’ve made on the app, therefore you will need to set it up again.
Windows 11 24H2 is still rolling out gradually, but you can bypass the waiting list and install it right now. We recommend waiting even if you see the update on the Windows update list. That’s because Microsoft is still working to fix numerous bugs. Most of them are caused by missing or incompatible drivers, exactly as the problem caused by Voicemeeter.
Hopefully, your PC still works fine after Voicemeeter update and Windows 11 24H2. But if you have any issues, we managed to provide many guides to fix them and you will find all on our website. If you have any questions, let us know about them in the comments below.
Microsoft is all set to roll out a new update, Windows 11 Insider Preview Build 22635.4445 (KB5046745), to Windows Insiders in the Beta Channel. With it, the Redmond-based tech giant will add even more options to the File Explorer context menu.
Microsoft adds a “New Folder” option when right-clicking locations in the File Explorer navigation pane, allowing users to create new folders and files easily. This comes days after the tech giant added even more options to this menu, angering many users who think it is unnecessary.
With KB5046745, the Redmond-based tech giant has also fixed several issues impacting Explorer.exe reliability in the latest Windows 11 builds, including a problem causing Explorer.exe to crash when right-clicking apps in the taskbar.
For left-aligned taskbar users with multiple monitors, Microsoft has fixed an issue where the widget text in the taskbar might overlap with the date and time.
There are a bunch of additional bug fixes, too, including a fix for an issue where the date and time properties of files were unexpectedly updated in some cases after copying them, a fix for an issue where the Details Pane icons in File Explorer weren’t responding correctly to theme changes, and a fix for a black flash in File Explorer that appeared when duplicating a tab.
Microsoft says that Windows Insiders in the Beta Channel will receive updates based on Windows 11, version 23H2, via an enablement package. Microsoft explains that many features in the Beta Channel are rolled out using Control Feature Rollout technology, starting with a subset of Insiders and then being pushed to everyone in the channel over time.
The Beta Channel builds, and updates are introduced in two phases: Some features, improvements, and fixes are gradually rolled out to a subset of Insiders who have opted to receive the latest updates early, and then these features, improvements, and fixes are rolled out to everyone in the Beta Channel.
As always, you can grab KB5046745 from Windows Update in the Settings app if enrolled in the Windows Insider Program. And if you’re looking to try out new Windows 11 features as soon as possible, you can flip the switch to turn on the ability to receive updates as soon as they’re available.
Microsoft has released the Windows 11 Insider Preview Build 26120.2222, or KB5046746, to the Dev Channel. The update will introduce a range of new features, improvements, and fixes to the OS.
For example, KB5046746 introduces a new Shift + CTRL combo functionality. Holding Shift + CTRL and clicking on a jump list item in the Start menu or taskbar launches the item as an admin. This way, opening Command Prompt as an admin will be easier and faster.
The latest build also squashes several bugs. For example, KB5046746 fixes an issue causing the “See More” menu in File Explorer to open in the wrong direction and an issue preventing the mouse from unlocking from a game window on a system with multiple monitors after opening and closing the Game Bar.
However, KB5046746 has several known issues, including one that will cause the Narrator to crash on launch if you use one of the natural voices (like “Jenny”). Microsoft says it’s working on a fix, but in the meantime, users can avoid the issue by switching to another voice, like Microsoft David, in Settings > Accessibility > Narrator.
If you’re enrolled in the Dev Channel, you can now download the Windows 11 Insider Preview Build 26120.2222 via Windows Update. Remember that the build is being rolled out using Control Feature Rollout technology, meaning it’ll become available to different subsets of users at various times.
So, will the new functionality for the Shift + CTRL combo be helpful to you? Is there a specific bug fix you’ve been waiting for?
The WIN32K_CRITICAL_FAILURE error with a bug check 0x164 appears due to a failure related to the Win32k.sys driver in Windows, which is responsible for user-mode graphics, core graphical components, or window management. The issue mainly indicates issues with the graphics subsystem or interactions between Windows and your hardware.
First, check if all the system components, especially the newly installed ones, are correctly seated, and ensure there is no dirt or debris in the cabinet. Also, if you have overclocked your system, it might cause instability, so check the settings and make changes accordingly.
How can I fix the WIN32K_CRITICAL_FAILURE error?
1. Update the graphics driver
Press Windows + R to open the Run window.
Type devmgmt.msc and click OK to open the Device Manager app.
From the list of components, locate and click Display adapters to expand it.
Right-click the graphics driver and select Update driver from the context menu.
Click Search automatically for drivers and follow the on-screen instructions to complete.
Windows will try to find the best version available; if it fails to do so, go to the manufacturer’s website and get the latest driver version. Alternatively, you can use a reliable driver updater tool to ensure all the drivers are up to date. If the driver has been recently updated, you can roll back the driver to fix the WIN32K_CRITICAL_FAILURE error:
Launch Device Manager, and click to expand the Display adapters category.
Go to graphics driver and click Properties from the context menu.
Switch to the Driver tab, and click the Roll Back Driver button.
Select the reason to roll back on the next screen and click Yes.
2. Check for Windows Updates
Press Windows + I to open the Settings app.
Go to Windows Update, then click the Check for Updates button.
If there is an update, click Download & install to update your computer to the latest version, then restart your computer when prompted.
3. Run the Windows Memory Diagnostic tool
NOTE
Before proceeding with the steps mentioned below, save all your work and close all the apps, as the system will reboot to run the scan.
Press the Windows key, type windows memory diagnostic in the search box, and click Open from the list of options.
Click Restart now and check for problems.
The system will now restart and check for memory issues during boot.
Once the scan is complete, you can log in to your computer as usual and see the results. If issues are found in the scan, you might need to reseat your RAM and rerun the scan. If you see the errors again, you might need to replace your RAM.
4. Run the SFC scan
Press the Windows key, type cmd in the search box, and click Run as administrator from the list of options.
To repair or restore the missing or corrupted system files, type the following command and hit Enter: sfc /scannow
Wait for the command to execute, and restart your computer to let the changes take effect.
Scroll to locate Related settings, and click Graphics.
Under Default settings, click Change default graphics settings.
On the next screen, locate Hardware accelerated GPU scheduling and toggle off the switch to disable it.
Restart your computer to let the changes take effect.
You can also try disabling hardware acceleration for Chrome and Office apps to fix the WIN32K_CRITICAL_FAILURE error.
6. Restart your computer in a clean boot
Press Windows + R to open the Run window.
Type msconfig and click OK to open the System Configuration window.
Go to the Services tab, place a checkmark next to Hide all Microsoft services, and click the Disable all button.
Switch to the Startup tab, click the Open Task Manager link.
On the Task Manager window, select all the Enabled items one by one and click the Disable option, then close the window.
Back on the System Configuration window, click Apply and OK to save the changes.
Click Restart to reboot your PC in clean boot.
Once your computer restarts, try enabling each service and startup one by one to identify which is causing the BSOD error. If none of these are causing the issue, reverse engineer these steps to restart your PC in normal mode.
7. Reinstall Windows
NOTE
Before proceeding with the steps to fix the error, back up your important data and keep a USB drive with 8 GB free space handy.
When the download is complete, double-click to open the tool and click Yes on the UAC prompt.
When the Windows 11 Setup guide opens, click Accept to agree to the license terms and agreements.
Plug in your USB drive, choose the USB flash device option on the screen, and click Next.
Select the language, edition, and architecture, then click Next.
Choose the USB device and click Next.
Follow the on-screen steps, click Finish, and eject the USB device safely.
Reinstall Windows
Plug the USB drive into the affected computer, then press Windows + E to launch the File Explorer.
Access the USB drive’s root directory, locate and double-click the setup.exe file, then click Yes.
Choose Change and select any of these options:
Keep personal files and apps – Preserve personal data, apps & settings
Keep personal files only – Preserves data & settings, but apps are deleted
Keep nothing – Removes all the settings, data, and apps.
Once you have chosen, click Install to reinstall Windows 11 on your computer.
Your PC will restart several times and then take you to the login screen. If nothing has worked, you can contact Microsoft Support for further assistance.
In conclusion, to fix the WIN32K_CRITICAL_FAILURE error, you can ensure all the CPU components are properly seated, then ensure Windows is up to date, then run the SFC scan, memory diagnostic tool, update the graphics driver, disable hardware acceleration, etc.
If you often encounter BSoD errors, you should learn the common reasons for them; read this guide for detailed information. Speaking of errors, we also covered ERROR_ALREADY_WIN32 in our latest article, so don’t miss it.
If you have any questions or suggestions about this BSoD error, feel free to mention them in the comments section below.
Wow64cpu.dll, along with Wowarmhw, wow64, xtajit, and wow64win, are legit system files included in the WOW64 emulator in Windows 10. These files allow 32-bit apps to run on a 64-bit Windows computer.
If Wow64cpu.dl is missing or can’t be located on your device, the reason could be malware infection, damaged system files, or a corrupted DLL file. To fix it, first, restart your computer, run a malware scan using a reliable antivirus tool, and ensure your Windows is up to date.
How can I fix the Wow64cpu.DLL not found error?
1. Use a third-party DLL fixer tool
Wow64cpu.dll is an essential system file that helps manage the translation and execution of 32-bit code into a 64-bit environment. One way to fix the issue is to get it from another computer with the same version of Windows by copying the file from C:\Windows\SysWOW64 and pasting it into the affected PC at the exact location.
However, if you know little about computers or are uncomfortable with the steps, we advise you to use a third-party DLL fixer tool. To restore the missing DLL files, you can quickly download & install the app and then run it to fix all DLL-related issues in no time.
2. Reregister the DLL file
Press the Windows key, type cmd in the search box, and click Run as administrator from the list of options to launch Command Prompt with admin rights.
To reregister the Wow64cpu.dll, copy & paste the following command and hit Enter:regsvr32 Wow64cpu.dll
Click OK when prompted and restart your PC to save the changes.
If the DLL file is already on the computer and you still get the error, re-registering the file can fix this problem.
3. Repair/Reinstall the affected app
Press Windows + I to open the Settings app.
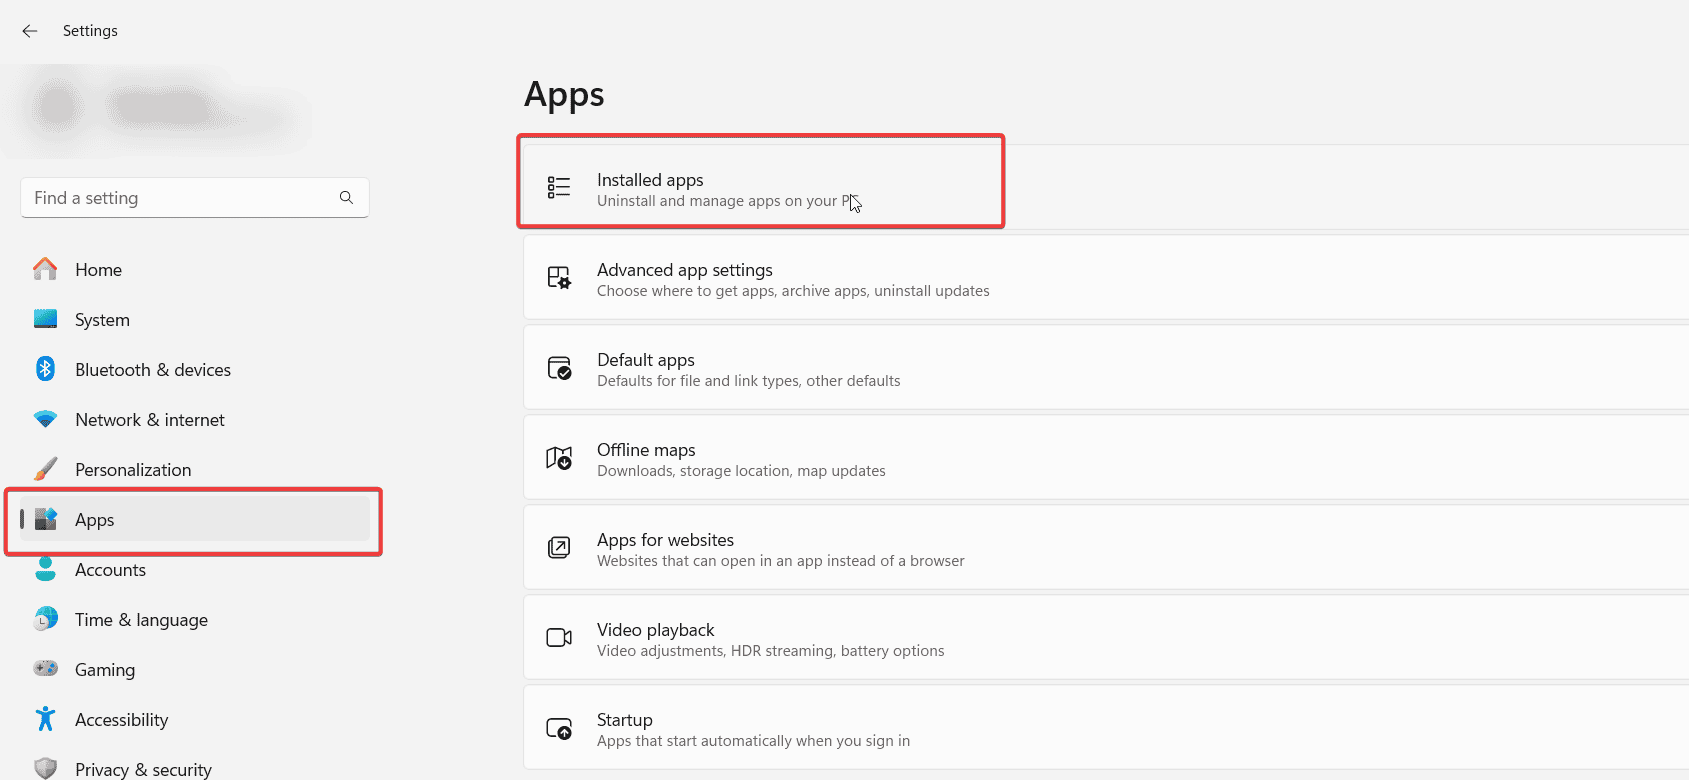
Go to Apps, then click Installed apps.
Locate the affected app, click the three dots icon, and choose Advanced options from the context menu.
Locate the Reset section and click the Repair button. This process may take some time, but your app data will not be removed.
If the Advanced options are not available for the app, or repairing it doesn’t help, try reinstalling it. For that, follow these steps:
Open the Installed apps list in Settings again.
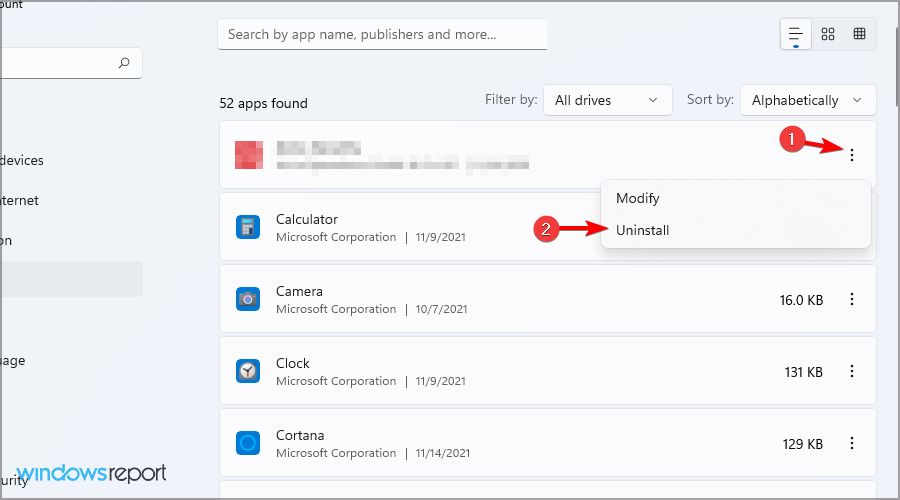
Locate the affected app, click the three dots icon, and choose Uninstall.
Click Uninstall again to confirm and follow the on-screen instructions to complete.
Launch the Microsoft Store or the app’s official website, and click Download/Get to reinstall.
Once done, restart your PC.
4. Run SFC & DISM scans
Press the Windows key, type cmd in the search box, and click Run as administrator to open Command Prompt with elevated rights.
Click Yes on the UAC prompt.
To restore/repair the system files, type the following command and press Enter: sfc/scannow
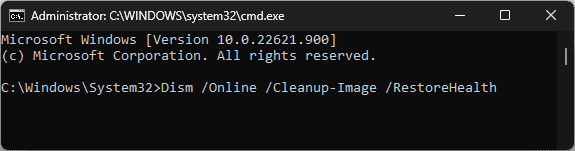
Wait for the scan to execute, copy & paste the following command to scan the Windows image for corruption and repair it via Windows Update, and hit Enter: Dism /Online /Cleanup-Image /RestoreHealth
Once the scan is complete, reboot your PC to let the changes take effect.
Press the Windows key, type control panel in the search box, and click Open from the list of options.
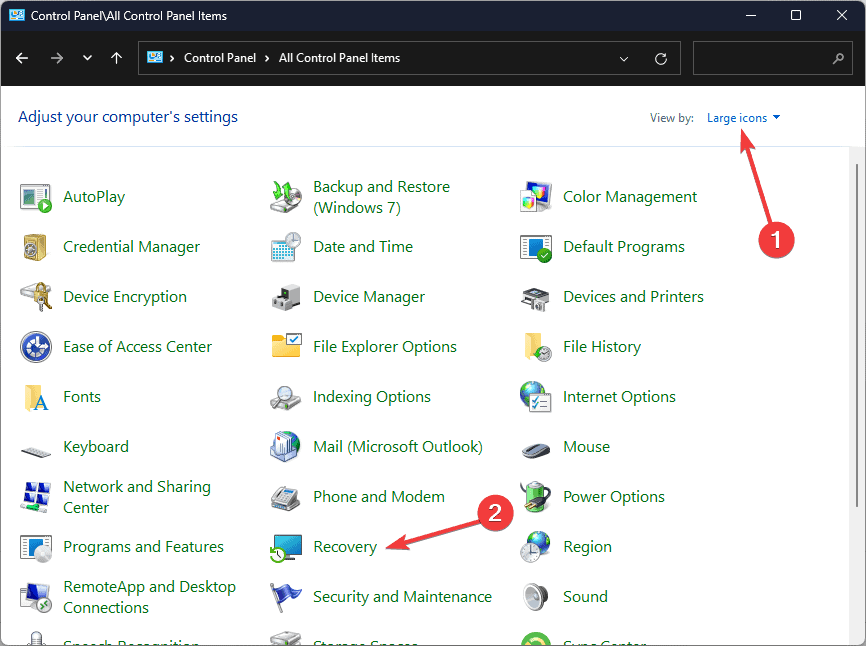
Choose Large icons for View by and click Recovery.
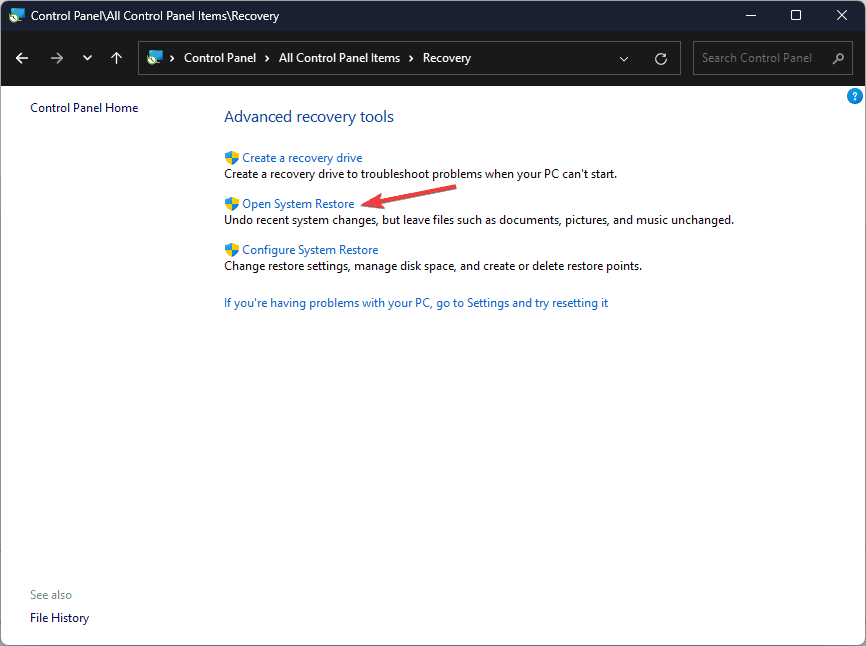
Click Open System Restore.
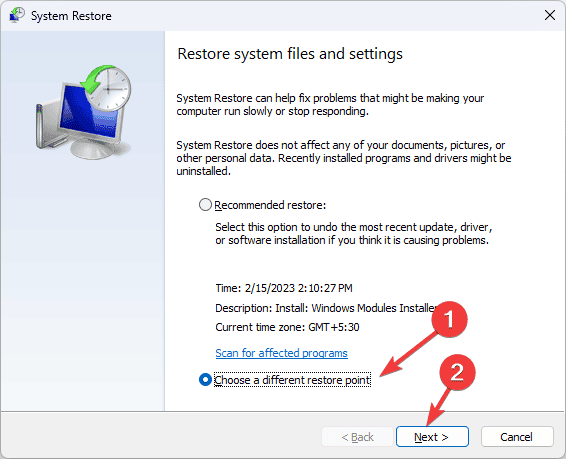
Select Choose a different restore point on the System Restore window, then click Next.
You will be presented with a list of available restore points on your computer. Choose the one created before encountering the wow64cpu.dll missing error and click Next.
Click Finish to start the process.
Windows will restart, and try to restore your system settings to the selected version. If you see the System Restore didn’t complete successfully error, the reason could be interference from third-party apps or driver errors; we recommend you check out this detailed guide for solutions.
6. Download the DLL file manually
NOTE
The last resort is to fetch the DLL file from a reliable third-party website like DLL-FILES, which has been verified and tested by our experts at WR.
Click the DLL-FILES website link to access the Wow64cpu.dll page, then click Download.
Double-click the downloaded folder to open, locate, and copy the .dll file.
Navigate to this path after replacing C with your system drive letter if it is not C for you, then paste the DLL file here: C:\Windows\SysWOW64
Reboot your computer to save the changes.
This is how you can fix the Wow64cpu.dll could not be found error. However, if you are facing the same issue due to any other DLL file, here are the common ways to quickly recover the DLL file.
Are you eager to learn about the causes of missing DLL files on Windows? We have got you covered. If you are facing a similar issue with other DLL files in the WOW64 emulator, like Wowarmhw.dll and WOW64d.dll, we have separate guides for you.
Before you go, don’t forget to check out our latest guide on what to do if ygpsvc.dll is missing from your computer.
Did we miss a step that helped you fix this missing DLL error? If so, share the method in the comments section below, and we will add it to the list.
A disk error indicating a bad block points out to disk failure. It can happen to HDDs and SSDs and the damage could be hardware or software-related. You’ll notice your PC has significantly slowed down and freezes frequently.
Unfortunately, a bad block restricts you from retrieving or storing any data on the affected drive so if you don’t have a backup of your files, they could be lost.
If you’re lucky the bad block disk error could be software-related which means it’s a corrupted file system or malware infestation that can be fixed with disk repair tools. If the issue is physical and affects the hardware, you may fix it temporarily but the drive now has a shorter lifespan.
How do I fix a disk error bad block?
1. Defragment your hard disk drive
Right-click on the Start Menu to bring up the shortcut menu, then select Windows Terminal (Admin).
Type the following command, then hit Enter to analyze your drive. Remember to replace X with the letter of your drive: defrag X: /a
After the scan is finished, you’ll see information about your hard drive, including the fragmentation level and a note saying whether you need to defragment your drive or not.
Now enter the following command to defrag that drive: defrag X:
Wait for the process to finish.
2. Check your drive’s health
2.1 Scan your drive
Press Windows + E to open File Explorer, right-click on your SanDisk SD card, and select Properties.
Go to the Tools tab, and click on the Check button.
Select the Scan drive option.
2.1 Run the SMART diagnostic tool
Press Windows + E to open File Explorer.
Go to This PC. Right-click on the drive you want to scan and select Properties.
Switch to the Tools tab, locate the Error checking section, and click Check.
On the next screen, you will be asked to schedule a disk check the next time you restart your computer. Click Yes.
Restart your computer for the disk check.
Even though Windows’ built-in tools do a great job, they may miss some errors. If you’d like a comprehensive scan, there are many tools available on the internet that can help you check the health of your SD card.
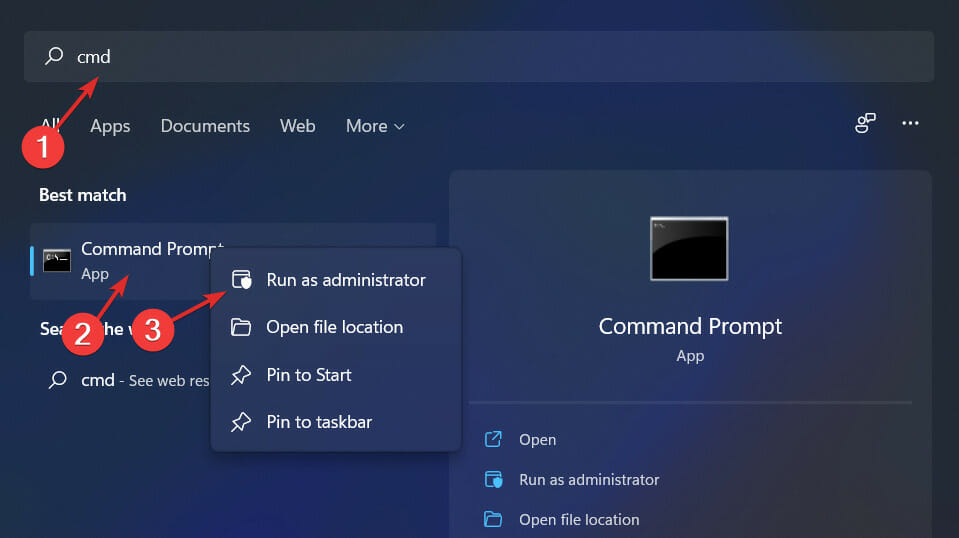
Open the Command Prompt by pressing Windows + S and typing cmd inside. Right-click on the top result and choose Run as administrator.
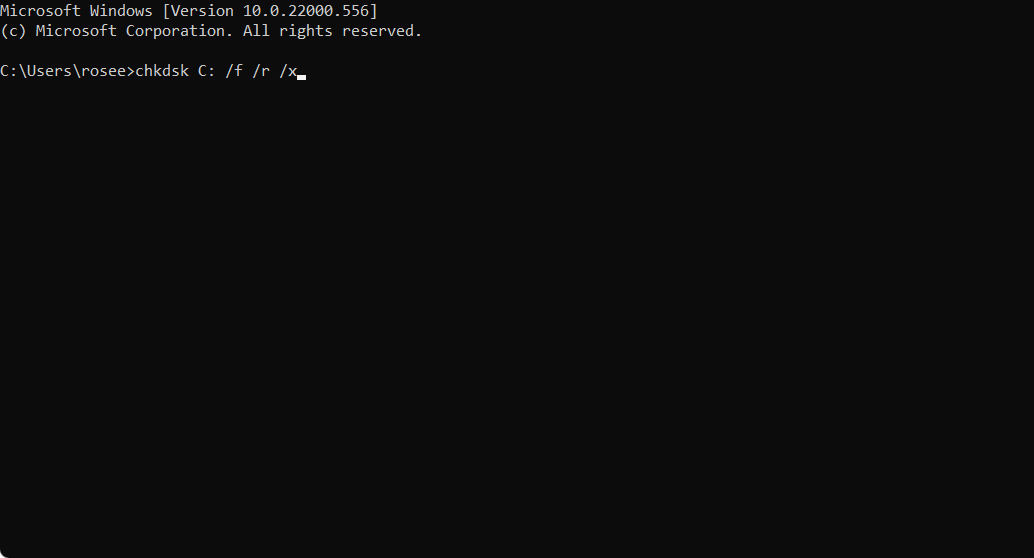
Type or copy-paste in the following command and press Enter to run it. Remember to replace the C with your SanDisk’s drive letter: chkdsk C: /f /r /x
Wait for the process to finish, then restart your computer to apply the changes made.
You can also go ahead and perform the SFC and DISM scans for good measure.
Hit the Start Menu icon, type cmd in the search bar, and click Run as administrator.
Type the following commands and press Enter after each one:DISM.exe /Online /Cleanup-Image /Restorehealthsfc /scannow
Additional tips to prevent bad block disk errors
Regular health checks – Make it a habit to perform routine checks on your hard drive and backup regularly so that you can catch errors in their early stages.
Defragment your drive – Ensure you defragment your disk by setting a disk defrag schedule and optimising your disk drives.
While you may get a reprieve by fixing the bad block disk error, the solution is only temporary. This is an indication of impending drive failure. The thing about a bad block is that it affects the hardware and no amount of disk checks can restore it back to health.
Further. disk errors are quite common but we’ve curated a cheat sheet to help you bypass the most common ones.
In the worst-case scenario, you may have to replace your HDD. Unfortunately, they don’t come cheap and the affordable ones either don’t have enough storage capacity or aren’t reliable.
You can consider buying a second-hand HDD but first, check out what you’re getting yourself into in our detailed article.
That’s a wrap from us but let us know if you’ve managed to fix this issue. Also, if you have any other solutions that worked for you, drop them in the comment section below.
Minecraft lovers have been getting the error code D-0010 when they attempt to join multiplayer games and access the marketplace and skins. The error restricts access to some features which can make the game unplayable or even inaccessible.
Mostly, this is a server-side issue and Minecraft is currently down but connection issues or a recent game update may also trigger this error.
How do I fix Minecraft error code d-0010?
1. Restart Minecraft
Save your current progress, log out of your account and close the Minecraft launcher.
Wait a few minutes before launching the app again.
Log in with your credentials and check whether you can access these features.
Press Windows + R to open Run, type cmd, and hit Ctrl + Shift + Enter.
Click Yes in the UAC prompt.
Now, paste the following command and hit Enter:ipconfig /flushdns
Once done, restart the computer for the changes to come into effect.
Press the Windows key, type control panel and click Open.
Select Category from View by options and click Network and Internet.
Click Network and Sharing Center.
Click the Change adapter settings link.
Right-click the active connection and select Properties.
On the next window, select Internet Protocol Version 4 (TCP/IPv4) and click Properties.
Select the Use the following DNS server addresses option.
And for type 8.8.8.8 for the Preferred DNS server and 8.8.4.4 for the Alternate DNS server.
Click OK to confirm the changes.
3. Use a VPN
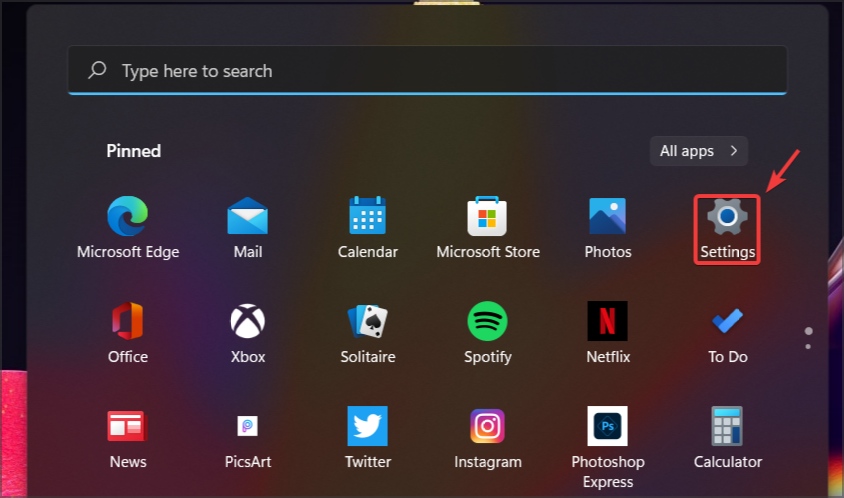
Press the Windows key and select Settings.
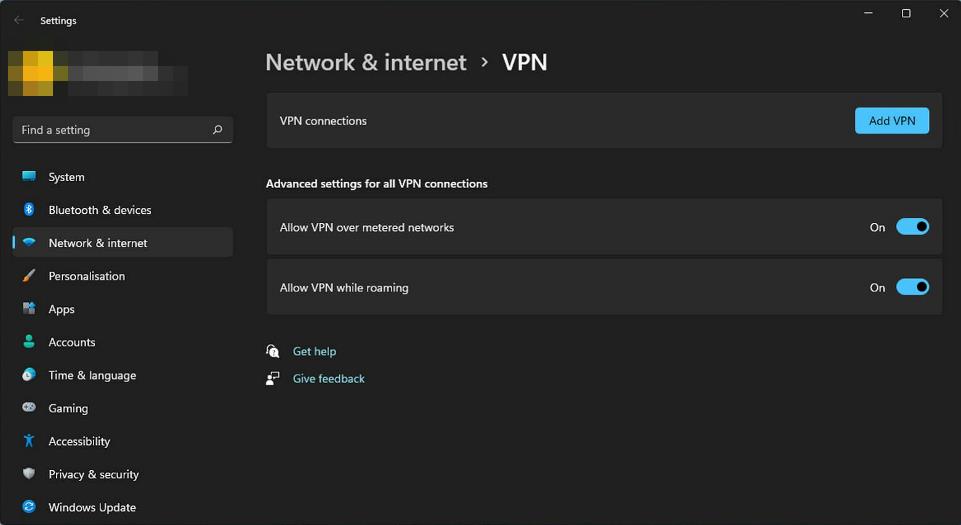
Next, select Network & internet and click on VPN in the right-side menu.
Click on Add VPN and follow the prompts to enable it.
Try making payment again and see if the internal error persists.
This can also be accomplished with the help of professional VPN software such as ExpressVPN. This tool is excellent for gaming as it provides you with a large number of servers you can connect too and a very good connection speed.
Press the Windows key, type minecraft and click Open to open Minecraft launcher.
Go to the Installations tab from the top menu.
Click the New Installation option.
Type in a name for the installation and, go to Version, select the latest release from the drop-down. If you are confused about which one to choose, like the one that starts with the word release.
Click Create.
Next, go to the Play tab and choose the installation you created to play.
5. Reset the Minecraft app
Press the Windows key, search for installed apps, and launch it.
Click the options icon beside Minecraft Launcher and select Advanced options.
Scroll down and select Reset button.
Click Reset again to delete the app’s data on the device permanently.
If none of the above solutions fixes the error D-0010, you might have to contact the Minecraft support team. They may be able to give an accurate timeline of when the servers will be back up.
Otherwise, you’ll just have to wait it out. Some users had luck unplugging and replugging their Xboxes and PS5s after a while so try it out. As you wait it out, consider trying out other Xbox games that are just as good or even better as Minecraft.
The PROFILER_CONFIGURATION_ILLEGAL BSoD has the value 0x0000017B and causes random system restarts when opening or closing an app. It also produces freezes due to software conflicts, malfunctioning drivers or system file corruption.
If the system doesn’t boot normally, you can use the Windows Recovery environment or booting into Safe mode to start troubleshooting the issue. If you installed any software recently, try uninstalling it as soon as Windows boots up.
How do I fix the PROFILER_CONFIGURATION_ILLEGAL BSoD?
1. Uninstall the recent Windows update
Press the Win + I hotkey to start Settings.
Click on Windows Update and select Update history from the right pane.
Now, click on Uninstall updates in order to remove the faulty files.
Click on Uninstall for the latest Windows update.
If the PROFILER_CONFIGURATION_ILLEGAL BSoD started acting up after the latest Windows Update, uninstalling it right away is the right thing to do in this situation.
2. Disconnect and reconnect external hardware devices
Detach all the plugged accessories from the device and reboot the PC.
If Windows boots successfully, attach the accessories again, one by one and check which one is causing PROFILER_CONFIGURATION_ILLEGAL.
Subsequently, get the updated drivers for that specific hardware from the manufacturer website and then install them.
This issue may also be cause by a malfunctioning hardware device, especially if it isn’t installed with the corrects drivers. This solution will help you troubleshoot this problem and restore things to normal.
3. Update or reinstall corrupted drivers
Right-click on the Start button and select Device Manager from the menu.
On the following screen, locate the devices having exclamation mark to their right.
Right-click on the driver and select Update driver to start the process.
Choose Search automatically for drivers.
When you are done, Restart the Windows to make the changes effective.
4. Run System File Checker and DISM scans
Click the Start button, type cmd in the search box, and click Run as administrator to launch Command Prompt with full permissions.
Type the following command to scan and repair the corrupted system files and press Enter: sfc /scannow
Wait for the process to finish, then copy & paste the following command to repair the Windows OS files, and hit Enter: DISM /Online /Cleanup-Image /RestoreHealth
Once the scan is complete, restart your computer to confirm the changes.
As with any BSoD error out there, it’s recommended to perform SFC and DISM scans because most of the times, they will help you fix any related system and Windows image errors.
4. Restore your system to a previous point
Press the Windows key, type control panel in the search box, and click Open.
Select Large icons for View by, then click the Recovery option.
Click the Open System Restore option.
Now, select Choose a different restore point and click Next.
Choose the restore point created before the error started to occur, then click Next.
Click on Finish to initiate the process.
Windows will reboot and restore your system settings to the chosen point. Of course, that will only work if you actually created a restore point along the way. If you see the System Restore didn’t complete the successfully, we suggest you check out this detailed guide for solutions.
If none of the solutions fixed the issue the last resort is to reinstall a fresh copy of Windows. If that is also unsuccessful, you should inspect the hardware for any signs of damage or overheating. Ultimately, you should consult a computer technician or repair shop in order to fix your PC.
So, by performing the solutions above, you hopefully fixed the PROFILER_CONFIGURATION_ILLEGAL BSoD.
If you know about any other solutions that worked, let us know in the comments section below.
If you’re a developer, you might want to know how to print error messages in SQL Server. This is simpler than you think, and this guide is going to show you a couple of methods you can use.
How can I display an error message in SQL?
1. Use RAISERROR
Open your configuration.
Add the following code: RAISERROR('This is an error message', 16, 1);
Save changes.
Let’s explain all the parameters. Besides your error message, the number 16 describes the severity of an error, and in this case, 16 is used for general user errors.
The last value, 1, indicates a different area of code or state.
As you can see, this method is incredibly simple, and it was used on older SQL servers, before SQL Server 2012.
2. Use THROW
Open your configuration.
Add the following line: THROW 50000, 'This is an error message', 1;
Save changes.
This command is intended for SQL Server 2012 and newer. As for parameters, let’s go through them.
The 50000 is used for error number and for user-defined errors you need to use 50000 or higher. 1 represents state, similar to RAISERROR.
Now enter the following: BEGIN TRY -- Code that may cause an error SELECT 1 / 0; -- Division by zero to force an error END TRY BEGIN CATCH PRINT 'Error Message: ' + ERROR_MESSAGE(); END CATCH
Save changes.
This is how you can print error messages in catch block SQL Server, and this is the best method for debugging your code. Now whenever an error occurs, the ERROR_MESSAGE() will return the error text.
As you can see, it’s pretty simple to print an error message in SQL Server by following these steps.
The packet.dll file, a component of WinPcap, is used by several applications and tools, primarily for network-related functions. When it’s not found, the error message reads, The program can’t start because packtet.dll is missing from your computer. Try reinstalling the program to fix this problem.
Tools that rely on packet.dll include eNSP, Ostinato Traffic Generator, URL Snooper, and Wireshark, amongst others, and all these have, in the past, thrown errors due to the missing DLL.
Before you proceed, reboot the PC, install pending updates for the affected app, and disable any third-party antivirus installed on the PC.
What can I do when packet.dll is missing?
Tip
Although several websites claim to host packet.dll for download, I recommend against it because such files are often bundled with malware that could harm your PC. Instead, go with simple solutions listed below.
1. Manually add packet.dll
The easiest fix when packet.dll is missing is to get a copy of the DLL from another PC and add it to the relevant directory on the affected computer. While doing so, make sure both the PCs are running the same iteration and architecture (32-bit or 64-bit) of Windows.
As for its location, packet.dll is stored in: C:\Windows\System32
Packet.dll in the System32 folder
Now, connect a USB flash drive to another PC > go to the System32 folder > copy the DLL file to the flash drive > plug the USB drive into the affected PC > transfer packet.dll to the same location > restart the PC to apply the changes.
2. Install WinPcap or Npcap
The packet.dll file is not natively a part of Windows but is included in the WinPcap library. So, when it’s missing, installing WinPcap from the official website will quickly fix things.
However, WinPcap hasn’t been updated in years and might lead to compatibility issues with newer iterations of the OS, such as Windows 10 or Windows 11. For these iterations, developers recommend using Npcap, a more suitable library.
Installing Npcap
Both software are easy to install and wouldn’t take more than a minute. Besides, upon getting Npcap, I was able to download packet.dll to the System32 folder on my PC.
3. Whitelist the affected application in Windows Security
NOTE
The steps listed here are for Windows Security, the built-in antivirus available in Windows. If you are using a third-party antivirus solution, check its developer’s website for the exact steps.
Press Windows + S to open Search, type Windows Security, and click on the relevant result.
Click on Virus & threat protection.
Click on Protection history.
Select Quarantined items from the Filters dropdown menu.
If packet.dll is listed here, restore the file.
Now, go back and click on Manage settings under Virus & threat protection settings.
Scroll down and click on Add or remove exclusions.
Click Yes in the UAC prompt.
Click the Add an exclusion button, and choose Folder from the dropdown menu.
Navigate to the program’s directory, choose it, and click on Select Folder.
Finally, reboot the PC to apply the changes and check for improvements.
If Windows Security or another antivirus mistook packet.dll for a threat, you will have to recover the file and then add the affected program to the list of exclusions so that the DLL remains safe from such actions in the future.
4. Reinstall the affected application
Press Windows + R to open Run, type appwiz.cpl in the text field, and hit Enter.
Select the affected program from the list, and click on Uninstall.
Follow the on-screen instructions to complete the process and then restart the computer.
Finally, reinstall the application from an official source and verify whether this downloads the missing packet.dll in Windows.
5. Perform a system restore
Press Windows + S to open Search, type Create a restore point, and click on the relevant result.
Click on System Restore.
Select the Choose a different restore point option, if available, and click Next.
Pick a restore point created before the issue first appeared or the oldest one, and click Next.
Verify the restore details, click Finish, and confirm the change.
If recent changes to the PC deleted packet.dll, a system restore will revert that and prevent further occurrences of the same. However, it won’t download the missing DLL, and you will have to add it manually.
Also, if you frequently face such issues, it’s best to use a top-rated DLL repair tool, which will restore all missing DLLs in one go!
For any queries or to share which fix worked for you, drop a comment below.
When it comes to BSOD errors Elam_Driver_Detected_Fatal_Error is rare since it usually affects developers, but if you encounter it as a regular user, a few solutions could help you fix it.
How can I fix Elam_Driver_Detected_Fatal_Error?
1. Ensure your system and drivers are up to date
Click the Start menu and then select the Settings app.
Navigate to the Windows Update section.
Click on Check for updates.
If any updates are available, they will be downloaded automatically.
In addition to Windows Updates, update your motherboard drivers by doing the following:
Visit your motherboard manufacturer’s website.
Locate your motherboard and go to the Drivers section.
Download the latest drivers and install them.
2. Use Safe Mode
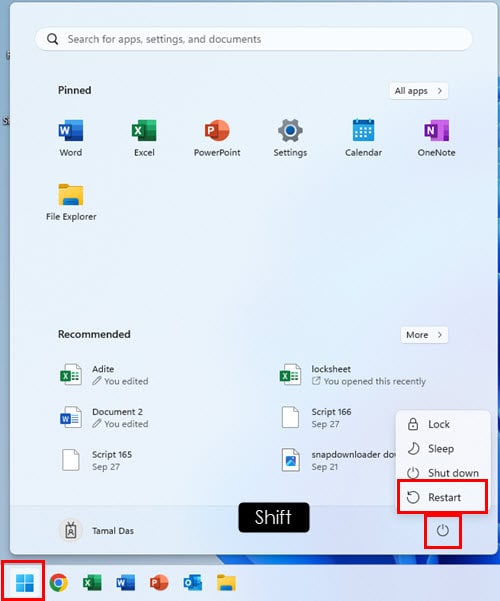
Open the Start menu. Click the Power button, press and hold the Shift key, and choose Restart.
Select Troubleshooting and then choose Advanced options.
Choose Startup Settings and then click Restart.
Press F5 to select Safe Mode with Networking.
Check if the problem appears in Safe Mode.
If the issue doesn’t appear, there may be an issue with one of your drivers or installed applications, so you’ll need to find it manually and remove it.
The COREMSG_INTERNAL_ERROR bug check comes with the 0x00000174 value. The error points out that CoreMessaging detected an unrecoverable error. The CoreMessaging process takes care of communication between UWP apps, handles input and touch events and manages system-wide input methods.
If it detected an unrecoverable error, that most likely has to do with some conflicting apps that might engage the same resources or they are just incompatible. It may also be due to driver problems or file system corruption.
How do I fix the COREMSG_INTERNAL_ERROR BSoD?
1. Uninstall any recently installed software
Press Win + I to start Settings.
Go to Apps > Installed apps and identify any recently installed apps.
Now, click the three dots button to the right of the app and select Uninstall.
Reboot your PC to see if the COREMSG_INTERNAL_ERROR reoccurs.
You may also try booting Windows in Safe mode to troubleshoot this BSoD. The PC will start with a minimum set of drivers and processes and that will help you determine the app that is causing this problem.
2. Update or reinstall the problematic driver
Right-click the Start button and select Device Manager.
Click on the component categories one by one to expand them, and look for a driver with a yellow exclamation mark next to it.
Once located, right-click the driver and choose Update driver from the context menu.
Click Search automatically for drivers.
Follow the on-screen prompts to complete the process.
If you remember installing any drivers lately, start with those. If Windows cannot find a driver for your device, you should go to the manufacturer’s website and download the right driver for your system.
As this whole process might take a lot of time and, and if you don’t actually find the right driver, you might make things worse. Therefore, we recommend using a reliable driver updater tool. They automatically scan your system for problematic drivers and automatically update or replace them with just a few clicks.
3. Perform SFC and DISM scans
Click the Start button, type cmd in the search box, and click Run as administrator to launch Command Prompt with full permissions.
Type the following command to scan and repair the corrupted system files and press Enter: sfc /scannow
Wait for the process to finish, then copy & paste the following command to repair the Windows OS files, and hit Enter: DISM /Online /Cleanup-Image /RestoreHealth
Once the scan is complete, restart your computer to confirm the changes.
As with any BSoD error out there, it’s recommended to perform SFC and DISM scans because most of the times, they will help you fix any related system and Windows image errors.
4. Restore your system to a previous point
Press the Windows key, type control panel in the search box, and click Open.
Select Large icons for View by, then click the Recovery option.
Click the Open System Restore option.
Now, select Choose a different restore point and click Next.
Choose the restore point created before the error started to occur, then click Next.
Click on Finish to initiate the process.
Windows will reboot and restore your system settings to the chosen point. Of course, that will only work if you actually created a restore point along the way. If you see the System Restore didn’t complete the successfully, we suggest you check out this detailed guide for solutions.
So, by performing the solutions above, you hopefully fixed the COREMSG_INTERNAL_ERROR bug check. You should also keep in mind that BSoD errors are also triggered by faulty or malfunctioning hardware. Therefore, if nothing worked, you should probably ask for professional help from a technician or a repair shop.
If you have any questions or know about other tested solutions that worked for you, let us know in the comments below. We also have a guide on the Error_Checkout_Required message, so don’t miss it for more solutions.
The much-loved Kojima Productions and 505 Games title, Death Stranding Director’s Cut, is now available on Xbox Series X|S and Windows PC as an Xbox Play Anywhere title. Released five years ago, Death Stranding has always been a game about connections, and the developers want to foster that spirit on Xbox.
To achieve this, Kojima Productions introduced the Social Strand System, along with several other capabilities; these would allow gamers worldwide to navigate the world of Death Stranding in unity.
For example, Death Stranding Director’s Cut’s unique online multiplayer mode lets players interact with others in-game. While you may never meet another player face-to-face, players can leave behind ladders, signs, and other items for others to find. Players can also give and receive “Likes” to one another to show appreciation for a helpful bridge or sign.
In addition to the Social Strand System, players can find structures and signs left behind by other players to help navigate the world.
Kojima Productions will also host regular virtual photography events in Death Stranding Director’s Cut, tasking players with capturing the best in-game shots based on a specific theme. The studio will pick the best shots each month and feature them in a showcase.
Death Stranding Director’s Cut includes the base game and a ton of additional content, such as new story missions, delivery equipment, and more.
If you’ve got an Xbox Series X, Xbox Series S, or a PC capable of playing games, you can pick up Death Stranding Director’s Cut now for just $19.99, down from its regular $39.99. And if you buy the game on Xbox, you’ll be able to play it on PC and vice versa, thanks to the Xbox Play Anywhere feature.
The ERROR_LOCKED Windows system error, with code 212 (0xD4), is encountered when a program tries to reallocate memory that is already locked and unavailable for other processes. The error message reads, The segment is locked and cannot be reallocated.
This usually happens due to missing permissions, corrupted system files, the presence of conflicting apps, and issues with the RAM.
Before you proceed to the solutions, reboot the PC, install pending Windows updates, and disable startup apps that are not critical. For most of you, this will do the trick!
How can I fix the ERROR_LOCKED Windows system error?
1. Run affected app with administrative privileges
Right-click on the affected app’s launcher (.exe) file, and select Properties.
Go to the Compatibility tab, and tick the check for Run this program as an administrator.
Click Apply and OK to save the changes, then relaunch the application and check for improvements.
2. Repair the corrupted system files
Press Windows + S to open Search, type Command Prompt in the text field, and click on Run as administrator.
Click Yes in the UAC prompt.
Run these three DISM commands: DISM /Online /Cleanup-Image /CheckHealthDISM /Online /Cleanup-Image /ScanHealthDISM /Online /Cleanup-Image /RestoreHealth
Next, paste this command and hit Enter to run the SFC scan: sfc /scannow
Finally, reboot the PC to apply the changes.
If the ERROR_LOCKED The segment is locked and cannot be reallocated system error appears due to corrupted system files, running the DISM (Deployment Image Servicing and Management) and SFC (System File Checker) scans will replace all problematic files with their cached copy and fix things in no time!
3. Uninstall conflicting apps
Press Windows + R to open Run, type appwiz.cpl in the text field, and hit Enter.
Select any application that was recently downloaded or updated, and click on Uninstall.
Follow the on-screen instructions to complete the process.
Now, restart the computer and verify whether ERROR_LOCKED 212 (0xD4) is fixed.
If a quick removal doesn’t work, it could be the leftover files or Registry entries to blame. In this case, I recommend using a top-rated software uninstaller to wipe all traces of the program that might be triggering conflicts.
4. Test the RAM for issues
Press Windows + S to open Search, type Windows Memory Diagnostic, and click on the relevant result.
Click on Restart now and check for problems.
After the scan is complete, check the mdsched logs and find out any issues with the RAM.
When Windows Memory Diagnostic can’t identify any problems, you can always use the more advanced Memtest86+, an open-source RAM testing tool that runs a series of scans on individual memory sticks and detects all issues.
If problems are reported, it’s best to replace the malfunctioning RAM module with a new one!
5. Perform a system restore
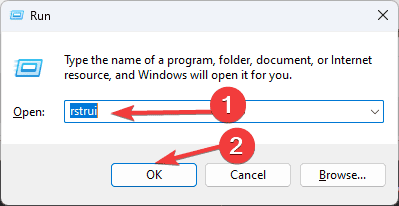
Press Windows + R to open Run, type rstrui.exe in the text field, and hit Enter.
Select the Choose a different restore point option, if available, and click Next.
Pick a restore point created before the error first appeared or the oldest one, and click Next.
Review the details, click Finish, and then confirm the restore.
Wait for the system restore to complete. It usually takes 15-30 minutes.
When you can’t figure out the underlying cause behind 212 (0xD4) The segment is locked and cannot be reallocated, a system restore comes to aid by reverting all recent changes to the PC, including the one triggering ERROR_LOCKED.
Many encounter Minecraft error code C-0010 on their device, and in today’s guide we’re going to show you a couple of solutions that can help you fix this issue.
What does error code C-0010 mean in Minecraft?
This error usually appears if there’s a network issue or if your game files are corrupted.
How do I fix error code C-0010 in Minecraft?
1. Disconnect from the Internet
Turn off Minecraft.
Next, disconnect from the Internet.
Reconnect and try to start the game again.
2. Use a 2.4GHz connection
If you have multiple Wi-Fi networks available, always use a 2.4GHz network.
Alternatively, go to your router settings.
Disable the 5GHz network and ensure that the 2.4GHz connection is running.
Try to start the game again.
Sometimes the network connection can cause Minecraft error code C-0010, so feel free to try this solution out.
Press the Windows key + I to open the Settings app.
Go to Apps and then Installed apps.
Locate Minecraft on the list, click the three dots next to it and choose Advanced options.
Select the Repair option and wait for it to finish.
Check if the problem is gone.
If not, select the Reset option.
If you’re on your phone or console, try clearing the app cache instead.
4. Reinstall the app
Open the Settings app and go to Installed apps.
Locate Minecraft, click the three dots next to it, and choose Uninstall.
Follow the instructions on the screen to complete the process.
Once the application is removed, install it again.
Minecraft error code C-0010 can appear on any platform, including Nintendo Switch and Xbox, and even though this guide shows you how to address the issue on PC, you can follow the same general guidelines on your console as well.
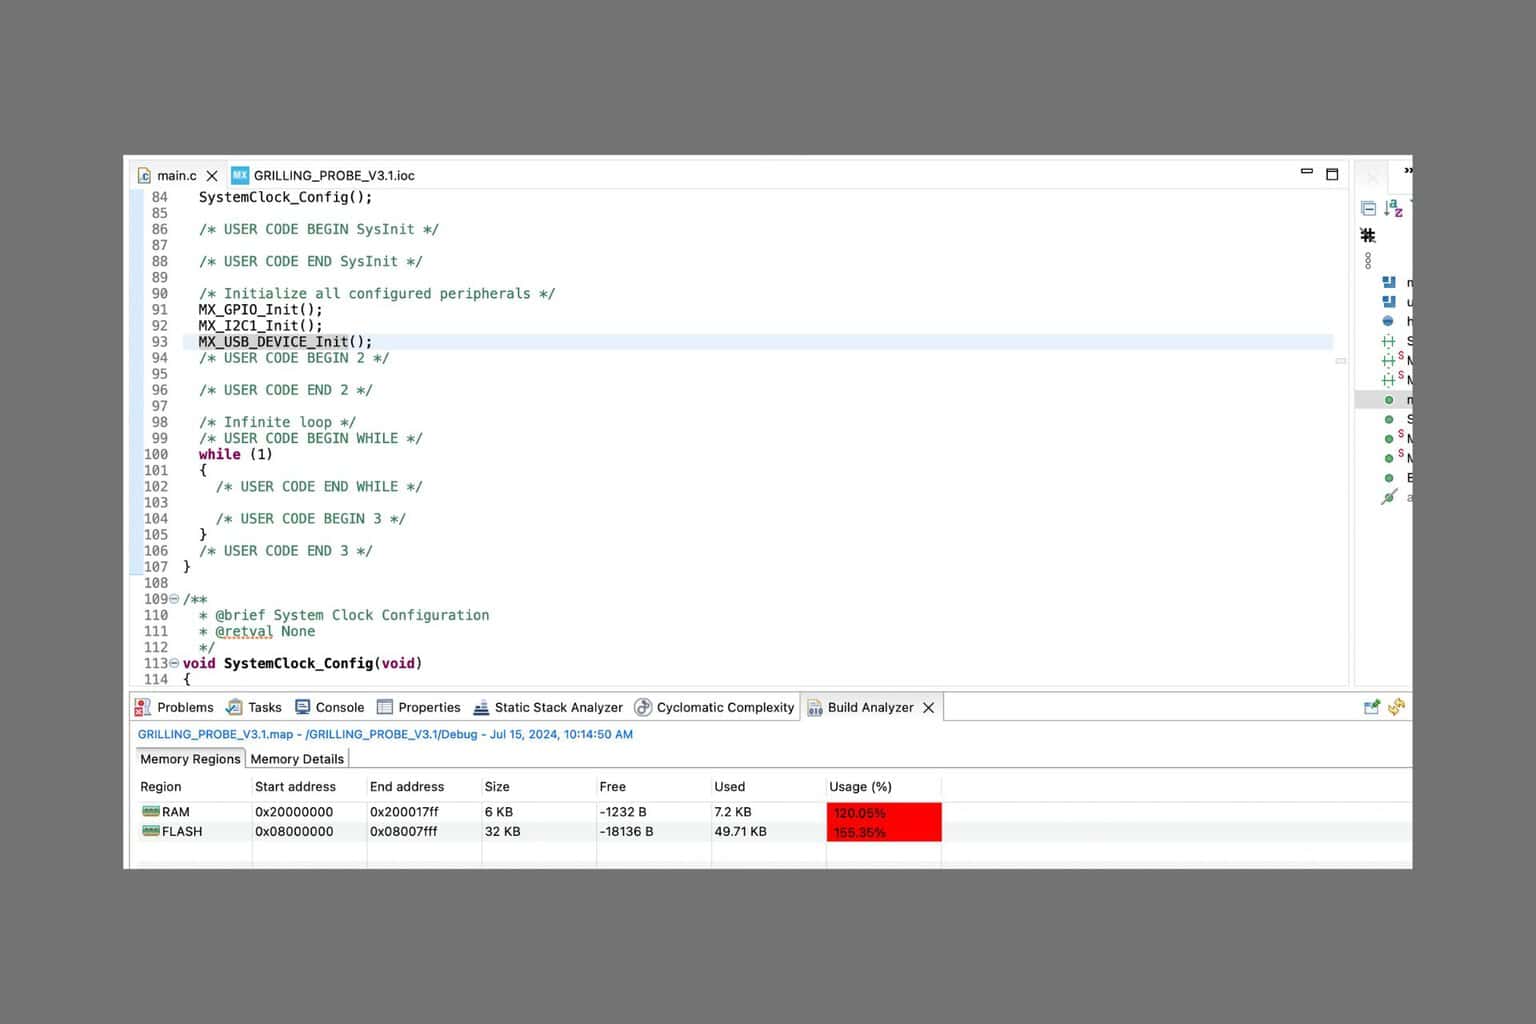
If you decided on a STM32 flash memory HAL approach, here’s the basics on how to program your microcontroller easily. The Hardware Abstraction Layer (HAL) should be pretty simple to set up using a few examples below.
How do I write on STM32 flash memory using HAL?
1. Prepare the flash memory for writing
Include necessary headers: #include "stm32f4xx_hal.h"
Unlock the flash memory: Before you can write to the flash memory, you need to unlock it by using the following command: HAL_FLASH_Unlock();
Erase the Flash Memory: You need to erase the sector of the flash memory where you want to write data. This is done using the following HAL_FLASHEx_Erase function:
FLASH_EraseInitTypeDef EraseInitStruct; uint32_t SectorError; EraseInitStruct.TypeErase = FLASH_TYPEERASE_SECTORS; EraseInitStruct.Sector = FLASH_SECTOR_2; // Choose the sector you want to erase EraseInitStruct.NbSectors = 1; EraseInitStruct.VoltageRange = FLASH_VOLTAGE_RANGE_3; if (HAL_FLASHEx_Erase(&EraseInitStruct, &SectorError) != HAL_OK) { // Handle the error }
2. Write data for the flash memory
Use the HAL_FLASH_Program function to write data to the flash memory. You can write data in bytes, half-words, words, or double words.
uint32_t Address = 0x08008000; // Starting address in flash memory uint32_t Data = 0x12345678; // Data to be written if (HAL_FLASH_Program(FLASH_TYPEPROGRAM_WORD, Address, Data) != HAL_OK) { // Handle the error }
Lock the flash memory – After writing the data, lock the flash memory to prevent accidental writes: HAL_FLASH_Lock();
Example code on STM32 flash memory HAL coding
Here’s a complete example that combines all the steps:
#include "stm32f4xx_hal.h"

void Write_Flash(uint32_t Address, uint32_t Data) {
    // Unlock the Flash
    HAL_FLASH_Unlock();

    // Erase the Flash sector
    FLASH_EraseInitTypeDef EraseInitStruct;
    uint32_t SectorError;

    EraseInitStruct.TypeErase = FLASH_TYPEERASE_SECTORS;
    EraseInitStruct.Sector = FLASH_SECTOR_2;
    EraseInitStruct.NbSectors = 1;
    EraseInitStruct.VoltageRange = FLASH_VOLTAGE_RANGE_3;

    if (HAL_FLASHEx_Erase(&EraseInitStruct, &SectorError) != HAL_OK) {
        // Handle the error
    }

    // Program the Flash memory
    if (HAL_FLASH_Program(FLASH_TYPEPROGRAM_WORD, Address, Data) != HAL_OK) {
        // Handle the error
    }

    // Lock the Flash
    HAL_FLASH_Lock();
}

int main(void) {
    HAL_Init();
    Write_Flash(0x08008000, 0x12345678);
    while (1) {
        // Main loop
    }
}
This example demonstrates how to unlock, erase, write to, and lock the flash memory of an STM32 microcontroller using HAL functions. We hope that our guide helped you with STM32 flash memory HAL coding.
Soon, you’ll be able to choose a custom icon so that it’s easier to tell your accounts apart while using Outlook on iOS and Android.
The Custom account icons are set to be released for Outlook for Mobile in January 2025 on Android and iOS devices.
In other news, Outlook will let users access the other Microsoft 365 apps directly from the platform in the following months. Microsoft is going to enhance the platform for it in a quest to make it easier to navigate and use the 365 Suite.
The COREMSGCALL_INTERNAL_ERROR BSoD comes with the value of 0x00000173. The bug check points out that the CoreMessageCall detected an unrecoverable error. Now, this CoreMessageCall is a Windows OS component that facilitates communication between different applications and processes.
So, this error is most likely caused by software conflicts and driver issues, although, as with any other BSoD, we can’t exclude hardware malfunctioning.
How do I fix the COREMSGCALL_INTERNAL_ERROR BSoD?
1. Uninstall any recently installed software
Press Win + I to start Settings.
Go to Apps > Installed apps and identify any recently installed apps.
Now, click the three dots button to the right of the app and select Uninstall.
Reboot your PC to see if the COREMSGCALL_INTERNAL_ERROR shows up again.
You may also try booting Windows in Safe mode to troubleshoot this issue. The PC will start with a minimum set of drivers and processes and that will help you determine which app is causing this problem.
2. Update or reinstall the problematic driver
Right-click the Start button and select Device Manager.
Click on the component categories one by one to expand them, and look for a driver with a yellow exclamation mark next to it.
Once located, right-click the driver and choose Update driver from the context menu.
Click Search automatically for drivers.
Follow the on-screen prompts to complete the process.
Of course, you should start by looking for a driver you installed recently, because that might be causing this issue. Also, if Windows cannot find a driver for your device, the best way would be to download it manually from the manufacturer’s website.
As this whole process might take a lot of time and effort, we recommend using a reliable driver updater tool. They automatically scan your system for problematic drivers and automatically update or replace them with just a few clicks.
3. Perform SFC and DISM scans
Click the Start button, type cmd in the search box, and click Run as administrator to launch Command Prompt with full permissions.
Type the following command to scan and repair the corrupted system files and press Enter: sfc /scannow
Wait for the process to finish, then copy & paste the following command to repair the Windows OS files, and hit Enter: DISM /Online /Cleanup-Image /RestoreHealth
Once the scan is complete, restart your computer to confirm the changes.
As with any BSoD error out there, it’s recommended to perform SFC and DISM scans because most of the times, they will help you fix any related system and Windows image errors.
4. Restore your system to a previous point
Press the Windows key, type control panel in the search box, and click Open.
Select Large icons for View by, then click the Recovery option.
Click the Open System Restore option.
Now, select Choose a different restore point and click Next.
Choose the restore point created before the error started to occur, then click Next.
Click on Finish to initiate the process.
Windows will reboot and restore your system settings to the chosen point. Of course, that will only work if you actually created a restore point along the way. If you see the System Restore didn’t complete the successfully, we suggest you check out this detailed guide for solutions.
So, by performing the solutions above, you hopefully fixed the COREMSGCALL_INTERNAL_ERROR BSoD. We remind you that BSoD errors are also triggered by faulty or malfunctioning hardware components. So, if nothing worked, you should probably ask for professional help from a technician or a repair shop.
Microsoft Ignite 2024 is going to be big! The next big Microsoft event, in Chicago and online, will bring a wealth of information about all things Microsoft – including Windows. Microsoft Ignite has something for you whether you’re a developer, IT pro, or business decision-maker.
First, the basics: when is Microsoft Ignite 2024? The conference runs from November 18-22, 2024, with in-person activities at Chicago’s McCormick Place and digital sessions available through the Microsoft Ignite website. You can still register here.
Now, on to the good stuff: Windows. Microsoft Ignite 2024 features a variety of breakout sessions, theater sessions, and hands-on labs focused on Windows 11 and Windows in the cloud. Looking to get up to speed on the latest Windows developments, brush up on your Windows skills, and network with other Windows enthusiasts? Here are some Windows-related activities you can check out at Microsoft Ignite.
Whether you’re attending in person or digitally, you can join breakout sessions led by Windows experts from Microsoft and other organizations. Here are a few sessions that caught our eye.
The Copilot+ PC session is probably the most anticipated of them all. Microsoft and its OEM partners released dozens of Copilot+ PCs this year, but the devices are still struggling to find their place in a context where most apps are not compatible with them.
Few users noticed ygpsvc.dll on their PC, and they are wondering what is this file, and what it does. Today we’re going to answer this and all other questions related to ygpsvc.dll.
What is ygpsvc.dll?
Not much information is available regarding this file, and some sources claim that this file is associated with YGP Service Layer and America Online Inc.
Other sources claim that this file is associated with Your Phone Windows application.
Is ygpsvc.dll safe?
This depends on the location of the file. If it’s located in the America Online directory, this could be a reason for concern since most of America Online software has been discontinued.
If the file is located in the Your Phone directory, it usually means that it’s safe, so you’re free to use it.
Is ygpsvc.dll malware?
Due to the lack of information, it’s hard to determine if this file is malicious. However, you can check it by doing the following:
Locate the DLL file.
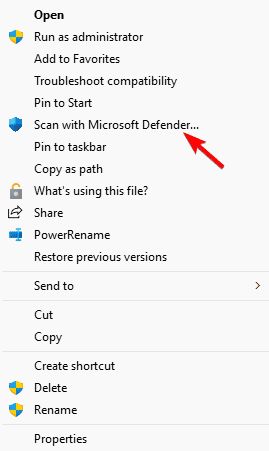
Right-click it and choose Scan with Microsoft Defender.
Wait for the scan to finish.
If the scan doesn’t find anything, the file is likely safe. You can also check its digital certificate by following these steps:
Right-click the file and choose Properties.
Next, go to the Digital Signatures tab. Double-click the available certificates.
If the certificates are related to America Online or Microsoft, the file is likely legitimate.
Press the Windows key + X and choose Installed apps.
Select the app that is associated with the DLL file.
Click the three dots next to it and choose Uninstall.
Follow the steps on the screen to remove the software.
Keep in mind that this method will only work if the file is associated with third-party software. If it’s associated with a Windows component, your only option is to manually remove it.
Ygpsvc.dll is a pretty vague file, so you should be careful with it, and if you notice it on your computer, be sure to check its certificates to determine its origin.
We also have articles on termsrv.dll and wscsvc.dll, so don’t miss them if you want to learn more about DLL files.
The IPHLPAPI.DLL, developed by Microsoft and a component of IP Helper API, is a critical part of Windows, helping with key network-related functions, and is used by several apps and games.
When IPHLPAPI.DLL is missing, or you have an incompatible version, games like PAYDAY 2, Age of Empires, Apex Legends, and Geometry Dash, amongst other applications, will stop running and throw an error message. If the affected app/game is configured to automatically load at startup, you will get the error message right after turning on the PC.
Before you proceed, reboot the PC, install pending Windows updates, disable unreliable third-party antivirus solutions, and uninstall recently added programs. For most of you, this should do the trick!
What can I do when IPHLPAPI.DLL is missing?
1. Manually get a copy of IPHLPAPI.DLL
The easiest solution to fix the IPHLPAPI.DLL not found error is to get a fresh copy of the DLL from another PC running the same iteration and architecture (32-bit or 64-bit) of Windows. As for the IPHLPAPI.DLL location, it’s stored in either of these locations: C:\Windows\System32C:\Windows\SysWOW64
So, connect a USB flash drive to another computer > go to the System32 or SysWOW64 folder > transfer a copy of the DLL to the flash drive > plug the USB into the affected PC > move IPHLPAPI.DLL to the same location > reboot the PC to apply the changes.
IPHLPAPI.DLL in System32
Also, if the missing DLL error is triggered by a game or application, move a copy of the DLL to its dedicated directory under one of the following paths: C:\Program FilesC:\Program Files (x86)
2. Repair the corrupted system files
Press Windows + S to open Search, type Command Prompt in the text field, and click on Run as administrator.
Click Yes in the UAC prompt.
Paste the following commands individually and hit Enter each: DISM /Online /Cleanup-Image /CheckHealthDISM /Online /Cleanup-Image /ScanHealthDISM /Online /Cleanup-Image /RestoreHealth
Now, run this SFC scan command: sfc /scannow
Finally, reboot the PC and verify whether the scans helped download IPHLPAPI.DLL to your PC.
Since IPHLPAPI.DLL is a system file, when it’s corrupted, running the DISM (Deployment Image Servicing and Management) and SFC (System File Checker) scans will replace the DLL with a fresh copy stored on the PC.
3. Install the Visual C++ Redistributables
Go to Microsoft’s official website, and download the latest Visual C++ Redistributables. Remember, for 32-bit Windows, you will need the x86 version, while for the 64-bit OS, both x64 and x86 packages are required.
Run the downloaded setup and follow the on-screen instructions to complete the installation.
Finally, reboot the PC and verify whether the missing IPHLPAPI.DLL error is fixed.
4. Reinstall the affected app
Press Windows + R to open Run, type appwiz.cpl in the text field, and hit Enter.
Select the affected app/game from the list, and click on Uninstall.
Follow the on-screen instructions to complete the process and then restart the PC.
Now, reinstall the app from an official source.
If your game includes mods, reinstall those as well to completely get rid of any incompatibilities due to IPHLPAPI.DLL.
Besides, when a quick removal doesn’t work, it’s likely due to the leftover app files and Registry entries still triggering conflicts. In this case, I recommend using a top-rated software uninstaller to wipe out all traces of the program!
5. Delete the IPHLPAPI.DLL file
As surprising as it may sound, for 2 out of 5 users, deleting IPHLPAPI.DLL from the program’s directory fixed all DLL errors. You will find the directory in either of these paths: C:\Program FilesC:\Program Files (x86)
Although, I wouldn’t recommend that you delete the DLL right away. Instead, move the file out of the directory, store it in another folder, and if the problem is resolved, keep it that way. Otherwise, move the file back to the directory and try the other solutions.
6. Scan the PC for malware
NOTE
While a malware scan won’t necessarily restore the missing IPHLPAPI.DLL, it will prevent future occurrences of the error by eliminating any threats that delete or corrupt the DLL file.
Press Windows + S to open Search, type Windows Security, and click on the relevant result.
Click on Virus & threat protection.
Click on Scan options.
Select the Full scan entry and click Scan now.
Wait for the malware scan to complete. It will take roughly 15-30 minutes.
Double-click the ISO file, and select Open in the confirmation prompt.
Run the setup.exe file.
Click Yes in the UAC prompt.
Click on Next to proceed.
Read Microsoft’s license terms and click on Accept.
Make sure the setup reads, Keep personal files and apps, click on Install, and wait for the process to complete.
Since the DLL is natively a part of Windows, performing an in-place upgrade will restore or download IPHLPAPI.DLL on your PC. Besides, it will improve the computer’s performance and make Windows run faster.
Before you leave, discover expert tips to fix all missing DLLs and prevent such errors from reappearing!
For any queries or to share more fixes with our readers, drop a comment below.
Microsoft is making it easier to access files shared in Teams meetings by using the Loop platform. The company is creating a new feature to automatically create a Loop workspace for all the content shared during a meeting series.
Loop is a service for organizing files, notes, and tasks into collaborative workspaces. It’s currently integrated into Teams, Outlook, and Yammer.
With the new feature, recurring meeting organizers will be prompted in the Microsoft Teams chat to create a Loop workspace after a meeting ends. The workspace will contain all the files shared during meetings in the series, allowing participants to continue collaborating.
In a blog post, Microsoft says the organizer can review, approve, or remove the files before they’re added to the workspace, and Loop workspace members can add additional content and rearrange the order of files in the app.
The workspace includes all the files shared during the meeting series but excludes the text chat and web links.
Microsoft says the feature has begun rolling out and should be available to all Windows, Mac, and web users. The company plans to add support for longer meeting series, modern groups, and additional roles.
Microsoft recently made Windows Server 2025 widely available, introducing enhanced security features to address modern threats across on-premises, hybrid, and cloud environments. However, with the persistent rise of cyberattacks, including AI-powered, Microsoft is more vulnerable than ever.
This means that administrators responsible for ensuring the security of Windows Server 2025 deployments in their organizations need to be more vigilant than ever.
To help with that, Microsoft has published the Windows Server 2025 Security Advice book, a free PDF download designed for IT professionals working in enterprise environments.
The 19-page book aims to understand better the protections baked into Windows Server 2025. It’s split into eight chapters covering:
System hardening and baselines
Credential protection and application control
Silicon-assisted security innovations
Operational security and continuous monitoring
Workload security for virtual machines and containers
Enhanced network security with micro-segregation
Advanced compliance and threat detection
Each chapter dives deep into covering the most important areas of Windows Server 2025 and methods to keep it safe from hard.
Given that mainstream support for Windows Server 2025 ends in October 2029 and extended support extends until 2034, the information in the book should be relevant for the better part of a decade.
The Windows Server 2025 Security Advice Book can be downloaded from this link.
Error_Ring2_Stack_In_Use is a developer error, and it comes with the following message: 207 (0xCF) The ring 2 stack is in use. This is a rare error, but if you ever encounter it, these steps might help you fix it.
How can I fix Error_Ring2_Stack_In_Use?
1. Adjust your network connection
Press the Windows key + S and type network. Select View network connections.
Locate your connection, right-click it, and choose Properties.
Ensure that the Client for Microsoft Networks is checked and save changes.
Do this for all computers in the network.
2. Update your network driver
Press the Windows key + X and choose Device Manager.
Locate your network adapter on the list, right-click it, and choose Update driver.
Select Search automatically for drivers.
Check if the problem is gone.
For best results, many are suggesting to visit your motherboard or network card manufacturer’s website and download the latest drivers for your network card.
Locate the network adapter on the list and right-click it.
Choose Uninstall device.
Once you uninstall it, go to Action and click on Scan for hardware changes.
Check if the problem is gone.
4. Use System Restore
Press the Windows key + R and type rstrui.
Next, select the desired restore point and click on Next.
Follow the instructions on the screen to complete the process.
Once restored, check if the problem is gone.
If nothing else helps with Error_Ring2_Stack_In_Use, check your network hardware and make sure that it’s working properly. As a last resort, you might want to perform a Windows 11 factory reset.
Microsoft Edge Insider Dev Channel recently received the 132.0.2931.1 update. This update includes a range of new features and improvements, along with fixes for several issues.
The update introduces a new avatar entry in the overflow menu on iOS, a profile settings page with a quick sign-in button in WebUI2, and a new tab for Cached Data in Workspaces.
The update fixes an issue where Game Assist crashes when switching to a tab from another application. It also resolves a problem where the browser crashes after right-clicking the ‘Quit app’ option in the site icon. Furthermore, the update addresses an issue where clicking the overflow menu button in InPrivate mode causes the browser to crash on iOS.
The height of the Favorites hub popup now matches that of the History popup, addressing an inconsistency. A red dot that appeared on the Share button on the privacy page has been removed, and the window caption controls are no longer misaligned when horizontal tabs are hidden in the tab center.
The update also fixes an issue where, in ‘Internet Explorer mode,’ split screen web content overlapped with the search flyout. Additionally, the browser now correctly displays the tab icon after a URL change for specific webpages that failed to do so despite having ‘favicon URL’ in their tab groups.
On iOS, the address bar’s contents are now centered, and switching between horizontal and vertical modes on the zip screen no longer causes the wallpaper to flash. The feedback button is no longer hidden in Safe Mode on iOS.
In Android, the reading icon no longer appears while scrolling down the page, even after the reader button is turned off. The Forward and Backward buttons now display correctly on the New Tab Page (NTP). The browser no longer remains in InPrivate mode when put in the background, but it continues to use InPrivate mode for voice searches on Android.
In other news, we exclusively learned that Microsoft Edge will improve the experience of online shopping by allowing users to automatically track product prices and receive notifications when prices drop.
The INVALID_RUNDOWN_PROTECTION_FLAGS Windows blue screen, with error code 0x0000016C, is encountered when invalid flags are passed to the rundown protection APIs.
The error is highly uncommon, and its underlying causes include outdated or incompatible drivers, corrupted system files, conflicting third-party apps, a buggy Windows update, and issues with the system’s memory.
Before you proceed, restart the PC, install pending Windows updates, reseat the RAM sticks in the correct slots, and disable overclocking if you have set up any. For most of you, this should fix the INVALID_RUNDOWN_PROTECTION_FLAGS bug check!
How can I fix INVALID_RUNDOWN_PROTECTION_FLAGS BSoD?
Press Windows + X to open the Power User menu, and select Device Manager.
Expand the various entries here, right-click on the devices listed underneath individually, and select Update driver.
Click on Search automatically for drivers and wait for Windows to install the best locally available version.
Similarly, update the other drivers, then reboot the PC and check for improvements.
The INVALID_RUNDOWN_PROTECTION_FLAGS 0x16C blue screen is, more often than not, caused by outdated drivers. So, your primary approach should be to update all the drivers, especially critical ones like those for the network and graphics adapters.
If Windows can’t find a better version, go to the manufacturer’s official website, find the new releases, and then manually install the latest driver.
2. Repair the corrupted system files
Press Windows + S to open Search, type Command Prompt, and click on Run as administrator.
Click Yes in the UAC prompt.
Paste the following DISM commands and hit Enter after each: DISM /Online /Cleanup-Image /CheckHealthDISM /Online /Cleanup-Image /ScanHealthDISM /Online /Cleanup-Image /RestoreHealth
Press Windows + R to open Run, type appwiz.cpl in the text field, and hit Enter.
Select any app that was recently downloaded or updated, and click on Uninstall.
Follow the on-screen instructions to complete the process and then restart the computer.
Now, download and install the same app from an official source.
If a quick removal doesn’t work, it could be due to the leftover app files and Registry entries. For this, I recommend using a top-rated software uninstaller and completely wiping all traces of the program.
4. Uninstall recent Windows updates
Press Windows + I to open Settings, go to Windows Update from the navigation pane, and click on Update history.
Scroll down and click on Uninstall updates.
Click the Uninstall option next to the recently installed update.
Again, click Uninstall in the confirmation prompt.
Finally, reboot the PC and verify whether INVALID_RUNDOWN_PROTECTION_FLAGS is fixed.
5. Test the RAM
Press Windows + S to open Search, type Windows Memory Diagnostic, and click on the relevant result.
When Windows Memory Diagnostic can’t detect any issues, I recommend running Memtest86+, an advanced open-source memory testing tool that runs a wide array of scans on individual RAM modules and finds even the smallest of problems.
If issues are detected, first try reseating the RAM sticks in the correct slots, and when that doesn’t work, replace the malfunctioning module to get rid of INVALID_RUNDOWN_PROTECTION_FLAGS.
6. Reinstall Windows
When nothing else works, you can reinstall Windows and fix all software-related conflicts. To prevent data loss, it’s best to move critical files to external storage before you proceed.
If even a Windows reinstallation fails to resolve the INVALID_RUNDOWN_PROTECTION_FLAGS blue screen, it’s most likely a hardware malfunction to blame. In this case, you must contact a professional or visit a local repair shop and get the PC’s hardware inspected.
Before you leave, learn all the causes of BSoD and take the necessary measures to prevent such errors from appearing!
For any queries or to share which fix worked for you, drop a comment below.
The new Microsoft Flight Simulator 2024, which is now available for pre-download, uses the Lido navigation data and charts from Lufthansa Systems for its navigation gameplay.
Lufthansa, one of the world’s biggest airlines, officially announced this in a press release. The company stated that its collaboration with Microsoft means that its Lido Sky Data and Lido Route Manual will be available to more than 15 million gamers and aviation enthusiasts worldwide.
The collaboration between Microsoft and Lufthansa focuses on bringing yet another layer of realism to the beloved flight simulator. The companies strived to use as much real data as possible to provide an authentic experience of piloting an airplane.
Microsoft Flight Simulator is not only a globally beloved game by aviation enthusiasts but stands for the most realistic flight simulations for private use for decades. I, myself, am also an enthusiastic Microsoft Flight Simulator user, and I am delighted that other aviation enthusiasts can now experience this realistic simulation with our professional data, (Philipp Barzen, Lufthansa)
Thanks to this partnership, Microsoft Flight Simulator will have navigational data in accordance with ARINC 424—an international standard file format for aircraft navigation—for various systems and applications. Those playing can use this information to understand airports, waypoints, airways, or terminal area procedures better.
Microsoft Flight Simulator will also provide access to charts usually used by commercial airlines.
With the Lido data and charts from Lufthansa Systems, we can offer our customers a more realistic and precise experience. This new data will add a higher coverage of regions and new airports to explore. As Microsoft Flight Simulator becomes even more professional, it is a great opportunity for the players to develop their skills and safely navigate extreme flight situations, pushing the limits of aircraft and their own abilities.
We already reported on how Microsoft Flight Simulator can be used to train future pilots, and it seems it is the case here, as well. With charts and data used in real-world commercial flying, the simulator can effectively train those learning to be pilots.
Microsoft Flight Simulator 2024’s great variety of aicrafts and airports available are also important in this process. Each aircraft has a set of particularities beyond its general infrastructure that can be tested and experienced in the game first.