This is how Microsoft wants to integrate AI in Windows’ third-party apps

As if it wasn’t evident enough, Microsoft’s bold plan to incorporate artificial intelligence (AI) into Windows 11 is a big step forward. This includes extending these abilities to third-party applications. It’s about improving user experience and giving developers the power to make more intelligent and quick-reacting apps. Microsoft’s initiative wants AI to become an important component within the Windows environment by using Copilot+ PCs to handle AI tasks locally; this characteristic could change our way of interacting with personal computers.

The AI world can appear like a labyrinth to developers, but it becomes clearer with Microsoft’s support document (credits to Windows Latest for spotting it). It gives an overview of fundamentals for integrating AI into Windows client applications, which includes suggestions for using AI models either locally or hosted in the cloud along with frameworks such as OnnxRuntime. Programming languages like C#, C++, and Python are also suggested for developing these apps, ensuring the document provides the necessary advice to start this path.

The Microsoft Copilot Runtime is a special element of this project, comprising an array of local and cloud-driven AI-supported APIs. Among them are Phi Sillica for text creation, OCR for text identification, and DALL-E for picture creation. These instruments assist programmers in incorporating AI aspects into their applications, improving functionality and user interaction.

For those who use it, this implies a more interactive and enhanced experience in all areas. Native Windows apps have already started incorporating AI characteristics, and Microsoft’s effort will likely motivate third-party developers to do the same. This could range from applications producing content to ones automating regular duties, with an assurance of privacy and data protection.

Regarding privacy, Microsoft highlights the significance of openness and user jurisdiction in gathering data. This is a vital part of incorporating AI into apps, as it tackles the rising worries around how personal data is utilized and safeguarded within this era of digital technology.

Besides improving existing applications, Microsoft’s AI integration plans also involve bringing exclusive AI features to Copilot+ PCs. For instance, Recall is a tool that shows the future possibility of using artificial intelligence (AI) for managing items; while it may encounter privacy and security issues, this heralds a new way in how humans interact with technology.

Microsoft’s AI plan for third-party apps in Windows 11 is both exciting and daring. It signifies a move forward in application intelligence and an attempt to provide users with an experience that feels more natural, effective, and tailored specifically for them. The future development of AI offers us unlimited opportunities limited only by our creativity; it guarantees a world where technology comprehends what we require and even foresees it before being asked.

Microsoft announces a plethora of new capabilities for Teams in VDI (Virtual Desktop Infrastructure)

There is much to discuss regarding Microsoft Teams’ development in Virtual Desktop Infrastructure (VDI). This advancement is much more than just an improvement; it commits to changing how Teams is used by VDI users. The previous year, Microsoft’s Teams app was revamped to highlight speed, performance, and the incorporation of AI-supported tools.

They are now introducing a fresh media engine to boost quality, performance, and dependability in virtual desktops. According to the latest announcement, Microsoft has rolled out the new architecture for all users.

We are excited to announce the public preview of the new optimization architecture for Microsoft Teams on Azure Virtual Desktop and Windows 365 is now rolled out for all users. This new architecture is designed to close the feature gap between native Teams and Teams for Virtual Desktop Infrastructure (VDI) by enhancing performance, providing auto updates, and streamlining support.

Microsoft

Microsoft heard feedback from many customer interactions, tech support cases, and talks with IT Admins. According to the official blog post, this feedback has helped to make the platform stable and ready for this big update. The redesigning of Microsoft Teams in VDI is based on four main pillars, which provide a variety of benefits for users and IT admins.

Another thrilling update is the arrival of a fresh media engine called SlimCore, which will replace WebRTC. This modification implies that the Microsoft Teams application in VDI will soon provide characteristics similar to those found on native Teams apps without being restricted by what WebRTC can do.

Picture a smoother and more dependable Teams experience within your virtual desktop setting, with reduced wait times for joining meetings and disconnections during calls.

Auto-updates and decoupling are also included in the package. With this feature, Microsoft will automatically update the SlimCore engine on your devices. This ensures that Teams keeps working smoothly without you requiring manual updates or restarts.

Such a method guarantees better quality and simplifies support because Microsoft takes complete responsibility for this solution.

The new architecture has a major change: Less dependency on VDI partners’ stacks. For IT Admins, this means less requirement to upgrade Remote Desktop clients or Citrix Workspace apps. Microsoft offers a client-side plugin for this purpose, which helps them stay current with the latest features without requiring frequent upgrades.

Also, traffic handling is improving in the new media engine. This takes care of all tasks like starting connections and guaranteeing top-notch audio and video. You may want to speak with your networking team now to confirm if everything has been arranged properly.

And there is more good news: New features are coming soon. These include things like better meeting abilities, telephony, and voice choices. Microsoft Teams in VDI will get even stronger with these improvements, whether you want 1080p video calls or noise suppression for virtual meetings.

Starting is simple, and Microsoft is excited about feedback while transitioning from public preview to general availability. If you are an admin, now you should examine how to permit these fresh features for Teams in your VDI surroundings.

You’ll be able to turn off Teams notifications in channels

If you ever felt overwhelmed by Teams notifications while working, you’ll be pleased to find out that you’ll soon be able to stop receiving notifications for channel posts in Microsoft Teams.

In a blog post, Microsoft says all those in the public preview program can now experience this feature, which is present in both Windows and Mac versions of Teams. It may seem small, but turning off or on notifications for a particular Teams post by simply clicking on the three-dot menu icon at the upper right corner offers useful control to users.

But why would someone want to keep notifications on? Microsoft explains these reasons: Real-time updates help you stay up-to-date by sending alerts when a new message is posted. They are about visibility, which means being aware of discussions and activities within the channel without checking manually. Also, they promote collaboration by ensuring that all people are involved and informed about what is occurring.

Even if you are curious about when this feature will be available on all Teams platforms, the Redmond-based tech giant hasn’t said anything about that yet

In other news, Microsoft Teams public preview users were given a special look at custom notification sounds for Windows and web editions. You can now customize your Teams notifications sound with the jingle you want. But now that you can turn off notifications entirely, why would you do that?

Snapdragon X Elite vs Z1 Extreme: Which One is Better?

Elite Z1 Extreme is one of the best mobile CPUs on the market, but with the release of the new Qualcomm CPUs, it’s time to make Snapdragon X Elite and Z1 Extreme comparison.

Snapdragon X Elite vs Z1 Extreme, here’s what you should know

Hardware specs

 Snapdragon X EliteRyzen Z1 Extreme
Cores/threads12/128/16
ArchitectureARMx86
HyperthreadingNoYes
Base frequency1.00 GHz3.30 GHz
Turbo frequency4.20  GHz5.10 GHz
TDP15-80W9-30W
Memory supportLPDDR5X-8448DDR5- 4800 to LPDDR5X-7500
Memory channels82
Memory bandwidth133.9 GB/s120 GB/s
L2/L3 cache42MB / NA8MB/16MB

Looking at the specs, the Z1 Extreme is faster and has more threads. However, Snapdragon X Elite has better memory bandwidth and more L2 cache.

Z1 Extreme has an incredibly small TDP, and it outperforms Snapdragon in every regard which means that it will produce less heat even during the most intense tasks.

Benchmark results

According to CPUBenchmark, Snapdragon X Elite outperforms Z1 Extreme in single thread results while Z1 Extreme gives better multithread results.

The single thread difference isn’t that noticeable, however, when it comes to multithread results, Z1 Extreme easily outperforms Snapdragon.

On the other hand, Geekbench paints a different picture and according to their results, Snapdragon X Elite outperforms Ryzen Z1 Extreme in both single and multithread tests.

 Snapdragon X EliteRyzen Z1 Extreme
Single thread28982206
Multithread154049661

While single-thread differences are noticeable, we were surprised to see the 37% difference in favor of Snapdragon X Elite for multithread results.

GPU and NPU

As for AI support, Z1 Extreme doesn’t have an NPU, while Snapdragon X Elite has a dedicated NPU that can provide up to 45 TOPS. If AI capabilities are your focus, then Z1 Extreme might not be a good choice.

As for GPU support, the situation is a bit different

 Adreno X1AMD Radeon 780M       
Compute units612
Hardware RaytracingNoYes
Base frequency1.50 GHz0.80 GHz
Turbo frequencyNA2.70Hz

While Z1 has more computing units, and Raytracing, its base frequency is lower than on Snapdragon X Exlite. However, it makes up for with with much higher Turbo frequency.

GPU benchmark results

 Adreno X1AMD Radeon 780M       
3DMark Fire Strike Standard Score5787  7056  

As you can see, according to 3Dmark, the Z1 Extreme iGPU offers almost 18% better performance, which makes it a better choice for multimedia and gaming.

Conclusion

If you need a CPU that has AI support, then Qualcomm Snapdragon X Elite is an obvious choice. As for performance, Z1 Extreme is faster with much lower TDP, and it outperforms Snapdragon in terms of multimedia performance.

As for performance, we got some conflicting results, but most everyday users probably won’t notice a difference.

To learn more, we suggest reading about different Snapdragon X Elite processors or taking a look at our Snapdragon X Elite vs Intel Core i7 guide to see how it compares with it.

If you’re a gamer, you might be interested in learning more about Snapdragon X Elite gaming performance, and we have an entire article dedicated to it.

We also have a great Snapdragon X Elite comparison guide that analyzes the performance differences between different models.

If you’re a fan of iOS, don’t miss our Snapdragon X Elite vs M4 guide for more information.

Everything You Need to Know About DALL-E 3

OpenAI has evolved since it first came out and although there have been many iterations, DALL-E 3 has been a show-stopper.

But what makes DALL-E 3 stand out? Aside from content generation, this iteration’s main feature is text-to-image generation. You can simply enter a text prompt describing an image and it will generate it for you. It is available on ChatGPT, Teams and Enterprise users.

What are the key DALL-E 3 features?

1. Image generation

Let’s face it, creating images from scratch or spending hours on end on the internet to find a matching image for your content can be a daunting task. It is also time-consuming and worse still, the end result may still be subpar.

With DALL-E 3, you have the ability to generate breathtaking images in seconds. And you don’t even have to type out lengthy descriptions. A few keywords will give you a high-quality image in seconds. Check out how our encounter with DALL-E 3 text-to-image generation went.

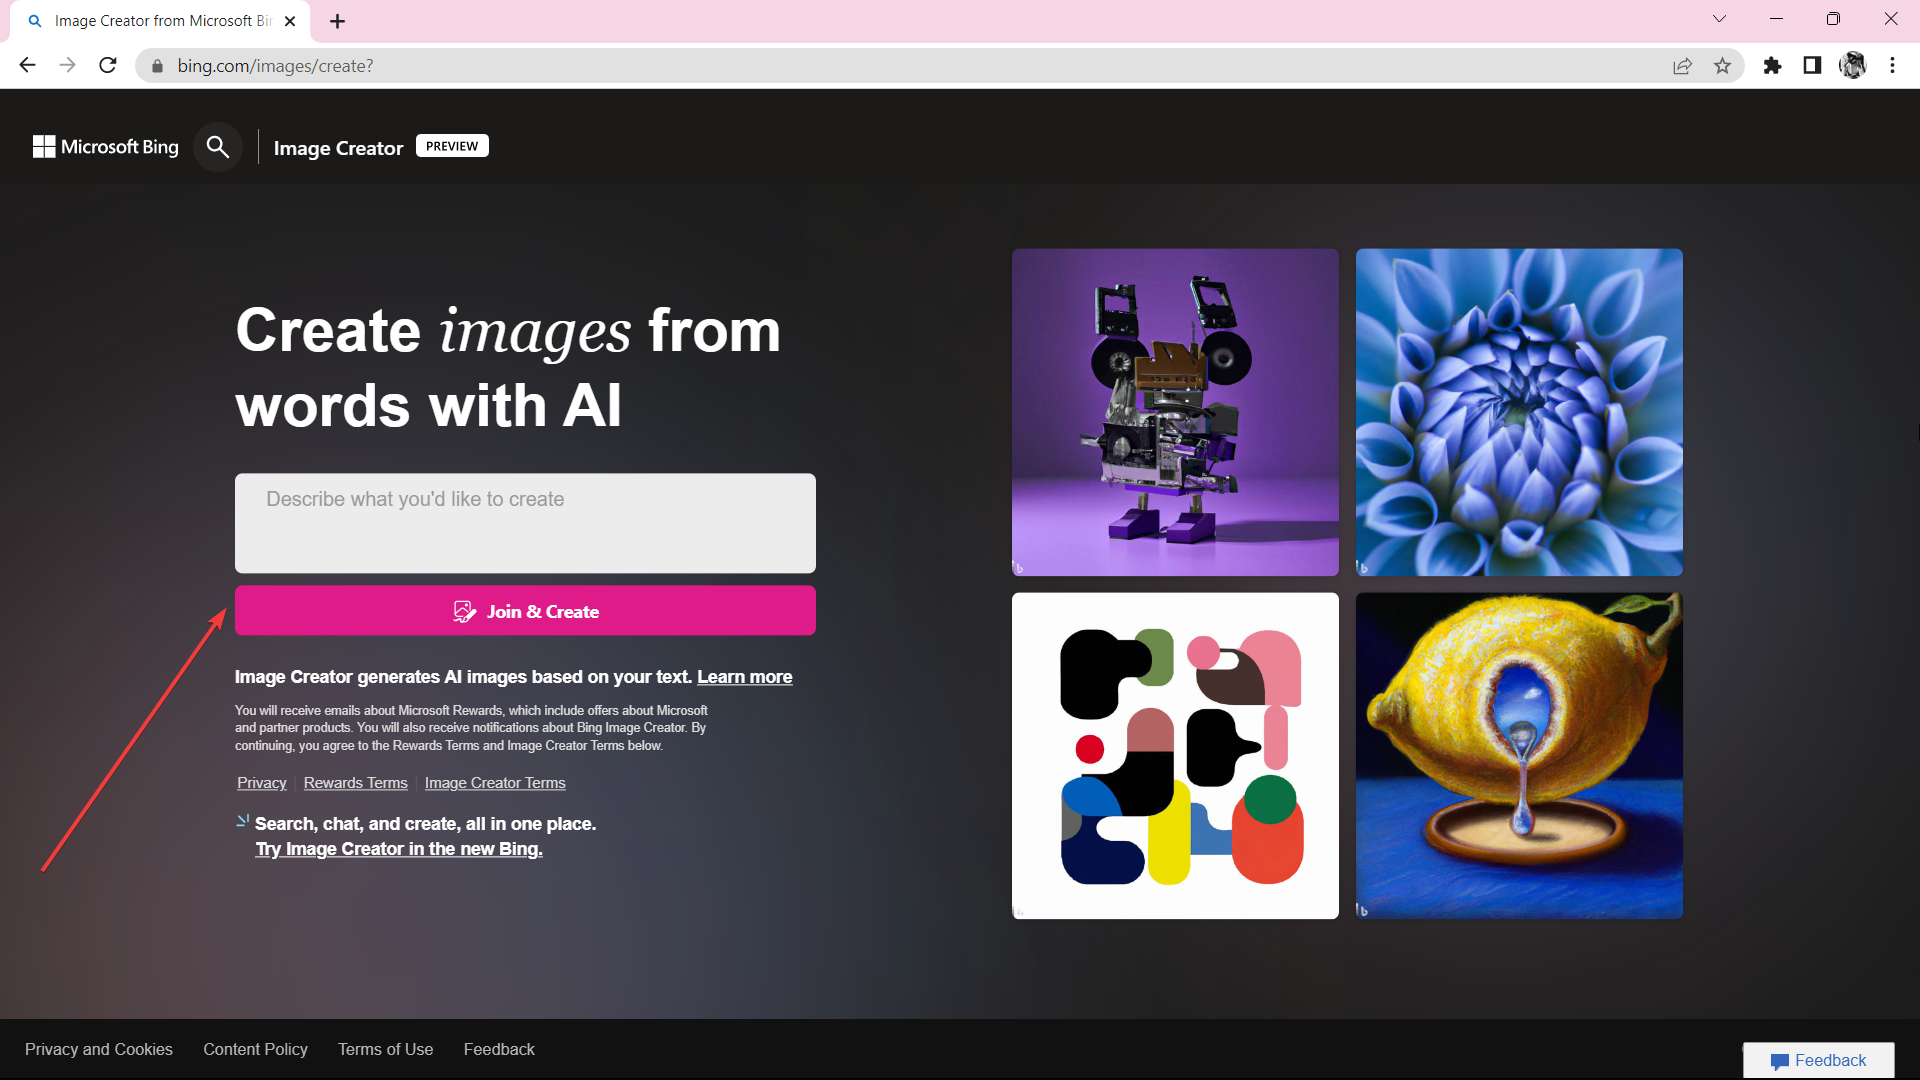
  1. Open Bing Image Creator from any browser. 
  2. Click Join & Create.
  3. Enter your Microsoft account’s email and password.
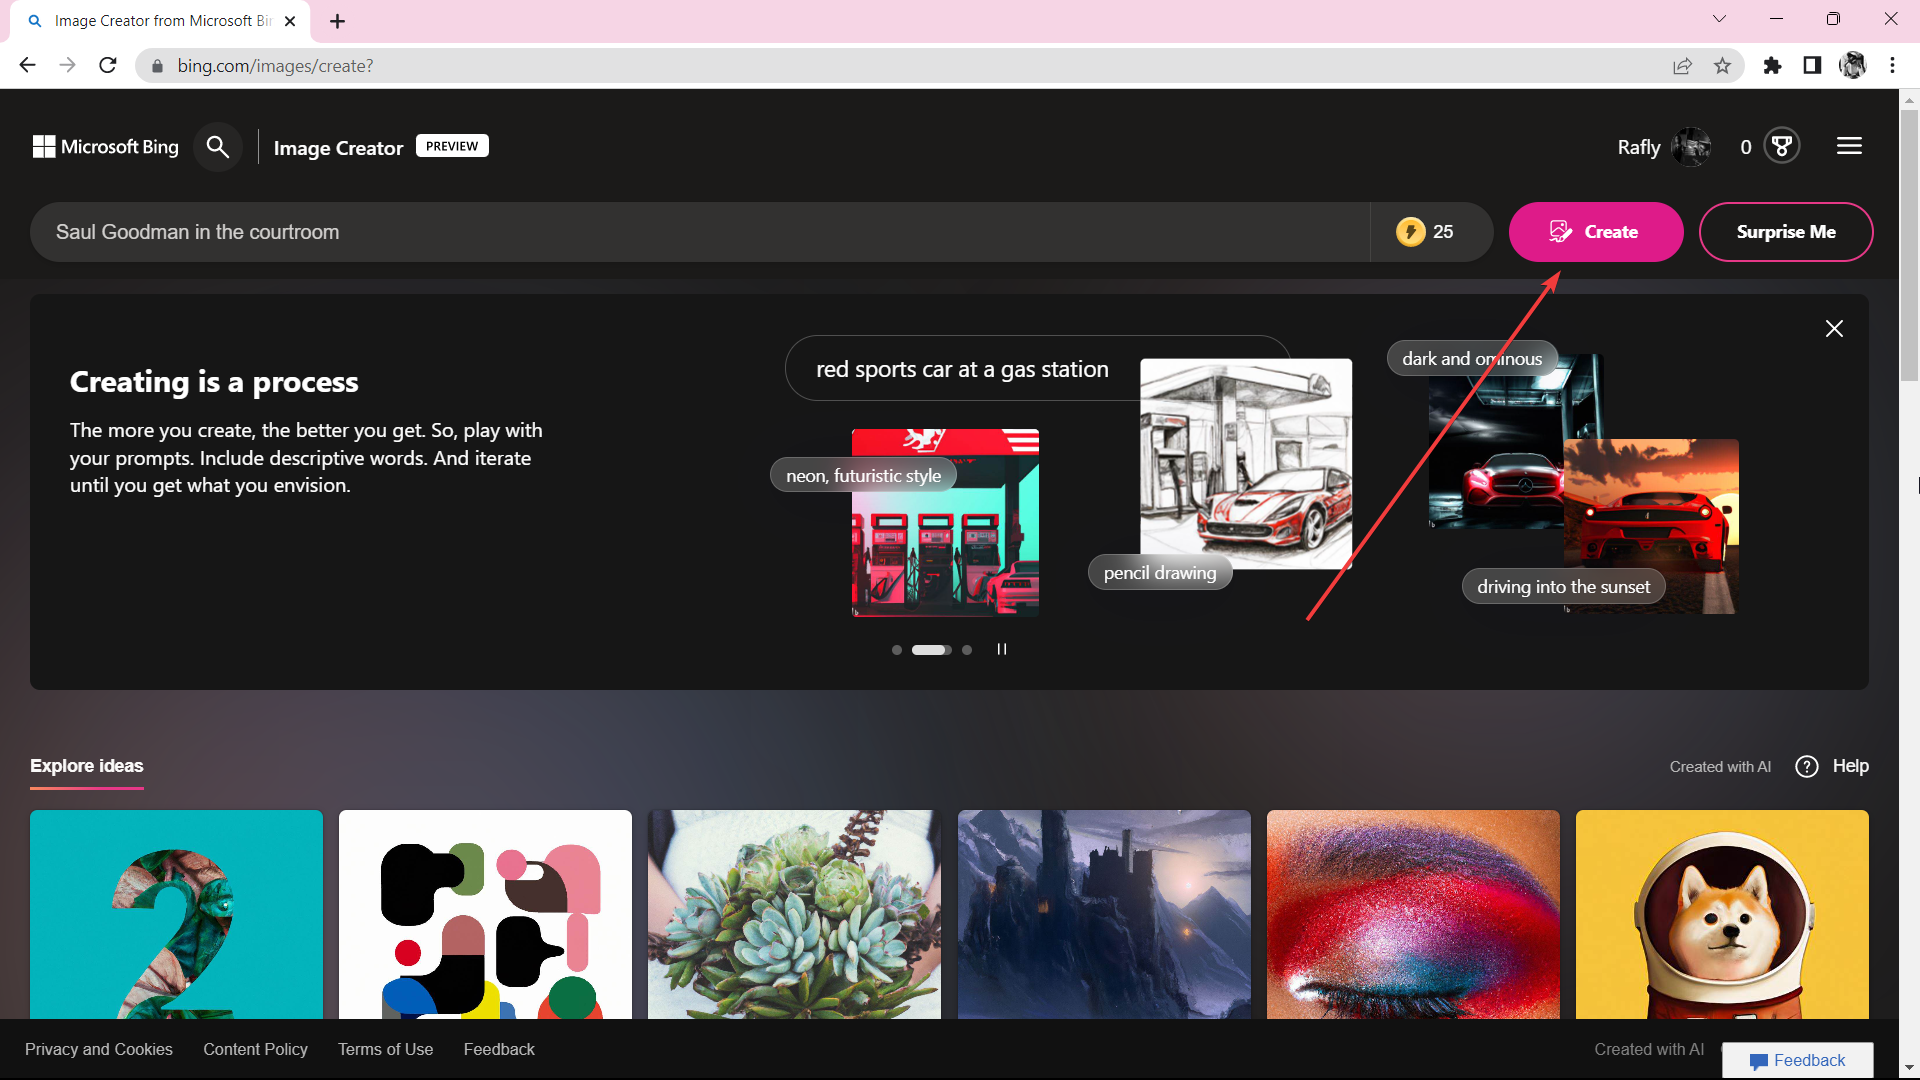
  4. Type the prompts that you want to create, then hit Create.
  5. An example: Can you create an image of a person that smiles? The person should have blue eyes, pink hair, carrying a black backpack and a camera on hand.

2. Image editing

Once you’ve generated your image, there may be certain aspects you don’t like or would like modified. Instead of creating a whole new image, you can select specific parts, enter a text prompt and only that part of the image will be edited.

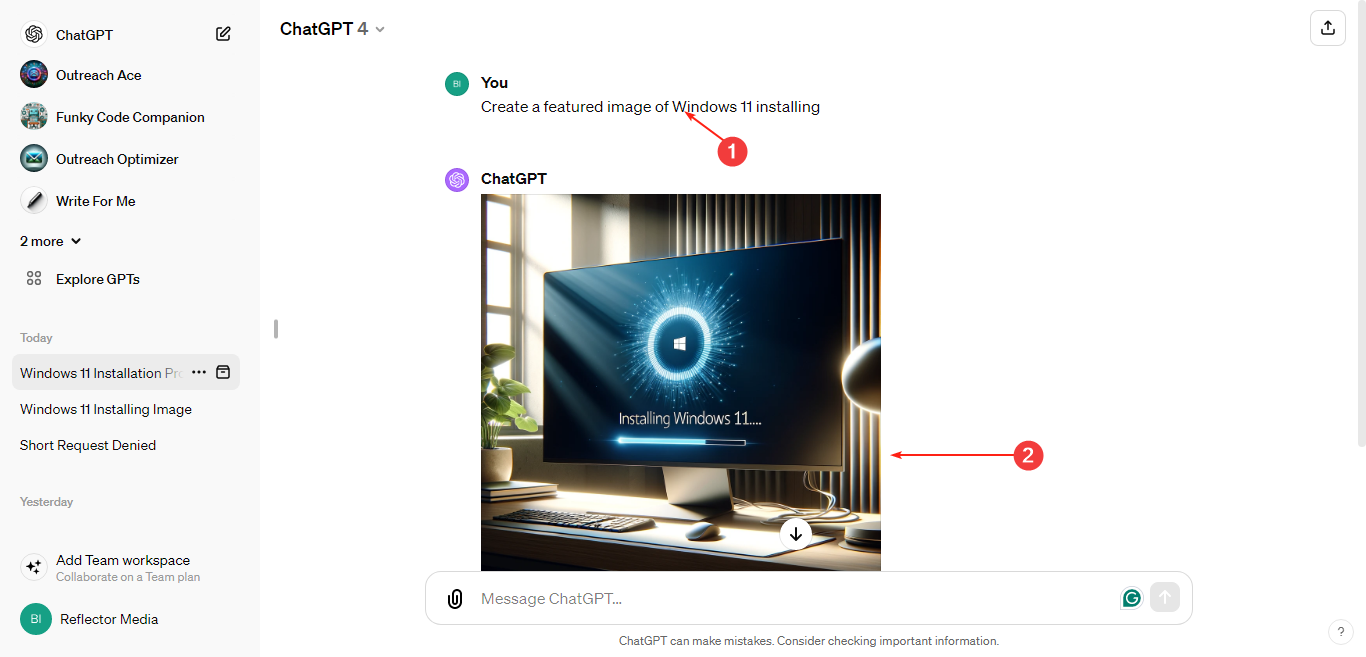
  1. Navigate to your browser and log in to ChatGPT. (You’ll need to be on the Plus plan to access DALL-E on ChatGPT4).
  2. In the text prompt, provide a description of an image you’d like to generate and wait for ChatGPT to create it.
  3. Next, click on the image and select the edit button.
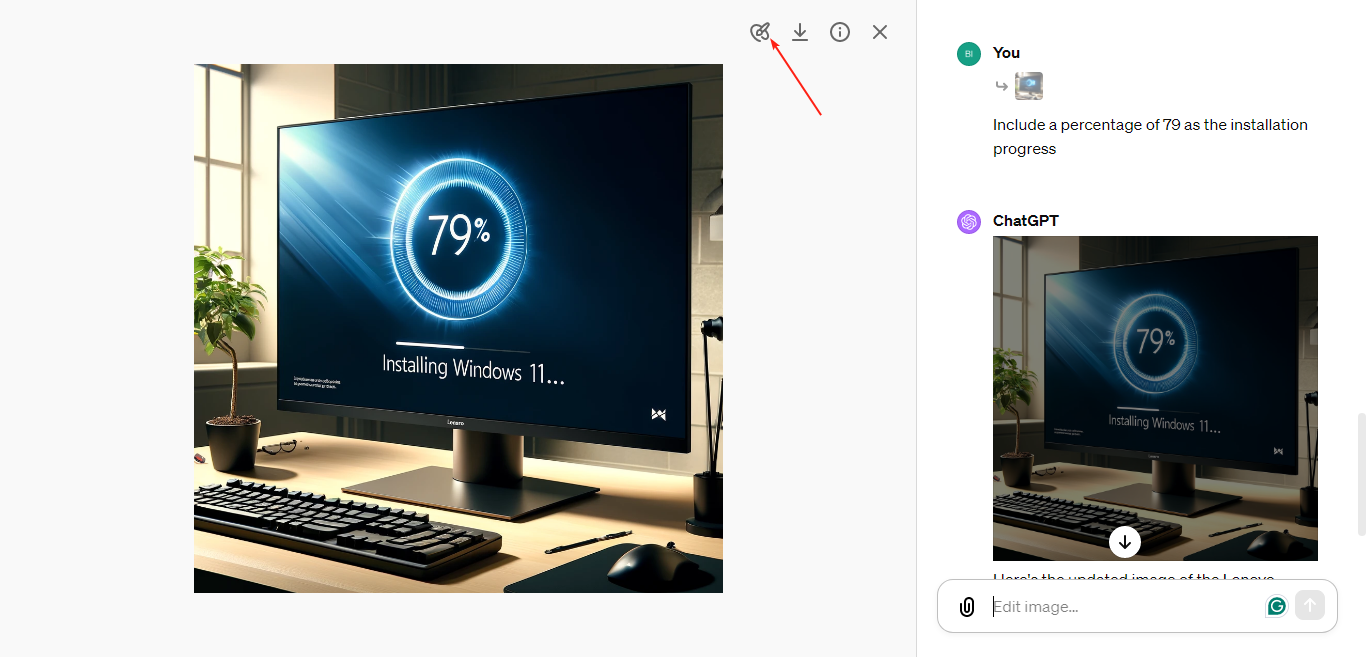
  4. You can select the specific area you’d like to edit and on your right in the text prompt, describe the edits. For instance, in this particular image, we want to include a PC brand and ensure it is displayed on the PC.
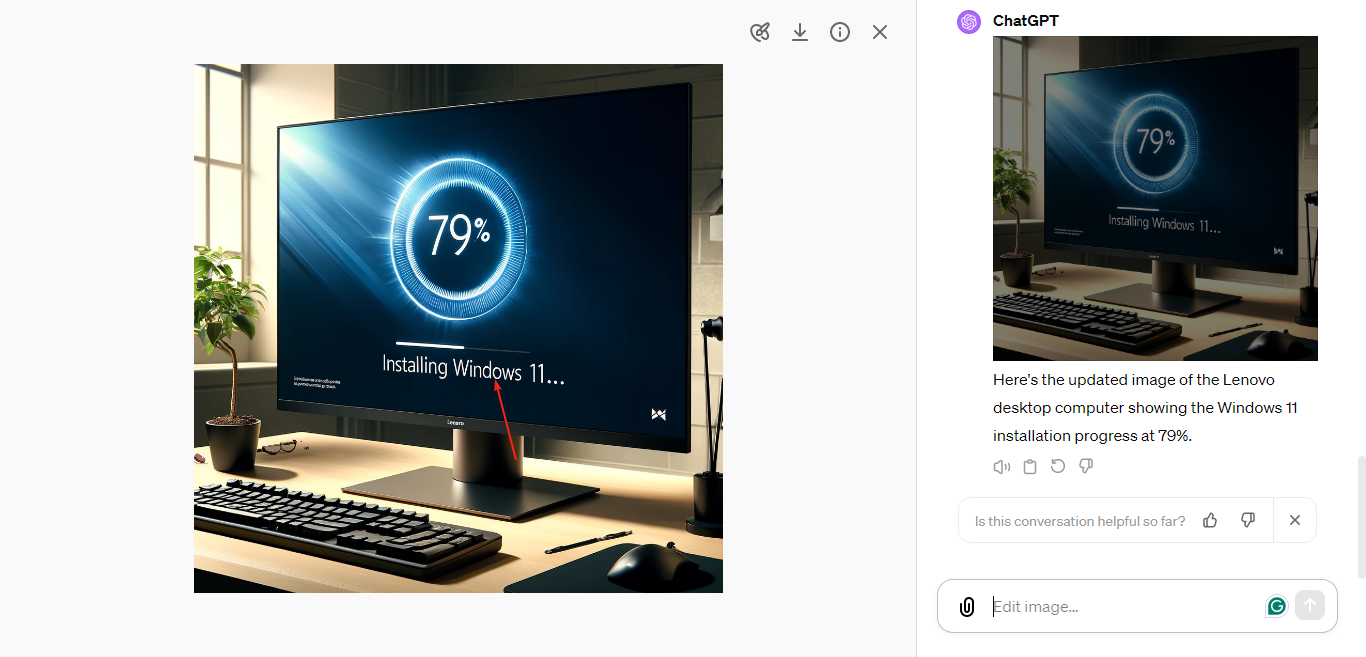
  5. Wait for the edits and view the updated image. Next, we want to remove the name Lenovo from the screen and include a progress percentage. Enter the prompt in the textbox and wait for the updated image.
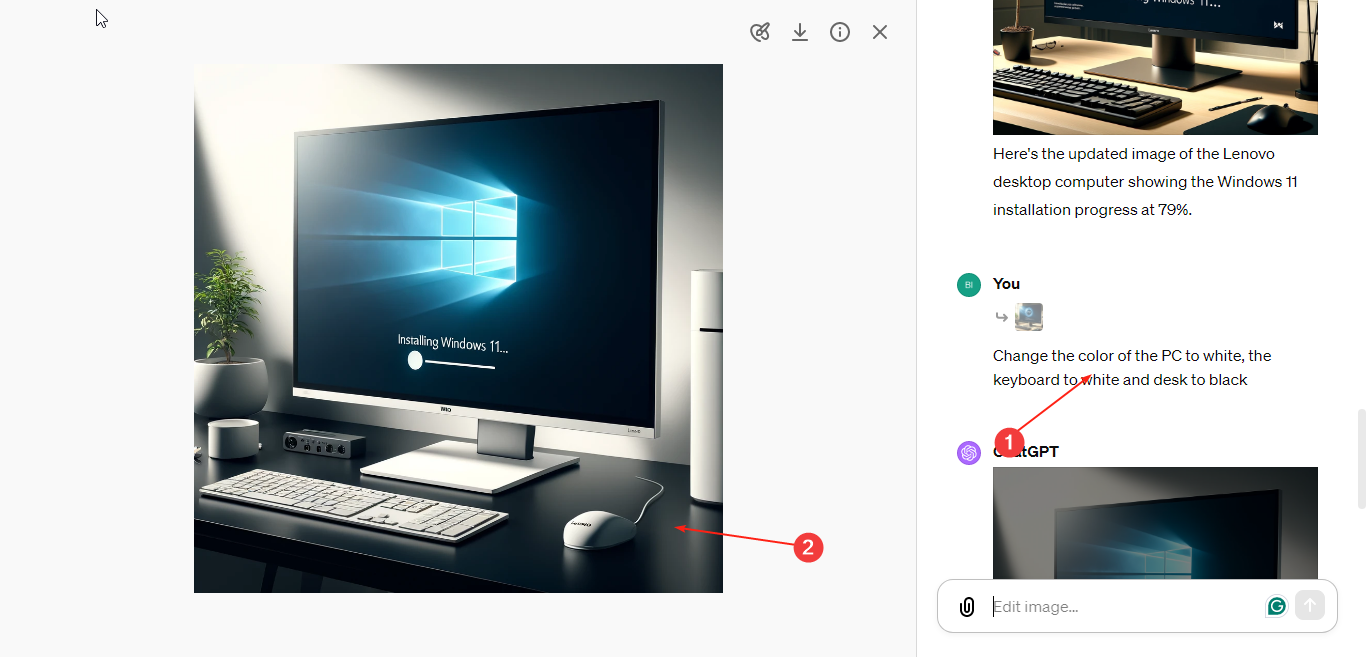
  6. Further, we want to change the color of the PC to be more vibrant so we task DALL-E to change it to white.
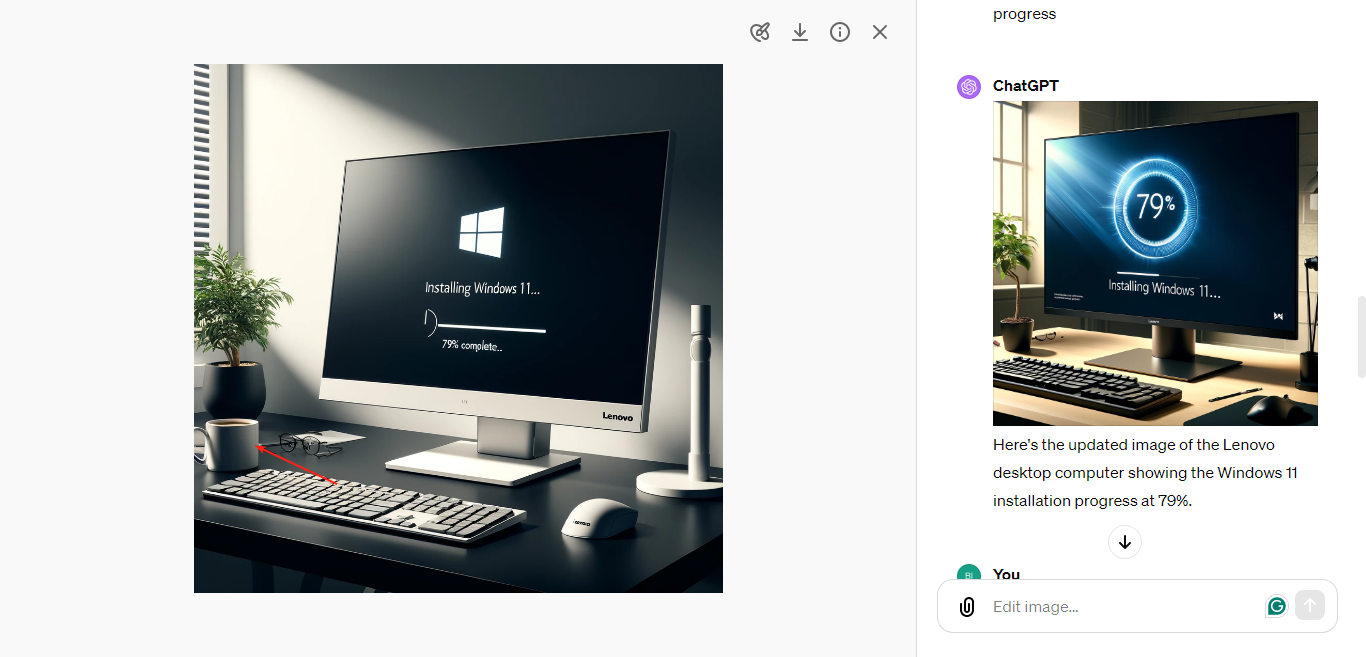
  7. Next, you can include more items in the picture. For instance, we add a cup of coffee.

Advantages and disadvantages of DALL-E 3

Advantages

  • Saves time – DALL-E 3 significantly reduces the amount of time you’d otherwise spend creating images and editing them using traditional photo editing tools.
  • High-quality images – The quality of edited images diminishes as you edit or transfer from one program to another. With DALL-E 3, you generate a quality image immediately with no need for further editing.
  • Highly customizable – If you do not like the image generated with DALL-E, you can adjust the keywords and a new image will be generated with your preferences included.

Disadvantages

  • Limited understanding – As much as DALL-E works with the keywords provided, it may struggle to understand topics with deeper context hence a mismatch in the images generated.
  • Diminished quality – With AI improvement and the introduction of newer iterations, the quality of earlier versions tend to degrade for users to switch. There have already been several complaints about the image quality of DALL-E 3.
  • Costly – It’s no lie that ChatGPT Plus comes at a cost. While some users can afford it, others can’t so an alternative is a much-welcome option. Microsoft’s AI image generator is free so you may want to explore it and see how it compares to DALL-E 3.
  • Ethical implications – Even though AI-generated images are high quality, they lack that human aspect and one can almost always tell that it is not a real image. Such issues can taint the authenticity of a product or service.

Best practices when using DALL-E 3

  • Experiment with different prompts – Although DALL-E 3 can generate images, it is limited to some extent. Some images are prohibited so familiarize yourself with the terms and conditions to avoid legal repercussions.
  • Use clear and concise descriptions – As much as DALL-E 3 understands concise prompts, accurate descriptions equal accurate generations. Avoid ambiguous statements that can be misrepresented.
  • Refine text prompts – Make use of the DALL-E 3 edit feature to refine your prompts for better results.
  • Update your apps/browsers – Most features work best when there are no compatibility issues. Keep your OS, browser and associated app up-to-date for improved efficiency and best results.

Image generation is not only on DALL-E 3. You can also try with Fotor AI or Ideogram AI and draw comparisons. Koala AI also claims to be five times faster than DALL-E and is also forgiving on your system resources so why not give it a spin?

Hopefully, you have a clear picture of DALL-E 3 and how to manoeuvre when using it for image generation. Have you tried its features? How would you rate it? Anything that requires improvement? Let us know in the comment section below.

WingetUI gets renamed as UniGetUI, and introduces dozens of new enhancements

Within the changing world of software utilities, a noticeable alteration has interested both tech fans and those who use Windows operating systems. The Windows package manager, once named WingetUI, underwent big changes to become UniGetUI—not only did it change its name, but its look and features also improved.

Martí Climent, who created WingetUI, decided on this rebranding because it shows how much more capable the utility is now by supporting many package managers beyond what was initially planned. Climent intended to clarify the separation between WingetUI and Microsoft’s authorized package manager, Winget.

The move from WingetUI to UniGetUI is characterized by a major remodeling of the app’s Package Engine. This revamp improves functionality, reduces RAM use, and enhances overall performance.

Among the alterations are an updated icon to match its rebranding, a redesigned package engine for faster processing speeds, and improved methods for loading icons associated with packages more efficiently. The detail page of Microsoft Store packages now shows screenshots, providing a visual aspect to the browsing process for people who enjoy observing finer points.

One important improvement is the reduction in RAM usage, where the software pages have been rebuilt to take up less memory. This optimization signifies that UniGetUI functions better and becomes more available for devices with restricted resources. The details page of a package has been improved for showing content, using bold, italic, and greyed-out fonts to make it easier to read and understand.

UniGetUI’s widgets now load packages faster, depending less on the interface than previously. This change, combined with the Windows Get system becoming the default, is an important step towards a more straightforward and more user-friendly package management experience.

Furthermore, if a package manager lacks a dependency, UniGetUI will ask you to install it for easier operation.

The change is visible in the whole interface, with significant improvements everywhere. Starting from the software pages that have been rebuilt and the settings page, which has been organized differently, every part of it has been improved for better user interaction.

New pixel-perfect icons have been added to the system tray, and the installer includes a facility that ensures WinGet along with Microsoft.WinGet.Client exists on your system now; you can choose not to install Chocolatey if you want to go through this setup process.

    This update includes many bug fixes and improvements. They cover everything from small mistakes in the README to big issues like the ParentContainsErrorRecordException error for limited Windows users resetting Winget sources. The developers have shown their dedication to refining and enhancing UniGetUI by providing a detailed changelog.

    If you want the app that Windows users agree should be on Windows by default, you can get it from GitHub now.

    WIC Reset Supported Printers: Epson, Canon

    The printer stores the ink in an absorbing pad from a dedicated container inside your printer. After a while, you need to replace the pads and clean the container.

    However, most printers stop printing even if this containers are not full or don’t acknowledge being cleaned. A tool called WIC Reset can bypass this problem but it doesn’t work on all printers. Here’s the complete list of WIC Reset supported printers.

    What is the list of WIC Reset supported printers?

    Epson

    SeriesModel
    ArtisanArtisan 50, Artisan 600, Artisan 700, Artisan 710, Artisan 720, Artisan 725, Artisan 730, Artisan 800, Artisan 810, Artisan 830, Artisan 835, Artisan 837, Artisan 1430
    BB30, B40W, B42WD, B1100, B1110
    BXBX300F, BX305FW, BX310FN, BX320FW, BX525WD, BX535WD, BX600FW, BX610FW, BX620FWD, BX625FWD, BX630FW, BX635FWD, BX925FWD, BX935FWD
    CC58, C59, C61, C62, C63, C64, C65, C66, C67, C68, C76, C77, C78, C79, C82, C83, C84, C85, C86, C87, C88, C90, C91, C92, C93, C94, C95, C97, C98, C99, C110, C120
    ColorColor 1160, 760, 860
    CXCX2800, CX2900, CX3100, CX3200, CX3300, CX3400, CX3500, CX3600, CX3650, CX3700, CX3800, CX3900, CX3905, CX4000, CX4080, CX4100, CX4200, CX4500, CX4600, CX4700, CX4800, CX4900, CX4905, CX5000, CX5700F, CX5900, CX6000, CX6300, CX6400, CX6500, CX6600, CX7300, CX7400, CX7700, CX7800, CX8300, CX8400, CX9300F, CX9400Fax, CX9500F
    DD68, D78, D88, D92, D120
    DXDX3800, DX4000, DX4050, DX4200, DX4800, DX5000, DX5050, DX6000, DX6050, DX7400, DX7450, DX8400, DX9400F
    EPEP-702A, EP-703A, EP-704A, EP-705A, EP-706A, EP-707A, EP-708A, EP-709A, EP-774A, EP-775A, EP-776A, EP-777A,
    EP-801A, EP-802A, EP-803A, EP-804A, EP-804F, EP-805A, EP-806A, EP-807A, EP-808A, EP-810A, EP-879A, EP-880A,
    EP-901A, EP-901F, EP-902A, EP-902F, EP-903A, EP-903F, EP-904A, EP-904F, EP-905A, EP-905F, EP-906A, EP-906F, EP-907A, EP-907F,
    EP-976A3, EP-977A3, EP-978A3, EP-979A3,
    EP-10VA, EP-30VA, EP-301, EP-302, EP-306, EP-4004
    ETEcoTank ET-1110, ET-14000, ET-16500, ET-16600,
    ET-2500, ET-2550, ET-2600, ET-2610, ET-2650, ET-2700, ET-2710, ET-2720, ET-2750, ET-2760,
    ET-3600, ET-3700, ET-3710, ET-3750, ET-3760, ET-4500, ET-4550, ET-4700, ET-4750, ET-4760,
    ET-5800, ET-7700, ET-7750, ET-8700, EW-M660FT
    EWEW-052A, EW-M571T, EW-M630T, EW-M660FT, EW-M670FT, EW-M770T, EW-M5071T, EW-M970A3T
    KK100, K101, K200, K201, K300, K301
    LL100, L110, L111, L120, L130, L132
    L200, L210, L211, L220, L222
    L300, L301, L310, L312, L350, L351, L355, L356, L358, L360, L362, L364, L365, L366, L375, L380, L382, L383, L385, L386, L395, L396
    L405, L455, L456, L475, L485, L486, L495
    L550, L551, L555, L556, L558, L565, L566, L575
    L605, L606, L655
    L800, L805, L810, L850
    L1110, L1455
    L1300, L1800
    L3050, L3060, L3070, L3100, L3101, L3108, L3110, L3111, L3116, L3118, L3150, L3151, L3156, L3158, L3160, L3168
    L4150, L4158, L4160, L4168
    L5190
    L8160 (Platen Pad Counter only)
    MM100, M105, M1108, M1128, M200, M205
    ME OfficeME-1, ME-2, ME-10, ME-20, ME-30, ME-32, ME-35, ME-70, ME-80W, ME-82WD, ME-100, ME-101, ME-200, ME-300, ME-301, ME-303, ME-320, ME-330, ME-340, ME-360, ME-400, ME-401, ME-510, ME-520, ME-530, ME-535, ME-560W, ME-570, ME-600F, ME-620F, ME-650FN, ME-700, ME-900WD, ME-940FW, ME-960FWD, ME-1100
    NXN11, NX100, NX110, NX120, NX125, NX127, NX130, NX200, NX210, NX215, NX220, NX230, NX300, NX305, NX330, NX400, NX410, NX415, NX420W, NX430, NX435, NX510, NX515, NX530, NX620, NX625, NX635
    PP50, P60
    PPPP-50, PP-50BD, PP-100 Discproducer – Requires Reset Keys for PP-50, PP-100 models
    PXPX650, PX659, PX660, PX700W, PX710W, PX720WD, PX730FWD, PX800FW, PX810FW, PX820WD, PX830FWD PX-5V, PX-7V
    PX-045A, PX-046A, PX-047A, PX-048A, PX-049A
    PX-1001, PX-1004, PX-1200, PX-1600F, PX-1700F
    PX-101, PX-105, PX-201, PX-203, PX-204, PX-205,
    PX-404A, PX-405A, PX-434A, PX-435A, PX-436A, PX-437A, PX-501A, PX-502A, PX-503A, PX-504A, PX-505F, PX-535F, PX-5500, PX-5600
    PX-601F, PX-602F, PX-603F, PX-605F, PX-673F, PX-675F
    PX-A640, PX-A720, PX-A740, PX-FA700
    PX-G5000, PX-G5100, PX-G530
    PX-K100, PX-K150
    PX-M650, PX-M650A, PX-M650F
    PX-S05B, PX-S05W, PX-V600, PX-V630, PX-V780
    PhotoPhoto 820U, 830U, 890, 900, 950, 960, 1280, 1290, 1390, 1400, 1410, 1430, 1500, 2100, 2200
    PictureMatePM100, PM-200, PM210, PM215, PM225 PM235, PM240, PM245, PM250, PM260, PM270, PM280, PM290, PM300, PM310, PM400
    PM-3500C, PM-4000px, PM-G800, PM-G4500, PM-G5000, PM-A820, PM-A840, PM-A840S, PM-A870, PM-A890, PM-A900, PM-A940, PM-A970, PM-D770, PM-D800, PM-D870, PM-G850, PM-G860, PM-G4500, PM-G5000, PM-T960, PM-T990
    RR200, R210, R220, R230, R240, R245, R250, R260, R265, R270, R280, R285, R290, R295, R300, R310, R320, R330, R340, R350, R360, R380, R390, R800, R1800, R1900, R2000, R2400, R2880, R3000
    RXRX420, RX425, RX430, RX500, RX510, RX520, RX530, RX560, RX565, RX580, RX585, RX590, RX595, RX600, RX610, RX615, RX620, RX630, RX640, RX650, RX680, RX685, RX690, RX700
    SS20, S21, S22
    Sure ColorSC-P400, SC-P407, SC-P408, SC-P600, SC-P607, SC-P608, SC-P700, SC-P708, SC-P800, SC-P900, SC-P908, SC-PX3V, SC-PX5VII, SC-PX7VII
    SXSX100, SX105, SX110, SX115, SX117, SC119, SX125, SX130,
    SX200, SX205, SX209, SX210, SX215, SX218, SX219, SX230, SX235, SX235W, SX400, SX405, SX409, SX410, SX415, SX419, SX420W, SX425W, SX430W, SX435W, SX440W, SX510, SX515, SX525WD, SX535WD, SX600FW, SX610FW, SX620FW
    TT10, T11, T12, T13, T20, T21, T22, T23, T24, T25, T26, T27, T30, T33, T40W, T42WD, T50, T59, T60, T1100, T1110
    TXTX100, TX101, TX102, TX103, TX104, TX105, TX106, TX109, TX110, TX111, TX112, TX113,
    TX114, TX115, TX117, TX119, TX120, TX121, TX125, TX130, TX133, TX135
    TX200, TX205, TX209, TX210, TX215, TX219, TX220, TX230, TX235, TX235W, TX300F, TX320F, TX325F
    TX400, TX405, TX409, TX410, TX415, TX419, TX420W, TX430W, TX435W
    TX510FN, TX515FN, TX525FW, TX550, TX560WD, TX600FW, TX610FW, TX620FWD, TX650, TX659
    TX700W, TX710W, TX720WD, TX730WD, TX800FW, TX810FW, TX820FWD, TX830FWD
    WorkForceWorkForce 30, 40, 42, 60, 310, 315, 320, 321, 323, 325, 435, 500, 520, 525, 545, 600, 610, 615, 625, 630, 633, 635, 645, 840, 845, 1100
    WF-2010, WF-2011, WF-2018, WF-2510, WF-2511, WF-2518, WF-2520, WF-2521, WF-2528, WF-2530, WF-2531, WF-2538, WF-2540, WF-2541, WF-2548, WF-2630, WF-2631, WF-2635, WF-2650, WF-2651, WF-2655, WF-2660, WF-2661, WF-2665, WF-2750, WF-2751, WF-2755, WF-2760, WF-2761, WF-2765
    WF-3720, WF-3723, WF-3725, WF-3730, WF-3733, WF-3735
    XPXP-20, XP-30, XP-33, XP-55
    XP-100, XP-102, XP-103
    XP-200, XP-201, XP-201, XP-204, XP-208, XP-202, XP-203, XP-206, XP-205, XP-207, XP-210, XP-211, XP-214, XP-216, XP-212, XP-213, XP-215, XP-217, XP-220, XP-225, XP-230, XP-231, XP-235, XP-240, XP-241, XP-242, XP-243, XP-245, XP-247, XP-255, XP-257
    XP-300, XP-301, XP-302, XP-303, XP-305, XP-306, XP-310, XP-311, XP-312, XP-313, XP-315, XP-320, XP-322, XP-323, XP-325, XP-330, XP-332, XP-335, XP-340, XP-342, XP-343, XP-345, XP-352, XP-355
    XP-400, XP-401, XP-402, XP-403, XP-405, XP-406, XP-410, XP-411, XP-412, XP-413, XP-415, XP-420, XP-422, XP-423, XP-425, XP-424, XP-430, XP-431, XP-432, XP-435, XP-434, XP-440, XP-441, XP-442, XP-445, XP-446, XP-447, XP-452, XP-455
    XP-510, XP-520, XP-530, XP-540
    XP-600, XP-601, XP-605, XP-610, XP-611, XP-615, XP-620, XP-621, XP-625, XP-630, XP-631, XP-635, XP-640, XP-641, XP-645
    XP-700, XP-701, XP-702, XP-710, XP-720, XP-721, XP-750, XP-760
    XP-800, XP-801, XP-802, XP-810, XP-820, XP-821, XP-830, XP-850, XP-860
    XP-900, XP-950, XP-960
    XP-15150, XP-15160, XP-15180 (Platen Pad Counter only)

    Canon

    SeriesModel
    MXMX470 series
    MX490 series
    TS8000 Series
    MBMB2000 series
    MGMG5100 Series, MG5200 Series, MG5500 series, MG5600 series, MG5700 series
    GG1000, G1100, G1400, G1900, G1010, G1110, G1410, G1910, G2000, G2100, G2400, G2900, G2010, G2110, G2410, G2910, G3000, G3100, G3400, G3900, G3010, G3110, G3410, G3910
    G4000, G4100, G4400, G4900, G4010, G4110, G4410, G4910
    TRTR8500 Series
    TSTS5100,
    TS8000 Series

    So, as you can see, only the Epson and Canon printers are supported. To search through the list, it’s much easier to press Ctrl + F and enter the model name in the search field.

    If you don’t know already, here’s our guide on how to reset the counter for Epson printers. Also, if WIC Reset is not working, check the highlighted guide to fix it.

    We hope you find your printer in the list and manage to reset its WIC to enable printing. However, remember that you also have to clean the printer of that residual ink at some point.

    Did it work for you? Let us know in the comments below.

    Microsoft is starting a new fiscal fear with layoffs

    Once again, Microsoft is in the news as it prepares to decrease its workforce at the start of a fresh fiscal year. The tech giant has made this choice many times before, and it seems to mirror an overall pattern seen throughout the technology industry. Companies adjust their tactics to respond flexibly to continually changing technological and economic environments.

    According to reports, while the number is unknown, the layoffs at Microsoft have a wide reach, affecting various teams and geographies. This has sparked questions about what lies ahead for those impacted by this decision and strategic adjustments within Microsoft itself.

    Organizational and workforce adjustments are a necessary and regular part of managing our business. We will continue to prioritize and invest in strategic growth areas for our future and in support of our customers and partners.

    Microsoft

    The Microsoft layoffs have impacted multiple areas, from product and program management to the Azure cloud unit and the HoloLens mixed-reality organization. This is a bitter pill for many long-term workers at this company.

    But the Redmond-based tech giant—which experienced a rise in its headcount during the pandemic—is in a position to make these cuts. The reason for this comes from trying to keep profit margins steady due to increased capital spending. This is especially true in areas related to AI, where the need for cloud infrastructure to train and use models continues growing. This strategic change towards AI and cloud computing symbolizes what lies ahead for Microsoft’s future and the entire tech sector.

    The layoff situation in Microsoft is not only due to its internal rearrangement but also shows the general picture of the tech industry. This year, more than 100,000 tech workers have been laid off from their jobs, and last year was even worse, with a total number reaching over 260,000 employees facing this issue. This trend has become common, making people ponder job stability and changing skills needed to keep up with technology.

    As Microsoft and other big players in this field keep steering through these waters, their actions have repercussions felt worldwide within the tech community, causing everyone to reassess what lies ahead for them.

    HP OmniBook X AI PC Review: The Future is Here

    If you are looking for an AI-ready PC, HP recently came out with OmniBook X, a sleek touch-screen laptop delivering unmatchable performance in the price range. I managed to get my hands on the HP OmniBook X – 14-fe0097nr, the top-end model priced at $1199.99, for a few days and was pleasantly surprised with the results!

    As Copilot+ PCs become the future of the Windows OS, the HP OmniBook series proves to be an excellent and economical option in the segment. And the HP OmniBook X is the first Copilot+ PC from HP.

    So, naturally, the expectations were high, but does it really deliver? Let’s find out!

    A comprehensive review of HP OmniBook X

    Tip icon Tip
    I have tried to keep the review simple, avoiding the intricacies, in a bid to make it easily readable to everyone. For a detailed overview of these aspects, you can visit HP’s official website.

    1. Performance

    HP OmniBook X’s performance, as expected, is exceptionally good, and much of the credit goes to the Snapdragon X Elite processor. Touted as a direct competitor to MacBook Air M3, the HP laptop delivers equally good performance in most aspects, and in some, like multi-core performance, even better.

    Even the most demanding apps run seamlessly on the laptop, and with 1 TB of storage in the top-end model, you don’t have to worry about running out of space. Besides, if you are content with 512 GB storage, get the fe0058nr model and save $50!

    Windows on ARM wasn’t a particularly popular concept until a few months ago, but with Microsoft realigning its plans and OEMs integrating performance-oriented chips, things are about to change.

    As for the GPU, the laptop features Qualcomm Adreno, a powerful option but not the most ideal. Most modern-day and older games don’t yet support Windows on ARM, so that’s a factor you will have to consider. The good news is that more designing apps are coming out with Windows on ARM support each day!

    2. AI integration

    One of the primary reasons the HP OmniBook X was able to garner so much attention is the fact that it’s a Copilot+ PC, which means that it comes with built-in AI capabilities powered by an NPU (Neural Processing Unit). In the HP OmniBook X, you will find the Qualcomm Hexagon NPU.

    For the unversed, the NPU allows you to run AI-related tasks locally on the PC instead of sending data to a cloud-based server, and, in turn, boosting both speed and security.

    In terms of AI performance for tasks that rely on the NPU, the HP OmniBook X performs better than the MacBook Air M3 and Dell XPS 13. Even the specifications make that abundantly clear. While the HP OmniBook’s NPU boasts 40 TOPS (Terra Operations per Second), the MacBook Air M3 can deliver a maximum of 18 TOPS.

    Coming to the AI-based feature set on this Next Gen AI PC, it includes Cocreator and Live Captions, amongst others. Ideally, the laptop should have included Windows Recall by default, but Microsoft took a step back and limited the feature to insiders to gather more feedback before a public roll-out. Nevertheless, you can still try Windows Recall alternatives!

    HP AI Companion
    HP AI Companion (Image source: Microsoft Store)

    Also, you have the HP AI Companion app pre-installed, which helps streamline critical tasks and improve productivity with AI.

    3. Design, display, and portability

    The HP OmniBook X is a sleek and elegant laptop, making it undoubtedly the perfect companion on the go. Although it is heavier than the MacBook Air M3 (2.7 pounds), the HP OmniBook X, at 2.97 pounds, feels lighter due to its design. Carrying it around isn’t a hassle. The laptop will fit right into any backpack!

    HP OmniBook X design

    The best part is that even though it’s lightweight, you are not compromising on any crucial aspects. The laptop features a 14″ (2240 x 1400) crystal clear, touch-screen display, perfect for gaming and graphic designing apps. By integrating touch-screen capabilities, the HP OmniBook X caters to a wider audience since the functionality is missing in its competitor, i.e., the MacBook Air M3.

    I wouldn’t call HP OmniBook X’s display the best in the market, but for the price range, it’s a decent option. Couple that with the built-in USB-A port, a standard that’s gone obsolete in recent years, you have a value-for-money laptop with support for legacy devices.

    4. Battery life

    One of the key advantages of Windows on ARM is the power efficiency, and the HP OmniBook X, with its all-day battery life, according to HP’s internal testing, is surely an upgrade over the currently available options running Intel and AMD processors!

    According to HP, the laptop can run for as long as 26 hours on a single charge under ideal conditions. Tests conducted by users suggest a lower value, something in the range of 12-14 hours, when running resource-intensive apps. But with basic web browsing, you will get up to 20-22 hours of battery backup.

    But it’s still no match for the MacBook Air M3, which delivered significantly better results with basic web browsing, video streaming, and gaming. Battery life is an aspect where the HP OmniBook X falls way short of the MacBook Air M3!

    The HP OmniBook laptop also supports fast charging. According to HP, you can charge it up to 50% in 30 minutes, although it requires a compatible HP adapter, and the laptop must be in the full shutdown state. Besides, after reaching 50%, the charging rate slows down to a great extent.

    5. Pricing

    The HP OmniBook X is competitively priced and costs lower than the MacBook Air M3, when comparing models with similar configurations. You presently have five models in the series, priced between $1049.99 and $1199.99.

    Considering the non-AI and non-NPU laptops we have right now, the HP OmniBook X does seem great, especially if we also evaluate battery life and performance.

    Besides, for any Windows user planning to upgrade, prioritizing Copilot+ PCs is a wise choice, as that’s what Microsoft is focussing on right now. And the sleek and power-packed HP OmniBook X will get you there without burning a hole in your pocket!

    HP OmniBook X’s specifications

    ProcessorSnapdragon X Elite X1E-78-100 (up to 3.4 GHz, 12 cores)
    GraphicsQualcomm Adreno GPU (Integrated)
    RAM16 GB LPDDR5x, 8448 MT/s
    Storage1 TB PCIe NVMe M.2 SSD
    Operating systemWindows 11 Home
    NPUQualcomm Hexagon
    Display14″, multitouch-enabled, IPS, 300 nits, Corning Gorilla Glass NBT
    Webcam5MP IR camera
    Battery3-cell, 59 Wh Li-ion polymer (supports fast charging)
    Item weight2.97 lb

    If you ask me, the HP OmniBook X, a powerful Copilot+ PC with a sleek and elegant design, 1 TB storage, a touch-screen display, and 26 hours of battery life, is a value-for-money device right now.

    But if you are not in a hurry, I would recommend waiting for a few days as other manufacturing giants release their Copilot+ PCs and then evaluating your options!

    If you have already got your hands on the HP OmniBook X, share your review with our readers in the comments section.

    This 32GB-RAM-based HP Omen 25L Gaming PC is now $300 OFF

    In the mood of the 4th of July, it looks like the tech world is thrilled about some unbelievable deals, particularly for all those who love gaming. Just think about finding a deal that greatly improves your game experience and reduces costs.

    This is exactly what’s going on with HP Omen 25L Gaming Desktop. Starting from $1,650, this beast machine is now offered for $1,350. It’s a discount worth $300! So, isn’t it thrilling to hear? You might have some funds left to participate in this week’s best monitor deals.

    Let us delve into what makes this gaming PC an essential acquisition. Inside, it has an Intel Core i7-14700F processor with 32GB of DDR5 memory. In terms of graphics, it has an NVIDIA GeForce RTX 4060 Ti. This ensures that your games run without problems and appear impressive. You can store up to 2TB inside its body, ensuring you have ample room for every one of your best-loved titles.

    In terms of performance, the HP Omen 25L lives up to expectations. Its i7 CPU—20 cores that can go as fast as 5.4GHz—ensures you won’t experience any issues with even the most demanding games today, such as Helldivers 2 or Counter-Strike 2.

    Whether playing these quick online titles or others, one will have a smooth and excellent experience without any delay in response time. Also, the assortment of ports, such as USB-C, USB-A, Ethernet, and a 3.5mm auxiliary port for a gaming headset, signifies that you are ready for different gaming situations.

    HP Omen 25L’s design focuses on cooling effectiveness and noise reduction. This means your gaming experience will not be disturbed by excessive heat or annoying sounds. Because such deals are infrequent and Best Buy’s promotions typically span only one week, it could be an ideal time to enhance your game setup.

    It might be a good time if you have been considering an upgrade or want to start with PC gaming. You could save lots of money today.

    Get the HP Omen 25L from here.

    MSConfig Only Shows 1 Processor? Here’s How to Fix the Problem

    Dealing with the issue where MSConfig only shows one processor can be quite frustrating, especially when you know your system has multiple cores. Don’t worry, it’s dust a issue with the settings. All the cores are there.

    What can I do if MSConfig only shows one processor/core?

    1. Verify Task Manager and Resource Monitor

    1. Press Ctrl + Shift + Esc to open Task Manager. Alternatively, right-click on the taskbar or the Start button and select Task Manager.
    2. In Task Manager, click on the Performance tab.
    3. Look at the bottom of the window to see the number of cores and logical processors.
    4. In Task Manager, click on the Open Resource Monitor link at the bottom. On Windows 11, click on the three dots icon and select Resource monitor.
    5. In Resource Monitor, go to the CPU tab.
    6. Look for activity by each logical processor on the right pane.

    This method helps you verify if all the cores are being recognized and used by your system, providing a clear view of your CPU activity.

    There’s also an option to change the number of processors in MSConfig. Check the highlighted guide if you made any changes by mistake.

    2. Uncheck the Number of Processors in MSConfig

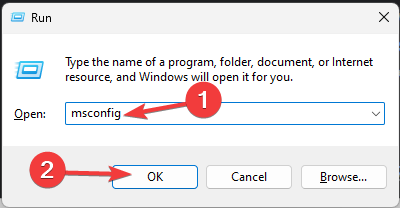
    1. Press Win + R to open the Run dialog, type msconfig and press Enter.
    2. In the System Configuration window, go to the Boot tab, then click on Advanced options….
    3. Ensure that the Number of processors checkbox is unchecked.
    4. Click OK and then Apply.
    5. Restart your computer to apply the changes.

    By unchecking the Number of processors box, you allow Windows to use the maximum number of cores available. This ensures that all your cores are active.

    3. Enable Turbo Mode and EIST in BIOS

    1. Restart your computer and press the key to enter BIOS (usually F2, Delete, or Esc).
    2. Navigate to the CPU settings, then enable Turbo Mode and Enhanced Intel SpeedStep Technology (EIST).
    3. Save the changes and exit the BIOS setup.

    Enabling Turbo Mode and EIST in BIOS ensures optimal performance by allowing the CPU to use all its cores and operate at higher speeds when needed.

    4. Ensure the cores are not disabled in BIOS

    1. Restart your computer and press the key to enter Restart your computer and press the key to enter BIOS (usually F2, Delete, or Esc).
    2. Navigate to the CPU configuration or similar settings and make sure that all the CPU cores are enabled.
    3. Save the changes and exit the BIOS.

    This step ensures that no cores are disabled at the hardware level, allowing Windows to recognize and use all cores.

    5. Reset the Boot configuration

    1. Click the Start button, type cmd and click on Run as administrator from the results.
    2. Type the following command and press Enter: bcdedit /deletevalue {default} numproc
    3. Restart your computer to apply the changes.

    This command removes any boot configuration option that limits the number of processors, ensuring that Windows uses all available cores.

    6. Perform a clean boot

    1. Press Win + R, type msconfig, and press Enter.
    2. In the General tab, select Selective startup and uncheck Load startup items.
    3. Go to the Services tab, check Hide all Microsoft services, and then click Disable all.
    4. Restart your computer to see if the cores are recognized.

    Performing a clean boot can help identify if a third-party application or service is interfering with the CPU core recognition.

    Of course, also make sure that you installed all impending Windows updates. This might also be a bug that has already been fixed in the latest patch.

    By following these steps, you should be able to resolve the issue of MSConfig only showing one processor.

    You might also find useful our guide on fixing MSConfig if it keeps reverting to selective startup.

    If your access is denied while trying to change a service in MSConfig, the highlighted guide will help you retake control.

    For any questions or suggestions, hit the comments section below and write about them.

    Run as Different User Not Working – How To Fix It Easily

    Is Run as Different User not working? This issue can be frustrating, especially when multiple accounts are required for different tasks. It can be caused by misconfigured settings, outdated software, conflicting applications, and more.

    Before we begin, you should try:

    • Updating the app
    • Reinstalling it
    • Restarting your PC
    • Updating Windows.

    If these quick fixes don’t solve the problem, read on.

    How To Fix Run as Different User Not Working

    Here’s how to quickly resolve this issue:

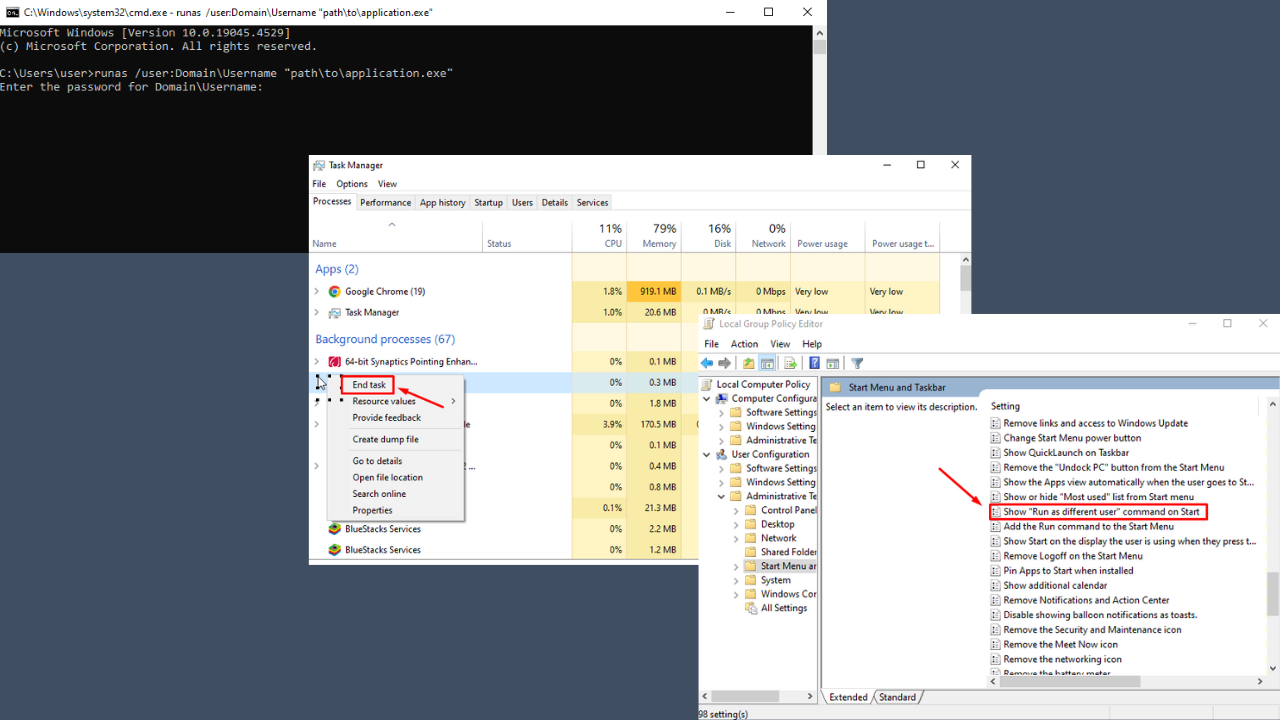
    Enable “Run as Different User” in Group Policy

    If Run as Different User isn’t working, it might be disabled in the Group Policy. Once you enable this setting, the feature will be available again in the context menu.

    Follow the below steps:

    1. Press the Windows Icon + R to open the Run dialog box.
    2. Type gpedit.msc and press Enter to open the Group Policy Editor.
    Type gpedit.msc
    1. Under User Configuration, double-tap Administrative Templates, then double-click Start Menu and Taskbar.
    Start Menu and Taskbar
    1. Find and double-click on the “Show ‘Run as different user’ command on Start.”
    Show ‘Run as different user’ command on Start
    1. Select Enabled, then click Apply and OK.
    Select Enabled

    Use Command Prompt

    You can use Command Prompt to run an application as a different user as an alternative method to the standard GUI approach. This can be useful in script-based environments.

    Here are the steps to follow:

    1. Press the Windows icon + R, type cmd, and press Enter to open Command Prompt.
    Open Command Prompt
    1. Type runas /user:Domain\Username “path\to\application.exe” and press Enter.

    The “path\to\application.exe” part represents the application you want to run as a different user. Replace it with the actual path to the executable file. For example, to run Notepad, use runas /user:Domain\Username “C:\Windows\System32\notepad.exe”

     runas /user:Domain\Username "path\to\application.exe"
    1. Enter the password when prompted and hit Enter.
    Add password

    Use Shift + Right-Click

    Sometimes the Run as Different User option is hidden and you can access it using the Shift key. This method is a quick workaround to ensure the feature is working without changing system settings.

    Follow the steps below:

    1. Locate the application you want to run.
    2. Hold down the Shift key and right-click on the application.
    3. Select “Run as different user.”
    Run as different user

    Check for Software Conflicts

    Sometimes, software like antivirus can interfere with the feature. You can temporarily disable it:

    1. Press Ctrl + Shift + Esc to open Task Manager.
    2. Go to the Processes tab and look for any third-party security software.
     Processes tab
    1. Right-click on the software and select “End task” to temporarily disable it.
    End task

    Now, try running the app as a different user again.

    So, now you know how to deal with Run as Different User not working. It’s a must-have feature for maintaining efficient workflows and managing multiple accounts. With this guide, you can restore it and enjoy a smoother user experience on your PC.

    Moreover, if you’re experiencing a similar issue on Windows 11, or if your access keeps getting denied, we’ve got you covered.

    Microsoft finally adds a collaboration capability to its Forms platform

    Microsoft has introduced a feature many people wanted for quite some time now: collaboration for Microsoft Forms. If you have a Microsoft account, this is good news because sharing forms with your friends to work together now becomes as easy as pie.

    According to the blog post, you only need to sign in with your Microsoft account. Then, start making a form that gathers your event’s small details. When you finish, tap on the “…” icon to create a link for teamwork and send it to people you want to work with.

    Now, they can jump in, modify things, give their opinion, and even edit the invitation. You will notice the initials of those editing this form – it makes tracking contributions simple. However, there is a condition that only people with Microsoft accounts may participate. When people utilize their work or school account, they won’t be able to participate in this activity.

    If you want to End the collaboration, it is simple: press the trash can button beside the collaboration link. Plus, for data enthusiasts, the recent introduction of Forms data sync to Excel is delightful. All responses are visible in Excel with a single click, and it’s easy to analyze and display your data.

    The new feature can be quite useful for those with a Microsoft account in many situations. It might be about planning a party, arranging things for a community event, or even collecting input for your project.

    You can visit Microsoft Forms at forms.office.com and try the new collaboration feature. Don’t be surprised by the new look, Microsoft recently updated Forms with a new design. If it’s good, let us know your opinion in the comments section below.

    Snapdragon X Elite Versions: All You Need to Know

    When diving into the world of Snapdragon X Elite versions, it’s essential to understand the features and differences between each variant. Whether you’re a tech enthusiast or a casual user, knowing these details can help you make an informed decision when selecting a device powered by these impressive chips.

    What are all the Snapdragon X Elite chip versions?

    1. Snapdragon X Elite X1E-84-100

    ComponentSpecification
    CPU12 Oryon cores, up to 3.8 GHz
    Dual-core boost up to 4.2 GHz
    GPUAdreno GPU with 4.6 TFLOPS
    NPUHexagon NPU with 45 TOPS
    MemoryLPDDR5x RAM, 8448 MT/s, up to 64GB
    StorageSupports PCIe 4.0 and UFS 4.0

    This version is the most powerful, providing top-tier performance for intensive computing tasks and AI applications, making it ideal for premium laptops and high-end devices.

    2. Snapdragon X Elite X1E-80-100

    ComponentSpecification
    CPU12 Oryon cores, up to 3.4 GHz
    Dual-core boost up to 4.0 GHz
    GPUAdreno GPU with 3.8 TFLOPS
    NPUHexagon NPU with 45 TOPS
    MemoryLPDDR5x RAM, 8448 MT/s, up to 64GB
    StorageSupports PCIe 4.0 and UFS 4.0

    This mid-tier version balances performance and efficiency, suitable for mainstream laptops that need solid multi-tasking and AI capabilities.

    3. Snapdragon X Elite X1E-78-100

    ComponentSpecification
    CPU12 Oryon cores, up to 3.4 GHz
    No dual-core boost
    GPUAdreno GPU with 3.8 TFLOPS
    NPUHexagon NPU with 45 TOPS
    MemoryLPDDR5x RAM, 8448 MT/s, up to 64GB
    StorageSupports PCIe 4.0 and UFS 4.0

    This version is designed for entry-level high-performance laptops, providing good performance without the dual-core boost capability, making it a cost-effective option for less demanding tasks.

    4. Snapdragon X Plus X1P-64-100

    ComponentSpecification
    CPU10 Oryon cores, up to 3.4 GHz
    No dual-core boost
    GPUAdreno GPU with 3.8 TFLOPS
    NPUHexagon NPU with 45 TOPS
    MemoryLPDDR5x RAM, 8448 MT/s, up to 64GB
    StorageSupports PCIe 4.0 and UFS 4.0

    This budget-friendly version is tailored for affordable laptops, perfect for users needing decent performance for everyday tasks and general use. Although it’s a Plus version, not Elite, we included it for full comparison.

    What are the differences between the Snapdragon X Elite SoCs?

    X1E-78-100X1E-80-100X1E-84-100X1P-64-100
    CPU ClassLaptopLaptopLaptopLaptop
    Clockspeed3.4 GHz3.4 GHz3.8 GHz3.4 GHz
    Turbo SpeedUp to 3.4 GHzUp to 4.0 GHzUp to 4.2 GHzUp to 3.4 GHz
    # of Physical Cores12 (Threads: 12)12 (Threads: 12)12 (Threads: 12)10 (Threads: 10)
    Cache42 MB42 MB42 MB42 MB
    TDP23W23W23W23W
    Other12 x Qualcomm Oryon CPU cores. Adreno GPU. Hexagon NPU12 x Qualcomm Oryon CPU cores. Adreno GPU. Hexagon NPU12 x Qualcomm Oryon CPU cores. Adreno GPU. Hexagon NPU10 x Qualcomm Oryon CPU cores. Adreno GPU. Hexagon NPU
    # of Samples142367
    Single Thread Rating(% diff. to max in group)3178 (-18.0%)3350 (-13.6%)3876 (0.0%)3257 (-16.0%)
    CPU Mark(% diff. to max in group)23480 (0.0%)22653 (-3.5%)23405 (-0.3%)22960 (-2.2%)

    Understanding these specifications will help you choose the right Snapdragon X Elite chip based on your performance needs and budget. However, you can clearly see that the difference between the Snapdragon X Elite chips is pretty slim. Only the benchmarking tests and the AI applications distinguish them in a more clear way.

    We didn’t include the Snapdragon X Elite X1E-00-1DE version because it was the first Elite chip included in the developer versions.

    Now, we made a list of all the released or upcoming Copilot+ PCs and there are already a lot of Snapdragon X Elite laptops already on the market.

    We also compared the Snapdragon X Elite chips vs Intel’s Core i7 CPUs if you want to know more. However, it’s more interesting how the Snapdragon X Elite compares to Apple’s M4 chips because they are in the same ARM family.

    We also have a guide on Snapdragon X Elite vs Z1 Extreme, so don’t miss it. To learn about performance differences, visit our Snapdragon X Elite comparison guide.

    Before you go, don’t forget to visit our Snapdragon X Elite vs Plus guide to see how different models compare.

    What do you think about the Snapdragon X Elite chips? Let’s discuss in the comments below.

    Microsoft updated Word, Excel, and PowerPoint for Web with new file menus

    This week, Microsoft released several quality-of-life improvements to Excel for the Web, including a new modern look; the Redmond-based tech giant announced Word, Excel, and PowerPoint file menus on the Web are also getting a series of updates.

    According to the official announcement, renaming files has become much more straightforward. You don’t need to right-click or go through menus anymore—just click on the file name in the title bar and rename it immediately. The autosave feature has also been given a new appearance.

    But how do we find commands? Microsoft listened to our frustrated sighs and made it simple. Everything is right there, at your fingertips. Need to rename a file? Just click its title. Worried about losing changes? Hunt for the green cloud icon. How about demonstrating your folder structure or exporting to PDF? It is all naturally found within the File menu.microsoft word for web

    Your file is saved automatically, so it’s always current. Making copies or downloading feels simple, too. Furthermore, if you need to keep track of different versions or transport documents, the File menu now has commands for ‘Move’ and ‘Version History.’

    These updates are rolling out now to some users and will be available for everyone by August 2024. If you have a comment or thought about these changes, Microsoft is open to hearing from you. Feedback can be found in the Help menu with just a few clicks of your mouse.

    What do you say about the changes Microsoft made to Word, Excel, and PowerPoint for Web? Let us know in the comments section below.

    The Office 365 connectors within Microsoft Teams will be fully retired in October

    Microsoft has announced that it will alter how users interact with Microsoft Teams. Starting on August 15, 2024, creating new Office 365 connectors within Teams will no longer be possible. This change led to the complete shutdown of these connectors on October 1st, 2024.

    This marks a significant turning point for this feature, which started its journey from 2016 onwards and provided smooth connections between Teams and many third-party apps and services. But don’t worry; Microsoft is not abandoning its users. There are options. According to the official announcement, the Redmond-based tech giant is guiding everyone toward Power Automate workflows as the fresh and primary method to blend services into Teams.

    The Power Automate workflows offer an enhancement in place of substitution. They provide a more extensive range of Office connectors and ensure scalability, adaptability, and safety for your business mixtures. If you are using Office 365 connectors now for your Teams operations, it is best to plan the shift. Microsoft will ensure this transition goes well, as the Teams Workflows app is regularly maintained and updated to match your requirements.

    This app is not only for keeping things as they are; it also improves how you work. It helps you handle approval processes easily, provides notifications on task changes, and better manages meetings. The Workflows app aims to increase productivity and make your operations more efficient. Microsoft has provided simple steps for this migration process for those thinking about switching from Office 365 connectors to Workflows. It assures that you can continue running your services smoothly without interruption or delay.

    If you are a Teams user dependent on these connectors, then it’s time to check out the Workflows app, learn its abilities, and start shifting over. You might want to do so before October arrives, as it will catch you unprepared.

    Snapdragon X Elite vs M4: An In-depth Comparision

    Ever since the introduction of new Surface devices, everyone has been wondering how will they compete with Macs, so today we’re going to make a Snapdragon X Elite vs M4 comparison.

    Snapdragon X Elite vs M4: Here’s what you should know

    Hardware specs

    Snapdragon X EliteApple M4
    InstructionARMv9ARMv9
    Number of cores8 performance, 4 efficient4 performance, 6 efficient
    CacheL2 12MB sharedL1 192K per core and L2 16MB shared
    TransistorsNA28 billion
    Fabrications process4 nm3 nm
    FrequencyUp to 4.2 GHzUp to 4.4GHz
    TDP23 W10 W
    iGPUAdreno X1-85Apple M4 GPU
    MemoryLPDDR5x-8448LPDDR5X-7500
    Memory bandwidth135 GBps120 GBps
    PCIe4.04.0

    While X Elite has more cores, M4 makes it up with the use of efficient cores. It also has a 3nm CPU making it more efficient.

    Its TDP is more than two times smaller than on Snapdragon X Elite, so it will produce less heat. In terms of frequency, the M4 outperforms Snapdragon X Elite.

    However, Snapdragon X Elite offers higher memory speed, and bandwidth, which may boost its performance.

    Performance

     Snapdragon X EliteApple M4
    Multithread2340525368
    Single thread38764503

    According to CPUBenchmark results, both devices offer solid performance, however, Apple M4 outperforms Snapdragon X Elite in both multithread and single-thread results.

    apple m4 cpubenchmark results

    However, Geekench results paint a different picture with Snapdragon X Elite outperforming M4 for multithreading.

     Snapdragon X EliteApple M4
    Multithread1540413386
    Single thread28983685

    It’s worth mentioning that multithread results vary depending on the device, but most devices with Snapdragon X Elite – X1E84100 have outperformed M4.

    Keep in mind that this is a varying difference and some models had higher differences while on others the difference was almost negligible.

    GPU performance

    For multimedia and gaming, the M4 appears to be a better choice since it comes with 10 GPU cores and features such as hardware-accelerated Ray Tracing and Mesh Shading.

     Adreno X1-85Apple M4 10-core GPU
    3D Mark Wild Life Unlimited62868673

    During the benchmark tests, Apple M4 GPU outperformed Qualcomm almost by 27% which is noticable.

    Qualcomm was outperformed by several M2 and M3 models, while Apple M4 GPU could parry some laptop GPUs, so it’s clear that M4 is the obvious winner.

    NPU performance

    In terms of NPU performance, Snapdragon X Elite is a clear winner since it can deliver up to 45 TOPS while M4 delivers only up to 38 TOPS. So, for AI-heavy features, X Elite is the way to go.

    Conclusion

    Snapdragon X Elite is gaining popularity, and this CPU is a better option for AI or if you want a better memory bandwidth.

    As for performance, there’s no clear winner since according to some benchmarks M4 outperforms Snapdragon while in others Snapdragon is a better option when multithreading.

    For multimedia, the M4 outperforms Snapdragon Elite X in every way, and with twice lower TDP, the M4 might be a better option for users.

    To learn more, we have a great guide on Qualcomm CPUs that work with Windows 11 as well as an in-depth guide on Windows 11 and Qualcomm CPUs, so don’t miss them.

    If you want to know how Qualcomm compares to Ryzen, don’t miss our Snapdragon X Elite vs Z1 Extreme guide. For gamers, we also have a great guide on Snapdragon Elite X gaming capabilities, so you might want to visit it.

    To see how different Snapdragon X Elite processors compare, visit our dedicated guide to learn more.

    Microsoft Edge introduces the Take a Tour option so that you won’t miss any new features from now on

    In this “internet-is-air” world, Microsoft Edge is taking a step forward with its newest update—version Dev 128.0.2677.1, now on the Dev Channel. This update is not only an update; it also has big enhancements for the Workspaces feature that will make navigation easier and more understandable for users.

    The update is full of fixes designed to increase stability and user experience. They range from dealing with crashing problems on different platforms to small annoyances interrupting browsing flow. Let us look at what this update brings and how it could improve your internet surfing experience more smoothly.

    Microsoft Edge’s Dev 128.0.2677.1 now has a new ‘Take a Tour’ button on the welcome page of Workspaces. This alteration could be quite helpful for people who appreciate guidance when trying out fresh characteristics. It feels similar to having someone with you, helping you understand and showing you how to utilize this improved functionality. Remember those times when you got lost while trying out a new feature? This addition is here to ensure you do not wander around aimlessly.

    Crashes and bugs are the worst part of any software experience, but Microsoft has been busy dealing with these problems. They have solved issues that made the browser crash when reopening a workspace, having the IE Mode tab in the background, or clicking ‘x’ on the banner shown after downloading a file from an iOS device.

    For those using Android phones, they have also fixed a crash problem caused by downloading an unknown file. For those who have felt the irritation of selecting the ‘Organize tabs’ button and then witnessing a browser crash, take a deep breath – that problem has been sorted.

    But, the small but impactful parts? Now, clicking on the right side of items in recently closed group history will display the ‘Open in new tab’ and ‘Copy link’ choices in the context menu. What is the problem with the search bar vanishing? Gone. The invisible and unclickable ‘Sort’ option icon in the collection pane? Fixed. Also, when you watch a full-screen video, the app pane unexpectedly appears and has been fixed.

    Instances such as the refresh buttons not responding under the extension on Android or fullscreen web pages like YouTube videos not hiding the sidebar on Mac have been addressed.

    Similar to the earlier version of Edge 128, which brought a new Copilot button, this update will likely arrive in the Stable Channel by late August and is now ready for download from the official Edge Insider website.

    Check out the full changelog here.

    Snapdragon X Elite vs Intel Core i7 Benchmark Comparison

    When it comes to choosing the right CPU, understanding the differences between the CPUs is pretty important. We decided to compare the notorious Snapdragon X Elite SoC with the latest Intel Core i7 14790F and 14700HX CPUs. While 14790F is a desktop CPU, 14700HX is a mobile CPU. Let’s see how they compare in terms of specifications and performance.

    Snapdragon X Elite vs Intel Core i7 detailed comparison

    Qualcomm Snapdragon X Elite vs Intel Core i7 14790F

    Cores & threadsClock speedsCacheIntel Core i7 14790FPower consumption
    Snapdragon X Elite12 cores with 12 threads1 GHz – 4.3 GHz42 MBLPDDR5x-844823-65 W
    Intel Core i7 14790F16 cores with 26 total threads2.1 GHz – 5.3 GHz36 MBDDR5-560065 W

    The Snapdragon X Elite X1E-84-100, which is for the ultraportable notebook market, has 12 cores and starts at a frequency of 3.8GHz. In comparison, Intel Core i7 14790F has a base rate of 2.1GHz with its powerful 16 core design that suits desktop needs. Yeah, we know that we compare apples and peaches here. Intel Core i7 14790F was created for desktops so the focus was not on power consumption, but even so, the Snapdragon SoC still tops it in other areas as well.

    The Snapdragon X Elite has its own graphics card, and better memory specs. This makes it good for people who want a small but strong technology that works well with many tasks. The benefits also include bigger memory bandwidth and higher base frequency which are important when doing multitasking. Also, the lower TDP (Thermal Design Power) suggests a cooler and more energy-saving operation which is an important consideration especially for portable devices.

    On the other hand, Intel Core i7 14790F is from a more recent PCIe version which may indicate better readiness for future with faster data transfer and new connectivity choices. The performance of this component in benchmark tests is quite good, especially when it comes to multi-core scenarios. This shows that it can handle demanding applications and do multitasking efficiently.

    In the end, if you are trying to make a decision between these two powerhouses, it depends on what your use is. For people who put importance on being mobile and saving energy – the Snapdragon X Elite is a clear choice. It offers promise for Windows 11 devices of the future and can run old Windows applications too (legacy). Its performance in AI inferencing also makes it interesting – showing potential strength for coming up with new uses or improvements in mobile computing area later on.

    On the other hand, for users who need top-level performance – particularly in desktop apps where how much power is used matters less – they might like to go with Intel Core i7 14790F. This one has better multi-core ability and more types of connections, which makes it suitable for demanding gaming, making content and similar heavy-duty activities. So, clearly, Intel Core i7 14790F is more powerful, but we expected more by comparing a mobile processor to a desktop PC CPU. Snap

    Qualcomm Snapdragon X Elite vs Intel Core i7 14700HX

    Cores & threadsClock speedsCacheIntel Core i7 14790FPower consumption
    Snapdragon X Elite12 cores with 12 threads1 GHz – 4.3 GHz42 MBLPDDR5x-844823-65 W
    Intel Core i7 14700HX20 cores with 26 total threads2.1 GHz – 5.5 GHz33 MBDDR5-560055 W

    Well, this battle is a lot more relevant because both Qualcomm Snapdragon X Elite (X1E-84-100) and Intel Core i7-14700HX were created for portable devices.

    Initially, we have the Snapdragon X Elite. It is a new entry launched in 2024’s second quarter and offers a 12-core setup. The base clock speed of this one starts at 1.00 GHz which may not sound too high but it can turbo boost to as much as 4.30 GHz. But wait, the Intel Core i7-14700HX which came out a little earlier in the first quarter of 2024 shows off with 20 cores and a base clock at 2.10 GHz that can go up to 5.50 GHz when it needs to flex its muscles. More cores and faster speeds could make you think Intel is ahead?

    However, a processor is not just about its speed and core count. Snapdragon has an integrated AI engine that can handle 45 TOPS (trillion operations per second), which is quite impressive. Intel’s AI Boost technology comes as a response but they haven’t specified the exact TOPS capability in their advertisement so we are still left somewhat unsure about how powerful it really is for handling artificial intelligence tasks.

    For graphics, both processors have their own built-in GPUs. The Snapdragon has an Adreno X1 GPU and the Intel comes with a UHD Graphics 13th Gen. These can handle basic graphic requirements but are not meant to replace a separate gaming GPU anytime soon.

    The next battle zone is memory support. The Snapdragon can hold a maximum of 64 GB LPDDR5X memory, which is very fast and good. But Intel goes higher with capacity to 192 GB but using DDR5-5600 or DDR4-3200, giving choice in memories. Intel appears superior in terms of memory capacity, yet Snapdragon matches them in speed.

    Maintaining thermal balance is very important, particularly for managing device cooling when under pressure. The Snapdragon has a TDP of 23 W, which is much less compared to Intel’s 55 W. Having lower TDP shows that Snapdragon can produce less heat and possibly offer longer battery life for devices running on it.

    Finally, we will mention the making method. The Snapdragon is created with a 4 nm process that appears to be more modern and effective compared to Intel’s 10 nm process. This could possibly result in enhanced performance and energy usage for the Snapdragon.

    Therefore, who is the winner in this race? Well, it truly depends on what you are searching for. If your desire is for more core numbers and capacity of memory, then Intel could be an option to consider. However, if you are someone who values high efficiency and advanced AI abilities, the Snapdragon might be your choice.

    Always keep in mind that the processor which suits best for your requirements is most preferable, no matter if it’s about gaming, creating or simply surfing on internet. And, of course, it also depends on the other configuration of your device. You will not see an Intel powered laptop with more than 64 GB of RAM any time soon and at the same RAM count, the Snapdragon machine will be faster in terms of memory speed.

    This isn’t the only Intel CPU we compared Snapdragon X Elite to, and if you want to learn more, go to our Snapdragon X Elite vs Intel Core Ultra 7 article for more details.

    In case you’re an AMD fan, make sure you visit our Snapdragon X Elite vs Z1 Extreme guide for an in-depth comparison between the two.

    What do you think about Snapdragon X Elite vs Intel Core i7? Which one you will choose? Let’s talk about that in the comments.

    Teams for Personal introduces the unified experience with new mic and camera settings

    Microsoft has made a series of improvements to Teams for Personal to help people interact online more smoothly and naturally. These changes are a turning point for users who want better control in their virtual meeting space, from finding communities effortlessly to swiftly adjusting camera and audio settings.

    Firstly, there are the community searches. According to Microsoft, whether you are using a desktop or mobile device, you can put in a word to search, press ‘Communities,’ and there it is—a collection of related groups appears for your viewing pleasure. It’s very helpful when you want to find people with similar interests without creating a new community from nothing.

    Tweaking the camera and audio configurations in a meeting was once somewhat tedious, but this is no longer true. Through the most recent update, these controls are readily accessible beside the camera and microphone icons, which means you can easily switch cameras, alter your background, or tweak brightness. teams for personal

    Everything is just one click away. For people who care about audio quality, picking microphones, altering volume, and reducing background sound feels like a gift from heaven. Also, there is a mode of high-fidelity music that allows you to exchange melodies with your group or the team.teams for personal

    Microsoft has improved the Teams experience by providing support for personal accounts on Mac, Windows 10, and the web. This means you can now manage your work, school, and personal accounts in a unified manner, making transitions between different parts of life easier.

    These changes show that Microsoft keeps improving how people interact with Teams. The new features make it more user-friendly and accessible, turning Teams into a work platform and a tool for personal connection and collaboration. Have you tested these new things? What do you think?

    Microsoft wants to build a peripheral privacy tool that encodes text only you can read

    Microsoft products and services are among the most targeted products in the world: in 2022 alone, over 80% of the Microsoft 365 accounts were successfully hacked that year, with many other attacks following in 2023 and 2024. This year, hackers have started using AI to create, develop, and send out malware and phishing threats, most lethal to organizations.

    Cybersecurity is more important than ever, no matter how it’s happening. If the Redmond-based tech giant now has Copilot for Security to effectively deal with all the threats mentioned above, it also wants to ensure that all the ways you can hack someone are covered, including the most basic ones.

    With that in mind, Microsoft is working on a computing system to create and display encoded documents to safeguard peripheral secrecy, according to the company’s latest patent.

    Microsoft says the peripheral privacy method changes the text of a document so private details can’t be seen by others, but it still allows users to view them. This system is not a simple exchange of some letters; it’s an intricate technological process that includes gaze tracking, alpha-blending, and altering in real time as per the user’s focus area.

    Think about working on private papers in open places without worrying that someone will see what you’re doing from behind your back.

    At the heart of this technology is its capacity to identify and encode a starting document by altering the text. The innovation does not solely rely on these characteristics; a camera monitors where the user’s eyes are looking to exhibit such encoded documents.

    It generates a mask according to where you are looking, blending the original and encoded documents. This way, information in your sight line becomes clear while text around it stays hidden from others.

    The most interesting part is the encoding method. The system does not mix letters in a disorderly manner. Instead, it uses a plan that changes letters according to their topological resemblance.

    This means that the general setup of the text, like sentence size and paragraph arrangement, stays unchanged, keeping it easy to read. This delicate method does not change the narrative’s flow but lowers the chances of information leaks for the users.

    Additionally, the system is made to be efficient. It stores the first and encoded documents in the device’s memory, reducing waiting time and ensuring that users’ document privacy does not slow down their interaction. This point is important because if a delay could be felt, it might break the reading flow and make technology an obstacle instead of an assistance.

    The possible effects of this kind of system are wide-ranging. In a time when digital privacy always feels at risk, having a tool that can guard important details from being seen visually holds immense value. Be it for business people in public areas or anyone who treasures their solitude; this technology offers an advanced and easy-to-use security layer.

    It would not be the first time Microsoft has considered it: earlier this year, the Redmond-based tech giant published a patent describing a form of protected LCD screen that would give users maximum intimacy when watching all sorts of content on their devices in public.

    So it’s clear that one or the other, the company is seriously thinking about releasing either software or hardware that would offer this sort of security. And quite frankly, it would be welcomed. There are screen protectors on the market, but they can sometimes be a nuisance to purchase and set up due to each device’s specificities.

    Microsoft’s development of a native screen protector as a peripheral privacy system is a good idea and necessary today.

    What do you think?

    You can read the full paper here.

    MSConfig Maximum Memory Triggers BSOD or Resets to 0 [Solved]

    Some settings on a Windows PC are not meant to be changed, including the Maximum Memory in MSConfig. I have seen hundreds of cases where the PC froze, stopped working, or became slow after users manually set the Maximum Memory to too low.

    First, you need to understand what Maximum Memory does in MSConfig. It’s the maximum amount of memory you want the OS to use and is to be set in MB. The maximum limit for the setting is the 1028x available memory (RAM) on the PC.

    If you set the maximum memory between 0-256 MB, the PC will get too slow, won’t respond, or crash with a BSOD (Blue Screen of Death), all due to the unavailability of sufficient RAM to handle the core processes. Let’s find out how you can fix that!

    How do I fix errors after changing maximum memory in MSConfig?

    1. Cold reboot the PC

    The easiest fix when you set the Maximum Memory too low in MSConfig is to press and hold the power button for 30 seconds, then disconnect the laptop/PC from the power source for 30 minutes, and finally plug it back in.

    If this doesn’t work, you can also remove the CMOS battery. It’s a coin-sized battery used to power the BIOS firmware.

    2. Untick the Maximum memory checkbox

    Tip icon Tip
    This solution only works if the PC, even though slow, remains usable, i.e., you can access the desktop and load applications.
    1. Press Windows + R to open Run, type msconfig in the text field, and hit Enter.
    2. Go to the Boot tab and click on Advanced options.msconfig
    3. Now, untick the checkbox for Maximum memory and click OK to save the changes.uncheck maximum memory
    4. Once done, reboot the PC and check if it now runs fine.

    In many cases, I saw that users were able to open MSConfig and uncheck the Maximum Memory option after hours of waiting on each step. Yet, this remains the simplest solution of all!

    2. Delete changes to maximum memory via Recovery Mode

    1. Turn on the PC, and as soon as you see the Windows logo, hold the Power button to turn it off.
    2. Repeat this thrice, and on the fourth attempt, the PC will automatically enter Startup Repair, which, most likely, won’t find a problem. On this screen, click Advanced options.
    3. Choose Troubleshoot.recovery mode
    4. Again, click on Advanced options.
    5. Click on Command Prompt.cmd
    6. Now, paste the following commands individually and hit Enter after each: bcdedit /deletevalue {current} removememory bcdedit /deletevalue {current} truncatememory bcdedit /deletevalue {default} removememory bcdedit /deletevalue {default} truncatememorycommand to fix msconfig maximum memory
    7. Once done, reboot the PC in normal mode.

    Even if the first three commands result in an error, the output from the fourth command should read, The operation completed successfully, and the maximum memory should revert to default.

    3. Boot into Safe Mode and revert changes to maximum memory

    1. Boot Windows into Recovery Mode, choose Troubleshoot, then Advanced options, and finally, click on Startup settings.recovery mode
    2. Click the Restart button.
    3. Once the PC restarts, press 4 or F4 to boot in Safe Mode.safe mode in Windows
    4. Now, open MSConfig, as you did earlier, go to Boot, click on Advanced options, uncheck Maximum memory, and save the changes.

    Some suggest pressing 5 or F5 to boot in Safe Mode with Networking, but that simply means putting additional strain on the PC. And given that you are already running low on RAM, it doesn’t make sense. Anyway, you don’t need Internet access to uncheck Maximum Memory in MSConfig!

    5. Reinstall Windows

    If nothing else works, you will have to reinstall Windows since the built-in reset options fail to work. First, download the ISO from Microsoft’s official website depending on the Windows iteration:

    Now, all you need to do is create a bootable Windows USB, set the PC to boot via it in the BIOS, and then reinstall Windows. This should reset the changes to Maximum Memory in MSConfig!

    Should I change the maximum memory in MSConfig?

    Windows is more than capable of handling the memory requirements for individual processes and hardware. So, you don’t need to adjust the maximum memory in MSConfig. Even Windows doesn’t want you to do that, and this is often the reason MSConfig’s maximum memory resets to 0.

    To find out how much memory is being used by the PC, check the Task Manager or Resource Monitor. If the PC seems to be running slow, perhaps increase the virtual memory in Windows.

    changing virtual memory
    Increasing Virtual Memory in Windows 11

    But in no case should you tinker with MSConfig. These settings are to troubleshoot problems with the PC and must not be adjusted for performance.

    If it’s the performance you are worried about, discover expert tips to make Windows run faster than ever!

    Which fix worked for you? Share with our readers in the comments section.

    Chrome on Windows gets Performance Boost with PartitionAlloc Expansion

    Good news for Windows Chrome users! Google is expanding the use of PartitionAlloc, its memory management tool designed for speed and efficiency, within the Windows component build of Chrome. This broader adoption could lead to noticeable performance improvements, making your browsing experience smoother.

    Back In March 2021, Google introduced PartitionAlloc, its custom memory allocator designed for faster performance, efficient memory usage, and improved security. Initially, PartitionAlloc was implemented within Blink, Chrome’s rendering engine.

    Building on this success, Google significantly expanded its use with Chrome 89. They implemented PartitionAlloc everywhere on Android and 64-bit Windows versions of Chrome by intercepting the standard memory allocation function (malloc). This resulted in memory and performance improvements.

    Now, Google is taking PartitionAlloc to another level. A new commit spotted by us, Windows Report, suggests the company is pushing for even broader adoption of PartitionAlloc. This commit focuses on enabling PartitionAlloc-Everywhere within the Windows component build of Chrome. This could lead to further performance and memory improvements for Windows users.

    “[PA] Support PartitionAlloc-Everywhere on Windows component build. To use allocator_shim for the Windows component build, all shared libraries and executables must be linked with allocator_shim.dll.
    (i.e. perfetto, icu, v8, blink_core, blink_modules, and so on). Instead of modifying BUILD.gn-s, update //build/config/BUILD.gn to make all shared libraries and executables depend on PartitionAlloc with build_with_chromium guard.” Google notes.

    Supporting PartitionAlloc more extensively within the Windows component build could bring several advantages to Chrome users on Windows:

    Potential Performance Boost: PartitionAlloc’s focus on low allocation latency could translate to a smoother and faster Chrome experience.
    Improved Memory Efficiency: Optimized memory usage by PartitionAlloc can potentially free up system resources and lead to a more responsive browser.

    Users of Chrome on Windows can potentially look forward to performance improvements when Google successfully lands PartitionAlloc-Everywhere within the Windows component build.

    In addition to PartitionAlloc improvement, Chrome is getting other features like Performance issue alert notifications, HTTPS-First Balanced Mode, and Google plans to deprecate Password leak warnings.

    Transfer Music From iPod To iTunes on Windows 7 [How to]

    Transferring music from iPod is usually seamless, and in today’s guide we’re going to show you how to transfer music from iPod to iTunes on Windows 7, so let’s get started.

    How can I transfer music from the iPod to iTunes on Windows 7?

    1. Use the Sync option

    1. Connect your iPod to your PC.
    2. On the iPod, select the Trust option.
       trust ipod touch
    3. Open iTunes and select Music from the sidebar.
      music selected sidebar itunes
    4. Check Sync Music and click Sync.
      sync music checked in itunes
    5. Optional: Choose which folders you want to sync or sync the entire library.
    6. Wait for the process to finish.

    2. Use the File Sharing option

    1. Connect your iPod to the PC.
    2. Select the iPod button in the top left in iTunes.
    3. Next, choose File Sharing and select an app in the list.
      file sharing itunes
    4. Select the file you want to transfer, right-click it, and choose Save to.
    5. Choose the destination directory and click on Save To.

    How to transfer music from an iPod to a Windows 7 computer without iTunes?

    1. Connect the iPod to your PC.
    2. Open My Computer and locate your iPod. Double-click to open it. Once it opens, go to the Music folder.
    3. If you don’t see any folders, you’ll need to go to Folder Options in the Control Panel and enable the Show hidden files, folders and drives option.
      show hidden files windows 7
    4. Copy all files from the Music folder to your PC.

    To add music to iTunes, just go to File and select Add File to Library or Add Folder to Library and select the desired directory.

    How do I connect my iPod to Windows 7?

    You can connect your iPod with Windows 7 using the USB cable. You might need to use Lightning to USB Cable or USB-C to USB Adapter or USB-C to Lightning Cable.

    Keep in mind that sometimes you might encounter issues, such as the iPod not being recognized, or the iPod being detected but it couldn’t be identified error.

    If our solutions don’t work for you, you can always use third-party software to transfer music from an iPod to a PC instead.

    How to Manage Storage Limits in Outlook

    Microsoft Outlook is an integral part of the Office suite, and it is essential to organize the mailbox effectively to improve the email experience. With Outlook.com, you get 15 GB of free email storage, which is not part of Microsoft Cloud storage.

    Your Microsoft account comes with 5 GB of free cloud storage, shared among files stored in OneDrive, attachments in Outlook.com, and other Microsoft 365 apps.

    However, if you have an active subscription to Microsoft 365, you get 50 GB of space. If you don’t have the subscription but want to manage your storage limits in Outlook, read on!

    How can I check my storage limit in Outlook?

    1. Open Outlook.com on your preferred browser.
    2. Click Settings from the top right corner.
    3. Go to General and then select Storage.How to Manage Storage Limits in Outlook
    4. Here, you will see Microsoft Storage and Email Storage.
    5. Click the Email Storage option to expand the category.
    6. You will get the Total used and the Total storage available information here.

    How can I get rid of Quota Exceeded, your account is above quota limits message?

    1. Launch Outlook.com on your preferred browser.
    2. Sign in with the Microsoft account, and select Settings from the top right corner.
    3. Go to General and then select Storage. If you use New Outlook for Windows, click Settings, go to Accounts, and choose Storage.How to Manage Storage Limits in Outlook
    4. You will see the breakdown of how much space each folder in your mailbox takes.
    5. Under Manage, you can choose the duration of each folder from 3 months to 6 months or 12 months.click delete
    6. Click the Delete icon to remove the emails and free up space.

    If you are a Microsoft 365 subscriber, you will get an option to upgrade to 50 GB of storage space.

    How can I delete permanently delete email?

    You can select and delete emails from your Inbox and other folders, and the items removed will be in the Deleted Items folder by default.

    Remember that the Deleted Items folder is counted in the mailbox storage limit of 15 GB, so you need to empty it manually to retrieve space instantly. However, if you don’t remove emails from this folder, they will be deleted automatically after 30 days.

    However, mail items from the Junk folder will be automatically deleted after ten days. To permanently delete emails without sending them to the Deleted Items folder, choose the messages and press Shift + Del on your keyboard.

    How can I get rid of the Microsoft Unified Storge is full message?

    1. If you exceed Microsoft storage

    This means you have exceeded your cloud storage quota, and you won’t be able to edit, upload, or sync new files to your OneDrive. You will be able to access the uploaded files, but they will be in read-only mode.

    You will not be able to send or receive email in Outlook.com, even if you haven’t exceeded the email storage limit. Furthermore, you won’t be able to send or receive Microsoft Teams messages with attachments. The most important thing to remember is that Microsoft will delete your OneDrive and the data in it.

    2. If you exceed email storage

    You won’t be able to send or receive emails on Outlook.com. This means any emails sent to you will be returned to the sender.

    If you are a new user, you need to get a subscription to increase your storage limit in Outlook or remove files to retrieve space. In case you already have a Microsoft 365 subscription and exceed the given limit, you can either free up space or upgrade to the Enterprise plan to get more space.

    In case you get the Mailbox Quota Exceeded error on Outlook, first check Trash and Spam folder, then set limit to your message box, read this to learn detailed steps.

    What are other methods to retrieve space on Outlook?

    1. Using the Sweep function

    This is the quickest way to remove emails from Inbox or archive folders and it will also automatically delete incoming emails from a particular sender.

    Go to your Inbox, choose the message you want to sweep and select Sweep from the menu bar.The deleted emails will be permanently removed and will not count toward your storage quota.

    2. Save attachments to OneDrive

    1. Choose Filter at the top of the message list on the Outlook web app, then click Sort.
    2. From the sub-context menu, select Size.
    3. For Sort order, select Largest on top.Sort - How to Manage Storage Limits in Outlook
    4. Now select the message with the attachment, open the attachment, and select Save to OneDrive.
    5. Once saved, you can select the email and press Shift + Delete to remove the message permanently.

    3. Delete emails with files or photos

    1. To remove images from your inbox, you can select the message in your mailbox and delete it.
    2. To delete the pictures from Sent Items, choose the message and click the Delete icon.
    3. Once you have deleted these items, head to the Deleted Items folder and click the checkbox in front of any email. It will show checkboxes for messages; click the checkbox next to Deleted Items.Delete items - How to Manage Storage Limits in Outlook
    4. Click the Empty folder option from the top menu.

    If you can’t find any emails to delete or attachments to shift to OneDrive, you can opt for the Microsoft 365 subscription, which gives you a 50 GB mailbox per person and advanced security for Inbox without ads.

    In case you cannot open Outlook on Windows 11, first update the app and run the app in safe mode. For more details, check out this guide. You can also change where sent items go and delete the search history. Moreover, you can turn on Dark Mode to make the app easier on the eyes.

    How do you manage Outlook’s storage limit? Share your views with our readers in the comments section below.

    How to Fix Roblox Error Code 769 Teleport Failed

    If you encounter Teleport Failed, Error Code 769, on Roblox, it could be due to a server outage, wrong network settings, or computer permissions issues.

    The error can prevent you from teleporting between games, making accessing the games you want to play challenging. To fix it, first go to Roblox server status page to see if the server is active, restart your router, then enable third-party teleports, run the game as an administrator, and change DNS to Google DNS. Let’s get started!

    How can I fix Roblox error code 769 Teleport Failed?

    1. Allow third-party teleports

    1. On the Roblox Studio home page, choose the game and select the Game Settings.Game Settings
    2. Go to the Security section.Settings - Third-party teleports - roblox error code 769 teleport failed
    3. Now, toggle on the switch for Allow Third Party Teleports and click Save.

    2. Run Roblox as administrator

    1. Locate Roblox on your desktop and right-click it to get the context menu.
    2. From the menu, select Properties.
    3. Go to the Compatibility tab, and under Settings, select Run this program as an administrator.Run as admin - How to Fix Roblox Error Code 769 Teleport Failed
    4. Click Apply, then OK to save the changes.

    3. Using a script

    1. Open Roblox Studio as usual and go to your game project.
    2. Next, locate the Explorer panel from the right side.Explorer - roblox error code 769 teleport failed
    3. Right-click on ServerScriptService or ServerStorage for Local Script, then select Insert Object, then choose Script or LocalScript.Script
    4. Double-click on the script you just added to open the script editor.
    5. Remove the existing code, then copy & paste the mentioned below.SCript  Play
    6. Once done, click from the top-left corner and choose Save.
    7. Click the Play button in Roblox Studio to test your game.
    local TS = game:GetService("TeleportService")
    
    game.ReplicatedStorage:WaitForChild("GiveCode").OnClientEvent:Connect(function(ID, code)
        local success, errorMsg = pcall(function()
            TS:TeleportToPrivateServer(ID, code, game.Players.LocalPlayer)
        end)
    
        if not success then
            warn("Teleport failed: " .. errorMsg)
            -- Handle the error here (e.g., notify the player, log the error)
        end
    end)

    In case you still see the error, double-check the server ID (ID) and code, then check the server capacity as Roblox now allows a certain number of players to join a private server.

    4. Clear the cache

    1. Press Windows + R to open the Run window.Temp - roblox error code 769 teleport failed
    2. Type %temp% and click OK to open the Temporary files folder.
    3. Press Ctrl + A to select all files and then click Delete to remove all the files.temp files

    Clearing cache from your computer can also help you fix issues like Roblox not launching; read this guide to learn more.

    5. Change DNS to Google DNS

    1. Press the Windows key, type control panel, and select Control Panel from the list for it to open.Control Panel start menu -Roblox Error Code 769 Teleport Failed
    2. Select Category as View by and then click Network & Internet.Network & Internet - Roblox Error Code 769 Teleport Failed
    3. Click Network and Sharing Center.Network and Sharing Center
    4. Now select Change adapter settings.Change adapter settings
    5. Right-click the active connection and select Properties from the context menu.Network Connection properties - oblox Error Code 769 Teleport Failed
    6. On the Properties dialog box, select Internet Protocol Version 4 (TCP/IPv4) and click Properties.
    7. Next, select the Use the following DNS server addresses option.Internet Protocol Version 4(TCPIPv4) Properties
    8. For the Preferred DNS server, enter 8.8.8.8, and for the Alternative DNS server, type 8.8.4.4.
    9. Click OK to confirm.DNS server
    10. Again, click OK twice to close all the dialog boxes.
    11. Restart your PC to let the changes take effect.

    6. Reset your network

    1. Press the Windows key, type cmd, select Command Prompt, and click Run as administrator.CMD elevated  Roblox Error Code 769 Teleport Failed
    2. Type the following commands one by one and press Enter after every command:
      netsh winsock reset
      ipconfig/ flushdns
      ipconfig/ renew
    3. Once done, reboot your computer.

    7. Reinstall Roblox

    1. Press Windows + I to open the Settings app.
    2. Go to Apps, then click Installed apps.Apps - Installed apps Roblox Error Code 769 Teleport Failed
    3. Locate Roblox from the list, click the three dots icon, and select Uninstall.Uninstall Roblox
    4. Now go to Roblox’s official website and click Download Windows app, then double-click the downloaded file to initiate the installation.Roblox - Download the Windows app
    5. Follow the on-screen instructions to complete the process.
    6. Alternatively, head to the Microsoft Store, search for Roblox, and click Install.Roblox Install

    Reinstalling the Roblox app can help you fix the An error occurred while starting Roblox issue’; read this guide to learn more.

    To conclude, to fix Roblox error code 769 teleport failed, you need to ensure the third-party teleport is enabled, and your network settings are configured properly. Also, run the Roblox app as administrator and change DNS to Google DNS.

    Many users also reported that Roblox won’t work on Google Chrome, but we tackled that issue in a separate guide, so don’t miss it.

    Did we miss a step that helped you fix the Roblox error code 769 Teleport failed issue? Share it with our readers in the comments section below.

    4 Easy Ways to Convert MSG Files to PST Format

    The MSG file format is widely used in emails and is easy to open but if they become too many, the need arises to convert them to the PST format.

    PST is a widely used format making it compatible. Also, dealing with multiple MSG files can take up too much storage space. Converting to PST means ease of access since it’s also a portable format and compresses the files to save on storage. Plus you can always resize a PST file.

    Other reasons could be for migration purposes especially when moving from one email client to another or to another computer. PST files also make a good backup solution for easy restoration.

    How do I convert MSG files to PST format?

    1. By using the drag and drop method

    1. Press the Windows key, type Outlook, and click Open.Outlook Start menu open
    2. Go to the Folder tab, and click New Folder.OUTLOOK_NEw folder
    3. Once the New Folder window appears, name it Unified Inbox and click OK.OUTLOOK_name the folder and click OK
    4. Navigate to your browser and log in to Outlook for web.
    5. Expand your folder list and select Create new folder at the bottom, or right-click on your Inbox folder and select Create new folder.
    6. Type out your preferred name for your new folder and hit Enter.
    7. Next, hit the Windows + E keys to open File Explorer.
    8. Locate your MSG files then hit the Ctrl + A keys to select all.
    9. Drag the selected files into the newly created folder.

    2. By using the copy-paste method

    1. Press the Windows key, type Outlook, and click Open.Outlook Start menu open
    2. Go to the Folder tab, and click New Folder.OUTLOOK_NEw folder
    3. Once the New Folder window appears, name it Unified Inbox and click OK.OUTLOOK_name the folder and click OK
    4. Navigate to your browser and log in to Outlook for web.
    5. Expand your folder list and select Create new folder at the bottom, or right-click on your Inbox folder and select Create new folder.
    6. Type out your preferred name for your new folder and hit Enter.
    7. Next, hit the Windows + E keys to open File Explorer.
    8. Locate your MSG files then hit the Ctrl + A keys to select all then Ctrl + C to copy.
    9. Go to your newly created Outlook folder and paste the files.

    Note that for both of these methods, the conversion to PST format can take a while especially if you have too many MSG files. There is also a high chance of data corruption on these files. If you’d like to speed up the process with minimal mistakes, go to the next step.

    3. By using a third-party tool

    1. Go to Stellar Converter for PST website and click Free Download.
    2. Double-click the installer file and click Yes on the UAC prompt to launch the installation wizard.
    3. Follow the on-screen instructions to install the software on your computer. Once the process is complete, click Finish to close the setup and the tool will be launched.Finish convert OST TO PST
    4. If you know the MSG file’s location, click Browse to choose the file or the Find option to search and choose the PST file. Click Convert.Convert Browse Convert OST Into PST
    5. If you don’t know the location, go to the Profile List tab. Click List Profiles. It will show you all the MSG files related to Outlook profiles from the default location. Choose the MSG file and click Convert.List profiles profile list Convert OST Into PST

    4. By using an online converter

    Apart from downloading an online tool, another easy way is to convert your MSG file to PST format online. There are a handful of websites that only require you to upload your file and with a click of a button, it will be converted to PST format in seconds.

    We found the Aspose site particularly easy so you can try it out if you prefer not to download programs and go through multiple steps.

    Note icon NOTE
    WindowsReport is not affiliated to the Aspose site so do your due diligence before uploading and downloading files.

    Best practices when converting MSG to PST

    • Conduct tests – Before converting a large number of MSG files, start with a test sample and check the accuracy. This will save you time and detect any problems in the initial stages.
    • Create a backup – Whichever conversion route you choose, make sure you have a backup of the file. Anything can happen so you’ll need a copy for when a case of data corruption occurs.
    • Convert in small batches – It’s easier for the conversion process to complete successfully when done in small batches.

    Once you have successfully converted your MSG file, open it and ensure it has no issues. If it does, you can always repair PST files. Speaking of file formats, you may also be interested in how to open the Outlook BAK file which serves as a backup file for your emails.

    And that wraps up our article on how to convert your MSG files. Have you tried any of these methods? Which one was the easiest and most efficient for you? Let us know in the comment section below.

    Why is Equalizer Missing on Windows 11?

    If you can’t find equalizer settings on your Windows 11 computer, you should know that Microsoft has discontinued adding the equalizer option in Audio settings. The Sound settings for Output devices still have the Enhancements tab, but no equalizer option exists.

    However, you can use EQ apps from your device manufacturer or Realtek. Generally, these apps come along with other native apps on your computer. If you can’t find any, let us help you find one.

    How can I fix the equalizer missing issue on Windows 11?

    1. Install the Realtek Audio Control app

    1. Press the Windows key, type store, and select Microsoft Store from the list to launch.
    2. In the search bar, type realtek audio control; you will get Realtek Audio Control, and click Install.
    3. Once done, launch the app.realtek audio control - equalizer missing on Windows 11
    4. From the left pane, click Speaker. In the right pane, locate Sound Effects, then go to Equalizer and adjust it to your preferences.

    If you don’t find any Equalizer options in Realtek Audio Console, it could mean that your computer has premium audio, such as Nahimic, Dolby, or DTS, and you need a dedicated app from the device manufacturer.

    2. Use the manufacturer’s audio app

    1. Identify the device manufacturer, press the Windows key, type store, and select Microsoft Store from the list to launch.
    2. Here is a reference for an HP device. In the search bar, type HP Audio Center, and you will get HP Audio Center; click Install.
    3. Once installed, go to the search bar, type HP audio center, and select it to launch.HP center
    4. From the top bar, go to Equalizer and adjust it per your preferences.

    You can look for a similar app for your device, like for Dell, it is Waves MaxxAudio Pro, and Lenovo, it is DolbyAudio.

    3. Get a reliable third-party app

    If you don’t find these options suitable enough, you can go for a third-party app like Equalizer APO, which is open-source. Another one is FxSound, which has good reviews on the Microsoft Store.

    However, if you are willing to pay for a high-end app, you can go for Dolby Atmos; here are some other equalizer apps you can try.

    If you are still not getting the desired output, you need to reinstall your audio driver. We have detailed instructions for you if you need help doing so.

    If you encounter the Realtek High Audio Driver having a problem issue, it could be due to corrupted or outdated drivers; read this to learn more.

    Which of these options works for you? Share your choice with our readers in the comments section below.

    Microsoft Edge is apparently getting rid of the ‘Follow this creator’ feature

    Microsoft Edge has been grabbing attention within the constantly changing universe of web browsers – although not all for positive reasons. Lately, the tech giant has desired to detach from a characteristic previously highlighted as groundbreaking.

    According to @Leopeva64, a famous tech enthusiast, the function “Follow this creator,” which allows users to monitor their preferred content creators directly from the browser, is slowly being removed from Microsoft Edge. If you wonder why, then the reason is that this feature was not working correctly.

    It sent all URLs of every webpage you visited directly to Bing, causing big privacy worries. Just picture it – every single site you go to, from those secret blogs you read to the late-night shopping trips, is being monitored! Not exactly what you signed up for, right?

    The answer is quick and clear. Microsoft will slowly remove the “Follow this creator” feature from Edge. If you have been using Edge recently, maybe you observed that the Collections tab where this function was located no longer provides a follow creator choice. On the other hand, Microsoft guides users in making collections similar to video playlists, reading lists, or wishlists. It’s a more secure and personal method for managing content.

    This choice wasn’t sudden. The Verge initially brought attention to the security gap, examining how Edge manages user data. It was discovered that the browser unintentionally sent URLs to Bing’s API, which was a bug set as activated by default. This wasn’t a deliberate attempt to spy on users but rather a badly executed feature that went wrong.

    This has created much discussion in the tech community, with people who love browsers and those concerned about privacy sharing their views on social media like X (previously known as Twitter). It is evident that Microsoft takes note of feedback and shows readiness to make daring alterations for safeguarding user’s privacy.

    If you want to keep up with creators who interest you, it could be a good idea to try other ways where you have more power over your data.

    AutoArchive Settings are Missing in Outlook: 3 Ways to Add Them

    The AutoArchive feature in Outlook allows you to better manage the space in your inbox, archiving the older, less-important emails in a locally stored file. While the feature is available by default, a few find the AutoArchive settings missing in Outlook.

    For anyone wondering why the AutoArchive option is not showing in Outlook, your mail profile could be linked to an Exchange Server, administrators have enforced a policy blocking AutoArchive, the local Registry configuration conflicts with the feature, or there’s an issue with Outlook itself.

    For the first two, i.e., profile linked to Exchange Server and enforced policies, you will have to contact the administrator. However, if others in the organization have the AutoArchive feature, it’s a problem with your profile or PC. So, let’s get to the solutions!

    How do I add AutoArchive to Outlook?

    1. Modify the Registry

    1. Press Windows + R to open Run, type regedit in the text field, and hit Enter.registry
    2. Click Yes in the UAC prompt.
    3. Navigate the following path where Version is the Microsoft Office version installed on your PC:HKEY_CURRENT_USER\Software\Microsoft\Office\Version\Outlook\Preferences
    4. Right-click on the empty portion on the right, hover the cursor over New, then select DWORD (32-bit) Value, and name it DoAging.
    5. Double-click on the DoAging DWORD, enter 1 under Value data, and click OK to save the changes.change value data to fix outlook autoarchive settings missing
    6. Now, navigate to the following path where version is again the installed version of Microsoft Office: Computer\HKEY_CURRENT_USER\Software\Microsoft\Office\Version\Outlook
    7. If you find a DisablePST DWORD on the right, double-click on it, enter 0 under Value data, and click OK to save the changes.DisablePST DWORD
    8. Reboot the PC, then launch Outlook, and verify whether the AutoArchive feature is still missing.

    In case the Outlook AutoArchive button is greyed out, look for a TCID with a value of 26308, and delete it.

    2. Repair Microsoft Office

    1. Terminate any active Microsoft 365 (Microsoft Office) apps.
    2. Press Windows + R to open Run, type appwiz.cpl in the text field, and hit Enter.
    3. Select Microsoft 365 from the list of installed apps, and click on Change.repair
    4. Click Yes in the UAC prompt.
    5. Choose Online repair, then click the Repair button, and wait for the process to complete.repair to fix outlook autoarchive settings missing

    When there are no AutoArchive settings in Outlook, it could be an improper installation or file corruption to blame. In such cases, running an Online Repair will get things up and running!

    A repair will also help if Outlook Auto Archive is not working.

    3. Create a new Outlook profile

    If the previous solutions didn’t work, you can always create a new Outlook profile, given that no group policies block AutoArchive, and you won’t find Outlook 365 AutoArchive settings missing anymore!

    Sometimes, it’s easier to create a new profile and get rid of the issue rather than identifying the underlying cause and eliminating it.

    While you are fixing things with the app, discover some quick tips to make Outlook run faster! You can also change where sent items go.

    How did you add AutoArchive to Outlook? Share with our readers in the comments section.

    HP LaserJet P2035n Driver for Windows 7: Download and Install

    Getting your HP LaserJet P2035n printer up and running on a Windows 7 system can be a bit of a challenge, but don’t worry, we’ve got you covered. Here are several methods to download and install the HP LaserJet P2035n driver for Windows 7, ensuring your printer works smoothly.

    How do I get the HP LaserJet P2035n driver for Windows 7?

    1. Download and install the driver from HP’s official website

    1. Open your web browser and go to the HP Customer Support – Software and Driver Downloads page.
    2. In the search bar, type HP LaserJet P2035n and press Enter.
    3. Select the exact printer model from the search results.
    4. Choose your operating system version (Windows 7 in this case) from the dropdown menu.
    5. Download the recommended driver, usually titled something similar to HP LaserJet P2035n Printer Series Full Feature Software and Driver.
    6. Once the download is complete, navigate to your Downloads folder and find the downloaded file.
    7. Double-click the file to launch the installer and follow the on-screen instructions to complete the installation.

    Using the official HP website ensures you get the most reliable and up-to-date drivers for your printer, which helps maintain compatibility and functionality.

    2. Redirect the printer in Remote Desktop Protocol (RDP)

    1. Ensure your printer (HP LaserJet P2035n) is installed and working locally on the Windows 10 machine.
    2. Download the older version of the HP Universal PCL 5 driver for Windows 10 and the HP Universal PCL 5 driver for Windows 7 32-bit from the HP support website and install them on the Windows 10 and the Windows 7 systems.
    3. Set the local HP LaserJet P2035n printer to use the Universal PCL 5 driver on the Windows 10 machine.
    4. Open the Remote Desktop Connection application on the Windows 10 machine.
    5. Click the Show Options button.
    6. Navigate to the Local Resources tab.
    7. Under Local devices and resources, check the Printers checkbox.
    8. Connect to the Windows 7 machine using RDP.
    9. The local printer should now be redirected and available on the Windows 7 machine with the compatible driver.

    Redirecting the printer during an RDP session can help you print from a remote desktop environment, making it easier to manage printing tasks without being physically present at the remote location.

    3. Manually install the printer

    1. On the Windows 7 machine, open the Control Panel.
    2. Navigate to Devices and Printers and click on Add a Printer.
    3. Select Add a local printer.
    4. Choose Use an existing port and select the appropriate port (e.g., USB001).
    5. Click on Next to proceed.
    6. Select Windows Update to update the list of printer drivers.
    7. Once the update completes, search for HP in the Manufacturer list.
    8. Find and select HP LaserJet P2035n from the list of available printers.
    9. Follow the on-screen instructions to complete the installation.

    Manually installing the class driver ensures compatibility with Windows 7, enabling the printer to function correctly and resolve any driver-related issues.

    4. Contact HP Support

    1. Visit the HP Customer Support page.
    2. Navigate to the Contact Support section.
    3. Choose the Printers category.
    4. Select HP LaserJet P2035n from the list of printer models.
    5. Follow the on-screen prompts to initiate a support request, either via chat, email, or phone.

    Contacting HP Support provides professional assistance in resolving driver issues. The support team can guide you through troubleshooting steps and ensure that your printer is properly set up and functioning.

    By following these solutions, you can effectively install and configure the HP LaserJet P2035n driver on a Windows 7 system, ensuring smooth and reliable printing tasks.

    We also have a complete guide on how to download and install HP printer drivers for Windows 11.

    We hope that now, your HP P2035n printer is working without problems on Windows 7. If you still have issues, hit the comments below and write all about it.

    MSConfig Keeps Reverting to Selective Startup: 3 Ways to Fix

    Many users are worried because msconfig keeps reverting to selective startup, and while this usually isn’t a reason for concern, let’s see how we can fix this issue.

    Why can’t I choose a normal startup in msconfig?

    This usually occurs if you have one or more services disabled in msconfig. Missing drivers can sometimes cause this problem as well.

    What can I do if msconfig keeps reverting to selective startup?

    Before we try anything else, ensure that all necessary drivers are installed. A few users reported that a missing Bluetooth driver caused this issue on their PC.

    1. Try enabling all disabled services

    1. Press Windows key + R and type msconfig. Click OK.
      Msconfig - run window windows 11
    2. Next, go to the Services tab and click on the Enable all button.
      services tab enable all button
    3. Click on Apply and OK.
    4. Try to enable Normal startup again.

    If you disable startup services, your PC will automatically switch to Selective startup, so the best way to fix it is to enable all disabled services.

    2. Disable all advanced boot options

    1. Open the msconfig again.
    2. Go to the Boot tab and then click on Advanced options.
      boot advanced options msconfig
    3. Enable Debug and then uncheck the Debug port. Next, uncheck Debug and make sure all other options are disabled.
      debug boot advanced options debug port disabled
    4. Save changes.

    3. Modify the registry

    1. Press the Windows key + R and type regedit. Click OK.
      regedit run window windows 11
    2. Navigate to the following path: HKEY_LOCAL_MACHINE\SOFTWARE\Microsoft\Shared Tools\MSConfig\state
      msconfig state registry editor
    3. Expand the state key in the left pane. If it has any subkeys, right-click each of them and choose Delete. Do this until all subkeys from state key are removed.
      delete key registry
    4. Repeat the same steps for all subkeys in the following paths:
      HKEY_LOCAL_MACHINE\SOFTWARE\Microsoft\Shared Tools\MSConfig\services
      HKEY_LOCAL_MACHINE\SOFTWARE\Microsoft\Shared Tools\MSConfig\startupfolder
      HKEY_LOCAL_MACHINE\SOFTWARE\Microsoft\Shared Tools\MSConfig\startupreg

      Keep in mind that modifying the registry comes with certain risks, so create a backup in case anything goes wrong.

      How do I turn off selective startup?

      To do this, just open msconfig and select Normal startup from the System Configuration window. Do keep in mind that all services need to be enabled for this to work.

      Before you go, you might want to learn how to properly open msconfig in Windows 11, or what to do if the Apply button is grayed out in msconfig.

      Did you find a different way to fix msconfig that keeps reverting to selective startup? If so, share it with us in the comments below.

      Easy Guide on How to Send Emails to a Folder in Outlook

      Outlook is a widely used email client and if you’re a user, you need better organization for streamlined communication.

      You don’t want to be missing any important emails or forget to respond or follow up on others so creating folders will help you get this done.

      How do I move emails to a folder in Outlook?

      1. Create folders in Outlook

      1.1 Outlook app

      1. Press the Windows key, type Outlook, and click Open.Outlook Start menu open
      2. Go to the Folder tab, and click New Folder.OUTLOOK_NEw folder
      3. Once the New Folder window appears, name it Unified Inbox and click OK.OUTLOOK_name the folder and click OK

      1.2 Outlook for web

      1. Navigate to your browser and log in to Outlook for web.
      2. Expand your folder list and select Create new folder at the bottom, or right-click on your Inbox folder and select Create new folder.
      3. Type out your preferred name for your new folder and hit Enter.

      2. Move emails to folders

      2.1 Manually move emails

      1. Launch your Outlook mail, select an email and click on Move to then, search for the folder you just created.
      2. You can also drag the email to your select folder.

      2.2 Automatically move emails to folders

      1. Launch your Outlook mail, select an email, right-click on it and select Create rule.
      2. Click on Message and select Rules.
      3. Click on the From (sender) check box in the Create rule dialog box.
      4. Select the newly created folder and all messages from this particular sender will automatically go to this folder.
      5. If you’d like to create new rules, clear the old ones by pressing Windows + R to begin the Run prompt.
      6. Type in outlook.exe /cleanrules in the prompt and press Enter.

      If you’d like to set up more defined rules, you can click on more options. For instance, if you want emails with attachments to go to a particular folder, you can check out our comprehensive article on how to go about it.

      How do I delete Outlook folders?

      1. Close the Microsoft Outlook client if it is opened.
      2. Go to Outlook.com via a browser and log into your account.
      3. Right-click the folder you want to delete.
      4. Select Delete folder.
      5. When the Delete folder dialogue box appears, press OK.
      6. Re-open the Microsoft Outlook client and check whether the folder is truly deleted or not.

      Once you’re done with creating and moving folders, with time, you may need to delete some of them. If the above method doesn’t work, we have a detailed article on how to force delete Outlook folders.

      Best practices for maintaining organized folders

      • Clean up your inbox – Create a schedule to clean up acted-upon emails. You can archive or delete them entirely to free up space and avoid losing important emails in a huge collection.
      • Unsubscribe from promotions – Unless you require promotional messages, unsubscribe from unnecessary emails as they tend to clog up your inbox.
      • Check your spam folder – Review your spam folder regularly and ensure important emails don’t end up here. If you’re not sure what folder an email is in, you can easily check using our guide.
      • Set alerts – If one folder contains high-priority emails, you can set alerts so that you get notified instantly whenever there’s a new email. You can also use the search folders in Outlook feature to look for a particular email.
      • Save folder to desktop – You can save some Outlook folders to your desktop especially if you want to work offline.

      Also, avoid creating too many folders. This can make your Outlook email look too busy and disorganized. Instead, try creating subfolders to keep things neat.

      In some instances, newly created folders in Outlook may fail to show up or folders disappear unexpectedly. You can also change where sent items go.

      That’s all we had for sending your Outlook emails to specific folders for better email organization. Have you tried folder organization? How easy was it and did it make you more productive? Let us know in the comment section below.

      Outlook will add the CTRL + Y shortcut for better folder management in the platform

      Outlook is set to introduce a new shortcut that will no doubt become one of the most popular on the platform.

      According to the latest entry in the Microsoft 365 Roadmap, the platform will use the CTRL + Y to allow users to quickly navigate to a folder when they’re focused on the folder pane.

      Users will have to press CTRL + Y + the first letter of the folder name they want to go directly to that folder.

      When focused on the folder pane, users can now press CTRL + Y to quickly navigate to a folder. Simply press the first letter of the folder name to move focus directly to that folder.

      Microsoft

      This new shortcut will be implemented in August 2024 in the new Outlook for Windows and the web, and it’s not the first. A few months ago, the Redmond-based tech giant introduced the platform’s famous CTRL + C and CTRL + V shortcuts.

      Will you use this one?

      How to Install the 7TV Extension/ Add-on in Firefox

      Installing the 7TV extension on Firefox can enhance your streaming experience by providing additional emotes and features. If you’re facing difficulties, this guide will walk you through several methods to get the extension up and running smoothly.

      How do I install the 7TV extension on Firefox?

      1. Install the 7TV extension from the Official Website

      1. Open Firefox and go to the 7TV website.
      2. Click on the Stable Release installer.
      3. Follow the prompts to install the extension.
      4. Now, click on the 7TV extension icon in Firefox and click on Onboarding.
      5. You will be redirected to a new tab in Firefox where you will go through the customizations for 7TV.

      If the page loads infinitely, try refreshing the page or reopening the website in a new tab. This process helps ensure the extension installs correctly, offering you the complete 7TV experience.

      2. Manually install the 7TV extension

      1. Open Firefox and go to the 7TV GitHub repository.
      2. Scroll down to the section that contains the latest release files.
      3. Click on the file named 7tv-webextension-ext-signed.xpi to download it to your computer.
      4. Click on the three horizontal lines at the top-right corner of Firefox to open the menu.
      5. Select Add-ons and themes.
      6. Click on the Gear Icon next to Manage Your Extensions and select Install Add-on From File…
      7. Browse to the location where you saved the 7tv-webextension-ext-signed.xpi file, select it, and click Open.
      8. Follow the prompts to complete the installation.

      Manually installing the extension ensures you get the latest version even if the stable version on the website has issues.

      3. Enable the Nightly Updates for the 7TV extension

      1. Open Firefox and go to the GitHub repository.
      2. Navigate to the releases section and locate the latest Nightly build.
      3. Click on the file that corresponds to the latest nightly build and download the 7tv-webextension-ext-signed.xpi file.
      4. Go to Firefox Menu > Add-ons and themes > Gear Icon > Install Add-on From File…
      5. Locate and open the 7tv-webextension-ext-signed.xpi file.
      6. Follow the installation prompts.

      Nightly updates contain the most recent fixes and features, which might resolve issues with the stable release.

      How to troubleshoot common issues with 7TV extension

      1. Refresh the page: After attempting to install the 7TV extension, refresh the page if it does not seem to work.
      2. Clear the browser cache:
        • Open Firefox Menu > Settings > Privacy & Security.
        • Scroll down to Cookies and Site Data and click Clear Data.
      3. Disable conflicting extensions: Some extensions might conflict with 7TV. Go to Firefox Menu > Add-ons and themes, and try disabling other extensions temporarily to see if 7TV works.
      4. Update Firefox: Ensure your Firefox browser is up to date by going to Firefox Menu > Help > About Firefox. If there’s an update available, install it.

      These troubleshooting steps address common roadblocks users face when installing browser extensions.

      Some users find better compatibility with Chromium-based browsers for extensions like 7TV, such as Chrome and Edge, ensuring a smooth experience without switching back to Firefox.

      By following these steps, you should be able to install the 7TV extension on Firefox without any issues. To avoid future problems, keep your browser updated and periodically check for extension updates.

      If your Firefox browser is not responding, click the highlighted link for a fix guide. Also, you might be interested in how to fix memory leaks in Firefox.

      We hope that you now can enjoy the 7TV extension in Firefox. If you have any problems with the installation, let us know in the comments below.

      Microsoft Planner will get a new Recommended Plans view for task management

      This month, the Microsoft Planner platform will add a new Recommended Plans view, which will help users visualize their tasks.

      According to the latest entry in the Microsoft 365 Roadmap, the new Recommended Plans view will help users discover plans with tasks assigned to them that they might not have seen yet,

      The Redmond-based tech giant says this new view will enhance task management efficiency and provide seamless workload prioritization.

      We are introducing a new Recommended view in Planner in Teams to help you discover plans with tasks assigned to you that you haven’t viewed yet, enhancing task management efficiency and providing seamless prioritization of your workload.

      Microsoft

      The planner was recently enhanced with Copilot, months after it was introduced in Microsoft 365. Copilot in Planner plans, manages, and executes tasks for users, streamlining their workload further.

      Microsoft will most likely follow up with an official announcement, where the company will showcase the new Recommended Plans view,

      What do you think about this?