FIX: Microphone not working in Windows 10

You’re probably using Skype on your computer almost on a daily basis, or at least one other application that requires a microphone.

Many users are complaining that their microphone isn’t working on Windows 10, so if you’re one of those unfortunate users, we might have a solution for you.

What can I do if microphone stops working in Windows 10, 7?

Table of contents:

  1. Check if your microphone isn’t disabled
  2. Check if your microphone isn’t muted
  3. Uninstall and reinstall the default driver
  4. Boost the sensitivity of your microphone
  5. Run Hardware troubleshooter
  6. Change the default format of your microphone
  7. Run the SFC scan

Fix: Microphone not recording in Windows 10, 8.1, 7

1. Check if your microphone isn’t disabled

Sometimes these issues occur if your microphone isn’t set as default or if it’s disabled, and here’s a way how can you quickly enable your microphone and set it as default.

  1. Make sure your microphone is connected to your computer.
  2. Right-click the volume icon in the bottom right of the screen and select Recording devices.
  3. Click on empty space in the window and then click on Show disconnected devices and Show disabled devices.
  4. To check if your microphone is enabled select Microphone and click on Properties, and you’ll be able to see if it’s enabled or not. If it’s not enabled, enable it.
  5. From there you can also check if your microphone is set as a default audio input device.

2. Check if your microphone isn’t muted

Right-click on the Sound icon in the bottom right of your screen and choose Volume Mixer from the menu.
When Volume Mixer opens, find the Microphone slider and raise it up to 100%. Also, make sure that nothing is muted.
Close Volume Mixer and click on the Sound icon again and choose Recording devices and test your microphone.

If there’s no activity in the volume level indicator, you might need to boost the sensitivity of your microphone.

3. Uninstall and reinstall the default driver

  1. Open the Device Manager. You can do this by clicking Start and typing devmgmt.msc in the search field.
  2. In Device manager find Sound, video and game controllers, and double-click the entry of your sound card.
  3. Click the Driver tab and then click Uninstall.
  4. Restart your computer and your Windows should load with default drivers.
  5. If the problem persists, download the latest drivers for your sound card/motherboard.

3.1 Update drivers automatically

If you don’t want to go through the hassle of updating your microphone drivers manually, there is a tool that will do the work for you automatically.

Utilizing advanced software will quick the job in total safety and will prevent any PC damage caused by updating the wrong version of the driver.

The software will check your PC’s hardware and peripherals for possible driver upgrades with only a few clicks. The utility will start operating automatically after installation, so you won’t have to look for a shortcut or the source folder.

In just a few seconds, Fortect Driver Updater will scan your system for any faults or missing drivers and generate a report. Use one to save yourself some valuable time.

⇒ Get Fortect Driver Updater

4. Boost the sensitivity of your microphone

  1. Right-click the Sound icon in the bottom right of your screen and choose Recording.
  2. Double click on the Microphone.
  3. Microphone Properties window should open, and you’ll need to go to the Levels tab and move the microphone slider to 100%. Also, check if your microphone isn’t muted while you’re there.
  4. Slowly move Microphone Boost slider to the right and test the microphone by gently tapping on it.
  5. Click OK and test your microphone.
  6. If your microphone still isn’t working open Microphone Properties and click on the Enhancements tab.
  7. Check the Disable all sound effect.
  8. Press Apply and then OK and test your microphone again.

5. Run Hardware troubleshooter

If you’re still having problems with your microphone, let’s try the hardware troubleshooter that’s built-in inside Windows 10. Here’s how to run it:

  1. Go to Settings.
  2. Head over to Updates & Security > Troubleshoot. 
  3. Select Hardware & Devices, and go to Run the Troubleshooter. Troubleshooting hardware
  4. Follow further on-screen instructions and let the process finish.
  5. Restart your computer.

6. Change the default format of your microphone

  1. To do this right-click the Sound icon in the bottom right of your screen.
  2. Then select Recording.
  3. Double click the Microphone to open Microphone Properties.
  4. In Microphone Properties window go to Advanced.
  5. Under the Default Format choose any of the 16-bit options.
  6. Click Apply, then OK.

7. Run the SFC scan

And finally, if none of the previous solutions resolved the microphone issue, let’s put your computer through a (not so) quick SFC scan. This tool will scan your computer for potential problems and interferences, and solve them if possible.

Here’s how to run the SFC scan:

  1. Go to Search, type cmd, and open the Command Prompt as Administrator.
  2. Type in the following command, and press Enter: sfc/scannow
  3. Wait for the process to finish.
  4. Restart your computer.

If your microphone isn’t working on Windows 10 we hope that at least one of these solutions was helpful to you. As you can see, most of the issues can be fixed by playing with Recording settings.

This issue is rather similar to the one covered in our microphone is not showing up in Device Manager guide, so don’t hesitate to check it out.

If the problem is caused by the sound driver then the best solution is to use the default Windows driver or to wait for the manufacturer to release a specific Windows 10 driver for your audio device.

A+ VCE not working: Error loading file [Fixed]

Many users reported not being able to open files in A+ VCE.

The error message Error opening file, if the problem persists, please report to … with the copy of this file or a pointer to its location pops up when trying to load a file.

In the following guide, we’ll take you through a series of solutions meant to fix this annoying issue.

How to fix A+ VCE not working error loading file

  1. Run the Windows App troubleshooter
  2. Do a Windows Store reset
  3. Make changes through Powershell
  4. Create another user
  5. Reinstall the program

1. Run the Windows App troubleshooter

The Windows App troubleshooter‘s role is to detect Windows Store apps that don’t work and automatically find fixes for these errors.

Running the troubleshooter should help you to fix this annoying A+ VCE error. If you’re running the latest OS version, you can quickly launch the troubleshooter from the Settings page.

run windows store app troubleshooter

To launch the troubleshooter on older Windows 10 versions, follow the steps listed below:

  • Press the Start button and open the Control Panel
  • Click System and Security
  • Under the Security and Maintenance select Troubleshoot common computer problems
  • Click Hardware and Sound > Windows Start Apps
  • Select Advanced > check if Apply repair automatically is selected, if not, have it selected
  • Click Next and wait for the troubleshooter to detect issues
  • After the process is done > click Close
  • Restart the PC and check if the issue was solved.

2. Run Windows Store reset

Try doing a Windows Store reset using the command prompt. To do so, follow these steps:

  • Press the Start button
  • Type in the search box command prompt > right click on the search result and select Run as administrator
  • Type WSreset.exe in the command prompt and press Enter on your keyboard
  • Reboot your computer

3. Make the changes through Powershell

Some users fixed the issue by inputting a specific command in Powershell, granting access to A+ VCE.

Attempting this fix requires you to follow these steps:

  • Press the Start button
  • Type in the search box powershell > right click on the search result and select Run as administrator
  • Type in the command presented below and press enter:

Get-AppxPackage -allusers Microsoft.WindowsStore | Foreach {Add-AppxPackage -DisableDevelopmentMode -Register “$($_.InstallLocation)AppXManifest.xml”}

4. Create another user

Try creating another Windows user and open A+ VCE from the newly created user.

Follow these steps to create a second user:

  • Press the Start button > open Settings
  • Go to Accounts > click Family & other people
  • Select I don’t have this person’s sign-in information > choose Add a user without a Microsoft account
  • Enter username, password and other required information > click Next
  • After creating the new user, you need to give it administrator privilege, as follows:
  • Press the Start button > open Settings
  • Go to Accounts > click Family & other users
  • Select the new account name > click Change account type
  • Go under Account type > choose Administrator and click OK
  • Restart your computer and sign in with the newly created user

5. Reinstall the program

If nothing goes your way, your last resort would be uninstalling the program and reinstalling it back.

Uninstall the program from the Control Panel as with any other program.

To perform this task follow the next steps:

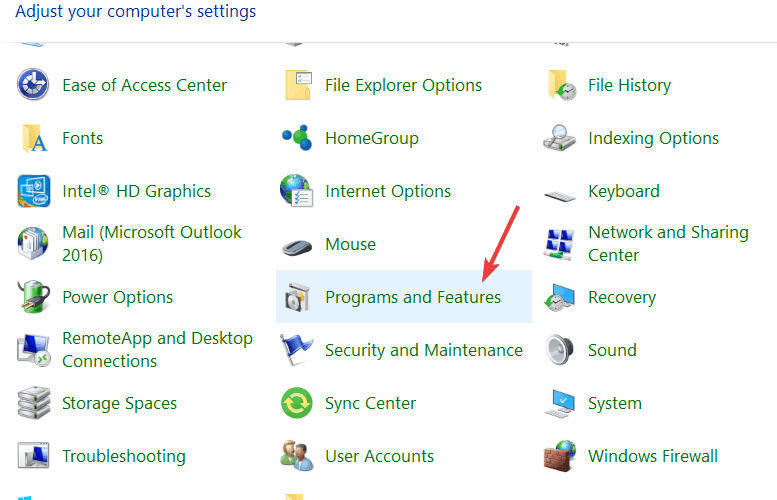
  • Press the Start button > open the Control Panel
  • Go to Programs and Features
  • Find A+ VCE in the list, select it > press Uninstall

Reinstall the program using Windows Store and see if it works.

Sometimes, the uninstaller is not doing a really good job of removing all files and reverting any other changes that might have happened during the installation process.

You can make use of a cleanup software capable to uninstall unnecessary files from your computer, erasing any program completely.

CCleaner is the proper solution for this task because it will uninstall any applications and clean temporary files or cookies from your system. Plus, it doesn’t leave residual files from the uninstalled software.

Hence, the tool can help you repair A+ VCE not working error efficiently and open your files without problems.

⇒ Get CCleaner

These are the solutions that we found work best. We hope that they helped you out. If you know other working solutions, please share them in the comment section below.

How to use Onedrive’s direct share option

OneDrive is a proprietary cloud service developed by Microsoft for the Microsoft Office Suite, however, you don’t need to pay in order to use it.

Admittedly, a subscription would bring you more advantages, but the bottom line is that it is one of the few Office products that you can use, to some extent, for free.

One of the reasons OneDrive is so popular is because it is constantly updated with new and improved features.

One good example of that is an update that allows OneDrive users to directly share a document with other contacts.

Before this particular update, users would have to first save the file to OneDrive and then go to the share dialogue to share the file with anybody else.

The new feature was first made available in Fast ring of the Office Insider program, running version 2006 (Build 12827.20000) or later

The guide below will show you exactly what you need to do in order to efficiently use this new direct share method.


How do I use OneDrive’s new direct share option?

Note: This can be done both from the desktop client and from the web client

  1. Open OneDrive
  2. Save whatever progress you have made with a document or folder
  3. Give the file a name
  4. Select a Save location
  5. In the Choose Collaborators filed, input the names of the contacts you want to share your files with
  6. As you type, OneDrive will suggest contacts from the list of those you have synced with OneDrive
  7. Add as many contacts as you want
  8. Press Save
    • By doing this, you will both save the document in its current state, and also send it to the selected contacts.

Because of this, the direct share method should only be used if you are currently done with the document, and not if it is still a draft in the works.

By following these steps, you should be able to use OneDrive‘s new and improved direct share option to improve the level of collaboration between you and your colleagues.

If you found this tutorial to be of use, leave us your feedback through a message in the comments section below, and we will continue to bring you more interesting guides.


[wl_navigator]

Column Contains Blank Values [Power BI Error Fixed]

Power BI Service and the Desktop client allows the users to have a dashboard scheduled to refresh daily using the table.

If you happen to have any blank rows in the table, you may see Column contains blank values and this is not allowed many-to-one relationship.

Several Power BI users have reported a similar error in the Power BI Community forum.

I have a dashboard scheduled to refresh daily, but each time I get an error that says:
Column in Table contains blank values and this is not allowed for columns on the one side of many-to-one relatioship for coulmns that are used as the primary key of a table.
I went to this table and edited the query to Remove Blank Rows, but I still get the error every time I try to refresh the data.

Follow the steps listed in this article to troubleshoot this error in Power BI service and desktop client.

How can I fix the power BI error blank values?

1. Delete Invalid Relationship Between Data Sets

  1. At times Power BI may automatically create relationships between the queries that are being used to drive the data in the reports. Here is how to fix this.
  2. Launch Power BI Service.
  3. Go into Manage Relationships.
    power bi error blank values
  4. Make sure that there is a relationship listed.
  5. Now check all the Form and To relationship that is available in the Active section.
  6. You need to delete any invalid From and To relationships between separate data sets.
  7. If you have two very different queries pulling data from separate source identical columns names then Power BI will generate a relationship between them which would be invalid. The error should resolve after you have deleted the invalid relationship.

2. Disable Include Relationship Columns Option

power bi error blank values
  1. In the window where you enter the server name, click on Advanced Options.
  2. Now uncheck Include Relationships columns option.
  3. Now check if the error occurs again as it should stop Power BI from identifying related columns resulting in the error.

3. Other Solutions to Try

power bi error blank values
  1. Try to clean the trailing and leading spaces in your data in PQ Transformation.
  2. On Power BI Desktop, go to File > Options. Click on Settings and Options. Now uncheck all the options under Relationships.
  3. Try to edit the load query and replace the blanks with some useful info such as document creation date or time etc.
  4. Go to the table that is referenced in the error message and try to sort your column in ascending/descending order.
  5. Remove and recreate the query. As a last resort, you can try to create and build a new query after deleting the older one.

Fix Intel Optane memory pinning error on Windows 10/11

Intel Optane memory is a smart technology that keeps track of your frequently used apps, documents, pictures, and videos and remembers them after shutdown.

This way, it increases the PC responsiveness and significantly cuts down your waiting time in Windows 10. But sometimes, this technology can trigger certain errors that can be quite annoying.

What is Intel Optane memory pinning error?

That’s the case with the Intel Optane memory pinning error, as one user describes it:

Hi, I recently began getting this error at seemingly random times (at least I haven’t been able to figure out a definite trigger yet).

And here’s the OP’s screenshot:

Intel-Optane-memory-error
It seems that this is connected to Intel Rapid Storage Technology and the error can be triggered even if you don’t have any Optane memory installed.

Another user stated that the error surfaced up with the latest Windows 10 updates:

My Dell started throwing this error notification after the recent Windows 10 update. When I checked Dell updates I saw there are 2 related Intel drivers available for download. Hoping that will fix it.

What causes Intel Optane memory pinning error?

Intel Optane maximizes your computer’s speed by caching and indexing all your most used applications, pictures, music, and other files. This is particularly useful when you’re using an old slow mechanical drive.

Intel Optane gives off the illusion that your hard-drive is reading faster.

The Intel Optane Pinning Service Extension not having access to the iaStorAfsServiceApi.dll is what causes the memory pinning error.

DLL stands for Dynamic Link Library. It contains important information, functions, and code to help processes or programs run smoothly.

After a major Windows update, Windows tries to reinstall all your system devices with drivers that match them the best. As we all know, sometimes this process can get a little wonky.

There may be a version mismatch or a compatibility issue.

As a result, Windows throws an error and leaves your device half installed.

This means that files and libraries such as the iaStorAfsServiceApi.dll were not copied across correctly when Windows was trying to reinstall the device drivers for the Intel Optane.

How do I fix Intel Optane memory pinning errors

Now that we understand what it is, we can take steps to fix it. The most efficient way to do this is to find the missing DLL and make sure that Optane Pinning Service has access to it.

Unfortunately, while this may be the most efficient way, it is not the easiest. So here, we’ve included three different solutions you can use to solve this error.

1. Repair the Intel Optane Explorer Extension

  1. Run Programs and Features
    The easiest way to do this is to open the run dialog (win + R), type Appwiz.cpl into the open text field, then click on the OK button.
  2. From the list of programs, look for one labeled Intel Optane Pinning Explorer Extensions.
  3. Once you’ve found it, right-click on it, then select Repair from the short context menu.
  4. Once the repair process is complete, restart your computer.

2. Uninstall the Driver

The first solution should have fixed your problem but if it did not, then try this:

  1. Run the Device Management console (Device Manager).
    Once again, the easiest way to do this is by opening a run dialog, typing devmgmt.msc into the text field and then clicking on the OK button.
  2. Scroll through the list of devices, until you find the field labeled Software components and expand it.
  3. Right-click on the Intel Pinning Shell Extensions field and then select Uninstall Device from the context menu.
  4. A dialog should appear. On this dialog, ensure that the Delete the driver software for this device checkbox is ticked and then click on the Uninstall button.
  5. Once the process is complete, restart your computer.

3. Uninstall the Intel Optane Explorer Extension

If all else fails, uninstall the Intel Optane Explorer Extension. Follow solution 1, until you reach step three. Instead of clicking on the ‘Repair’ option, select the Uninstall option. You may be prompted to restart your computer – don’t.

Instead, close the dialog and go back to the list of programs. Look through the list to see if you can find any other software associated with Intel Optane. Uninstall anything you can find and then restart your computer.

It’s important to note that this might disable your computer’s Intel Optane system acceleration. If you want to re-enable it, you can download the drivers and software from Dell or Intel (depending on your PC’s manufacturer).

With the help of the above guide, you should be able to solve the Intel Optane Memory Pinning Error on Windows 10.

If you want to prevent this error from occurring in the future, you can disable the Intel Optane module from your computer’s BIOS settings before updating Windows next time.

Either way, we hope you’ve found this article to be helpful. Please do not hesitate to share your experience or point out a blind spot on our side in the comment section below. As always, thank you for reading.

  • Does my computer have Intel Optane memory?
Type Device Manager in Windows search, then click on it in the results. Now locate and expand Disk drives. If it shows Intel Optane…, the computer has Intel Optane memory.
  • Does Optane speed up SSD?
Optane speeds up systems by keeping their frequently accessed files. However, you will only see a notable difference for HDDs as SSDs are already very fast. Are you looking for an SSD? Here’s a list with the best 1TB and 2TB SSD.

[wl_navigator]

Hardware-backed PC security to thwart Thunderspy attacks

The concept of hardware-backed PC security is gaining momentum day by day. It is an outcome of industry stakeholders rethinking their cybersecurity strategies.

That is why, in the war against cyber attacks, Microsoft is pushing for a multi-faceted approach. The company argues that traditional anti-malware software or firewall defenses are inadequate today.

Therefore, it is advocating for the use of multiple strategies built around hardware-backed security or secured-core PCs. This approach is more effective in the prevention of Thunderspy or similar attacks.

What is a Thunderspy attack?

Thunderspy is a type of hacking that exploits direct memory access (DMA). A recent report by scientists at the Eindhoven University of Technology shows how it works.

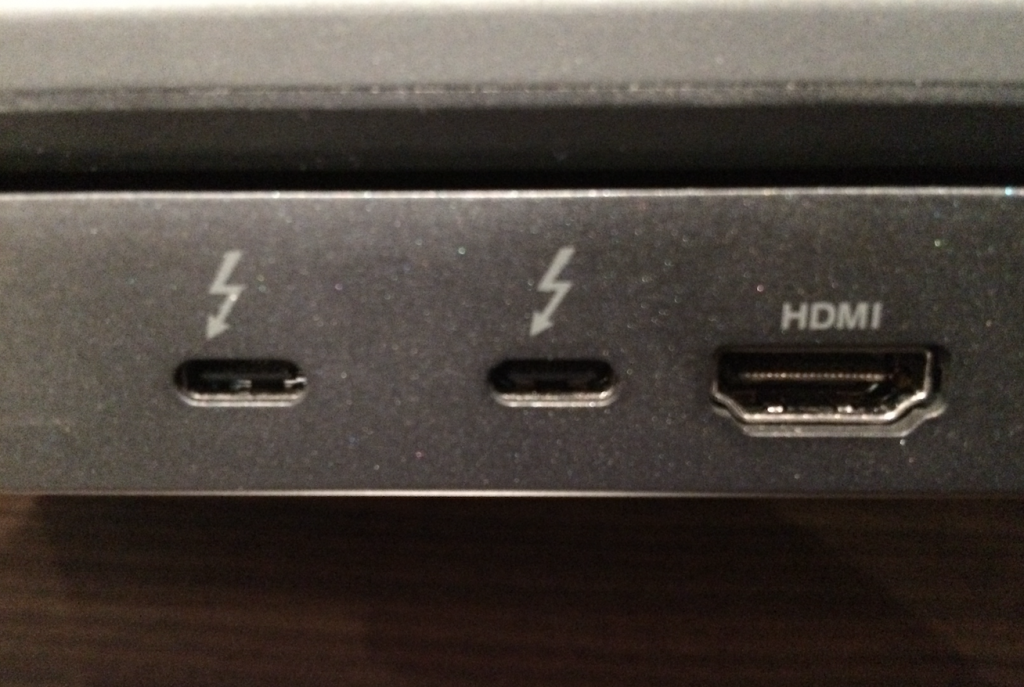
The end-game for Thunderspy is data theft or other types of illegal code execution at the system kernel level. To achieve that, the attacker has to breach kernel security by exploiting Thunderbolt weaknesses.

First, the hacker connects a malware-infested device to a PC via the Thunderbolt hardware interface.

Then, the Thunderspy hacking tool disables Thunderbolt firmware’s security features.

In a successful attack, the malware bypasses Windows system security measures like sign-in. It then becomes possible to steal, spy, or manipulate data without restrictions.

The threat is so scary that an attacker does not need to know your password to breach your PC.

It appears that Thunderspy is not a remote code execution (RCE) attack. Thus, it requires the malicious actor to have physical access to the target device.

Secured-core PCs

Microsoft is talking up secured-core  tech as the backbone of hardware-backed PC security.

These personal computers have built-in hardware and firmware that protect them from Thunderspy or similar DMA infringements.

For starters, hardware-backed PCs support Kernal DMA protection. This security layer makes it difficult for Thunderspy malware to read or write to system memory.

The devices also leverage the Windows Defender System Guard and hypervisor-protected code integrity (HVCI).

You can always leave your questions or suggestions in the comments section below.

[wl_navigator]

Windows 10 build 19628 introduces DoH encryption

Windows 10 insider preview build 19628 now supports the DNS over HTTPS (DoH) protocol. This feature is not available to all users yet as Microsoft only released it to insiders in the Fast ring.

The change is part of the general improvements and a single fix that this update introduces.

Initial support for DoH

DoH is somewhat a controversial protocol. It is an internet standard whose purpose is to address specific security and privacy vulnerabilities affecting traffic over the web.

Its critics argue that it is not the best approach to the preservation of user privacy. They even offer alternatives like DNS over TLS.

Nonetheless, Microsoft is one of the tech firms that consider DoH useful in the encryption of DNS queries. So, it is offering the tool to enhance the privacy of web traffic for users of Windows 10.

DoH is a new feature in Windows 10, and no insider has tested it before. Still, you have to first activate it because it is not available by default.

We’re adding initial support for DNS over HTTPS, so that you can opt into using encryption when Windows makes DNS queries.

It appears Microsoft recognizes the fact that not everyone might be ready to start using a new feature that has data security and privacy implications.

It is giving insiders the choice of sitting out on the beta testing phase of the DoH protocol in Windows 10.

Other updates in Windows 10 preview build 19628

Microsoft said it fixed a problem that prevented some PCs from updating.

We’ve fixed an issue causing some devices fail to update with error code 0xc0000409.

The 0xc0000409 bug rears its ugly head from time to time when insiders are trying to upgrade their PCs to a more recent build. The issue has some fixes you may want to try just in case it persists, though.

Don’t hesitate to share your feedback or any questions in the comments section below.

[wl_navigator]


New Dynabook business laptops sport 10-gen Intel vPro chips

It will not be long before you can buy one of the Dynabook business laptops with Intel vPro microchips. The company announced that these devices will be available before the end of the second quarter this year.

This announcement coincided with the introduction of the new 10-gen Core vPro processors from Intel.

Laptops built for business

The use of vPro processors on Dynabook Portégé X Series and Tecra A Series should help deliver some powerful devices for business applications. Besides, the laptops come with superior WiFi connectivity and stronger security.

Dynabook appears to be targeting enterprises that prioritize things like PC performance. Addressing chip security makes sense too considering that processors are always a target for hacking.

Portégé X30L-G

The Portégé series has a deep history, but one thing about it that has not changed is its portability. It has always been superlight. The X30L-G carries on the tradition, with Dynabook terming it as the lightest 13.3-inch laptop in the whole world.

The device weighs 1.92 pounds, and it starts at $1,373.99.

Other Portégé laptops with a 10th gen Intel Core chip are X30-G, X40-G, and X50-G.

Tecra A30-G

The Tecra A series includes the A30-G laptop, which starts at $444.99. Although it has the same display size as the X30L-G, it is heavier, weighing 2.65 pounds.

It is still the thinnest and lightest in the Tecra A family.

One of its top features is Wi-Fi 6, which meets the 802.11ax next-gen standard for connectivity. It also includes USB-C, another faster data transfer standard.

Tecra A40-G is the other notebook in this series that has an Intel vPro chip. It starts at $399.99.

So, if you are looking for a low-end laptop, the Tecra series is an ideal choice.

Intel is building its next-gen processors to support business functions that demand high computing power. Robust and faster communication and cybersecurity are also a vital goal.

If these processors deliver on their promise, most PC makers will be racing to put them on their devices.

[wl_navigator]

Fix: Error 451 Unavailable Due to Legal Reasons

451 unavailable due to legal reasons is an error status code you receive when attempting to visit HTTP pages that your government blocked.

There are many reasons why this could happen, depending on the laws of your country, website content, and policy violation: copyright, privacy, gambling, drugs, religion, politics, blasphemy, or something else.

If you get the 451 unavailable due to legal reasons error when trying to access specific web pages, you can fix it using the solutions described below.

How can I fix error 451 unavailable due to legal reasons?

1. Use a VPN

  1. Download Private Internet Access
  2. Install PIA on your computer and launch it
  3. Click VPN Server and select a country from the listThe main window of Private Internet Access
  4. Press the large power button to connect to the VPN serverPIA is connected to Netherlands
  5. Try visiting the blocked page in your web browser

The best way to fix HTTP error 451 unavailable for legal reasons is by using a VPN service to defeat censorship. And we can’t think of a better app than Private Internet Access (PIA).

Developed by Kape Technologies, PIA can help you unblock websites and freely navigate the web without worrying about censored pages. It has over 3,200 servers in 45 countries and exclusive DNS servers.

In case you especially need uncensored worldwide content, then with this VPN, you can access content from around the globe. Plus, there are no bandwidth limits, so you can stream at high speed.

Private Internet Access doesn’t have a free trial, but you receive a 30-day money-back guarantee.

Private Internet Access

Solve connection errors and unlock geo-blocked pages with this powerful VPN solution.
Check Price Visit Website

2. Use HTTPS instead of HTTP

Since the error 451 unavailable for legal reasons occurs when using the HTTP protocol, try using HTTPS instead. If the page has an SSL certificate, your request will force the HTTPS page instead of loading the HTTP version.

HTTPS Everywhere forces your browser to load only HTTPS pages

If this solution works for you, consider installing HTTPS Everywhere, a browser extension that forces pages to load HTTPS if they exist.

3. Change your DNS servers

  1. Go to Network Connections, select your network interface, and click Properties
  2. Select Internet Protocol Version 4 (TCP/IPv4) and press PropertiesChange the properties of your IPv4 network
  3. Select Use the DNS server addressesChange your DNS server addresses
  4. At Preferred DNS server, write 8.8.8.8 (Google Public DNS)
  5. At Alternate DNS server, write 8.8.4.4 (Google Public DNS)
  6. Press OK and try to access the blocked page

Instead of Google Public DNS, you can also try OpenDNS (208.67.222.222 preferred, 208.67.220.220 alternate) and Cloudflare (1.1.1.1 preferred, 1.0.0.1 alternate). Those are free and public DNS servers.

In some cases, governments can block DNS requests instead of specific IP addresses. To test this theory, you can change your DNS servers and try to get past error 451 unavailable due to legal reasons.

Have DNS issues? Check out this article to see how to quickly fix them.

4. Use a proxy server

A proxy server redirects your browser traffic to another IP address. So you can use it to hide your true IP address and switch to another one not blocked by your government (in another country).

It’s worth a shot if you want to fix HTTP error 451 unavailable for legal reasons.

Use a free proxy server to bypass error 451 unavailable due to legal reasons

Try accessing the blocked page using a free online proxy service like Hide.me Proxy, Hidester Proxy, and Croxy Proxy. But there’s a small chance that your government has already identified and blocked those public IP addresses.

Have trouble connecting to the proxy server? Check out this article to fix proxy connection issues in no time.

5. Use Tor

  1. Download Tor Browser and install it on your PC
  2. At startup, click Configure and enable Tor is censored in my countryRequest a bridge to browse the web if Tor is censored in your country
  3. Select Request a bridge from torproject.org and click Connect
  4. Try accessing the censored site in Tor BrowserBrowse the web anonymously with Tor

Tor is an anonymous network specifically designed to help users bypass censorship. You can download the Tor web browser and mask your actual IP address to bypass error 451 unavailable due to legal reasons.

However, Tor can be intimidating for casual users. It can also become painfully slow to securely browse the Internet, especially if you turn on all advanced settings for maximum security.

It can be really frustrating to keep getting HTTP error 451 unavailable for legal reasons whenever you’re trying to access websites blocked by your government. But the five solutions above should do the trick.

We suggest using the VPN option if you had to pick only one. Private Internet Access is the best VPN that can help you defeat government censorship.

And for other related errors like HTTP error 302, refer to our detailed guide for fixes.

The new Alienware Aurora R11 gets water cooling

Dell announced the new Alienware Aurora R11, the first PC from Alienware to feature PCI-e liquid cooling graphics. It’s available with up to an NVIDIA GeForce RTX 2080 SUPER and up to a 10th Gen Intel Core i9 10900KF. Also, you can choose to load up an AMD Radeon VII graphics if you prefer AMD systems.

What’s new about Alienware Aurora R11?

Dell sais that the Aurora R11 is less noisy and cooler than older devices. To be more precise, they say that you should see up to a 19.5% temperature reduction and 69.2% less noise.

You will be able to upgrade the Aurora R11 if needed without using any tools and overclock the system to tweak performance. 

Possible configurations

CPU

  • 10th Gen Intel® CoreTM i5 w/Turbo)
  • 10th Gen Intel® CoreTM i5 10th Gen Intel® CoreTM i7 w/Turbo Boost Max 3.0) 10th Gen Intel® CoreTM i9 w/Thermal Velocity Boost)
  • 10400F (6-Core, 12MB Cache, 2.9Ghz to 4.3GHz
  • 10600KF (6-Core, 12MB Cache, 4.1Ghz to 4.8GHz) 10700KF (8-Core, 16MB Cache, 3.8GHz to 5.1GHz
  • 10900KF (10-Core, 20MB Cache, 3.7GHz to 5.3GHz

GPU

Single Graphics Options

  • NVIDIA GeForce GTX 1650 4GB GDDR5
  • NVIDIA GeForce GTX 1650 SUPERTM 4GB GDDR6
  • NVIDIA GeForce GTX 1660 SUPERTM 6GB GDDR6
  • NVIDIA GeForce GTX 1660 Ti 6GB GDDR6
  • AMD RadeonTM 5600 6GB GDDR6 (OC Ready)
  • NVIDIA GeForce RTXTM 2060 6GB GDDR6 (OC Ready)
  • NVIDIA GeForce RTXTM 2060 SUPER 6GB GDDR6 (OC Ready)
  • AMD RadeonTM RX 5700 8GB GDDR6 (OC Ready)
  • NVIDIA GeForce RTXTM 2070 8GB GDDR6 (OC Ready)
  • NVIDIA GeForce RTXTM 2070 SUPER 8GB GDDR6 (OC Ready)
  • AMD RadeonTM RX 5700 XT 8GB GDDR6 (OC Ready)
  • NVIDIA GeForce RTXTM 2080 SUPER 8GB GDDR6 (OC Ready)
  • NVIDIA GeForce RTXTM 2080 Ti 11GB GDDR6 (OC Ready)
  • AMD RadeonTM VII 16GB HBM2 (OC Ready)
  • Liquid Cooled NVIDIA GeForce RTX 2080 SuperTM 8GB GDDR6 (OC Ready)

Dual Graphics Options

  • Dual NVIDIA GeForce RTXTM 2070 SUPER 8GB GDDR6 (OC Ready) with NVIDIA NVLink SLI Enabled
  • Dual NVIDIA GeForce RTXTM 2080 SUPER 8GB GDDR6 (OC Ready) with NVIDIA NVLink SLI Enabled
  • Dual NVIDIA GeForce RTXTM 2080 Ti 8GB GDDR6 (OC Ready) with NVIDIA NVLink SLI Enabled

Memory

2933Mhz Class

  • 8GB HyperXTM FURY DDR4 XMP at 2933MHz; up to 64GB (additional memory sold separately)
  • 16GB Dual Channel HyperXTM FURY DDR4 XMP at 2933MHz; up to 64GB (additional memory sold separately)
  • 32GB Dual Channel HyperXTM FURY DDR4 XMP at 2933MHz; up to 64GB (additional memory sold separately)
  • 64GB Dual Channel HyperXTM FURY DDR4 XMP at 2933MHz

3200Mhz Class

  • 8GB HyperXTM FURY DDR4 XMP at 3200MHz; up to 64GB (additional memory sold separately)
  • 16GB Dual Channel HyperXTM FURY DDR4 XMP at 3200MHz; up to 64GB (additional memory sold separately)
  • 32GB Dual Channel HyperXTM FURY DDR4 XMP at 3200MHz; up to 64GB (additional memory sold separately)
  • 64GB Dual Channel HyperXTM FURY DDR4 XMP at 3200MHz

The Aurora R11 starts at $1,130 and is already available for purchase. If you wait a little bit longer, until May 28, you will be able to buy more affordable configurations starting at $880.

[wl_navigator]

Raspberry Pi not showing up on network? Try these solutions

You’re used to seeing your Raspberry Pi as a capable device that helps you explore computing. This isn’t a viable option when Raspberry Pi is not showing up on the network at all.

Plenty of users describe how they’ve connected the network cable and both of the lights were showing up as usual.

They confirm that the cable itself works too, so there seems to be a deeper issue this time. Do you also feel that you’re out of options?

This tutorial will help you find out the reason why your Raspberry Pi isn’t anywhere to be found on the network.

What can I do if Raspberry Pi is not visible on the network?

1. Connect the Raspberry Pi computer directly to the switch

connect Raspberry Pi to the switch

Quite a few users discovered that their problem was related to some RJ45 ports. Long story short, they simply weren’t connected to the main switch, hence the devices from those ports had strange IPs.

To make sure that’s not your case as well, connect the Raspberry Pi directly to the switch and check if it finally shows up on the network.


2. Enable SSH on Raspberry Pi

Enable SSH

  1. Go to the Raspberry Pi configuration window from the Preferences menu.
  2. Click on the Interfaces tab.
  3. Select Enable SSH next.
  4. Finally, restart your Pi for the changes to be maintained.

SSH is disabled by default in Raspberry Pi, so it’s time to correct that. In order to do so, you’ll need to have an HDMI monitor plugged into your Raspberry Pi.

Then, feel free to enable SSH manually from the desktop GUI, as described above. If it is already enabled, move on to the next troubleshooting tip.


3. Make sure all wired and wireless devices are on the same network

wired connection

Within your local network, the router is responsible for way more than the IP address assignment. There are routers with an option to isolate Wi-Fi connected devices from wired ones.

Therefore, have a look at your router under Wi-Fi settings. Be particularly careful about any security settings like wireless AP/Client isolation.

Your goal here is to make sure both your wired and wireless devices are on the same network.


4. Manually set the IP of your Raspberry Pi

Raspberry Pi IP

Another solution that may work is making sure that your Pi doesn’t have the same IP as any other device on the network.

Users often describe how manually setting the IP of their Pi fixed the issue and the little device eventually showed up on their network.

Moreover, this will prove useful in the future too. After all, Raspberry Pi requires a static IP address if your wish is to access it with other devices over a long period of time.

We may only hope that this tutorial has helped Raspberry Pi to show up on the network. If you are aware of other working solutions, don’t hesitate to leave a comment in the section below.

[wl_navigator]

Windows 10 2004 optimized for Ryzen 4000 chips

Ryzen 4000 chips entered the scene at CEC 2020, where AMD showcased its next-gen mobile and desktop processing units. The chips may have come to the party later than their dominant counterparts like the Intel Core series. But they are early enough to leverage Windows 10 2004 support.

Microsoft updated Windows 10 processor requirements

The latest Windows Processor Requirements document confirms the compatibility of Ryzen 4000 processors with Windows 10 2004. Microsoft uses that page to reveal all the chips that its operating systems support.

Older AMD processors are in the updated list too.

Up through the following AMD 7th Generation Processors (A-Series Ax-9xxx & E-Series Ex-9xxx & FX-9xxx); AMD Athlon 2xx processors, AMD Ryzen 3/5/7 4xxx, AMD Opteron and AMD EPYC 7xxx.

Most major chip manufacturers have been aware of these processor specifications for a long while. So the latest inclusion does not catch any of them by surprise.

Also, multiple variants of Intel microprocessors are in the updated list. The company has a deep history in the manufacture of chips for different versions of the Windows operating system.

Its listed CPUs include the powerful 10th generation processors in the Intel Core series.

Pentium 4 and Celeron processors may be slow and not ideal for high-end, CPU-intensive applications. But they are still in use today. It, therefore, makes sense that Microsoft is not ending Windows 10 support for the older chips from Intel, in the meantime.

About missing processors

There is no mention of AMD Athlon 3000 in the Windows Processor Requirements list. Unsurprisingly, the document includes Athlon 200-series microchips.

If a processor model is not in the list, it can only mean one thing. Microsoft expects its maker (OEM) not to install it on a customer system running on Windows.

Still, any exclusion could be an error of omission. So, affected companies can contact Microsoft for clarification or the inclusion of their chips.

You can always get back to us with suggestions or questions in the comments section below.

[wl_navigator]

Microsoft to stop offering 32-bit Windows 10 to PC makers

Microsoft intends on doing away with 32-bit versions of Windows 10 at some point in a gradual phase out. Starting with Windows 10 2004, OEMs will be getting only 64-bit versions of the operating system.

64-bit architecture is the future CPU systems

Microsoft published minimum hardware requirements that OEMs in relationship with the company have to address. The company announced that it will stop releasing 32-bit builds of Windows 10 to device makers, beginning with version 2004.

“Beginning with Windows 10, version 2004, all new Windows 10 systems will be required to use 64-bit builds and Microsoft will no longer release 32-bit builds for OEM distribution.”

Microsoft’s decision is in line with the ever-rising demand and preference for high-performance CPU systems. That is why more and more gadgets are coming out with 64-bit processor architectures.

The main reason behind this trend is that 32-bit processors handle only a small amount of RAM. Their 64-bit alternatives are capable of utilizing much more system memory.

Unfortunately, 32-bit Windows 10 is unable to get the most out of modern 64-bit chips. So it makes sense that, in the long run, Microsoft will be focusing on building OS versions with 64-bit processor architecture in mind.

You can still use your 32-bit Windows 10, for now

In the meantime, you need not worry that your PC may be running on the 32-bit version of Windows 10. The change is only affecting newly manufactured devices that have not received any OS from Microsoft yet.

So, if your PC came with the 32-bit OS pre-installed, you will continue receiving support from Microsoft. That includes security updates and regular fixes from the company.

It still makes to prepare for that time when OEMs will not be making 32-bit chips anymore.

With Windows 10 32-bit also gradually dying out, other app and software developers will have little choice but to focus on building for the CPU architecture of the future.

Feel free to leave any feedback or questions in the comments section below.

[wl_navigator]

Decentralized Tachyon VPN now has 250,000 users worldwide

Blockchain-based ecosystem, Tachyon, has now 250,000 people using it’s VPN decentralized system, according to their Tachyon Protocol Weekly Report.

More than 100,000 global users joined Tachyon VPN in only one week and their own prediction over that fulminant growth is that they expect to reach one million users in July.

According to their Weekly Report, they are now accelerating the integration of the IPX Staking System to Tachyon VPN:

IPX will build the world’s first million scale traffic marketplace on a decentralized network powered by Tachyon Protocol.

Decentralized VPN could be the future

Decentralized internet was the business model of the blockchain startups until recently, but the (centralized) VPN service provider X-VPN  changed all that with their Tachyon Network, a blockchain-based decentralized internet protocol. 

All that was built in association with V SYSTEMS, a blockchain infrastructure provider that has the main focus on database and cloud services.

With X-VPN being considered to be one of the more popular centralized VPN service providers out there, there is no wonder that Tachyon got to be such a successful decentralized VPN system in such a short time.

The secret formula of success might be that the Tachyon VPN combines the features of blockchain, User Datagram Protocol (UDP), Distributed Hash Table (DHT), and cryptographic encryption, as described in their whitepaper published in late September.

What is the difference between centralized and decentralized VPN?

VPN is an acronym for Virtual Private Network and its role is to extends a private network across a public network. In other words, you can send and receive data across shared or public networks. It’s almost as if your device has a direct connection to the private network.

Initially, VPN technology was created to enables remote users and branch offices to access corporate applications and resources securely.

A VPN is like a direct tunnel between two messages, making sure that they are safe from the internet service provider. They are protected from the middleman. Also, a VPN will provide you with a different IP address. From an outside onlooker, you will appear as using the Internet from a different geographical location.

So if you want to access websites in certain countries that are censored or unavailable, you can bypass that using a VPN.

The problem with centralized VPN is that the hosts of more traditional VPN servers are centralized companies. And often, these servers are under the control of a commercial entity that charges for subscriptions and they sell data and bandwidth. You see where we’re getting at, right?

A decentralized and blockchain-based VPN is not controlled from a single point. The system is naturally impartial and comparatively more secure because it’s not controlled by a single entity. A decentralized VPN brings together the traffic of numerous computers and communicate using a peer-to-peer system.

So each computer functions like some sort of a server. And the help from blockchain technology enables the nodes to make decisions that will have an impact on the VPN. In other words, it is very difficult to hack a decentralized VPN.

Anyhow, Tachyon asked us to Please stay tuned! and that’s what we’re about to do next, to watch the interesting evolution of the decentralized VPNs.

Alan Wake is coming to Xbox Game Pass for Console and PC on May 21

Alan Wake, the cult-classic survival horror game released ten years ago, is coming to Xbox Game Pass for Console and PC on May 21. Developer Remedy Entertainment announced the news today during a 10th-anniversary livestream, and you can watch the snippet captured by Twitter user Nibellion below

As a reminder, Alan Wake launched as an Xbox 360 exclusive back in May 2010, with the Windows version coming two years later. It’s a game that truly showed Remedy’s storytelling expertise, and Alan Wake pretty much pioneered the episodic format later perfected by Telltale Games in games like The Walking Dead. Despite Remedy releasing the stand-alone Alan Wake’s American Nightmare in 2012, many fans have been hoping to see Remedy release a true sequel. Unfortunately, Remedy went to create a new IP called Quantum Break for Microsoft, followed by the cross-platform game Control last year.

Alan Wake game was actually published by Microsoft Studios, so adding it to Xbox Game Pass along with newer Xbox Game Studios titles makes complete sense. If you have yet to play this old gem, we remind you that you can get your first month of Xbox Game Pass Ultimate for just $1.

FIX: Black textures in Apex Legends

It’s no surprise that ever since Apex legends appeared in the gaming scene, a lot of other FPS Battle-Royale games have taken a brief nosedive.

This critically-acclaimed game developed by Respawn Entertainment and published by Electronic Arts has been very popular within the gaming community.

In fact, the constant patches that contain new features, fixes, and balance changes are a testimony to that.

However, not all updates go as smoothly, as some do manage to bring a few issues of their own.

For example, those of you that installed the recent Apex Legends System Override update may have noticed that the game now suffers from black textures or even missing visual elements.

These include black boxes or backgrounds on maps, sometimes over individual characters.

Fortunately enough, there are currently two reasons why the black textures bug may appear:

  • Missing game assets
  • Incorrect GPU settings

How do I fix black textures in Apex Legends?

1. Repair the game through the Origin launcher

  1. Open the Origin Launcher a
  2. Locate Apex Legends in your gaming library
  3. Right-click on Apex Legends
  4. Select RepairRepair Apex Legends
  5. Wait for the software to finish verifying, downloading, and installing the necessary files

2. Run the game in High-performance mode

  1. Make sure that both Apex Legends and the Origin launcher are closed
  2. Go to the Start Menu
  3. Type in Graphics settings and go to the first result
  4. Within Graphics settings, under the option to Choose an app to set preference, select Classic app
  5. Click Browse and navigate to the Apex Legends installation folderGraphics Settings
    • The default directory is C:Program FilesOrigin GamesApex
  6. Select the game’s executable file,  then click Add
  7. Click the Options button
  8. In the pop-up menu, select High performance, then click Save

Another thing you could try is running the game using Admin rights. However, this is only worth trying if you are running the game from a PC’s Guest Account and not the PC’s default administrative account.

Although this bug has been around for some time now and the solutions to solving it are pretty straightforward, you have to admit that being immersed in a photorealistic world and suddenly seeing black textures can be annoying.

Have you experienced the black texture issue while playing Apex Legends? Let us know how you handled it by leaving us a message in the comments section below.


[wl_navigator]

Microsoft publishes full Build 2020 session catalog

Microsoft has published today the full session catalog for its Build 2020 developer conference on May 19-21. The event is going all-digital this year, and the company is allowing everyone to register for free.

If a quick search for “Windows 10” reveals no less than 60 sessions focusing on the Windows Insider Program, Windows Terminal and WSL2, or PowerToys, we couldn’t find any sessions dedicated to Windows 10X, the new lightweight version of Windows 10 that Microsoft will now be adapting for single-screen devices.

One session titled “Unifying and evolving the Windows app platform” sounds quite promising. The description says “Learn how the Windows app platform is evolving and unifying Win32 and UWP so your present and future apps can easily target 1 billion+ Windows devices.” As Windows enthusiasts have been debating about the “death of UWP apps,” this particular session should be quite enlightening.

You can already register for sessions you want to attend, and overall Microsoft promises 48 hours of content. Let us know in the comments if you spot other interesting sessions in the catalog.

Microsoft confirms Secured-core PCs are better protected from “Thunderspy” Thunderbolt vulnerability

A couple of days ago, researchers at the Eindhoven University of Technology disclosed a critical vulnerability in Intel’s Thunderbolt technology labelled “Thunderspy.” According to the researchers, pretty much all PCs with a Thunderbolt port built before 2019 are vulnerable, though exploiting Thunderspy requires having physical access to PCs.

Thunderspy is considered by the researchers as a design flaw that can’t be fixed by software updates, making silicon redesign mandatory. Consequently, the only way to fully protect your PC against Thunderspy attacks is to disable the Thunderbolt controller entirely in UEFI (BIOS), though that’s probably a bit extreme considering all the benefits brought by Thunderbolt 3.

It’s not all bad, though: According to the researchers, PCs that support Kernel DMA Protection (available in systems purchased in or after 2019) are better protected from this Thunderspy vulnerability. Microsoft confirmed this yesterday in a blog post about its custom Secured-core PC architecture, which the company introduced last fall:

Secured-core PCs ship with hardware and firmware that support Kernel DMA protection, which is enabled by default in the Windows OS. Kernel DMA protection relies on the Input/Output Memory Management Unit (IOMMU) to block external peripherals from starting and performing DMA unless an authorized user is signed in and the screen is unlocked.

This means that even if an attacker was able to copy a malicious Thunderbolt firmware to a device, the Kernel DMA protection on a Secured-core PC would prevent any accesses over the Thunderbolt port unless the attacker gains the user’s password in addition to being in physical possession of the device, significantly raising the degree of difficulty for the attacker.

The list of Secured-core PCs already includes various devices from Dell, HP, Lenovo and even Microsoft’s Surface Pro X. It’s also worth noting that Microsoft never implemented Thunderbolt in its Surface devices so far, and the company specifically highlighted Thunderbolt’s security risks in an internal video that leaked last month.

Sling DVR not working? Follow these steps to fix it fast

Sling TV, is one of the most famous Internet television services in the US, owned by Dish Network and it’s available on many devices and platforms. With Sling’s Cloud DVR, you can record movies, full series, your favorite episodes of your favorite shows, and more. 

However, lately, there were a lot of users complaining about Sling DVR not working. If you set it to record any shows or movies, sometimes, you don’t find them afterward in the Recordings ribbon on your My TV screen.


How can I fix the Sling DVR not working?


The first thing you need to do is to go to the full recordings menu. To do that, select Settings, then go to DVR.

Another thing is to check if your Cloud DVR isn’t at capacity. If you reached the maximum recording capacity, the oldest recordings, the ones which are not protected, will be deleted to make room for new recordings. To check your recording quota, go to the Recordings menu from My TV screen and select My DVR. 

You can also check your current Cloud DVR subscription just to be sure you have enough space to record the programming you want. You can check that in your Sling app by going to Settings > Account.

The free Cloud DVR offers only 10 hours of recording while upgrading to Cloud DVR Plus you will have 50 hours of recording for $5 per month.

Sling Cloud DVR storage capacity
If you switched from Cloud DVR Plus to Cloud DVR Free recently, make sure that you didn’t have any protected recordings stored. If those add up to more than the free 10 hours of cloud storage, you will not be able to make new recordings.

If you’re still unable to locate your recording, check the channel you recorded the program from to see if it’s available On-Demand. That will at least get you the show you were trying to see in the first place.


Record all episodes


Apparently, to ensure that you record the new episodes from a show it’s not recommended to choose to record  new episodes only because for some shows there is no new symbol next to the show and the system ignores them.

So, if you want to make sure that you record them, set the recording to all episodes. This should solve this problem,


Perform a power cycle


If you still can’t record any shows and you can’t see the recordings, it would be a good idea to perform a power cycle for the whole system.

To do that, switch off all your devices, including your modem or router, and fully unplug them. Wait a few minutes, then plug them back in and switch them on again and see if the recordings are working.

Usually, a power cycle helps and there’s no need for further troubleshooting. However,  if the problem persists try the next solution.

We hope that these solutions will help you solve this issue. If not, you will need to contact support.

If you have any other solutions or questions, please drop us a line in the comments below and we will get back to you as soon as possible.

How to quickly find your Gaming Controller in Windows 10

We all know that a game controller can make games a lot more enjoyable on a Windows 10 PC. That’s if you’re used to them from a console or whatnot. Anyway, the first step after you get the controller is to connect it to your rig, right?

If it’s a USB controller, the things are pretty straightforward but what if it’s a Bluetooth one? In fact, some users complained that they can’t find it in Windows 10.

To make things easier, Microsoft updated the text of the Add a Device dialog so the list of examples under Bluetooth includes controllers in the Windows 10 Insider Preview Build 19624.

How can I find my Gaming Controller in Windows 10?

1. Prepare your controller

Make sure your controller is charged, is ON, and it has the Bluetooth connection turned ON (if applicable, of course).

2. Look for your controller in Windows 10

To start adding a new Bluetooth controller click on the Windows Start button or press the Windows key, then click on Settings (the little cogwheel), and then on Devices.

Adding a new Bluetooth device

First, turn on the Bluetooth connection, then click on the + button like shown in the image.

3. Detect and setup

Adding a Bluetooth game controller

In the next window, you will see three options to add a device. You need the first option, to add a Bluetooth device, and as you can see, Microsoft added the controllers word to describe the list of devices you can add.

After you click on the Bluetooth button, you will see a list of devices that Windows detected and among them, hopefully, your Bluetooth controller. Click on it and follow the on-screen instructions. Again, make sure your controller is ON, charged, and with Bluetooth ON. Also, make sure that the controller is in the Bluetooth range.

That’s about it! Enjoy and game ON! If you have any other problems, questions or suggestions, please drop us a line in the comments section below.

  • Does a wired controller reduce input lag?
It’s a subject of debate but wired controllers should be a little bit faster than the wireless ones, especially if you use a USB 3.0 port.

[wl_navigator]

Inkscape 1.0 Version Released: Download Now [+ Review]

After over three years of development, the open-source vector editor Inkscape 1.0 is finally out.

That 3 years wait was not in vain as Inkscape 1.0 comes with a lot of improvement starting with using a more recent version of the software used to build the editor’s user interface (GTK+3).

Inkscape uses the SVG format but it supports other formats, and it can be extended by installing add-ons. Graphics professionals use vector graphics because the format doesn’t depend on resolution.

about Inkscape 1.0


Overall, the developers promise that the new Inkscape delivers a smoother, higher performance experience on Linux and Windows, HiDPI support, and better system integration on macOS. It offers 32-bit and 64-bit versions for Windows, and it’s compatible even with Windows 7.

Download the new Inkscape 1.0 and learn about what’s new

1. New toolbox

First, you will appreciate the new reorganized toolbox, with many new and improved Live Path Effect (LPE) features. You’ve got a new searchable LPE selection dialog that looks a lot better, and it comes with descriptions, and now you can mark your favorite LPEs. 

The developers say that you will also notice performance improvements when you need to edit node-heavy objects, using the Objects dialog, and when grouping/ungrouping.

Inkscape 1.0 toolbox with LPE

2. Freestyle options and canvas manipulation

If you’re a freestyle artist you can now mirror and rotate the canvas and check out the Xray and Split-view modes. Also, if you’re using the software with a tablet, the new PowerPencil mode of the Pencil tool provides pressure-dependent width, and you will discover that it’s possible to create closed paths.

Of course, as you would expect, the new Inkscape 1.0 lets you vectorize line drawings in the new unified Trace Bitmap dialog. Also, the new path effects that will appeal to the artistic user include Offset, PowerClip, and PowerMask LPEs.

canvas manipulation and split

3. Technical drawing tools

For technical drawings, you will be able to create a duplicate guide, to align grids to the page, and the Measure tool’s path length indicator. You will probably also like the new Corners (Fillet/Chamfer) LPEs for even rounding / cutting of path corners, Ellipse from Points for construction of circles and ellipses.

You can now create closed arcs (fillets) with the click of a button using the Circle Tool.

4. PDF export, text & document fixes

You can now export your work in PDF version with clickable links and metadata. There are also new palettes, mesh gradients compatible with web browsers, and an on-canvas alignment for objects. In the new Inkscape, they also improved text wrapping.

There are also new templates for different screen sizes, margin guides, and a colorful checkerboard background.

object alignment

5. Customize the UI, themes, icons and fonts

If you like having your own customized place to work, Inkscape 1.0 comes with a lot of suck adjustments. Just click on Edit > Preferences and a new window of opportunities will open. Literally.

Menus and toolbars, page sizes, custom font directories, and after you finish tinkering with them, you can save it as a new template so you can always find it and modify it as you please.

Inkscape Preferences

6. Not all third-party extensions are still compatible

The extension system has changed significantly in version 1.0. Inkscape migrated towards Python 3 and a more logical and fully tested extensions API. However, they didn’t bring forward all the third-party extensions. That means that 1.0 may not allow some users to continue with their normal extensions workflow.

All you need to do is download the new Inkscape 1.0 and see how it goes.

Don’t forget to drop us a line in the comments section with questions, suggestions, or thoughts about this.

How to Use Google Meet Inside Gmail

With the pandemic making people flocking to Zoom for video communication, Google has decided it’s time to make Google Meet a star alternative.

How? Getting it back from G Suite and putting it where at least it makes much sense, into Gmail.

That means that now it’s free, and Google says it allows meetings of up to 100 people with no time limits.

Google made Meets super easy to use and safer than Zoom, apparently.

How can I use Google Meet inside Gmail?

All you need to do is click on Start a meeting or Join a meeting buttons. If you choose the first option, you will start a video session right away, but you will only see your face on the screen.

Google added Google Meet in Gmail


To invite others, you need to click on the Join now button. You will see a dialogue with a link needed for others to join.

Just copy and paste that into a message or e-mail to the ones you want to invite. However, to join a Meet, you will need to log into your Google account, a thing that makes things a lot safer, of course.

Google Meet invite link


If you want to join an already-created meeting, just click on the link provided by the host. But you can also join if you click on the  Join a Meeting button from your Gmail.

If you do the latter, you will be asked for the meeting code from the organizer, exactly like in Zoom.

Just paste that from the message you received, and you will be added to the meeting automatically.

meeting code


As for the features, as a host, you can present any document, screen, browser, or file exactly like in Zoom if you click the Present now button in the lower right corner of the screen.

Google Meet layout and functions


If you click on the three vertical points from the lower right corner, you will find, among others, the settings and the option for changing the layout of the images from the participants.

There is also an exciting option to use a phone for audio. However, an actual call is necessary, so be careful about the rates of the countries you call to and from.

We’ve tried a few video calls, and they are very stable, but the video is limited to 720p resolution, a sign that Google wants to limit the bandwidth as much as possible and to maintain a stable connection.

If you need to change your display name in Google Meet, the highlighted guide will help you with step-by-step instructions.

For more details on how to download Google Meet for Windows 11, you can follow the step-by-step instructions in our dedicated guide.

That’s about it. Simple and easy to use. Use it and drop us a line in the comments about it or any other questions or suggestions.

How to use the PDF Reader in Microsoft Edge

As you probably know already, the Microsoft Edge browser has a brand new PDF Reader. Well, actually, Microsoft Edge has been supporting PDF documents for a long time, but only with a few features included.

Starting with the Windows 10 Fall Creators Update (version 1709), Microsoft Edge got a number of significant improvements that make it fit to view and edit PDF documents without the help of the classic Acrobat Reader.

Recently, Microsoft also added the ability to exit ink/highlight mode in PDFs by pressing the Esc key on your keyboard, as well as a red PDF highlighter color.

How can I use the new PDF Reader in Microsoft Edge?

Quick Tip

While it’s OK to use the browser functionalities to view PDFs, for the whole range of PDF editing options, we recommend using a dedicated tool such as Adobe’s Acrobat Reader.

view pdfs in edge


That is, using Acrobat Reader you won’t just get to read documents, but also annotate, edit, or sign them. Or create your own professional documents, for that matter.

The basic version of the tool comes as a freeware software, but with the Pro version, you can export your documents in other formats or password-protect them.

Acrobat Reader

Don’t stick to just reading PDFs, create your own documents and put you name on them with Adobe’s Acrobat Reader.
Free trial Visit website

1. Opening a PDF document

Well, to open a PDF document in Microsoft Edge you just need to grab it with your mouse pointer and drop it onto an Edge window. Of course, if the document is online, open the link to the PDF document to open it.

2. How to navigate in a PDF document inside Microsoft Edge

Like in any other page or document, you can just scroll down with the mouse wheel, the arrow buttons and the Page Up and Page Down buttons.

However, if you open a PDF document that has a table of contents, in the top left corner you will see a menu icon and if you click on it, the table of contents for the file will open in the left pane.

microsoft edge PDF navigation


Of course, that will help you go directly to the chapter you need to go. However, if you don’t have a table of contents you will still be able to go directly at the page you want if you write the exact number of the page you’re looking for in the upper left corner, where you see X of Y pages.

3. The view options

On the upper right part of the screen, you will see four buttons where you can tinker with how you see the document.


The + and – buttons zoom in and out of the document, the circling arrow rotates the document and the fourth button automatically fits the document to the window. Clicking it again will make the document smaller again.

4. Drawing on the PDF

The next two buttons are the most fun but they can also be very useful. They are the draw and erase buttons.

PDF drawing in Microsoft Edge


If you click or touch the Draw button you will be able to make notes or draw directly in the PDF file. That can be very useful when you collaborate on a document.

The Erase button is there if you want to delete the drawings. It doesn’t act like an eraser in Paint, for instance, that erases pixels. This one erases a whole line or drawing that you did on a single go.

drawing in Microsoft Edge

5. Saving and printing

The last buttons are the printing and saving the document. There is no secret there, really.

If you press the printer icon, that will trigger the printing dialogue and the diskette icon will help you save the document.

The last button helps you unpin this whole command bar so you won’t be bothered with them when you read the document.

saving and printing


That is all about the new PDF reader in Microsoft Edge. If you have any questions or suggestions, please leave them in our comments section below.

Which is the better buy between Surface Book 3 vs XPS 13?

A Surface Book 3 vs XPS 13 (2020) comparison is not one of the most straightforward to do when processing power is your sole differentiator. The two laptops come with 10th generation Intel Core processors, and some of their variants have superior RAM capacities.

But their capabilities for things like gaming or graphics processing are not exactly the same. These are some of the factors to consider, along with your budget and features like display resolution, versatility, and connectivity.

Surface Book 3 vs XPS 13 review

Surface Book 3

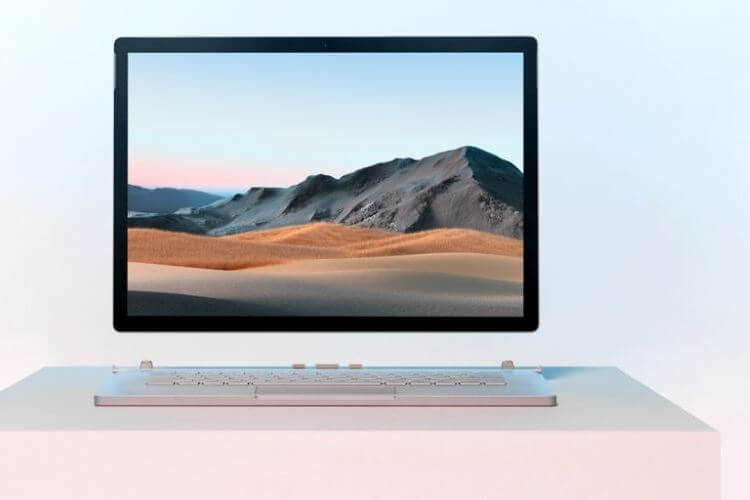
Surface Book 3 is arguably the most advanced laptop that Microsoft has designed, developed, and launched so far. It is a 2-in-1 form factor meant to serve as both a laptop and tablet. It has better processing specs than its predecessor.

Surface Book 3 13.5” comes with either an Intel Core i5 103G7 or Intel Core i7 1065G7 processor. The 15” variant has an Intel Core i7 1065G7 chip.

The device offers two options for battery life. The smaller model (in terms of screen size), supports typical operations for up to 15.5 hours. The larger one offers up to 17.5 hours of usage.

Microsoft designed Surface Book 3, especially the 15-inch version, with gaming in mind. The 13-inch, Core i5 model comes with Intel Iris Graphics, while the Core i7 version of the same size features an NVIDIA GeForce GTX 1650 GPU.

On the other hand, the 15” model is compatible with an NVIDIA GeForce GTX 1660 Ti GPU.

All Surface Book 3 laptop models use PixelSense display technology. Regarding screen resolution, the versions with a smaller screen size support 3000 x 2000 (267 PPI), while the larger variant boasts 3240 x 2160, (260 PPI).

These devices can work with up to 32GB RAM. They come with several solid-state drive (SSD) options, which max out at 2TB PCIe SSD.

The Surface Books start $1599, with the price going up depending on the model and the specs you get.

Microsoft Surface

Comparing with Dell XPS 13 (2020)

Dell XPS 13 9300 is a force to reckon with too, thanks to its processing power. The cheapest model, which retails at $1999.99, has a 10th generation Intel Core i5 chip.

The most expensive XPS 13 ($2,149.99) comes with a 10th gen Intel Core i7 chip, though. Its processing power compares favorably with the 15-inch Surface Book 3. Also, the model comes with 32GB RAM, which also stacks up well against the most advanced Surface Book 3.

XPS 13 and Surface Book are 2-in-1 devices, so both a versatile for use as traditional laptops and tablets. The only difference in this aspect of their design is that the Microsoft device has a detachable keyboard.

Just like one variant of the 13.5-inch Surface Book, XPS 13 has an integrated Intel Iris Plus GPU. The main shortcoming of such a GPU is that it gets its RAM from system memory. The sharing can compromise the performance of your games as well as other PC applications.

The other Surface Book 3 variants use discrete GPUs that do not depend on CPU memory to support video or graphics-hungry applications. Reasonably, you would expect the laptops to perform a little better than the XPS 13 when playing more demanding games.

Likewise, theseMicrosoft laptops come with better options for SSD storage. The most advanced of the Surface Books supports up to 2TB, while the XPS 13 will max out at 1TB. The former would be an ideal choice for applications that store larger files, including videos.

Display-wise, XPS 13 has a 13.4” screen, and the most expensive model has a 3840 x 2400 resolution. That is certainly superior to the 260 PPI 15-inch Surface Book. It also boasts a longer battery life (up to about 18 hours in typical device usage).

SpecificationsSurface Book 3Dell XPS 13
Processor optionsIntel Core i7
Intel Core i5
Intel Core i7
Intel Core i5
Display size options15"
13.5"
13.4"
Resolution13.5” screen: 3000 x 2000 (267 PPI)
15" screen: 3240 x 2160, (260 PPI)
1920 x 1200
3840 x 2400
GPU optionsIntel Iris Plus Graphics
Discrete NVIDIA GeForce GTX with Max-Q tech
Integrated Intel Iris Plus Graphics
RAM options8GB, 16GB, or 32GB8GB, 16GB, or 32GB
Storage options256GB, 512GB, 1TB, or 2TB PCIe SSD256GB or 1TB PCIe SSD

Wrapping up: Surface Book 3 offers superior performance-related specs

Surface Book 3 and XPS 13 have a fair share of hardware similarities, especially microchip power and RAM. Both are two-in-ones, but they are not necessarily the same. When you take into account SSD storage and GPU, Surface Book 3 trumps XPS 13. As for cost, XPS 13 starts at a slightly higher price than the Surface Book 3 with lowest specs.

Have you used one the latest XPS 13 or Surface Book yet? Feel free to share your experience or questions in the comments section below.

[wl_navigator]

Next gen Fortnite video game is coming to Microsoft’s Xbox Series X console on Day One

Epic Games announced this morning that they are working on a proper next gen version of their popular Fortnite video game for next gen consoles such as Microsoft’s Xbox Series X that’s due out later this year.

While the current Xbox One version of Fortnite would have likely run perfectly fine on the Xbox Series X, the fact that they’re developing one for next gen hardware is curious. This next gen version of Fortnite will support crossplay with all current versions which means that the game’s content can’t be too different.

The announcement does tease that there’s more details to come however, so there may be some noticeable improvements in addition to the expected faster loading times and improved framerate.

One potential feature could be the ability to have larger groups of players in the new Fortnite Party Royale mode. This new mode currently limits sessions to 25 players and even with this small number, still experiences significant slow-down on an Xbox One X. If Epic Games truly wants to turn this Party Royale mode into a virtual concert space, they’ll need to increase the player numbers and next gen consoles may allow this.

Of note is the fact that this new version of Fortnite for the Xbox Series X console will be built with Unreal Engine 4 and is expected to upgrade to Unreal Engine 5, which was also announced today, around the middle of next year.

The Xbox Series X version of Fortnite will be available on launch day.

Are you excited for a next gen version of Fortnite? Let us know why or why not in the comments below and then follow us on Pinterest and Twitter for more Xbox gaming news.

Fortnite
Fortnite
Developer:
Epic Games Inc.
Price:
Free


How to install Dell Mobile Connect on Windows 10

Dell Mobile Connect is an alternative to Microsoft’s Your Phone. Dell Mobile Connect works in the same way that Your Phone does; you can connect your Android or iOS phone to your Windows 10 PC via Bluetooth. Previously, Dell Mobile Connect was an exclusive feature on Dell PCs. However, there is a way to install Dell Mobile Connect on any Windows 10 PC. Here is a look at what you will need to get started.

Turn developer mode on

First, you have to make sure that your Windows 10 settings will allow you to install Dell Mobile Connect. Here is what you need to do to get started. Go to Settings > Update & Security > For developers.

From here, you will find three options to install apps.

  1. Microsoft Store apps – only allow you to install apps specifically from the Microsoft Store. You will be blocked from installing apps from websites.
  2. Sideload apps – Install apps from known sources that you trust to install third-party apps.
  3. Developer mode – Install any app from any source.

Install the Dell Mobile Connect app and drivers

Once you choose Developer mode, a package will download and install on your Windows 10 PC automatically. Next, follow these steps to download the necessary apps and drivers to get Dell Mobile Connect working on your Windows 10 PC.

1. Install the Dell Mobile Connect Driver Update for Windows 10 from the Dell website.
2. Install Dell Mobile Connect from the Microsoft Store.


3. Install the Dell Mobile Connect app on your Android and iOS smartphone.


‎Dell Mobile Connect 3.3
Developer:
Screenovate
Price:
Free

Link your smartphone to your PC

Finally, you will need to complete the link on Dell Mobile Connect between your smartphone and your Windows 10 PC over Bluetooth. Once you go through the linking process, you will be able to see and respond to text messages, transfer files, and run apps on your phone, directly from your Windows 10 PC.

Do you prefer using Dell Mobile Connect or Your Phone on Windows 10? Let us know in the comments.

Tony Hawk’s Pro Skater 1 and 2 remasters are coming to Xbox One on September 4

The classic Tony Hawk Pro Skater 1 and 2 are getting brought back to life a new remastered Xbox One release.

The remastered Xbox One release of Tony Hawk Pro Skater 1 and 2 isn’t the run-of-the-mill rehashing with some updated graphics, but a true 4K experience equipped with smoother 60fps tweaks, and new multiplayer platform for arcade-style skateboarding.

Scheduled for a September 2020 release, fans of the iconic skating game can immerse themselves in nostalgic skaters music, levels, tricks, and gameplay while also exploring the new local co-op or online multiplayer game modes.

Players can revisit the skills and tricks from legendary skaters on the original roster that include Geoff Rowley, Bucky Lasek, Elissa Steamer, Kareem Campbell, Andrew Reynolds, Bob Burnquist, Eric Koston, Rodney Mullen, Jamie Thomas, Rune Glifberg and more.

As part of its revival, the game developer are celebrating the reemergence of Pro Skater 1 and 2 with a digital pre-order special that includes access to the Warehouse Demo ahead of its official launch.

For $39.99 gamers can grab the digital version or for $49.99 a deluxe digital version with unique content and gear on September 4, 2020.

Windows 10 May 2020 Update will get a new feature to protect you from potentially unwanted applications

The Windows 10 May 2020 Update will introduce a new security feature that will help you detect and block the installation of potentially unwanted applications (PUAs) on your PC. According to a support document spotted by ZDNet, Windows Defender has a dedicated option in the settings panel which will allow you to block the installation known unwanted programs or applications.

It is worth mentioning that this feature has been available in both Windows 10 and Windows Defender for a while, though it was previously accessible via group policy settings. Starting with the Windows 10 May 2020 update, Windows Defender will actively protect your PCs from PUA threats, as the PUAs protection functionality will be available directly through the Windows interface itself.

Windows 10 PUA Protection
Source: ZDNet

For those don’t know, potentially unwanted application or PUAs are programs that come along with the installer of legitimate programs. One case could be CCleaner which is sometimes bundled with the Avast antivirus program (if we ignore it). Microsoft’s new Edge browser has also been able to block the download of potentially unwanted apps since March, but Windows Defender will now be able to do that for all Windows 10 users with the May 2020 Update.

According to Microsoft’s support page, you can turn on PUAs protection in Windows Defender by heading to Start > Settings > Update & Security > Windows Security > App & browser control > Reputation-based protection settings. Once activated, Microsoft recommends to turn on two additional settings (block apps and block downloads) under the “Potentially unwanted app blocking” section (shown above).

  • Block downloads looks for PUA as it’s being downloaded, but note that it only works with the new Microsoft Edge browser.
  • Block apps will detect PUA that you’ve already downloaded or installed, so if you’re using a different browser Windows Security can still detect PUA after you’ve downloaded it.

In case you missed, the Windows 10 May 2020 Update is planned to arrive later this month. We will keep you updated about other new features in this update once it becomes generally available.

KB4556799 fails to install for some users

The May Patch Tuesday Updates have just arrived, but it seems that not everyone has the chance to get it.

Several users have been reporting that they are having issues with installing the new update, particularly those running Windows 10 versions 1909 and 1903 that received the KB4556799 cumulative update.

One user stated that:

2020-05 Cumulative Update for Windows 10 version 1903 for x64-based Systems (KB4556799) Error 0x800f0831 fails.

Also, DISM.exe /Online /Cleanup-image /Restorehealth Gets to 99.4% and stops.
Error: 0x800f081f
[…]

Other users reported that they too have similar issues with not being able to update, only that they are receiving a different error code:

When i try to install the update its says me:
2020-05 Actualización acumulativa para Windows 10 Version 1909 para sistemas basados en x64 (KB4556799)
Error 0x80070308
I have my windows on spanish but is a acumulative updates

Users can still follow a few troubleshooting steps to stop this problem

While it may be indeed one of the first times users have faced error code 0x800f081f, we can’t say the same thing about error code 0x80070308. Apparently, this is an issue that plagued Windows 7 users in the past as well.

However, these types of errors are common enough that over time plenty of solutions have been found to fix them. these include:

  • Running the Windows Update Troubleshooter
  • Stopping the Windows Update service from the Task Manager
  • Deleting all the files from the C:WindowsSoftwareDistributionDownload folder
  • Resetting Windows Update Service, and more…

One thing worth mentioning is that both of these errors happened while updating via the Windows Update menu. However, keep in mind that Patch Tuesday updates can also be downloaded via the Windows Update Catalog or through the Windows Server Update Service.

We’ve also written an article that has direct download links to each cumulative update, as well as a short changelog for each of them.

All in all, those who did manage to get the new update installed should now enjoy improved security, especially since Microsoft introduced a new feature that filters apps base don their reputation.

More so, gamers should also see a boost to their system with the new Windows Display Driver Model (WDDM) 2.7.

What’s your take on this new update for Windows 10 version 1909 and 1903?

Let us know if you’ve discovered other issues by leaving us a message in the comments section below.

[wl_navigator]

How to use Surface Earbuds with Microsoft 365

One of the features that make Microsoft’s new Surface Earbuds quite unique is their integration with the company’s Microsoft 365 service. With a valid subscription, and when the Earbuds are paired over Bluetooth LE, you can use the Earbuds to dictate documents and emails, live caption PowerPoints, and even play your emails on iOS devices. If you just purchased your own Surface Earbuds, here’s a look at how that works and how you can get started with it all.

Dictation

With two microphones per earbud, the Surface Earbuds are perfect for skipping your computer’s in-built microphone and using your new Earbuds for some higher quality voice dictation. You can set this up in Microsoft Word and Outlook by first making sure you’ve paired your Earbuds with your PC with Bluetooth LE.

If you haven’t already paired, to get started, open the case, put your Earbuds in the case and press the button on the bottom for 5 seconds to put the Earbuds in pairing mode. You should then head into Bluetooth settings in Windows 10, and search for your Headphones and pair to it. If your PC is compatible, you’ll also see a notification appear on your screen as soon as the Earbuds enter pairing mode, allowing you to pair without having to go through settings.

Once paired, you can now head to the Office app that you want to use dictation with. Head up to the top Home bar and then choose Dictate from the list. You might be prompted to enable the microphone permissions. When done, a microphone icon will appear, you’ll want to wait for it to turn on before you start speaking. You’ll be able to insert punctuation as you speak by saying them explicitly. When done, you can exit dictation with the close button in the toolbar.

Live Caption in PowerPoints

Just like using the Earbuds for dictation, getting Live Captions in PowerPoints is quite easy, too. When enabled, you’ll be able to have captions appear on the screen as you talk during your presentation. There’s also a portion to translate the captions in real-time to another language, too, which we will discuss later.

To get started with Live Captions, you’ll want to first open the PowerPoint presentation. Then, select Slide Show and then head over to From Beginning. From there, you can then right-click anywhere in the slide and choose the Start Subtitles option.

Just to be safe, before speaking, you’ll also want to make sure that you’ve chosen the Earbuds as your Microphone. To check this, right-click again on the slide and choose Subtitle Settings and then choose More Settings. In captions & Subtitles, for the microphone, you’ll want to choose Headset (Surface Earbuds Hands-Free AG Audio). You can then begin the presentation.

If you want PowerPoint to translate your voice while speaking into a different language, you’ll want to look at the Slide Show ribbon tab and select Subtitle Settings. Check to make sure that Spoken Language is set to the one you’re speaking, and then check Subtitle Language to the one you want to appear in translations. There are also additional controls under the Subtitle Settings menu which will help you set the desired position for captions or subtitles. Typically it’ll appear under the bottom side of the screen by default. Also, keep in mind that PowerPoint for Microsoft 365 can display captions or subtitles on-screen in any of more than 60 languages. You can see the full list at the bottom of this Microsoft Support page.

Play your emails aloud in Outlook on iOS

So far the two features we’ve described only work on Windows 10, but, if you’ve got yourself an iOS device, you also have access to a unique feature for your new Surface Earbuds. You can use them with your iPhone or iPad to manage your emails when on the go and reply to messages, delete them, and more.

As usual, you can get started by connecting your Earbuds to the iPhone over Bluetooth. Do this by putting your Earbuds back in the case, and press and hold the button on the bottom of the case for 5 seconds. When done, head into Settings, on your iOS device and then tap on Bluetooth. Turn Bluetooth on if it isn’t already, and then tap on Surface Earbuds. You’ll be connected now.

Pairing done, head into the Outlook app and swipe from the left side of the screen. Select Settings and then tap on Play my Emails. You’ll then want to grant Outlook the permissions to use your Microphone, and then finish setting it up. From now on, you can Play your Emails by swiping left and tapping the play button in the sidebar.

While your emails are playing, you can use some of these gestures to control them. Double-tap on either earbud to stop or play messages. To go to the next message, swipe forward on the left earbud. To go to the previous message, swipe backward on the left earbud. Finally, to adjust the volume, on the right earbud, swipe up on increase volume, and swipe down to decrease volume.

Are you enjoying Surface Earbuds?

With this integration with Microsoft 365, the Surface Earbuds are more productivity-centered than any other earbud in the market. Do you find these features useful? Or do you just use your Earbuds for music and conference calls? Let us know in the comments below and stay tuned to OnMSFT for our full Surface Earbuds review in the coming days.

New Edge Canary flag brings Jump Lists support to PWAs

Microsoft Edge and Chromium-based web browsers are getting experimental support for Jump Lists for Progressive Web Apps (PWAs) installed as regular apps. If Microsoft’s Chromium-based Edge browser makes it quite easy to install any website as an app, there’s still a way to go before these apps can work more like native apps, and Jump Lists support would definitely be an important step in that direction.

For those unfamiliar with Jump Lists, they’re the quick actions that show up when you right-click on an app icon on your taskbar. Google engineer Rayan Kanson explained this week on the public blink-dev Google Group (via Techdows) that bringing this same capability to PWAs will allow developers to “show a shortcuts menu of common tasks in their app.” Kanson also shared a test website to demonstrate how the feature works.

To try it on Microsoft Edge Canary, you’ll have to visit edge://flags and enable “Desktop PWAs app icon shortcuts menu.” We can confirm Jump Lists work for the test website shared by Kanson, but we haven’t been able to make them work for other websites such as Outlook.com and Twitter (even though the Twitter app on the Microsoft Store, which is a PWA, does support Jump Lists). It’s now up to developers to make their PWAs compatible with this new experimental feature.

Anyway, the Microsoft Edge team is participating actively to this Chromium project, which will eventually benefit all Chromium-based browsers. Last month, the Edge team published a long explainer document on GitHub about why it was important for PWAs to “facilitate re-engagement with key tasks,” and we invite you to check it out.

Microsoft’s Surface Go 2 and Surface Earbuds get new firmware updates on launch day

Microsoft’s new Surface Go 2 and Surface Earbuds might have only just gone on sale yesterday, but the software giant is already pushing new firmware updates for its new devices. The Surface Go 2’s first firmware updates aim to improve both Bluetooth and Wi-Fi connectivity, and here’s what you should be seeing in Windows Update:

  • Intel(R) Wi-Fi 6 AX200 160MHz – Network Adapters: 21.80.2.1 improve connection reliability.
  • Intel(R) Wireless Bluetooth(R) – Bluetooth: 21.80.0.3 improve connection reliability.

Microsoft’s Surface Earbuds are also getting their first firmware update with audio quality and stability improvements, as well as pairing and connection improvements. Those of you who have already purchased the Surface Earbuds will need to download the Surface Audio app for Android, iOS, or Windows 10 to download the firmware version 3.0.0.5.

Microsoft’s Surface Go 2 can be purchased for $399.99 on the Microsoft Store, while the Surface Earbuds are currently priced at $199.99. The new Earbuds are much more affordable than the original Surface Headphones, and we plan to review them really soon.

Fix Grammarly error: No document is open or detected


No document is open or your document could not be detected [Grammarly error]

  1. Update Office
  2. Make sure that add-in is enabled
  3. Disable antivirus
  4. Disable additional add-ins
  5. Reinstall the add-in
  6. Reinstall Office

Grammarly is such a great service for both professionals and students. It’s the most popular proofreading tool and it’s both functional and educational. It comes in various add-on options and clients, for browsers and desktops. But, users can use it in Office, as well, to help with proofreading and grammar in Word and Outlook. And that’s where some of them run into a problem. For no apparent reason, Grammarly couldn’t access a document and prompted users with the “No document is open or your document could not be detected.” error.

Don’t worry, there’s a solution for that. We enlisted some solutions to move onward through the list.

How to fix “No document” error in Grammarly for Microsoft Office/Outlook

1: Update Office

The first step we can suggest is to update your version of Word or Outlook to the latest version. Due to a lack of adequate support, Grammarly supports only Office suits from 2016 till this day. If you run an older iteration of Office suite, Grammarly probably won’t work on it.

The updates for Office are administered through the Windows Update so navigate to Update settings and check for updates. In addition. After you’ve got the latest version, try opening the said document and look for changes.

2: Make sure that add-in is enabled

Due to a certain policy, especially in Office 365, some add-ins might get disabled. This, of course, applies to Grammarly, as well. In order for the add-in to work, you’ll need to double-check the Add-ins list and confirm that Grammarly is not on the “Disabled” list.

Follow these steps to do so:

  1. Open Word.
  2. Click on File.
  3. Choose Word options.
  4. Select Add-ins.
  5. Under the “Manage” section, choose COM Add-ins.
  6. Click Go.
  7. Check the “Grammarly” box.
  8. Confirm changes.

3: Disable antivirus

In some cases, a third-party antivirus will block Grammarly to prevent it from communicating with its servers. We can’t say with certainty whether this is the case or not, but it won’t cost you a thing to try and disable the antivirus temporarily. If that seems to be the cause of the problem, you can always whitelist Grammarly or temporarily disable the antivirus while working in Word or Outlook.

If you’re using Windows Defender, here’s how to disable it:

  1. Open Windows Defender from the notification area.
  2. Open Virus & threat protection.grammarly office error
  3. Under the Virus & threat protection settings, click Manage settings.grammarly office error
  4. Disable Real-time protection and Cloud-delivered protection.grammarly office error

4: Disable additional add-ins

Some other add-ins in Word or Outlook might conflict with Grammarly so we suggest disabling them. At least, similar tools or the ones you recently installed. You can try with the system of elimination and remove add-ins one by one until you determine the culprit.

You can do that in Office > File > Word options > Add-ins. The same procedure applies to Outlook, too.

5: Reinstall the add-in

Reinstalling the add-in is another solution we can offer. The problem mostly occurs due to changes made to Office via Windows Update. This led lots of users to various errors, including the one we’re trying to address today. After you reinstall the add-in, the problem should be resolved.

Follow these steps to reinstall Grammarly add-in for Microsoft Office:

  1. In the Windows Search bar, type Control and open Control Panel.
  2. Click Uninstall a program.
  3. Locate Grammarly for Microsoft Office Suite and uninstall it.
  4. Download the latest version of Grammarly, here.
  5. Run the installer.
  6. Before clicking on the “Get started”, hold Shift and Ctrl keys on your keyboard and then click.
  7. Install Grammarly for all users.

6: Reinstall Office

Finally, the only thing which comes to mind is the reinstallation of Office. You might as well roll back to an older version or uninstall recent updates. But we can’t suggest that as these patches are important for the security of Office and the whole platform.

After you uninstall the current version, navigate to the official website and download the suite again. Enable Grammarly and look for changes.

That should do it. In case you have some questions or alternative solutions, feel free to tell us in the comments section below.

[wl_navigator]

KB4556804 fixes Internet Options and UE-V-related issues

The 5th round of monthly cumulative updates have finally arrived, and they are called the May Patch Tuesday Updates.

Like with all other updates of its kind, these bring major improvements to the level of the OS’ security, as well as new features and fixes to any existent issues.

Another thing that these updates have with the ones from the past is the fact that they exist in one form or another for all versions of Windows 10, from 1507, all the way to 1909.

Speaking of which, one particular update has caught our eye because it now prevents background processes from running without our knowledge.


KB4556804 fixes UE-V and Internet Options issues

Two major fixes make KB4556804 stand out compared to the other cumulative updates.

On one hand, it deals with an issue that hindered the functionality of  Microsoft User Experience Virtualization (UE-V).

Before this fix, its settings could not roam to enable the signature files that are used for new messages, forwarded messages, and replies.

The second issue that this cumulative update deals with is when a third-party application loads hidden tabs into Internet Options.

However, once you’ve installed this update on Windows 10 version 1703, this will no longer be an issue.


How do I install KB4556804?

Patch Tuesday updates are very important, especially from a security standpoint, so it is important that you get them as soon as they become available in your timezone.

Fortunately enough, you don’t have to worry about how you can get the Patch Tuesday updates since you can get them like any other updates:

Additionally, we’ve created an article with direct download links to each cumulative update, so you might as well check it out as well.

If you want to know everything there is to know on Patch Tuesday, check out this in-depth guide.

Note: It is important that you always have a backup of all of your data before performing a big set of updates like the ones on Patch Tuesday.

What’s your take on what KBX brought new to Windows 10? Let us know your opinion by leaving us a message in the comments section below.


[wl_navigator]

KB4556812 for Windows 10 v1709 fixes Group Policy issues

May 12 is finally here and that means that a new round of Patch Tuesday updates has just hit live. This 5th round of updates is called the May Patch Tuesday Update, and they bring with them extensive new features, bugfix, and very important security updates.

As with all Patch Tuesday updates of the past, these are available to all versions of Windows 10, starting from 1507 to 1909.

Speaking of which, keep in mind that this is the last time the Patch Tuesday Updates will be in this format since the new Windows 10 version 2004 is expected to hit live on May 28.

That being said, KB4556812that has been released for Windows 10 version 1709 also brings some interesting fixes.


You can now install apps via GPO without issues

The main issue covered by this particular cumulative update is one that many users have encountered, especially those that use GPO very often to perform all of their basic computer tasks.

However, this no longer seems to be the case, since KB4556812 now addresses an issue that prevents certain apps from installing if they are published using a Group Policy Object.

This means that those of you that have all of your software installed via GPO programmed by admins should be able to install theany programs without any error messages.

Besides that, KB4556812 also addresses an issue that leads to an access violation error (0xC0000005), as well as an issue that prevents Microsoft Internet Information Services (IIS) management tools.

How do I install KB4556812?

Remember that Patch Tuesday Updates are generally very important, especially from a security standpoint, so installing them as soon as they become available is crucial.

KB4556812 can be installed like any other update that becomes available for your PC. This means that you can use methods like the Windows Update Catalog,  Windows Server Update Services (WSUS), or using the built-in Windows Update feature.

Note: It is important that you always have a backup of all of your data before performing a big set of updates like the ones on Patch Tuesday.

If you want to know everything there is to know on Patch Tuesday, check out this in-depth guide.

What do you think about the changes brought by KB4556812 to Windows 10 version 1709? Let us know if these updates met your expectations by leaving us a message in the comments section below.


[wl_navigator]

Windows 10 May Patch Tuesday [DIRECT DOWNLOAD LINKS]

Microsoft just released the latest round of Patch Tuesday updates called the May Patch Tuesday Updates.

In this article, we will be providing you with direct download links for each of these updates, and they vary depending on what version of the Windows 10 OS you are using.

More so, each update will be accompanied by a miniature changelog.


Cumulative updates included in May Patch Tuesday Updates

Windows 10, version 1909

Windows 10 version 1909 and versions 1903  share a common core operating system and an identical set of system files. As a result, all major changes that apply to one version will be present in the other.

Cumulative update name:

Improvements and fixes 

  • Updates the 2020 start date for daylight saving time (DST) in the Kingdom of Morocco.
  • Security updates to Internet Explorer, the Microsoft Scripting Engine, Windows App Platform and Frameworks, Microsoft Graphics Component, Windows Input and Composition, Windows Media, Windows Shell, Microsoft Xbox, Microsoft Edge, Windows Fundamentals, Windows Cryptography, Windows Authentication, Windows Kernel, Windows Linux, Windows Update Stack, Windows Network Security and Containers, Windows Active Directory, Windows Storage and Filesystems, and the Microsoft JET Database Engine.

Known Issues

  • Microsoft is not currently aware of any issues with this update.

[DIRECT DOWNLOAD LINK]


Windows 10, version 1903

Windows 10 version 1909 and versions 1903  share a common core operating system and an identical set of system files. As a result, all major changes that apply to one version will be present in the other.

Cumulative update name:

Improvements and fixes

  • Same as Windows 10, version 1909

Known Issues

  • Same as Windows 10, version 1909

[DIRECT DOWNLOAD LINK]


Windows 10, version 1809

The 1809 version of Windows 10 is getting an update as well, this one bumping the build number to OS Build 17763.1217. Some of the highlights of this build include updates to improve security when using Internet Explorer and Microsoft Edge, as well as other Microsoft Office products.

Cumulative update name:

Improvements and fixes

  • Updates the 2020 start date for daylight saving time (DST) in the Kingdom of Morocco.
  • Adds Shell Launcher v2 to improve reliability and usability. Shell launcher v2 allows you to specify a Universal Windows Platform (UWP) app as the replacement shell.
  • Addresses an issue that prevents a call to NCryptGetProperty() from returning the correct pbOutput value when pszProperty is set to “Algorithm Group” and you are using a Trusted Platform Module (TPM) 1.2 device.
  • Security updates to Internet Explorer, the Microsoft Scripting Engine, Windows App Platform and Frameworks, Microsoft Graphics Component, Windows Input and Composition, Windows Media, Windows Shell, Microsoft Xbox, Microsoft Edge, Windows Fundamentals, Windows Cryptography, Windows Authentication, Windows Kernel, Windows Linux, Windows Update Stack, Windows Core Networking, Internet Information Services, Windows Network Security and Containers, Windows Active Directory, Windows Storage and Filesystems, and the Microsoft JET Database Engine.

Known Issues

  • After installing KB4493509, devices with some Asian language packs installed may receive the error, “0x800f0982 – PSFX_E_MATCHING_COMPONENT_NOT_FOUND.”

[DIRECT DOWNLOAD LINK]


Windows 10, version 1803

The May patch Tuesday updates come to windows 10 version 1803 as well in the form of new features.

Cumulative update name:

Improvements and fixes

  • Updates the 2020 start date for daylight saving time (DST) in the Kingdom of Morocco.
  • Addresses an issue that prevents a call to NCryptGetProperty() from returning the correct pbOutput value when pszProperty is set to “Algorithm Group” and you are using a Trusted Platform Module (TPM) 1.2 device.
  • Security updates to Internet Explorer, the Microsoft Scripting Engine, Windows App Platform and Frameworks, Windows Input and Composition, Windows Media, Windows Shell, Microsoft Xbox, Microsoft Edge, Windows Fundamentals, Windows Cryptography, Windows Kernel, Windows Linux, Windows Update Stack, Windows Core Networking, Internet Information Services, Windows Network Security and Containers, Windows Active Directory, Windows Storage and Filesystems, and the Microsoft JET Database Engine.

Known Issues

  • Microsoft is not currently aware of any issues with this update.

[DIRECT DOWNLOAD LINK]


Windows 10, version 1709

For those of you that don’t know, Windows 10 version 1709, reached the end of service on April 9, 2019, for devices running Windows 10 Home, Pro, Pro for Workstation, and IoT Core editions. 

As such, if you meet any of those criteria, please update to a newer version of Windows 10 to continue receiving updates.

Cumulative update name:

Improvements and fixes

  • Addresses an issue that prevents certain apps from installing if they are published using a Group Policy Object.
  • Updates the 2020 start date for daylight saving time (DST) in the Kingdom of Morocco.
  • Addresses an issue that causes a memory leak in the LsaIso.exe process when the server is under a heavy authentication load and Credential Guard is enabled.
  • Addresses an issue with running klist.exe that causes lsass.exe to stop working and generates an access violation error (0xC0000005).
  • Addresses an issue that prevents Microsoft Internet Information Services (IIS) management tools, such as IIS Manager, from managing an ASP.NET application that has configured SameSite cookie settings in web.config.
  • Addresses an issue that prevents a call to NCryptGetProperty() from returning the correct pbOutput value when pszProperty is set to “Algorithm Group” and you are using a Trusted Platform Module (TPM) 1.2 device.
  • Security updates to Internet Explorer, the Microsoft Scripting Engine, Windows App Platform and Frameworks, Windows Input and Composition, Windows Media, Windows Shell, Microsoft Xbox, Microsoft Edge, Windows Fundamentals, Windows Cryptography, Windows Kernel, Windows Update Stack, Windows Core Networking, Windows Peripherals, Internet Information Services, Windows Network Security and Containers, Windows Active Directory, Windows Storage and Filesystems, and the Microsoft JET Database Engine.

Known Issues

  • Microsoft is not currently aware of any issues with this update.

[DIRECT DOWNLOAD LINK]


Windows 10, version 1703

Similarly to Windows 10 version 1709, version 1703 has also reached the end of service for all devices running Windows 10 Home, Pro, Pro for Workstation, and IoT Core editions, so make sure you update your OS as well.

Cumulative update name:

Improvements and fixes

  • Addresses an issue that occurs when a third-party application loads hidden tabs into Internet Options.
  • Addresses an issue that prevents certain apps from installing if they are published using a Group Policy Object.
  • Addresses an issue that prevents Microsoft User Experience Virtualization (UE-V) settings from roaming to enable the signature files that are used for new messages, forwarded messages, and replies.
  • Updates the 2020 start date for daylight saving time (DST) in the Kingdom of Morocco.
  • Security updates to Internet Explorer, the Microsoft Scripting Engine, Windows App Platform and Frameworks, Windows Input and Composition, Windows Media, Windows Shell, Microsoft Edge, Windows Update Stack, Windows Fundamentals, Windows Cryptography, Windows Kernel, Windows Core Networking, Internet Information Services, Windows Network Security and Containers, Windows Active Directory, Windows Storage and Filesystems, and the Microsoft JET Database Engine.

Known Issues

  • Microsoft is not currently aware of any issues with this update.

[DIRECT DOWNLOAD LINK]


Windows 10, version 1607

The May Patch Tuesday updates came for Windows 10 version 1607 as well, but don’t forget that devices running Windows 10 Home or Pro editions will no longer receive monthly security and quality updates.

Update now to a newer version of Windows 10 to no longer have this issue.

Cumulative update name:

Improvements and fixes

  • Updates the 2020 start date for daylight saving time (DST) in the Kingdom of Morocco.
  • Security updates to Internet Explorer, the Microsoft Scripting Engine, Windows App Platform and Frameworks, Windows Input and Composition, Windows Media, Windows Shell, Microsoft Edge, Windows Fundamentals, Windows Kernel, Windows Core Networking, Internet Information Services, Windows Network Security and Containers, Windows Active Directory, Windows Storage and Filesystems, and the Microsoft JET Database Engine.

Known Issues

  • After installing KB4467684, the cluster service may fail to start with the error “2245 (NERR_PasswordTooShort)” if the group policy “Minimum Password Length” is configured with greater than 14 characters.

[DIRECT DOWNLOAD LINK]


Windows 10, version 1507

The oldest version of Windows 10 still receiving updates is none other than Windows 10 version 1507, but despite the support, like the versions mentioned above, it is highly advised that you upgrade to a newer version.

Cumulative update name:

Improvements and fixes

  • Addresses an issue that prevents certain apps from installing if they are published using a Group Policy Object.
  • Updates the 2020 start date for daylight saving time (DST) in the Kingdom of Morocco.
  • Security updates to Internet Explorer, the Microsoft Scripting Engine, Windows App Platform and Frameworks, Windows Input and Composition, Windows Media, Windows Shell, Windows Fundamentals, Windows Kernel, Windows Core Networking, Internet Information Services, Windows Network Security and Containers, Windows Active Directory, Windows Storage and Filesystems, and the Microsoft JET Database Engine.

Known Issues

  • Microsoft is not currently aware of any issues with this update.

[DIRECT DOWNLOAD LINK]


Patch Tuesday list of CVEs

Of course, Patch Tuesday isn’t just about new features, bug fixes, and performance improvements, as their main focus is actually security updates.

That being said, the May Patch Tuesday Updates bring fixes to over 147 CVEs.


How else can I download Patch Tuesday updates?

Patch Tuesday updates can be acquired like any other update. This means that you can use the Windows Update menu, the Windows Update Catalog, or the Windows Server Update Service (WSUS).

However, the Windows Update menu will download all available updates, while the Windows Update Catalog and the Windows Server Update Service will let you choose specific updates to download.


Note: It is important that you have a backup of all of your data before performing a big set of updates like the ones on Patch Tuesday, just in case things go wrong

Editor’s Note: If you want to know everything there is to know on Patch Tuesday, check out this in-depth guide.