NBA 2K Playgrounds 2 and Override: Mech City Brawl are free to play with Xbox Live Gold this weekend

Ahead of the official announcement on Xbox Wire, NBA 2K Playgrounds 2 and Override: Mech City Brawl will be available to play for free for Xbox Live subscribers this weekend. As noted in a post on TrueAchievements, these two games are being offered in the latest installment of Free Play Days on Xbox One.

Xbox Live Gold subscribers will be able to play NBA 2K Playgrounds 2 for free until April 16, 2020, giving players plenty of time to complete the estimated 20-25 hours in the regular campaign mode. On the other hand, Override Mech City Brawl will be available for free until Sunday, April 12, 2020 at 11:59 PM PDT. NBA 2K Playgrounds 2 allows you to play as any of the players from a massive roster of current and retired NBA greats. NBA 2K Playground 2 has online matchmaking with dedicated servers, four-player matches on Xbox Live, three-point contests, slam dunk contests, and more.

Override: Mech City Brawl takes about 12-15 hours to complete and offers players a chance to fight against opponents in a 3D city landscape. Override lets you play in epic battles against your friends with online Versus mode and an interesting take on 4-player co-op. In 4-player co-op, each player controls one half of each mech as they fight head-to-head.

Don’t forget, Xbox Live Gold subscribers can play Gears 5 for free until April 12, 2020. As usual, Xbox Live Gold subscribers will be able to download both games using Xbox.com, or via your Xbox One console. Xbox Live Gold subscribers can also get these games at under $10 a piece now or at the end of the Free Play Days trial period. Unfortunately, neither game is available to play for free as part of an Xbox Game Pass subscription.

NBA 2K Playgrounds 2
Developer:
2K
Price:
$7.49


Override: Mech City Brawl
Developer:
Modus
Price:
Free

Department of Defense deploys Microsoft Teams despite of JEDI contract issues

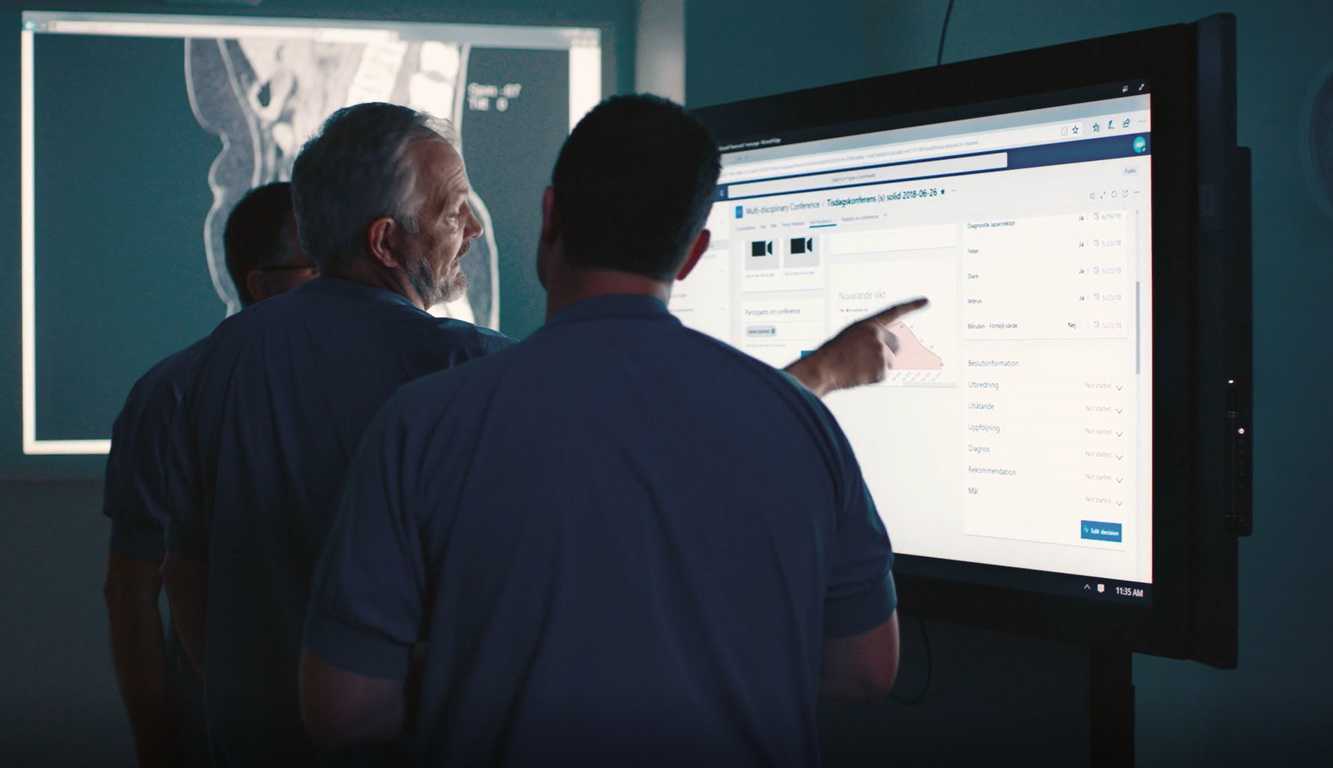
Seemingly unrelated to its recent joint defense project on the books, the Department of Defense and Microsoft are steamrolling another collaborative effort in deploying Microsoft Teams throughout the agency amid COVID-19 related circumstances.

Late summer of 2019, contract partner General Dynamics Corp, was awarded the $7.6 billion Defense Enterprise Solutions contract otherwise know as the DEOS, as part of an effort to upgrade the DoD’s collaborative workspace by implementing Microsoft 365.

Outlined in the agreement, “DEOS will streamline our use of cloud email and collaborative tools while enhancing cybersecurity and information sharing based on standardized needs and market offerings.”

However, with a global pandemic forcing people to “social distance”, “shelter-in-place”, and “stay at home” the DoD is quickening the pace at which it wants to deploy parts of Microsoft’s collaborative suite, specifically Microsoft Teams, to presumably help facilitate work-from-home orders by the agency.

As Windows Central is reporting, a source familiar with the DoD leaked a screenshot of the DoD’s version of Teams account login, the source also clarifies that “the DoD has begun to accelerate Microsoft Teams deployment ahead of schedule.”

While it’s not the unequivocal clearance Microsoft and the DoD were looking for to move ahead with their currently injuncted JEDI contract, it is another collaborative piece the two (excluding General Dynamics Corp as thrid party contractor) entities can begin setting in place support for one another, ahead of a potentially mutually beneficial relationship.

Microsoft shares new usage numbers on Teams, announces new Education features

Microsoft Teams is one of the few apps that has been seeing unprecedented growth since the beginning of the coronavirus pandemic. As expected, the software giant is striking the iron while it’s out by announcing new features and some interesting hard data about the team collaboration app.

Jared Spataro, Corporate Vice President for Microsoft 365, shared today some highlights from Microsoft’s new Work Trend Index, a new research effort to understand how workers around the world interact with Microsoft’s productivity apps:

  • First of all, the number of weekly Microsoft Teams users on mobile grew more than 3x from early February to March 31.
  • Microsoft also saw Teams users turning on video in Teams meetings grow two times more than before, and the total number of Teams video calls also grew by over 1,000% in March.
  • The company recently noticed a new daily record of 2.7 billion meeting minutes in one day, which represents an increase of 200% from 900 million in mid-March.
  • China is one of the markets where Teams is growing very fast, and Redmond now sees more than two times the number new Teams users in China each day compared to end of January.

Microsoft Teams was already one the fastest-growing Microsoft 365 apps before the pandemic, but it has now clearly become one of the company’s main priorities for the next couple of months. “While there is no true replacement for in-person collaboration, we’re working harder than ever to quickly innovate to decrease pain points, increase human connection, and make work a bit more fun,” Spataro said today.

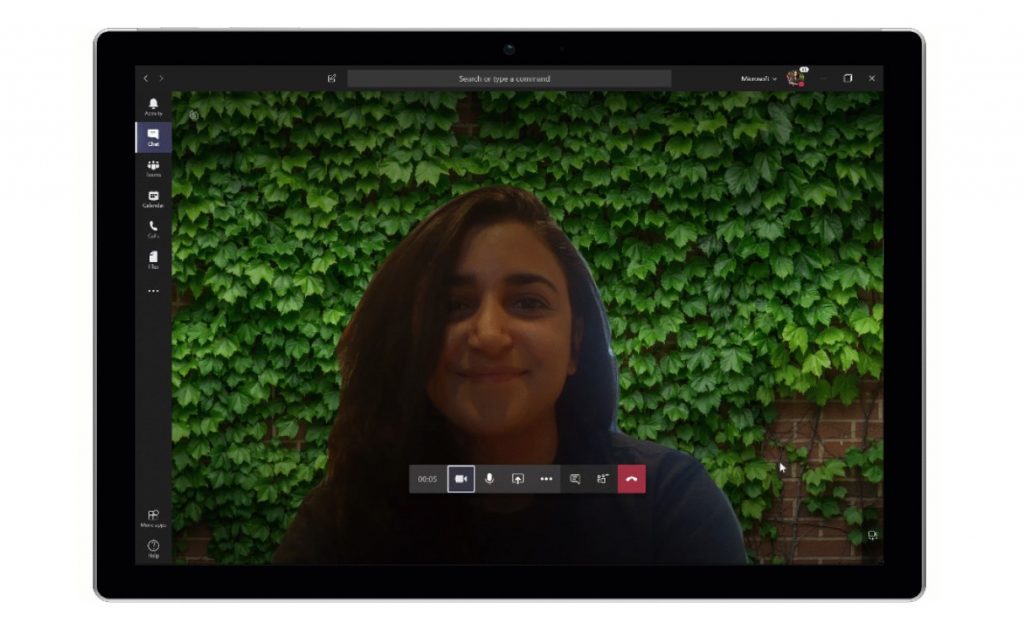
Those of you using Teams video calls frequently will be pleased to know that Custom background effects in video calls are now generally available starting today, according to the post. “This feature builds upon background blur, which uses AI to blur the environment behind you,” Spataro explained.

A raise hand feature to notify others in your Teams calls that you want to speak will also start rolling out this month, Spataro said today, and Microsoft also plans to improve your Teams calls with real-time noise suppression later this year. Lastly, Spataro announced two upcoming Education features for meeting organizers: an end meeting feature to end them for everyone in one click, as well as participant reports including join and leave times.

FIX: Ctrl Alt Del Not Working on Windows 10/11

If you want to open Task Manager on your Windows , or Windows device then you will have to use a combination of three keyboard buttons: ctrl+alt+del. Unfortunately, there are situations in which the ctrl alt del sequence is not working on our Windows 10 device. Why is that happening?

Well, ctrl+alt+del might not work after installing third-party apps, or after updating the system with an unofficial firmware.

These third-party apps are making changes on the Registry and by modifying the default values the ctrl+alt+del feature will stop working.

Therefore, for fixing this Windows problem you will have to access Registry and modify the values by yourselves. But, for further details on this matter, don’t hesitate and check the guidelines from below.


Ctrl Alt Del is one of the most-used keyboard shortcuts, and not being able to use it can be a big problem for many users. Since this is a big problem, in this article we’re going to cover the following issues:

  • Ctrl Alt Del not working – PC frozen – Several users reported that using Ctrl Alt Del shortcut causes their PC to freeze. This can be a big problem, but you should be able to fix it using one of our solutions.
  • Ctrl Alt Del not working on login screen – According to users, this keyboard shortcut isn’t working for them on the login screen. This is usually related to third-party applications and it can be fixed by finding and removing the problematic application.
  • Ctrl Alt Del not working to lock PC, to unlock – Many users use this shortcut to lock or to unlock their PC. However, if the keyboard shortcut isn’t working, you won’t be able to lock or unlock your PC with it.
  • Ctrl Alt Del not working on laptop keyboard – This issue can affect laptop keyboards as well, and if you have this problem, be sure to try using a USB keyboard and check if that solves the problem.
  • Ctrl Alt Del not working due to a virus – Sometimes malware infection can cause Ctrl Alt Del shortcut to stop working. If you have this problem, we strongly advise that you scan your PC with your antivirus tool.

How do I fix Ctrl+Alt+Del not working

1. Use Registry Editor

  1. Launch the Run window on your Windows 8 device – do this by holding Windows + R buttons at the same time.
  2. Then, in the input field enter Regedit. Press Enter or click OK to start Registry Editor.
    Ctrl Alt Del not working on login screen
  3. In the left pane navigate to HKEY_CURRENT_USERSoftwareMicrosoftWindowsCurrentVersionPoliciesSystem.
  4. If the mentioned key doesn’t exist, go to HKEY_CURRENT_USERSoftwareMicrosoftWindowsCurrentVersionPolicies. Right-click Policies and choose New > Key. Enter the System as the name of the new key. Once you create a System key, navigate to it.
    Ctrl Alt Del not working to unlock
  5. Now from the right panel of Registry find DisableTaskMgr and double click it to open its properties. If this DWORD isn’t available, right-click the right pane and choose New > DWORD (32-bit) Value to create it. Enter DisableTaskMgr as the name of the DWORD.
    Ctrl Alt Del not working on laptop keyboard
  6. At this point you should know that value 1 means enable this key, thus disable Task Manager, while value 0 means disable this key therefore enable Task Manager. Set the desired value data and click on OK to save changes.
    Ctrl Alt Del not working virus
  7. So, set the value you want and then close Registry Editor and reboot your Windows 10.

Once your PC restarts, try using Ctrl Alt Del shortcut and check if the problem is resolved.


Can’t access Registry Editor? Things aren’t as scary as they seem. Check out this guide and solve the issue quickly.


2. Install the latest updates

If Ctrl Alt Del shortcut isn’t working on your PC, the problem might be the missing updates. Certain bugs can appear in Windows and cause this and many other problems to appear.

However, you can fix this problem by installing the missing updates. To check for updates manually, do the following:

  1. Open the Settings app. You can do that simply by pressing Windows Key + I on your keyboard.
  2. When the Settings app opens, navigate to the Update & security section.
    Ctrl Alt Del not working frozen
  3. Now click on Check for updates button. Windows will now check for available updates and download updates in the background.
    Ctrl Alt Del not working frozen

After downloading the latest updates, the problem should be resolved and the keyboard shortcut should start working again.


3. Scan your PC for malware

Several users reported that Ctrl Alt Del isn’t working on their PC due to malware infection. To fix this problem, it’s highly advised to scan your PC for malware.

You can run a scan with the built-in Windows Defender, but we recommend you use third-party software. Dedicated antimalware antivirus tools are reported to have higher detection rates.

Pick an antivirus with a transparent privacy policy, a large threat database, as well as anti-phishing technologies, and online privacy features.


4. Check your keyboard

If Ctrl Alt Del shortcut doesn’t work, the problem might be your keyboard. To check if your keyboard is the problem, we advise you to connect it to a different PC. Also, you can try using a different keyboard on your PC and check if it works.

Several users reported that they fixed the problem by using a different keyboard. According to them, after using a different keyboard Ctrl Alt Del command started working on their keyboard as well.

This is an unusual solution, but users reported that it works, so be sure to try it out.


5. Remove Microsoft HPC Pack

Several users reported problems with Ctrl Alt Del and LogonUI.exe. According to them, the problem was related to Microsoft HPC Pack, and to fix it, you need to remove Microsoft HPC Pack from your PC.

Once you remove Microsoft HPC Pack from your computer, the problem should be completely resolved and Ctrl Alt Del shortcut should start working again.

If you want to completely remove this application along with all files associated with it, be sure to try one of the best uninstaller software on the market. They can automatically remove any stubborn app from your PC.

These tools will scan and erase all files associated with Microsoft HPC Pack from your PC without having any impact on any other apps on your device.


6. Perform a Clean boot

Sometimes third-party applications and services can interfere with your PC and cause this and many other errors to appear. To find out which application is causing this problem, you need to perform a Clean boot.

This is rather simple and you can do it by following these steps:

  1. Press Windows Key + R and enter MSConfig. Press Enter or click OK.
    Ctrl Alt Del not working on login screen
  2. Navigate to Services tab, check the Hide all Microsoft services box and click on Disable all button.
    Ctrl Alt Del not working to lock PC
  3. Now navigate to the Startup tab and click on Open Task Manager.
    Ctrl Alt Del not working on laptop keyboard
  4. A list of all startup applications will now appear. Right-click the first entry on the list and choose Disable from the menu. Repeat this step until you disable all startup apps.
    Ctrl Alt Del not working virus
  5. Now go back to System Configuration window and click on Apply and OK.
    Ctrl Alt Del not working frozen
  6. When asked to restart your PC, choose the option to restart now.

Once your PC restarts, check if the problem reappears. If not, you need to enable services and applications one by one until you find the problematic application.

Keep in mind that you need to restart your PC after enabling each application or service to apply the changes.

Once you find the problematic application, you can remove it from your PC, update it or just keep it disabled.

[wl_navigator]

Windows 10 build 19603 enhances access to Linux files

Windows 10 Preview Build 19603 is now available in the Fast ring. It comes with a bunch of new features, most notably, integration of the Windows Subsystem for Linux (WSL) with FileExplorer.

As usual, Microsoft announced several Windows 10 fixes and improvements that the build includes.

Linux file access in Windows 10

If you tried manipulating Linux files in Windows in the past, you would sometimes corrupt or lose them. Microsoft addressed that problem with WSL/File Explorer integration in Windows 10 version 1903.

With that change, it became easier to access Linux distributions from Windows.

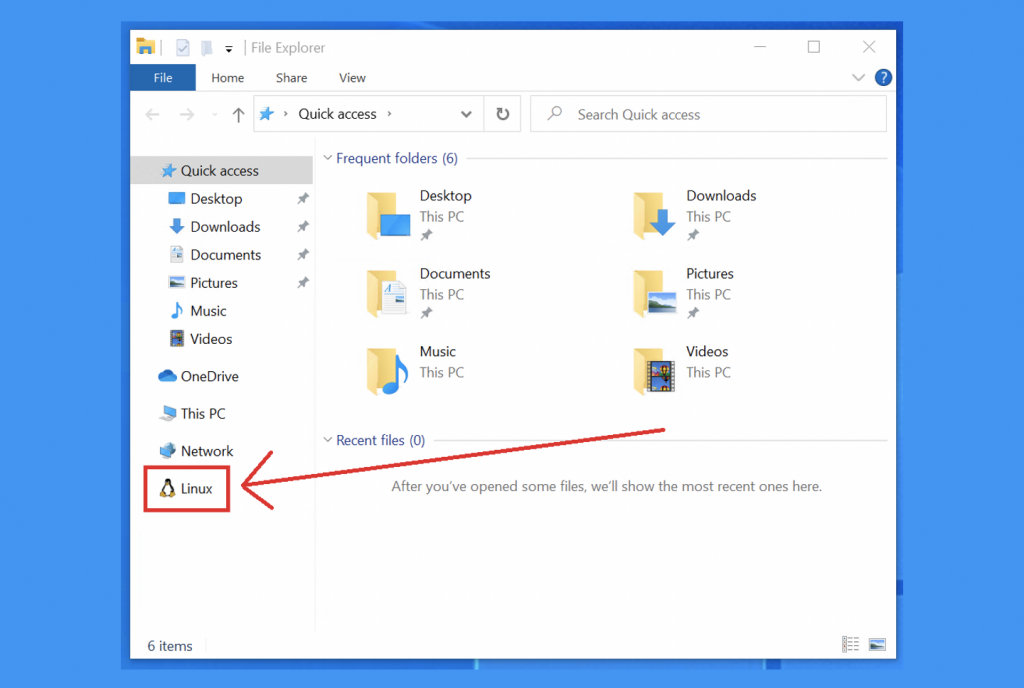
Today, build 19603 improves that integration by enabling you to get to your Linux files from File Explorer’s left navigation pane.

We’ve had the ability to access your Linux files since Windows 1903, but now you can easily get to them from your left-hand navigation pane in File Explorer.

To get view your distributions, start by clicking the Linux icon on the left-hand pane of File Explorer. Then select a distribution to access its Linux root file system.

Recently, File Explorer received a couple of fluent design enhancements too.

Disk space optimization

You will be able to optimize your disk space in a more efficient manner after installing build 19603.

With the improved Storage Settings feature, you can see all your content in one page. This way, you can quickly view disk cleanup recommendations and spot any apps or files that are stretching you PC storage.

You may also see how much space you can save by removing redundant content, such as files you have synced to the cloud.

Offering space-saving recommendations is a welcome idea, especially since Windows 10 cannot always tell what you want to do with large or unused files. As such, you still can ignore the suggestions and keep important large files or uninstalled apps.

If you experience any issue with build 19603, feel free to report it to Microsoft for correction or improvement.

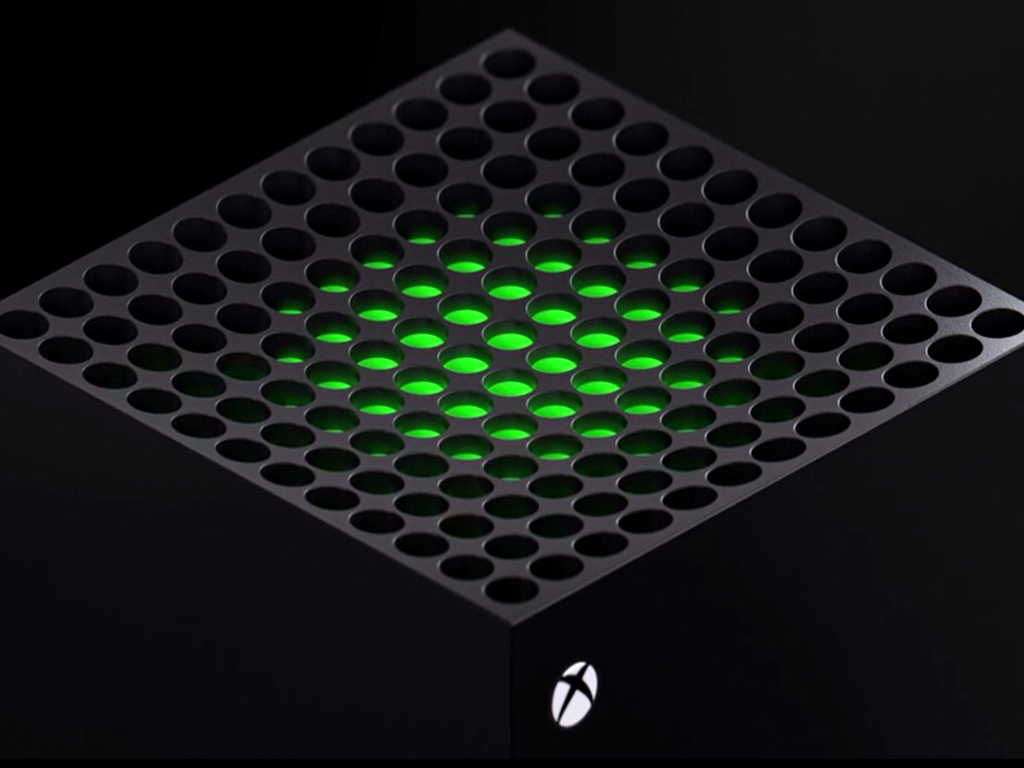
Microsoft’s Xbox Series X console to be added to Xbox All Access payment plans in Australia

When Xbox All Access launched in Australia in October of last year, many were disappointed to see the lack of any mention of Microsoft’s upcoming next gen Xbox Series X console.

The new payment plan, which allows gamers to pay off a new Xbox console on a monthly basis, included the Xbox Series X alongside the Xbox One X and Xbox One S in the UK and US with the offer of a free upgrade to the new console once it launched. The Australian version of the plan, which is managed by the Telstra telecommunications company, excluded the Series X completely and only made vague references to it on social media encouraging people to stay tuned for more information.

It looks as if Telstra has finally bitten the bullet as, earlier this week, the company updated its website with a statement announcing that “Xbox Series X is coming to Xbox All Access.”

Unfortunately, right now there’s no information on if the next gen console will be a free or paid upgrade or if an upgrade will even be available at all. Those interested in getting the Xbox Series X via Xbox All Access are encouraged to fill out this form though.

Do you want to buy an Xbox Series X via Xbox All Access or do you prefer to pay all of the fees up front? Let us know in the comments below and then follow us on Facebook and Pinterest for more Xbox gaming content.

Microsoft reportedly changes Windows 10X plans – no Surface Neo this year

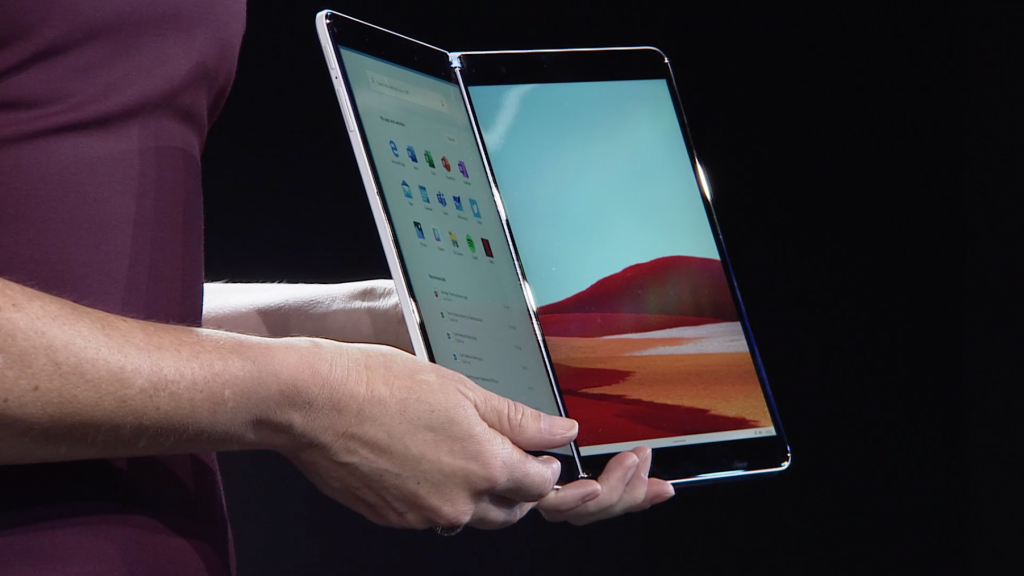
A late afternoon blog post by Mary Jo Foley reveals that, according to her sources, Microsoft won’t be delivering its Windows 10X powered Surface Neo dual screen device this year, nor will it ship Windows 10X to other OEMs for 3rd party Windows 10X dual screen devices in 2020. The delay is being attributed to the effects of shutting down the Microsoft campus as well as supply chain issues due to COVID-19. However according to Foley the Surface Duo, which will run on Android and not any variant of Windows 10, is not being delayed, at least not yet.

Foley reports that “Microsoft’s new priority is to get Windows 10X on single-screen devices first.” When announcing the Surface Neo and its Android powered cousin, the Surface Duo last year, Microsoft said that Windows 10X was planned for dual screen devices only, although the company had reportedly already been working on 10X for clamshell devices. Brad Sams is also reporting that he’s hearing “that the company is planning to release a version of 10X in the near future, possibly at Build, that will run on existing devices, but will be for testing purposes only.”

According to Foley, one sticking point may be how well the plan to containerize Win32 apps to run on Windows 10X, and “the inside word was the team had a long way to go to make this something “normal” users would understand and accept, as compatibility levels were not great.” It may be that by releasing Windows 10X early for some form of insider testing, something that was never clear was going to happen with the dual screen first plan, may now be seen as being more useful.

What do you think, is this the right move for Microsoft? Would you prefer trying out Windows 10X on a single screen device, or are you saddened by the Surface Neo news? Let us know in the comments below

Microsoft and BlackRock announce strategic partnership to host Aladdin Investment Platform on Azure Cloud

Today, Microsoft and BlackRock announced a new strategic partnership to host BlackRock’s Aladdin infrastructure on Microsoft’s Azure Cloud.  BlackRock is a leading global investment management company with more than $7.4 trillion and with this new partnership, BlackRock and Microsoft will work together to bring its Aladdin platform to the cloud with the goal of creating new opportunities for scale and innovation for BlackRock’s customers.

Aladdin is BlackRock’s end-to-end investment management and operations platform that combines a range of services for its customers including portfolio and risk management, trading, and operations.  By leveraging the cloud, BlackRock’s Aladdin customers are now able to better meet their infrastructure requirements around resiliency and security, while also being to scale and support the localized needs of its clients by leveraging Microsoft Azure’s network of global data centers.

“By bringing Aladdin to the cloud, Microsoft will support BlackRock in further enhancing its client experience while also enabling continuous innovation in the financial services industry,” said Judson Althoff, executive vice president of Microsoft’s Worldwide Commercial Business. “Together, we will empower an ecosystem of financial services customers running their most critical workloads in the cloud.”

With this partnership, BlackRock and Microsoft indicated that they also work together on initiatives that leverage technology to improve and expand sustainability data and analytics including close partnerships with academics, startups, non-profits, and others to improve the lack of standardized, high-quality data.  The first initiative will be to collaborate on challenge grants for organizations that use data and technology to understand and drive sustainability.


Windows 10 Insider build 19603 integrates Windows Subsystem for Linux with File Explorer

Microsoft has just announced the release of Windows 10 Insider build 19603 for Fast Ring Insiders, and the main new feature is the integration of Windows Subsystem for Linux with File Explorer. After installing this build, those of you who have WSL installed will spot the new Linux icon in the left-hand navigation pane of File Explorer, making it easier than ever to access files from your different Linux distros.

Another new feature in this build is the new User cleanup recommendations in Storage Settings, which will free up space on your PC by removing unused apps and files. “Windows cannot predict whether you want to delete personal files, uninstall apps, or remove local copies of files synced to the cloud. With this tool, all the content is gathered in one page and removable by you with a few clicks,” the Windows Insider team explained today.

This new build also comes with various quality improvements, including a fix for an issue causing webcams to not function properly when making video calls in Microsoft Teams. You can check out the full list of fixes and known issues in this build below:

General changes & improvements

  • Going forward, services that are implemented by binaries residing in the user profiles will be persisted on upgrades.
  • Narrator will no longer automatically enable scan mode when interacting with the Ideas pane in Excel. In the new Microsoft Edge, Narrator now automatically enables scan mode and starts reading webpages.

Fixes

  • We are removing the known issue for incompatibility issues due to changes in the operating system between some Insider Preview builds and certain versions of BattlEye anti-cheat software. If you run into issues playing games that use BattlEye anti-cheat software, please submit feedback on these issues to us via Feedback Hub.
  • We fixed an issue causing webcams to not function correctly when attempting to make a video call in Microsoft Teams.
  • We fixed an issue resulting in some Insiders experiencing a green screen citing an error with mssecflt.sys when starting safe mode on recent builds.
  • We fixed an issue resulting in the WIN + PrtScn keyboard shortcut no longer saving a picture to file.
  • We fixed several reported stability issues with Narrator, including a fix where it will no longer crash when selecting text in scan mode with new Edge when remote operations are off.
  • We fixed an issue leading to the Narrator Quick Start guide crashing while traversing it with Narrator.
  • We fixed an issue where the EXE property information was incomplete in Task Manager for EoAExperiences.exe.
  • We fixed an issue resulting in some devices experiencing a bugcheck (GSOD) during the reboot to install an update.
  • We fixed an issue resulting in some Insiders experiencing a sporadic bugcheck (GSOD) with the error CRITICAL_PROCESS_DIED.
  • We fixed a bugcheck with error KMODE_EXCEPTION_NOT_HANDLED some Insiders were experiencing when trying to sign out from the current user.
  • We fixed an issue resulting in some Insiders receiving driver compatibility warnings when trying to update to a newer build in certain virtual environments.
  • We fixed an issue that led to inaccurate size estimates for disk cleanup when the option to clean up old Windows installation files was included.
  • We fixed an issue where Storage settings would say the option to clean old Windows installation files wasn’t available, because it had been automatically removed after a certain number of days, when actually you had manually selected to remove it.
  • We fixed an issue that could result in Settings crashing when navigating to Network & Internet for some Insiders.
  • We fixed an issue where you would see a notification from the Shared Experiences page saying your account needed fixing, however the Fix Now option on the page wouldn’t work.
  • We fixed an issue where if the Cortana icon was turned off on the taskbar, it might still partially display on secondary monitors.
  • We fixed an issue resulting in not being able to drag and drop files into the root of a network share folder.
  • We fixed an issue where the IME context menu wouldn’t appear when pressing Shift+F10 if the display language was something other than English.
  • We fixed an issue that could result in IMEs created for Amharic and Sinhala to not input text until rebooting your PC.
  • We fixed a crash some Insiders were encountering when switching window focus while an IME candidate pane was open.

Known issues

  • We are aware Narrator and NVDA users that seek the latest release of Microsoft Edge based on Chromium may experience some difficulty when navigating and reading certain web content. Narrator, NVDA and the Edge teams are aware of these issues. Users of legacy Microsoft Edge will not be affected. NVAccess has released a NVDA 2019.3 that resolves the known issue with Edge.
  • We’re looking into reports of the update process hanging for extended periods of time when attempting to install a new build.
  • The Documents section under Privacy has a broken icon (just a rectangle).
  • Sticky Notes windows can’t be moved on the desktop. As a workaround, when you set focus to Sticky Notes, press Alt + Space. This will bring up a menu that contains a Move option. Select it, then use either the arrow keys or the mouse to move the window.
  • We’re investigating reports that app icons in the taskbar are having rendering issues, including defaulting to the .exe icon.
  • We’re investigating reports that the battery icon on the lock screen always shows close to empty, regardless of actual battery levels.
  • We’re investigating reports of IIS configuration being set to default after taking a new build. You will need to back up your IIS configuration and restore it after the new build is installed successfully.`
  • Language packs may fail to install on this build. This is most impactful for anyone who chooses to reset their PC – the language packs you have prior to upgrading will persist. Anyone impact by this may notice some parts of the UI don’t display in your preferred language.

Lastly, the Windows Insider team shared today two important pieces of information for Windows Insiders: First of all, the team wants some feedback about the new Microsoft News Bar widget that was quietly released on the Microsoft Store last month. Moreover, Windows Insiders can also update the Raw Image Microsoft Store extension to try out support for Canon’s latest CR3 raw format.

How to password protect OneNote 2016 notebook sections

If you’re looking for a little more privacy with OneNote, then you might want to password protect your notebook sections. While we’ve already talked about how you can do this in the Microsoft Store, Android, MacOS, and Android versions of OneNote, we’ll now turn our attention to OneNote 2016.

While the Microsoft Store version of OneNote is more often updated, some users might still prefer OneNote 2016, too. After all, Microsoft said that the desktop app is here to stay. So, we’ve got you covered, and here’s how you can password protect OneNote 2016 notebook sections.

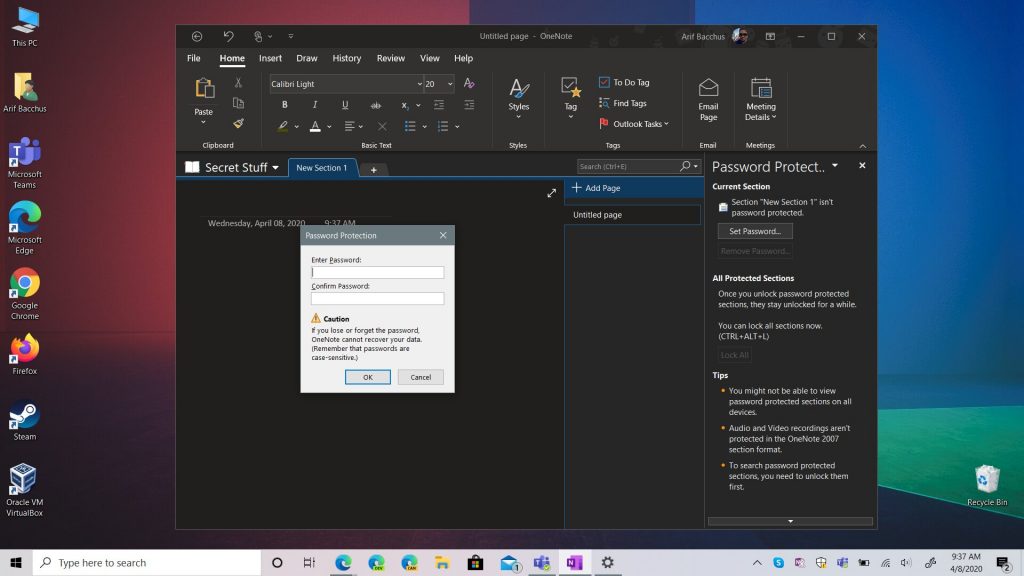
To get started, you’ll want to open the notebook with the section that you want to protect. Once there, right-click the tab on the top with the section name. You’ll then see an option which says Password Protect this Section. This is what you’ll want to click. OneNote will then open a sidebar, and you’ll want to click the Set Password option on the top.

You’ll be prompted to enter a password, so type it in and then confirm. Be sure you remember this password, and keep in mind that if you lose it, OneNote won’t be able to recover it. Also, be aware that passwords are case sensitive.

Once a password is set, OneNote will also automatically lock your sections after a period of inactivity. You can always, however, manually lock by pressing Ctrl, Alt, and L on your keyboard.  You’ll also need to keep in mind that you’ll need to unlock sections first if you want to search them.

And, that’s it! Password protecting sections in OneNote 2016 just takes a few simple steps. There’s much more to OneNote 2016 than just password protection, though. Our previous guide shows you how you can integrated it with Outlook, and how you can move local notebooks over to the Microsoft Store version of the app. Keep it tuned to OnMSFT for all your OneNote news and information, and let us know how OneNote works for you by dropping us a comment below.

Microsoft Teams is getting the ability to set background effects this month

The ability to set background effects during Microsoft Teams meetings will be coming later this month, according to an email sent out to Office 365 subscribers. The feature is now timed for roll out beginning in mid-April, with the ability for users to upload their own custom images in May.

As a reminder, this feature builds on the already popular background blur feature in Teams. It allows meeting attendees to customize their background during a video call from a list of pre-selected images. Microsoft originally said that the feature would be coming “within a quarter” so we now have a more solid date. The company also updated the Microsoft 365 Roadmap to clarify, showing that it is in development, with the release of April CY2020.

Microsoft is also planning on rolling out a new experience for launching instant channel meetings in Mid-April. In addition, is an improved Teams meeting join launcher experience. Both will be coming in late April.

Update: Our original headline for this article stated that Teams would be getting the ability to upload custom image backgrounds in April. We’ve updated the headline to clarify that Microsoft’s message is about the pre-selected background effects, and not custom images. Those will be coming in May.

How to set up PS4 Remote Play in Windows 10

PS4 Remote Play is a handy little tool for PlayStation console gamers that allows you to stream and remotely play games from your PlayStation 4 to a Windows PC. It’s great if you want to, for example, feel some PS4 exclusives on a PC.

Now, before you start playing God of War 5 on your Desktop PC, there are a few requirements you need to meet and a setting up procedure you need to go through. First off, here’s what you’ll need to set up the PS4 Remote Play on your PC:

  • DualShock 4 controller
  • Micro USB Cable
  • PlayStation Network access
  • Internet connection with upload and download speeds of at least 5 Mbps (12 Mbps recommended)

If you meet all the requirements, and I’m pretty sure you do, let’s move on to setting up the PS4 Remote Play on your computer. The instructions are below.

How to use PS4 Remote Play on a Windows PC

1. Update PS4 Firmware

  1. Turn on your console.
  2. Go to Settings > System Software Update.
  3. Select Update.
  4. Wait for the system to download the new update.
  5. Once the new update is downloaded, head over to Notifications > Downloads.
  6. Follow further instructions to install the downloaded update.

2. Enable Remote Play

  1. Go to Settings > Remote Play Connection Settings.
  2. Check both Enable Remote Play and Connect directly with PS Vita/PS TV.
  3. Now, go back to Settings, and select PlayStation Network/Account Management.
  4. Select Activate as Your Primary PS4, and choose Activate.
  5. The Remote Play feature is now activated, so you should now allow it to start when your console is in the Reset Mode. To do that, go back to Settings > Power Save Settings.
  6. Select Set Features Available in Reset Mode, and check the Stay Connected to the Internet.

That’s it, your PlayStation 4 is now ready to cast the signal to your PC. Now, we need to do the same on your computer.

3. Download and install PS4 Remote Play on your computer

  1. Download the PS4 Remote Play package, here.
  2. Once you download the installer, run it and simply follow further installation instructions.
  3. Once the package is installed on your computer, we can move to the final step and set up the connection between your PlayStation 4 and your Windows 10 PC.

4. Set up the connection

  1. Lunch the Remote Play app you just installed.
  2. Click Start, and then sign in with your PlayStation account.
  3. The app should now start searching for your PS4.
  4. Once the connection is established, you’ll be able to cast or remotely-play PS4 games on your computer.

That’s about it, as you can see establishing the connection between your PS4 and your PC is straightforward with the Remote Play feature, and you can establish it within minutes (if you have the required hardware, of course).

If you have any comments, questions, or suggestions, just let us know in the comments down below.

FIX: Mouse or touchpad not working in Windows 10/11

When you’re using a new operating system such as Windows 10 or Windows 11, there can always be some hardware compatibility issues. You can apply most of the solutions on both versions of Windows, and also check our dedicated guide to fix touchpad issues on Windows 11.

According to users, it seems that mouse pads and touchpads aren’t working for some Windows 10 users, and this can be a big problem, especially for laptop users, but today we have a few tips on how to fix this.

How do I fix mouse or touchpad issues in Windows 10?

  1. Reinstall the touchpad driver
  2. Install the latest drivers
  3. Roll back to an older driver
  4. Enable ELAN
  5. Enable ETD service
  6. Use the Hardware Troubleshooter
  7. Set the touchpad to No Delay
  8. Disconnect other USB devices
  9. Change Power Management options
  10. Run the SFC scan

1. Reinstall the touchpad driver

  1. Press Windows key + X and go to Device Manager
  2. In the Device Manager window find your touchpad drivers.
  3. Right-click them, and select Uninstall.
  4. Select the option to delete the driver package from the system.
  5. Go to the Action menu of Device manager and select Scan for Hardware changes to reinstall your drivers.
  6. Restart your computer.

Maybe something went wrong with your touchpad driver, while you were upgrading your system to Windows 10. So, you can try reinstalling the touchpad or mouse driver, and check if it works again.

2. Install the latest drivers

  1. Download the driver and right click the setup file.
  2. Choose Properties and then go to Compatibility tab.
  3. Check Run this program in compatibility mode for and choose Windows 8 from the list.
  4. Install the driver and see if the problem still persists.

Often you’ll need drivers for Windows 10, so check your manufacturer’s website for Windows 10 drivers. If there are no Windows 10 drivers download latest Windows 8 drivers and install them in compatibility mode.

In addition, you can always check for Windows updates and keep your Windows 10 up to date to avoid any compatibility issues. If you’re having trouble updating your Windows, check out this guide that will help you solve them in no time.

It is very important to choose the right driver versions from the manufacturer’s website. But since it can be hard to find the right drivers for your DVD drive, software dedicated to finding drivers automatically may come in handy. 

Using a specialized tool is suggested. This kind of software is very easy to use and can automatically do the work in just a few minutes.

However, once the tool scans the system it will give you a list of recommended drivers to install. Then you only have to decide whether you install them one by one, by checking the boxes next to their names.

So, the fittest solution to manage your PC drivers securely and update the latest versions is dedicated software like Fortect Driver Updater.

3. Roll back to an older driver

This solution is the same as Solution 1, you open Device Manager, find your touchpad driver but instead of uninstalling it, you choose the Roll Back Driver option. After you’ve rolled back to older drivers, restart your PC and try again.

If the rollback worked and the issue was solved, you’ll have to prevent Windows from automatically updating your driver. To do that, follow the easy steps from this guide.

4. Enable ELAN

  1. Go to Settings.
  2. Find Devices and then go to Mouse & Touchpad.
  3. Scroll down to Related Settings and click on Additional mouse options.
  4. Mouse Properties Window should open and in it you should go to ELAN tab.
  5. Click your device and then click Enable.

5. Enable ETD service

  1. Press Ctrl+Alt+Del to open Task Manager and go to the Services tab.
  2. Find ETD service and Enable it.
  3. Restart your computer to see if the issue is resolved.

6. Use the Hardware Troubleshooter

  1. Go to Settings.
  2. Head over to Updates & Security > Troubleshoot.
  3. Click Hardware and Devices, and click Run the troubleshooter.
  4. Wait for the process to finish.
  5. Restart your computer.

If none of the solutions from above resolved the issue, let’s try with Windows 10’s troubleshooting tool. You can use this troubleshooter to resolve all sorts of issues, including the hardware problems.

7. Set the touchpad to No Delay

Disabling the touchpad delay may also resolve the problem.

  1. Go to Settings.
  2. Head over to Devices > Touchpad. 
  3. Now, under Touchpad section and set the delay before clicks to No delay (always on).
  4. Restart your computer.

8. Disconnect other USB devices

There’s also a possibility that some external USB device interferes with the touchpad. So, if none of the previous solutions worked, try disconnecting all the USB peripherals, and check if the touchpad works now.

9. Change Power Management options

  1. Go to Search, type devicemngr, and open Device Manager.
  2. Scroll down and find your touchpad from the list of devices.
  3. Right-click the touchpad, and go to Properties. 
  4. Head over to the Power Management tab.
  5. Uncheck the Allow the computer to turn off this device to save power option.
  6. Restart your laptop.

Power Managment is a very important feature for every laptop. However, saving power can sometimes disable some vital functions of your machine. It’s possible that your Power Management settings are actually preventing the touchpad from working.

10. Run the SFC scan

  1. Go to Search, type cmd, and open the Command Prompt as Administrator.
  2. Type in the following command, and press Enter: sfc/scannow
  3. Wait for the process to finish.
  4. Restart your computer.

The last thing we’re going to try is another troubleshooting tool. That tool is the SFC scan. The SFC scan is designed to resolve various issues inside and outside your system. So, hopefully, it’ll be useful in this case, as well.

If you’re having trouble accessing Command Prompt as an admin, then you better take a closer look on this guide.

For a complete walkthrough on restoring pointer control, read our mouse not working on laptop guide.

As you can see, this is a driver issue, but we hope that there will be official driver update from Microsoft and other manufacturers. If you have any comments, or suggestions, write them down in the comment section below, we would love to read it.

But first, here are some more examples of similar issues you can resolve with basically same solutions:

  • Touchpad lagging in Windows 10
    • If your touchpad actually works, but you have a hard time using it, you can still apply the solutions from this article.
  • Mouse unable to connect to Windows 10 laptop 
  • Mouse lagging in Windows 10
  • Touchpad disabled in Windows 10
    • Well, enable it! Of course, it may not be as easy as it sounds, because various issues might get involved.
  • Touchpad freezes in Windows 10
    • If your touchpad freezes, check out this article. If you still have problems, carry on with the solutions from this article.

Sony’s next gen PS5 controller reveal got Microsoft’s Xbox controller trending on Twitter

Sony made some waves this morning with the official reveal of the controller for their next gen console, the PlayStation 5.

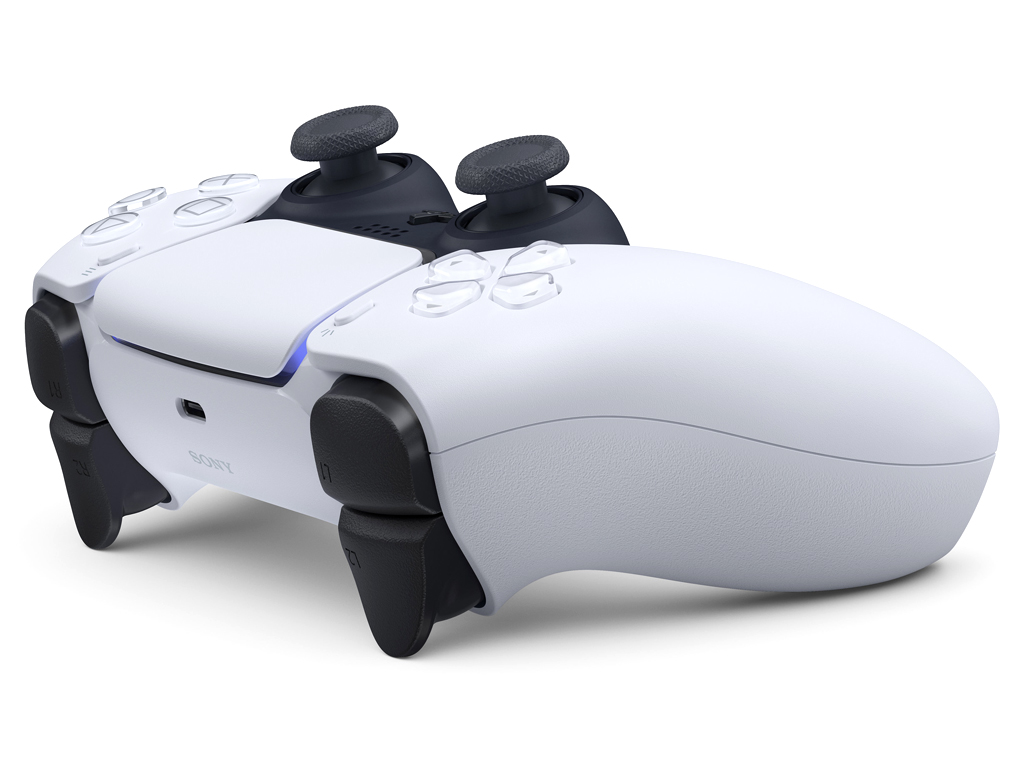
Named, DualSense, this PlayStation 5 controller features haptic feedback, adaptive triggers in the L2 and R2 buttons, a rechargeable battery, and a built-in mic for voice chat and, presumably, potential voice commands.

This new controller is without a doubt the most-dramatic evolution of a PlayStation controller in terms of appearance with a radically different design that seems closer to an Xbox One controller than any first-party controller for the PlayStation, PS2, PS3, or PS4.

Here’s the PS4’s DualShock 4 alongside the PS5’s DualSense for comparison. As you can see, it’s quite a big leap in appearance.

PS4 and PS5 controllers

This resemblance to the current Xbox controllers wasn’t lost on gamers who immediately took to social media platforms, such as Twitter, to discuss the similarities. Numerous hilarious memes were created and at one point “Xbox Controller” was trending while “PS5 Controller” and “DualSense” didn’t even crack the top 20.

Xbox Controller trending on Twitter

Here’s some of the funniest PS5 and Xbox One controller comparison tweets:

https://twitter.com/Nitomatta/status/1247638170457354240

Microsoft recently revealed the look of their new controller for the next gen Xbox Series X console and it’s almost identical to the current version in use right now on Xbox One consoles. One of the reasons for this is that many gamers and industry insiders widely believe the current Xbox controller to be near perfect in design so the only real change Microsoft needed to make with the new one was the addition of a Share button and USB-C.

Personally, I was hoping it was going to have a built-in mic though so kudos to Sony for including that in their controller.

What do you think of the DualSense controller? Do you like it or hate it? Share your thoughts with the community in the comments below and then follow us on Pinterest and Twitter for more gaming news.

Full Fix: Your Insider preview build settings need attention

Many Windows 10 users who have updated their computers are now complaining they can’t get rid of the annoying error message informing them that their Insider preview build settings need attention.

Although this is not a blocking error, it’s quite intriguing for users because some of them have never run Insider builds.

The whole error message reads as follows: Your Insider preview build settings need attention. Go to Windows Insider Program to fix this.

It appears this is a harmless error message, as users haven’t reported any serious issue associated with it.

Your Insider preview build settings need attention message can appear and cause issues while downloading Insider builds. Speaking of this issue, here are some similar problems that users reported:

  • Your diagnostic and usage data settings require attention to get Insider preview builds – This is a variation of the original error, but you should be able to fix it using one of our solutions.
  • Your security settings need attention to get Insider preview builds – This is another problem that can appear, and in order to fix it, be sure to disable your antivirus and check if that helps.
  • Your Microsoft account requires attention to get insider preview builds – Sometimes this problem can be caused by your Microsoft account. Simply verify your account or change your password and check if that solves the problem.

How to fix Your Insider preview build settings need attention?

1. Make changes to your registry

  1. Press Windows Key + R and enter regedit. Press Enter or click OK.
    Your Microsoft account requires attention to get insider preview builds
  2. Navigate to the HKEY_LOCAL_MACHINESOFTWAREMicrosoftWindowsSelfHostUIStrings key.
    Your diagnostic and usage data settings require attention to get Insider preview builds
  3. Delete every entry except for the first one.
  4. Stay away from the Windows Insider Program menu in Settings. As soon as you navigate to that menu, the error message appears again.

2. Remove the AllowTelemetry value from your registry

If you’re getting Your Insider preview build settings need attention message, you might be able to fix the problem simply by removing a single value from your registry. To do that, follow these steps:

  1. Open Registry Editor.
  2. In the left pane navigate to HKEY_LOCAL_MACHINESOFTWAREPoliciesMicrosoftWindowsDataCollection.
    Your security settings need attention to get Insider preview builds
  3. Deleting values from the registry can be potentially dangerous and cause issues with your system. Therefore, it’s always a good idea to create a backup of your registry, just in case anything goes wrong. To back up your registry, right-click the DataCollection key and choose Export from the menu.Your diagnostic and usage data settings require attention to get Insider preview builds
  4. Now make sure that Export range is set to Selected branch. Choose a safe location, enter the desired file name and click the Save button.Your security settings need attention to get Insider preview builds
  5. In case anything goes wrong after modifying your registry, you can just run the backup file you created in order to restore it to the original state.
  6. In the right pane, locate AllowTelemetry value, right-click it and choose Delete from the menu.

After you delete this value, the problem should be completely resolved. If AllowTelemetry isn’t available in the registry, you can just skip this solution.

3. Clear FlightingOwnerGUID value

According to users, sometimes FlightingOwnerGUID entry in your registry can cause Your Insider preview build settings need attention message to appear.

However, you can fix that simply by clearing the value of theFlightingOwnerGUID entry. To do that, just follow these steps:

  1. Open Registry Editor and in the right pane navigate to HKEY_LOCAL_MACHINESOFTWAREMicrosoftWindowsSelfHostApplicability.
    Your Microsoft account requires attention to get insider preview builds
  2. Create a backup of Applicability key just in case.
  3. In the right pane, locate FlightingOwnerGUID double-click it and clear its Value Data. Alternatively, you can remove this value.

After doing that, you need to go through the Get Insider Preview Builds process again and sign in with your Microsoft account. Several users reported that it worked for them, so be sure to try it out.

4. Check your antivirus

According to users, sometimes your antivirus can interfere with your system and cause Your Insider preview build settings need attention message to appear.

To fix this problem, it’s advised that you disable certain antivirus features or your antivirus altogether. If that doesn’t work, you might even have to remove your antivirus.

If the problem is resolved after removing the antivirus, you should consider switching to a different antivirus solution, that won’t interfere with your system.

Several users reported that Spybot software caused this issue on their PC, but after disabling Spybot the problem was completely resolved.

5. Change EnablePreviewBuilds DWORD

If you keep getting Your Insider preview build settings need attention message, you might be able to fix the problem by making a few minor changes in your registry. To do that, follow these steps:

  1. Open Registry Editor.
  2. In the left pane navigate to the HKEY_LOCALMACHINESOFTWAREMicrosoftWindowsSelfHostApplicability. Create a backup of Applicability key just in case.
  3. Now locate EnablePreviewBuilds value in the right pane and double-click it. Change its Value data to 1 and click OK to save changes.

After doing that, you just need to make few changes in the Settings app. To do that, follow these steps:

  1. Press Windows Key + I to open the Settings app.
  2. Navigate to Update & Security section.
    Your diagnostic and usage data settings require attention to get Insider preview builds
  3. Go to the Advanced options.
    Your security settings need attention to get Insider preview builds
  4. Click the Fix me button and choose to sign-in with your Microsoft account.

After doing that, the problem should be completely resolved and everything will start working again.

6. Terminate Insider preview and change your password

According to users, you might be able to fix the problem with Your Insider preview build settings need attention message simply by terminating the Insider preview.

Users reported that they changed their account password online and then made sure that their account is verified.

After doing that, they just restarted their PC and joined the Insider preview program once again. After doing all that, the issue should be resolved completely and everything will start working again.

7. Run WSReset command

Sometimes Your Insider preview build settings need attention message can appear due to certain issues with Microsoft Store, and several users claim that they fixed the problem by clearing the Store cache.

This is quite simple to do, and you can do it by following these steps:

  1. Press Windows Key + R to open the Run dialog.
  2. Now enter wsreset.exe and press Enter or click OK.
    Your Microsoft account requires attention to get insider preview builds

After doing that, the Store cache will be cleared and the problem should be resolved.

8. Make sure that your account is verified

According to users, sometimes in order to fix Your Insider preview build settings need attention message you need to make sure that your account is verified. You can do that by following these steps:

  1. Open the Settings app and go to the Accounts section.
  2. In there you should see a Verify option available. Click it and follow the instructions on the screen.

Once you verify your account, check if the problem is still there.

9. Delete ErrorState, LastHR, PilotInfoRing values

Sometimes certain entries in your registry can interfere with your system and cause Your Insider preview build settings need attention message to appear.

To fix this problem, you just need to remove certain entries from the registry. To do that, follow these steps:

  1. Open Registry Editor and navigate to the HKEY_CURRENT_USERSoftwareMicrosoftWindowsSelfHostApplicability. Back up Applicability key.
  2. In the right pane, locate ErrorState, LastHR, and PilotInfoRing DWORDs and remove them.
  3. Close Registry Editor.
  4. After doing that, go to the Settings app > Update & Security > Advanced options and enable Insider Builds.

After doing that, the issue should be completely resolved.

Your Insider preview build settings need attention message that will prevent you from downloading the latest Insider builds, but we hope that you managed to fix the problem by using one of our solutions.

FIX: Acrobat failed to connect to a DDE server

The Adobe Acrobat PDF (Portable Document Format) software throws out this error message for some users:

Acrobat failed to connect to a DDE server

That error message can pop up when users try to open PDFs or merge documents within Adobe Acrobat.

Consequently, users can’t open a PDF or merge documents in Acrobat when the issue arises. This is how users can fix the Acrobat failed to connect to a DDE server error in Windows 10.

How can I fix Acrobat’s DDE server error?

1. Update the Acrobat software

  1. Right-click the Start menu and select Run.
  2. Enter appwiz.cpl in the text box and click OK.
  3. Select Adobe Acrobat and click Uninstall.
  4. Click the Yes button to confirm.
  5. Restart Windows after uninstalling Adobe Acrobat.
  6. Download Adobe Acrobat from the official page

The DDE server error will more likely arise for older versions of Adobe Acrobat. Adobe might have released an update that fixes the DDE server issue. Thus, updating Acrobat to the latest version might fix the issue for some users.

Users can update the software by clicking Help > Check for Updates in Acrobat. That will open the Updater window that installs updates.

2. Turn off antivirus software

Some third-party antivirus utilities might flag Adobe Acrobat when users try to merge PDFs. So, turning off antivirus software is another potential resolution for the DDE error.

Users can usually select to temporarily disable antivirus software by right-clicking their system tray icons and selecting a disable, exit, pause, or turn off the option.

If there isn’t a disable option on the software’s context menu, open the utility’s primary window and look for a turn off option on its settings tab.

3. Edit the Registry

  1. First, press the Windows key + X hotkey.
  2. Select Run to open that accessory.
  3. Input regedit in the text box and press Enter to open the Registry Editor.
  4. Enter this registry path in the address bar:
    • ComputerHKEY_CLASSES_ROOTacrobatshellopenddeexecapplication.
  5. Select the application key on the left of the Registry Editor’s window.
  6. Double-click Default to open the Edit String window shown directly below.
  7. Then delete the current AcroviewA18 or AcroviewA19 text in the Value data box.
  8. Enter AcroviewR18 in the Value data box if the original value was AcroviewA18.
    1. Note that the A and R values depend on the version installed, so some users might need to enter AcroviewR19.
  9. Then click the OK button.
  10. Restart Windows after editing the registry.

If you can’t edit your Windows 10’s registry, read this handy guide and find the easiest solutions to the issue. This registry edit is one of Adobe’s official resolutions for the DDE error. The edit requires that users modify an application key for Acrobat.

4. Repair Acrobat

  1. Some users have fixed the DDE server error by repairing Acrobat’s installation. To do that, open Run.
  2. Enter appwiz.cpl in Run and press Return.
  3. Select the Adobe Acrobat software.
  4. Press the Change button to open the window in the image directly below.
  5. Select the Repair installation errors in the program option.
  6. Press the Next button.
  7. Click Finish when the repair installation process is done.

5. Turn off Protected Mode at startup

Click Edit > Preferences in Acrobat to open the window in the shot directly below.

  1. Click Security (Enhanced) on the left of that window to open the options shown below.
  2. Deselect the Enable Protected Mode at Startup option.
  3. Deselect the Enable Enhanced Security option.
  4. Close the Preferences window and Adobe Acrobat.
  5. Thereafter, open Adobe to see if that resolution has fixed the DDE server error.

Deselecting the Protected Mode at startup and Enhanced Security settings is another resolution that has fixed the DDE server error some Acrobat users.

Those are resolutions that have fixed the DDE server error for Adobe Acrobat users. So, they’ll probably resolve the error. If further fixes are still needed, however, Acrobat users can log in to adobe.com to open a support case.

If you have any more suggestions or questions, don’t hesitate to leave them in the comments below and will surely take a look.

Microsoft keeps the bad guys away, purchases Corp domain name

Today, security expert Brian Krebs posted on this blog that Microsoft has apparently purchased the domain corp.com.  The domain went up for auction at a starting price of $1.7 million when it was listed by its Wisconsin native, Mike O’Connor, who has owned the domain for 26 years. Microsoft’s goal in purchasing the domain was to keep the domain out of the hands of nefarious actors and based on the previous owner’s statement it seems like Microsoft had good reason to take this action. Mike O’Conner indicated that “hundreds of thousands of Windows PCs are trying to share sensitive data with corp.com,”

The domain could have created potential security issues for the company’s Windows clients where admins used the generic domain name when setting up Active Directory, also known as namespace collision. For years, experts have suggested that whoever would gain access to corp.com would also potentially get access to sensitive data from hundreds of thousands of Windows systems around the world.

While we all laud Microsoft for its efforts around security including their purchase for TLS 1.2 that doesn’t mean the issue is resolved. Microsoft’s purchase helps safeguard companies that have built Active Directory infrastructures on top of “corp” or “corp.com,” however any company that has tied their internal Active Directory network to a domain they do not control is still opening itself to a similar potential security nightmare.

Fix: Application.exe has Stopped Working Error

One of the most common problems that occur on Windows PCs is an application crash. This issue has been present over the years.

The symptoms have changed, the configurations have changed, but the problem is still there just to break your nerves from time to time.

We can assure you that Windows 10 isn’t an exception. The well-known application.exe has stopped working message is still making an appearance in Microsoft’s OS.

For that purpose, we conducted a thorough search to provide you with the solutions to the problem at hand. So, if you have experienced sudden crashes, you should consider these workarounds:

How can I fix application.exe crashes in Windows 10?

1. Restart the troubled program

The first thing you should do is close the dialog app crash report and try starting the program again. This may be a one-time error due to some unexpected corruption or just a temporary lack of system resources.

So make sure to close the program properly before you start it again. Namely, even though you close the dialog box, there’s a chance its respective processes are still running in the background.

Because of that, make sure to navigate to Task Manager, kill the process, and start the application again. On the other hand, if the program doesn’t start with the system, you can also restart your PC and try running it again.

If you’re not sure how to do it, follow the instructions below closely:

  1. Close the dialog message that informs you of the crash.
  2. Right-click on the taskbar and open Task Manager.
  3. Make sure to kill the main and related processes related to a crashed app.
  4. Now, try starting the app again and look for changes.

That’s just the thing with the software: it’s not always as stable as one would expect. And, if the problem is still there, make sure to check the other steps in the list.

Can’t open Task Manager? Don’t worry, we’ve got the right solution for you.


Windows won’t end a task in Task Manager? Check out this amazing guide to fix the issue in no time.


2. Change compatibility settings

Another thing you can do, especially if we’re talking about older software, is to change the compatibility settings. Some older programs you may have used with ease on older OS versions might provoke issues in Windows 10.

That occurs due to compatibility issues, especially if the program we’re referring to is as old as time. Luckily, you can change the compatibility mode and set the compatibility to some older Windows version.

If Windows 10 is unable to run the program seamlessly, you can switch to, let’s say, Windows 7, and have an easy time running the program. Additionally, that way you’ll probably get rid of the further crashes.

If you’re not sure how to do it, you’ll find these instructions helpful:

  1. Navigate to the installation folder of the troubled app.
  2. Locate the .exe file, right-click and open Properties.
  3. Under the Compatibility tab, check the box beside ”Run this program in compatibility mode for”.run the application in the compatibility mode
  4. Choose the preferred Windows version and click OK to confirm changes.

That should address some of the possible stops caused by the system’s inability to read the program as intended.

3. Run the program as administrator

Besides the Compatibility mode, some programs thrive (read: work properly) only with the Administrative permission. It’s not unusual for certain applications to make some system changes that are only permitted to an administrator.

Moreover, the User Account Control prompts that occur once the program tries to make changes, can stall the execution of the program and thus, cause the crash.

We won’t advise you to disable those completely because of the security risks, but you can at least disable them for the individual program that has a problem.

So, besides the compatibility, we have another common tweak, and the instructions are below:

  1. Navigate to the installation folder of the troubled app.
  2. Locate the .exe file, right-click, and open Properties.run application as administrator
  3. In the Compatibility tab, check the box beside the ”Run as Administrator” box.
  4. Click OK.

With that, you should resolve certain issues. However, if the problem is going deeper, make sure to turn to other steps.

Learn everything there is to know about the administrator account and how you can enable/disable it right here!


Nothing happens when you click on Run as administrator? Don’t worry, we’ve got the right fix for you.


4. Scan for malware

Another reason for sudden crashes can be the malware infection. Those pesky viruses can certainly cause a lot of issues, and the disrupted use of certain applications is firmly at the top of the list.

What they tend to do, and that’s an awfully common occurrence, is to infect the installation files and corrupt the program. There are various reasons why the virus may attack a certain application, but you can be sure it’s up to no good.

So, make sure your PC is clean before we get to some other, slightly complicated workarounds. Sometimes viruses pass through the real-time protection, so it’s advisable to scan your hard disk from time to time.

The procedure is different for 3rd-party solutions, but we offer you an insight into how to perform a deep scan with Windows’ native security solution, Windows Defender. The instructions are below:

  1. Open the Windows Defender icon from the notification area and choose Advanced Scans.
  2. Save everything to prevent data loss because your PC will restart after the next step.
  3. Locate Windows Defender Offline and click Scan Offline.advanced scans windows defender
  4. Your PC will restart and the scanning procedure will last for approximately 15-20 minutes.

If you need additional info on how to perform a full system scan with Windows Defender, read this dedicated article.

However, if Windows Defender cannot provide maximum security for your PC, you can rely on dedicated antivirus programs as it has powerful engines against all types of cyber threats.

⇒ Get TotalAV


Do you want to check if your firewall is blocking a certain program? Follow the simple steps from this guide to find out.


5. Clean Registry values

There’s a great chance that you’ve installed one program for more than a few times. Now, that’s just a usual thing and it shouldn’t cause any problems.

But it’s not always the case. Namely, once you uninstall the program within the Add/Remove Programs section of the Control Panel, some files remain on your PC.


Remove software leftovers in just a couple of simple steps! Check out this handy guide to find out how you can do it.


And in the Registry, which is of greater importance. So, for some applications, it’s wise to clear your registry of the remaining values and reinstall your program.

Moreover, we advise you to delete all the remaining files from the installation folder which is, most of the time, placed in the C: partition. The additional folder you should check out is the App Data folder.

To access it, just type %appdata% in the Windows Search bar. For cleanup purposes, you can use CCleaner or some similar 3rd-party solution. However, keep in mind that the Registry is dangerous ground, so back it up before the cleansing begins.


Clean your registry like an expert with the help of this amazing guide written by…you guessed it: experts!


6. Clean temporary files

Temporary files are a necessity for some time, but then they become redundant and can create problems within the system. We highly recommend cleaning them up from time to time.

For that purpose, you can use a large variety of 3rd-party tools, including  CCleaner. However, don’t take system tools for granted. You can delete temporary files with system tools, as well.

Follow these instructions to perform a disk cleanup and get rid of the system’s temporary files:

  1. Open This PC.
  2. Right-click the system partition and open Properties.
  3. Choose Disk Cleanup.
  4. Check the boxes beside Temporary files.temporary files disk cleanup
  5. Confirm the selection and clean temporary files.

After that, it should be easier to run some of the programs. However, if the program is still crashing unexpectedly, there are some other things you can do.

Can’t delete the temporary files? After following these easy steps, you’ll delete them like a pro.


Problems deleting all your junk files? Follow this guide to solve Disk Cleanup issues and save your drive.


7. Run SFC and DISM

For some system-related programs, the problem might lie in the corrupted or incomplete system files. It’s not an unusual occurrence, especially since frequent updates or malware can easily inflict these errors.

For that purpose, it’s safest to turn to the elevated Command Prompt and one essential tool that should scan and resolve common issues with system files. The SFC tool is the first obvious choice, even though you can try DISM for more advanced scanning.

If you’re unsure how to run the SFC tool through the elevated Command Prompt, follow the instructions below:

  1. Right-click the Start menu and open Command Prompt (Admin).
  2. In the command line type the following command and press Enter:
    • sfc/scannowcmd sfc
  3. After the procedure is finished, restart your PC.

As we already mentioned, the SFC scan is the first troubleshooting step when you want to check the system files’ integrity.


Scannow command has stopped before the process finished? Don’t worry, we’ve got an easy fix for you.


However, if SFC fails, you can always turn to DISM. Deployment Image Servicing and Management is a great tool that should help you resolve issues with system files by restoring them to their original state.

If you’re unsure how to run DISM, follow these instructions:

  1. Right-click on Start and open Command Prompt (Admin).
  2. In the command line type the following command:
    • DISM.exe /Online /Cleanup-image /Restorehealth
  3. The process should scan and resolve possible file corruption and fix related issues.

There is more than one way to use DISM, and for additional information, you can check this article for a thorough explanation.

If you’re having trouble accessing Command Prompt as an admin, then you better take a closer look at this guide.

Executing the DISM command to restore your Windows system image can also help you fix the Pbid.exe Application Error; read this guide to learn about other solutions.


Does it seem that everything is lost when DISM fails on Windows? Check out this quick guide and get rid of the worries.


8. Change Permissions

Another thing that’s worth checking is Data Execution Prevention. Most of the programs are initially blocked before the first use.

But, as you start an application, and provide it with the permission to change the system settings, DEP won’t bother you. Of course, not most of the time.

Sadly, due to frequent updates, especially major updates, the given permissions can be revoked. And that may just block your application and cause sudden crashes from time to time.

For that purpose, you should navigate deep into System Properties and create an exception for the troubled app. Follow the steps below to do so:

  1. Open This PC and click on System Properties.
  2. Under the Advanced tab > Performance, click on Settings.
  3. Click on the Data Execution Prevention tab.
  4. Choose ”Turn on DEP for all programs and services except those I select”.
  5. Click Add and browse to the installation folder of the troubled app and locate the .exe file.
  6. Set an exception and confirm changes.

That should resolve some of the problems, but it still may not be enough to get you out of the slump.

9. Check drivers

This, of course, primarily affects games. If your game is crashing suddenly, you should check these two things first:

  • If additional programs and versions are present(like DirectX, redistributables, NET Framework or some 3rd-party clients)
  • GPU drivers.

Once you’re certain that everything the game requires is installed, you should tend to drivers. Drivers are essential and they may as well be the reason for crashes in the first place.

If you’re unsure how to install or update GPU drivers, the instructions below should work in your favor:

  1. Right-click Start and open Device Manager.
  2. Navigate to Display drivers, right-click on your GPU and Update Driver.update gpu drivers
  3. Also, you can navigate to the OEM’s site and download the official drivers since some cards have specific software support.

It’s paramount to install appropriate drivers provided by the OEM for many reasons. Don’t download suspicious drivers.


Want the latest GPU drivers? Bookmark this page and always stay updated with the latest and greatest.


That should do it. In case you have any questions or suggestions, we advise you to post them in the comments below. We’ll be glad to help.


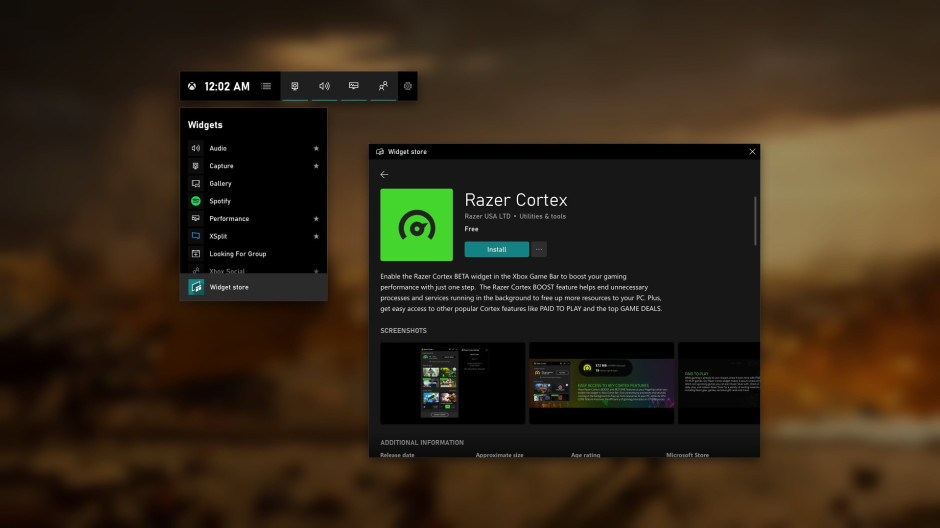
Xbox Game Bar for Windows 10 is becoming much more versatile with new widgets from Razer, XSplit, and Intel

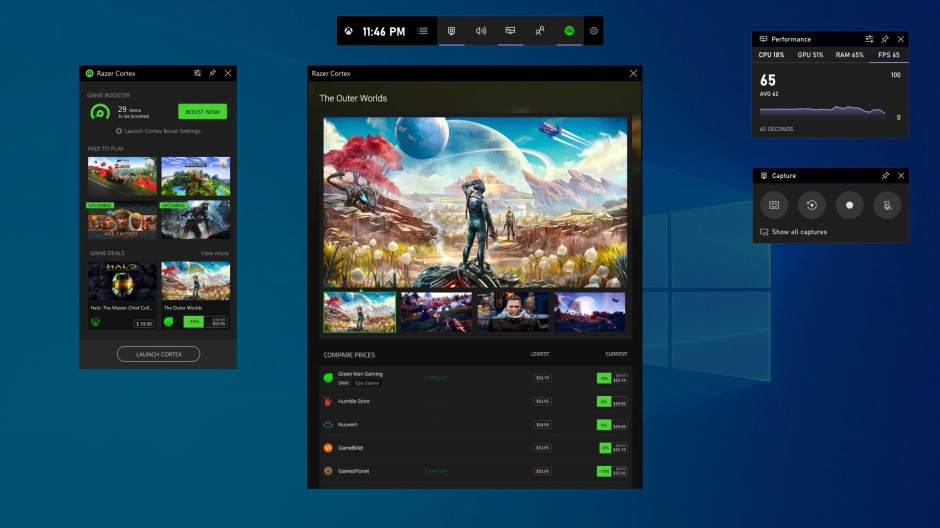
Microsoft has just announced a pretty big update for its Xbox Game Bar for Windows 10. The company’s gaming overlay, which can be accessed by pressing Win + G, can already be used for various tasks including Game DVR, changing audio settings, accessing Xbox Live chats, or controlling Spotify playback. However, it’s about to become much more customizable thanks to a new widget store.

Exciting additions include a Razer Cortex widget to boost gaming performance, as well as an XSplit Gamecaster widget that is set to replace the now-deprecated built-in Mixer streaming feature. The Razer Cortex widget is available in beta today, and it will act as an extension of the Windows 10 Game Mode with options to end unnecessary processes running in the background. The widget will also feature PC game deals, with Razer’s Gold & Silver virtual currencies for gamers being front and center.

The new XSplit widget is also available from the Microsoft Store today, and it will also come pre-bundled with the Gamecaster desktop app. “XSplit’s integration with Game Bar provides access to critical Gamecaster tools without having to tab between apps or leave your gaming session. Start and stop your broadcast, interact with chat, check out recent events and stats to help increase viewer interaction, and optimize encoding settings to ensure the highest quality stream – all from the Gamecaster widget,” the Xbox team explained today.

Intel’s Graphics Command Center will also be available as an Xbox Game Bar widget later this spring, and it will also support game streaming and capture features in addition to display settings and power profiles. Microsoft said today that these new Xbox Game Bar widgets are only available for Windows Insiders for now, or Windows 10 users who joined the Game Bar Flight in the Xbox Insider Hub. The company is also releasing today the Game Bar SDK to allow any developers to create widgets for the Xbox Game Bar.

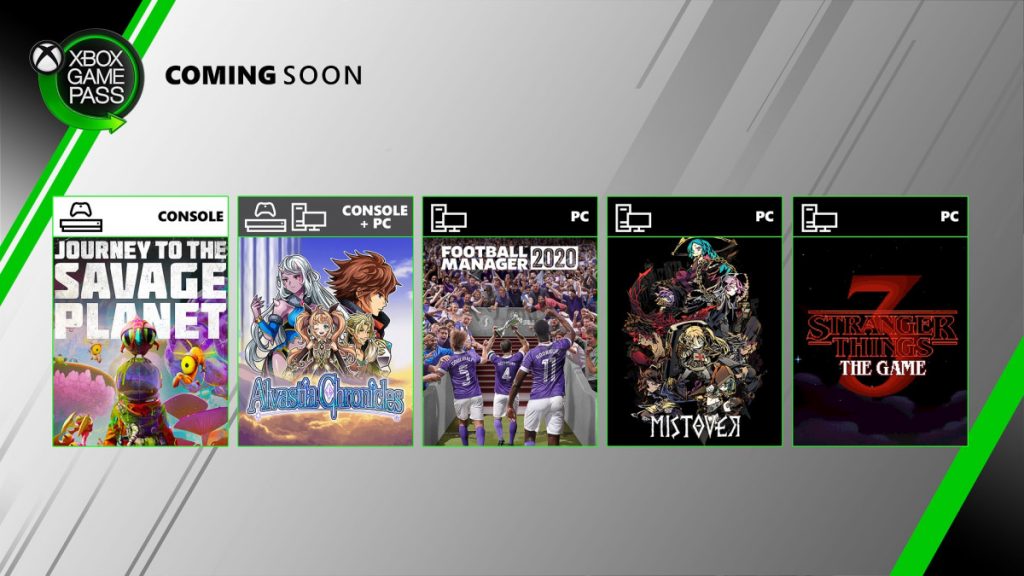
Journey to the Savage Planet, Alvastia Chronicles and more are coming to Xbox Game Pass in April

Microsoft has just announced a couple of new games coming soon to Xbox Game Pass in April during today’s Inside Xbox episode. The adventure game Journey to the Savage Planet is coming to Xbox Game Pass for Console soon, along with the J-RPG Alvastia Chronicles.

Xbox Game Pass for PC members will get four new games this month including the aforementioned Alvastia Chronicles, Football Manager 2020, Stranger Things 3: The Game, and the dungeon crawler Mistover. Yakuza Kiwami was also announced as coming soon to Xbox Game Pass for PC today.

In other Xbox Game Pass-related news, Xbox Game Pass for Console, Xbox Game Pass for PC, and Xbox Game Pass Ultimate will also launch in Japan and South Korea next week on April 13. These are not countries where the Xbox brand is particularly strong, but it really makes sense for Microsoft to finally bring its gaming subscription service to these huge gaming markets.

ESA cancels plans for digital-only E3 2020 after IGN announced ambitious Summer of Gaming online event

After the Entertainment Software Association (ESA) cancelled E3 2020 last month amid concerns about the coronavirus pandemic, the organization said that it would try to work with developers and game publishers to hold an online-only event in June. Well, the ESA has now cancelled its plans for an online E3 2020 event entirely, though the association said in a new statement that it plans to promote gaming announcements in the coming months ahead of a “reimagined E3” next year.

“Given the disruption brought on by the COVID-19 pandemic, we will not be presenting an online E3 2020 event in June,” the ESA said in a statement provided to IGN. “Instead, we will be working with exhibitors to promote and showcase individual company announcements, including on www.E3expo.com, in the coming months. We look forward to bringing our industry and community together in 2021 to present a reimagined E3 that will highlight new offerings and thrill our audiences.”

It’s worth noting that the ESA’s plans for a digital E3 this year may have been jeopardized by IGN’s freshly-announced Summer of Gaming online event, which will be held in June. IGN remains one of the biggest video games websites on the Internet these days, and the company certainly has big plans for its online event that appears to be pretty much what the ESA was planning to do with its digital E3 this year.

“IGN will be collaborating with the likes of 2K, Square Enix, SEGA, and more to bring you publisher presentations with IGN pre- and post-discussions, remote developer interviews, hands-on demos and preview impressions, gameplay, and news segments recapping the biggest announcements,” IGN said today. This announcement didn’t mention Microsoft, which also plan to do its own Xbox digital event in June.

FIX: Connection is not private on Safari

Many Mac users reported getting This connection is not private message in Safari. This message will prevent you from accessing certain websites, so today we’ll show you how to bypass it.

What to do if the connection is not private in Safari?

1. Select the visit website option

This is just a warning message and you can bypass it by doing the following:

  1. When the warning message appears, click on Show details.
  2. Now choose Visit the website on the bottom of the page.
  3. A pop up will now appear. Select Visit website.

Some users reported that opening the website in a Private window and repeating the process fixed it permanently, so you might want to try that as well.

2. Delete the certificate

One way to fix this problem is to find and delete the certificate. To do that, follow these steps:

  1. Check the certificate details from the page.
  2. Go to the Keychain Access.
  3. Find the certificate and delete it.
  4. Refresh the website and choose the option to access it anyway.

After doing that, the correct certificate should be installed and the issue will be resolved.

3. Set the certificate to Always trust

Changing the certificate options can help you fix Connection is not private message in Safari. This might not be the safest method, so use it only for websites that you trust:

  1. Open the Keychain Access.
  2. Find the certificate and choose Get Info.
  3. Expand Trust and set When using this certificate to Always Trust.

4. Make sure that the time is correct

If your clock isn’t correct, that can lead to issues with Connection is not private error. To fix it, do the following:

  1. Go to Apple Menu > System Preferences > Date & Time.
  2. Check your date and time and make sure it’s correct.
  3. Also, you can check Set Date and time automatically

Now check if the problem is resolved.

5. Clear the browser cache

Corrupted cache can cause this problem, so it’s advised to clear it. To do that, just follow these steps:

  1. In Safari, go to Preferences > Privacy.
  2. Click on Manage Website Data button and click on Remove.
  3. Optional: Go to History and choose Clear History.

This message will prevent you from accessing certain websites in Safari, but we hope that you managed to fix it with our solutions.

PowerToys for Windows 10 get minor improvements and bug fixes

It’s been a week since Microsoft released PowerToys v0.16 with 4 exciting utilities that are already favorites here at OnMSFT, and the company is following up this week with PowerToys v0.16.1 with some improvements and bug fixes including enabling new features to be turned on by default for upgrades. For anyone who tried the recently released utilities, all the new features were disabled by default and it seems Microsoft is continuing to listen to their users and improve the user experience.

This patch release includes the following fixes:

  • New utilities are turned on by default for upgrades – (#1878)
  • Correct localization bug – (#1795)
  • RDP bug in FancyZones – (#1821)
  • Focus bug in Window Walker – (#1800)
  • Added telem to actually know if Window Walker was enabled (#1925)
  • Make user aware of dual MSIX and MSI install issue, partial solution (#1920)
  • fixed FancyZone crash with Unity (#1873)

To see the latest features of PowerToys, check out our hands-on review of PowerToys recently released utilities. You can also check out PowerToys GitHub page for an overview and installation instructions.

Microsoft announces new changes to SharePoint and OneDrive Files On-Demand to cope with higher usage

Due to higher usage of Office 365 services since the beginning of the coronavirus outbreak, Microsoft announced two weeks ago some restrictions to prioritize the company’s cloud capacity to critical activities. The software giant is following up this week by informing users of more minor changes on the Office 365 service portal (via ZDNet).

In this latest development, Microsoft is changing how OneDrive Files on Demand works on Windows 10 and macOS to remove thumbnails for certain files, and the company also added more details to its SharePoint changes announced two weeks ago. You can read the full details below:

OneDrive: Customers who use OneDrive Files On-Demand and choose to “display items by using large thumbnails” in Windows Explorer or Mac Finder will see generic icons instead of thumbnails for a subset of file types, such as PDF and video files. Photo file thumbnails (jpeg, jpg, png, etc) are not affected by this change.

SharePoint: Updated (in bold) to provide additional clarity: We are rescheduling specific backend operations to regional evening and weekend business hours. Impacted capabilities include migration, DLP, apps that scan the service, and delays in file management after uploading a new file, video or image.

Among the service changes that Microsoft announced earlier, the company has already reduced video resolution for Microsoft Teams meetings and reduced frequency of Presence checking. Additionally, the meeting recording video resolution in Microsoft Stream has also been adjusted to 720, while the download size and sync frequency of file attachments in OneNote has also been changed. The company says that it will continue to monitor the usage of its Office 365/Microsoft 365 services, and more changes could happen as usage continues to rise.

How to assign tasks when working remotely using Microsoft Planner

With whole offices now adapting to working remotely, it can be difficult to figure out an effective way to assign and delegate tasks. While there’s no direct alternative to the daily whiteboard session or team stand-up meeting, Microsoft Planner can help ensure everyone’s aware of what’s going on.

Screenshot of assignees in Microsoft Planner

If you’re new to Planner, you might want to read our overview guide first before moving forwards. Planner gives you a Kanban-style task board, where tasks are arranged as vertical lists of cards in horizontal “buckets.” The buckets are used to group tasks by category or completion state.

Tasks can be “assigned” to Planner users. Click any task on the board and then click the “+ Assign” button beneath its title.

Screenshot of assignees in Microsoft Planner

Use the dropdown menu which appears to select the user you’d like to assign the task to. Back on the board, the assignee will appear on the task’s card, letting everyone see that there’s now somebody tackling the problem.

To get the most from task assignments, users should enable Planner notifications. Click the Settings cog icon in the top-right corner, followed by “Notifications” under the first heading (“Planner”). (Note: Confusingly, there is a separate “Notifications” heading further down the settings pane, which lets you turn all Planner alerts on or off with a single click.)

The Notifications popup dialog lets you choose how you should be notified when you’re assigned a new task. When enabled, you’ll get an email, push notification and Microsoft Teams alert whenever you become a task’s assignee. You can also choose to get email alerts when a task is approaching its deadline or has become overdue.

Screenshot of assignees in Microsoft Planner

By assigning tasks to users, you get more visibility into what’s being worked on. You can also check in on the workload of individual team members. Click the “Charts” tab at the top of the Planner screen to see a breakdown of the tasks assigned to each user. If somebody’s got a lot of tasks outstanding, you might want to offer them a hand to help them through their day.

How to use MyAnalytics in Office 365 to better manage your time when working remotely

Working from home can be challenging, especially when the whole household is around. Effective time management is critical if you’re to get through your day while maintaining a reasonable work-life balance.

Microsoft’s MyAnalytics is a lesser-known member of the Office 365 family. MyAnalytics can provide insights which help you to understand how you’re spending your time. It tracks your activity and engagements within other Office 365 apps and then analyses how you can improve your focus, wellbeing, networking and collaboration.

Screenshot of Microsoft Analytics

MyAnalytics isn’t available on all Office 365 plans and may be disabled by an administrator. If it’s available, it will show up in the app launcher at Office.com (you may need to click “All apps” first).

The MyAnalytics homepage breaks down your current statistics across the app’s four main sections: Focus, Wellbeing, Network and Collaboration. By maximising your effectiveness across all four areas, you can increase your chance of working productively while still being able to relax and unwind at the end of the day.

Focus

The Focus section assesses how much focus time you’re getting during your day. Focus time refers to distraction-free time in which you’re working deeply and at maximum productivity.

Screenshot of Microsoft Analytics

MyAnalytics identifies your focus time periods by looking at how much calendar time you had, minus your “Collaboration” periods. A collaboration is counted as any call you make, email you send or meeting you participate in. Events on your calendar with no attendees aren’t considered to be a collaboration.

MyAnalytics displays a bar graph showing how much focus time you’ve had over the past month. If the green bars aren’t tall enough, you may be spending excess time dealing with distractions. MyAnalytics can help by automatically scheduling a 1-2 hour focus slot onto your calendar, ensuring you’ve got the space you need to get work done.

Wellbeing

Wellbeing considers your life outside of work. Real-time notifications are one of the distinguishing features of the digital age, yet they can also be one of the greatest threats to free time.

Screenshot of Microsoft Analytics

MyAnalytics shows how often you drop into overtime or respond to a work email out of hours. Completing any “significant activity” after work or over the weekend will cause you to lose one of your “quiet days”.

Regularly working overtime or checking your work alerts can be a major contributor to stress and burnout. MyAnalytics can help you visualise the amount of extra time you’re putting in, which might give you a clearer picture of how your work-life balance is holding up.

Network

The Network screen shows how you interact with other people, whether inside your organisation or externally. You can see your relationship to contacts, how much time you spend collaborating with them and how many people are active within your network.

Screenshot of Microsoft Analytics

This is especially useful to salespeople, where network size can directly correspond to sales success. More broadly, it helps you identify who you’re speaking to, which is particularly important if you’re a team leader. If a team member hasn’t been active in your network lately, it may be time to drop a friendly message to see how they’re progressing.

Collaboration

Collaboration is the final section. It enables you to see how much time you spend in meetings, on the phone or responding to emails.

Screenshot of Microsoft Analytics

MyAnalytics looks at the number of calls, emails and messages you’ve participated in over the past month. You can then use these insights to gauge how much of your day is spent collaborating with others.

The implications of these stats are likely to depend on your role within your organisation. A salesperson or executive may well spend much of their time collaborating with other individuals, whereas a writer, designer or developer might be expected to utilise more focus time. Always remember that “ideal” values for one individual might look radically different for another.

Analysing your working patterns

If you’re struggling with remote working, start by thinking about how you spend your day. Then login to MyAnalytics and look at its reports. You might find that a few little changes, such as limiting the time you spend in emails, make all the difference in increasing the amount of work you get done.

Screenshot of Microsoft Analytics

MyAnalytics’ sections are inherently interlinked and it’s important to find a balance between them. To maximise Focus’ stats, you’re likely to need a reduction in Collaboration; however, it’s unrealistic to cut Collaboration out entirely.

Instead, try to consider – with MyAnalytics’ help – how much of your collaboration time is necessary. One easy fix may be to allocate some “edge hours” (such as before or after lunch) to responding to emails, giving you a greater stretch of time to block off for productivity in the morning or afternoon.

Top 5 ways to customize Microsoft Teams to make it your own

Sometimes, you just want to make the apps and programs you use every day a bit more personal. With Microsoft Teams, this is something you can do, too.

Be it a dark theme, read receipts, apps, and more, there are a couple of different ways to customize it. Here’s a look at the top 5 ways you can tweak Teams to your own liking.

Dark theme

The first way you can customize Teams to your liking is with a dark theme. Unlike Slack, Teams doesn’t support custom themes, but you can switch the Teams app over to a dark theme if you’re looking for something different. The process is the same across MacOS and Windows.

To get started, just tap your profile picture in the top right corner of the screen. After that, click Settings. You’ll then need to click the General tab if it isn’t already open. Then, you can choose Dark from the Theme option. Once you select Dark Teams will automatically switch over to the dark theme. There’s no need to restart the app. The dark theme works just as you expect. It turns the background in Teams from white to a dark color. If you’re using the dark theme in your operating system like we are, this makes for a cleaner and more concise look.

Read receipts

Read receipts are turned on by default in Microsoft Teams. As the name suggests, you’ll get a checkmark on your messages in a 1:1 or group chat to show that it was sent. Then, when the message was read, it will shift to an eye icon. Your IT admin has full control over this feature and can turn it on or off for all users, but if it has been allowed by IT, you also can turn it on or off on your own, too.

To configure read receipts, tap your profile icon on the top right corner of the screen. You’ll then want to click Settings and then choose Privacy. You should then see a switch for read receipts. If your admin has allowed it, you’ll be able to toggle the switch to off. Keep in mind, though, that if you send a chat to someone who has read receipts turned off, but you still have the feature turned on, you won’t see read receipts at all from that person.

Add some apps

Third on our list are apps. If your IT administrator has allowed it, you’ll be able to install apps in Teams. We’ve covered a few picks for our favorite apps before. These range from Trello, YouTube, Wikipedia, and Microsft Flow. There is a catalog of over 200+ applications that you can download, however.

There are three specific ways you can add apps to Teams. First off, you can choose Apps from the left side of Teams, and then search for your app to add it there. You’ll then see the app appear in the sidebar.

Secondly, you can add apps to a tab in a channel of chat. To do this, you’ll want to go to the channel, group chat, or one-on-one conversation and click Add a tab. It shows up as a + icon. You can then search for or select the tab that you want.

Finally, you can add apps from the messaging area as a Bot. These apps in the messaging area allow you to insert content directly into your Teams messages. You can do this by selecting the … at the bottom of the box where you normally type your message and then choose your app.  You also can try to type out @ and then click Get bots to find some more apps.

Tweak your notifications

Our fourth pick relates to notifications. On this front, you’ll be able to customize which notifications you receive, to help you clean up your activity area in Teams. There’s quite a bit you can control, be it mentions, messages, highlights, and more. You can see all the options for this by heading to your profile icon, clicking the Settings option, then clicking Notifications.

For mentions such as personal mentions, channel mentions, or team mentions, you have a few options. These include banner and email notifications, banner, and only show in feed. For messages, replies, likes, followed channels, and Trending, you’ll have the same options for mentions, with the additional abilities to turn the notifications off altogether.

If you want, you also can create notifications for a specific person by clicking the Manage notifications button at the bottom of the settings page. This will let you follow a person’s status and get notified when they appear Available or Offline. It might be useful for tracking when someone comes online for a shift at a job.

Set a status message

Our final choice for customizing Teams is using a status message. With a status message, you can let your colleagues know what you’ll be doing. This can be set for a few hours, days, weeks, or on a daily basis. It’s separate from your online presence, and you can add additional information to it of up to 280 characters, including emojis, and more.

To set a status message, you’ll want to tap your profile icon. You can then click the Set status message button. A box will then appear and you can enter your custom text and choose. Keep in mind, you can also tick the box that says show when people message me. This will allow people to see your status message as they compose a message,  or @mention you.  For further customization, you can set a custom time for the status message to clear, on an hourly, weekly, or specific basis.

How do you customize Teams?

This is just a wide-angle look at how you can customize Microsoft Teams. As a bonus, we also suggest trying out Snapchat Camera with Microsoft Teams for spicing up your calls with your friends. You also might want to check out how you can blur your background in Teams as well, if you’re looking for some privacy during your video conferences.

But that’s just the start. There’s much more that you can do with Teams, and we invite you to check out our dedicated news hub for more guides and how-tos relating to Teams. Also, feel free to let us know your thoughts in the comments below.

To learn more about Teams, check our latest guide on the best whiteboard apps for Microsoft Teams.

Ori and the Will of the Wisps gets performance improvements and more on Xbox One and Windows

The latest patch for Ori and The Will of the Wisps is out with performance updates and bug fixes on Xbox One and Windows 10. Developed by Moon Studios, it’s getting rave reviews for its gameplay.

As noted in a post on the Moon Studios blog, the patch is full of bug fixes and performance updates. Ori and The Will of the Wisps has earned great reviews online, but most of the negative criticism has been based primarily on the game’s bugs.

Ori and The Will of the Wisps is available for purchase in the Microsoft Store or you can play the game for free for those with an Xbox Game Pass subscription. The game is free to play with Xbox Game Pass for Console and Windows 10 PC. If you purchase Ori and The Will of the Wisps from the Microsoft Store, the game supports Xbox Play Anywhere, which means that you can play it on both Xbox One and Windows 10 and your progress will be saved in the cloud.


Xbox Game Pass Ultimate

Windows 10 People app gets a new Fluent Design icon

Microsoft has started rolling out a new icon for its People app on Windows 10. The new icon inspired by Fluent Design previously shipped to Windows Insiders, as did other new icons from Microsoft’s inbox apps such as Photos, Weather, Alarms & Clock and Mail and Calendar.

You can see the old and new People app icons side by side below. Just like other app icons refreshed recently, the new People app icon uses a blue background color by default, and it doesn’t respect your choice of accent color in the Windows 10 Settings app.

.
Microsoft isn’t done yet refreshing all of its app icons on Windows 10, and icons for Calculator, Camera, Feedback Hub, Maps, Messaging, and even the Microsoft Store will likely get a fresh coat of paint sooner or later. Do you like this new icon for the People, or did you prefer the old one? Sound off in the comments below.

Runtime Error Repair Tool for Windows: We’ve Ranked 5 Best

If you are always getting runtime errors, the best thing that you can do is cleaning and repairing the Windows database. The database includes lots of important info on your PC and if any of this data or the files in Windows database become corrupted, this can trigger lots of errors. However, you can fix these runtime errors in Windows 10 with the tools suggested.

Other times, runtime errors can be triggered by a file that you’re trying to open or that is no longer in the directory. Even if the program or app that produced the file that you are trying to run is no longer on your computer, it is still able to cause errors.

These runtime errors can cause your system to run slower and you may also notice that files and programs that you usually open effortlessly and now slower or they may not run at all. Fortunately, there are a few solutions to fix runtime errors and we chose some of the best.

Some general guidelines when trying to fix Windows 10 runtime errors are to check if you have enough storage space available and sufficient memory to run the application.

Best tools to fix runtime errors that you can use today

SpeedyPC Pro Software

SpeedyPC is a tool that can fix Runtime Error 429. This originates in the Windows database, and it is caused by the fact that every time you install or uninstall software, a signature of the program is registered in the Windows database.

Considering the vast amount of records and combinations that are there, especially wrong installations, you will find out that the database may be full of corrupted entries. Your best bet is to open a database cleaner such as SpeedyPC and fix any files in the database that could be causing this error. Check out the best features and advantages that are packed in SpeedyPC Pro Software:

  • This is an innovative software that scans your computer, searching ActiveX and Windows registry errors, dangerous malware, process performance problems, junk files and privacy files.
  • Once it finds the problems, the software eliminates them.
  • Using SpeedyPC Pro, you won’t have to deal with a slow computer anymore or with clutter, error messages, freezing, crashes or all kinds of erratic performance.
  • The scan will take care of common issues such as registry errors that usually make the computer perform poorly and slowly.
  • SpeedyPC Pro also comes with lots of advanced features and tools that will improve startup time, find the best program to open file extensions, defragment your computer memory and also eject unwanted browser add-ons.

This amazing piece of software will eliminate runtime errors, clean registry errors, wipe away privacy files to protect your data, optimize memory, manage restore points and more. You can find out more details about the software’s functions by heading over to the official website and downloading this handy tool.

⇒ Get SpeedyPC Pro’s

Primasoft’s Error Scan and Fix

Primasoft’s Error Scan and Fix is a really advanced registry cleaner that is compatible with Windows and allows you to safely scan, clean and repair various registry issues with just a few mouse clicks. Windows Registry issues are a common cause of Windows crashes and error messages.

By making use of PC tune-up utilities such as registry cleaners every once in a while, you will help your system to become more stable, your software will run quicker and your operating system, in this case, Windows, will boot much faster than before. Check out the best features and functionalities that are included in this handy tool:

  • Primasoft’s Error Scan and Fix helps you scan and repair errors in your Windows Registry.
  • The program’s interface is effortless to use, and even beginners will be able to understand it.
  • The functions that are included in this tool are well identified, and the options are simply set.
  • Operating the software is easy, and all you have to do is click on the areas that you want to scan and press the Scan Now button.
  • The program begins scanning your system and fixes issues in Windows Registry.

The simple command set makes this a user-friendly tool that is worth checking out to see how it works on your computer.

⇒ Get PrimaSoft PC Software

Fix Runtime Error 1.2

windows 10 fix runtime error 1.2

This is another useful solution for fixing runtime errors that pop up on your computer. Fix Runtime Error is a next-generation registry cleaner that allows you to scan, repair and compact Windows registry with just a few clicks of the mouse. Take a look at other handy features that are packed in this tool:

  • Fix Runtime Error will scan the entire registry in order to find any problems and it will repair them quickly.
  • Using this tool on a regular basis will make your system more stable, and it will help it boot faster.
  • Fix Runtime Error is safe to use, and you will get the ability to undo any change made by the program if there is a problem with it.

It’s important to note that over time, any Windows registry accumulates old and incorrect records that will trigger system errors and slower performance. This software will help you fix all this and we recommend that you try out this tool because it works successfully.

⇒ Get Fix Runtime Error

Wondershare’s 1-Click PC Care

1-Click PC Care is a registry cleaner tool that will scan, clean and fix all kinds of errors. This tool automatically scans and repairs runtime errors on your system, so it’s definitely worth checking out. Take a look at the best features that are included in this tool below:

  • This is a professional registry cleaner tool that can diagnose your registry and clean up registry trash, remove registry redundancy and repair your registry-related issues and other errors in order to speed up your system’s performance.
  • This tool also helps create a backup for all the changes that it makes on your system for any potential restoration.
  • The software is effortlessly used by both beginners and more professional users as well.
  • 1-Click PC Care deeps scans your Windows system health, and it generated a detailed diagnostic report that presents the potential risks.

After using this handy tool, you will notice that your system becomes more stable. Head over to Wondershare’s official website and get the 1-Click PC Care to try it out on your system running Windows.

⇒ Get 1-Click PC Care

SpyHunter

Sometimes, runtime errors can be caused by SpyHunter. If you are trying to run or upgrade SpyHunter and you are experiencing a runtime error, the only thing that you can do is perform a re-installation of this tool.

It’s important to remember that most runtime errors can easily be fixed just by uninstalling and reinstalling SpyHunter. The three steps required by this operation include uninstalling the current version of SpyHunter, deleting the folder and reinstalling SpyHunter. Here’s how you do all this:

  • After uninstalling SpyHunter, make sure that all its icons from the desktop have been deleted, and delete any remaining icon related to it.
  • The next step is to find and delete the SpyHunter folder and after that, reboot the computer before downloading and installing the software again.
  • Now, all you have to do is download SpyHunter again and install it, but make sure that you don’t re-use any remaining installation files, but re-download the installation file once more.

You can find SpyHunter on Enigma Software’s official website. This is a convenient tool that detects and removes the latest Trojans, spyware, rootkits, keyloggers, ransomware and more types of malicious software.

⇒ Get SpyHunter  

These are the best ways and tools that will help you get rid of the annoying runtime errors and make your system more reliable, while also speeding up its performance at the same time.

FIX: PC uses less RAM than is physically installed

Nowadays, RAM comes in abundance since the hardware needs to closely follow the software requirements. And adding more RAM is probably the best way to get your PC go the extra mile.

However, even though some Windows 10 versions support up to 512 GB of RAM (yes, you read that right), your RAM is of no use if it’s not fully employed in the system processing. Some users reported that the difference between the installed and used RAM is enormous.

This is a grave problem and we’ll make sure to help you address it with a few workarounds. In addition, we make an effort to explain the background of this peculiar issue. If your PC runs 6GB of RAM instead of the installed 8GB, make sure to check the solutions below.

How do I use my full RAM on my Windows 10 PC?

  1. Explanation
  2. Check boot settings
  3. Check and update BIOS

Explanation

There are so many reasons why your installed and physical RAM are 2 different values in the system configuration. Some of the most common reasons for such occurrence are:

  • Onboard integrated GPU takes some RAM and uses it as a VRAM.
    • Integrated GPU’s mostly come with 256 MB of VRAM or so, and therefore it’s obvious for them to take some of that RAM plenitude in order to work in a seamless manner.
  • Motherboard and BIOS are optimized for a certain RAM amount.
    • If you add more RAM than it’s initially supported, your system won’t be able to ‘see’ it.
  • Certain Windows versions support only limited RAM.
    • Windows 10, with the 32-bit architecture, can read only up to 4GB of RAM.

When it comes to Windows 10, these are the supported RAM values for different iterations:

  • Home 64 bit: 128 GB.
  • Pro 32-bit: 4 GB.
  • Pro 64-bit: 512 GB.
  • Enterprise 32-bit: 4 GB

In addition, make sure to check your RAM placement. Remove your RAM card from the dedicated socket, try another socket, and check for changes.

On the other hand, if you’re positive about the RAM compatibility and its physical placement on the motherboard, two steps we presented below are essential for retaining your full RAM values.

1. Check boot settings

Here’s how to do it in a few easy steps:

  1. In the Windows Search bar, type System config and open System Configuration.less ram usable than installed
  2. Open the Boot tab.
  3. Choose Advanced options.less ram usable than installed
  4. Uncheck the Maximum memory box and click OK.less ram usable than installed
  5. Restart your PC for changes to take effect.
  6. In the Windows Search bar, type System info and open System Information.
  7. Under the System Summary, navigate to RAM section below and look for Installed and Physical memory.
    • A normal value for 8GB of Installed RAM is 7.92 of Physical RAM, as you can see for yourself.less ram usable than installed

Firstly, let’s check your boot system settings. In order to speed up the Windows startup and fully utilize the Fast Boot function, your system will use RAM extensively. And that would be just fine except the system tends to take more RAM than it’s needed.

That will, of course, affect the size of available RAM later on, when the system starts. By default, the system will take as much RAM as available. So, what we’ll need to do is to restrain the startup process and don’t let it eat on our RAM, which should resolve your problem.

On the other hand, if you still stuck with the substantial difference between the two, make sure to check the alternative solution below.

2. Check and update BIOS

  1. Press Windows key + I to summon the Settings app.
  2. Open Update & security section.less ram usable than installed
  3. Select Recovery from the left pane.
  4. Under the Advanced startup, click on the Restart Now button.less ram usable than installed
  5. In the Advanced startup menu, select Troubleshoot.
  6. Choose Advanced options.
  7. Select UEFI Firmware settings.
  8. Click Restart and your PC should boot into BIOS settings.
  9. Here, you should search for the following settings and set them as below:
    • iGPU, Internal Graphics. or Onboard Graphics > Disabled
    • Memory Map Feature > Enabled
    • Render Standby > Enabled
    • iGPU Memory  > Auto
    • Multimonitor > Disabled
  10. Save changes and exit the BIOS settings menu.

Even if your motherboard supports a vast amount of RAM, some UEFI/BIOS settings might limit the installed RAM to a greater or lesser extent. So, you’ll need to navigate to BIOS settings and, if needed, make some changes.

Additionally, since Windows 10 packs that Fast Boot, the boot sequence will just run past the settings and repetitive pressing of the key won’t do you any good. So, bear with us and follow the instructions closely.

Furthermore, older motherboards with the outdated firmware won’t support large amounts of RAM that are quite common nowadays.

So, it’s recommended to update your BIOS and check for the resolution. However, since this is quite a risky procedure, we advise you to take a look at this article and look for the thorough explanation before you move to updating your BIOS.

We also have a guide that explains how to make sure RAM is running at full speed, so don’t miss it.

With that, we can conclude this article. We hope that you’ll take all of your RAM with the solutions we provided above. In any case, don’t forget to share your questions or alternative solutions with us. We look forward to hearing from you.

Xbox One’s April Update to get a revamped Guide and improved Mixer experience

Microsoft’s Xbox One console is due to get its next big update later this month with a variety of features that the company has been testing with its Xbox Insider testers recently.

These changes include a bit of a revamp of the Guide menus, some improvements to the My Games and Apps section, and some added functionality to the native Mixer experience.

The new Guide moves the main Xbox icon to the left side and reorganizes several links. Here’s the official list of changes:

  • The new default tab order opens Guide with tabs in a left-to-right configuration, the order of which can continue to be customized from the “Profile & system” tab.
  • Party, messaging, and invites have been combined in the new “Parties & chats” tab, providing one single location to communicate with other players.
  • Settings, audio, and power options are now located in the “Profile & system” tab on the left side of Guide, as identified by your gamerpic.
  • Looking for Group can be found in the “People” tab next to the “Find someone” option.
  • App & system notifications are now grouped under the bell icon with other alerts.

The My Games and Apps section will add a new Surprise Me! button which will select a game for the user to play when they can’t make up their mind.

Here’s a pic of it from Xbox Wire:

Xbox One Surprise button

Finally, the relatively new native Mixer experience will finally gain support for subscriber badges, emotes, and Ember messages while having video options more easily accessible via the controller’s Menu button as opposed to the rather confusing current menu which auto-hides.

While these additions to the Mixer experience are good to see, the soon-to-be-removed Xbox One Mixer app, which is essentially a web wrapper of the Mixer website is still much easier to use, looks better, and offers more features for viewers such as XP and channel rank tracking and significantly better search screens for finding channels to watch.

Hopefully updates to the Mixer console experience will be pushed out at a faster rate going forward.

What do you think of these changes coming to Xbox One consoles this month? Share your thoughts with us in the comments below and then follow us on Pinterest and Facebook for more Xbox gaming content.

Microsoft announces expansion of Project xCloud in 11 new countries amid COVID-19 pandemic

Microsoft today announced that they are now beginning to expand the preview of their Project xCloud video game streaming platform to 11 new countries.

The countries being added to the xCloud preview are Belgium, Denmark, Finland, France, Germany, Ireland, Italy, Netherlands, Norway, Spain, and Sweden. Those located within any of these 11 countries who are interested in trying out this new service are encouraged to sign up via this web page. Note that only Android users are being accepted as of this moment. iOS devices will likely be added at a later date as was done in existing test regions.

This expansion of the cloud streaming service is a bit surprising as most of Europe, like many other regions, has restricted internet services due to the global COVID-19 pandemic which has forced the majority of the popular to stay at home.

“With that in mind, we continue to evaluate the COVID-19 situation and will begin rolling out the Project xCloud preview across 11 Western European countries when we are confident it is sensible to do so,” a blog post on Mirosoft’s Xbox Wire website says of the situation. “We will take a measured approach to help conserve internet access, beginning the preview in each market with a limited number of people and adding more participants over time.”

Microsoft has continually been testing and improving its Project xCloud service adding new games and regions on a regular basis over the past several months. Just last week, the new Bleeding Edge video game was added to the xCloud library.

Are you excited for Project xCloud and have you had a chance to try it yet? Share your thoughts with the community in the comments below and then follow us on Pinterest and Twitter for more Xbox gaming news.

Epic Games Launcher error Something went wrong [Fixed]

We’re all familiar with Epic Games and their game client called the Epic Games Launcher, but some users have experienced the Something went wrong with Epic games.

The cause of this issue can vary from permission, network connection, or the game client being corrupted. But luckily, we have a few solutions for you.

How can I fix Something went wrong Epic Games error?

1. Log out and log in

log out Something Went Wrong Epic Games
  1. This solution involves you exiting whichever game you’re playing and logging out of the Epic Game Launcher.
  2. Wait for a couple of moments, and log back into the launcher.

2. Firewall permission

  1. From your Start Menu select Control Panel.
  2. Select Windows Firewall, and click on Allow an app or feature through Windows Firewall.
    allow apps to communicate firewall Something Went Wrong Epic Games
  3. The Allowed App windows will open. Click on the Change Settings
  4. Check Private and Public checkboxes next to Epic Games Launcher. If the application isn’t on the list, you’ll have to add it manually.
  5. Click OK to save your new settings.

If you are facing other issues like Install Failed error code: II-E1003 while downloading game files on Epic Launcher, we suggest you check out this guide for easy solutions.

3. Uninstall and reinstall Epic Games Launcher

  1. Start Control Panel.
  2. Now click on Uninstall a Program.
    uninstall a program control panel Something Went Wrong Epic Games
  3. Select Epic Games Launcher and uninstall it.
  4. Afterward, proceed to download Epic Games Launcher from its official website.
  5. Open the file and reinstall the program with the onscreen instructions.

Alternatively, you can use helpful uninstaller software to completely remove Epic Games Launcher and all of its related files.

It will save you a lot of time cleaning up games leftover from a standard uninstall by going from folder to folder.

Reinstalling the game can also help fix other similar issues like Invalid Drive error. You can also follow this guide on fixing the Epic Games Launcher setup ended prematurely error for additional installation troubleshooting steps.

4. Update your network drivers

  1. From the Start Menu select your Device Manager.
    device manager start menu Something Went Wrong Epic Games
  2. Now expand the category with the hardware you want to update.
  3. Right-click on the device, and select Update Driver.
    update driver device manager Something Went Wrong Epic Games
  4. Click the Search automatically for updated driver software.

If the solution above is not working or you need an alternative method, we’re here to offer the most suitable answer.

More exactly, a driver update application is the most suited way to manage all drivers from your Windows OS due to its automatic technology that will scan and update obsolete drivers one by one.

⇒ Get Fortect Driver Updater

5. Remove left-over files

  1. From your Start Menu, select Run and click on it.
  2. You’re going to type %appdata% in the box and press Enter.
    appdata run window Something Went Wrong Epic Games
  3. Search for the Epic Games folder and delete it.

6. Change launcher properties

  1. Find the Launcher shortcut on your desktop.
  2. Right-click on the Epic Games Launcher and now select Properties.
  3. From the Target field, add the –OpenGL line.
    epic games properties opengl Something Went Wrong Epic Games
  4. Click on Apply and then OK.

7. Malware scan

  1. Perform a full scan on your machine with a good antivirus program.
  2. After you’ve performed the scan, restart your machine for the changes to take effect.

If you don’t have a reliable antivirus, you might consider trying out a gaming-compatible third-party security software that includes malware scans and detection.

A gaming-friendly antivirus solution even has a dedicated mode for playing games when alerts and other distractions are silenced so that the game is not disrupted.

If your computer is powerful enough to run the game, it should be able to manage the antivirus software that is running alongside it. The antivirus should detect and prevent malware infection if it’s a proper one installed, so make sure.

We hope that these solutions were of help to you. In the meantime, let us know in the comment section down below what other issues have you stumbled upon when running the Epic Games Launcher.

C:/Users/[Your Username]/AppData/Local/EpicGamesLauncher/Saved/webcache

  • How do I reinstall my Epic game launcher?
  1. Go to Control Panel
  2. Open Programs and Features
  3. Find the Epic Launcher
  4. Click Uninstall

Another way to do this is:

  1. Click on Start
  2. Type Apps and Features
  3. Search for Epic
  4. Uninstall

Once you uninstall the Epic launcher, go to the official website and download and run the installer.

  • How do you fix the glitch on the Epic Games launcher?

Close the Epic Games launcher from Task Manager, then delete your web cache folder. If that does not work, then reinstall the launcher.

If you have encountered the error code 502 while launching Epic Games Launcher, you need to force close the app and then restart it; read more to learn other solutions.

Skype’s ‘Meet Now’ feature is arguably the experience Zoom users crave

Despite being among the top-considered teleconferencing solutions in the market, the Skype team is finding itself having to promote its more casual friendly solutions in the wake of new competition.

Begun the video conferencing wars have.

While Zoom seems to be on the lips of most people as the go-to service for hosting everything from business meetings to weddings, there is an equally growing concern about its privacy and security handling of user data; and to that end, the Skype team is looking to regain mindshare by positioning itself as the safer Zoom alternative.

Late in 2019, Skype began testing its Meet Now feature that functionally gave the platform the same hassle-free experience being touted by Zoom users daily.

Meet Now appears as a new button in the new Skype Insider build, and clicking it will open a window where you can see a call link you can share with others. Again, the nice thing is that even users without a Skype account will be able to participate to the group call, but “Meet Now” also creates a regular group chat where you can send messages to other participants.

However, Meet Now was rolled out to only Insiders and given no public air to showcase a solution to arguably the biggest hurdle casual users have with the platform, regarding the need for a Microsoft account for use.

In addition to lowering the barrier to entry by removing the asinine need of a Microsoft account ID with Meet Now, Skype is already a more secure platform than Zoom at the moment and is offering more features for free.

Along with Meet Now, users will also get the customary ability to utilize picture-in-picture when navigating away from the app in progress, split-view mode as well as the ability to record meetings and have those recordings stored for up to 30 days.

Skype Insider update brings back Split View mode on Windows, Mac, and Linux

It remains to be seen how well Skype markets Meet Now and when it will make it a full-fledged part of the platform, but as Zoom continues to take fire for its handling of user data and security flaws, it would serve Microsoft well to rush out a bunch of ads promoting its latest features to stem the loss of mindshare it is currently experiencing.

Microsoft Office Picture Manager is not working? Try this

At times, when you try to launch Microsoft Office Picture Manager, the app may stop responding. This is a common problem and many users have reported similar issues in the Microsoft Community forums:

When I try to start Microsoft Office Picture Manager, a window appears with the message: Microsoft Office 2010 has stopped working. 

This error can occur due to corrupted Picture Manager files or if a third-party app is creating issues with the app’s functionality.

In this article, we have listed a couple of troubleshooting tips to help you repair the Picture Manager app if it’s not working issue in Windows 10.

What to do if Microsoft Office Picture Manager is not responding?

1. Repair the Office application

Microsoft Office Picture Manager not working
  1. Press Windows Key + R to open Run.
  2. Type control and click OK to open the Control Panel.
  3. Go to Programs > Programs and Features.
  4. From the list of app, select the Microsoft Office app.
  5. Click on Change.
  6. In the Office Repair tool you will see two options:
    Quick Repair – First select this option and click Repair. The troubleshooter will scan and fix any software related issues.
    Online Repair – Select this option if Quick Repair did not resolve the issue. This option might take longer and requires an active internet connection.
  7. Follow the on-screen instructions suggested by the tool to apply fixes.

The Microsoft Office repair tool should fix any issues with the Picture Manager. However, for this to work, you must have Office 2010 or earlier versions installed. If you have installed Picture Manager separately, try other steps in this article.

2. Check for third-party issues

microsoft office picture manager not working
  1. Press Windows Key + R to open Run.
  2. Type msconfig and click OK to open System Configuration.
  3. Open the Boot tab.
  4. Under Boot Options, check the Safe boot box and click Apply.
  5. When prompted to restart the computer, click on Restart.
  6. After the computer restarts, start Picture Manager and check if the issue is resolved.
  7. If everything works fine in Safe boot mode, you may have a third-party app installed on your computer creating issues.
  8. Make sure you disable Safe boot by unchecking the Safe boot option in the System Configuration window to restore all the functionality.

The best way to find the conflicting program is to open Control Panel > Programs > Programs and Features.

Start by uninstalling the most recently installed app and check if that resolves the issue. You may also want to scan your system for malware and virus.

Safe mode is not working? Don’t panic, this guide will help you get past the booting problems.

3. Other solutions to try

Run as administrator

  1. Right-click on the Microsoft Office Picture Manager icon in the Dekstop.
  2. Select Run as Administrator from the context menu.
  3. If prompted by UAC, click Yes.

Does nothing happen when you click on Run as administrator? Don’t worry, we’ve got the right fix for you.

Run from the source

  1. Open File Explorer and navigate to the following location where the Picture Manager is installed:
    C:Program Files (x86)Microsoft OfficeOffice14
  2. Double-click on OIS.exe and check for any improvements.

4. Use a third-party software

Even though it was a standards-defining tool a while ago, an ill-functioning Picture Manager might just be an indicator that it is time to upgrade to more modern software, better equipped for viewing and organizing your photos.

Lightroom is a cutting-edge, cloud-based service that gives you everything you need to edit, organize, store, and share your photos across any device.

Let’s quickly look at its key features:

  • Capture, edit, and share your photos all from one place
  • Cross-platform functionality
  • Cloud storage starting at 1TB
  • Machine learning-based photo management with unlimited capacity
  • Interactive, in-app tutorials
  • Photo library for inspiration

⇒ Get Adobe Lightroom

We know that Microsoft Office Picture Manager has been replaced by the Photos app in Windows for quite a while now.

However, for those who are still running the Picture Manager and having issues with it, the steps described in this article might be useful.

If you have any other questions or suggestions, leave them in the comments section below and we’ll be sure to check them out.

Eager to discover more similar solutions? Check out our Photo Software page.

Match your cutting-edge software with an impeccably-functioning operating system thanks to our Windows 10 Troubleshooting Hub.