FIX: Street Fighter V not launching

Street Fighter 5 is a fluid, reliable game, but sometimes players can’t launch it. When they hit the play button, nothing happens, an error message appears on the screen, or the loading process suddenly stops.

Here’s how one gamer describes this issue:

Downloaded game, downloaded update. Game will not launch when I hit play. My frame turns green for maybe 2 seconds, then absolutely nothing happens. The game will not even launch. No error. No nothing. It just won’t even start.

If you can’t launch Street Fighter 5, follow the troubleshooting steps listed in this article to solve the problem.

How to fix Street Fighter V launch issues

  1. Add Street Fighter V to your antivirus’ exceptions list
  2. Install the latest Windows and driver updates
  3. Restart your PC, run both Steam and SFV as an Administrator 
  4. Verify the integrity of the game cache
  5. Perform a clean boot
  6. Disable  IPv6
  7. Unplug all the peripherals

1. Add Street Fighter V to your antivirus’ exceptions list

One of the reasons why you can’t launch Street Fighter 5 is because the game conflicts with your antivirus and security programs. Many players confirm that adding ST5 to your antivirus’ exceptions list fixes this problem.

It appears that Windows Defender, Security Essentials, AVG and Avast Antivirus often have false positives on the external SFV launcher.

2. Install the latest Windows and driver updates

Make sure that your computer has all the necessary resources to properly run this game. Install the latest OS updates available, as well as the latest graphics driver updates.

3. Restart your PC, run both Steam and SFV as an Administrator

This might help, as well. The first thing you should do is reboot your PC. After that, right-click on both Steam‘s and SFV’s shortcuts respectively, and open Properties. In the Compatibilty tab, check the “Run this program as an administrator” box and confirm changes.

4. Verify the integrity of the game cache

For a step-by-step guide, check out the steps we provided below:

  1. Open Steam.
  2. Right-click on the Street Fighter 5 in the Library and open Properties.
  3. Choose Local files.
  4. Click Verify the integrity of the game cache.

5. Perform a clean boot

  1. Type System Configuration in the search box > hit Enter
  2. On the Services tab >  select the Hide all Microsoft services check box > click Disable all.
  3. On the Startup tab > click on Open Task Manager.
  4. On the Startup tab in Task Manager > select all items > click Disable.
  5. Close the Task Manager.
  6. On the Startup tab of the System Configuration dialog box >click OK > restart your computer.

6. Disable  IPv6

You can use this workaround to fix both ST5 launch issues, as well as random crashes:

  1. Go to Start > type “View network connections” > select the first result
  2. Right-click your Ethernet adapters > go to Properties > Disable IPv6

7.  Unplug all the peripherals

Unplug all the peripherals from your computer, launch ST5 and then plug them back in. This helped some users as there’s seemingly an issue with

We hope that the solutions listed above helped you to fix Street Fighter 5’s launch issues. If you’ve come across other workarounds to fix this problem, you can list the troubleshooting steps in the comment section below.

[wl_navigator]

Fix: Steam game already running error

If you’re bothered with the Steam is already running or Failed to start game (app already running) error when running the Steam desktop client, don’t panic. We have a few solutions for you in the tutorial below.

As we all know, Valve hit the jackpot with Steam. Nowadays, their own game development falls behind digital distribution as that seems to be a more profitable service. So, while the gaming community awaits for Half-life 3, Steam game base is getting larger.

Even though the Steam client receives frequent updates and fixes, some of the issues keep popping up. One of the notable issues is ‘game is already running’. According to some users, their client seems active and thus preventing them from starting the game. So, if this is your problem as well, we’ve prepared some troubleshooting for this annoyance.

How to solve ‘Steam game already running’ issue

  1. Kill the process in the Task Manager
  2. Disable possible compatibility modes
  3. Disable known interfering applications
  4. Re-update Steam
  5. Reinstall Steam

Solution 1 – Kill the process in the Task Manager

According to some reports, Steam.exe seems to be working, but the client interface just doesn’t show up. In this case, you should try stopping the process and retry. You can do this by following these steps:

  1. Right-click Taskbar and select Task Manager.
  2. Find Steam Client Bootstrapper and stop it.
  3. Exit Task Manager and restart the Steam client.

If the client user interface is not visible, then the problem requires other solutions, which you can find below.

If the game is already running, you need to follow the same steps as above. This time, instead of searching for Steam client in the list of processes you will look for something similar to the name of the game (or that has a similar icon with the game). You will end that process, wait a few seconds and then try launching the game again.


Having problems with Task Manager? We’ve got the guide for you.


Solution 2 – Disable possible compatibility modes

The solution for some other Steam-related problems is changing the compatibility mode for the client. However, this medicine does have some counter-effects, as it may cause even more problems. It can cause the client malfunction, especially on x64 systems. So, it’s better to revert it to the original settings, and here’s how to do that:

  1. Go to the Steam folder (default location is: C:Program FilesSteam).
  2. Find the Steam application file.
  3. Right-click and open Properties.
  4. Open Compatibility tab.
  5. Uncheck all boxes except Run as administrator.steam compatibility modes
  6. Save and restart the Steam client.

Solution 3 – Disable known interfering applications

As the Steam tech support stated, there are some background applications that occasionally interfere with Steam. According to them, those applications can slow down or even prevent Steam from working. Since we are into the saying ‘better safe than sorry’, here is the list of apps you should stop while running the Steam client:

  • Anti-Virus Applications
  • Anti-Spyware Applications
  • Firewall/Security Applications
  • Torrent and Download Applications
  • VoIP Applications
  • Peer 2 Peer Applications

Try disabling their respective processes to prevent possible conflicts with Steam. If the problem persists, move on to the next solution.

Solution 4 – Re-update Steam

In some occasions, Steam files get corrupted or incomplete. Most of the time, the problem lies in some malware infections. Those things can ruin your life for sure! However, once you’ve scanned your PC and the malicious software is out, you should re-update your Steam client. To do so, follow these instructions:

  1. Exit Steam completely.
  2. Go to the Steam client installation location. The default location should be C:Program FilesSteam.
  3. Find ClientRegistry.blob and back it up. Just copy and paste on your desktop.
  4. Delete all files in a folder except Steam.exe and steamapps folder (we don’t want to delete all games, do we?)
  5. Start Steam and let it update.

On the next start, Steam client will update and possibly fix the issues. If the problem remains unresolved, we give you a final you can try to deal with this problem.

Solution 5 – Reinstall Steam

Yes, reinstall. If none of the solutions from above helped, the re-installation should work it out. Since the program is not as large as you think, the whole process is fast and as easy. Albeit, the re-installation procedure requires you to delete some associated files and, possibly, some registry entries. You can also use a third-party uninstaller, just don’t forget to backup your games as those will be deleted, too.

Do as follows:

  1. Exit Steam
  2. Move the Steamapps folder out of C:Program FilesSteam (or custom location) to keep game installations.delete steam associated files after uninstall
  3. Click the Control Panel.
  4. Open the Add or Remove Programs.
  5. Select Steam from the list and click the Change/Remove button.
  6. Select the Automatic option and click Next.
  7. Click Finish to uninstall Steam.
  8. Restart your PC and download client installer from the official site.
  9. Install Steam.

These were our possible solutions for this issue. You should start from top to bottom and try them out. Hopefully, they’ll help.

If you are having some other workarounds or ideas, please share them with us in the comments.

[wl_navigator]

HP error 75: Quick solutions to fix it when it pops up

Are you trying to copy or print using your HP printer and you get a HP error 75? Here’s how you can fix this in no time.

How to fix HP error 75

Solution 1: Check the power cable

HP recommends that the printer should be plugged in directly to a wall outlet, not a surge protector or battery backup, which may not allow sufficient voltage to get through to the printer.

Sometimes HP error 75 may occur during the printing or copying process, when the level of current passing through to your printer, if using a UPS, surge protector, or power strip, fluctuates slightly causing inadequate power supply to the printer.

When there’s inadequate power supply, you can get symptoms such as:

  • Inexplicable or false error messages for instance the HP error 75
  • The printer won’t ‘wake up’ from sleep mode
  • Incorrect printouts
  • Slower printing (than normal)
  • Printer control panel display goes blank or shows jumbled characters
  • Monitor shuts off or loses power
  • Paper jam from halfway done print job

These and many other symptoms can be very frustrating.

Connecting or plugging directly to a power outlet on your wall ensures that a consistent level of power is supplied to a printer, which prevents any printing problems.

It is also important when you are experiencing wireless connectivity, sleep mode, and other power problems with your printer.

If you need a new power cable, here are some suggestions:


Solution 2: Perform a Hard Reset

Although this may not be a guaranteed solution to solve all your printer issues, it can solve a few and is often a good first aid step.

Here’s how to do a hard reset:

  • Unplug all cables and memory card from the printer
  • Unplug power cord from the back of the printer while it is still turned on
  • Unplug the other end of the power cord from the power outlet. If there’s a power module on the cord, disconnect one end, then reconnect it
  • After about a minute or so, plug the power cord into the power outlet on the wall (don’t plug it to a surge protector or battery backup – see solution1)
  • Plug the cord to the back of the printer (it should automatically turn on or power back up – if not, turn it on with the power button)
  • Try making a photocopy before connecting other cables to the printer
  • Connect all other cables to the printer

Once you complete the hard reset process, update your printer’s firmware. For Windows operating system users, you can get updates from the following sources:

  • 123.hp.com, which provides guided driver download and installation for Windows users. It installs the full feature print driver for most HP printers released in 2013 or later on.
  • HP software and driver downloads, which provides any available, full feature (to get most of all supported printer features), and basic drivers (for basic printer functionality), plus added printing software, and driver updates for Windows computers
  • HP support assistant, which is a support app for Windows 7 or later for HP printers and computers, and notifies you when the updated printer software is available

While you’re at it, you can check for updates that include performance enhancements, bug fixes, and the latest features for your HP printer.

Did this resolve your issue? Let us know in the comments section below.

[wl_navigator]

How to augment ancient items in Diablo 3

With new players joining the eternal battle of Diablo 3 every season, some might be put off by the learning curve that Diablo has. One of the most frequent questions asked is about Kanai’s Cube, and specifically how to augment ancient items.

Kanai’s Cube is an artefact that players can find in the world of Sanctuary which allows them to transform items, extract powers and convert materials.

How do I augment ancient items in Diablo 3?

1. Find Kanai’s Cube

diablo 3 kanai's cube location


  1. Start a game in adventure mode
  2. Open the Map (M) or step on a waypoint
  3. Go to Act III > The Ruins of Sescheron
  4. Navigate to the Inner Sanctum
  5. Once you find the chamber containing the Cube, interact with it
  6. When you teleport back to town, you will find the cube next to Zoltun Kulle

To start augmenting your gear, the first thing you need is the device which allows you to augment ancient items.

The Cube is a powerful artefact created by Zoltun Kulle and used by the Horadrim. As its corruptive powers became apparent, the Horadrim hid the Cube on Mount Arreat, entrusted to the Barbarians living there.

In its place, they created a less powerful artefact, called the Horadric Cube, which The Adventurer used in Diablo 2.


2. Gather the required materials to augment ancient items

kanai's cube recipe augmentation

  1. Augment ancient and primal ancient weapons: Item to augment + Legendary Gem level 30 (minimum) + 3 x Flawless Royal gems
  2. Augment ancient and primal ancient rings or amulet: Item to augment + Legendary Gem level 40 (minimum) + 3 x Flawless Royal gems
  3. Augment ancient and primal ancient armour: Item to augment + Legendary Gem level 50 (minimum) + 3 x Flawless Royal gems

The three Flawless Royal Gems will determine the primary stat applied by Cladesann’s Despair:

  1. Flawless Royal Ruby will apply strength
  2. Flawless Royal Topaz will apply intelligence
  3. Flawless Royal Emerald will apply dexterity
  4. Flawless Royal Amethyst will apply vitality

Augmenting an ancient item will apply the main stat in addition to what the item being augmented already has.

Keep in mind that the gems will be consumed on each augment, so you will need a new legendary gem and 3 flawless royal gems for each subsequent augment you do.

Beware of the hidden cost of augmenting ancient items in Diablo 3. Whilst you will not need gold for the augmentation itself, you need to upgrade the gems to the top tier. This cost can add up when you’re just starting.


Want to play Diablo 3 but blattle.net isn’t launching? Fix it using this simple guide.


3. Use the recipe to augment your items

augment ancient items diablo 3

  1. Click on Kanai’s Cube
  2. Click on the book icon
  3. Use the arrow buttons to scroll to page 10
  4. Place the materials in the Cube
  5. Click on Transmute 

The item will be returned to your inventory and you will see an extra stat appear in the description. Keep in mind that if you re-augment an ancient item, it will replace the previous augmentation.


4. Augment ancient items when needed

primal ancient augmentation diablo 3

Once you gain access to item augmentation, you will be tempted to augment often. You can do your first round of augments when you have the legendary gems available, afterwards, you will want to do it every 10-15 levels of the legendary gems.

Naturally, this pace will slow down as you go past legendary gem level 60, and from here you can do it every 5 levels or so, depending on how many mats you have available.

The legendary gem you use for augmentations does not impact the final result. The only thing to take into account is the level of the legendary gem used, as each level will add 5 points to the main stat added to the final item.

Diablo is a game that has become synonymous with the ARPG genre. It is a series that is still thriving, with new players joining the eternal conflict regularly.

If you’ve just started playing Diablo 3 and you need some help getting around, sound off in the comments section below and we’ll be sure to help you out.


[wl_navigator]

Windows 10 news recap: Xbox Game Bar to get a widget store, Your People app gets a new icon, and more

Welcome back to our Windows 10 news recap, where we go over the top stories of the past week in the world of Microsoft’s flagship operating system.

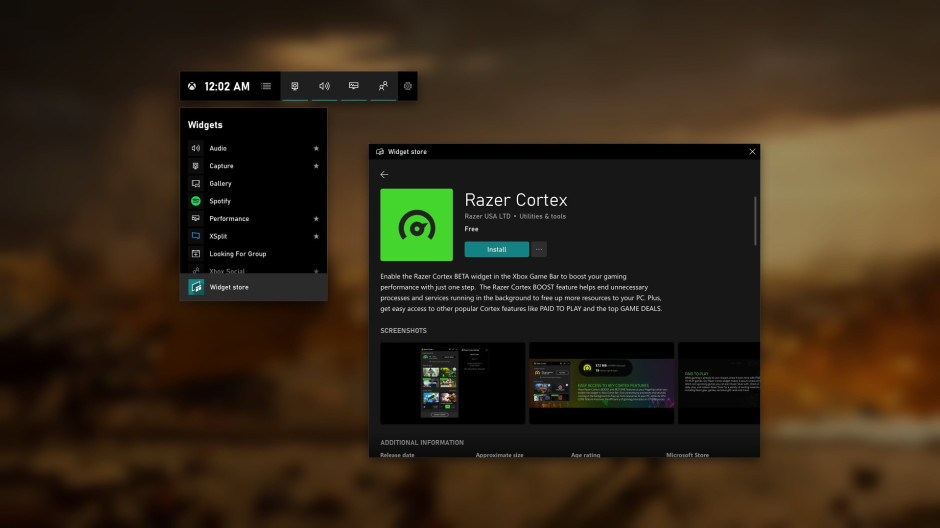
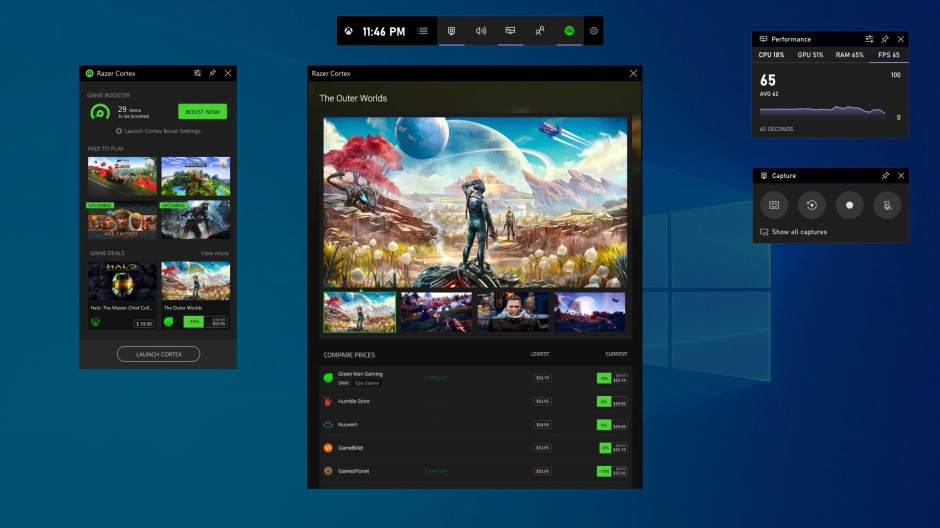
Xbox Game Bar for Windows 10 is becoming much more versatile with new widgets from Razer, XSplit, and Intel

The Xbox Game Bar on Windows 10 is set to become more versatile due to a new ‘widget store’ which will allow users to add new widgets to the bar. Companies such as Razer, XSplit, and Intel will have widgets available.

Windows 10 People app gets a new Fluent Design icon

The People app on Windows 10 has received a new icon with the Fluent Design treatment.

Windows 10 Your Phone app gets subtle design changes with latest Insider update

The Your Phone app on Windows 10 is receiving some slight design changes, available for Windows Insiders initially. You can find the full details of the design changes here.

That’s it for this week. We will be back next week with more Windows 10 news.

How to fix 7 common Imperator: Rome bugs on PC

Imperator: Rome is a great strategy game that all the history buffs out there will love.

With instances of bugs being reported on the game, we’ve gathered up some tips and tricks, that will keep the conquest going for a long time. We came, we saw, we fixed.

How can I fix these Imperator: Rome issues?

  1. Black screen
  2. Save game issues
  3. Connection errors
  4. Game crashes
  5. Game freezing u
  6. Audio issues
  7. Validation errors

1. Fix Black screen issues

In order to ensure that this works, first, you’ll need to try running the game in Windowed Mode or lowering your resolution to 1080p.

If this didn’t work, click on Verify or Repair Imperator in your Steam client.

Or alternatively, simply uninstall and reinstall the game in case you have corrupted files in your Steam directory.

2. Fix savegame issues

More or less, this issue can be traced to faulty game files, maybe some got corrupted at some point. But we’ve got a solution for this, simply follow these steps:

  1. Start your Steam client.
  2. In the Library section, right-click on the Imperator game and click on Properties from the menu.
  3. Now select the Local files tab and click on the Verify integrity of game files.
  4. After this is done, try running the game again.

3. Fix connection issues

Simply add your game to an exception list for both your antivirus or Windows Firewall. The same solution for the game glitching out works for this as well, you can reproduce the same steps to verify your game files.

4.Game crashing fix

To prevent Imperator from crashing we first suggest that you right-click on your game shortcut or exe. file and run the game in Windows Compatibility Mode.


Secondly, if that didn’t work, open your Nvidia Control Panel and Select Manage 3D Settings and select Imperator from the Program Settings and next you’re going to set the Power Management to Prefer Maximum Power.

5. Game freezing up

You should try running the game in Windowed Mode, as a first solution. Or alternatively, repair and verify your files can do the trick. But if that doesn’t work you should uninstall and reinstall your game.

6. Fix sound issues

For this fix, you’re going to right-click on the speaker icon on the bottom right corner of your screen or toolbar for hidden icons and click on Sounds.

Now head on over to the Playback section and disable all the sound devices except the internal speaker or the speaker you wish you want to use.

Also, keep in mind that changing your audio from surround sound to stereo can do the trick too.

7. Validation fix

Navigate to your Steam directory, and locate where the game is installed. Now you’re gonna look for masterservers.vdf files in your Steam or game directory and delete all of them.

Sometimes there are duplicates in different directories and that is why the validation process isn’t working out for you. After you have deleted them proceed to Verify or Repair your game.

Tips for smooth Imperator: Rome gaming sessions on PC

Always whitelist your game through the Windows Firewall, or any antivirus software that might be preventing the game from going into split screen mode.

Keep your graphic drivers up-to-date, and any essential components on your machine.

Whenever you have a freshly launched game, it’s best to run the game on recommended settings until future patches are released.

Always remember the minimum requirements when running a game, these are specs for Imperator:Rome:

  • Operating System: Windows 7 / 8 /10
  • Architecture: 64 bit
  • System Memory: 4GB
  • Processor: Intel iCore i3-2105 or AMD FX-8120
  • Graphics Card: Nvidia GeForce GTX 570 or equivalent AMD Graphics Card

Recommended:

  • OS: Windows 10 Home 64 bit
  • Processor: Intel iCore i5- 3570K or AMD Ryzen 3 2200G
  • Memory: 6 GB RAM
  • Graphics: Nvidia GeForce GTX 660 or AMD Radeon R9 380

[wl_navigator]

Posted in Fix

Fix Star Wars: The Old Republic issues on Windows 10/11

Star Wars games were always popular among gamers, but even Star Wars games have their issues. Speaking of Star Wars games and issues, today we’ll fix Star Wars: The Old Republic issues on Windows 10.

Star Wars: The Old Republic is a popular massive multiplayer online game from EA, but the game has issues, and players have reported various problems, such as being unable to launch the game, black screen issues and other similar problems.

Fix Star Wars: The Old Republic Problems On PC

Solution 1 – End bitraider processes using Task Manager

Players are complaining that they are getting This application has encountered an unspecified error. Please try this patch again message when they try to start the game. According to them, the launcher starts and tries to download the patch but it gets interrupted by the error message.

In order to fix this issue go the following:

  1. Start Task Manager by pressing Ctrl + Shift + Esc.
  2. When Task Manager starts go to the Processes tab.
  3. Find brw.exe and brstvc.exe processes and stop them.
  4. Try downloading the game again.

Solution 2 – Delete the client_settings.ini

There’s a strange issue with Windows 10 and Star Wars: The Old Republic that causes the change of your display resolution to 800×600. There’s no crash, no error message, but the game changes your display resolution.

During this time the game will run in the background, but you won’t be able to switch to it. After closing the game using the Task Manager, the resolution will go back to the original value. This is unusual problem, but there’s a way to fix that.

  1. Go to App data folder. To access it, press Windows Key + R and type %appdata%. Click OK or press Enter.
  2. Now locate Star Wars: The Old Republic folder and find client_settings.ini file.
  3. Delete that file and try running the game again.

Solution 3 – Make sure that your drivers are up to date

If you’re experiencing black screen issues you need to make sure that your graphic drivers are up to date. In addition, it wouldn’t be a bad idea to update your DirectX, .NET Framework, and Visual C++.

You can update the GPU drivers by going into the Device Manager from Display Drivers. As for the DirectX, .Net Framework, and Visual C++, you’ll have to go to their official websites and download the latest versions by yourself.

If you want to prevent the risk of downloading and installing the wrong driver versions, we suggest you do it using a dedicated driver updater tool that automatically updates your graphic card drivers. You just have to choose the right drivers and this tool will safely update it in seconds!

Solution 4 – Change your display resolution

If your resolution changes every time you start the game, you can try lowering your display resolution to match it. For example, if your resolution changes to 800×600 when you start Star Wars: The Old Republic try changing your resolution manually to 800×600 before starting the game.

Change Display resolution and Text size in Windows 10

When you start the game go to game options and change the resolution from 800×600 to the one that you usually use on your desktop. After doing that, exit the game and change your display resolution to the original value. Now when you start the game there won’t be any resolution changes.

Solution 5 – Use FixLauncher.exe

If you think that your launcher is corrupted, it’s always good to run FixLauncher.exe in order to fix it.

To access FixLauncher.exe just go to the C:Program Files (x86)Electronic ArtsBioWareStar Wars – The Old Republic and run FixLauncher.exe from there.

Solution 6 – Run Star Wars: The Old Republic as administrator

  1. Go to the game’s installation directory. By default, it should be
    C:Program Files (x86)Electronic ArtsBioWareStar Wars - The Old Republic
  2. Find launcher.exe and right-click it.
  3. Choose Properties and go to the Compatibility tab.
  4. Check Run this Program as an administrator.
  5. Click Apply and OK to save the changes.
  6. Try running the game again.

Solution 7 – Check your computer’s time and date

date and time options pc

If you’re receiving The login Service is unavailable error message, make sure that you check your computer’s time and date. If your time and date isn’t correct, enter the correct time and date and try running the game again.

Solution 8 – Make sure that your firewall or antivirus isn’t blocking launcher.exe and swtor.exe

Sometimes antivirus software or firewall can block certain programs, so make sure that launcher.exe and swtor.exe aren’t blocked by your antivirus or firewall software.

Solution 9 – Download swtor_setup.exe

  1. Download swtor_setup.exe from here.
  2. Launch the file and it will redownload launcher files.
  3. After the download is complete try running the game again.

Solution 10 – Switch to windowed mode

When you start the game make sure that you press Alt + Enter to switch between fullscreen and windowed mode.

If the keyboard combination isn’t working for you you might have to change game configuration files. To do that follow these instructions:

  1. Press Windows Key + R.
  2. Enter %localappdata%swtorswtorsettings and press OK to open that location.
  3. Open the client_settings.ini and change the values to:
    • Fullscreen = false
    • D3DFullScreen = false
    • RefreshRate = 60
  4. Save the changes and try running the game again.

Solution 11- Use game optimization software

If you’re having FPS issues, lags, and slowdowns while playing, we recommend you use a dedicated game optimization tool that will focus your computer resources and processes on the game without overclocking your hardware.

This kind of tool also provides real-time system health and performance information like the CPU and GPU temperature and clock-speed.

⇒ Get Game Fire

Solution 12 – Delete the Patch folder

If you’re getting the error message saying Logging service unavailable try deleting the Patch folder.

  1. Make sure that your game or launcher isn’t running.
  2. Go to the game installation directory. By default, it should be:
    C:Program Files (x86)Electronic ArtsBioWareStar Wars - The Old Republic
  3. If you see Patch folder make sure that you delete it.

Solution 13 – Flush the DNS cache

Flushing the DNS cache sometimes helps with Logging service unavailable errors, so it’s worth trying.

  1. Run Command Prompt as administrator. To do that type Command Prompt in the Search bar and right click Command Prompt from the list of results. Choose Run as administrator.
  2. When Command Prompt opens type the following and press Enter to run it:
    • ipconfig /flushdns
flushdns command

Solution 14 – Restart your computer and your router

If you are unable to retrieve patch data restart your computer and try running the game again. If the problem persists after the restart, try restarting your modem.

In addition, if you’re using VPN or proxy make sure that your game is allowed to communicate through the VPN.

We hope that our solutions were helpful to you, and if you need more information regarding Star Wars games, you can check what to do to fix Star Wars Battlefront 2 in Windows 10 and how to fix Star Wars: Knights of the Old Republic issues on Windows 10.

FIX: Microsoft Solitaire Collection error 404017

There’s a lot of good things going for the Microsoft Solitaire Collection. The recently-revamped game set of various games was mostly welcomed by avid solitaire players around the world.

However, even this graphically simple game somehow has more than a few issues. Some of them are self-explanatory while the error 404017 is quite peculiar.

Some players see this error prompt whenever they start the game and, well, nothing happens. They close it and play without problems. Now, even though error 404017 can’t be related to a problem, it sure is an error. And we have a few ways to get rid of it.

How to fix error 404017 in Microsoft Solitaire Collection

  1. Reset Store
  2. Run app troubleshooter
  3. Reset the MSC to factory settings and update it
  4. Run SFC and DISM
  5. Update Windows
  6. Reinstall the game

Solution 1 – Reset Store

Let’s start by resetting the store cache. Due to the mysterious nature of the error at hand, we can’t be sure whether this is an isolated Microsoft Solitare Collection error or it has something to do with the Store itself.

The most common way to address Microsoft Store stalling or misbehaving is by resetting it. This is an essential system application and it can’t be reinstalled, but a reset should be a good start.

Here’s how to reset the store with the WSReset command:

  1. In the Windows Search bar, type wsreset.
  2. Click on wsreset to execute the command.wsreset
  3. Open Microsoft Solitaire Collection and look for improvements.

Solution 2 – Run app troubleshooter

The next thing we can do is run the dedicated built-in troubleshooter. There’s a whole menu of tools for Windows 10 designated to troubleshoot a variety of system issues.

In this case, we’ll be looking for the Store Apps troubleshooter. If it doesn’t relieve you of the error 404017, it should at least give you a hint on what went wrong.

You can run the built-in Store apps troubleshooter by following these steps:

  1. Press Windows key + I to open Settings.
  2. Choose Update & Security.
  3. Select Troubleshoot from the left pane.
  4. Expand the “Windows Store Apps” troubleshooter.
  5. Click Run the troubleshooter.windows store apps troubleshooter

Solution 3 – Reset the MSC to factory settings and update it

Now, even though Store can’t be reinstalled or thoroughly meddled with, you can most certainly tweak Microsoft Solitaire Collection. The one action we usually recommend if one or another UWP app has issues is to do a factory reset.

You don’t need to worry about your score (in-game progress) as it’s saved in the cloud and thus safe from deletion.

Here’s how to reset Microsoft Solitaire Collection to factory settings:

  1. Press Windows key + I to open Settings.
  2. Choose Apps.
  3. Expand the Microsoft Solitaire Collection app and open Advanced options.advanced options msc
  4. Scroll down and click Reset.

After you’ve done that, we suggest checking for updates. In order for the Collection to work in a seamless manner, make sure it’s up to date. You can update the app by accessing the Microsoft Store.

Once there, open Downloads & Updates from the 3-dot menu. The only remaining thing is to click Get updates.

Solution 4 – Run SFC and DISM

If the error 404017 persists, it’s maybe time to get big guns into play. Besides the Store and apps falling within its ecosystem, there are still some interfering factors.

For example, if certain system files get corrupted, it can affect the Store. Theoretically, that’s quite a rare occurrence, but knowing Windows 10, running SFC and DISM is well-advised.

They work the best when running together, one after another. The first utility we’ll need to use is the System File Checker. After that, if no error is found, run the Deployment Image Servicing and Management tool.

Here’s how to run both tools via the Command Prompt:

  1. In the Windows Search bar, type cmd.
  2. Right-click the Command Prompt and run it as an administrator.
  3. In the command line, type the following command and press Enter:
    • sfc /scannowsfc
  4. After it’s done, in the same window, type the following commands and press Enter after each:
    • DISM /online /Cleanup-Image / ScanHealth
    • DISM /Online /Cleanup-Image /RestoreHealth
  5. Reboot your PC when everything ends.

As an alternative, you will most likely resolve Solitaire errors with a practical repairing service that automatically detects damaged system files on your PC.

Solution 5 – Update Windows

Mandatory Windows 10 updates are known for causing all kinds of issues, as Microsoft likes to fix what is not broken and make you accept it whether you like it or not. Thankfully, not every update is like that.

The error at hand emerged for some users just after an update, but we might expect that a next update resolves it. Therefore, we suggest checking for the update manually and hoping for the best.

Here’s how to check for updates in Windows 10:

  1. Press Windows key + I to open Settings.
  2. Choose Update & Security.
  3. Click on the Check for updates button on the right.check for updates win 10

Solution 6 – Reinstall the game

Finally, if none of the previous steps helped you address the error 404017, we suggest reinstalling the game as the last resort. Microsoft Store apps, like their older siblings – win32 applications, can get buggy and a reinstall is due.

In this case, we can’t say with certainty whether reinstallation brings more success than the previous solutions, but it’s worth giving it a try.

Follow these steps to reinstall Microsoft Solitaire Collection:

  1. In the Windows Search bar, search for Microsoft Solitaire Collection.
  2. Right-click on it and uninstall it.uninstall microsoft solitaire collection
  3. Reboot your PC.
  4. Open Microsoft Store, look for the Microsoft Solitaire Collection and install it on your PC.
  5. Sign in with your Microsoft account.

With that said, we come to a conclusion. If you’re still having a hard time with this or any other error in Microsoft Solitaire Collection, contacting Microsoft is the next obvious step. Also, tell us if we helped you or not in the comments section below.

  1. Beginner, L1-4
  2. Recruit, L5-9
  3. Enthusiast, L10-14
  4. Apprentice, L15-19
  5. Graduate, L20-24
  6. Aficionado, L25-29
  7. Talented, L30-34
  8. Skilled, L35-39
  9. Seasoned, L40-44
  10. Specialist, L45-49
  11. Expert, L50-54
  12. Veteran, L55-59
  13. Pro, L60-64
  14. Card Shark, L65-69
  15. Genius, L70-74
  16. Master, L75-79
  17. Superstar, L80-84
  18. Ace, L85-89
  19. Champion, L90-94
  20. Legend, L95-99
  21. Grandmaster, L100

Discord mutes out Microsoft Teams by bringing background noise supression to calls first

Microsoft recently announced that its Teams service would be getting real-time noise suppression for video calls, but now Discord now has a response, too. In a blog post today, Discord detailed a similar feature for voice chats on its platform.

Rolling out today, and coming to 100% of desktop users, Discord said its new noise suppression feature is currently still in beta, and it’s available as a toggle switch in settings. Additional controls for the feature on Discord can also be found under App Settings, Voice and Video, Advanced, and Noise Suppression. The company also plans to bring it to iOS and Android users at some point.

Overall, what Discord announced today works similar to Microsoft’s upcoming solution for Teams, though it’s worth noting that Discord has teamed up with Krisp.ai to bring background suppression to the app. Anyway, it’s quite surprising to see Discord ship first a much-anticipated Teams feature, especially since Microsoft has yet to give a timeframe for its background noise suppression feature to Teams users.

According to Discord, the new tech is smart enough to remove background noises happening around you every day. That can be a vacuum cleaner, a door slam, a ruffle of a bag of chips, or more. Much like Microsoft, Discord also claims that user video or audio is not shared outside of the platform. “Krisp runs on your device to cancel out noise — no data is ever sent to their servers under any circumstances,” Discord said.

As more people head to online collaboration services due to the Coronavirus pandemic, this is yet another interesting move from Discord. While Slack and Zoom have been seen as Microsoft Teams and Slack’s main competitors, Discord recently has stepped up to the plate. The company says that it has seen a 50 percent growth in daily voice users in the United States. The platform also recently pushed out an appeal to student and education audiences.

Resident Evil 3 patch improves performance on Xbox One X at the cost of native 4K

Capcom has just released a patch for the Xbox One version of Resident Evil 3, which was released worldwide a week ago. This new patch addresses the performance issues that Xbox One X have been encountering, and we noted in our own review that the game didn’t run as flawlessly as the Resident Evil 2 remake from last year.

The Xbox One X was the only console to run Resident Evil 3 in native 4K, but this ambitious choice by Capcom caused this version to often miss its 60 FPS target. Well, this new patch has now dropped the resolution to 1600p on Xbox One X, which is the same resolution that Capcom chose last year for the Resident Evil 2 remake. The resolution change was noticed by NXGamer today (via Twisted Voxel), a YouTuber known for his deep technical analysis of video games.

Even though Capcom’s RE Engine can deliver some amazingly detailed graphics in Resident Evil 3 and other games like Devil May Cry 5, we’ll have to wait for Xbox Series X and PlayStation 5 to see 4K/60FPS becoming a standard on consoles. Still, the Xbox One X has now replaced the PlayStation 4 Pro as the best console to play Resident Evil 3, as seen in this freshly-published comparison video from VG Tech:

Resident Evil 3 was one of the most-anticipated remakes to hit consoles and PC this year, and it’s a great follow-up to 2019’s Resident Evil 2 remake. The $59.99 survival-horror adventure also comes with the multiplayer game Resident Evil: Resistance, which is an interesting take on the 4 vs. 1 experience previously seen in Dead by Daylight.

RESIDENT EVIL 3 for Xbox

How to fix Windows Modules Installer Service issues

The Windows Modules Installer Service is an essential Windows Update system process that looks for updates and installs them on your computer. In other words, the service enables users to install, modify and remove Windows updates and optional components.

If this service is disabled, you may encounter various issues and errors when trying to install or uninstall Windows updates.

Under the Task Manager, you may find various Windows Modules Installer Service processes, such as TiWorker.exe. If you select the Details tab, you should find it there. You can also go to Start and type services.msc. Then scroll down and locate the Windows Module Installer.

WMI’s main process is TrustedInstaller.exe. The process is usually located at C:Windowsservicing, as you can see in the screenshot below, and it runs under Local System Account.

trustedinstaller windows 10

Its startup state is normally set to Manual.

Sometimes, the Windows Modules Installer Service is missing or fails to work. So, where can you download the Windows Modules Installer Service from in order to fix this issue? This is actually quite a common question among Windows 10 users.

Unfortunately, since the Windows Modules Installer Service is a system process, you cannot download it as a package. In case it fails to work properly or is missing altogether, you can use the solutions listed below to fix the problem.

How to repair Windows Modules Installer Service

1. Make sure that the service is running

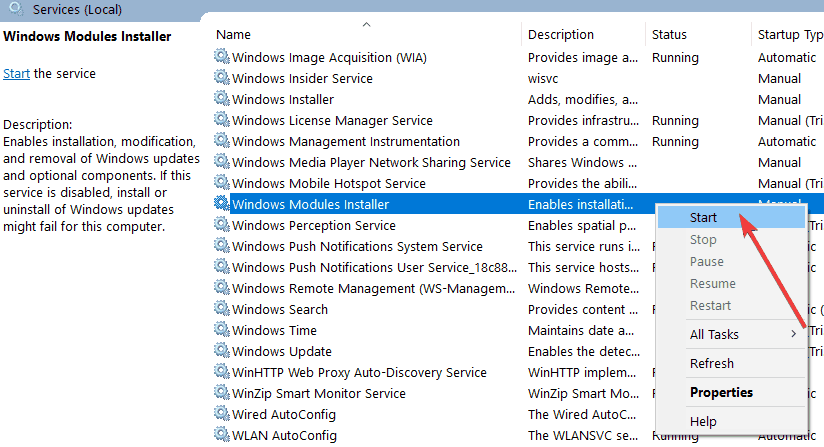
  1. Go to Start > type services.msc > locate the service > right-click on it > go to Properties
  2. Check if the service status is ‘Stopped’windows module installer stopped
  3. If this is the case, right-click again on WMI > select Start.
start windows module installer

See our guide on Windows Installer Service missing for installer engine errors and quick Windows 11 fixes. You can also review the steps for restoring installer related services in this guide on how to enable Windows Installer Service, which offers additional fixes when core components stop working.

2. Run the Windows Update Troubleshooter

Windows 10 also features a built-in troubleshooter that you can use to fix technical issues affecting the system, including update install/removal issues.

Go to Start > Update & Security > Troubleshoot > Run the Windows Update Troubleshooter

windows update troubleshooter

3. Scan your system for malware, viruses and the like

If you computer is infected with malware or other cyber threats, this may explain why you’re experiencing WMI issues. Running a full-system scan should help you fix the problem.

If Windows Defender is your antivirus of choice, launch it and go to Virus & Threat protection. Click on Advanced scan and select Full system scan.

scan computer for virus

We also recommend you to install an anti-malware tool compatible with your antivirus for an extra layer of protection.

4. Run SFC scan

System file corruption issues may also trigger Windows Modules Installer problem. The quickest way to fix the problem is to run a System File Checker scan.

Launch Command Prompt as administrator > enter the command sfc /scannow > hit Enter.

SFC scan

There you go, we hope that this article answered your question as to where you can download the Windows Modules Installer Service. As you can see, you can’t actually download it as this is a system service that’s included in the OS install package.

Before you go, don’t forget to check our guide on Windows Modules Installer Worker High CPU problems.

Xbox beta app for Windows 10 gets significant performance improvements with 2004 update

Last week, Windows Insiders received a new version of the Xbox beta app for Windows 10 that introduced some welcome under the hood changes. Indeed, the app ditched the Electron framework in favour of Facebook’s React Native, bringing some significant performance improvements along the way.

This new React Native revamp of the Xbox beta app is now available for non-Insiders with version 2004.2000.36.0. After installing this update, you’ll notice that the app now uses much less memory and CPU, making it just as efficient as an app like Steam. Previously, the Xbox beta app could use close to 50% of your CPU during game downloads, meaning it was often better to just close it when playing games.

We’ve also noticed some minor design changes with this update, including a slightly slimmer top navigation bar. The taskbar icon also changed from a white Xbox logo to the same logo above a green square. The Xbox beta app could still do a better job at displaying content by wasting less space, but this is a solid update overall.

It’s now been almost a year since this new Xbox app has been beta. Microsoft launched it along with Xbox Game Pass for PC back in June 2019, and the subscription service remains great value for PC gamers. In case you missed it, Football Manager 2020, Stranger Things 3: The Game and more are joining the catalog this month.

Fix: Netflix error code ui-800-3 on Xbox One

Millions of users use Netflix every day, but Xbox One users reported certain issues with Netflix app. According to them, they are getting Netflix error code ui-800-3, so let’s see how to fix this error.

How do I fix Netflix error code ui-800-3 on Xbox One?

Solution 1 – Try logging out of Netflix app

According to users, one potential solution is to log out of Netflix app and sign in again. To do that follow these steps:

  1. Start Netflix application on Xbox One.
  2. When the app opens, locate the Menu Row or press the B button on your Xbox One controller.
  3. Select Settings from the menu.
  4. Select Log Out.
  5. Log in to Netflix again.

After logging back in check if error code ui-800-3 appears again. If the problem persists, move on to the next solution.

Solution 2 – Reinstall the Netflix application

Few users claim that you can fix Netflix error code ui-800-3 on Xbox One simply by reinstalling the Netflix application. To do that, first you need to uninstall Netflix by following these steps:

  1. From your Xbox Dashboard select My Games & Apps.
  2. Select Apps from the menu on the left.
  3. Highlight Netflix app and press the Menu button on your controller.
  4. Select Manage App button.
  5. Choose Uninstall All and select Uninstall All again to confirm.

After uninstalling the Netflix app, you need to install it again by following these steps:

  1. From the Home screen navigate to the Store.
  2. In the Apps section select Netflix.
  3. Select Install and wait for Netflix to install.

After the application is installed, run it and check if the error appears again.

Solution 3 – Check your DNS settings

Sometimes your DNS settings can interfere with Netflix app and cause Netflix error code ui-800-3 to appear. To fix this issue you need to check your DNS settings. To do that, follow these simple instructions:

  1. Press the Menu button on your controller and select Settings. Alternatively you can select Settings from the Home screen.
  2. Select Network and go to Advanced settings.
  3. Open DNS settings and select Automatic.
  4. Press the B button to save changes.

After setting the DNS settings to automatic, start Netflix again and check if the problem is resolved.

Solution 4 – Reset Netflix

Users reported that they managed to fix this problem by resetting Netflix. To do that, wait for the error message to appear and select Reset Netflix option. After Netflix resets, start it again and the problem should be completely fixed.

Solution 5 – Reinstall Netflix, turn on Power Saving Mode and turn off your console

Few users claim that they fixed this error simply by reinstalling the Netflix application and by turning on Power Saving Mode. After you uninstall Netflix app, change console settings from Instant On to Power Saving Mode. Now you need to hold the power button down until the white light turns orange. Unplug the console from your TV and wait for few minutes. After that, connect your console, turn it on and install the Netflix application again. We’re not sure if this solution works, but you can still try it.

Netflix error code ui-800-3 on Xbox One can cause a lot of problems, but you should be able to fix it simply by resetting the Netflix app. If that doesn’t work, feel free to try any other solution from this article.

[wl_navigator]

Posted in Fix

The Windows 20H1 evolution continues as build 19041.173 goes live

Windows Insider Preview build 19041.173 is now live in the Slow ring. The release is an update to build 20H1, which has undergone significant improvements since it hit the Fast ring last year.

Cumulative update KB4552455 fixes multiple bugs, although it does not add new features to build 20H1.

Issues fixed

Microsoft said that this CU includes solutions that came with build 19041.172. Extra fixes include:

App compatibility

The update minimizes app compatibility problems with build 20H1. According to Microsoft, outdated versions of certain Windows 10 applications would fail to launch in some cases.

Resource allocation

The update solves a resource allocation glitch during device initialization. The problem would cause the failure of certain mass storage devices that connect to Windows 10 PCs via USB.

Mute button

Some insiders reported the malfunction of the mute button on specific devices with the Your Phone app. Update KB4552455 fixes this volume control problem.

Other issues the update addresses are:

  • We have fixed an issue that causes a fault in the input-output memory management unit (IOMMU) and a DRIVER_VERIFIER_DMA_VIOLATION (e6) error. This issue occurs after resuming from hibernate on systems that have Kernel Direct Memory Access (DMA) Protection and Dynamic Root of Trust Measurement (DRTM) enabled.
  • We have updated the Country and Operator Settings Asset (COSA) to increase the coverage for automatic cellular provisioning on devices with mobile broadband.

Persistent screen reader issues

There is one issue that build 19041.172 does not fix, though. It has everything to do with the incompatibility of certain screen-reading apps and the new Microsoft Edge.

As such, Narrator and NVDA users are still unable to access some content when browsing the web via the Chromium-based browser. These apps work well with the old Edge, however.

Windows 10 20H1 gets closer to general availability

Microsoft may release Windows 10 20H1 to general availability any time in April or even May. Also known as the Windows 10 April 2020 Update, the OS sports a bunch of new features and improvements.

This build has a much-advanced Windows Search experience based on what Fast ring insiders have sampled so far. Virtual assistant, Cortana, also gets some substantial enhancements in this version of Windows 10.

Build 20H1 constitutes a major Windows 10 upgrade that many users cannot wait to download. Hopefully, the current COVID-19 crisis will not significantly delay the release of the OS.

“You won’t have to wait much longer” for exciting Xbox Game Studios news, insider says

As we get closer and closer to the next-gen Xbox console, we’re all waiting for Microsoft to share more details about upcoming Xbox Game Studios titles. @Shijobi602, a self-proclaimed communications guy at Wushu Studios with more than 50K Twitter followers, teased some exciting news in a post on Resetera yesterday (via Windows Central).

“You won’t have to wait too much longer, really. I’m incredibly excited about what’s coming from Xbox…gorgeous fantasy worlds, reboots, big sci-fi,” the post reads.

Xbox Game Studios

While many would suggest that the insider’s details are just rumors, it might be safe to assume that his game studio is likely connected to upcoming Xbox game projects. Moreover, Xbox head Phil Spencer revealed in an interview with IGN last week that “he believed Xbox had made the decisions in their approach to the next generation console and that he feels very good about the overall package.” So far, the best glimpse we have seen into the next generation titles was our look at Hellblade II, a game that was previously announced at the Game Awards 2019, which showed up some very impressive video rendered on the upcoming Xbox Series X.

You can keep up with the latest updates over at the Inside Xbox live streams and of course, we will share news on the upcoming digital events. What game are you looking forward to? Let us know in the comments below.

New report reveals Microsoft Azure was struggling with reliability and capacity before coronavirus outbreak

Microsoft CEO Satya Nadella is often lauded for transforming the Redmond giant into a trillion-dollar company after making a big bet on cloud services year ago. With Azure, Microsoft is indeed the second biggest cloud provided after Amazon’s AWS, and Azure has also become one of Microsoft’s fastest-growing businesses in recent years.

The recent coronavirus outbreak revealed that cloud computing is now more important than ever, with lots of employees around the world being forced to work from home. This has put a huge pressure on the most popular Internet services including YouTube and Netflix, but Microsoft also had to implement some restrictions for its Office 365 services, including Microsoft Teams, to cope with higher usage.

“As demand continues to grow, if we are faced with any capacity constraints in any region during this time, we have established clear criteria for the priority of new cloud capacity. Top priority will be going to first responders, health and emergency management services, critical government infrastructure organizational use, and ensuring remote workers stay up and running with the core functionality of Teams. We will also consider adjusting free offers, as necessary, to ensure support of existing customers,” the company explained on March 21 on the Azure blog.

If this reassuring message suggested that Azure customers had no reasons to worry, a new report from The Information reveals today that Azure has actually been under some pressure before the coronavirus outbreak. Big Azure customers including Adobe Systems have been encountering performance issues, while others like Walmart and Chevron also had issues when accessing Azure services, the report reveals.

“It doesn’t appear that the issues big Azure customers have faced are bad enough that they have stopped using the service completely, at least not yet. Microsoft has broad, multiyear corporate alliances with some of those customers, including Adobe, Chevron and Walmart, that would be hard to walk away from. However, those companies could shift some of their computing chores to other cloud providers, making it harder for Azure to pick up additional business down the line,” the report reads.

Interestingly, GitLab, a competitor to the now Microsoft-owned GitHub also decided to move a “ significant portion” of its cloud business from Azure to Google’s cloud. “We had very long boot times that did hinder us in critical situations,” said Brandon Jung, Vice President of alliances at GitLab to the Information, adding that Microsoft’s acquisition of GitHub didn’t lead to its cloud deal with Google.

The report also reveals something interesting about the Azure infrastructure: Currently, Microsoft has more cloud regions than Amazon’s AWS, but compared to its competitors, Microsoft’s datacenters could be spread too thin. “Microsoft is trying to have the most regions possible but there is little evidence that each Azure region is materially more than a single data center,” said Corey Quinn, a cloud economist at The Duckbill Group to The Information.

Another issue with Azure could be an excess of large customers compared to the amount of SMBs. This is a problem that Amazon apparently doesn’t have with AWS according to a person doing business with the Azure team.

AWS, too, has big customers, but also has a wide mix of medium and small businesses, said the person who does business with the Azure team. The diversity in its customer base, along with the larger overall cloud capacity at AWS, lessens the risk that a single customer can suck up all of the computing resources in a specific data center, the person said.

Microsoft said on its Azure blog last month that it was “expediting the addition of significant new capacity that will be available in the weeks ahead.” Lastly, a Microsoft spokesperson gave a reassuring statement to The Information. “Microsoft is committed to our customers and to delivering cloud services built on security, privacy, compliance, and transparency. We have a strong sustained track record to meet customer demand at global scale. This requires careful demand planning and flexibility, which is what we are doing today. We are working closely with existing and new customers to help them best manage their infrastructure needs,” the spokesperson said.

The success of Microsoft Azure took many by surprise in recent years, and Microsoft was indeed one of the very few companies with the resources and scale to challenge Amazon Web Services. However, AWS remains far ahead of Azure. If the cloud remains a big priority for Microsoft CEO Satya Nadella, Google may reportedly have second thoughts about its own cloud business. Back in December, a previous report from The Information revealed that Google was considering giving up on competing with AWS and Azure if it didn’t reach a top two position by 2023.

Latest Windows 10 Insider build hides new revamped media control and “What’s new” section in Settings

Microsoft rolled out Windows 10 Preview Build 19603 to Fast Ring Insiders yesterday, which comes with a bunch of new features and enhancements, including the Windows Subsystem for Linux (WSL) integration with File Explorer. However, besides all the features listed in the changelog, this new preview build packs two hidden features as well.

In a recent development, Twitter user @Albacore discovered that the Redmond giant is experimenting with a revamped version of the Windows 10 volume flyout with media controls, with the pop up now making much better use of Microsoft’s Fluent Design guidelines.

Windows 10 volume flyout media controls

In addition to the new media controls, @Albacore spotted in the latest Inisider build another hidden feature in the Windows 10 Settings panel. As you can see in the screenshot below, a new “What’s New” section provides useful information about new Windows 10 features that non-power users may ignore. A visible “Give feedback” would also make it easy for Windows users to submit feedback about individual features.

Windows 10 Whats New Section

Again, the aforementioned features are not currently activated and they may well never ship to the public. Brandon LeBlanc from the Windows Insider team stated on Twitter that the media controls feature in the volume flyout “isn’t available yet to Insiders and is hidden in code as it’s currently a design investigation we’re doing.” As for the “What’s New” section, LeBlanc said in a separate tweet that “We didn’t note this in our flight blog post because it’s hidden in code and not enabled for Insiders yet or ready to be used.”

What do you think about these hidden experimental features? Let us know in the comments if you’d like Microsoft to make them available in a future flight.

NBA 2K Playgrounds 2 and Override: Mech City Brawl are free to play with Xbox Live Gold this weekend

Ahead of the official announcement on Xbox Wire, NBA 2K Playgrounds 2 and Override: Mech City Brawl will be available to play for free for Xbox Live subscribers this weekend. As noted in a post on TrueAchievements, these two games are being offered in the latest installment of Free Play Days on Xbox One.

Xbox Live Gold subscribers will be able to play NBA 2K Playgrounds 2 for free until April 16, 2020, giving players plenty of time to complete the estimated 20-25 hours in the regular campaign mode. On the other hand, Override Mech City Brawl will be available for free until Sunday, April 12, 2020 at 11:59 PM PDT. NBA 2K Playgrounds 2 allows you to play as any of the players from a massive roster of current and retired NBA greats. NBA 2K Playground 2 has online matchmaking with dedicated servers, four-player matches on Xbox Live, three-point contests, slam dunk contests, and more.

Override: Mech City Brawl takes about 12-15 hours to complete and offers players a chance to fight against opponents in a 3D city landscape. Override lets you play in epic battles against your friends with online Versus mode and an interesting take on 4-player co-op. In 4-player co-op, each player controls one half of each mech as they fight head-to-head.

Don’t forget, Xbox Live Gold subscribers can play Gears 5 for free until April 12, 2020. As usual, Xbox Live Gold subscribers will be able to download both games using Xbox.com, or via your Xbox One console. Xbox Live Gold subscribers can also get these games at under $10 a piece now or at the end of the Free Play Days trial period. Unfortunately, neither game is available to play for free as part of an Xbox Game Pass subscription.

NBA 2K Playgrounds 2
Developer:
2K
Price:
$7.49


Override: Mech City Brawl
Developer:
Modus
Price:
Free

Department of Defense deploys Microsoft Teams despite of JEDI contract issues

Seemingly unrelated to its recent joint defense project on the books, the Department of Defense and Microsoft are steamrolling another collaborative effort in deploying Microsoft Teams throughout the agency amid COVID-19 related circumstances.

Late summer of 2019, contract partner General Dynamics Corp, was awarded the $7.6 billion Defense Enterprise Solutions contract otherwise know as the DEOS, as part of an effort to upgrade the DoD’s collaborative workspace by implementing Microsoft 365.

Outlined in the agreement, “DEOS will streamline our use of cloud email and collaborative tools while enhancing cybersecurity and information sharing based on standardized needs and market offerings.”

However, with a global pandemic forcing people to “social distance”, “shelter-in-place”, and “stay at home” the DoD is quickening the pace at which it wants to deploy parts of Microsoft’s collaborative suite, specifically Microsoft Teams, to presumably help facilitate work-from-home orders by the agency.

As Windows Central is reporting, a source familiar with the DoD leaked a screenshot of the DoD’s version of Teams account login, the source also clarifies that “the DoD has begun to accelerate Microsoft Teams deployment ahead of schedule.”

While it’s not the unequivocal clearance Microsoft and the DoD were looking for to move ahead with their currently injuncted JEDI contract, it is another collaborative piece the two (excluding General Dynamics Corp as thrid party contractor) entities can begin setting in place support for one another, ahead of a potentially mutually beneficial relationship.

Microsoft shares new usage numbers on Teams, announces new Education features

Microsoft Teams is one of the few apps that has been seeing unprecedented growth since the beginning of the coronavirus pandemic. As expected, the software giant is striking the iron while it’s out by announcing new features and some interesting hard data about the team collaboration app.

Jared Spataro, Corporate Vice President for Microsoft 365, shared today some highlights from Microsoft’s new Work Trend Index, a new research effort to understand how workers around the world interact with Microsoft’s productivity apps:

  • First of all, the number of weekly Microsoft Teams users on mobile grew more than 3x from early February to March 31.
  • Microsoft also saw Teams users turning on video in Teams meetings grow two times more than before, and the total number of Teams video calls also grew by over 1,000% in March.
  • The company recently noticed a new daily record of 2.7 billion meeting minutes in one day, which represents an increase of 200% from 900 million in mid-March.
  • China is one of the markets where Teams is growing very fast, and Redmond now sees more than two times the number new Teams users in China each day compared to end of January.

Microsoft Teams was already one the fastest-growing Microsoft 365 apps before the pandemic, but it has now clearly become one of the company’s main priorities for the next couple of months. “While there is no true replacement for in-person collaboration, we’re working harder than ever to quickly innovate to decrease pain points, increase human connection, and make work a bit more fun,” Spataro said today.

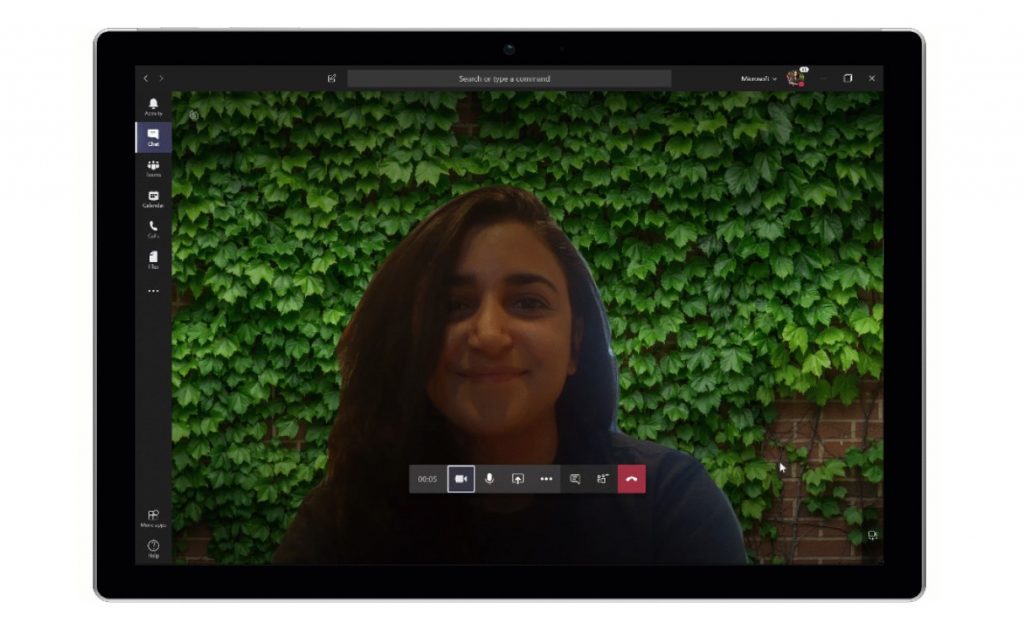
Those of you using Teams video calls frequently will be pleased to know that Custom background effects in video calls are now generally available starting today, according to the post. “This feature builds upon background blur, which uses AI to blur the environment behind you,” Spataro explained.

A raise hand feature to notify others in your Teams calls that you want to speak will also start rolling out this month, Spataro said today, and Microsoft also plans to improve your Teams calls with real-time noise suppression later this year. Lastly, Spataro announced two upcoming Education features for meeting organizers: an end meeting feature to end them for everyone in one click, as well as participant reports including join and leave times.

FIX: Ctrl Alt Del Not Working on Windows 10/11

If you want to open Task Manager on your Windows , or Windows device then you will have to use a combination of three keyboard buttons: ctrl+alt+del. Unfortunately, there are situations in which the ctrl alt del sequence is not working on our Windows 10 device. Why is that happening?

Well, ctrl+alt+del might not work after installing third-party apps, or after updating the system with an unofficial firmware.

These third-party apps are making changes on the Registry and by modifying the default values the ctrl+alt+del feature will stop working.

Therefore, for fixing this Windows problem you will have to access Registry and modify the values by yourselves. But, for further details on this matter, don’t hesitate and check the guidelines from below.


Ctrl Alt Del is one of the most-used keyboard shortcuts, and not being able to use it can be a big problem for many users. Since this is a big problem, in this article we’re going to cover the following issues:

  • Ctrl Alt Del not working – PC frozen – Several users reported that using Ctrl Alt Del shortcut causes their PC to freeze. This can be a big problem, but you should be able to fix it using one of our solutions.
  • Ctrl Alt Del not working on login screen – According to users, this keyboard shortcut isn’t working for them on the login screen. This is usually related to third-party applications and it can be fixed by finding and removing the problematic application.
  • Ctrl Alt Del not working to lock PC, to unlock – Many users use this shortcut to lock or to unlock their PC. However, if the keyboard shortcut isn’t working, you won’t be able to lock or unlock your PC with it.
  • Ctrl Alt Del not working on laptop keyboard – This issue can affect laptop keyboards as well, and if you have this problem, be sure to try using a USB keyboard and check if that solves the problem.
  • Ctrl Alt Del not working due to a virus – Sometimes malware infection can cause Ctrl Alt Del shortcut to stop working. If you have this problem, we strongly advise that you scan your PC with your antivirus tool.

How do I fix Ctrl+Alt+Del not working

1. Use Registry Editor

  1. Launch the Run window on your Windows 8 device – do this by holding Windows + R buttons at the same time.
  2. Then, in the input field enter Regedit. Press Enter or click OK to start Registry Editor.
    Ctrl Alt Del not working on login screen
  3. In the left pane navigate to HKEY_CURRENT_USERSoftwareMicrosoftWindowsCurrentVersionPoliciesSystem.
  4. If the mentioned key doesn’t exist, go to HKEY_CURRENT_USERSoftwareMicrosoftWindowsCurrentVersionPolicies. Right-click Policies and choose New > Key. Enter the System as the name of the new key. Once you create a System key, navigate to it.
    Ctrl Alt Del not working to unlock
  5. Now from the right panel of Registry find DisableTaskMgr and double click it to open its properties. If this DWORD isn’t available, right-click the right pane and choose New > DWORD (32-bit) Value to create it. Enter DisableTaskMgr as the name of the DWORD.
    Ctrl Alt Del not working on laptop keyboard
  6. At this point you should know that value 1 means enable this key, thus disable Task Manager, while value 0 means disable this key therefore enable Task Manager. Set the desired value data and click on OK to save changes.
    Ctrl Alt Del not working virus
  7. So, set the value you want and then close Registry Editor and reboot your Windows 10.

Once your PC restarts, try using Ctrl Alt Del shortcut and check if the problem is resolved.


Can’t access Registry Editor? Things aren’t as scary as they seem. Check out this guide and solve the issue quickly.


2. Install the latest updates

If Ctrl Alt Del shortcut isn’t working on your PC, the problem might be the missing updates. Certain bugs can appear in Windows and cause this and many other problems to appear.

However, you can fix this problem by installing the missing updates. To check for updates manually, do the following:

  1. Open the Settings app. You can do that simply by pressing Windows Key + I on your keyboard.
  2. When the Settings app opens, navigate to the Update & security section.
    Ctrl Alt Del not working frozen
  3. Now click on Check for updates button. Windows will now check for available updates and download updates in the background.
    Ctrl Alt Del not working frozen

After downloading the latest updates, the problem should be resolved and the keyboard shortcut should start working again.


3. Scan your PC for malware

Several users reported that Ctrl Alt Del isn’t working on their PC due to malware infection. To fix this problem, it’s highly advised to scan your PC for malware.

You can run a scan with the built-in Windows Defender, but we recommend you use third-party software. Dedicated antimalware antivirus tools are reported to have higher detection rates.

Pick an antivirus with a transparent privacy policy, a large threat database, as well as anti-phishing technologies, and online privacy features.


4. Check your keyboard

If Ctrl Alt Del shortcut doesn’t work, the problem might be your keyboard. To check if your keyboard is the problem, we advise you to connect it to a different PC. Also, you can try using a different keyboard on your PC and check if it works.

Several users reported that they fixed the problem by using a different keyboard. According to them, after using a different keyboard Ctrl Alt Del command started working on their keyboard as well.

This is an unusual solution, but users reported that it works, so be sure to try it out.


5. Remove Microsoft HPC Pack

Several users reported problems with Ctrl Alt Del and LogonUI.exe. According to them, the problem was related to Microsoft HPC Pack, and to fix it, you need to remove Microsoft HPC Pack from your PC.

Once you remove Microsoft HPC Pack from your computer, the problem should be completely resolved and Ctrl Alt Del shortcut should start working again.

If you want to completely remove this application along with all files associated with it, be sure to try one of the best uninstaller software on the market. They can automatically remove any stubborn app from your PC.

These tools will scan and erase all files associated with Microsoft HPC Pack from your PC without having any impact on any other apps on your device.


6. Perform a Clean boot

Sometimes third-party applications and services can interfere with your PC and cause this and many other errors to appear. To find out which application is causing this problem, you need to perform a Clean boot.

This is rather simple and you can do it by following these steps:

  1. Press Windows Key + R and enter MSConfig. Press Enter or click OK.
    Ctrl Alt Del not working on login screen
  2. Navigate to Services tab, check the Hide all Microsoft services box and click on Disable all button.
    Ctrl Alt Del not working to lock PC
  3. Now navigate to the Startup tab and click on Open Task Manager.
    Ctrl Alt Del not working on laptop keyboard
  4. A list of all startup applications will now appear. Right-click the first entry on the list and choose Disable from the menu. Repeat this step until you disable all startup apps.
    Ctrl Alt Del not working virus
  5. Now go back to System Configuration window and click on Apply and OK.
    Ctrl Alt Del not working frozen
  6. When asked to restart your PC, choose the option to restart now.

Once your PC restarts, check if the problem reappears. If not, you need to enable services and applications one by one until you find the problematic application.

Keep in mind that you need to restart your PC after enabling each application or service to apply the changes.

Once you find the problematic application, you can remove it from your PC, update it or just keep it disabled.

[wl_navigator]

Windows 10 build 19603 enhances access to Linux files

Windows 10 Preview Build 19603 is now available in the Fast ring. It comes with a bunch of new features, most notably, integration of the Windows Subsystem for Linux (WSL) with FileExplorer.

As usual, Microsoft announced several Windows 10 fixes and improvements that the build includes.

Linux file access in Windows 10

If you tried manipulating Linux files in Windows in the past, you would sometimes corrupt or lose them. Microsoft addressed that problem with WSL/File Explorer integration in Windows 10 version 1903.

With that change, it became easier to access Linux distributions from Windows.

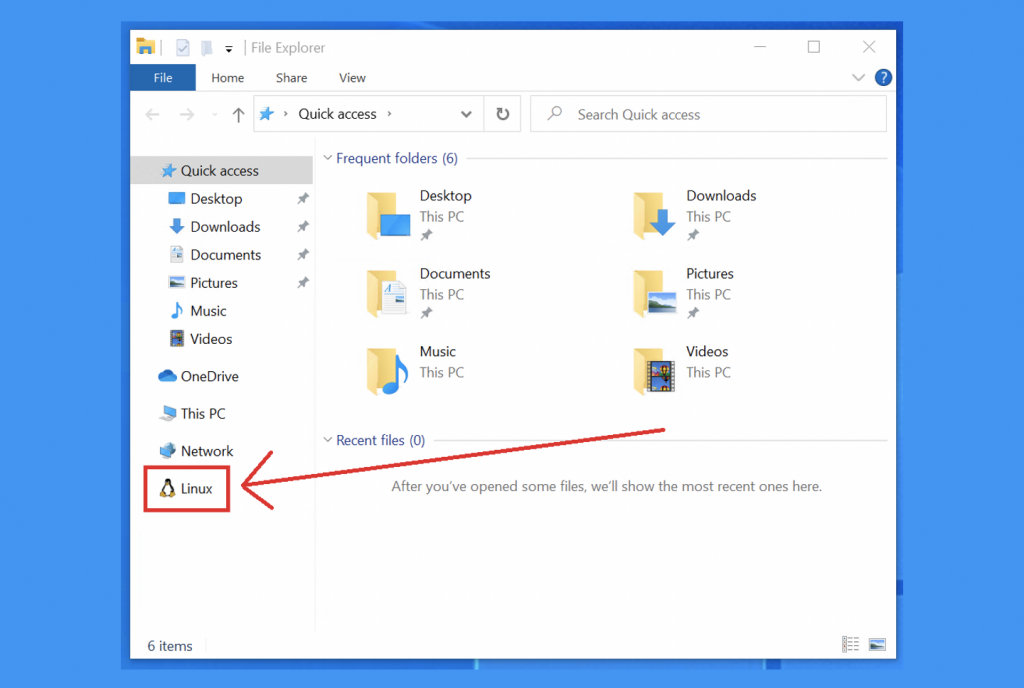
Today, build 19603 improves that integration by enabling you to get to your Linux files from File Explorer’s left navigation pane.

We’ve had the ability to access your Linux files since Windows 1903, but now you can easily get to them from your left-hand navigation pane in File Explorer.

To get view your distributions, start by clicking the Linux icon on the left-hand pane of File Explorer. Then select a distribution to access its Linux root file system.

Recently, File Explorer received a couple of fluent design enhancements too.

Disk space optimization

You will be able to optimize your disk space in a more efficient manner after installing build 19603.

With the improved Storage Settings feature, you can see all your content in one page. This way, you can quickly view disk cleanup recommendations and spot any apps or files that are stretching you PC storage.

You may also see how much space you can save by removing redundant content, such as files you have synced to the cloud.

Offering space-saving recommendations is a welcome idea, especially since Windows 10 cannot always tell what you want to do with large or unused files. As such, you still can ignore the suggestions and keep important large files or uninstalled apps.

If you experience any issue with build 19603, feel free to report it to Microsoft for correction or improvement.

Microsoft’s Xbox Series X console to be added to Xbox All Access payment plans in Australia

When Xbox All Access launched in Australia in October of last year, many were disappointed to see the lack of any mention of Microsoft’s upcoming next gen Xbox Series X console.

The new payment plan, which allows gamers to pay off a new Xbox console on a monthly basis, included the Xbox Series X alongside the Xbox One X and Xbox One S in the UK and US with the offer of a free upgrade to the new console once it launched. The Australian version of the plan, which is managed by the Telstra telecommunications company, excluded the Series X completely and only made vague references to it on social media encouraging people to stay tuned for more information.

It looks as if Telstra has finally bitten the bullet as, earlier this week, the company updated its website with a statement announcing that “Xbox Series X is coming to Xbox All Access.”

Unfortunately, right now there’s no information on if the next gen console will be a free or paid upgrade or if an upgrade will even be available at all. Those interested in getting the Xbox Series X via Xbox All Access are encouraged to fill out this form though.

Do you want to buy an Xbox Series X via Xbox All Access or do you prefer to pay all of the fees up front? Let us know in the comments below and then follow us on Facebook and Pinterest for more Xbox gaming content.

Microsoft reportedly changes Windows 10X plans – no Surface Neo this year

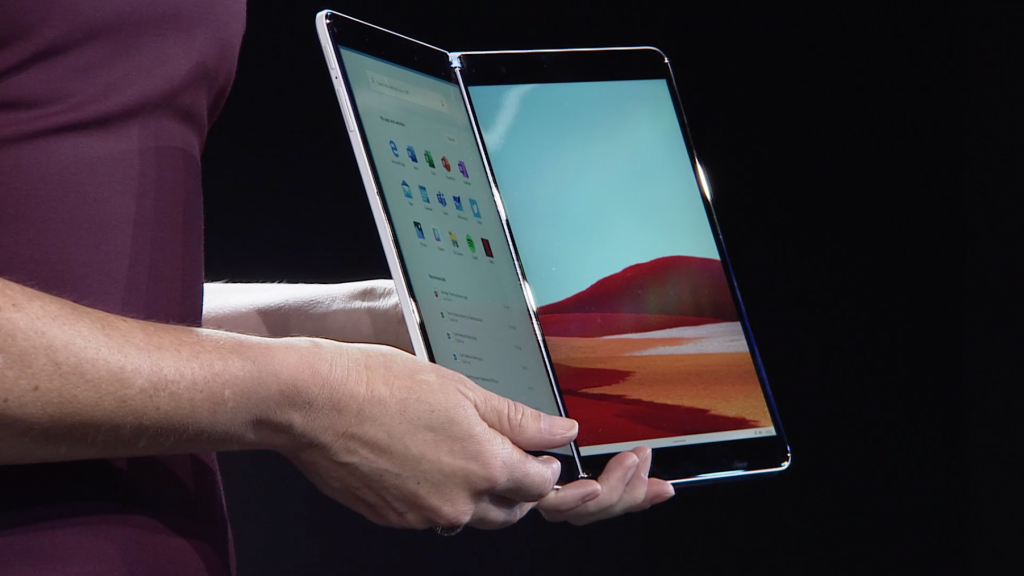
A late afternoon blog post by Mary Jo Foley reveals that, according to her sources, Microsoft won’t be delivering its Windows 10X powered Surface Neo dual screen device this year, nor will it ship Windows 10X to other OEMs for 3rd party Windows 10X dual screen devices in 2020. The delay is being attributed to the effects of shutting down the Microsoft campus as well as supply chain issues due to COVID-19. However according to Foley the Surface Duo, which will run on Android and not any variant of Windows 10, is not being delayed, at least not yet.

Foley reports that “Microsoft’s new priority is to get Windows 10X on single-screen devices first.” When announcing the Surface Neo and its Android powered cousin, the Surface Duo last year, Microsoft said that Windows 10X was planned for dual screen devices only, although the company had reportedly already been working on 10X for clamshell devices. Brad Sams is also reporting that he’s hearing “that the company is planning to release a version of 10X in the near future, possibly at Build, that will run on existing devices, but will be for testing purposes only.”

According to Foley, one sticking point may be how well the plan to containerize Win32 apps to run on Windows 10X, and “the inside word was the team had a long way to go to make this something “normal” users would understand and accept, as compatibility levels were not great.” It may be that by releasing Windows 10X early for some form of insider testing, something that was never clear was going to happen with the dual screen first plan, may now be seen as being more useful.

What do you think, is this the right move for Microsoft? Would you prefer trying out Windows 10X on a single screen device, or are you saddened by the Surface Neo news? Let us know in the comments below

Microsoft and BlackRock announce strategic partnership to host Aladdin Investment Platform on Azure Cloud

Today, Microsoft and BlackRock announced a new strategic partnership to host BlackRock’s Aladdin infrastructure on Microsoft’s Azure Cloud.  BlackRock is a leading global investment management company with more than $7.4 trillion and with this new partnership, BlackRock and Microsoft will work together to bring its Aladdin platform to the cloud with the goal of creating new opportunities for scale and innovation for BlackRock’s customers.

Aladdin is BlackRock’s end-to-end investment management and operations platform that combines a range of services for its customers including portfolio and risk management, trading, and operations.  By leveraging the cloud, BlackRock’s Aladdin customers are now able to better meet their infrastructure requirements around resiliency and security, while also being to scale and support the localized needs of its clients by leveraging Microsoft Azure’s network of global data centers.

“By bringing Aladdin to the cloud, Microsoft will support BlackRock in further enhancing its client experience while also enabling continuous innovation in the financial services industry,” said Judson Althoff, executive vice president of Microsoft’s Worldwide Commercial Business. “Together, we will empower an ecosystem of financial services customers running their most critical workloads in the cloud.”

With this partnership, BlackRock and Microsoft indicated that they also work together on initiatives that leverage technology to improve and expand sustainability data and analytics including close partnerships with academics, startups, non-profits, and others to improve the lack of standardized, high-quality data.  The first initiative will be to collaborate on challenge grants for organizations that use data and technology to understand and drive sustainability.


Windows 10 Insider build 19603 integrates Windows Subsystem for Linux with File Explorer

Microsoft has just announced the release of Windows 10 Insider build 19603 for Fast Ring Insiders, and the main new feature is the integration of Windows Subsystem for Linux with File Explorer. After installing this build, those of you who have WSL installed will spot the new Linux icon in the left-hand navigation pane of File Explorer, making it easier than ever to access files from your different Linux distros.

Another new feature in this build is the new User cleanup recommendations in Storage Settings, which will free up space on your PC by removing unused apps and files. “Windows cannot predict whether you want to delete personal files, uninstall apps, or remove local copies of files synced to the cloud. With this tool, all the content is gathered in one page and removable by you with a few clicks,” the Windows Insider team explained today.

This new build also comes with various quality improvements, including a fix for an issue causing webcams to not function properly when making video calls in Microsoft Teams. You can check out the full list of fixes and known issues in this build below:

General changes & improvements

  • Going forward, services that are implemented by binaries residing in the user profiles will be persisted on upgrades.
  • Narrator will no longer automatically enable scan mode when interacting with the Ideas pane in Excel. In the new Microsoft Edge, Narrator now automatically enables scan mode and starts reading webpages.

Fixes

  • We are removing the known issue for incompatibility issues due to changes in the operating system between some Insider Preview builds and certain versions of BattlEye anti-cheat software. If you run into issues playing games that use BattlEye anti-cheat software, please submit feedback on these issues to us via Feedback Hub.
  • We fixed an issue causing webcams to not function correctly when attempting to make a video call in Microsoft Teams.
  • We fixed an issue resulting in some Insiders experiencing a green screen citing an error with mssecflt.sys when starting safe mode on recent builds.
  • We fixed an issue resulting in the WIN + PrtScn keyboard shortcut no longer saving a picture to file.
  • We fixed several reported stability issues with Narrator, including a fix where it will no longer crash when selecting text in scan mode with new Edge when remote operations are off.
  • We fixed an issue leading to the Narrator Quick Start guide crashing while traversing it with Narrator.
  • We fixed an issue where the EXE property information was incomplete in Task Manager for EoAExperiences.exe.
  • We fixed an issue resulting in some devices experiencing a bugcheck (GSOD) during the reboot to install an update.
  • We fixed an issue resulting in some Insiders experiencing a sporadic bugcheck (GSOD) with the error CRITICAL_PROCESS_DIED.
  • We fixed a bugcheck with error KMODE_EXCEPTION_NOT_HANDLED some Insiders were experiencing when trying to sign out from the current user.
  • We fixed an issue resulting in some Insiders receiving driver compatibility warnings when trying to update to a newer build in certain virtual environments.
  • We fixed an issue that led to inaccurate size estimates for disk cleanup when the option to clean up old Windows installation files was included.
  • We fixed an issue where Storage settings would say the option to clean old Windows installation files wasn’t available, because it had been automatically removed after a certain number of days, when actually you had manually selected to remove it.
  • We fixed an issue that could result in Settings crashing when navigating to Network & Internet for some Insiders.
  • We fixed an issue where you would see a notification from the Shared Experiences page saying your account needed fixing, however the Fix Now option on the page wouldn’t work.
  • We fixed an issue where if the Cortana icon was turned off on the taskbar, it might still partially display on secondary monitors.
  • We fixed an issue resulting in not being able to drag and drop files into the root of a network share folder.
  • We fixed an issue where the IME context menu wouldn’t appear when pressing Shift+F10 if the display language was something other than English.
  • We fixed an issue that could result in IMEs created for Amharic and Sinhala to not input text until rebooting your PC.
  • We fixed a crash some Insiders were encountering when switching window focus while an IME candidate pane was open.

Known issues

  • We are aware Narrator and NVDA users that seek the latest release of Microsoft Edge based on Chromium may experience some difficulty when navigating and reading certain web content. Narrator, NVDA and the Edge teams are aware of these issues. Users of legacy Microsoft Edge will not be affected. NVAccess has released a NVDA 2019.3 that resolves the known issue with Edge.
  • We’re looking into reports of the update process hanging for extended periods of time when attempting to install a new build.
  • The Documents section under Privacy has a broken icon (just a rectangle).
  • Sticky Notes windows can’t be moved on the desktop. As a workaround, when you set focus to Sticky Notes, press Alt + Space. This will bring up a menu that contains a Move option. Select it, then use either the arrow keys or the mouse to move the window.
  • We’re investigating reports that app icons in the taskbar are having rendering issues, including defaulting to the .exe icon.
  • We’re investigating reports that the battery icon on the lock screen always shows close to empty, regardless of actual battery levels.
  • We’re investigating reports of IIS configuration being set to default after taking a new build. You will need to back up your IIS configuration and restore it after the new build is installed successfully.`
  • Language packs may fail to install on this build. This is most impactful for anyone who chooses to reset their PC – the language packs you have prior to upgrading will persist. Anyone impact by this may notice some parts of the UI don’t display in your preferred language.

Lastly, the Windows Insider team shared today two important pieces of information for Windows Insiders: First of all, the team wants some feedback about the new Microsoft News Bar widget that was quietly released on the Microsoft Store last month. Moreover, Windows Insiders can also update the Raw Image Microsoft Store extension to try out support for Canon’s latest CR3 raw format.

How to password protect OneNote 2016 notebook sections

If you’re looking for a little more privacy with OneNote, then you might want to password protect your notebook sections. While we’ve already talked about how you can do this in the Microsoft Store, Android, MacOS, and Android versions of OneNote, we’ll now turn our attention to OneNote 2016.

While the Microsoft Store version of OneNote is more often updated, some users might still prefer OneNote 2016, too. After all, Microsoft said that the desktop app is here to stay. So, we’ve got you covered, and here’s how you can password protect OneNote 2016 notebook sections.

To get started, you’ll want to open the notebook with the section that you want to protect. Once there, right-click the tab on the top with the section name. You’ll then see an option which says Password Protect this Section. This is what you’ll want to click. OneNote will then open a sidebar, and you’ll want to click the Set Password option on the top.

You’ll be prompted to enter a password, so type it in and then confirm. Be sure you remember this password, and keep in mind that if you lose it, OneNote won’t be able to recover it. Also, be aware that passwords are case sensitive.

Once a password is set, OneNote will also automatically lock your sections after a period of inactivity. You can always, however, manually lock by pressing Ctrl, Alt, and L on your keyboard.  You’ll also need to keep in mind that you’ll need to unlock sections first if you want to search them.

And, that’s it! Password protecting sections in OneNote 2016 just takes a few simple steps. There’s much more to OneNote 2016 than just password protection, though. Our previous guide shows you how you can integrated it with Outlook, and how you can move local notebooks over to the Microsoft Store version of the app. Keep it tuned to OnMSFT for all your OneNote news and information, and let us know how OneNote works for you by dropping us a comment below.

Microsoft Teams is getting the ability to set background effects this month

The ability to set background effects during Microsoft Teams meetings will be coming later this month, according to an email sent out to Office 365 subscribers. The feature is now timed for roll out beginning in mid-April, with the ability for users to upload their own custom images in May.

As a reminder, this feature builds on the already popular background blur feature in Teams. It allows meeting attendees to customize their background during a video call from a list of pre-selected images. Microsoft originally said that the feature would be coming “within a quarter” so we now have a more solid date. The company also updated the Microsoft 365 Roadmap to clarify, showing that it is in development, with the release of April CY2020.

Microsoft is also planning on rolling out a new experience for launching instant channel meetings in Mid-April. In addition, is an improved Teams meeting join launcher experience. Both will be coming in late April.

Update: Our original headline for this article stated that Teams would be getting the ability to upload custom image backgrounds in April. We’ve updated the headline to clarify that Microsoft’s message is about the pre-selected background effects, and not custom images. Those will be coming in May.

How to set up PS4 Remote Play in Windows 10

PS4 Remote Play is a handy little tool for PlayStation console gamers that allows you to stream and remotely play games from your PlayStation 4 to a Windows PC. It’s great if you want to, for example, feel some PS4 exclusives on a PC.

Now, before you start playing God of War 5 on your Desktop PC, there are a few requirements you need to meet and a setting up procedure you need to go through. First off, here’s what you’ll need to set up the PS4 Remote Play on your PC:

  • DualShock 4 controller
  • Micro USB Cable
  • PlayStation Network access
  • Internet connection with upload and download speeds of at least 5 Mbps (12 Mbps recommended)

If you meet all the requirements, and I’m pretty sure you do, let’s move on to setting up the PS4 Remote Play on your computer. The instructions are below.

How to use PS4 Remote Play on a Windows PC

1. Update PS4 Firmware

  1. Turn on your console.
  2. Go to Settings > System Software Update.
  3. Select Update.
  4. Wait for the system to download the new update.
  5. Once the new update is downloaded, head over to Notifications > Downloads.
  6. Follow further instructions to install the downloaded update.

2. Enable Remote Play

  1. Go to Settings > Remote Play Connection Settings.
  2. Check both Enable Remote Play and Connect directly with PS Vita/PS TV.
  3. Now, go back to Settings, and select PlayStation Network/Account Management.
  4. Select Activate as Your Primary PS4, and choose Activate.
  5. The Remote Play feature is now activated, so you should now allow it to start when your console is in the Reset Mode. To do that, go back to Settings > Power Save Settings.
  6. Select Set Features Available in Reset Mode, and check the Stay Connected to the Internet.

That’s it, your PlayStation 4 is now ready to cast the signal to your PC. Now, we need to do the same on your computer.

3. Download and install PS4 Remote Play on your computer

  1. Download the PS4 Remote Play package, here.
  2. Once you download the installer, run it and simply follow further installation instructions.
  3. Once the package is installed on your computer, we can move to the final step and set up the connection between your PlayStation 4 and your Windows 10 PC.

4. Set up the connection

  1. Lunch the Remote Play app you just installed.
  2. Click Start, and then sign in with your PlayStation account.
  3. The app should now start searching for your PS4.
  4. Once the connection is established, you’ll be able to cast or remotely-play PS4 games on your computer.

That’s about it, as you can see establishing the connection between your PS4 and your PC is straightforward with the Remote Play feature, and you can establish it within minutes (if you have the required hardware, of course).

If you have any comments, questions, or suggestions, just let us know in the comments down below.

FIX: Mouse or touchpad not working in Windows 10/11

When you’re using a new operating system such as Windows 10 or Windows 11, there can always be some hardware compatibility issues. You can apply most of the solutions on both versions of Windows, and also check our dedicated guide to fix touchpad issues on Windows 11.

According to users, it seems that mouse pads and touchpads aren’t working for some Windows 10 users, and this can be a big problem, especially for laptop users, but today we have a few tips on how to fix this.

How do I fix mouse or touchpad issues in Windows 10?

  1. Reinstall the touchpad driver
  2. Install the latest drivers
  3. Roll back to an older driver
  4. Enable ELAN
  5. Enable ETD service
  6. Use the Hardware Troubleshooter
  7. Set the touchpad to No Delay
  8. Disconnect other USB devices
  9. Change Power Management options
  10. Run the SFC scan

1. Reinstall the touchpad driver

  1. Press Windows key + X and go to Device Manager
  2. In the Device Manager window find your touchpad drivers.
  3. Right-click them, and select Uninstall.
  4. Select the option to delete the driver package from the system.
  5. Go to the Action menu of Device manager and select Scan for Hardware changes to reinstall your drivers.
  6. Restart your computer.

Maybe something went wrong with your touchpad driver, while you were upgrading your system to Windows 10. So, you can try reinstalling the touchpad or mouse driver, and check if it works again.

2. Install the latest drivers

  1. Download the driver and right click the setup file.
  2. Choose Properties and then go to Compatibility tab.
  3. Check Run this program in compatibility mode for and choose Windows 8 from the list.
  4. Install the driver and see if the problem still persists.

Often you’ll need drivers for Windows 10, so check your manufacturer’s website for Windows 10 drivers. If there are no Windows 10 drivers download latest Windows 8 drivers and install them in compatibility mode.

In addition, you can always check for Windows updates and keep your Windows 10 up to date to avoid any compatibility issues. If you’re having trouble updating your Windows, check out this guide that will help you solve them in no time.

It is very important to choose the right driver versions from the manufacturer’s website. But since it can be hard to find the right drivers for your DVD drive, software dedicated to finding drivers automatically may come in handy. 

Using a specialized tool is suggested. This kind of software is very easy to use and can automatically do the work in just a few minutes.

However, once the tool scans the system it will give you a list of recommended drivers to install. Then you only have to decide whether you install them one by one, by checking the boxes next to their names.

So, the fittest solution to manage your PC drivers securely and update the latest versions is dedicated software like Fortect Driver Updater.

3. Roll back to an older driver

This solution is the same as Solution 1, you open Device Manager, find your touchpad driver but instead of uninstalling it, you choose the Roll Back Driver option. After you’ve rolled back to older drivers, restart your PC and try again.

If the rollback worked and the issue was solved, you’ll have to prevent Windows from automatically updating your driver. To do that, follow the easy steps from this guide.

4. Enable ELAN

  1. Go to Settings.
  2. Find Devices and then go to Mouse & Touchpad.
  3. Scroll down to Related Settings and click on Additional mouse options.
  4. Mouse Properties Window should open and in it you should go to ELAN tab.
  5. Click your device and then click Enable.

5. Enable ETD service

  1. Press Ctrl+Alt+Del to open Task Manager and go to the Services tab.
  2. Find ETD service and Enable it.
  3. Restart your computer to see if the issue is resolved.

6. Use the Hardware Troubleshooter

  1. Go to Settings.
  2. Head over to Updates & Security > Troubleshoot.
  3. Click Hardware and Devices, and click Run the troubleshooter.
  4. Wait for the process to finish.
  5. Restart your computer.

If none of the solutions from above resolved the issue, let’s try with Windows 10’s troubleshooting tool. You can use this troubleshooter to resolve all sorts of issues, including the hardware problems.

7. Set the touchpad to No Delay

Disabling the touchpad delay may also resolve the problem.

  1. Go to Settings.
  2. Head over to Devices > Touchpad. 
  3. Now, under Touchpad section and set the delay before clicks to No delay (always on).
  4. Restart your computer.

8. Disconnect other USB devices

There’s also a possibility that some external USB device interferes with the touchpad. So, if none of the previous solutions worked, try disconnecting all the USB peripherals, and check if the touchpad works now.

9. Change Power Management options

  1. Go to Search, type devicemngr, and open Device Manager.
  2. Scroll down and find your touchpad from the list of devices.
  3. Right-click the touchpad, and go to Properties. 
  4. Head over to the Power Management tab.
  5. Uncheck the Allow the computer to turn off this device to save power option.
  6. Restart your laptop.

Power Managment is a very important feature for every laptop. However, saving power can sometimes disable some vital functions of your machine. It’s possible that your Power Management settings are actually preventing the touchpad from working.

10. Run the SFC scan

  1. Go to Search, type cmd, and open the Command Prompt as Administrator.
  2. Type in the following command, and press Enter: sfc/scannow
  3. Wait for the process to finish.
  4. Restart your computer.

The last thing we’re going to try is another troubleshooting tool. That tool is the SFC scan. The SFC scan is designed to resolve various issues inside and outside your system. So, hopefully, it’ll be useful in this case, as well.

If you’re having trouble accessing Command Prompt as an admin, then you better take a closer look on this guide.

For a complete walkthrough on restoring pointer control, read our mouse not working on laptop guide.

As you can see, this is a driver issue, but we hope that there will be official driver update from Microsoft and other manufacturers. If you have any comments, or suggestions, write them down in the comment section below, we would love to read it.

But first, here are some more examples of similar issues you can resolve with basically same solutions:

  • Touchpad lagging in Windows 10
    • If your touchpad actually works, but you have a hard time using it, you can still apply the solutions from this article.
  • Mouse unable to connect to Windows 10 laptop 
  • Mouse lagging in Windows 10
  • Touchpad disabled in Windows 10
    • Well, enable it! Of course, it may not be as easy as it sounds, because various issues might get involved.
  • Touchpad freezes in Windows 10
    • If your touchpad freezes, check out this article. If you still have problems, carry on with the solutions from this article.

Sony’s next gen PS5 controller reveal got Microsoft’s Xbox controller trending on Twitter

Sony made some waves this morning with the official reveal of the controller for their next gen console, the PlayStation 5.

Named, DualSense, this PlayStation 5 controller features haptic feedback, adaptive triggers in the L2 and R2 buttons, a rechargeable battery, and a built-in mic for voice chat and, presumably, potential voice commands.

This new controller is without a doubt the most-dramatic evolution of a PlayStation controller in terms of appearance with a radically different design that seems closer to an Xbox One controller than any first-party controller for the PlayStation, PS2, PS3, or PS4.

Here’s the PS4’s DualShock 4 alongside the PS5’s DualSense for comparison. As you can see, it’s quite a big leap in appearance.

PS4 and PS5 controllers

This resemblance to the current Xbox controllers wasn’t lost on gamers who immediately took to social media platforms, such as Twitter, to discuss the similarities. Numerous hilarious memes were created and at one point “Xbox Controller” was trending while “PS5 Controller” and “DualSense” didn’t even crack the top 20.

Xbox Controller trending on Twitter

Here’s some of the funniest PS5 and Xbox One controller comparison tweets:

https://twitter.com/Nitomatta/status/1247638170457354240

Microsoft recently revealed the look of their new controller for the next gen Xbox Series X console and it’s almost identical to the current version in use right now on Xbox One consoles. One of the reasons for this is that many gamers and industry insiders widely believe the current Xbox controller to be near perfect in design so the only real change Microsoft needed to make with the new one was the addition of a Share button and USB-C.

Personally, I was hoping it was going to have a built-in mic though so kudos to Sony for including that in their controller.

What do you think of the DualSense controller? Do you like it or hate it? Share your thoughts with the community in the comments below and then follow us on Pinterest and Twitter for more gaming news.

Full Fix: Your Insider preview build settings need attention

Many Windows 10 users who have updated their computers are now complaining they can’t get rid of the annoying error message informing them that their Insider preview build settings need attention.

Although this is not a blocking error, it’s quite intriguing for users because some of them have never run Insider builds.

The whole error message reads as follows: Your Insider preview build settings need attention. Go to Windows Insider Program to fix this.

It appears this is a harmless error message, as users haven’t reported any serious issue associated with it.

Your Insider preview build settings need attention message can appear and cause issues while downloading Insider builds. Speaking of this issue, here are some similar problems that users reported:

  • Your diagnostic and usage data settings require attention to get Insider preview builds – This is a variation of the original error, but you should be able to fix it using one of our solutions.
  • Your security settings need attention to get Insider preview builds – This is another problem that can appear, and in order to fix it, be sure to disable your antivirus and check if that helps.
  • Your Microsoft account requires attention to get insider preview builds – Sometimes this problem can be caused by your Microsoft account. Simply verify your account or change your password and check if that solves the problem.

How to fix Your Insider preview build settings need attention?

1. Make changes to your registry

  1. Press Windows Key + R and enter regedit. Press Enter or click OK.
    Your Microsoft account requires attention to get insider preview builds
  2. Navigate to the HKEY_LOCAL_MACHINESOFTWAREMicrosoftWindowsSelfHostUIStrings key.
    Your diagnostic and usage data settings require attention to get Insider preview builds
  3. Delete every entry except for the first one.
  4. Stay away from the Windows Insider Program menu in Settings. As soon as you navigate to that menu, the error message appears again.

2. Remove the AllowTelemetry value from your registry

If you’re getting Your Insider preview build settings need attention message, you might be able to fix the problem simply by removing a single value from your registry. To do that, follow these steps:

  1. Open Registry Editor.
  2. In the left pane navigate to HKEY_LOCAL_MACHINESOFTWAREPoliciesMicrosoftWindowsDataCollection.
    Your security settings need attention to get Insider preview builds
  3. Deleting values from the registry can be potentially dangerous and cause issues with your system. Therefore, it’s always a good idea to create a backup of your registry, just in case anything goes wrong. To back up your registry, right-click the DataCollection key and choose Export from the menu.Your diagnostic and usage data settings require attention to get Insider preview builds
  4. Now make sure that Export range is set to Selected branch. Choose a safe location, enter the desired file name and click the Save button.Your security settings need attention to get Insider preview builds
  5. In case anything goes wrong after modifying your registry, you can just run the backup file you created in order to restore it to the original state.
  6. In the right pane, locate AllowTelemetry value, right-click it and choose Delete from the menu.

After you delete this value, the problem should be completely resolved. If AllowTelemetry isn’t available in the registry, you can just skip this solution.

3. Clear FlightingOwnerGUID value

According to users, sometimes FlightingOwnerGUID entry in your registry can cause Your Insider preview build settings need attention message to appear.

However, you can fix that simply by clearing the value of theFlightingOwnerGUID entry. To do that, just follow these steps:

  1. Open Registry Editor and in the right pane navigate to HKEY_LOCAL_MACHINESOFTWAREMicrosoftWindowsSelfHostApplicability.
    Your Microsoft account requires attention to get insider preview builds
  2. Create a backup of Applicability key just in case.
  3. In the right pane, locate FlightingOwnerGUID double-click it and clear its Value Data. Alternatively, you can remove this value.

After doing that, you need to go through the Get Insider Preview Builds process again and sign in with your Microsoft account. Several users reported that it worked for them, so be sure to try it out.

4. Check your antivirus

According to users, sometimes your antivirus can interfere with your system and cause Your Insider preview build settings need attention message to appear.

To fix this problem, it’s advised that you disable certain antivirus features or your antivirus altogether. If that doesn’t work, you might even have to remove your antivirus.

If the problem is resolved after removing the antivirus, you should consider switching to a different antivirus solution, that won’t interfere with your system.

Several users reported that Spybot software caused this issue on their PC, but after disabling Spybot the problem was completely resolved.

5. Change EnablePreviewBuilds DWORD

If you keep getting Your Insider preview build settings need attention message, you might be able to fix the problem by making a few minor changes in your registry. To do that, follow these steps:

  1. Open Registry Editor.
  2. In the left pane navigate to the HKEY_LOCALMACHINESOFTWAREMicrosoftWindowsSelfHostApplicability. Create a backup of Applicability key just in case.
  3. Now locate EnablePreviewBuilds value in the right pane and double-click it. Change its Value data to 1 and click OK to save changes.

After doing that, you just need to make few changes in the Settings app. To do that, follow these steps:

  1. Press Windows Key + I to open the Settings app.
  2. Navigate to Update & Security section.
    Your diagnostic and usage data settings require attention to get Insider preview builds
  3. Go to the Advanced options.
    Your security settings need attention to get Insider preview builds
  4. Click the Fix me button and choose to sign-in with your Microsoft account.

After doing that, the problem should be completely resolved and everything will start working again.

6. Terminate Insider preview and change your password

According to users, you might be able to fix the problem with Your Insider preview build settings need attention message simply by terminating the Insider preview.

Users reported that they changed their account password online and then made sure that their account is verified.

After doing that, they just restarted their PC and joined the Insider preview program once again. After doing all that, the issue should be resolved completely and everything will start working again.

7. Run WSReset command

Sometimes Your Insider preview build settings need attention message can appear due to certain issues with Microsoft Store, and several users claim that they fixed the problem by clearing the Store cache.

This is quite simple to do, and you can do it by following these steps:

  1. Press Windows Key + R to open the Run dialog.
  2. Now enter wsreset.exe and press Enter or click OK.
    Your Microsoft account requires attention to get insider preview builds

After doing that, the Store cache will be cleared and the problem should be resolved.

8. Make sure that your account is verified

According to users, sometimes in order to fix Your Insider preview build settings need attention message you need to make sure that your account is verified. You can do that by following these steps:

  1. Open the Settings app and go to the Accounts section.
  2. In there you should see a Verify option available. Click it and follow the instructions on the screen.

Once you verify your account, check if the problem is still there.

9. Delete ErrorState, LastHR, PilotInfoRing values

Sometimes certain entries in your registry can interfere with your system and cause Your Insider preview build settings need attention message to appear.

To fix this problem, you just need to remove certain entries from the registry. To do that, follow these steps:

  1. Open Registry Editor and navigate to the HKEY_CURRENT_USERSoftwareMicrosoftWindowsSelfHostApplicability. Back up Applicability key.
  2. In the right pane, locate ErrorState, LastHR, and PilotInfoRing DWORDs and remove them.
  3. Close Registry Editor.
  4. After doing that, go to the Settings app > Update & Security > Advanced options and enable Insider Builds.

After doing that, the issue should be completely resolved.

Your Insider preview build settings need attention message that will prevent you from downloading the latest Insider builds, but we hope that you managed to fix the problem by using one of our solutions.

FIX: Acrobat failed to connect to a DDE server

The Adobe Acrobat PDF (Portable Document Format) software throws out this error message for some users:

Acrobat failed to connect to a DDE server

That error message can pop up when users try to open PDFs or merge documents within Adobe Acrobat.

Consequently, users can’t open a PDF or merge documents in Acrobat when the issue arises. This is how users can fix the Acrobat failed to connect to a DDE server error in Windows 10.

How can I fix Acrobat’s DDE server error?

1. Update the Acrobat software

  1. Right-click the Start menu and select Run.
  2. Enter appwiz.cpl in the text box and click OK.
  3. Select Adobe Acrobat and click Uninstall.
  4. Click the Yes button to confirm.
  5. Restart Windows after uninstalling Adobe Acrobat.
  6. Download Adobe Acrobat from the official page

The DDE server error will more likely arise for older versions of Adobe Acrobat. Adobe might have released an update that fixes the DDE server issue. Thus, updating Acrobat to the latest version might fix the issue for some users.

Users can update the software by clicking Help > Check for Updates in Acrobat. That will open the Updater window that installs updates.

2. Turn off antivirus software

Some third-party antivirus utilities might flag Adobe Acrobat when users try to merge PDFs. So, turning off antivirus software is another potential resolution for the DDE error.

Users can usually select to temporarily disable antivirus software by right-clicking their system tray icons and selecting a disable, exit, pause, or turn off the option.

If there isn’t a disable option on the software’s context menu, open the utility’s primary window and look for a turn off option on its settings tab.

3. Edit the Registry

  1. First, press the Windows key + X hotkey.
  2. Select Run to open that accessory.
  3. Input regedit in the text box and press Enter to open the Registry Editor.
  4. Enter this registry path in the address bar:
    • ComputerHKEY_CLASSES_ROOTacrobatshellopenddeexecapplication.
  5. Select the application key on the left of the Registry Editor’s window.
  6. Double-click Default to open the Edit String window shown directly below.
  7. Then delete the current AcroviewA18 or AcroviewA19 text in the Value data box.
  8. Enter AcroviewR18 in the Value data box if the original value was AcroviewA18.
    1. Note that the A and R values depend on the version installed, so some users might need to enter AcroviewR19.
  9. Then click the OK button.
  10. Restart Windows after editing the registry.

If you can’t edit your Windows 10’s registry, read this handy guide and find the easiest solutions to the issue. This registry edit is one of Adobe’s official resolutions for the DDE error. The edit requires that users modify an application key for Acrobat.

4. Repair Acrobat

  1. Some users have fixed the DDE server error by repairing Acrobat’s installation. To do that, open Run.
  2. Enter appwiz.cpl in Run and press Return.
  3. Select the Adobe Acrobat software.
  4. Press the Change button to open the window in the image directly below.
  5. Select the Repair installation errors in the program option.
  6. Press the Next button.
  7. Click Finish when the repair installation process is done.

5. Turn off Protected Mode at startup

Click Edit > Preferences in Acrobat to open the window in the shot directly below.

  1. Click Security (Enhanced) on the left of that window to open the options shown below.
  2. Deselect the Enable Protected Mode at Startup option.
  3. Deselect the Enable Enhanced Security option.
  4. Close the Preferences window and Adobe Acrobat.
  5. Thereafter, open Adobe to see if that resolution has fixed the DDE server error.

Deselecting the Protected Mode at startup and Enhanced Security settings is another resolution that has fixed the DDE server error some Acrobat users.

Those are resolutions that have fixed the DDE server error for Adobe Acrobat users. So, they’ll probably resolve the error. If further fixes are still needed, however, Acrobat users can log in to adobe.com to open a support case.

If you have any more suggestions or questions, don’t hesitate to leave them in the comments below and will surely take a look.

Microsoft keeps the bad guys away, purchases Corp domain name

Today, security expert Brian Krebs posted on this blog that Microsoft has apparently purchased the domain corp.com.  The domain went up for auction at a starting price of $1.7 million when it was listed by its Wisconsin native, Mike O’Connor, who has owned the domain for 26 years. Microsoft’s goal in purchasing the domain was to keep the domain out of the hands of nefarious actors and based on the previous owner’s statement it seems like Microsoft had good reason to take this action. Mike O’Conner indicated that “hundreds of thousands of Windows PCs are trying to share sensitive data with corp.com,”

The domain could have created potential security issues for the company’s Windows clients where admins used the generic domain name when setting up Active Directory, also known as namespace collision. For years, experts have suggested that whoever would gain access to corp.com would also potentially get access to sensitive data from hundreds of thousands of Windows systems around the world.

While we all laud Microsoft for its efforts around security including their purchase for TLS 1.2 that doesn’t mean the issue is resolved. Microsoft’s purchase helps safeguard companies that have built Active Directory infrastructures on top of “corp” or “corp.com,” however any company that has tied their internal Active Directory network to a domain they do not control is still opening itself to a similar potential security nightmare.

Fix: Application.exe has Stopped Working Error

One of the most common problems that occur on Windows PCs is an application crash. This issue has been present over the years.

The symptoms have changed, the configurations have changed, but the problem is still there just to break your nerves from time to time.

We can assure you that Windows 10 isn’t an exception. The well-known application.exe has stopped working message is still making an appearance in Microsoft’s OS.

For that purpose, we conducted a thorough search to provide you with the solutions to the problem at hand. So, if you have experienced sudden crashes, you should consider these workarounds:

How can I fix application.exe crashes in Windows 10?

1. Restart the troubled program

The first thing you should do is close the dialog app crash report and try starting the program again. This may be a one-time error due to some unexpected corruption or just a temporary lack of system resources.

So make sure to close the program properly before you start it again. Namely, even though you close the dialog box, there’s a chance its respective processes are still running in the background.

Because of that, make sure to navigate to Task Manager, kill the process, and start the application again. On the other hand, if the program doesn’t start with the system, you can also restart your PC and try running it again.

If you’re not sure how to do it, follow the instructions below closely:

  1. Close the dialog message that informs you of the crash.
  2. Right-click on the taskbar and open Task Manager.
  3. Make sure to kill the main and related processes related to a crashed app.
  4. Now, try starting the app again and look for changes.

That’s just the thing with the software: it’s not always as stable as one would expect. And, if the problem is still there, make sure to check the other steps in the list.

Can’t open Task Manager? Don’t worry, we’ve got the right solution for you.


Windows won’t end a task in Task Manager? Check out this amazing guide to fix the issue in no time.


2. Change compatibility settings

Another thing you can do, especially if we’re talking about older software, is to change the compatibility settings. Some older programs you may have used with ease on older OS versions might provoke issues in Windows 10.

That occurs due to compatibility issues, especially if the program we’re referring to is as old as time. Luckily, you can change the compatibility mode and set the compatibility to some older Windows version.

If Windows 10 is unable to run the program seamlessly, you can switch to, let’s say, Windows 7, and have an easy time running the program. Additionally, that way you’ll probably get rid of the further crashes.

If you’re not sure how to do it, you’ll find these instructions helpful:

  1. Navigate to the installation folder of the troubled app.
  2. Locate the .exe file, right-click and open Properties.
  3. Under the Compatibility tab, check the box beside ”Run this program in compatibility mode for”.run the application in the compatibility mode
  4. Choose the preferred Windows version and click OK to confirm changes.

That should address some of the possible stops caused by the system’s inability to read the program as intended.

3. Run the program as administrator

Besides the Compatibility mode, some programs thrive (read: work properly) only with the Administrative permission. It’s not unusual for certain applications to make some system changes that are only permitted to an administrator.

Moreover, the User Account Control prompts that occur once the program tries to make changes, can stall the execution of the program and thus, cause the crash.

We won’t advise you to disable those completely because of the security risks, but you can at least disable them for the individual program that has a problem.

So, besides the compatibility, we have another common tweak, and the instructions are below:

  1. Navigate to the installation folder of the troubled app.
  2. Locate the .exe file, right-click, and open Properties.run application as administrator
  3. In the Compatibility tab, check the box beside the ”Run as Administrator” box.
  4. Click OK.

With that, you should resolve certain issues. However, if the problem is going deeper, make sure to turn to other steps.

Learn everything there is to know about the administrator account and how you can enable/disable it right here!


Nothing happens when you click on Run as administrator? Don’t worry, we’ve got the right fix for you.


4. Scan for malware

Another reason for sudden crashes can be the malware infection. Those pesky viruses can certainly cause a lot of issues, and the disrupted use of certain applications is firmly at the top of the list.

What they tend to do, and that’s an awfully common occurrence, is to infect the installation files and corrupt the program. There are various reasons why the virus may attack a certain application, but you can be sure it’s up to no good.

So, make sure your PC is clean before we get to some other, slightly complicated workarounds. Sometimes viruses pass through the real-time protection, so it’s advisable to scan your hard disk from time to time.

The procedure is different for 3rd-party solutions, but we offer you an insight into how to perform a deep scan with Windows’ native security solution, Windows Defender. The instructions are below:

  1. Open the Windows Defender icon from the notification area and choose Advanced Scans.
  2. Save everything to prevent data loss because your PC will restart after the next step.
  3. Locate Windows Defender Offline and click Scan Offline.advanced scans windows defender
  4. Your PC will restart and the scanning procedure will last for approximately 15-20 minutes.

If you need additional info on how to perform a full system scan with Windows Defender, read this dedicated article.

However, if Windows Defender cannot provide maximum security for your PC, you can rely on dedicated antivirus programs as it has powerful engines against all types of cyber threats.

⇒ Get TotalAV


Do you want to check if your firewall is blocking a certain program? Follow the simple steps from this guide to find out.


5. Clean Registry values

There’s a great chance that you’ve installed one program for more than a few times. Now, that’s just a usual thing and it shouldn’t cause any problems.

But it’s not always the case. Namely, once you uninstall the program within the Add/Remove Programs section of the Control Panel, some files remain on your PC.


Remove software leftovers in just a couple of simple steps! Check out this handy guide to find out how you can do it.


And in the Registry, which is of greater importance. So, for some applications, it’s wise to clear your registry of the remaining values and reinstall your program.

Moreover, we advise you to delete all the remaining files from the installation folder which is, most of the time, placed in the C: partition. The additional folder you should check out is the App Data folder.

To access it, just type %appdata% in the Windows Search bar. For cleanup purposes, you can use CCleaner or some similar 3rd-party solution. However, keep in mind that the Registry is dangerous ground, so back it up before the cleansing begins.


Clean your registry like an expert with the help of this amazing guide written by…you guessed it: experts!


6. Clean temporary files

Temporary files are a necessity for some time, but then they become redundant and can create problems within the system. We highly recommend cleaning them up from time to time.

For that purpose, you can use a large variety of 3rd-party tools, including  CCleaner. However, don’t take system tools for granted. You can delete temporary files with system tools, as well.

Follow these instructions to perform a disk cleanup and get rid of the system’s temporary files:

  1. Open This PC.
  2. Right-click the system partition and open Properties.
  3. Choose Disk Cleanup.
  4. Check the boxes beside Temporary files.temporary files disk cleanup
  5. Confirm the selection and clean temporary files.

After that, it should be easier to run some of the programs. However, if the program is still crashing unexpectedly, there are some other things you can do.

Can’t delete the temporary files? After following these easy steps, you’ll delete them like a pro.


Problems deleting all your junk files? Follow this guide to solve Disk Cleanup issues and save your drive.


7. Run SFC and DISM

For some system-related programs, the problem might lie in the corrupted or incomplete system files. It’s not an unusual occurrence, especially since frequent updates or malware can easily inflict these errors.

For that purpose, it’s safest to turn to the elevated Command Prompt and one essential tool that should scan and resolve common issues with system files. The SFC tool is the first obvious choice, even though you can try DISM for more advanced scanning.

If you’re unsure how to run the SFC tool through the elevated Command Prompt, follow the instructions below:

  1. Right-click the Start menu and open Command Prompt (Admin).
  2. In the command line type the following command and press Enter:
    • sfc/scannowcmd sfc
  3. After the procedure is finished, restart your PC.

As we already mentioned, the SFC scan is the first troubleshooting step when you want to check the system files’ integrity.


Scannow command has stopped before the process finished? Don’t worry, we’ve got an easy fix for you.


However, if SFC fails, you can always turn to DISM. Deployment Image Servicing and Management is a great tool that should help you resolve issues with system files by restoring them to their original state.

If you’re unsure how to run DISM, follow these instructions:

  1. Right-click on Start and open Command Prompt (Admin).
  2. In the command line type the following command:
    • DISM.exe /Online /Cleanup-image /Restorehealth
  3. The process should scan and resolve possible file corruption and fix related issues.

There is more than one way to use DISM, and for additional information, you can check this article for a thorough explanation.

If you’re having trouble accessing Command Prompt as an admin, then you better take a closer look at this guide.

Executing the DISM command to restore your Windows system image can also help you fix the Pbid.exe Application Error; read this guide to learn about other solutions.


Does it seem that everything is lost when DISM fails on Windows? Check out this quick guide and get rid of the worries.


8. Change Permissions

Another thing that’s worth checking is Data Execution Prevention. Most of the programs are initially blocked before the first use.

But, as you start an application, and provide it with the permission to change the system settings, DEP won’t bother you. Of course, not most of the time.

Sadly, due to frequent updates, especially major updates, the given permissions can be revoked. And that may just block your application and cause sudden crashes from time to time.

For that purpose, you should navigate deep into System Properties and create an exception for the troubled app. Follow the steps below to do so:

  1. Open This PC and click on System Properties.
  2. Under the Advanced tab > Performance, click on Settings.
  3. Click on the Data Execution Prevention tab.
  4. Choose ”Turn on DEP for all programs and services except those I select”.
  5. Click Add and browse to the installation folder of the troubled app and locate the .exe file.
  6. Set an exception and confirm changes.

That should resolve some of the problems, but it still may not be enough to get you out of the slump.

9. Check drivers

This, of course, primarily affects games. If your game is crashing suddenly, you should check these two things first:

  • If additional programs and versions are present(like DirectX, redistributables, NET Framework or some 3rd-party clients)
  • GPU drivers.

Once you’re certain that everything the game requires is installed, you should tend to drivers. Drivers are essential and they may as well be the reason for crashes in the first place.

If you’re unsure how to install or update GPU drivers, the instructions below should work in your favor:

  1. Right-click Start and open Device Manager.
  2. Navigate to Display drivers, right-click on your GPU and Update Driver.update gpu drivers
  3. Also, you can navigate to the OEM’s site and download the official drivers since some cards have specific software support.

It’s paramount to install appropriate drivers provided by the OEM for many reasons. Don’t download suspicious drivers.


Want the latest GPU drivers? Bookmark this page and always stay updated with the latest and greatest.


That should do it. In case you have any questions or suggestions, we advise you to post them in the comments below. We’ll be glad to help.

Xbox Game Bar for Windows 10 is becoming much more versatile with new widgets from Razer, XSplit, and Intel

Microsoft has just announced a pretty big update for its Xbox Game Bar for Windows 10. The company’s gaming overlay, which can be accessed by pressing Win + G, can already be used for various tasks including Game DVR, changing audio settings, accessing Xbox Live chats, or controlling Spotify playback. However, it’s about to become much more customizable thanks to a new widget store.

Exciting additions include a Razer Cortex widget to boost gaming performance, as well as an XSplit Gamecaster widget that is set to replace the now-deprecated built-in Mixer streaming feature. The Razer Cortex widget is available in beta today, and it will act as an extension of the Windows 10 Game Mode with options to end unnecessary processes running in the background. The widget will also feature PC game deals, with Razer’s Gold & Silver virtual currencies for gamers being front and center.

The new XSplit widget is also available from the Microsoft Store today, and it will also come pre-bundled with the Gamecaster desktop app. “XSplit’s integration with Game Bar provides access to critical Gamecaster tools without having to tab between apps or leave your gaming session. Start and stop your broadcast, interact with chat, check out recent events and stats to help increase viewer interaction, and optimize encoding settings to ensure the highest quality stream – all from the Gamecaster widget,” the Xbox team explained today.
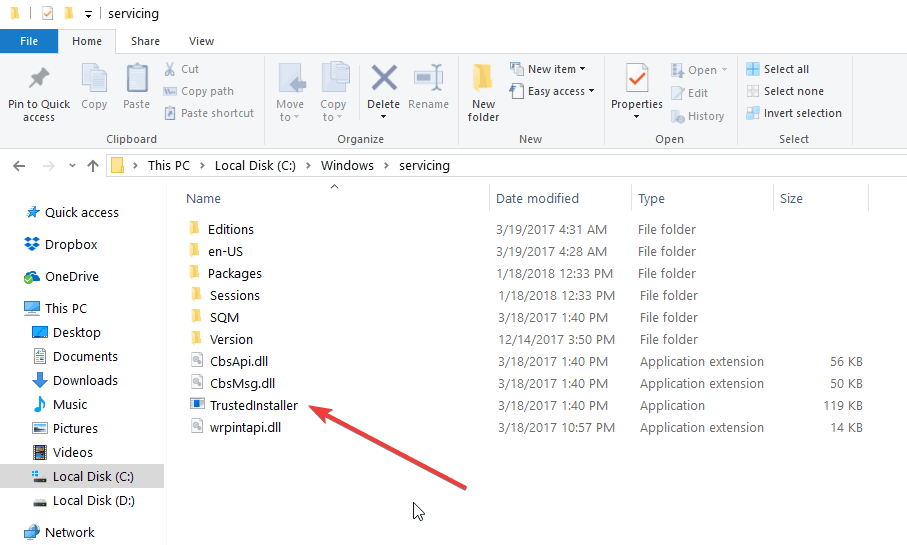
Intel’s Graphics Command Center will also be available as an Xbox Game Bar widget later this spring, and it will also support game streaming and capture features in addition to display settings and power profiles. Microsoft said today that these new Xbox Game Bar widgets are only available for Windows Insiders for now, or Windows 10 users who joined the Game Bar Flight in the Xbox Insider Hub. The company is also releasing today the Game Bar SDK to allow any developers to create widgets for the Xbox Game Bar.