The SESSION2_INITIALIZATION_FAILED bug check, with a value of 0x0000006E, indicates that the Windows OS failed to load in the initialization stage. This usually happens due to corrupt system files, outdated, corrupt or buggy drivers, disk issues, problems with the RAM, and an improper Windows installation!
Before you start troubleshooting the Session2 Initialization Failed blue screen error, install pending Windows updates, disable startup apps, disconnect all non-critical peripherals, and fix overheating issues.
How can I fix the SESSION2_INITIALIZATION_FAILED BSOD error?
NOTE
If SESSION2_INITIALIZATION_FAILED keeps appearing at startup and you can’t access the PC, boot Windows into Safe Mode with Networking and then use the solutions listed below.
1. Repair the corrupt system files
Press Windows + S to open Search, type Command Prompt in the text field, and click on Run as administrator.
Click Yes in the UAC prompt.
Paste the following three DISM commands individually and hit Enter after each: DISM /Online /Cleanup-Image /CheckHealthDISM /Online /Cleanup-Image /ScanHealthDISM /Online /Cleanup-Image /RestoreHealth
Now, run this command for the SFC scan: sfc /scannow
Finally, reboot the PC and check for improvements.
In 3 out of 5 cases, the SESSION2_INITIALIZATION_FAILED blue screen error in Windows is caused by corrupt system files. To fix this, run the DISM (Deployment Image Servicing and Management) and SFC (System File Checker) scans, which will replace all corrupted system files with their cached copy stored on the PC!
2. Update all the drivers
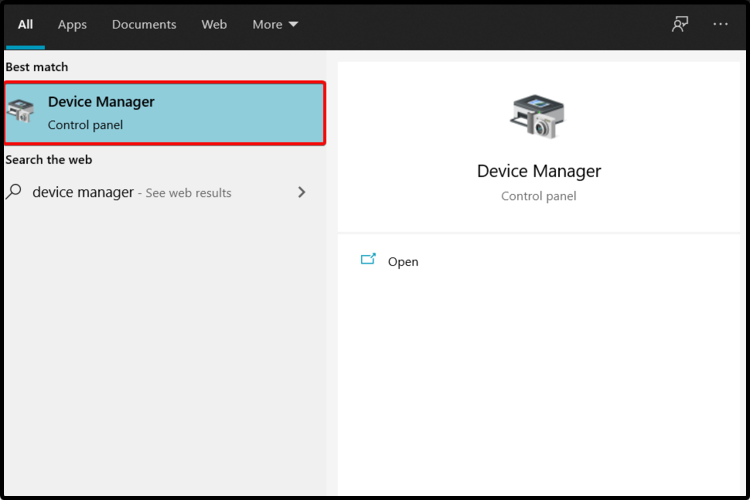
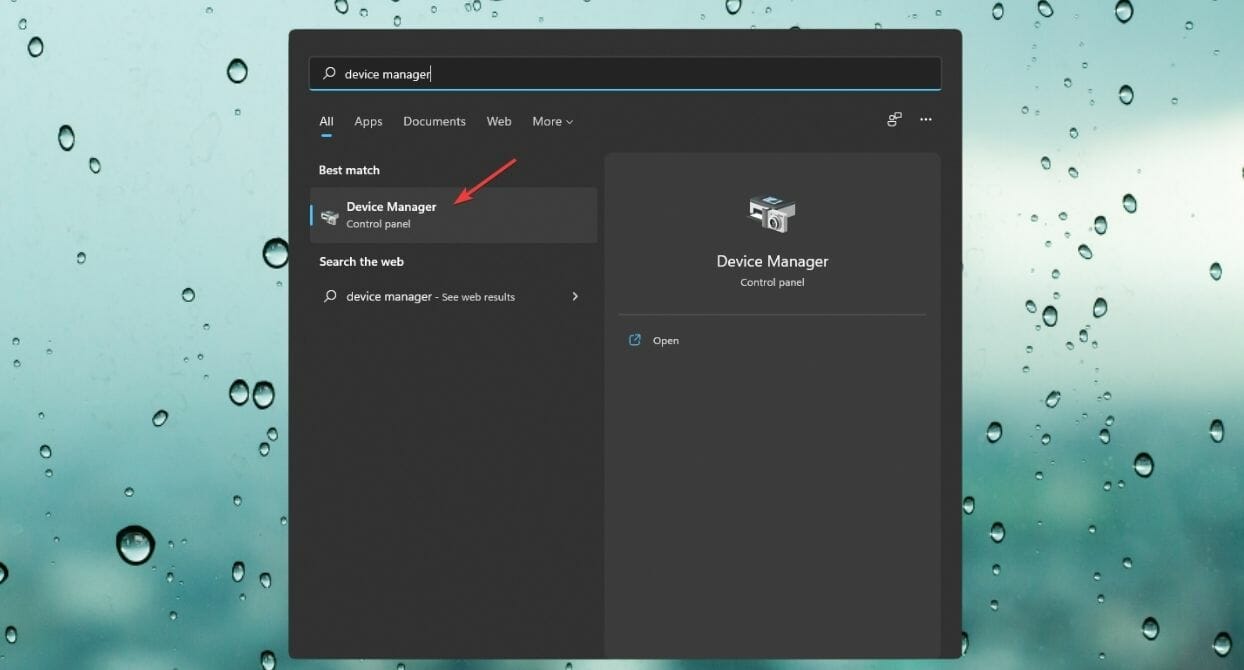
Press Windows + X to open the Power User menu, and select Device Manager.
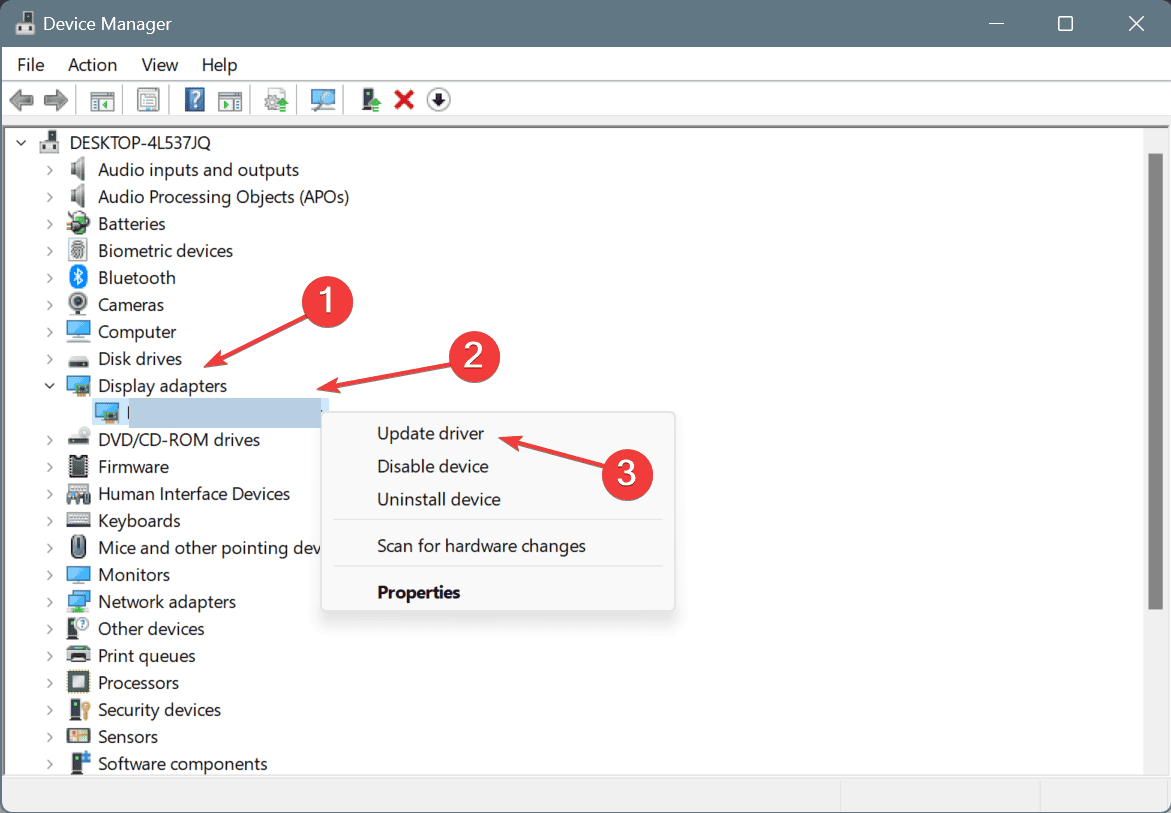
Expand the different entries here, individually right-click on the devices listed underneath, and select Update driver.
Choose Search automatically for drivers and wait for Windows to install the best locally available version.
After updating all the drivers, restart the computer and check for improvements.
To streamline the process, you can get a top-rated driver update software which will automatically fetch and install the latest driver version for all the devices.
3. Repair disk issues
Press Windows + R to open Run, type cmd, and hit Ctrl + Shift + Enter.
Click Yes in the UAC prompt.
Paste the following command and hit Enter: chkdsk /r
If asked to schedule the scan for the next restart, press Y, hit Enter, and then reboot the computer.
Wait for the Check Disk utility to detect and eliminate disk-related issues causing SESSION2_INITIALIZATION_FAILED.
4. Check for problems with the RAM
Press Windows + S to open Search, type Windows Memory Diagnostic, and click on the relevant result.
If the built-in utility doesn’t find any problems, you must run Memtest86+, an open-source RAM testing tool that runs a series of advanced scans on individual memory modules and detects even the smallest of the issues.
5. Reinstall Windows
When nothing else works, the last option is to reinstall Windows from scratch. In most of the SESSION2_INITIALIZATION_FAILED BSOD error cases, it was a software-based underlying cause, which should, in all likelihood, be fixed after a reinstall.
Creating a Windows 11 bootable USB drive
To reinstall Windows 11 > go to Microsoft’s official website > download the Media Creation Tool > plug in a pre-formatted USB drive > run the downloaded setup > follow the on-screen instructions to create a bootable Windows USB > change the boot order to the USB drive > install Windows.
If the SESSION2_INITIALIZATION_FAILED still keeps appearing, you can check the BSOD error logs, find what’s triggering the error, and take the necessary measures. Or you could always visit a local repair shop. They will also check the hardware for faults, another likely reason for the issue.
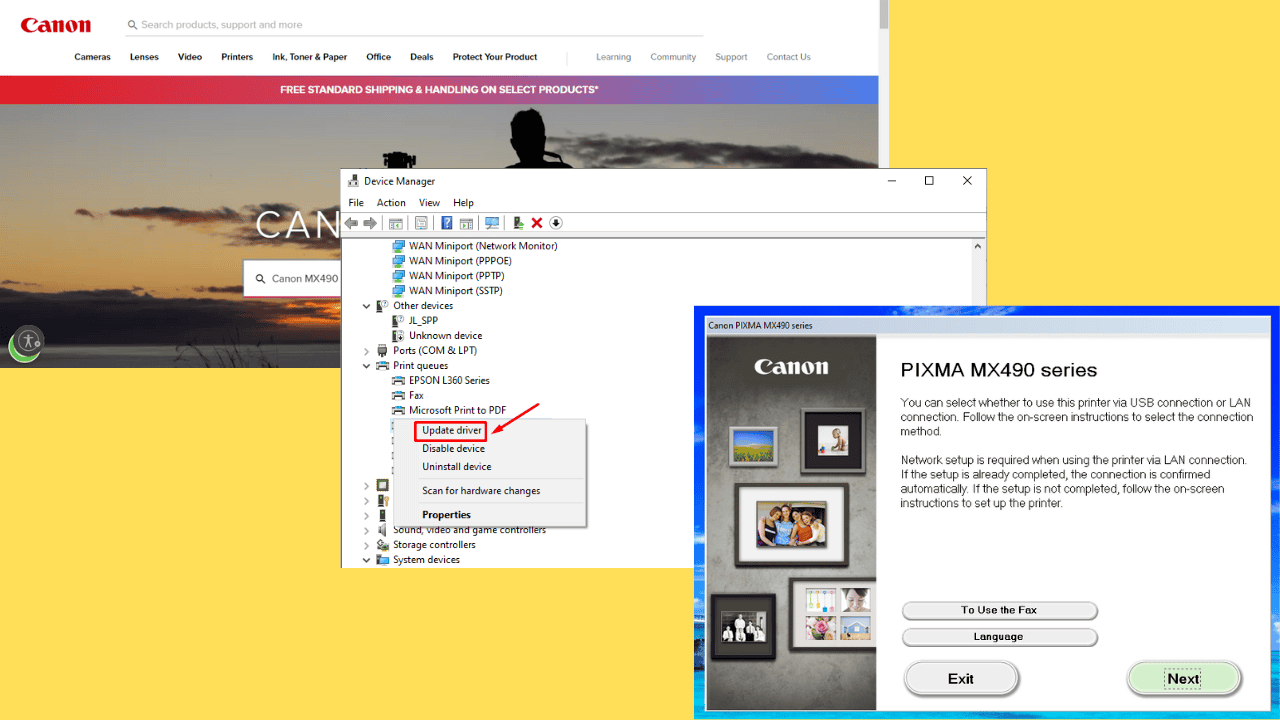
Want to know how to install the Canon MX490 driver? Installing the correct drivers makes sure your printer operates at its best and is fully compatible with your computer. Otherwise, it might not function correctly or even be recognized by your system.
I’ll list step-by-step instructions for downloading and installing it, so let’s begin!
How To Download and Install Canon MX490 Driver
You can get and deploy the driver using the manufacturer’s website, Device Manager, Windows Update, and a driver updater. I’ve covered all these methods below.
Via the Manufacturer’s Website
Follow the below steps:
Open your browser and visit the Canon official site. Type “Canon MX490 driver” in the search bar and hit Enter.
Tap Software and Drivers.
Select your operating system and version from the drop-down menu and click Download. The site may sometimes detect these automatically, but it’s important to confirm.
Tap the download icon on the top right corner of your screen and click the exe file to start the installation process.
Run the installer and follow the on-screen instructions.
Via the Device Manager
Here are the steps to follow:
Right-click on the Start menu and select “Device Manager” from the context menu.
Find your Canon MX490 driver under the Print Queues section. Right-click on the printer and choose “Update driver.”
Select Search Automatically for Drivers. Windows will look for the latest driver software online and prompt you to install it.
Once done, restart your PC to apply the changes.
Using Windows Update
Below are the steps to follow:
Press Windows + I to open settings, then tap Update & Security.
Tap View optional updates under Check for updates.
Click Driver Updates, tick the Canon MX490 printer box, and tap Download and Install.
Using a Driver Updater Tool
You can use a third-party tool to simplify managing your drivers. Start by selecting something reputable, likeFortect Driver Updater, and installing it on your computer. It’ll help you repair corrupt ones, schedule scans, create backups, manage downloads, and more, all to keep your PC running smoothly.
This approach saves time and keeps your system optimized with minimal effort.
These steps will help you download and install the Canon MX490 driver to ensure your printer functions properly and remains compatible with your system. I recommend you get the file from the official website to avoid getting corrupted drivers.
In a nostalgic nod to gaming history, Capcom and GOG have teamed up to bring back the classic Resident Evil games to PC, starting with the iconic 1996 Resident Evil. Now, they’re gearing up to re-release Resident Evil 2, the 1999 PC port, not to be confused with the 2019 remake.
The original Resident Evil 2 is set to hit the GOG store on August 27 at 8 A.M. UTC, promising a slew of enhancements to ensure it runs smoothly on modern systems. What’s exciting is that this version is not just a mere port. It includes full compatibility with Windows 10 and 11, supports multiple languages, and offers improved DirectX game rendering, among other features.
Do those around the gaming block remember the thrill of navigating through the zombie-infested Raccoon City? Well, it’s about to get better. The GOG version boasts new rendering options like Windowed Mode and Vertical Synchronization Control, enhanced audio, and improved cutscenes and subtitles. Saving your progress and exiting the game is now hassle-free, and the game settings have been fine-tuned for an optimal experience.
But here’s the kicker: modern controller support. Yes, you read that right. Whether you’re team Sony, Microsoft, Nintendo, or Logitech, the game has covered you with optimal button binding for a seamless gaming experience. And for the hardcore fans, the 4th Survivor and Tofu modes are unlocked from the get-go.
Unfortunately, GOG hasn’t said anything about the price yet, but it’s likely to mirror the first game’s re-release at $9.99. There’s also a bundle option for the classic trilogy, which includes the upcoming Resident Evil 3, priced at $24.99.
If you’re a fan of survival horror or just looking to relive some of those heart-pounding moments from your youth, keep your eyes peeled for Resident Evil 2’s return to the GOG store.
It’s a trip down memory lane that promises nostalgia and a smoother, more accessible experience for old fans and newcomers alike.
And speaking about memory lane, don’t forget about Age of Mythology: Retold, which will also be released early for those with Early Access. The end of August seems a good time to be a PC gamer.
Microsoft has introduced Microsoft Loop 2.0, the latest platform version with a sleek, revamped UI and many improvements to enhance the user experience.
What’s new with Loop 2.0? It’s moved to a new URL, part of Microsoft’s broader effort to streamline access to its online services. This means no more pesky sign-in prompts, redirects, and delays that sometimes make online work feel tiring.
The new UI offers a clean and simple design that makes navigating the app a breeze. A new navigation menu on the left puts your meeting notes, favourites, recent items, and more at your fingertips.
Microsoft Loop 2.0 also introduced a new Create button at the top left that lets users create workspaces and draft ideas from anywhere in the app.
Adding Loop Components, pages, or ideas to a workspace has also been simplified. Users can do this directly from the breadcrumb at the top, either adding them to existing workspaces or creating new ones on the fly. And for those who rely heavily on Microsoft Teams for collaboration, all your Collaborative Meeting Notes are now neatly organized under the Meeting Notes tab.
The Redmond-based tech giant has also modified the Favorites and Recent tabs on the navigation bar. It’s now easier to switch between your go-to workspaces in the Microsoft Loop app, and the Recent tab is also helpful for accessing your Loop pages and components across Microsoft 365.
Microsoft Loop 2.0 is being rolled out, so it might be unavailable to many users now, but it will be soon. The company has posted a thread on X (formerly known as Twitter, describing all the new capabilities coming to the platform).
Microsoft recently updated Loop to allow admins to enable guest sharing, which allows people outside of the organization to participate in a project. It’s safe to say this capability will still be in the platform’s new version.
Microsoft has just rolled out a new build for Windows 11, specifically for those Copilot+ PC users in the Windows Insider Program’s Release Preview channel. The build number is 26100.1586, and it’s tagged under KB504186.
First off, the update includes a tweak to the FrameShutdownDelay. This means the browser will no longer heed the value in the “HKLM\SOFTWARE\Microsoft\Internet Explorer\Main” registry key. This tweak will make your browsing experience smoother and more reliable.
KB5041865 also fixes a deadlock issue in the Domain Name System (DNS) that could occur when a domain controller starts up. This is crucial for ensuring your device can connect to the internet without hiccups.
For those who like to keep their systems secure (and who doesn’t?), this update introduces a prompt that asks for confirmation when turning on OpenSSH using the Server Manager UI. It’s a small step but adds an extra layer of security by ensuring that OpenSSH isn’t enabled without your knowledge.
Microsoft has been on a roll with Windows 11 24H2 updates lately. They released a Safe OS Dynamic Update earlier in August to improve the Windows recovery environment. Another update, under KB5041178, focused on enhancing Windows setup binaries for feature updates in Windows 11, version 24H2. And let’s not forget the update under KB5040529, which introduced many new features, including Emoji 15.1 support and a new account manager for the Start menu.
The week has just begun, and the Windows Insider Community has already been offered several builds through the different channels of the Insider Program. The latest KB5041587 to the Windows 11 Insider Release Preview Channel is no exception.
First, KB5041587 introduces a new feature in the Windows Share window that allows you to share content with your Android device. To make this work, you’ll need to pair your Android device with your Windows PC using the Link to Windows app on your Android device and Phone Link on your PC.
KB5041587 also brings several improvements to make life easier for those using accessibility technologies. For instance, the Narrator’s scan mode has been made quicker, which is a big plus when browsing large documents in Microsoft Edge. And for those who use voice access, you’ll be pleased to know that dictating characters and editing text just got faster and more intuitive.
On the technical side, there are updates to the Input Method Editor (IME), Bluetooth policies, and fixes for issues related to the File Explorer navigation pane and symbolic links. An update for Unified Write Filter (UWF) and Microsoft System Center Configuration Manager (SCCM) users addresses a deadlock issue that prevented devices from restarting as expected.
One exciting update concerns hibernate-stop errors. Suppose you’ve ever experienced your laptop not responding after resuming from hibernate, especially after opening and closing the lid multiple times. In that case, this update might be the fix you’ve been waiting for.
The changelog also mentions the European Digital Markets Act (DMA) and how it affects Microsoft Entra single sign-on (SSO). There’s a hiccup with the SSO notice prompting too often when authenticating using a certificate.
It’s important to note that the KB5041587 updates might not be available to everyone immediately. They’re rolling out gradually, so some might have to wait longer to get them.
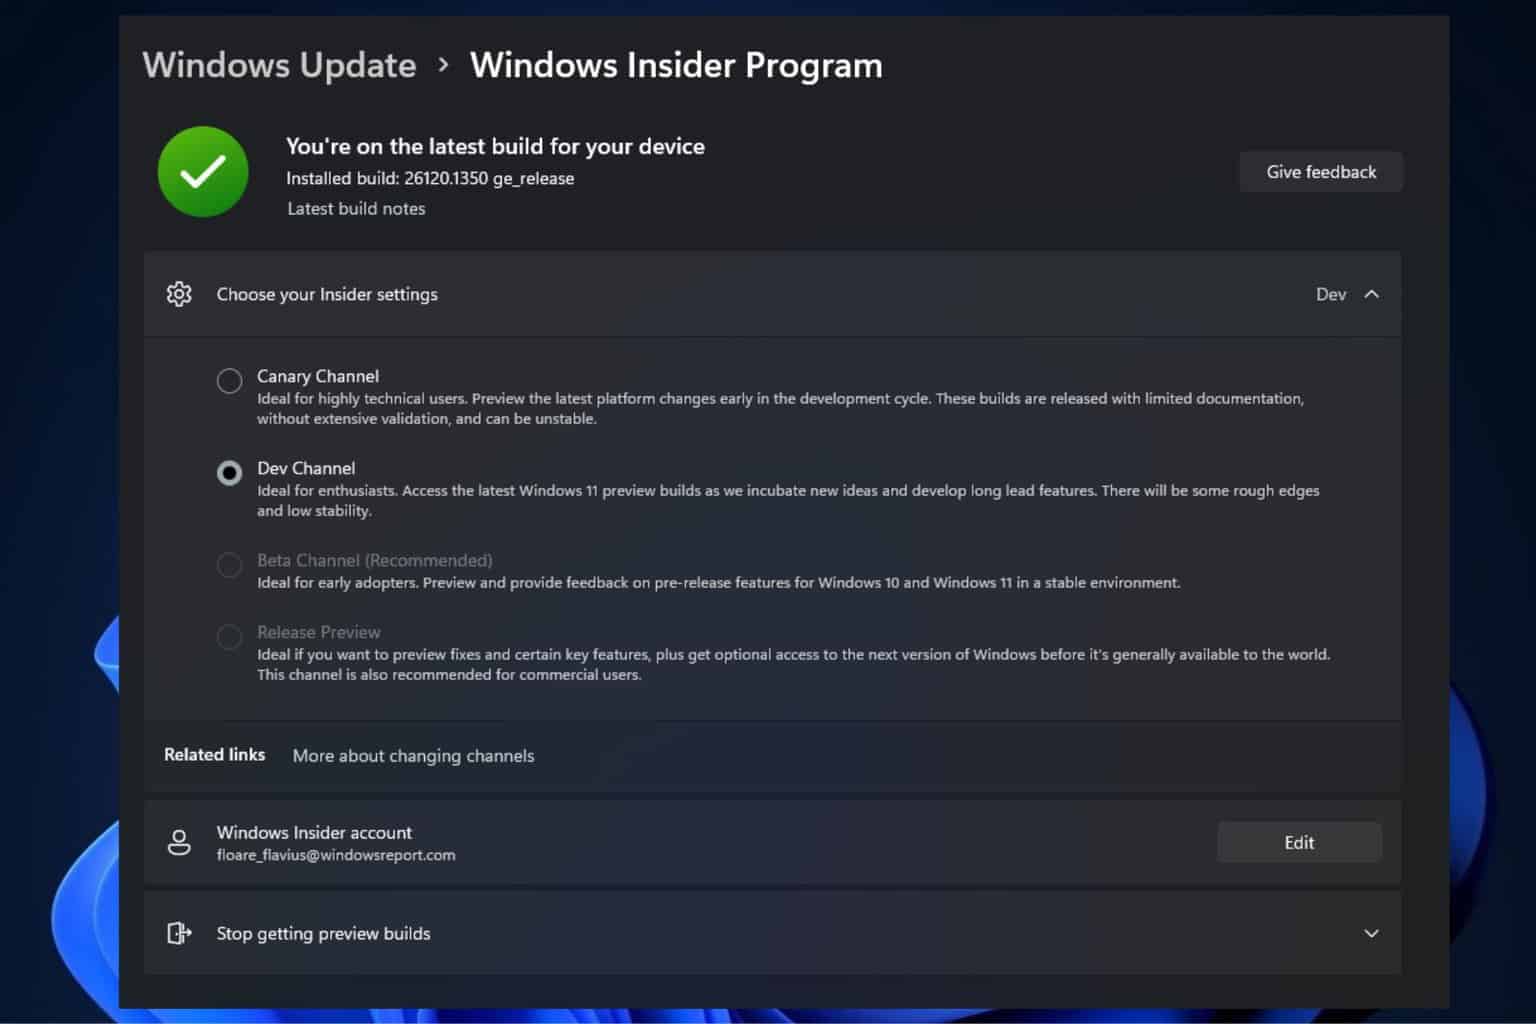
After the confusion with last week’s new Canary Build being mistaken for a Dev Build by some users, Microsoft released a new patch to the Dev Insider Channel, KB5041872, also known as Preview Build 26120.1542.
First, KB5041872 is a sneak peek into what Microsoft is cooking for Windows 11, version 24H2. Microsoft made some pretty neat changes, especially to the Widgets on the taskbar. If you love having everything at your fingertips, you will enjoy this. The Widgets entry point is moving to a new spot on left-aligned taskbars, making accessing your personalised content more accessible and intuitive. However, it might take users some time to get used to it, and that experience can be pretty frustrating.
But that’s not all. The taskbar has gotten some changes. Now, it supports first-letter navigation. Imagine you’re looking for an app that starts with “S”. Just hit “S” on your keyboard, and voilà, you’re there.
And, of course, fixes to those pesky bugs come with new updates. Microsoft has been hard at work squashing bugs that affect everything from text suggestions on hardware keyboards to issues in the Registry Editor. This should make writing and typing on Windows 11 easier.
KB5041872 also has known issues, like potential crashes in Task Manager when navigating between pages.
It’s also worth mentioning that these updates in the Dev Channel are like a tech playground. They’re testing grounds for new features, which means not everything might make it to the final release.
The Redmond-based tech giant also released an Insider Build to the Beta Channel. With it, Microsoft finally fixed the emoji panel that’s been crashing for a while (the fix is also present in this build). However, users will get the fix gradually.
The CANNOT_WRITE_CONFIGURATION bug check, with a value of 0x00000075, typically occurs when Windows can’t load or convert the SYSTEM registry hive file due to the non-availability of resources during the initialization phase.
The Cannot Write Configuration BSOD (Blue Screen of Death) error highlights a major OS-based configuration issue or conflicts triggered by third-party apps because it rarely occurs under normal system configuration.
Before you proceed with the troubleshooting, install pending Windows updates, disconnect all non-critical peripherals, fix any memory leaks, and reconnect the RAM modules in the respective slots.
How do I fix the CANNOT_WRITE_CONFIGURATION bug check 0x75?
Tip
If you can’t normally boot into Windows and keep getting CANNOT_WRITE_CONFIGURATION at startup, boot Windows into Safe Mode with Networking and then execute the solutions listed below.
1. Repair the corrupt system files
Press Windows + S to open Search, type Command Prompt in the text field, and click on Run as administrator.
Click Yes in the UAC prompt.
Paste the following three DISM commands individually and hit Enter after each: DISM /Online /Cleanup-Image /CheckHealthDISM /Online /Cleanup-Image /ScanHealthDISM /Online /Cleanup-Image /RestoreHealth
Now, execute this command to run the SFC scan: sfc /scannow
Finally, reboot the PC and check whether the CANNOT_WRITE_CONFIGURATION bug check is fixed.
2. Update all the drivers
Press Windows + X to open the Power User menu, and select Device Manager.
Expand the Network adapters entry here, right-click on the active adapter, and select Update driver.
Click on Search automatically for drivers and let Windows fetch and install the best locally available version.
Similarly, update the disk’s driver from under the Disk drives section, amongst other critical ones.
The CANNOT_WRITE_CONFIGURATION blue screen error in Windows can be caused by outdated and buggy drivers, especially the ones for the network adapter and disk drive. So, updating the drivers, in all likelihood, will do the trick!
And if Windows can’t find a better version, go to the manufacturer’s official website, search for the new releases, and then manually install the latest driver.
3. Repair the disk drive
Press Windows + R to open Run, type cmd, and hit Ctrl + Shift + Enter.
Click Yes in the UAC prompt.
Paste the following command and hit Enter: chkdsk /r
If asked to schedule the scan for the next restart, press Y and then hit Enter to confirm.
Finally, restart the computer and wait for the Check Disk utility to detect and repair issues with the drive.
4. Perform a clean boot
Press Windows + S to open Search, type System Configuration, and click on the relevant result.
Go to the Services tab, tick the checkbox for Hide all Microsoft services, and then click on Disable all.
Now, go to the Startup tab, and click on Open Task Manager.
Individually select any apps that have Enabled listed under the Status column, and then click on Disable.
Go back to System Configuration, and click Apply and OK to save the changes.
Click on Restart in the confirmation prompt.
After the system reboots, check whether the CANNOT_WRITE_CONFIGURATION error is fixed.
If it is, again open System Configuration, re-enable the services and startup apps one at a time, and wait for the BSOD to reappear. The moment it does, the last enabled service/app is likely to be the underlying cause.
If it’s an app, update it, roll back the recent update, or simply uninstall it (explained in the next solution) for the time being. For a service, you can contact the developers.
A Clean Boot environment is for troubleshooting issues with the PC and identifying the faulting app or service. And it can quickly help fix the CANNOT_WRITE_CONFIGURATION BSOD in Windows!
5. Uninstall conflicting third-party apps
Press Windows + R to open Run, type appwiz.cpl in the text field, and hit Enter.
Select any app you believe might be conflicting with Windows, and click on Uninstall.
Follow the on-screen instructions to complete the uninstall process and restart the computer.
If the blue screen error still appears, uninstall other similar apps from the PC.
6. Check for RAM issues
Press Windows + S to open Search, type Windows Memory Diagnostic in the text field, and click on the relevant result.
If the built-in utility is unable to find any issues, I recommend you use Memtest86+, an open-source RAM testing tool that runs a wide array of scans on individual modules and detects almost every problem. If any of the modules are faulty, replace them.
Besides, if feasible, you can also increase the PC’s physical RAM to eliminate CANNOT_WRITE_CONFIGURATION in Windows 11!
Right-click on the ISO file, choose Mount, and then click on Open in the confirmation prompt.
Run the setup.exe file.
Click Yes in the UAC prompt.
Click Next to proceed.
Now, click on Accept to agree to Microsoft’s license terms.
Finally, make sure the setup reads, Keep personal files and apps, and then click on Install.
Wait for the process to complete. It can take between 30-90 minutes.
An in-place upgrade will fix most, if not all, software-based issues triggering the CANNOT_WRITE_CONFIGURATION BSOD.
In case the error persists, it’s most likely a hardware malfunction or connection problem to blame. So, it’s best that you contact the dedicated manufacturer support or visit a local repair shop.
Microsoft has just rolled out a fresh build, KB5041873, for those in the Windows Insider Program Beta Channel. This build includes a new Studio Effects icon debuting in the system tray. This addition, alongside several bug fixes and known issues, marks the latest update under build number 22635.4076.
Microsoft’s recent release isn’t just about the new icon. For instance, the Studio Effects icon, designed to elevate, has been gradually introducing changes and improvements but is set to come with updates.
The improvement introduced with Build 22635.3930 that introduces a Studio Effects icon in the system tray when using any application with a Studio Effects-enabled camera has temporarily been disabled with this build. We plan to re-enable this feature in a future flight.
Microsoft also addressed many fixes with KB5041873. From resolving issues where keyboard focus could wander to fixing Voice Access commands for non-English languages, the update aims to smooth out the creases for a more seamless interaction with Windows 11. Even the emoji panel and Registry Editor quirks were improved.
The update doesn’t stop at targeted fixes, though. It addresses broader system concerns, too, like a system hang when large data packets travel over Wi-Fi or adding drivers to the Vulnerable Driver Blocklist to beef up security. KB5041873 also enhances stability and security, from the nuances of Group Policy Preferences to the specifics of Autopilot provisioning for Surface Laptop SE devices.
However, the patch also has known issues, such as explorer.exe crashes linked to taskbar interactions or archive file engagements, which remain on the radar.
In other news, the Canary channel was also recently updated with one of the biggest patches, including the Windows Sandbox, among many different capabilities. However, if it shows up as a Dev build, ignore it. It’s Canary.
Encountering the ERROR_SHARING_BUFFER_EXCEEDED error in SharePoint can be frustrating, especially when it disrupts your workflow. This guide will walk you through practical solutions to resolve this issue and help you get back on track.
How do I fix ERROR_SHARING_BUFFER_EXCEEDED?
1. Verify the SharePoint site’s list limits
Open your SharePoint site.
Navigate to Site Settings by clicking the gear icon in the upper right and selecting Site settings.
Under Site Administration, click on Site Collection Features.
Look for SharePoint Server Publishing Infrastructure and ensure it’s activated.
Go back to Site Settings and select Site Libraries and Lists under the Site Administration section.
Review each library’s settings and check the number of items to ensure it doesn’t exceed the 5000 item threshold.
This solution helps identify if your lists or libraries exceed the limits set by SharePoint. If you have too many items, it can lead to performance issues and errors like ERROR_SHARING_BUFFER_EXCEEDED.
2. Break large lists into smaller sub-lists
Open the large list in SharePoint.
Use the Create View option to create multiple views that filter items into smaller, manageable segments.
Navigate to Site Settings by clicking the gear icon in the upper right and selecting Site settings.
Under Site Administration, click on Site Libraries and Lists.
Configure each view to show only a subset of items based on specific criteria (like date ranges or categories).
This method reduces the load on the SharePoint list by dividing it into smaller, more manageable views, which helps reduce the likelihood of encountering the ERROR_SHARING_BUFFER_EXCEEDED error.
3. Utilize SharePoint’s Content Organizer
Go to Site Settings by clicking the gear icon in the upper right and selecting Site settings.
Under Site Collection Administration, select Content Organizer Settings.
Activate Content Organizer if it’s not already active.
Set up rules to automatically route items to different libraries based on metadata.
Verify that the rules work by uploading test items and checking their destination.
The Content Organizer helps distribute documents into different libraries, preventing any single library from exceeding limits, thus resolving ERROR_SHARING_BUFFER_EXCEEDED.
Navigate to Monitoring and click on Configure throttling rules.
Identify and adjust limits for less critical processes.
Ensure critical workflows have higher thresholds.
Save the changes and monitor SharePoint performance to ensure the adjustments help.
By adjusting the throttling limits for non-critical processes, you can ensure that critical operations have enough resources, reducing the chance of hitting the ERROR_SHARING_BUFFER_EXCEEDED error.
5. Use Indexing and Column Filtering
Open the affected list or library in SharePoint.
Go to the Library or List settings.
Under the Columns section, add or adjust indexes for columns frequently used in filters and views.
Ensure that indexed columns are used in library views and filters.
Test the performance by accessing filtered views to ensure they load quickly.
Properly indexed columns improve query performance and help SharePoint handle large lists by reducing the load on the server, thus preventing ERROR_SHARING_BUFFER_EXCEEDED.
6. Review and optimize custom solutions
Review custom code or third-party solutions that interact with SharePoint lists.
Identify areas where the solution retrieves large datasets.
Optimize code to fetch only necessary items using proper filtering and paging.
Test the optimized solution in a staging environment.
Deploy the changes to production and monitor for improvements.
Custom code and third-party solutions may not handle large datasets efficiently. Optimizing these components ensures they don’t contribute to ERROR_SHARING_BUFFER_EXCEEDED.
7. Migrate excess data to another site collection
Identify lists or libraries that can be split based on logical criteria (e.g., department, project).
Create a new site collection for the migrated data.
Use SharePoint’s export/import features or PowerShell scripts to move data.
Update any links or references to the new site collection.
Verify data integrity and access permissions post-migration.
Dividing data across multiple site collections can balance the load and reduce instances of ERROR_SHARING_BUFFER_EXCEEDED, especially if your current site collection hosts excessive data.
By following these solutions, you can effectively manage and prevent the ERROR_SHARING_BUFFER_EXCEEDED error in SharePoint. Regularly monitoring your lists and libraries and optimizing your processes can help maintain a smooth and efficient SharePoint environment.
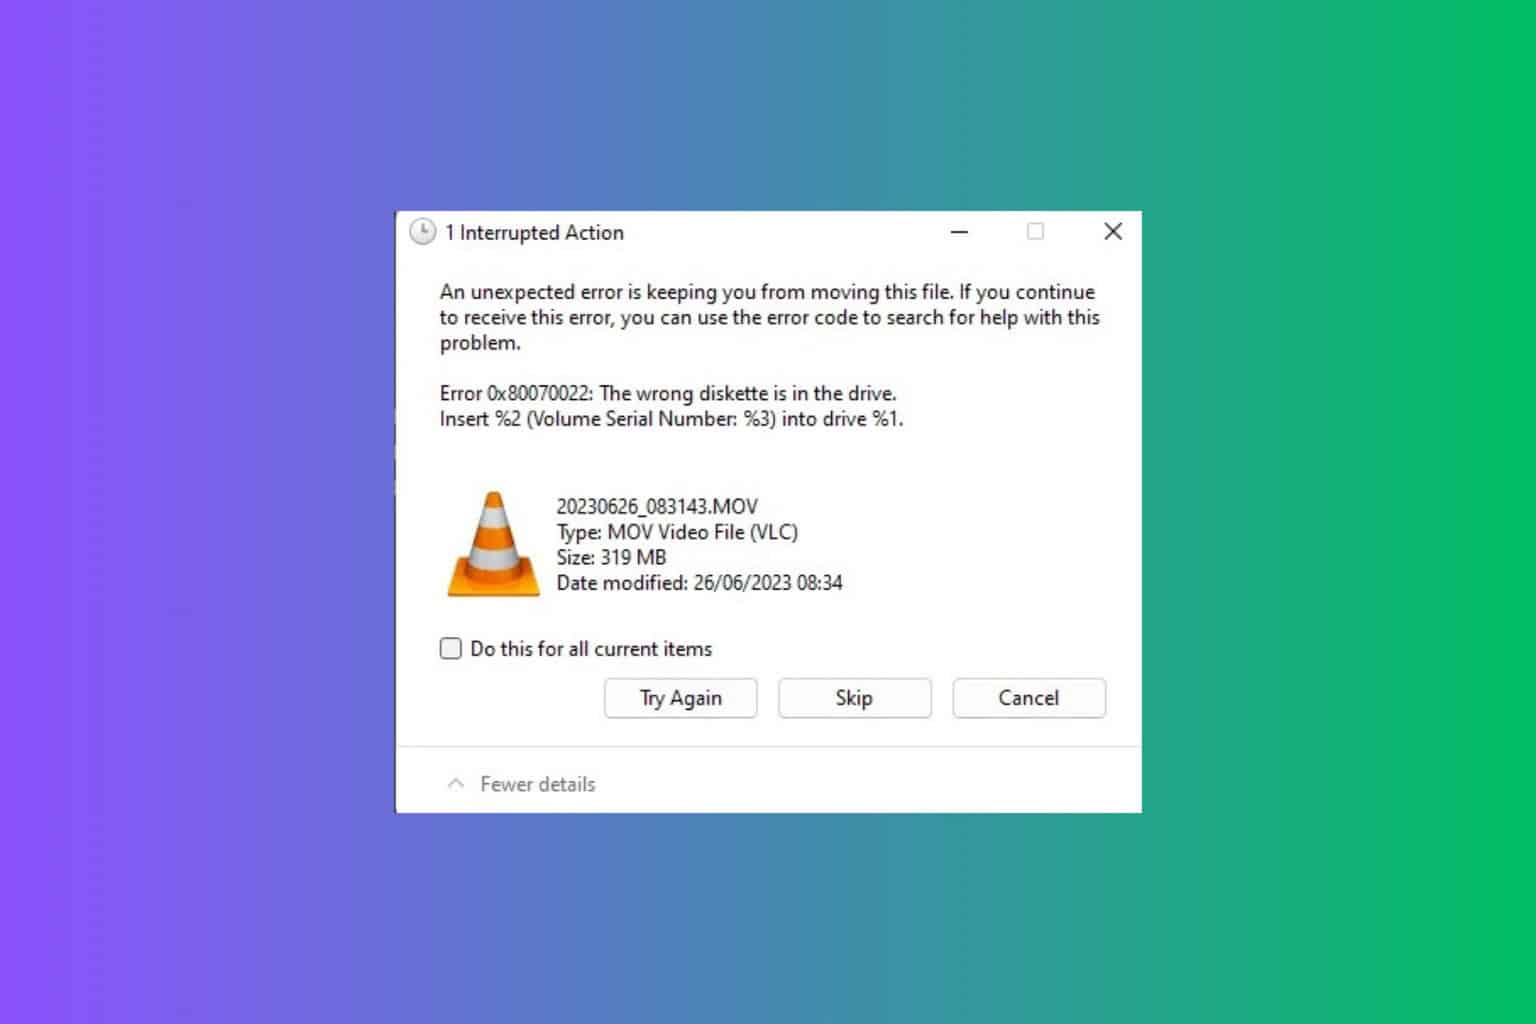
Encountering the ERROR_WRONG_DISK can be frustrating when you’re eager to use your software or play a game. This error typically arises when the system cannot recognize the correct disc in the drive. The message that comes with this error can be something like 34 (0x22) The wrong diskette is in the drive. Insert %2 (Volume Serial Number: %3) into drive %1.
Search for the 0x00000022 ERROR_WRONG_DISK hotfix.
If the hotfix is available for download, click on the “Hotfix download available” link.
Select the language of your operating system.
Download the hotfix and follow the installation instructions.
After the installation, restart your computer.
This solution addresses the race condition issue in Windows Vista or Windows Server 2008 where the application creates a network printer connection and the RPC proxy does not exist. The hotfix corrects the problem by ensuring proper handling of the RPC proxy.
2. Mounting the disk image correctly
Download a virtual drive software like Daemon Tools or PowerISO and install it on your computer.
Open the virtual drive software and mount the game’s .iso file to a virtual drive (e.g., drive letter D: or the next letter available).
With the .iso mounted, attempt to run the game again.
If prompted, select the virtual drive where the .iso is mounted as the source.
This method suggests using software to simulate a physical disc drive, tricking the game into recognizing the mounted .iso as the original game disc.
3. Reinstall and update drivers
Open Device Manager by pressing Windows + X and selecting Device Manager.
Expand the DVD/CD-ROM drives section.
Right-click your CD/DVD drive and select Uninstall device.
Restart your computer.
Windows will automatically reinstall the default drivers upon restart.
Ensure there are no errors in the Device Manager for the CD/DVD drive.
If this doesn’t work, go to the CD/DVD drive manufacturer’s website.
Download and install the latest drivers for your drive model.
Reinstalling and updating the drivers ensures that your CD/DVD drive is functioning correctly and can read the game disc properly, eliminating errors caused by outdated or corrupted drivers.
By following these solutions, you can troubleshoot and fix the Wrong Disc Inserted error, whether it’s for network printers on older Windows systems or for nostalgic gaming experiences with abandonware. Remember to keep your drivers updated and handle your discs with care to prevent future issues.
We reported that Google Chrome was integrating Reading mode into Google Docs a few months back. The feature is now available and working in Chrome Canary.
Google Chrome on the desktop has recently got Reading Mode. When you select the Reading Mode option from the context menu or click on its icon on the toolbar, Chrome shows page text in a readable format without disturbing elements in the sidebar for pure readability.
While Google has tested local and other forms of the feature including displaying images, their priority is always to provide an improved version that lets users read articles in the sidebar while staying on the same tab.
Not only did Google add aloud support to Reading mode, but they also offered formatting options such as increasing font size, disabling links, and images, and changing the theme, including dark from the available Light, yellow, and Blue to support reading.
The latest addition of a “Load More” button at the end of the reading mode UI allows for seamless scrolling through the next page, eliminating the constant “Getting Ready” spinning icon in the sidebar. WindowsReport Observed.
How to enable Reading Mode in Google Docs in Chrome:
Launch Chrome.
Visit chrome://flags.
Find and enable the following flags: Reading Mode Google Docs Integration Reading Mode Google Docs Load More button
Restart Chrome.
Ensure you’re signed into Chrome with a Google Account.
Open a Google Docs file.
Click on the Reading icon on the toolbar. Chrome will do the rest. Enjoy Reading Mode inside Google Docs in the Google browser.
For Google Docs reading Mode to happen, Chrome will use a local Side Panel to display the feature. This approach prioritizes user privacy by keeping Reading Mode isolated from other tabs, preventing any data sharing.
Microsoft Mesh is set to receive a string of new updates in October, which could see the platform widely adopted by organizations and personal users.
According to the latest entries in the Microsoft 365 Roadmap, three capabilities are coming to the platform: the Microsoft Mesh app on Meta Quests headsets will support hand interactions, the platform will also introduce audio zones that enable Mesh creators to craft custom audio experiences, and finally, Mesh events will also be enhanced with Teams chat support.
First, with the new hand interactions in the Mesh app, Meta Quest users can now interact with virtual spaces more intuitively. The roadmap says this enhancement will come to Meta Quest 2, 3, and Pro, enabling users to move around in event environments and interact with objects using their hands.
Motion controllers will still be supported, and users can switch between them or use their hands—and we say, better use your hands.
Microsoft Mesh app users on Meta Quest 2, 3, and Pro headsets can now use their hands to use the app, move around in event environments, and interact with objects. Motion controllers continue to be supported, and users can switch between using controllers or their hands while using the app.
The second capability focuses on crafting custom audio experiences in Mesh that can be used to build a more realistic experience inside the platform. For example, one can create a custom audio experience for a certain space that automatically lowers or restricts what audio can enter that space. This way, multiple events can take place in the same space without disturbance,
Spatial audio in Mesh provides a realistic recreation of how sound moves in the real world, with the volume of people speaking or media playing getting lower of as you move away from the source of the sound. The introduction of audio zones enables creators to craft custom audio experiences for the intended use of a space with features such as extended audio drop off distances for conversations that happen in a large area, or restricting what audio can enter a given area, to allow smaller groups to have lively conversations without disrupting their neighbors.
Finally, Mesh events will have Teams chat support, meaning all participants can use Teams chat to talk to others within the same Mesh event, whether they accessed it from a PC or Mac.
Participants in Mesh events on PC and Mac can use Teams chat to communicate with all participants, across all rooms, within a Mesh event. Users can do this in the Microsoft Mesh PC app, the Mesh app in Teams, as well as in the chat message list of the Teams app.
All these capabilities promote a hybrid human interaction in Microsoft Mesh, something the Redmond-based tech giant promised a while ago. Suppose we’re thinking about audio experiences that, by the description, mimic real-world environments and users being able to move their hands to express themselves better on the platform. In that case, we say Mesh is on the right track.
However, we’ll have to wait until October to see it.
Are you looking for the best Time Machine alternative for Windows?
This intuitive backup and restore macOS app supports unattended and ad hoc backups, scheduling, and more. Its timeline-like display is also the reason for its name, Time Machine.
However, it can be challenging to find a valid alternative for Windows operating systems. Luckily, I’m here to help out!
6 Time Machine Alternatives for Windows
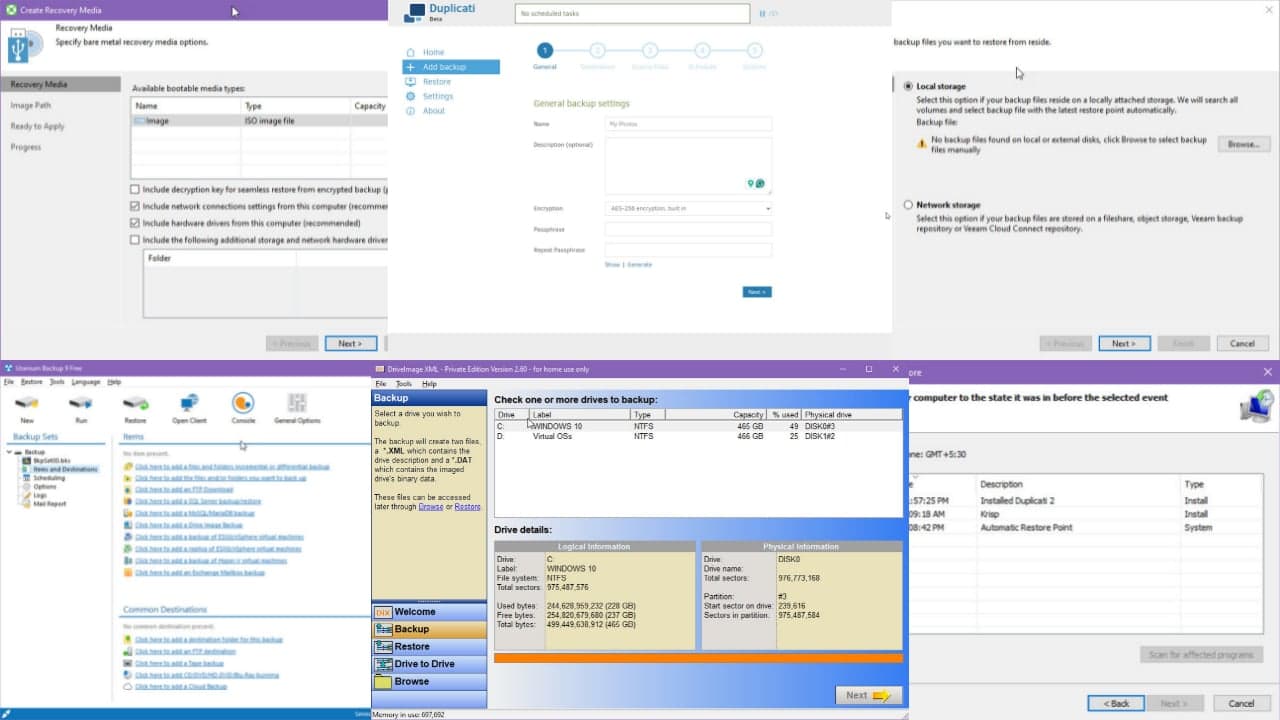
After testing over 20 PC backup and restore programs for over a week, I’ve found that the following six stood above the rest:
Windows File History – Best Built-In Solution
The File History app is the most closely related Time Machine alternative for Windows. It ships with every edition since Windows 8. You can enable this feature in the Files backup section of the Update & Security or in the Security menu.
It accepts various types of storage devices for backup purposes. For example, you can select an existing drive, a USB stick, an external mass storage device, and NAS storage. The drives could contain other content or be empty.
You can configure how frequently you want the tool to back up the system and other directories. Also, you can configure it to erase backups within 1 month to 2 years. However, you can also keep them forever if needed.
Not to mention, you can determine which folders to save. Or, you can create a snapshot for the entire system.
Pros
Cons
Free for individual and business use cases.
It comes with a steep learning curve.
It doesn’t consume extra system resources except backup storage space
Setup is a complicated process.
It can work as a version management system for individual files.
Often takes hours to create the first snapshot for the entire system or a single drive.
Easy to understand user interface with minimal functionalities and hence no guesswork.
It doesn’t let you create a backup and bootable disc image that you can use if struck by ransomware or BSOD.
DriveImage XML lets you create hot or live copies of drives within your Windows PC using Microsoft’s Volume Shadow Services (VSS). It works even if you’re working on the source drive.
It allows you to choose a destination for backup. It could be within the same device or on a removable disc drive. It’ll store the data in XML files so you can use any third-party restore programs that support it.
Primarily, it creates images of partitions and logical data drives. Also, you can clone a drive to another one. Furthermore, you can use the software to import XML backups from other sources. Moreover, DriveImage XML can compress images for archival purposes.
The minimal Windows operating system, WinPE Boot Medium is fully compatible with backup images created by DriveImage XML. Thus, if you’ve suffered from a ransomware attack, you can quickly regain control of your devices.
Pricing: It’s free for home and individual use. For business use, licensing costs start from $100.00 for five PCs, one year of free updates, and two support incidences.
Pros
Cons
Free version available for home and individual users. Business users can check the free trial.
It doesn’t show a timeline-like interface to choose the exact version you want to restore.
Works seamlessly with external or internal drives.
The user interface is a little bit cluttered.
Truly lightweight third-party restore software.
It doesn’t let you create a bootable system restore medium.
Duplicati is a Time Machine alternative for Windows with a hybrid environment that includes a cloud dashboard for device monitoring and a standalone client app. So, let’s say you deployed the client software in five PCs connected to the internet. You can control all of those from your cloud dashboard, like scheduling and performing ad hoc backups, restoring previous versions, etc.
Besides storing backups in external SSDs or internal drives, you can also use cloud storage, like Amazon S3, Backblaze, Box.com, Dropbox, Google Cloud, etc. Moreover, you can use protocols, like SFTP Servers, FTP Servers, and Network-attached Storages.
Duplicati allows you to create a new backup or import one from third-party providers. Also, during the restoring phase, you can use a version from the local PC or import one from a cloud storage source. Moreover, during scheduling, you can choose whether to do so locally or on the cloud.
Pricing: It’s free for up to five devices. You can revisit up to the last 200 saved versions. Duplicati will keep them in this subscription plan for up to one year. If you’d like to get a commercial license, a subscription starts at $5.00/ device/ month. The billing will be done annually.
Pros
Cons
Free for home and business use cases up to five machines.
Setting up cloud storage as backup drives comes with a moderate-level learning curve.
Super easy to configure, monitor, and restore backups.
It doesn’t let you create a rescue disk for situations like ransomware, BSOD events, etc.
Like Time Machine, you can choose to restore single folders.
Veeam Agent – Best for Windows Servers and Client PCs
If you’ve got an organizational setup consisting of Windows Servers and PC clients, you can check out Veeam Agent. Its Veeam Backup & Replication software is for servers and bare metal VMM platforms. Contrarily, you can install the Standalone app on endpoint devices at remote, onsite, and VMs deployed in cloud locations.
You can create backups of the entire server, client PC, partitions, logical discs, folders, and individual files. You can also generate a bootable USB or DVD media by cloning the existing machine.
It offers three different interfaces:
New Backup Job: Here you can configure the Backup Mode, Destination, Schedule, etc.
Volume Level Restore: This interface allows you to choose the source, like Local and Network storage. You can also configure Restore Point, Disk Mapping, Summary, etc.
Create Recovery Media: It allows you to create an ISO image of the system for immediate restoration.
Pricing: Veam has a free edition aimed at tech enthusiasts to protect Windows tablets, laptops, and desktops. Paid plans start at $428 USD for the Essentials bundle of 5 instances (5 servers or 15 workstations at that cost).
Pros
Cons
Free trial available for non-commercial and individual evaluation purposes.
Multiple separate UIs make it a bit challenging to create backups and restore from existing ones.
Familiar UI for servers, VMs, and physical Windows PC endpoints.
There’s a moderate-level learning curve.
Dedicated UI for backup, restore, and bootable recovery media creation purposes.
Doesn’t offer a transparent pricing policy.
Accepts small external storage devices, like SD cards and USB sticks.
Uranium Backup is a popular tool with exclusive support for SQL server, MariaDB, MySQL backup, and more. It allows you to create snapshots of the whole system, a specific drive, folder, and file. Also, you can store it on local drives and the cloud.
One of the best features is the template-based backup and restore. You’ll find a list of hyperlinks on the software home screen. For example, if you click the SQL Server backup/ restore option, an appropriate wizard will open to guide you through.
Pricing: You can use the basic services for free. Both non-commercial and commercial usage are allowed. If you need a complete solution, you can start with the Base plan for €80.00 for one physical or virtual Windows PC.
Pros
Cons
A free-forever plan is available for evaluation.
It has an intermediate-level learning curve.
It allows you to create a disc image of the whole system for disaster recovery.
Setting up a Cloud Client connection is challenging.
Uranium supports continuous backup of drives even if you’re working on a few files.
It offers multiple storage options, like local storage, FTP, cloud, and more.
Windows System Restore – Best for Entire System Recovery
Windows System Restore is the default PC backup program. Microsoft introduced it in Windows XP and it has been around ever since. Best of all, it’s zero maintenance. Unless you’ve manually disabled the app, your Windows OS will often create a system restore point automatically.
It usually happens when you make a major change, like installing an application, hardware driver, or Windows feature update.
However, you can also manually create a system restore point. For example, right after installing a new Windows 11 OS and updating drivers, you might want to create one. In the future, if you see a considerable decrease in system performance, you can revert to the last known good configuration.
Windows System Restore creates a table of backups by date and time. You can use this database to choose the snapshot for restoration. Therefore, you can also select it as a Time Machine alternative for Windows since this table works similarly to its timeline feature.
Pros
Cons
Low to no maintenance requirements.
You can’t create system restore points on a cloud storage.
Virtually zero learning curve.
There’s no option to import restore points from third-party tools.
Available in a large range of Windows OSs.
It doesn’t save folders and files individually. It creates a default system image for restoration.
Doesn’t occupy much internal storage space.
The app lacks most features offered by modern backup and restore software, like macOS Time Machine.
How I Chose the Best Time Machine Alternative for Windows
Here’s what I considered while choosing the above apps:
Backup creation: Except for Windows System Restore, all of the mentioned programs can take snapshots of the entire system, partitions, drives, folders, and files. You can configure backup images at granular levels.
Make an image of the entire system: For emergency recovery purposes, these tools let you create a bootable media so you can quickly reinstate the PC.
Performance: Most of these apps work silently when scheduled or don’t run in the background when not scheduled.
Onsite and online backup: You can store snapshots on the PC or cloud storage.
Encryption: Backup images can be encrypted so someone else can’t access confidential content.
Backup scheduling: All the apps allow for auto-scheduling.
File version management: Most of these apps are suitable for managing different versions of files.
Support for FTP, AFP, and SMB: You can configure them to store backups in NAS, remote FTP servers, and more.
Summary
This list should save you from investing too much time in research for backup and restore programs. Try these apps on your PC to experience their features and performance. Now, you can choose the best Time Machine alternative for Windows and comment below to let us know which one you like.
Microsoft will enhance its AI model, Copilot, to support image generation directly in the chat with natural language. According to the latest entry in the Microsoft 365 Roadmap, users only need to describe their idea or concept using any natural language to prompt Copilot to generate an image.
The enhancement will be released in September 2024 for Microsoft Teams, all Surface devices, and the web version of Microsoft Copilot. Suppose users must explicitly ask Copilot to generate visual creations with this enhancement. In that case, Copilot might develop its visual creations without asking the user for an explicit request.
Here’s what the entry says:
Create images using natural language to visualize concepts and ideas within the flow of work in Copilot for Microsoft 365.
The enhancement is a welcomed addition, considering Microsoft will also update Copilot to suggest prompts so that users know what to say to it if they want to use it.
Similar to the image generation enhancement, this one will come to Copilot in September.
Zotac is entering the gaming handheld arena with its latest creation, the Zone, and it’s already causing quite a stir among gamers. The Zone, now up for pre-order, is a powerhouse with features designed to cater to gamers who demand precision, performance, and portability.
At the heart of the Zone lies an AMD Ryzen 7 8840U processor, boasting Zen 4 architecture and RDNA 3 graphics. This means you’re getting top-notch performance that can handle even the most demanding games. Coupled with 16 GB of LPDDR5X-7500 memory, it ensures smooth gameplay and quick load times. And with Windows 11 Home as its operating system, you’re getting a familiar interface with the bonus of gaming optimizations.
Thanks to its 2280 512GB M.2 NVMe PCIe 4.0 x4 SSD, storage won’t be an issue. For those who need more, there’s an expandable storage option via a UHS-II microSD card reader. The display is just as impressive, featuring a 7″ Full HD AMOLED screen with a 120 Hz refresh rate and 800 nits brightness, ensuring vibrant colours and fluid motion.
But what sets the Zone apart are its controls. Triggers and analogue sticks use hall-effect sensors for unmatched precision, reducing the risk of drift over time. Plus, the adjustable triggers and radial dials around the analogue sticks allow on-the-fly adjustments without pausing your game. And for those who prefer a mouse and keyboard setup, twin trackpads offer an alternative way to play.
Connectivity is also top-notch, with Wi-Fi 6E and Bluetooth options and a front-facing camera and microphone for streaming or chatting with friends. Security is also handled with a fingerprint reader integrated into the power button.
Zotac Zone also comes with a free one-month trial of Xbox Game Pass, so you can start playing right out of the box. If you’re interested in grabbing one, head to Zotac’s website to see if it’s available in your region.
It will be interesting to see how this console competes with other Windows 11-based handhelds, such as Legion Go or Rog Ally.
The CACHE_INITIALIZATION_FAILED BSOD, with an error code 0x00000066, causes the OS to crash during the boot stage due to issues with the cache memory initialization. And since the blue screen error is rarely encountered, you won’t find much about it!
Based on my research, the Cache Initialization Failed error 0x66 can be caused by corrupt system files, low available storage, outdated or buggy drivers, or misconfigured boot settings. Before you proceed to the troubleshooting, disconnect all non-critical peripherals and install any pending Windows updates.
How do I fix the CACHE_INITIALIZATION_FAILED BSOD?
1. Update all the drivers
Press Windows + X to open the Power User menu, and select Device Manager from the list.
Expand the different entries here, right-click on the listed devices individually, and select Update driver. I started with the graphics driver.
Click on Search automatically for drivers and wait for Windows to install the best locally available driver version.
Similarly, update all the drivers and then reboot the PC.
When faced with the CACHE_INITIALIZATION_FAILED blue screen error in Windows, your primary approach should be to update the drivers. If a better version is not found locally, head to the manufacturer’s website, locate the latest releases, and then manually install the latest driver.
2. Clear storage space in the system drive
Press Windows + S to open Search, type Disk Cleanup in the text field, and click on the relevant result.
Select the system drive (drive where Windows is installed) from the list, and click OK. For most of you, it’s the C: drive.
Now, select all the non-critical file categories from the list, including Recycle Bin, and again click OK.
Finally, click Delete Files in the confirmation prompt.
The built-in utility, Disk Cleanup, allows you to quickly delete non-critical files from the PC, clearing up significant storage. If this is a frequent problem for you, it’s best to set up Storage Sense to automatically delete such files on a periodic basis.
3. Repair the corrupt system files
Press Windows + R to open Run, type cmd, and hit Ctrl + Shift + Enter.
Click Yes in the UAC prompt.
Paste the following DISM commands individually and hit Enter after each: DISM /Online /Cleanup-Image /CheckHealthDISM /Online /Cleanup-Image /ScanHealthDISM /Online /Cleanup-Image /RestoreHealth
Now, execute this command to run the SFC scan: sfc /scannow
Finally, restart the computer for the changes to fully come into effect.
Since CACHE_INITIALIZATION_FAILED can also be caused by corrupt system files, repairing them using the DISM (Deployment Image Servicing and Management) and SFC (System File Checker) scans could get things up and running. These will replace all corrupt or broken protected system files with their cached copy stored on the PC!
4. Turn off fast startup
Press Windows + S to open Search, type Control Panel, and click on the relevant result.
Click on System and Security.
Now, click on Change what the power buttons do under Power Options.
Click on Change settings that are currently unavailable.
Untick the checkbox for Turn on fast startup, and click on Save changes at the bottom.
Reboot the PC and check for improvements.
5. Perform a system restore
Press Windows + R to open Run, type rstrui.exe in the text field, and hit Enter.
Select the Choose a different restore point option and click Next.
Pick the oldest restore point from the list and click on Next.
Verify the details, and click on Finish to start the restore. It will take between 15-45 minutes.
If it’s a recent software-based change triggering the CACHE_INITIALIZATION_FAILED BSOD, performing a system restore should get things up and running. And if no restore points are available, you can always reinstall Windows.
But before you do that, check the BSOD error logs, identify the problematic file, driver, or module, and take the necessary measures. For regular users, the process is bound to prove tricky, but it is always worth a shot!
In case the blue screen error reappears, it’s likely a hardware malfunction or connection issues to blame at this point. So, I recommend you visit a local repair shop and get the PC inspected for any hardware-related problems.
For any queries or to share which fix worked for you, drop a comment below.
Epson has some of the best printers int he market so here’s a quick tutorial to get the right drivers for your Eco Tank et-4850 model.
How can I install the Epson et-4850 driver?
1. Use a driver installer software
For anyone looking for the easy way out to download drivers for your Epson et-4850, a driver updater software should be the first to pop up in your mind.
All you have to do is download and install the program and leave all the heavy lifting to the tool. They work in the background and when they detect a new printer, it will start scanning your PC for missing drivers and then match it with the correct ones from its extensive database.
2. Download and Install from the manufacturer’s website
Select your OS from the Operating System list. In most cases, it detects your Windows version but it can be incorrect so make sure you manually select for your version of Windows.
Now, download the driver.
Open the installer file and install it on your computer.
Restart your PC.
3. Using your printer’s driver disc
Connect your printer to your PC and turn it on.
Insert the CD you received with your printer into your PC. (Not all models come with this CD).
Locate the Autorun.exe file and follow the on-screen instructions. It will launch the Epson Printer Utility setup just like it does if you download the drivers from the official website.
Once the utility is installed, your printer should automatically be detected and drivers installed.
4. Use Device Manager
Open the Start Menu, type Device Manager, and hit Enter.
Expand Print queues.
Right-click on the one you need, and select Properties.
Select the Driver tab and click on Update Driver.
Choose to Browse my computer for drivers.
Navigate to Let me pick from a list of available drivers on my computer.
Click onHave Disk…, and locate your driver file.
Select Next and wait until the installation is completed.
Find the Epson device you want to update.
If you don’t have the driver in your files, right-click on the device and choose Update driver.
Want to learn how to unlock an Excel sheet without a password in case you forget it?
Microsoft Excel workbooks and worksheets come with individual protection features. They prevent unauthorized users from editing or making structural changes to the content. Also, if you’ve used the workbook encryption functionality, you might not even open it without a password.
So, if you’ve misplaced the password or the file got corrupted and no longer accepts the right passphrase, you can take a few steps to recover your data.
I’ve tested the following password-unlocking methods and outlined the exact steps you need to follow to access your data quickly.
NOTE
Disclaimer: These techniques are only for educational purposes. Please practice them on your own workbooks where you’ve forgotten the password. Don’t attempt to use these methods on someone else’s Excel files without their permission.
How To Unlock Excel Sheet Without Password
Before moving ahead with the instructions, you should know about some of the limitations:
Using a third-party password-finding app comes with the risk of making confidential data public. Don’t use any such programs if your datasets require absolute secrecy.
It’s highly likely you won’t be able to unlock the Excel workbook without a password if the encryption has been implemented using the Tools menu.
Editing the XML files poses a higher risk of corrupting the entire workbook if you make any changes outside the steps mentioned here.
If you’re okay with the above risks and shortcomings, follow along:
With an Excel Password Recovery Tool
This is the easiest and most intuitive method to unlock an Excel sheet without a password. If you’re okay with uploading your workbook to a third-party server, follow these steps:
Interact with the reCAPTCHA challenge to enable the file uploader.
Drag and drop the Excel file into the appropriate field.
If the uploaded workbook only contains passwords for the Protect Sheet and Protect Workbook commands, the web app will quickly unlock the file.
You should see the following screen next: Success! The document is unlocked.
Click on the Download Unlocked File button to get the unprotected file.
You can now freely edit the worksheet contents or change the workbook structures.
I also tested the app with an Excel workbook protected with file access encryption. You usually add this lock from the Save As dialog box, by clicking the Tools option at the bottom, near the Save button.
This protection prevents you from opening the file as well as making the workbook read-only.
So, when you upload this type of workbook, LostMyPass uses the Weak password recovery algorithm. It runs through all possible password combinations.
The password I used for the test file was 12345. The program unlocked that in less than a minute.
Moreover, LostMyPass appears to be an HTTPS site. It means the tool encrypts data at rest or in transit.
Using Google Drive
When you need to unlock a confidential worksheet with Protect Sheet and Protect Workbook locks, you can use Google Drive. It’s more secure than random third-partyapps. Let’s look at the steps:
Go to Google Drive.
Drag and drop the source workbook on the home screen.
The 1 upload complete message will pop up in the bottom right corner.
You can now edit the sheets as well as workbook structures.
Now, click the File menu in the top left corner and hover the mouse cursor over the Download menu.
Select Microsoft Excel from the overflow menu.
Your web browser will download a copy of the Google Sheets file in the XLSX format. You can now edit the Excel workbook or worksheet the way you like.
This method won’t work if the source Excel workbook was saved as access-protected.
Using XML Editing
If you don’t want to use any third-party programs to unlock an Excel sheet without a password, you can try this approach. This is completely offline and performed on the local PC without leaving any online traces.
Remove Protection from a Worksheet
Create a New folder anywhere on your PC.
Copy and paste the source Excel workbook into this folder.
Now, select this file inside the New folder and press Alt + Enter.
The File Properties dialog box will open.
Click on the file extension name in the General tab and change it to ZIP.
Select OK and click Yes on the warning pop-up.
Extract the file using WinRAR, 7-Zip, or Windows ZIP file uncompressing tool.
A few new folders and files will appear.
Delete the source ZIP file.
Go to the xl directory.
Now, access the worksheets folder.
Here, you’ll see the XML files for all the worksheets of the source file.
Select an XML file here, like sheet1.xml, right-click, and choose Open with Notepad.
Now, search for the sheetProtection code in the Notepad file that opens.
The sheetProtection code along with its helper components will be closed within these brackets <>.
So, select the entire code line as shown below and hit Delete.
Now, close the Notepad file and go back to the New folder.
Select all the files and folders in that directory, right-click, hover over Send to, and select Compressed (zipped) folder on the overflow menu.
You must create a ZIP archive. If you’re using WinRAR, don’t create a RAR archive. It won’t work.
Now, change the file extension to XLSX.
Double-click the file to open the unlocked worksheet.
Remove Protection from a Workbook
If you’re unable to rename a worksheet or add more to an Excel file, the Protect Workbook feature is active. Here’s how to remove that so you can change the workbook structure:
Follow all the steps mentioned in the above method until you reach the xl directory.
There, select the workbook.xml file and open it in Notepad.
Now, follow all the steps from 18 to 22 as outlined above.
Now, you’ll be able to rename, add, and remove sheets.
With a VBA Macro
By using this approach, you can unlock an Excel sheet without a password using a script. You’ll only need to run a VBA macro which will look up the password and disable it.
Open the source workbook and navigate to the sheet that’s locked.
Now, press Alt + F11 to bring up the Excel VBA Editor interface.
Select the appropriate workbook in the Project column on the left-side navigation panel.
Click on the Insert button in the VBA Editor toolbar and choose Module.
In the blank module, copy and paste the following VBA script:
Sub unlocksheet()
    Dim digit1 As Integer, digit2 As Integer, digit3 As Integer, digit4 As Integer
    Dim digit5 As Integer, digit6 As Integer, digit7 As Integer, digit8 As Integer
    Dim digit9 As Integer, digit10 As Integer, digit11 As Integer, digit12 As Integer

    If ActiveSheet.ProtectContents Then
        On Error Resume Next
        For digit1 = 65 To 66
            For digit2 = 65 To 66
                For digit3 = 65 To 66
                    For digit4 = 65 To 66
                        For digit5 = 65 To 66
                            For digit6 = 65 To 66
                                For digit7 = 65 To 66
                                    For digit8 = 65 To 66
                                        For digit9 = 65 To 66
                                            For digit10 = 65 To 66
                                                For digit11 = 65 To 66
                                                    For digit12 = 32 To 126
                                                        ActiveSheet.Unprotect Chr(digit1) & Chr(digit2) & Chr(digit3) & Chr(digit4) & Chr(digit5) & Chr(digit6) & Chr(digit7) & Chr(digit8) & Chr(digit9) & Chr(digit10) & Chr(digit11) & Chr(digit12)
                                                    Next digit12
                                                Next digit11
                                            Next digit10
                                        Next digit9
                                    Next digit8
                                Next digit7
                            Next digit6
                        Next digit5
                    Next digit4
                Next digit3
            Next digit2
        Next digit1
        MsgBox "One usable password is " & Chr(digit1) & Chr(digit2) & Chr(digit3) & Chr(digit4) & Chr(digit5) & Chr(digit6) & Chr(digit7) & Chr(digit8) & Chr(digit9) & Chr(digit10) & Chr(digit11) & Chr(digit12)
    End If
End Sub
Click the Save button.
Now, press Alt + F8 to launch the Macro dialog.
Select the unlocksheet macro and hit Run.
It might take up to 30 minutes or more to decode the passphrase.
The Excel app won’t respond when the macro is running.
You can check the Windows Task Manager process for CPU and Power usage.
Once the password has been discovered, a dialog box will show up.
Click OK and then you can edit the worksheet.
Summary
These are some of the methods you can try to unlock an Excel sheet without a password. If you’d like to remove passwords from your Excel file, we also have a guide for that.
Don’t forget to leave a comment below to share which approach you liked the most or if you know a better technique.
Microsoft decided to surprise Windows users by stopping a workaround for installing Windows 11 on PCs that technically didn’t meet the system requirements. As you might know, the Redmond-based tech giant had set the bar high for what hardware could officially support their latest operating system.
It left many users with perfectly good, albeit slightly older, machines in the lurch. However, even so, until last week, there was a trick that allowed users to install Windows 11 on such devices. All it involved was adding a “/product server” command when running the Windows 11 setup, and the hardware check would magically be skipped.
This workaround wasn’t just for the tech-savvy; it was a lifeline for those clinging to older hardware, from the venerable Core 2 Duos to Ryzen 1st Gen CPUs. But as with all good things, this bypass method’s days were numbered.
According to tech enthusiasts who were probably trying to use the workaround to install Windows 11, Microsoft caught wind of this bypass and stopped it in their latest Canary build. The loophole was patched up, leaving users to look for alternative methods to install Windows 11 on unsupported hardware.
The recently released Windows 11 Insider Build 27686 (Dilithium) has patched the "setup.exe /product server" workaround for bypassing the system requirements check. ? pic.twitter.com/G9Q1v3O1uU
But don’t lose hope just yet. There are still a few tricks up the sleeve, including Microsoft’s Windows 11 LTSC 2024, which offers a softer approach to system requirements.
While some may argue about the fairness of Microsoft’s strict hardware policies, the company aims to push users towards more secure and reliable systems. But the quest for a workaround continues for those not ready to part with their trusty machines.
Who knows what clever bypass the community will come up with next to access the Windows 11 setup?
If you keep getting the DATA_COHERENCY_EXCEPTION BSOD (bug check) with a value of 0x00000055, it’s usually the corrupt system files, issues with the disk, conflicting third-party apps, or malware infection to blame.
Since the Data Coherency Exception error 0x55 is rarely encountered, there isn’t any valuable troubleshooting information available online. But you can fix things by updating Windows, disconnecting non-critical peripherals and devices, and disabling startup apps in Windows.
How do I fix the DATA_COHERENCY_EXCEPTION BSOD?
1. Repair the corrupt system files
Press Windows + S to open Search, type Command Prompt in the text field, and click on Run as administrator.
Click Yes in the UAC prompt.
Paste the following DISM commands individually and hit Enter after each: DISM /Online /Cleanup-Image /CheckHealthDISM /Online /Cleanup-Image /ScanHealthDISM /Online /Cleanup-Image /RestoreHealth
Now, run this command for the SFC scan: sfc /scannow
Finally, reboot the PC and check for improvements.
Press Windows + R to open Run, type cmd, and hit Ctrl + Shift + Enter.
Click Yes in the UAC prompt.
Paste the following command and hit Enter:chkdsk /r
If asked to schedule the scan for the subsequent reboot, press Y and then hit Enter.
Finally, reboot the PC, wait for the Check Disk utility to run, and check for improvements.
3. Uninstall conflicting third-party apps
Press Windows + R to open Run, type appwiz.cpl in the text field, and hit Enter.
Select any app you believe might be conflicting with the OS or data storage, and click on Uninstall.
Follow the on-screen instructions to complete the process, and then restart the PC.
If the DATA_COHERENCY_EXCEPTION bug check reappears, uninstall other problematic apps.
If the bug check continues even after uninstalling the app(s) likely causing the BSOD, I recommend you use a top-rated software uninstaller tool to also delete the leftover files and Registry entries. Because in many cases, these kept triggering issues even after the related app was removed.
4. Scan the PC for malware
Press Windows + S to open Search, type Windows Security, and click on the relevant result.
Click on Virus & threat protection.
Now, click on Scan options.
Next, select the Full scan entry and click on Scan now.
Wait for the scan to complete, and if any active threats are eliminated, check for improvements.
5. Perform a system restore
Press Windows + S to open Search, type Create a restore point, and click on the relevant result.
Click on System Restore.
Now, select the Choose a different restore point option, and click Next.
Pick the oldest restore point from the list, and click on Next.
Verify the details and click on Finish to start the system restore.
When nothing else works, restoring the PC to a previously created restore point should fix the DATA_COHERENCY_EXCEPTION blue screen error in Windows. And if you don’t see any restore point, reinstall Windows. Although, unlike System Restore, a reinstall may lead to data loss!
For advanced Windows users, I suggest looking at the BSOD crash logs, identifying the problematic file or module, and taking the necessary measures to fix DATA_COHERENCY_EXCEPTION.
For any queries or to share which fix worked for you, drop a comment below. You can also learn how to deal with similar BSOD errors, SETUP_FAILURE and ERROR_SEM_USER_LIMIT.
Microsoft has announced a significant shift in its security protocol for Azure users. Starting this October, the tech giant will begin enforcing mandatory multi-factor authentication (MFA) for accessing the Azure portal, Microsoft Entra admin centre, and Intune admin centre.
This decision isn’t just a whim; it’s a calculated move to combat the ever-increasing threat of account compromise attacks. Microsoft’s data shows that MFA can block over 99.2% of these attacks.
Ensuring Azure accounts are protected with securely managed, phishing-resistant multifactor authentication is a key action we are taking. As recent research by Microsoft shows that multifactor authentication (MFA) can block more than 99.2% of account compromise attacks, making it one of the most effective security measures available, today’s announcement brings us all one step closer toward a more secure future.
If you’re wondering whether this will affect you immediately, the answer is that it might not. Microsoft plans to roll this out gradually, so if you don’t get prompted for MFA immediately, don’t sweat it.
However, it’s only a matter of time before this becomes the new norm. It’s also worth mentioning that Phase 2 of this rollout, expected early next year, will extend MFA requirements to Azure CLI, Azure PowerShell, the Azure mobile app, and Infrastructure as Code (IaC) tools.
Microsoft is giving a heads-up with a 60-day advance notice to Entra global admins and through Azure Service Health Notifications. The company is also open to extending the timeframe for organizations that might find this transition difficult due to complex environments or technical hurdles.
Several MFA options will be available. They range from the Microsoft Authenticator app, which allows sign-ins via push notifications, biometrics, or one-time passcodes, to more advanced methods like FIDO2 security keys and certificate-based authentication. Passkeys for phishing-resistant authentication and, as a last resort, SMS or voice approvals will also be available to users.
Microsoft is serious about beefing up security and is not taking any half-measures. The Redmond-based tech giant recommends taking time to start planning for compliance to avoid disruptions in business operations.
You can read more about the new Microsoft Azure MFA authentication method here.
DeArrow is an extension that is a must-have for any content creator on YouTube who aims to rack up some views on their videos. Firefox’s library is rich with thousands of extensions and add-ons and it can be hard to comb through each to unearth what you may need.
What does DeArrow do?
If you want your videos to get organic views without the need for clickbait titles and over-the-top thumbnails, then DeArrow can help you with this. YouTube is full of creators and your video can get lost if it lacks eye-catching titles or thumbnails.
DeArrow steps in to save the day by helping you draft a title and thumbnail. The thumbnail is a screen capture of random moment in the video so you can rest assured that it will not be clickbait.
DeArrow’s developers have also made sure the the titles are rewritten to be user-specified. This avoids robotic content generated to capture the attention of the viewers without reflecting the content of the video.
Search for DeArrow, select the one you want from the search results, and then click Add to Firefox.
The extension will be downloaded and installed. Click Add to allow the extension to access browser tabs, and browser activity during navigation.
You might also get a prompt to allow this extension to work in a private session. To enable it, place a checkmark and click Add.
Once it’s installed, you’ll be directed to the payment page. It’s $1 for an unlimited-use license key but if you’re not ready to make that commitment yet, you can click on the free trial for 6 hours and see if it’s worth your money.
Next, sign in to your YouTube account, create a video and the DeArrow extension will suggest a new title and thumbnail.
Unlimited license key – Although a paid for extension, it’s a one-off subscription that doesn’t require a renewal fee which makes it a worthy and cost-effective investment.
Open-source – The DeArrow extension for Firefox is an open-source which means the source code is available to the general public for any modifications.
Enhanced functionality – Because DeArrow comes up with titles and thumbnails, this saves you time allowing you to be more productive.
Community-based – DeArrow being community-based means most of its content is crowdsourced. That’s why you can suggest a title for your video and the most upvoted will win.
Availability – The extension is not only available for Firefox but also other browsers especially since each creator swears by a YouTube-friendly browser with great upload speeds.
Cons
Paid subscription – You only have six hours to try out the extension and see if it’s a match for you otherwise you have to part with $1 to purchase the unlimited license key.
Firefox also has a tendency to get stuck especially when the extensions installed has not been greenlit and made available on its add-ons store so keep an eye for this too.
Hopefully, this breakdown helps you make a decision on whether the DeArrow extension on your Firefox browser is worth it.
From us, we’d give it a try. It’s affordable, open-source and enhances your video creation especially if you’re a newbie trying to navigate the YouTube streets and want your video to gain some traction.
Have you taken DeArrow on a spin? What are your thoughts and would you recommend it to other users? Let us know in the comment section below.
Magic School AI offers a suite of AI tools designed to revolutionize the way educators create lesson plans, provide feedback, and communicate with parents. Below, we’ll walk you through some of the most impactful features of Magic School AI.
From the dashboard, locate and select the lesson plan generator tool.
Enter the grade level and subject for which you need a lesson plan.
Type in any relevant background information and special instructions. The more specific you are, the better the output.
Click the Generate button to create the lesson plan.
Examine the AI-generated lesson plan for accuracy and relevance. Customize any parts that need tweaking.
Once satisfied, export the lesson plan to your LMS or copy and paste it into your preferred format.
This solution helps you save a significant amount of time by automatically generating high-quality lesson plans tailored to your specific needs.
2. Generate student work feedback
From the Magic School AI dashboard, choose the student work feedback tool.
Enter the student’s name, grade level, and the type of assignment they completed.
If needed, upload the student’s assignment file or input key details about the assignment.
Click the button to generate feedback.
Check the feedback for accuracy and contextual relevance, making any adjustments necessary.
Copy the feedback and paste it into your email or LMS to share with the student.
By using this tool, you streamline the process of providing detailed, constructive feedback, freeing up more time for other important teaching tasks.
3. Write IEPs with Magic School AI
From the dashboard, select the IEP (Individualized Education Program) tool.
Enter the student’s name, grade level, and specific needs or accommodations required.
Add any relevant information or specific instructions that will help the AI tailor the IEP appropriately.
Click the button to generate the IEP.
Carefully review the IEP to ensure it meets all the necessary requirements and is accurate.
Export the IEP document to your preferred format or your school’s management system.
Creating IEPs can be time-consuming and complex. Magic School AI simplifies this by providing a structured, detailed IEP based on your input.
4. Design assignments and assessments
From the Magic School AI dashboard, choose the assignment or assessment design tool.
Specify the grade level, subject, and type of assignment or assessment you need.
Enter any specific guidelines or objectives for the assignment.
Click the button to generate the assignment or assessment.
Carefully review the generated content, making any necessary adjustments.
Export or copy the assignment to your LMS or distribute it directly to students.
Using this tool, you can quickly create customized, high-quality assignments and assessments, tailored to meet your students’ needs.
5. Translate documents
From the dashboard, find and select the Text Translator tool.
Upload the document you need to translate or paste your text.
Select the target language for the translation.
Click the button to generate the translated document.
Check the translation for accuracy, making any necessary adjustments.
Export the translated document to your desired format or platform.
This feature is particularly useful for communicating with non-English speaking students and parents, ensuring everyone stays informed and engaged.
6. Create newsletters
From the Magic School AI dashboard, select the newsletter creation tool.
Enter the key points, events, and announcements you want to include.
Click the button to generate the newsletter.
Review the content for accuracy and relevance, customizing it as needed.
Export or copy the newsletter to your email system and distribute it to parents and students.
This tool helps you keep your school community informed efficiently, saving time on writing and formatting newsletters.
Magic School AI has a lot of other AI tools. For instance, you can create PD plans, generate images, generate email messages, quizzes, group assignments and a lot more. You should definitely create a free account and try it out to discover the multitude of possible choices.
Magic School AI is a game-changer for educators, making various aspects of teaching more efficient and effective. By integrating these tools into your daily routine, you can focus more on what truly matters—educating and inspiring your students. Always keep your software updated and regularly explore new features to maximize its potential.
In the meantime, you may also read our article on ChatGPT Professional, one of the most reputable AI generators out there.
Your computer was unable to start is an error that indicates your system is struggling to boot up properly. This issue can arise for various reasons, such as corrupted system files,faulty hardware, or a recent software installation. Fortunately, there are several methods you can try to resolve this problem and get your computer back to normal.
I’ll take you through the steps to fix this error and restore your system’s functionality.
Let’s begin!
5 Ways To Fix Your Computer Was Unable To Start Error
Here are the five solutions:
Boot into Safe Mode
Safe Mode allows you to start your computer with minimal drivers and services, which can help identify and resolve issues. Here’s how to boot into it:
Restart your PC multiple times to activate Automatic Repair Mode.
Select Troubleshoot from the options available.
Click Advanced options.
Tap Startup Settings.
Tap Restart.
Press F5 to boot Windows into Safe Mode with Networking.
Windows will now start in Safe Mode, allowing you to perform more in-depth troubleshooting.
Repair Corrupted System Files
Corrupted system files can prevent your computer from starting correctly. Using the System File Checker (SFC) tool, you can scan and repair them. Follow these steps:
Wait for the scan to complete, and it’ll automatically repair any corrupted files.
Restore Your System
If your computer worked fine recently, restoring your system to a previous state might resolve the issue. Here’s how to do it:
Press the Windows icon + I to open Settings, then click System.
Tap About, then click System Protection.
Tap System Restore.
Click Next.
Pick a restore point from the list. If available, then click Next.
Click Finish.
Your system will now use the previous working state.
Run Startup Repair
Startup Repair is a built-in Windows tool that can fix issues preventing your computer from booting. Here’s how to use it:
Access Windows Recovery Environment (WinRE) by holding the Shift key while clicking Restart from the Start menu. Alternatively, you can turn the computer on and off three times to trigger it.
Select Troubleshoot.
Tap Advanced options.
Click Startup Repair.
Windows will attempt to fix the startup issues automatically.
Reinstall Windows
As a last resort, reinstalling Windows can fix the error by replacing all system files. Be sure to back up your data before proceeding. Here’s how:
Press F12, F2, or ESC during startup to enter the Boot Menu.
Choose your USB drive from the boot options and press Enter.
Follow the on-screen instructions to install it.
The Your computer was unable to start error is easy to solve with the right steps. Remember to back up your important data regularly to avoid potential loss in situations like this.
The new update focuses on making Skype smoother and more reliable on mobile devices. This latest version, 8.127, doesn’t boast flashy new features but zeroes in on stability and performance enhancements, bug fixes, and other minor tweaks.
Performance and reliability have been significantly boosted, thanks to improvements in the database system designed to lessen the load on mobile devices and CPUs. Users can expect a smoother Skype experience without annoying lags or crashes.
Good news for iPad users: a resolved permission issue ensures audio/video permissions messages reappear correctly, making call setups seamless. Mac users will appreciate the fixed button alignment in the Calls tab, which enhances usability.
The update has made navigating contacts in compact mode on mobile devices more efficient by eliminating large spaces between contacts. iOS users will notice that the call option visibility from the Copilot chat has been removed, aligning with the expected behaviour. Lastly, the update has corrected market selection for channel mute/unmute actions, preventing the errors that previously occurred.
While Skype might not be the first choice for messaging or calls these days, version 8.127 makes it far from obsolete. Regular updates from the Skype Insider program show Microsoft’s commitment to not giving up on this platform.
After a bug affected Outlook, Word, and OneNote, Microsoft revealed that the issue also impacted Classic Outlook. Certain Office apps, including OneNote, Word, and Outlook, crashed last week due to a bug in Office version 2407. However, the bug caused more damage to Classic Outlook, which has been reported to crash upon launch or even when trying to start it in Safe mode.
If you’re tech-savvy, you might head straight to the Windows Event Viewer to investigate the crash logs. You’d be looking for Event 1000 or Event 1001, with a keen eye on details like the faulting application name (OUTLOOK.EXE) and the faulting module name (ucrtbase.dll).
Microsoft says corrupted server-based rules for Microsoft 365 mail accounts, which Outlook can’t seem to process correctly, might cause the issue.
However, the Redmond-based tech giant has offered a workaround that might save your day. The first step is to run the Clean rules command line to clean the client and server rules slate.
If that doesn’t work, you can create a new Outlook Profile. If you’re still stuck, you can visit Outlook Web Access to manually remove any pesky rules.
To work around the issue, do the following:
Run Clean rules command line to remove the client and server rules.
Close Outlook.
Right-click the Windows Start button and select Run.
In the Run box paste: Outlook.exe /cleanrules.
Select OK.
Create a new Outlook Profile, if necessary. For more information, please go to Create an Outlook profile.
If you still have the issue, please go to Outlook Web Access and manually remove any rules.
You can also see the original forum post leading to the issue with Classic Outlook.
The latest Windows 11 Canary build was one of the most significant in a while. It included many features, such as the automatic HDR settings and Windows Sandbox, as well as the change in the FAT32 file system. However, some insiders were also surprised by another confusing name.
— ???????? ?➡️ Dungeons of Hinterberg ?? (@Pschirki) August 16, 2024
Brandon LeBlanc, a Senior Program Manager at the Windows Insider Program team, chimed in to clarify. He mentioned that this “Dev” label doesn’t refer to the Insider Channel but indicates that the build is an in-development pre-release of Windows 11.
The "Dev" here is not the channel but to indicate it's an in-development pre-release build of Windows 11.
This makes sense. After all, Canary builds are meant to be on the cutting edge, not tied to any specific Windows release. There’s already a Dev Channel, so you can see why some people might be slightly puzzled about the latest Windows 11 Canary build.
Remember when Microsoft had just two channels (or “rings”)? Fast Ring and Slow Ring were straightforward. Now, we’ve got four channels, and features often pop up in the “slower” or more stable channels before Canary and Dev.
Plus, with features rolling out gradually, it’s a bit of a lottery whether you’ll see new stuff immediately. While this approach has a clear logic, it doesn’t simplify things for Insiders.
If you ever wonder which Insider channel you’re on, go to Settings > Windows Update > Windows Insider. You should see your channel there, as pictured above.
The SECURITY1_INITIALIZATION_FAILED blue screen error (bug check) with a value of 0x00000063 is rarely encountered on Windows PCs. But when it does, there’s very little information available about troubleshooting the BSOD.
The Security1 Initialization Failed error 0x63 appears due to corrupt system files, outdated or buggy drivers, third-party apps triggering conflicts, malware infection, issues with the Windows installation, and hardware malfunction.
To fix things, start by installing all available Windows updates, disconnecting any non-critical devices, and fixing overheating issues. If none work, the methods listed next should!
How do I fix the SECURITY1_INITIALIZATION_FAILED blue screen error?
1. Run the DISM and SFC scans
Press Windows + S to open Search, type Command Prompt in the text field, and click on Run as administrator.
Click Yes in the UAC prompt.
Paste the following commands individually and hit Enter after each: DISM /Online /Cleanup-Image /CheckHealthDISM /Online /Cleanup-Image /ScanHealthDISM /Online /Cleanup-Image /RestoreHealth
Now, execute the following command to run the SFC scan: sfc /scannow
Press Windows + R to open Run, type appwiz.cpl in the text field, and hit Enter.
Select any recently added app from the list, and click on Uninstall.
Follow the on-screen instructions to complete the process.
Once done, reboot and check for improvements.
If the error 0x00000063 persists, uninstall other apps you believe might be conflicting with the OS.
Remember, it’s not only the recently installed apps that cause the SECURITY1_INITIALIZATION_FAILED BSOD but also apps that were recently updated. So, look for those as well.
Besides, I recommend you use an effective software uninstaller tool to get rid of any leftover files and Registry entries that, if left undelete, might trigger the error.
4. Scan the PC for malware
Press Windows + S to open Search, type Windows Security in the text field, and click on the relevant result.
Click on Virus & threat protection.
Click on Scan options.
Select the Full scan entry and click on Scan now.
Wait for Windows Security to detect and eliminate any threats on the PC.
5. Check RAM and disk for issues
5.1. Repair the disk
Press Windows + R to open Run, type cmd, and hit Ctrl + Shift + Enter.
Click Yes in the UAC prompt.
Paste the following command and hit Enter: chkdsk /r
If asked to schedule the scan for the next reboot, press Y and hit Enter.
Finally, reboot the computer, and let Check Disk run and repair disk issues.
5.2 Inspect the RAM
Press Windows + R to open Run, type mdsched.exe in the text field, and hit Enter.
Click on Restart now and check for problems and then wait while the built-in utility looks for RAM issues.
If Windows Memory Diagnostic fails at detecting problems, I recommend you use Memtest86+, an open-source tool that runs a series of advanced tests on individual RAM modules and identifies even the most trivial issues.
And if the tool detects any issues that might be responsible for SECURITY1_INITIALIZATION_FAILED, get the malfunctioning memory module checked and preferably replaced!
6. Perform a system restore
Press Windows + S to open Search, type Create a restore point, and click on the relevant result.
Click the System Restore button.
Select the Choose a different restore point option, and click on Next.
Pick the oldest restore point (bottom of the list), and click on Next.
Finally, verify the details, click on Finish, and wait for the restore to complete.
If this, too, fails, it’s most likely a hardware malfunction to blame for the BSOD. In this case, it’s best to contact official support or visit a nearby repair shop because both the connections and internal components (assuming you already tried disconnecting the external peripherals) need to be inspected.
Microsoft’s latest build to the Canary Channel is full of exciting and valuable capabilities; some standout features have caught the attention of Windows 11 enthusiasts and tech lovers alike. Firstly, Microsoft is introducing a new Sandbox Client preview for those on the Windows 11 Canary Channel, offering a sandboxed environment for testing and development without risking the central system.
However, perhaps even more intriguing is the announcement that Microsoft plans to significantly expand the FAT32 file system limit from 32GB to a whopping 2TB in Windows 11. Spotted by tech enthusiast @xenopanther, this change is a big deal because, let’s face it, in an era where digital content is king, having the flexibility to manage larger partitions without jumping through hoops is a welcome improvement.
You might wonder, “Why does this matter to me?”. Well, imagine you’re trying to format a large external hard drive or USB stick to store your massive collection of photos, videos, or backup files. Until now, you have been stuck with a 32GB limit unless you opt for other file systems like NTFS or exFAT, which, while helpful, don’t have the same compatibility with older devices.
With this update, Microsoft is essentially removing this barrier, allowing larger FAT32 partitions in Windows 11 to enable a more comprehensive range of devices to read more universally.
But here’s the kicker: as of this build, the change is only accessible via the command line. Yes, you heard that right. For the non-tech-savvy among us, you’d need to dive into some code to take advantage of this new limit. However, Microsoft hints at the possibility of bringing this feature to the GUI-based Format dialogue box in the future, making it much easier for everyone to use.
Another noteworthy update in the same build is the support for ReFS (Resilient File System) version 3.15. For those not in the know, ReFS is designed to maximize data availability, efficiently manage large volumes of data, and resist corruption. It’s a file system that’s been slowly integrating into Windows, and this update signifies another step forward in its development.
Build 27686 adds support for ReFS version 3.15. However, Windows still formats partitions with v3.14 (added in 26047). pic.twitter.com/uclg9WMq7f
These updates are part of Microsoft’s continuous effort to enhance Windows 11, making it more robust and user-friendly. While introducing a new Sandbox Client preview is exciting for developers and tech enthusiasts, the increase in the FAT32 limit could benefit a much wider audience by simplifying data management and storage solutions.
Have you ever toggled HDR on and off on your Windows 11 device to enjoy some HDR content without making the rest of your display look washed out? In a recent update, specifically in build 27686 released in the Canary Channel, a new feature has been spotted that could make this annoyance a thing of the past.
This new option, nestled within the HDR settings, allows for HDR video streaming even when HDR is toggled off. Users no longer have to go into the settings to switch HDR on and off whenever they want to play a game or watch a video in high dynamic range.
However, initially, Microsoft didn’t officially announce this feature in the release notes for build 27686. Instead, the tech enthusiast @phantomofearth spotted it and posted it on X (formerly known as Twitter), and then the Redmond-based tech giant updated the blog post. If you’re already on the latest Canary build and your setup supports HDR, you might want to check this out in the Settings > System > Display > HDR section.
Build 27686 updates HDR settings: a new option to "Allow HDR video streaming even when HDR is off" is present.
There are also some string changes, such as "HDR video streaming" being changed to "HDR video streaming, games, apps and more" under Display capabilities. pic.twitter.com/4icDR8OwPc
Running into the VAL Error 43 in Valorant can be incredibly frustrating, especially when you’re ready to dive into a game. This error typically points to connectivity issues or problems with the Riot Client. Although it seems weird, pressing the W, A, S, D keys while the game loads is a working way to avoid this issue so try it first. Also, go to the Riot Games service status page to check if their servers are live.
How do I fix Valorant error 43?
1. Restart the Valorant client and PC
Close the Valorant game by clicking the X button or using Alt + F4 to close any window.
After closing the game, restart your computer. Click on the Start menu, then click the power button, and select Restart.
Once your computer has restarted, re-open Valorant by clicking the shortcut or finding the game in your Start Menu.
Restarting both the game and your computer can resolve temporary connectivity issues or minor glitches affecting the game.
2. Delete the Riot client Settings file
Press Win + R to open the Run dialogue.
Type %AppData% and press Enter.
Go to Local > Riot Games > Riot Client > Data.
Locate the RiotClientPrivateSettings.yaml file, right-click on it, and choose Delete.
Restart Valorant as an administrator by right-clicking the Valorant shortcut and selecting Run as administrator.
Deleting the Riot client settings file can resolve issues related to corrupted or misconfigured client settings, causing the error.
3. Enable the Vanguard service
Press Win + R to open the Run dialogue.
Type msconfig and press Enter to open the System Configuration window.
Go to the Services tab.
Locate the vgc service, tick the box next to it to enable the service if it’s disabled, and click Apply then OK.
Ensuring Vanguard, the anti-cheat service, is running correctly is essential for Valorant to function without errors.
4. Flush the DNS cache
Press Win + R to open the Run dialogue.
Type cmd and press Enter to open the Command Prompt.
Type ipconfig /flushdns and press Enter.
Then type netsh winsock reset and press Enter.
Restart your computer.
Flushing your DNS cache clears outdated data, which can resolve connectivity issues by refreshing the network settings.
5. Update the network adapter driver
Press Win + R to open the Run dialogue.
Type devmgmt.msc and press Enter to open Device Manager.
Expand the Network adapters section.
Right-click on your network adapter and select Update driver.
Choose Search automatically for drivers and follow the prompts.
Updating your network adapter driver ensures that any bugs or compatibility issues with older drivers are resolved, which might be causing the error.
6. Reinstall the Riot client
Press Win + R to open the Run dialogue.
Type appwiz.cpl and press Enter to open the Programs and Features window.
Locate and select Riot Client‘ then click Uninstall.
Reinstalling the Riot Client can resolve issues related to corrupted installation files that could be causing the error.
By following these solutions, you should be able to fix the Valorant Error Code 43 and enjoy smooth gameplay. Each solution targets a specific potential cause, ensuring a comprehensive troubleshooting approach. For future prevention, regularly update your system and game, and keep an eye on Riot’s server status.
The REFMON_INITIALIZATION_FAILED BSoD comes with the value of 0x0000006C, and it’s pretty rare, but don’t worry, we’ve got you covered. This error often stems from various software or hardware issues. First, check if any of the PC components is overheating or properly connected.
How do I fix the REFMON_INITIALIZATION_FAILED bug check?
1. Update device drivers
Right-click on the Start button and select Device Manager.
Look for devices with a yellow triangle icon.
Right-click on the device and select Update driver. Follow the on-screen instructions to update the driver.
Outdated or corrupt drivers are common causes of BSoD errors. Updating them ensures compatibility and stability. For more information, we have a dedicated guide on how to update drivers on Windows 11.
2. Restore the system to a previous state
Type rstrui in the Run dialog (press Windows key + R).
Select a restore point from a date before the error appeared.
Complete the restore process.
If the error started after a recent change, restoring your system to a previous state can undo problematic changes.
3. Free up disk space
Type disk cleanup in the Start menu search bar and press Enter.
Select your main drive, usually C:.
Select all file categories you wish to delete, especially Temporary files.
Click OK and Delete Files to confirm.
Insufficient disk space can cause system instability. Freeing up space can help stabilize your system.
4. Check and repair hard drive issues
Type cmd in the Start menu search bar, right-click on Command Prompt, and select Run as administrator.
Type chkdsk C: /f /r and press Enter. Replace C: with the appropriate drive letter if needed.
Allow the utility to run on reboot.
Disk errors can lead to BSoD. Repairing bad sectors can fix underlying issues causing the error.
5. Test and replace RAM if needed
Type memory diagnostic in the Start menu search bar and select the tool.
Choose Restart now and check for problems.
The system will restart and check for memory issues.
Faulty RAM can cause system errors, including BSoD. If the scan identifies any problems with one of the RAM modules, test it on another system if possible. If needed, replace the module with a new one.
6. Reset BIOS to default settings
During boot, press the key to enter BIOS (usually F2, F10, DEL, or ESC).
Find the option labeled Load Optimized Defaults or similar and select it.
Press the key for saving changes (usually F10 and exit BIOS).
Incorrect BIOS settings can cause system instability. Resetting to defaults ensures stable settings.
Boot from the installation media and follow the on-screen instructions to reinstall.
If all else fails, a fresh OS install can resolve multiple underlying issues causing BSoD. We have a dedicated guide on reinstalling Windows 11 if you need more information.
By following these steps, you should be able to resolve the REFMON_INITIALIZATION_FAILED BSOD. To prevent future issues, keep your system updated and regularly clean your hardware.
Did you get a pop-up saying “Unable to execute file in the temporary directory. Error 5: Access is denied.”?
This issue is related to the Windows InstallShield tool and temporary folders on the Windows installation drive. It’s primarily the C: drive. Sometimes, the InstallShield wizard can’t unpack the content of the installation package, and you’ll get this error message.
It usually happens for the following reasons:
The active user account doesn’t have admin rights to install certain apps.
Hard drive or SSD malfunction prevents creating new directories or writing to existing folders.
Someone has modified folder security rights so your user account can’t write data.
InstallShield wizard can’t locate or use the default TEMP folder in the C: drive.
To help you fix the issue, I’ve reproduced this error on a Windows 10 PC. Here are the solutions that worked for me!
How To Fix Unable To Execute File in the Temporary Directory Error 5
Here are some techniques to try, starting with the simplest. Follow this order for the quickest and best results:
Log On as an Administrator
Click on the Start menu button and then on your user profile picture in the bottom right corner.
A context menu will show up. Select Sign out.
Wait for your computer to return to the login screen.
If you see more than one user account, click on the one that’s the Administrator account.
You might need to contact the device owner or IT support personnel if you don’t know which admin account to use.
Enter the required credentials in the User name and Password fields.
Hit Enter to log on as an administrator.
Now, try installing the app again.
Run Installer as Administrator
If you’re already logged in to the Windows PC as an administrator, try the following instead:
Locate the installer package, select it, and right-click.
Click on the Run as administrator from the context menu.
The InstallShield wizard of the software package will now gain privileged access to read and write storage drives and directories.
Set Full Control for the Temp Folder
Navigate to the following location to find the Temp folder used by the InstallShield wizard.
C:\Users\CtOS\AppData\Local
Replace CtOS with your user account name.
Locate the Temp folder and right-click on it.
Select Properties from the context menu.
The Temp Properties dialog box will show up.
Navigate to the Security tab.
Select your user account in the Group or user names section.
In the Permissions for section, look for given accesses below the Allow column.
If it looks like the image below, the selected user account doesn’t have enough permission to use this folder.
Click on the Edit button.
The Permissions for Temp dialog will open.
Again select your user account.
Checkmark the boxes for all the items below the Allow column.
Click Apply and OK to enforce the changes.
Again, click Apply and OK on the Temp Properties dialog box.
This should help you fix the “Unable To Execute File in the Temporary Directory Error 5” problem when installing software.
Clear the Temporary Files
Navigate to the following Temp folders in your Windows PC and delete all the content inside these directories.
Try to erase as many temporary files as you can from them:
C:\Windows\Temp
C:\Users\CtOS\AppData\Local\Temp
In the above Temp directory address, replace CtOS with your user account name.
You’ll need administrator access to delete the content of these Temp folders.
Create a New Default TEMP Folder
Go to the Windows installation drive and create a new folder named TEMP.
Press the Windows + R keys to open the Run dialog.
Type sysdm.cpl in the Open field and press Enter.
In the System Properties window, go to the Advanced tab.
Click on the Environment Variables option.
Under User variables for CtOS, click New.
In place of CtOS, you’ll see your user account name.
For the Variable name field, enter TEMP.
In the Variable value field, enter the full path to your new Temp folder as shown below:
C:\TEMP
Click OK.
Click OK again to close all windows.
Run Disk Cleanup
Type Disk Cleanup in the Start menu.
Click on the Disk Cleanup app below the Best match section.
You’ll see the Disk Cleanup: Drive Selection dialog box.
Ensure, the Windows installation drive is selected there. For example, (C:\).
You’ll now see the Disk Cleanup for WINDOWS 10 dialog box.
In place of WINDOWS 10, you might see Local Disk C: or any other name you’ve assigned to the Windows installation folder.
Click on the Clean up system files button.
Again, you’ll see the Disk Cleanup: Drive Selection pop-up.
Select the same drive again.
Windows will delete unnecessary system files.
When the Disk Cleanup for WINDOWS 10 dialog shows, click on the OK button.
You’ll now see the Disk Cleanup progress bar.
Once you’ve cleaned the C: drive, try to install the app again.
Turn User Account Control Off
Click on the Start menu button.
Type User Account Control.
Select the Change User Account Control settings below the Best match.
You’ll now see the User Account Control Settings dialog box.
Usually, it should be on the Always notify side.
Slide it down to the Never notify level.
Click OK.
You might need to approve the action by clicking Yes or Continue on a confirmation dialog.
Test if the issue has been fixed or not. Follow the steps mentioned above to revert the User Account Control level to Always notify.
Perform a Clean Boot
Press the Windows and R keys together to open the Run dialog box.
Type msconfig in the Open field and hit Enter.
In the System Configuration window, click on the Services tab.
Check the box next to Hide all Microsoft services.
Click Disable all.
Click on the Startup tab.
Click Open Task Manager.
In the Task Manager, go to the Startup tab.
For each startup item, right-click on it and select Disable.
Close the Task Manager.
In the System Configuration window, click Apply and then OK.
Restart your PC.
Test if the issue is fixed or not. Once you’re able to install the new app, follow these steps again to enable non-Microsoft services and startup services from Task Manager. Reboot your PC to enforce these changes.
Create a New Administrator Account
Press the Windows + R keys to open the Settings app.
Click on the Accounts menu in the list.
You’ll see the Settings > Your info menu.
Click on the Family & other users option in the left-side navigation panel.
Select the Add someone else to this PC button below the Other users section on the right.
A Microsoft account sign-in dialog will open. Click on the I don’t have this… hyperlink.
Select Add a user without a Microsoft account on the next screen.
Enter the necessary details on the Create a user for this PC dialog and click Next.
You should see the newly created account in the Other users section.
Click on that and hit the Change account type button.
You’ll see the Change account type dialog.
Click on the Account type drop-down menu and choose Administrator.
Hit OK to apply the modification you just made.
Now, log out of the existing Windows user account and log in with the new Admin account.
You should now try to install the new app and see if the “Unable To Execute File in the Temporary Directory Error 5” issue is fixed.
Disable the Antivirus Program Briefly
Open the Windows Settings by pressing the Windows + I keys together and click on the Update & Security option.
On the Update & Security menu, click on the Windows Security option.
Click on the Virus & threat protection setting below the Protection areas section on the right.
Select Manage settings below the Virus & threat protection settings.
Use the toggle button to disable the Real-time protection feature.
Keep this window as is.
Try to install the new app.
If it works, use the Real-time protection toggle button again to activate the security feature.
Reboot Windows Into Safe Mode
Click on the Start menu and select the Power button.
A context menu with three power options will show up.
Press the Shift key on the keyboard and click on the Restart button.
The Windows PC will restart and boot into the WinRE environment.
Click Troubleshoot.
Select Advanced options in the Troubleshoot screen.
Click on the Startup Settings.
Select Restart on the next screen.
The PC will reboot to the Startup Settings menu with several options.
There, press the numeric 4 key for Safe Mode.
The PC will reboot into Safe Mode.
Now, check if Error 5 surfaces again when you try to install an app.
Summary
So, these are the fixes you can follow to overcome the Unable to execute file in the temporary directory Error 5 when installing apps. These methods will work effectively on Windows 7, 8, 11, etc.
Microsoft has just released the first preview of Visual Studio 2022 v17.12, which supports .NET 9, the latest iteration of Microsoft’s open-source development platform. This is big news for those who have been wishing to explore .NET 9 since its public preview release in February 2024.
Microsoft’s announcement focuses on cloud-native and intelligent app development, with enhancements aimed at boosting productivity, simplifying deployments, and integrating AI more seamlessly. But that’s not all – GitHub Copilot AI improvements are explicitly tailored for this new version of Visual Studio.
We’re excited to announce the availability of Visual Studio 2022 v17.12 Preview 1 – the first preview of our next update to Visual Studio. This update focuses on providing fantastic developer experiences for working with .NET 9projects and new AI productivity features, along with continues improvements all-around.
.NET 9 is all about elevating your development game, especially if you’re into cloud development or keen on exploring new AI features. Microsoft ensures that Visual Studio 17.12 fully supports .NET 9 development, making it easier for developers to leverage all the latest tools and improvements.
Microsoft has made the download available on its site for those eager to try this preview. As always, it’s open to feedback. If you find a bug or have a suggestion for a new feature or improvement, make sure to let Microsoft know. Remember, this is a preview, so it might not be ready for production environments yet. Some extensions or workloads may not play nicely with it.
So, what do you think? Are you ready to explore the new horizons that Visual Studio 2022 v17.12 and .NET 9 open up? Whether you’re a seasoned developer or just starting, this update seems to have something for everyone.
Sometimes, the available storage space on a drive appears less than what was advertised, and it’s often due to unallocated space. This space is not available for data storage and, in simple terms, is a waste of storage. So, how do you allocate unallocated space on a disk drive in Windows?
Allocating unallocated space is simple and can be done via Disk Management, a built-in utility in Windows, or Diskpart, a command-line tool. The former is preferred for regular and basic disk partitioning and space allocation, while the latter is used for advanced operations. Let’s find out the steps to allocate using both!
How do I allocate the unallocated disk space in Windows 11?
NOTE
While the process listed below is for Windows 11, it works the same way on Windows 10.
1. Via Disk Management
Press Windows + S to open Search, type Create and format hard disk partitions, and click on the relevant result.
Right-click on the unallocated space, and choose New Simple Volume.
Click Next to proceed.
Under the Simple volume size in MB field, enter the amount of space you wish to allocate, and click Next. By default, it lists the entire unallocated space.
Select Assign the following drive letter, pick one from the dropdown menu, and click Next.
Go with the default settings on this page, and click on Next.
Verify the chosen settings and click Finish to allocate the unallocated space in Windows.
The unallocated space should now be allocated and available as a separate drive with the chosen drive letter.
But the question is, how do you find unallocated space? The unallocated space always has a black bar at the top in Disk Management, in contrast to the allocated space or primary partition, which has a blue bar.
Also, you wouldn’t always want to create a new drive with the unallocated space and may like it to be added to an existing drive or perhaps allocate unallocated space to the C: drive.
To allocate unallocated space to an existing partition, right-click on the partition appearing before the unallocated space in Disk Management > select Extend volume > click Next > enter the space to expand in the text field > click Next > click on Finish.
Extend Volume Wizard
2. Via Diskpart
Press Windows + S to open Search, type Command Prompt, and click on Run as administrator.
Click Yes in the UAC prompt.
Paste the following command and hit Enter: diskpart
Now, run the following command to view available disks: list disk
Execute this command while replacing X with the number assigned to the drive with the unallocated space: select disk X
Now, paste the following command and hit Enter to create a new partition over the entire unallocated space: create partition primary
Next, run this command to view all partitions, including the new one: list volume
Execute this command to select the new partition while replacing Y with the number assigned to the volume: select volume Y
Now, use this command to perform a quick format and set the NTFS file system for the newly allocated space: format fs=ntfs quick
Run the following command to assign a drive letter to the new volume by replacing Z with it (shouldn’t be used by any other volume): assign letter=Z
As soon as you assign the drive letter, the unallocated space will now be available for use as a separate drive and listed in the File Explorer alongside the others.
While the Diskpart commands seem a bit confusing, you are less likely to run into errors and can perform a wide array of advanced operations, which is often not possible through Disk Management.
3. Using a third-party disk management tool
The built-in methods, although feasible, cannot help perform all the operations. For instance, if the unallocated space appears to the left of an existing partition, you can’t allocate it there and will be forced to create a new volume.
Command problems like these can be quickly bypassed by using a top-rated disk management tool for Windows. With most of these, you simply have to drag a slider to adjust or allocate the unallocated space on the disk.
If you want to allocate unallocated space on an SSD, I recommend using a dedicated tool because partitioning and allocation have to be optimal on a Solid State Drive, given the cost factor. You should also carefully divide the hard disk space so as to not waste any storage.
Now that you know how to allocate unallocated space, no storage will ever be left unused on your disk. Also, if you ever run low on storage, use the built-in Disk Cleanup utility in Windows!
For any queries or to share which method worked best for you, drop a comment below.


 NOTE