Solved: Microsoft Outlook Was Not Able to Create a Message With Restricted Permission

Email confidentiality is important so when you get the Microsoft Outlook was not able to create a message with restricted permission message, you need to address it first to ensure data security is upheld.

When sending secure mail using Outlook, you may get the above error if your Outlook profile is corrupt, server-side issues or Outlook plugins interference.

How do I fix the Microsoft Outlook was not able to create a message with restricted permission error?

1. Revert to an older Outlook build

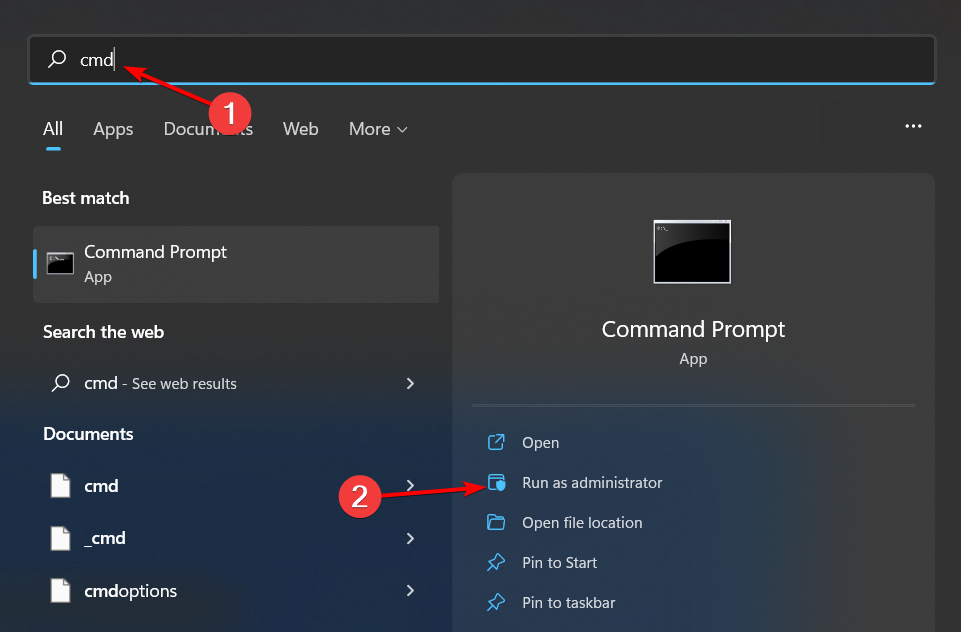
  1. Hit the Windows key, type CMD in the search bar, and click Run as administrator.
  2. Type in the following commands and press Enter after each one. For the correct build version number, go to Microsft 365’s official update history page and check for supported versions: cd %programfiles%\Common Files\Microsoft Shared\ClickToRun officec2rclient.exe /update user updatetoversion=16.0.17231.20236

2. Run Outlook in Safe Mode and disable plugins and add-ins

  1. Press Windows + R keys to open the Run dialog box, type outlook.exe/safe, and then click the OK to start Outlook in Safe Mode.
  2. Click Yes on the Microsoft confirm prompt.
  3. Select File at the top of the screen, then click on Options.
  4. Click on Add-ins, then click on Go beside the Manage COM Add-ins button.
  5. Select the add-ins you want to disable from the available menu, then click the Remove button.
  6. Restart your PC.

The Safe Mode option ensures Outlook runs void of any interferences while disabling plugins removes and shuts down any problematic add-ons. You can also try Outlook for web and see if the Microsoft Outlook was not able to create a message with restricted permission error persists.

3. Clear Outlook cache

  1. Press the Windows + R keys to open the Run dialog box.
  2. Type %LOCALAPPDATA%\Microsoft\Outlook\ in the dialog box, then click OK.
  3. Right-click the RoamCache folder, select Copy, then paste it into another folder.
  4. Double-click the RoamCache folder, select all the items in the folder, or press Ctrl + A, then press the Delete key.
  5. Restart your PC.

4. Repair Microsoft Office

  1. Hit the Windows key, type Control Panel in the search bar, and click Open.control-panel-search fallout new vegas runtime error
  2. Navigate to Uninstall a program under Programs.going uninstall program control panel
  3. Locate Microsoft Office and click on Change.Change OFfice 0x80040610
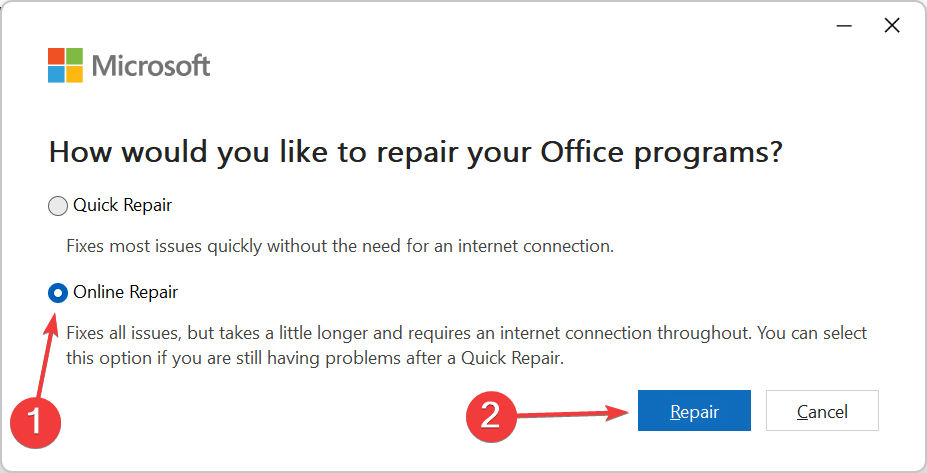
  4. Select the Online Repair option and wait for the process to finish before trying again.online repair to fix 78754 failure outlook

5. Adjust permission settings

  1. Launch your Outlook app, click File in Outlook and click on Options.
  2. Click Trust Center and select Trust Center Settings.
  3. Next, click the Email Security button, and ensure that the Encrypt contents and attachments for outgoing messages and Add digital signatures to outgoing messages boxes are unchecked and hit OK.

6. Create a new Outlook profile 

  1. Hit the Windows key, type Control Panel in the search bar, and click Open.control-panel-search fallout new vegas runtime error
  2. Type Mail in the search bar and click to open.
  3. Next, click on Show Profiles under Profiles in the Mail setup window that pops up.
  4. A list of Outlook profiles registered on your PC will appear. Find the one that was having problems, click on it, then select Remove.
  5. A confirmation dialog box will appear, so click Yes to confirm.

A new Outlook profile resets your settings to default and you start on a clean slate with bo built-up cache that may be corrupted. It is also possible to rebuild your Outlook profile but it’s best to start afresh.

7. Reinstall Microsoft Office

  1. Hit the Windows key and click on Settings.settings windows 11
  2. On the right pane, click on Apps, then on the left, Apps & features.

  3. Scroll to Microsoft Office, click the three ellipses, and select Advanced options.
  4. Click Uninstall under the Uninstall menu.
  5. Confirm your choice and follow the wizard to complete the process.
  6. Download a fresh copy of Microsoft Office.

Elsewhere, Outlook may fail to encrypt your email message but worry not as we’ve already detailed how to fix it. If all these encryption errors seem to be persistent, try password-protecting your Outlook emails.

Alternatively, you can opt out of Outlook’s built-in security and go for third party email encryption software.

In future, to prevent a reoccurrence of such errors, keep your Outlook updated and avoid problematic add-ins. And if you’re using a work/school account, ensure you have the requisite permissions and access. Otherwise, contact your IT administrator for further assistance.

That’s a sign out from us but keep the conversation alive in the comment section below. Let us know if you’ve had any run-ins with permissions and encrypted messages on your Outlook client.

Microsoft is updating the Win + ALT shortcut in New Outlook

The new Outlook will be enhanced to shorten the shortcut for accessing keyboard navigation. According to the latest entry to the Microsoft 365 Roadmap, the Redmond-based tech giant will enhance the newer version of the Outlook platform to ask only the ALT key instead of the classic Win + ALT.

This enhancement will be released in September 2024 and will only impact the new Outlook for Windows. This means the other Outlook versions won’t support the new ALT shortcut.

Here’s what the entry says:

Users in new Outlook can now use the Alt key to bring up key tips when using keyboard navigation. This behavior was previously Win+Alt. Other Outlook apps will not be impacted by these changes.

Microsoft

Speaking of shortcuts, the new Outlook for Windows recently introduced the classic CTRL+C/CTRL+V to allow users to be more productive when managing emails in the platform. What do you think about the new version of the Win + ALT in new Outlook?

Windows 11 introduces a new Settings area, Power Mode, which lets users set power modes for plugged devices

Good news for all Windows users who want to keep a closer eye on their device’s power and battery settings.

With the latest release to the Canary Insider Channel, Microsoft has added a new section within Settings’ Power&Battery area, called Power Modes, which offers a detailed view and new options to customize the way your device works when it’s plugged in or not.

According to popular @phantomofearth, who spotted the feature, you can optimize your device with different settings according to its state, as you can see in the picture below.

The feature is currently hidden, but it can be enabled with a third-party app such as ViveTool. However, like most hidden features, it might be unreliable once enabled.

Either way, if you do want to enable it, then use this command (credits to @phantomofearth)

vivetool /enable /id:39007349

Windows already remembers separate power modes for when the device is plugged in or not, but the new area is a dedicated space where you have more control, and the settings appear simpler and clearer.

As with all Canary features, the new Power Mode section will be available to all Windows users as soon as Windows 24H2 is out.

Steam Inventory Helper For Firefox: How to Download & Use

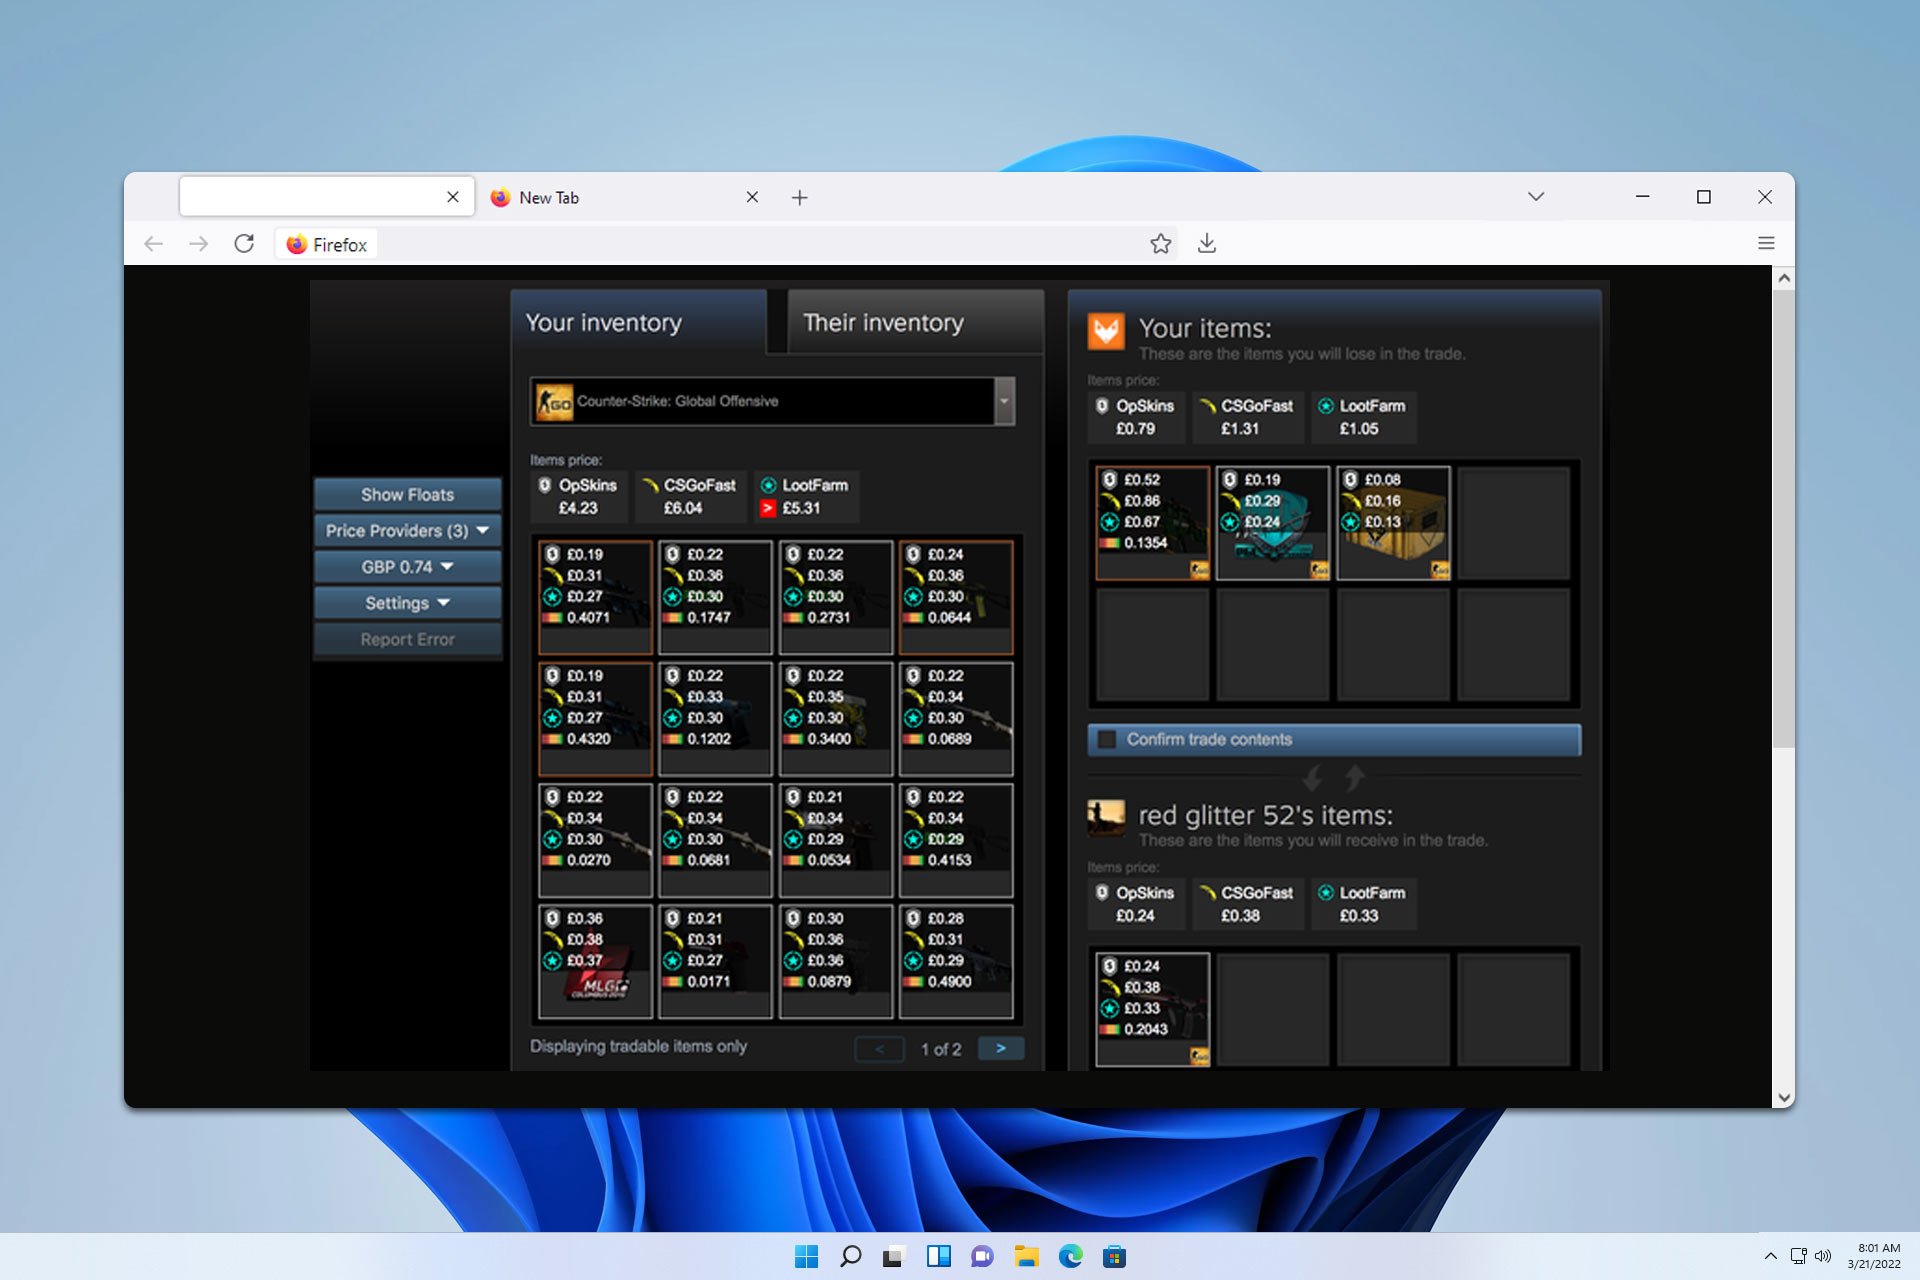
Many are wondering if the Steam Inventory Helper extension is available for Firefox, and in today’s guide we’re going to answer this question, so keep on reading.

How can I get Steam Inventory Helper for Firefox?

Use Steam Booster (Steam Trade Helper)

  1. Visit the Steam Booster (Steam Trade Helper) page and click on Add to Firefox.
     steam booster add to firefox
  2. Next, click on Add.
    steam booster extension add
  3. Once installed, open the extension.
  4. Go to Options and enter your Steam API key. You can get your key at the Steam API registration page.
    steam booster options steam api key

Alternatively, you might use one of these extensions:

Are Firefox extensions safe?

For the most part, yes. All extensions are scanned for malicious code and some are manually checked, but that doesn’t mean that the extension is 100% safe.

To be on the safe side, use extensions that have positive ratings and a high number of users. Also, use extensions from developers that you trust.

As you can see, Steam Inventory Helper isn’t available for Firefox, but luckily, there are several decent alternatives that you can use.

Do keep in mind that you can encounter issues when trading such as Error while accepting trade on Steam.

If you are looking for more extensions, we have a great guide on OneTab alternatives for Firefox, so don’t hesitate to check them out. We also have a guide on the Dark Reader extension for Firefox, so don’t miss it.

To stay safe while trading, don’t miss our guide on Steam scams to learn more.

Google Chrome Is Capturing Your Screen? Here’s How To Stop It

What can you do when Google Chrome is capturing your screen? This can be alarming and may indicate a privacy issue or a misconfigured setting. It’s usually due to permission settings and active extensions.

If you face this problem, try reinstalling Google Chrome or restarting your PC. If it’s still recording your screen, read on for more detailed solutions.

How To Stop Google Chrome From Capturing Your Screen

Try these fixes in the order they appear in for the best results:

Review Chrome Permissions

Chrome’s permissions might be allowing websites to capture your screen. Here’s how to disable them:

  1. Open Chrome and click on the three dots in the top-right corner.
Click on the three dots
  1. Tap Settings, click on Privacy and Security, then Site Settings.
Privacy and Security
  1. Under Permissions, tap on Camera.
Permissions
  1. Confirm if there are sites allowed to use your camera and remove them. Do the same for the microphone.
Sites allowed to use your camera

However, if your browser still records your screen, try the below fix.

Disable Chrome Extensions

Google Chrome extensions can sometimes cause unexpected behavior, including screen capturing. Disabling them could fix the issue:

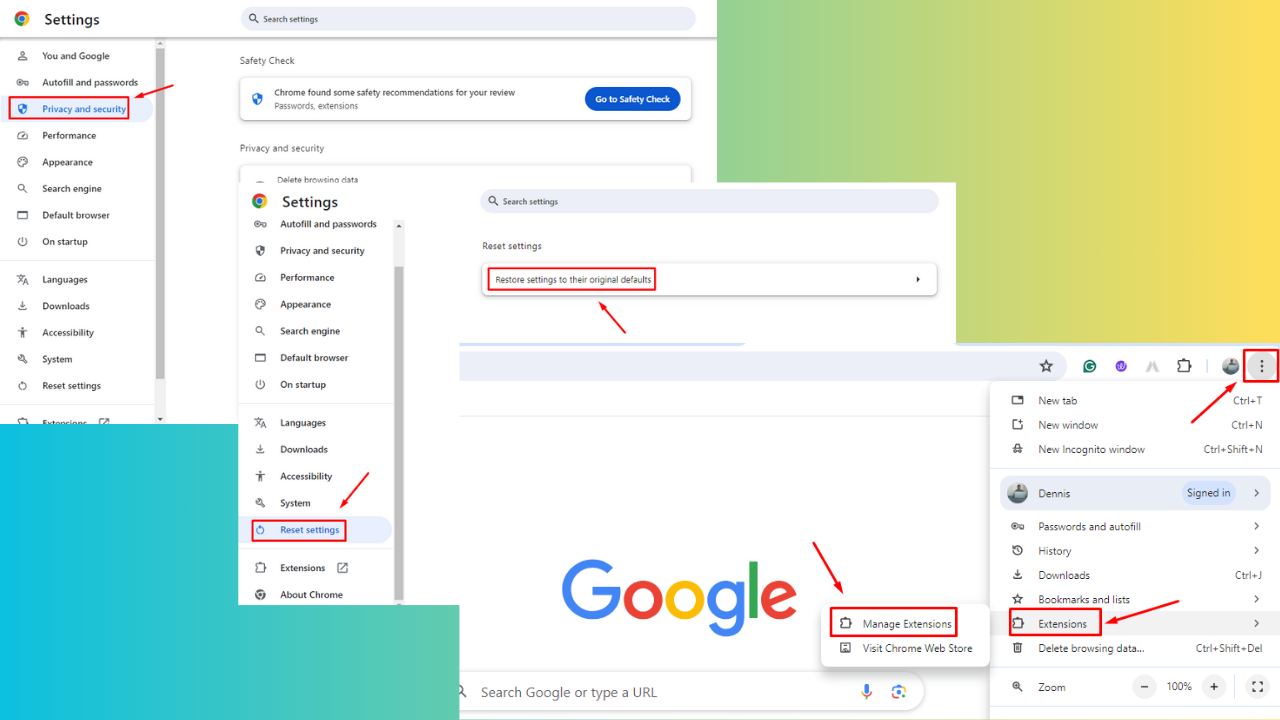
  1. Open Chrome, click the three dots in the top-right corner, and tap Extensions > Manage Extensions.
Manage Extensions
  1. Disable all extensions by toggling them off.
Disable all extensions

Restart Chrome and enable extensions one by one to identify the culprit, then remove it.

Disable Using Registry Editor

The Registry Editor can help manage Chrome’s settings if you’re using Windows. Follow the steps below to stop screen capturing: 

  1. Press Windows Icon + R, type “Regedit,” and press Enter.
Type Regedit
  1. Go to HKEY_LOCAL_MACHINE > SOFTWARE > Policies > Google > Chrome.
HKEY_LOCAL_MACHINE > SOFTWARE > Policies > Google > Chrome
  1. Right-click on Chrome, tap New, then select DWORD (32-bit) Value. 
Select DWORD (32-bit) Value
  1. Name it ScreenCaptureAllowed. Keep it at zero value and tap OK to disable screen capture on Chrome.
Name it ScreenCaptureAllowed

Open the browser and confirm if the issue is solved. 

Reset Chrome Settings

If the issue persists, resetting the browser to its default settings might help. Follow the below steps:

  1. Open Chrome, click on the three dots in the top-right corner, then tap Settings.
Settings
  1. Tap Reset settings, then click Restore settings to their original defaults.
Restore settings to their original defaults.
  1. Confirm by clicking Reset settings.
Reset settings

Check if the issue is solved.

So, now you know what to do if Google Chrome is capturing your screen! You’ll have to review permissions, disable extensions, and manage settings through the Registry Editor or Chrome’s settings.

Which one of these worked for you? Feel free to share your thoughts in the comments below! If you want to know how to take screenshots on this browser, we can help out. Moreover, if you’re having trouble with Chrome not responding, websites not loading, or not uninstalling, we’ve got you covered.

If your Windows 10/Windows 11 has been plagued by the 0x80070643 error, Microsoft just released a fix

The “0x80070643 – ERROR_INSTALL_FAILURE” message feared by Windows PC users is a notorious error that has haunted Windows devices for months. However, you should know that Microsoft has now offered a solution for this problem on both Windows versions.

The heart of this trouble lies in two updates, KB5034441 and KB5034440, which were made to fix a particular Secure Boot bypass vulnerability. People were expecting a normal update experience but saw an error message on their screens.

For some time now, Microsoft has been working hard to solve this problem by providing solutions and instructions for users dealing with these issues.

Microsoft’s recommendation is simple: if your Windows Recovery Environment (WinRE) is already updated or you don’t have a WinRE partition, you don’t need to do anything. This may relieve some people, but what about those who still have the problem?

Microsoft advises checking their WinRE version and making sure they have adequate space in the recovery partition. For the update to be installed properly, you must have a minimum of 250 MB of free space. If there’s not enough room, they’ve provided guidelines and a script that will assist with resizing your partition.

Unfortunately, there’s no auto-fix. Some hands-on work is needed, so prepare yourself for that part of the process. It may be inconvenient, but Microsoft has provided a thorough guide to make it less troublesome. You can find the guide for Windows 10 here, while the guide for Windows 11 devices is here. After making the needed changes, go to Windows Update. That should fix things for you.

If you come across the “0x80070643” error, it is not a complete stop. Microsoft’s new guidance provides a way to fix it, even though some do-it-yourself steps are needed. So, have you checked your WinRE status? Let us know if you managed to fix your device.

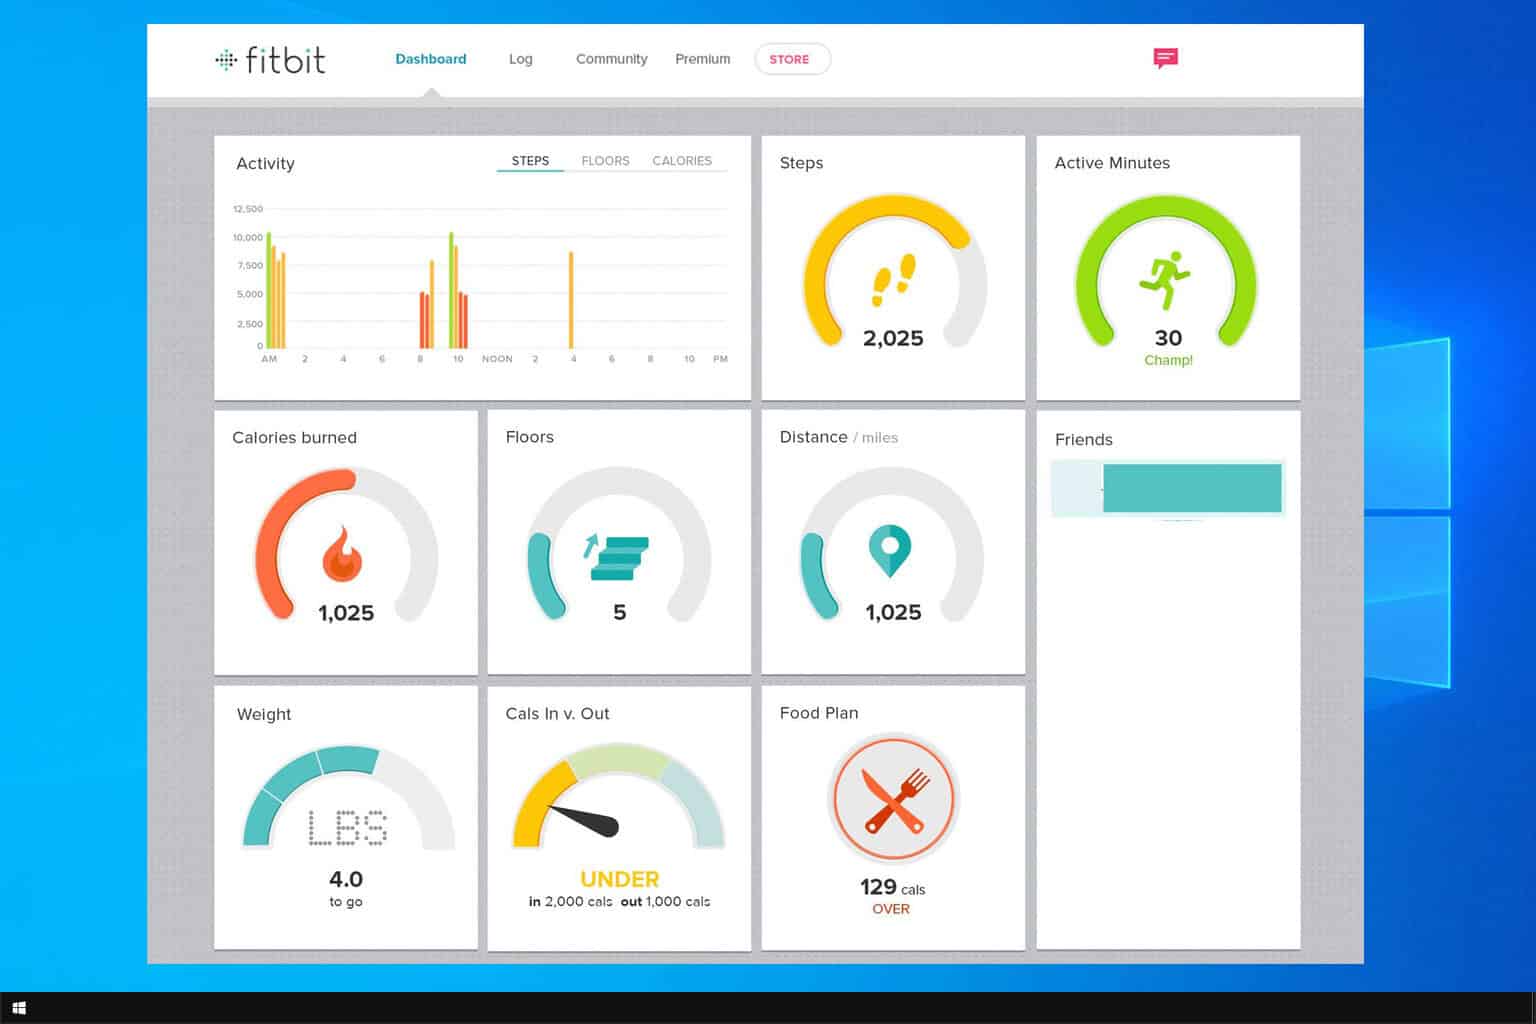
How to Download & Install Fitbit App for Windows 11

Many who have a Fitbit product want to download the app on Windows 11, especially due to the bigger display and seamless interface. But that has been made more difficult over the years!

For anyone wondering whether it’s possible to install the Fitbit app on a PC, the answer is no. Fitbit, in October’22, discontinued the Fitbit Connect app for Windows and macOS. Two years later, in July’24, Fitbit announced the discontinuation of the web dashboard and moved all the features and functionalities to the Fitbit app, which is limited to Android and iOS.

But that doesn’t mean you can’t access it, input the data on the PC, or set goals. You can have it all without even directly installing the dedicated Fitbit Windows app!

How can I access the Fitbit app for Windows 11?

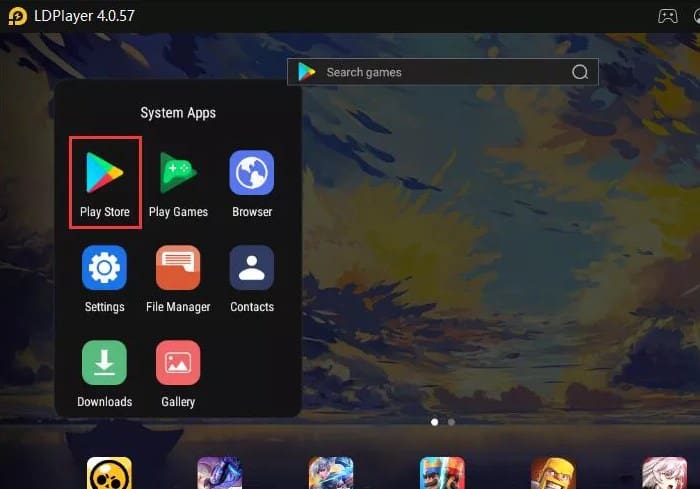
  1. Download any one of the top-rated Android emulators for Windows 11. I picked LDPlayer.
  2. After installing the emulator, launch it, and then open the Google Play Store.Google play store
  3. Sign in with a Google account. If you don’t have one, create it.
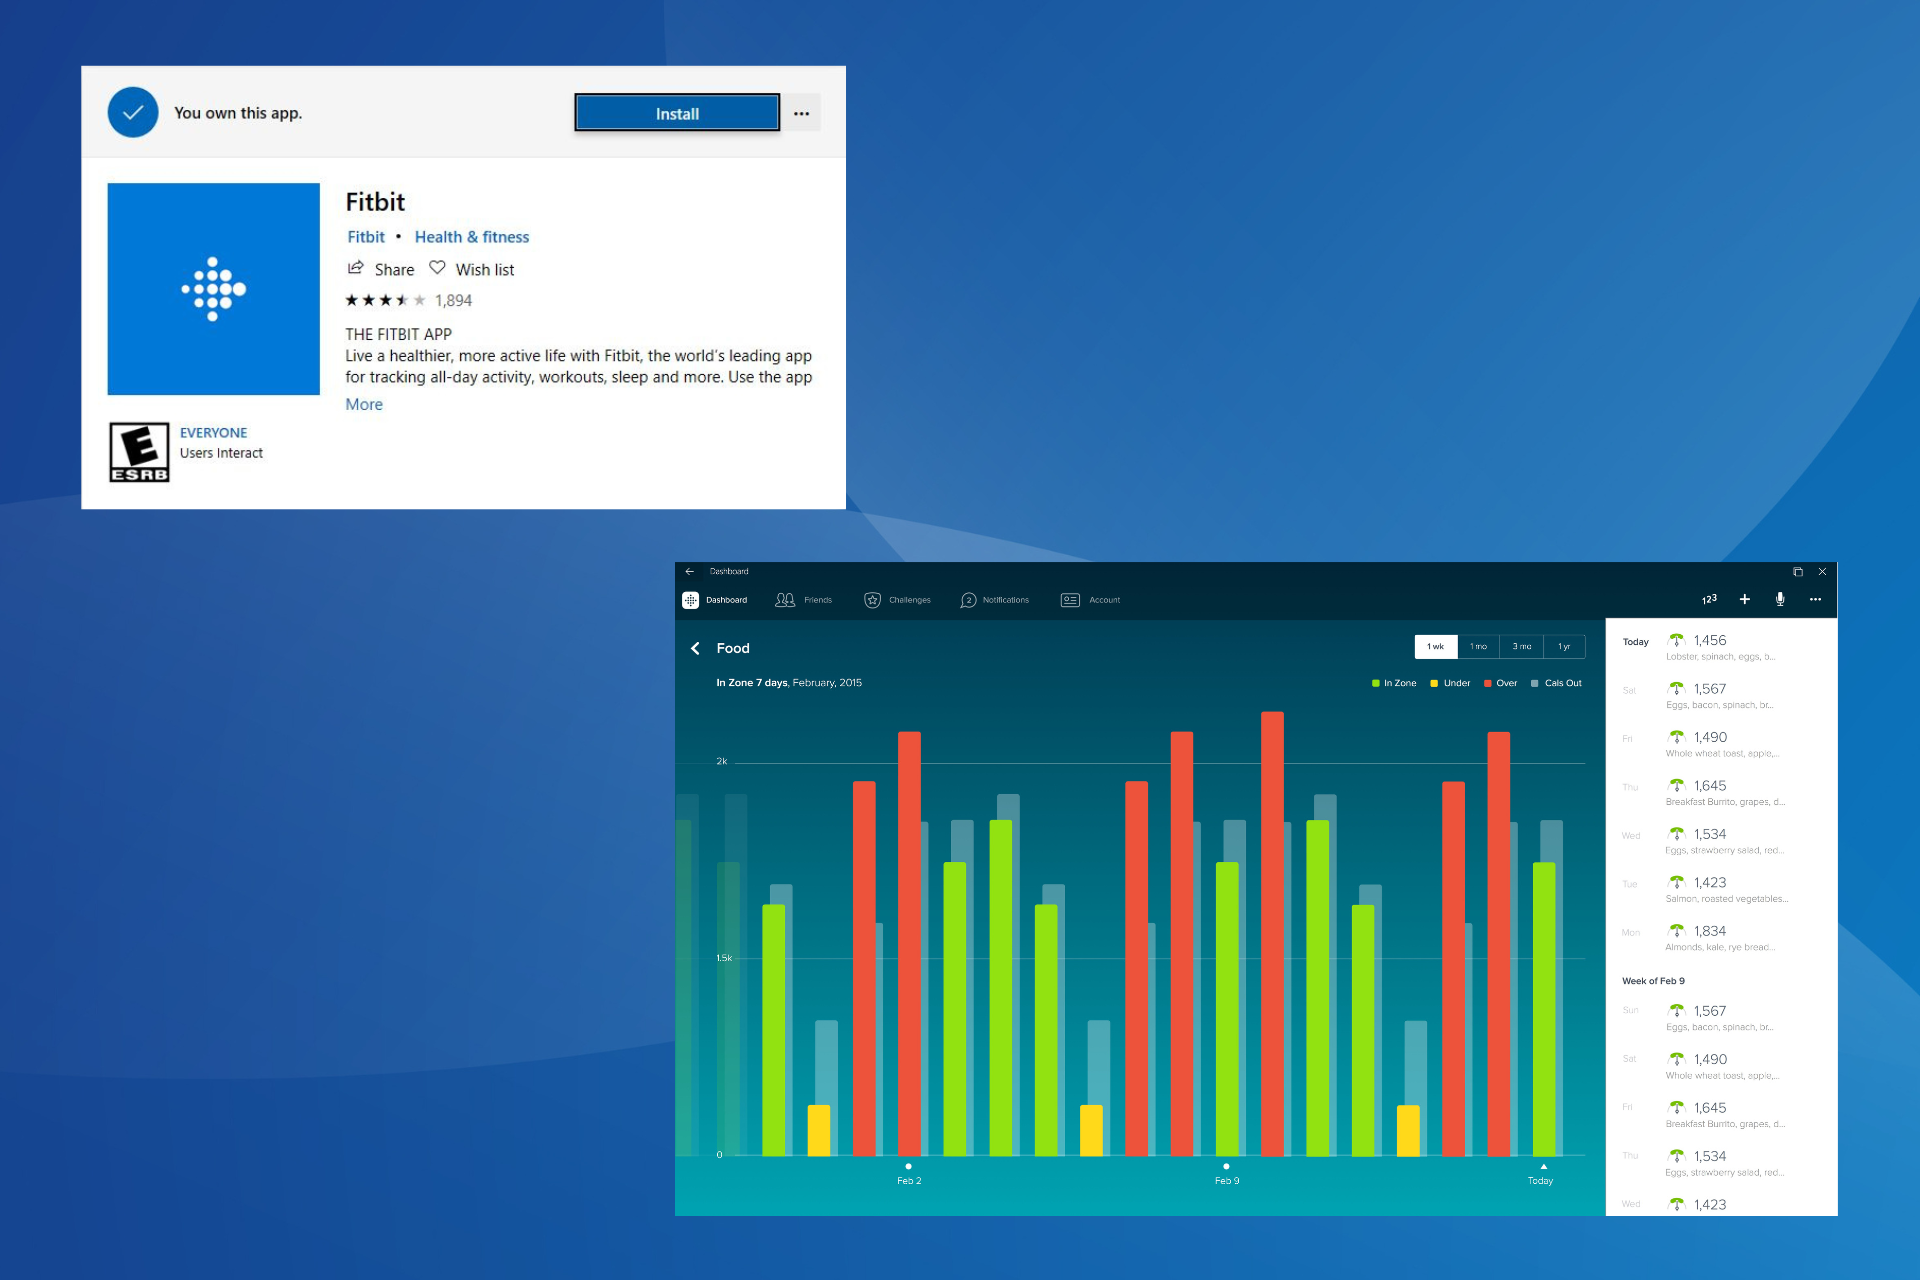
  4. Now, search for the Fitbit app and install it.fitbit app for windows 11
  5. Once downloaded, launch the Fitbit app, and sign in with your login credentials.
  6. You can now access all the health-related data, set goals, and make changes as you do on the mobile app.

Since Fitbit has been discontinued for PCs, you are left with no option but to download an emulator and then install the app. Also, if you are an iPhone user, get a reliable iOS emulator for Windows, although the options are limited here compared to Android.

Is Fitbit compatible with Windows 11?

No, Fitbit is not compatible with Windows 11, or for that matter, most PC-based operating systems, including macOS and Linux. The Fitbit Connect app stopped working for Windows 11 from October’22.

Although there’s another interesting aspect I must mention. Anyone who didn’t sign out of the Fitbit app for Windows 11 post-discontinuation still has access and can view/input the data. At least, that’s the case with most. So, if you, too, haven’t done that, I recommend remaining logged in.

As you can see, there are limited ways of using the Fitbit app on Windows 11. The dedicated app has been deprecated, the web dashboard has been discontinued, and you are only left with the option of getting an Android or iOS emulator. The latter, under ideal conditions, wouldn’t have been my first pick, but there’s no other way now!

Similarly, you can get the Fitbit app for Windows 10.

What’s your take on Google limiting Fitbit to mobile devices? Share with our readers in the comments section.

Clipchamp is now part of the Microsoft 365 for Education Suite

As we suspected a while ago, Microsoft integrated Clipchamp into Microsoft 365 for Education. This game-changing tool for the educational sector aims to enhance learning experiences and prepare students for a digital future.

Microsoft’s acquisition of Clipchamp wasn’t just a business move but a step towards enriching its ecosystem with more creative tools. Initially available to personal and business customers, Clipchamp’s expansion into the education sector was eagerly anticipated. Although slightly delayed, its launch is perfectly timed for the 2024 school year.

In a blog post, the Redmond-based tech giant shows how it enhanced Clipchamp as more than just a video editor. It’s a suite of tools designed to foster communication skills crucial for success in the classroom and in the workplace. Its drag-and-drop features simplify video creation, making it accessible for all skill levels.

Whether for lesson plans, presentations, or creative exploration, Clipchamp offers a wide range of resources, including video clips, images, voiceovers, and animations.

For those who are wondering, yes, Clipchamp is easily accessible. Whether using a Windows 10 PC or the latest Windows 11, downloading it from the Microsoft Store or finding it via the taskbar is a breeze. It’s also available online for those who prefer working directly from a browser.

The recent updates to Clipchamp have been nothing short of impressive. Features like adding audio recordings and the AI-powered Silent Removal show Microsoft’s commitment to making video editing as intuitive and efficient as possible.

With tools like the webcam and screen recorder, creating instructional content has never been easier or more creative. And let’s not forget the teleprompter feature, which is a boon for anyone looking to practice public speaking.

Microsoft’s integration of Clipchamp into its 365 Education suite is a testament to its vision for a future where digital skills are paramount.

What do you think about it?

5 Ways to Fix No Healthy Upstream Error on VMware vCenter

Many of our readers reported no healthy upstream error when accessing VCenter or VMware. This means no additional data is sent to the software’s source, which usually occurs due to a misconfigured DNS configuration. In this guide, we will discuss ways to fix this.

How can I fix the No Healthy Upstream error on VCenter/VMware?

1. Access the VCenter Server Management Portal on Port 5480

  1. Open VCenter Server Management, and go to Networking.Networking - No Healthy Upstream Error on VMware vCenter
  2. You will see the IP address under DHCP; click Edit from the top right corner.
  3. Go to Edit Network Settings, click Edit settings, change the setting from Obtain IPv4 settings automatically to Enter IPv4 settings manually, and click Next.Edit settings
  4. Next, enter the SSO username and password on the SSO credentials page, then click Next.
  5. Double-check the network configuration changes, click the checkbox to acknowledge them, and click Finish.Acknowledge - No Healthy Upstream Error on VMware vCenter

It will take a few minutes for the vSphere Client Web Server to initialize and all the services to start, so take a break for 5-10 minutes, then try accessing the vCenter Server Appliance Management Interface.

2. Configure vCenter Settings

  1. On the VMware Server Management page, locate Virtual Machines on the left pane and click the drop-down arrow next to it.
  2. Right-click on VMware vCenter to open the context menu and select Edit settings.
  3. Go to the VM Options tab.
  4. From the left pane, click VMware Tools to get more options.Synchronize guest time with host -  No Healthy Upstream Error on VMware vCenter
  5. Scroll down to the Time section, remove the checkmark next to Synchronize guest time with host, and click Save.

3. Check if there are expired certificates

  1. Launch the vCenter Appliance.
  2. Copy & paste the following command: for store in $(/usr/lib/vmware-vmafd/bin/vecs-cli store list | grep -v TRUSTED_ROOT_CRLS); do echo "[*] Store :" $store; /usr/lib/vmware-vmafd/bin/vecs-cli entry list --store $store --text | grep -ie "Alias" -ie "Not After";done;
  3. Check if Machine_SSL and the Solution User certificates are valid. If they are expired, you need to replace them.
  4. Alternatively, press the Windows key, type cmd, and click Run as administrator.
  5. Type the following command and hit Enter: $VCInstallHome = [System.Environment]::ExpandEnvironmentVariables("%VMWARE_CIS_HOME%");foreach ($STORE in & "$VCInstallHome\vmafdd\vecs-cli" store list){Write-host STORE: $STORE;& "$VCInstallHome\vmafdd\vecs-cli" entry list --store $STORE --text | findstr /C:"Alias" /C:"Not After"}
  6. If you cannot log in, you need to reset the root password first.

4. Reboot the vCenter

  1. On the vCenter Server Appliance Management page, click Summary.Summary -  No Healthy Upstream Error on VMware vCenter
  2. Now click Actions from the top pane to open the drop-down menu.
  3. Select Reboot or Shut Down.Reboot or shutdown
  4. Click Yes to confirm the selection.

You will be logged out of the system, and the virtual machine will shut down or reboot in 10 to 15 minutes.

5. Update VMware

Another reason for the No Healthy Upstream error could be the current version of VMware. You should update it to the latest version and see if that resolves the problem.

If you still have this problem, contact the VMware vCenter support team. In case you are facing the no healthy upstream on Spotify or any other browser application, we have a separate guide for you.

Did we miss a step that helped you fix the No Healthy Upstream on the vCenter? If so, share the method in the comments section below, and we will add it to the list.

How to Remove the Dmr_72.exe PUP From Your PC

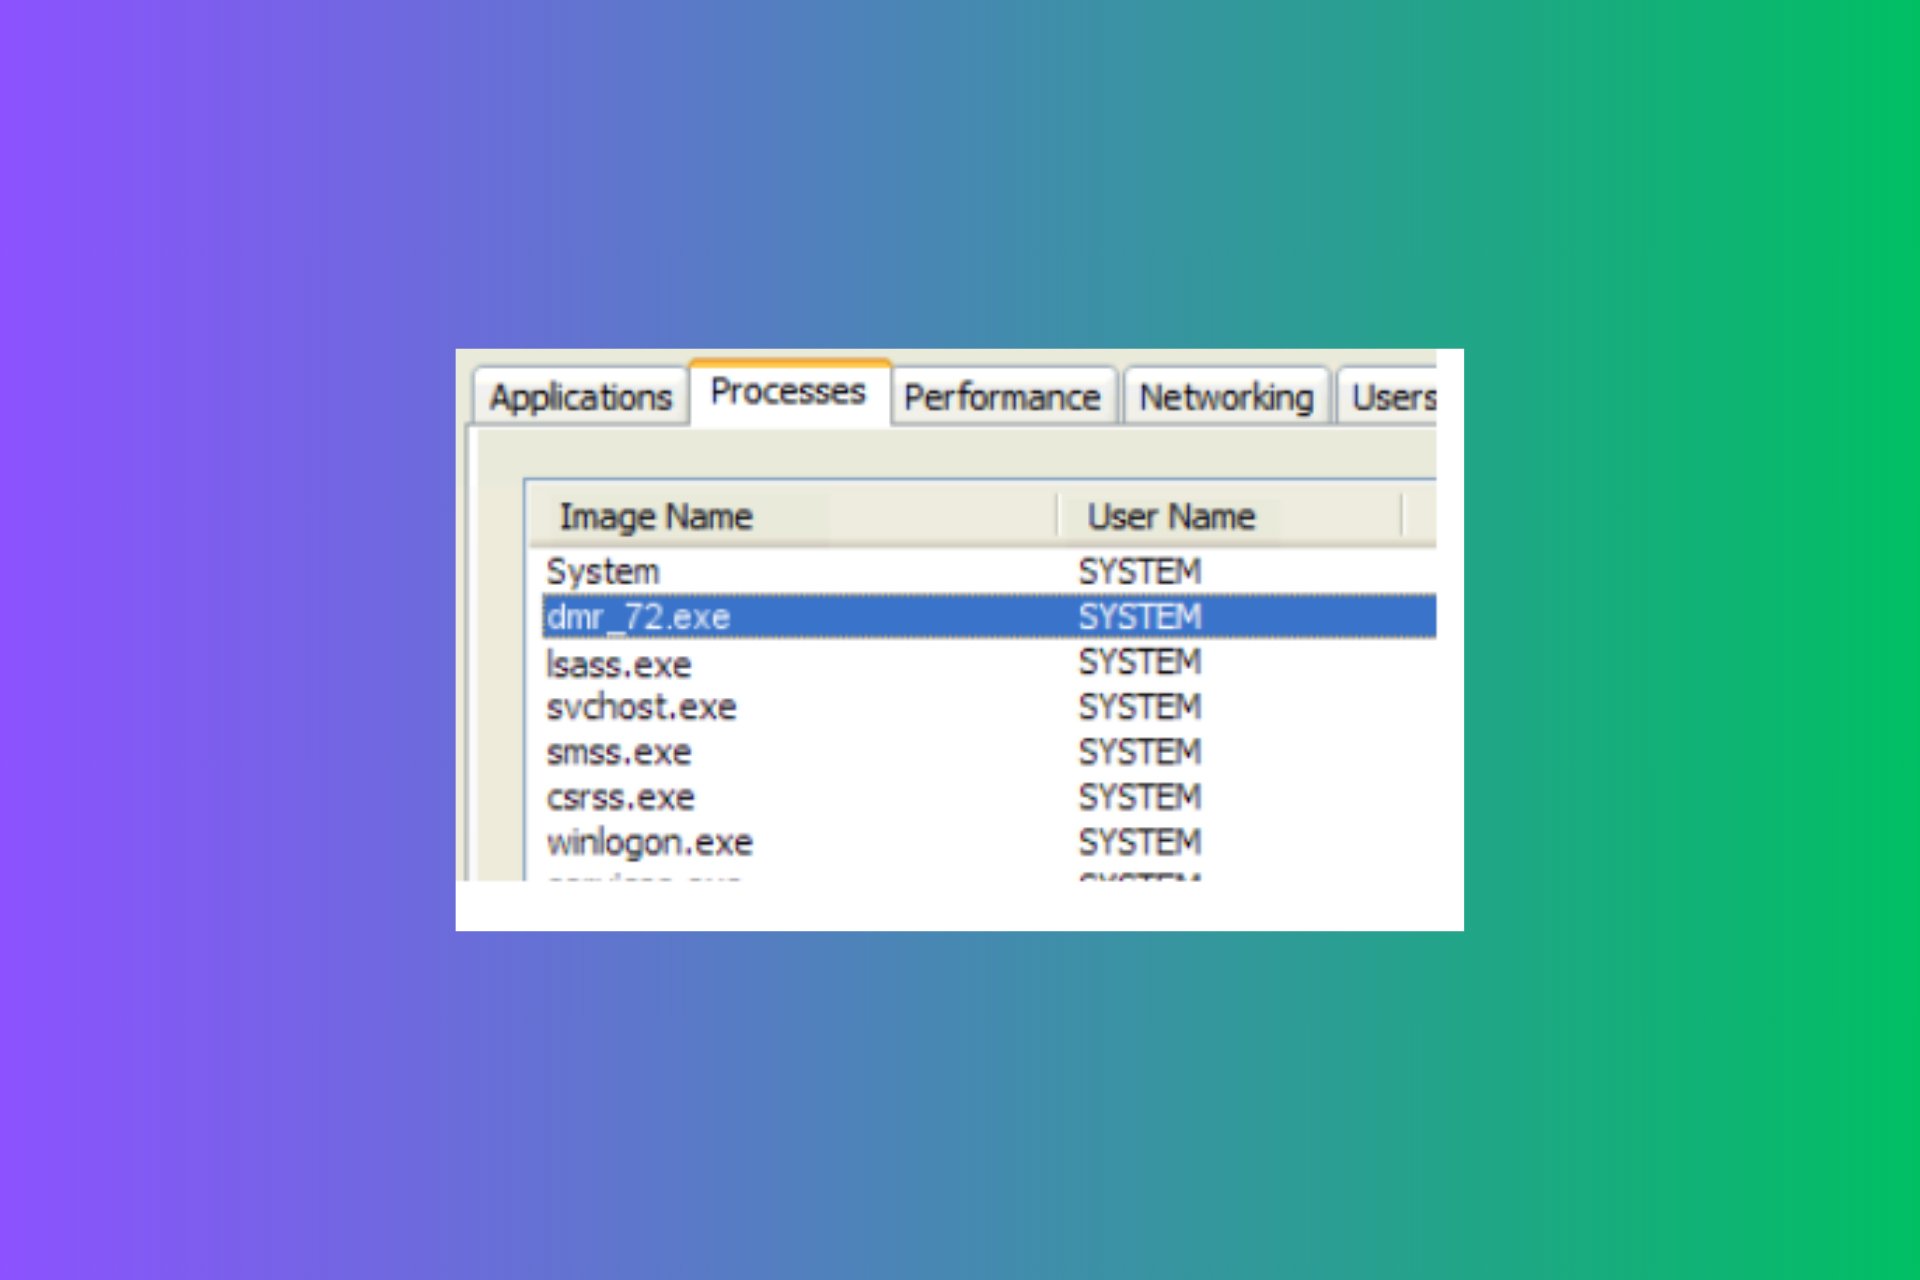
If you’ve noticed a new process running in your Task Manager that you don’t recognize. Its name? dmr_72.exe. This little file, which might seem innocuous at first glance, is actually a setup installer published by CHIP Digital GmbH. It’s often found lurking in the C:\users%USERNAME%\appdata\local\temp\dmr folder. If you’ve spotted it, you might want to buckle up for a bit of a digital cleanup.

How do I safely remove Dmr_72.exe?

1. Identify and check the Dmr_72.exe process

  1. Press Ctrl + Alt + Del keys simultaneously on your keyboard to open the Task Manager.
  2. Click on the Processes tab to see all running processes.
  3. Look for Dmr_72.exe in the list of processes. Important: Dmr may also come with other numbers such as 82, 76, 72 and more. Make sure you stop all of those.
  4. If found, right-click on one of them and select Properties to check the file location and other details.
  5. The legitimate process should be featured under the CHIP Digital GmbH license. If it doesn’t have a legitimate provenience, it is clearly virus or malware. If not, it’s not dangerous but you still can stop the process and delete the app.

2. Uninstall the associated app

  1. Open the Start menu, type Control Panel in the search bar and press Enter.
  2. In the Control Panel, click on Programs and then Programs and Features.
  3. Locate any software that you don’t recognize or don’t remember installing in the list of installed programs.
  4. Click on them and then click on Uninstall.

It’s urgent to first uninstall the software that came with this file.

3. Use security software to scan for malware

Even though you identified that the Dmr_72.exe is a legitimate software, it’s still worth scanning your PC with Windows Defender, and, even better, with a third-party antivirus, such as TotalAV.

If any threats are detected, follow the software’s instructions to quarantine or remove the malware. Using this tool ensures any instance of Dmr_72.exe or related files that might be malware is detected and removed, securing your computer.

4. Manual cleanup of unnecessary files

  1. Open the Start menu and type cleanmgr in the search bar, then press Enter to open Disk Cleanup.
  2. Select the drive you want to clean (usually C:) and click OK.
  3. Check the file types you want to delete, such as temporary files and system files, and click OK to delete them.

Regularly cleaning your system of unnecessary files, including old program files like DLD.exe, helps maintain system performance and prevents potential issues related to cluttered storage.

Is Dmr_72.exe safe?

The Dmr_72.exe was flagged by Vitus Total as a threat. So, although initially, this file was a legitimate installer for the CHIP installer, it has been hijacked by wrongdoers and spread as a virus.

By following these steps, you can ensure that DLD.exe is properly managed on your system, whether it’s a legitimate file or a potential threat. Always keep your system clean and secure to avoid future issues. We definitely recommend using a third-party powerful antivirus or PUP removal tool to completely get rid of this threat.

A complete guide on how to clean the Applications Data folder on Windows 11 will also help you make sure it’s nothing there you don’t want or need.

Did you get rid of Dmr_72.exe? Let us know in the comments below.

Microsoft announced the Python Editor in Excel, with access to all Insiders

If you love playing around with Python code in Excel, then you should know that Microsoft released the Python Editor, which is merged directly into the platform. The new tool has the potential to turn Excel into a strong data analysis system.

The story of Microsoft and Python in Excel starts with an experiment add-in from Excel Labs, introduced in September 2023. The Python Editor was integrated into Excel itself, and its user interface stays close to Excel’s initial design.

Accessing it is also quite easy: just click on the Formulas tab, and you will see the new Editor icon there. With a click, you’re ready to start coding.

According to the official blog post, the Python Editor sees every cell as a code cell in a Jupyter notebook. You can edit and execute Python code within Excel, getting results that show up nicely in your spreadsheet. It does not matter if they are plain text, number-based responses, or even visualizations like graphs and tables from DataFrames.excel python editor

This function is a game-changer, bringing Intellisense, colorization, and function help to make coding in Excel easy. No worries if you’re not in the Insider program. The Python Editor continues to be accessible as an add-in through Excel Labs, so everyone is included.

Even though no official announcement has been made about when this feature will be released for all Windows users, support for Python in Excel has been available to different user groups since June, which shows a big move towards making Excel more flexible for data analysis.

Incorporating Python into Excel offers numerous chances to automate tasks, scrutinize data, and form intricate models within your spreadsheets, and the new Python Editor will make the platform an irreplaceable tool for professionals in different industries.

Are you excited about this new tool? Please share your thoughts in the comments section below.

Despite denying the initial claims, CISPE has made a deal with Microsoft, after all

Microsoft has made a clever move to avoid a possible antitrust investigation by the European Union. They signed an agreement worth $21.7 million with Cloud Infrastructure Service Providers in Europe (CISPE), a group of European cloud companies.

This consortium includes big names such as Amazon Web Services and several smaller cloud entities. In a somewhat surprising turn of events, CISPE previously filed a complaint against Microsoft, claiming that Microsoft was using unfair methods in its cloud business to suppress competition.

Microsoft’s response? A large monetary resolution and an assurance of working together. They have decided to give CISPE members the authority to use Microsoft software. Interestingly enough, CISPE recently denied the existence of such a deal.

This partnership will present an “improved edition of Azure Stack HCI” for European cloud providers. It assures a package of appealing elements like multi-session virtual desktop infrastructure reliant on Windows 11, free Extended Security Updates (ESU), and adaptable pay-as-you-go licensing for SQL Server.

According to reports, Brad Smith, Microsoft’s President, said they were happy to solve previous issues with CISPE and set a new direction that he thinks will bring more competition in Europe’s cloud computing market. However, there is one thing: Microsoft must start using this software collaboration within nine months. Otherwise, CISPE promised to re-initiate the lawsuit.

After working with CISPE and its European members for more than a year, I am pleased that we’ve not only resolved their concerns of the past, but also worked together to define a path forward that brings even more competition to the cloud computing market in Europe and beyond.

Brad Smith, Microsoft

This agreement may steer an official EU investigation away from Microsoft’s cloud department. It is interesting to note that Amazon Web Services, as a CISPE member, was not included in the settlement talks. AWS still takes a strong position and wants an end to what it sees as Microsoft’s unfair actions that impact various customers, providers, and regulators across the globe.

Will this agreement between Microsoft and CISPE prevent the European Commission from starting an investigation? We can only wait and see. However, one thing remains evident: if it does happen, a crucial deal like this might spark big alterations in the field of cloud computing within Europe.

Error Parsing .NET Framework machine.config [Solved]

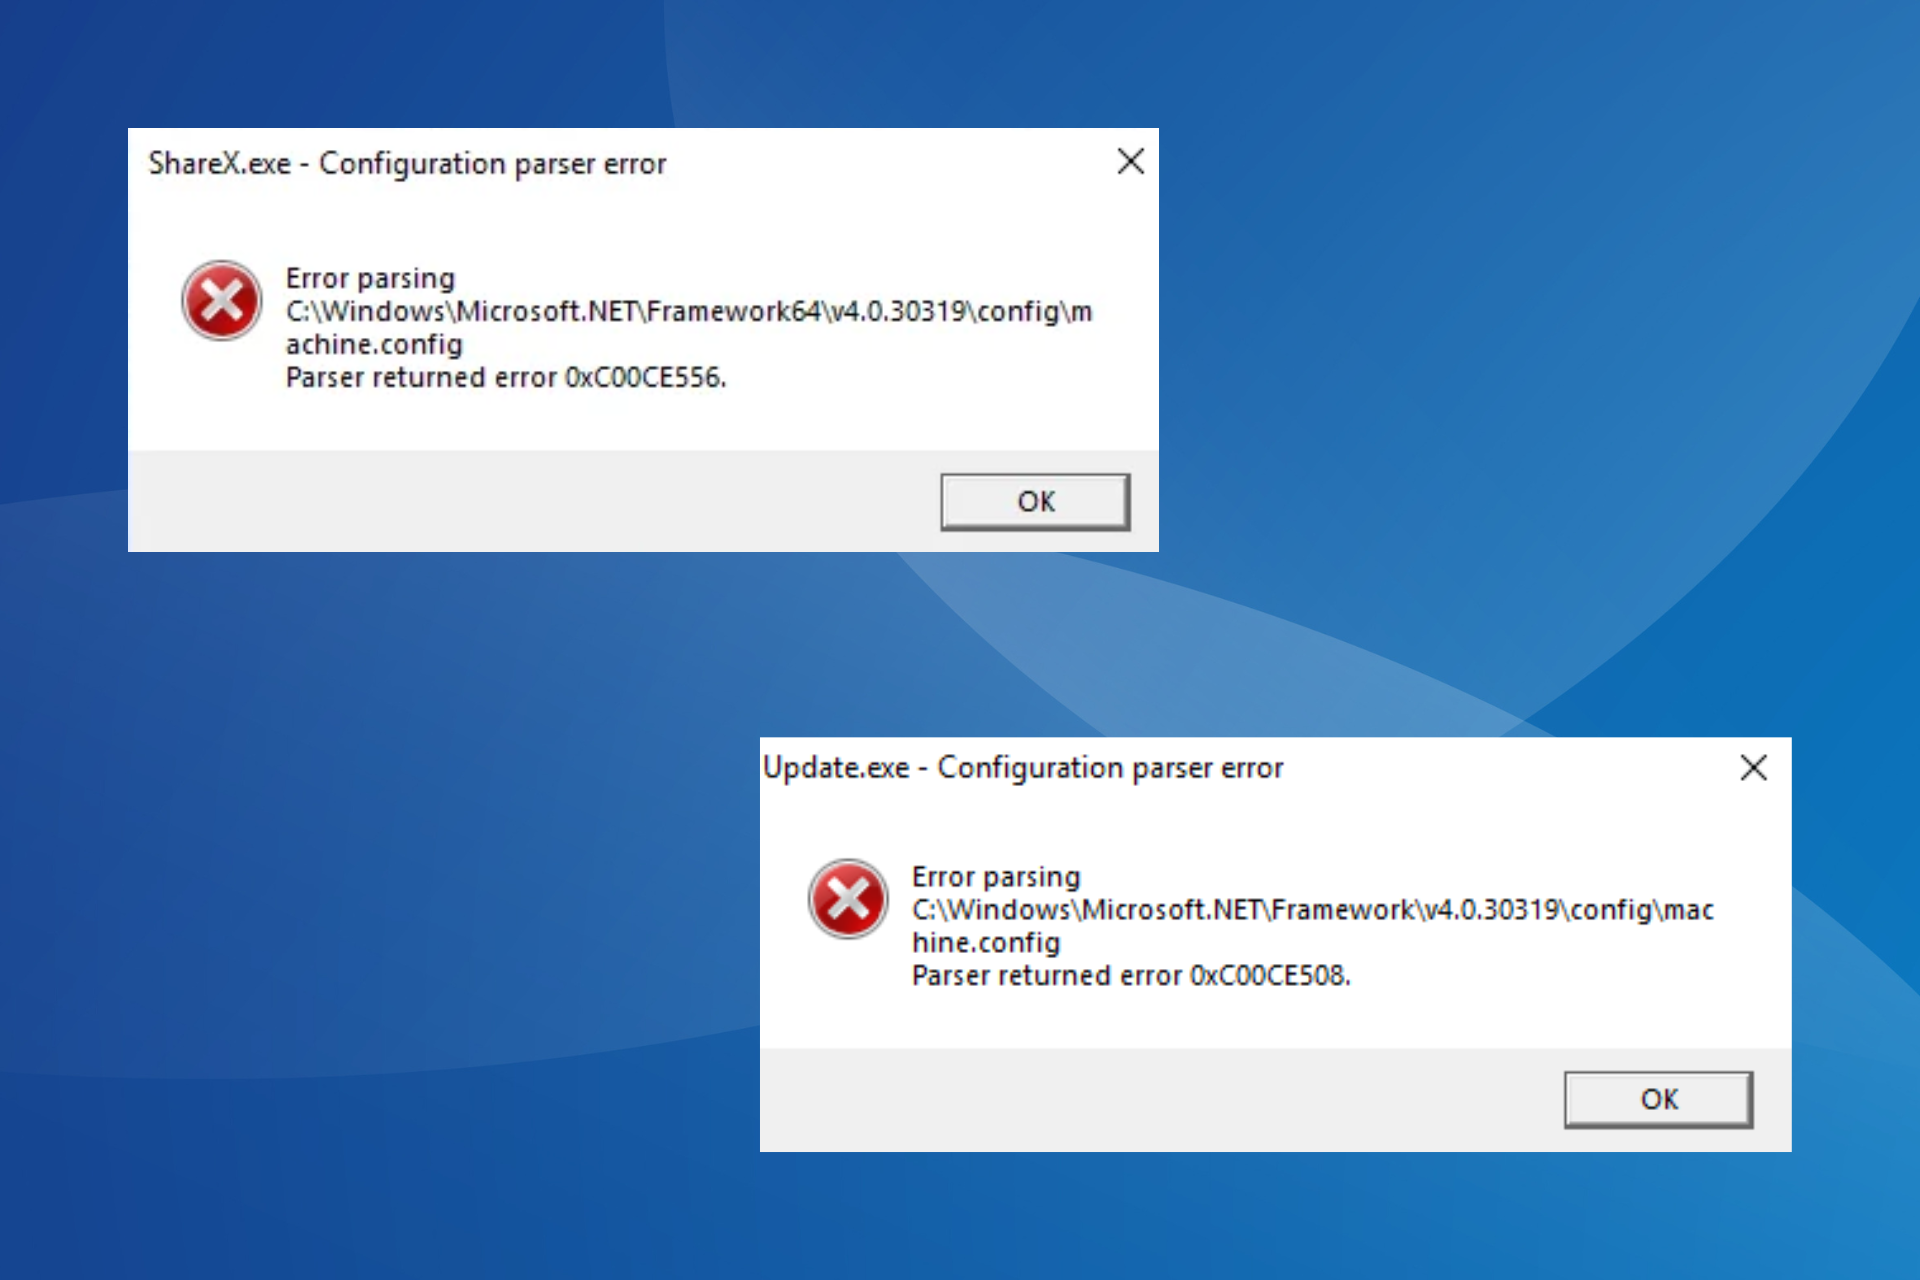
You may receive the Error parsing message followed by the C:\Windows\Microsoft.NET\Framework|v4.0.30319\config\machine.config path while launching applications when the machine.config file is corrupt, the .NET Framework has run into issues, or the relevant permissions are missing.

Under the path, it says, Parser returned error 0xC00CE556 or Parser returned error 0xC00CE508. For some, the error even appeared while installing applications, especially the ones that relied on the .NET Framework.

How do I fix the Configuration parser error with .NET framework’s machine.config?

1. Replace the machine.config file

  1. Press Windows + E to open File Explorer, paste the following path in the address bar and hit Enter: C:\Windows\Microsoft.NET\Framework64\v4.0.30319\Configpath
  2. Remember, the version in the path should match that in the error message. For instance, if the error message reads v4.0.30319, head to that folder, and if it reads v2.0.50727, head to the folder by the same name instead.
  3. Select the machine.config file, hit the Delete key, and confirm the change.delete file to fix error parsing .net framework machine.config
  4. Now, move the machine.config.default file stored here to the desktop.
  5. Rename the machine.config.default to machine.config.machine.config
  6. If you receive any warning, go ahead and confirm the change.confirm
  7. Finally, move the machine.config file back to the Config folder, restart the computer, and then check for improvements.

The easiest way to fix Error parsing Microsoft.NET framework machine.config is to replace the file altogether with the default one already available on the PC.

2. Allow full control of machine.config to everyone

  1. Navigate the path listed in the error message to the machine.config file. It’s most likely the following (the version might be different): C:\Windows\Microsoft.NET\Framework64\v4.0.30319\Config
  2. Right-click on the machine.config file and choose Properties.
  3. Go to the Security tab, and click on Edit.edit permissions
  4. Click on Add.
  5. Enter Everyone in the text field, click on Check names, and then on OK.permissions
  6. Select Everyone from the list, and tick the checkbox for Full control.full control to fix error parsing .net framework machine.config
  7. Finally, click on Apply and OK to save the changes.

If you can’t edit or delete the machine.config file, it’s the missing permissions to blame. And in this case, granting full control to everyone should get things up and running!

3. Install Microsoft .NET Framework

  1. Go to Microsoft’s official website and download the latest Runtime version of the .NET Framework. At the time of writing, it is v4.8.1.download
  2. Run the downloaded setup and follow the on-screen instructions to complete the process.setup
  3. Once done, restart the computer and verify whether the Configuration parser error is fixed.

If the setup can’t proceed with the installation and reads .NET Framework 4.8.1 or a later update is already installed on this computer, you will have to repair the current installation.

4. Repair the .NET Framework

  1. Go to Microsoft’s website, scroll down, and click on Download to get the .NET Framework Repair Tool..NET Framework repair tool
  2. Run the downloaded .exe file and click Yes in the UAC prompt.
  3. Tick the checkbox for I have read and accept the license terms and click on Next.
  4. Let the repair tool run, and once it finds problems, again click on Next to apply the recommendations.repair tool to fix error parsing .net framework machine.config
  5. Finally, reboot the device and verify whether you are able to install and run applications that earlier triggered Error parsing .NET framework machine.config.

5. Repair the corrupt system files

  1. Press Windows + S to open Search, type Command Prompt in the text field, and click on Run as administrator.command prompt
  2. Click Yes in the UAC prompt.
  3. Paste the following DISM commands individually and hit Enter after each: DISM /Online /Cleanup-Image /CheckHealth DISM /Online /Cleanup-Image /ScanHealth DISM /Online /Cleanup-Image /RestoreHealth
  4. Next, run this command for the SFC scan: sfc /scannowsfc scan to fix error parsing .net framework machine.config
  5. Finally, restart the computer.

For a few users, the corrupt system files were to blame for the Error parsing .NET framework machine.config message when running applications. In this case, you can run the DISM commands and SFC scan to replace all corrupted files with their cached copy.

If nothing works, you can always reset Windows to factory defaults, and it will get rid of the Parser returned error 0xC00CE556 message.

Once done fixing the issues, discover some quick tips to make Windows faster and get better performance from apps!

Which fix worked for you? Share with our readers in the comments section.

What is Dld.exe? Should I Uninstall it?

If you’ve ever stumbled upon a mysterious file named DLD.exe on your Windows system, you’re not alone. The DLD.exe file is the executable for an app called Download Direct by SenBit. If you don’t know anything about it, you have probably installed it by mistake in another software bundle. Whichever it is, you may safely remove it because it’s not a Windows System file.

How do I identify and uninstall Dld.exe?

1. Identify and check the DLD.exe process

  1. Press Ctrl + Alt + Del keys simultaneously on your keyboard to open the Task Manager.
  2. Click on the Processes tab to see all running processes.
  3. Look for DLD.exe in the list of processes.
  4. If found, right-click on DLD.exe and select Properties to check the file location and other details.
  5. If it’s in the C:\Program Files\download direct folder, it is legitimate. You can still close its process if you’re in Task Manager.

This process helps you identify whether the DLD.exe running on your system is legitimate or potentially harmful by verifying its location and details.

2. Uninstall Download Direct (if identified as DLD.exe)

  1. Open the Start menu, type Control Panel in the search bar and press Enter.
  2. In the Control Panel, click on Programs and then Programs and Features.
  3. Locate Download Direct in the list of installed programs.
  4. Click on Download Direct and then click on Uninstall.

Uninstalling Download Direct removes the software associated with DLD.exe, which is a download accelerator that can be safely removed if causing issues. To check if it’s completely uninstalled, go to C:\Program Files\download direct in File Explorer and manually delete potentially remaining files.

3. Use security software to scan for malware

Even though you identified that Download Direct is a legitimate software, it’s still worth scanning your PC with Windows Defender, and, even better, with a third-party antivirus.

If any threats are found, follow the software’s instructions to quarantine or remove the malware.

Using security software ensures any instance of DLD.exe or related files that might be malware is detected and removed, securing your computer.

4. Manual cleanup of unnecessary files

  1. Open the Start menu and type cleanmgr in the search bar, then press Enter to open Disk Cleanup.
  2. Select the drive you want to clean (usually C:) and click OK.
  3. Check the file types you want to delete, such as temporary files and system files, and click OK to delete them.

Regularly cleaning your system of unnecessary files, including old program files like DLD.exe, helps maintain system performance and prevents potential issues related to cluttered storage.

Is Dld.exe safe?

Right now, it’s not on any antivirus list for any malicious actions, but as with any other software, if you downloaded it from an unsafe website, it might be infected, so you need to take every precaution possible.

DLD is also associated with Digital Line Detect which is a tool that came with old DELL ;laptops and enabled Conexant or Broadcom modem drivers. However, its executable file is Dlg.exe. If you find it, you may also remove it by using the solutions above.

By following these steps, you can ensure that DLD.exe is properly managed on your system, whether it’s a legitimate file or a potential threat. Always keep your system clean and secure to avoid future issues.

We also have a complete guide on how to clean the Applications Data folder on Windows 11 and make sure it’s nothing there you don’t want or need.

Did Dld.exe keeps bothering you? Let us know in the comments below.

NewPipe Network Error: 6 Ways to Quickly Fix it

A NewPipe app network error where a video self-destructs before you’re done watching indicates underlying issues that could be server-side or app-related.

Luckily, the problem isn’t major, and generally quick to fix. Follow the steps below to see how.

What do I do when it says network error on NewPipe?

1. Run the connection troubleshooters

1.1 Run the Network adapter troubleshooter

  1. Hit the Windows key and click on Settings.settings windows 11
  2. Click on System, then select Troubleshoot.Open system troubleshooter
  3. Select Other troubleshooters.other troubleshooters
  4. Locate the Network Adapter troubleshooter and click on the Run button next to it.Network Adapter Run IPv6 No Internet Access

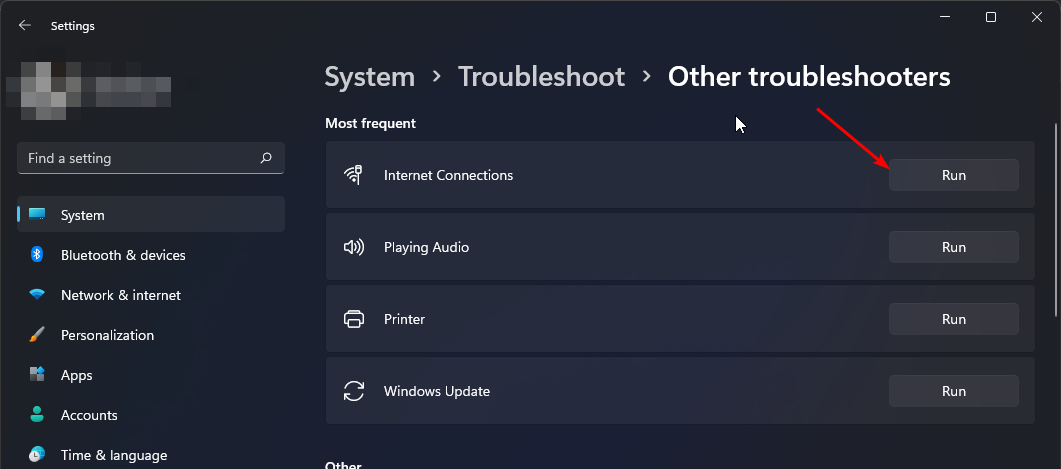
1.2 Run the Internet Connections troubleshooter

  1. Hit the Windows key and click on Settings.settings windows 11
  2. Go to System, and click Troubleshoot.System - Troubleshoot wifi keeps disconnecting windows 11
  3. Now click Other troubleshooters. Other troubleshooters
  4. Locate Internet connections, and click Run. 
  5. Follow the onscreen prompts to complete the process.  

2. Delete cache

2.1 System cache

  1. Hit the Windows key, then click on the Settings menu.settings windows 11
  2. From the left window pane, select System, then, from the right window side, navigate to Storage.
  3. Wait for your OS to scan and assess the temporary cache files stored on your system then click on the Temporary files option.
  4. Scroll down, then select the files that you want to delete, and click on the Remove files button.
  5. In the pop-up window, click on Continue to complete the process.
  6. Now, your selected files are deleted.

2.2 NewPipe for Android

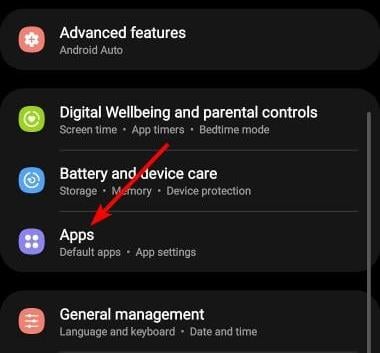
  1. Tap on settings on your phone.
  2. Next, tap on Apps.
  3. Find the NewPipe app and tap on it.
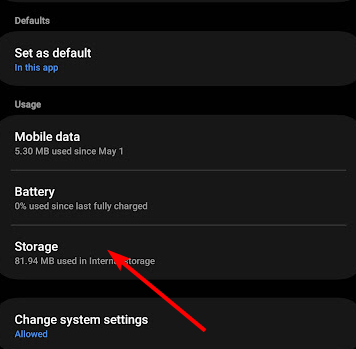
  4. Scroll down and select Storage.
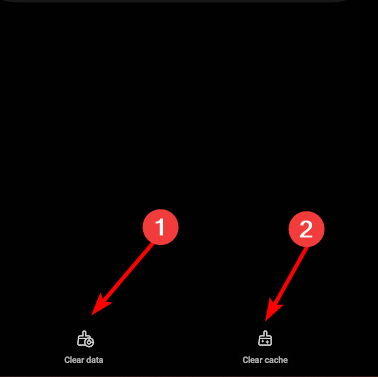
  5. Tap on Clear data and Clear cache, then try again.

2.3 Clear metadata

  1. Open Settings in NewPipe.
  2. Next, go to History and cache.
     history and cache newpipe settings
  3. Select Wipe cached metadata.
    wipe caced metadata newpipe settings

3. Address DNS issues

3.1. Flush the DNS

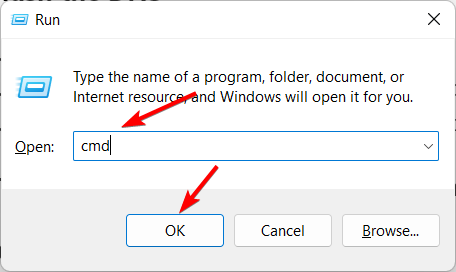
  1. Use the following keyboard shortcut: Windows + R, then type cmd and click OK.cmd-ok steam error code 105
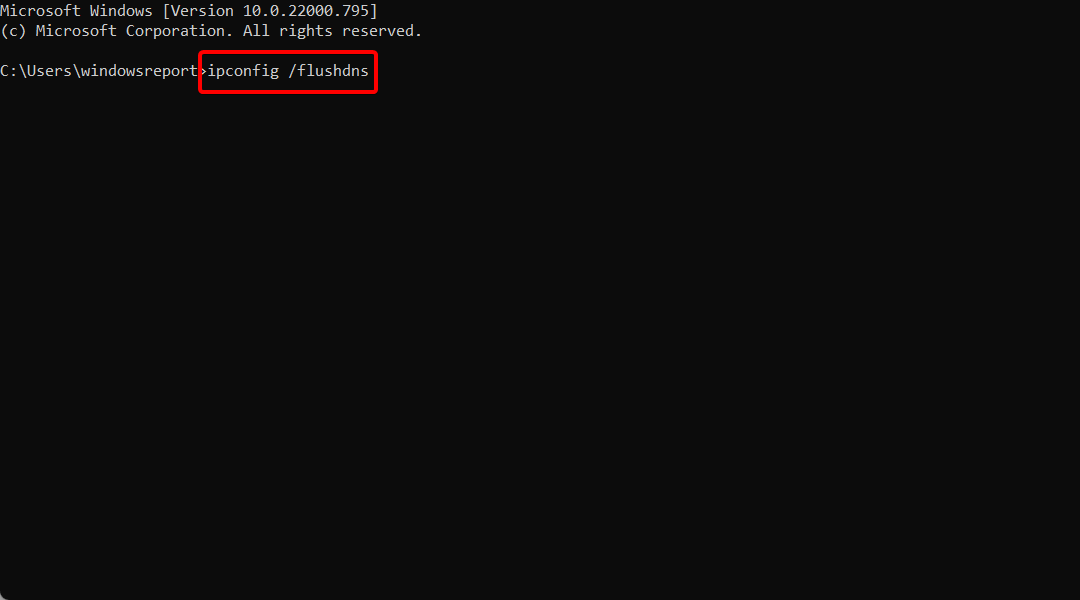
  2. In the opened window, input the following command, then press Enter: ipconfig /flushdnsipconfig-cmd steam error code 105
  3. Now, launch Steam and check if Error Code 105 persists.

3.2 Change your DNS Address

  1. Press simultaneously on the following keys to open the Windows Run dialog box: Windows + R.
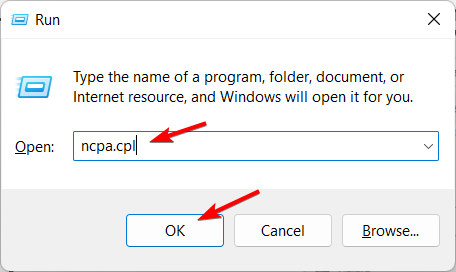
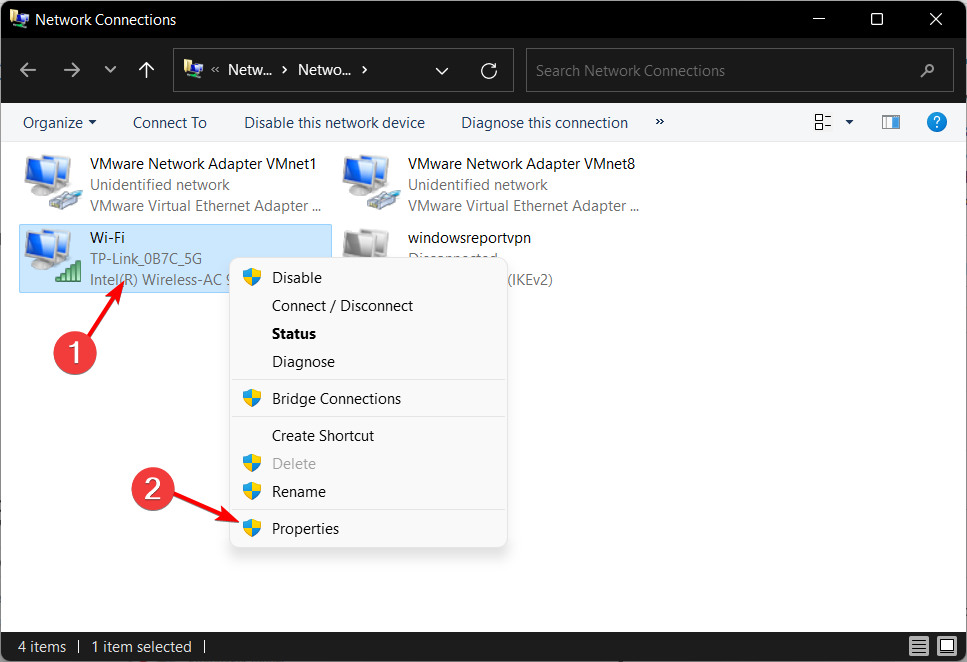
  2. Type ncpa.cpl, then click the OK option. It will open the Network Connections Control Panel applet.ncpa steam error code 105
  3. There, right-click your Internet connection and select Properties.wifi-prop steam error code 105
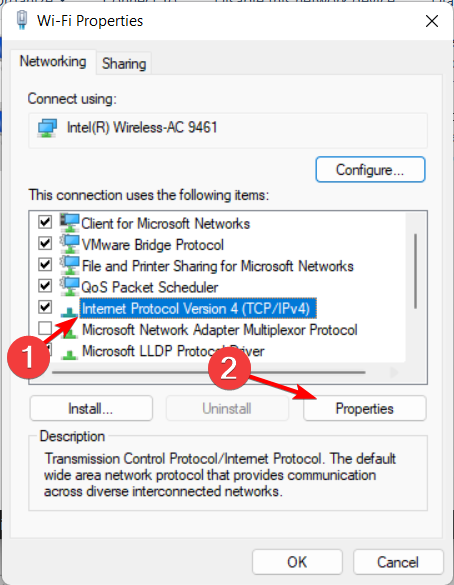
  4. Select Internet Protocol Version 4, then select the Properties button.inp4-prop steam error code 105
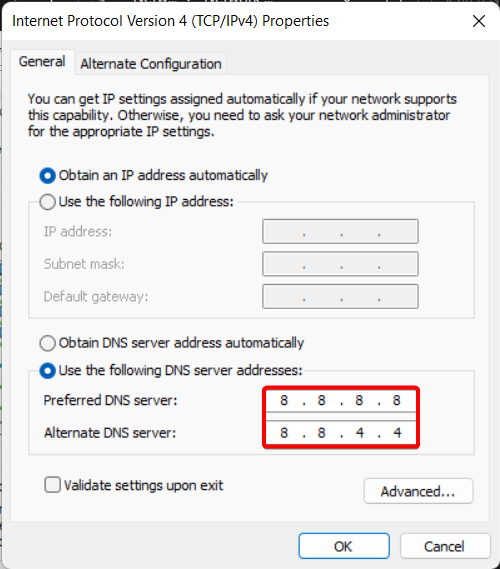
  5. Choose to Use the following DNS server addresses radio button.
  6. Next, input 8.8.8.8 in the Preferred DNS server box and 8.8.4.4 in the Alternate DNS section.dns-88 steam error code 105
  7. Press the OK button on the Internet Protocol Version 4 window.

Changing your DNS settings could resolve the NewPipe network error especially if the one provided by your ISP is slow. When the response time is too slow, the connection may be timed out hence the network error every time you try to play videos.

4. Change your network band

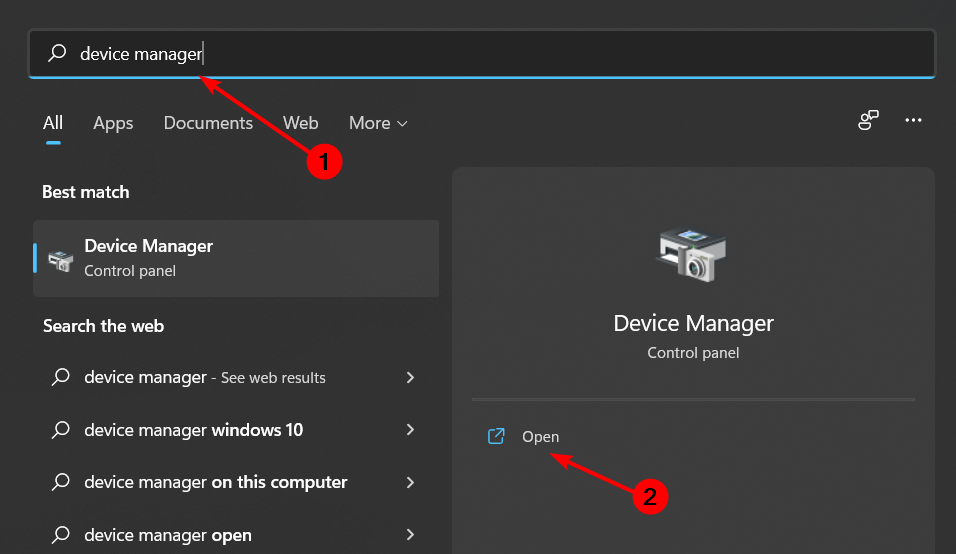
  1. Click on the Start Menu icon, type Device Manager in the search bar, and click Open.
  2. Navigate to Network adapters and double-click to expand.
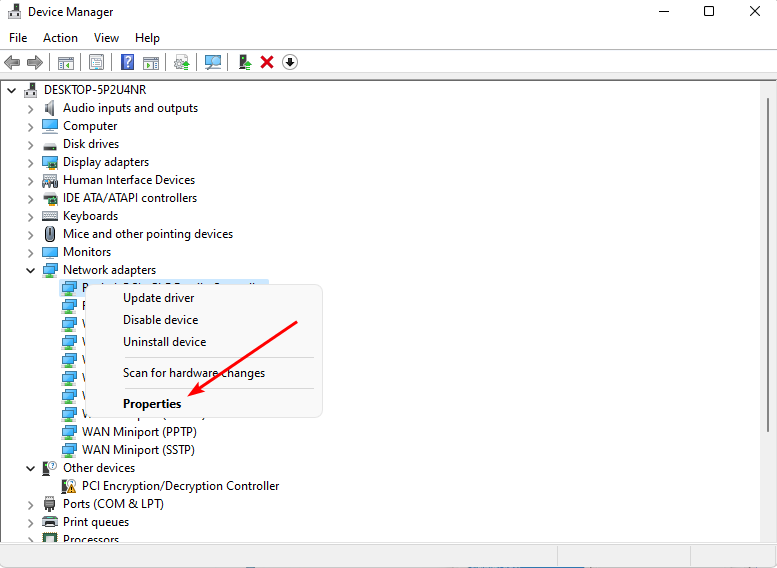
  3. Right-click on your network adapter and select Properties.
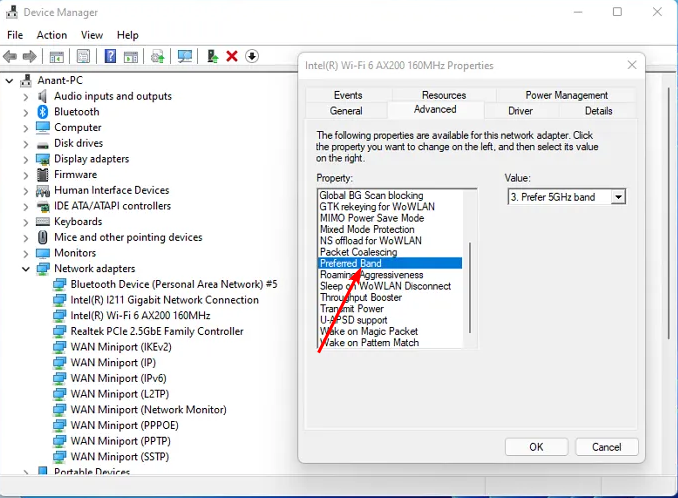
  4. Click on the Advanced tab and locate the Preferred Band.
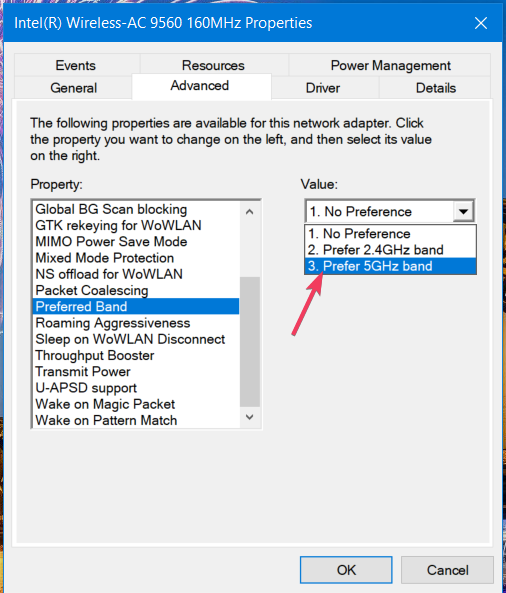
  5. In the Value drop-down menu, select Prefer 2.4GHz band or Prefer 5GHz band then hit Enter.
  6. Restart your PC.

Changing your network band can help address the network error on NewPipe especially if it’s a case of network congestion or device compatibility. NewPipe may have received an update that no longer supports your current network band. An upgrade or downgrade can help reconnect.

5. Disable the firewall temporarily

  1. Hit the Start menu icon, type Windows Security in the search bar, and click Open.
  2. Click on Firewall & network protection, then select Public network.league of legends black screen after champion select
  3. Locate Microsoft Defender Firewall and toggle the off button.turning off Microsoft Defender Firewall Windows

Your antivirus, as it updates, may quarantine some apps and flag them off as threats. When isolated, your firewall can block connections. If disabling it resolves the NewPipe network error, consider whitelisting it since it’s not advisable to leave your system unprotected.

6. Reset your network

  1. Hit the Windows key and click on Settings.settings windows 11
  2. Navigate to Network & internet.
  3. Select Advanced network settings.going advanced network settings win11
  4. Click on Network reset.Network Reset 1
  5. Next, hit the Reset now button.Network Reset now

NewPipe is supposed to be a more advanced YouTube alternative because it is open-source and comes with more features. However, network connection issues are not unique to a specific app.

If your NewPipe app is not working because of connectivity issues, it is probably some misconfigured setting, firewall restrictions or built-up cache. If your internet is working but NewPipe still won’t connect, it may be an issue with an outdated app.

And if videos are increasingly encountering playback issues, download the YouTube music for PC and see whether the same issues are replicated here.

That’s all we had but do let us know what solution fixed it for you or if you have any other solution, let us know in the comment section below.

Change User Agent Permanently in Firefox [How to]

Sometimes it’s necessary to change your user agent in Firefox, especially if you’re developing a new web app, so in today’s guide, we’ll show you how to do that.

How do I change my user agent in Firefox?

1. Use about:config page

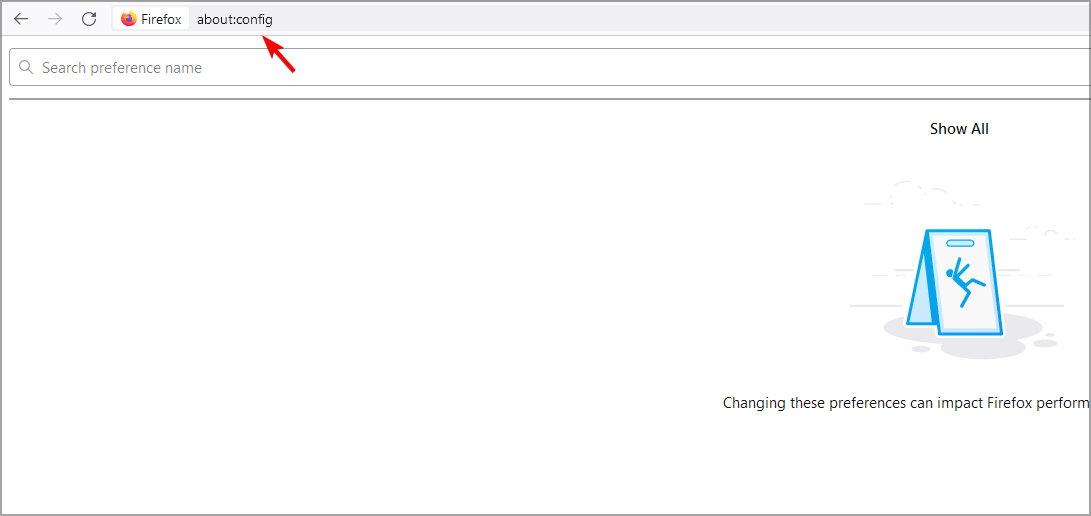
  1. In Firefox, in the address bar type about:config and go to it.
    about config firefox
  2. In the search bar enter general.useragent.override. Locate it on the list and set it to String.
     general.useragent.override string
  3. Click the Plus icon.
    plus icon about config in firefox
  4. Now enter the desired string that matches the user agent you want to imitate. We used this string for example Mozilla/5.0 (Macintosh; Intel Mac OS X 10_15_7) AppleWebKit/537.36 (KHTML, like Gecko) Chrome/104.0.5112.79 Safari/537.36
    user agent string firefox
  5. After testing we can see that even if we’re using Firefox, websites are seeing it as Chrome.
    whatsmybbrowser results

Keep in mind that you need to find the exact user agent string on your own for the desired browser version.

2. Use extensions

  1. Open the User-Agent Switcher page.
  2. Click on Add to Firefox.
    user-agent switcher add to firefox
      
  3. Next, click on Add to confirm.
    user-agent switcher add button
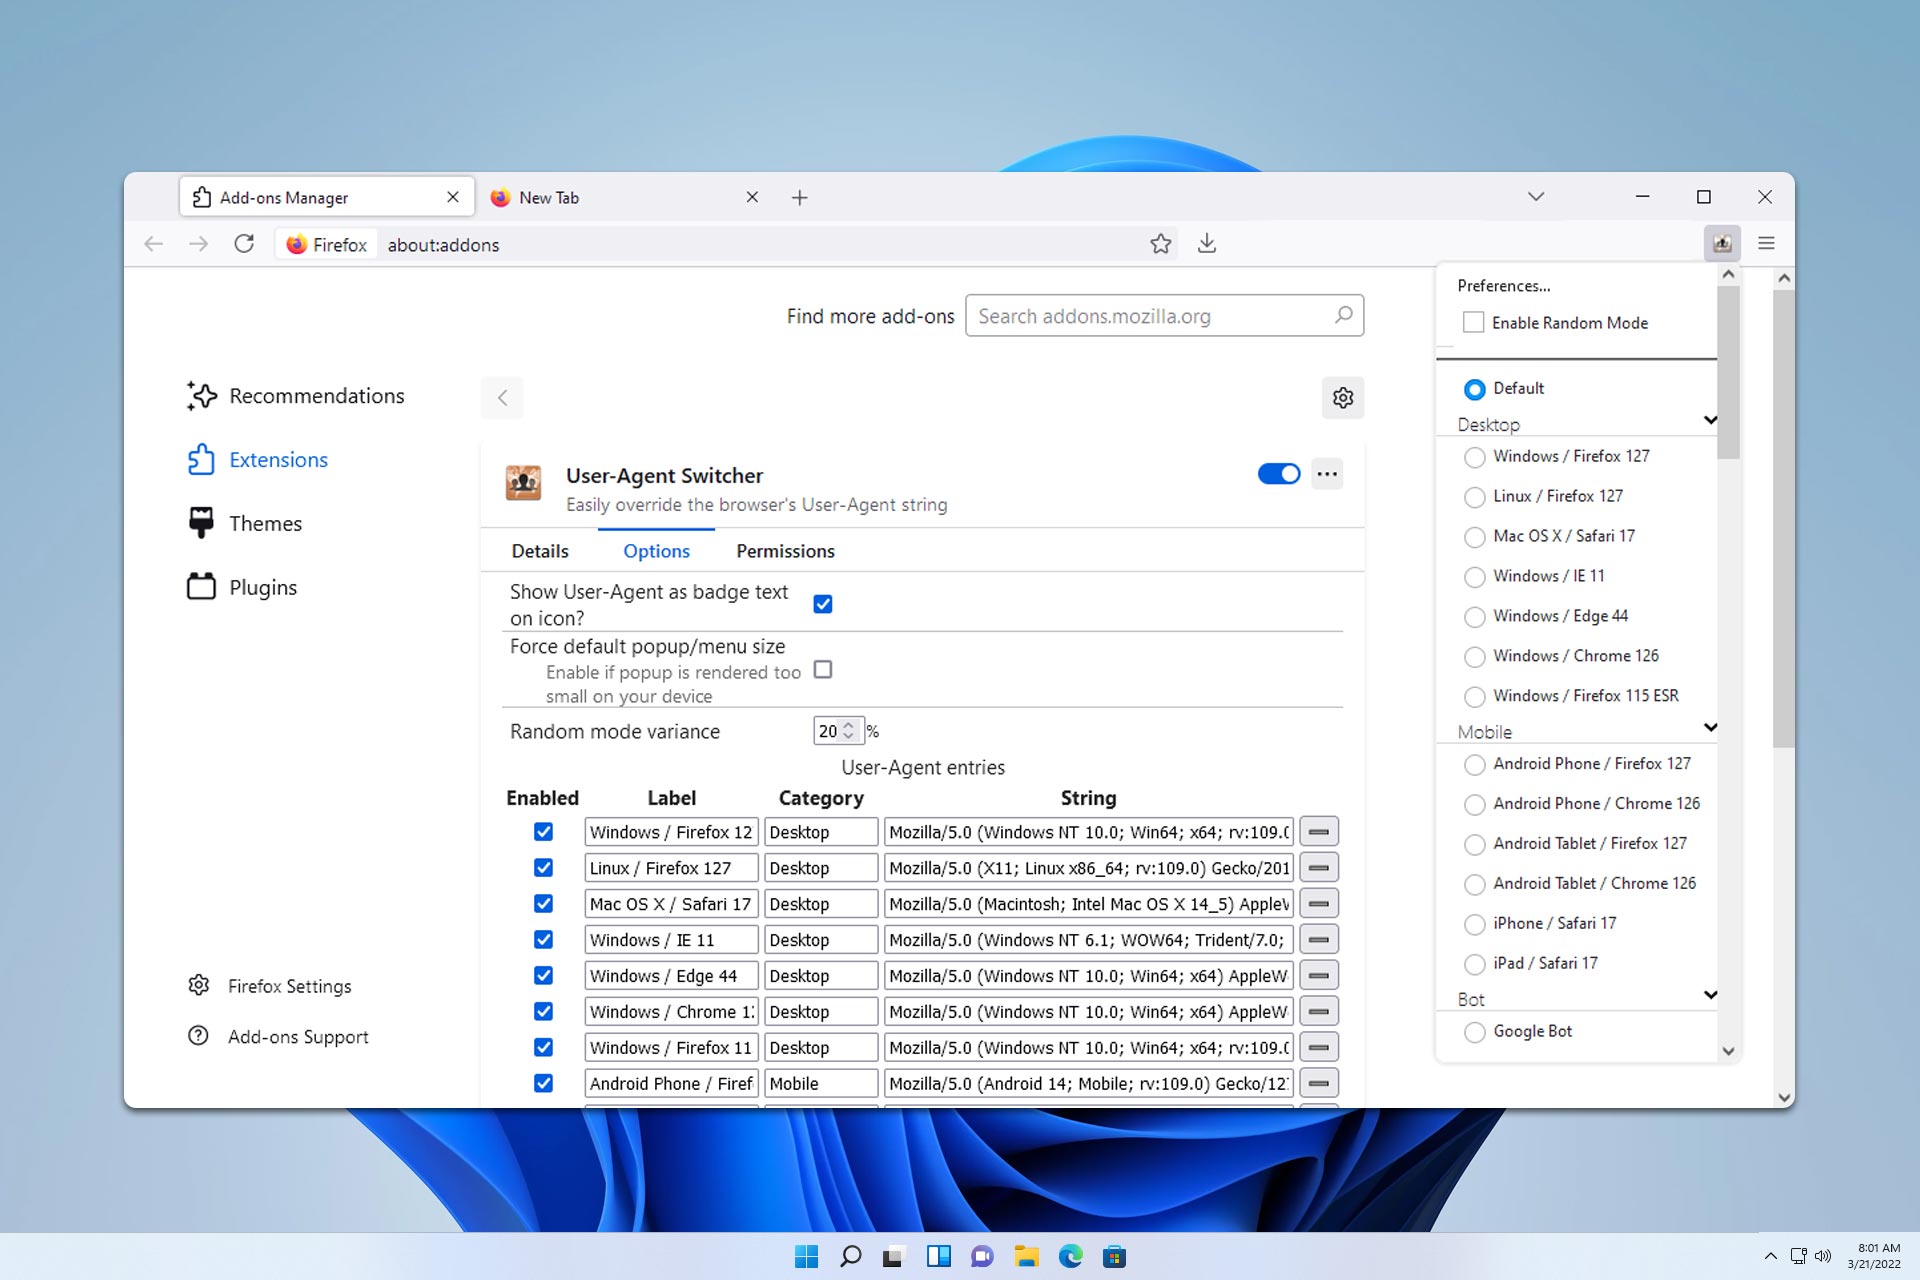
  4. Lastly, select the User-Agent Switcher from the toolbar and choose the desired user agent.
    user agent switcher open in firefox

Where is the Firefox user agent?

Firefox doesn’t have a setting that lets you change the user agent. Instead, you need to use the about:config page or extensions to do so.

Is it illegal to change user agent?

No, it’s not illegal to change the user again. Many developers use this option when optimizing their websites. Speaking of which, if you’re a developer, you might want to download Firefox Developer Edition and give it a try.

How do I reset my user agent?

  1. Open the about:config page in Firefox.
  2. Look for general.useragent.override and click the trashcan icon next to it.
    delete general useragent override
  3. Your user agent will now reset to default.

If you’re using extensions to change the user agent, disable or uninstall them.

As you can see, it’s pretty simple to change user agent on Firefox, and while it’s possible to do that without extensions, extensions tend to be simpler to use and might be a better option for less experienced users.

Keep in mind that issues with user agents can occur, and we wrote about Reddit user agent error in one of our older guides.

To learn more about Firefox, we have great guides on Firefox profile location as well as guide that shows you how to disable hardware acceleration in Firefox, so don’t miss them.

Bell Network Authentication Error: 7 Tested Fixes

Facing a Bell network authentication error may also appear as Error 2000 on your modem and can be triggered by local issues with your modem or by local outages. That is why, the first thing to do is to check the Bell Network status on your mobile device or another device that is not affected. Input the postal code or address in the dedicated field and find out. Also, it’s worth checking if if the services are paid.

How do I fix the Bell Network authentication error?

1. Check the modem connections

  1. Locate your modem and ensure all connections are secure. Unplug each cable and plug it back in to ensure it is tight.
  2. Check the power cord to ensure it is firmly connected to both the modem and the electrical outlet.
  3. Confirm that the Ethernet cable is properly connected from the modem to your computer or router.
  4. Examine the fiber optic cable, if applicable, to make sure it is not bent or damaged.

Ensuring solid connections can sometimes resolve the network authentication error as loose or improperly connected cables can disrupt the signal.

2. Power cycle your modem

  1. Unplug the power cord from the modem and wait for about 30 seconds.
  2. Plug the power cord back into the modem.
  3. Wait for the modem’s lights to stabilize. This may take a few minutes.
  4. Check to see if the error is resolved.

Power cycling your modem can reset its system and clear minor glitches that may be causing the authentication error.

3. Reset the modem to factory settings

  1. Locate the reset button on your modem. This is typically a small, recessed button that may require a pin or paperclip to press.
  2. Press and hold the reset button for about 10-15 seconds until the lights on the modem start to blink.
  3. Release the button and wait for the modem to restart completely.
  4. Reconfigure your modem settings as necessary, including reconnecting to your network.

A factory reset will return your modem to its original settings, which can resolve deeper issues causing network authentication errors.

4. Update the modem firmware

  1. Access your modem’s settings by opening a web browser and entering the modem’s IP address (e.g., 192.168.2.1).
  2. Log in with your username and password. If you haven’t changed them, they might be on the modem’s label or in the user manual.
  3. Navigate to the firmware update section in the settings menu.
  4. Follow the on-screen instructions to update to the latest firmware version.

Firmware updates often include fixes for bugs and compatibility issues, which can resolve network authentication errors. Usually, the firmware is updated automatically so a current update may be just the cause for the Bell Network authentication error. If that’s the case, let the modem update and retry.

5. Contact Bell support

  1. Gather information about the error, including the exact error code and the times it occurs.
  2. Call Bell Support at 1-866-310-BELL (2355) for Ontario and Quebec residents, or 1-866-342-7367 for residents of the Atlantic provinces.
  3. Provide the support representative with the error code and any troubleshooting steps you’ve already tried.
  4. Follow their instructions for further diagnostics or to schedule a technician visit if necessary.

If the issue is due to a service outage or a more complex technical problem, Bell Support can provide the necessary assistance to resolve it.

6. Use Virtual Repair Tool

  1. Navigate to the Bell Virtual Repair Tool website.
  2. Follow the on-screen prompts to log in to your Bell account.
  3. Allow the tool to run a diagnostic check on your network.
  4. Follow the recommendations provided by the tool to fix the issue.

The Bell Virtual Repair Tool can automatically detect and fix many common network issues, including network authentication errors.

7. Reposition your modem

  1. Move your modem to a more open and elevated location, away from walls or obstructions.
  2. Ensure it is not placed near other electronic devices that might cause interference.
  3. Keep it in a well-ventilated area to avoid overheating.

Proper positioning can improve your modem’s performance and prevent issues that may lead to network authentication errors.

By following these steps, you should be able to resolve the Bell network authentication error and enjoy a stable internet connection. To prevent future issues, regularly check your modem connections and keep your firmware updated.

If Bell Canada is blocking some websites, check the highlighted link to learn how to fix the problem.

For any suggestions or questions, check the comments section below and tell us about it.

How To Record a Skype Meeting on Your PC and Phone Easily

Knowing how to record a Skype meeting can be a helpful skill if you want to capture important decisions or discussions during a virtual meeting.

With the rise of video conferencing for home, school, or work purposes, you may feel the need to capture such sessions for future analysis or reference. Luckily, Microsoft’s Skype has a screen recording option.

I’ve compared various recording methods and listed the best ones below, so read on!

Skype Meeting Recording Features

How to Record a Skype Meeting
Image credit: Microsoft Support

Skype offers you the following meeting recording functionalities:

  • It records and combines the video and audio streams of all the video meeting participants.
  • If the video conferencing involves screen sharing or slideshow presentations, it’ll also record those.
  • If any participants leave the call, it’ll stop recording for that individual and continue for the rest.
  • When the meeting host or organizer leaves or ends the meeting, Skype posts the recorded video publicly in the chat box of the meeting.
  • Recording can go on as long as 24 hours.
  • Long recordings can be split into multiple video files.
  • All participants of the recorded meeting can access the content for up to 30 days.

However, keep in mind that everyone in the session will know you’re about to record the conversation. So, if you’re looking for a discrete way to record Skype video calls, read on!

How To Record Using Skype for Business

  1. Join a meeting using the Skype for Business app.
  2. If you don’t have any immediate meeting scheduled, click on the cogwheel icon on the left and choose Meet Now from the context menu.
Meet Now
  1. Click OK on the Join Meeting dialog.
Join meeting
  1. The video conferencing will start.
  2. Click on the three-dot menu below your profile picture, avatar, or webcam feed.
  3. Select the Start Recording option from the context menu.
Start recording
  1. A yellow banner will show above the Skype app buttons and below your video or profile picture. It should say Recording has started.
  2. To stop the recording process, again click on the three-dot menu and select Stop Recording.
stop recording
  1. The yellow ribbon will now show the All recordings have stopped message.
  2. From the Windows System Tray, you can now open the Skype for Business Recording Manager tool.
  3. There should be two Skype icons in the System Tray. One will be with a red solid dot. That’s the one you need to click.
  4. From the Skype for Business Recording Manager interface, you can now Play, Browse, Publish, and Rename the recorded meetings.
Skype for business

How To Record a Skype Meeting Using the Desktop App

If you’re using a personal Skype ID to host or join a video conferencing, you’ll need to use the Skype desktop app. Its call recording feature is slightly different than the Business version.

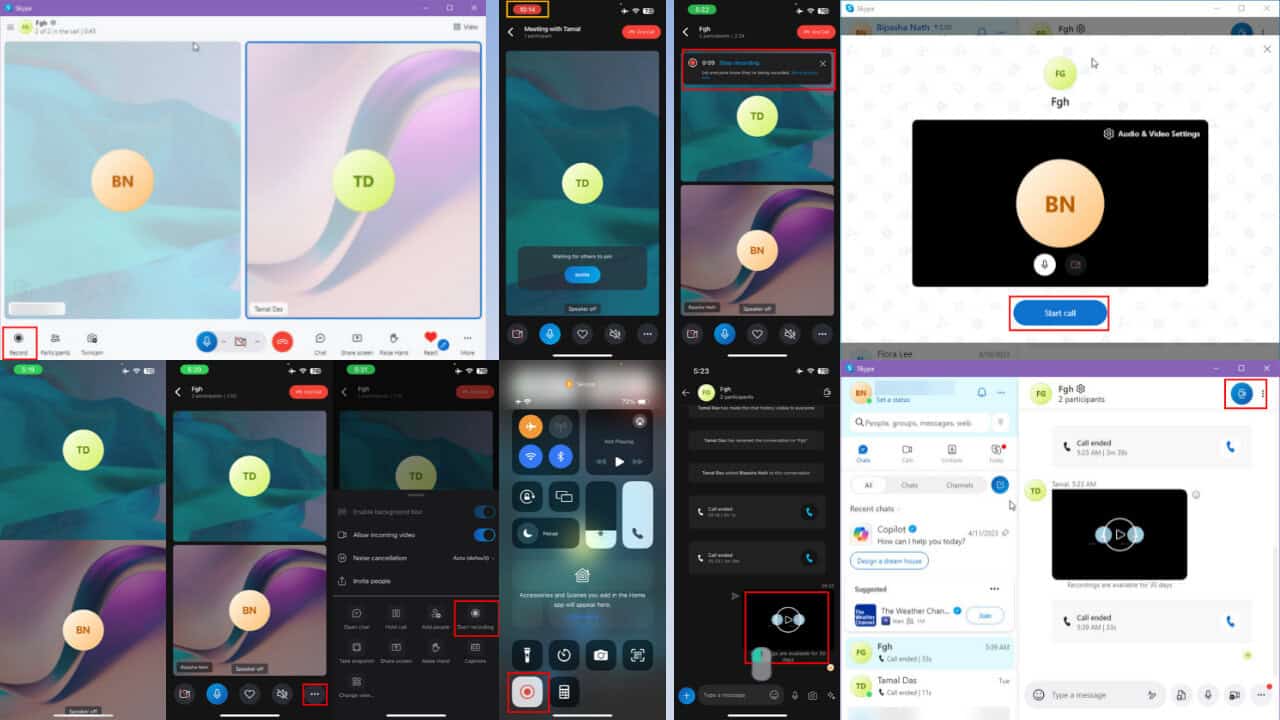
  1. Create a group or channel in the Skype app.
  2. Add participants to that group.
  3. Click the Skype video call button in the top right corner.
Start skype call
  1. Hit the Start call button on the next screen.
start call button
  1. As all other participants do the same, you should see the video conferencing interface with multiple profile pictures, webcam feeds, or desktop screen share feeds.
  2. When ready to record the session, click on the Record button in the lower left corner.
click record
  1. The recording banner would show up at the top of the screen.
recording on pc app
  1. After you end the call, Skype will create the MP4 file and post it in the chat thread of the group.
  2. Click the three dots menu of the video file and choose Save from the context menu.
save video on pc
  1. You can find the downloaded video in the Downloads directory.
Video recording in downloads

How To Record a Skype Meeting on the Mobile App

You won’t find the video call recording feature on the mobile app if you join an empty meeting. It’s unlike the Skype for Business app where you can practice call recording in an empty room.

Here’s how to use it on a smartphone:

  1. Create a new meeting and add participants to it.
  2. Tap the video calling button in the top right corner of the app.
add people
  1. When the meeting backstage shows, tap the Start now button to begin the video call.
start now
  1. You should now see the video calling interface with videos from all the participants.
video call stage
  1. Gently touch anywhere on the screen to bring up the Skype user interface buttons.
  2. Tap on the three-dots menu button in the bottom right corner of the app.
Tap three dots menu
  1. You should see a console with many functions.
  2. Tap on the Start recording button.
start recording
  1. It should be the fourth option counting from the Open chat button.
  2. The recording status and timer ribbon will show up on the call conferencing screen.
  3. It’ll also show up on the participants’ screens.
  4. Tap End call when you’re done with the meeting.
recorder
  1. Skype will now process the recorded data into a video file.
  2. The processing time is directly proportional to the length of the virtual meeting.
  3. Once it’s complete, the video file will show up as an attachment in the channel’s chat box.
  4. All the participants will see this item.
  5. To save the video file locally on the smartphone, long press on the video clip and choose Save from the bottom navigation panel.
long press on video
  1. iOS saves the video recording in the Photos app.
save video

How To Record a Skype Meeting Anonymously

Since Skype automatically alerts the whole group about call recording, you can opt for any of the following methods for discrete recording. However, you must do so ethically.

On a PC

  1. Start the video call as a host or join one as a participant.
Start Skype video call
  1. Press Ctrl + G to bring up the Windows Game Bar.
  2. Click on the Mic icon to enable it.
  3. Then, click on the Record button to start recording the video call.
  4. Make sure you maximize the Skype window to fill the whole screen.
Record Skype using Game bar

This method is only applicable if you’re using a Windows 10 or 11 PC.

On a Smartphone

All the latest Android and iOS smartphones come with built-in screen recording tools. You can simply start or join a Skype call from your mobile device and do the following:

  1. Swipe down from the top right corner of your iPhone to open the Control Center.
control center
  1. Scroll down on Control Center if you don’t see the Screen Record button.
  2. Once you reveal the Record button, tap on that.
screen record
  1. It’ll turn solid white with a red dot at the center.
  2. It means recording has started.
  3. Now, go back to your Skype call to record the session.
recording on iphone

Summary

So far, we’ve covered various methods on how to record a Skype meeting on a PC, smartphone, and the Skype for Business desktop app. You can choose the one that meets your device and video recording requirements.

Moreover, you can try specialized call recording software or Skype alternatives. Also, if you need help with blocking people, we have just the guide for that.

If this article helped or you know an even better trick, feel free to comment.
Microsoft Teams’ custom emojis are now available to users in the Preview program

Microsoft Teams has finally added the ability to create custom emojis and reactions. The long-awaited capability is now available in the Teams Public Preview program, so you’re already enlisted there. You can now personalize your Teams experience with the emoji details.

The Redmond-based tech giant has been teasing the option for users to create custom emojis and reactions for quite some time now. And this fresh inclusion is not only for amusement; it symbolizes a move towards more tailored and creative communication in Teams.

For those ready to try it, here is the deal: you can upload your emojis. Maybe you have a special symbol that means something to your team, or perhaps there is an amusing picture that shows how you feel right now. These custom emojis offer an excellent method for highlighting and emphasizing messages.

You shouldn’t worry about the technical aspects; the process is simple. Go to the emoji library in Teams, select a custom section, and then upload your preferred image.

However, it’s worth mentioning this feature can only be used in Teams apps for Windows, Mac, iOS, and the web. Users with Android might have to wait sometime before they can utilize it, too. And if you are curious about when this feature will be available, there isn’t a specific date for its release to all Team users yet.

According to the official blog post, Microsoft has set a maximum limit of 5,000 custom emojis for each tenant. This ensures everybody can participate in the enjoyment and enthusiasm without overloading the system. Admins have control over this feature—they can turn it on or off and decide who can create or delete emojis.

Custom emojis and reactions in Teams are a great way to efficiently communicate your status or share a lighthearted message or feeling. There is a maximum of 5,000 custom emojis allowed per tenant.

Microsoft

So, do you like it? Can you express your personality in Microsoft Teams using custom emojis and reactions? Let us know below, and post a screenshot of your emoji.

Microsoft withdraws from OpenAI’s board: What does this mean for the two companies?

Microsoft withdrew from OpenAI’s board as a non-voting observer. The company was given a seat without voting rights on the board of OpenAI only last year, which allowed it to observe the organization but not directly affect its decisions.

Nevertheless, according to the latest reports, Microsoft has decided to step back from its observer role—an unexpected move demonstrating a change in its relationship with OpenAI. This choice follows news that Apple, a separate tech leader, was also reviewing its participation on OpenAI’s board.

Microsoft’s departure from OpenAI’s board is a matter of changing corporate positions and signifies a more profound strategic shift. When the company first assumed the observer seat, OpenAI was changing, and Microsoft intended to offer support without influencing the board’s independence.

Despite the departure, Microsoft has expressed trust in OpenAI’s path. They highlight notable advancements made by the organization under the new board’s guidance. This sentiment is also reflected in a letter from Keith Dolliver, who serves as Microsoft’s deputy general counsel, to the board of directors at OpenAI.

OpenAI has appreciated Microsoft’s assistance and future-oriented view on partnerships. The organization is shifting to frequent stakeholder meetings to encourage teamwork and exchange advancements without utilizing the structured element of board observer positions.

The two companies have a history together, and Microsoft’s Copilot products use the GPT-4o AI model to function and complete tasks. So, while this move from Microsoft might not mean anything other than that it trusts OpenAI, it still raises questions about its future partnerships and projects.

In the future, the relationships between OpenAI, Microsoft, and Apple will remain important but might not be officially tied to one another.

Windows Security Smart Card Error: 7 Ways to Fix it

If Windows Security throws a Smart Card error or pop-up on your screen, it’s likely due to a misconfiguration. Surprisingly, the error even appears for users who have never had a smart card!

The problem arises due to corrupt SSL certificates or saved web credentials, issues with the smart card driver, or a buggy Windows update.

As for users who do use a smart card to access important apps and websites, the Windows Security error message reads, The smart card cannot perform the requested operation or the operation requires a different smart card. In this case, try unplugging the smart card and reconnecting it to a different port, and if that doesn’t work, move on to the solutions listed next!

How can I fix the Windows Security smart card error?

Tip icon Tip
If you are using a smart card and intend to continue with it, the first three solutions will help. For others who are not using one and still get the Windows Security Smart Card pop-up, solutions 4-7 will do the trick!

1. Clear the SSL certificates

  1. Press Windows + R to open Run, type inetcpl.cpl in the text field, and hit Enter.
  2. Go to the Content tab, and click on Clear SSL state.clear
  3. Now, click on Certificates.
  4. Select each certificate listed here, click on Remove, and confirm the change.delete to fix windows security smart card error
  5. Head back to Internet Properties and click Apply and OK to save the changes.
  6. Restart the computer and check for improvements.

In 9 out of 10 cases, clearing the SSL state and deleting saved certificates fixed Windows Security’s Smart Card error and allowed you to use the smart card to access the website/webmail it was intended for without throwing any further pop-ups.

2. Reinstall the smart card drivers

  1. Press Windows + X to open the Power User menu, and select Device Manager from the list.
  2. Expand the Smart Card entry, right-click on the affected smart card, and select Uninstall device.device manager
  3. Tick the checkbox for Attempt to remove the driver for this device, if available, and then click Uninstall.remove smart card driver
  4. Restart the computer, let Windows automatically install a fresh copy of the smart card driver, and check for improvements.

If the smart card has a warning sign next to its icon in the Device Manager, it indicates driver corruption. Here, you will need to reinstall the device driver for Windows Security to stop throwing error messages like A communication error occurred with the smart card.

3. Update the smart card driver

  1. Press Windows + S to open Search, type Device Manager in the text field, and click on the relevant result.
  2. Expand the Smart Card entry, right-click on the one that appears in the Windows Security error, and choose Update driver.update driver to fix windows security smart card error
  3. Select Search automatically for drivers and wait for Windows to install the best locally available version.search automatically
  4. Restart the computer and check for improvements.

If the Windows Security error message reads, The smart card requires drivers that are not present on the system. Please try another smart card or contact your administrator, updating the drivers will do the trick!

In case Windows can’t find a better version, head to the manufacturer’s website, and manually install the driver. Or, for a seamless and error-free installation experience, use a top-rated driver updater tool.

4. Disable smart card login

4.1 Via Registry

Note icon NOTE
The following steps will modify the Registry, so I recommend you create a restore point beforehand. This will allow you to revert to the previous stable configuration in case things go wrong.
  1. Press Windows + R to open Run, type regedit in the text field, and hit Enter.registry editor
  2. Click Yes in the UAC prompt.
  3. Paste the following path in the address bar and hit Enter: HKEY_LOCAL_MACHINE\Software\Microsoft\Windows\CurrentVersion\Policies\Systemregistry path
  4. Double-click the scforceoption DWORD on the right.
  5. Enter 0 under Value data to disable smart card login and click OK to save the changes.change value data to fix windows security smart card error
  6. Restart the computer.

4.2 Via Local Group Policy Editor

Note icon NOTE
The Local Group Policy Editor comes pre-installed on the Pro edition of Windows. If you are using the Home edition, you will need to manually install gpedit.msc.
  1. Press Windows + R to open Run, type gpedit.msc in the text field, and hit Enter.gpedit.msc
  2. Now, navigate the following path: Computer Configuration > Administrative Templates > Windows Components > Smart Card
  3. Double-click the Turn On Smart Card Plug and Play service policy on the right.policy
  4. Choose Disabled and click on Apply and OK to save the changes.disable to fix windows security smart card error
  5. Restart the computer and check whether the Windows Security Smart Card error is fixed.
  6. If you continue receiving smart card pop-ups, disable other policies in the list.

5. Delete all saved web credentials

  1. Press Windows + S to open Search, type Credential Manager in the text field, and click on the relevant result.
  2. Now, individually expand all saved credentials under Web Credentials, and click on Remove for each.delete web credentials to fix windows security smart card error
  3. Click Yes in the confirmation prompt.
  4. Once done with all the saved web credentials, restart the computer.

6. Uninstall the last Windows update

  1. Press Windows + I to open Settings, go to Windows Update from the left pane, and click on Update history.windows update
  2. Scroll down and click on Uninstall updates.
  3. Click the Uninstall option next to the recently installed update.uninstall update to fix windows security smart card error
  4. Click on Uninstall in the confirmation prompt, then restart the PC and check for improvements.

For roughly 2 out of 5 users, the problem started after installing a new version of Windows. And in this case, uninstalling the Windows update did the trick. Remember, you may have to uninstall a few updates to get things back on track!

7. Factory reset the PC

When nothing else works, the last option is to reset the PC to factory defaults. During reset, you can choose the Keep my files option to prevent them from being deleted. Still, I would recommend backing them on an external storage drive in case the reset runs into an error and corrupts the stored data.

factory resetting the PC
Resetting the PC

After you are done with the reset (it may take upto an hour), there won’t be Windows Security Smart Card pop-up errors anymore.

When I once started receiving these pop-ups, deleting the SSL state and certificates fixed things in no time. However, it could be a different solution for you. So, try them all!

Before you leave, discover some quick tips to make your Windows PC run faster than ever.

Which fix worked for you? Share with our readers in the comments section.

AMD announces plans to buy Silo AI, Europe’s biggest AI Lab

AMD, a major player in the tech industry, plans to buy Silo AI for $665 million in cash, according to the latest announcement; for those of you who don’t know, Silo AI is Europe’s biggest private Artificial Intelligence lab. AMD wants more presence within the field of AI, as the company might want to take on big competitors such as Nvidia.

The move of Silo AI under AMD’s control is not just a buying act. It means investing in a coming time where artificial intelligence becomes the core of every action we perform. The particular skill of Silo AI in making tailored AI solutions, which they apply across many markets, will bring about significant change for AMD.

First, Silo AI is not a tiny company. They have more than 300 AI specialists on their team, with around 125 PhDs among them, and they’ve been leading the way for quite some time in AI innovation. They have made AI-driven solutions for well-known companies such as Allianz and Philips, and they were among the first to train big language models on some of the quickest supercomputers worldwide. Picture what can happen when this brain power links up with AMD technology.

This purchase is not just a deal in business terms; it represents AMD’s announcement of its aspiration to become a global AI race leader. The company is already developing Ryzen chips that perform better at AI tasks than similar chips on the market. So, having invested more than $125 million in AI firms within the last 12 months shows that AMD is seriously competitive and wants to take its AI initiatives to the next level.

You might be thinking, what do we gain from this? Well, the answer is faster and smarter technology. AMD’s entry into AI could lead to progress in areas such as cloud computing, smart devices, and self-driving cars. The term “integration of AI with AMD’s offerings” hints at a future where our gadgets are smarter and better fitted for us.

If everything goes as planned, this deal will be completed in the second half of 2024.

The buying of Silo AI by AMD is a courageous action that shows the strong dedication of this company to be at the forefront of AI, while for us end users, it marks an era where our involvement with technology becomes smoother, instinctual, and, maybe, smart.

Dltray.exe: What is it & Should You Remove it?

Many users reported dltray.exe on their PC, and since they are not familiar with the file, they suspect that it might be harmful. In this guide, we’re going to tell you everything you need to know about this file.

What is dltray.exe and should I remove it?

What is dltray.exe?

This file seems to be associated with DeviceLock software. This software is owned by Acronis, and it’s used to prevent data loss and theft in companies by enforcing certain security policies.

The dltray.exe is likely associated with the tray icon that is used by this software.

Is dltray.exe safe?

Yes, this file should be perfectly safe if it comes from a legitimate source. If you have Acronis DeviceLock software installed, it’s rather likely that you have the legitimate version of the file.

You can always check the publisher of the file by doing the following:

  1. Locate dltray.exe on your PC.
  2. Right-click it and choose Properties.
    properties context menu
  3. Go to the Details tab and check if the information mentions Acronis.
    details tab
  4. Lastly, go to Digital Signatures and ensure that the file is properly signed by Acronis.

Is dltray.exe malware?

No, if this file isn’t malicious, however, you can always scan it by doing the following:

  1. Right-click the file and choose Show more options.
     show more options context menu
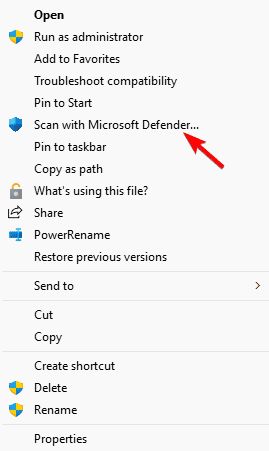
  2. Next, select Scan with Microsoft Defender.
    scan with Microsoft Defender context menu
  3. Wait for the scan to finish.

If you’re using a different antivirus software, the process will be different.

Should I remove dltray.exe?

If you have Acronis DeviceLock installed, you should keep this file on your PC since the application relies on it.

If you never used this software before and you don’t have it, you can go ahead and remove the file.

As you can see dltray.exe is in most cases perfectly safe to use since it’s a part of Acronis DeviceLock software.

Many users also noticed Wscript.exe and Openwith.exe on their devices, and we covered these two files in separate guides, so don’t miss them.

How to Check if Your Password is Compromised

It’s important to check password data breach in today’s digital age. Unfortunately, most passwords can be hacked within 1 minute and recently, over 10 million passwords have been exposed online. If you’re worried that your password might be compromised, here are some quick and easy methods to verify its security and strength.

How do I check if my passwords have been compromised?

1. Check your password on the Have I Been Pwned website

  1. Go to the Have I Been Pwned website.
  2. Click on the Passwords tab.
  3. Enter your password into the provided field.
  4. Click pwned? to see if your password has been included in any data breaches.

This tool compares your password against a database of compromised passwords. If your password is found, it means it’s known to hackers and should be changed immediately.

2. Use Google Password checkup

On Google Chrome:

  1. Open Google Chrome and click on your profile icon at the top right corner.
  2. Select Google Password Manager.
  3. Click on Checkup to initiate the password checkup.
  4. Here, you can click on every compromised account and change the password.

On the Web:

  1. Go to Google Password Manager.
  2. Click on Go to Password Checkup.
  3. Sign in to your Google account if prompted.
  4. Click Checkup.

On Android:

  1. Open the Settings app on your Android device.
  2. Search for Password Manager and tap it.
  3. Tap Password Checkup to start scanning your saved passwords for security issues.

This solution helps you identify and change any unsafe passwords saved in your Google Account, enhancing your online security.

3. Use a password strength checker

  1. Open a trusted password strength checker like the one from Security.org or Bitwarden.
  2. Enter your password in the designated field.
  3. Review the feedback provided, including the estimated time to crack your password and any suggestions for improvement.

Password strength checkers analyze the complexity of your password, checking for length, character variety, and common patterns. This helps ensure your password is difficult for hackers to guess or brute-force.

4. Calculate password entropy

  1. To manually calculate password entropy, use the formula: E = log2(R^L), where E is entropy in bits, R is the range of characters, and L is the length of the password.
  2. For a more straightforward approach, use an online entropy calculator like the one provided by NordVPN.
  3. Enter the details of your password to determine its entropy and assess its strength.

Higher entropy means greater randomness and security. Calculating password entropy helps you understand how resistant your password is to various attacks.

5. Use a Password Manager with built-in checker

Download and install a reputable password manager, such as the one we’ve gathered in the highlighted list. After that, use the built-in password generator to create strong, unique passwords.

Check the generated password’s strength within the manager itself, which often includes entropy calculations and checks against known compromised passwords.

Password managers provide an all-in-one solution for generating and storing secure passwords. They often include features to check the strength and safety of your passwords.

5. Regularly update and diversify passwords

  1. Set a reminder to review and update your passwords every 6-12 months.
  2. Ensure each password is unique to prevent a single breach from compromising multiple accounts.
  3. Use a mix of uppercase and lowercase letters, numbers, and special characters.

Regular updates and diverse passwords reduce the risk of multiple accounts being compromised in case of a data breach. Unique, complex passwords are harder for hackers to crack.

Also, whenever possible use 2FA or MFA. two-factor or multi-factor authentication is a much safer way to log into security-sensitive applications. Google Passkeys should also suffice if you want to go password-free.

By using these methods, you can effectively check if your password is compromised, measure its strength, and ensure it meets high-security standards. Remember to stay proactive about your password security to keep your accounts safe.

If you need a wake-up call on this matter, you can check some recent password statistics for more information.

How is the password situation on your accounts? Let’s talk about that in the comments below.

Firefox spams users with notifications to open browser on every computer restart

Following its ability to auto-launch on Windows with Firefox 127, we noticed Firefox is showing multiple notifications in Firefox 128, prompting, that you can set the browser to open automatically when restarting the computer.

In Firefox 127, Mozilla introduced the ability to configure automatic opening on Windows startup. The browser’s built-in messaging system informs users about this with notifications like “Open Firefox every time you restart your computer? You can set Firefox to automatically open when you restart your device” and offers options to “Open with Firefox,” “No thanks,” or dismiss the notification.

Today, upon launching Firefox 128 stable, we encountered two notifications regarding the same functionality, worded slightly differently to inform you can manage startup preferences in Windows Startup Settings. However, the issue lies with the duplicate notifications.

Open Firefox every time you restart your computer notification

The notification displays the message “Open Firefox every time you restart your computer? To manage Startup preferences, search ‘startup’ in Settings.” It also offers options to “Learn more,” “No thanks,” and “Yes, open Firefox.”

Notification prompts user to set Firefox to open on every computer restart
Image Credit: Windows Report

We, at Windows Report, noticed the issue has been reported with Firefox 127 already. The company has no idea how to repro this where a user encountered a more extreme case and received 16 notifications in their browser.

“FF Update 127.0: Auto Start On Restart Computer Message Gets Spammed After Updating” the bug message reads.

You can always adjust Firefox’s startup behavior on Windows to your liking by visiting Settings > General > “Open Firefox automatically when your computer starts up.”

Meanwhile, if you’re affected or not affected visit about: config, change the below preference enabled value to false, and restart Firefox.

  1. visit about:config
  2. Ensure the checkbox is ticked and click “Accept the Risk and Continue”
  3. Search for “messaging”
  4. Edit the “browser.newtabpage.activity-stream.asrouter.providers.messaging-experiments” pref value
  5. Set “id”:”messaging-experiments”,”enabled” value from true to false.
  6. Restart Firefox

This appears to be a potential bug. While Mozilla might not have direct control over this behavior as it triggers on the user’s device, hopefully, Mozilla will identify and address the multiple notification issue in a future update.

Besides the issue of spammy notifications prompting users to open Firefox on computer restart, you can now enable Vertical Tabs in Firefox. Mozilla is also testing HTTPS-First Mode in Nightly and running a campaign to find unofficial websites offering third-party installers.

Are you affected? Let us know in the comments below.

Microsoft Edge 128.0.2690.1 fixes many of the browser’s annoying UI bugs

Microsoft Edge 128.0.2690.1 is now available in the Dev Channel, bringing many fixes and small changes with it.

Firstly, a little something for those who appreciate smooth browsing. The update brings keyboard focus functionality for the hide button used in autofill. This is a minor alteration, but it adds convenience, particularly for people switching between a keyboard and a mouse.

If you have ever been frustrated by crashes while restoring tabs or during a sync status change on your mobile devices, this update has directly addressed these problems for Android and iOS users.

The update also made the user interface smoother. Did you ever notice how the extensions menu did not work well with hover states that were high in contrast? Or do you remember that strange bleed at the lower corner of the side pane when hovering? Neither of these things exist anymore. Also, they have ensured that the auto-open toggle truly recalls your decision and that the ‘Sign in to sync data’ button doesn’t linger on your screen after you sign in.

This update will clarify the UI for those who see two address bars or find all their tab groups listed as open even after deleting some. Users who pay attention to details will like that deleting search results no longer remove unrelated history records.

They have not left Linux users out—there is a solution for that wrong spacing in the title bar. And Android people, if you were confused by the ‘chrome-native://new tab/’ URL on the feedback page for NTP or found no response when clicking the settings button in the Global Speed extension, these problems have been fixed.

This is a reminder that the stable version of Edge 128 (with a new Copilot button) will be available in the week starting August 22nd, 2024. You can read Microsoft Edge 128.0.2690.1’s full changelog here.

Fitbit App For Windows 10: How to Get it on Your PC

Fitbit is no longer available on Windows and Mac, but many are still wondering if they can install the Fitbit app for Windows 10. Today we’ll show you a few workarounds that you can use.

How do I get the Fitbit app on Windows 10?

1. Convert the web version to a desktop app

  1. Open the Fitbit page with Microsoft Edge and log in. Open your Dashboard.
  2. Click the Menu icon in the top right corner and choose Apps. Select Install Fitbit.
     install fitbit edge
  3. Click on Install to confirm.
    install fitbit confirm
  4. Wait for the process to finish.

If you’re using Chrome, do the following:

  1. Open the Fitbit page in Chrome, log in, and access your Dashboard.
  2. Click the Menu button in the top right select Save and share. Lastly, click on Install Fitbit.
     install fitbit google chrome
  3. Click Install once again to confirm.
    install app chrome confirm

After doing that, you’ll have the web version of Fitbit installed as an “app” on Windows 10, and you should be able to access it without any issues.

2. Use an Android emulator

  1. Install any Android emulator.
  2. Once you finish the setup, start the emulator and make sure you log in with your Google Account.
  3. Open the Play Store and look for Fitbit.
    play store android emulator
  4. Download the application and install it on the emulator.

While this method gives you the same experience as on your phone, you’ll have to start the emulator every time you want to use Fitbit and that can be a bit tedious.

In case you decide to use this method, we have a guide on the best Android emulators for Windows 10, so don’t miss it.

What happened to the Fitbit app for Windows?

Fitbit app for Windows and Mac was discontinued in 2022 and it’s no longer available for download on these platforms.

Does the Fitbit desktop app still work?

No, the desktop app is no longer available, and it doesn’t work anymore on the PC.

Did Fitbit stop support for Windows?

Fitbit app is no longer supported on Windows, but the web app still works on Windows and all other desktop platforms.

As you can see, since the official app is discontinued, you can’t install it, and the best alternative is to install the web version of Fitbit as an app and use it.

The same applies if you want to get a Google Maps app for Windows 7 or use any other discontinued software on Windows.

Microsoft released Build 26252 to the Canary channel, adding the ability to personalize the Lock Screen

Microsoft released Windows 11 Build 26252 in the Canary Channel. This update has many improvements, with a special focus on the Lock Screen and Start menu, among other places.

Windows users can now get lively updates about weather, finance, traffic, and sports on their Lock Screen. Not only can you drag and drop to pin apps from the redesigned Start menu, but it also lets you do so directly onto the taskbar. These little tweaks make the user experience smoother and more personalized. Microsoft teased this feature, a while ago, but now it’s finally available in the Canary channel.

In the Start menu, dragging apps from the Start menu to pin them to the taskbar is a small yet valuable enhancement. This simplifies customizing your taskbar and improves ease of access for frequently used applications.

The Settings menu also has something new. It shows the evaluation copy expiry date in Settings > System > About, which helps you know when your build will no longer be valid. Another fresh thing is an energy suggestion for switching off HDR to save power on PCs with HDR screens, which can be found in Settings > Power & battery > Energy recommendations.

Certainly, no update is perfect. This build tackles a few problems, such as errors when using Voice Typing with particular languages. It displays variations in the Performance part of Task Manager while dark mode is on. There were solutions for big-sized icons at Settings > Apps > Startup and repeated text at Settings > System > Power & Battery.

The Redmond-based tech giant also acknowledged that some Windows Insiders in the Canary and Dev Channels could get stuck on earlier builds, but the company is working on it. However, a clean installation with the latest ISO is suggested if you want to move up to the newest build today.

You can read Build 26252’s full changelog here.

Copy-item Access is Denied in PowerShell: 8 Tested Fixes

Running into the Copy-Item Access is Denied error in PowerShell is baffling since you can perform the process in File Explorer without a problem. This is due to lack of NTFS permissions when writing to a network share but the solutions below will fix the problem in no time.

How do I fix the Copy-Item Access is Denied error in PowerShell?

1. Ensure correct NTFS permissions

  1. Press Win + E to start File Explorer.
  2. Navigate to the folder you want to modify.
  3. Right-click on the folder and select Properties.
  4. Click on the Security tab.
  5. Click the Edit button to change permissions.
  6. Ensure your user account or the account running the PowerShell script has Full Control permissions.
  7. Click Apply and then OK to save the changes.

Ensuring proper NTFS permissions allows the script to write to the folder, resolving access issues.

2. Verify the Share permissions

  1. Open the Run dialog by pressing Win + R, type fsmgmt.msc, and press Enter.
  2. Navigate to the shared folder.
  3. Right-click on the folder and select Properties.
  4. Click on the Share Permissions tab.
  5. Ensure that the user or group running the PowerShell script has Full Control permissions.
  6. Click Apply and then OK.

Both NTFS and Share permissions need to allow write access for successful file copying.

3. Run PowerShell as Administrator

  1. Click on the Start button.
  2. Type PowerShell in the search bar.
  3. Right-click on Windows PowerShell and select Run as administrator.
  4. Execute your Copy-Item script again.

Running PowerShell as an administrator ensures full access to protected system folders and network shares.

4. Use UNC paths without credentials

  1. Create a new PowerShell drive for the network location using New-PSDrive: New-PSDrive -Name "P" -PSProvider FileSystem -Root "\\network\path" -Persist
  2. Use the new drive letter to execute Copy-Item (change the source and destination paths accordingly): Copy-Item "P:\source\file" -Destination "P:\destination\path"

Using UNC paths and mapping a network drive helps avoid credential-related issues with network paths.

5. Modify Environment Variables in PowerShell

  1. Replace environment variables with PowerShell syntax: Copy-Item -Path "E:\FolderA" -Destination "C:\Users\$($env:USERNAME)\AppData\Roaming\FolderB" -Recurse -Force
  2. Alternatively, use the APPDATA environment variable directly: Copy-Item -Path "E:\FolderA" -Destination "$($env:APPDATA)\FolderB" -Recurse -Force

Correctly referencing environment variables in PowerShell ensures paths are resolved properly.

6. Enable PowerShell Remoting

  1. On the remote machine, run: Enable-PSRemoting -Force
  2. Ensure the user has permission to run scripts on the remote machine: Set-PSSessionConfiguration -ShowSecurityDescriptorUI -Name Microsoft.PowerShell
  3. Use the ToSession parameter for remote copying: $session = New-PSSession -ComputerName "remote_machine" -Credential "username" $source = "C:\path\to\source" $dest = "C:\path\to\destination" Copy-Item -Path $source -Destination $dest -ToSession $session -Recurse -Force

Enabling PowerShell remoting and using the correct session parameters makes remote file operations smoother.

7. Address User Account Control (UAC) issues

  1. Create a PowerShell script to elevate permissions: If (-NOT ([Security.Principal.WindowsPrincipal][Security.Principal.WindowsIdentity]::GetCurrent()).IsInRole([Security.Principal.WindowsBuiltInRole] "Administrator")) { Start-Process powershell -Verb runAs -ArgumentList $MyInvocation.MyCommand.Definition Break }
  2. Execute the Copy-Item command within the elevated session: Copy-Item "C:\source\file" -Destination "C:\Program Files (x86)\target\folder" -Force

Elevating permissions within the script circumvents UAC restrictions.

8. Handle the Double Hop issue

  1. Pre-copy necessary files to the remote machine: Copy-Item -Path "C:\local\path\file" -Destination "\\remote_machine\path" -Force
  2. Use Invoke-Command to run the installation on the remote machine: Invoke-Command -ComputerName "remote_machine" -ScriptBlock { Copy-Item -Path "\\remote_machine\path\file" -Destination "C:\Windows\Temp" -Force Start-Process msiexec -ArgumentList "/i C:\Windows\Temp\installer.msi /quiet" -Wait }

Pre-copying files and using direct paths prevent issues related to multiple remote connections.

By following these solutions, you should be able to resolve the Copy-Item: Access is denied error in PowerShell.

Once this error is cleared out, you may also check our guide on what to do if PoweShell is not showing the full output.

Also, if PowerShell is closing after running a script, click the highlighted link to learn how to keep it open.

For any suggestions or question, hit the comments section below to write them down.

How to Create an Anonymous Survey in Microsoft Forms

Microsoft Forms is a popular tool for creating online surveys, forms, polls, and quizzes. It can also create anonymous surveys, which allow respondents to provide feedback without revealing their identities.

Creating an anonymous survey in Microsoft Forms is a simple process; in this guide, we will discuss the steps to do the same.

How do I make a Microsoft Forms survey anonymous?

  1. Visit the forms.microsoft.com website and sign in with your Microsoft account or Office 365 account.
  2. On the webpage, click New Form.Start form - Create an Anonymous Survey in Microsoft Forms
  3. Name the form and add a description to it.Form name
  4. Click Add new to select Choice, Text, Rating, and Date. If you want to add anything else, click the drop-down menu and choose Ranking, Likert, Upload File, Net Promoter Score, and Section.Add new - Create an Anonymous Survey in Microsoft Forms
  5. If you want a long answer, toggle on Long answer; if you don’t like the respondent to skip the answer, toggle on Required. You can also add Restrictions, Subtitles, and Branching.
  6. Once you have set the questions, locate the three-dot (More form settings) icon from the top right corner and click Settings.Settings
  7. Under Who can fill out this form, select Anyone can respond. This will make the form accessible to respondents without requiring sign-in.Anyone can respond
  8. Once you have prepared the questions, click Collect responses.Collect responses
  9. In the next dialog box, make sure Anyone can respond is selected. Now, you can click the Copy link option and paste the form into groups to share it. Enter people’s names, Teams group, or channel, and click Send.Send form

If the respondent is unable to see all questions in Microsoft Forms, ask them to sign out and back in. To learn more, check out this detailed guide.

Can Microsoft Forms be truly anonymous?

When you select the Anyone with the link who can respond option, a response submitted is anonymous. Microsoft Forms can not identify the individual’s identity who submitted the response, and it will be displayed as anonymous.

Also, even the admin and creator of the form can not see the username for the anonymous responses. When they check the responses, they only show the respondent as anonymous. So, there is no way to track the respondents’ identities.

Earlier, the anonymous responses could be seen by global admins of Microsoft 365 through the Audit log, and the survey information, including ID and date columns, could be exported to an Excel sheet, provided they have enabled Audit logs. However, Microsoft now seemed to have corrected this flaw.

What are the benefits of anonymous surveys?

  • Honest feedback – The respondents don’t have to worry about identification; they will be more confident in giving candid responses.
  • More participation – With no fear of identification, individuals will be more willing to participate in surveys and polls.
  • Improved data quality – These surveys foster open and honest communication, contributing to higher-quality data that helps companies make informed decisions based on unbiased information.
  • Removes bias – Anonymity helps you remove biases based on demographic factors like age, gender, or ethnicity that could influence how respondents perceive or respond to some questions.
  • Enhanced trust and confidentiality – Anonymity reassures respondents that personal information will be kept confidential, which builds trust between respondents and the surveyor.

If you encountered your account is not enabled for the Microsoft Forms problem, follow the steps outlined in this article. 

To conclude, creating an anonymous survey in Microsoft Forms ensures the respondents feel secure and comfortable while sharing unbiased and honest feedback. This way of collecting opinions can be helpful if you wish to improve survey participation and get quality data.

If you are unable to open Microsoft Forms, it could be due to permissions issues. Read this guide to learn more.

Will you create anonymous Microsoft forms? Share your opinions with our readers in the comments section below.

Microsoft teases Copilot in Loop, announces private preview for it

Microsoft is teasing the Copilot integration with Microsoft Loop with a post on X (formerly known as Twitter) showcasing how the AI model turns empty pages into organized documents, making content creation easy.

A private preview of this brand-new feature is now available to users, and it will be released to all enterprise users with a Copilot subscription in the following weeks.

If you’re using Microsoft Loop on a daily basis, you should be excited. Why? Well, Copilot in Microsoft Loop can be very helpful when you start creating a document.

You’ll have three main options: building a fresh page from the beginning using a text prompt, reusing and modifying an already-made Loop template, or reusing and modifying an existing Loop page.

However, Microsoft Copilot in Loop can only comprehend the text within the Copilot block. It will not recognize anything outside or linked to this specific section. Despite this limitation, the benefits of improved efficiency and productivity are great.

To be eligible for this feature, you’ll need a Microsoft Copilot subscription, as we mentioned earlier. This means you’ll need a Microsoft 365 E3 or E5 license to purchase a Microsoft Copilot for Microsoft 365 license. But there’s good news coming up: customers using Microsoft 365 F3 and F1, Office 365 E1, Business Basic, and more will soon be able to.

In other news, the Redmond-based tech giant also updated Microsoft Loop to notify users of various updates. For example, as a manager, you’ll be able to create custom notifications that will let you know when your workmates complete their tasks. One more reason to use Loop, right?

Age of Mythology: Retold announces closed beta taking place from July 12th to 14th

Age of Mythology: Retold is right around the corner, but if you can’t wait until September 4, there will be a secret beta testing phase from July 12th to 14th available only for those who pre-order Premium Editions. This new version of the beloved game is not only a reference to the past; it’s an actual resurrection, ready to launch on PC and Xbox Series X|S consoles starting September 4, thanks to World’s Edge and Microsoft.

For this quick look, you will jump directly into a lively situation. Begin with the Tutorial, shake off your rustiness, and then move on to the first five missions from the Fall of Trident campaign.

Would you like to have a skirmish or multi-player battle? The beta offers a variety of maps that reflect the variety in the complete game, even though it only has eight players.

If you are interested in mythology, this is your chance to control three powerful Pantheons: Greek, Norse, and Egyptian. You can summon mythological creatures and use godly abilities to defeat your enemies.

Now, if you are thinking, “How can I participate?” it is easy. Pre-order the Premium Edition at $49.99 from Steam or the Xbox Store, and that’s all you need to do.

It is not just a key to the beta; it also allows early entry into the game one week before it is launched and provides two upcoming expansion packs. If you are concerned about starting late in the beta phase, don’t worry! You can pre-order anytime and still have fun playing this version.

In this closed beta, developers are interested in getting feedback about various aspects, such as gameplay mechanisms, possible faults, and equilibrium problems. This is an opportunity to leave your mark on the game and guarantee it matches the reputation of its previous version.

If you didn’t get into the Age of Mythology: Retold Beta, a stress test might be available to all PC Steam players before the game comes out. It’s an opportunity for everybody to try it out and assist in testing how far the servers can handle it.

You can find out more here.

Microsoft Teams will be enhanced with Copilot speaker recognition that identifies all the participants in a meeting

In a time of virtual meetings as the new standard, Microsoft is improving Teams Rooms on Windows with its Copilot speaker recognition technology. Picture being in a meeting, and the tech understands who’s talking, making it obvious and unique for everyone to contribute.

That’s precisely what Microsoft’s Copilot speaker identification technology is doing. It is similar to making a voiceprint for every participant, like how we have digital fingerprints for their speaking style. This function is not only about recognizing who spoke; it also helps enhance the accessibility and effectiveness of meetings, as live transcriptions can now identify speakers no matter which microphone they use.

According to the blog post, all microphones are compatible with this feature, thus making it simpler for every Teams Rooms user to enjoy improved clarity and concentration during meetings. This is significant because it removes obstacles in effective communication, guaranteeing that noise from the surroundings does not overshadow crucial remarks.

AI-powered speaker recognition technology has now expanded to all Teams Rooms on Windows devices, regardless of the microphone type. This was previously only available with intelligent speaker equipment in the room. Now any Teams Room on Windows can enhance meeting experiences with precise speaker attribution and intelligent insights from Copilot. Everyone can be recognized and get the most from Copilot with our cloud technology, Teams Rooms devices such as Surface Hub 3, and other devices certified  from partners.

Microsoft

Creating your digital voice profile is simple and helps Teams Rooms to know who you are in every meeting. The reason behind this feature isn’t just convenience; it’s about making the meeting experience more tailored and interesting. When Copilot works with Teams Rooms, meetings can be shortened by summarizing them for later reference while labeling tasks that make follow-up actions easier.

But what about privacy and security? You might wonder how the company handles these aspects. Microsoft says that the voice and face data are encrypted and GDPR compliant. They also offer the choice to unenroll whenever desired.

This feature will soon be available for Teams desktop apps and, in 2025, on Android devices.

Snapdragon X Elite Monitor Support: Can I Connect a 4K 120Hz Display?

Snapdragon X Elite powered laptops are already available and they are taking the market by storm. We don’t know if you will be able to connect an eGPU to these laptops in the future, but right now, you can’t. But the users are also wondering what is the Snapdragon X Elite external display support.

How many monitors can I connect to Snapdragon X Elite?

In the Snapdragon X Elite technical specification sheet provided by Qualcomm, things are pretty clear. The chip supports Display port v1.4 and it allows you to connect up to 3 external displays with UHD 60 Hz and HDR 10 or up to 2 displays at 5K resolution and 60 Hz, or just one at either 5K 60 Hz or 4K 120 Hz.

Also, the built in display can go up to UHD resolution with 120 Hz and HDR 10.

Does it work to connect a 4K 120Hz display?

Theoretically, Qualcomm specifies that you can connect an external display with 4K resolution at 120 Hz. In a recent Reddit thread, a user who tried connecting a 120 Hz display to Samsung Galaxy Book 4 Edge and they only got 98 Hz at 4k. Another said that he connected a Samsung 28 inch 4K 144Hz monitor to Galaxy Book 4 Edge and it only works at only 4K@60Hz even though he tried both USB-C or HDMI connections.

On the other hand, there are users for whom connecting an external 4K 120 Hz display worked fine. However, if you connect an 144 Hz display, you will be clearly limited to 120 Hz.

The conclusion is clearly that Snapdragon X Elite laptops support connecting an external 4K 120 Hz display. It’s probably a question of installing the right monitor drivers and having the correct settings.

We should also go through the possible video encodings of the built-in Adreno VPU. It can encode 10-bit 4K at 60 Hz in H.264, HEVC(H.265) and AV1 standards. Decoding can be ensured at 10-bit 4K resolution and 120 Hz in H.264, HEVC (H.265), VP9 and AV1 standards. That mostly covers the 4K video standards nowadays.

Did you have problems connecting a 4K 120 Hz external monitor to your Snapdragon X Elite laptop? Tell us about it in the comments below.

RockYou2026: Almost 10 billion passwords are now exposed in the most significant leak of all time

In the biggest gathering of stolen passwords known to date, specialists from Cybernews unexpectedly found an astonishing collection containing almost 10 billion passwords on a famous hacking forum called RockYou2024. The one who uploaded this troubling file, identified as “ObamaCare,” has gathered a big collection of rare plaintext passwords. This individual sets a new standard for cyber dangers, consolidating data from previous and current breaches.

It’s a warning for all. If you use the same passwords on different platforms, this is the time to reconsider your safety methods. A large amount of revealed passwords greatly increases the danger of credential-stuffing attacks. These attacks take advantage of the usual practice of using one password for many accounts, which lets hackers get into several platforms with only a single set of login details.

But here’s the thing: The RockYou2024 database is a blend of new and old passwords, which means that there’s a high chance one of your passwords is present in it. As cybercriminals keep looking for ways to break into accounts using these login credentials, the danger becomes very imminent indeed.

So, what do we all have to do at this point? Change the passwords. If you find your password in the leak (although we don’t recommend downloading the file, as it is over 50GB) or think it may be weak, modify it to something robust and distinctive. Also, make sure you are not using identical passwords for multiple services.

You might also want to try multi-factor authentication, and on Windows 11, it is quite easy to enable it. Using more than one method can lower the chance of someone getting into your accounts without permission. Do not forget password managers, either. These are useful tools for managing your passwords and ensuring each one is strong enough. Edge’s password monitor is handy here, as it shows you when your passwords are found in online leaks – you’ll just need to enable the option.

The RockYou2024 leak is definitely scary, and chances are your password, or ours, for that matter, might be on that list. There are around 10 billion (9,948,575,739, to be more specific) passwords, making the danger very real. Yet, with proper measures, you can protect your digital life from these constantly changing cyber dangers.

ChatGPT Error: Plugins are no Longer Supported [Solved]

If you frequently use ChatGPT, it may often throw the error Plugins are no longer supported when using an available GPT or one created manually!

For anyone wondering why the ChatGPT plugin is not working, OpenAI, in March’24, confirmed that plugins will be deprecated and replaced with GPTs. All major developers have released their GPT replacement for plugins. Also, users can create custom GPTs.

However, even when using GPTs while interacting with the AI-based chatbot, the Plugins are no longer supported error appears. If that happens, check the ChatGPT server status on the official website or use a real-time monitoring service like Downdetector. If there’s no ongoing maintenance or outage, press Ctrl + Shift + R to perform a hard refresh, and try the solutions listed next!

How do I fix the Plugins are no longer supported error in ChatGPT?

1. Switch browser or device

In most cases, switching to another browser does the trick. For instance, a user faced the Plugins are no longer supported ChatGPT error in Chrome on Mac, but moving to Safari fixed things. Similarly, for another user, switching from Brave to Microsoft Edge worked on Windows.

So, I suggest you look at our list of top-rated browsers and pick one!

Besides, there have been cases where ChatGPT threw the plugin error on a PC browser, but switching to the mobile app resolved the problem, or even moving from macOS to Windows. If any of this applies to you, try it!

2. Clear the browsing data

  1. Launch the browser, and press Ctrl + Shift + Delete to open the Clear browsing data window.
  2. Select All time from the Time range dropdown menu, tick the checkboxes for Cookies and other site data and Cached images and files, and then click on Delete data.delete data
  3. Open ChatGPT, access the GPT that earlier threw the Plugins are no longer supported error, and check for improvements.

3. Toggle on GPT-3.5 and GPT-4

For paid ChatGPT users, enabling GPT-3.5 and GPT-4 also worked, as confirmed in dedicated forums.

To do that, head to ChatGPT’s home page (general interface) > locate and enable the toggle for GPT-3.5 and GPT-4 > go back to the GPT that throws the plugin not supported error and check for improvements.

4. Delete all past conversations

If nothing else works, you can try deleting all past conversations, especially the one made with a plugin. In a few cases, this conflicted with the active GPT and triggered the Plugins are no longer supported error in ChatGPT.

To do that, click on the ellipsis next to any conversation > choose Delete from the menu > click on Delete to confirm.

delete chats in ChatGPT
Deleting conversations in ChatGPT

5. Contact OpenAI support

The last option, as expected, is to contact OpenAI support and raise a ticket via the chatbot at the bottom-right corner. At this point, the support team will be able to better identify the underlying cause and provide a solution.

And until the problem is resolved, you can switch to a reliable ChatGPT alternative!

Which fix worked for you? Share with our readers in the comments section.