Windows 11 users can download today a new optional patch (KB5006746) that fixes the L3 caching issue that caused some apps to run slower than usual on PCs with AMD Ryzen processors. This update also includes a fix for an issue causing the Start menu to stop working and the new Windows 11 taskbar to not show up on some PCs.
Today’s optional patch was made available a week ago for Window Insiders in the Beta and Release Preview channels, and here’s the list of fixes and improvements Microsoft highlighted in the release notes:
Updates an issue that causes Internet Explorer to stop working when you type certain characters in the Input Method Editor (IME).
Updates an issue that occurs when you try to rename a file in File Explorer using the new Japanese IME.
Updates an issue that might distort the sound captured by voice assistants.
Updates an issue that sometimes causes your lock screen background to appear black if you have set up a slideshow of pictures as your lock screen background.
Updates an issue that might cause your Bluetooth mice and keyboards to respond slower than expected.
Improves the time estimate for how long you might wait to use your device after it restarts.
Updates an issue that might prevent you from using the Xbox Game Bar recording features.
Updates an issue that causes some applications to run slower than usual after you upgrade to Windows 11 (original release).
Updates an issue that prevents Narrator and other screen readers from announcing when the Start menu is open in certain cases.
Updates an issue in that prevents the search window from appearing on a secondary monitor.
Updates an issue that prevents you from opening multiple instances of an app using Shift and clicking on the app’s icon in the taskbar.
Updates the visual design and animations of the Chat icon on the taskbar.
Updates an issue for a small number of users that prevents the Start menu from working and prevents you from seeing the updated taskbar after upgrading to Windows 11 (original release).
Just like Windows 10, Windows 11 will be serviced with monthly updates, and Microsoft will ship “B” releases on the second Tuesday of every month followed by optional “C” releases later in the month. If you prefer to skip today’s optional patch, you’re still going to receive all these bug fixes and improvements in next month’s “B” release, which is also known as “Patch Tuesday.”
In other Windows 11-related news, Microsoft released yesterday the first preview of Android apps on Windows 11 for Insiders in the Beta channel. We don’t know yet when the Amazon Android App Store and the Windows Subsystem for Android will be available for non-Insiders, but things are already looking pretty good and we invite you to check out our hands-on video for more details.
Microsoft is getting ready to roll out Windows 10 version 21H2 (also known as the “November 2021 update”) next month, and the update is now available for all “seekers” in the Release Preview ring. Microsoft has also released the ISO for the 21H2 build 19044.1288 today, which the Windows Insider team considers the final build.
If you have a PC on the Release Preview ring that didn’t receive 21H2 builds before, Windows 10 version 21H2 should now be available as an optional update. The update process from Windows 10 version 21H1 to 21H2 should be pretty quick as users are just downloading an enablement package that will turn on dormant features in the latest 21H1 builds. “We will continue to improve the overall experience of the November 2021 Update on customers’ PCs through our usual servicing cadence,” the Windows Insider team said today.
Microsoft previously detailed the following 3 new features coming with Windows 10 version 21H2:
Adding WPA3 H2E standards support for enhanced Wi-Fi security
Windows Hello for Business supports simplified passwordless deployment models for achieving a deploy-to-run state within a few minutes
GPU compute support in the Windows Subsystem for Linux (WSL) and Azure IoT Edge for Linux on Windows (EFLOW) deployments for machine learning and other compute intensive workflows.
Unfortunately, the Windows Insider team said today that the new Windows Hello for Business deployment method coming with Windows 10 version 21H2 is “still under development,” and it will be released in a future monthly update. Overall, Windows 10 version 21H2 is another minor update like 21H1 was, but Microsoft is sticking with bi-annual releases for Windows 10 until the OS reaches end of support in 2025.
Microsoft previously said that Windows 10 users would be getting the same redesigned Microsoft Store that recently shipped on Windows 11, though there’s no ETA yet. However, the new integration with the Amazon Android App Store will be exclusive to Windows 11, as Windows 10 doesn’t support Microsoft’s new Windows Subsystem for Android.
Microsoft is overworking when it comes to releasing updates. OneDrive users are the recipients of the good news as the company is currently working on a new update that will allow users to enhance their photos with image filters.
The company announced the news through the Microsoft 365 Admin centre and will begin rollout later this month. There is no official date yet, so we should expect it in a few days now.
New look from the browser
The new update will allow users to make the enhancements right from their web browsers. Some of the expected enhancements include; contrast, exposure, highlights, and saturation. They will also be able to add color to shadows, turn photos into black and white and apply mid-tones.
You can now edit your photos without the hassle of transferring from one app to the other with the newly added features.
OneDrive for Business – OneDrive Image Edit – Filters
Users will soon be able to quickly stylize their photos in #OneDrive by applying filters. With filters, users can adjust the “look” of their photos with one click without having knowledge of photo edi…https://t.co/nWnE9N6jqB
Whereas there are many image formats from different devices, Microsoft notes that the only available options that will allow the filters will be the JPG and JPEG formats. Later on, the PNG format will also be integrated.
The update has also not been availed to iOS and Android users, but the company is making plans to bring this capability soon, so we can only wait and see what’s in store in the coming months.
Do you believe the new features will make the app more useful? Share your thoughts in the comment section below.
Back in July, Microsoft unveiled a new high-fidelity Music Mode that should help improve the quality of music streamed during Teams calls and meetings. This feature is finally rolling out in the public preview version of Microsoft Teams.
Microsoft says this release enables users to automatically optimize audio settings in a Teams meeting and call so that listeners receive a richer sound experience. “In music mode, we support up to 32 kHz sampling rate mono audio at 128 kbps, and optimize our internal audio processing settings for reproducing music with high fidelity. Teams will automatically adjust the audio bitrate based on the available bandwidth, going down to 48 kbps while still delivering good music quality,” the Microsoft 365 roadmap reads.
To enable this feature, head over to Settings >> Devices and turn on the “High fidelity music mode” option. Users can choose to turn off echo cancellation when using the music mode if needed. Once enabled, click the music mode icon available at the top of the meeting window to transmit high-quality music to an online audience.
The new high fidelity music mode should be helpful for conducting online music lessons, live musical performances, or streaming other non-speech content. However, Microsoft recommends users to disable this feature during regular calls and meetings to conserve bandwidth and reduce background noise.
Windows has had a humungous leap in design and under-the-hood advancements with Windows 11. With the OS officially released, everyone wants to enjoy it.
Windows Insiders helped Microsoft eradicate various bugs and polish the OS for regular users. However, it seems there are still some hiccups along the way.
People complain about an issue where their machines are freezing up and are rendered completely unresponsive.
Thankfully, Microsoft has addressed this problem and it can be resolved quickly. If you too have been impacted by this issue, below are some quick resolutions that will cent percent resolve the problem.
Why is my PC freezing up when I start it up?
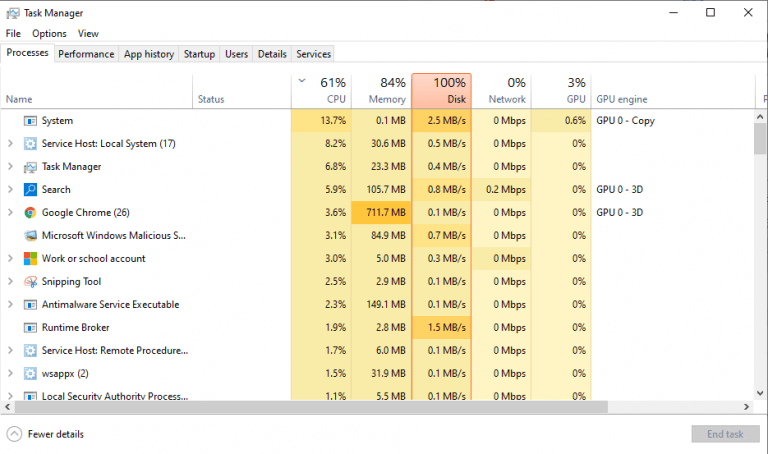
Usually, there could be many reasons for your computer to freeze up. The list includes but is not limited to inadequate RAM (Random-Access-Memory) in your computer, slow secondary storage, or damaged and/or corrupted operating system files.
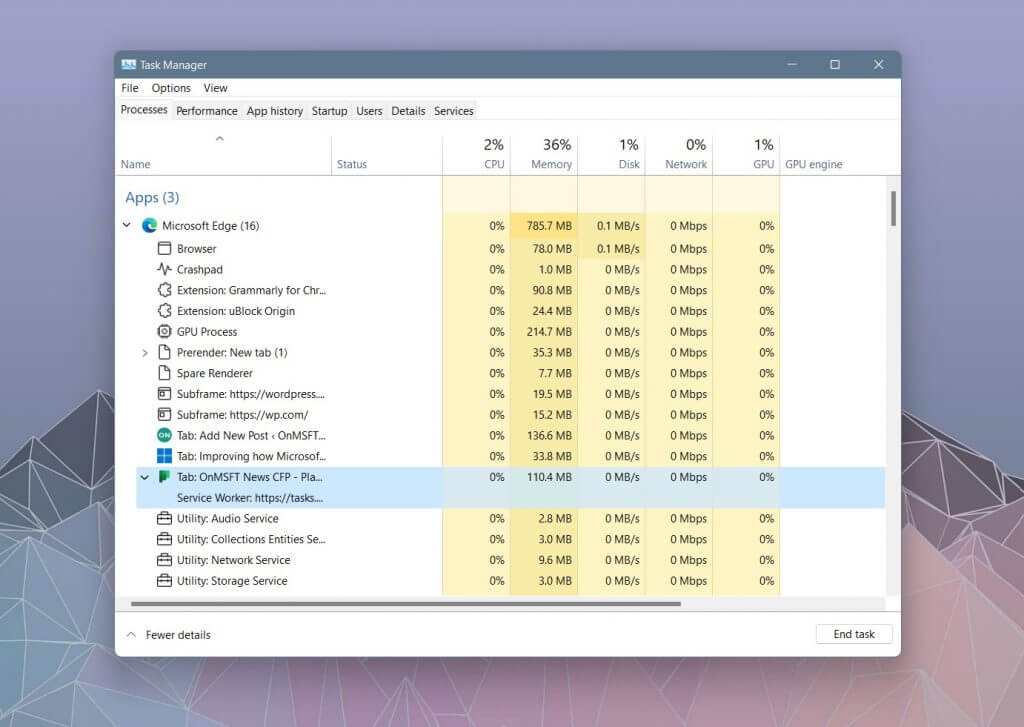
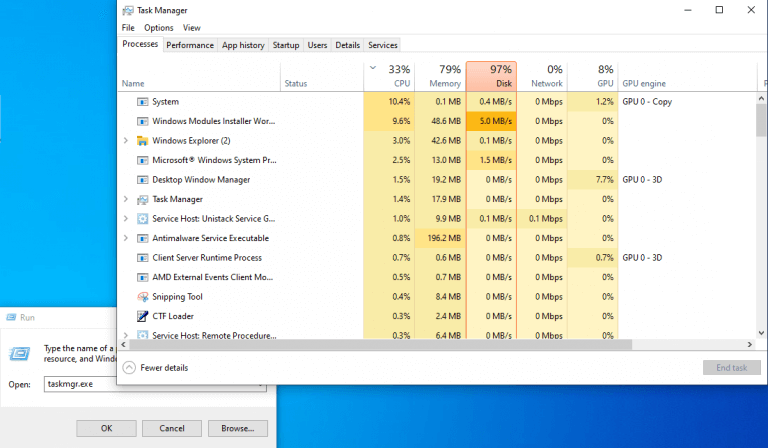
Current memory utilization can be tracked from the Performance tab of Task Manager
Though you can quickly delete a registry file using the Command Prompt, which is the official way to tackle the issue, many users were able to fix Windows 11’s freezing problem by desyncing their computer clocks as well.
Below are the steps to both of the previously mentioned solutions for your ease of convenience, and you can fix the issue using the preferred method.
How can I stop Windows 11 freezing on startup?
1. Use the Command Prompt
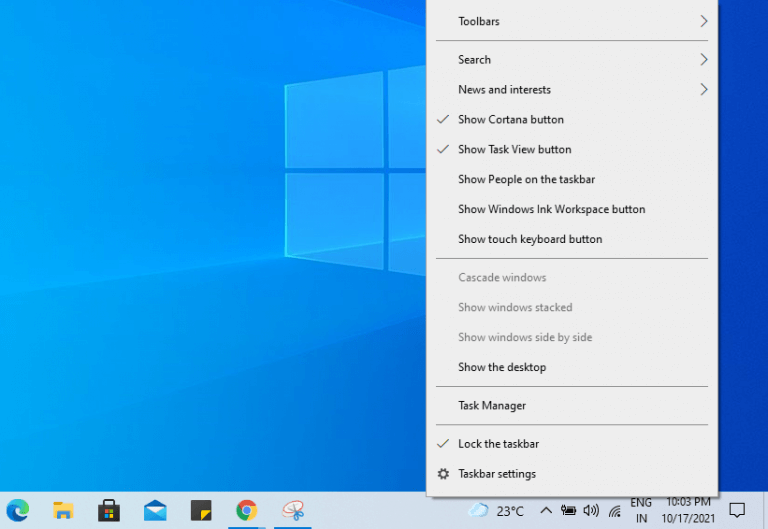
First, press the Ctrl+Alt+Del shortcut on your keyboard to summon the security screen. Then, click on the Task Manager option from the list.
After that, click on the File tab from the menu bar and click on the Runnewtask option from the overflow menu.
Then, type cmd in the text box and click on the OK button or hit Enter on your keyboard.
Now, type or paste the following command in the cmd window and hit Enter on the keyboard.
Since fixing the issue by using this method requires you to delete a registry file, many users might not feel confortable performing this action on their computer. If that’s the case, the second solution might be much more suitable.
2. Desync the clock
To do so, press the Ctrl+Alt+Del shortcut on your keyboard to bring up the security screen. Then, click on the Task Manager option from the list.
Now, click on the File tab from the top left corner and choose the Runnewtask option from the overflow menu.
After that, type control in the textbox and click on the OK button or hit Enter on your keyboard to open the Control Panel.
From the Control Panel window, locate and click on the Date and Time option from the grid.
Next, go to the InternetTime tab and click on the Change settings button present on the window.
Now from the overlay window, uncheck the SynchronizewithanInternettimeserver option and click on the OK button to confirm and close.
Then, head to the DateandTime tab and click on the Change date and time button.
From the overlay window, select a date ahead of the current date by atleast 3-4 days and click on the OK button to confirm and close the window.
Finally, click on the StartMenu icon present on the taskbar. Then, click on the Restart option to restart the computer.
3. Disable Fast Startup
Press Windows + R, type control, and hit Enter.
Navigate to System and Security, and click on Power Options.
Select Choose what the power buttons does on the left pane.
Click the option to Change settings that are currently available.
Tick the option to Turn on fast startup (recommended).
Finally, click on Save changes.
4. Update Graphic Card drivers
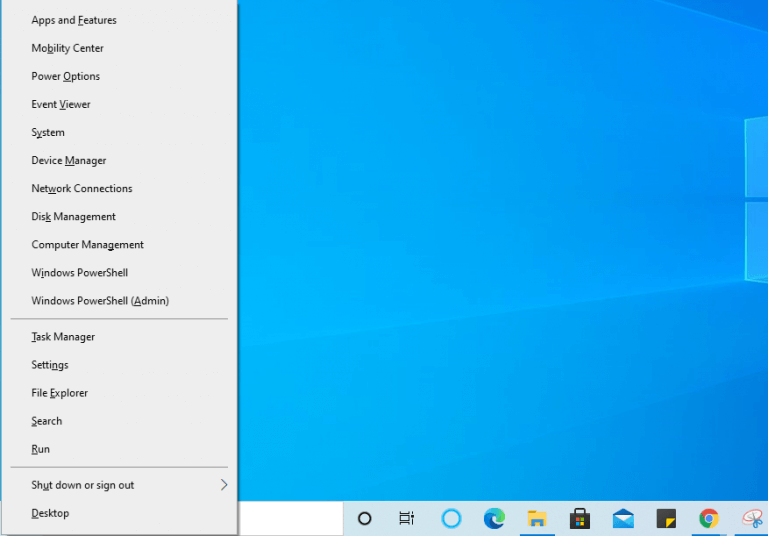
Right-click the Windows icon and select Device Manager.
Expand the Display adapters, right-click on your graphics driver, and select Update driver.
Select the option to Search automatically for drivers.
5. Boot into Safe mode
Press the Windows key + I to open the Settings app.
Navigate to System and Recovery.
Under the Recovery options section, select Restart now in the Advanced startup.
Now select the following options as the next screens present themselves; Troubleshoot, Advanced options, Startup Settings.
Click the Restart button.
Finally, press F4 to start your device in Safe Mode.
How do I prevent Windows 11 from freezing on startup?
There are several options to ensure a Windows 11 computer is not freezing upon startup. First and foremost, you can verify that you do not have any unnecessary startup apps enabled to ensure there is no extra load on the processor when booting up.
You can disable the start-up programs from the Task Manager
Next, also check that there are no corrupted and/or damaged OS files by running a DISM scan on the computer that will enable you to fix those errors and restore the health of your PC.
In case there is a sudden drop in performance system-wide and tasks such as browsing directories, opening apps that are taking longer than usual, it is time to get the RAM and ROM of the PC checked as it also plays a crucial role in system behavior.
Updating drivers is also a thing to consider as the system tends to slow down when drivers are outdated or corrupted, we recommend a specialized driver updater for automatic scans and driver updates.
Windows 11 freezing on startup is definitely an annoying and frustrating issue, but on the bright side, it can be fixed relatively easily. Moreover, since Microsoft has addressed the problem, you can be assured it is very less likely you will be facing this kind of issue anytime in near future.
This isn’t the only issue you can encounter, and many reported that Windows 11 freezes but mouse works, however, we covered this in another guide, so don’t miss it.
In case you still have some questions or even suggestions for us, do not hesitate to let us know in the comments section below, and we’ll get back to you as soon as possible.
Microsoft has just announced the upcoming release of new 2TB and 512GB Xbox Series X|S Storage Expansion cards from Seagate, which will complement the existing 1TB model. The 512GB Expansion Card will be priced at $139.99 in the US and the 2TB model will cost $399.99, which is definitely not cheap when you consider that an Xbox Series X console costs just $100 more.
The 512GB Seagate Storage Expansion Card is available to pre-order from Walmart in the US today and will start shipping in mid-November, while the 2TB model will go up for pre-order in November and will launch in early December launch. The existing 1TB Expansion card remains available at $219.99, and you can still purchase it from the Microsoft Store.
If Microsoft’s Xbox Series X|S consoles support regular external storage solutions for playing backwards-compatible games,
the company teamed up with Seagate to create these proprietary extension cards that are primarily designed for next-gen games. Indeed, these storage extension cards from Seagate provide the same level of performance as the internal NVMe SSDs inside Microsoft’s Xbox consoles, and they remain the only external SSDs allowing gamers to play next-gen Xbox games directly from them.
The Seagate Storage Expansion cards can be plugged on the back of Xbox Series X|S consoles, and this plug-and-play functionality is one big advantage this proprietary solution has over the PlayStation 5’s internal bay for regular NVMe SSDs. However, these Seagate Storage Expansion cards remain quite expensive, and it’s still not clear if Microsoft will allow other manufacturers than Seagate to release cheaper alternatives in the future.
As we’re seen more and more current-gen games like Microsoft Flight Simulator weighing more than 100GB, these Seagate Storage Expansion Cards will likely become a necessary purchase for Xbox gamers, especially for Series S owners as this console only comes with 362GB of usable internal storage. If you own both a Series X and a Series S, these Seagate Storage Expansion cards are also really handy for moving or copying games between your consoles, or just for playing all your games on the console you want, when you want.
Following the release of Microsoft’s Surface Pro 8, Surface Laptop Studio, and Surface Go 3 earlier this month, the company’s dual-screen Surface Duo 2 is launching in select markets today. This is Microsoft’s second attempt at creating an Android-based dual-screen device, and the hardware of the Surface Duo is a big step forward.
With larger 8.3” PixelSense Fusion displays, a top-of-the-line Snapdragon 888 SoC, support for 5G and NFC, and a triple-lens camera on the back, the Surface Duo 2 addresses many of the original Surface Duo’s shortcomings while iterating on a premium-looking design. The Duo 2 also adds a fingerprint sensor that’s integrated into the power button, and the hinge has also been improved with a “Glance Bar” that can display the time of day and notifications without opening the Duo 2.
The Surface Duo 2 is available in Glacier or a new Obsidian finish, and it starts at $1499.99 in the US for the model with 128GB of storage. In the UK, the same base model is priced at £1,349, and the Surface Duo 2 starts at €1,599 in other European markets.
If the Surface Duo 2 is slightly more expensive than the original model, keep in mind that the Surface Duo 1 was discounted pretty quickly and we saw it under $400 back in August. It remains to be seen if the same thing will happen with its successor, but sometimes being an early adopter isn’t such a good idea. The original Surface Duo had a lot of software issues and has yet to be updated with Android 11, and we hope that the Surface Duo 2 will fare better on the software front.
The Firefox internet browser is finally (via Thurrott) on its way to the Microsoft Store app store. The move appears to be in response to the recent shift in policy on Microsoft’s end that now allows for more third-party browsers and other apps on their app store platform.
“Microsoft has loosened restrictions on its Windows Store that effectively banned third-party browsers from the store,” a post on the official Mozilla blog reads. “We have been advocating for years for more user choice and control on the Windows operating system.
“We welcome the news that their store is now more open to companies and applications, including independent browsers like Firefox. We believe that a healthier internet is one where people have an opportunity to choose from a diverse range of browsers and browser engines. Firefox will be available in the Windows store later this year.”
Currently, the Windows (Desktop) version of Mozilla’s Firefox browser needs to be downloaded and installed directly from the official Mozilla website.
Microsoft has released preview build 22483 to the Dev channel. Although it has no new added features, it comes with a bunch of bug fixes and general improvements. At the moment, only Beta Channel Insiders can test Android apps on Windows 11.
What’s new in Windows 11 build 22483
There’s a newly added option to right-click on ‘recommended’ or ‘more’ button in the Start menu.
Fixes
There was an issue where the ‘search’ was appearing black and failed to display content below the search box. This has now been fixed.
There was an issue in the settings where ‘display’ was not appearing in display settings. This has now been fixed.
Other fixes
The error displaying “wsl.localhost is unavailable, insufficient resources exist” on ARM64 PCs when trying to access Linux entry for WSL in File Explorer’s navigation pane does not pop up anymore.
There was an issue whereby cellular data failed to work on certain Dev Channel builds, but that has since been fixed.
There was an issue with NTFS when USN was enabled. There was unnecessary action detected with each write affecting I/O performance, but that has now been fixed.
Some minor improvements to the keyboard navigation and screen reader usage of performance monitor have been made.
The Webview2 processes have now been properly grouped with the application using it in Task Manager’s Processes tab.
There was an issue that was causing the Publisher column not to retrieve publisher names in Task Manager.
Celebration time
Microsoft is giving out anniversary badges as part of the celebrations in reaching the seven-year mark on the Windows Insider program. The badge is set to appear in the Feedback Hub achievement section in a few weeks to come.
Has the latest preview build fixed any burning issues you had? Let us know in the comment section.
Desktop is unavailable if the location is on this PC –if you get this error message, do not worry! Windows Report will show you how to fix this error problem.
Apart from this error message, users can’t access the desktop location, and loss of data is involved as well. After booting their Windows PC, the error message shows up instead of seeing the desktop.
There are several reasons for this error problem, namely: system crash, system file corruption, malware and or virus attacks, incomplete application program installation, Windows Updates error, and most especially unstable OS beta version.
However, Windows Report’s technical team has compiled a list of applicable solutions that can be utilized to fix this issue. You can try out any of the solutions listed above to fix Desktop is unavailable if the location is on this PC” error problem.
One of the easiest solutions you can try out is to restart your Windows PC immediately after you get the error message. Windows users reported, being able to access their desktop after rebooting their computers.
However, this solution is temporal due to the fact that the error problem can still recur after 2-3 PC restarts; hence, you may proceed to the next solution for a permanent fix.
2. Use SFC Scan
Press Windows+Q and type cmd.
From the search results, right-click Command Prompt and choose Run as Administrator.
A new cmd window appears. Type sfc /scannow and hit the Enter key.
Wait until scan and repair process is finished.
In addition to SFC scan, you should perform CHKDSK on your hard drive; this removes any drive-related error and frees up your hard drive. Here’s how to perform CHKDSK:
Go to Start > Type command prompt >Right-click on it, and select Run as administrator.
Now, type CHKDSK C: /F.
Hence, type CHKDSK C: /R without quotes in the Command Prompt and hit Enter key.
After CHKDSK process, restart your PC afterwards.
SFC (System File Checker) utility scans the system files so as to check for any corruption and repairs them simultaneously.
3. Scan your PC for virus or malware
Go to Start > type defender > double click Windows Defender to launch the tool.
In the left hand pane, select the shield icon.
In the new window, click the Advanced scan option.
Check the full scan option to launch a full system malware scan.
Viruses and malware can cause the “desktop is unavailable if the location is on this PC” error problem. Hence, run a full system scan on your PC to remove every possible virus corruption. You can also use Windows’ built-in antivirus, Windows Defender.
Alternatively, we strongly suggest you check out some of the best antivirus software for your Windows PC and install them on your computer.
Some third-party antivirus programs are ideal for virus removal. You can use a malware removal program that also stops adware and other online threats with several layers of security including real-time protection.
4. Use Advanced Boot Options
Another way of fixing the error problem is using advanced boot options to reset the boot configuration. Here’s how to access advanced boot options:
Reboot your system
Press the F8 continuously during restart until the advanced boot screen with multiple boot options comes up
Now, select Last Known Good Configuration (advanced) using the arrow keys and hit the “Enter” button to boot Windows normally.
Alternatively, you can also boot into safe mode using steps 1-2 above and then perform a system restore. Here’s how to do this:
Reboot your system
Press the “F8” continuously during restart until the advanced boot screen with multiple boot options comes up
Navigate to the “Run in Safe Mode” option and hit “Enter”.
Go to Start > Type “system restore” and then hit “Enter”.
Follow the prompts to revert back to a certain restore point.
Wait for the process to complete, and then reboot.
Note:Ensure you are able to identify the restore point date before the error message display.
5. Perform a Clean Boot
Another applicable solution for the desktop is unavailable if the location is on this PC error problem is to clean boot your PC. Clean boot starts up your PC in a clean state to prevent software conflicts.
These conflicts can be caused by applications and services that start up and run in the background whenever you start Windows normally.
However, In order to successfully perform a clean boot on Windows 10, you have to be logged on as the administrator, and then follow these steps:
Go to the search box, and then type MSConfig
Select System Configuration to open the dialog box as below:
Find Services tab
Select Hide all Microsoft services box
Click Disable all
Go to Startup tab
Click Open Task Manager
Close Task manager then click Ok
Finally, reboot your PC
6. Use a driver updater
Installation errors, outdated drivers, and missing system drivers can cause the desktop to be unavailable if the location is on this PC error problem. Hence, you need to use an automatic software solution to ease the process.
Advanced software will scan your PC’s drivers so as to update, fix, and repair corrupt drivers. Also, it fixes problems related to installation errors. You can choose a good tool for that in our driver updater software guide.
7. Run Automatic Repair/Startup Repair
Insert Windows bootable installation DVD and restart your PC afterward.
Press any key to boot from CD or DVD when prompted to continue.
Select your language preferences, and click “Next”.
Click Repair your computer in the bottom-left.
In the “choose an option” screen, Click Troubleshoot > Click Advanced option > Automatic Repair or Startup Repair. Then, wait for the Windows Automatic/Startup Repairs to be complete.
Restart your PC and boot to Windows.
You can also fix Desktop is unavailable if the location is on this PC error problem by performing automatic repair/startup repair on your system by using Windows bootable installation DVD.
8. Install the latest Windows Updates
Go to Start > Type Windows Update and hit the Enter key.
In the Windows Update windows, click on the Check for updates button.
Frequent patches released by Microsoft consist of fixes and drivers for your Windows PC; hence, you need to ensure that you’re running the latest OS version on your computer. This would keep your PC devoid of issues most especially Microsoft products related issues.
9. Reset your PC
Hard power off your PC 3 times until the Advanced Recovery environment appears.
Choose “Advanced options”.
Now, select Troubleshoot > Click “Reset this PC”
Choose whether you want to keep or delete your files and apps.
Click “Reset” to proceed
Finally, if after trying all the solutions listed above the problem still persists; we recommend that you reset your PC. Reset PC’ option is an advanced recovery option that restores your PC to its factory state.
10. Restart explorer.exe in Task Manager
Press Ctrl+Alt+Delete and open Task Manager.
After Task Manager opens, select Windows Explorer and click on Restart.
This article in question is just one of many that we’ve included in our hub dedicated to fixing System Errors, so make sure you bookmark it in case you ever need it again. Looking for more troubleshooting guides? Check out our dedicated Fix page.
What does location not available mean?
When you see this error message, it means that the file path that you are trying to access is no longer available.
Why do I get the Is unavailable if the location is on this PC error message?
If get this error while trying to access a location on your PC, it means that the location no longer exists. This can also be an effect of you not being able to save to a certain location.
Why do I get the Desktop is unavailable if the location is on this PC error if the file path exists?
You may also get this message when trying to access a location that has just been moved or deleted.
In conclusion, feel free to comment us below if you have any questions concerning the solutions we mentioned above.
Windows 10 installs the missing updates automatically, but sometimes you might encounter automatic update problems on your PC. These problems can leave your system vulnerable, so today we’ll show you how to fix them.
Automatic update problems on Windows 10, how to fix them?
Windows Update is an important part of Windows 10, but sometimes you might encounter automatic update problems. Speaking of these issues, here are some common problems that users reported:
Windows Update not working Windows 10 – This is a common problem that can occur with Windows 10, and it’s usually caused by your antivirus, so be sure to disable it.
Windows 10 automatic update error – There are various automatic update errors that can occur on Windows 10, and if you encounter them, just run the Windows Update troubleshooter.
Windows 10 automatic update is stuck, taking forever – Stuck updates are a common problem on Windows 10, and if waiting for update process to finish doesn’t help, you can always try disconnecting the external storage.
Automatic update service is not running – This issue can occur if there’s a problem with Windows Update components, however, you can fix the problem simply by restarting the necessary components.
1. Change Windows Update settings
Open the Settings app. You can do that quickly by pressing Windows Key + I shortcut.
When Settings app opens, go to Update & Security section.
Navigate to Advanced options.
Now disable Give me updates for other Microsoft products when I update Windows option.
Scroll down and navigate to Delivery Optimization section.
Locate Allow downloads from other PCs option and disable it.
If you’re having automatic update problems on Windows 10, you might be able to fix them by making a couple of changes to the Windows Update settings. After making these changes, check if the problems with automatic updates are resolved.
2. Check your antivirus
According to users, the most common issue with automatic updates can be your antivirus software. In some cases, the antivirus can interfere with your system and cause various problems with Windows Update.
To fix the problem, it’s advised to disable certain antivirus features and check if that helps. If that doesn’t work, your next step would be to disable your antivirus altogether. In the worst-case scenario, you might even have to remove your antivirus.
If removing the antivirus solves the issue, you might want to consider switching to different security software with maximum protection that won’t interfere with your system.
3. Free up some space
Press Windows Key + S and enter disk cleanup. Choose Disk Cleanup from the list of results.
Select your system drive and click OK.
Disk Cleanup will now scan your drive. This can take a couple of seconds, so don’t interrupt it.
When Disk Cleanup window opens, you’ll see a list of files. Select the files you want to remove and click OK.
Issues with automatic updates can occur due to a lack of space on your PC, and in order to fix that, it’s advised to free up some space on your system drive. The updates require at least 20GB free on your system drive, and if you don’t have space, you’ll need to free it up as described above.
The application will now remove the selected files and you’ll successfully free up some space. If you’re not a fan of Disk Cleanup, you can also use third-party tools to free up more space on your PC.
After freeing up space, try to install Windows Updates again.
4. Disconnect USB storage devices
Many users use portable hard drives and other USB storage devices to store their files, but sometimes these devices can interfere with Windows Update and cause issues with automatic updates.
To fix this problem, it’s advised that you disconnect all external storage devices from your PC and check if that solves the problem.
5. Run Windows Update troubleshooter
According to users, if you have problems with automatic updates, the best way to fix them is to run Windows Update troubleshooter. Windows comes with many built-in troubleshooters that can fix common problems, and if you have problems with Windows Updates, you can fix the issue by doing the following:
Open the Settings app and go to Update & Security section.
Select Troubleshoot from the left pane. Select Windows Update from the list and click Run the troubleshooter button.
The troubleshooter will now start and try to fix the problems automatically. Once the troubleshooter is finished, check if the problem is resolved.
6. Reset Windows Update components
Sometimes problems with the automatic update can occur because certain Windows Update components aren’t working properly. However, you can fix that by resetting them. There are several ways to do that, but the fastest one is to use the command line. To do that, just follow these steps:
Press Windows Key + X to open Win + X menu. Choose Command Prompt (Admin) or Powershell (Admin) from the list.
Once
Command Prompt starts, run the following commands one by one:
After running all these commands, the Windows Update components will reset and the issue should be resolved.
7. Disable your proxy
Many users use proxy in order to protect their privacy online, but sometimes your proxy can interfere with your Internet connection and cause automatic update problems. However, you can easily fix this issue by disabling your proxy. This is pretty easy to do, and you can do it by following these steps:
Open the Settings app. Now select Network & Internet.
Navigate to Proxy in the left pane. In the right pane disable all options.
Once you do that, the proxy should be completely disabled on your PC, and problems with automatic updates will be resolved. If you’re still concerned about your privacy, we suggest that you try using VPN software.
8. Download the missing update manually
If you’re having automatic update problems, you might be able to circumvent them simply by downloading and installing the missing updates manually. All Windows updates are available for download from Microsoft Catalog, and you can download them for free.
Before you can download the missing update, you need to know its update code. The updated code starts with KB and it’s followed by an array of numbers, and you can usually find it in the Windows Update section. Once you find the updated code, you can download the update by doing the following:
Go to the Microsoft Update Catalog website and enter the update code in the search box.
You should now see the list of matching updates. Pick the update that uses the same architecture as your PC and click the Download button.
Wait while the update is downloaded. Once the download is finished, run the setup file to install the update.
Keep in mind that this solution might not fix the core problem with Windows Update, but at least it will allow you to install the missing update.
If other solutions didn’t fix the automatic update problems on your PC, you might have to perform an in-place upgrade. This process will install the latest version of Windows while keeping all your files and applications intact. To perform an in-place upgrade, do the following:
Download and run Media Creation Tool.
Select Upgrade this PC now option in Windows Media Creation Tool.
Wait while the setup prepares the necessary files.
Select Download and install updates (recommended) and click Next.
The setup will now download the updates. This can take a while so be patient.
Once the updates are downloaded, follow the instructions on the screen. Once you reach Ready to install screen click Change what to keep.
Select Keep personal files and apps and click Next.
Follow the instructions on the screen to complete the setup.
After performing the in-place upgrade, you’ll have the latest version of Windows 10 and the problem with the automatic update should be fixed.
Knowing what devices to invest your hard-earned money in is an essential skill in the 21st century, and the fact that the market is over-saturated with millions of options doesn’t help either.
It can even be hard to choose a product if you decide you’re interested in only one company out of hundreds.
ASUS has a long-lasting history of producing quality computers that resist the test of time, but that doesn’t imply that it would make it any easier to choose from their wide range of products.
Comparing all the components like CPU, GPU, RAM, and storage can be tricky and time-consuming, and for this reason, we tasked our experienced team of testers to do this for you.
Our panel of expert testers has a combined experience of over 15 years of product testing, which includes hardware, and also a variety of software and devices.
As you can see from the graph presented above, our team of testers goes through a rigorous process of researching, shortlisting, comparing, and testing the products presented to you in this list.
Below, you will find a more in-depth analysis of all the elements considered in the testing and research phases of this process.
Tip
Editor’s tip:
Choosing the best ASUS PC’s, as in the case of other similar lists, will be carried out considering a wide set of elements, but most importantly:
➡ Processor ➡ GPU ➡ Rapid access memory (RAM) ➡ Storage space ➡ Design and utilizability
The elements mentioned above are the most important factors that our team of experts has considered while creating this list, but that doesn’t mean that other aspects have not been included as well.
Let’s discuss the list presented above to understand why all these elements are important when creating a thorough list, or while choosing how to invest your money.
Processor
The processor, also known as the CPU is the heart of your PC, making sure that all the tasks are optimally performed, from the background elements to the most complex games and software usage.
Having a good processor not only will make your PC work faster, but it will also ensure that no matter what software you’re using, and no matter how many apps you’re running at the same time, your experience will be smooth.
As you already know, not all processors are built the same, and if you’re not a very technical person, then choosing a setup with a good CPU can be intimidating.
This principle applies even to users who know how to compare pieces of hardware, but other elements like the optimal CPU cooling levels and processor frequency are also important factors.
As you can see from the graph above, normal temperatures can range from anywhere between 40 degrees Celsius to 65 degrees, and this is the range in which your CPU can work at full speed without any issues.
If your hardware ends up recording some of the maximum temperatures mentioned above, then not only the CPU will underperform, but will probably cause long-term damage to the system.
GPU
The GPU (graphics processing unit), or video card, enables you to experience the full-fledged range of graphics both for your games, your app usage, and even the quality at which you can watch videos.
If you’re interested in gaming and want to be able to run the latest game releases, then choosing a system with a powerful GPU will come a long way. In case you’d like to explore games, but are not so inclined to use the highest graphics settings available, then a medium-range GPU will do the trick without any problems.
A medium-range GPU will also give you enough power to run image and video rendering software, and have access to normal utilities like HD videos, and even 3D rendering software in some cases.
A good GPU will ensure that you will be set for the following years in all the categories mentioned above, and our list includes a variety of options to choose from.
RAM
The Rapid Access Memory (RAM) enables your device to run multiple applications and features at the same time. As you might expect, the more RAM the better.
This applies especially if you’re planning on playing games or running complex 3D rendering software, but also helps in day-to-day tasks like browsing the internet while listening to your favorite podcast.
As Windows 11 requires your system to have at least 4GB RAM installed, all the choices found in this list will go above that value.
A good RAM amount for powerful gaming will be anywhere between 16 to 32 GB RAM, while an average amount would range from 8 to 16.
Storage space
The amount of storage space you have on your device will determine how much data you will be able to store on your PC.
Not all storage elements are the same, some of the most common being either an HDD (hard disk drive) or an SSD (solid-state drive). Both of these options do the same thing – enable you to store and access data, but they don’t do it in the same way.
Even though an HDD is required at the minimum for you to store your OS and other personal data and files, an SSD provides you with all these elements at a higher reading and writing speed, thus improving your system’s efficiency considerably.
As you can observe in the graph above, there are quite a few differences between these two types of storage, but even SSDs come in two main categories:
SATA
NVMe
Even the speeds between these two types range a lot, with the NVMe SSD reaching speeds of 3,5 GB/s, while the SATA version clocks in at about 0.5 GB/s.
If you’re interested in having the fastest write/read speeds for your PC, then choosing a PC with an NVMe SSD is the way to go. In case you want speed but not necessarily the highest available, then choosing a device that uses a SATA SSD is a good option.
Of course, if you’re not that interested in this topic, and simply want a good PC that can store data while also saving some money, going with an HDD is a good option.
Design and utiizability
The design of your ASUS PC might not seem that important, but some elements can make a huge difference.
A principle that applies both when it comes to laptops and desktop PCs, is that the design not only improves the aesthetics of your device but can also make a huge difference when it comes to functionality and even performance.
Aesthetics – an important element that makes your device fit into the background of your home/office without being and eye-sore.
Functional design – some devices have designs that give them an edge when compared to other devices, such as the extra display found on the ZenBook Pro Duo 15, the detachable screen from the Lenovo ThinkPad X12, or the bending screen found on the Lenovo ThinkPad X1 Fold.
Performance-related design – design elements that can be found on Windows 11 tablets, desktops, and laptops with the latest OS can also be quite efficient when it comes to improving the performance of the device itself. This comes in a variety of types, including heat exausts, the thickness of the device, and even easily-upgradable parts.
Considering all these elements when choosing a good Windows 11 ASUS PC will hugely impact your future, so we made sure to take them into account when creating this thorough list.
Tip
Buyer’s tips:
➡ If you’re a creative type, and are also interested in trying out some of the latest designs in laptop display setups, then the ZenBook Pro Duo 15 is the perfect choice for you.
Designed specifically with digital creation in mind, this laptop is equipped with amazing components, and features two full-touch 4K displays.
➡ For those of you more inclined to choose an ASUS gaming laptop that can run the latest games at great FPS rates, then the ASUS ROG Zephyrus M16 is our top pick.
This device not only provides you with a great CPU, GPU, and SSD but also packs 40GB RAM, and a gaming mouse and mousepad.
➡ If you aim to invest in a powerful office laptop, and don’t mind having a lower-grade GPU, the ExpertBook B9 from ASUS is worthy of your attention.
This rugged and slick laptop has a very powerful CPU, great RAM, and also offers a Full HD 14-inch display with a 180-degree hinge.
➡ As no list would be complete without presenting you with a versatile and powerful laptop that doesn’t require you to spend a lot of money, the TUF Dash 15 (2021 edition) is a perfect option.
It will not be able to reach the FPS from the Zephyrus M16 but provides you with everything you need to run games as a gaming amateur.
➡ The ExpertCenter D500SA is a very compact and versatile desktop PC from ASUS that will perform everyday tasks without any problems.
It also comes bundled with a mouse and a keyboard, so you can install it in your office in no time.
As we now covered the most important aspects you need to consider when choosing one of the best ASUS PCs, we can move further onto seeing which of these devices were chosen, and discuss the details for each of them.
The ZenBook Pro Duo 15 is a device that impressed us both when it comes to its design and also processing power. The second screen installed on this device not only looks amazing, but also provides quick access to apps, software shortcuts, and can be used as an extension of the main screen, but also as a separate display.
This element has proven incredibly useful especially when dealing with image and video processing applications, making this device one of the best laptops for creatives.
Even though it might not have the best processor available on the market at his point in time, the Intel Core i9-10980HK with 8 cores does its job perfectly, being able to support two amazing touch displays with lots of functionality, and not disappointing at any level of test we threw at it.
The powerful NVIDIA GeForce RTX 3070 GPU with 8GB VRAM performed incredibly well even when trying it out with multiple graphic-intensive applications running simultaneously, and even in the games we tried on it.
Being built with NVIDIA Studio only bolsters our previous statement about this device being designed by creatives, for creatives.
That being said, the fact that the main screen can be extended to the so-called ScreenPad Plus 14-inch 4K display offers an incredibly immersive experience during gaming.
The 32GB DDR4 RAM featured on the powerful ZenBook Pro Duo 15 supplements the power of the CPU and GPU perfectly, offering great multi-tasking capabilities both in the field of simultaneous app usage, but also when running some of the latest games.
To be able to sustain good overall performance, this device comes equipped with a 1TB PCIe NVMe M.2 SSD, which provides much-needed storage space at great reading and writing speeds alike.
The powerful ROG Zephyrus M16 from ASUS was selected as the best gaming laptop from this company, offering incredible processing power, great graphics, and a full gaming setup right out of the box.
The package includes both an ASUS ROG Gladius II Origin gaming mouse and a Strix Edge gaming mousepad, which allow you to start gaming as soon as the delivery reaches your house.
The 11th Gen Intel Tiger Lake Core i9-11900H with 8 Cores provides you with more than enough power to play the latest games, run CPU-intensive applications, and support daily usage as well. During our tests, the CPU has reached the base frequency of 2.5GHz, and this was expanded to up to 4.9GHz, making this device a force to be reckoned with.
The NVIDIA GeForce RTX 3060 GPU with 6GB GDDR6 VRAM matches the powerful CPU perfectly, offering you an immersive gaming experience, and ensuring good FPS levels across the board.
To support the immersive experience mentioned above, this device is equipped with a 16-inches 165Hz IPS display with an incredible 3ms latency. Even more, the 2560 x 1600 resolution and the Anti-Glare feature round this device up, making it a very good choice for all gamers.
40GB of DDR4 RAM running at 3200MHz ensures that your device will never start lagging even if you’re running the latest games, or running multiple heavy-graphics applications at the same time.
When it comes to storage, the ASUS ROG Zephyrus includes a 2TB Samsung NVMe SSD which is capable of reading data sequentially at 7GB/s, and writing at 5.1GB/s.
The ExpertBook B9 from ASUS is a very powerful laptop that fits perfectly in any office setting and offers incredible processing speeds and multi-tasking capabilities. Everything is encased in a slim and lightweight magnesium-lithium alloy chassis, making it extremely portable, and durable.
As an added feature, this laptop comes with a LED-illuminated numeric ASUS NumberPad, which brings you a consistent edge when working with numbers all day.
The 4 core Intel Core i7-1165G7 processor uses a 12M Cache, and runs up to 4.7 GHz frequency, ensuring that you will always have enough power to tackle any office task without worrying about lagging and losing any data.
Even though it is not the top-of-the-line GPU, the Intel Iris X installed on this device provides you with more than enough graphics processing power to run demanding software and deal with everyday tasks.
For a superior multitasking experience, the 32GB LPDDR4X RAM will surely contribute to your increase in productivity at work, never requiring you to choose which software you want to run at the same time. No matter how many large documents you open on this device, the laptop will perform exemplary.
A 2TB PCIe NVMe M.2 SSD ensures that you have enough space to store all your work-related material, including presentation files, large documents, videos, images, and even personal files. Reading at writing speeds is top of the line thanks to the NVMe configuration.
The 14-inches Full HD Display is encased in a narrow bezel design to provide you with a maximum amount of working space, and also features a 180-degree hinge for presentations and meetings.
The TUF Dash 15 from ASUS released in 2021 is a medium-range gaming PC that can be extremely useful for a variety of tasks. This includes of course gaming but can be used as a work laptop as well, being considerably helped by the slim design.
The Intel Core i7-11370H processor uses a 12M Cache, and runs up to 4.8GHz, making this device a top contender in our list, and doing so while not affecting your bank account very much.
This CPU will be perfectly capable of running some of the latest games on the market, even though it might not reach the same FPS rates as the other more capable options presented in this guide.
When it comes to graphics, this laptop has an NVIDIA GeForce RTX 3050 Ti with 4GB GDDR6 VRAM which, even though on the lower spectrum of VRAM values, provides you with decent image processing capabilities.
The 8GB DDR4 RAM ensures that you will be able to run Windows 11 on this device without encountering any issues whatsoever, and will also be enough to play games like Red Dead Redemption 2 and others. If you’re not a professional gamer or keen on having the greatest visual experience, using lower graphics settings will come a long way.
This laptop comes with a 512GB PCIe NVMe M.2 SSD, which provides fast booting times, and great reading and writing speeds as well.
To round this laptop up, it allows you to upgrade to Windows 11 freely, by using the Update feature on the Windows 10 version already installed out of the package, and the 0.8 inches thickness and 4.4 lbs weight make it qualify in the ultra-portable section, even though a gaming laptop.
The ExpertCenter D500SA is a very versatile option in case you’re not interested in getting a laptop, but also appreciate a slim desktop design for day-to-day usage, both at home and in the office.
The 10th Gen Intel Core i5-10400 processor has 6 cores and uses a 12M cache while running to up to 4.3 GHz, making it a decent and affordable Windows 11-capable ASUS PC. Even though the performance can not be compared with some of the top choices in this list, it proved to be perfect for creating, editing, and writing documents, while also tackling low to medium-range multitasking.
Its multitasking capabilities are enforced by the usage of the 12GB DDR RAM, which can also be expanded to up to 64 GB. Even with the 12GB, we didn’t have absolutely any problems running Google Chrome with at least 15 tabs open, image-editing software, music playing in the background, and even a set of Office documents.
The 512GB PCIe NVMe M.2 SSD, even though not very big, should be enough to use every day, especially as you won’t be installing any games on this device.
To round this ASUS desktop PC up, the slim design fits any office or home environment without taking too much space and also comes bundled with a wired keyboard and a mouse. All you need to do after you get the package is to plug it in the wall socket, connect it to your preferred display, and start working on it.
Bottom runners
During our testing, as we aimed to cover the needs of as many users as possible in the main list, there are a few ASUS options that have caught our attention, which didn’t fit in the list based on our parameters.
For this reason, the following options are two ASUS desktop PCs which also cover the needs of the readers who want a gaming desktop PC from this company.
The GT15 is a compact desktop PC which offers great processing power, and also comes in at an affordable price. The setup contains an Intel Core i5-10400F Processor, the GeForce GTX 1660 Super GPU, and 8GB RAM.
The ad also allows you to choose a better-configured option, which reaches 64 GB RAM but involves a higher cost.
For the people inclined to spend more money on an ASUS desktop gaming PC, the G15C offers you an Intel Core i9-11900KF processor, an NVIDIA GeForce RTX 3060 GPU, and 32GB RAM.
This configuration can also be improved by choosing other options from the ad.
As you can see, our best Windows 11 ASUS PC list includes a variety of options that cover the needs of creative, gamers, and also average users.
We also made sure that the price ranges cover the entire spectrum, so anybody interested in a capable ASUS device can invest accordingly.
Be sure to share your choice with us by using the comment section found below this guide.
After abandoning the franchise for several years, Microsoft decided to team up with Asobo Studio and launched Flight Simulator in 2020.
In the meantime, the now highly popular game also became available on the latest generation consoles, the Xbox Series X/S.
The latest news to come out of Redmond is that Microsoft Flight Simulator: Game of the Year Edition will be launching next month with a collection of upgrades.
Discover the Windows 11 Easter eggs in the game
Asobo Studio announced a special event that involves both the game and Microsoft’s latest operating system.
From today until November 18th, there are 11 landmarks around the world that will be lit up in Windows Blue.
Creators won’t reveal what those landmarks are, so it sounds like it’s up to the community to find them. In addition, the EXTRA 330LT is getting a Windows 11 livery as part of this event.
The Game of the Year Edition will become available starting November 18th and will add five aircraft to the game.
One of these new aircraft is the Boeing F/A-18 Super Hornet, which is also the first military jet being added to the game ahead of next year’s Top Gun: Maverick expansion.
The other models being added are pretty awesome too and include the VoloCity, Pilatus PC-6 Porter, CubCrafters NX Cub, and the Aviat Pitts Special S1S.
Furthermore, eight entirely new handcrafted airports from Germany, Switzerland, and the United States will be added to the game.
Therefore, players will be able to visit Leipzig/Halle (EDDP), Allgäu Airport Memmingen (EDJA), Kassel (EDVK), Lugano (LSZA), Zurich (LSZH), Luzern-Beromunster (LSZO), Patrick Space Force Base (KCOF) and Marine Corps Air Station Miramar (KNKX) from the United States.
Let’s not forget about the new missions, tutorials, updated weather systems, early DX12 support, and new photogrammetry cities.
The Game of the Year content will be free for those who already own Microsoft Flight Simulator on PC and Xbox Series X/S, so pretty much a win-win situation.
Also, remember to check out the latest hardware, developed while collaborating with top aeronautical engineers and pilots, among which the Velocity One, and the Xbox Recon controllers.
Excited about the new additions to your favorite game? Share your thoughts with us in the comments section below.
If you’re looking for the best Windows 7 ISO mounting software to use on your computer, take a peek at some of the top tools.
Mounting software, also known as disk image tools, lets you turn discs and drives into virtual images so you can easily store and/or modify them from your computer’s storage.
An ISO file is a disk image file derived from an optical disc that contains the same contents from the disc, including its file system.
ISO files are characterized by their .iso extension, so if you have or receive any such files for users who are not on Windows 8 or 10 – because these two already automatically mount ISO files – then you need the best Windows 7 ISO mounting software to execute the task.
Mounting such files is one of the best things to have happened after CD and DVD drives because the latter was becoming cumbersome to move around with, plus added to the clutter around us.
Thereby ISO mounting software comes as salvation for old files stored on CDs that need to be exported in your computer storage and taking back important files from your discs.
Today, you don’t have to struggle with carrying around volumes of files in several discs on which you’ll burn your files to. Simply get mounting software or disk image tools, and you’re all set.
Here are our top picks for the best Windows 7 ISO mounting software you can use today.
What are the best Windows 7 ISO mounting tools for your PC?
Topping off our list is a software utility that is a top choice when it comes to archiving, extracting, or encrypting data, and it is called WinZip.
That being said, WinZip is perfectly compatible with Windows 7, even if it is an outdated OS. It supports all major archive file formats, as well as image files like ISO or BIN.
What makes WinZip ideal for handling ISO files is just how easy it is to use. Simply install it, then right-click the ISO file, and select the Extract here or Extract options.
Once you’ve done that, whatever was on the ISO files will be up for grabs in the location of your choosing.
Hence, this solution is the most appropriate one if you need to safely export your ISO files from your discs on a PC, assuring high encryption and great efficiency for multiple file types.
Here are some of the perks of using WinZip:
Require no prior knowledge of using software
Universal archiver and file extractor
Can handle image file formats
Low system impact
Easy-to-use
WinZip
Looking for a tool to handle ISO files in Windows 7? Search no further than WinZip, since you will enjoy full compatibility for all files.
As its name suggests, PowerISO can and will mount ISO files onto your virtual drives and it supports Windows 7 too.
The good thing about this mounting software is you can create bootable USB flash drives with it, plus you can use it to rip audio from your CD/DVD discs and convert them to mp3 files for easier storage and listening.
It is as well likely to use this strong functionality to burn, compress or edit files from your CD discs and get all content you need from portable storage.
Moreover, you can create personal image files and mount them on virtual storage drives that will keep all your system data entirely secure. Plus, configure USB drives to store your ISO files to have them on the go.
It also supports other image file formats besides ISO, such as CDI, BIN, NRG, or DAA file types, thus you can mount not only one specific data.
Lastly, this software is really intuitive when attempting to mount ISO files and after you get familiar with the process, you will become best friends.
PowerISO
As the name suggests, it’s a powerful virtual drive software that supports a lot of image files besides ISO.
This is a free, open-source mounting software that lets you mount ISO files in Windows 7 through Windows Explorer.
All you do is click on the disc images, or if you have an ISO image you intend to use, then WinCDEmu is your friend.
It is a one-click ISO mounting tool that runs on both 32 and 64-bit versions of Windows 7. What’s more, you can mount as many virtual drives as you so wish with this tool.
It also doesn’t take up so much time during installation as it is smaller than 1MB, so you can mount whatever files you want, like movies, games, music, and any other files you may have.
The beauty is that, unlike the CD/DVD discs, you get more storage with a virtual drive, plus it opens up faster from your computer than a disc.
Therefore, this comprehensive program will execute your discs files mounting in the most simplistic way to offer fast services and instant gratification.
As one of the best Windows 7 ISO mounting software on the market, this tool mimics an optical disc only that it exists virtually in your computer.
You can mount ISO files to a virtual drive and still use it the way you would a CD/DVD drive.
It is so simple to use, plus it comes free of charge and supports Windows 7 operating system.
The only flaw is the limited amount of virtual drives you can get with this tool at just 8 drives, otherwise, it is one of the most popularly used mounting software.
At the same time, this program can support 15 virtual drives at once so you can seamlessly add many of your files on virtual drives.
Thus you can store multiple files like images, video, or audio in virtual drives and have your files stored virtually instead of using optical discs.
One of the most frequently used applications in the market. DAEMON Tools Lite works on Windows 7 and any other Windows platform, for that matter.
It brings all the usual jazz to the table, with multi-drive virtual simulation and a simple-to-use interface.
As the name suggests, this is a lightweight application with a portable version that doesn’t require installation for you to mount ISO files.
Even though the interface is a bit outdated in comparison to some other entries on this list, you’ll figure it out in a matter of minutes.
You can either set a permanent virtual volume drive or add it only when needed. Not to mention a large variety of supported formats and fast access from the system tray.
All in all, this software will do its job smoothly and help you burn multiple types of files. Plus, you can try it with a free download from the website.
This mounting software works magic on ISO files as it mounts multiple images simultaneously – such a time saver, right?
However, you only get up to 15 drives with this tool, which is pretty much better than Virtual CloneDrive, but this one doesn’t have a user-friendly interface like the other tools.
This tool also lets you extract images from optical discs and convert different formats, plus you get to work with your disk image the same way you would have with an active CD/DVD drive.
The best part is you can use it with Windows 7 as it works with Windows Explorer so you can drag and drop your files and mount with zero hassles.
Therefore if you badly need to access your favorite CD or DVD files without having to burn them, use this software to run your games, music, or other files much faster with this virtual CD-ROM tool.
Besides all, Magic Disc ISO will help you store your most valuable media as disc image files on your Windows 7 PC.
Which of these best Windows 7 ISO mounting software sounds like a plan for you? Let us know in the comments section below, and share your experience if you’ve used any of them.
UPDATE: Microsoft made the official Windows 7 ISO files available for download. This means that you can go to Microsoft’s official website and copy the ISO files to an external device. You can then use the respective files to install Windows 7 on your computer.
Important note: Microsoft officially ended Windows 7 support. If you’re planning to upgrade to Windows 10, make sure to check out our wide collection of guides on how to make the transition as smooth as possible.
Game design and development require the knowledge of a programming language. Whether they’re amateur or professional, game developers must learn ActionScript, JAVA, C++, or some other complex programming language necessary for creating 2D or 3D games.
But, fortunately, these days, there is a variety of game-making software that doesn’t require coding.
In other words, with all of the tools on the market in today’s gaming industry, you can really get into game development without any formal education.
These are user-friendly and they include a straightforward drag-and-drop interface, an event system, a graphics editor, a level editor, and special effects.
How do I create a video game?
Before choosing a video game creator, you may need to know the basics of developing your own game. Hence, the development of the game involves different stages you need to follow:
Imagine and create the concept of the game
Design the game themes and mechanics
Choose the right game creator and start developing
Test your game
Here’s a list of the best game-creating software for PC games that will turn out to be appropriate for any game developer or amateur creators.
Adobe Creative Cloud gives you an entire collection of creative apps and services to develop anything from authentic characters beautifully illustrated and hiper-realistically animated.
From idea to implementation, checking every single design box, the Creative Cloud includes 20+ desktop and mobile apps and services for photography, graphic design, video and audio, Illustration.
Seamless app integration, cross-platform functionality, easy collaboration, comprehensive toolsets, unlimited storage – all in one place.
Create incredible images with the world’s best photography tools: Adobe Lightroom, Adobe Photoshop, and many more.
Make gorgeous graphic design and beautiful vector art and illustrations, with excellent software like Adobe InDesign (elegant layouts for print and digital) or Adobe Dimension (for 3D design).
After Effects is perfect for cinematic visual effects or motion graphics, and when it comes to creating graphics, web pages, and video stories, you’ll need a great tool like Spark.
If you want to make amazing video, audio, visual effects, and animation, keep in mind these incredible tools: Premiere Pro, Premiere Rush, Audition, Animate, and Character Animator.
Let’s quickly look at its key features:
20+ apps to cover every single need a game developer can have
Thousands of fonts
Creative Cloud Libraries
Adobe Portfolio
100GB of cloud storage for files
Cross-app integration for sharing and collaboration
Adobe Creative Cloud is a subscription-based service. You can try each tool included for free for 7 days.
Adobe Creative Cloud
Push your imagination beyond limits with the most complex multimedia editing tool!
We recommend this software as anyone can start making a simple game or a more complex one using 3D modeling software, which is now a requirement for any game developer’s toolkit.
This software gives you the framework to design and share a great gaming experience.
With Indie Game Maker you get to create your game in three phases, each of them allowing you to be as creative and complex as you want it to be.
The great thing about this game-maker is that you can set the ground base of your design and start testing, iterating, and then work on the details to smooth it up. You just need enough to get going.
If you want to learn more about the game development you can download the Cat-Fu Game kit and get to look into each phase’s assets as documented by the game makers.
From this, you can add your own characters or environments, or even re-build an entirely new game.
You can start with the free trial just to plunge into the process. With your characters and environments created in 3D, you can then start building your game.
Other key features include:
Advanced in-motion character builder
Fine detail support for every object
Animation and VFX support
You build levels and create the rules for how your game works in the Stingray game engine on Maya LT. Although it has a good complexity level, you don’t need to be a programmer to use it.
Autodesk
Model 3D characters and environments, test your game, and improve every detail to perfection.
In case you are not an absolute beginner and you already have some experience and some programming knowledge, Unity might turn out to be the perfect choice for you.
Its only setback may be the fact that the software is quite intimidating to learn for users who are complete beginners.
This particular limitation together with the fact that the pro license is quite expensive and you really need it if you want to make a profit off of your games are the two main minuses of the program.
Unity is also one of the most flexible and the most robust programs for creating games, and it also features lots of support, and assets to purchase.
In addition, it comes with its very own built-in IDE, and also the ability to create various 2D and 3D games.
Other key features of Unity include:
Game builders for all platforms: mobile, console, PC, AR, VR, and web
Complete control over game size
Scalable performance
Project Tiny feature to build small games quickly
If you are interested in creating 3D games or if you have some background in a programming language, maybe this will turn out to be the ideal tool for your needs.
Unity
Create 2D and 3D games with plenty of professional-level tools, including an integrated ID for advanced configurations.
This is one of the most flexible, powerful, and easy-to-understand game-making programs on the market.
YoYo Games just recently opened up the full Standard license completely for free, launched their own marketplace, and boasts one of the largest and the most significant communities.
It’s also essential that the internal program language called GML is straightforward to learn and it will teach you concepts that you will be able to apply also to other languages.
This is the reason why Game Maker is the ideal starting point for any developer. There’s already a growing list of high-quality games developed with this program.
The software features a drag-and-drop interface which makes it incredibly easy to pick up and get started as soon as possible.
This intelligent program will help you lay the foundation you need in order to branch off into coding your own games and become a true pro.
Other keyfeatures of Game Maker Studio include:
Game builder for Windows, Mac, Linux, Android, iOs, HTML5, Xbox, PlaStation and Nintendo Switch
Camera controls settings in the room builder
Sequence animation tool for cutscenes
High-performance bug fix
There’s an endless wealth of information and tutorials available, and all these make the program excellent to boost any developer’s career.
This will be your best bet in case you have never written a line of code in your whole life. This game development tool is GUI-driven, and this means that everything is drag-and-drop.
Variables and game logic are implemented using the design features included in the app. On the other hand, even if you want to write code you should know that it’s unavailable.
With this software, you are able to export your work to a dozen different platforms and formats, and you don’t have to change a single thing in your game to accommodate these options.
After you finish your game, you can export it to the Windows Store, HTML5, Chrome Web Store, or Facebook. If you get a paid copy, you can also export to Windows, Linux, Mac, and more.
Construct 3 features some of the most complex documentation included in a game development tool.
Most developers lack skills in music, art, or animations, but this is not a problem when using Construct 3 as you can always browse and purchase ready-made assets from the Scirra Store.
Other key features include:
Works offline
Auto updates
Instant previews
Comprehensive user manual and tutorials
You can also get sample games with a source that can be helpful for studying and learning new tricks and tips of all kinds.
Before we had fancy HD graphics and more gigs of storage space, some words on a screen were enough.
Back then, before graphical games, you would only have some text-based adventures that unfolded similarly to a choose-your-own-adventure story.
As you might imagine, making a text-based game is really an advisable first undertaking of a game project.
You will not have to worry about lots of programming and graphics, and that’s why you will have enough time to focus on creating believable stories with an in-depth narrative and dialogue.
Quest is a very intuitive and straightforward text-game creator, and its interface is free of clutter. The UI is designed in such a way that really makes sense from a game-creation point of view.
Other key features of Quest include:
Compatible with multiple languages and supports your own language script
Online builder and Windows app
Multimedia effects including sound effects, music, and pictures
In case you are planning on creating stories for others to get involved with and if you want to keep things basic, the software is the perfect place to start, and you can even use it entirely in your browser.
Adventure games are one of the main genres that have seen a significant comeback in the past years, along with retro-style games.
This opened the doors for indie developers to tap back into the pulse of the Myst faithful.
This is a smart evolution considering the fact that most games from the Adventure genre could be summarized as Text-based adventure games with graphical presentations.
Adventure Game Studio software is totally free, and it’s designed for simple use.
Of course, you should know that there haven’t been lots of blockbusters made with the help of this program, but this doesn’t mean that there haven’t been a few successes.
The program provides you all the necessary tools for building your own adventure for free. You can bring your story and artwork and slot it in, and the program will make sure to do the rest.
Other key features of Adventure Game Studio include:
Support for multiple platforms, including Windows operating systems, Linux, and macOS
Builds games at any resolution
Multiple audio formats
Speech packs
Support for multiple language game translation
You can create, test, and debug the game, and all these in a single place.
The RPG Maker has been around for quite a while now. The VX Ace edition of RPG Maker has come a long way and it’s an incredibly flexible and powerful software in the scenery of today’s industry.
It may not be as adored as other programs when it comes to making professional commercial games, but it sure does have its great features.
The software is designed like an RPG featuring lots of menus and areas to soft through and to learn them, and the community is also beneficial and vast.
You will see that it’s quite easy to pick up and learn the program very quickly.
You should keep in mind the fact that you will have to dedicate an extraordinary amount of time to this in case you want to create something worth playing.
Other key features of RPG Maker VX Ace include:
Map Editor
Character database
Built-in character generator for custom sprites and faces
The software itself promises to be simple enough for a child but also powerful enough for a developer, and it’s supposed to offer you the most powerful RPG-making tools.
Stencyl is quite a portable game studio that offers a fantastic toolset as well as extensive platform support. The program requires no coding and includes the coolest drag-and-drop interface.
The interface is inspired by the MIT Scratch project. The software developers modified MIT’s project by adding a bunch of new features.
You will find out the dragging and dropping blocks was never the piece of cake it is with this program.
The program allows advanced game developers to write their code, import libraries, and custom classes and it offers them full freedom to create their games.
Developers will also be able to design scenes and build worlds using the software Scene Designer.
It also features an Actor editor tool that offers you the possibility to create characters and NPCs and to tweak their behaviors and appearance.
Other key features of Stencyl include:
Free guides and tutorials
Compatible with all major platforms inlcuding iOS, ANdorid, Windows, macOS, and Linux
Worlds and character builders
You can create Flash games for free and publish them on the website of the program, but if you want to publish them on Windows, Google Play, and more, you will need to pay a yearly subscription.
This is a game-making software for beginners, that lets newbies delve into the world of program development by offering them all the necessary toolsets along with a friendly interface.
Developers will be able to create cool arcade games, shooters, platformers, and space adventures.
You’ll be glad to see that every genre has its own set of tools and there is also a separate physics game creator for creating physics-based games and a graphics editor.
Even if the program is a pretty great platform to create a game, unfortunately, it doesn’t support application monetization. You will not be able to publish your game to a mobile market.
On the other hand, you can publish your games on the company’s website, and you’ll receive ratings from other members.
Sploder is a space where everyone can create games online and share them with the whole world, and all you need for this is a great imagination and the desire to create.
Other key features of Sploder include:
Extensive tutorials and learning resources
Builders for various types of games including retro arcade games, flash games, adventure games, shooters, and many more
Supports game publishing
Sploder’s community is self-regulating, and the members monitor the site content every day.
This is another online game making program that features an open community where developers and all game enthusiasts can discuss and share all of their creative ideas.
This online toolset helps amateurs and also professional developers to create HTML5, web, and also mobile games.
GameFroot is a straightforward online tool for creating pixilated games, but in case you are thinking about monetizing your games, you should know that you have to pay for this.
You must also pay money if you want to get some learning resources and publish to AppStore, GooglePlay, or other markets.
This tool includes lots of useful features for professional users such as private groups, which encourage developers to create games together and to copy protection and support.
Even if the app is not the best game maker for Android and PC, it will definitely turn out to be worth trying.
Other key features of Game Froot include:
Wide selection of tutorials
Gamefroot Arcade platform for sharing your creation
Multiple languag support
Don’t forget to get the free version first and only go for the pro one in case you will be satisfied with the service, features, and interface.
This is a beautiful interactive experience for every platform, and it allows to create of 3D HTML5 and WebGL games that will amaze everyone.
The program also allows coders and creatives to develop Rich Media Ads that run everywhere.
You will be able to reach your audience wherever they are, and this includes desktop, mobile, social media, and instant messengers.
The PlayCanvas is a free and open-source engine, and it’s easy to pick up for beginners and also powerful for experts. The company’s transparent development process is great for everybody.
The program’s tools are built on open-source technology, and you will be able to create content in the fastest way possible. You can develop anything from simple product demos to complex games.
Other key features of PlayCanvas include:
Advanced audio API
Realtime 3D graphics
Hardware-accelerated character animation
Import external models of various formats
The program is free to use for public projects, and you also have the option of choosing a paid plan for unlimited private projects.
All these tools from the list above are some of the most powerful ones on the market, and their complexity varies, so some of them are ideal for beginners, and others are perfect for pros.
The game-making software we presented is user-friendly and powerful, so check out all of our options and stick with the one that suits your needs for creating the coolest games.
We’d like to hear more from you on this subject so don’t hesitate to drop us a comment in the dedicated section below.
Mind mapping is a great technique to structure a topic and assess its implications across the board.
However, it’s not so easy to do it with a pen and paper while you’re brainstorming an idea because you will make a lot of changes within the process.
The solution is to use a mind map software that can help you create and edit them on the fly or highlight the most important ideas.
That’s why in this review we’re talking about Wondershare EdrawMind, a solution that comes with all the tools to create a good design with a minimum effort.
What is EdrawMind and how does it help?
Wondershare EdrawMind is probably the best mind map software for business and education that you will find right now.
If you are not aware, a mind map is a diagram that helps you represent tasks, concepts, words, or items that revolve around a central concept.
Then, all of these are placed in a graphical layout that allows you to build an intuitive arrangement around that concept.
The goal is to turn all these items into an organized diagram that will become much easier to understand and memorize.
EdrawMind can help you achieve that with simple and intuitive tools so you can easily layout a concept or a brainstorming idea into a memorable design.
And you can also turn a mind map into a Gantt chart with one click. It’s a very popular business-type diagram but you can use it in any field of work.
What are Wondershare EdrawMind’s most important features?
1. Plenty of mind map structures
EdrawMinds comes with 12 mind map structure designs like a radial mind map, Timeline & bubble, fishbone, sector map, and more.
That basically means that you can start off with the best structure that fits the type of mind map that you want to create.
And going on with a structure, you will discover 33 themes and over 700 clipart images that will help you personalize your mind map and make it unique.
If you don’t know what structure to use from the start, you can still view plenty of templates and examples from other users and figure out what is the one for you.
Mind mapping is a growing trend and so is EdrawMind’s community so you will definitely see interesting creations and you will be able to communicate with the users within the online platform.
2. Create presentations automatically
After you finish your work, you will want to show it to others and that can be tricky because the more complicated is the mind map, the more difficult it will be to present it.
That’s where the EdrawMind magic starts because this tool comes with an automatic slideshow creator.
You only need to access the Slideshow tab and click the Auto Create button, then the software will automatically split the main concepts into separate slides.
Of course, you can edit the slides and their content as much as you want but you can also interact with the presentation and click on the different topics right when you show them on the big screen.
Anytime you can add more slides where you want them and restructure the content of the slide as you seem fit.
3. Use the Outline mode to add or change data quickly
Sure, it’s simple to work directly on the mind map in its graphical representation but as your diagram grows bigger and bigger, that is going to become increasingly harder.
EdrawMind makes it a lot easier to work on your mind map by using a feature called the Outliner mode.
Just click on Outliner when you’re in your mind map and you will find the same structure but here, you will only see the text organized as a logical indented mode.
You will find it intuitive to add the content here, then switch to the MindMap mode to switch to its graphical representation.
And the tools displayed on top will help you quickly change the indentations, add graphics, images, hyperlinks, tags, and even replace words in the diagram.
4. Use the Brainstorming mode for collaboration
The most interesting aspect of mind mapping comes from developing and growing an idea, a concept, and although you can do it alone, collaboration is key.
That’s why Wondershare EdrawMind also comes with a Brainstorming mode that you can access whenever you’re working on a mind map.
Clicking on the Brainstorming button triggers a full-screen mode so that everybody can see the graphical representation and add concepts on the board.
You can color-code each concept and add them right into your mind map by simply dragging and dropping it onto the board, connect it to other ideas and grow the mind map.
It’s so simple to use it that you won’t need to concentrate on clicks and styling and concentrate on discussing the concept with your peers.
And within the online edition, you can also collaborate with them in real-time, wherever they are in the world if they only have an Internet connection.
5. Extensive compatibility
If you have older mind maps created with other tools or someone sends you such files, you need to know that EdrawMind will be able to convert them right away.
So, you can also import MindManager, XMind, EdrawMax, FreeMind, Markdown, HTML, and Word files but Wondershare warns you that they are not 100% compatible.
That’s because some symbols, clipart, and images may be different in other software but we didn’t have any troubles so far.
It’s also important to know that after you finish your mind map, you can export it as images, PDF, or Office documents, as HTML, and even as an SVG or MindManager file.
6. Create Gantt charts with just a click
If you’re creating a business organization chart, you can always add tasks by transforming your mind map into a Gantt chart extremely easily.
In any mind map, you can go to the tasks menu and click on the dedicated button to create a Gantt chart from the mind map.
All you need now is to fill the table with the time, date, and duration for the tasks. You don’t need to transform all the mind map. You can just select the branches you need with your mouse.
This can save you a lot of time in the process and you will have all the data conveniently stored, then share it with your staff.
How can I create a mind map using Outline in EdrawMind?
Open EdrawMind and click on New.
Now you can select a structure from the ones available and if you scroll down, you will see some local examples. We chose Outliner because it’s the easiest and quickest mode to get to the desired result.
Next, start working on your concept by simply developing around the main idea. In our example, we’ve outlined the basic steps to upgrade a software program in an organization.
The map in the Outliner mode is like a simple bulleted list so you can increase or decrease the indent of an element in the list by clicking on the dedicated buttons from the toolbar.
As you can see in our screenshot, you can also add images, notes, marks and tags, hyperlinks or quickly replace one or more words.
Once you’ve structured your data, you can click the MindMap button from the top left corner to see its graphical representation.
Of course, you can also use the toolbar from the top or the toolbox from the right to work on the mind map design, shape and structure.
But after you finish, you can also do a lot of things with it. For instance, you can create a presentation of your mind map. For that, you need to click the Slideshow option.
There are a lot of functions inside but we mostly played with AutoCreate, Traverse Topics, and Traverse Branches.
We already explained AutoCreate, that helps you automatically produce a presentation. Traverse Topics and Branches will highlight the titles and branches and, in the presentation, clicking on the screen will switch to the next. You can also change the level of contrast from the lower left button.
Don’t forget to click the File button then select Save as or Export to save your finished project.
Now click on Download Link 1. If that dowsn’t work, you can also click the mirror link but the first worked fine for us.
The installer will download and running it right after will start installing the software on your computer.
Now you only need to start the app.
You’re set to use the software now but we must remind you that you can also use the online version. You only need to create an account on the EdrawMind page.
In fact, we recommend creating an account anyway because you will be able to collaborate with your peers and save your mind maps on your cloud account and access them from everywhere in the world.
It’s very convenient because the software is available on Windows, macOS, Linux, Android, iOS, and Web so basically you can use it on any platform.
Wondershare EdrawMind
Create your mind maps and present them with style using this premium tool!
Compatible with Windows, macOS, Android, Linux and iOS devices
Outliner and Brainstorming modes
33 themes and over 700 clipart images to personalize your mind map
Cons
Not 100% compatible with other mind mapping software
Final notes
Usually, software tools that use the graphical interface are a bit demanding on the resources side, but EdrawMind worked seamlessly along with a lot of other tools.
Then, we discovered that the interface is really intuitive. Although we didn’t do much mind mapping before, we’ve worked our way to a great presentation in the end.
Our example is indeed pretty simple but you can go to more complex branching as the concept develops.
It’s also extremely nice that you can collaborate on ideas online and find a lot of themes that other users created so you can get inspired.
We hope that you found our Wondershare EdrawMind helpful and that you will give it a try.
And if you do, share your experience and impressions in a comment on the dedicated section below.
Microsoft has officially announced that Visual Studio Code, the company’s cross-platform Integrated Development Environment (IDE), is now available within a browser. vscode.dev offers a lightweight version of VS Code running fully in the browser. You can open a folder on your local machine and start coding without installing anything.
VS Code on the Web works on modern browsers that support the File System Access API (Microsoft Edge and Google Chrome) that allows web pages to access the local file system. This gateway to the local machine allows for local file viewing and editing, building client-side applications, as well as editing your code on devices like Chromebooks and iPad. However, even if your browser doesn’t support local file system APIs, you’ll still be able to open individual files by uploading and downloading them via the browser.
Since VS Code for the Web is running completely within the browser, some experiences are constrained – for example, the terminal and debugger are not available, and the code editing, navigation, and browsing too are powered by language services running fully in the browser instead of compilers that expect a file system, runtime, and compute environment.
For most programming languages, vscode.dev gives you code syntax colorization, text-based completions, and bracket pair colorization. The TypeScript, JavaScript, and Python experiences are all powered by language services that run natively in the browser and hence you also get rich single file completions, semantic highlighting, syntax errors, and more. However, for many “webby” languages, such as JSON, HTML, CSS, and LESS, the coding experience in vscode.dev is nearly identical to the desktop.
That said, most UI customization extensions such as themes, key maps, and snippets all work in vscode.dev and you can even enable roaming between the browser, the desktop, and GitHub Codespaces through Settings Sync.
VS Code on the Web is an ephemeral editor that is available to anyone with a browser and an internet connection and is the foundation of Microsoft’s vision for fully serverless development tool.
A drive partition is a separate region of a hard disk. By default, your hard disk is on C: drive, but you can split it up into smaller ones with partition manager software.
The advantage of partitioning a drive is that you can separate user files from the OS files. Additional partitions can be handy for multi-boot setups with alternative operating systems on separate partitions.
Although Windows 10 does include partitioning tools, third-party partition manager utilities have more extensive options.
There are plenty of benefits that come with good partition management. You get to create the best possible disk space optimization to ensure your OS and application function at full capacity.
Having multiple disk partitions allow you to run multiple operating systems on your computer.
Dedicated software usually creates a better user experience by enabling you to follow intuitive step-by-step operations.
On top of that, partition management softwares are configured to ensure maximum safety when it comes to preventing errors and data loss. Manually managing your disks is a little bit riskier.
If created incorrectly, a hard disk partition can actually decrease the functionality of your PC and make it run slower. This often happens when you use multiple partitions for similar files and thus duplicate some essential system files.
These are some of the more notable partition manager software packages for Windows 10.
What is the best partition manager for Windows 10?
AOMEI Partition Assistant is another third-party package that provides a great alternative to Windows 10’s Disk Management tool.
It has a fairly extensive freeware version, but you can also upgrade to Professional, Server, Unlimited or Technician editions if required.
AOMEI Partition Assistant is chock-a-block with partition management wizards.
For example, users can select Disk Copy, Partition Copy, Partition Recovery, Migrate OS to SSD and Extend Partition wizards from the software’s sidebar.
Below those you can select a variety of options for copying, merging, creating, splitting, moving, formatting, and deleting partitions.
Its Quick Partition option is a great addition that enables users to re-partition a hard disk in just a few clicks. This software also enables users to queue multiple operations that they can then execute simultaneously.
The software also allows complete disk conversion from MBR to GPT, dynamic disk to basic disk and vice versa, and also file system conversion between NTFS and FAT32. All conversions are done without any loss of data.
Aomei Partition Assistant also comes with a recovery tool that can find lost files and partitions.
Other key features of Aomei Partition Assistant include:
Data protection feature
Permanent technical support
Data migration support
The software comes in different versions, starting from standard-personal use packs and ending with full-featured professional versions created for MSPs.
AOMEI Partition Assistant
Automated disk splitting and recovery that queues multiple operations that can then be executed simultaneously.
Aside from all its partitioning options, it also includes backup and restores tools so that users can back up files and clone entire hard disks.
The software has freeware, Home and Professional version. With the freeware version users can create, format, move, resize and delete partitions.
If you upgrade to the Home edition, you can split and merge partitions and redistribute free space to increase partition storage.
The Home and Pro versions also have a handy boot manager that enables you to choose an OS to boot with and set up OS parameters.
Paragon Partition Manager also has an intuitive UI reminiscent of the Windows 10 Start screen. The Express Launcher has tiles that provide easy access to the software’s wizards and utilities.
Paragon has several conversion options including logical partition to primary partition, HFS volume to NTFS without reformatting, and MBR to GPT.
It also offers support for safe operating system migration to another HDD or SSD. You don’t need to reinstall or reboot your OS.
Other key features include:
Data recovery with the undelete feature
Expand already existing partitions
Identifies and fixes errors
Partitioning hard disks is a breeze with the Split Partition Wizard.
Paragon Partition Manager
Create, manage and recover partitions with intuitive tools that save you a lot of time.
Acronis provides powerful disk management controls under a simple and intuitive user interface. The aim is to maximize functionality without requiring much technical knowledge.
This tool lets you create partitions and set them up to fully benefit your specific needs. You can label, format, and activate your partitions in just a few clicks. The process is completely safe and error-proof.
Acronis Disk Director offers advanced format options that let you easily adapt your drive to the correct file system. It works with FAT16, FAT32. NTFS, Ext2, EXt3, Reiser, and Linux SWAP.
Another useful feature that can improve disk performance and data storage is the disk converter. Acronis Disk Director can convert basic disks to dynamic disks without any loss of data or errors.
On the topic of data security, this utility also provides a recovery tool. The Acronis Recovery Expert scans and recovers deleted or damaged volumes.
This software has an easy-to-follow disk cloning wizard. This is very useful as allows you to replace old MBR disks with new ones without requiring you to reinstall the operating system and vital applications.
Other key features of Acronis Disk Director include:
UEFI suupport
Boot from CD/DVD or USB stick
Add, remove, or break mirrored volumes
Acronis Disk Director is compatible with Windows operating systems starting with Windows XP. It is a licensed software with a free trial version with no expiration date.
Acronis Disk Director
Manage your partitions and optimize the functionality of your PC with this comprehensive tool that guarantees a seamless and secure experience.
Tenorshare Partition Manager is another viable option that offers assisted support for general tasks such as disk creation, disk deletion, clone, split, format, resize, and more. It is also equipped with additional, more advanced features that help users take full control of their disk settings.
The user interface is very simple with controls that are familiar to any Windows user. The design is very minimal as the main focus of this tool is its functionality.
This comprehensive tool offers an easy step-by-step partition creation process. You just have to make sure that your disk has the necessary unallocated space for a new partition.
Once you have that figured out, head to the Create tool in the main window of the software, and set your preferred parameters including name, type, file system, size, space, and more.
You can always come back and change certain parameters, as the software lets you resize your partition. If you need to allocate unused disk space elsewhere, you can easily shrink your partition. On the other hand, if you need additional space, you can easily extend it.
This tool can safely convert partitions from MBR to GPT as well as vice versa. It supports conversion for all types of file systems including FAT, NTFS, and HFS.
Moreover, when it comes to HDD interfaces, Tenorshare Partition Manager can easily work with SATA, SCSI, SSSD, IEEE, and USB 3.0.
It is also compatible with all types of removable media including CDs, DVDs, external hard drives, USB drives, and more.
As previously mentioned, this software offers advanced partition customization tools. You can set partitions as active, change volume labels as well as change driver letters and paths. This allows you to create a better-organized workspace.
Other key features include:
Format tool to erase all data
Partition deletion option
Disk splitting feature
Tenorshare Partition Wizard has a free version that includes all the above-mentioned features (with some limitations here and there). You can buy a license for more advanced features.
Tenorshare Partition Manager
Create, split, resize, format, and remove your partitions in just a few intuitive steps.
MiniTool Partition Wizard’s website boasts that this utility has had more than 16 million downloads.
Even though it provides a plethora of advanced disk management tools, the program is surprisingly straightforward to use with its Actions & Wizards sidebar and color-coded partition indicators.
The software has freeware, Pro, Server, Enterprise, and Technician editions.
The freeware version has a good variety of options for resizing, splitting, aligning, moving, creating, deleting, and formatting basic partitions.
However, you’ll need to upgrade to the Pro version to merge partitions and create, delete and format dynamic volumes.
MiniTool Partition Wizard is a comprehensive utility that comes with full partition controls that let you create, format, delete and copy your partitions.
Not only that, but you can use some customization features to set partitions as active or inactive, ad labels, change drive letters, change partition type IDs and even change the serial number.
The tool also offers a solution for users that worry about storing sensitive data. MiniTool lest you hide/unhide your partition in just a few clicks so no one can access the information without you knowing about it.
The software also offers full partition properties reports and file system checks.
Other key features of MiniTool Partition Wizard include:
Copy system and non-system disk
Migrates OS to SSD/HDD
Disk cleanup
The software’s Partition Recovery Wizard works like a charm and enables users to recover all partitions. MiniTool Partition Wizard also supports all hard disks such as IDE, SCSI, and external USB disks.
Minitool Partition Wizard
Advanced disk partition and disk conversion management software to guarantee optimal hard drive configuration.
EaseUS Partition Master is a highly rated utility for partitioning hard disks. This also has a trial version you can add to Windows 10 by clicking the Free Trial button on this page.
However, the freeware version alone packs a lot in. With that you can resize, merge, move and split partitions. It provides you with recovery tools to restore lost partitions with.
This software provides efficient and safe disk resize settings. If you want to add more space or, on the contrary, remove some disk space, just use the resize feature.
You can slide the partition left and right until you get your optimal configuration or enter the specific size you want right away.
An additional optimization method provided by EaseUS Partition Manager is the merge partitions feature. This can solve your low disk space options by combining two small, cluttered partitions into a larger one that has the potential to run smoother.
The utility is also a safe environment for converting disks from MBR to GPT and vice versa without losing any data. It can also safely convert the file systems from FAT32 to NTFS.
EaseUS Partition Manager also lets you clone your Windows 10 system partition/ drives to a new hard drive without reinstalling or reconfiguring the operating system.
Other key features of EaseUS partition Wizard include:
Adjust all partition simultaneosly with the disk layout feature
Manage dynamic volume
Support for Windows Server
Partition recovery feature
Format feature
You can copy partitions to new disks with the program’s Partition Copy Wizard. EaseUS Partition Master’s defrag option is also a good system tool to include.
GParted is a free partition manager that enables you to resize, copy, and move partitions without data loss.
It runs from a bootable disc or USB, but it has a full user interface. GParted is easy to use and it has a very intuitive process of editing a partition.
The partition manager includes a lot of different file formats like EXT2/3/4, NTFS, FAT16/32, and XFS.
You can change anything with just one click, and because it runs on a USB drive, there’s no need for a reboot. It also lets you hide partitions and works with all versions of Windows.
Gparted is available for multiple operating systems including Windows and macOS.
It is compatible with hard disk drives such as SATA, IDE, and SCSI, as well as flash memory devices, such as USB memory sticks, SSDs, and NVMes. Gparted also supports RAID devices.
Other key features include:
Align partitions to MiB or traditional cylinder boundaries
Data recovery from lost partitions
Most features don’t require internet connection
GParted is around 300 MB and you can download it for free by following the link below.
These are the best recommended partition management utilities for Windows 10. With them, you can partition your hard disk quickly and efficiently. Some also include additional backup tools.
If you have any more suggestions or questions, don’t hesitate to leave them in the comments section below.
Rendering software is used to convert a user-created 3D graphic model into full 3D environments or images.
This rendering software helps graphic designers, architects, and media developers to insert objects and disparate objects from 3D modeling programs into a graphically desired environment. These rendered images are easy to scale, navigate, and are responsive.
The rendering software may have features including animation tools that can integrate with animation programs to bring life to images. These can be used for movies, games, architecture, and other uses.
SolidWorks is a professional computer program for solid modeling. It can automatize some calculations and also offer proper simulations of the project.
It is also a good proofing tool because it lets engineers thoroughly check for any errors before submitting the final project to their clients.
The software allows users to sketch in 2D or 3D with various advanced geometry features.
SolidWorks can export files of various formats which makes its products compatible with multiple other CAD software.
You can easily open and edit SolidWorks files to other programs and also import projects created with other programs into your SolidWorks workspace.
There are numerous SolidWorks rendering programs available but we have compiled the very best below in terms of functionality.
What are the best tools to generate SolidWorks previews?
3ds Max is a unique rendering software that is widely used. Its major advantage is its versatility. You can utilize this software for different types of projects from architecture to fully animated characters for video games with quality results.
This program is compatible with Autodesk software and other render software which enables more functions and features. The modifier and texturing features are quite amazing. In addition, it is easy to use its texturing tool.
3ds Max has nice inbuilt tools that can be added on through the store. The internal scripting language can be utilized by users to write their own tools.
The software is the perfect software for architectural rendering. It also brings a quality interpretation of industrial design concepts and presentations.
However, this software has a complexity of features which can be frustrating for beginners. All the features cannot be utilized on a single project.
Other key features of Autodesk 3ds Max include:
Extensive library of different modifiers
Free version for students
Automated retropology and mesh repair
Autodesk 3ds Max is a subscription-based service. There are multiple types of subscriptions available. It also has a free trial.
Autodesk 3ds Max
For high-quality SolidWorks renderings, 3ds Max is a must given its rich features that will render models up to the very last detail.
Adobe Dimension is a modeling software equipped with the tools necessary to complete various types of projects, including illustrations, interactive content, and much more. It can import and edit Solidworks projects in STL formats.
This software has a user-friendly interface. It provides all the controls you need without being intimidating. Even though it comes with plenty of advanced features, it can be a good choice for a beginner because you can quickly adjust to it.
Adobe Dimension lets you select canvas size, units, and resolution. It also has 3D scene controls that you can use to scale objects in meters, centimeters, feet, inches, yards, and more.
In order to allow users to create their projects as specific and precise as they can, Adobe Dimension lets you combine 3D and 2D assets, apply images, materials, and advanced lighting controls including reflection adjustments, multiple shadow options, color, contrast, and more.
Moreover, users get access to the Adobe Stock library where they can find ready-made objects and models that they can use in their projects. You can access the on the web or via the Creative Cloud Libraries in the Adobe Dimension UI.
Dimension also lets you create highly realistic illustrations that look like photographs. It is vector-based, so you never have to compromise on quality. You can use this feature to create beautiful commercial pictures for your models.
Other key features include:
Supports OBJ, Autodesk FBX, STL, and Sketchup file formats
Compatible with Windows, macOS
Available in multiple languages
Support for interactive environments
Adobe Dimension is a subscription-based software. You can use it along with the other Adobe Creative Cloud tools, or on its own. You can try it for free
Adobe Dimension
Import and work on your SolidWorks projects with top-quality tools such as 3D and 2D assets, material settings, lightning controls, and more.
Unity is another powerful modeling software. It can be used to create animations, virtual realities, architectural projects, video games, and many more.
This tool offers a full-featured platform that lets you create, edit, and export your projects with maximum efficiency. To import your SolidWorks projects into Unity, you need to convert them into an FBX file.
Unity has both 2D and 2D modeling features. The 2D feature set includes foundations, world-building tools, animation support, graphic tools, and physics controls.
The extensive 3D toolset and the multiple controls for character creation made Unity a user favorite when it comes to game creation and animation.
Along with that, it provides the features necessary to build realistic environments. These include point-to-point cut tools, shape creators, and terrain tools.
Other key features include:
In-depth tutorials available on the official website
Kinematica character animation system
AR support
Unity has both a free version and some subscription plans.
Unity
Import your SolidWorks project and create animated environments, advanced models, or even virtual realities.
Maya is rendering software that has earned rave reviews over the years with its excellent rendering services.
This software gives users beautiful renders of 3D models with its unique tricaster system. The software allows for extensive object manipulation. The camera angles are also unique with excellent views of the model from various angles.
In addition, this program has a well-arranged workspace which gives freedom on customization, while optimizing the workspaces to suit your needs. This makes working easier in the 3D modeling environment.
One of the major cons is that the user interface is not easy to understand for beginners and could take a while to learn the rudiments of the software.
Autodesk Maya supports the SolidWorks projects in the IGES format.
The 3D modeling toolset includes polygon modeling, NURBS modeling, UV editing and toolkit, a sculpting toolset and more. The software has advanced animation tools that include graphics editors, a time editor, a preview playback player, and more.
Other keyfeatures of Autodesk Maya include:
Integrated Arnold render
GPU and CPU rendering
Standard surface shader
Advanced color management
Autodesk Maya is a subscription-based software with a free trial included for each plan.
Maya
Check out Maya’s artist-friendly UI that will provide high-quality renderings and allow for quick, on the spot, changes.
This rendering software has been for a long time and enables the quick and fast rendering of images. Lumion allows easy animation as users can insert cover materials, weathering, aging, and transparency with ease.
Lumion is user-friendly which enables users with basic knowledge to produce awesome renders. In addition, it gives detailed light editing and users can configure 3D models as many times as needed.
The virtual reality feature is also nice as users can render models and transfer them to other devices or access the links through email.
However, this rendering software involves the graphic card, since the software is fully graphic card-based. Hence, users cannot do other things on the computer that require graphics while rendering.
Lumion supports imports DAE, FBX, MAX, 3DS, OBJ, DWG, and DXF 3D files. In order to open your SolidWorks project in Lumion, you need to first convert/save as one of these formats.
Lumion has a large library with various objects that help you create architectural designs, street maps, realistic 3D environments, and more.
Cinema 4D gives a simple straightforward way of creating renders. Users have more control over combinations with light and shadows. The rendering software is an ideal tool for newbies, as it makes rendering quite easy.
Cinema 4D has an easy User interface that is intuitive, which gives beginners the rudiments of the basics with good results. The app also incorporates online training which gives techniques and easy-to-learn tutorials.
The major con of the software is the UV system which should be improved. Although the current setup is ok, it can be improved upon which would make editing easier.
This is one of the most popular rendering software used globally. KeyShot allows you to create materials needed to get the required visual effect. The software allows for editing, to achieve a realistic feel of models to be showcased.
Users can also import 3D model files and update them without fear of losing quality on changes made.
One of the major cons is the presence of some imperfections in terms of transparent/cloudy materials.
This software has an advanced scene manager that is based on sene nodes. Users can create procedural geometries or even entire scenes in a hierarchy-based view. You can easily integrate objects with drag-and-drop.
The user interface is easy to navigate. Cinema 4D provides multiple assets that you can integrate into your project. The integrated asset browser is very well organized so you can easily find what you need with keywords and filters.
Other key features include:
Lets you work on multiple documents with tabs
HDR/EDR viewport
Dynamic palletes
This software has multiple subscription plans available. It offers a free trial.
Thea Render is one of the ideal software for rendering, though it’s not too popular, it does the job well.
The major feature is the speed of rendering, this software is good to use when you are on a tight schedule.
Although it may not give you the same rendering quality as other software mentioned above, Rhea Render still gives decent rendering quality.
However, this software uses the Presto engine which provides quick network rendering services. There is also more emphasis on lightning with its impact on rendering easily adjusted to give optimal results
The major con is the lack of numerous features that exist in other major rendering software.
Whether you work in IT or business management, in the education sector or you’re a skillful engineer, you will need good diagram software to illustrate your work.
That is why in this review we’re going to talk about Wondershare EdrawMax, a great Visio alternative and an excellent tool to boost your efficiency in designing your projects.
We’re going to show you all its most important features, show you how to get it, and, most importantly, how to use this diagram software.
What is Wondershare EdrawMax and how can it help you?
Wondershare EdrawMax is a complete solution to create all diagrams you can think of. In fact, it supports over 280 types like flowcharts, business process diagrams, p&id, genogram, electrical diagram, org chart, project management diagram, and a lot more.
And it also offers the tools to do so because it integrates 26,000 ready-made symbols and over 1500 built-in templates for creating any possible diagrams.
Moreover, many of the users share their creations and now you can access a library of more than 5000 templates produced by them.
Another great thing is that after you’re done, you can export your work in a number of formats including but not limited to editable PowerPoint, Word, Excel, and PDF.
And yes, if you’re a Visio user, you can import Visio files and stencils so you can switch any time you want.
What are Wondershare EdrawMax main features?
1. Choose the right diagram for your needs
As we’ve already mentioned, this diagram software features more than 280 types of diagrams and they are structured neatly in dedicated categories so you can easily pick the right one for your field.
This flowchart software has seven big categories, Basic, Business, Software & Database, Network, Engineering, Design, and Education, but all of them have subcategories to lead you straight to the diagram you need.
And if you scroll down on each subcategory, you will find a lot of applied fields with examples for each of them.
For instance, in IT Management, you will have dedicated diagrams for UML, AWS Architecture, CISCO Architecture, Network, Rack, and LDAP.
Choosing the right one for you will make the process a lot more efficient so you can focus on making the actual diagram than starting from scratch.
2. Huge selection of templates
Another way of making your work a lot easier is to use the impressive library of templates.
With 1500 built-in templates and over 5000 online shared diagram templates from the other users, you can be sure to find something that will match your type of design.
Don’t worry because it won’t take too much looking through them because they are also organized by Roles (IT, marketing, business, etc.) and Diagram Types.
And if you don’t come across something you like, you can still get inspired by the design of other users who created something similar.
3. Visio compatibility
If you’ve worked with Visio before or you need to edit one now, you can simply do it with Wondershare EdrawMax.
We’re not going to talk about it because it’s a lot more simple to just show you how to import and export Visio files in just three simple steps.
In the main EdrawMax window, click on the Import option.
Now you have two options, you can either convert and open a single Visio file or you can convert a whole batch of them from a folder.
To export your files in Visio format is just as simple. Click on Export & Send from the left pane, select the Visio format, then choose Visio VSDX Format.
Yes, it’s that simple and no data will be lost in the process so this way, you can easily convert your old files or collaborate with someone who uses Visio.
How to create a network diagram with Wondershare EdrawMax?
If you work with diagrams, you’ll feel at home in Wondershare EdrawMax because it has dedicated features for any type of work, including, IT, business, engineering, and education.
In fact, it comes with a lot of great predefined categories of diagrams so you don’t need to look too far to find exactly what you need.
Let’s see an example of how you can create an elegant network diagram for this field type. We chose this one because it’s right up our alley but you can do the same for any other diagram.
Open Wondershare Edraw Max and click on Network. Of course, you can start from a Blank Drawing, but you will see that the templates can help you a lot.
The section will expand and now you can select again Network, and choose the Basic Network Diagram. As you can see, there are a lot of other possible options, from Cisco related products to video and audio ports.
The main working window will appear and as you can see from our screenshot, you also get some pointers on how to use the different options and tools.
On the left pane, you will see all the network and peripherals symbols that you can just drag-and-drop on your sheet.
And on the top, you have access to all the editing tools needed for editing and connecting your elements easily.
On the right pane, you will be able to use a lot of design features to customize your diagram to your preferences. In just a few minutes, we created the network diagram. Of course, yours will be a lot more complex and comprehensive!
Asuming you finished your work, now you can click the File option to save your file.
Now you can click on Save As and select a destination on your computer or on your Personal Cloud. Yes, you also have plenty of space on your account to save your work and access it from everywhere in the world where you can access your online account.
Of course, there’s also the option to export the diagram, select the file type and then send it via email.
As you could see, the path from a diagram idea and the finished result is really smooth and you’ve got all the tools to get excellent results. Good luck!
You will be redirected to the downloading website and receive the file.
After it finishes downloading, run the installer and start the app.
That’s it! You’re good to go and use this free diagram software. The whole download and installation procedure only lasts a few seconds.
However, it would be really smart to create yourself an account on the EdrawMax website. You will have a lot of advantages because you will be able to store and access your work from everywhere.
Not to mention that you can also use it in your browser with the web-based interface. That way, you won’t even need to download and install anything.
By the way, the flowchart software is also available for Mac and Linux so it covers all the platforms you may want to use it on.
Wondershare EdrawMax
This complete diagram software will help you get to professional level results in just minutes!
Compatible with Windows PC, Mac, Linux and Web-based platform
Visio file compatibility with import and export options
26,000 ready-made symbols
Great for IT, management, education and engineering fields
Cons
Can seem a bit complicated for beginners
Final notes
First of all, we’ve been impressed with how quickly we got from downloading the installer for EdrawMax to actually creating a diagram.
Then, all the tools and symbols are right there, placed intuitively within the interface so if you have an organized way of working, you will have no trouble learning its ropes right away.
It only took us a few minutes to put together a simple diagram but we could have gone all the way with the design and make it unique and memorable.
We discovered that we can even doodle or take notes which is great for collaboration and it convinced us that it is a great Visio alternative that you can try now for free.
And if you do, you can share your experience and impressions in a comment on the dedicated section below.
There are many ways of encrypting CD/DVD. The most convenient method, however, is via the adoption of a durable CD/DVD encryption software.
There are many advantages to protecting your DVDs/CDs. Encryption prevents data loss as it won’t allow anybody without a password to make any changes to your disc.
On top of that, if you work with sensitive or private information, you can use encryption software to create read-only CDs or DVDs. That way you will be able to share your data with other users, but they won’t be able to make any changes to the disc without an admin password.
Good encryption software use multilayered protection technologies, as well as customizable password creation features.
If you need to share your discs with other people in your companies, look for a software that lets you work with permission settings and create different types of user passwords.
A typical CD/DVD encryption software is equipped with algorithms that encrypt the files or data on a target CD/DVD.
In this article, we have compiled some of the best available CD/DVD encryption software for you.
What is the best CD/DVD encryption software for Windows 10?
GiliSoft CD/DVD Encryption is a great tool to help your software to burn password-protected CDs/DVDs.
The software hosts a unique core technology that runs a multilayer protection. In addition, this tool has one of the most intuitive user interfaces among its contemporaries.
It provides clear directions on how to encrypt and decrypt files on CDs/DVDs.
The encryption process is really easy. In just a few steps, you will be able to set a password. You will get instructional prompts directly from the UI as you go.
The software also comes with a decrypt function which can be handy when you want to add more files to an already protected CD or DVD. This feature will let you burn files to your disc, as well as assist you in encrypting it again. Keep in mind that to decrypt your disk, you still need to use the password.
Also, the software’s size is relatively small. Hence, it can easily be installed on systems with low specs.
Other key features include:
Lightweight
Password strenght assesment
Online guides
Lifetime free updates
This is a licensed product with a free trial included. If you are not satisfied with your purchase, you can get your money back in the first 30 days. Basically, it supports all Windows versions, ranging from Windows 2000 to Windows 10.
GiliSoft CD/DVD Encryption
Ensure the security of your files and folders contained on your CD or DVD drive with GiliSoft CD/DVD Encryption.
Roxio Secure Burn Enterprise is a security software that is equipped with relevant encryption tools, needed to protect confidential data on CDs and DVDs from unauthorized access.
The software can also be used to encrypt external storage devices like USB flash drives and pen drives.
It hosts a simple interface, which is ideal for new users, as all displayed options are well organized on the home menu.
The software’s drag & drop feature makes it very easy to use, and its automated security functions make encryption faster and more efficient.
In addition, the software is designed to meet up with industry-standard, while also fulfilling all legal requirements.
It is FIPS 10-2 compliant, and it employs a 256-bit AES encryption system, which is one of the best available security protocols.
Roxio lets you create your own security policies with administrative tools. You can set various access permissions for different users.
Other key features include:
Activity monitor for administrators
Set password protocols
Enables logging to keep track of data, computer, username, and more
Roxio Secure Burn Enterprise is a premium software, which offers paid (subscription) plans to users.
However, new users can download a free trial version, which provides you access to some of its basic features for a short period of time.
Roxio Secure Burn Enterprise
Protect your removable discs with advanced 256-bit AES encryption and set passwords and security policies for all users.
Master Voyageris a CD/DVD encryption tool that is well-equipped to encrypt sensitive files on a CD/DVD.
The software hosts a user-friendly interface, which facilitates swift and effective encryption of files, via the drag & drop function.
Basically, Master Voyager encrypts CD/DVD files using a rudimentary method that protects files with only a unique password.
Hence, to access your CD/DVD files, you don’t have to go through any decryption process. This applies to other external storage devices like USB flash drives, pen drives, and others.
In addition, Master Voyager is flexibly built to support all Windows versions, ranging from Windows XP to Windows 10.
Also, the software adopts the AES 256-bit protocol, which is one of the most reliable file encryption tools available.
Lastly, this program hosts an in-built CD/DVD burning option that facilitates the encryption of discs.
This action requires only a few clicks of buttons; hence, your encryption process is made more efficient, and you are able to save valuable time and resources.
Other key features include:
Rewritable CD eraser module
Multiple secure zones with different passwords
Can assign admin and user passwords
Email support
This is a licensed software. You can choose between 3 different versions. Master Voyager sells licenses for as many devices as you need, providing plans even for 500+ PCs.
DataLocker’s Encrypt Disc is an all-around CD/DVD encryption software, which is equipped with a 256-bit AES encryption that protects every encrypted file on your CD or DVD.
The software is also FIPS 10-2 compliant, which provides you with legal cover, as well as necessary certifications.
Typically, EncryptDisc hosts the drag and drop mechanism, which makes your disc-encryption process easier and faster.
The software’s advanced design makes it suitable for protecting high-capacity encrypted files, in line with SOX, HIPAA, and other industry standards.
The encryption software is embedded on a disc, and all you need to do is to purchase the disc and create a password. You can then drag and drop files on the disc to finish the process.
Such encrypted disc can be shared as read-only media or you can decide to open the disc and add extra file or information on it.
Nevertheless, EncryptDisc is highly versatile, as it is compatible with virtually all Windows versions higher than Windows 7.
This software also allows you to create read-only discs, so you can easily share your data with your peers without allowing them to make any changes to it.
Other key features include:
Compatible with most CD and DVD formats
Disc burning functionality
Online guides and instructions
This is a licensed software with a demo version that is available upon request.
Idoo Secure Disc Creator helps users to create encrypted data files on CDs and DVD.
It is equipped with a complex algorithm, which can partition (divide) a CD into two parts: a secure (password) file section and a public (insecure) section.
In this case, files are kept safe using the 256-bit AES encryption algorithm. This protects your files and makes it inaccessible without permission.
You just have to select the type of disc you want to create, add your files and decide which parts of your discs will be the public area and which will be encrypted.
Once you’re all set, you will need to insert and confirm your password. The software has a built-in password strength assessment feature.
Other key features include:
Compatible with all Windows versions starting Windows 2000
Compatible with Windows server
Quick and straightforward
This product comes in a free version as well as a premium version.
DiskEncryptoris a CD/DVD encryption software developed by Kernsafe and equipped to encrypt data contents stored on disk drives.
The software supports a wide range of external storage devices, including memory cards, floppy disks, USB flash drives, and others.
In fact, DVD images (ISO) and virtual CDs & DVDs can also be encrypted by this software.
DiskEncryptor uses a high-end encryption protocol, AES 256-bit, to protect encrypted files. Disc partitions can also be encrypted.
The tool also integrates well with Windows Explorer and you are afforded the opportunity of locking/unlocking your drive(s) with a password.
Furthermore, the software is lightweight (small-sized) and can be installed on all versions of Windows. It also functions perfectly well on both Intel and AMD computers.
Other key features include:
Lifetime updates for premium users
Lets you add name and company information in the About dialog box
Lightweight
Compatbile with all Windows versions starting Windows 2000
Microsoft CEO Satya Nadella recently released his annual report to shareholders, colleagues, customers, and partners. In the report, Nadella detailed the struggles many have faced throughout this year due to the pandemic, as well as the gains that Microsoft has made in security, modern work, and gaming.
At the top of the report, Nadella summarized how Microsoft delivered $168 billion in revenue, as well as the fact that Microsoft’s operating income grew 32 percent to $70 billion. The Microsoft SEO even detailed that the company is “built for this moment” when it comes to Digital Transformation.
Nadella’s report dives deep into the gains Microsoft made this year in Applications and Infrastructure, Data and AI, Developer Tools, Power Platform, Business Applications, and LinkedIn. For us consumers, though, the most interesting part comes where he discussed security, modern work, and gaming.
Here, the SEO talked about the past year’s updates to Teams, Microsoft Viva, and the introduction of Windows 11, and Windows 365. In the security section, meanwhile, Nadella went into Microsoft’s intelligence helping intercept 30 billion email threats and 31 billion authentication attacks. Finally, in gaming, Nadella touched on how with Xbox Game Pass, the acquisition of ZeniMax Media, Microsoft is “expanding our opportunity to reach every one of [gamers.]”
We’re just hitting highlights, but Nadella also pointed to examples of how Microsoft’s technologies drove change during the pandemic. That includes GitHub code used in the NASA Mars Mission, mixed reality being used for surgeries in Mt. Sinai Health Systems in New York, and how Team Rubicon used Dynamics 365 to manage the deployment of thousands of volunteers to set up 169 COVID-19 response sites. You can check out Nadella’s full post on his LinkedIn for more.
Microsoft just released two new Windows 10 builds to the Release Preview Channel of the Windows Insider program.
There’s both a new Windows 10 21H2 build, as well as a Windows 10 21H1 build available, and fixes are the same between the two releases.
OOBE and VPN issues fixed in latest preview builds
Build 19043.1319 (KB5006738) is now available for Insiders that are running Windows 10 21H1 Meanwhile, users with Windows 10 21H2 received build 19044.1319 (KB5006738)
The fixes in both these new builds cover a wide range of issues from the out of box experience, VPN connections, Bitlocker, and more, as follows:
Fixed an issue that prevents you from accessing the pre-provisioning page during the out-of-box experience (OOBE). This issue occurs when the credentials page for signing in to Azure Active Directory appears, and you press the Windows key five times.
Added a feature that facilitates certain cross-browser data transfers.
Fixed an issue with Assigned Access kiosks that are configured with Microsoft Edge as a kiosk application. These kiosks might sometimes fail to restart Microsoft Edge if users close the browser window.
Fixed an issue in which the use of App-V intermittently causes black screens to appear when signing in on the credentials page.
Fixed an issue that might prevent subtitles from displaying for certain video apps and streaming video sites.
Fixed an issue that prevents Windows 10 virtual private network (VPN) users from connecting to Windows Server 2019 Routing and Remote Access service (RRAS) servers.
Fixed an issue that prevents Software-Defined Networking (SDN) virtual machines from working when you configure the Generic Routing Encapsulation (GRE) VPN bandwidth limitation.
Fixed a Primary Refresh Token (PRT) update issue that occurs when VPN users sign in using Windows Hello for Business when the VPN connection is offline. Users receive unexpected authentication prompts for online resources that are configured for user sign-in frequency (SIF) in Azure Active Directory-Conditional Access.
Fixed an issue that causes Windows to go into BitLocker recovery after a servicing update.
Fixed an issue that might cause Kerberos.dll to stop working within the Local Security Authority Subsystem Service (LSASS). This occurs when LSASS processes simultaneous Service for User (S4U) user-to-user (U2U) requests for the same client user.
Fixed an issue in Code Integrity that might cause a memory leak.
Enhanced Microsoft Defender for Endpoint’s ability to identify and intercept ransomware and advanced attacks.
Fixed an issue in the OOBE that might cause Windows AutoPilot provisioning to fail.
Fixed an issue that prevents Kana input mode users from inserting a question mark (?) using the Shift-0 key combination.
Fixed an issue that sometimes causes the lock screen to appear black if you enable slideshow.
Fixed a reliability issue with LogonUI.exe, which affects the rendering of the network status text on the credentials screen.
Fixed an issue that causes Server Message Block (SMB) Query Directory Requests to fail when the buffer size is large.
Fixed a memory leak issue in lsass.exe on domain controllers in the forest root domain that occurs when you have multiple forests and multiple domains in each forest. The SID-Name mapping functions leak memory when a request comes from another domain in the forest and crosses forest boundaries.
Fixed an issue with the virtual machine (VM) Load Balancing feature, which ignores a site’s fault domain.
Remember that the versions we talked about in this article are only available for Windows Insiders. If you aren’t already part of the program, you can join by going to Microsoft’s dedicated page.
Are you testing one of the two new builds announced by the tech giant? Share your experience with us in the comments section below.
Microsoft has released a new experimental version 0.48.1 to users running the pre-release versions of its PowerToys suite of tools. The update includes all the improvements and bug fixes made available for version 0.47.1 as well as the long-awaited Video Conference Mute utility.
As the name suggests, the Video Conferencing Mute feature lets users quickly mute audio and video feeds in meetings globally with a keystroke. The PowerToys team is actively developing this Video Conferencing Mute utility, but there is no word on the possible timeframe for the official launch of the tool.
The latest release also addresses an issue with the tool which was previously causing “unintentional shortcut reassignment” for some users. Microsoft has also detailed some known issues and limitations in this release, and you find the full list below:
With some webcams, there is an incompatibility with Teams and the overlay image is not rendered, instead a corrupted frame is shown. If your camera has this quirk, please let us know the model in the [main tracking issue – #6246]
The application preview (Teams, Meet, etc.) may show the overlay image flipped horizontally but that is expected, the image will show correctly to the other people on the call.
In order to enable/disable the VCM, PowerToys should run as administrator
Changes to some of the VCM settings require the application to restart to pick up the new values such as a new overlay image.
In some cases, the overlay image can be shown flipped vertically (the workaround is to edit the image and flip it before selecting it).
(#6246)
If the PowerToys Video Conference Mute webcam doesn’t show up in the video conference app, try restarting the app and if still doesn’t show up try restarting Windows.
It is important to note that PowerToys version 0.48.1 will only be automatically offered to users running the experimental version and it cannot be installed via WinGet. If you haven’t done it yet, you can head over to the GitHub releases page to manually download the experimental version of the suite of tools.
If you’re buying the new Surface Pro 8 or Surface Laptop Studio, then the Surface Slim Pen 2 should be a natural purchase. Available for $130, the newest Surface Pen brings some minor design advancements over the first generation, as well as a haptic feature that make inking on the Surface Laptop Studio & Surface Pro 8 more lively. That’s why we put together this guide for you with some tips and tricks and how you can get the most out of your new Surface Slim 2 pen.
We want to begin this piece by noting that the Surface Slim Pen 2 is designed for the newer Surface Pro 8 and Surface Laptop Studio. However, like most Surface Pens, it is backwards compatible with older Surface devices. You won’t be getting the special haptic feedback if you use Slim Pen 2 on an older Surface, but it is certified for legacy Surface devices. That includes the Surface Pro 3 -Surface Pro 7+, Surface Pro X, Surface Duo, Surface Go 2, Surface Laptops 1-4, Surface Studio 1-2, and Surface Book 1-3.
Change your haptic feedback settings
That said, let’s jump into our first tip which relates the haptic feedback. Officially Microsoft calls this feature of the Slim Pen 2 “tactile signals.” This is thanks to a haptic motor built into the bottom half of the pen, near the tip which provides slight vibrations as you ink on the screen. By default, the settings for these signals are set to medium-low. However, if you go to Bluetooth & devices in Windows 11’s settings menu, followed by Pen & Windows Ink, you can change the tactile intensity so that it’s all the way up. When you do this, you’ll be able to feel stronger friction as you drag the pen across the screen for your inking. It creates more of a pen-to-paper feel.
Find your lost Surface Slim Pen 2
The second tip on our list involves finding lost Surface Pens. This not only applies to the Slim Pen 2, but any other Surface Pen you might own. Since a Surface Pen is usually tied to a Surface, you can locate it by using the Find my Pen Under Privacy & Security followed by Find by Device. This pulls the location data from your Surface and gives you a map of where Windows thinks your pen might be. Of course, it’s not always accurate since it’s pulling data from Wi-Fi networks, and just showing you a general map. If you lost the pen inside your home, or at the office, you might be a bit out of luck.
Change your Windows Ink shortcuts
A signature feature of Windows 11 is the new inking menu that pops up whenever you pick up or connect a Surface Pen. In the case of the Slim Pen 2, once Windows detects a Slim Pen 2 is nearby and in your hands after being detached, you’ll see a pop-up menu above the taskbar with shortcuts to some suggested apps. You can switch these apps to your own liking if you please. Simply click the settings cog, and then the Edit pen menu. You can then add two more pinned apps to make it easier to jump into the inking action.
Change your pen pressure sensitivity in the Surface app
Surface Slim Pen 2 has a total of 4,096 pressure levels. That’s a lot of pressure to deal with, so you feel like the pen is too sensitive, though, you can tweak things down a bit. Just open the Surface App, and then click the bottom area to summon the Slim Pen 2 settings. You can then draw to test the pen pressure, and drag the slider around to change how light or heavy the pressure sensitivity is. The settings you choose will be system and app-wide and will remain in effect after you restart your Surface.
Change your Slim Pen 2 button functions
The last tip on our list involves the Slim Pen 2 button functions. Just like with the pressure sensitivity, you can tweak the buttons on your pen to fit your own needs. Open the Settings app, choose Bluetooth & devices, then choose Pen & Windows Ink. From there, you can click Choose with your shortcut button does. There will be options for what single-click, double-click, press and hold can do. Under each of these menus, you can choose one of the pre-set options like Whiteboard or Screen Snip, or the Pen Menu and OneNote. Or, you can tweak things so that you can open a specific program or app.
How are you inking?
We hope that these tips and tricks help you get more out of your new Surface Slim Pen 2. If you decide to use our new tips, let us know how you’re enjoying your Slim Pen in the comments below. And, be sure to keep tuned for more, as we’re planning additional coverage on our favorite inking, drawing, and note-taking apps on Windows 10 and Windows 11.
Microsoft Teams is getting a new update that should give users a faster way to switch between different meeting views. The new View Switcher feature is currently available in public preview on the Windows and macOS desktop apps.
The Redmond giant first unveiled the View Switcher experience at its Ignite 2021 conference back in March. The “View Switcher” menu brings together all the Teams meeting views in one place. It lets users quickly choose between Gallery, Together mode, Focus, Large gallery, Gallery at top, as well as Full-screen options. Previously, users had to access all these options by clicking the ellipsis (. . .) option in the navigation menu.
To use this feature, you will need to click on the dedicated “View Switcher” icon available in the top left corner of the meeting window. From there, choose your desired meeting view from the list of options. However, keep in mind that the Focus mode option will only be accessible when another user shares content or screen.
The new View Switcher feature should be helpful for those who frequently switch between different views during a meeting. In case you missed it, Microsoft Teams has also added a new quoted replies feature that lets users reply to specific chat messages.
Microsoft has started testing a new feature on Xbox consoles that will automatically mute speaker audio when gamers start using a headset. Currently, Xbox gamers have to manually turn off their speakers after connecting a headset to the console, and repeating that process every single time can quickly become a hassle.
This streamlined audio experience is currently being tested with Xbox Insiders on the Alpha and Alpha Skip-Ahead rings, with a possible release next month. Sony’s PS5 consoles can already mute speakers when you connect a headset to them, and it’s nice to see Microsoft’s Xbox consoles following suit.
The latest Xbox Insider “2111” build released yesterday also introduce new colorblind filters on Xbox Series X and Series S consoles. This system-level feature will apply to games, movies, apps, and menus, and the Xbox team hopes that it will make games that lack similar filters more accessible for people with color blindness or color vision deficiency.
Microsoft releases new Xbox system updates almost every month, and the company has another big new feature coming later this year with Xbox Cloud Gaming finally launching on Xbox consoles. This will allow Xbox Game Pass subscribers to quickly test games before downloading them, but Xbox Cloud Gaming will also bring next-gen games like Microsoft Flight Simulator to Xbox One consoles.
The Windows Xodo app updated to Version 5.0.21 today. This latest update made a number of fixes to the PDF reader and editor that corrected an animation bug and some editing and saving issues that had been experienced by users.
Here’s the full release notes for Xodo Version 5.0.21:
Fixes and Improvements
Fixed reordering animation issue which would cause a wrong page to be displayed when reorganizing pages
Fixed Outline editing which would not properly add a new outline child to a not expanded outline
Fixed Color mode saving state to ensure to display the selected color mode when starting up the application
Fixes for hangs and crashes
Xodo is a fully-featured PDF app for Windows devices running Windows 8.1, Windows 10, or Windows 11 that lets users create, edit, merge, print, and annotate PDF files.
Here’s some of Xodo’s main features:
View & Navigate — Xodo seamlessly renders even the most complex PDFs. View in single-page, continuous or thumbnail modes. Easily skip to chapters, sections or annotations. Search and zoom in on text.
Convert & Create — Use your mobile device to convert or scan images to PDF for easy viewing and annotation. Create new blank PDFs and use Xodo as an image-rich notepad.
Annotate & Comment — Highlight, underline or strikeout text. Attach sticky notes or add text. Insert lines, arrows, circles, polygons or draw freehand. Change colors, sizes, transparencies and more.
Sign & Fill Forms — Quickly fill in, save, and share PDF forms. Easily sign any contract, agreement, or statement by hand, then save your signature for easy future use.
Share & Print — Send your annotated documents to others via email. Print your PDF documents directly from your mobile device.
Access & Manage Documents — Easily select, rename, copy, move or delete documents or folders with Xodo’s built-in file manager. Access recent docs and automatically open them to the last page visited.
Multilanguage – English, Simplified Chinese, Portuguese, Spanish, German, Italian, and French
The new white Xbox logo has been visible on the Xbox app’s page within Apple’s App Store for a week or so but it’s now finally started to appear on iPhones and iPads, replacing the previous green icon.
The new app icon (see top image,) which features a white background and a green Xbox logo, only seems to be in use on iPhones and iPads right now as the Android and Windows Xbox apps are still using the old green background/white logo. Both of these platforms are expected to get the new app icon soon though as this new aesthetic is part of Xbox’s 20th anniversary celebration which is beginning to ramp up.
Here’s the previous app icon for comparison.
Xbox, Game Pass, and Cloud Gaming app icons on iPhone
A variety of outfits and skins inspired by the new Dune movie launched in the popular Fortnite video game this morning on Xbox, PlayStation, Windows, and all other supported platforms.
Among the new Dune content are outfits based on Timothee Chalamet and Zendaya’s Paul Atreides and Chani, two back blings, an Ornithopter glider, a sand walk emote, and two pickaxes.
Most of the Dune items are available to purchase separately though those who choose to buy them all as part of a bundle will also receive an exclusive loading screen.
Dune is the latest of many franchises to take part in some form of promotion or collaboration with Fortnite. Amusingly, special promotions for DC Comics, Venom 2, Ghostbusters: Afterlife, Ariana Grande, and Universal Classic Monsters are also currently active in Fortnite.
The new Dune movie, a fresh take on the book series that’s unrelated to the previous live-action adaptions, premiered in some regions back in September but it’s set to debut in theaters and on HBO Max in the United States this week on October 22nd.
FPS (frames-per-second) is the number of frames displayed per second in games. A game’s frame rate is of some significance as a higher FPS will ensure smoother gameplay. A game with a lower frame rate will generally have choppy action sequences.
As such, raising the frame rate with better graphics cards or by reducing graphical settings is one of the best ways to optimize games.
If you’re curious about what your laptop’s or desktop’s current frame rate is, you’ll need an FPS counter. A frames-per-second overlay counter displays what the frame rate is within a game. A few VDUs include frame rate counter options.
In addition, there are also software packages that include FPS counters. These are five Windows programs that provide frame rate counters for games.
Bandicam Screen Recorder is a great screen recording software that shows FPS on your screen. It is used mostly for screen recording but it also has a special game recording mode.
This is very helpful for all players that want to record or simply see their in-game FPS.
After installing and starting Bandicam, the program will show you the FPS count in the corner of your screen. The maximum frame rate of this program is 120 FPS.
You can find an instruction on how to use its FPS count feature on this official page.
The FPS counter has two modes – non-recording (displayed in green) and recording (displayed in red). Bandicam can be tested in the trial version but if you want to unleash all its features, you can buy it.
Here are some of the perks of using Bandicam Screen Recorder:
Records videos and captures screenshots in incredible quality
Excellent for recording gaming highlights
Does not slow down your PC
Affordable price
Easy-to-use
Bandicam Screen Recorder
Capture all of your favorite gaming highlights and see if your PC is giving you it’s all with this amazing screen recorder!
Fraps is software for capturing game screenshots and recording gameplay. However, this is also benchmarking software with which you can add an FPS counter to DirectX or OpenGL games.
The registered version of Fraps is retailing at $37 on the software’s website, but you can also add the freeware version to Windows platforms from XP to 10 by clicking Download Fraps on this webpage.
You can’t record videos for very long in the unregistered package, but it still includes all the FPS counter settings.
Fraps include an FPS tab from which you can configure the counter’s settings. You can select to include the FPS counter in any corner. You also toggle the FPS counter overlay on/off with a customizable hotkey.
Furthermore, Fraps users can capture in-game snapshots that include the FPS counter as shown below.
Dxtory is also software with which you can capture in-game snapshots and recordings. The software is great for recording DirectX and OpenGL game clips.
Games will also include an FPS counter at their top left corners when Dxtory is running.
Dxtory’s Overlay Settings tab includes a few customization settings for the frames-per-second counter. You can customize the colors of the overlay for movie (or game) and screenshot capture.
Furthermore, you can apply alternative status colors to recording and non-recording overlay frame rate counters. Unlike Fraps, the Dxtory’s FPS counter also works for Universal Windows Platform games.
FPS Monitor is a complete hardware tracking software that delivers information regarding FPS counter.
Straight to the point, the program offers insights regarding GPU or CPU performance related to the gaming experience. So you always know when PC hardware resources are highly used.
Also, you can make the most of it with an overlay option that lets users customize font, size, or color for each sensor you need to see.
Furthermore, given that game performance is influenced by the PC components you need such software to display data about your computer processes.
More so, on top of displaying system information in real-time in the game, the tech savvy users can see collected statistics about system performance and save it for further analysis.
Razer Cortex is freeware game booster software that you can optimize and launch games with. The program automatically closes non-essential background software to free up RAM.
It also provides optimization tools to boost game frame rates with.
You can get instant frame rate feedback for games with Razer Cortex’s FPS counter. The great thing about Razer Cortex is that it also provides an FPS chart when you’ve stopped playing.
The FPS line graph chart shows you the maximum, minimum, and average frame rate during the playtime. As such, you can get a better idea of what the average frame rate for games is with the additional FPS chart.
If your laptop or desktop includes a GeForce graphics card, you can optimize your games with GeForce Experience.
You can utilize this software to optimize games’ graphics, record gaming videos, update GeForce drivers, and even add extra filters to games for saturation, HDR, etc.
Of course, GeForce Experience also includes an overlay FPS counter for games that you can position in all four VDU corners.
RadeonPro is the equivalent of GeForce Experience for desktops and laptops with AMD graphics cards. This is great software to optimize games’ graphics and frame rates with. It also includes game recording, screenshot and post-processing effects options.
RadeonPro users can enable the software’s frame-per-second counter by selecting the FPS counter tab on the RadeonPro Settings window. From that tab, you can configure the counter’s display corner and adjust the counter’s hotkeys.
Aside from the frame rate counter, the software also includes some handy FPS settings such as Dynamic Frame rate Control and Lock frame rate up to monitor’s refresh rate, which locks the frame rate at the VDU’s refresh rate.
Note that some games include an FPS counter setting on their Graphics Options menus, and Steam also includes an in-game FPS counter option. If an FPS counter highlights that your frame rate needs boosting, check out this article.
Microsoft has announced a couple of new features and capabilities for its Microsoft 365 apps. The company says that these updates are designed to help organizations better support their frontline workers in hybrid environments.
“We know those on the frontline need the right digital tools and purpose-built hardware for the specific ways they work,” explained Emma Williams, CVP for Modern Work Transformations at Microsoft. “In fact, we’ve seen more than a 150 percent increase in Microsoft Teams usage among frontline workers over the past year in industries such as retail, financial services, healthcare, and government.”
First of all, Microsoft is bringing its Approvals app to Word, which should help to make the approval process efficient and faster than ever before. This release facilitates the creation of approval requests for specific sections or entire Microsoft Word documents. The Approvals app is getting a new capability that lets users select DocuSign (a third-party provider) to create electronic signature approval requests natively.
Furthermore, the Viva Connections mobile app in Microsoft Teams is finally getting ready to drop its preview tag next month. The iOS and Android apps have been available for public testing since September, and they give frontline workers quick access to relevant news, conversations, and other resources.
In addition, there are a few new features for the Microsoft Teams Electronic Health Record (EHR) connector. The new additions announced today include the ability to schedule and launch virtual visits, waiting room, and SMS notifications for virtual visits. This update brings the ability for attendees to join a virtual visit in a browser directly from their mobile devices without downloading Teams.
Last but not least, Microsoft is also unveiling new AI-based privacy management solutions for Microsoft apps and services, and we invite you to check out this blog post for more details.
Have you ever heard of the Windows 11 File History add folder function? We will like to explore it in this article and include all the essential elements.
Backing up information is an essential aspect of daily computer use. This is because a lot can get lost or destroyed, and backup is often the best practice to guard against this.
Many valuable elements of the Windows 11 OS guarantee the proper backing up of your files and documents. Specifically, let us look at the Add Folder OS option.
Where are File History settings in Windows 11?
On the new OS, you will be able to find these settings in the Control Panel in the path below:
Control Panel\All Control Panel Items\File History
This function comes in very handy and is vital for the following:
Auto backups – This saves you the time and energy to perform repetitive tasks on your devices.
Great for storage conservation – Since these backups could be linked to an external storage unit, you are not tasking your primary computer storage with any additional load.
Personal files storage – Unlike System Restore, which holds a complete image, the backup allows you to choose personal files that you consider essential.
Easy file recovery – If you accidentally delete a file or it becomes corrupted, you can quickly restore a previous file version from the backup.
Versioning – File History keeps multiple versions of your files, so you can return to an earlier version if needed.
Flexibility – You can choose which folders to include in the backup and where to store the backup files, such as an external hard drive or a network location.
With this out of the way, let us explore adding folders to your File History on Windows 11.
How do I add a folder to File History?
Press Windows + R to open the Run dialog, type control, and hit Enter.
Navigate to the path below or simply copy and paste it on the address bar of your Control Panel and hit Enter: Control Panel\All Control Panel Items\File History
Then, connect your external storage to your PC.
Alternatively, you may click Select drive on the left pane (this is the correct choice if you would instead use a network location).
Select your drive and click Add network location.
Select the Network folder to add to File History and click on Select Folder.
Click OK, then select the Turn on button.
Optionally, you may click on Advanced settings on the left pane.
Choose your preferred settings for Save copies of files and Keep saved versions; the defaults may be just fine.
If you have followed the steps above, you should have successfully been able to add a folder to your Windows 11 File History.
File History is an essential feature in Windows 11 that allows you to automatically back up essential files on your personal computer to an external drive or network location.
By regularly backing up your files, you can ensure that you have a copy of important documents, photos, and other data in case your computer’s hard drive fails or your files become corrupted.
Finally, let us know in the comments if you have any luck with this.
Whether you want to design a pre-action, Dry Pipe, Wet Pipe, or Deluge fire sprinkler system, it’s important to know what computer-aided sprinkler design program to use.
A good fire sprinkler design software allows you to increase your flow and productivity while keeping your work error-free.
These programs can help designers do hydraulic calculations and manage 3D piping with CAD functions, automatic insertion of joints and hangers, ability to set terminals flow and pressure, and more.
If you are a company specialized in offering fire protection services, you would already know the importance of a fire sprinkler design program.
Instead of going into further details of the working of fire sprinkler design software, let’s take a look at how you should pick the proper tool.
How to pick the best fire sprinkler system design software?
This list was put together for engineering professionals that are looking to find a better tool to improve their design.
That is why, if you’re a specialist, you probably know exactly what’s missing from your arsenal. However, we will highlight a few focal points that might help you.
➡ Accurate representation
It’s very important to have software that respects the on-site 3D environmental variables. As you will see below, there are tools that even take the pipe elevation to make calculations.
A proper 3D representation will also help you see all the pipes, pumps, fittings, etc. in a realistic way and evaluate the system a lot better.
➡ Automatic calculations
Double-checking all your data during the project design is essential but if the automatic calculations within the software are error-free, that is only going to help you move faster with your design.
Automatic calculation table in AutoSprink
In the example above, you need to supply the information for an In-Rack system layout of sprinklers. You will get your results in seconds instead of making the calculations manually.
➡ Check system compatibility and requirements
Most of the CAD software tools are resource-hungry apps and need specific requirements to work properly.
So, before making the purchase, check if your system is compatible and even more, if possible, take it for a spin on your system to see if it can hold the workloads you’re expecting.
And now, let’s take a look at the best free and paid software for fire sprinkler system design that will help you to perform essential tasks more effectively and give you the confidence to take on any project irrespective of the size.
What are the best 3D fire sprinkler design tools for PC & Mac?
AutoSprink is the industry leader when it comes to fire sprinkler design software. It is a premium solution, but you can download the demo to test it out for your projects.
AutoSprink is used for large commercial constructions projects for creating drawings, hydraulic calculations, stock listing, and coordination.
The sprinkler systems can be designed in 3D space with proper elevation. To perform the calculation, simply draw a Remote Area boundary around the heads you want to follow and run the Calc.
AutoSprink also offers an accurate 3D design environment to manage coordination in your design offering precise fitting for pipes. Not more, not less, just right!
The listing process is effortless as well, which is due to the fact that the systems with pipes, fitting, hangers, etc. are modeled in 3D.
Keep in mind that the latest version of AutoSprink comes with OpenGLSL Rendering offering much-optimized speed for zoom, pan, and orbit for frame rate.
It also allows the users to create multiple sheet tables with multiple views with minimal impact on drawing speed.
The Manufacturer Database gives access to tons of new parts from the clouds through the Parts Picker feature. You can also export the stocklists to AutoSprink FAB to reduce processing time for a stock listing.
On the flip side, AutoSprink is not the easiest fire sprinkler design program. As a result, you may need to attend some training sessions before getting used to the working of the software.
This solution only works on Windows PCs so if you’re looking for a macOS tool, AutoSprink is definitely not the one.
From creating fire sprinkler system designs to performing complex hydraulic calculations, SpinkCARD 3D can do it all.
It is an amazing BIM (Building Information Modeling) suite that helps professionals across industries to create safer, efficient, and cost-effective fire sprinklers designs.
SprinkCAD 3D also offers Revit Tools at an additional cost so if you use Revit, you can benefit from those add-ons.
The optional add-on allows you to build custom Families using the family builder to draw arm-overs, springs, goose-necks, drops, and more at any elevation.
This program offers comprehensive tools to design sprinkler systems, perform hydraulic and fluid delivery time calculations, and more.
It is a Windows-compatible program and can be installed on Windows 7 and above running computers.
Coming to the bad bits, the software can be buggy at times with occasional freezes, which can be fixed with a software update, but something to consider.
SprinkCAD 3D is a premium software; however, you can request a demo and take the software for a spin before making a commitment.
Take a look at this tool’s best features:
Complete Building Information Modeling suite
Automatical hydraulic and fluid delivery time calculations
FireACad is one of the popular fire sprinkler system design software programs available for fire protection design companies.
If you have used SpinkCAD and AutoSprink before and you’re looking for an alternative, FireACad offers similar functionalities at a competitive price tag.
The software is capable of creating a 3D view to Navisworks or Revit MEP for BIM use very conveniently.
Using the tools, you can create a 3D solid pipe network, produce new calculations reports as required by the NFPA Code, produce drawing errors, change sprinkler stem on the spot, and work with AutoCAD using FireACad profile.
The tool can also write pipe size, length and end finish automatically. The users can either start with the built-in pre-designed details or create a custom one from scratch.
FireACad is capable of showing valid FireACard details and objects automatically and also show only specific layers on the drawing.
For performing hydraulic calculations and material lists, the software takes the information from the drawing.
FireACad is relatively easy to use if you have enjoyed any other fire sprinkler system design software before. However, for newbies, the software does require some commitment to be comfortable with.
Unfortunately, this software can only be used in Windows so it doesn’t support macOS.
Let’s review some of the most important features of this tool:
Produces new calculations reports as required by the NFPA Code
Writes pipe size, length and end finish automatically
Creates a 3D view to Navisworks or Revit MEP for BIM
Automatic hydraulic calculations and material lists
Stabicad Sprinkler is a new Revit sprinkler module that allows its users to design and analyze the fire sprinkler system.
It comes with the ability to design and place multiple sprinklers with any desired connection and perform a hydraulic calculation based on the drawing.
From modeling sprinkler installation to the sprinkler head, this sprinkler module allows you to perform various tasks on Revit. The integrated calculation offers speed advantages while making the monitoring of drawn system easier.
The user interface is intuitive, and anyone with a good knowledge of other sprinkler design software can understand the working of this tool in no time.
Note that the calculation is performed based on local standards for sprinkler systems using the design conditions. The module also benefits from high-quality Revit families on MEP content controlled by the manufacturers.
The new sprinkler module also offers a solution for drawing with a flexible pipe in Revit thanks to the flexible drawing support in the module.
Stabicad Sprinkler module is a premium add-on and a great alternative for those who are already using Revit for designing and falling short of Sprinkler features offered in Revit.
With this add-on, you can extend the sprinkler design functionality of your Revit design suite. This tool is compatible with Mac computers in a dual boot configuration by using Bootcamp.
Let’s look at some of its best features:
Design and analyze fire sprinkler systems
Perform hydraulic calculations based on the drawing
FHC Hydraulic Calculation Software is used by fire protection engineers all over the world to design the most demanding fire protection systems to international standards.
And the tool is compatible with all present regulations in the industry, including EN 12845, BS 9251, FM Global, NFPA 13, NFPA 750, and LPCB / BRE.
With FHC you can simply use a set of drawing tools to build complex hydraulic models easily, directly on your screen.
You can see the pipe network updating instantly and that eliminates the input errors so you can concentrate on optimizing your hydraulic model.
That, in turn, will lead to less time spent on design time and lower installation costs with smaller pipe sizes or system pumps.
But probably the most important feature of this solution is the fast calculation algorithm that will show you the result in seconds so you can focus on developing a more economic design.
You can calculate the pipe friction loss easily by using the Hazen-Williams or Darcy-Weisbach pressure loss equations with a single click.
This makes FHC suitable for fire sprinkler systems, high and low-pressure water mist systems, and other such demanding designs.
Take a look at its most important features below:
Hazen-Williams or Darcy-Weisbach pressure loss equations for automatic calculus
EN 12845, BS 9251, FM Global, NFPA 13, NFPA 750, and LPCB / BRE conformity
Simple, yet effective set of drawings available
Ideal for designing sprinkler systems or low-pressure water mist systems
If you need a duct system and fire protection design tool for macOS, Trazar is a rare find but it also works on Windows if you have a change of heart.
It’s actually a dedicated software for architectural, engineering, and industrial development that can help you design HVAC duct systems, sanitary and plumbing lines, fire protection, electrical power and lighting, and fire alarm systems.
Trazar is a complete MEP application that runs on BricsCAD for Windows, macOS, and Linux OS so you can use the lite version, Pro version, BIM version, Mechanical version, or Ultimate version of BricsCAD.
The catch here is that the app comes with a freeware version only for macOS users so you can at least give it a try without any implications.
With designing such an important system, security plays a crucial role so you can also share the files in read-only mode so that no one can alter or modify them.
However, you can still distribute them in read-write mode and give permissions only to certain users to make such modifications.
It’s very interesting that this software also comes with a voice command button to access certain tools and features that can make your work a lot easier.
Let’s see some of its best features:
Free for macOS but also compatible with Windows and Linux computers
Can be also used to design HVAC duct systems, sanitary and plumbing lines and more
Fire sprinkler systems are one of the fundamentals that make the building safe. However, the sprinkler system is more demanding than it appears.
Apart from creating a truly efficient sprinkler system that can protect the building from mishaps, you also need to be sympathetic to the overall visual look of the ceiling and other coverage areas.
This is where the fire sprinkler design software makes the task easier and a lot more efficient too.
With the help of these tools, you can create an efficient fire sprinkler system design in 3D and also get support for hydraulic calculations, coordinates, and stocklist management.
Have you used any of these options before? Do let us know about your experience in the comments below.
If you’ve been a Windows user for a while, I’m sure you would’ve come across the Windows Task Manager at least once by now. Some users often find it difficult to open Task Manager in Windows 11, which is a major setback considering how important it is.
The last line of defense for every Windows user, the Task Manager is usually called upon when all your programs stop responding and your PC is stuck still and simply won’t budge from inactivity.
While the Task Manager can be used for much more than clearing non-responsive tasks and errors, here we’ll focus on how to open Task Manager so as not to digress from our topic.
Moreover, there’s not just one, but multiple ways that you can open the Windows Task Manager in your Windows. Let’s start with the simplest one.
1. Open the Task Manager with a keyboard shortcut
One of my personal favorites and probably the simplest one on this list, you can launch the Task Manager simply by pressing Ctrl + All + Delete together. When you press the shortcut keys, you’ll see the Windows Security screen pop open on your screen.
From there, click on Task Manager, and the Task Manager window will open up. From here, you’re free to use Task Manager however you’d like.
2. Use the Power user menu
You can also open the Task Manager from the Power User menu on your Windows computer. Put briefly, the Power User menu is a central place to access some of the most widely used Windows features.
To get started, press the Windows key + X option to open the Windows power menu. From there, select the Task Manager option, and you’ll have the Task Manager window in front of you.
3. Launch Task Manager from the taskbar
Navigate and right-click on the taskbar of your Windows 10 PC, or on the Windows icon in the taskbar on a Windows 11 PC and select the Task Manager from the diverse set of options available on your screen.
4. Use the Ctrl + Shift + Esc shortcut
Another shortcut on our list, the Ctrl + Shift + Esc shortcut, is slightly different from the Ctrl + Alt + Delete shortcut we’ve used above.
Pressing Ctrl + Shift + Esc will open Task Manager in just a few seconds on your screens, as opposed to Ctrl + Alt + Delete, where you’ll have to first go through the Windows Security menu. Use this one if you’re rushing and want to quickly launch the Task Manager.
5. Use the “taskmgr” from the Start menu search bar
To open Task Manager in Windows 10/11 from the taskmgr EXE file, do the following:
Go to Start menu search bar, type “taskmgr.exe,” and select the Best match.
The Task Manager will be launched on your screen. Alternatively, you can also enter “taskmgr.exe” in the Run dialog box and hit Enter to launch the application.
This is a rather long-winded way, but you can also make use of the Control Panel to open Task Manager.
To get started, go to the Start menu search bar, type in “control panel,” and select the best match.
In the Control Panel, go to the search option in the top-right corner, type in ‘task manager’ in the search bar, and select the Task Manager option when it comes up.
If you’re also looking to refresh the look of your Task Manager in Windows 11, we have a separate post highlighting what the Task Manager is and what it’s used for.
The Task Manager is another one of the free utilities from Windows that makes our day-to-day Windows workflow hassle-free.
Apart from helping you fix random hang-ups of Windows that pop up from time to time, it can also help you see and fix the processes that are running behind your PC, while at the same time, showing the app history, user, and service details of your Windows.
Often, users runs into error messages like “cannot delete file: access is denied” or “the file is used by another program or user” when they are trying to delete files and folders on Windows. Essentially, this means that these files and folders are locked i.e., they are in use by some other app or system process or running in the background, and hence cannot be deleted.
ForceDelete is a handy utility to fix these issues and delete the locked files and folders forcibly. It helps delete files and folders which cannot be deleted and remove program folders that have been uninstalled already. It can also allow users to unlock files and folders locked by other processes. ForceDelete also allows users to shred files to permanently delete files and folders if you want. All such files and folders would be unrecoverable.
ForceDelete can also help users delete locked files and folders without terminating the processes. While this will help you delete the locked file you wanted, it will not affect any other program or process. All you need to do is uncheck the “Close Processes” option before deleting the file.
ForceDelete also adds two shortcuts into the context menu allowing you to easily unlock or delete files by right clicking the file. Of course, on Windows 11, these get added to the extended ‘Show more options’ fly-out menu. Apart from a GUI mode, there’s also a command line batch mode. You can run forcedelete.exe from the command line to batch delete files and folders as following:
forcedelete.exe [file1] [file2] … (The “file1” and “file2” could be a file or a folder)
ForceDelete is a straightforward, and easy to use application. And it’s free, and there are no ads! You can download ForceDelete for Windows XP and above. It’s a tiny installer, less than 1MB in size. If you do not want to install it and only intend to use the app occasionally, you can download the portable version which is a standalone executable file that runs without any installation or dependencies.


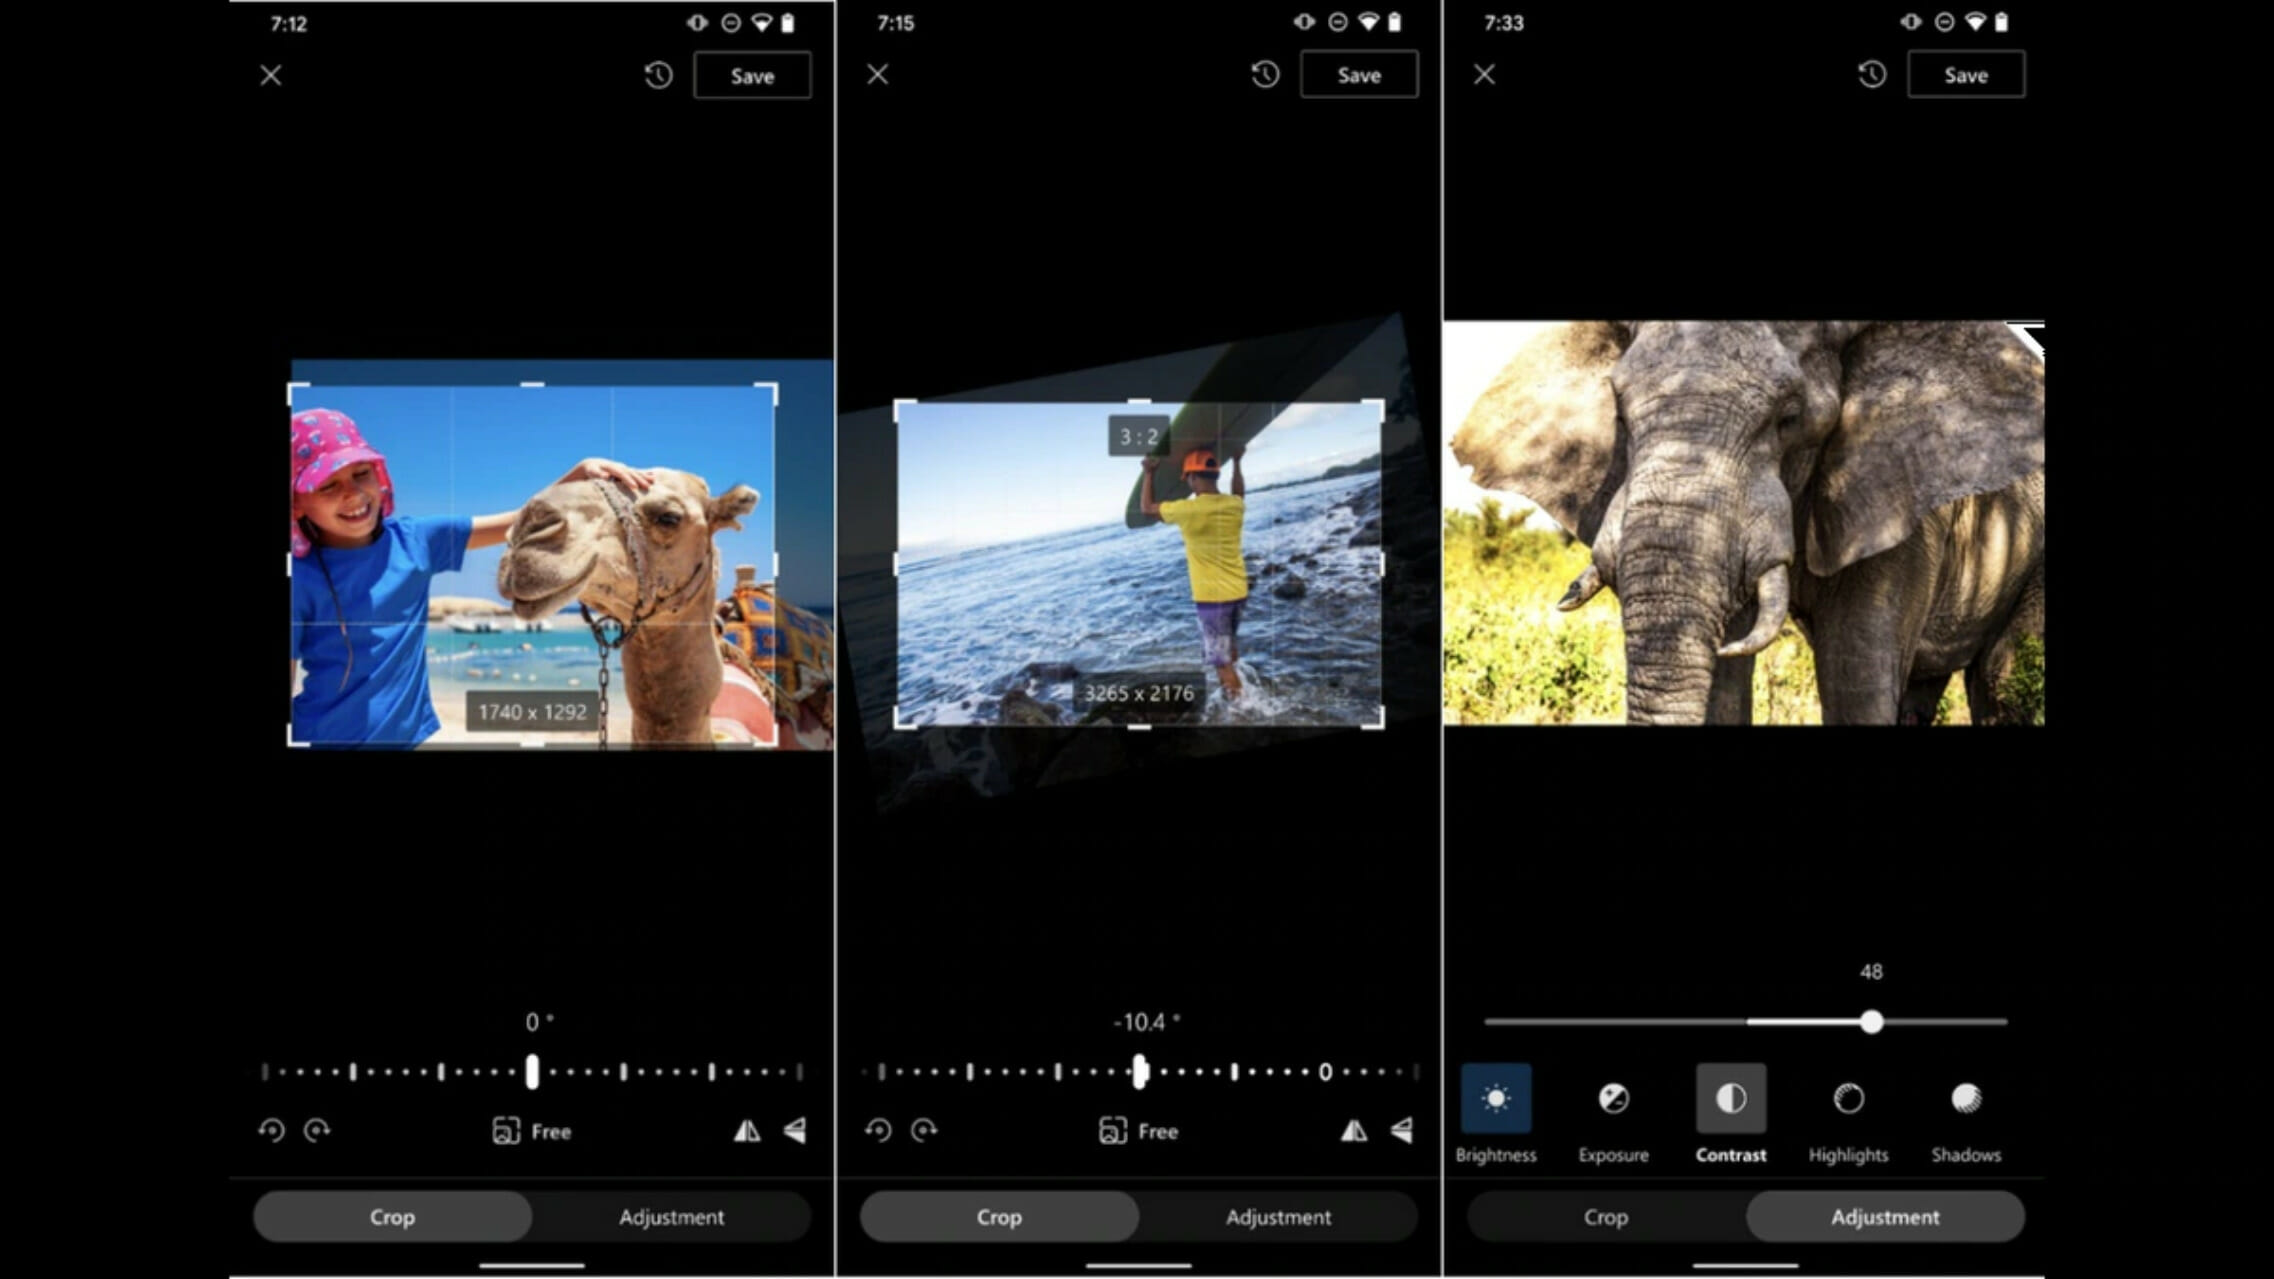


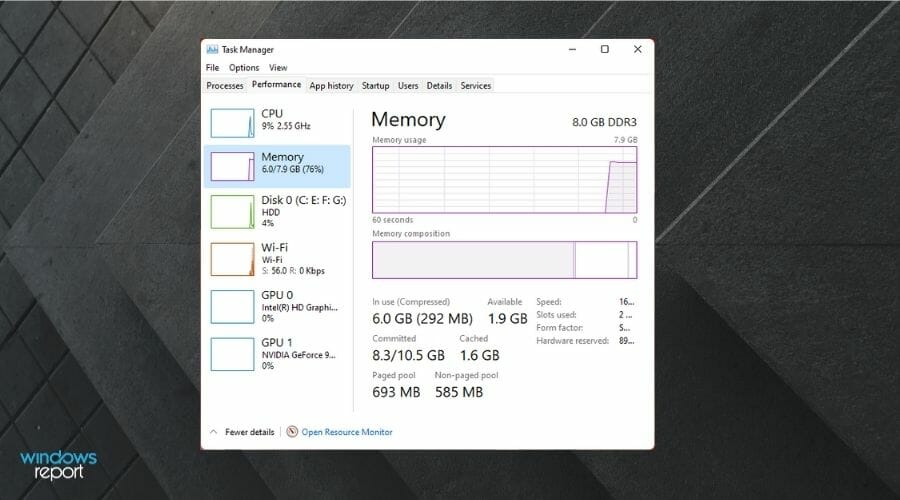


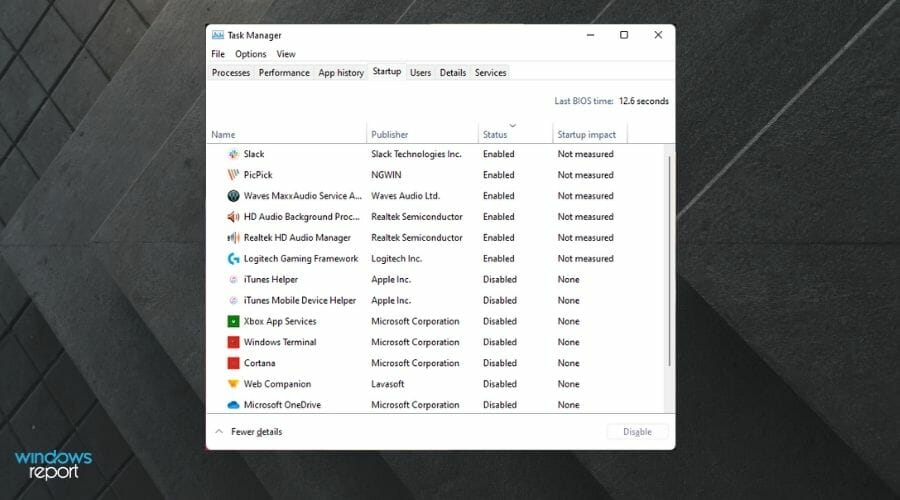
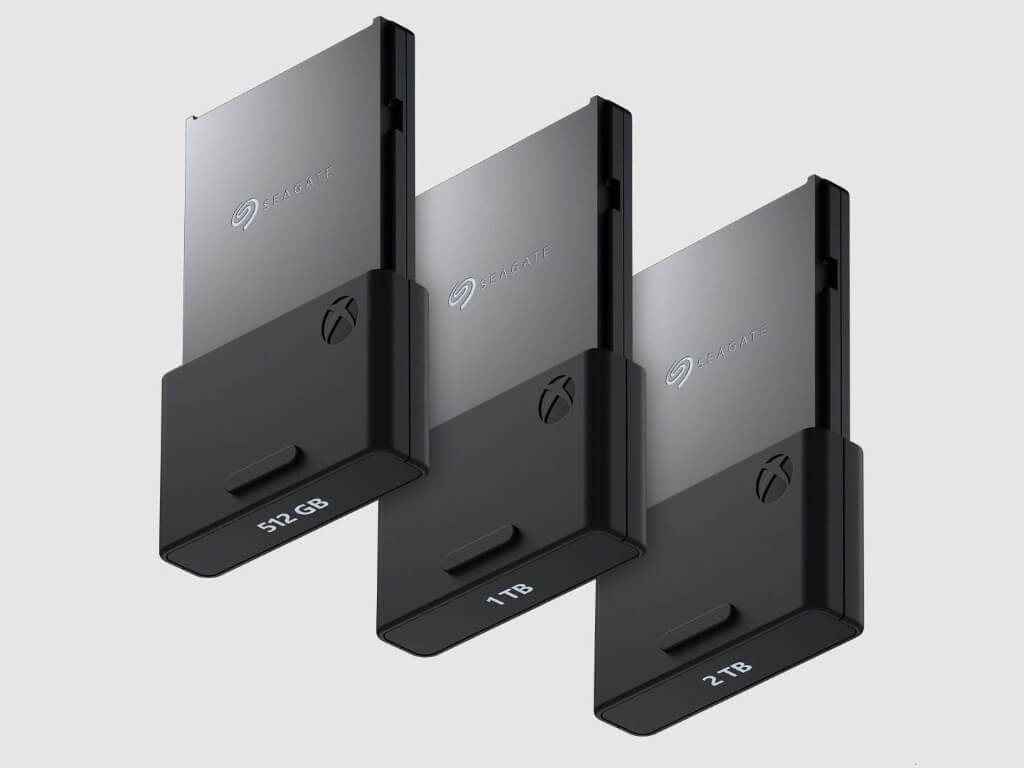
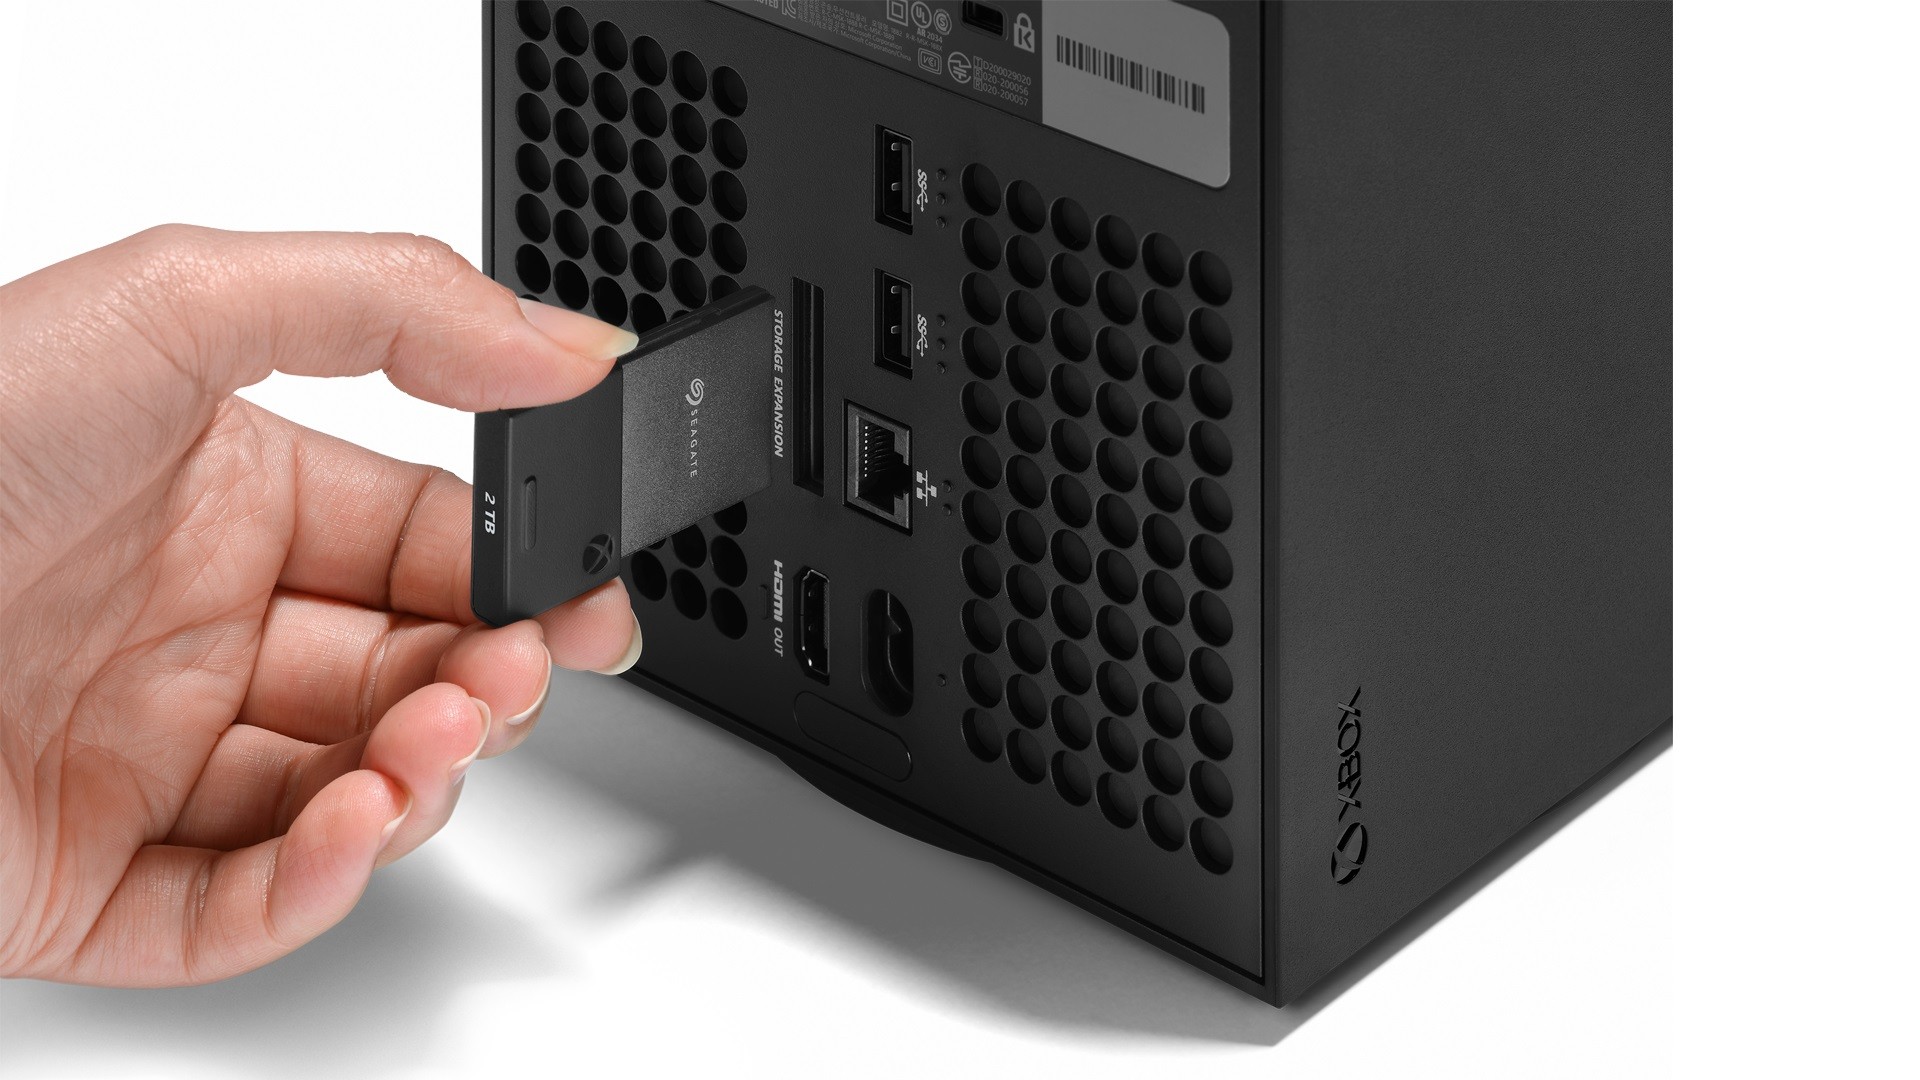
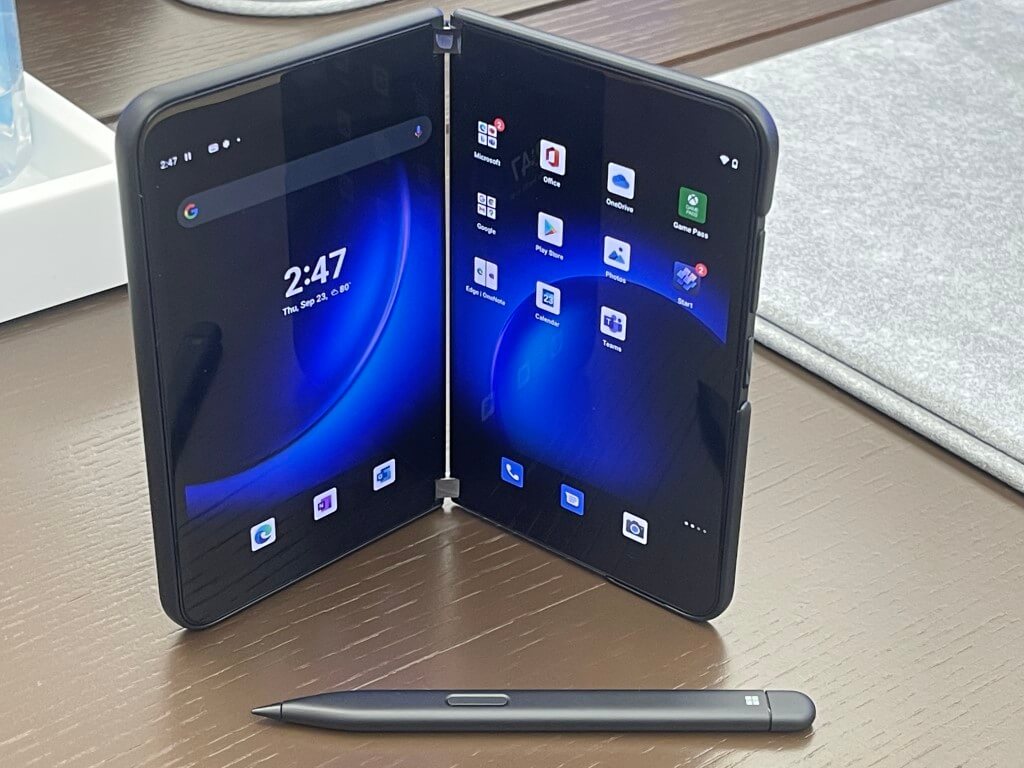
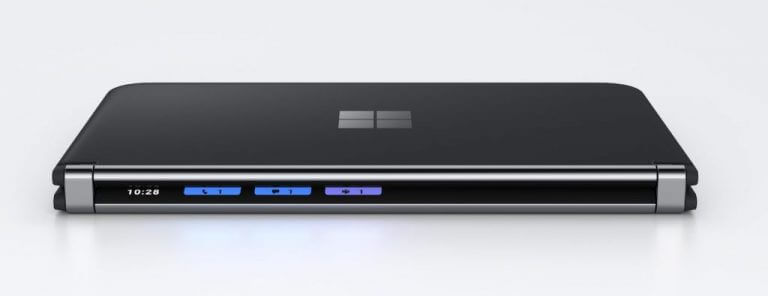

![Desktop Is Unavailable If the Location Is on This PC [Fixed]](https://windowsreport.com/wp-content/uploads/2020/03/Fix.jpg)
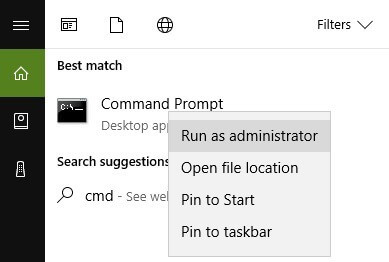
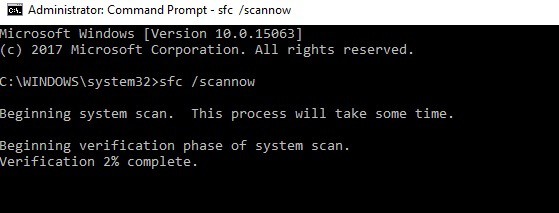
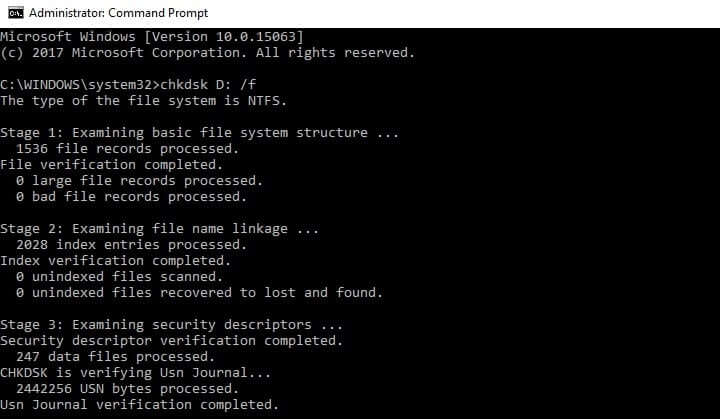
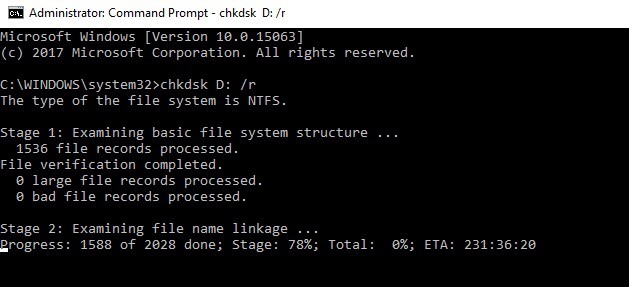
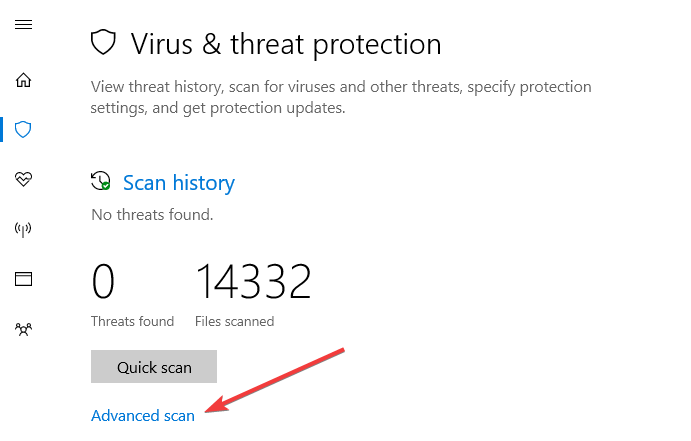
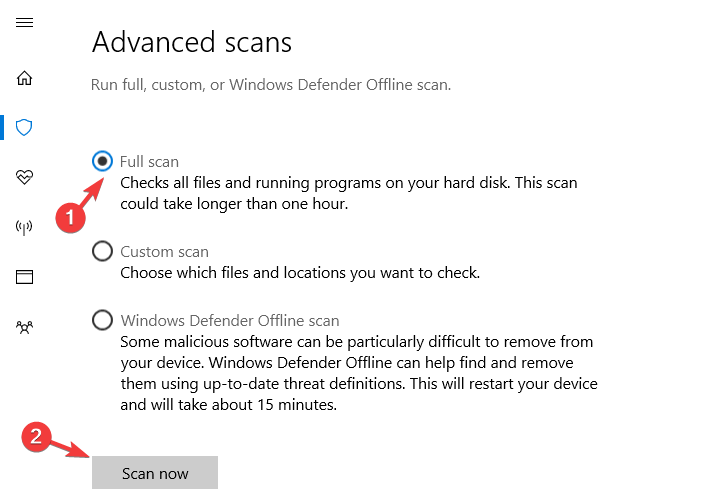
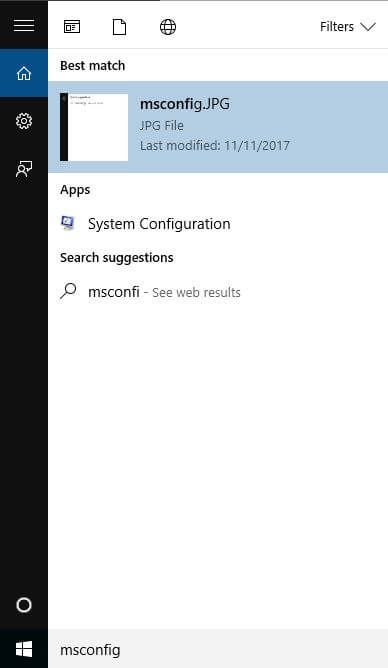


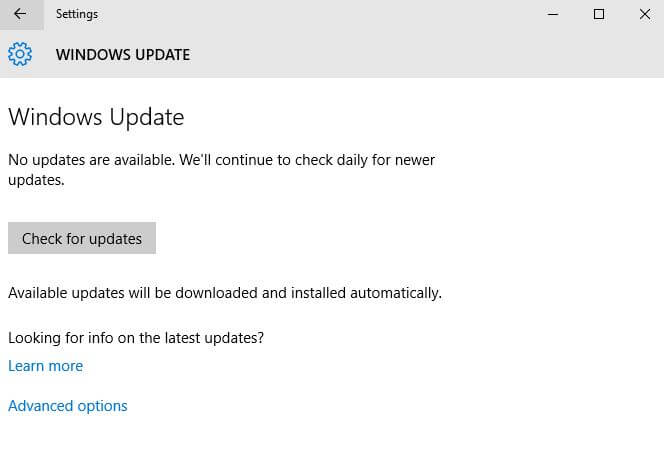
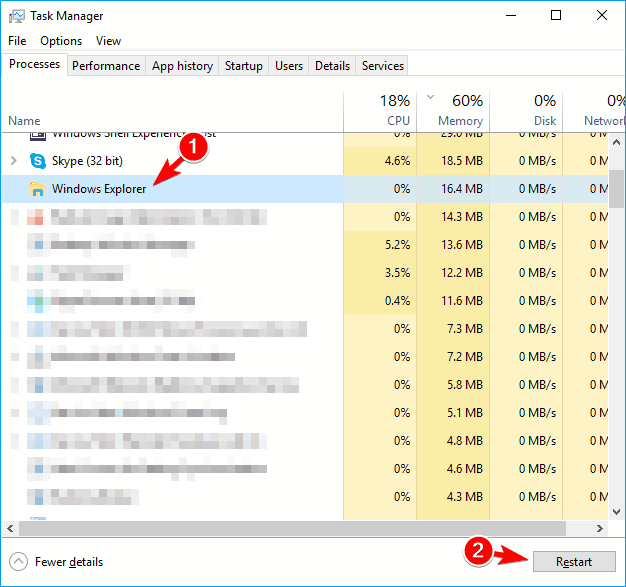

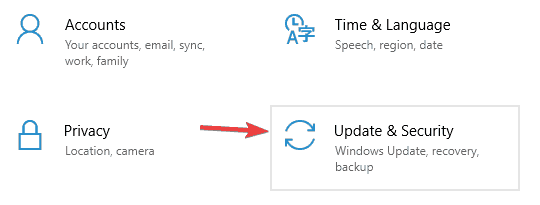
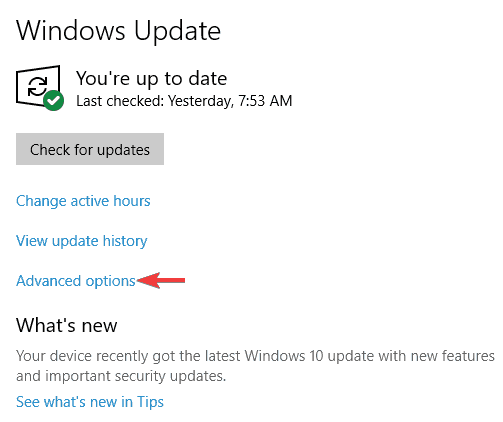
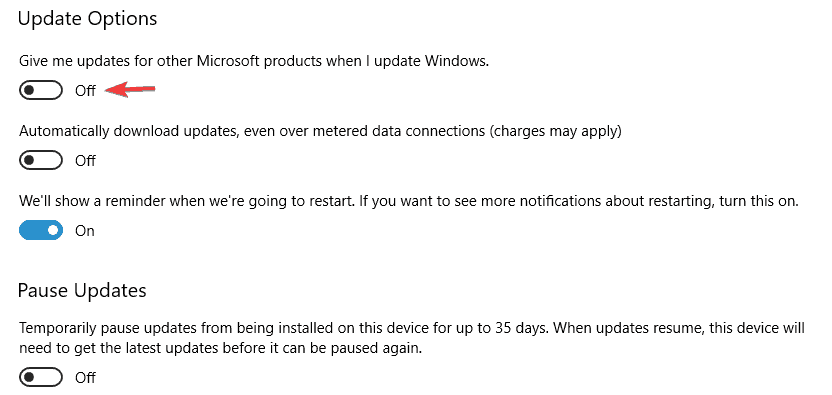
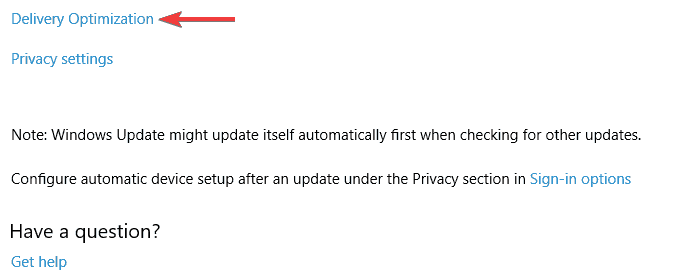
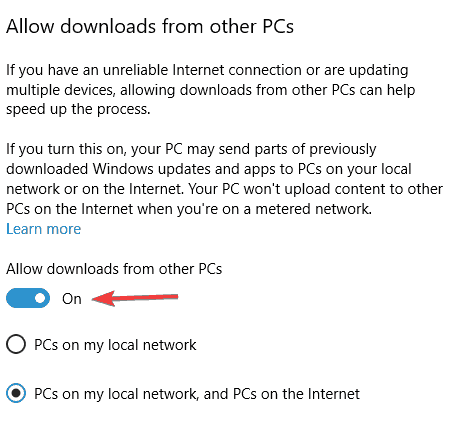
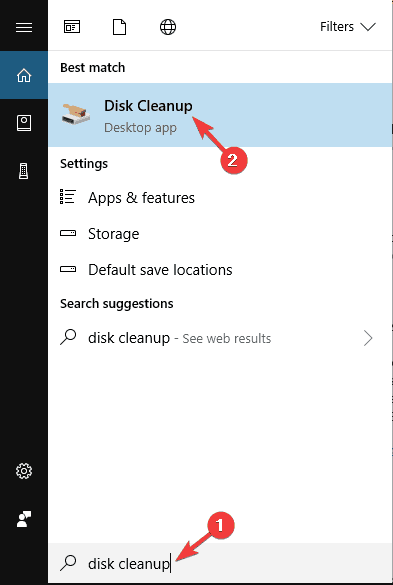
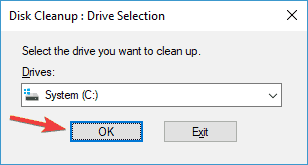
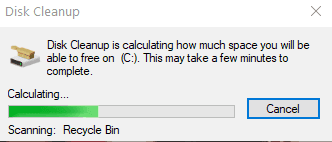
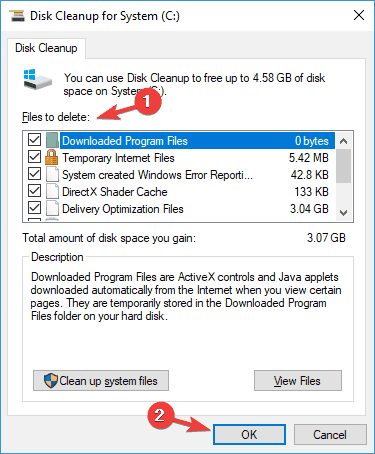
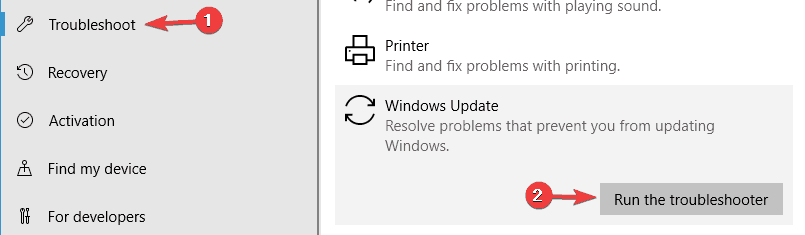
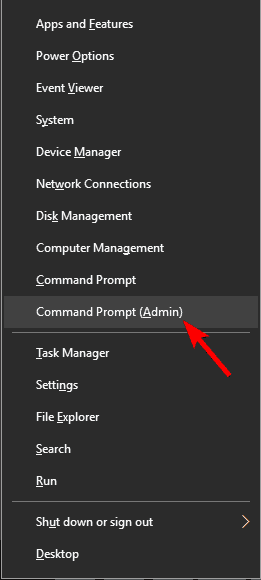
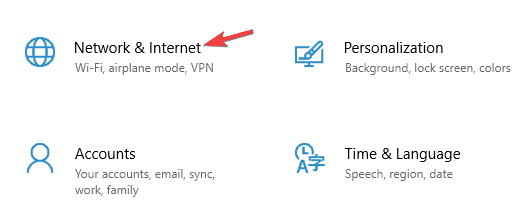
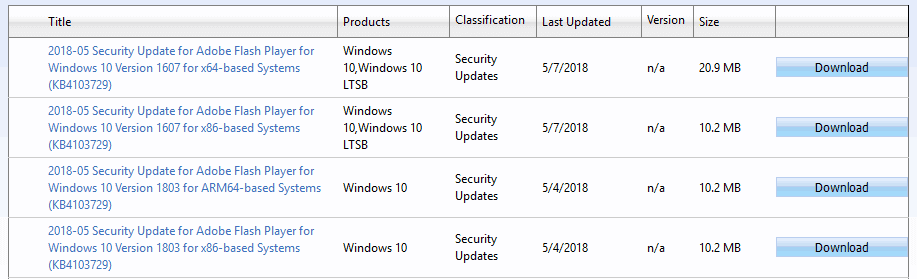


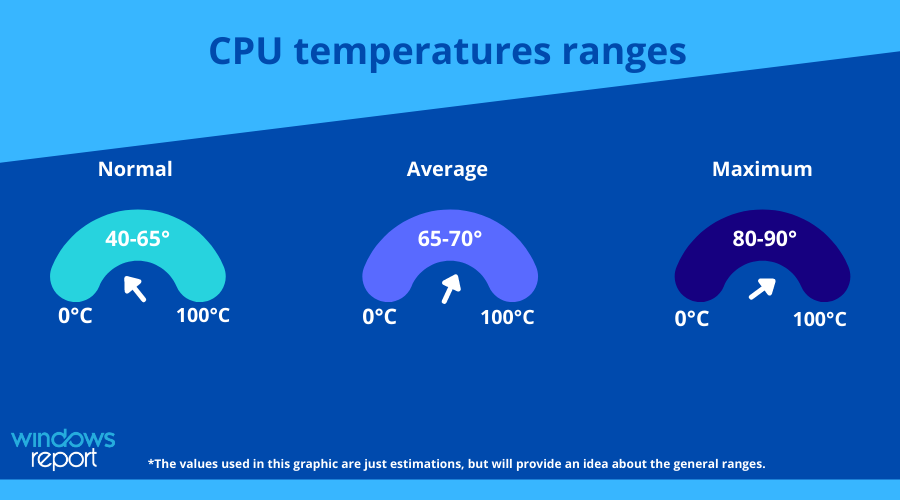


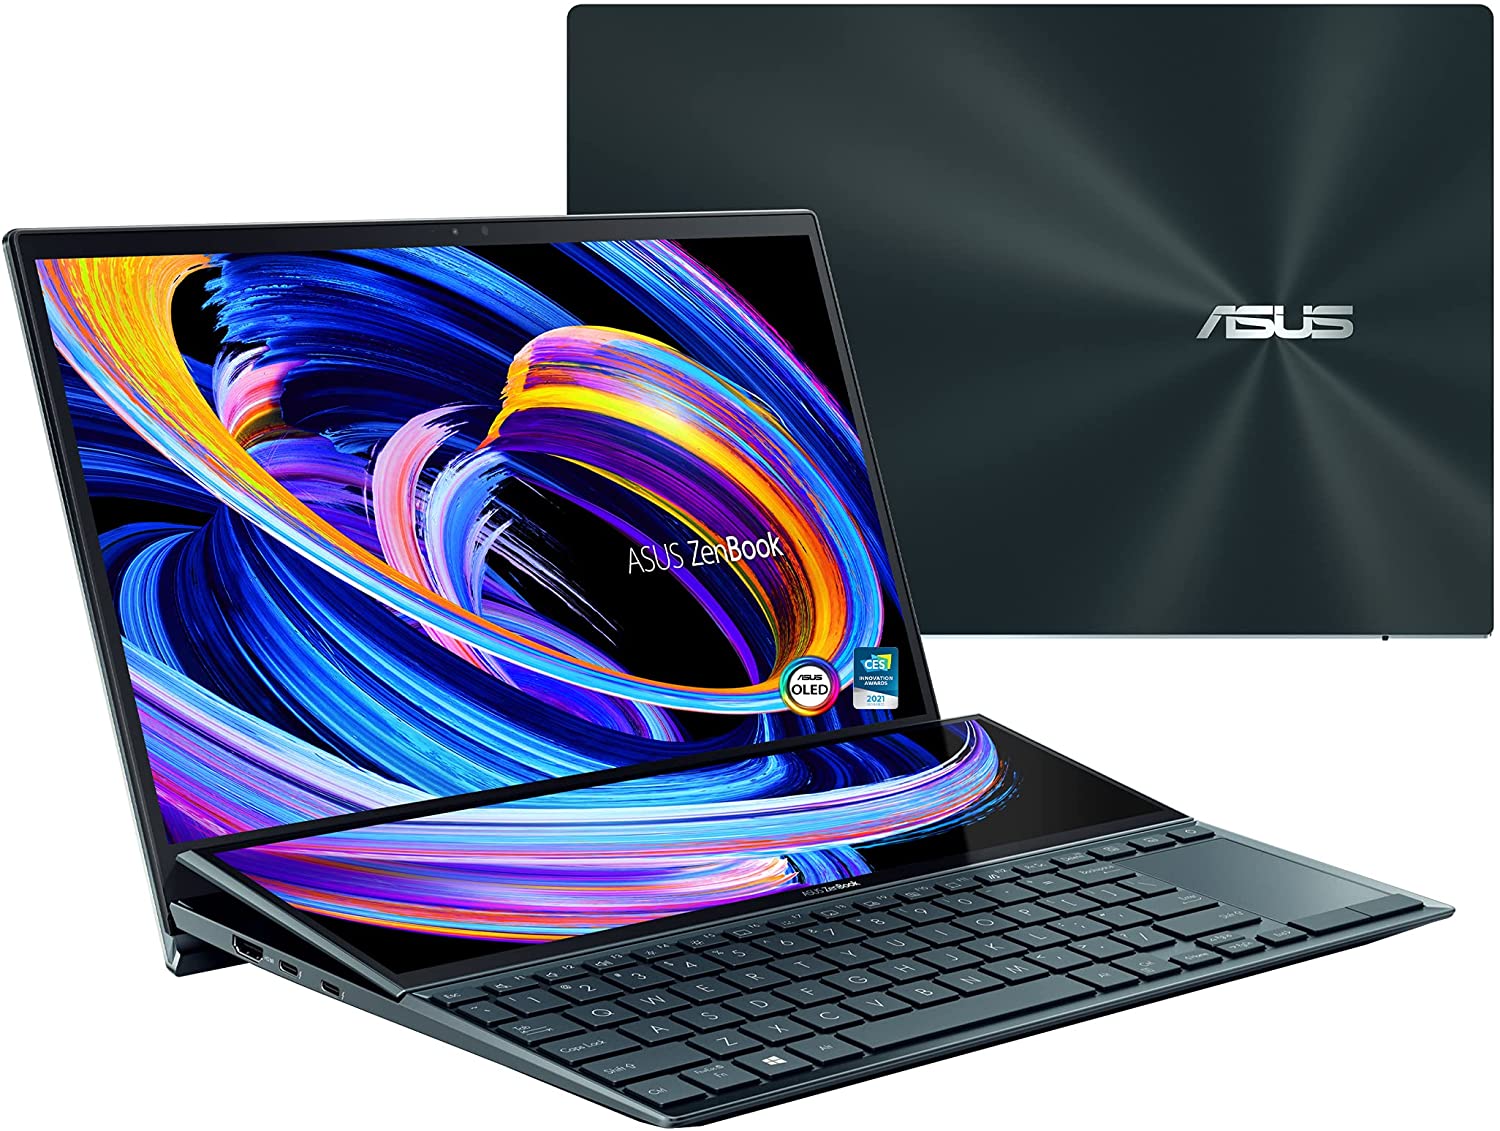
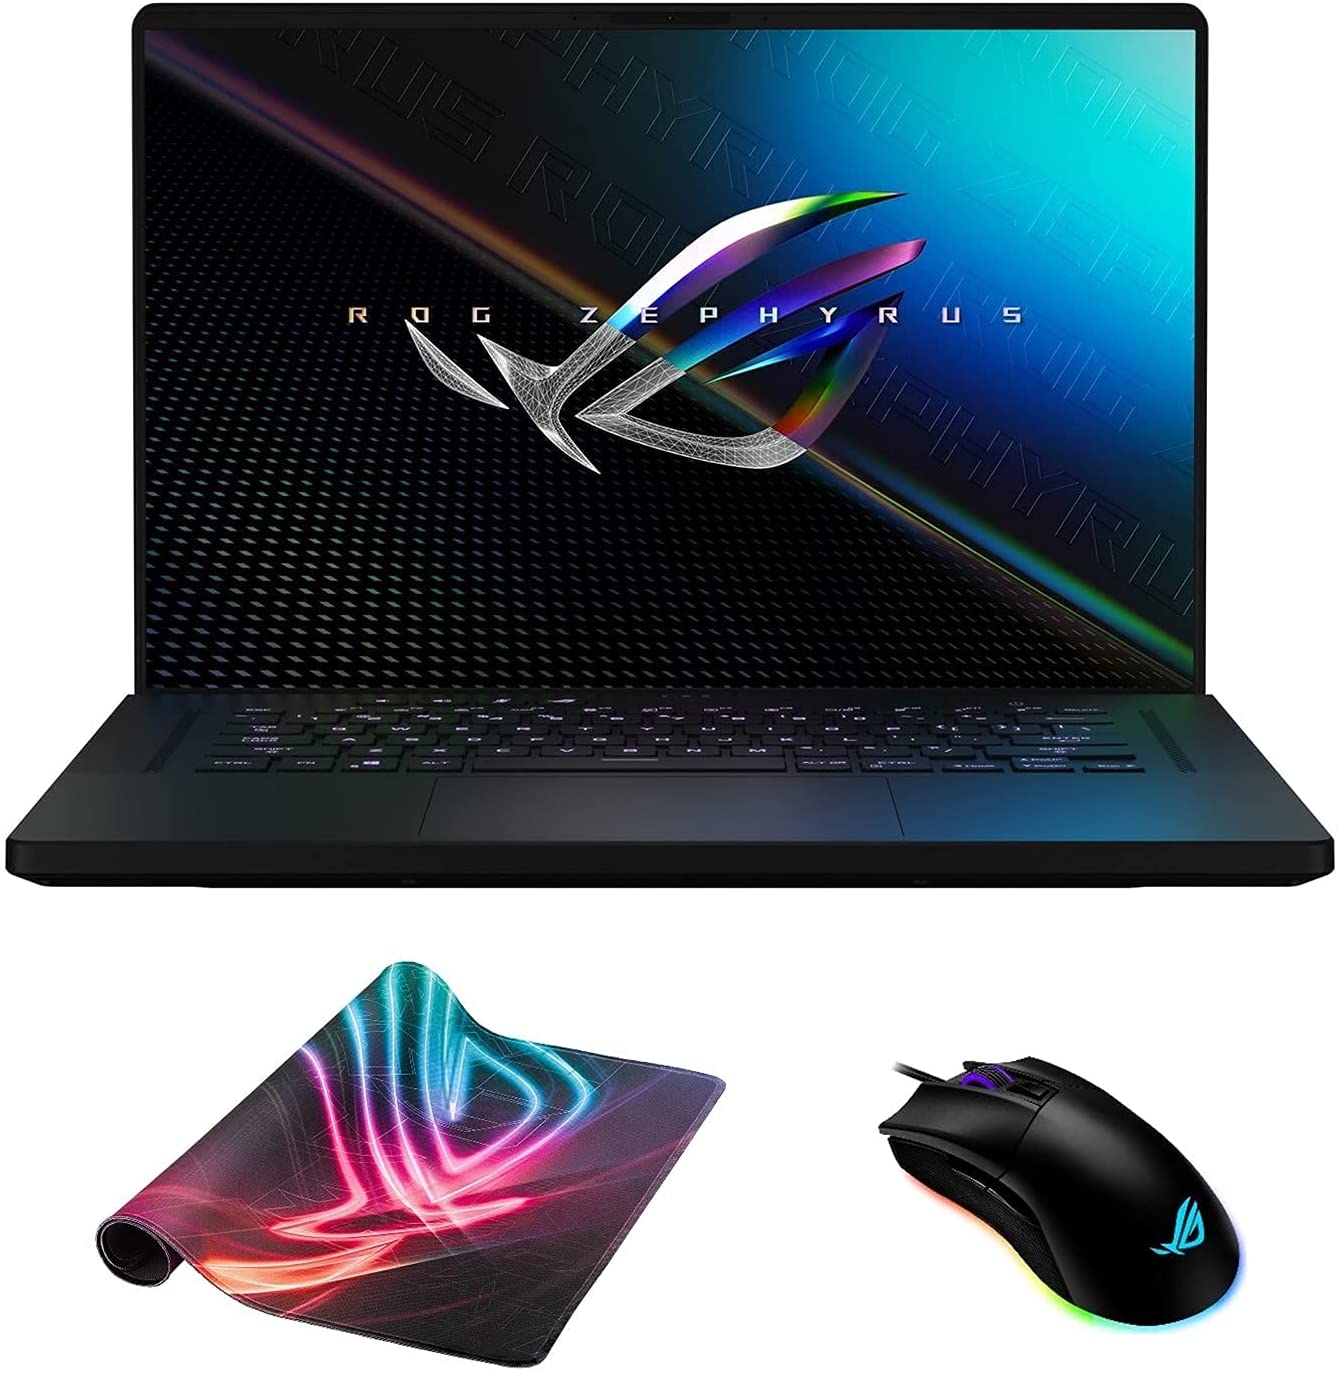
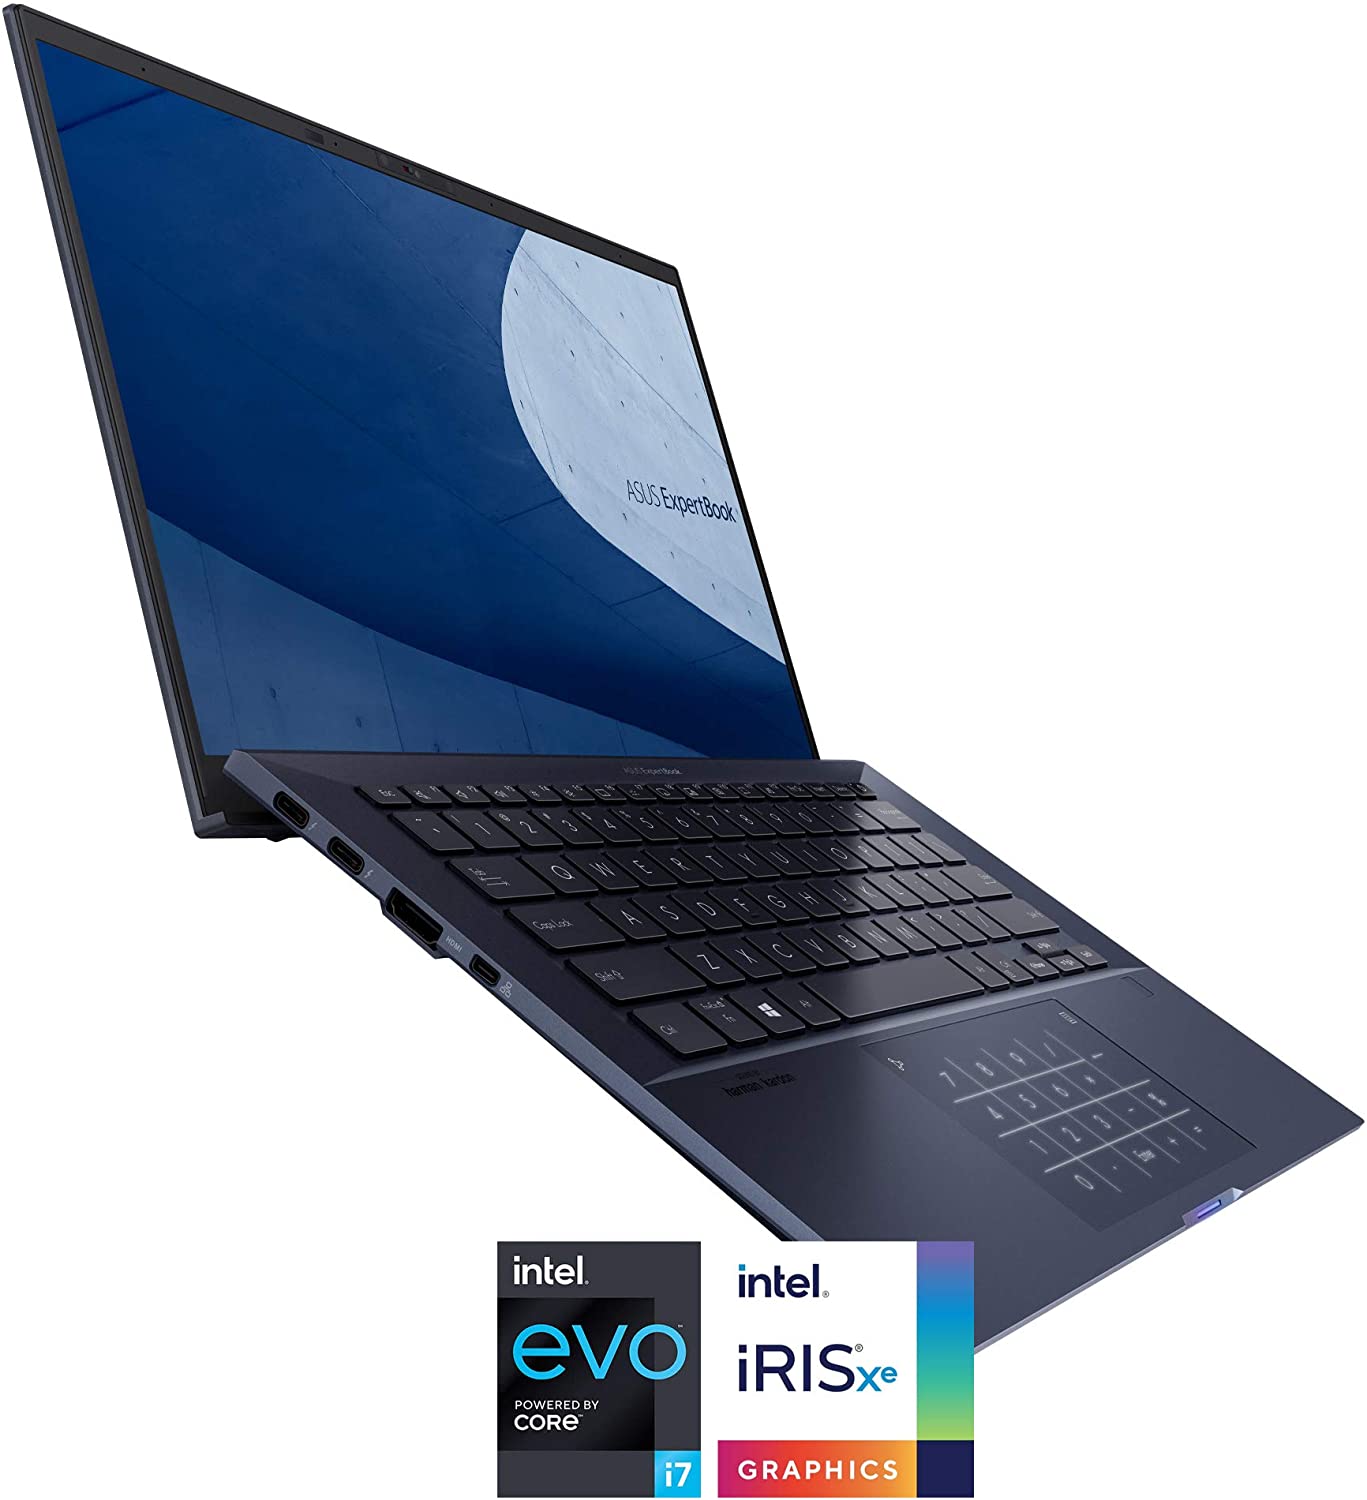
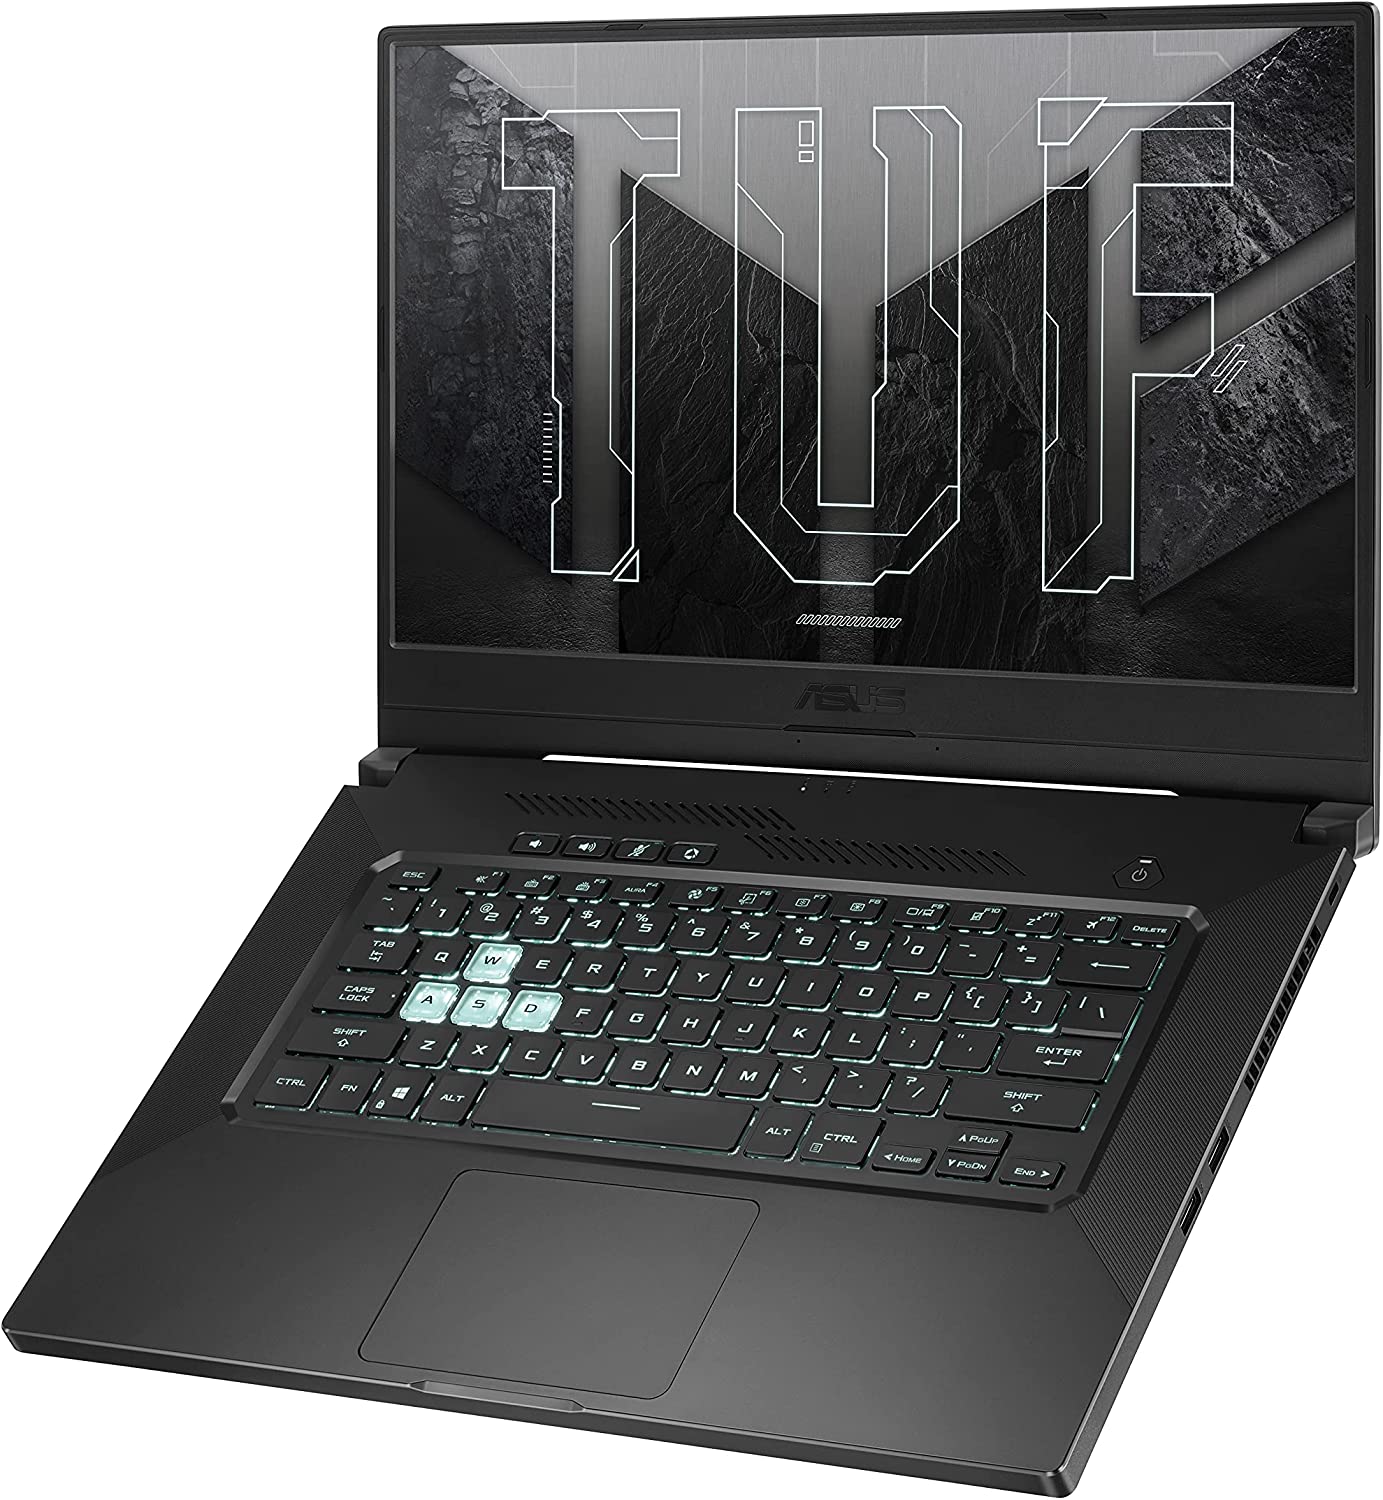
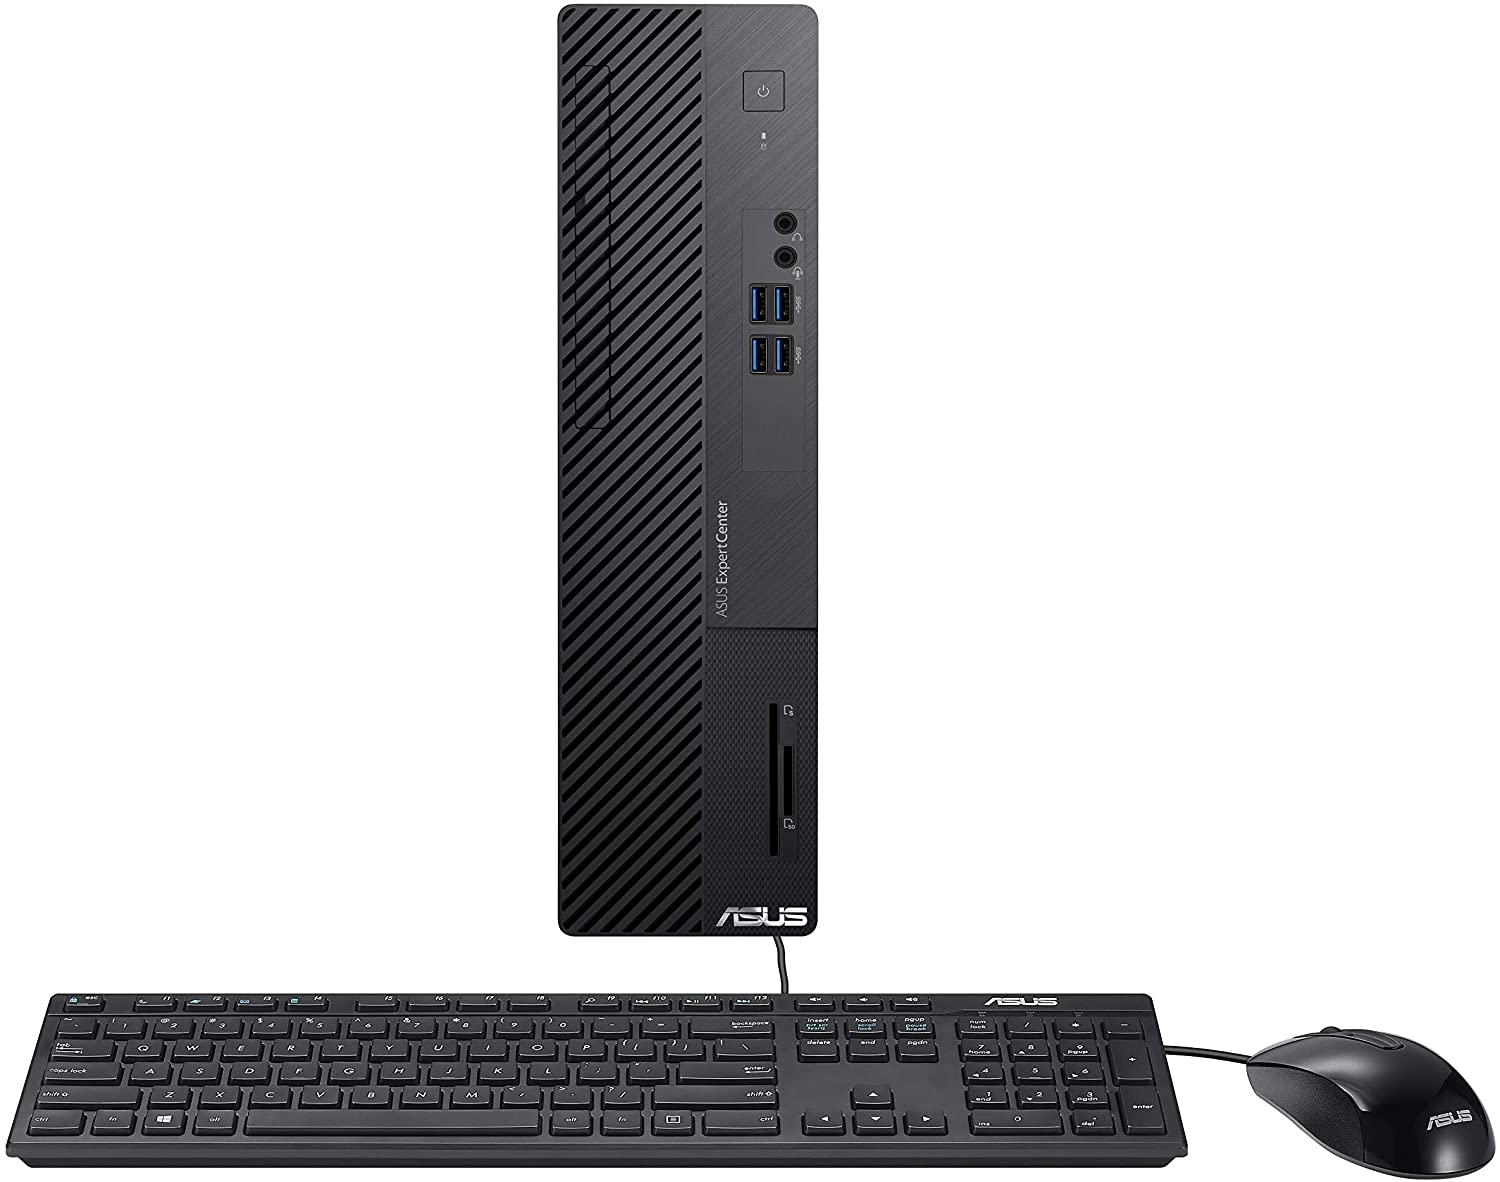



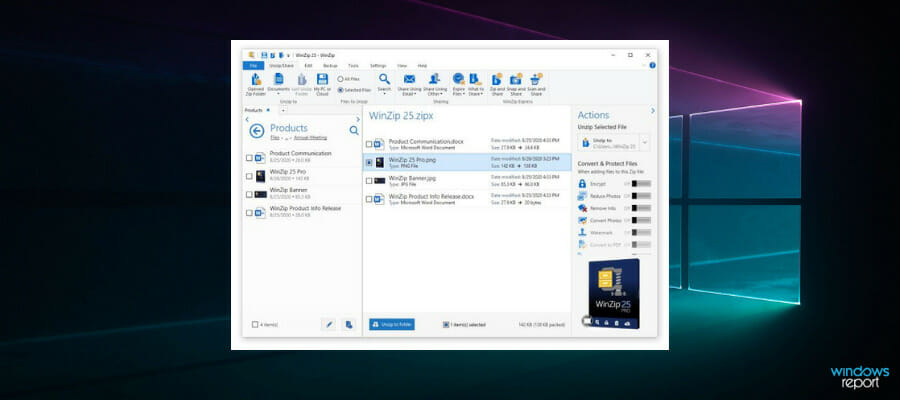

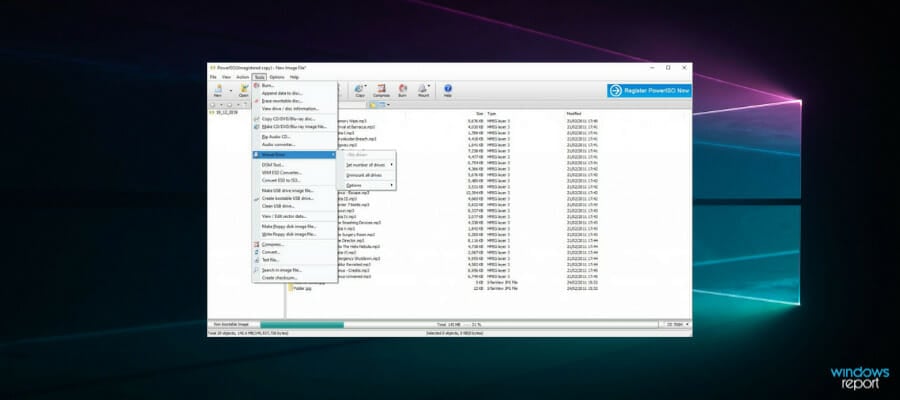

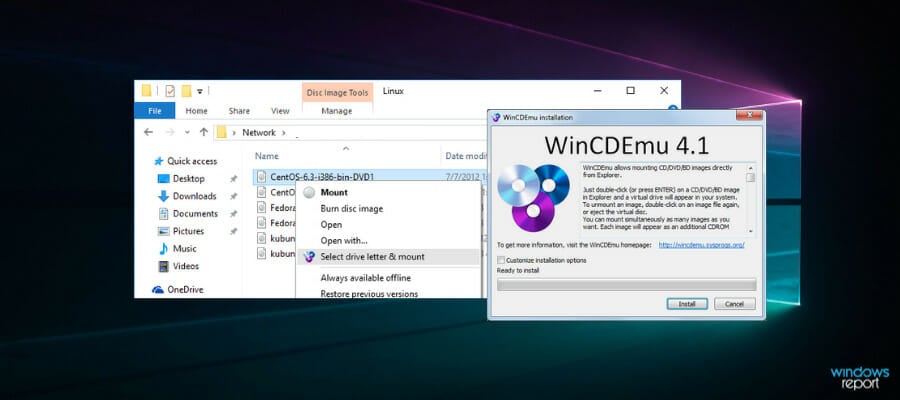
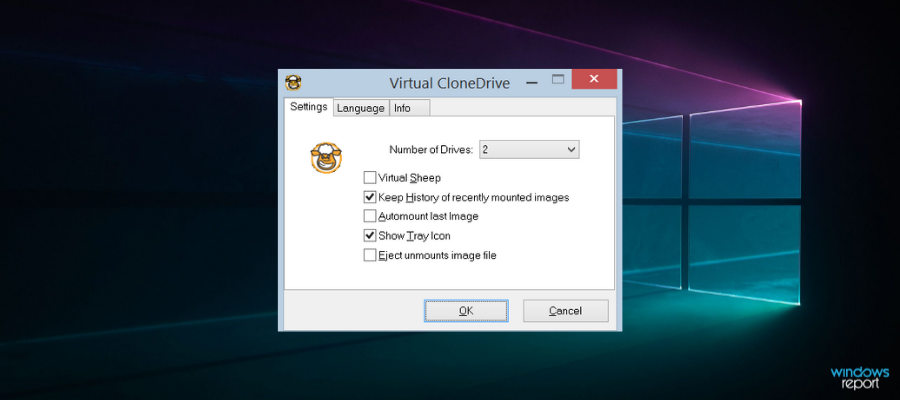
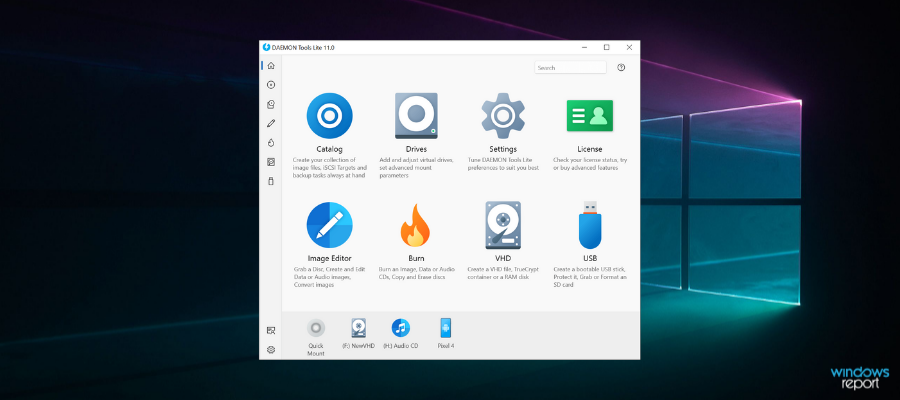
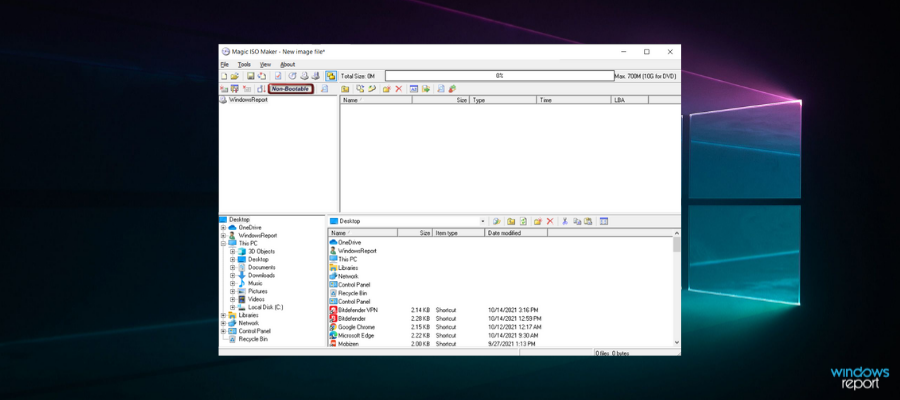

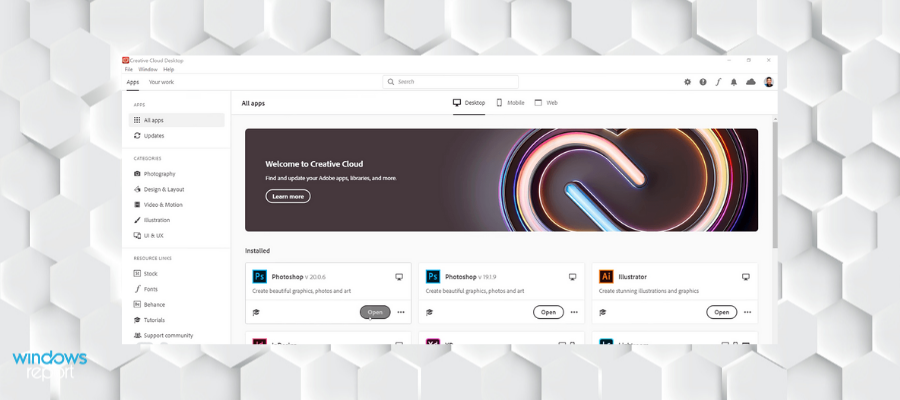

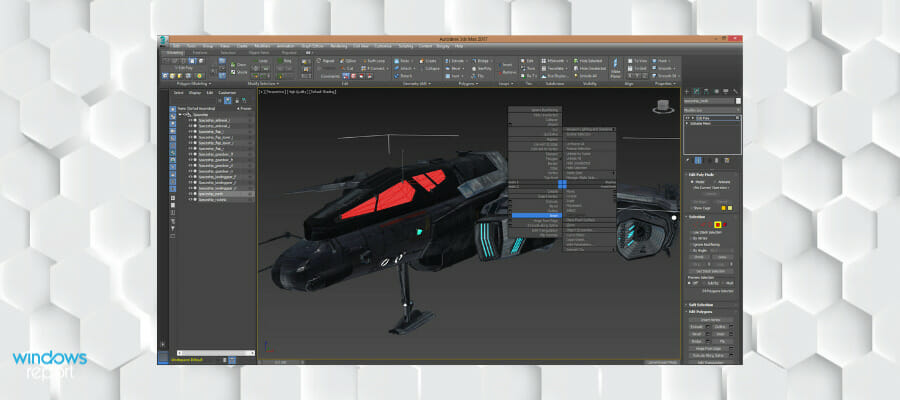

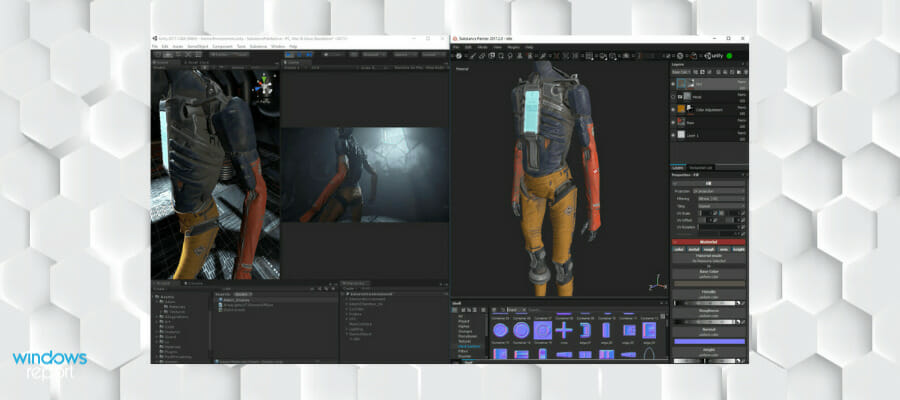

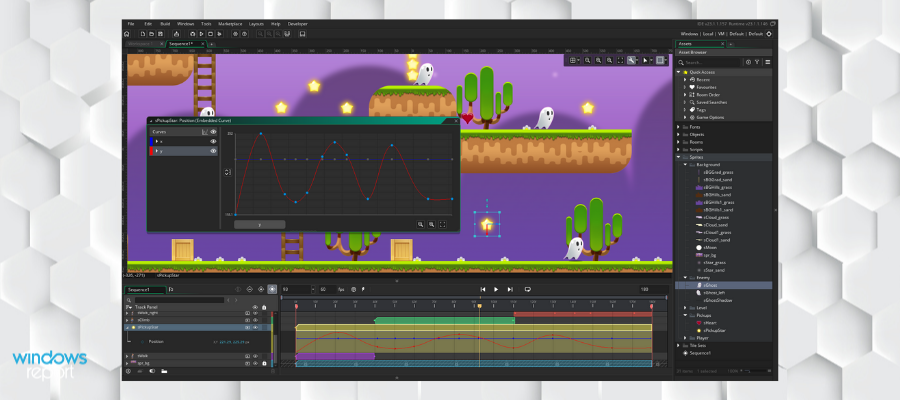

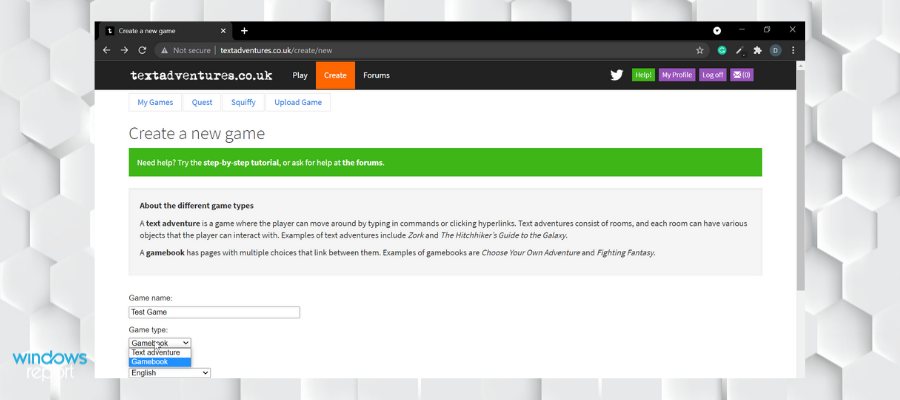
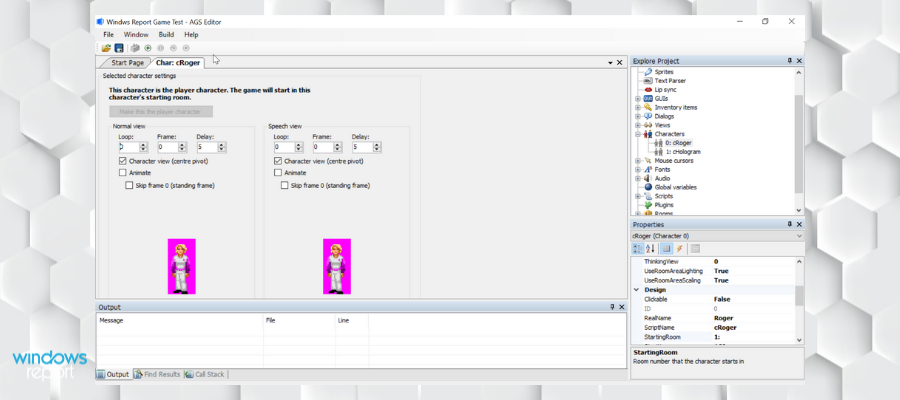
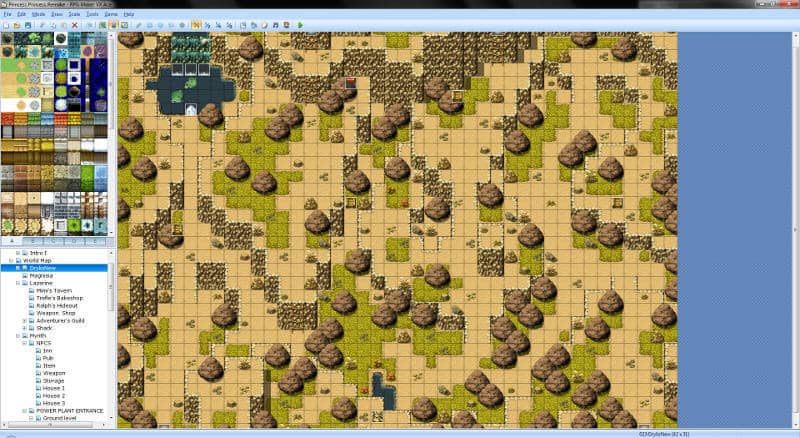
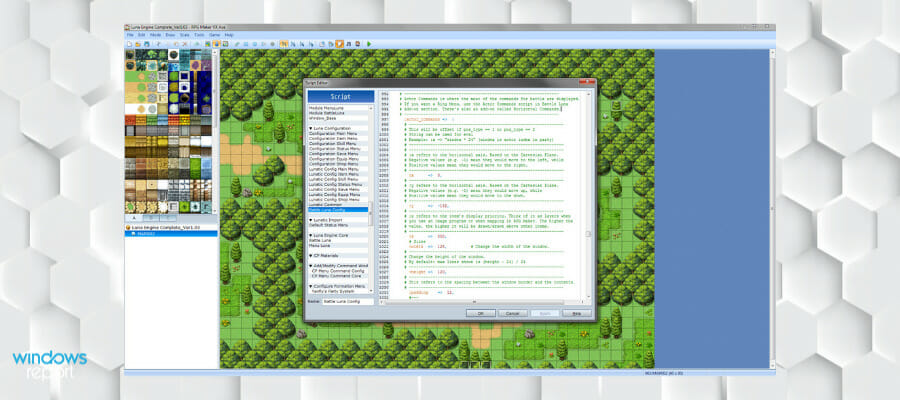
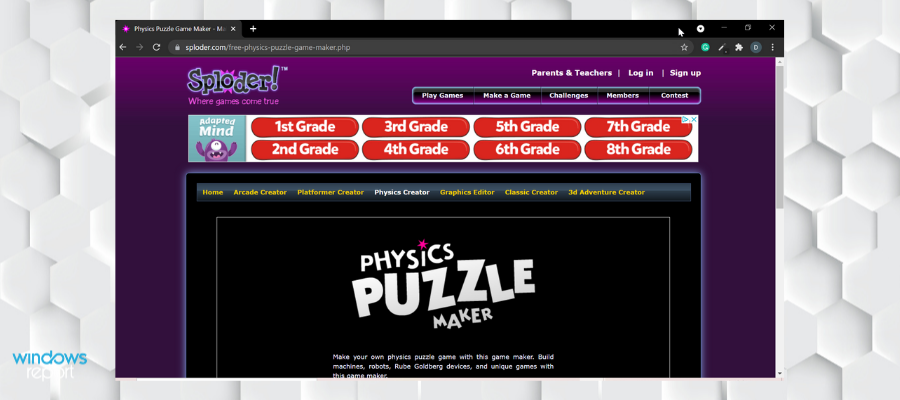
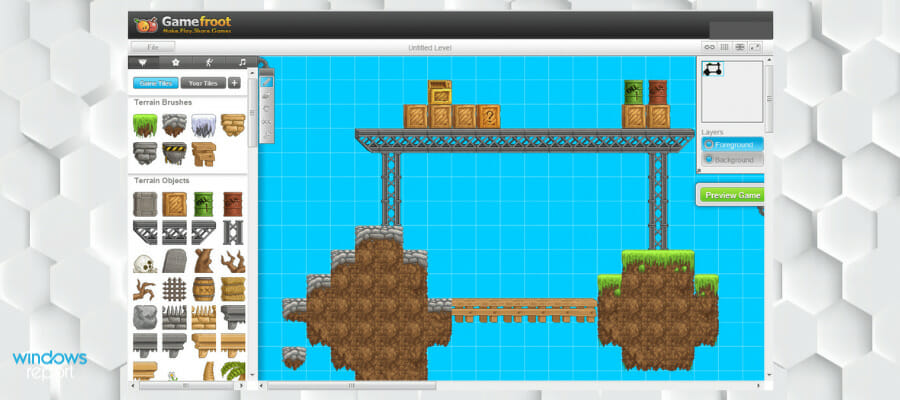
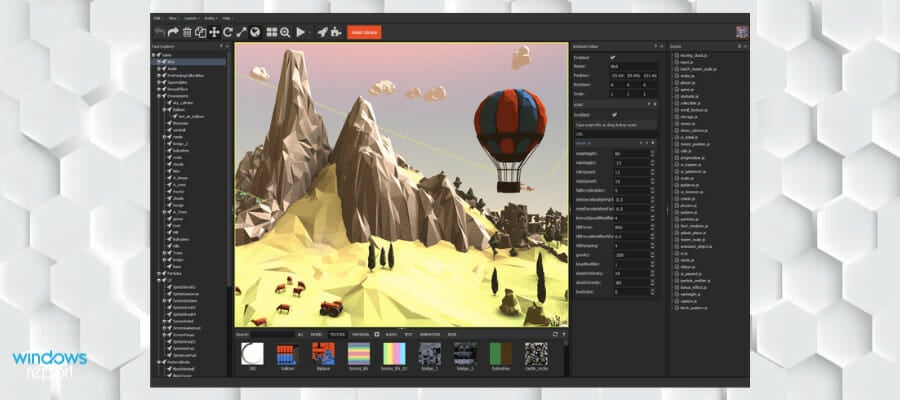

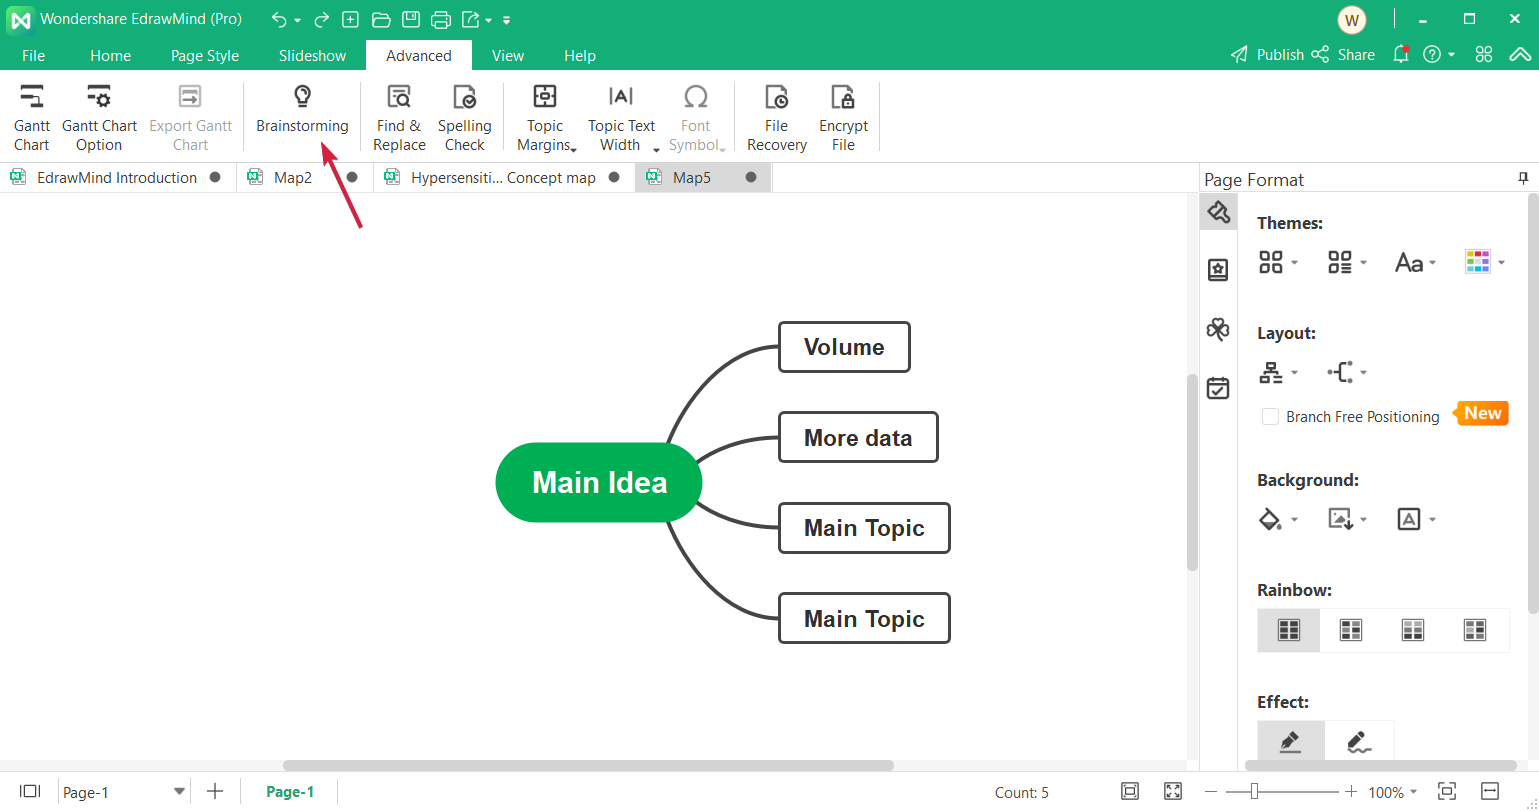

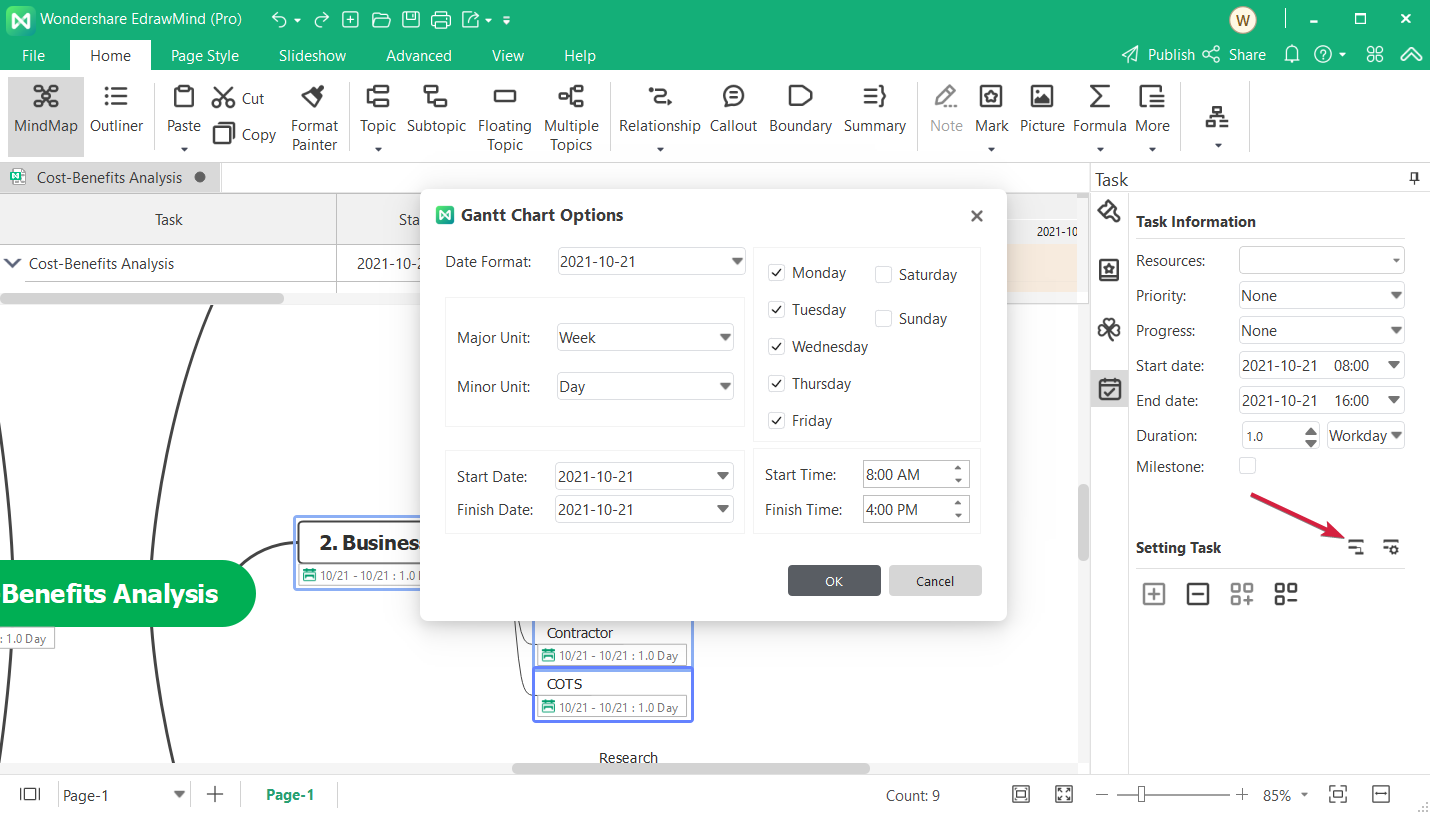
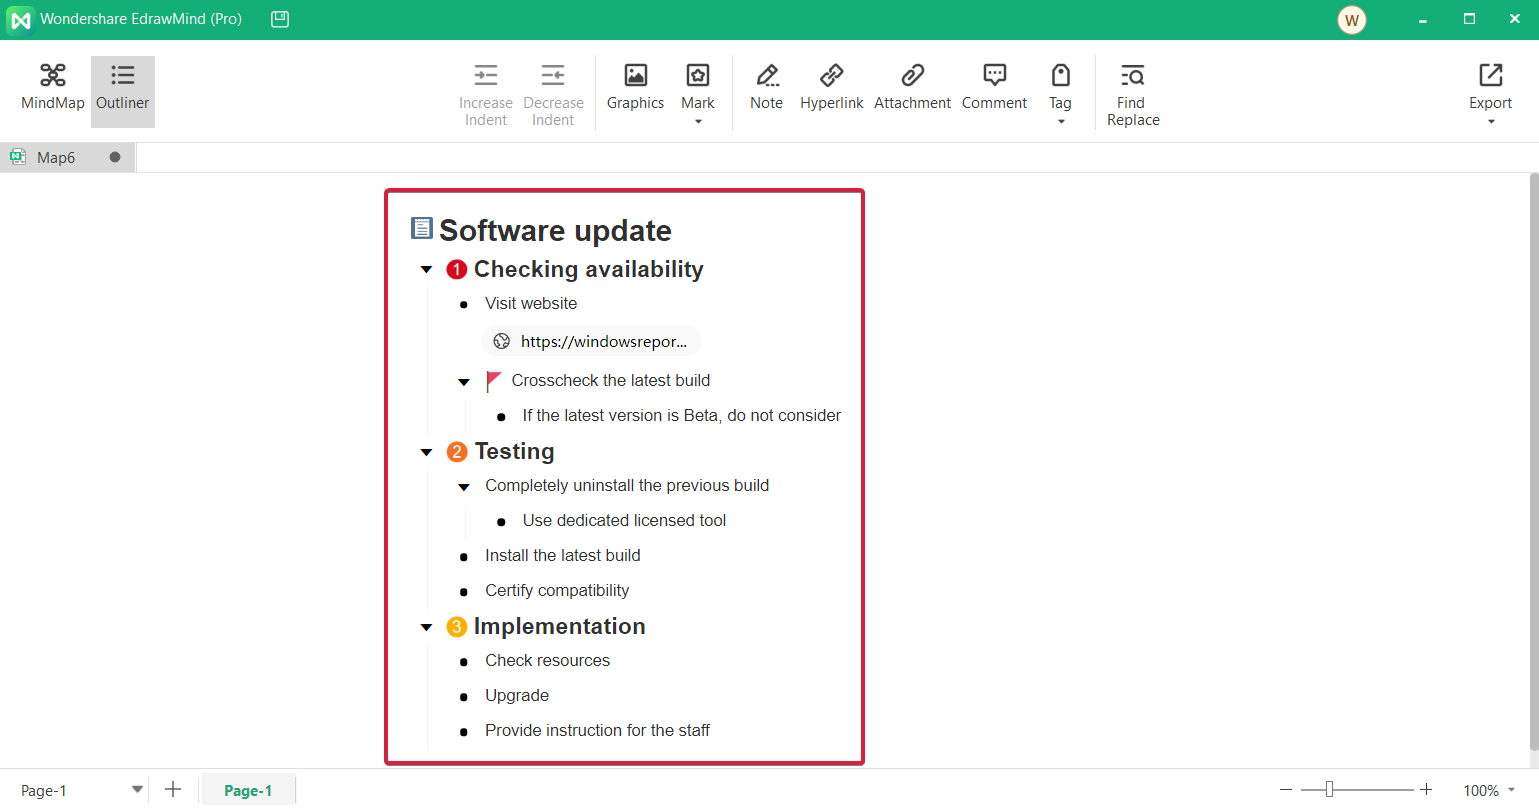
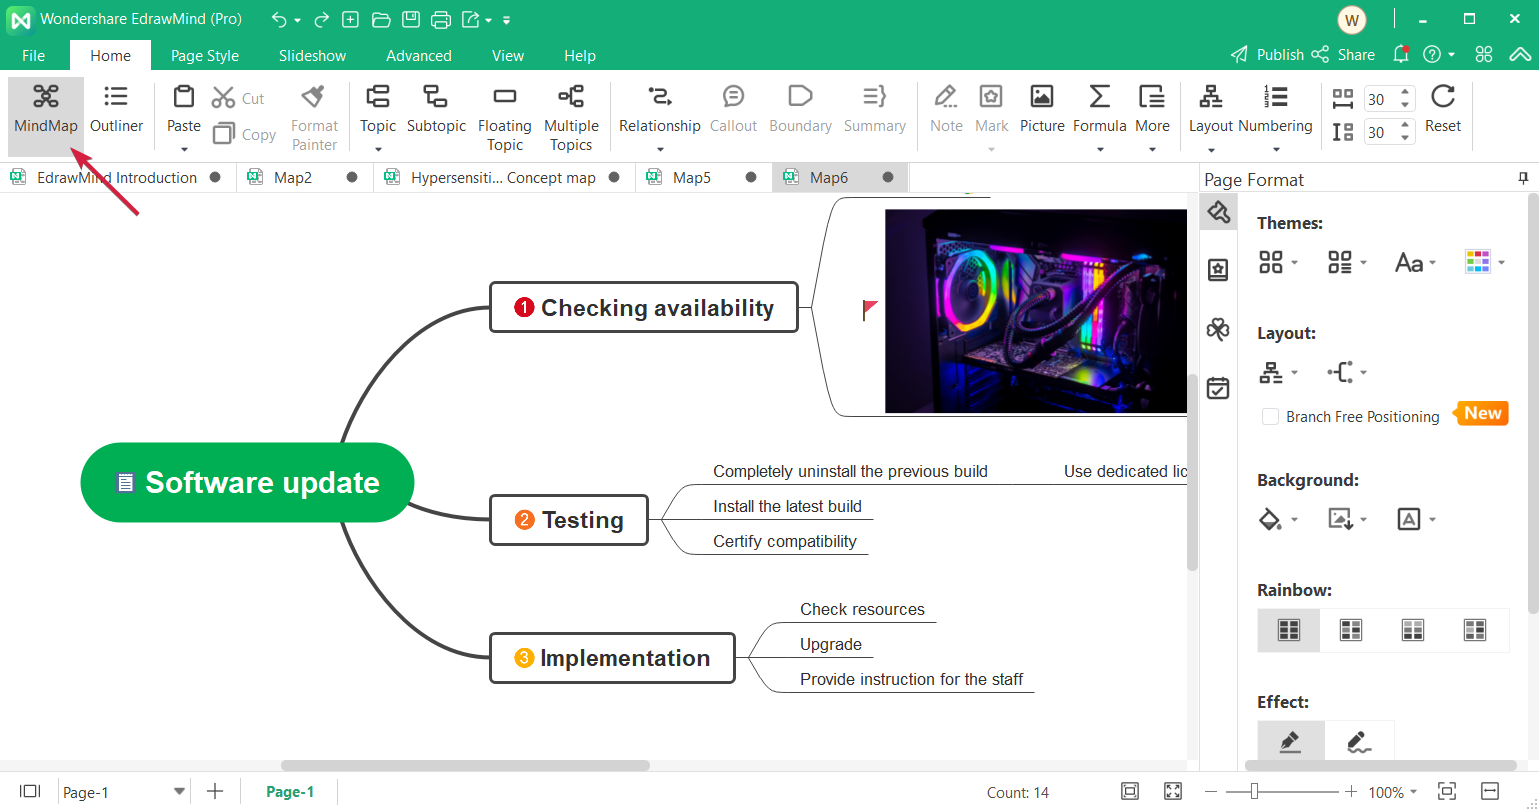
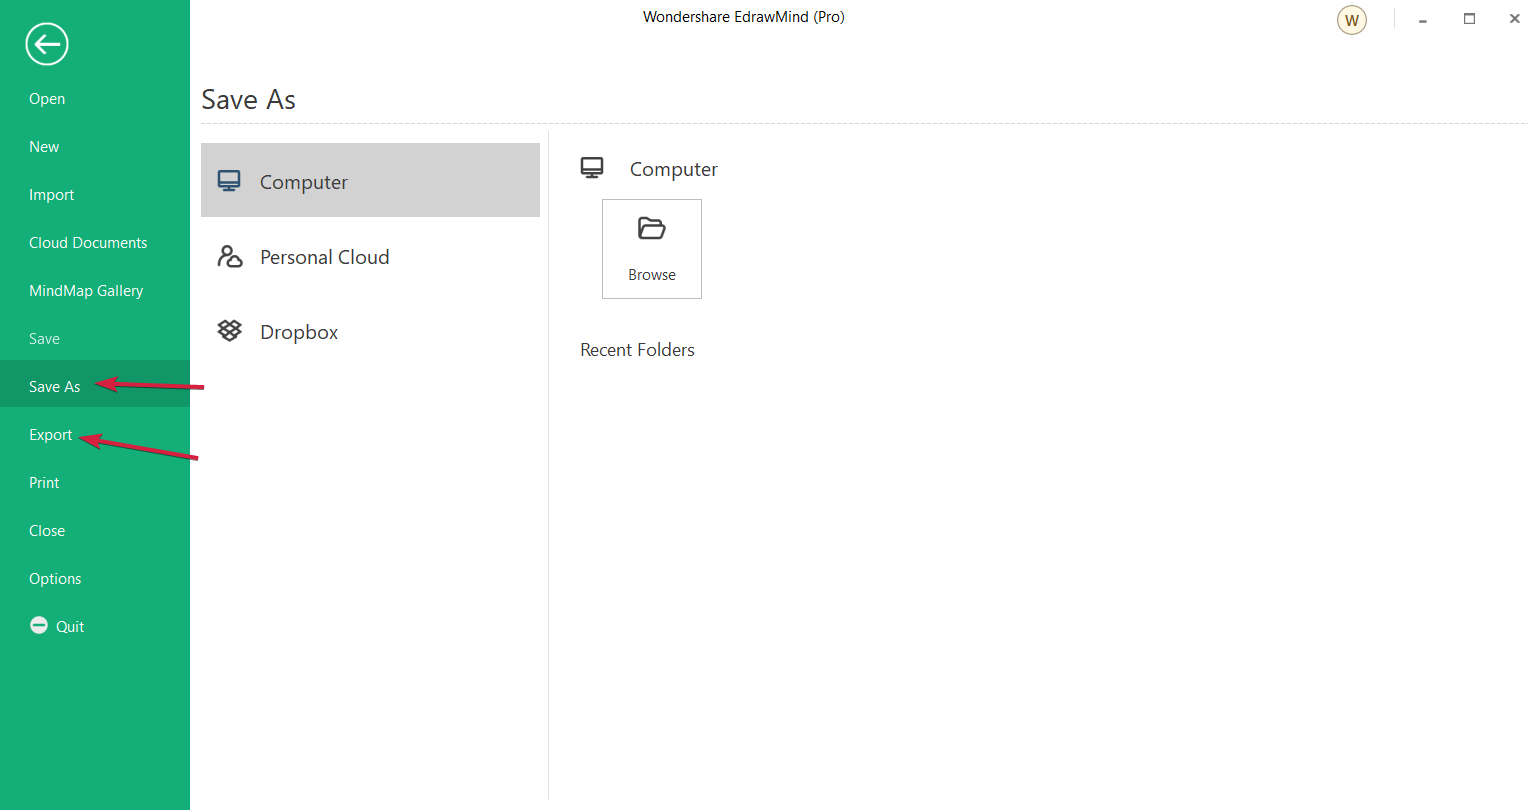
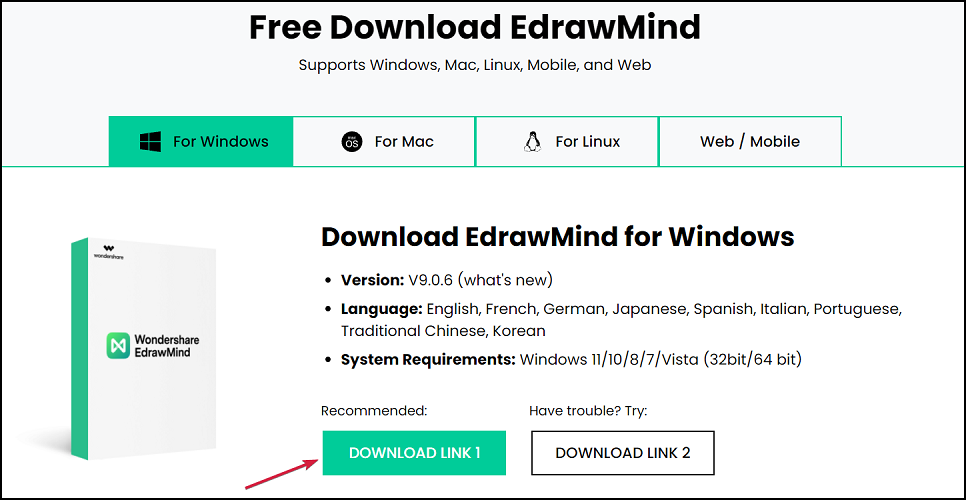


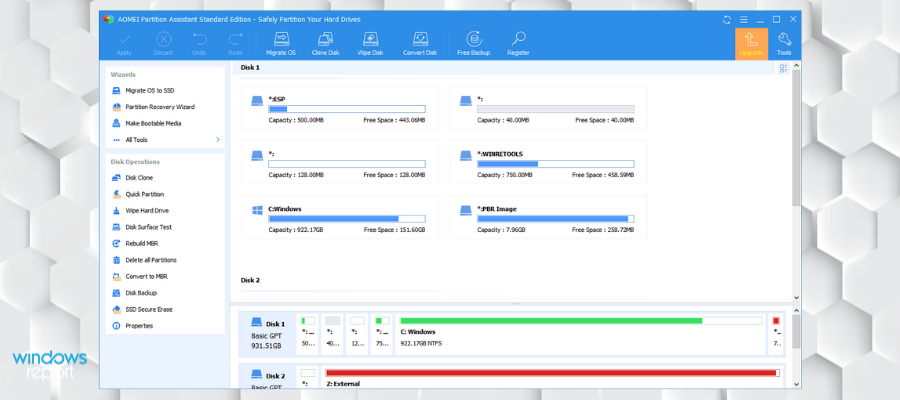

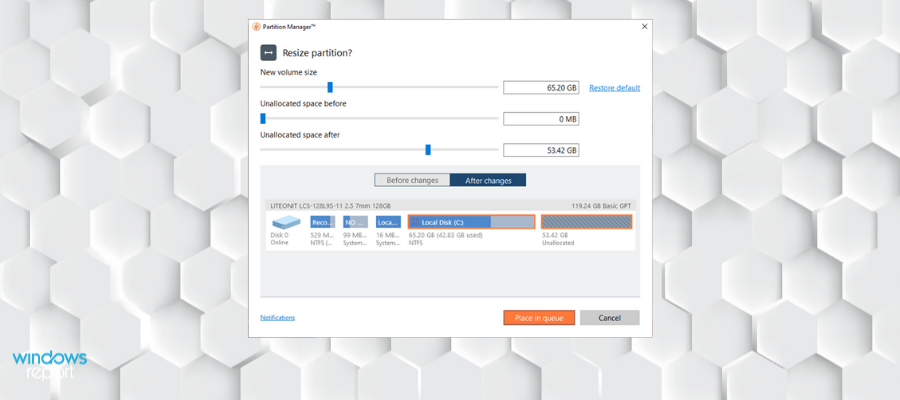

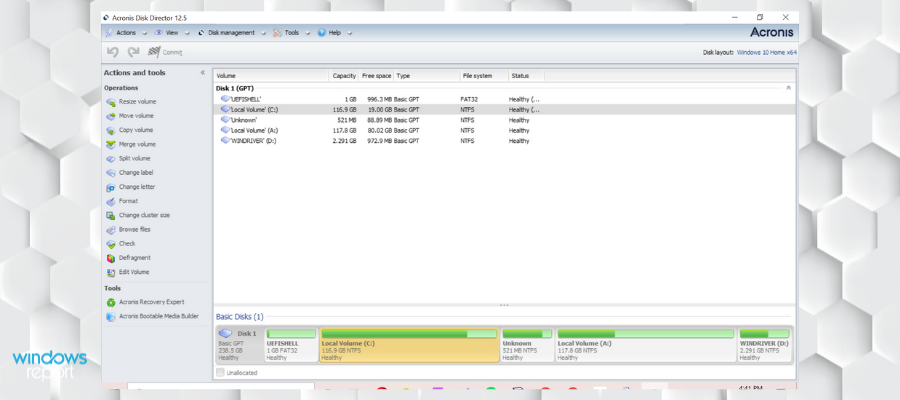


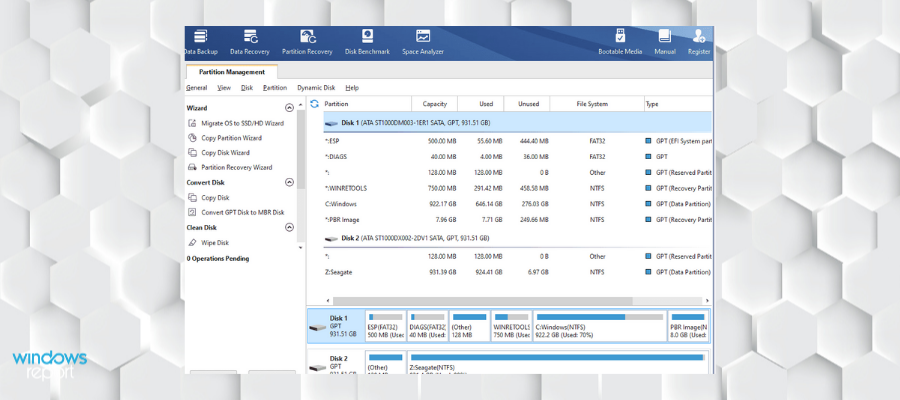

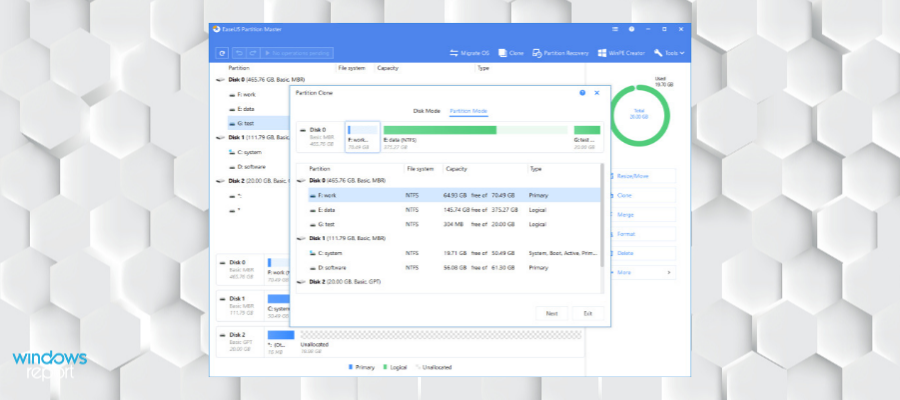
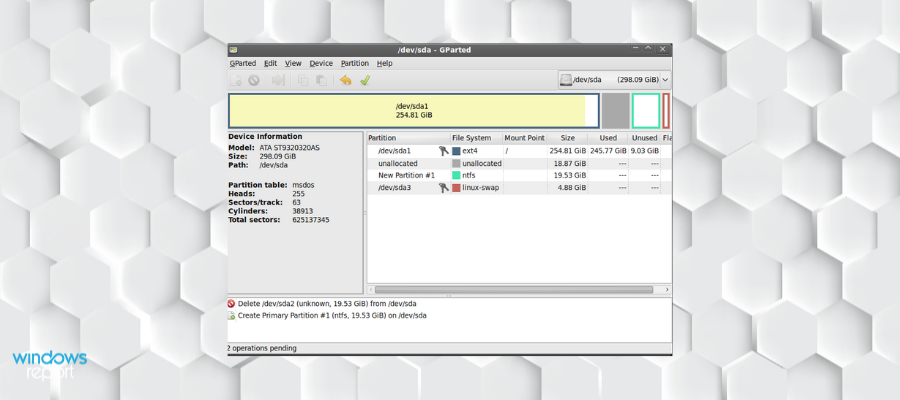




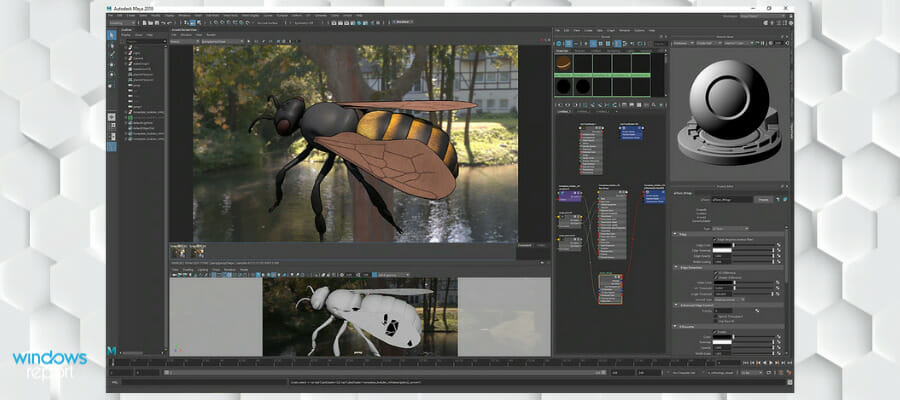


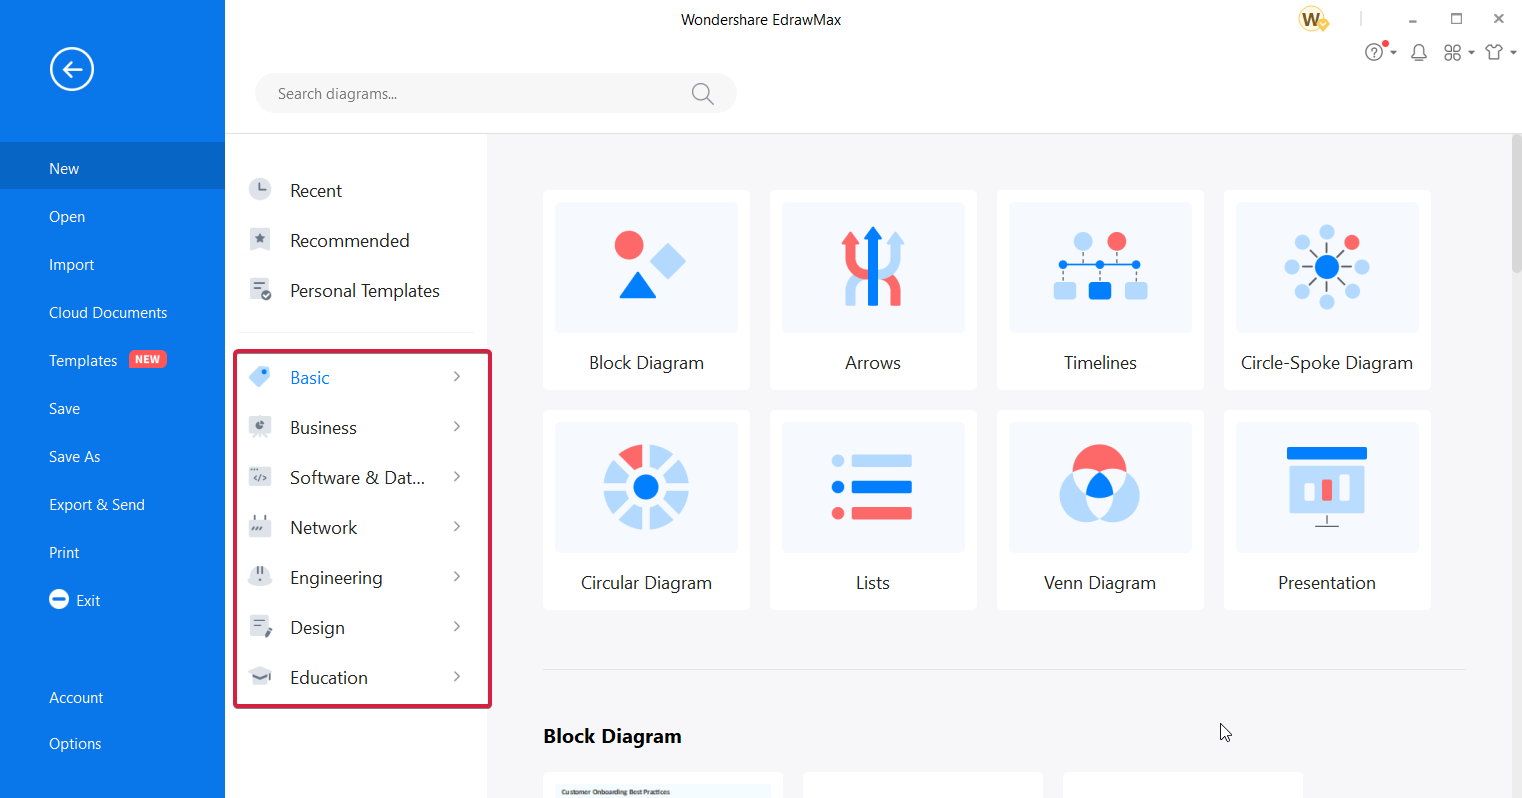

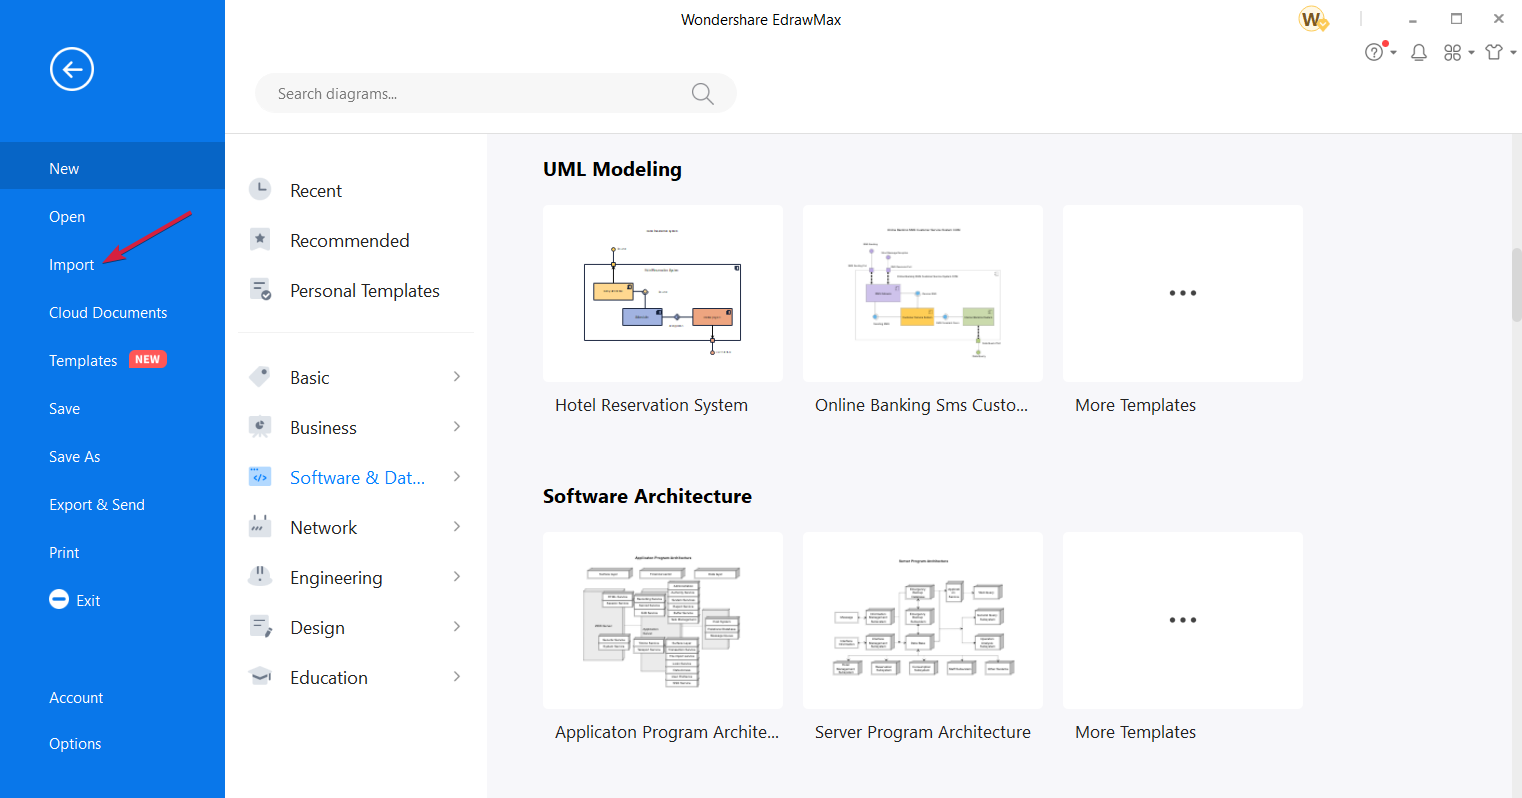
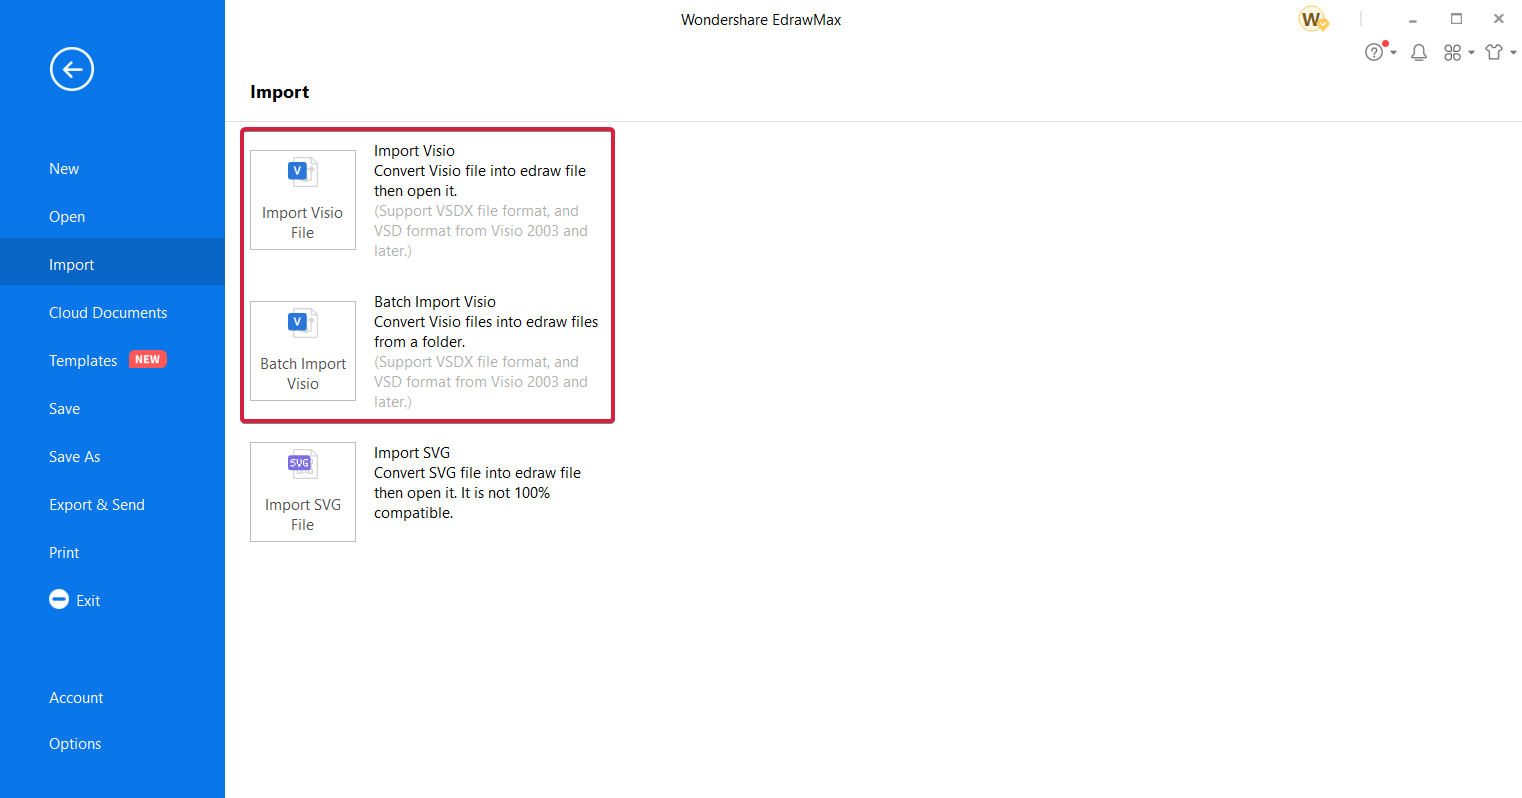
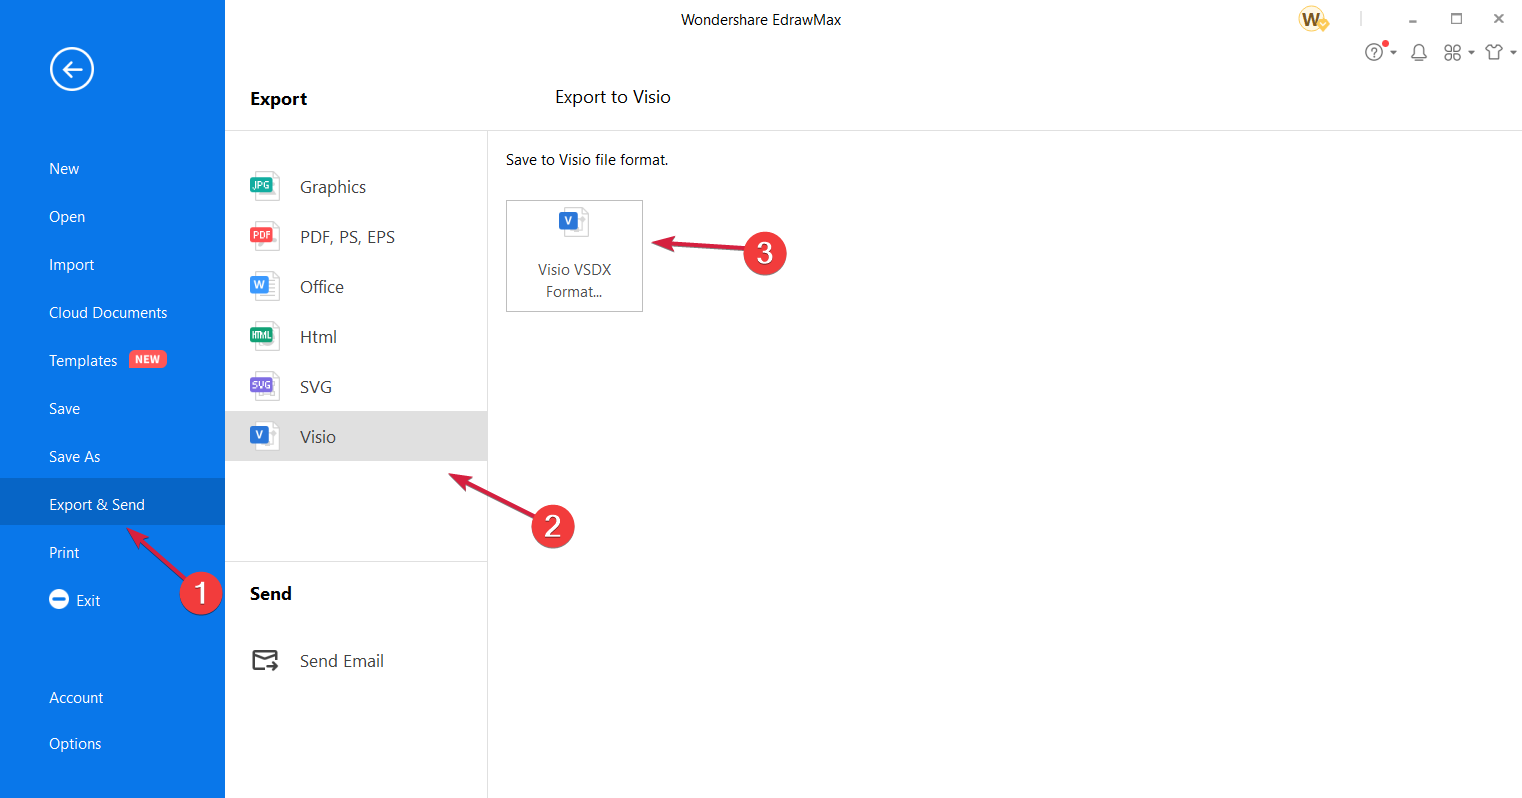
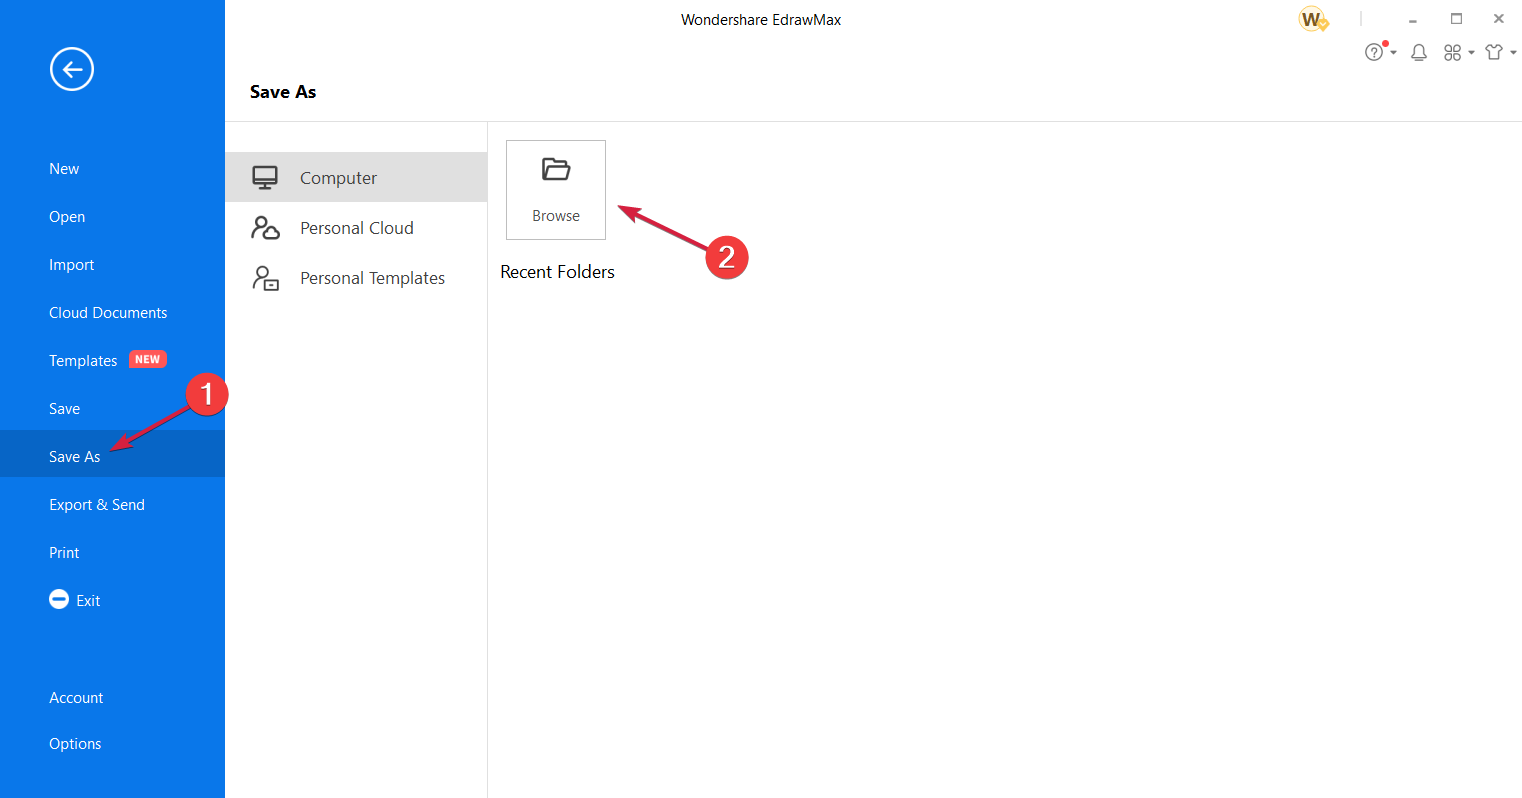
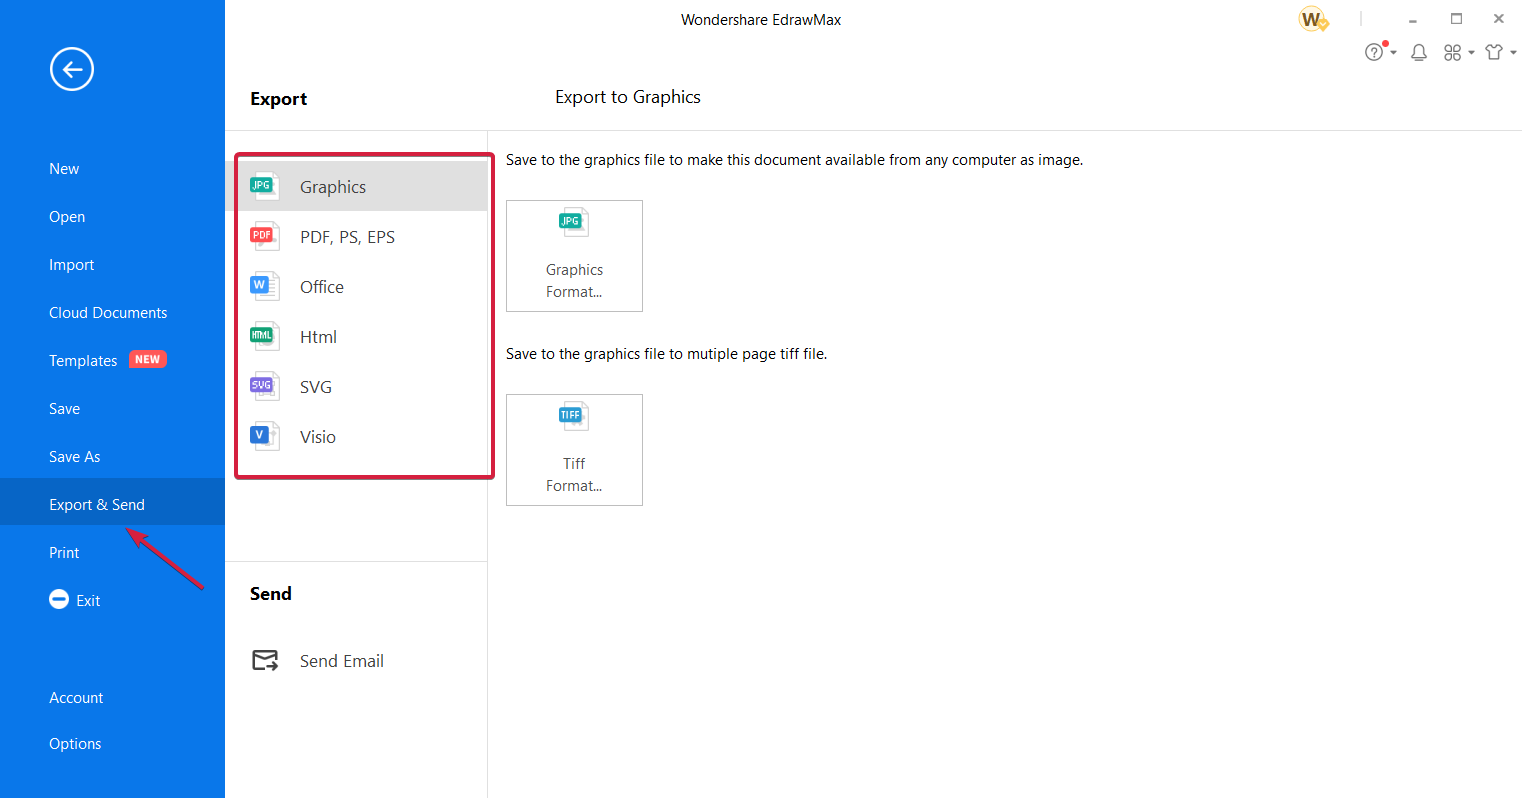





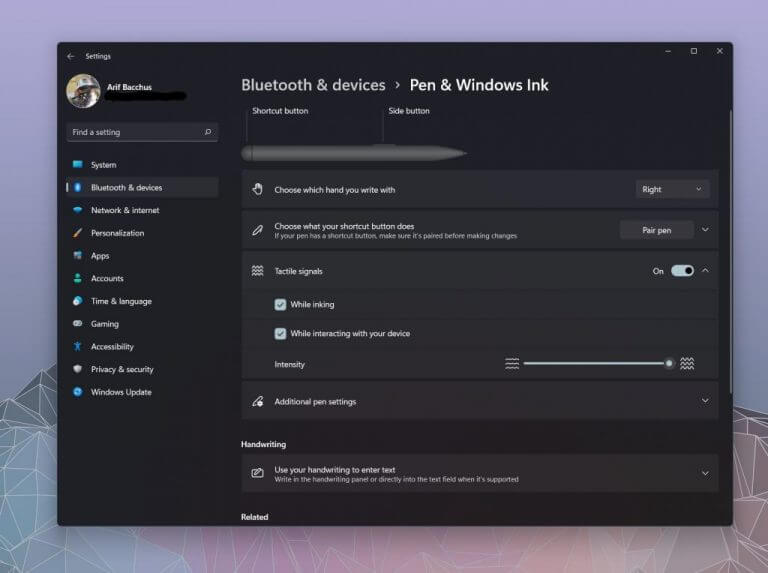
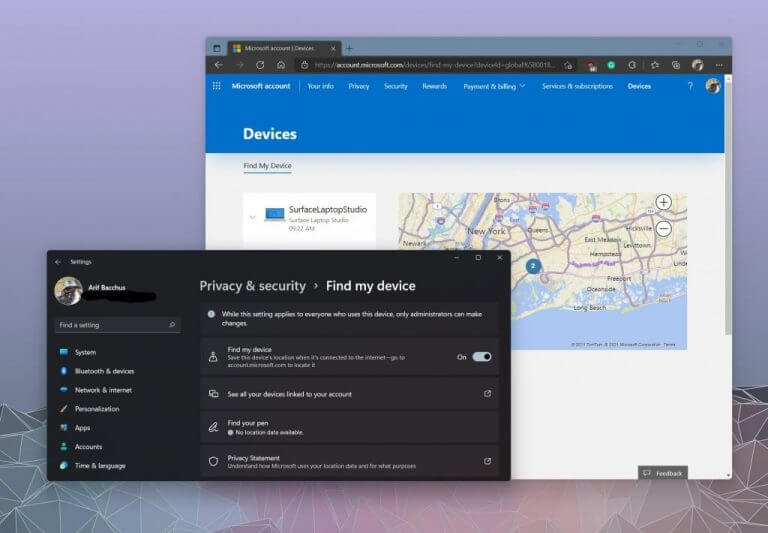
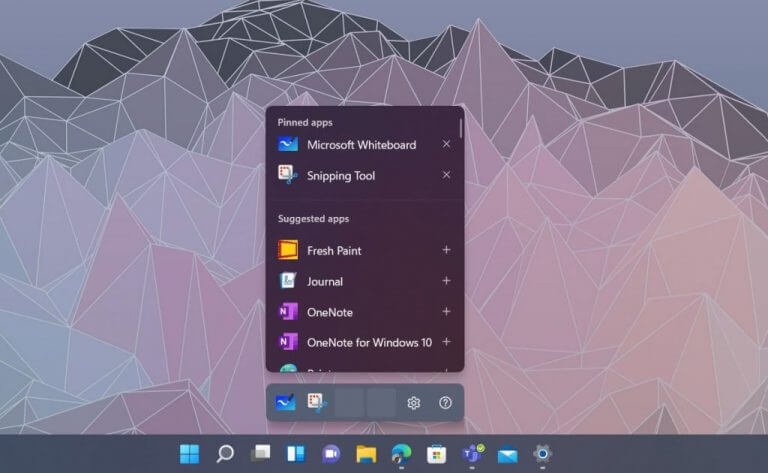
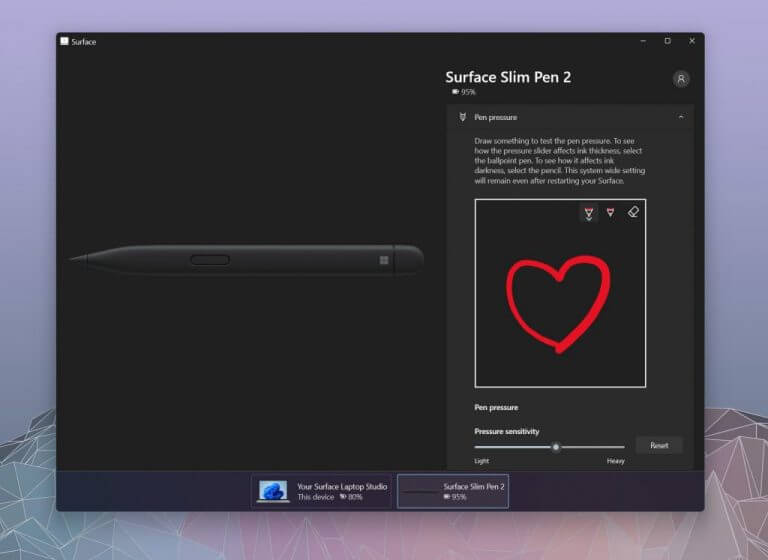
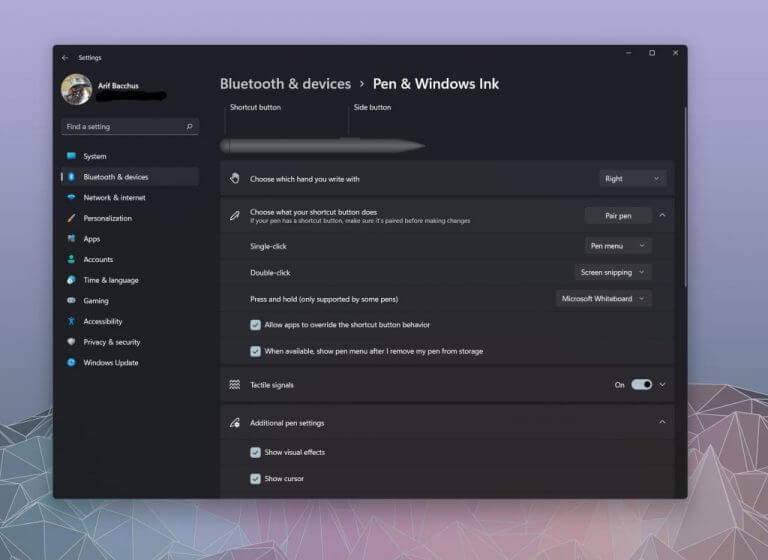












![FPS Counter for PC [7 Best Picks for 2026]](https://windowsreport.com/wp-content/uploads/2020/03/Gaming.jpg)