Fix: Slack Notifications Not Working on Windows 11

Slack is among the most popular messaging apps that many organizations use to collaborate with team members. Many readers have complained about Slack notifications not working on Windows 11, which could result from incorrect app settings or corrupted cache data.

Before starting with the detailed troubleshooting steps, ensure you have not turned on Do not Disturb mode on your computer, restart it, and then check Slack’s server status.

How can I fix Slack Notifications Not Working on Windows 11?

1. Check the settings for Notifications

  1. Press Windows + I to open the Settings app.
  2. Go to System, then select Notifications.System - Notifications - slack notifications not working windows 11
  3. Locate Notifications from apps and other senders, and look for Slack.Slack - Notifications
  4. Ensure the toggle button is turned on for Slack to get notifications.

You also need to check the Notifications settings in Slack as well; follow these steps to do so:

  1. Press the Windows key, type slack, and click Open.Slack  start menu - slack notifications not working windows 11
  2. Click your Profile picture from the bottom left corner and select Preferences.Preferences - Profile picture
  3. Go to Notifications, locate Notify me about, and choose from All new messages and Direct messages, mentions & keywords.Notifications -
  4. Make sure Nothing is not selected.

2. Disable Do Not Disturb mode on Slack

  1. Press the Windows key, type slack in the search box, and click Open.Slack  start menu - slack notifications not working windows 11
  2. Click your Profile picture from the bottom left corner, and hover over Pause notifications.Resume notifications - Slack  start menu - slack notifications not working windows 11
  3. Select Resume notifications.
  4. You can also hover over Adjust time to select another time frame.Adjust time

3. Disable Focus Assist settings

  1. Press Windows + I to open the Settings app.
  2. Go to System, then select Focus.System - Focus - slack notifications not working windows 11
  3. Ensure there is no Focus session running.Focus session

4. Clear cache from the app

  1. Press the Windows key, type slack in the search box, and click Open.Slack start menu - slack notifications not working windows 11
  2. Click on the hamburger menu from the top left corner.
  3. From the context menu, select Help, then Troubleshooting, followed by Clear Cache and Restart.Clear cache and restart
  4. The cache data will be cleared,, and Slack will restart automatically.

Are you not able to send messages via Slack? It could be a server issue or a corrupted app cache; you can remove the cache; for more details, read this guide.

5. Reset the app data

  1. Press the Windows key, type slack in the search box, and click Open.Slack start menu - slack notifications not working windows 11
  2. Click on the hamburger menu from the top left corner.
  3. From the context menu, select Help, then Troubleshooting, followed by Reset App Data.Reset app
  4. The app data will be cleared, and Slack will restart automatically.

6. Update or reinstall the app

  1. Press the Windows key, type slack in the search box and click Open.Slack start menu - slack notifications not working windows 11
  2. Click on the hamburger menu from the top left corner.
  3. From the context menu, select Help, and click Check for Updates. If there is an update available, it will download and upgrade the app to the latest version.Check for updates

If the app is already updated to the latest version, you can try reinstalling it to fix the issue. For that, follow these steps:

  1. Press Windows + I to open the Settings app.
  2. Go to Apps, then select Installed apps.Apps - Installed apps - slack notifications not working windows 11
  3. Locate Slack and click the three-dot icon, then select Uninstall.Slack - Uninstall
  4. Follow the on-screen instructions to complete the process.
  5. Once done, head to Slack’s official website and click Download. You can also download the app from Microsoft Store; here is how.
  6. Double-click the downloaded file and follow the on-screen instructions to complete the installation.

If nothing has helped you so far, you need to leave a message on Slack’s help center to get further assistance. Make sure you mention the problem in detail, along with the steps you took.

If Slack gets stuck while uploading a file, the cause could be corrupted app data or outdated browser cookies; read this guide to learn more.

If you have any other questions or suggestions about Slack notifications not working on Windows 11, feel free to leave them in the comments section below.

The frustrating Xbox One issue that prevented the console from updating is finally fixed

If you’ve been unable to update your Xbox One console properly, you should know you’re not the only one. Many other Xbox fans were also scratching their heads at this problem.

Some even questioned if their trusted gaming systems would end up as costly decorations on top shelves or expensive paperweights. However, Microsoft saved the day by solving a strange issue that prevented these consoles from updating if they used software before November 2018. It’s a relief.

The Xbox team member Jason Ronald posted this positive information on his social media. He expressed gratitude to DigitalFoundry for bringing it up.

Now, all those users who couldn’t update their Xbox One can resume playing without difficulties; online functions like digital buys and multiplayer games can all be used just like before. This issue appeared to be related to the original Xbox One models. The smoother One S and the advanced One X versions passed without any problem.

In other news, Microsoft has also closed down the digital marketplace for Xbox 360. New games cannot be purchased anymore, but your current collection is secure. Additionally, Xbox One/Series owners can still get backward-compatible 360 titles.

Microsoft Planner Notifications Not Working: 3 Ways to Fix

Dealing with Microsoft Planner notifications not working can be quite frustrating, especially when you’re relying on them to stay on top of tasks and deadlines. Let’s go through some effective solutions to get those notifications back on track.

Why am I not getting Planner notifications in Teams?

This happens if notifications aren’t properly configured, or if you’re not a member of a group or a plan.

What can I do if Microsoft Planner notifications are not working?

Before starting, ensure that you’re assigned to a group or a plan since guest users can’t receive notifications. Sometimes, you just need to comment on the task to start receiving notifications.

1. Turn on planner assignment notifications in Teams

  1. Ensure that the Planner app is installed within Teams and that your plan has a tab in Teams.
  2. Go to the Planner website.
  3. Select the Settings button (gear icon) near the top right of the screen.
  4. In the Settings menu, choose Notifications.
  5. Check the box next to Someone assigns a task to me.
    someone assigns a task to me

2. Check the send notifications option

  1. Navigate to the Planner website and open Settings.
  2. Make sure the box next to Send notifications about task assignments and Task completion to the Plan’s conversation feed is checked.
    send notifications about task assignment
  3. Save changes.

3. Enable email settings

  1. Go Planner web version.
  2. Go to the specific plan for which you want to enable email settings.
  3. Select Plan settings by clicking the three dots (ellipses) next to the plan name.
  4. Check the box that says, Send email to the group when a task is assigned or completed.
    send email to group when task is assigned or completed

By following these solutions, you should be able to resolve most issues related to Microsoft Planner notifications not working, ensuring better task management and team coordination.

Unfortunately, this isn’t the only problem you can encounter, and many reported that Microsoft Planner is not saving comments.

Some users even reported that Microsoft Planner is not working at all or that Planner isn’t showing in Teams, but we tackled these issues in our previous guides. Moreover, you can check out alternatives if Planner doesn’t suit you completely.

PowerToys 0.83, one of the biggest updates in a while, brings many quality-of-life changes to Windows users

Microsoft recently released PowerToys 0.83, an update that brings dozens of capabilities and features to Windows 10 and 11 users. It includes a critical revamp for the Awake tool, plus enhancements to various modules.

The Awake tool underwent some quality-of-life changes. It now adjusts its tray icon according to the mode, making it more straightforward for users to notice if their PC is set to stay awake or not. Additionally, you can find fresh general Group Policy Object (GPO) policies and Mouse Without Borders updates, guaranteeing that all your settings are set to meet specific requirements.

Not only this, but there is also better stability everywhere. One example is that the CSV parser in the Advanced Paste feature now accepts double quotes and escape delimiters when pasting as JSON; it’s a great help for those who handle data.

And for people who utilize the Color Picker, they can now go through color history by scrolling mouse wheel. This makes it faster and simpler to discover the shade you require.

The File Explorer add-ons have also been given attention, allowing for copying from the right-click menu in Monaco and Markdown previewers. And if you ever encountered a crash because there were too many entries in File Locksmith, now it is fixed: when you click on an open file of a process to lock or unlock it, this action moves that opened file to another dialog box.

Another feature is stopping a transparency fix code from executing on Windows 10 so as not to create visual errors. An addition involves setting up settings to adjust how the “First week of the year” and “First day of the week” calculations work within the DateTime plugin. Lastly, Quick Accent now allows the use of the Bulgarian character set.

The PowerToys team also released a hotfix for the user-scope installer path issue from 0.82. Mouse Without Borders also received some changes, like disabling non-supported options in the old UI and new GPO policies to control the use of certain features.

The PowerToys 0.83 update can now be downloaded from GitHub and Microsoft Store.

You can also check the full update log on GitHub.

Microsoft enhances Windows 11’s taskbar with the option to display seconds

Have you ever noticed the clock on your Windows 11 taskbar and thought, “It would be nice if I could see the seconds, too?” If so, Microsoft has heard you. They have made a small change that has sparked quite some conversation.

Not going too far into the registry or dealing with a bunch of settings, getting this ticking second feature is quite simple now due to an update that has been made.

But there’s one thing: they have changed where you find them. Now, go to Settings > Time & Language > Time & date, and you can enable ticking seconds there. That makes sense.

Microsoft didn’t make a big deal out of it. They put the update in Windows 11 Insider Preview build notes. This method might appear a little sneaky to those who prefer straightforward everything, but don’t worry; it’s still available and more accessible to locate. Here’s what Microsoft has to say:

[ADDED 7/29] The setting to show seconds in the system tray clock has moved to Settings > Time & language > Time & date under “Show time and date in the system tray”.

Nevertheless, you should know that activating those seconds on your Windows 11 taskbar could slightly reduce your battery power. It’s a 1.9% decrease from a tiny test one year ago. It’s not too concerning, but it’s good to remember.

In other news, Microsoft is working to make Windows 11 easy for users. The Settings application now includes choices to turn off mouse acceleration and modify scroll direction. Users will no longer need to explore the system’s hidden parts to adjust these settings.

How To Send Multiple Pictures in an Email Easily

Want to know how to send multiple pictures in an email? It’s a convenient way to share memories, documents, or important visuals with friends, family, or colleagues. Whether you’re using a desktop or a mobile app, it’s pretty straightforward.

I’ll show you a few different methods below, so let’s jump right in!

How To Send Multiple Pictures in an Email on Desktop

You can send several photos in an email through a zipped folder or individually.

Send as a Zipped Folder

Here are the steps:

  1. Select all the pictures you want.
Select pictures
  1. Right-click on them, tap Send to and select the compressed (zipped) folder.
Compressed (zipped) folder.
  1. Name it and hit Enter.
Name the Zipped folder
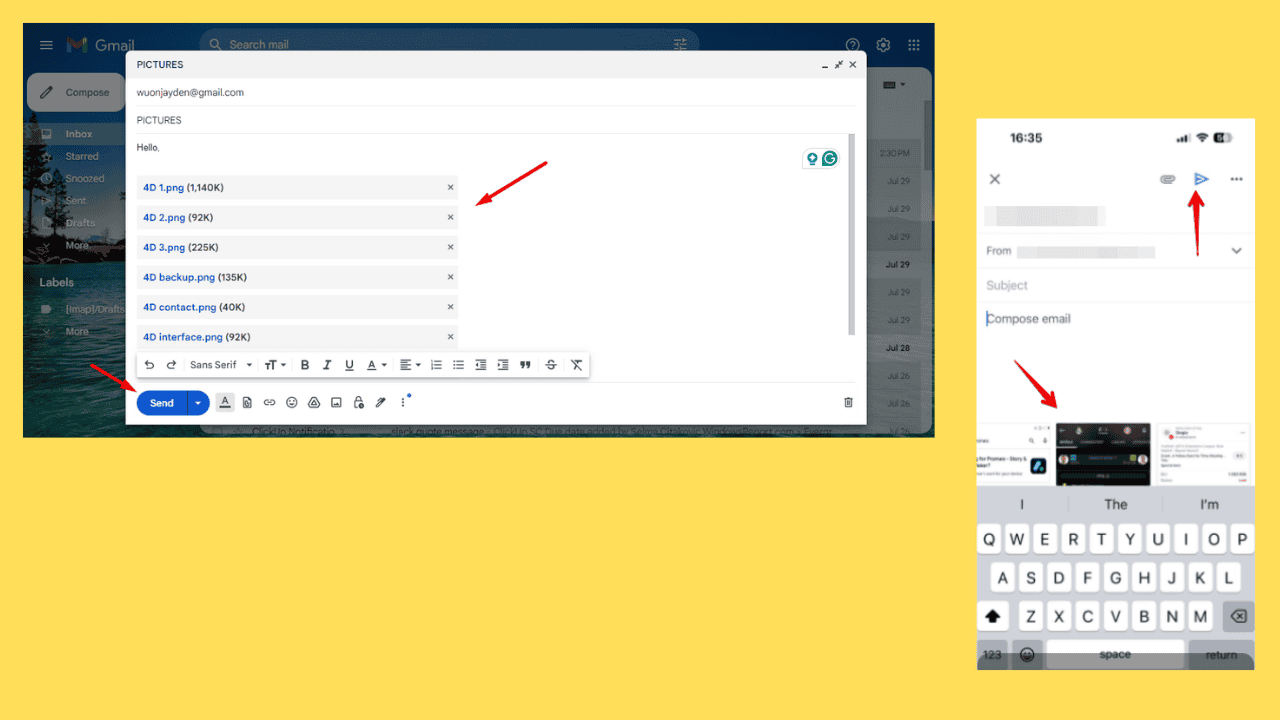
  1. Open Gmail and click on “Compose” to start a new email.
Compose email
  1. Click on the “Attach files” button (paperclip icon).
Paperclip icon
  1. Select the zipped folder or enter the name, then hit Open.
Select the Zipped folder
  1. The folder will be automatically attached to your new email draft. Tap Send.
Pictures will be attached

Send Multiple Individual Photos

Follow the below steps:

  1. Open Gmail and click on “Compose” to start a new email.
  2. Click on the “Attach files” button (paperclip icon).
  3. Long press Ctrl and tap on the pictures you want to send. Click “Open” to attach them to your email.
Select the pictures
  1. Now, hit send.
Photos attached

How To Send Multiple Pictures in an Email on Mobile

Alternatively, you can also use your phone for this. Here are the two methods:

Follow the below steps:

  1. Select the pictures you want to send. Most gallery apps allow you to select multiple photos by long-pressing one photo and tapping on the others.
Select photos
  1. Tap the “Share” icon and choose your Gmail from the sharing options.
Tap the Share button
  1. The selected pictures will be automatically attached to a new email draft. Add recipient and subject, and tap Send.
Tap send

Send Directly from Email

Here’s what to do:

  1. Open your email client app and tap Compose.
Compose email
  1. Tap the attachment icon (paperclip sign). It might appear at the top or the bottom of the screen.
Tap the attachment icon
  1. Long-press on one photo to select it, then tap the rest that you want to send. Tap Insert.
Select photos
  1. Your pictures will be attached to your draft. Tap Send.
Send

So, now you know how to send multiple pictures in an email. Whether you’re sharing vacation photos, work-related images, or something else, your recipients will receive everything you intend to share. Additionally, if you want to send group emails on Gmail and Outlook, we’ve got you covered.

Microsoft Planner Not Saving Comments: 4 Ways to Fix it

Struggling with Microsoft Planner not saving your comments can be incredibly frustrating, especially when you’re trying to keep your team on the same page. However, this can be easily fixed with our solutions.

What can I do if Microsoft Planner is not saving comments?

Before trying anything else, try using a different browser. Also, ensure that your Exchange Online is used for your email accounts. Lastly, avoid using From: and Sent: email headers in comments.

1. Change Email rules

  1. Select the desired rule and choose Edit rule conditions.
  2. Select Except if. Then choose the Message header. Select Matches these text patterns.
    except if conditions
  3. Click on Enter text and enter X-MS-TrafficTypeDiagnostic Word/Phrase and EE_PlannerComment.
  4. Save the condition.

Sometimes a different rule can cause the problem so to find the cause go to Exchange Admin Center and choose Mail Flow. Select Message Trace. Check the trace log for errors when sending messages.

2. Assign the task and reopen

  1. Go to your Microsoft Planner and open the relevant task.
  2. Assign the task to a member by clicking on the Assign button and selecting a user.
    assign task microsoft planner
  3. Close the task by clicking outside of it or the X button.
  4. Reopen the task to check if the comments are now visible.

3. Check Team Email settings

  1. Go to the Exchange Admin Portal.
  2. Navigate to Groups and search for your team name.
    groups exchange admin
  3. Click on Settings and then Edit Delivery Management.
    delivery management
  4. Ensure that the email address associated with the team is not restricted from sending emails.

When the team is created a new email is created as well for sending comments, so ensure that team members can access it.

4. Add a Dummy User

  1. Go to your Office 365 Admin panel.
  2. Add a new user with an A1 license (or any available free license).
  3. Add this dummy user to your team in Microsoft Planner.
  4. Try adding comments again.

Where are Microsoft Planner comments stored?

All task comments are stored in a group mailbox that is associated with the plan. Each task has its email thread.

These are a couple of solutions that should help you if Microsoft Planner is not saving comments. Keep in mind that this service can experience other issues, and many reported that Microsoft Planner is not working as well as that Planner notifications aren’t working.

This isn’t the only service that can experience issues, and in the past, we already wrote about what to do if Microsoft Teams is not working or if Planner isn’t showing in Teams, so don’t miss it.

Windows on Arm now supports Adobe Illustrator, and there is a beta for it if you want to join

According to the latest reports, Adobe Illustrator now natively supports Windows on ARM devices. Users of gadgets such as Surface Pro 11 or Laptop 7 will find this very exciting since they can now access Adobe Illustrator in its beta version straight from their machines.

Adobe Illustrator, if you are not aware, is a key tool in image editing, particularly for scalable vector graphics. Its availability on Windows on ARM implies that the main Creative Cloud applications are nearly fully transitioned for this architecture – Photoshop and Lightroom (already ARM-native) and now Illustrator.

The last big name missing from this list is Premiere Pro but there have been hints about an ARM-native version coming soon too.

But why does it matter? It improves performance and efficiency noticeably because running apps natively on ARM devices is faster than doing it through emulation. This speed increase can be significant for creative professionals who need every second of processing power they have available to them.

Additionally, Adobe is launching a beta version, which means users can try out the app and contribute to its enhancement. Still, some unfinished details might be present at this point.

The big picture in this situation is the growing interest in Windows on ARM. When Adobe Illustrator also becomes available, it shows developers and users that ARM-based Windows PCs are an effective choice. Moreover, apps such as DaVinci Resolve 19 and Slack update with native ARM support enhance the environment.

The method for seeing if an app is running natively or in emulation is also simple. Open Task Manager, go to the Details tab and look at the Architecture column. This quick check will determine which essential apps are fully optimized for your ARM device.

The fact that Adobe Illustrator now offers ARM-native support shows a positive trend towards ARM compatibility for heavier applications and probably other software. This indicates that the appeal of using an ARM-based PC will keep increasing as these big-name programs start to fully exploit its benefits.

How To Leave a Slack Channel (Mobile & Desktop Guide)

Wondering how to leave a Slack channel? If you find yourself in spaces that no longer serve your interests or workload, just leave them. That way, you can reduce clutter or focus on more relevant discussions.

I’ll show you the ropes below, so let’s get started!

How to Leave a Slack Channel

You can do it on your desktop or mobile app. Here are the steps for each:

On Desktop

Follow these steps:

  1. Open Slack and select the channel you want to leave.
Slack channels
  1. After selecting the channel, tap on the name.
Channel name
  1. Scroll down in the dropdown menu and click on “Leave Channel.”
Leave channel

Please note that when you leave a private channel, you’ll no longer see its messages and files in your search results. To rejoin it and be active again, another member will need to add you back.

On Mobile

Here are the steps:

  1. Launch the Slack app on your mobile device.
  2. Tap on the channel you wish to leave.
Channels
  1. Click the name of the channel on top.
Channel name
  1. Scroll down and select “Leave Channel” from the options provided.
Leave channel

Need to leave the entire team instead? Read our guide on how to leave a Slack workspace.

So, now you know how to leave a Slack channel and stay focused on what matters the most. Whether you’re streamlining your workspace or refining your communication flow, you can now rest easy. You can also log out whenever you want.

Moreover, you can learn how to create a shared channel, change your email, or delete or archive old ones thanks to our guides.

Intel announces new Lunar Lake Core Ultra CPUs, as direct competition to AMD and Qualcomm

On September 3rd, Intel will launch its “Lunar Lake” Core Ultra CPUs with a presentation at the upcoming IFA event. These new chips are made specifically for laptops and are seen as a direct competition with AMD and Qualcomm products.

According to the official press release, Intel promises that these chips will do things no other processor can do before them, pushing the limits of what we thought was possible in this technology area. Intel’s announcement mentioned showing off the processors’ excellent power efficiency, core performance, and progress in graphics plus AI computing power at the upcoming event.

During the livestreamed event, they will reveal details on the new processors’ breakthrough x86 power efficiency, exceptional core performance, massive leaps in graphics performance and the unmatched AI computing power that will drive this and future generations of Intel products.

With the new Core Ultra processors, Intel and Microsoft could team up for the Copilot+ PC devices that mix artificial intelligence (AI) characteristics into ultraportable laptops. The tech industry expects roughly 80 Windows laptops to have these next-gen CPUs before 2024 ends, and many might sport the new Intel gear.

Let’s not forget about the delayed start of the Recall feature in Copilot+ PCs. This has been put off because of worries related to security.

The Recall function takes pictures of your screen every few seconds so you can find them later quickly, which has caused surprise and made people ask when it will be used or at all.

Call of Duty’s Caldera map is now open-source and available to download

Activision, the gaming giant, has decided to open up one of its most precious assets—the Caldera map from Call of Duty: Warzone—as an open source. Think about possessing a AAA game map that can be studied, comprehended, and even altered. That’s precisely what’s on offer here.

What’s the fuss about this Caldera map? It’s not a simple map initially. It is somewhat like an elaborate landscape that has functioned as the fighting area for innumerable players. It is currently distributed in OpenUSD format with its near-complete geometry and a subset of anonymized player movement data.

According to the official announcement, this gift isn’t only for those learning to make games; it also includes lots of information that academic researchers and AI enthusiasts can find helpful. The dataset is extensive – weighing around 4 GB – holding over five million meshes and one billion-point instances.

This first-of-its-kind data set release for Call of Duty, now available in OpenUSD, contains the near-complete geometry of Caldera as well as a collection of randomly selected anonymized time samples showing how players move around the map. This initiative represents Activision’s commitment to innovation and growth in multiple fields, including AI learning, within the communities of academia and research, while propelling the advancement of game development. It brings to life the colossal and carefully crafted map that was home to many epic brawls in Call of Duty: Warzone and is production-proven and battle-tested.

For game designers—those starting out or already established in their field—it allows them to observe how a high-quality game map is constructed. You may dive into the geometry, comprehend the arrangement, and possibly utilize it as a base for your undertakings.

The data on player movement could lead to fresh research paths in studying game design and players’ behavior. What elements create an exciting map? How do players move through complex worlds? These types of inquiries can be explored extensively.

There is also the AI part. The gaming industry is always working on advancing AI, and having a dataset like this could be extremely useful for creating more brilliant game characters. It offers a detailed environment to train AI models, which might make game artificial intelligence more intelligent and reactive.

Moreover, it serves as an excellent aid for those developing algorithms related to spatial navigation. Also, people studying how AI can interact with intricate 3D surroundings will find this tool very useful.

Activision’s choice to make Call of Duty’s Caldera map available as open-source is audacious and more than welcome in the gaming community. Plus, it’s on GitHub and available to download and dissect.

If you develop games, are a researcher, or are simply interested, the Caldera dataset has something special for everyone. This could be an extraordinary chance for you to study, try new things, and possibly assist in creating the next significant advancement in game design or AI exploration.

The Surface Laptop 3, released in 2019, officially reached its end of support

Surface Laptop 3 has reached the end of support for AMD and Intel varieties of this much-loved device, including those in 13-inch and 15-inch sizes. No more firmware and driver updates will be supplied now—these are important for fixing security problems and enhancing hardware performances, among other things.

Released with great excitement in October 2019, the Surface Laptop 3 was a big move for Microsoft as it included a bigger 15-inch model and AMD processors for the first time in its range. It was quite an improvement, offering noticeable enhancements such as a larger display, faster charging speed, and a more powerful processing unit.

Although it received good appreciation and achieved success, some criticisms were raised about its performance and battery life. If you have a Surface Laptop 3, your device won’t suddenly stop working, but there will be no more new driver updates.

Still, Microsoft will focus on the Surface Laptop 4, assuring new improvements and a support timeline with Windows updates until April 2027.

If you have the model but are thinking about getting a new Surface Laptop, the new ones might be a good idea. They’re very capable and quite sustainable, in the sense that you can repair them very easily.

Microsoft Planner is Not Working: 4 Ways to Fix it

Having trouble with Microsoft Planner not working in Teams or on mobile apps? You’re not alone. Many users face issues with Planner, but there are several methods you can try to get it up and running smoothly again.

What can I do if Microsoft Planner is not working?

Before we try anything else, try using a different network. Sometimes connecting to a different network can help with this issue. Alternatively, try accessing Planner in the browser.

1. Check the service status

  1. Navigate to the Microsoft Service Status page.
  2. Check if all services are properly running.
    microsoft service status
  3. If there’s an issue with Planner or Teams, you’ll have to wait for Microsoft to fix the problem.

2. Quit and Restart Teams

  1. Right-click on the Microsoft Teams icon in the system tray (bottom-right corner of your screen, next to the clock).
  2. Select Quit from the context menu.
    quit teams systray
  3. Open Microsoft Teams again by clicking on its icon on your desktop or searching for Teams in the Start menu.

You can also try logging out and logging back into Teams.

3. Clear Teams Cache

  1. Close Microsoft Teams completely.
  2. Press Win + R to open the Run dialog box.
  3. Type the following and press Enter: %appdata%\Microsoft\Teams
    appdata teams
  4. Delete all files and folders in this directory.
  5. Reopen Microsoft Teams and sign in.

4. Uninstall and Reinstall Teams

  1. Press Win + X and select Apps and Features.
    apps and features menu
  2. Scroll down to find Microsoft Teams in the list of installed applications.
  3. Click on the three dots next to Microsoft Teams and select Uninstall.
    uninstall an app windows 11 settings app
  4. Follow the prompts to complete the uninstallation.
  5. Visit the Microsoft Teams download page and download the latest version.
  6. Install Teams and sign in with your Microsoft 365 credentials.

Following these steps can help you troubleshoot and resolve problems with Microsoft Planner not working in Teams.

This isn’t the only problem, many reported that Teams status is stuck on unknown as well as that Teams keeps restarting.

Users also encountered We’re sorry – we’ve run into an issue, but we have a whole guide dedicated to this problem, so don’t miss it.

Many users also reported that Planner is not showing in Teams, but we have a guide that addresses that.

As for Planner problems, many reported that Microsoft Planner is not showing comments and that notifications in Planner aren’t working but this can be fixed with ease.

Microsoft’s fiscal results for Q4 2026 sees AI, cloud tech, and gaming the most profitable areas

For the Q4 of the 2024 fiscal year, which ended in June, Microsoft announced $64.7 billion in revenue. This is 15% more than the $56.2 billion they made at the same time last year.

And their net income? That went up to $22 billion, a 10% increase from the previous year’s $20.1 billion. Both numbers show Microsoft’s strong performance and exceed the expectations set by financial analysts.

However, not everything was perfect. Even with these prominent figures, Microsoft’s stock suddenly dropped, dropping more than 5% in after-hours trade. The reason for this downturn was pointed towards the firm’s cloud services like Azure; they grew by 29% but didn’t meet the 31% growth that analysts predicted. It is a reminder that even tiny misses can result in significant reactions in the severe game of tech.

But we shouldn’t just focus on the downsides. According to the official announcement, the company’s Productivity and Business Processes divisions, which sell office software, saw revenue rise by 11% to $20.3 billion.

The More Personal Computing division covers Windows, devices, and gaming and was not far off, increasing at 14%, up to $15.9 billion.

Another point to mention was the Xbox revenue, which saw a significant boost of 61% due to the purchase of Activision Blizzard. Nevertheless, it was not entirely positive news because device income decreased by 11%.

What do the results of the 2024 Q4 fiscal year mean for Microsoft? The company is still experiencing strong growth, especially in cloud computing and gaming. Yet, the small cloud revenue growth miss and the subsequent drop in stock price remind us that even tech giants have difficulties keeping up their pace and meeting market expectations.

In the future, Microsoft’s introduction of its consumer Surface Laptop 7 and Surface Pro 11 PCs might change the situation even more. Will these fresh gadgets help compensate for the decrease in device earnings? We can only wait and see, but one fact is particular: Microsoft continues to be an essential part of the technology business, and its actions are always interesting to observe.

You can now organize Tabs into groups using AI in Chrome

Google has recently announced its generative AI features for Chrome browser where you can create themes, get help with writing on the web with Compose feature aka Help Me write feature and organize tabs. Not to forget, History search Powered by AI. The ability to organize tabs using AI from Tab Search is now available in Chrome Canary, here is how you can try it now.

Google Chrome already offers Tab groups on desktop and mobile devices. So organizing tabs into groups has to be done by the user manually. Microsoft Edge already allows organizing similar tabs into groups using AI, Google Chrome also allows to do that, albeit in initial stages and is an “experimental AI” feature.

Like Edge, Google Chrome wants to take the pain out of creating tab groups manually, instead, the browser will auto group similar tabs and even offers suggestions if it can’t find similar tabs group. This neat feature called “Tab Organizer” is available to try out in Chrome Canary with respective flags.

How to enable and use Tab Organizer AI feature in Chrome

  1. Launch the latest Chrome Canary
  2. Visit chrome://flags
  3. Find and enable following flags related to “Tab organization” as well as “Tab reorganization”.
    Tab organization flags in Chrome:
    Tab organization
    Tab Organization Settings Visibility
    Multi Tab Organization
    Tab reorganization flags:
    Tab Reorganization
    Tab Reorganization Divider
  4. Restart Chrome.

When you enable Tab Organization flags, Chrome enables “the Auto Tab Groups feature, which can be found within the Tab Search bubble”, after that, you can find and enable “Tab organizer” under “Experimental AI”. Chrome also offers “multi Tab groups suggestions for multiple tab groups at once”.

Tab orgranization flags. Image Credit: Windows Report

When you enable Tab reorganization flags, Chrome offers “Auto Tab Groups suggestions for adding tabs to existing groups” as well as “Shows a divider in Auto Tab Groups suggestions for existing groups, indicating which tabs in the group are new”.

Tab Reorganization flags. Image Credit: Windows Report

Now, click on the tab search icon on the left which you can move to the right, and click “Organize Tabs”, Chrome organizes tabs into respective groups, else, it offers suggestions to create a group or two from similar tabs it found.

You can also right click on a tab and select “Organize similar tabs”. When Chrome can’t find any similar tabs to groups it asks to refresh or try again later.

Organize similar tabs option. Image credit: Windows Report.
Image Credit: Windows Report

When you try Tab Organizer feature for the first time, Chrome warns the feature uses AI won’t always get it right. Your tabs, page titles and URLs are sent to Google. Like History Search AI feature, the data may be seen by trained reviewers to improve the features, Google cautions.

You can use WinGet 1.8 to download Microsoft Store apps when the platform is not working. Here’s how

Did you ever get stuck trying to download Microsoft Store apps for offline use or maybe need them to distribute across devices in your network? Starting on July 29th, 2024, Windows Package Manager (WinGet) 1.8 is available to save the day for IT professionals and tech enthusiasts.

To begin with, what is WinGet all about? It is a command-line utility crafted to automate the installation and updating of applications on Windows 10 and Windows 11 gadgets. This tool functions with diverse sources, enabling you to easily search for and explore fresh apps. But the real game-changer here is the WinGet Download feature.

WinGet Download takes the stage, allowing you to distribute Microsoft Store apps offline. This is a significant development as it replaces the Microsoft Store for Business Enterprise Offline capability. It simplifies and enhances access to this process. So, how do you begin using WinGet 1.8 to download these applications?

It’s pretty simple. Just make sure you have the most recent WinGet version on your gadget. You can check this by entering the command widget –version in a PowerShell or Command Prompt window. Want to get the latest version? Then, you could download the newest installer or use the command Winget upgrade widget in your command prompt. Additionally, it’s possible to update App Installer via Microsoft Store.

Employ the Winget download directive to get a Microsoft Store application. For example, executing this command: widget download Calculator -s store will download the Calculator app from Microsoft Store. The outcome of running this command is that it makes a new folder in your Downloads directory where you can locate downloaded application package(s). After doing so, you can copy this package to a different device and proceed with the installation, thereby employing the Add-AppxPackage PowerShell cmdlet.

Please review the Windows Package Manager and Winget tool documentation to better understand this.

What do you think about this new method of downloading Microsoft Store apps with WinGet 1.8?

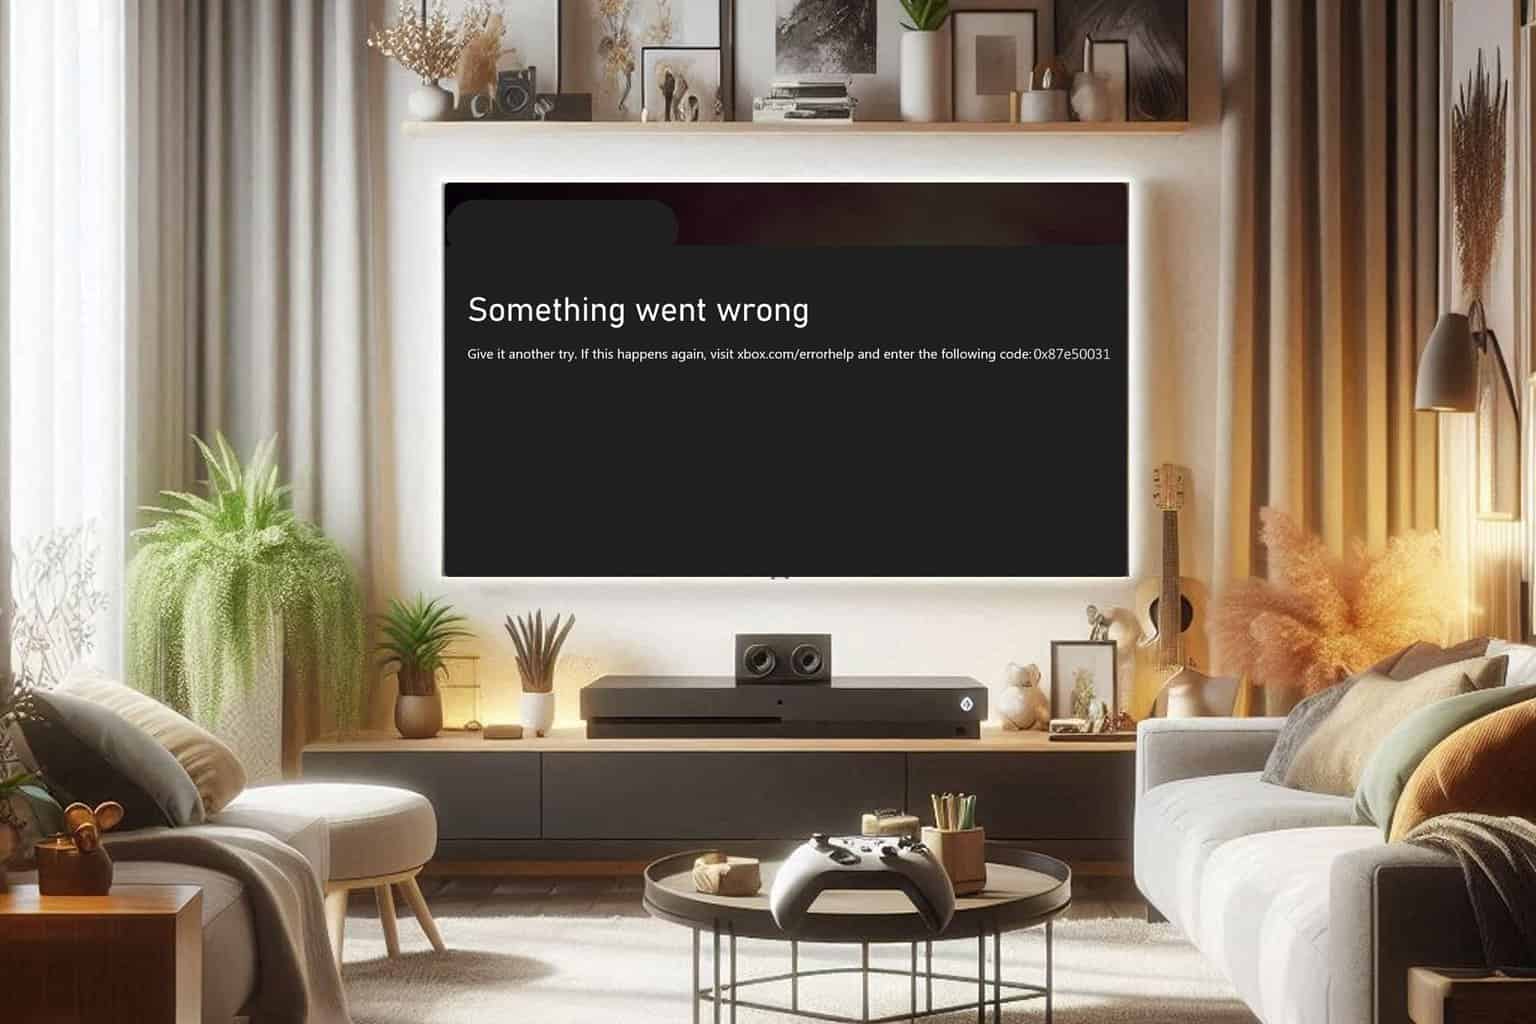
Xbox.com/errorhelp 0x87e50031 Message: How to Fix it

Many users encountered error 0x87e50031 followed by a message to visit xbox.com/errorhelp for more information. This error will prevent you from playing certain games, so you must fix it by following these steps.

How can I fix Xbox error code 0x87e50031?

1. Install the game on internal storage

  1. If you have an external drive connected to the console, disconnect it.
  2. Download the game to the console again.
  3. Connect the hard drive again.
  4. Go to System and select Storage device.
    storage devices xbox
  5. Delete the game from the external drive.
  6. Optional: Move the game to an external drive again.

2. Reinstall the game

  1. Open the Guide and go to My games & apps.
    my games and apps
  2. Choose See all.
    see all xbox games
  3. Select Games from the sidebar.
    games xbox series x
  4. Select the game you want to remove and then press the View button.
  5. Choose Uninstall all.
    uninstall all xbox series x
  6. Once the game is removed, install it again.

Some users are suggesting uninstalling the game while offline or using the disc to install the game, so you can try that as well.

3. Use an alternate MAC address.

  1. Remove the game from your console.
  2. Open Settings on your console.
  3. Choose Network settings.
     network settings xbox
  4. Next, select Advanced settings.
    advanced network settings xbox
  5. After that select Alternate MAC address.
    alternate mac address xbox
  6. Choose Clear and then Generate.
    clear alternate mac address xbox
  7. Restart your console and connect to the Wi-Fi network.
  8. Download the game again.

To learn more, we have a great guide on how to set up alternate MAC address on Xbox, so don’t miss it for more information.

These are just some of the solutions that can help you with the xbox.com/errorhelp 0x87e50031 message. Similar errors such as 0x80270300 have been reported in the past, but we covered them in our older guides.

We also have a guide on Xbox Series X loading issues that can provide you with more useful information.

Microsoft has completely stopped all ads on Skype

After not releasing any build to the Skype Insider Program, Microsoft has released build 8.125, a big patch with even more prominent features.

The new build is now rolling out to users and will revamp Skype’s AI image creation. If you remember, the Redmond-based tech giant not long ago enhanced the platform to allow users to create AI images directly on it.

Now, it seems Microsoft wants to take it to the next level: users can create images within their chat window, and they’ll have several design tweaks to make it easier, as you can see below.

  • Streamlined Access: Easily access the AI image creator from the chat window or the top bar. ?
  • Enhanced UI: Enjoy a more intuitive and visually appealing interface for creating AI images. ✨
  • Improved Image Expansion: Images now expand on click, making it easier to view your creations. ?
  • Better Navigation: Navigate seamlessly with the new back button for the ideas page. ?
  • Optimized Menu Options: The image creator option is now more conveniently placed after the forward option in the message context menu. ?
  • Consistent Margins: Fixed margin inconsistencies in the image creator on macOS for a consistent design. ?️

However, one of the most important updates coming with this build is the ad-free experience on Skype. Yes, you read that well. Skype will no longer have ads. Microsoft is stopping all the ads from all Skype channels and the entire Skype platform.

  • Ad-Free Channels: Enjoy uninterrupted browsing and communication in all your favorite Skype channels. ?️
  • Seamless Conversations: Focus on your chats without any ad distractions, making your Skype experience cleaner and more user-friendly. ?
  • User-Centric Design: We’ve prioritized your feedback to create a more streamlined and pleasant environment across all platforms. ?

Plus, as the last new capability of build 8.125, all iOS users can sign in with OneAuth on Skype. Alongside stopping the ads on Skype, the Redmond-based tech giant also fixed some frustrating issues regarding the platform’s problems with connecting to 5G networks.

You can read the official changelog here.

Microsoft updated Windows Admin Center v2’s public preview build

Have you heard about the latest buzz in the tech world? Windows Admin Center v2 just rolled out a new public preview update, and it’s packed with features that are bound to make IT admins’ lives a bit easier.

Since its initial release in 2018, Microsoft has been trying to revamp this handy app, the “Modernized Gateway,” to manage Windows PCs and services more efficiently. They recently announced the availability of a new build for public preview.

However, due to its preview nature, Microsoft advises against installing this build in production environments. This new version isn’t compatible with the previously available Windows Admin Center version 2311 or any previous versions.

So, what’s new in this update? According to the blog post, a backend shift from .NET Core 6 to .NET Core 8 promises enhanced security and performance. This upgrade includes support for HTTP 2, aiming to reduce latency and boost the responsiveness of the Windows Admin Center.

Imagine getting your tasks done quicker and more efficiently—sounds good, right? Additionally, the virtual machine tool has seen some significant improvements. The runtime pipeline has been removed to improve responsiveness, and the default view now features fewer columns, though you can switch back to the detailed view if you prefer.

But that’s not all. The Azure Site Recovery integration experience has been refreshed, the installer updated, a new data migration flow added, and the settings UI tweaked. Microsoft is setting the stage for the Windows Admin Center v2 to become generally available before the end of 2024.

This update is an exciting glimpse into the future of Windows administration for IT admins and developers already familiar with Windows Admin Center. It indicates that Microsoft is committed to improving security, performance, and user experience.

Whether you’re managing a small business network or a large enterprise system, these updates are designed to make your job easier. So, what do you think? Are you looking forward to exploring these updates?

Sony will release the much-awaited PlayStation VR2 App in August, allowing users to play this console’s games on PC

Sony’s PlayStation VR2 is getting ready to connect console and PC gaming. This has been a big talk in the gaming community since Sony said earlier this year that they plan to provide official help for PlayStation VR2 headsets and controllers on PC.

Earlier this month, Sony announced the PlayStation VR2 on Steam, revealing all the details about the upcoming device and its adjacent app. This app is essential because it serves as the link between PlayStation VR2 hardware and PCs.

The app is not merely for display; it holds a lot of functions that aim to make the switch from console to PC smooth. Players can enjoy VR games and apps on Steam, set up their PlayStation VR2 on a computer system, and update their gear with the newest firmware.

They can also adjust settings from the SteamVR dashboard, such as the play area or screen brightness changes. But, there is a small hitch. The app shows that certain enhanced aspects of PlayStation VR2, such as HDR, headset feedback, eye tracking, adaptive triggers and haptic feedback might not work with the PC version.

Yet Sony guarantees that other high-quality and sensory submersion features will still function, like 4K visuals, a 110-degree viewing range, finger touch detection, and a see-through view, among many more that are too numerous to mention here.

Save the date of August 7th, when the PlayStation VR2 PC adapter and Steam app will be available. This adapter costs $59.99, but remember that a DisplayPort 1.4 compatible cable is necessary and not included in this package.

This move by Sony shows their dedication to making sure more people can experience VR through their devices, not only on PlayStation 5 but also on PCs now. This is an exciting moment for those who enjoy PC gaming and PlayStation because this change might give a wider range of virtual reality experiences to more people.

LOOT Failed Exit Code 1 Error: 5 Ways to Fix it

Encountering the LOOT failed exit code 1 error can be quite frustrating, because you can’t get back to your game. This error often stems from issues with LOOT’s cache, conflicting programs, outdated files, or even interference from your firewall or antivirus. Let’s dive into some practical solutions to fix this error.

How do I fix the LOOT Failed Exit Code 1 error?

1. Delete LOOT’s cache and reinstall

  1. Close Mod Organizer 2 (MO2) and ensure LOOT is not running.
  2. Press Win + E to open File Explorer.
  3. Go to C:\Users\[YourUsername]\AppData\Local\LOOT\
  4. Look for folders named after the game(s) you’re modding, such as Skyrim Special Edition or Fallout4.
  5. Delete the entire LOOT folder inside AppData\Local\
  6. Go to the official LOOT website and download the latest version.
  7. Run the installer and follow the instructions to reinstall LOOT.
  8. Open LOOT from its installed location (e.g., C:\Program Files (x86)\LOOT).
  9. Allow it to initialize and sort the masterlist, then close LOOT.
  10. Restart MO2 and try running LOOT from within MO2 again.

Deleting the LOOT cache and reinstalling it ensures that any corrupted files or settings are removed and replaced with fresh ones, which should help resolve the error.

2. Ensure that there are no conflicting programs

  1. Ensure no other programs are using the LOOT files:
    • Press Ctrl + Shift + Esc to open Task Manager.
    • Check for any applications that might be using the LOOT files in the background.
    • Close any unnecessary applications that might be using these files.
  2. Run MO2 and LOOT as Administrator:
    • Right-click on the MO2 shortcut and select Run as administrator.
    • Do the same for LOOT if running it independently.

Running both MO2 and LOOT as administrators can prevent permission issues caused by other applications or system restrictions.

3. Update LOOT’s .dll files

  1. Open File Explorer by pressing Win + E.
  2. Go to C:\Program Files\ModOrganizer\loot or wherever MO2 is installed.
  3. Download the updated loot32.dll file from a reliable source (Ensure it’s safe and from a trusted site).
  4. Replace the existing loot32.dll in the MO2 loot folder with the new one.
  5. Restart MO2 and try running LOOT again.

Updating the .dll files ensures compatibility and fixes any issues caused by outdated files.

4. Disable the firewall and antivirus temporarily

  1. Disable Windows Firewall:
    • Open Control Panel.
    • Go to System and Security > Windows Defender Firewall.
    • Click Turn Windows Defender Firewall on or off.
    • Select Turn off Windows Defender Firewall (not recommended) for both private and public network settings.
  2. Disable the antivirus software:
    • Open your antivirus program.
    • Temporarily disable it (this varies depending on the antivirus software).
  3. Run MO2 and LOOT to see if the issue is resolved.
  4. Re-enable your firewall and antivirus after testing.

Sometimes, firewall or antivirus software can block LOOT’s operations. Disabling these temporarily can help determine if they are the cause.

5. Reinstall Mod Organizer 2 (MO2)

  1. Open MO2.
  2. Export your mod list and configurations to a safe location.
  3. Go to Control Panel > Programs > Programs and Features.
  4. Find Mod Organizer 2 and uninstall it.
  5. Download the latest version of MO2 from the Nexus website.
  6. Follow the installation instructions.
  7. Import your mod list and configurations back into MO2.
  8. Try running LOOT again.

Reinstalling MO2 ensures that all corrupted files are replaced, and any issues caused by the program itself are resolved.

By following these steps, you should be able to identify and fix the LOOT failed exit code 1 error, allowing LOOT to run successfully within MO2. To avoid similar issues in the future, regularly update your software and keep backups of your configurations.

You might also be interested in how to fix Fallout 4 if the mods are not working.

For any other questions or suggestions, feel free to address them in the comments below.

How To Fix Windows Update 8024200d Error [7 Proven Solutions]

Want to learn how to fix the Windows Update 8024200d error? It typically arises from damaged update files, system file issues, low storage, or software conflicts. But don’t worry—it’s straightforward to resolve. I’ll show you how to solve this problem and ensure your system receives vital updates. 

But before we begin, do this preliminary check first:

  • Perform a Disk Cleanup: Type “disk cleanup” in the Windows search bar and open it. Choose the file types to delete and click “OK.” Confirm by tapping “Delete files.” This will free up some space for the update to install properly.

Now, let’s get started and get your system back on track.

How To Fix Windows Update 8024200d Error

Follow these fixes in the order they appear in:

Reset the Windows Update Components

Resetting the Windows Update components can resolve various issues, including the 8024200d error. Follow these steps:

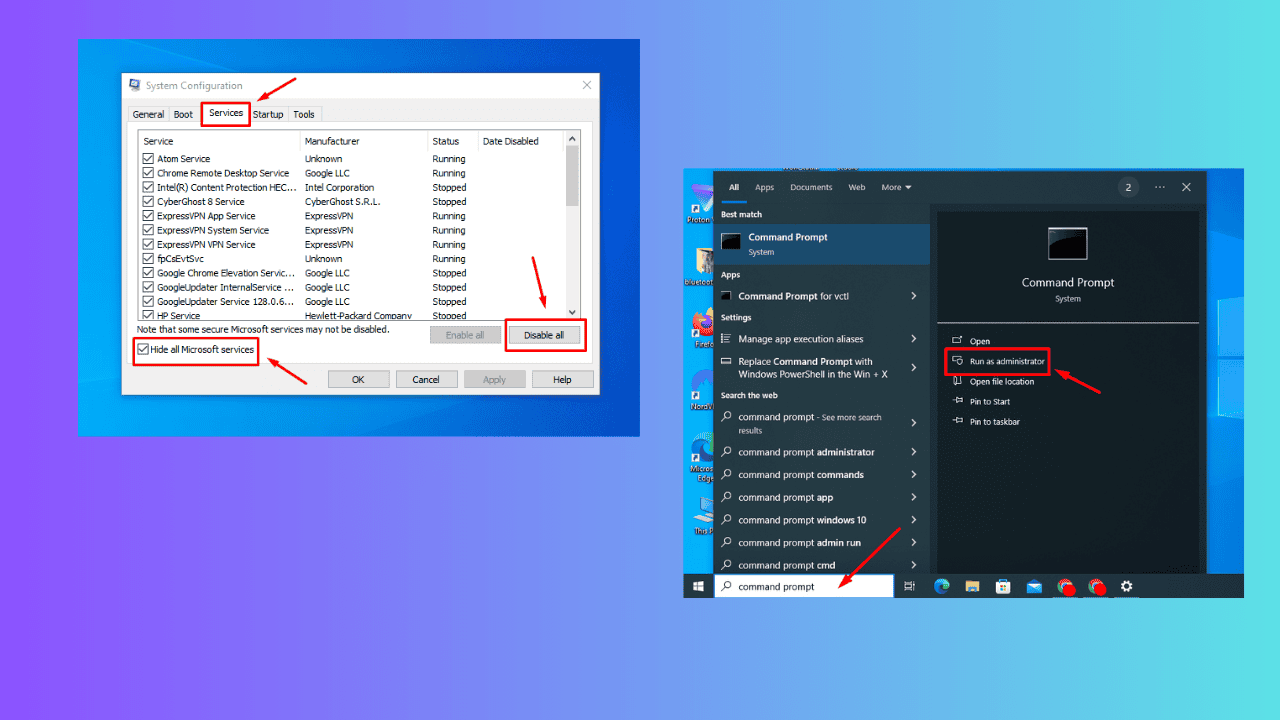
  1. Type Command Prompt in the search bar beside the Windows icon and click Run as Administrator.
Run as Administrator
  1. Copy and paste these commands: 


net stop wuauserv
net stop cryptSvc
net stop bits

net stop msiserver
ren C:\Windows\SoftwareDistribution SoftwareDistribution.old
ren C:\Windows\System32\catroot2 catroot2.old
net start wuauserv
net start cryptSvc
net start bits
net start msiserver
Pause

Paste commands

Once complete, close the window and check if it solved the error.

Run the Windows Update Troubleshooter

Windows has a built-in troubleshooter designed to identify and fix common update problems. Running this tool can help with the error 8024200d. Here’s what to do:

  1. Open Settings by pressing Windows + I.
  2. Tap Update & Security.
Update & Security.
  1. Click Troubleshoot and select Additional Troubleshooters.
Additional Troubleshooters
  1. Select Windows Update and click Run the troubleshooter.
Run the troubleshooter

If the troubleshooter recommends fixes, apply them and restart your computer to ensure all changes take effect.

Temporary Disable Antivirus

Sometimes, Your PC’s antivirus can interrupt the update process. So, try temporarily disabling your antivirus, then run Windows Update again. Remember to re-enable it after the update process is complete.

Follow the below steps:

  1. Type Windows Security on the search bar and open the app.
  2. Tap Virus & Threat Protection, and select Manage settings under Virus & Threat Protection settings.
Virus & Threat Protection
  1. Toggle off the real-time protection button.
Real-time protection

Perform a Clean Boot

A clean boot starts Windows with minimal drivers and startup programs. This can help eliminate software conflicts that occur during the update process.

  1. Press Windows + R, type msconfig, and press Enter.
Type msconfig
  1. The System Configuration window will pop up. Go to the Services tab, check Hide all Microsoft services, and then click Disable all.
Services tab
  1. Go to the Startup tab, click Open Task Manager, and disable all startup items. Once you’ve done this, tap OK.
Open Task Manager

Restart your computer and try to update Windows.

Restart the Windows Update Service

Restarting the Windows Update service ensures that the update process functions smoothly. Here are the steps:

  1. Press the Windows key + R to open the Run dialog box. Type services.msc and press Enter.
Type services.msc
  1. Scroll through the list of services until you find Windows Update. Double-click on it to open its properties.
Windows Update
  1. In the properties window, ensure the Startup type is set to Automatic. If it’s not, select Automatic from the drop-down menu.
Set to Automatic
  1. Click on the Start button to activate the service. If it’s already running, click on Restart at the top left to refresh it.
Restart service status

Check if the error is solved.

Run SFC and DISM

The System File Checker (SFC) and Deployment Imaging Service and Management Tool (DISM) are utilities that can repair corrupted system files, which might be causing the update error. Follow the below steps:

  1. Press the Windows Icon + R, type cmd, and click Ctrl + Shift + Enter to open Command Prompt as an administrator. 
Type cmd
  1. To run SFC, type sfc /scannow and press Enter. After the process is complete, restart your PC.
Type sfc /scannow

Check if the error is solved. If not, run DISM.

  1. Run command prompt as administrator.
  2. Type DISM /Online /Cleanup-Image /RestoreHealth and press Enter.
DISM /Online /Cleanup-Image /RestoreHealth

After completing the scan, restart your PC and confirm if you can update your Windows without the error.

Manually Download and Install the Update

If all else fails, you can manually download and install the update from the Microsoft Update Catalog.

  1. Visit the Microsoft Update Catalog.
  2. Search for the update using its KB number, then download the appropriate version for your system.

Press Windows + I > Update & Security > View Update History to know your KB number.

Download manually

Open the downloaded file and follow the on-screen instructions to install the update.

So, now you know how to fix the Windows Update 8024200d error! The above steps will help you overcome it and keep your system updated and protected with the latest security patches. 

Moreover, if you’re experiencing similar trouble with error codes 0x80240031, 0xd000034, or 0x8024d001, we can help you out!

Microsoft adds a new contact Editor for Outlook on iOS and Android

Microsoft has introduced a new contact editor for its Outlook mobile app on iOS and Android. The aim is to replace the native contacts editor in iOS and Android with this new offering, providing a uniform and complete experience.

In a blog post, Microsoft wrote that they received feedback from users who described the experience with the native contacts editors in iOS and Android as “inconsistent.” The contacts editor inside the Outlook app for iOS and Android has indeed been, at times, a bit of a mess. For example, when you try to create new contacts or merge duplicates, this app frequently reverts to using your system’s contacts application.

The contacts editor of Outlook mobile intends to be superior to the native contact editors. According to Microsoft, it should furnish a more uniform experience on iOS and Android devices, along with the fresh Outlook application for Windows and Outlook.com, available through web browsing. The new editor can also handle categories that Microsoft explains are used to “group your contacts into meaningful clusters.”

The contacts editor also complies with Microsoft Intune policies, a feature the system contacts editor in iOS and Android does not support. This indicates that businesses can handle their contacts through the Outlook mobile app and implement regulations such as necessitating a PIN to access contact details.

To access the new contact editor, users must tap the “Apps” option in the bottom panel and move to the Contacts tab. Click or press the “New Contact” button to add a contact for yourself. Otherwise, go to the Feeds tab from the bottom panel and click or press “Create” to add new contacts using the form.

For those who use Android, there is an extra feature. On the Feeds tab, you can now choose “Scan Business Card.” This action will allow your phone’s camera to photograph any physical business card and show contact details in the editor.

In other news, the new Outlook will be enhanced to support meeting artifacts, meaning users will get all the details they need from a Teams meeting every time they leave a meeting.

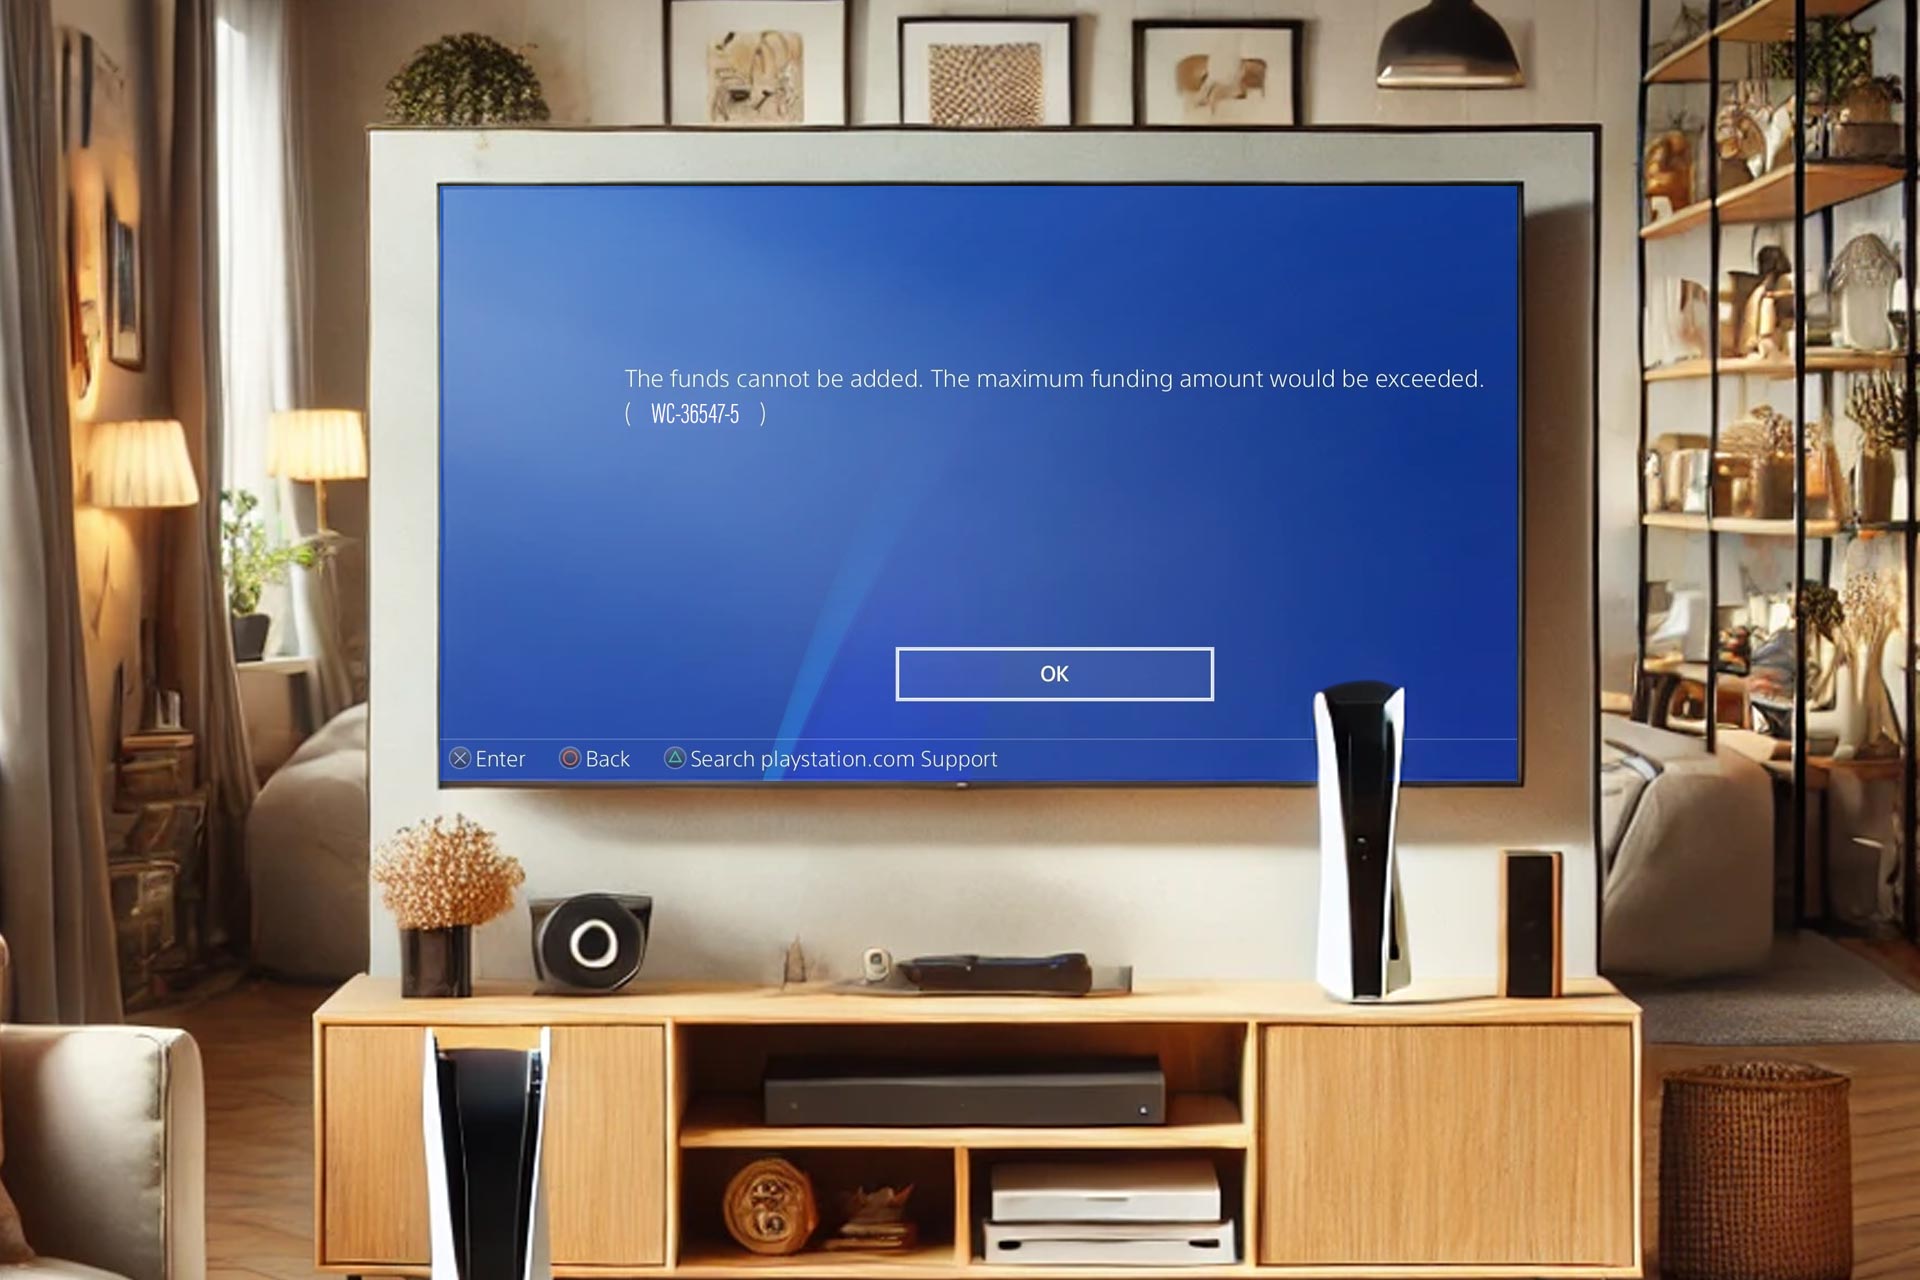
PlayStation WC-36547-5 Error: 4 Ways to Fix it

The PlayStation WC-36547-5 will prevent you from making online purchases, so in today’s guide, we’re going to take a closer look at this error and show you how to fix it.

How can I fix the PlayStation WC-36547-5 error?

Before trying anything else, try restarting the console. Turn it off completely, disconnect it from the wall, and turn it back on after a few minutes. Also, keep your console up to date to prevent this issue.

1. Check your credit card information

  1. Open the PlayStation Store.
     playstation store dashboard
  2. Next, navigate to Payment Methods.
    payment methods playstation store
  3. Check if your payment information is correct.
  4. If not update it.
  5. You can also try entering all your payment information again, even if it’s correct.

2. Check your payment information from the browser

  1. Open your browser and visit the PlayStation Store.
  2. Log in with your credentials.
    sign in playstation store
  3. Go to the Wallet section.
  4. Choose Add debit/credit card.
  5. Locate your card, and remove it.
  6. Now add it again.

3. Reinstall problematic app

  1. Select the game or app that is giving you this error.
  2. Press the Options button on the controller.
  3. Next, select Delete.
    delete game ps5
  4. Download the app or the game again.

4. Rebuilt the database

  1. Turn off your console.
  2. Press and hold the Power button until you hear two beeps.
  3. Select Rebuilt database.
    rebuilt database ps4

These are just several methods that can help you with PlayStation WC-36547-5. Keep in mind that there are many other errors, and we covered Ws-44750-0 and WS-116386-5 errors before.

Before you go, don’t miss the PS4 SU-42118-6 error that we covered recently, since it can provide you with more useful information.

TFT Display vs LCD: Which One is Better

TFT and LCD are display technologies that you find in many electronic devices. TFT is the short form for Thin Film Transistor, while LCD stands for Liquid Crystal Display. TFT and LCD displays are similar in using liquid crystals to show images, but they have differences. Now we will look deeper into the distinctions between TFT and LCD displays.

TFT and LCD display definition and comparison

What is a TFT display?

As we’ve mentioned above, TFT means Thin Film Transistor, and it’s a type of active-matrix display technology. It utilizes a thin film transistor to control the brightness of every pixel on the screen.

This gives more power to manage the display, which provides improved contrast ratios, livelier colors and superior image quality when compared with passive-matrix LCD displays.

What is an LCD display?

An LCD display, also known as a Liquid Crystal Display, is a flat panel that shows images by utilizing liquid crystals. The display has a layer of these liquids in between two filters for polarizing.

The liquid crystals, they get aligned by an electric current and this lets light go through the filters to create a picture on display screen. They are often found in many types of devices such as televisions, computer monitors and mobile phones.

However, you should know that most of the LCD displays you see on TVs and monitors are actually TFT-LCD displays. That means the actual display build includes both the liquid crystals layer and the TFT wafer. The resulting screen has improved contrast. However, for the purpose of this guide, we will treat them separately.

Differences between TFT and LCD Displays

Image quality

The contrast ratio of TFT displays is much better, providing sharper and clearer images. Additionally, they have wider viewing angles and show colors more accurately. All these features make TFT displays superior to passive-matrix LCD ones in terms of image quality.

These screens also give improved viewing from different angles as well as showing colors in a more precise manner compared to passive-matrix LCD screens. TFT screens are also known as active matrix because it actively manages every pixel’s state on the screen to form an image.

The use this method allows for improvement like enhanced refresh rates that result into lesser flicker or ghosting effects seen while displaying pictures along with faster response time suitable particularly during gaming requirements- these improvements are absent from earlier versions such as those based upon passive matrix LCDs where only static content could be shown without any direct control over what pixels appeared on the display panel at any given moment.

A different kind of LCD known as passively driven uses electronic charge stored within tiny capacitors for controlling individual pixel states; however this design does not allow fast manipulation needed especially when dealing with larger screens having many more picture elements – hence why people prefer using thin film transistor technology instead

Power consumption

TFT displays need more power compared to LCD displays, it may result in devices such as smartphones and tablets having lesser battery life. TFT displays have a thin film transistor for adjusting the brightness of every pixel on the screen. This method needs more power compared to passive-matrix technology found in LCD displays.

Refresh rate

TFT screens are often said to have a faster refresh rate than LCD screens. This implies that the TFT can show pictures more rapidly and with better fluency. Therefore, TFT displays are perfect for gaming monitors or devices that need quick image processing.

Price

In simple terms, TFT displays usually cost more than LCD displays. This is why they are not so much used in low-cost things such as budget smartphones or computer monitors. LCD displays are more widely used and are generally less expensive than TFT displays.

Conclusion

To sum it up, TFT and LCD displays are the usual display technologies found in electronic devices. Even though both technologies use liquid crystals for showing images, TFT displays provide better image quality, quicker refreshing speed and more power consumption compared to LCD displays.

Still, TFT displays tend to be more costly than LCD displays. This attribute makes them less prevalent in low-priced gadgets. The decision for TFT or LCD displays is based on the device’s requirements and its purpose.

We also have a LED vs OLED vs Nanocell display comparison guide if you’re interested in other screen technologies.

If you’ve got more questions, hit the comments below and leave us a line.

What is an SRT file and How to Open it on Windows?

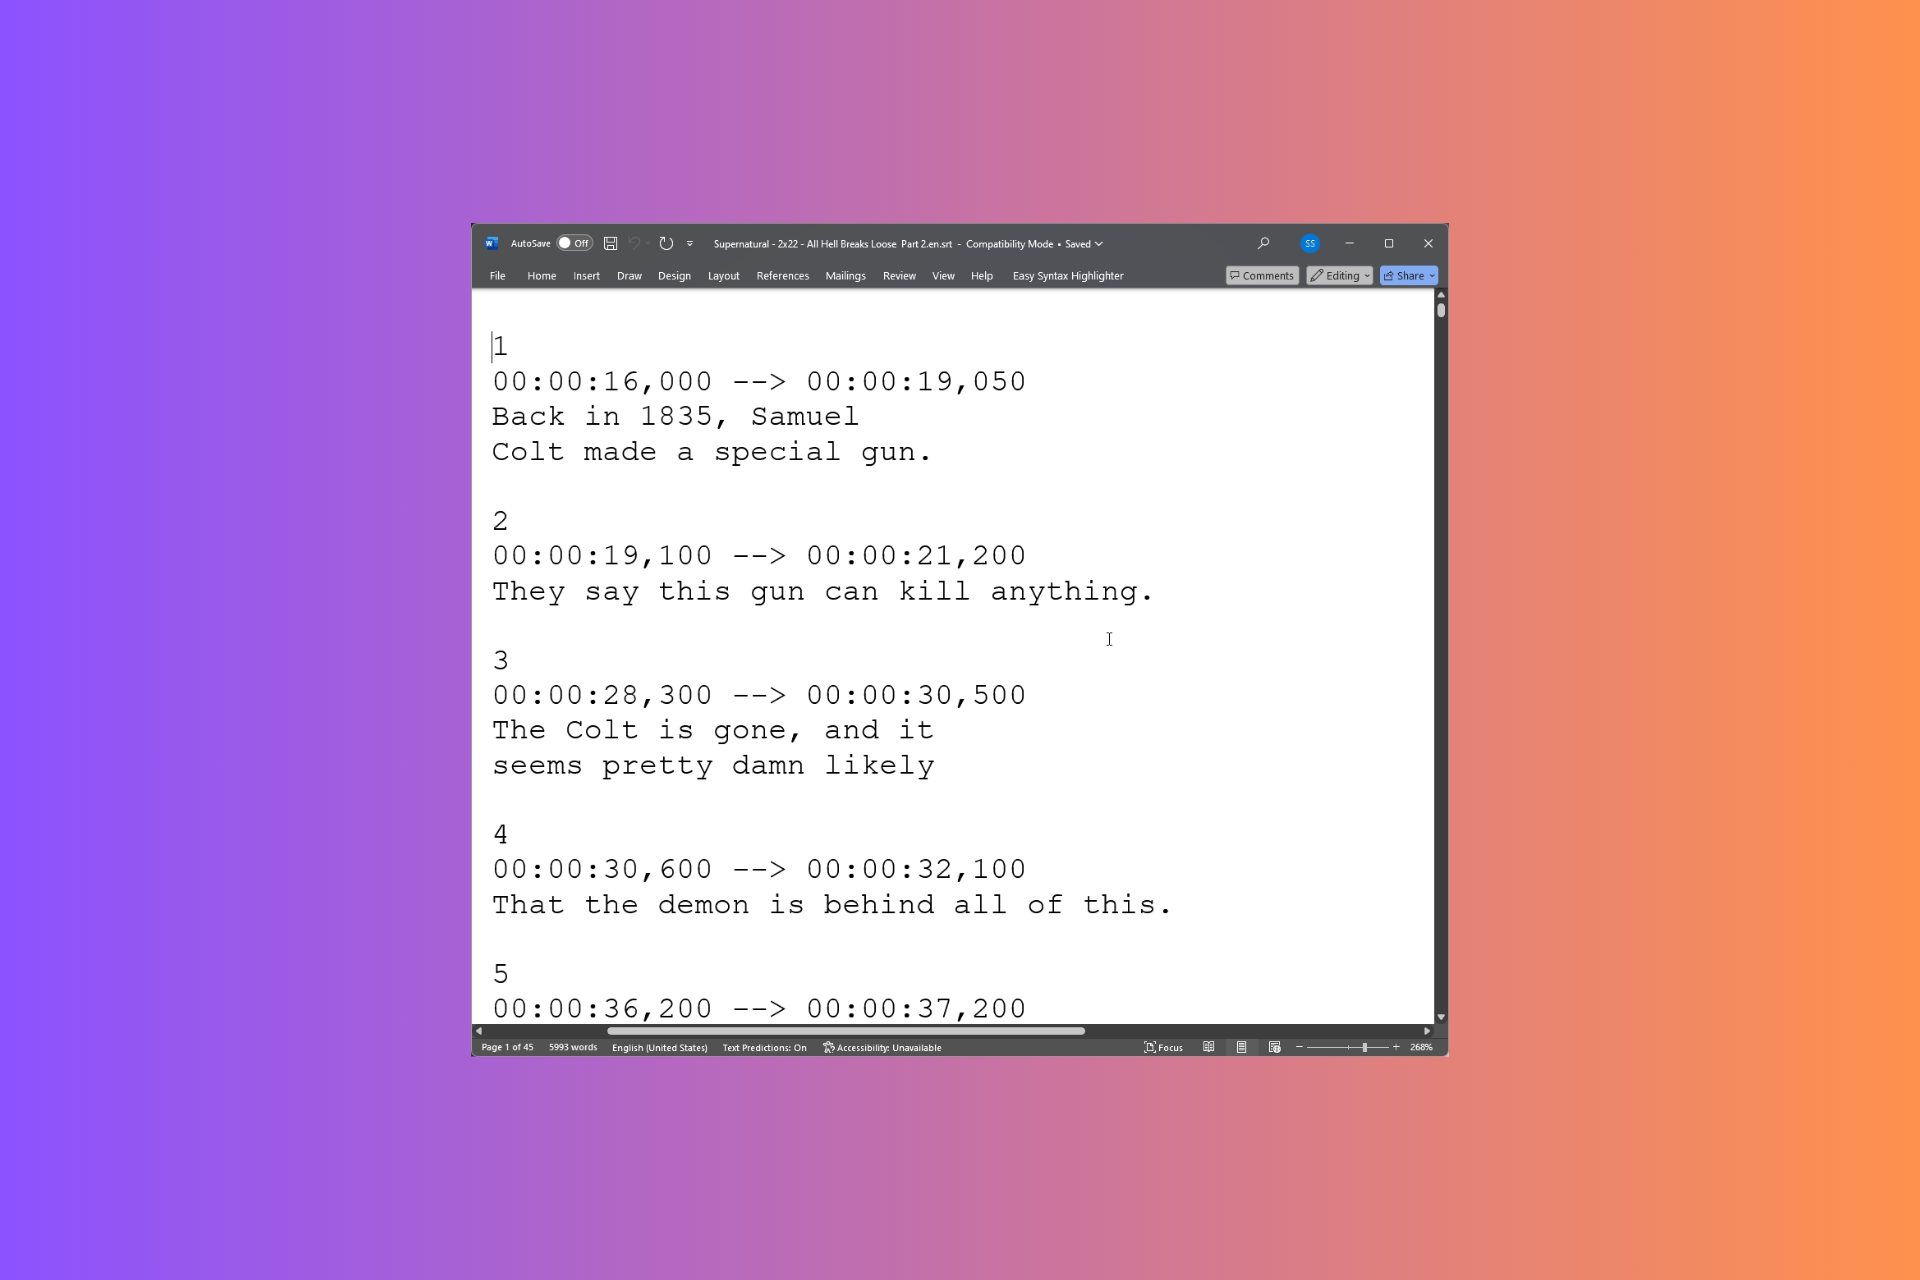
An SRT file is a popularly-used format for subtitles. The acronym SRT stands for SubRip Subtitle, named after the SubRip software used to create and edit these files.

A subtitle file that contains video subtitle information, such as the start and end of text timecodes and a sequential number of subtitles.

How can I open an SRT file on Windows?

1. Using the Notepad

  1. Press the Windows key, type notepad in the search box, and click Open.Notepad - open SRT file step 1
  2. Click File and select Open from the context menu.Step 2 Open
  3. Navigate to the SRT file and select it, then click Open.
  4. Select All files from the drop-down menu if you don’t see the file in the location. Once you see the file, select it and click Open.Select the file and click Open

2. Using the context menu

  1. Press Windows + E to open the File Explorer.
  2. Locate the SRT file and right-click it to open the context menu.Open from the context menu
  3. Select Open with and choose any available option.

3. Using Microsoft Word

  1. Press the Windows key, type word in the search box, and click Open.Word open - open the SRT file
  2. Click Open from the left side pane and click Browse.Open - Browse open SRT file
  3. Navigate to the SRT file and select it, then click Open.
  4. Select All files from the drop-down menu if you don’t see the file in the location. Once you see the file, select it and click Open.Open the file

You can also open the SRT files on the media players VLC media player, KMPlayer, MPlayer, and other text editors.

In case you are having problems with VLC subtitles on your computer, you can reset VLC, double-check the SRT file name, and ensure that it matches the video filename.

If you’re looking for subtitle editing software for Windows, you can try Adobe Premiere Pro or WonderShare Uniconverter; check out this guide for the full list.

If you have any other suggestions or comments about the topic, feel free to mention them in the comments section below.

AMD Technical Preview Driver for Fluid Motion Frames 2, which greatly improves frame rates, is now available

AMD has released a technical preview driver for its Fluid Motion Frames (AFMF) technology, which aims to boost frame rates and smoothness in games.

As the company mentioned in its blog, the new driver includes AMD Fluid Motion Frames 2, a set of fresh features that enhance the visuals and performance of games using AFMF.

Also, AMD stated they have enhanced game quality and gameplay smoothness with AFMF 2. For AFMF 2, there are two fresh modes. The first is Search Mode with an automatic setting that “cuts back on a fallback for better AFMF smoothness” for games running in 1440p resolution and above; you can switch it to the “Standard” setting if playing at 1080p resolution.

The next mode is Performance Mode. It aims to reduce the AFMF 2 overhead for better frame rates on more devices. Many games have also seen a reduction in latency thanks to AFMF 2, such as Cyberpunk 2077, which experienced less delay by 28 percent, and Counter-Strike 2, where the latency was cut down by 12 percent.

The fresh edition also backs up games that rely on Vulkan and OpenGL. For individuals who wish to control game frame rates to a specific degree, AFMF 2 includes what the firm refers to as AMD Radeon Chill.

The company claims that enabling Radeon Chill after enabling AFMF 2 will automatically set the native FPS cap to be half of your AMD FreeSync monitor’s maximum refresh rate. So, after the AFMF 2 frame generation is used, Radeon Chill will ensure that FPS doesn’t exceed the maximum refresh rate.

This is important because exceeding this limit can result in screen tearing and lower image quality. You can get the technical preview driver from here. AMD warns that this is a technical preview, so it might have bugs that could impact your gaming experience.

AMD plans to officially release AFMF 2 something in the fourth quarter of 2024.

In other news, the company also teased the new FSR 3.1, which will come later this year and make video games look hyper-real on screen.

(Photo credits: AMD)

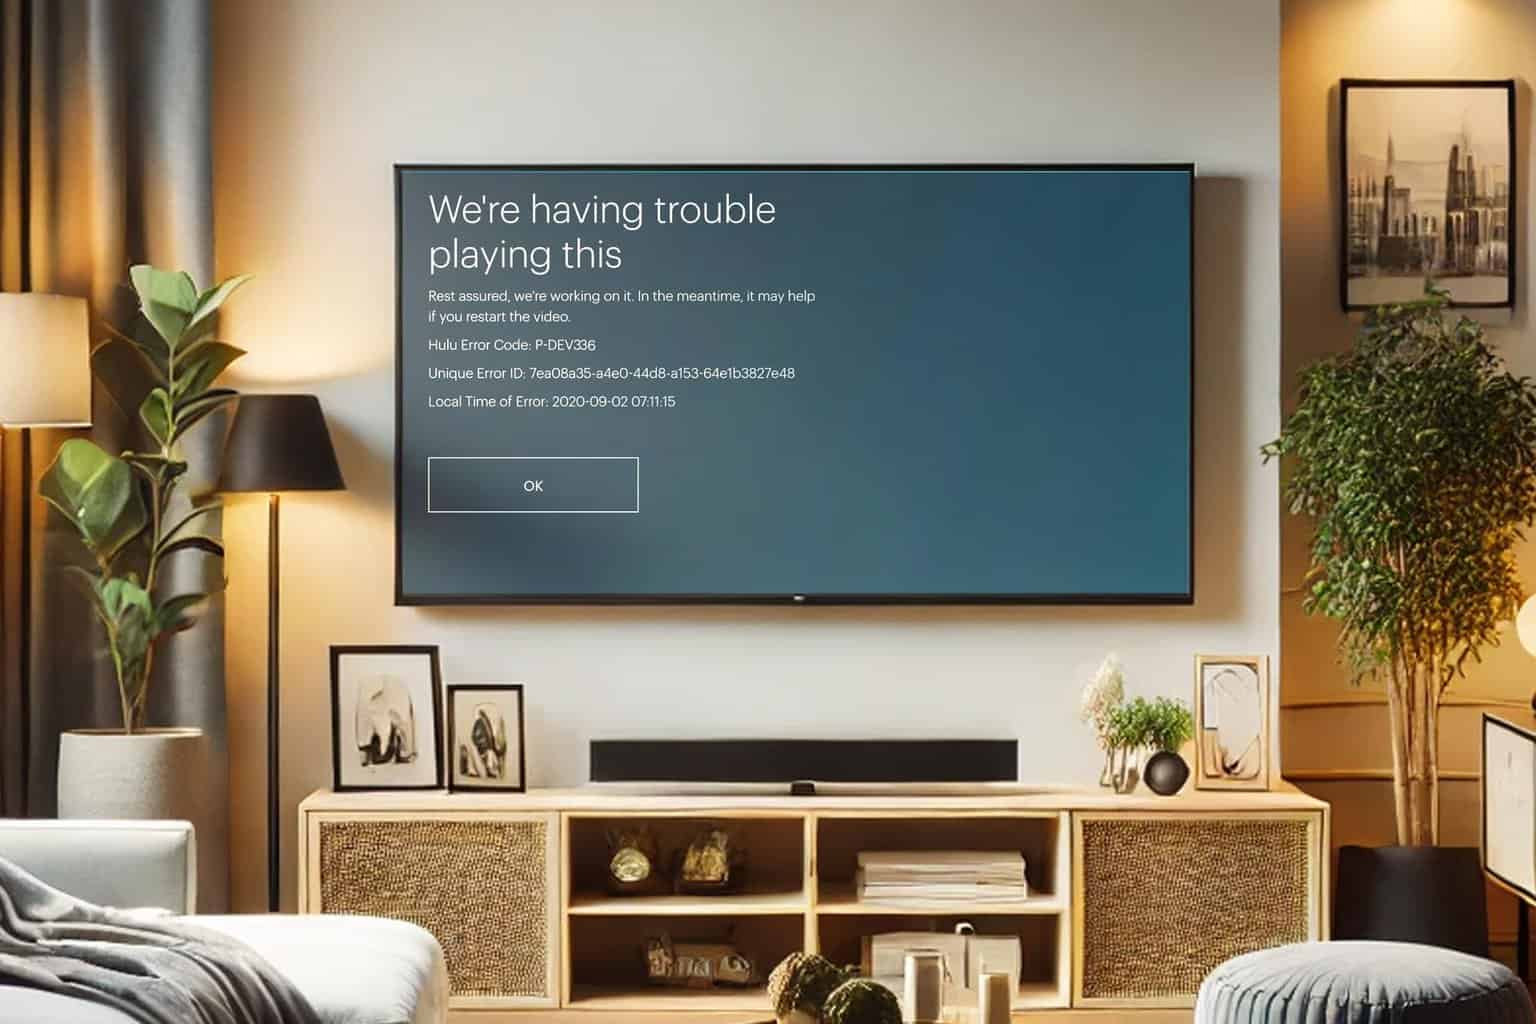
Hulu Error Code P-DEV336: Use These 5 Ways to Fix it

Many encountered Hulu error code P-DEV336 and if this error appears, you won’t be able to enjoy any online content, so it’s important to know how to fix this error, and this guide will show you how to do it.

How can I fix Hulu error code P-DEV336?

Before trying anything else, make sure that your connection is working properly. If possible, use a wired connection instead of Wi-Fi. You can also use Hulu on a different device and check if it works.

1. Update your Hulu app

  1. Open the Play Store on your device.
  2. Locate Hulu.
  3. Click the Update button next to it to update it.
    hulu update

2. Reinstall the Hulu app

  1. Press the Menu button and then go to Settings.
  2. Navigate to Apps.
  3. Locate Hulu on the list and select it.
  4. Choose Uninstall.
  5. Once removed, restart your device.
  6. Next, install Hulu again.

3. Change to HDMI 1.4 mode

  1. Open Settings on your device.
  2. Select About.
     about android tv
  3. Locate the Build number and select it several times until the developer mode is unlocked.
  4. Next, go to Developer options and set HDMI to 1.4 mode.
    developer options android TV

These instructions are for Nvidia Shield, but they should work for any Android streaming device.

4. Disable IPv6

  1. Open Settings.
  2. Navigate to Network.
  3. Next, toggle Enable IPv6.
    ipv6 disable nvidia shield
  4. Locate and disable Wi-Fi Roaming as well.

5. Other tips to try

  1. Disable any network-level ad-blockers such as Pi-Hole.
  2. Assign a fixed IP to your device via the router.
  3. Restart your device a couple of times.
  4. Alternatively, reset your device to get a new IP address.

These are just a few solutions that can help you with Hulu error code P-DEV336. These aren’t the only issues, and we covered Hulu P-DEV310 and P-DEV320 errors in the past.

Hulu error P-DEV313, P-DEV340 and P-DEV317 are also common, but we covered them in our earlier guides, so don’t miss them.

How to Hide Discord Channels from Certain Roles

If you want to keep your hidden Discord channel from newer roles to make it less confusing for them, or if you want to keep some channels for certain roles, this guide can help!

There are different roles assigned to people on the Discord server, including moderators and administrators.

How can I hide Discord channels from certain roles on the Desktop app?

  1. Press the Windows key, type discord, and click Open. Discord - how to hide discord channels from certain roles  
  2. Go to the Discord server from which you want to channel.
  3. Go to the top left side pane of the server, hover over the channel, and click the Settings icon.Settings
  4. From the Settings page, go to Permissions.Channel settings - how to hide discord channels from certain roles
  5. On the right side of the page, ensure you have toggled on the switch for Private Channel.
  6. Locate the role or individual user you want to restrict from accessing the channel. If you don’t find the role, you need to add it first.
  7. To add it, click Add role or member, then type in the @Name of the account or mention the title.
  8. Next, go to Advanced permissions and click the downward arrow to get the list of options.
  9. By default, under Roles/Members, everyone is allowed to view the channel.
  10. Click the plus sign to add roles or specific persons under Roles/Members.Add member
  11. Next, you will get many things you can allow or deny to members, such as View Channel, Manage Channel, Manage Permissions, Manage Webhooks, Create Invite, Send Messages, and others.
  12. Once done, click Save changes.Hide channel

To unhide these channels, place the checkmark again or toggle on the Show All Channels option. If Discord is not opening, you can check your proxies and then clear the cache; read this guide to learn more.

In case you are looking for steps to create a Discord Rules channel for your server, we have a separate guide for you.

If you have any other suggestions or comments about the topic, feel free to mention them in the comments section below.

Microsoft confirms Remote Desktop issues in Windows Server KB5040437 update

The recent Windows Server 2022 KB5040437 update has caused several issues for IT admins. According to the Redmond giant, this issue impacts Remote Desktop capabilities. The problem appears sporadic and might occur in organizations utilizing a legacy protocol within the Remote Desktop Gateway called RPC over HTTP.

Systems might sometimes lose the connection and require users to reconnect to the server. Microsoft has given a few temporary solutions for IT admins to handle this issue.

The initial solution is not allowing connections over pipe and port \pipe\RpcProxy\3388 via the Remote Desktop Gateway. This procedure necessitates using connection applications, like firewall software. It is suggested that admins refer to their connection and firewall software’s documentation for details on disallowing and porting connections.

The following solution involves removing a key linked to RDGClientTransport from the registry of client devices.

Option 1: Disallow connections over pipe, and port \pipe\RpcProxy\3388 through the RD Gateway. This process will require the use of connection applications, such as firewall software. Consult the documentation for your connection and firewall software for guidance on disallowing and porting connections.

​​​​​​​Option 2: Edit the registry of client devices, by removing a key related to RDGClientTransport

Important: This article contains information about how to modify the registry. Make sure that you back up the registry before you modify it. Make sure that you know how to restore the registry if a problem occurs. For more information about how to back up, restore, and modify the registry, see How to back up and restore the registry in Windows .

Open the Windows Registry Editor and navigate to the following registry location:
HKCU\Software\Microsoft\Terminal Server Client\RDGClientTransport

Find the registry key titled ‘DWORD’ and set the ‘Value Data’ field to ‘0x0’.

Microsoft has acknowledged that this issue is not exclusive to Windows Server 2022 but can also impact versions such as Windows Server 2019, 2016, 2012, and 2012 R2. They are presently developing a patch to solve this problem; however, there is no information on when it will be ready for use.

Also, we have Microsoft’s official explanation for the Remote Desktop issue. Windows systems might enter BitLocker recovery mode after installing these July 2024 Patch Tuesday updates. The company has mentioned they’re looking into it and will offer an update in one of their subsequent releases. To learn more about confirmed issues in Windows Server KB5040437, see Microsoft’s support page here.

How to Add Lorem Ipsum in Word: Generating Random Text

Adding the famous Lorem Ipsum text filling in Word is great if you want to develop your formatting skills in the text editor. Sometimes, you need a default Word text filling if you don’t have some content readily available. Luckily, there’s a Word formula that automatically fills your Word document with text.

How do I add Lorem Ipsum in Word?

Apply the Lorem Ipsum formula in Word

  1. Open a new blank document in Word.
  2. Type the following formula and press Enter: =lorem ()
  3. This will automatically add 5 paragraphs to your document with random text in Latin to your page.

If you want slightly more text, just repeat the formula. Note that the formula will disappear after pressing Enter. We just entered it again in the text to show you the process.

How do I insert a fixed number of paragraphs and sentences?

If you want to insert a precise number of Lorem Ipsum paragraphs and sentences per paragraph, you can do that because you may also include variables in the lorem formula. Here’s how to use it:

=lorem (number of paragraphs, number of sentences per paragraph)

Of course, replace the text with the actual values. For instance, =lorem (10,3) will generate 10 paragraphs and each paragraph will have 3 sentences.

The beauty of it is that you can go as high as you want, according to your needs. For instance, we filled 14 pages of Lorem Ipsum text in 11 Aptos sized fonts by using the formula =lorem (250,4).

Just do a few tests to insert random text in Word and get to the exact requirements for your project. Of course, after you generate the text, you can copy and paste it in any other application.

The lorem formula is highly used by editors who need Lorem Ipsum filling text for publishing any type of material, from magazines to websites, greeting cards and more. This will help you know exactly how many words or characters fill up certain boxes or sections and how to design the layout based on these variables.

If you want to get more tips, check our guide on how to split a Word page in half. You might also be interested in how to create and customize a table of contents in Word.

Did you manage to insert Lorem Ipsum into Word? Let us know in the comments below.

Microsoft Teams Planner App unveils new features, including the ability to share files with a single click

Microsoft has introduced fresh features for its Planner app in Teams, aiming to enhance user-friendliness and availability.

Now, people can get quick links to their plans in Planner to share them with team members. You can obtain a link for any plan by clicking on an overflow menu. Furthermore, it is possible to swiftly change from looking at one task to observing the complete plan.

This capability allows you to quickly share your plans with teammates, ensuring that everyone can access the plan with a single click. To access this feature, select a plan’s overflow menu from the My Plans page and select “Copy link to plan”.

The “Assigned tasks” card in Viva Connections has fresh updates. It now allows users to add tasks and quickly open the full Planner app. According to Microsoft, these updates are currently being released to customers.

We’ve recently improved the “Assigned tasks” card in the Viva Connections dashboard.  With the new updates to the “Assigned tasks” card, which is powered by Planner, users will see a new ‘Add Task’ button. Using this button, users can quickly create tasks, which will be available in the Planner app. As before, the “Assigned tasks” card will continue to show a user how many tasks are assigned to them, and allow the user to open the Assigned to me view to see those tasks in more detail. The large format of the “Assigned tasks” card will also include an “Open Planner” button to open the full Planner app, which is great for other needs like viewing all tasks in a plan.  

Businesses that use Planner for project management and progress tracking across teams should find the new features useful.

Although the updates are good, the Planner app for Teams still lacks many features compared to third-party tools for project management. Microsoft has been improving this app over time, so they might fill more of these gaps later on.

However, earlier this month, the Redmond-based tech giant previewed the new Recommended Plans inside Microsoft Planner as part of the upcoming features, and it’s pretty useful for project management.

How to Split a Page in Half on Word: 2 Easy Methods

The arrangement in a Word document is no secret, a page that is plain and filled with text from the left to right margins. If you desire to split a Word page in half, you need to change the document layout by adding columns or tables. There are quite a few methods so here’s what to do!

How do I split a Word page in half?

1. Split the page by using Columns

  1. Open your Word document.
  2. If you’ve already have text on the page, select it in your document.
  3. Open the Layout tab.
  4. Select Columns and choose one Two to split the Word document in half.
  5. You also have the option to set up the distance between the columns if you want to save more space into the document by just dragging the stop marks at the top of your editing window.
  6. To create a new column below an existing text paragraph, place your cursor just above the area for the new columns and go to Layout > Breaks > Column.

After setting up the page in two columns, you should know that the overflowing text from the first column will automatically go to the second column, not on the next page. You may also want to know how to automatically adjust selected columns to fit text.

2. Split the page in half using a table

  1. Open your Word document or create a new one.
  2. Place your blinking cursor in the correct position for the new table.
  3. Press Insert  and select Table.
  4. Choose 2×1 (two columns and one row)to split the document in half.
  5. Of course, you may add more rows right from the start or afterwards and populate them with content.

With the table created, click on the cell you want to write in and start typing or paste the desired text. We also have a very useful guide on how to create and format a table in Word if you need more information such as how to hide the table borders.

How do I split the pages while printing the Word document?

This is not actually splitting the content of the pages but it rather prints two Word pages on one printed page. Here’s what to do:

  1. Click the File menu and select Print on your document.
  2. On the bottom, click on the 1 Page Per Sheet menu and select 2 Pages Per Sheet from the menu.
  3. The contents of 2 Word pages will be printed on a single printed sheet.

This technique can be very useful if you want to preview your document but save a lot of paper in the process. However, the results may vary in quality depending on the printer, the size of the font and the margins. We recommend testing it first with the first 2 pages and see how it looks before applying it to the whole document.

So, now you know how to split a page in half on Word by using simple and quick methods.

This guide was created for the desktop version of Word, but you may also use Word in a browser and the methods described above are identical.

If you have any other questions, drop us a line in the comments below.

Microsoft nearing a deal for more Capcom games to come to Xbox consoles, according to reports

According to a report, Microsoft is collaborating with Capcom to release more of its games on Xbox consoles. The games mentioned are from a group of classic Marvel-themed games that were re-released this year but not for Xbox consoles.

Capcom revealed that a new compilation of seven famous Marvel-themed games will be reissued as The Marvel vs. Capcom Fighting Collection: Arcade Classics. The first two Marvel vs. Capcom fighting games are part of this collection, which is set to hit the market in June. However, it’s important to note that only PC, Sony PS4, and Nintendo Switch platforms will have access to these re-released versions—not Xbox consoles.

Another fighting game that has been recently re-released, SNK vs. Capcom: SVC Chaos, is not coming to Xbox either. This situation makes many Xbox fans disappointed with these decisions.

Capcom didn’t give any reason for this exclusion, but some fans have said that the game’s use of Capcom’s MT Framework engine, which doesn’t work on Microsoft’s Xbox One, is why. A few of those fans have claimed that other Capcom games using MT Framework—such as Great Ace Attorney and the two Monster Hunter Stories titles—skipped the Microsoft Xbox platform because they couldn’t run with it, too.

But this weekend, there is fresh optimism that all those re-released games might finally debut on Xbox consoles. In the Xbox Two podcast (at 2:09:35), Jez Cordon from Windows Central states through anonymous sources that “Microsoft is actively engaged with Capcom” to resolve this MT Framework issue so that these games can be launched on Xbox consoles.

The report doesn’t include when Microsoft expects to solve this problem. If they try to fix it with Capcom and make these missing re-released games available, we might see them on the Xbox platform soon. Or who knows, in the cloud, as many think this is the future of the console.

Copilot has become an essential part of the global business network, says Microsoft

More than a year after their announcement on customer devices, businesses, and organizations have been using Microsoft’s generative AI services (Copilot) more frequently.

In a blog, Judson Althoff, Microsoft’s Executive Vice President and Chief Commercial Officer, said that companies and partners had utilized AI (Copilot) to boost the output of their workers and enhance customer participation and business procedures.

Althoff argued that organizations were using AI for responsible and safe innovation, citing a range of businesses and groups that used Microsoft’s AI services in the past fiscal year.

Together with our customers and partners, we have established how AI Transformation enriches employee experiences, reinvents customer engagement, reshapes business processes and bends the curve on pragmatic innovation. Our approach to put a Copilot on every desk for every role, identify AI design patterns and build a strong cybersecurity foundation is helping organizations harness AI responsibly, securely and with purpose.

Another company, Audi, plans to update the two million vehicles it has made since 2021. By integrating ChatGPT and Microsoft’s Azure OpenAI Service, these cars will have better voice control.

Another instance is Moody’s Corporation, which has employed numerous AI services from Microsoft, like Moody’s Copilot, a unique internal tool for accessing and synthesizing large amounts of data. Microsoft states that 94% of the employees at Moody’s have improved their productivity with these AI tools.

Dozens of other global companies have integrated Copilot into their infrastructure: for example, there is Coles, an Australian supermarket chain; eFishery, an Indonesian aquaculture park; EY, a finance platform; GHD, a global design and environmental platform; Hanover Research; Lumen Technology, with whom Microsoft recently made a deal; and many more.

Althoff stated that Microsoft is “dedicated” to making Copilot accessible on every device and every work role. The company’s financial results on July 30 might reveal more about its intentions and goals.

How do you feel about the higher adoption of AI services in everyday business activities? Do you view it as a blessing or an affliction?

How to Fix Windows Update Error 0x80240031

Many of our readers have complained about getting error 0x80240031 while installing an update on Windows 10. This could occur due to malware infection, incorrect configuration settings, insufficient disk space, or corrupted Windows system files.

How can I fix the Windows update error 0x80240031?

1. Run the Windows update troubleshooter

  1. Press Windows + I to open the Windows Settings app.
  2. Go to Update & Security.Update &  Security error 0x80240031
  3. Click Troubleshoot, then select Additional troubleshooters.
  4. From the list of troubleshooters, click Windows Update, then click the Run the troubleshooter button.Run the troubleshooter
  5. Follow the on-screen instructions to complete the process.

Running the troubleshooter can also help you fix Windows Update error code 0xc007000d; read this guide to learn more.

2. Perform a clean boot

  1. Press Windows + R to open the Run window.msconfig - error 0x80240031
  2. Type msconfig and click OK to open System Configuration.
  3. On the System Configuration window, go to the Services tab, place a checkmark next to Hide all Microsoft services, and click Disable all.  This will ensure only non-Microsoft services are disabled.Services- error 0x80240031
  4. Switch to the Startup tab and click the Open Task Manager link.Open task manager
  5. On the Task Manager window, for each Enabled item, select them one by one and click Disable. You can always turn them back off.Disable startup
  6. Close Task Manager.
  7. On the System Configuration window, click Apply, then OK.Click OK and Apply- error 0x80240031
  8. Click Restart to reboot your PC.

3. Reset the Windows components

  1. Press the Windows key, type cmd in the search box, and select Run as administrator.Command Prompt Windows 10
  2. Type the following commands to stop the BITS and Windows Update services and hit Enter after each command: net stop bits
    net stop wuauserv
  3. Copy & paste the following script to delete the qmgr*.dat files and press Enter: Del "%ALLUSERSPROFILE%Application DataMicrosoftNetworkDownloaderqmgr*.dat"
  4. Type the following commands to rename the following folders to *.BAK and hit Enter after every command: Ren %systemroot%SoftwareDistributionDataStore *.bak
    Ren %systemroot%SoftwareDistributionDownload *.bak
    Ren %systemroot%system32catroot2 *.bak
  5. Now, copy & paste the following commands to reset the BITS service and the Windows Update service and hit Enter after every command : sc.exe sdset bits D:(A;;CCLCSWRPWPDTLOCRRC;;;SY)(A;;CCDCLCSWRPWPDTLOCRSDRCWDWO;;;BA)(A;;CCLCSWLOCRRC;;;AU)(A;;CCLCSWRPWPDTLOCRRC;;;PU)
    sc.exe sdset wuauserv D:(A;;CCLCSWRPWPDTLOCRRC;;;SY)(A;;CCDCLCSWRPWPDTLOCRSDRCWDWO;;;BA)(A;;CCLCSWLOCRRC;;;AU)(A;;CCLCSWRPWPDTLOCRRC;;;PU)
  6. Type in this command to open System32 and press Enter: cd /d %windir%system32
  7. Copy & paste the following commands to reregister the BITS and Windows Update files and hit Enter after each command:
    regsvr32.exe atl.dll
    regsvr32.exe urlmon.dll
    regsvr32.exe mshtml.dll
    regsvr32.exe shdocvw.dll
    regsvr32.exe browseui.dll
    regsvr32.exe jscript.dll
    regsvr32.exe vbscript.dll
    regsvr32.exe scrrun.dll
    regsvr32.exe msxml.dll
    regsvr32.exe msxml3.dll
    regsvr32.exe msxml6.dll
    regsvr32.exe actxprxy.dll
    regsvr32.exe softpub.dll
    regsvr32.exe wintrust.dll
    regsvr32.exe dssenh.dll
    regsvr32.exe rsaenh.dll
    regsvr32.exe gpkcsp.dll
    regsvr32.exe sccbase.dll
    regsvr32.exe slbcsp.dll
    regsvr32.exe cryptdlg.dll
    regsvr32.exe oleaut32.dll
    regsvr32.exe ole32.dll
    regsvr32.exe shell32.dll
    regsvr32.exe wuaueng.dll
    regsvr32.exe wuaueng1.dll
    regsvr32.exe wucltui.dll
    regsvr32.exe wups.dll
    regsvr32.exe wups2.dll
    regsvr32.exe wuweb.dll
    regsvr32.exe qmgr.dll
    regsvr32.exe qmgrprxy.dll
    regsvr32.exe wucltux.dll
    regsvr32.exe muweb.dll
    regsvr32.exe wuwebv.dll
    regsvr32.exe initpki.dll
    regsvr32.exe wuapi.dll
  8. Type the command to reset Winsock using the following command and press Enter: netsh winsock reset
    net start bits
    net start wuauserv
  9. Now, copy & paste the following commands to restart the BITS and the Windows Update services and hit Enter after every command: net start bits
    net start wuauserv
  10. Restart your computer to let the changes take effect.

Resetting the Windows components can also help you fix the Windows Update not loading or working; check out the guide to learn more.

4. Run SFC & DISM scans

  1. Press the Windows key, type cmd in the search box, and click Run as administrator.Command Prompt Windows 10 - error 0x80240031
  2. Copy & paste the following command to repair the Windows update files and press Enter: DISM /Online /Cleanup-Image /CheckHealth
    DISM /Online /Cleanup-Image /ScanHealth
    DISM /Online /Cleanup-Image /RestoreHealth
  3. Once done, you will see The restore operation completed successfully; type the following command to repair the system files and hit Enter: sfc/scannowScan now Windows 10 - error 0x80240031
  4. Wait until you see sfc scan verification reaches 100% completion, then close the Command Prompt window.
  5. Reboot your PC to save the changes.

Running a DISM scan can also help you fix if there were some problems installing updates issue; read this separate guide to learn more.

5. Repair the hard driver errors

  1. Press the Windows key, type cmd in the search box, and click Run as administrator.Command Prompt Windows 10 - error 0x80240031
  2. Type the following command to repair the hard driver error and hit Enter: chkdsk/f C:Check disk - C
  3. Type Y to proceed; once the command is executed, restart your computer.

6. Run Automatic Repair

  1. Press Windows + I to open the Windows Settings app.
  2. Go to Update & Security.Update & Security error 0x80240031
  3. Click Recovery from the left pane.
  4. Locate Advanced Startup and click Restart Now.Recovery Advanced startup - error 0x80240031
  5. The computer will restart and will take you to the blue screen.
  6. Click Troubleshoot.
  7. Then, on the next page, select Advanced Options.
  8. Click Automatic Repair to initiate the repair process.

7. Perform a clean installation

Note icon NOTE
Backup your important data, and ensure you have the product key or access to the Microsoft account. Also, make sure you have an 8 GB USB drive to create a bootable installation media.

7.1 Create installation media

  1. Go to the Microsoft Windows 10 download page.Down,oad now - error 0x80240031
  2. Click the Download tool now to get the Media Creation tool on your device.
  3. Connect the USB drive, double-click the Media Creation tool to run it, and click Accept.Accept the terms and click Next
  4. Select Create installation media (USB flash drive, DVD, or ISO file) for another PC, and click Next.NExt
  5. Choose the language, edition, and architecture (32-bit or 64-bit) for Windows 10, then click Next.Create an installation media
  6. Select USB flash drive and click Next. This will make the USB a bootable media.

7.2 Install Windows 10

  1. Connect the USB drive to the targeted computer, then restart it.
  2. Press F2, F12, ESC, or DEL (the specific key per your manufacturer) during startup to access the BIOS/UEFI settings.
  3. In the BIOS settings, go to the Boot menu and select the USB drive to prioritize booting from the flash drive, then press F10 to save the changes and exit.
  4. Now, the computer will restart and boot from the USB drive.
  5. Select the language, time and currency format, & keyboard input method, then click Next.
  6. Click the Install Now button.INstall - error 0x80240031
  7. On the following screen, enter the Windows 10 product key when asked. You can skip the step if you have already activated Windows 10 and installed it on the device.
  8. Next, accept the license terms and click Next.
  9. Choose Custom: Install Windows only (Advanced) to perform a clean installation.Custom Advanced
  10. Select the drive you want to install Windows, or you can delete existing partitions. If you want to perform a completely fresh installation, choose the partition of your drive, then click Delete. In case you need a new one, click New to create a new partition.
  11. Follow the on-screen instructions to complete the process.

7.3 Configure Windows settings

  1. Once the installation is done, choose your region and keyboard layout.
  2. Connect to the Wi-Fi network when prompted.
  3. Next, sign in with a Microsoft account or create if needed.
  4. Choose the privacy settings per your preferences, then follow other prompts to set up other features.
  5. Once the setup is complete, go to Windows + I to open Settings, go to Update & Security, and choose Windows Update.Check for updates - error 0x80240031
  6. Click Check for updates.

To conclude, to fix the Windows Update error 0x80240031 on Windows 10, you can run the SFC scan to repair the corrupted system files, try performing automatic repair, or reset Windows components. You can also use a reliable Windows Update repair tool to fix all such errors automatically and quickly.

If you have any other suggestions or comments about the topic, feel free to mention them in the comments section below. Additionally, if you need any help with error code 8024200d, we have just the guide for you.