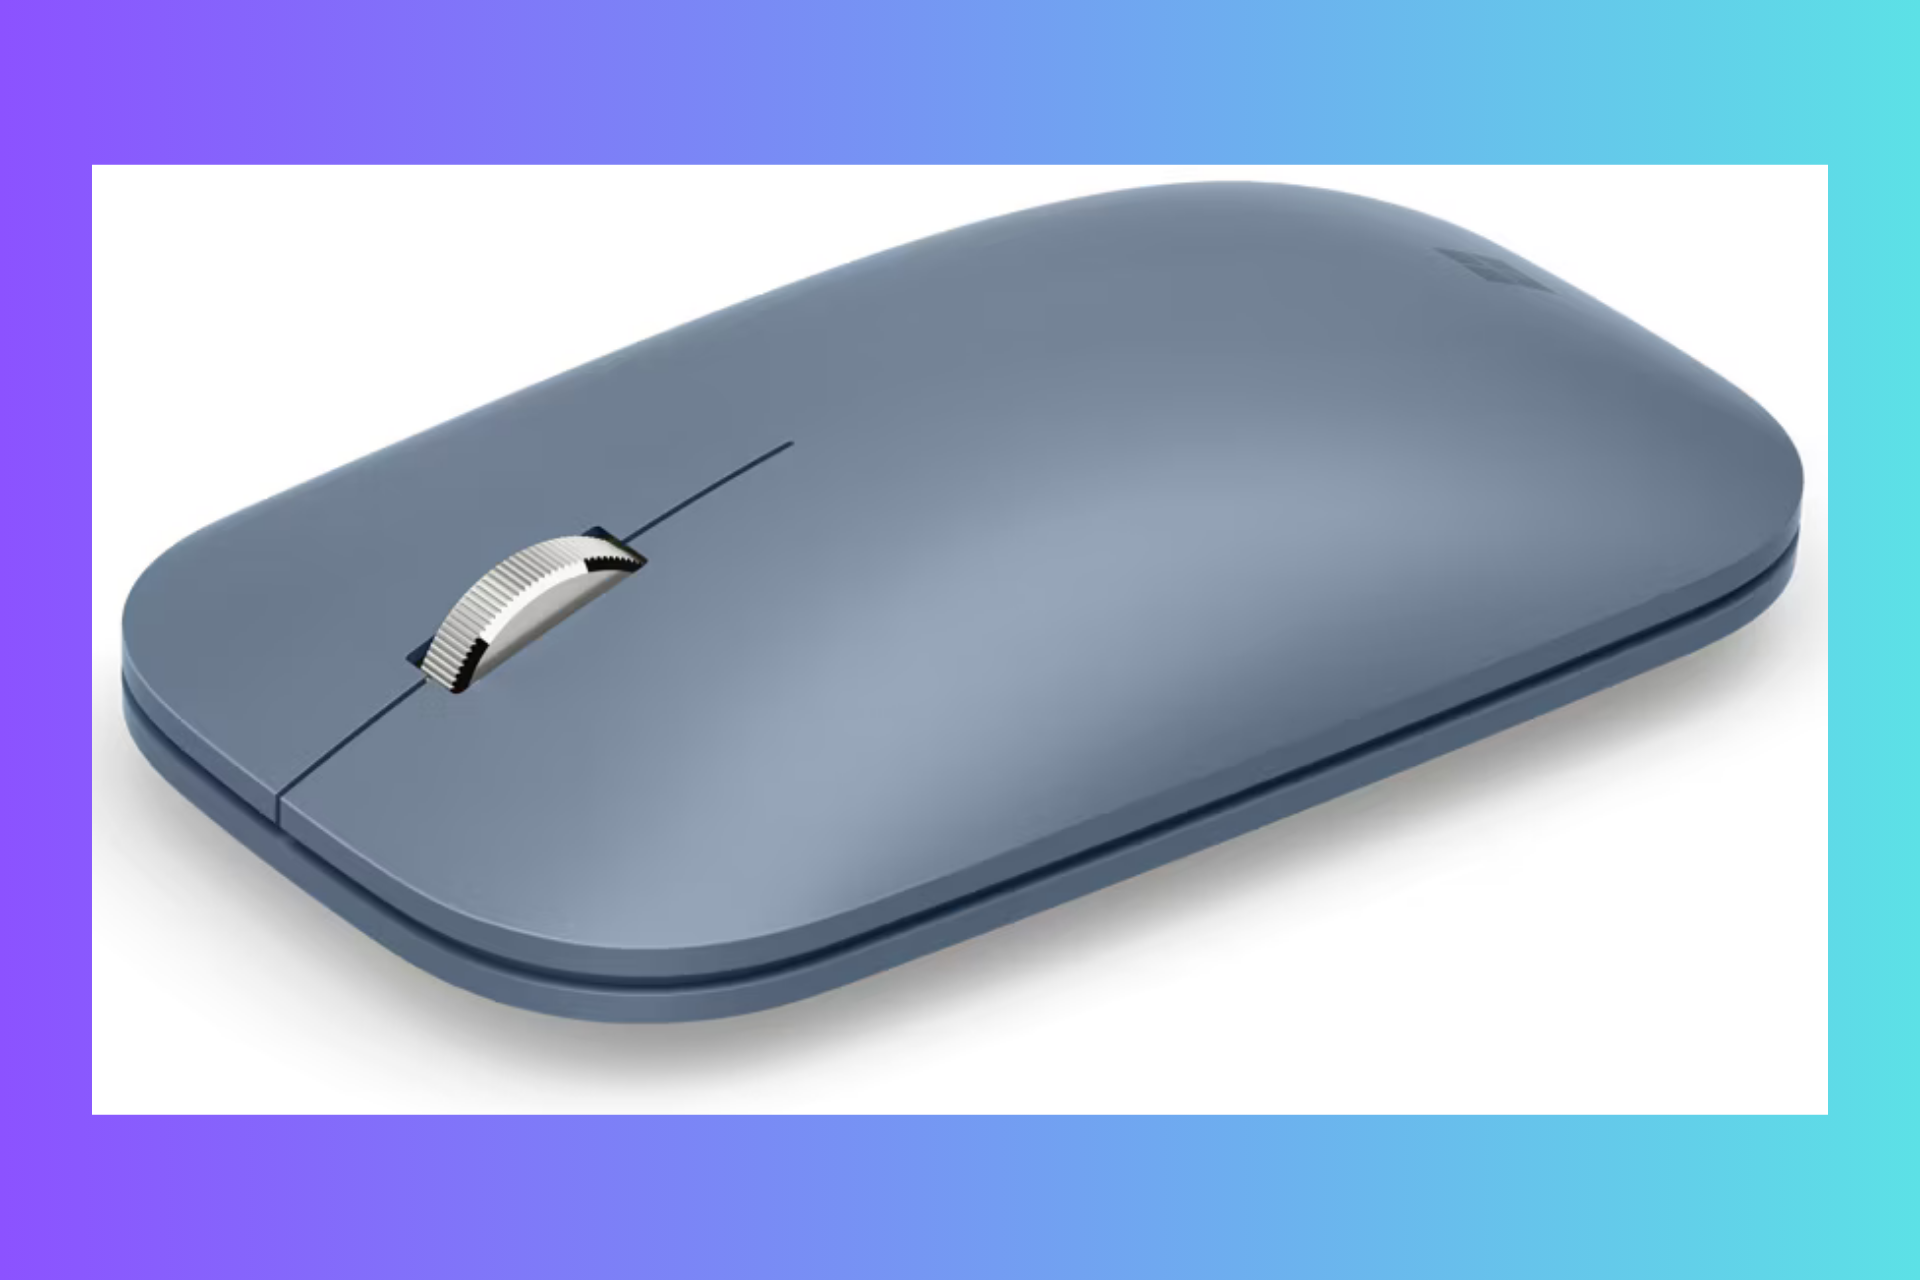
Microsoft Surface Mobile Mouse Review: Too Flat For Long Usage

When it comes to portable and efficient peripherals, the Microsoft Surface Mobile Mouse stands out as a popular choice among Windows users. Let’s dive into a comprehensive review, exploring its pros and cons, and providing practical solutions to common issues.

All about Microsoft Surface Mobile Mouse

1. Design and basic usage

This sleek little device has been turning heads with its stylish design, long battery life, and the kind of wireless connectivity that dreams are made of. And the best part? It won’t leave your wallet feeling too light. It’s a well-engineered peripheral that’s both functional and affordable, making it a standout choice for anyone on the go.

However, right from the start I was baffled by its skinny figure. Yeah, it’s just another Apple Magic Mouse clone and of course, it’s a mobile mouse, not a regular desktop one, but still, it’s pretty hard to hold. If you’ve got larger hands, you might find the limited palm support a tad uncomfortable.

On the positive side, the Surface Mobile Mouse sports a comfortable, space-saving design that’s easy on the eyes. Its sturdy build and multiple color options mean you can match it with your other gadgets or let it stand out on its own.

Another plus is that Microsoft’s mouse is ambidextrous, making it a great pick for lefties and righties alike.

2. Connection and battery

Setting it up is a breeze, thanks to its support for Windows Swift Pair, and once you’re up and running, you’ll enjoy a long battery life that’s sure to keep you clicking happily for months on end.

But it’s not all sunshine and rainbows. While this mouse is a marvel in many ways, it does have its downsides. The occasional connection lag can be a bit of a bummer. That said, these are relatively minor gripes in the grand scheme of things.

It connects via Bluetooth and features a Microsoft BlueTrack sensor with a maximum resolution of 1800 dpi. Power comes from disposable AAA batteries, and the whole package weighs in at a feather-light 2.75 ounces.

If you compare it to Microsoft Modern Mobile Mouse, for instance, the latter a similar blend of portability and price, albeit with a feature set that some might find a bit light. It’s incredibly slim and light, making it a dream for travelers, but its slim profile might not be everyone’s cup of tea.

To start off, Microsoft Surface Mobile Mouse needs the two AAA included batteries. Turn on the Bluetooth connection from your laptop and then press the Bluetooth button on the mouse until the light starts flashing. That means it’s powered and in pairing mode.

Thanks to Windows Swift Pair, the laptop will immediately identify the mouse and prompt you to connect it.

However, you can still connect it the old fashioned way. On your laptop open Settings > Devices > Bluetooth & other devices, then click on Add Bluetooth or other device and click on the Surface Mobile Mouse when you see it on the list.

As for the battery autonomy, Surface Mobile Mouse is rated for up to 12 months of typical usage. We tested it for two weeks and it barely went to 99% with 8 hours of usage per day. That means you can forget about that aspect for a very long time. And if you want to prolong the battery life even more, long press the power button to turn it off when it’s not in use.

3. Microsoft Surface Mobile Mouse price

Right now, the Microsoft Surface Mobile Mouse is not available in Microsoft Store, but you can still find it on Amazon with a price starting from $41. So, it’s pretty affordable for a sleek mobile mouse.

Pros & cons of the Microsoft Surface Mobile Mouse

Pros:

  • Portability: Lightweight and compact, making it easy to carry around.
  • Design: Sleek and modern design that complements Surface devices.
  • Battery Life: Long-lasting battery life with efficient power usage.
  • Connectivity: Easy Bluetooth pairing with Windows devices.

Cons:

  • Lag Issues: Occasional connection lag can be frustrating.
  • Surface Compatibility: May not work well on all surfaces without a mouse pad.
  • Customization: Limited customization options without additional software.

Conclusion

In the end, whether you’re a digital nomad in need of a trusty companion for your laptop, or just someone who appreciates the finer things in tech, the Microsoft Surface Mobile Mouse is worth a look. Its blend of style, functionality, and affordability makes it a compelling choice for anyone in the market for a mobile mouse. So, why not give it a whirl? Your perfect tech accessory might just be a click away.

While you’re here, you may also check out the Arc Touch Bluetooth mouse, because you might also like it. And if you need more options, we’ve got a list of the best mice for Windows PCs.

Do you already have a Microsoft Surface Mobile Mouse? Describe your experience in the comments below.
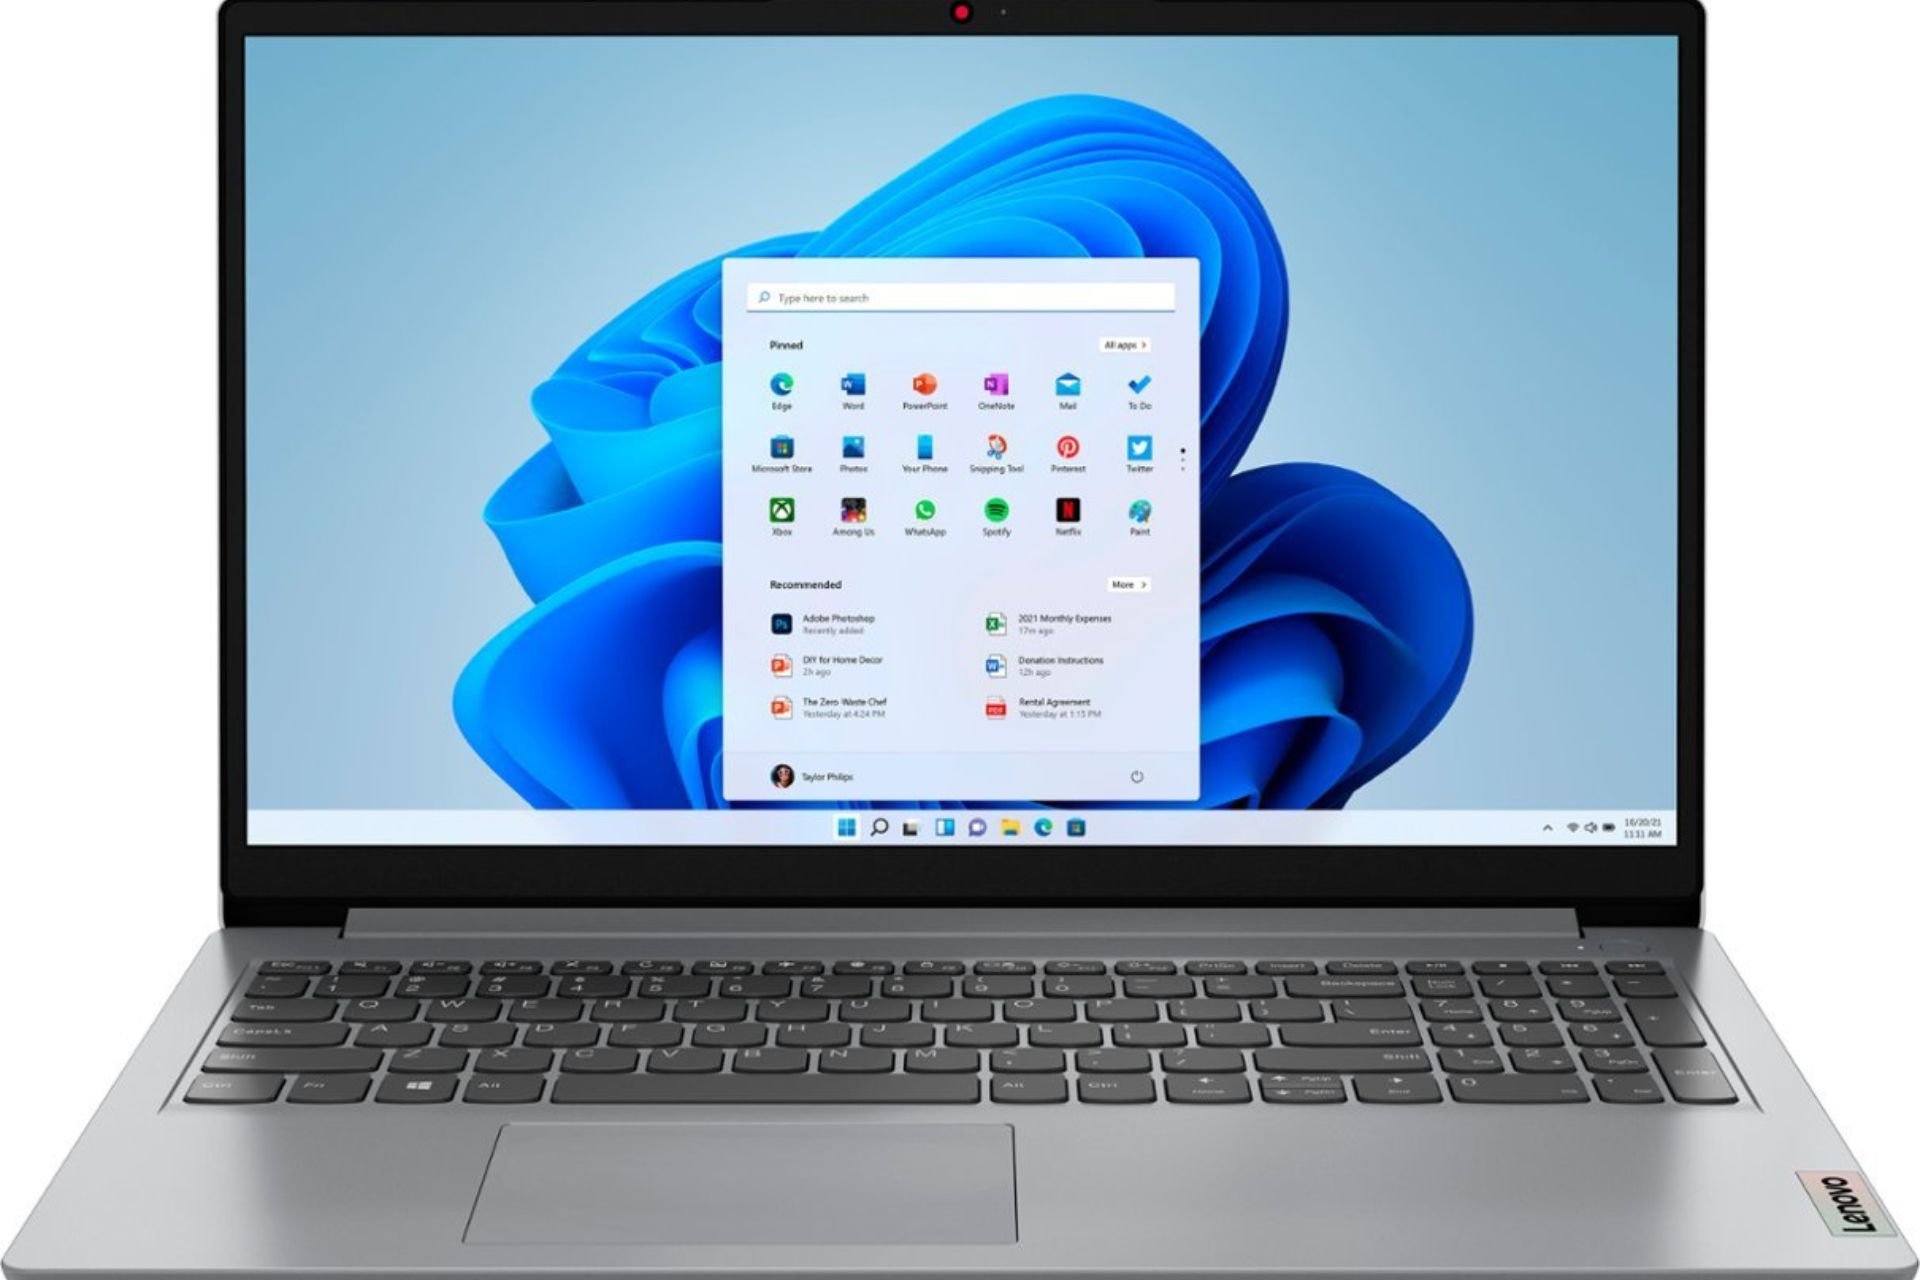
The fast and efficient Lenovo IdeaPad 1i is now available at half the price

Have you heard about the Lenovo laptop deal for back-to-school? It’s exciting news, particularly if you’re looking for a dependable and reasonably priced laptop before school starts again.

Best Buy offers a massive 50% discount on the Lenovo IdeaPad 1i. Previously priced at $500, this laptop is now marked down to only $250. But there’s a catch: we don’t know how long this deal will be available, so if it meets all your needs, you might want to grab it fast before time runs out.

Now, you may ask, “Why should I consider the Lenovo IdeaPad 1i?” First of all, it has many features that are good for students. It works with a 12th-generation Intel Core i3 processor, includes integrated Intel UHD Graphics, and has 8 GB RAM. This arrangement is very well suited for usual activities such as searching online, writing reports, and making presentations.

It also has a touch-sensitive 15.6-inch screen with Full HD resolution, which makes this device good for both working and enjoying entertainment tasks. Windows 11 Home in S Mode comes installed on a 256GB SSD, so you can keep all your files well organized while having an operating system that feels familiar to use.

But what makes this deal unique? Not every laptop deal is the same. Some target professionals and some are for gamers. This offer, in particular, is centered around giving students a choice that fits their budget.

Based on the price of $250 after Best Buy’s 50% off deal, it’s an inviting chance. As families prepare for the start of school season, offers such as this are being grabbed quickly. So, if you’re eyeing the Lenovo IdeaPad 1i, my advice is to act fast.

In the tech world, it is common to be attracted by new devices that are expensive. However, sometimes, a basic and affordable solution can also do the job well. The Lenovo IdeaPad 1i shows this concept, as it provides good performance at a fraction of the price.

This deal should not be overlooked if you are a student requiring an enduring partner for your studies or simply searching for a basic laptop to handle daily tasks. So, why not give it a try and assess whether it meets your requirements?

If you want to get it, you can find it here.

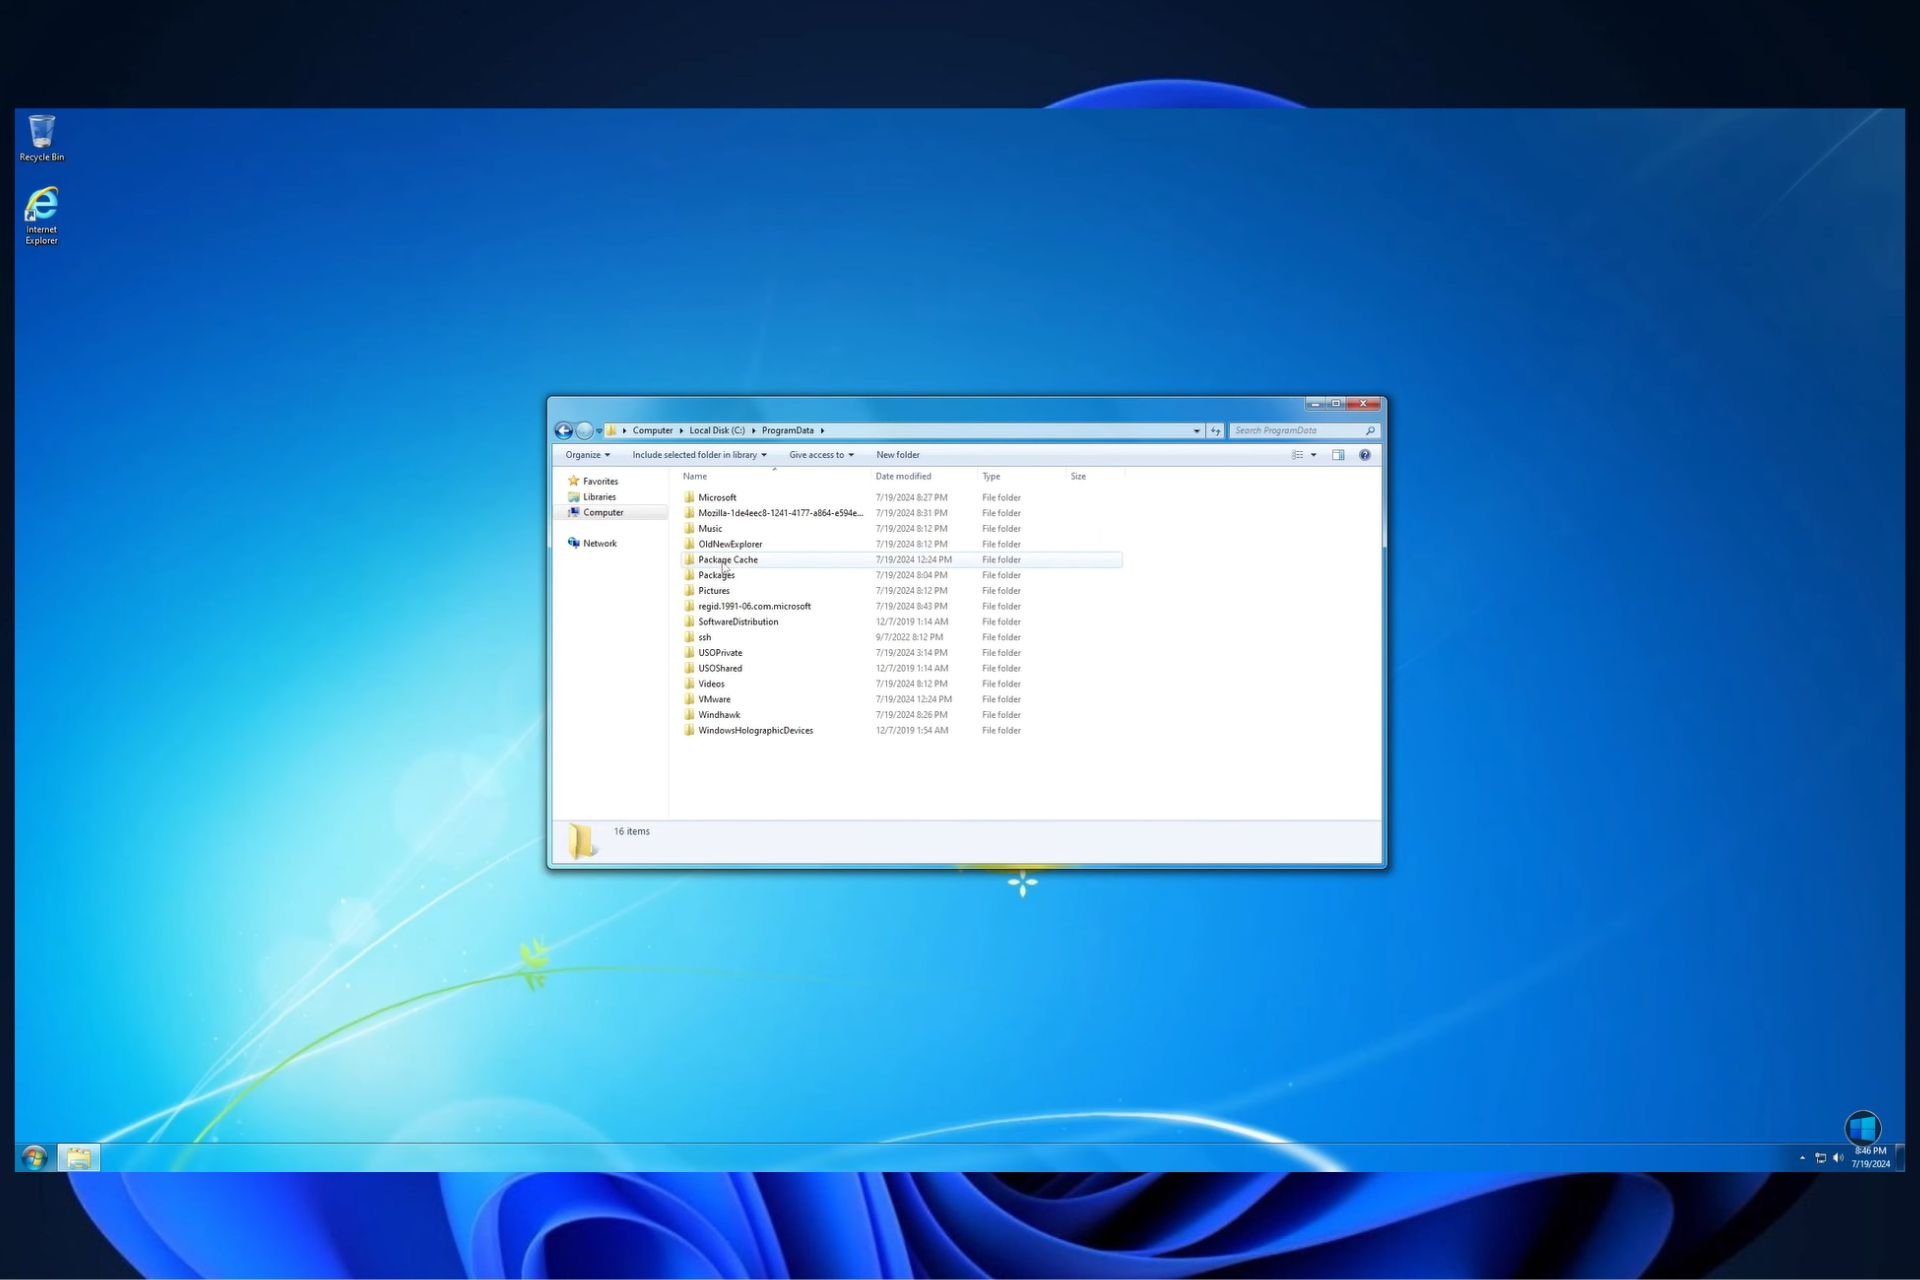
Turn your Windows 11 into Windows 7 in 17 minutes. Here’s how

Have you ever thought about going back in time with your Windows 10 computer? Surprisingly, it’s possible! Picture converting your contemporary Windows 10 setup into the much-loved old-style Windows 7 interface. It might read like a tech lover’s wish, but this is not just an idea; recently, a Windows fan and YouTuber showed how it can be done.

They modified the Registry, customized Group Policy settings, and utilized the AME Wizard to transform their Windows 10 into a complete resembling of Windows 7. This process combines tech magic with a hint of nostalgia, making it an intriguing project for those who long for the straightforwardness and layout of Windows 7.

Now, you could be wondering, “Why all of this?” Even though Windows 11 was introduced almost three years ago, Microsoft has struggled to gain support from most of its user community. Statcounter data shows that less than one-third of the market share is owned by Windows 11, and many users still hold on to Windows 7—one of OS’s most cherished versions.

On the other hand, Windows 10 is still leading in market share. This shows that many users are not ready to leave behind what they know and find comforting from earlier versions of Windows.

The change happened by employing a playbook named “Transforming Windows 10 into Windows 7 pack” on AME Wizard, combined with Revert8Plus, for that added genuine feel. AME Wizard is a modding tool that helps personalize Windows through the application of Playbooks.

These are ready-made or user-designed guides encompassing all settings modifications and adjustments. The AME Wizard is available in Windows 10 and 11 versions to accommodate users from either operating system.

Even though the thought of converting your Windows 10 to resemble Windows 7 is surely attractive, it must be remembered that such changes are not suggested for your main PC. This could serve as an exciting test in a virtual machine (VM), where you can experiment without endangering the steadiness and safety of your primary system.

So, should you try this on your main computer? Well, we don’t recommend it. But if you’re seeking a touch of reminiscence or just like the Windows 7 user interface more while keeping the Windows 11 functionalities, preparing a VM and trying out this change might be an enjoyable venture.

The European Commission doesn’t see itself responsible for Microsoft’s IT outage

After a Microsoft exec accused it of being partially responsible for last week’s enormous IT outage, the European Commission strongly rejected any blame.

As we all know, last week, the world experienced one of the most significant outages in information technology (IT), leading to various disturbances – flights got late, businesses faced difficulties with payment transactions, and healthcare services were greatly affected.

The central piece of this chaos was a big time-out, which impacted many computers running Windows and using the Falcon cybersecurity software from CrowdStrike. Right after finding temporary solutions, Microsoft hinted that a ten-year-old deal with the European Commission is to blame for this unprecedented disruption.

The European Commission, though, has rapidly responded to protect its position in a statement to Euronews. A spokesperson clarified that Microsoft never mentioned any security worries before or after the incident. This statement was a clear answer to Microsoft’s suggestion that the agreement made in 2009—which aimed at creating equal opportunities for providers of security software—somehow added to this mess.

Microsoft is free to decide on its business model. It is for Microsoft to adapt its security infrastructure to respond to threats in line with EU competition law. Additionally, consumers are free to benefit from competition and choose between different cybersecurity providers.

The European Commission

The situation is intriguing because it shows that the outage was not limited to the EU, which makes us think about how these IT weaknesses can affect the world. The Commission spokesperson also noted that consumers have a choice in selecting cybersecurity services from different providers, implying a competitive environment for Microsoft to handle smartly.

Fix: Upstream Connect Error or Disconnect/Reset Before Headers

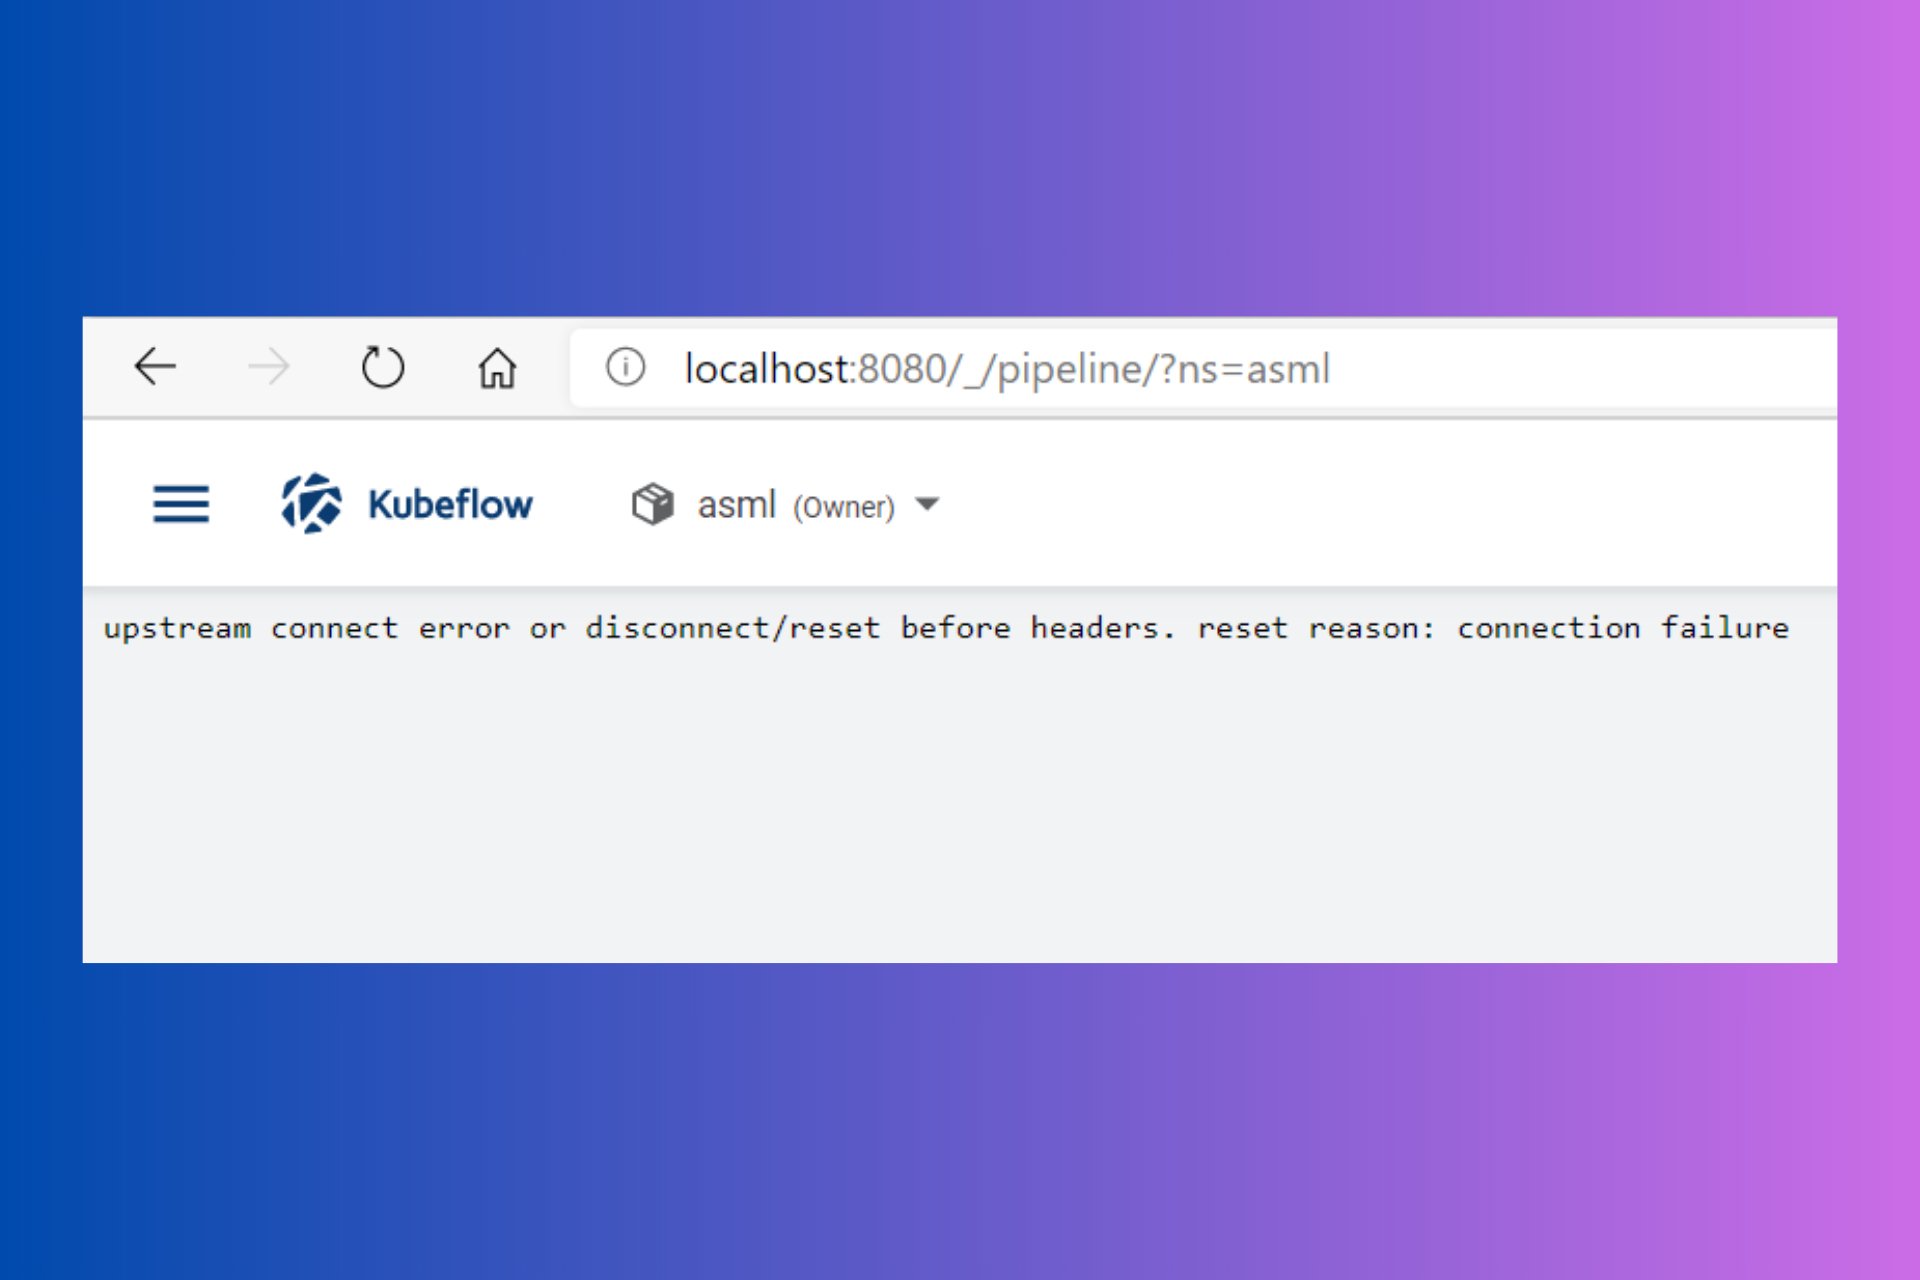
Dealing with the upstream connect error or disconnect/reset before headers issues can be quite frustrating. The message indicates that the connection between the client and the server was closed before the server could send a response. This issue can occur in different scenarios, but it usually applies in programming situations.

How do I fix the Upstream connect error or Disconnect/Reset Before Headers?

1. Check your firewall settings

  1. Open the firewall settings on your cloud platform:
    • For Azure, you can find this under Network Security.
    • For GCP, it’s typically under VPC Network > Firewall Rules.
    • For AWS, go to the Security Groups settings.
  2. Locate the firewall rule for your container or VM:
    • Look for inbound rules allowing traffic.
  3. Ensure the correct ports are open:
    • Typically, you need to open ports like 80 (HTTP), 443 (HTTPS), or any custom port your app uses (e.g., 6001 for Kestrel).
  4. Add rules if necessary:
    • Add a rule to allow inbound traffic on the necessary ports and assign it to the appropriate network interface.

This solution ensures that your app can receive traffic from external sources by having the proper firewall rules configured.

2. Update Istio Gateway and VirtualService configuration

  1. Check your Gateway and VirtualService configurations:
    • Open your Istio configuration files (gateway.yaml, virtualservice.yaml).
  2. Verify port configurations:
    • Ensure the ports defined in your Gateway match the ports exposed by your services.
    • Example for Gateway: apiVersion: networking.istio.io/v1alpha3 kind: Gateway metadata: name: my-gateway namespace: istio-system spec: selector: istio: ingressgateway servers: - port: number: 443 name: https protocol: HTTPS tls: mode: SIMPLE credentialName: "my-credential" hosts: - "my-host.example.com"
  3. Check VirtualService routes:
    • Ensure your VirtualService has the correct route configuration.
    • Example for VirtualService: apiVersion: networking.istio.io/v1alpha3 kind: VirtualService metadata: name: my-service spec: hosts: - "my-host.example.com" gateways: - my-gateway http: - route: - destination: host: my-service port: number: 443

By ensuring that your Gateway and VirtualService configurations are correct and match your service requirements, you can avoid connectivity issues. Also, make sure that you are using the correct yaml file.

3. Check pod and service naming and port configuration

  1. Check your Kubernetes Service configuration:
    • Ensure the ports defined in your Service match the ports your application exposes.
    • Example: apiVersion: v1 kind: Service metadata: name: my-service spec: selector: app: my-app ports: - protocol: TCP port: 443 targetPort: 8080 name: https
  2. Update your deployment’s container port:
    • Ensure the container definition in your deployment YAML exposes the correct port.
    • Example: apiVersion: apps/v1 kind: Deployment metadata: name: my-app spec: replicas: 1 selector: matchLabels: app: my-app template: metadata: labels: app: my-app spec: containers: - name: my-container image: my-image ports: - containerPort: 8080

Correctly configuring your Service and Deployment ensures that Istio can correctly route traffic to your pods, avoiding connection errors.

4. Check resource allocation and node health

  1. Check node resource allocation:
    • Ensure your Kubernetes nodes have adequate resources (CPU, memory) allocated.
    • You can check node resource usage using kubectl top nodes and kubectl describe node <node-name>.
  2. Add more nodes or increase the resources of existing nodes if they are under heavy load.
  3. Restart the affected pods:
    • Restart your application pods to clear any potential memory leaks or resource allocation issues.
    • Use kubectl rollout restart deployment <deployment-name>
  4. Monitor node health via your cloud provider’s monitoring tools (CloudWatch for AWS, Cloud Monitoring for GCP, or Azure Monitor).

Ensuring your nodes have sufficient resources and are healthy helps prevent downtime and connection errors due to resource constraints.

5. Use the correct protocol and security settings

  1. Check protocol settings:
    • Ensure you’re using the correct protocol (HTTP/HTTPS) in your configurations.
    • Update Dockerfile or environment variables to expose the correct ports.
  2. Set environment variables correctly:
    • Example for Dockerfile: FROM mcr.microsoft.com/dotnet/aspnet:5.0 EXPOSE 80 ENV ASPNETCORE_URLS=https://+:80
  3. Adjust ASP.NET Core/Kestrel settings:
    • Ensure Kestrel is set to listen on the correct ports.
    • Example in Program.cs:public class Program { public static void Main(string[] args) { CreateHostBuilder(args).Build().Run(); } public static IHostBuilder CreateHostBuilder(string[] args) => Host.CreateDefaultBuilder(args) .ConfigureWebHostDefaults(webBuilder => { webBuilder.UseStartup<Startup>() .UseUrls("https://+:80"); }); }

Correct protocol and port configuration ensure your application is accessible as expected, avoiding the disconnect/reset error.

FAQ

What does upstream connect error or disconnect/reset before headers mean?

It indicates that your request never reached the server, often due to gateway or proxy issues.

How do I fix upstream connect error or disconnect/reset before headers?

Try refreshing the page, clearing cookies, changing DNS, or switching to another network.

Is this error caused by my internet connection?

Sometimes. Unstable connections, VPNs, or DNS problems can trigger the error.

Can the error be on the service provider’s side?

Yes. If the server has no healthy upstreams or is under maintenance, you must wait until it is resolved.

By following these solutions, you can troubleshoot and resolve the upstream connect error or disconnect/reset before headers error in your Kubernetes and Istio environments. Always remember to monitor your configurations and resource allocations to prevent future issues.

In some cases, the error may change into a no healthy upstream message. If that happens, you should look into these dedicated solutions for no healthy upstream errors or even the specific case of Spotify upstream problems. These resources give you service-specific fixes that can save time and effort.

For any other questions or suggestions, scroll down to the comments section.

Audio Conferencing For Microsoft Teams Has Been Turned Off

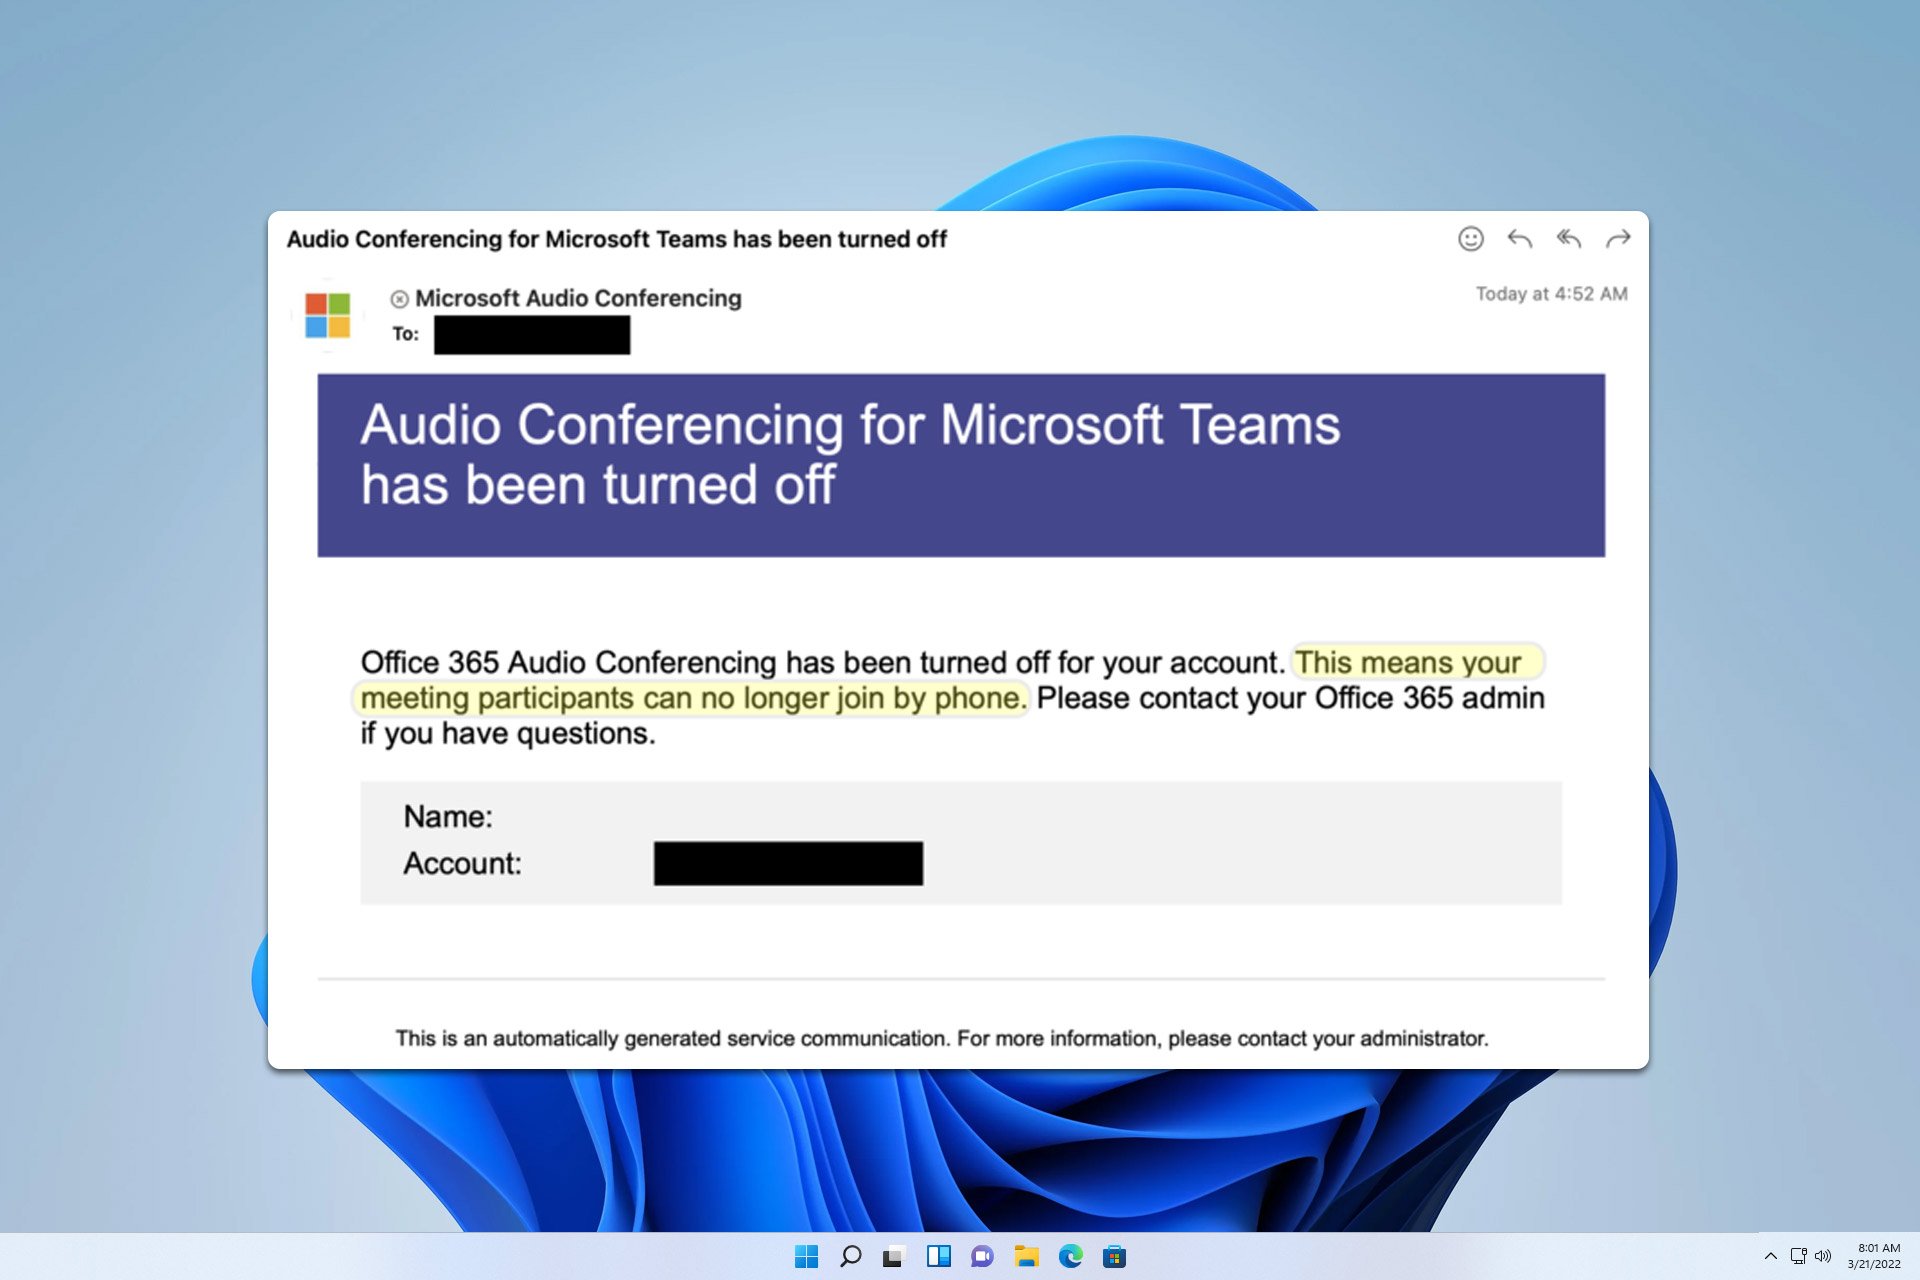
Audio conferencing for Microsoft Teams has been turned off message can be a real headache, especially when you have important meetings lined up. However, the issue can be fixed with these steps.

What does it mean when audio conferencing for Microsoft Teams has been turned off?

If you get this email message, it means that your audio conferencing license has expired, and it needs to be renewed.

What can I do if Audio conferencing for Microsoft Teams has been turned off?

If this happens, contact your IT administrator to confirm that you have the correct Microsoft 365 subscription or add-on for Audio Conferencing enabled.

 1. Check your subscription

  1. Log in to Microsoft 365.
  2. Navigate to the Admin center.
    admin center office 365
  3. Head to Billing and then to Your products and verify that the Audio Conferencing license is active.

2. Check Conferencing policies

  1. Log in to Microsoft Teams as an admin.
  2. In the left navigation pane, go to Meetings and choose Conference Bridges.
    conference bridges admin center
  3. At the top of the Conference Bridges page, select Bridge settings.
    bridge settings admin center
  4. Verify and, if needed, modify settings like dial-out permissions and meeting join options.
  5. Ensure that Automatically send emails to users if their dial-in settings change is enabled if you want users to receive notifications about their conferencing settings.

As you can see, Audio conferencing for Microsoft Teams has been turned off message is a licensing issue, and in most cases, only your administrator can address it, so be sure to contact it.

Regarding other audio problems, many reported that audio is not working in Microsoft Teams as well as echo problems during Teams calls.

We hope that this guide helped you fix this problem. If we missed a solution that worked for you, let us know in the comments.

How To Highlight Text in Gmail on Desktop and Mobile

Want to know how to highlight text in Gmail? It allows you to modify text and background colors so you can draw attention to important points. Highlighting is especially useful for providing targeted feedback or clear instructions in your emails.

Best of all, it’s very simple to do. I’ll show you how below!

How To Highlight Text in Gmail

You can highlight the text using the desktop or mobile version.

On Desktop

Follow the below steps:

  1. Go to your Gmail account and tap Compose.
Gmail account on desktop
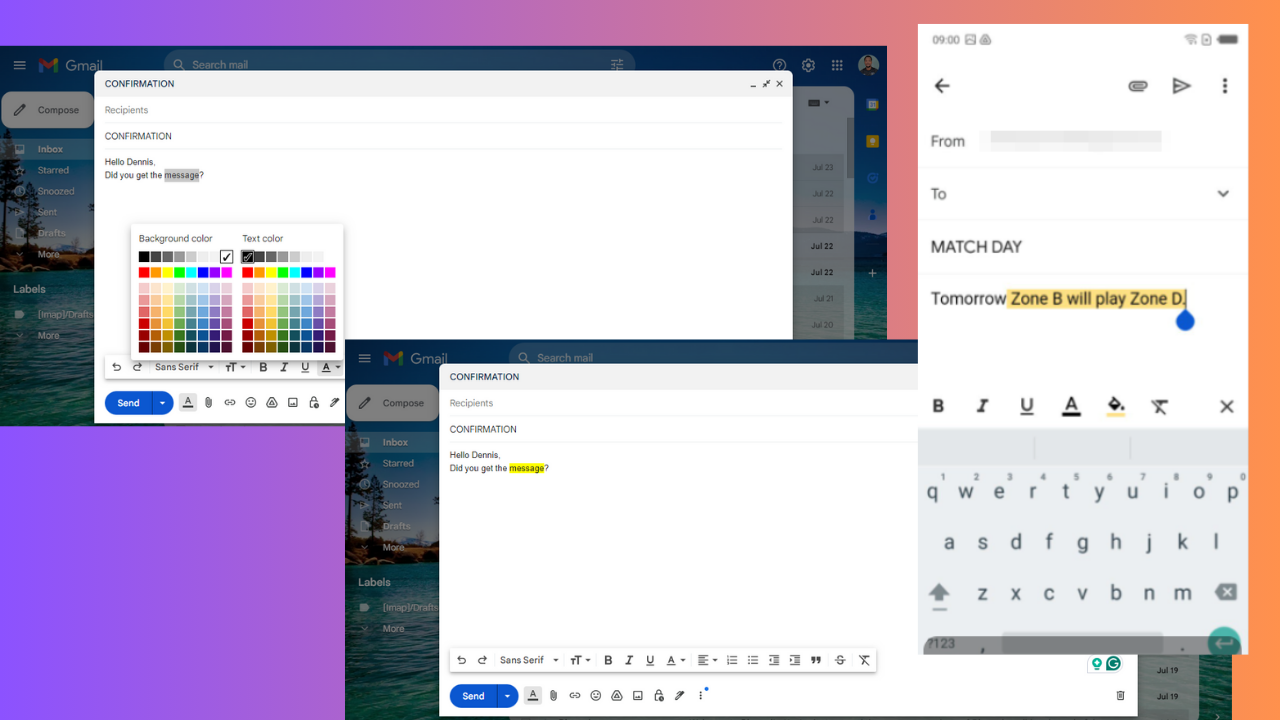
  1. Type your email and select the text you want to highlight.
Highlight text
  1. Tap the Formating options icon, then click the color text drop-down arrow.
Click format
  1. Choose a background color of your choice.
Pick color
  1. The text will be highlighted in the color you picked.
Text highlighted

On Mobile

Here are the steps:

  1. Go to your Gmail account and hit Compose.
Compose message
  1. Write a message, select the text to highlight, and hit Format.
format
  1. Tap on the text color icon.
Color text icon
  1. Select a color and the text background will be highlighted automatically.
Highlighted text

So, now you’ve learned how to highlight text in Gmail. Whether you’re using a desktop or mobile device, this will help you emphasize key points in your messages.

Moreover, we can also help you unarchive or set up group emails.

Best Slack Themes and How to Create Your Own

Customizing your Slack workspace can make your daily interactions more enjoyable and visually appealing. Whether you prefer default themes or want to create your own, here are some of the best ways to personalize your Slack experience.

How do I set up the best theme for Slack?

1. Using default Slack themes

  1. Open Slack Desktop App or Web App.
  2. Click on your profile picture in the lower-left corner.
  3. Select Preferences from the dropdown menu.
  4. In the Preferences menu, click on Themes on the left-hand sidebar.
  5. Under Slack Themes, you’ll find several default themes. Select any theme to apply it immediately.

This solution is perfect if you prefer a quick and simple way to change the look of your Slack without dealing with hex codes or custom themes.

2. Creating a custom Slack theme

  1. Open Slack Desktop App or Web App.
  2. Click on your profile picture in the lower-left corner.
  3. Select Preferences from the dropdown menu.
  4. In the Preferences menu, click on Themes.
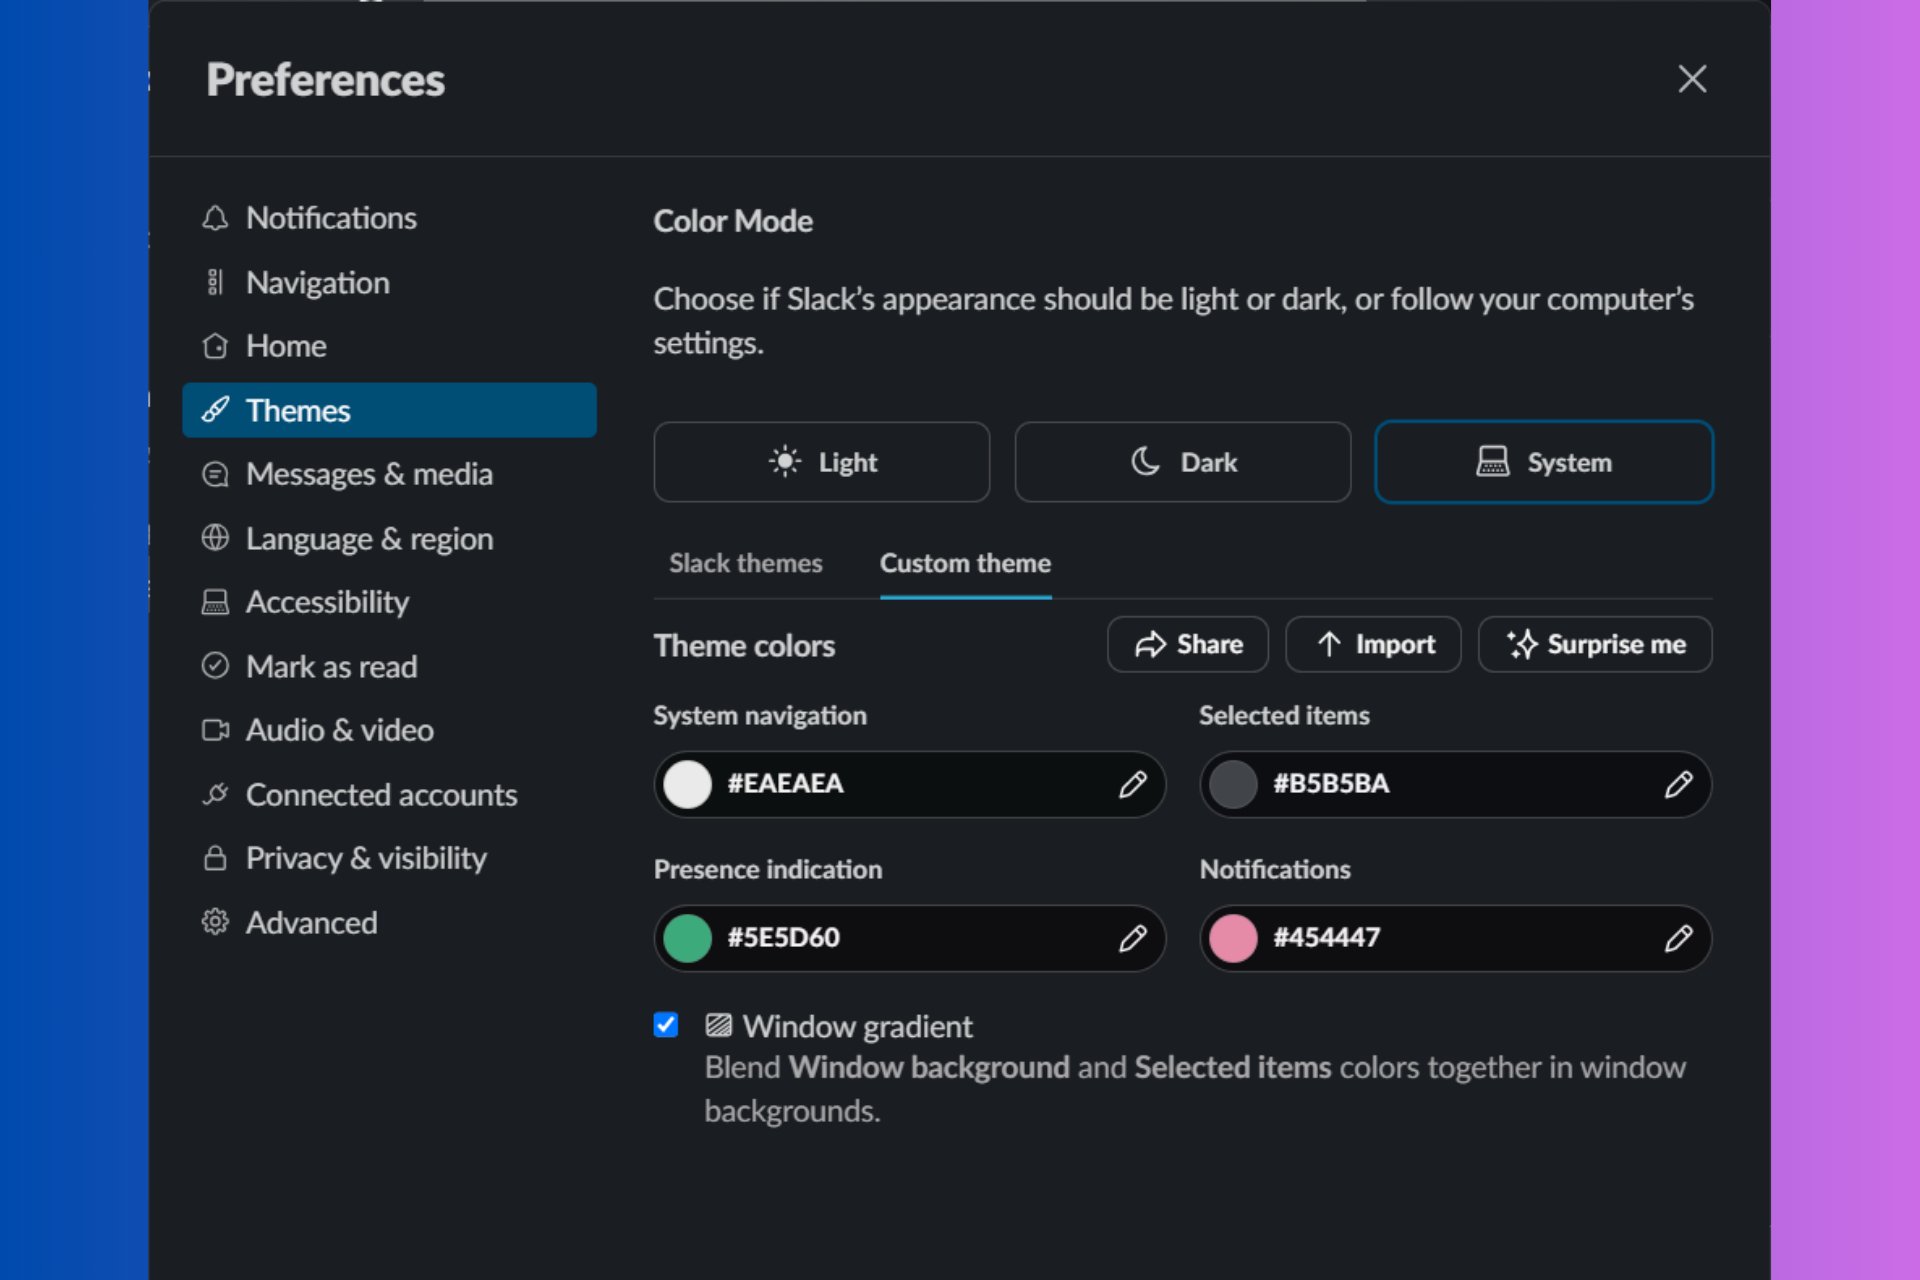
  5. Scroll down to Custom Theme and click on it.
  6. For each element like Column BG, Active Item, Text, etc., select a color swatch from the color picker.
  7. Click Save Changes to apply your custom theme.

Creating a custom theme allows you to personalize Slack according to your unique color preferences, making your workspace truly yours.

3. Using predefined theme codes

  1. Copy the hex codes of the theme you want to use (these can be found in various online repositories).
  2. Open Slack Desktop App or Web App.
  3. Click on your profile picture and select Preferences from the dropdown menu.
  4. In the Preferences menu, click on Themes.
  5. Scroll down to Custom Theme and paste the hex codes in the provided box.
  6. Press Enter to apply the theme.

For instance, to apply the Dracula theme, you could paste #282A36,#44475A,#50FA7B,#FF5555 into the custom theme box. This method is fantastic for those who love exploring and trying out various themes found online.

4. Importing legacy themes

  1. Open Slack Desktop App or Web App.
  2. Click on your profile picture and go to Preferences from the dropdown menu.
  3. In the Preferences menu, click on Themes.
  4. Scroll down to Custom Theme and click on Import.
  5. Paste your legacy theme colors and click Apply.

Importing legacy themes is beneficial for users transitioning from older versions of Slack who want to retain their familiar workspace appearance.

5. Sharing custom themes

  1. Open Slack Desktop App or Web App.
  2. Click on your profile picture and hit the Preferences option from the menu.
  3. Now, click on Themes.
  4. Scroll down to Custom Theme and select Share to copy your theme.
  5. Paste the copied theme values into any Slack message and press Enter.
  6. Anyone in the conversation can now click Apply Slack theme to use your custom theme.

Sharing themes is perfect for teams who want a unified look across their Slack workspaces or for anyone who wants to showcase their design talents.

6. Using online theme repositories

  1. Visit websites like Slackthemes, or GitHub repositories like Sachinh19.
  2. Browse through the list of themes and find one you like.
  3. Copy the hex code values provided for your chosen theme, then use the solutions above to apply a custom theme.

Using online repositories gives you access to an extensive collection of themes created by the community, ensuring that you’ll find something that fits your style. Forums are also excellent for discovering unique themes and engaging with a community of like-minded individuals who share your interest in customizing Slack.

Also, if you want to test a custom Slack theme before you apply it to your desktop or web app, you can go to a dedicated editor where you can enter any custom color code and see how it looks.

By following any of these solutions, you can easily enhance your Slack experience with themes that best match your style and preferences. Enjoy your newly customized workspace! For future customization, consider bookmarking your favorite theme repositories and joining theme-sharing communities to stay updated with the latest designs.

Did you know that you can integrate Teams with Slack? Check out the highlighted guide to see how it’s done.

You may also be interested in reading our guide on how to check who is on any Slack channel and their status.

We hope that our guide on how to customize your Slack themes offers all the information you needed. For any other questions or suggestions, hit the comments section below.

Microsoft introduces a new Personalized offers option in Windows 11

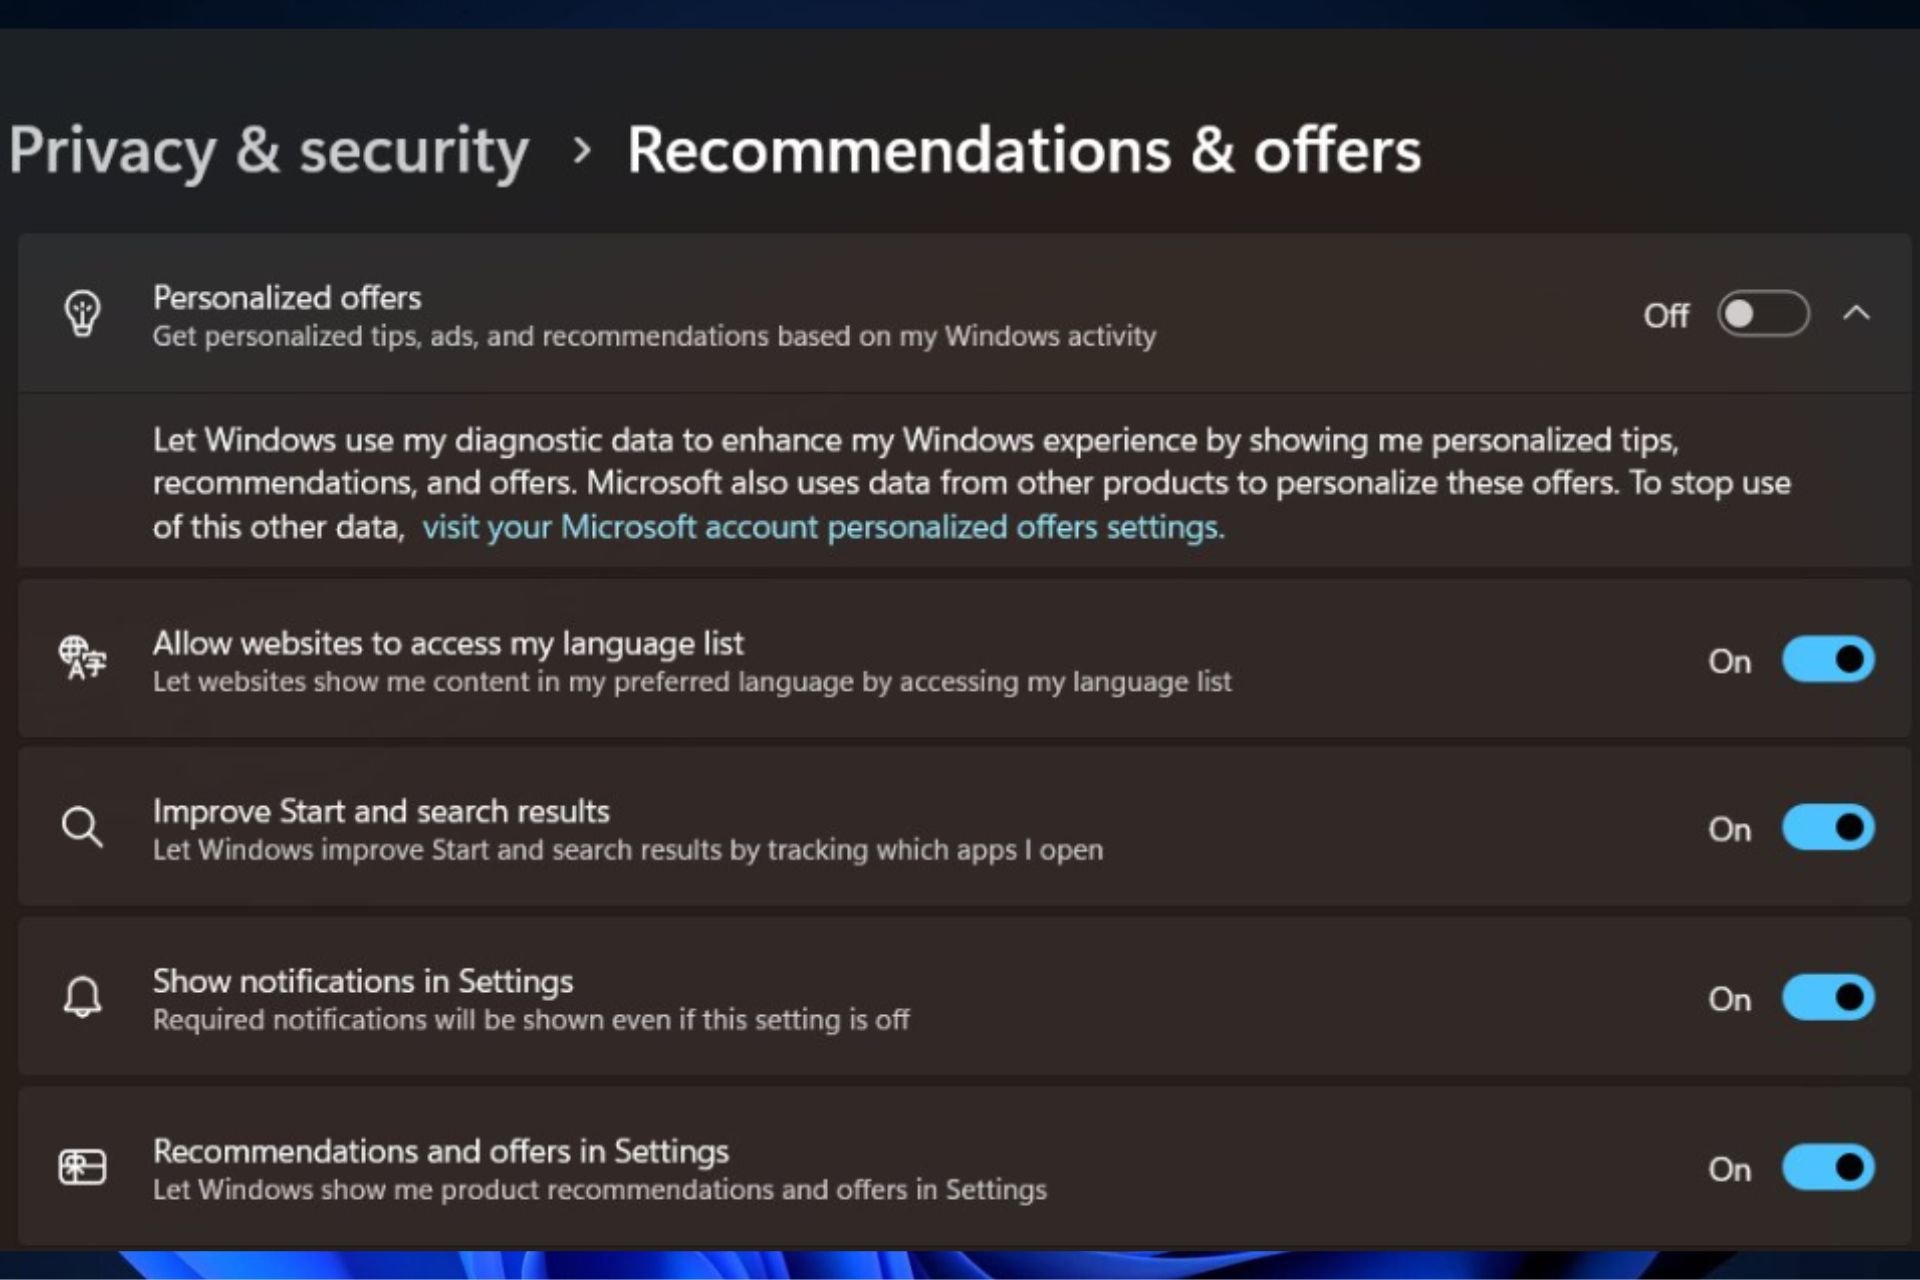
Within the constantly changing environment of Windows 11, Microsoft has made a move to clarify its advertising methods, especially for users located in Europe. The technology powerhouse is now changing the name of the “Tailored experience” feature to “Personalized offers,” in Windows 11’s Settings, with the intention that this will make clear what kind of ads and suggestions are being given to users.

This change was noticed by the tech enthusiast @phantomofearth in the newest Windows 11 beta update, which includes some repairs and enhancements and tries out a fresh part called the “Recommended for you” section within the Microsoft Store. This is a small change but important for how Microsoft talks to its users, particularly in a place where digital privacy and advertising methods are observed with great attention.

The change, known as update KB5040535 or Windows 11 Insider Preview Build 22635.3936, displays this Personalized offers renaming in the Settings menu and during out-of-box experience (OOBE). The toggle for these personalized experiences will be located under General privacy & security settings.

Microsoft intends to simplify user options and potentially reconcile with its previous advertising mistakes. The alteration is deactivated as a standard setting, with user permission and adjustment carefully handled.

This step follows Microsoft’s receiving many criticisms about its advertisement actions, and the launch of Recall is a significant public relations mishap. By changing the name from “Tailored experiences” to “Personalized offers,” the Redmond-based tech giant aims for a more straightforward and accessible understanding of its combined advertising strategy.

The update also includes a new feature: a “Recommended for you” section within the Microsoft Store’s search box. This is common in app stores and can be seen as a way to improve user experience by suggesting apps. While some might see it only as advertising, many others do this, too—for example, Apple’s App Store does a similar thing so that users are directed towards apps they could find helpful.

Microsoft Word in Two Columns – How To Set It Up Easily

Setting up Microsoft Word in two columns allows you to create documents for side-by-side display, such as product brochures, flyers, newsletters, and more.

If you wish to learn all about this layout, read on!

How To Apply Microsoft Word Two Columns

Here’s how to transform one column into two on desktop, web, and mobile apps:

On Desktop

  1. Open the source document in Microsoft Word.
  2. Select the content you want to transform into the two-column view.
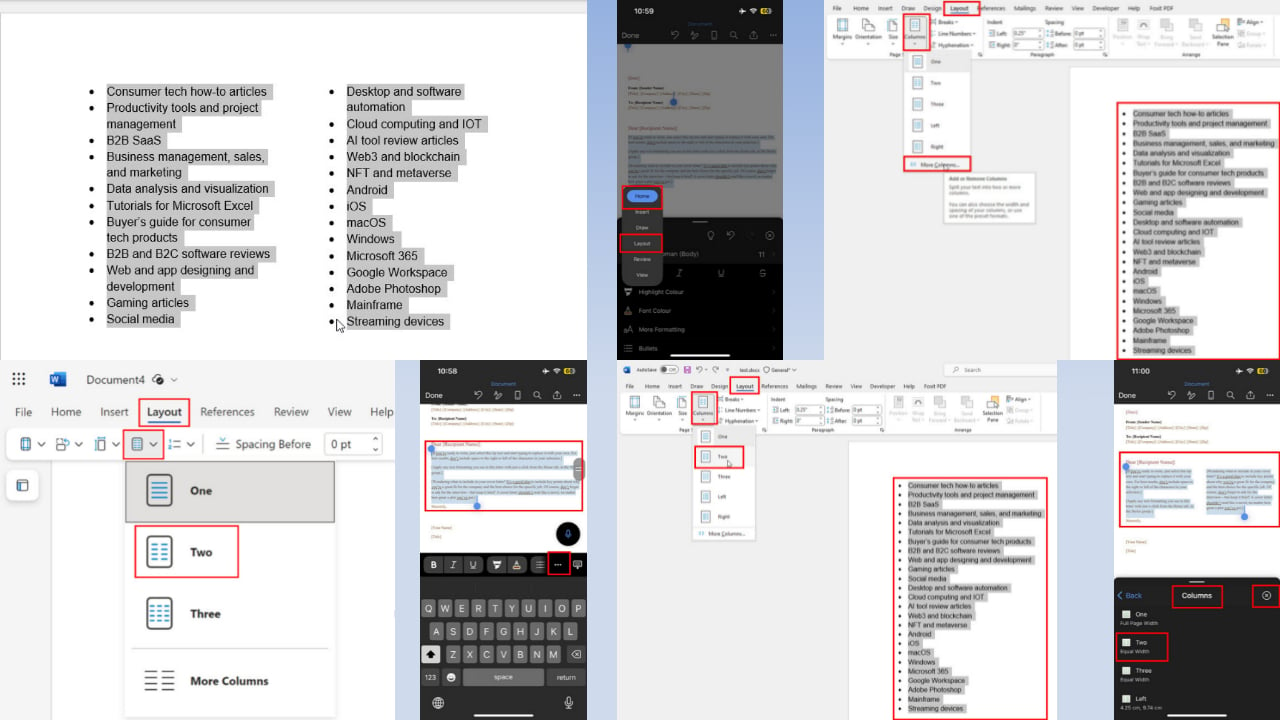
  3. Go to the Layout tab on the Word ribbon menu.
  4. Click on the Columns drop-down menu in the Page Setup block.
Layout columns
  1. Select Two from the context menu that opens.
two columns layout

The above steps will insert the default two-column layout in Word. If you need to customize it, follow these steps instead:

  1. Select the source content and click on the More Columns option in the Columns drop-down menu of the Layout tab.
more columns
  1. The Columns dialog box will open.
columns dialog
  1. There, you can customize the following parameters:
    • The Line between setting to add a line.
    • Width and spacing boxes for custom column sizes.
    • Uncheck the Equal column width option to create columns of different sizes.
    • Apply to drop-down list to enforce the layout for the entire document or just for the selected text.
  2. Click OK to apply the changes you’ve made.  
Added a line

Here are some tips for creating two columns in Microsoft Word:

  • You can use the steps mentioned above in the Microsoft 365 web app as well.
two columns in web
  • You can add two-column layouts anywhere in the Word file for any type of content, like bulleted lists, paragraphs, etc.
  • You can select a small portion in between two paragraphs or the whole page to transform into a two-column layout.

On Mobile App

  1. Open the source document in the Word mobile app.
  2. Select a part or the entire content for transformation into the two-column view.
  3. Tap the three-dots menu in the top-right corner above the keypad.
three dots
  1. You’ll see the Home drop-down menu in the top left corner.
home menu
  1. Tap on that and choose Layout from the drop-down menu.
layouts menu
  1. The Layout menu will show various options including Columns.
  2. Tap on the Columns menu and choose Two from the dialog box that opens next.
two columns set
  1. There should be a Close button at the top right corner of the same dialog box.
  2. Tap it to close the Layout options and go to the main document.

Summary

Now you know how to quickly set up Microsoft Word in two columns on any document! Moreover, if you want to change to light mode or need help with creating a table of contents, we have guides for that.

If the article helped or you’d like to share feedback, comment below.

Microsoft Flight Simulator adds the UK and Ireland to its map

Do you imagine flying high in the sky over the UK and Ireland, looking at beautiful scenery, cities, and landmarks with detailed precision from your home? Microsoft Flight Simulator’s newest update, World Update XVII, can make this dream come true for virtual pilots or anyone fascinated by these iconic areas.

Microsoft has released a graphical update that provides better views of many United Kingdom and Ireland locations. Imagine flying above 16 TIN cities, such as the lively streets of Greater London and the historical landmarks in Edinburgh, or even experiencing how it feels to be at Cliffs of Moher—all these are now possible with this enhancement.

And this is not the end; the update presents 79 interesting spots distributed throughout England, Ireland, Scotland, Wales, and even the Isle of Man.

But what’s a flight without landing? In a blog post, Microsoft says this update brings five handcrafted airports, from Farnborough Airport in England to Cork Airport in Ireland. Every airport is carefully made to give an authentic feeling of landing that will challenge your pilot abilities.

For the Adventurers, there are eight fresh activities to take on. Fly high in the sky with three discovery flights, prove your precision with two landing challenges, or go on three bush trips around this area – these will surely excite every sort of aviator.

The secret cooperation amplifies this update’s uniqueness. Microsoft formed a partnership with Bing Maps, Gaya Simulations, and iniBuilds. These companies joined forces to actualize this dream, combining new aerial imagery with digital elevation and TIN surface modeling. This kind of accuracy and effort makes virtual skies even more appealing now.

And guess what? There is no charge for this update; it’s accessible to all Microsoft Flight Simulator owners. You only need to confirm that your simulator has the latest version, 1.37.19.0 or higher, download World Update XVII, and you are set to fly. Whether you are an experienced aviator or a fresh adventurer, the skies above the United Kingdom and Ireland beckon to you.

Also, did you know that Microsoft Flight Simulator 2024 is coming to Xbox Series S and X, as well as PCs, later this year?

Blackbox AI: Is it Legit & What Can it Do?

There are many popular AI chatbots on the market, but one that is gaining popularity is Blackbox AI, so in today’s guide, we’re going to take a closer look at it and see what it can do.

Blackbox AI, what is it and how does it work?

Blackbox AI seems to be focused on utilizing AI for various programming tasks similar to GitHub Copilot. The service can generate any code for you, and it seems to be significantly faster than other AI chatbots.

blackbox ai results

What separates this AI chatbot from others is that you can edit the code or verify it using the AI. If needed, you can even run the code right in the browser or in a separate editor.

blackbox AI code editor

As for the full-size editor, it also has AI Chat available, so you can get additional information about the code. The editor supports more than 20 languages, so it should be able to work with almost any language that you need.

blackbox ai full size editor

The AI offers a playground that you can use to comment on your code or to get extra explanations regarding each line. The service can also find bugs in our code and warn you about them.

blackbox ai find bugs

If needed, you can also share your code with others and invite them to edit it, so it’s perfect for collaboration.

The service also has special agents for various programming languages, including Python, HTML, Java, JavaScript, React, Android, Next.js, and more, so it should be able to handle almost any programming question that you have.

We also have to mention that Blackbox AI is available as a Visual Studio Code extension, so you can use it in your editor without having to open the browser.

Is Blackbox AI free?

Yes, Blackbox AI is free. During our testing, we didn’t find anything mentioning the subscription, but the service may have some hidden limitations.

Is Blackbox AI legit?

Yes, Blackbox AI is legitimate to use, so you can give it a try if you’re interested.

Is Blackbox better than ChatGPT?

During our testing, Blackbox appeared to be a lot faster than ChatGPT. It’s worth mentioning that Blackbox offers many coding features, so it’s better than ChatGPT for all coding tasks.

How to use Blackbox for free?

You can start using it today, and you don’t even have to sign up to use the web version, however, some features might require you to create an account.

As for the VS Code extension, you can download and install it right from the Visual Studio marketplace.

Overall, Blackbox AI is an incredibly useful tool for programmers, and if you’re a developer and you’re looking for an AI chatbot, be sure to consider Blackbox AI.

If you prefer more familiar tools, we have a great guide on how to use GitHub Copilot in Visual Studio. If you encounter any issues with it, we also have an article that can help you if GitHub Copilot X isn’t working, so don’t miss it.

Meta releases the new Llama 3.1 models family, and they surpass every possible AI tests

Meta has taken the AI world by storm with its new invention, the Llama 3.1 AI models family. It includes Llama 3.1 8B, Llama 3.1 70B, and the massive Llama 3.1 405B, all with an enhanced context length of up to 128 K each.

They are available for use, and according to the announcement, developers can utilize the outputs of these Llama models to improve other models, expanding the limits of what AI can do. Meta subjected Llama 3.1 to more than 150 benchmark datasets and even human evaluations to measure its performance against other top models in real-life situations.

So, what is the result? The Llama 3.1 405B model, like its older sibling GPT-4 (which is already old, as OpenAI is seeking to release the next model), is a giant in open-source models and not only the biggest but also one of the most powerful foundation models for everyone to use. Even lesser versions of the Llama 3.1 family can fight equally with both closed and open models that are similar in size.Llama 3.1

The Llama 3.1 family can be reached through AWS, NVIDIA, Databricks, and other important platforms. Additionally, Azure AI has presented the 405B model as a serverless API endpoint. Thanks to Meta’s dedication to open-source AI, the new Llama family is more accessible than ever.

Even Mark Zuckerberg mentioned how quickly open-source models are advancing—not only matching but often surpassing closed models in terms of being open, modifiable, and cost-effective.

Today, several tech companies are developing leading closed models. But open source is quickly closing the gap. Last year, Llama 2 was only comparable to an older generation of models behind the frontier. This year, Llama 3 is competitive with the most advanced models and leading in some areas. Starting next year, we expect future Llama models to become the most advanced in the industry. But even before that, Llama is already leading on openness, modifiability, and cost efficiency.

Mark Zuckerberg

The company wants to make a stronger AI model, spread AI to many people, encourage creative ideas, and establish fresh norms for cooperation and clarity in the area, and it might just do that with Llama 3.1. So, what is your opinion? Are we witnessing a pivotal moment in the evolution of AI models?

Check out the full blog post if you want an in-depth analysis of the latest Llama family.

Unlock Learning with Microsoft Azure Dev Tools for Teaching

If you’re an educator or student looking to leverage the power of Microsoft Azure, the Azure Dev Tools for Teaching program is a fantastic resource. It provides access to a suite of developer tools and resources that can significantly enhance the learning experience.

How do I start and use Microsoft Azure Dev Tools for Teaching?

1. Enroll in or Renew an Azure Dev Tools for Teaching Subscription

Enroll in a new subscription

  1. Go to the official Azure Dev Tools for Teaching page and click on the Sign up button on the banner.
  2. Now, select Enroll or Renew.
  3. Choose Apply for a new plan, and then click Save.
  4. Enter the necessary details for your institution. This will be filled in automatically if you’re renewing.
  5. The plan name will be automatically populated. Confirm the duration is set to one year.
  6. Enter the details for the plan administrator and the department.
  7. If desired, select Yes to activate Azure for Students for all students who sign up.
  8. Add the domain or domains associated with your institution to facilitate student access.
  9. Confirm all the information and click Confirm and Place Order.

This process ensures that your institution is enrolled in the Azure Dev Tools for Teaching program, granting students and faculty access to a variety of Microsoft developer tools and resources.

Renew an existing subscription

  1. Go to the Azure Dev Tools for Teaching management portal to see if it’s time to renew.
  2. Sixty days before your membership expires, you will receive email reminders with a link to renew.
  3. You can renew up to 90 days before expiration by visiting the management portal.
  4. On the Azure Dev Tools for Teaching banner, select Renew an existing plan.
  5. Search for your institution name and select the subscription ID you wish to renew.
  6. Choose the plan type and verify the administrator information.
  7. Confirm all the information and click Confirm and Place Order.

Renewing your subscription ensures continuous access to Microsoft’s valuable educational resources, enabling students and faculty to stay updated with current tools and technologies.

2. Set up access for Azure Dev Tools for Teaching

For administrators

  1. Administrators can access Azure developer tools via the Visual Studio subscription portal.
  2. Go to the Azure Dev Tools for Teaching management portal to request access.
  3. The first time you access the portal, link your Microsoft account with the email provided during enrollment. You’ll need your subscriber ID or benefits access number, and the first and last name of an administrator.
  4. Once the accounts are linked, you can access the developer tools.

By following these steps, administrators can effectively manage and distribute developer tools and software to students and faculty through the Visual Studio subscription portal.

For students and faculty

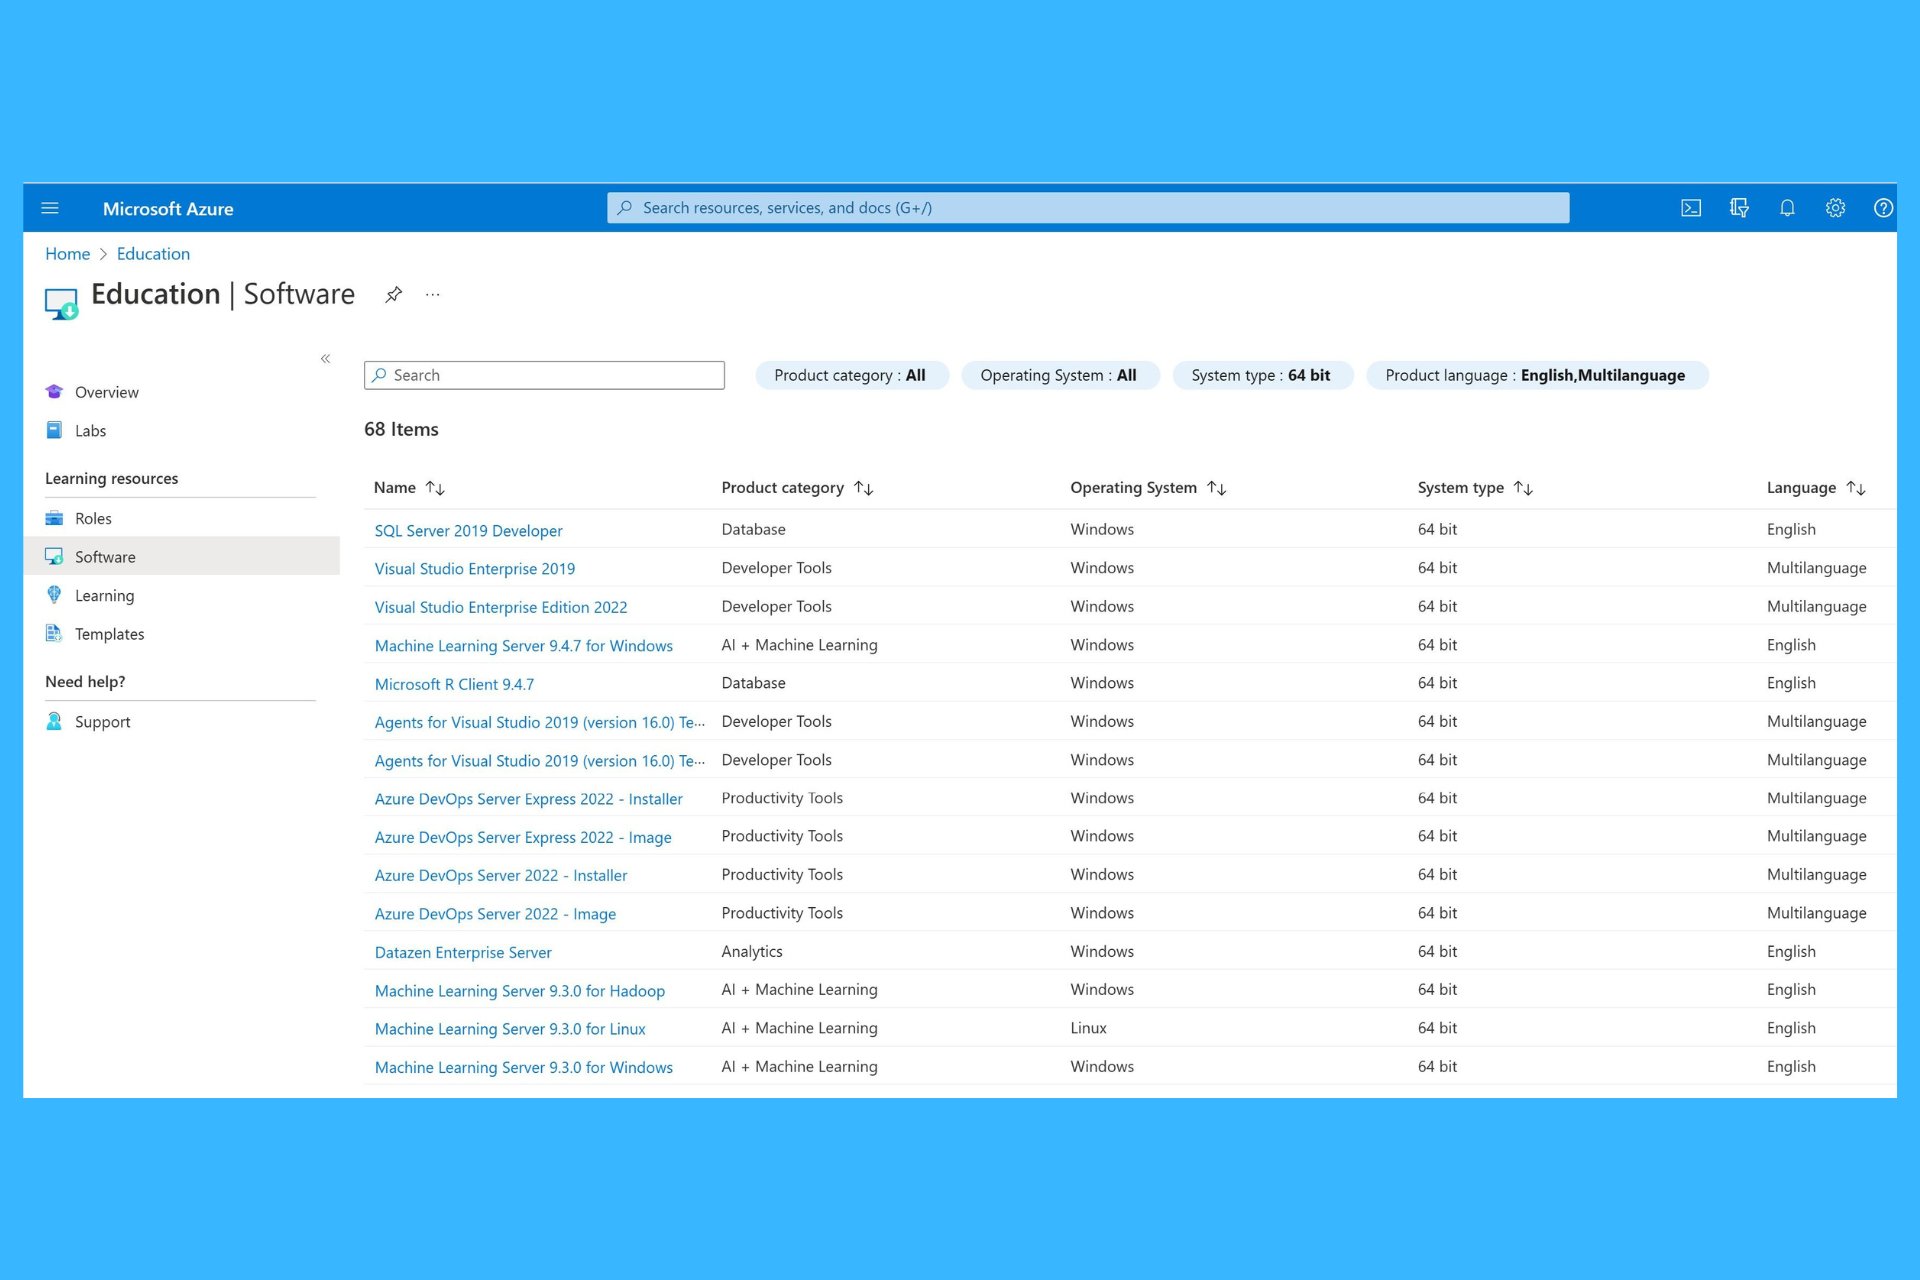
  1. Students and faculty access Azure developer tools through the Azure Education Hub within the Azure portal. To find the Education Hub in the portal, enter education in the search box, then select Education under Services.
  2. Sign in with the credentials provided by your institution to access the Education Hub Store.
  3. Browse the catalog of available software and training materials. Download what you need for instructional or research purposes.

The Education Hub Store simplifies the process for students and faculty to access and utilize a vast array of professional tools and resources, enhancing their learning and teaching experiences.

3. Manage and access software

  1. Centralized Online Location: Administrators can manage and access software from a centralized online location, eliminating the need for maintaining a webstore or internal site.
  2. Grant Access: Give academic users access to software, free training materials, and the Azure cloud platform through the same online portal.

This centralized system streamlines the distribution and management of software, ensuring students and faculty can easily access necessary tools and resources.

What are the benefits for faculty and students?

  1. Eligibility: Faculty members teaching approved courses can install Azure Dev Tools for Teaching software on their computers for non-commercial use.
  2. No Azure subscription needed: Students don’t need to sign up for an Azure subscription to get software benefits; they can access tools via their Imagine subscription credentials.
  3. Azure Credit: Microsoft offers $100 in Azure credit for students, along with access to free Azure services.
  4. Microsoft Learn integration: Incorporates Microsoft Learn online learning resources, offering a comprehensive platform for students to enhance their skills.
  5. Continuous updates: Provides access to beta releases, new releases, and technical support, keeping the educational content current and relevant.

These benefits provide valuable resources and tools to both faculty and students, enhancing their educational and research capabilities. Also, integrating access to Microsoft’s vast array of learning resources and continuous updates ensures that students and educators are always equipped with the latest tools and information.

To make the most of these resources, regularly check for updates and new tools available through the Azure Dev Tools for Teaching program.

Call of Duty: Modern Warfare III is now finally available on Xbox Game Pass

Big news for gamers! Microsoft just announced that Call of Duty: Modern Warfare III is coming to Xbox Game Pass on July 24. This is the second game from Activision Blizzard’s list to be added to the Game Pass collection after Microsoft bought them in October 2023. The first one is Diablo IV, which was added in March 2024.

In a blog post, Microsoft also announced that Call of Duty: Black Ops 6 will be released on October 26th and available on Game Pass on its first day. Also, starting on August 30, an Early Access Beta for the game will be available to all Game Pass subscribers.

This is great news if you are a follower of the Call of Duty series. You can watch the newest game, Modern Warfare III, and have an advanced look at Black Ops 6 via Early Access Beta.

We should also mention the Season 5 modifications for Modern Warfare III, with two fresh multiplayer maps, three updated maps displaying a cel-shaded design, and a concluding story task for Zombie mode.

For people who are Game Pass subscribers already, this news feels like an early Christmas present. And if you are not yet subscribed to it? Perhaps now is the moment to think about subscribing because with big-name games coming up in the future, Game Pass seems more attractive than ever before.

What do you think about Call of Duty: Modern Warfare III coming to Xbox Game Pass? Let us know in the comments section below.

Slack Workflow Builder: Everything You Need to Know

If you’re looking to streamline and automate your tasks within Slack, the Workflow Builder is a powerful tool that can help you achieve just that. It simplifies repetitive tasks, collects information, and triggers alerts, ensuring that your team stays on top of their responsibilities.

What is Slack Workflow Builder and what can it do?

Workflow Builder allows you to create automated tasks to streamline your processes directly within Slack. It can handle repetitive tasks, collect information, and trigger alerts to ensure tasks are completed in a timely manner.

You can open it in Slack by going to the Tools section from the workspace drop-down menu. Here are the main features of Slack Workflow Builder and how to use it.

1. Using Slack Workflow Builder to automate welcome messages

  1. Open Slack and click on your workspace name in the top left corner.
  2. From the dropdown menu, select Tools and then click on Workflow Builder.
  3. Click the Create button to start a new workflow.
  4. Name your workflow (e.g., Channel Welcome Message) and click Next.
  5. Choose New Channel Member as the trigger.
  6. Select Person who joined channel as the recipient.
  7. Write your welcome message, personalizing it with variables like their username.
  8. Click Publish to activate the workflow.

This solution easily automates the process of welcoming new members to your Slack channels, ensuring everyone gets the information they need right when they join.

2. Collect information using Custom Forms

  1. Open Slack and go to your workspace name in the top left corner.
  2. Select Tools and then click on Workflow Builder.
  3. Click the Create button and give your workflow a descriptive name.
  4. Choose Shortcut as the trigger.
  5. Add a new step and select Send a form.
  6. Create your form by adding fields for the information you need (e.g., name, email, request details).
  7. Set the form to send responses to a specific channel or user.
  8. Click Publish to activate your workflow.

Creating custom forms helps you capture all necessary information in a structured way, making it quick and efficient to handle requests.

3. Automate daily reminders

  1. Open Slack, click on your workspace name, and go to Tools > Workflow Builder.
  2. Click the Create button and name your workflow (e.g., Daily Standup Reminder).
  3. Choose Scheduled date & time as the trigger.
  4. Set the schedule for your reminders (e.g., every weekday at 9:00 AM).
  5. Add a new step and select Send a message.
  6. Write the reminder message and choose the channel where it should be posted.
  7. Click Publish.

Automating daily reminders ensures that important tasks and updates are never missed, keeping your team on track and organized.

4. Manage the approval processes

  1. Open Slack and navigate to Workflow Builder via Tools.
  2. Click Create and name your workflow (e.g., Approval Request).
  3. Choose Shortcut as the trigger to manually start the workflow.
  4. Add a new step and select Send a form to collect necessary details.
  5. Create the form with fields like request type, description, and urgency.
  6. Set the form to send responses to an appropriate channel or user.
  7. Add another step to post a message notifying the approver about the new request.
  8. Click Publish.

Managing approval processes through workflows helps to streamline decision-making, ensuring that requests are handled promptly and efficiently.

5. Integrate external services with Workflow Builder

  1. Open Slack and access Workflow Builder from Tools.
  2. Click Create, name your workflow, and choose a trigger that suits your needs (e.g., New Channel Member or Scheduled date & time).
  3. Add a new step and select Add connector step.
  4. Choose the external service you need to connect (e.g., Google Sheets, Asana).
  5. Follow the prompts to authenticate your account with the third-party service.
  6. Configure the actions that the connector should take (e.g., add a row to a spreadsheet, create a task).
  7. Click Publish.

Integrating external services automates tasks across different platforms, saving time and reducing manual work, so you can stay focused on more critical activities.

6. Using Workflow Builder for incident reporting

  1. Open Slack and go to Workflow Builder under Tools.
  2. Click Create and name your workflow (e.g., Incident Report).
  3. Choose Shortcut as the trigger.
  4. Add a new step and select Send a form.
  5. Create the form with fields like incident type, description, and priority.
  6. Set the form to send responses to a specific channel for incident triage.
  7. Add another step to notify relevant teams or individuals about the new incident.
  8. Click Publish.

Using Workflow Builder for incident reporting ensures that issues are promptly logged and communicated to the right people, facilitating quick resolution.

7. Advanced custom workflows with Task Assignment

  1. Open Slack and head to Workflow Builder under Tools.
  2. Click Create, name your workflow, and set a trigger (e.g., Shortcut or New Channel Member).
  3. Add a new step and select Send a form to gather initial information.
  4. Set the form to send responses to a specific channel or user.
  5. Use Wrangle or another third-party app to add a task list step after the form submission.
  6. Assign tasks to specific team members and set deadlines.
  7. Click Publish when you’re done.

Advanced workflows allow for detailed task management, ensuring that responsibilities are clear and that all steps in a process are completed efficiently.

How much do I pay for Slack Workflow Builder?

To get unlimited workflows, you need to pay at least for the Slack Pro plan which starts at $8.75 / month, but if you pay for at least 3 months, you get a 50% discount that will get you to $4.38 / month.

By leveraging these features of Slack’s Workflow Builder, you can significantly enhance productivity and ensure smoother communication within your team. Always remember to review and update your workflows periodically to adapt to your team’s evolving needs.

If you’re working with this tool, you might be interested in how to convert DMs to private channels, or how to set up a shared channel in Slack.

We hope that our article provided you with all information needed to use Workflow Builder in Slack. If you have any questions, don’t hesitate to ask in the comments below.

KB5040525 addresses many of Windows 10’s most frustrating bugs

The most recent non-security update for Windows 10, called KB5040525 (build number 19045.4717), brings a host of fixes for various known problems, such as ones tied to Universal Print, Windows Backup, Group Policy, and more.

This update mainly concentrates on non-security fixes for your Windows operating system. One specific problem it addresses is related to MSIX applications. If you attempted to install such an application from an HTTPS URI link and found that it does not open, the probable reason would be an incomplete download, which has caused damage to the package.

The refresh also improves mobile device management (MDM) because the MDM client can now transmit additional information about the device, making it easier to recognize what model and who made this particular one.

Have you ever seen triangles or boxes quickly appear on your screen? This update also fixes this problem, which impacts browsers such as Microsoft Edge and other applications because of an issue with Direct Composition batched presentations. Moreover, the update ensures that Country and Operator Settings Asset (COSA) profiles are current for people who use specific mobile operators.

There are fixes for more severe issues, such as one that might prevent your system from resuming hibernating after you turn on BitLocker. Another fix deals with a problem in Windows Defender Application Control (WDAC), where unsigned WDAC policies were copied to the EFI disk partition, which is only reserved for signed policies. And, if you have ever tried removing items from a folder context menu only to find out that new items were added instead, this update has a fix for it, too – it corrects the behavior when a third-party service implements a sync feature.

However, no update is perfect. A bug might prevent you from changing your user account profile picture, giving an error message with code 0x80070520. However, Microsoft knows about this and says it will fix it in the next version of Windows 11.

For people who appreciate organized registry keys, this release contains an unlisted fix that ensures the browser follows its value in the “HKLM\SOFTWARE\Microsoft\Internet Explorer\Main” registry key.

Receiving this update is simple. Go to Settings > Windows Update, press “Check for updates,” and download KB5040525. Alternatively, you can manually obtain it from the Microsoft Update Catalog by selecting KB5040525 as a manual install package.

You can check out KB5040525’s full changelog here.

Mark all as Read in Slack & Get Rid of All Unread Messages

Sometimes you can have multiple missed messages on Slack, and you just want to mark them all as read. This is easier than you think, and this guide will show you how to do that.

How do I mark everything as read in Slack?

1. Use keyboard shortcuts

  1. Open Slack.
  2. Press Shift + Esc shortcut.
  3. You’ll be asked to confirm you want to clear all unread messages. Click on Yes, Clear All.
    clear all unreads confirm

You can also clear messages for individual channels by selecting them and pressing the Esc key.

2. Use the context menu

  1. Locate the channel or conversation that has unread messages.
  2. Right-click and choose Mark as read.
    mark as read slack
  3. Repeat these steps for all desired conversations and channels.

As you can see, it’s pretty simple to mark all as read in Slack, and the best way to do it is with a keyboard shortcut, just keep in mind that this will affect all channels and conversations in the workspace.

For more control, you can always clear all unread messages for individual channels or conversations with a keyboard shortcut or from the context menu to ensure that you don’t miss anything important.

To learn more about Slack, we have a great guide on how to edit, delete, or archive Slack channel. Speaking of channels, we also have a guide on how to create a shared channel in Slack so don’t miss it.

Before you go, did you know that you can expand Slack’s functionality with add-ons? That’s right, and you can use them to create polls in Slack, so don’t miss it.

How to Fix Firefox Bookmarks Disappeared

Many users have complained about being unable to find Firefox bookmarks, but everything else, including passwords, is there.

This could happen after a system crash, software problem, virus attack, or updating or downgrading Firefox. In this guide, we will discuss quick steps to fix the Firefox bookmarks disappeared issue.

How can I fix the Firefox bookmarks disappeared issue?

Note icon NOTE
Firefox bookmarks could have been missing in different scenarios, so we will discuss each and offer a solution.

1. Situation 1: You only see the default set of bookmarks in the Bookmarks folder

Bookmarks are associated with the Firefox profile you use, so if you create a new profile with a default set of bookmarks, you might feel you have lost them.

  1. Launch Firefox and type about: profiles in the address bar, then press Enter.
  2. This will open the About Profiles page, and you will see the list of profiles.
  3. If you have another profile listed, Launch profile in a new browser to see if it contains your lost bookmarks.Launch a new profile - firefox bookmarks disappeared
  4. In case you have found the missing bookmarks, go back and select the Set as default profile button.
  5. If not, check other listed profiles to be sure.

2. Situation 2: The bookmarks toolbar is missing

  1. Open Firefox and right-click the empty space in the navigation bar.
  2. Hover over the Bookmarks Toolbar from the pop-up menu and select Always Show from the sub-context menu.Always Show - firefox bookmarks disappeared
  3. Now, you will see the bookmarks toolbar again.

3. Situation 3: The Bookmarks toolbar button is missing

  1. Launch Firefox and click on the three-line icon.
  2. Click More tools from the pop-up menu.More tools -  firefox bookmarks disappeared
  3. Now select the Customize toolbar option.customize toolbar -  firefox bookmarks disappeared
  4. From the options available, locate the Bookmarks menu and drag & drop it into the toolbar.Bookmarks tabs

4. Situation 4: The bookmarks have disappeared

Firefox automatically backs up bookmarks and saves up to 15 backups in the profile bookmarkbackups folder, and you can restore by using these steps:

  1. Click the three-line icon or the Menu button to open the menu panel.
  2. Select Bookmarks.Bookmarks
  3. Choose the Manage Bookmarks bar at the bottom.Bookmarks manage them
  4. In the Library window, select Import and Backup button, then choose Restore.Import and restore bookmarks
  5. You will get the list of backups; choose the one you want to restore from the list.
  6. If you have created a manual backup, click Choose file to restore bookmarks from your saved file.
  7. Once done, the bookmarks from the backup will be restored.

5. Situation 5: The bookmarks are missing after installing an add-on

  1. Press Ctrl + Shift + Esc to open Task Manager.
  2. Go to the Processes tab, locate Mozilla Firefox, and select End task.End task -  - firefox bookmarks disappeared
  3. Now, restart your computer and log in to your computer, then launch the browser and check if you see the bookmarks.

6. Situation 6: Can’t find bookmarks after importing them

  1. Click the three-line icon or the Menu button to open the menu panel.
  2. Select Bookmarks.Bookmarks - firefox bookmarks disappeared
  3. Choose the Manage Bookmarks bar at the bottom.Bookmarks manage them

If you can’t find it, check it at the end of the Firefox Bookmarks toolbar or the bottom of the Bookmarks list under the Bookmarks Menu button.

7. Recover Firefox bookmarks from old profile

  1. Launch Firefox, and click the three-line icon or the Menu button, then choose Help.Help - firefox bookmarks disappeared
  2. Select More troubleshooting information.troubleshooting information
  3. Under Application Basics, locate Profiles, then select about:profilesAbout profiles
  4. On the About Profiles window, click Open Folder.Open folder
  5. Now, press Ctrl + Shift + Esc to open Task Manager.
  6. Go to the Processes tab, locate Mozilla Firefox, and select End task.End task - - firefox bookmarks disappeared
  7. On the File Explorer window, locate bookmarkbackups, then copy the file.bookmarkbackups
  8. Open the new Firefox profile folder using steps 1 to 3.
  9. Now, paste the folder to the new profile folder.

Remember, when copying files from an old Firefox profile to a new one, copy only a few files that contain important data you want to keep.

Also, copying fewer files at a time can help identify which file is causing the problem, which is why the Firefox bookmarks disappeared.

How do I recognize important data and files?

Here is the table with files and filenames to identify the important data and files:

FilesFilename
Bookmarks, Downloads, and Browsing Historyplaces.sqlite and favicons.sqlite
Passwordskey4.db and logins.json
Site-specific preferencespermissions.sqlite
Search enginessearch.json.mozlz4
Personal dictionarypersdict.dat
Autocomplete historyformhistory.sqlite
Cookiescookies.sqlite
Security certificate settingscert9.db
File types and download actionshandlers.json

To conclude, the Firefox bookmarks disappearance issue could occur if the profile is corrupt or we mistakenly logged in to a different profile. Also, installing a new add-on could temporarily cause the issue.

If you’re looking for simple steps to import bookmarks from Chrome to Firefox, check out our detailed guide, which provides step-by-step instructions.

In case your bookmarks are not syncing on Firefox, you may not have signed in to your Firefox account or have corrupted browser files; read this guide to learn more.

If you want to know what is the quickest way to bookmark all tabs in Firefox, we have a separate guide for you.

In case, you have any questions or suggestions about the topic, feel free to mention them in the comments section below.

How to Convert a DM to a Private Channel in Slack

Navigating Slack can be a breeze when you know how to make the most of its features. One common task is converting direct messages (DMs) into channels to streamline communication and keep everyone in the loop.

How do I convert Slack DMs to a private channel?

1. Convert a one-to-one DM to a channel on Slack

  1. Find and open the direct message you want to convert to a channel.
  2. Click the names at the top of the DM and select Add people.
  3. Slack will create a new Group DM with the additional user.
  4. Click the gear icon in the top right corner of the Group DM and select Convert to a private channel.
  5. Name the new channel and customize it, then click Convert.
  6. Type the name of any user (it can be a real or a fake user) and add them to the DM.
  7. Choose to Include conversation history if you want them to see the previous conversation.

Converting your one-on-one DM to a Group DM and then to a channel allows you to preserve the conversation history and move toward a more organized communication structure. This will help you keep related discussions in a single, easily accessible place.

2. Convert a group DM to a channel

  1. Open the Group DM you want to convert.
  2. Click the gear icon in the top right corner of the Group DM.
  3. Click on the three dots menu for additional options.
  4. Select Convert to a private channel.
  5. Choose a name for the new channel and decide if it will be public or private, then click Convert.

This process helps in transforming Group DMs with three or more participants into a channel, which can further streamline and organize your team discussions.

3. Move a conversation to a channel

  1. Navigate to the DM you want to move to a channel.
  2. Click the three dots menu for more options.
  3. Choose Move to Channel from the list of options.
  4. Select the existing channel where you want to move the conversation and confirm the move.

Moving a conversation to an already existing channel allows you to consolidate all messages in one place without having to create a new channel. This is especially useful for ongoing projects that require frequent communication.

4. Adding people to a direct message

  1. Open the DM where you want to add more people.
  2. Click the names at the top of the DM.
  3. Click Add people.
  4. Type the names of the people you want to add and select them from the list.
  5. Select Include conversation history.
  6. Click on Done and Confirm.

This method can be useful when you need to include additional people in an ongoing discussion without losing the context or historical messages.

5. Enable or disable DM to Channel Conversion Permissions (Admin)

  1. Click on your workspace name in the sidebar.
  2. Select Tools & settings from the menu and click on Workspace settings.
  3. Go to the Permissions tab.
  4. Find Slack Connect MPDM change to private channels and click Expand.
  5. Choose the appropriate option from the dropdown menu, then click Save.

Admins can control whether members can convert Group DMs to private channels. This is important for managing how conversations transition into broader team discussions.

How do I keep channels and discussions organized?

  1. Review Channels
    • Periodically go through the list of channels in your Slack workspace.
  2. Organize Channels
    • Archive channels that are no longer active.
    • Rename channels that aren’t clear or descriptive.
    • Consolidate channels with overlapping purposes.

Regular maintenance helps keep your Slack workspace organized, ensuring that all channels serve a clear purpose and team communication remains efficient.

These solutions provide step-by-step instructions to convert direct messages to channels, enabling better organization and collaboration within Slack. By following these methods, you can manage your team’s communication more effectively. Regularly review your channels and adjust permissions to maintain a streamlined workspace.

You might also be interested in how to see channel members and their status on Slack. You should also check our guide on how to edit, delete or archive a Slack channel because it will help you keep things under control.

And if you want to know how to create a shared channel in Slack, the highlighted guide will provide the necessary information.

For any other questions, you may hit the comments section below and let us know.

Microsoft Edge is adding Esc Key for a faster Fullscreen exit (Goodbye F11)

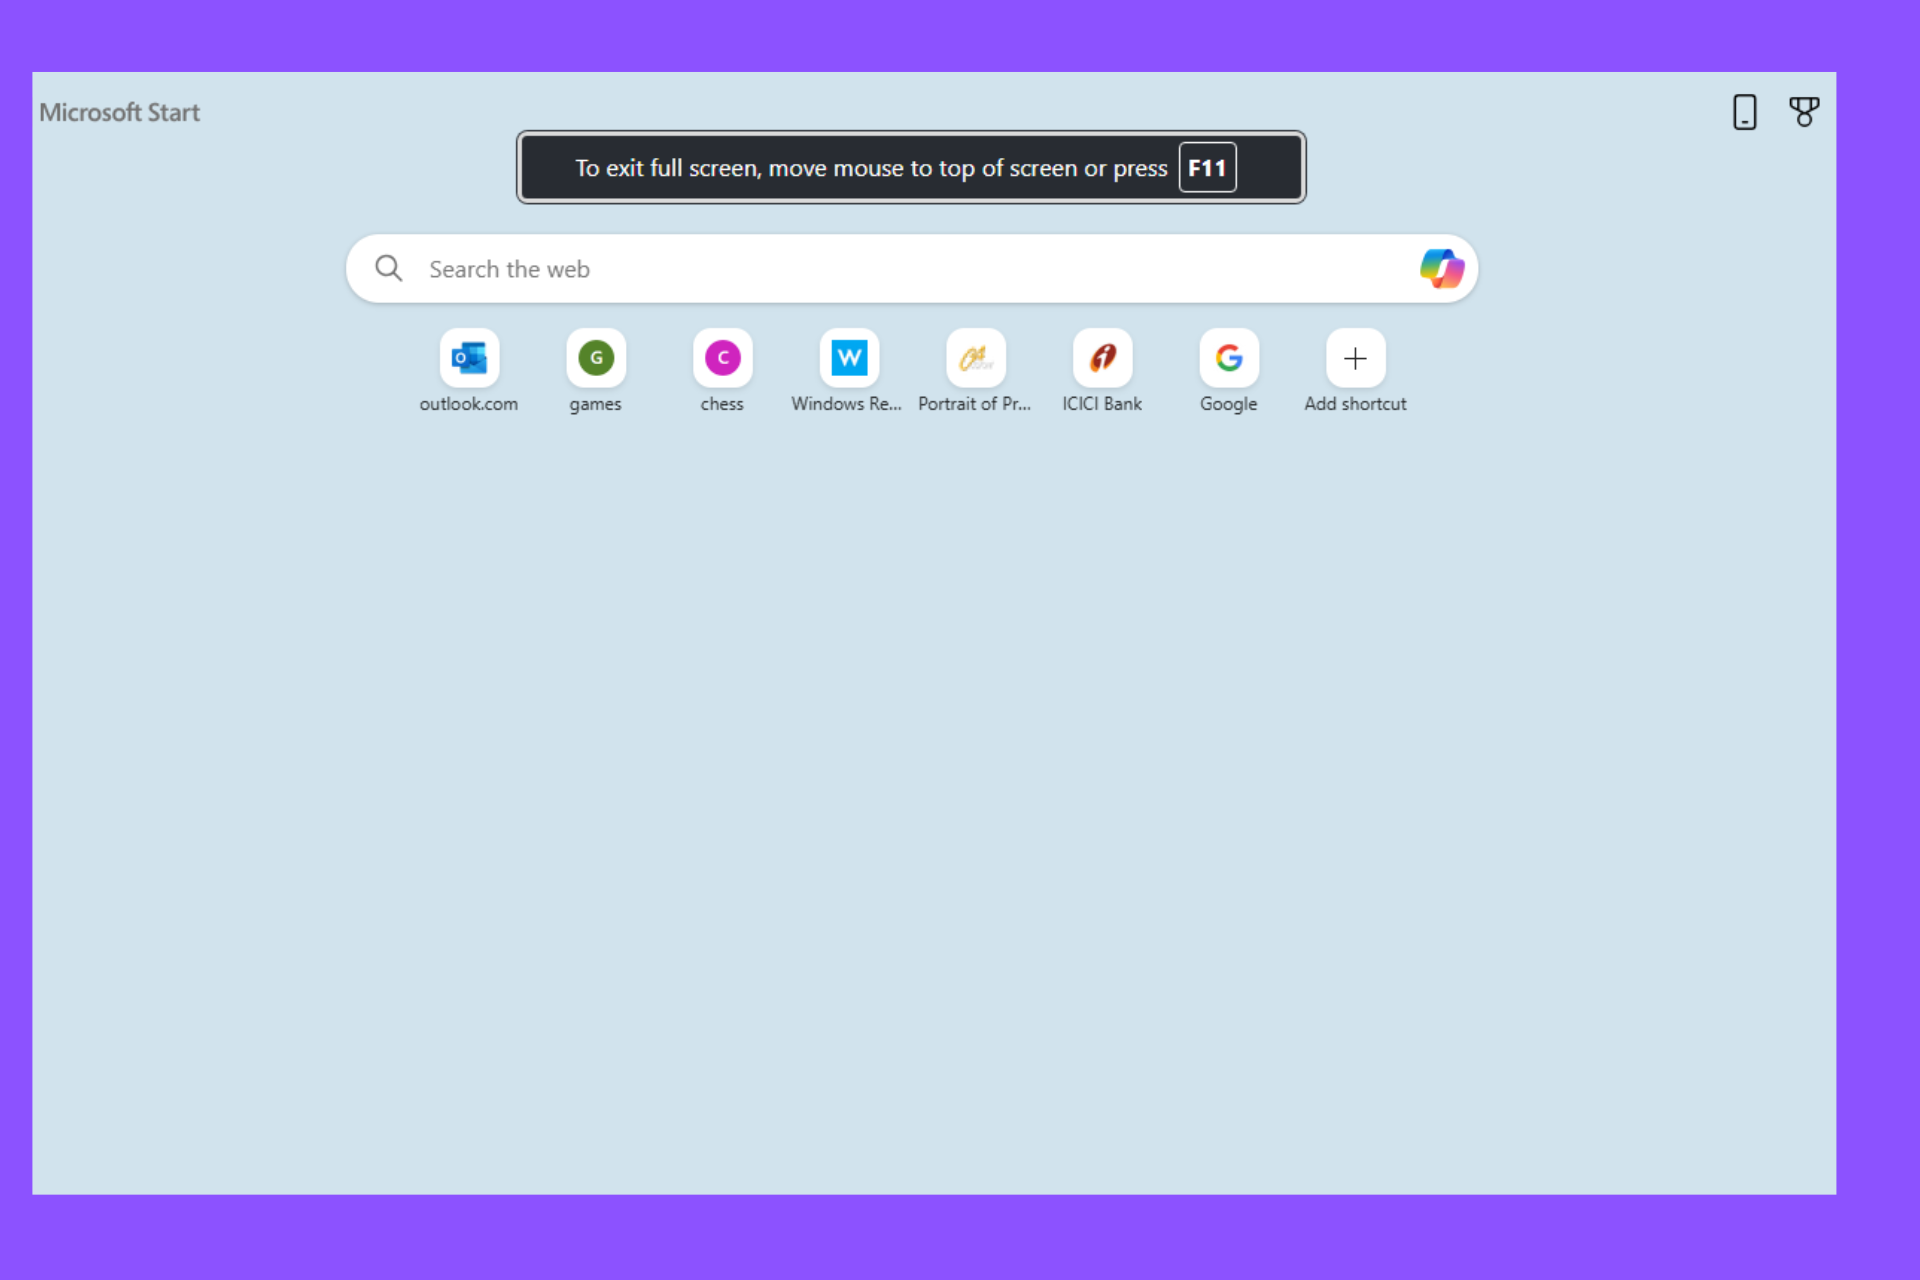
Microsoft Edge browser supports full screen mode, which helps to focus entirely on the web page. Soon, Edge will offer a new way to exit fullscreen mode with just one keyboard shortcut for users on Windows, Mac, and Linux. This new feature is being tested in the Edge Canary version.

Fullscreen mode hides the browser interface (toolbars, menus, bookmarks) and maximizes the viewing area for the web page. This is perfect for an uninterrupted view when watching videos or playing games.

There are two main ways to exit fullscreen in Edge (and most browsers):

  • Keyboard Shortcut: Pressing the F11 key toggles fullscreen mode on and off.
  • Mouse: Moving the cursor to the top of the screen usually reveals the hidden interface, allowing you to click an “Exit Fullscreen” button (often an icon with two diagonal arrows).

How Does Chrome Do It?

Chrome functions similarly to Edge. Users can utilize the F11 key or move the mouse to the top of the screen to exit fullscreen.

Wait! In fact, Google Chrome has started testing allowing users to exit full screen with the Esc key. Unfortunately, though the feature works only when you enable the flag, it’s still not turned on by default.

Microsoft has followed suit and is experimenting with the same feature in Edge Canary. The experimental feature in Edge Canary, behind a flag when enabled,” allows users to Press and hold Esc to exit browser full screen”.

Esc key offers another option for quickly leaving fullscreen mode, potentially appealing to users who prefer keyboard shortcuts.

Benefits of using Esc key to exit full screen in Microsoft Edge

For users comfortable with keyboard shortcuts, the Esc key combo might be a quicker way to exit fullscreen compared to moving the mouse and clicking.

This approach aligns with programs that use Esc to escape full screen and creates a consistent user experience across different applications.

The new fullscreen exit feature using the Esc key should work consistently across Windows, Mac, and Linux versions of Microsoft Edge, assuming it makes it to the final release.

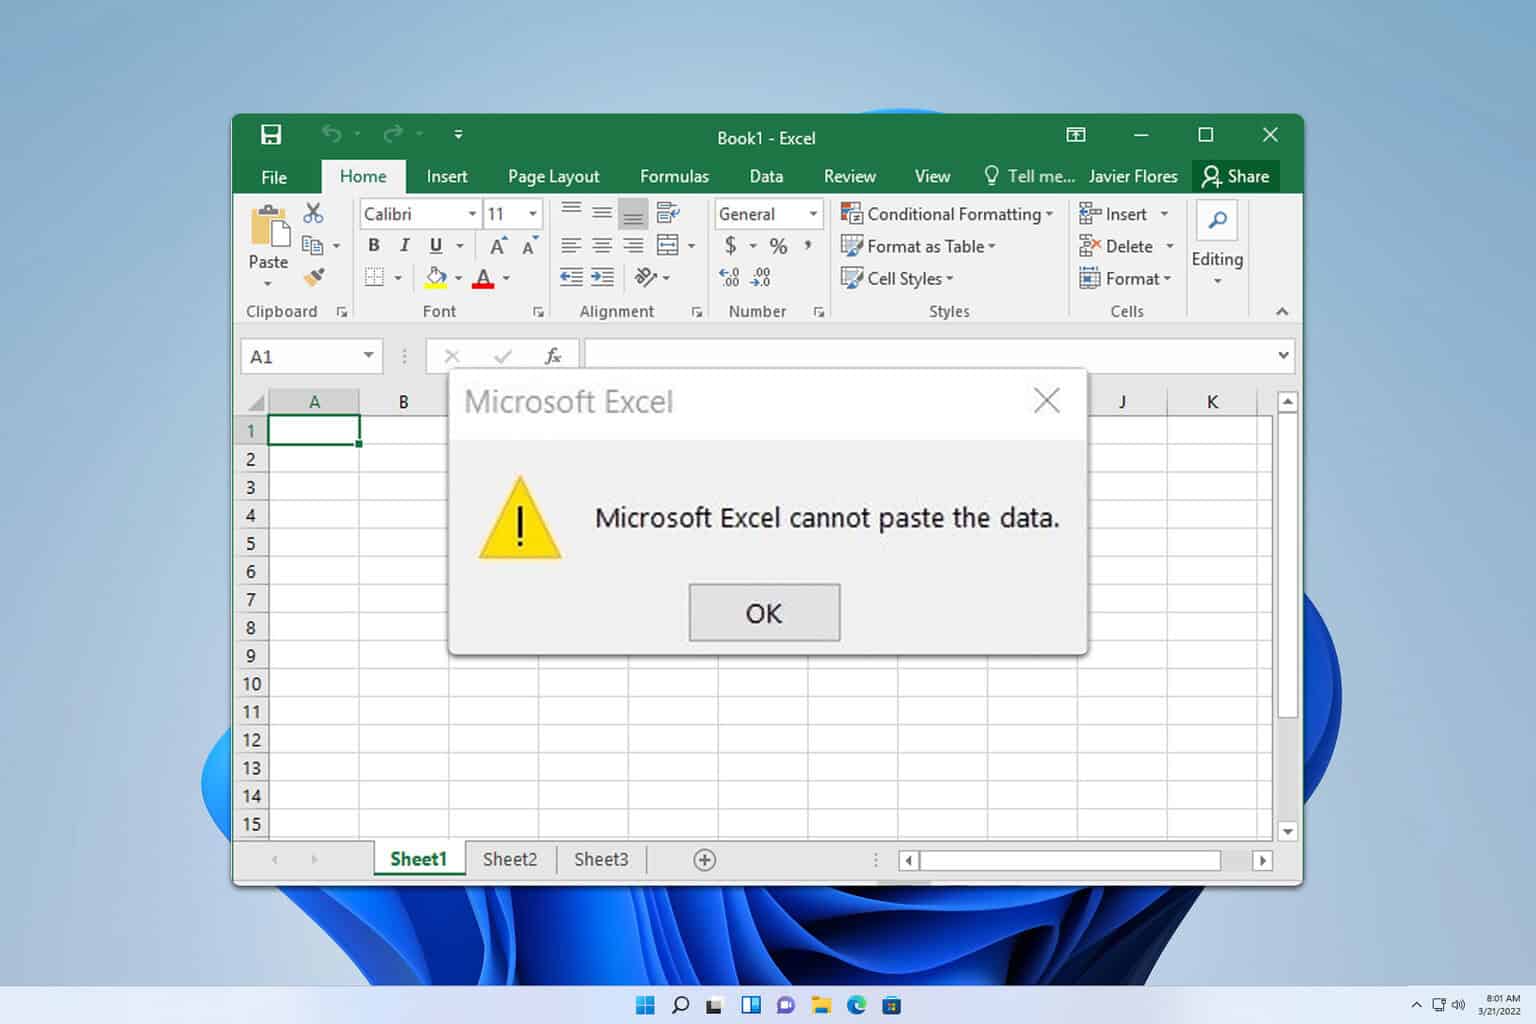
Microsoft Excel Cannot Paste The Data: 3 Ways to Enable it

If you cannot paste the data in Microsoft Excel, you won’t be able to use the software properly, and this can be a major problem. However, the solution is simpler than you think, and today we’ll show you how to do it.

Why won’t Excel let me paste data?

This can occur due to multiple Excel instances, or if you’re using protected sheets. Certain settings in Macro Editing mode can also cause this issue.

What can I do if the Paste option is not working in Excel?

Before we try anything else, make sure that you have only one instance of Excel open. You can also go to the For Objects option, select Show All, and check if that helps.

1. Unprotect the worksheet

  1. Open the worksheet that is giving you trouble.
  2. Next, choose  File and then Info.
     info tab in excel
  3. Select Protect and then Unprotect Sheet.
    unprotect sheet excel
  4. If asked, enter the sheet password.

You can achieve the same results by going to the Review tab, selecting Changes and then using Unprotect Sheet.

For more information, our guide on This workbook was opened in read-only mode error might be of service to you.

2. Use developer Macro Editing mode

  1. Press Alt + F11 to open developer Macro Editing mode.
  2. Select ThisWorkbook.
  3. Locate DisplayDrawingObjects = if "3 - xlHide" and change it to "xlDisplayShapes --4104"

This is an advanced solution, so it requires some familiarity with macro scripting to complete it.

  1. Open Phone Link.
  2. Click the Gear icon to open settings.
    phone link settings icon
  3. Next, choose Features and disable Cross-device copy and paste.
    cross device copy and paste toggle

If Microsoft Excel still cannot paste the data, perhaps it would be best to reset Excel to default and check if that helps.

Copy-paste problems can affect other applications, and sometimes copy and paste isn’t working in Windows 11 at all, but we have a guide that addresses that.

Amazon Price Tracker Extension for Firefox: Top 6 Add-ons in 2026

The best Amazon price tracker extension for Firefox will help you easily monitor product price changes.

Whether you’re an individual shopper looking for discounts or an Amazon seller wanting to keep product pricing competitive, you’ll need a reliable tool.

If you prefer Firefox and need add-ons to track Amazon prices, you’re in luck. I’ve installed and tested more than 20 options and singled out the following six tools for their performance.

Let’s check them out!

6 Best Amazon Price Tracker Extensions for Firefox

Here are my top recommendations that you can try out right now:

Keepa.com  – Best for Comprehensive Data Analytics

Keepa.Com

Most Amazon sellers and smart shoppers use the Keepa.com extension to track product pricing. With more than 200,000 active users in the Firefox environment, this is the top-notch tool you should try.

It creates a comprehensive historical price chart for a product as soon as you visit the item on Amazon. You should find the chart just below the About this item section. You can manually change the data range from various timespans, like Day, Week, Month, 3 months, Year, and All.

Furthermore, the chart differentiates the data at the most granular levels of a product, like different sizes, versions, colors, etc. It also offers the following tools and services for all Amazon products:

  • Product availability chart.
  • Price drop chart.
  • Automated price alert so you can buy quickly at the best-discounted price.
  • Overview chart of recent price drops and daily price drops.
  • The Wishlist Import feature enables you to add items for tracking in bulk.

You can use Keepa for most regions where Amazon operates, like the US, the UK, Germany, Japan, France, Canada, Italy, Mexico, and more.

Get Keepa for Firefox

AMZ Radar – Best for Individual Shoppers

AMZ Radar price chart

AMZ Radar is a lightweight price tracker for various Amazon websites. You can primarily use this tool if you’re an individual shopper. It doesn’t include any complicated functionalities that most Amazon sellers use.

E-commerce sites like Amazon resort to dynamic pricing policies by tracking your behavior or emotion towards a specific product. You might not get any discounts if you look up an item on Amazon. AMZ Radar helps you avoid such a price trap by offering the price peak feature.

AMZ Radar link preview

You can simply hover the mouse cursor over an item’s link. The tool will show the price and a small chart for historical pricing.

Its other major features include:

  • Track overpriced items specifically during the Cyber Monday and Black Friday sales days.
  • A comparison chart for new, refurbished, and used products.
  • A comparison table for product pricing by Amazon and third-party sellers.
  • Always visible small price chart widget.
  • Details price chart on the widget.
AMZ Radar widget
  • Price preview works for amzn.to links used by affiliate sellers.

This tool effectively monitors the pricing of billions of products on most Amazon sites, like Germany, France, the UK, the USA, Canada, Mexico, etc.

Get AMZ Radar for Firefox

AliPrice Shopping Assistant – Best for Review Image Collection

AliPrice Shopping Assistant is a reliable and robust tool to track Amazon product pricing as an individual shopper or seller. Its best feature is the product and review image downloading in bulk.

As an individual buyer, you might scroll through an endless list of reviews to find actual images of the product you want to buy. That’s where AliPrice Shopping Assistant steps in.

download review image

You can download all or some of the review images in one click. There are various selection ranges, like Previous 5 pages, Previous 15 pages, Previous 25 pages, and so on. The browser will show an appropriate directory browsing dialog box so you can save the images in personalized folders.

It also offers an intuitive graphical user interface for price tracking. Simply visit the product page and click on the Track price button on the Price History chart window.

price history

Other features you can expect in AliPrice Shopping Assistant include:

  • Three price-tracking timelines: 3 months, 6 months, and 1 year.
  • Switch between three Amazon regions: the USA, the UK, and the UAE.
  • Get quick suggestions for Gift Cards, Today’s Deals, Orders, Shopping List, and more.
  • An all-in-one package tracking utility to monitor the progress of the order you’ve placed.

If you see a specific product is overpriced on Amazon, you can quickly look up the same item on AliExpress, Auction, eBay, Shopee, Walmart, and more.

same products

Get AliPrice Shopping Assistant for Amazon for Firefox

Amazon Price Tracker – Best Simple User Interface

Amazon Price Tracker

Amazon Price Tracker is a simple Firefox extension that just monitors pricing changes. This is your best choice if you don’t require fancy tools with charts, many tabs, endless settings, etc. You can start tracking multiple products’ pricing simultaneously.

Once you add it to Firefox, it shows a clickable button in the product description area of the Amazon item you visit. Upon clicking it, the tool will ask you to enter the target price, monitoring interval, and monitoring interval’s value. It’s quite simple. If you visit another product on Amazon and need to track for a price drop, just repeat the same steps.

Get Amazon Price Tracker for Firefox

Alert Me – Best for Quick Price Alerts 

Alert Me overlay form

Alert Me creates a price-tracking overlay card under the Delivery box of the product you visit. It shows a modified Amazon monogram with the alert me text. There, you’ll find a text input field that says Alert me when. When you click on that, you’ll get the following options for product price tracking and shipping:

  • Price Decreases
  • Price Increases
  • Price is Between
  • Prime Shipping is Available.

In further fields, you’ll be asked to enter a value depending on the option you chose earlier in the form. For example, if you’ve selected the Price Decreases option, you’ll need to enter a reduced price when you’d like to get a notification.

Alert Me form entries

Get Alert Me for Firefox

Glass It – Best for Data Privacy

Tracking overview Glass it

Glass It monitors the pricing of various Amazon products without accessing the URLs you visit. This is a data privacy benefit that many other Amazon price tracker extensions don’t offer.

It takes you to a completely different dashboard with other functionalities, like My Items, My Business, Search, Settings, Messages, etc.

Glass it my items

Since it uses an independent web app, you no longer need to keep your device on all the time to stay aware of the latest price drops.

Glass it price tracker

You can shut down the PC and the tool will send push and email notifications to your smartphone. 

It also has a Search portal where you can look up the Amazon product you want to buy. The search field matches the same product across many e-commerce platforms and fetches the lowest priced option.

Get Glass It for Firefox

How I Chose the Best Amazon Price Tracker Extension for Firefox

I considered the following points to pick only the most functional tools:

  • The price tracker actually shows a price drop when it happens and doesn’t just fetch imaginary or fake numbers.
  • Since browsing privacy is also important, I’ve checked whether these extensions track your online surfing on other websites. I didn’t face any issues with these add-ons tracking my activities across the internet and selling my data to online advertising agencies.
  • If you’re highly concerned about browsing privacy, I’ve included a tool that uses a completely different web app. It doesn’t track your browsing habits on any website including Amazon.
  • The extensions come with an easy-to-use user interface so all users can successfully track Amazon prices on the first attempt.
  • I’ve only included fully functional add-ons. There are hundreds of broken or non-functional Amazon price trackers that will only waste your time.    

Summary

So, now you know how to find the best Amazon price tracker extension for Firefox. Give one or all of the above a try and choose the one that delivers the best results.

Don’t forget to mention in the comments which Firefox extension you liked the most! Moreover, if you need add-ons for color picking or tab reloading, we’ve got you covered.

Windows 10’s KB5040427 is breaking devices, causing them to restart over and over again

Even though the latest Patch Tuesday updates were released two weeks ago, it seems that the packages are causing trouble for many Windows users.

CVE-2024-38051 is still being picked up by CrowdStrike Spotlight (the company is also in the middle of its biggest outage in history) despite being addressed by Microsoft earlier this month, along with the other CVEs.

However, it’s not only the CVE-2024-38051 that’s causing issues. Windows 10’s KB5040427, which brought many security updates and enhancements to the different versions of this OS, is wreaking havoc.

Dozens of users are reporting an issue with their Windows 10 devices constantly restarting after installing KB5040427.

Windows 10 update 2024-07 Cumulative Update version 22H2 for x64 -based systems (KB5040427) makes the laptop restart frequently. Also the laptop is set back to a clean blue screen, looks like it’s back to factory settings. Prompts to log in to one drive each time the laptop restarts. Tried to troubleshoot windows update, shows no trouble shoot error. I have paused the windows update for 7 days.

Any suggestions or solutions as to why this is happening after regular updates.

What can you do in this case?

Well, some of the users suggested running a system repair, and you can do that pretty easily by following our comprehensive guide, which will show you, step by step, how to repair your Windows 10’s corrupted files, as they most likely are causing the OS to behave like this.

Let us know if it worked.

CVE-2026-38051 hasn’t been fixed on Windows devices, as CrowdStrike Spotlight still picks it up

The July Patch Tuesday updates were released two weeks ago, and they fixed more than 140 vulnerabilities, many of them critical and important.

The patch fixed many vulnerabilities, including CVE-2024-38051, which allows remote code execution. Fixing it was a priority for the Redmond-based tech giant, as it could lead to serious hacking issues and the risk of losing sensitive information.

However, even though two weeks have passed since the vulnerability was fixed, some Windows users have reported that external anti-malware software, such as CrowdStrike, is still picking it up.

Good day all,

Not sure if the community is aware, but even though we are patched with this KB. It is being flagged as vulnerable per below. Is there a fix or any insight as to why it’s still being flagged? Thank you.

This is being picked up by Crowdstrike Spotlight.

C:\Windows\System32\gdi32full.dll

Version

10.0.22621.3672

Expected Value

10.0.22621.3880

CrowdStrike is famously experiencing a security crisis right now, but apparently, it’s not the company’s fault that CVE-2024-38051 is still being picked up on Windows devices.

One of the users says Microsoft might be at fault since it’s happening on multiple devices.

This is confirmed to be true with us. It appears Microsoft failed to properly update the DLL file, as it has not been modified since last patch Tuesday on my device. Microsoft must provide us with a hotfix patch to remediate this ASAP.

Windows User

What to do? For now, if you’re dealing with it, you can report it to Microsoft and CrowdStrike.

How to Turn Off Microsoft Teams Performance Tracing

If you’re experiencing performance issues with Microsoft Teams, you might want to consider turning off performance tracing and optimizing your settings. First of all, make sure that Microsoft Teams is updated to the latest version.

How do I turn off Microsoft Teams Performance Tracing?

1. Disable GPU hardware acceleration in Teams

  1. Open Microsoft Teams.
  2. Click on your profile picture located at the top right of the Teams window.
  3. Select Settings from the dropdown menu.
  4. Go to the General tab.
  5. Uncheck the box labeled Disable hardware acceleration.

Disabling GPU hardware acceleration can help improve performance issues related to video sharing or general sluggishness in Teams, especially when using high-resolution monitors. This reduces the workload on your graphics card, potentially making Teams run smoother.

2. Optimize the notification settings

  1. Open Microsoft Teams.
  2. Click on your profile picture at the top right and select Settings.
  3. Click on Notifications from the sidebar.
  4. Turn off Banner and feed for All new posts.
  5. Set Channel mentions to Only show in feed.

Optimizing notification settings can reduce the number of interruptions you face, preventing Teams from slowing down due to constant alerts and pop-ups.

3. Disconnect from docking stations and reduce monitor resolution

  1. Disconnect your monitor from the port replicator or docking station.
  2. Connect it directly to the laptop’s video port if available.
  3. Change the resolution of your 4K/UHD monitor:
    • Right-click on your desktop.
    • Select Display settings.
    • Scroll down to Display resolution.
    • Choose 1920 x 1080 from the dropdown menu.
    • Click Apply.

Reducing the monitor resolution and connecting directly to the laptop can alleviate performance issues by lowering the display demands on your hardware.

4. Clear Teams cache

  1. Close Microsoft Teams completely.
  2. Open File Explorer on your computer.
  3. Navigate to the following path: %appdata%\Microsoft\Teams
  4. Delete the contents of the following folders:
    • Application Cache\Cache
    • Blob_storage
    • Cache
    • databases
    • GPUCache
    • IndexedDB
    • Local Storage
    • tmp
  5. Restart Microsoft Teams.

Clearing the cache can help resolve any performance issues related to corrupted or overloaded cache files, making Teams run more efficiently.

5. Disable full-screen mode during meetings

  1. During a meeting, click on More actions (three dots) in the meeting controls.
  2. Select Full screen to turn it off.

Disabling the full-screen mode can reduce the demand on your system’s resources, improving performance during video meetings.

6. Limit Microsoft Teams data collection

  1. Open Microsoft Teams.
  2. Click on your profile picture at the top right and select Settings.
  3. Go to the Privacy tab.
  4. Turn off Read receipts and other unnecessary data collection features.

Limiting the amount of data Teams collects can reduce the load on your system, preventing performance slowdowns.

7. Use different connection ports for monitors

  1. If you are using a USB-C connection for your monitor, try switching to HDMI or DVI:
    • Disconnect the USB-C cable from your monitor.
    • Connect an HDMI or DVI cable to your monitor and laptop.

Switching connection ports can sometimes resolve performance issues related to video sharing or high-resolution displays.

Implementing these solutions can significantly improve Microsoft Teams’ performance, especially for users experiencing slowdowns during video sharing or while using high-resolution monitors. Each step is designed to optimize system resources, reduce unnecessary data processing, and ensure smoother operation. To keep Teams running smoothly, regularly clear your cache and keep your software updated.

Everything You Need to Know About Google Scholar

Anybody who does research and needs to back it up with facts knows the importance of Google Scholar. And while it plays a key role in academic research, if you don’t know how to use it, it can be a daunting task.

There are many browsers for academic research but Google Scholar is the most popular one. But why is this so?

What are the key Google Scholar features?

1. Broad coverage

Google Scholar is enriched with all types of content. Whether you’re looking for journals, articles, books, dissertations or any other kind of information, you’ll definitely find it here. It also covers a wide range of disciplines from medicine, technology and AI among others

When looking for information on Google Scholar, you can use the different filters to skim through the information and limit it to a certain year or by using certain keywords.

Further, if you’re looking for related works, you can also refine your search to include this so that you can make references on both.

3. Notifications

In case you’d like to stay updated on a certain publication or keep abreast with an author’s new works, you can sign up for email notifications. Anytime this author publishes their work in your field of interest, you’ll get an email notification.

This is very helpful especially if you want to keep your work up-to-date with newly discovered data and maintain a high ranking on Google.

4. Simplified citation

Since not everyone is familiar with the different citation methods, Google Scholar makes it easier for you. When you search for an article or journal, at the bottom, you’ll see a Cite option.

When you click on it, it will last all the different citations of the particular research and you can copy it directly to your references list.

5. Save articles

If you’re pressed for time but don’t want to repeat the same search later on, you can easily save articles. For every search you make, there will be a Save button at the bottom. When you click on it, it will be added to your library, provided you’ve logged in.

Your Google Scholar library will keep your saved articles here and once you’re done, you can delete them.

6. Browser integrations

Google Scholar has also made it easier for you to do your research. With the Google Scholar button, you can install the extension directly to your browser. This helps you search for any paper directly without having to go to the Google Scholar website separately.

Not only is it convenient but also enhances your workflow. It is also compatible with multiple browsers. Google Scholar dark mode is also available to make it easy on the eyes.

There’s also the Scholar PDF reader which helps make the continents of a paper easy to read. You can quickly scan through its table of contents to see if it has the information you need. You can also copy and paste from it.

What are the pros and cons of using Google Scholar?

Pros

  • Free to use – You do not need a subscription to use Google Scholar as majority of articles are readily available.
  • Wide coverage – Articles on Google Scholar cover a wide range of disciplines so you’ll be lost for choice.
  • Simple user interface – You’ll not need a tutorial on how to navigate as everything is quite straightforward. It’s almost like the Google search page only with filter options, advanced searches and other options like saving an article and citation.
  • Metrics – Google Scholar provides you with the citation metrics of each article. This lets you know whether it is a high-impact or low-impact article.

Cons

  • Paid articles – Although accessing Google Scholar articles, some articles are behind a paywall which may require you to subscribe to view the full document.
  • Lack of quality control – Anyone can publish an article and have it listed on Google Scholar. You’ll have to filter the search results for peer-reviewed articles for credible sources.
  • Non-contextual searches – Even though you can filter your search results to certain keywords, it doesn’t always translate to the subject matter. The search results may bring up articles unrelated to your search queries.

How to use Google Scholar effectively

  • Refine your search – With so many articles on the web, you can easily get overwhelmed. To make your work easier, use keywords and quote marks where necessary to narrow the search results.
  • Check citation metrics – Each article has the number of times it has been quoted. This can help you gauge its importance and whether to use it.
  • Use your Google Scholar profile – If you are using a work or school account, chances are that some resources are paid for and there’s unlimited access to the articles.
  • Check for credibility – Although most papers published can be cited, those that are peer-reviewed are considered more credible. You can use Google Scholar’s filter option to get credible sources.
  • Save articles and set alerts – if you’d like to review an article later save it to your library. And if you’d like to get updates on related articles, sign up for email alerts.

Once you’ve figured out how to use Google Scholar effectively, you may be interested in getting a little more help. Some papers may be a little too complex for you to understand and that’s where SciSpace Copilot comes in.

It can easily break down the content into bite-sized and easy-to-understand knowledge. This will help improve your workflow and come up with a well-researched paper. And if you’d like even more assistance with writing your paper, we have a list of academic writing software.

Don’t forget to use plagiarism checker software to ensure you’re only submitting original content since most institutions use essay grading software to detect academic dishonesty.

That’s all we had on Google Scholar. We’re curious to hear about your experience. Have you used it before? How effective was it in helping you come up with a research paper? Any features you liked or didn’t like? Let us know in the comment section below.

BetterTTV For Firefox: How to Install & Activate it

Many watch Twitch frequently, and to get the best experience, they sometimes use certain extensions. Speaking of which, today we’re going to show you everything you need to know about BetterTTV for Firefox.

BetterTTV on Firefox here’s what you should know

How to install the BTTV extension on Firefox?

  1. Go to BetterTTV Firefox addon page.
  2. Click on Add to Firefox button.
    add to firefox button betterTTV  
  3. Confirm that you wish to install this addon by clicking Add.
    betterTTV add button
  4. Click on Allow for Twitch and YouTube.
    allow for twitch and youtube button
  5. Click on Allow to complete the setup.

How does BetterTTV work?

With BetterTTV you’ll get access to additional emotes on Twitch, and all emotes will be sorted in different tabs and easier to access. Of course, you can easily search for a specific emote right from the chat.

BetterTTV  emotes

This feature isn’t enabled by default, so you’ll need to turn it on from the BetterTTV settings page. Speaking of chat, you’ll also get a list of suggested emotes while typing them, which may come in handy to many.

BetterTTV emote suggestion

As for other chat features, with BetterTTV you can join chat anonymously and automatically claim rewards. If needed, you can blacklist words or users, so they won’t negatively affect your experience.

blacklist keywords BetterTTV settings

You can just as easily highlight certain keywords if you want to ensure that you don’t miss anything important.

It’s also possible to declutter the chat and hide message history, bits, subscription notices, community highlights, and other elements.

chat settings BetterTTV

That’s not all, the same applies to usernames, so you can remove their colors or badges to make them more readable.

usernames BetterTTV

The extension can also hide deleted messages, show them, or even highlight them if needed.

BetterTTV  deleted messages settings

Regarding decluttering, it can be also used on your sidebar so you can remove recently watched, recommended, similar, or offline channels from it.

BetterTTV sidebar settings

Lastly, BetterTTV can also change channel settings and you can automatically enable dark theme, theatre mode, and more.

How to activate BetterTTV in Firefox?

There are no special instructions, just install the application and give it all the necessary permissions and it will be automatically activated. However, you won’t notice any differences until you configure BetterTTV settings.

How do I open BTTV settings?

  1. Navigate to Twitch.
  2. Click your profile icon and select BetterTTV settings from the list.
    betterTTV settings twitch
  3. Now you should be able to change all your settings.

Does BetterTTV block Twitch ads?

No, BetterTTV doesn’t block ads, so to that you have to use an ad block extension. Do keep in mind that several users reported that AdBlock is not working on Twitch, but we have a guide that tackles that.

Others reported that uBlock Origin isn’t blocking ads on Twitch, but we also have a guide that addresses this problem.

So this is everything you need to know about BetterTTV for Firefox. It’s an amazing tool, and in our opinion is one of the best Twitch browser extensions that you can use.

To customize your Twitch experience further, you might be interested in stream cleaner tools for Firefox or check our guide on how to install FrankerFaceZ for Firefox.

If you need another great extension, Dark Reader for Firefox is one of the extensions that you must try.

How to Adjust Screen Brightness on Windows 7

Struggling with screen brightness on your Windows 7 PC? Whether you’re trying to reduce eye strain or just need a brighter screen, here are some simple steps to adjust your screen brightness.

How do I increase or decrease brightness on Windows 7?

1. Using the Power Options

  1. Click on the Start button type control panel and select the app from the results.
  2. In the Control Panel window, click on Hardware and Sound.
  3. Now, click on Power Options.
  4. At the bottom of the Power Options window, you will see a slider labeled Screen Brightness.
  5. Drag the slider to the left to decrease brightness or to the right to increase brightness.

Adjusting the brightness through Power Options is straightforward and helps optimize your screen for different lighting conditions, reducing eye strain.

2. Using the Brightness keys on your keyboard

  1. Find the brightness adjustment keys on your keyboard. These are usually function keys (marked with a sun icon) and are located at the top, typically between F1 and F12.
  2. Hold down the Fn key, usually found near the bottom-left corner of your keyboard.
  3. While holding the Fn key, press the key with the sun icon and up arrow to increase brightness, or the sun icon and down arrow to decrease brightness.

Using keyboard shortcuts allows for quick adjustments without navigating through menus, ideal for on-the-go brightness changes.

How do I restoring a missing brightness slider on Windows 7?

  1. Click on the Start button and type Device Manager into the search bar, then select the app from the search results.
  2. In the Device Manager window, click the arrow next to Monitors to expand the category.
  3. Click on the monitor listed under the Monitors category.
  4. Click on the Action tab at the top of the window and select Properties.
  5. Go to the Driver tab and click Uninstall. Confirm any prompts to uninstall the driver.
  6. Click on the Scan for hardware changes button in the Device Manager toolbar. This will reinstall the driver.
  7. Reboot your computer to ensure the changes take effect.
  8. Once your computer restarts, go back to the Power Options to see if the brightness slider has been restored.

Restoring the brightness slider by reinstalling the monitor driver can fix issues where the brightness control is missing, ensuring you can adjust the screen lighting as needed.

Each of these methods provides a way to adjust screen brightness on Windows 7, ensuring you can find the right brightness level for your environment and usage needs.

If the brightness level is stuck on high, click the highlighted link to fix it. You might also be interested in reading our guide on what to do if the monitor brightness keeps changing.

We hope that our guide helped you adjust the brightness on Windows 7, but if you have more questions, feel free to use the comments below.

Microsoft’s latest patent describes a VR/AR headset capable of adjusting the level of reality displayed on their screen

Virtual reality (VR) and augmented reality (AR) technology and headsets are quickly changing, and Microsoft is trying to keep up. The Redmond-based tech giant seems to be considering developing a VR/AR technology for headsets that takes you into the digital space and lets you control how much of the real world comes in. Thanks to Microsoft’s fresh vision-control system for near-eye display systems, the tech might soon be implemented in headset devices.

According to a recent patent, this new technology incorporates an electrochromic insert into the sides of a head-worn frame. This lets users change how clear or opaque their side vision is, making it simple to adjust as needed. Suppose you are playing a virtual reality game or using an augmented reality application to improve your real-life situation. In that case, the system ensures a smooth mixing of digital and physical environments.

At the heart of this system is its capacity to change the optical transmittance of an electrochromic insert. This element, situated at one side of the head-worn frame, links with at least two peripheral contacts stretching to transparent electrodes. Equipped with a control circuit that reacts per the user’s command, it can alter the voltage applied to these contacts and modify the transparency level in the insert accordingly. Users can then determine how much of the real world they want to observe by giving a simple command while still wearing their headsets.

But how does it play out? Imagine you’re deeply immersed in a VR experience, and your phone starts ringing. To avoid clumsily taking off the headset, you can use the vision-control system to make the peripheral inserts more transparent. You can look around and find your phone while still in the virtual world. This system is very easy to use. It can also respond to motion sensors, voice orders, or outside sounds taken by a microphone.

In addition, the electrochromic insert is not a sole function. It can be modified to suit various lighting situations and has been designed with flexibility in mind – it can also be detached from the helmet. So, when you require darkening against disturbing lights or want to increase the entry of natural light for better viewing of things around you, this system provides all that’s needed. And for those who care about its appearance, the insert can be fitted into different head-worn frame styles such as visors and goggles to helmets or safety glasses.microsoft vr headset

This technology might be a game-changer for professionals who use AR in their work, like design, training, or remote help. It could make switching between digital content and the actual world much easier. Likewise, gamers may find it beneficial to create an even more immersive and personalized experience with their games.

Microsoft’s vision-control system is a step forward in near-eye display technology for VR/AR headsets. It mixes digital and real-world experiences more smoothly than ever before, allowing new ways of interacting with technology.

Could it be implemented into the next Hololens devices? Who knows? Microsoft has been publishing dozens of patents that hinted at the upcoming device, but it’s still too early to say anything. We surely hope so.

Meanwhile, you can read the full paper here.

Microsoft Update Health Tools: How Do You Download it, and What is It Used For?

Microsoft has been working on making the Windows update process smoother and in the same direction; with update KB4023057, the Redmond tech giant introduced Microsoft Update Health Tools.

In this guide, we will discuss Microsoft Update Health Tools, its features, and how to download it to your computer.

What is Microsoft Update Health Tools?

Microsoft Update Health Tools is offered to devices through Windows Update as KB4023057 and applies to both Windows consumer and commercial devices.

Though it has slightly different functionality on these devices:

  • Consumer devices – The update assists in remediating the smooth functioning of Windows Update on consumer devices.
  • Commercial devices – The update is suggested for Windows Update for Business (WUfB) Deployment Service as it can help you manage Feature and Quality Updates.

It is needed to speed up security updates via Microsoft Intune and Microsoft Graph. The utility or app will be downloaded and updated periodically if you have the KB4023057 version or higher on your Windows 10 or Windows 11 computer. However, if your device has issues like low disk space, it might not get regular updates, which may prevent your PC from installing the latest version of the tool.

The utility runs in the background only when it detects problems with the Windows Update service. You can update your device to the latest version or manually install it from Microsoft Download Center.

What does Microsoft Update Health Tools do?

To ensure a smooth Windows Update, it can:

  • Reset your network settings
  • Compress files in the user profile directory to retrieve the disk space
  • Request your device to stay awake longer to allow the installation of updates
  • Repair corrupted Windows operating system components
  • Reset the Windows Update database to repair the problems to clear the Windows Update history

How do I download Microsoft Update Health Tools?

  1. Go to the Microsoft Download Center.
  2. Select a language from the drop-down menu and click Download to get the file.Update Health tools Download  
  3. Save the zip file to your computer, right-click the file, and select Extract All.
  4. Select the path to this folder and click Extract.Extract
  5. Now, navigate to Windows 10, Windows 11, and Windows 11 22H2+ folders and choose the version you have on your operating system.
  6. Double-click UpdHealthTools.msi to initiate the installation.Health tool
  7. Follow the on-screen instructions to complete the process.

How can I check if I have Microsoft Update Health Tools installed?

1. Using the Settings app

  1. Press Windows + I to open the Settings app.
  2. Go to Apps, then click Installed apps.Microsoft Update Health Tools - Settings
  3. Look for Microsoft Update Health Tools from the list of apps.

2. Using the Control Panel

  1. Press Windows + R to open the Run window.
  2. Type appwiz.cpl and click OK to open the App and Features window in the Control Panel.Microsoft Update Health Tools - Control Panel
  3. From the list of installed apps, look for Microsoft Update Health Tools.

3. Using the File Explorer

  1. Press Windows + E to launch the Windows File Explorer window.Microsoft Update tools
  2. Navigate to this path: C:\Program Files\Microsoft Update Health Tools

To conclude, this Microsoft utility tool plays an essential role in ensuring that your Windows devices are updated with the latest software improvements and security updates.

If you see Uhssvc.exe running on your Task Manager and wondering what it is and how it relates to Microsoft Update Health Tools, read this detailed guide.

If you have any questions or suggestions about the topic, feel free to mention them in the comments section below.

How to Install Microsoft Edge on Ubuntu: 3 Easy Methods

Switching from Windows to Ubuntu but still want to use Microsoft Edge? No worries! This guide will walk you through the steps to install Microsoft Edge on Ubuntu using different methods. Whether you prefer a graphical interface or the command line, we’ve got you covered.

How do I install Microsoft Edge on Ubuntu?

1. Install Microsoft Edge on Ubuntu using GUI

  1. Open a web browser and navigate to the official Microsoft Edge download page.
  2. Click the Download for Linux button.
  3. Agree to Microsoft Edge’s terms of service and save the .deb package to your Downloads folder.
  4. Open your file manager and locate the downloaded Edge installer in the Downloads folder.
  5. Double-click on the installer to open it with the Ubuntu Software app.
  6. Click on the Install button and follow the on-screen prompts.
  7. Once the installation is complete, open Microsoft Edge from the Applications menu or use your system’s app launcher.

This method allows you to install Edge using a graphical interface, making the process straightforward and user-friendly. The official repository will also be added to your system, ensuring you receive updates seamlessly.

2. Install Microsoft Edge on Ubuntu using Terminal

  1. Open a Terminal window (Ctrl + Alt + T).
  2. Add the Microsoft Edge repository to your sources list: sudo sh -c 'echo "deb [arch=amd64] https://packages.microsoft.com/repos/edge stable main" > /etc/apt/sources.list.d/microsoft-edge-dev.list'
  3. Remove the downloaded GPG key file: sudo rm microsoft.gpg
  4. Update your package lists: sudo apt update
  5. Install Microsoft Edge: sudo apt install microsoft-edge-stable
  6. Open Microsoft Edge from the Applications menu or by typing microsoft-edge in the Terminal.

Using the terminal is efficient and gives more control over the installation process. This method is ideal if you prefer command-line operations or if the graphical installer encounters issues.

As a sidenote, you might also need to add the Microsoft GPG key and install it.

3. Install Microsoft Edge using Flatpak

  1. If Flatpak is not already installed, you can install it by running: sudo apt install flatpak
  2. Add the Flathub repository which hosts the Microsoft Edge Flatpak: flatpak remote-add --if-not-exists flathub https://flathub.org/repo/flathub.flatpakrepo
  3. Install Microsoft Edge from Flathub: flatpak install flathub com.microsoft.Edge
  4. Launch Microsoft Edge using Flatpak: flatpak run com.microsoft.Edge

Flatpak provides a sandboxed environment which isolates the application from the system. This installation method ensures that Microsoft Edge remains updated independently of the system packages, making maintenance simpler.

How do I uninstall Microsoft Edge from Ubuntu?

  1. Open a Terminal and run: sudo apt remove microsoft-edge-stable
  2. Uninstall via GUI
    • Open the Ubuntu Software app.
    • Search for Edge.
    • Click on the application and select Remove.

Uninstalling Microsoft Edge is straightforward and can be done either through the terminal or the graphical interface.

By following these methods, you can install and manage Microsoft Edge on your Ubuntu system easily, choosing the installation method that best suits your preferences. For a smoother experience, always keep your system and applications updated.

If you’re interested, we also have a great guide on how to install Ubuntu on Windows 10 and 11. You might also be interested in our tutorial on how to dual boot Ubuntu and Windows 11.

We also have a guide on Microsoft Edge offline installer, so feel free to check it out.

For any other questions or suggestions, you can use the comments section below.

Microsoft Forms Not Updating Excel: 9 Proven Solutions

Is Microsoft Forms not updating Excel properly? Read on to learn the proven fixes that’ll surely work.

Microsoft Forms allows you to extract the raw data in a database format in an Excel workbook. However, due to many technical reasons, form entries may not update appropriately.

Luckily, I’ve reproduced all possible issues with MS Forms and Excel and listed all the fixes that actually work below. Ready?

How To Fix Microsoft Forms Not Updating Excel

I arranged the solutions, starting with the simplest ones for your convenience:

Perform These Basic Checks

Before going ahead with the detailed troubleshooting, check these settings first:

  • You must log in to MS Forms with the account you previously used to create the form.
  • If you’re not the owner of the form, you won’t be able to see the necessary settings to fix syncing issues between the Excel spreadsheet and Microsoft Forms.
  • You might be looking for form responses in the Excel worksheets, like Sheet1. Instead, look for the survey data in the Form1 tab. You can find that in the sheet tab ribbon at the bottom.
Form1 tab
  • Ensure you didn’t make any changes in the linked Excel file. For example, you added a new column or table in the same worksheet. In this case, Microsoft Forms won’t update new responses to this workbook.
  • Businesses often enforce Information Rights Management (IRM) on their digital documents including Excel workbooks. Microsoft Forms won’t be able to access such files and will stop automatically updating new responses.
  • Did you create the underlying Excel workbook in a shared OneDrive storage? A coworker might have checked out the Excel file. Hence, the form is unable to update the Excel file with the latest survey responses.

Ensure the Excel Workbook Is Online

You should check whether the workbook is offline.

Microsoft Forms and Excel file linking only works when the Excel file is hosted online on SharePoint, OneDrive, or Excel for the web.

If it isn’t getting updated, you’ve likely downloaded an offline copy by using the dedicated button.

download a copy

To avoid this, bookmark the Excel web or OneDrive workbook. Now, whenever you need the latest survey data, you can access this bookmarked online file.

Force Sync the Excel File With Your Form

You can try these steps for a manual sync:

  1. Go to the Data tab of the Excel workbook.
  2. Click on the Refresh command inside the Queries & Connections commands block.
  3. If the Refresh button isn’t available, try the Refresh All button.
Refresh all
  1. You’ll see the Synced with Forms ribbon above the formula bar.
synced with forms

Sync Data to a New Excel Workbook

You won’t be able to update the existing Excel workbook with the latest survey data from the new responses for the following reasons:

  • You no longer have the necessary file rights, like read and write.
  • The Excel online file got corrupted.
  • You’ve edited the Excel worksheet where Microsoft Forms automatically saves data.
  • Someone has checked out the underlying Excel file.
  • The existing Excel workbook has reached its file size limit.
  • IRM-protected Excel file.

On a Form Created Using MS Forms

  1. Open your form on MS Forms.
  2. Navigate to the Responses tab.
  3. You’ll see an Excel file button on the header area of the form.
  4. Click on the drop-down menu.
  5. Select the Disconnect and sync to a new workbook option.
sync to workbook

On a Form Created Using OneDrive

  1. Go to the Microsoft 365 portal from your registered account.
  2. Below the Quick access section, you should see all recent files including your form.
  3. Click on the form to open it.
quick access
  1. Navigate to the Responses tab.
  2. Click on the More options for Responses or the three dots menu near the Open in Excel button.
  3. From the context menu, choose the Sync all responses to a new workbook option.
sync all data
  1. Click OK on the confirmation dialog box.
  2. Once the syncing process is over, click on the Open in Excel button.
open new excel
  1. Microsoft Forms will take you to the newly created online Excel workbook.

Free Up Data From the Existing Excel Workbook

All online Excel files hosted on SharePoint Online, OneDrive, and OneDrive for Business have a maximum file size capacity of 100 MB. If a workbook goes past this limit, Microsoft Forms won’t be able to record new survey data in the existing form.

Here’s what you can do:

  1. Open the file of the form in Excel for the web.
  2. Click on the File tab and select Save As from the left-side navigation panel.
  3. On the right side below the Download section, click the Download a Copy option.
download a copy
  1. An offline version of the Excel file will be saved on your PC.
  2. Now, delete the content of the online file.
  3. You’ll see the Forms response table is missing warning above the Excel formula bar.
warning
  1. Close the Excel for the web portal.
  2. Go to the form and click on the Excel file button.
open file again
  1. The existing workbook will open in Excel for the web with new survey data.

Clear Browser Cache and Data

Perform these steps on Microsoft Forms and Excel web apps to refresh content from the servers:

  1. Click on the View site information or padlock icon in the browser address bar.
  2. Select the Cookies and site data option in the context menu.
Cookies and site data
  1. Click on the Manage on-device site data option.
  2. The On-device site data dialog will open on the top of the web app.
  3. Click on the delete or bin icon for all the items.
  4. Click Done to save the changes.
Delete cookies
  1. Now, close all the instances of MS Forms and Excel for the web app.
  2. Open them again and log in with credentials.

Open the linked Excel file of your forms to test the synchronization status.

Use a Different Browser

Are you fulfilling all conditions for Microsoft Forms and Excel online and are still unable to get the latest form data automatically? It might be an issue with the browser you’re using.

If you’re on outdated or unsupported browsers like Internet Explorer, switch to one of the popular services like Google Chrome and Mozilla Firefox.

If these don’t work, you should also give Microsoft Edge a try. Should you need to contact Microsoft’s technical support team, they’ll ask you to try this before moving on with helping you.

Disable Excel Add-Ins

Did you notice MS Forms not updating Excel right after installing one or more Excel add-ins? In that case, you should uninstall them and test the form again. You can try these steps:

  1. Go to the File tab and click the Get Add-ins menu in the left-side panel.
  2. On the right-side navigation panel, you’ll see the Get Add-ins menu.
  3. At the bottom, click the Manage my Add-ins button.
Manage my Add-ins
  1. You’ll see the Office Add-ins dialog box.
  2. Find the extensions that you’ve added recently.
  3. Click on the three dots menu or Options icon in the top right corner.
  4. A context menu will open with three options. Click on Remove.
remove add in
  1. Repeat the same steps for all the add-ins you want to uninstall.
  2. Once done, refresh the Excel web app.

Get Support for Microsoft 365 Admins

If none of the above works for you, contact the Microsoft 365 admins specialist support team by following these steps:

  1. Navigate to the Microsoft 365 admin center.
  2. Click on the Help & support icon in the lower right corner of the website.
help support
  1. Enter the error message in the How can we help? field and click on the right arrow next to it.
how can help
  1. At the button, click Contact support.
contact support
  1. The Contact support form will open. There, enter the necessary details and click the Contact me button at the bottom.
contact me
  1. You’ll see the Service request page.
service request confirmation
  1. You might get a call at the given mobile or telephone number or get email support depending on the agent’s availability and the issue’s complexity.
  2. To check the service request status, go to the How can we help? page and click on the History button.
service history
  1. Open the pending service request from the following page.
service request pending
  1. You’ll now see the current status of the support request.
service request status

Summary

So, now you know how to fix Microsoft Forms not updating Excel for MS Forms, SharePoint, and OneDrive.

If you can’t resolve it and must move to a different online form tool, check out this Microsoft Forms vs Google Forms comparison. Moreover, if Forms isn’t accepting responses or if branching doesn’t work, we can help out!

Cannot Quit Microsoft Excel: 5 Quick Ways to Close it

Struggling to close Microsoft Excel can be incredibly frustrating, especially when you need to save your work. Whether it’s a stubborn process or a deeper issue, I’ve got you covered with these ultimate fixes.

What do I do if Excel won’t let me close the app?

1. End task via Task Manager

  1. Save any open work in Excel by clicking File and then Save.
  2. Press Ctrl + Shift + Esc to open the Task Manager.
  3. Click on the Processes tab.
  4. Scroll down to find Microsoft Excel or EXCEL.EXE.
  5. Right-click on the process and select End Task.

This solution will force Excel to close, ensuring that you can restart the program without any issues. Be sure to save your work before ending the task to avoid losing any unsaved data.

2. Close other applications

  1. Save your work in all open applications.
  2. Close each application one by one by clicking on the X button at the top-right corner or using Alt + F4.
  3. Once all other applications are closed, try to close Excel again.

Closing other applications can free up system resources, making it easier for Excel to close properly. This can be particularly useful if your computer is low on RAM.

3. Disable COM Add-Ins

  1. Open Excel.
  2. Click on File and then Options.
  3. In the Excel Options window, click on Add-Ins.
  4. At the bottom of the window, select COM Add-ins from the Manage dropdown menu and click Go.
  5. Uncheck all add-ins and click OK.
  6. Try to close Excel again.

Disabling COM Add-Ins will help you identify if a third-party add-in is causing Excel to hang. You can re-enable each add-in one by one to find the problematic one.

4. Clean up macros and VBA code

  1. Open Excel.
  2. Press Alt + F11 to open the VBA editor.
  3. In the editor, check for any unused modules or macros.
  4. Delete unused modules and controls by right-clicking and selecting Remove.
  5. Close the VBA editor and try to close Excel again.

Removing unused macros and VBA code can prevent Excel from hanging during the closing process. This ensures that there’s no orphan code causing issues.

5. Perform a Repair Installation

  1. Press Windows + R to open the Run dialog box.
  2. Type appwiz.cpl and press Enter to open the Programs and Features window.
  3. Find Microsoft Office in the list of installed programs.
  4. Right-click on Microsoft Office and select Change.
  5. In the Microsoft Office window, select Repair and click Continue.
  6. Follow the prompts to repair the installation and restart your computer when prompted.

A repair installation can fix any corrupted files that may be causing Excel to hang. This is a more comprehensive solution that ensures all Office components are in good working order.

Malware can sometimes prevent Excel from closing properly. Running a full system scan will ensure that your computer is free from malicious software, which could be causing the issue.

By following these solutions, you should be able to resolve the issue of Excel not closing properly. Each step addresses different potential causes, offering a comprehensive approach to troubleshooting this problem. To prevent this issue in the future, regularly update your software and perform routine system maintenance.

6 Easy Fixes For the Once Human Network Error

Once Human is probably the hottest PC game right now but it might be shortlived if the network error is anything to go by.

You’ll be prompted to check your internet connection when playing which can be caused by a network interruption or the game servers are down due to an influx in traffic. Nevertheless, you can try a bunch of troubleshooting steps just to make sure everything on your side checks out.

How do I fix the Once Human network error?

1. Run the network troubleshooters

1.1 Run the Network adapter troubleshooter

  1. Hit the Windows key and click on Settings.settings windows 11
  2. Click on System, then select Troubleshoot.Open system troubleshooter
  3. Select Other troubleshooters.other troubleshooters
  4. Locate the Network Adapter troubleshooter and click on the Run button next to it.Network Adapter Run IPv6 No Internet Access

1.2 Run the Internet Connections troubleshooter

  1. Hit the Windows key and click on Settings.settings windows 11
  2. Go to System, and click Troubleshoot.System - Troubleshoot wifi keeps disconnecting windows 11
  3. Now click Other troubleshooters. Other troubleshooters
  4. Locate Internet connections, and click Run. 
  5. Follow the onscreen prompts to complete the process.  

While you’re checking for any issues with your internet, also shut down any superfluous processes and switch off any devices you’re not using that may cause network interference or congestion. Once done, run a network speed test to ensure you have a fast and stable connection.

2. Disable your antivirus temporarily 

  1. Hit the Windows key, type Windows Security in the search bar, and click Open.
  2. Click on Firewall & network protection, then select Public network.league of legends black screen after champion select
  3. Locate Microsoft Defender Firewall and toggle the off button.turning off Microsoft Defender Firewall Windows

3. Update your Network driver

  1. Hit the Windows key, type Device Manager in the search bar, and click Open.device manager w11
  2. Navigate to your Network adapter, right-click on it, and select Update driver.
  3. Select Search automatically for updated drivers.

4. Adjust network bands

4.1 Switch to a faster GHz band

  1. Hit the Windows key, type Device Manager in the search bar, and click Open.
  2. Navigate to Network adapters and double-click to expand.
  3. Right-click on your network adapter and select Properties.
  4. Click on the Advanced tab and locate the Preferred Band.
  5. In the Value drop-down menu, select Prefer 5GHz band then hit Enter.
  6. Restart your PC.

4.2 Remove bandwidth limits

  1. Hit the Windows key and select Settings.settings windows 11
  2. Click on Network & internet on the left pane.
  3. On your current Wi-Fi connection, click on Data usage.
  4. Select Enter limit.
  5. Under Set data limit, check the Unlimited box, then click Save.

Once Human is a data-intensive game so if you’ve enforced any data limits, you may get the network error.

5. Enable your VPN

  1. Press the Windows key and select Settings.settings windows 11
  2. Next, select Network & internet and click on VPN in the right-side menu.
  3. Select the VPN connection you want to enable and click Connect.

Using a VPN will allow you to change to different servers and you may land in one that is less crowded allowing you to bypass the network error on Once Human.

6. Reset your network

  1. Click on the Start Menu icon and click on Settings.settings windows 11
  2. Navigate to Network & internet.
  3. Select Advanced network settings.going advanced network settings win11
  4. Click on Network reset.Network Reset 1
  5. Next, hit the Reset now button.Network Reset now

Keep in mind that if the issue is server-related, you’ll have to wait until there’s less traffic. You can choose to play during off-peak hours and see if the network error still appears.

Alternatively, you can contact Once Human Support to report the issue and see if they have alternative workarounds.

In the meantime, explore other PC games that deliver the same thrill as Once Human. You can even engage with another player on two-player games for a more fun experience.

If you’ve encountered the network error and found a way out that is not listed here, let us know in the comment section below.

AOL Mail Forwarding: How to do it Automatically

Many are still using AOL as their email provider, and since they don’t want to move from it or change their email address, today we’re going to show you how to set up AOL Mail forwarding.
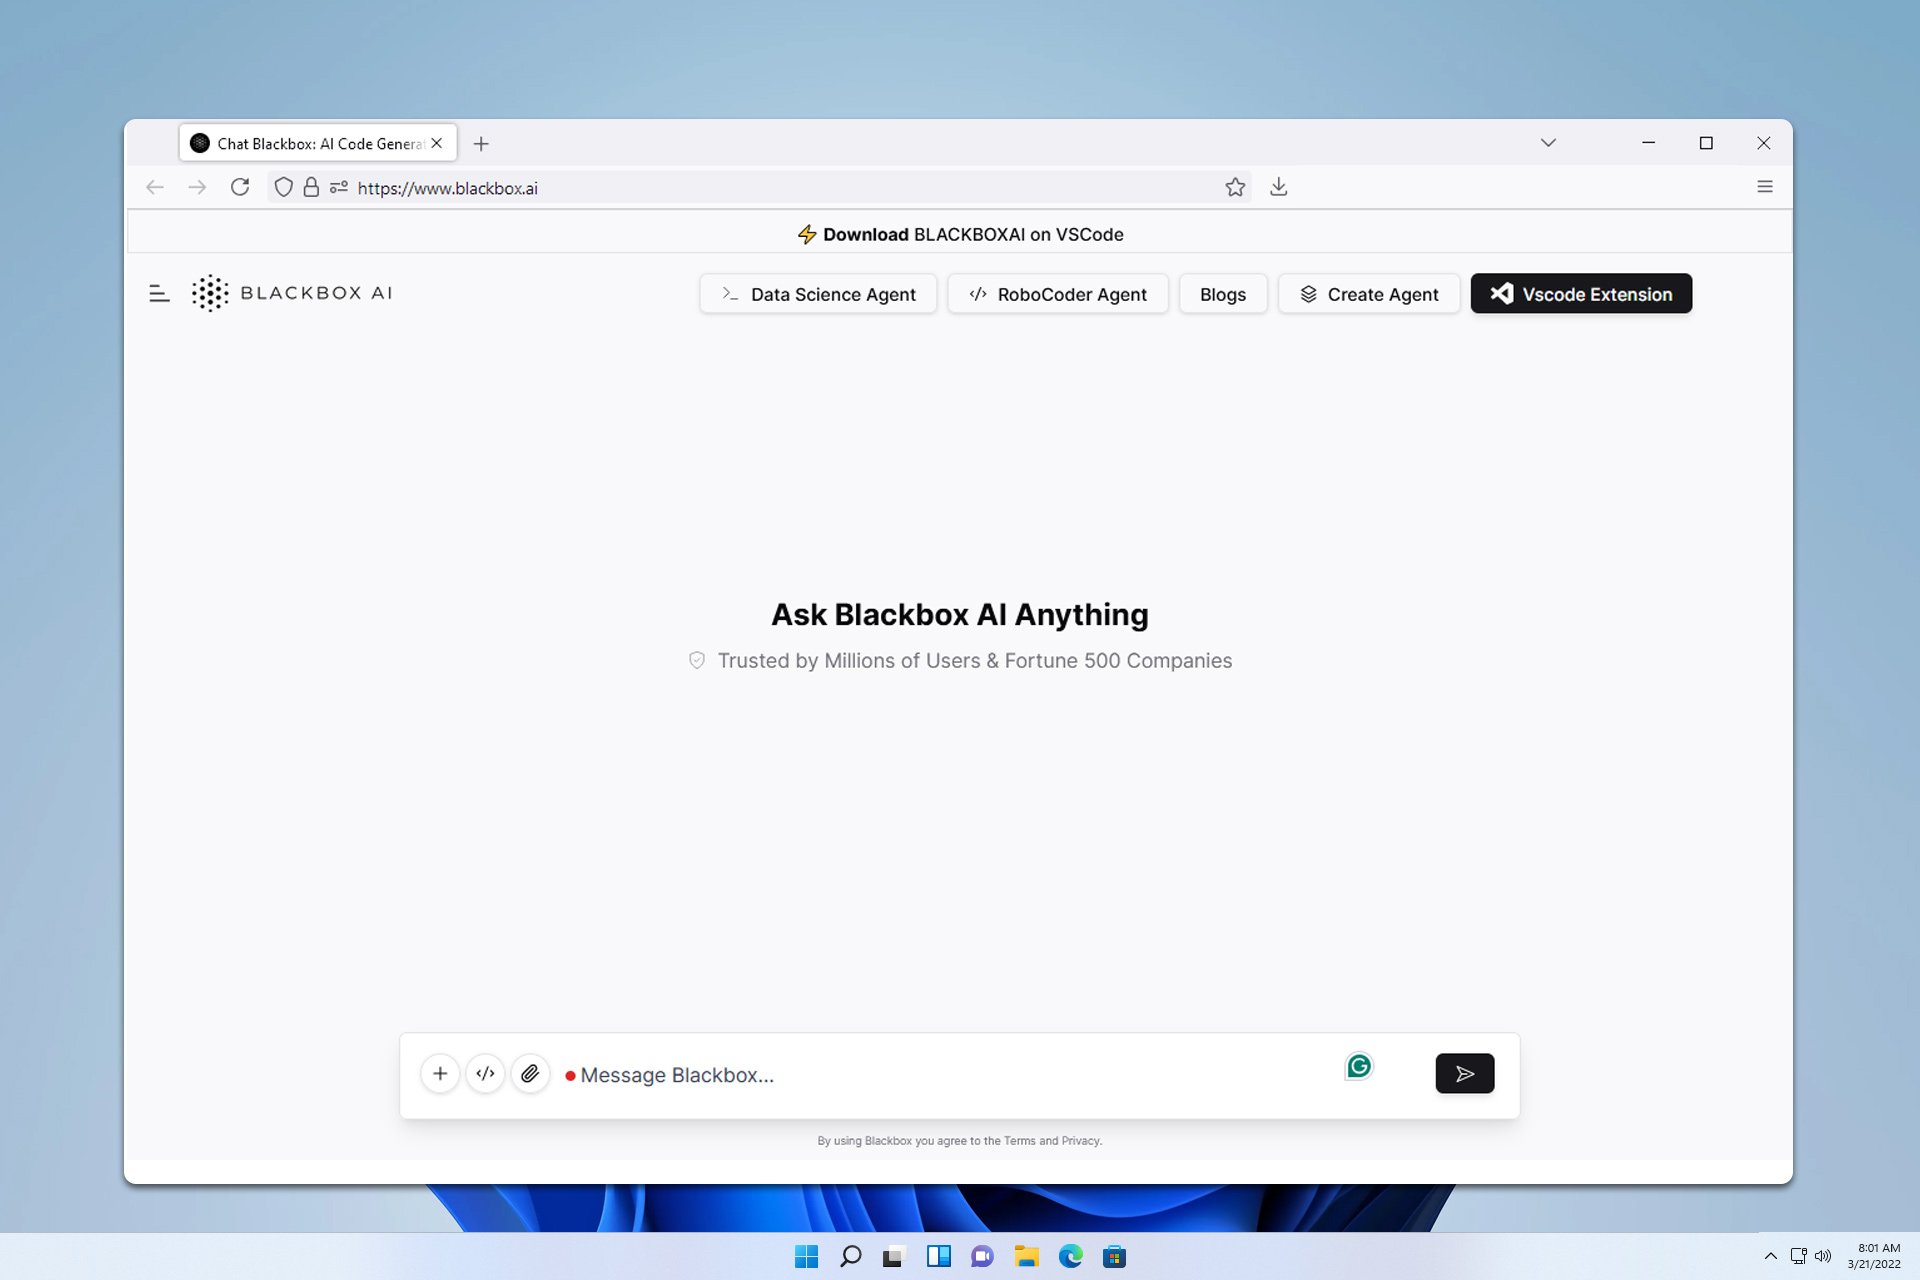
How do I forward an AOL email to another account?

1. Change AOL settings

  1. Log in to your AOL account.
  2. Switch to Classic Mail. You can do that from Settings and choosing Switch to Classic Mail.
  3. Go to Settings and choose General Settings.
    general settings aol
  4. Next, select Forwarding.
  5. Choose Forward a Copy of Incoming Mail to and enter the desired address.
  6. Lastly, click on Save Changes.

Do keep in mind that this feature might not be available to all AOL Mail users.

2. Change import settings

  1. Open Gmail, click the Gear icon, and then choose Show all settings.
     see all settings gmail
  2. Navigate to the Accounts and Import tab and choose Add a mail account in the Check mail from other accounts field.
    add another email address
  3. Enter your AOL email address, password, server information, and other data that is required.
    aol email address next

Keep in mind that these steps are just for Gmail. If you use another service, the steps might be different.

Can you automatically forward an AOL email to Gmail?

Yes, all the methods from above will help you forward AOL emails to your Gmail account.

As you can see, it’s pretty simple to set up AOL mail forwarding, and you can use that if AOL Mail is not syncing with Windows or if you’re having other issues.

To learn about forwarding, we have a great guide on how to forward multiple emails in Gmail or how to import old emails into Gmail, which can be handy if you’re moving away from AOL.