Recently, thousands of PlayStation players from across the globe reported getting the WS-116386-5 error, with the message reading, We’re doing some maintenance on PlayStation Network right now. Please try again later.
The reports of error WS-116386-5 on PS4 and PS5 first emerged on July 1, 2024, from countries like the United States, United Kindom, Canada, Australia, Sweden, Portugal, and Italy, amongst others.
While the error message made it clear that server maintenance was underway, it only affected a section of users while others were able to access the PlayStation Network and play games, even in Online Mode. This led to many confusing the error with an account ban, given that they were kicked out of the game and there’s no mention of it on Sony’s official website.
How do I fix the WS-116386-5 PlayStation error?
1. Check the PlayStation Network’s status
Your primary approach when faced with WS-116386-5 on PS4 or PS5 should be to check the PSN Service Status. If there is an issue at PlayStation’s end, the server status would indicate it, as was the case on July 1, 2024, when most services were marked as down. It took a few hours for the systems to be back up and running.
PlayStation Network’s Service Status
Also, to verify if others are facing the same problem, use a service like Downdetector. If there’s a sudden spike, it means that other users, too, are reporting issues, indicating a widespread outage!
2. Reconnect to the wireless network
If the problem is limited to an individual wireless network, I recommend you connect to another Wi-Fi point. Also, switch to Wi-Fi or connect to mobile data, then reboot the console and check for improvements.
Switching the network helps when the PlayStation network services are up and running for others while your console still throws the WS-116386-5 or nw-31291-6 error.
3. Contact PlayStation support
If nothing else works, the last option is to contact PlayStation support. While they may not be able to share a fix since the error has to do with ongoing maintenance, the support team could share a timeline as to when things will be up and running!
For a few users, simply pressing X on the WS-116386-5 error screen did the trick. But it could just as well have been a coincidence, and the PlayStation Network’s services resumed at that very instant. So, unless Sony shares an official statement, there’s very little I can tell you about the error.
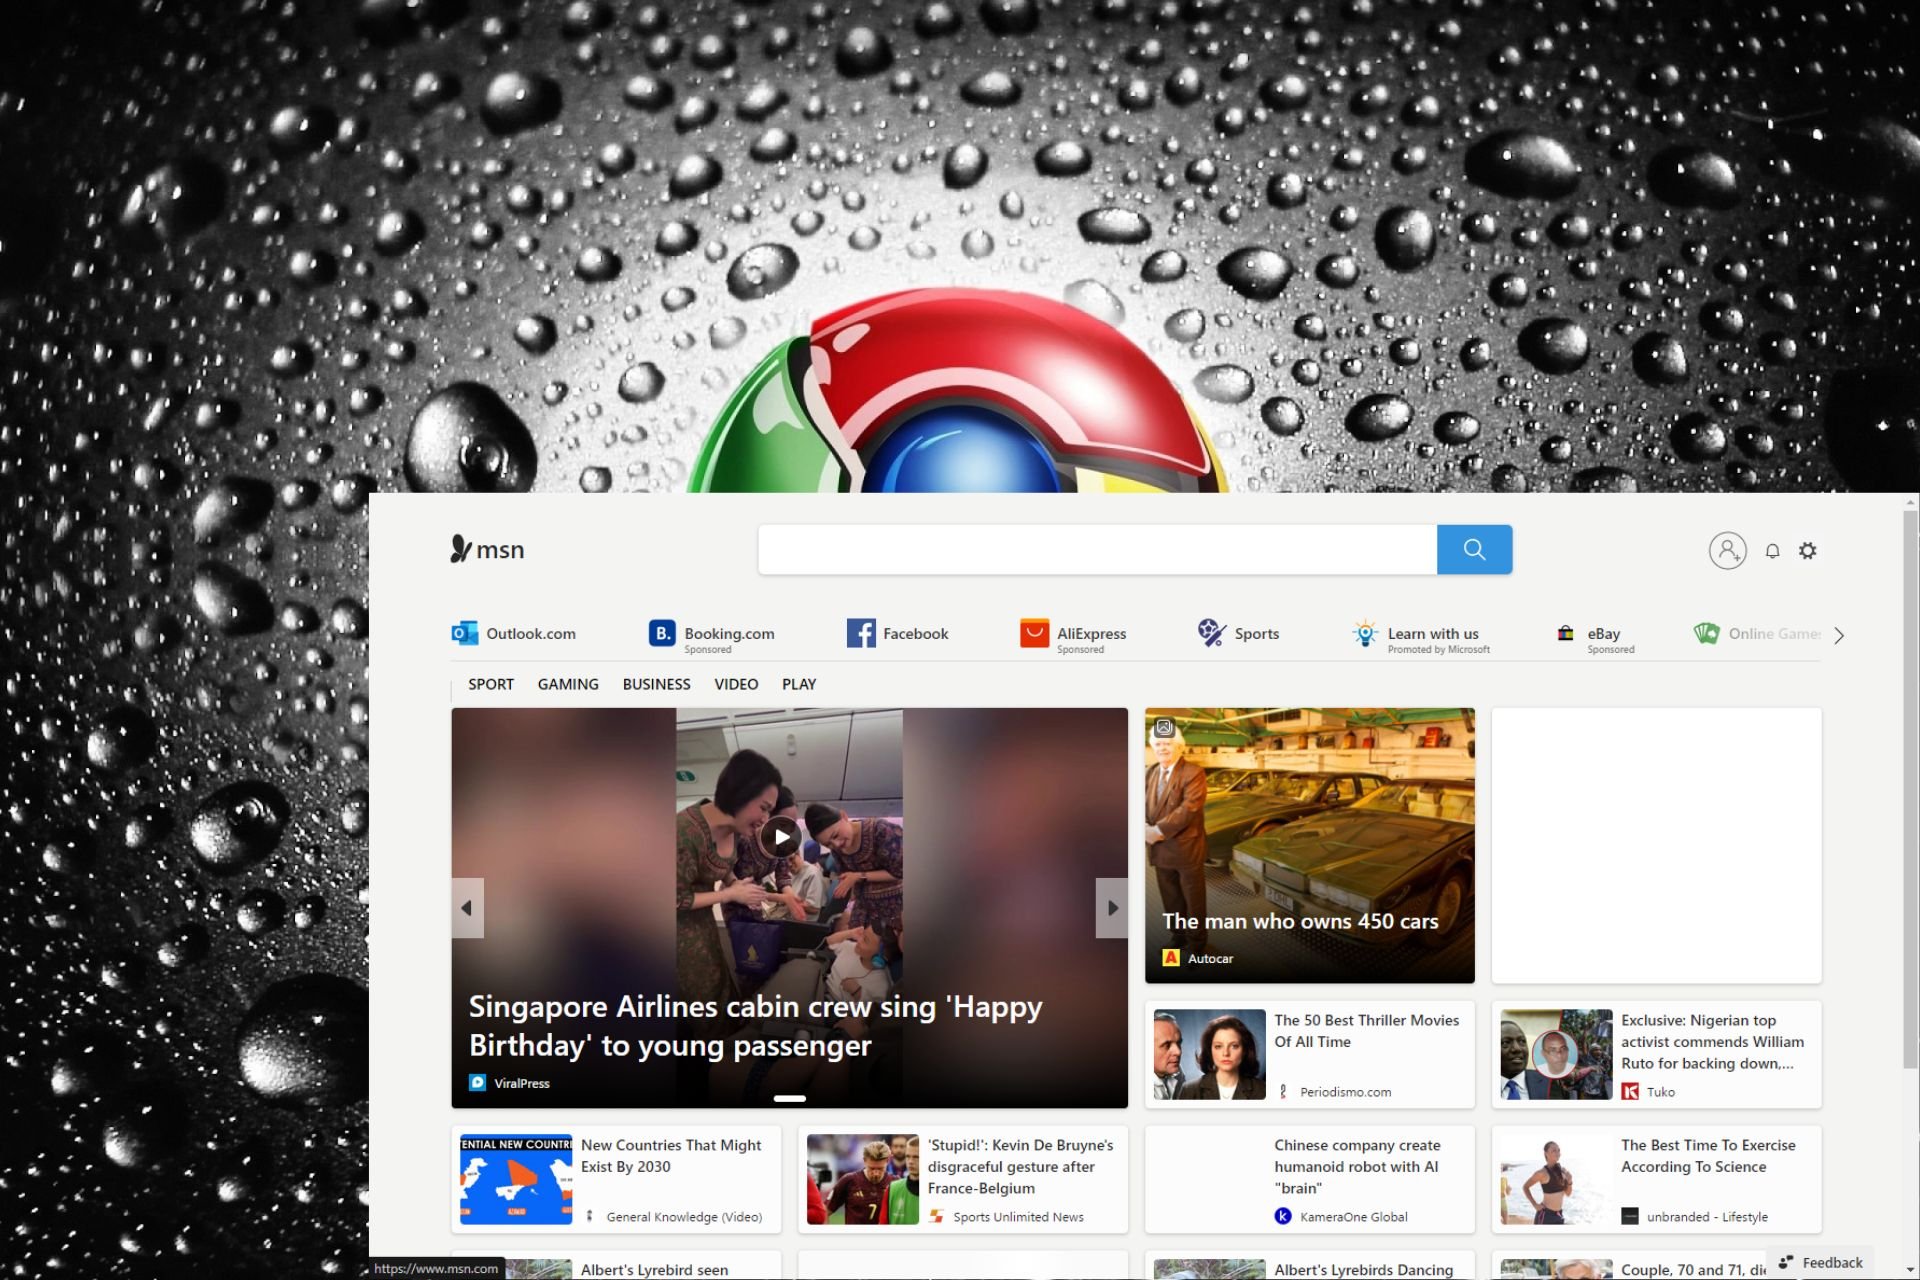
Google Chrome is a great browser but its homepage may be a little too bland for some users hence why one would make MSN the default homepage.
MSN is an excellent choice of homepage because of its quick access menu to social sites like Facebook and your Outlook email. You also get to explore trending topics at a glance, weather updates and search on the Internet thanks to the Bing search bar.
What’s more, you can customize your MSN homepage to display your preferred content if you don’t like the preset menus and content.
How do I make MSN the homepage on Google Chrome?
Launch your Chrome browser, click on the three ellipses at the top right corner and select Settings.
Navigate to Appearance and on the right side, under the Show home button option, select custom webpage and enter MSN’s official site.
Close the Settings page and when you click the home button or new page, you should be directed to MSN as your homepage. If it doesn’t, restart your browser for the changes to take effect.
While setting MSN as your homepage on Google Chrome is pretty straightforward, you may encounter some issues. The MSN homepage may fail to display or freeze whenever you open a new tab.
If this is the case, ensure your Chrome browser is up-to-date, clear any cache and cookies and disable any problematic extensions. You can also reset or reinstall your browser if the problem persists but also try with another browser like Opera to check whether it is a Chrome issue.
Have you tried the MSN site as your homepage? Would you say it’s better than Chrome’s default start page? Share your thoughts with us in the comment section below.
Google Chrome has a built-in security feature to check and warn users if saved passwords to the browser are involved in a data breach. This feature has been part of Safe browsing’s Standard Protection for a while now. However, Google is now considering deprecating the Password leak toggle altogether.
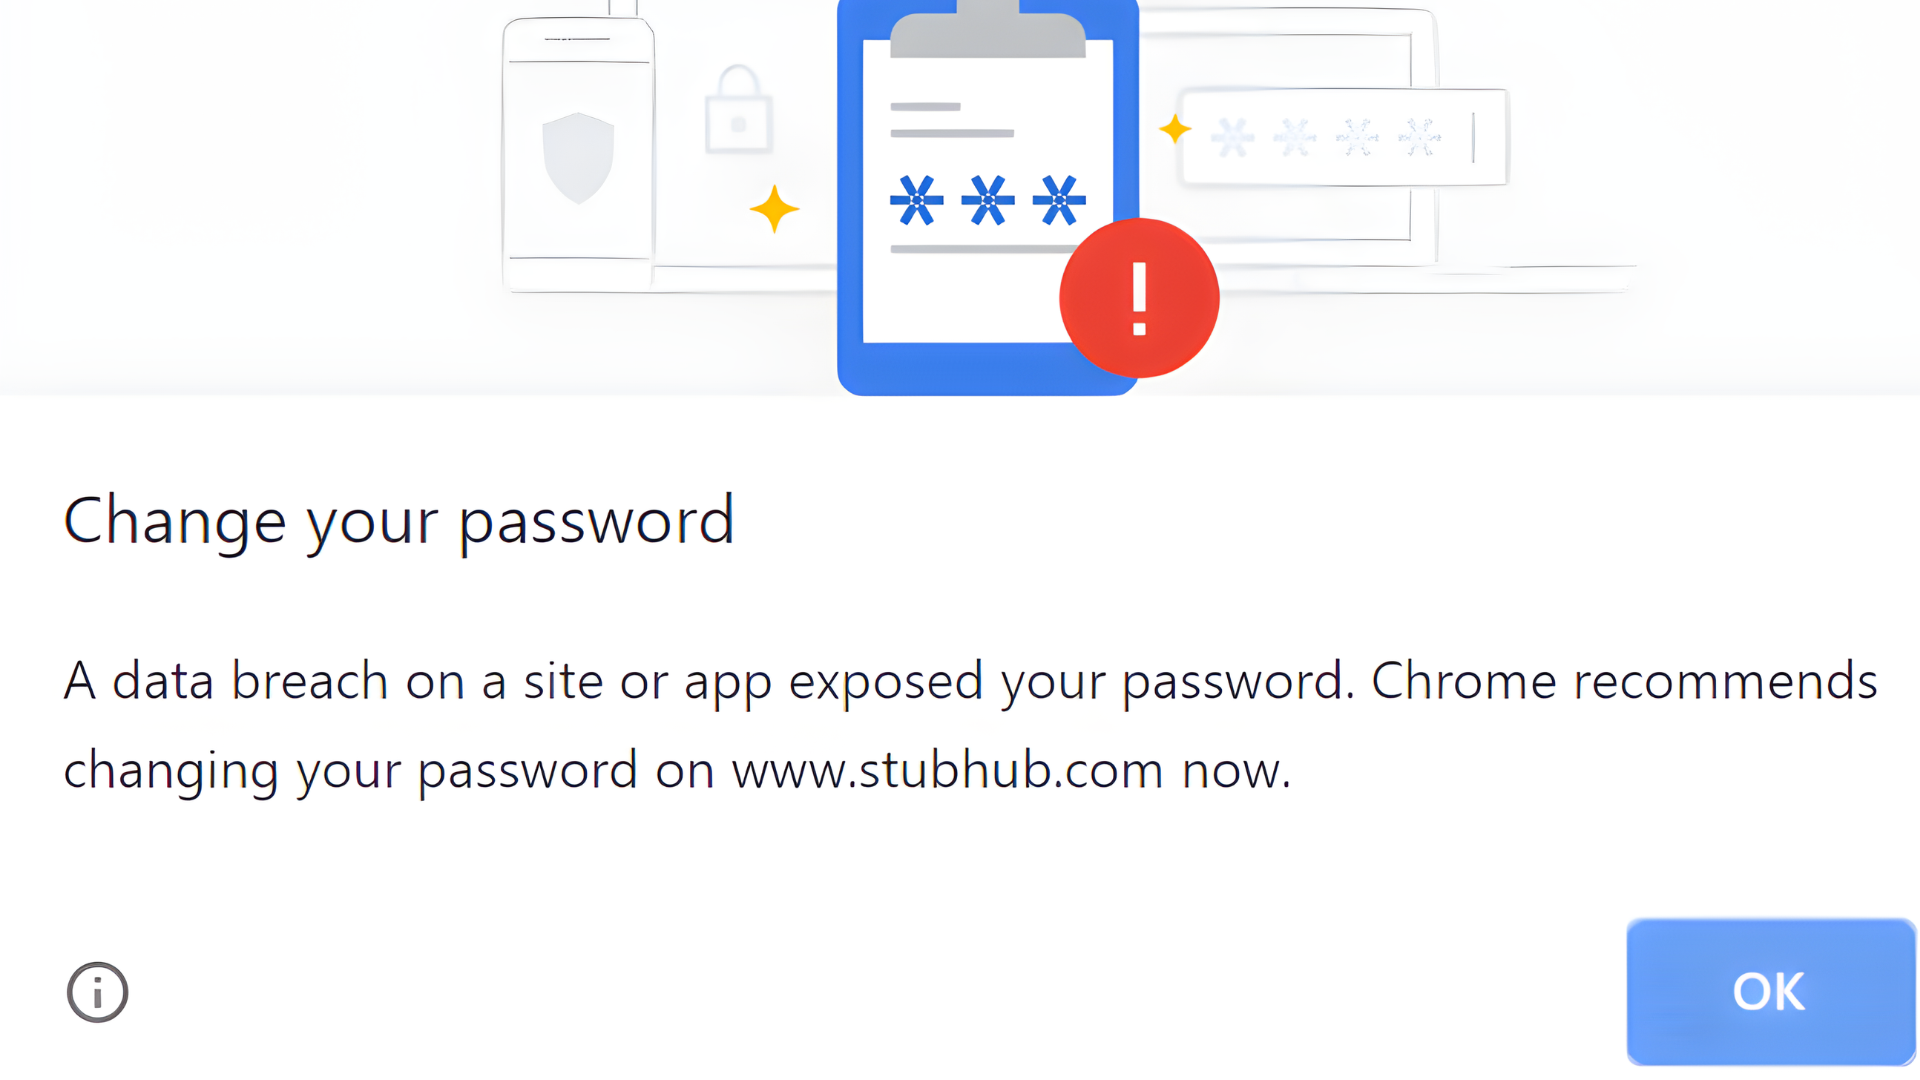
When Chrome detects a compromised password, it alerts you with a warning to change your password, like this:
“Change your password. A data breach on a site or app exposed your password. Chrome recommends changing your password on [website name] now.”
Upon seeing this, users will typically head to the affected website and reset their password. This is a very useful feature, and Microsoft Edge has a similar security feature integrated as well.
Chrome to deprecate data breach Password leak warnings
As spotted by Windows Report, Google is now planning to deprecate this feature. The company is tracking a metric that shows how many users disable this toggle. If a high number of users are opting out, we might see Google removing the feature.
“Add a metric that checks if the password leak toggle is off. This metric is needed so we can get a better understanding of how many users opt out of the password leak toggle on the chrome://settings/Security page under standard protection since we are planning on deprecating it.” Google notes.
Since the feature is automatic and cannot be disabled in Enhanced Protection (which is not the default setting), user behavior data might be primarily coming from Standard Protection users. This could lead Google to believe the feature is less valuable than initially thought.
The decision or change hasn’t been finalized yet. If you have found this feature useful, you can enable it by visiting Settings > Password and Security, and under Standard Protection, enable “Warn you if a password was compromised in a data breach.”
Password leak toggle to be deprecated. image Credit: Windows Report
Here are some possible reasons for users to opt-out of Password leak warnings for data breaches:
The warnings might be overwhelming, especially for users who frequently encounter compromised password alerts.
Some users might have their methods for checking compromised passwords, rendering the Chrome toggle redundant.
There could be concerns about the accuracy of the warnings, leading users to disable them out of skepticism.
There are still several ways to check if your passwords stored in Chrome are compromised including even weak or reused. The Password Checkup built into Google Password Manager in Chrome offers this functionality, and Safety Check recently gained the ability to run in the background. So, regardless of the decision about the toggle, you’re still covered.
Encountering a Patreon Error 500 can be frustrating, especially when it disrupts your workflow on your website. This guide will help you troubleshoot and resolve this issue with some straightforward solutions.
How do I fix Error 500 on Patreon?
1. Deactivate all plugins to check for conflicts
Go to your WordPress dashboard by logging in to your admin panel.
On the left-hand menu, click on Plugins.
In the plugins list, click on Deactivate for each plugin except for the Patreon WordPress plugin.
After deactivating all other plugins, check if the error still occurs by visiting the problematic page.
If the page loads without the error, reactivate each plugin one by one and refresh the page each time until you find the plugin causing the conflict.
Disabling and enabling plugins helps identify if a conflict between plugins is causing the error. Once the problematic plugin is found, you can seek an alternative or update it.
2. Check and Update .htaccess File
Connect to your website using an FTP client or your hosting control panel’s file manager.
Locate the .htaccess file in the root directory of your WordPress installation.
Download a copy of the .htaccess file to your computer as a backup.
Open the file in a text editor and check for any irregularities or incorrect configurations.
If unsure, you can replace its content with the default WordPress .htaccess content: # BEGIN WordPress <IfModule mod_rewrite.c> RewriteEngine On RewriteBase / RewriteRule ^index\.php$ - [L] RewriteCond %{REQUEST_FILENAME} !-f RewriteCond %{REQUEST_FILENAME} !-d RewriteRule . /index.php [L] </IfModule> # END WordPress
Save the changes and re-upload the .htaccess file to the server.
Check your website to see if the issue is resolved.
Editing the .htaccess file can fix issues caused by improper configurations that result in a 500 error.
3. Increase the PHP memory limit
Access your website’s root directory using an FTP client or your hosting control panel’s file manager.
Locate the wp-config.php file.
Download a copy of wp-config.php to your computer as a backup.
Open the file in a text editor.
Add the following line before the That’s all, stop editing! comment: define('WP_MEMORY_LIMIT', '256M');
Save the changes and upload the modified wp-config.php file back to your server.
Refresh your website to see if the error is resolved.
Increasing the PHP memory limit helps your WordPress site handle more resources, which can prevent errors like the 500 Internal Server Error.
Microsoft Designer, already known for helping users create AI-generated artwork and graphics by simply giving some text instructions, has now added personalized greeting cards to its list of abilities after recently being updated with landscape mode and Restyle Image.
According to the blog post, the process is straightforward. When logged into your Microsoft account and on the Microsoft Designer site, you will see a section for Greeting Cards. In this place, you can get inspired by existing designs or, if you feel creative, type in a description and let AI create it.
Greeting Cards is a fast and intuitive tool that turns your text description into a personalized greeting card tailored to your unique style and message. The front of the card features an AI-generated design inspired by your description. The inside includes an editable message for that extra personal touch.
Microsoft
The outcome? Four distinct designs designed specifically for your prompt, ready for you to choose your preference.
But what if none of the designs you see enthuse you? It’s simple—change your prompt and attempt again. When you finish choosing a design, you can modify the message inside the card to make it yours. Just after that, with one touch on the download button, you have a personalized greeting card ready for utilization. This has been saved in PNG format, and it’s also simple to share on mobile devices.
The charm of this feature is not limited to personal usage. Think about sending a unique card to celebrate your work anniversary or finish a project with one of your colleagues. The variety can go on and on, from birthdays and anniversaries to holidays or simply for no reason. The secret is customization, and through Microsoft Designer’s Greeting Cards, you can expand your possibilities as much as you desire.
It’s worth mentioning that this feature is currently only available in English, but more languages will be added soon.
Will you try the new Microsoft Designer’s Greeting Cards?
Can you rotate Google Maps on the desktop? Yes, you can rotate Google Maps on your desktop using the satellite view, but the default mode has no such option. It’s useful for getting a different view of a location or aligning the map with a specific direction of travel.
While Google Maps on mobile devices easily supports rotation, many desktop users wonder if they can achieve the same flexibility.
I’ll show you how to do it below!
How To Rotate Google Maps on Desktop
Here are two methods you can try:
Using Satellite View
Go to Google Maps and tap the layers button on the bottom left of your screen.
Tap More, then select Satellite.
Tick the Globe view box, and a compass will appear on the right side of your screen.
Tap on the arrows on thecompass to rotate the map.
That’s it! You can better view your map by rotating it to any angle.
Sometimes, you can select the satellite view and tick the globe view box, but you won’t see the compass on the right side of the screen. In that case, you’ll need to enable hardware acceleration.
Here’s what to do:
Tap on the three dots in the top right corner of your screen.
Scroll down and tap Settings.
Click System.
Enable “Use graphics acceleration when available.”
You can install an Android emulator like Bluestacks on your desktop and then download the mobile version. This allows you to access features that might not be available on the desktop version, such as rotating the map on the default view. However, you must sign in with your Google Account to access the Play Store through Bluestacks.
Still, you might be unable to replicate the touchscreen commands perfectly with a mouse. This can make navigation and other touch-based interactions a bit trickier.
So, can you rotate Google Maps on your desktop? Luckily, yes. You can use the satellite view and turn on hardware acceleration if you don’t see the compass. Another option is to get an Android emulator, but it might be tricky to navigate with a mouse.
Keep in mind that this service has its share of issues, and we already wrote what to do if Google Maps location is wrong on your PC, so you might want to check it out.
While it’s possible to run applications as other users, many reported an Access denied message when trying to run something as a different user, so today we’re going to show you how to fix that.
What can I do if run as a different user gives an Access denied error?
Before we try anything else, you can try uninstalling applications that can potentially interfere with your permissions.
1. Start the command line as administrator
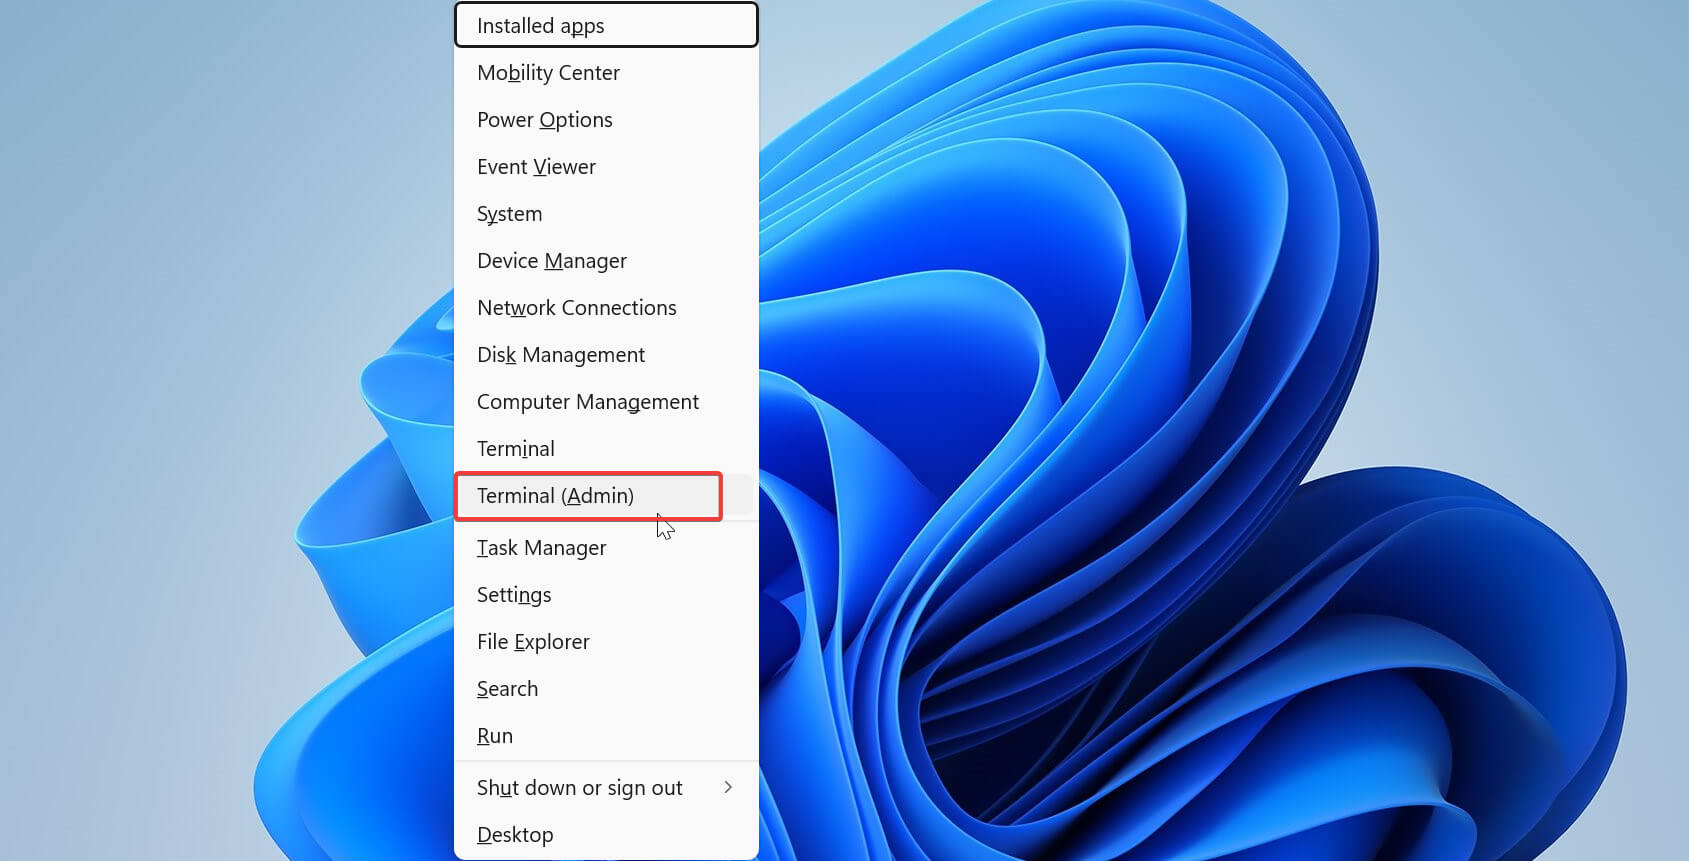
Press the Windows key + X and choose Terminal (Admin).
Next, run the desired runas command.
Press Enter.
2. Use PowerShell
Open the command line.
Use the following command, but be sure to replace [user] and [command] with the appropriate user and command: powershell.exe -ExecutionPolicy Bypass -command "& {Start-Process powershell.exe -Credential '[user]' -ArgumentList 'Start-Process ""[command]"" -Verb runAs'}"
Do keep in mind that this isn’t the only issue that can occur, and for some users Run as administrator isn’t working, but we have a different guide that addresses this issue.
Microsoft 365 Insiders have a special opportunity to try the ODF 1.4 support in Word, Excel, and PowerPoint. The Redmond-based tech giant announced the new feature in its latest blog post.
With this change, ODF files in Microsoft 365 apps will now save only to the ODF 1.4 format. ODF 1.4 adds support for a number of features—which we’ll explore below—that are already supported by the Open Office XML format (.docx, .xlsx, and. pptx).
Microsoft
Firstly, ODF means OpenDocument Format. This is important because it’s a way to make documents, spreadsheets, and presentations better in how they are saved and shared. With support for ODF 1.4, Microsoft shows that they are doing more – files from Word, Excel, or PowerPoint will be saved as the newest version of this format.
But why is it so important? This update is filled with improvements that assure you that you will make your documents easier to access and the work process more efficient.
One of the most exciting parts about this update is the variety. Imagine being able to put tables in shapes in Word or start lists from nothing. For people who care a lot about looks, the update ensures images and shapes do not overlap, keeping your documents clean and organized.
For those using Excel, there are improvements like better adjustments for error values and the capacity to save color filter configurations. PowerPoint also has a rise in performance, with support for slide numbering starting from zero and improved text direction inside table cells.
You may be thinking, “How can I access these features?” It’s not complicated at all. If you are a Microsoft 365 Insider in the Beta Channel, then everything is already prepared for your discovery of these updates on Windows or Mac.
This feature is available in Word, Excel, and PowerPoint to Beta Channel users running:
Windows: Version 2404 (Build 17531.20078) or later
Mac: Version 16.84 (Build 24041420) or later
Microosoft
This update is an excellent addition for Microsoft 365 users. It improves functionality in Word, Excel, and PowerPoint while meeting the requirement of easier and quicker document management.
If you are a tech lover or like to try out new software updates, the new Microsoft 365 ODF support is worth checking into. Let us know your opinion on this.
In other news, Microsoft extended its AI model, Copilot, to various subscription plans. Regardless of their license, almost every Microsoft 365 user should be able to use AI capabilities in platforms such as PowerPoint, Excel, or Word.
Microsoft Teams is configured to show you a mirrored view of your video feed, although other participants in the meeting see the unmirrored feed. To have the same feed as others, you will have to flip the camera in Microsoft Teams!
For anyone wondering why Microsoft Teams flips the camera video in your feed, it’s to provide you with a more familiar experience, as if you are looking in a mirror. This also causes issues, especially when you are presenting something, because all the characters on your feed appear inverted, making them illegible and necessitating the need to flip the webcam feed.
How can I flip the camera on Microsoft Teams?
1. Via Teams’ meeting settings
1.1 At the start
On the Choose your video and audio settings screen, click the Settings icon (gear) under the webcam feed.
Scroll down to Video settings and disable the toggle for Mirror my video.
1.2 While in the meeting
While in the meeting, click on the ellipsis at the top, select Settings, and then choose Device settings from the flyout menu.
Scroll down and disable the toggle for Mirror my video.
As soon as you disable the Mirror my video setting, the camera’s video feed appearing at your end will be the same as that shown to the other participants. However, the Mirror my video setting is only available for accounts linked to organizations and not on personal Microsoft Teams accounts.
2. Using a third-party app
If the Mirror my video setting is not available in Microsoft Teams, or you want to flip the camera feed visible to other participants, using a third-party webcam software will do the trick!
Many third-party software offer the ability to flip the camera on a software level, thus showing a mirror image of your feed even to others. Similarly, if Microsoft Teams, for some reason, shows a mirrored video feed to others, you can un-mirror it using a dedicated software.
All you have to do is select the feed from the downloaded app in Microsoft Teams and then make the changes at the app level. To do that, open the Device settings for a meeting > choose the app from the Camera dropdown menu.
What can I do if Microsoft Teams automatically flips the camera?
Update Microsoft Teams: If there are any pending updates for Microsoft Teams, install them.
Clear the app data: Press Windows + E to open File Explorer > paste %appdata%\Microsoft\Teams in the address bar > hit Enter > press Ctrl + A to select all the files > hit Delete to clear them > confirm the change > relaunch Microsoft Teams > check for improvements.
Disable/remove any third-party webcam software: If you have any webcam-feed customization software available on the PC, uninstall the app and check for improvements.
Microsoft Teams cache under AppData
You now know how to flip the camera in Microsoft Teams as well as fix things when it does so automatically. In case issues persist, you can always switch to another reliable video conferencing software!
Were you able to flip the camera using our methods? Share with us in the comments section.
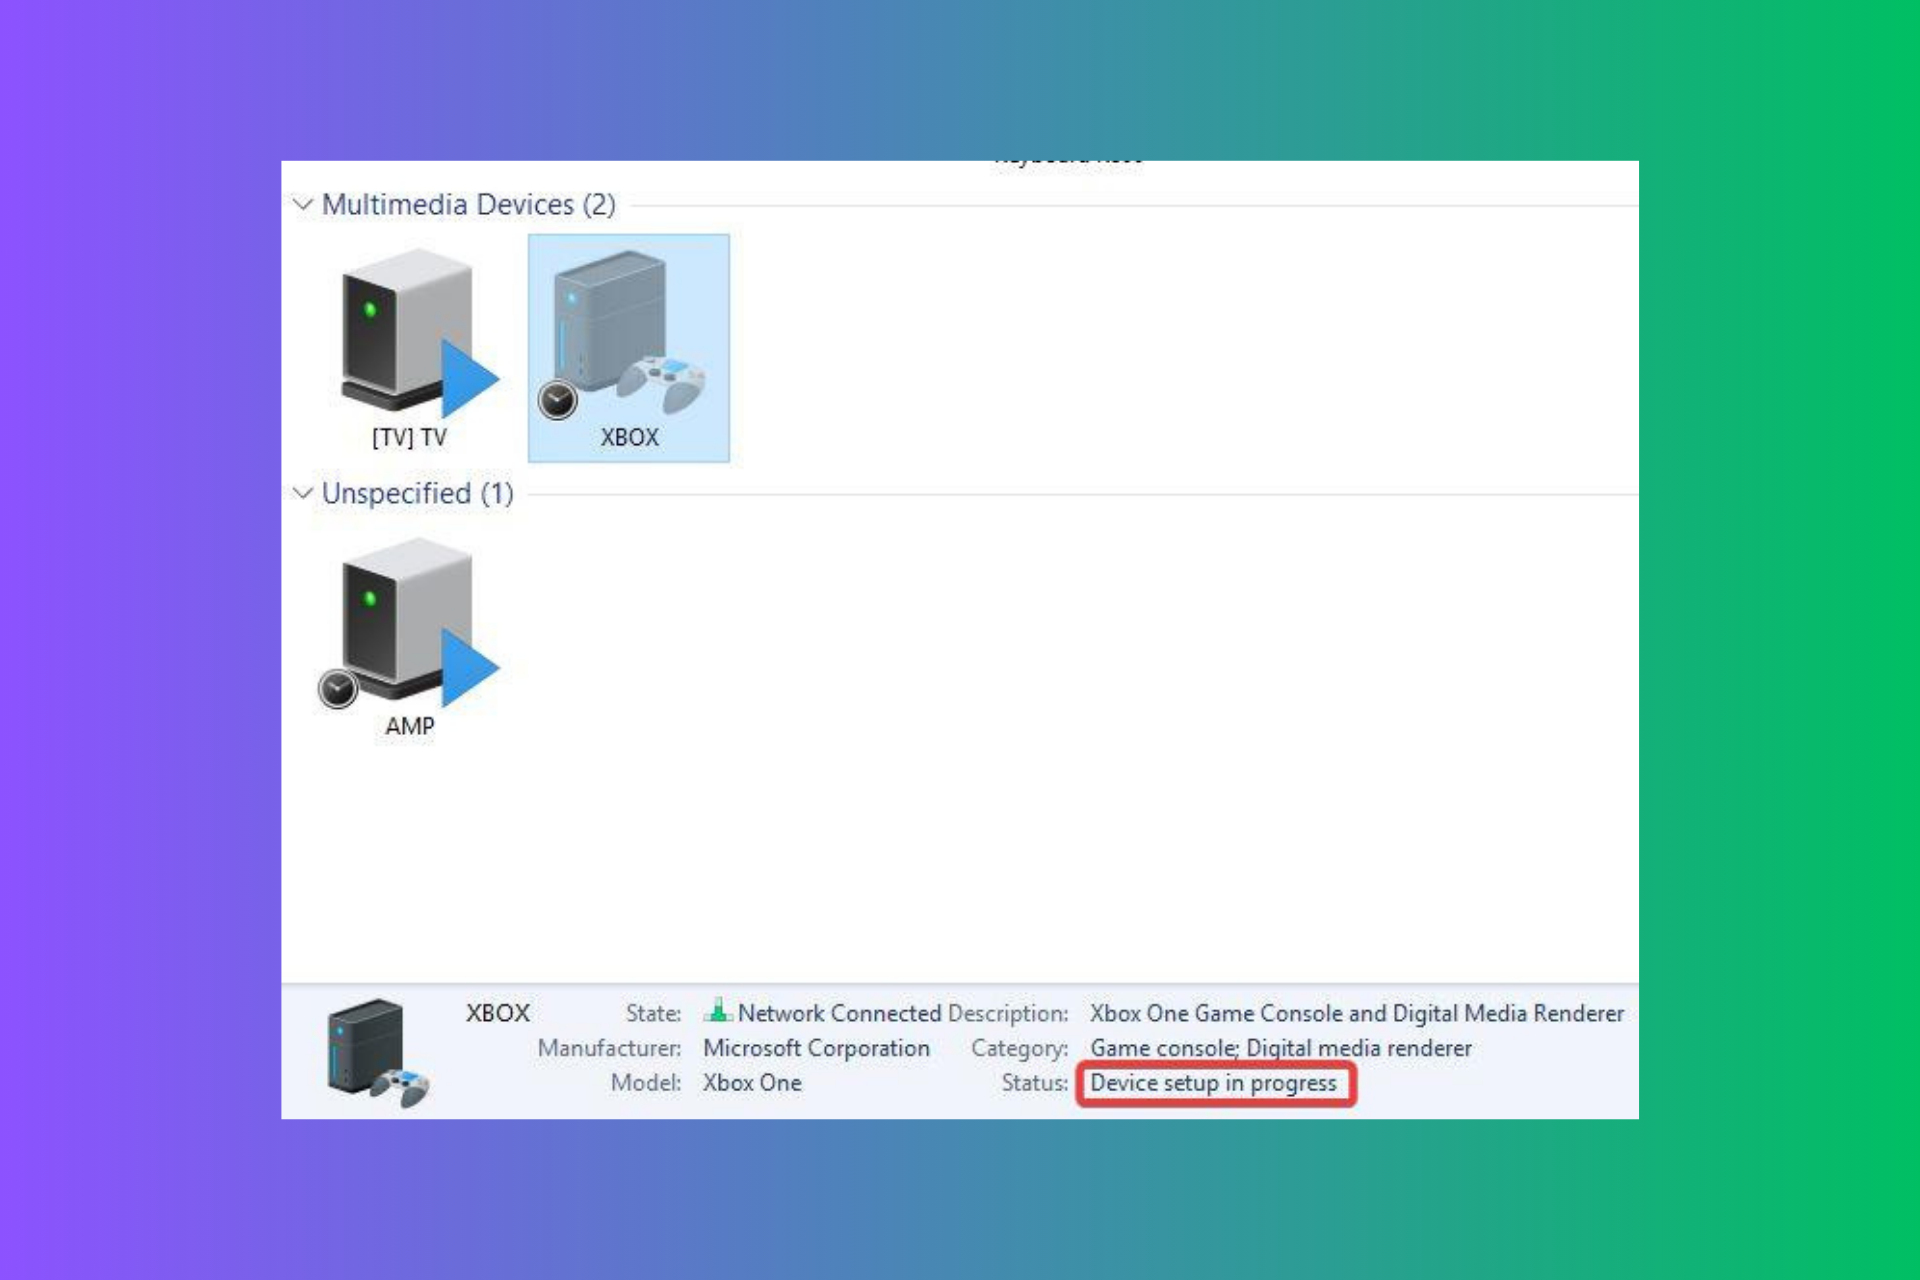
You have installed a new device and it’s working, but when you look in Devices and Printers, you see the Device Setup In Progress message that never goes away whatever you do. It can happen with printers, audio devices and even Xbox, and it’s caused by an issue with the metadata retrieval in Windows. Don’t worry, this is not a serious issue, but the solutions below will fix the problem quickly.
How do I fix the Device setup in progress in Devices and Printers?
1. Disable the device metadata retrieval
Press Win + R to open the Run dialog, type gpedit.msc and press Enter.
Go to Computer Configuration > Administrative Templates > System > Device Installation.
Find and double-click Prevent device metadata retrieval from the Internet and set it to Enabled.
Click Apply, then OK.
Restart your computer to apply the changes and go to Devices and Printers to see if the Device setup in progress message is still there.
Disabling device metadata retrieval will stop Windows from hanging while trying to download icons and metadata, speeding up the device setup process.
2. Disable metadata retrieval using Registry
Press Windows key + R to open the Run dialog, type regedit and press Enter.
Navigate to the following key: HKEY_LOCAL_MACHINE > SOFTWARE > Microsoft > Windows > CurrentVersion > Device Metadata
Find PreventDeviceMetadataFromNetwork, double click it and set its value to 1.
If it doesn’t exist, create a new DWORD (32-bit) value named PreventDeviceMetadataFromNetwork and set its value to 1.
Restart your computer to apply the changes.
Modifying this registry key stops Windows from trying to retrieve metadata over the internet, which can cause long delays or failures during device setup.
3. Clear the Printer Spooler files (for printer issues)
Press Windows key + R to open the Run dialog, type services.msc and press Enter.
Scroll down and find Print Spooler.
Right-click it and select Stop.
Open File Explorer (Win + E) and navigate to C:\Windows\System32\spool\PRINTERS.
Delete all files in this folder.
Go back to the Services window, right-click Print Spooler and select Start.
Clearing out the print spooler’s files can resolve issues where printer installations get stuck due to corrupted spooler data.
4. Reset Device Internet settings using CMD
Click the Start button, type cmd and select Run as administrator from the results.
Type or paste the following command and press Enter: Rundll32.exe %SystemRoot%\System32\newdev.dll,DeviceInternetSettingUi
Restart your computer to apply the changes.
Running this command resets the device internet settings, which can resolve issues where the device setup process is stuck.
5. Reinstall Printer Drivers and Software
Go to Control Panel and select Devices and Printers.
Right-click the problematic printer and select Remove device.
Press Windows key + R to open the Run dialog, type services.msc and press Enter.
Scroll down and find Print Spooler, right-click it and select Stop.
Open Control Panel and go to Programs and Features.
Uninstall all software related to the printer.
Open Run (Win + R) and type printui.exe /s /t2 to open the Print Server Properties.
Remove any entries related to the printer under the Drivers tab.
Open File Explorer (Win + E) and navigate to C:\Windows\System32\spool\PRINTERS.
Delete all files in this folder.
Go back to the Services window, right-click Print Spooler and select Start.
Now, download the latest drivers from the printer manufacturer’s website.
Install the drivers and add the printer again.
By completely removing the printer software and drivers, then reinstalling them, you ensure a clean setup that can resolve issues related to corrupted installations.
Remember, keeping your drivers updated and regularly clearing out old printer spooler files can prevent many of these issues from cropping up again. For more information, read our guide on how to manage Devices and Printers on Windows 11.
Do you know the feeling of searching through countless emails, looking for an important attachment but hiding somewhere in your inbox? It seems Microsoft has also been thinking about this common problem.
The Redmond-based tech giant’s latest patent describes a technology capable of doing that: allowing you to search through email attachments without opening those emails. This approach simplifies finding attachments, as going through every email is unnecessary.
The main part of this invention is showing search suggestions in a messaging application, including attachments. It’s like when you write a question in your email app and get suggestions that show related emails and attachments linked to those messages. So, it could let you avoid email and direct access to documents, images, or files necessary for you.
The proposed search results might also bring up attachments from other sources besides the messaging application. So, for example, if you are using a Microsoft email client on Outlook and have gotten some attachments through another channel, but it’s still related to what you’re searching for, that could show up in your results, too. This widens your search area and guarantees that no possibly helpful files are overlooked.
But how does it work? When messages come in from a messaging app, they’re managed in a way that allows the application to do queries without needing to look at each message. If you type a query for an attachment specifically, the application will suggest something with at least one attachment received via message.
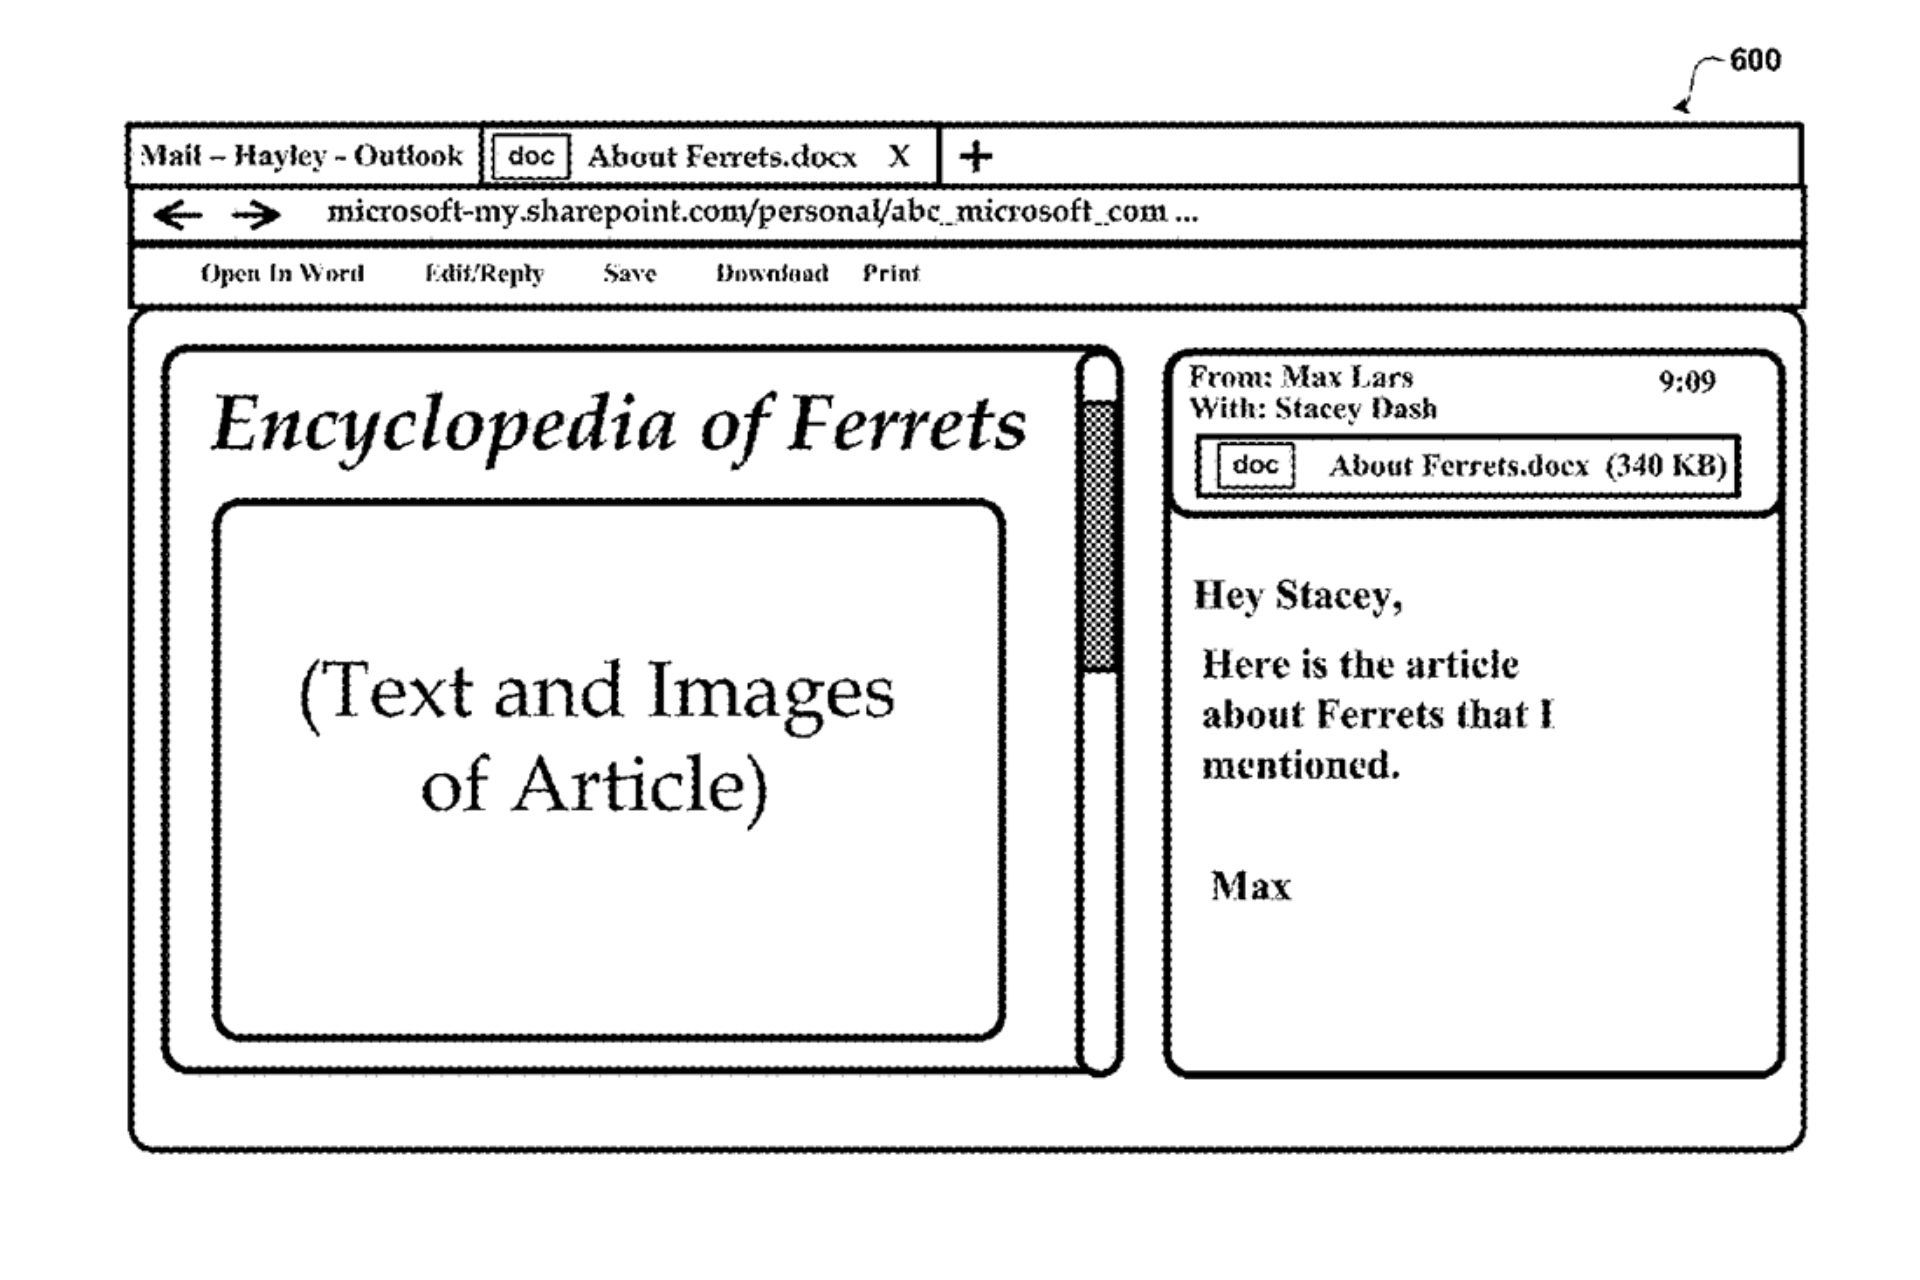
Another interesting part of this patent is the user interface it suggests. It’s made to show suggested search results and find email attachments while allowing users to interact with these attachments directly. For instance, choosing an attachment from the proposed search results can open it in an associated application, such as a word processor or spreadsheet viewer, right next to the email message that came with it. This might be a big change for getting work done, making it possible to find and open important documents faster, which could lead to more efficient work.
Microsoft’s patent discusses making it easier for us to handle our emails and their attachments. The potential of finding email attachments quickly and straightforwardly could greatly decrease both the time and annoyance associated with locating certain files within our inboxes.
This technology might be helpful for professionals dealing with many documents or individuals wanting to organize their email better, providing an answer to a common issue.
In other news, another patent revealed that Microsoft is working to enhance Teams with a name mispronunciation detector, meaning you won’t have to spell your colleagues’ names wrong anymore.
Have you experienced the puzzling situation where your Microsoft OneDrive shared folders are now only internet shortcuts on Windows 11? If so, then know that this strange bug has confused numerous people, causing them to ponder if it was due to an update or some unknown error.
Microsoft is aware of the problem and is working to solve it, so patience is required on official Microsoft Office forums; a Microsoft agent detailed that the Redmond-based tech giant knows about the problem and is actively looking to fix it.
Welcome to Microsoft Community.
This appears to be a known issue currently affecting OneDrive shared folders. Users from different regions have reported the same issue beginning approximately June 2024. We’ve summarized the main points of our current situation in this issue, you can review them at your convenience:
1-> Impact Summary:
Many customers worldwide have reported that their OneDrive shared folders have become inaccessible as regular file folders in File Explorer and instead appear as internet shortcuts. The reported issues include:
Shared Folder Visibility – Users can see shared folders in a web browser, but these folders appear as link files (.URL) in File Explorer, which open the OneDrive website rather than displaying the folder contents.
Synchronization Issues – Shared folders are not syncing properly with OneDrive on the desktop. Attempts to add these folders to “My Files” result in creating internet shortcuts instead of actual folders.
Access and Sync Problems – Users are unable to sync shared folders with their local devices, resulting in workflow disruptions and inability to access files offline.
2-> Latest Update:
This issue may be due to an internal error affecting data synchronization and handling within the OneDrive service. Microsoft has acknowledged the problem and is actively working on a resolution.
Efforts are underway to restore proper access to affected shared folders. Initial steps include investigating the issue’s root cause and implementing fixes to ensure shared folders appear correctly as file folders in File Explorer.
A comprehensive analysis is being conducted to determine the exact cause of the issue. Preliminary findings suggest a possible misconfiguration or recent update affecting shared folder handling and synchronization processes.
3- > Current Status:
Some users have reported temporary workarounds, such as accessing shared folders directly via OneDrive web interface -<onedrive.live.com>
Microsoft internal engineers are closely monitoring the service and implementing fixes to ensure stability and proper synchronization of shared folders.
We fully understand the inconvenience and disruption caused by this issue. Our team is actively addressing it and working hard to fix it as soon as possible. We are still gathering and monitoring many cases and thread behaviors, so we can always follow up with any new updates or fixes that come up.
Microsoft
If you don’t know what to do for now, you can try a couple of solutions: firstly, there is a discovered solution where the user can directly download files from the shared folder if they have permission to do so. It might not be very sophisticated, but at least it works.
Secondly, one could try different cloud storage services as an interim remedy. Remember, these aren’t official fixes, so proceed with caution.
As annoying as it is, Microsoft is working on a fix for the OneDrive internet shortcut bug, so an update will be released soon.
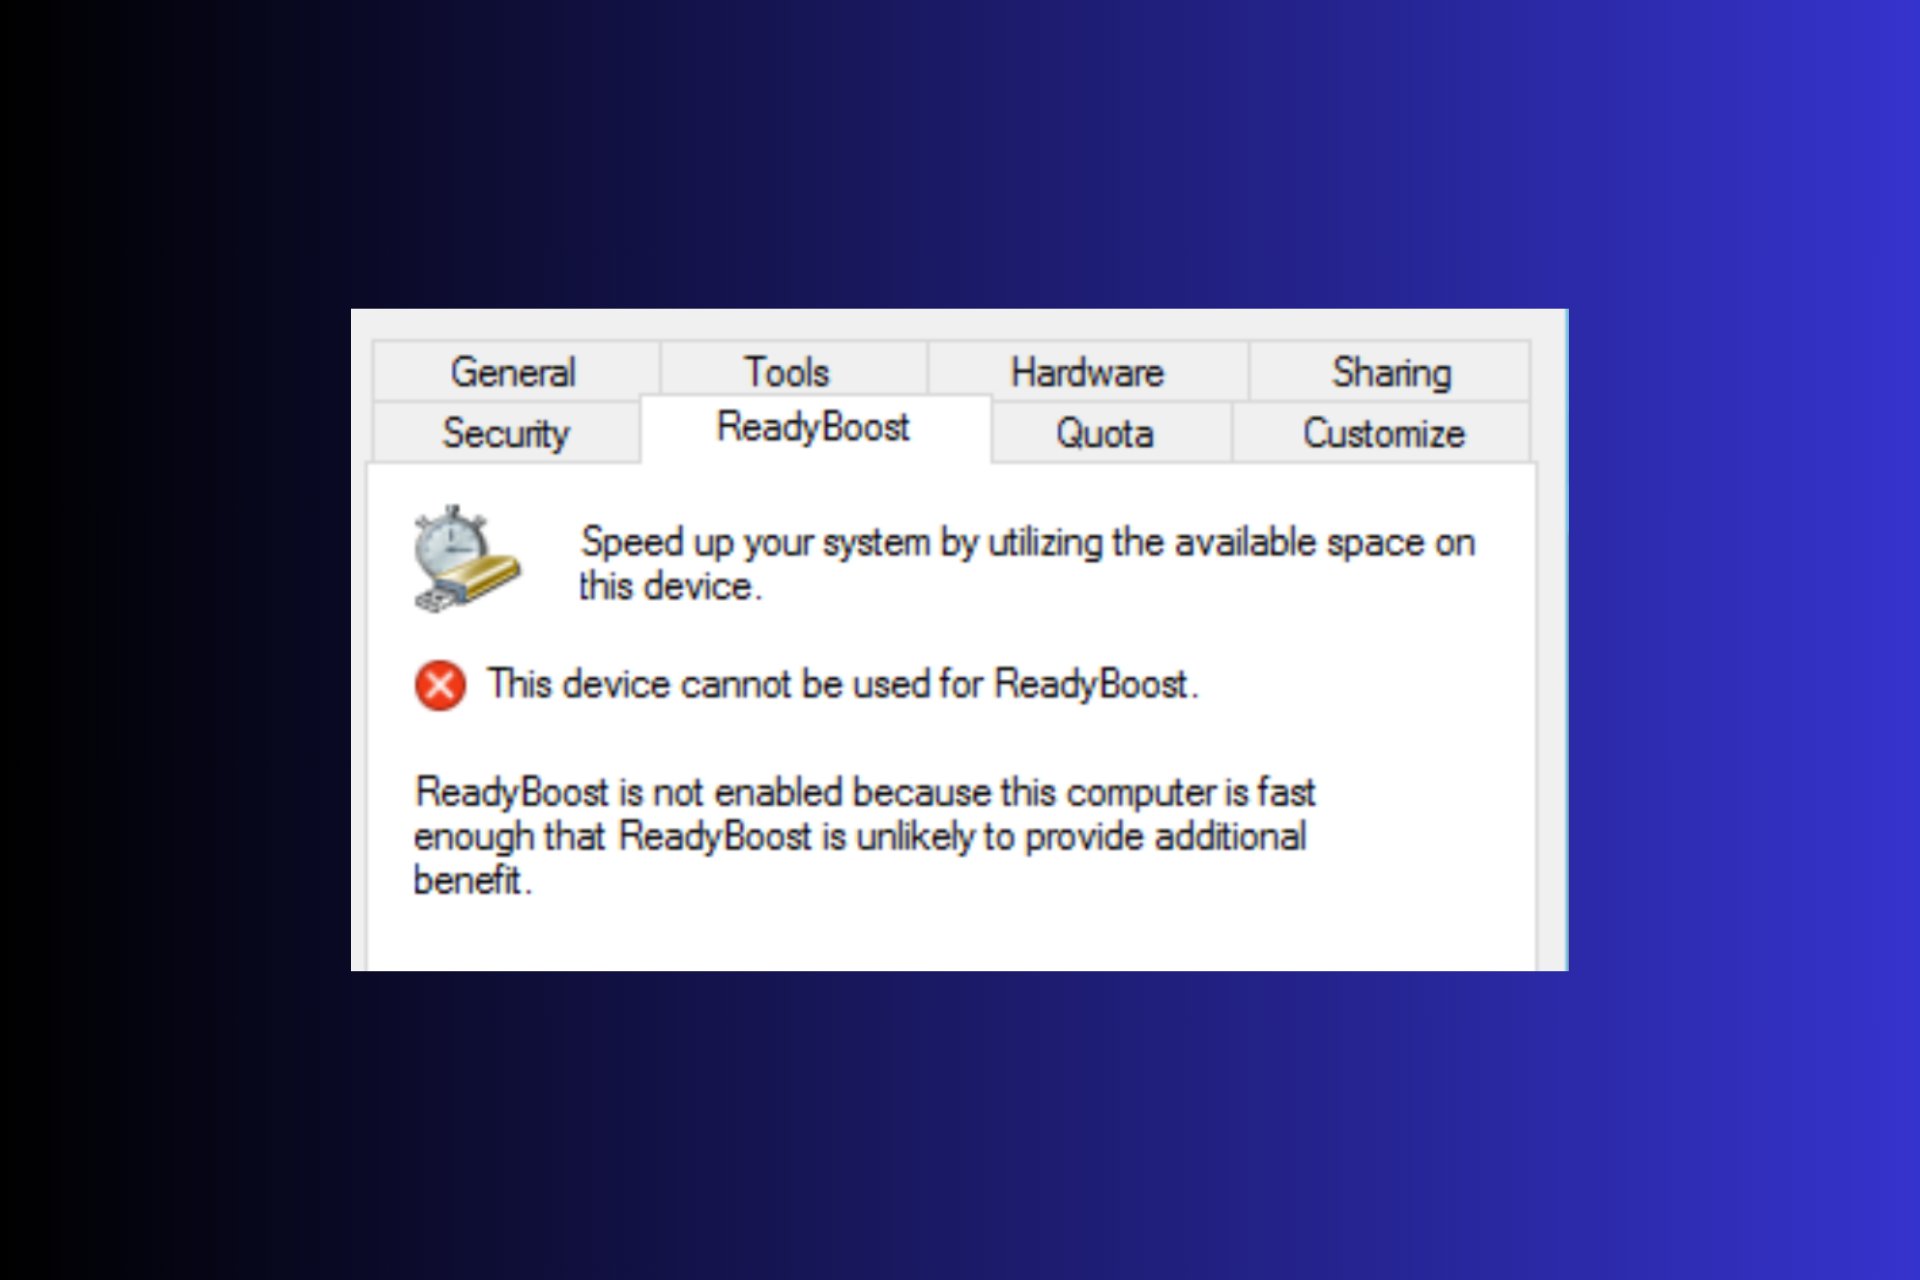
Running into the ReadyBoost This device cannot be used error can appear if your flash drive is not compatible with this feature or it’s corrupted. The error will also show up if your system is installed on an SSD. In this case, ReadyBoost will not make any difference. Also, your flash drive needs to have more than 2GB of storage space.
What do I do if This device cannot be used for ReadyBoost?
1. Format the flash drive to NTFS
Plug the flash drive into one of your computer’s USB ports, or insert the SD card into the corresponding slot.
Click the folder icon in the taskbar or press Win + E to start File Explorer.
Right-click your flash drive under This PC and select Format.
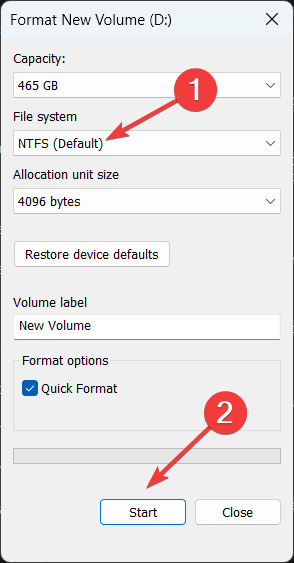
In the File System dropdown menu, select NTFS.
Ensure the Quick Format box is checked, then click Start.
Click OK to confirm and proceed.
Formatting your flash drive to NTFS may resolve compatibility issues with ReadyBoost. This file system supports larger cache sizes, which can improve performance.
2. Delete external drive folders from Registry
Press the Start button, type cmd and select Run as administrator from the results.
Type or paste the following command and press Enter: reg delete "HKLM\SOFTWARE\Microsoft\Windows NT\CurrentVersion\EMDMgmt" /v "GroupPolicyDisallowCaches" /f
Type the next command and press Enter: reg delete "HKLM\SOFTWARE\Microsoft\Windows NT\CurrentVersion\EMDMgmt" /v "AllowNewCachesByDefault" /f
Restart your PC and see if your flash drive can now be used for ReadyBoost.
Removing these registry keys can allow ReadyBoost to reappear and function properly, bypassing any group policy restrictions that may be in place.
3. Ensure USB ports and BIOS settings are correct
Try plugging the flash drive into different USB ports on your computer, especially the USB 2.0 ports.
Restart your computer and press the appropriate key (F2, DEL, or ESC) to enter the BIOS settings.
Use the arrow keys to find the USB configuration settings.
Ensure USB2.0 is enabled. Save your changes and exit the BIOS.
Ensuring your USB ports are enabled and functioning properly can help overcome ReadyBoost issues related to port performance.
If you still get the This device cannot be used for ReadyBoost message, you either have an SSD, or the USB drive is corrupted or malfunctioning. If the drive is not working even after formatting it to NTFS, try another drive. If your OS is using a FAT32 file system, you will need to format the flash drive to FAT32 instead, but you will be limited to 4GB of storage space.
Also, if you have more than 8GB of RAM, even if you have the system installed on a HDD, using ReadyBoost will not make any difference.
That’s it! We hope that you can now boost your booting speed by using ReadyBoost using your flash drive or SD card. For more information, here’s our guide on how to use ReadyBoost on Windows 10.
Mustafa Suleyman, who serves as Microsoft AI’s CEO, confidently states that almost everything found on the web can be used for AI training, a viewpoint that is causing waves in the digital world. This declaration points to a sensitive equilibrium between the internet’s openness and the rights of those who create content, creating a stage for intricate legal and moral talks.
With respect to content that’s already on the open web, the social contract of that content since the 90s has been that it is fair use. Anyone can copy it, recreate with it, reproduce with it. That has been “freeware,” that’s been the understanding.
There’s a separate category where a website, a publisher, or a news organization has explicitly said do not crawl or scrape me for any other reason than indexing me so that other people can find this content. That’s a grey area, and I think it’s going to work its way through the courts.
Mustafa Suleyman
Picture yourself as someone who creates, investing all your passion and dedication into producing something, only to discover it being utilized for training AI without any agreement or payment. Numerous individuals are dealing with this situation, wherein firms such as Microsoft assert that the internet’s content is essentially free for AI’s learning objectives by default.
Comments from Suleyman at the Aspen Ideas Festival propose a historical “social contract” of the Internet in which content is recognized as “freeware.” But can we say that this is a fair presumption? Aren’t we ignoring the rights of people who create the content?
The dispute is not only theoretical; lawsuits are being filed against big companies such as Microsoft. Different content creators, from newspapers to single authors, assert that their work is unlawfully utilized to train AI models like Copilot and ChatGPT. These legal conflicts show a rising worry: the possible misuse of intellectual property in the AI era.
Suleyman’s viewpoint might appear practical in the context of AI advancement, but it raises important questions about where content creation is headed. If everything on the internet is free for AI training, why would creators continue generating their original work? There’s a concern that this could lead to a future where creating content is no longer seen as valuable, affecting the variety and quality of what we find online.
Additionally, Suleyman forecasts when AI could make the cost of creating new knowledge almost zero. This idea of having an open-source and globally available information base seems idealistic but also threatens creators’ livelihoods. The difficulty is to maintain an equilibrium that encourages inventiveness without harming the privileges and benefits for content makers.
In these uncertain times, it is obvious that the chat about AI and copyright law is still ongoing. The older legal and moral systems might not be enough to handle the new intricacies AI brings.
So, what is the limit? How can we defend people’s rights while using AI’s huge possibilities? These are important questions that need our focus!
Disk Cleanup and Disk Defragmentation (Defrag or Defragging) are two terms often used interchangeably when we talk about optimizing the PC’s performance. However, each has a specific purpose, quite different from another!
Disk Cleanup is a built-in utility that allows you to clear files on the PC and boost the available storage space. On the other hand, Disk Defrag reorganizes the data on the drive so that related files are stacked up close to one another, facilitating quick access.
What is the difference between Disk Cleanup vs Defrag?
Disk Cleanup
Disk Defragmentation
Purpose
Free up storage space by deleting unnecessary files
Reorganizing the file segments and bringing them close to one another for easy access
Ability to clear storage space
Increases free storage
No effect on free storage
Application with HDD and SSD
Can be used on both HDD and SSD
Only for HDD, defragging SSD will reduce its life span
Benefits
Deletes temporary files, allowing you to store more data
Removes fragmentation, thus improving the PCs performance and boot speed
Low possibility of errors with built-in defragmentation utility in Windows
A quick comparison between Disk Cleanup and Disk Defragmentation
What will happen if I do Disk Cleanup?
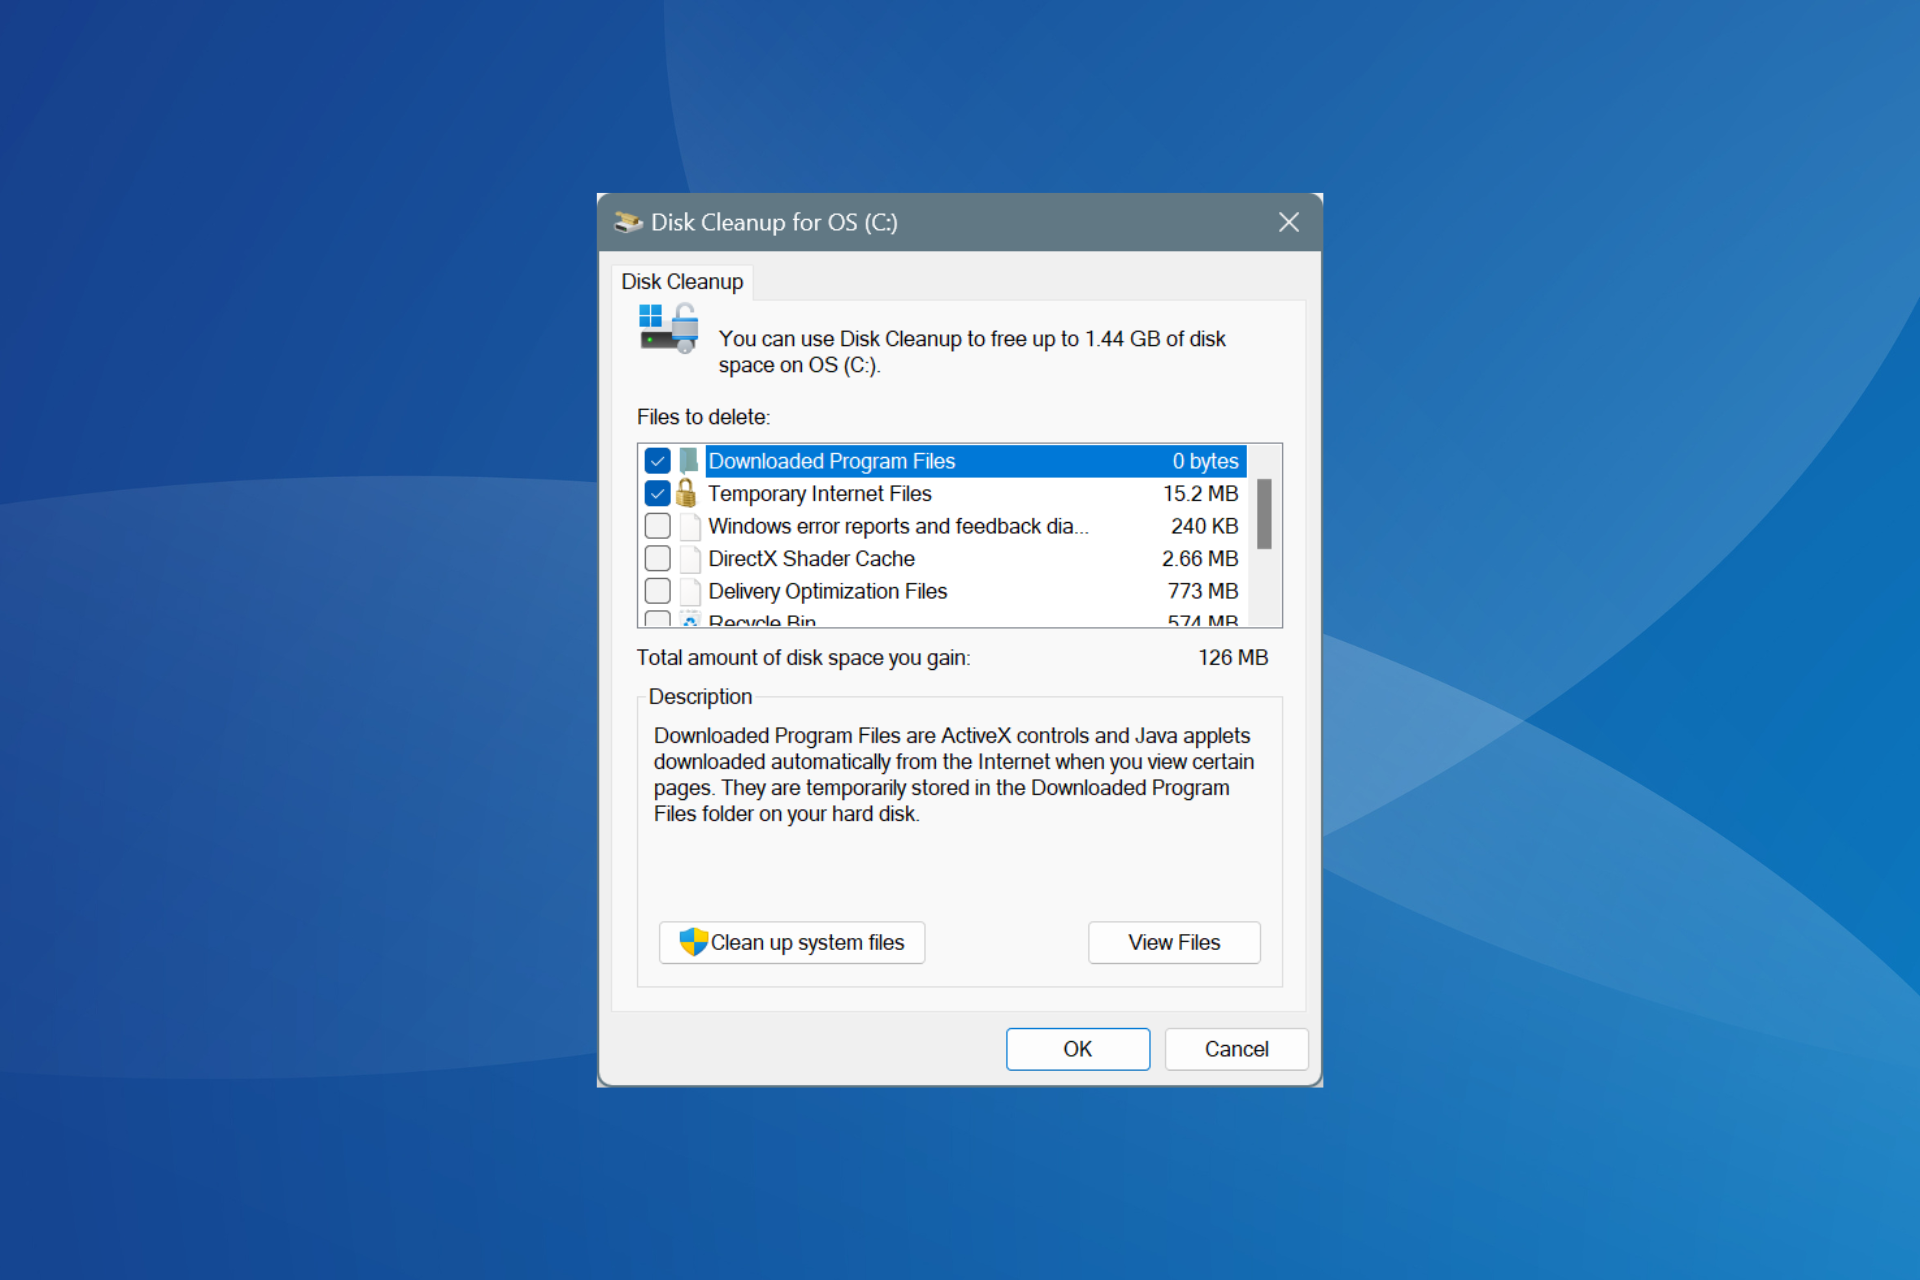
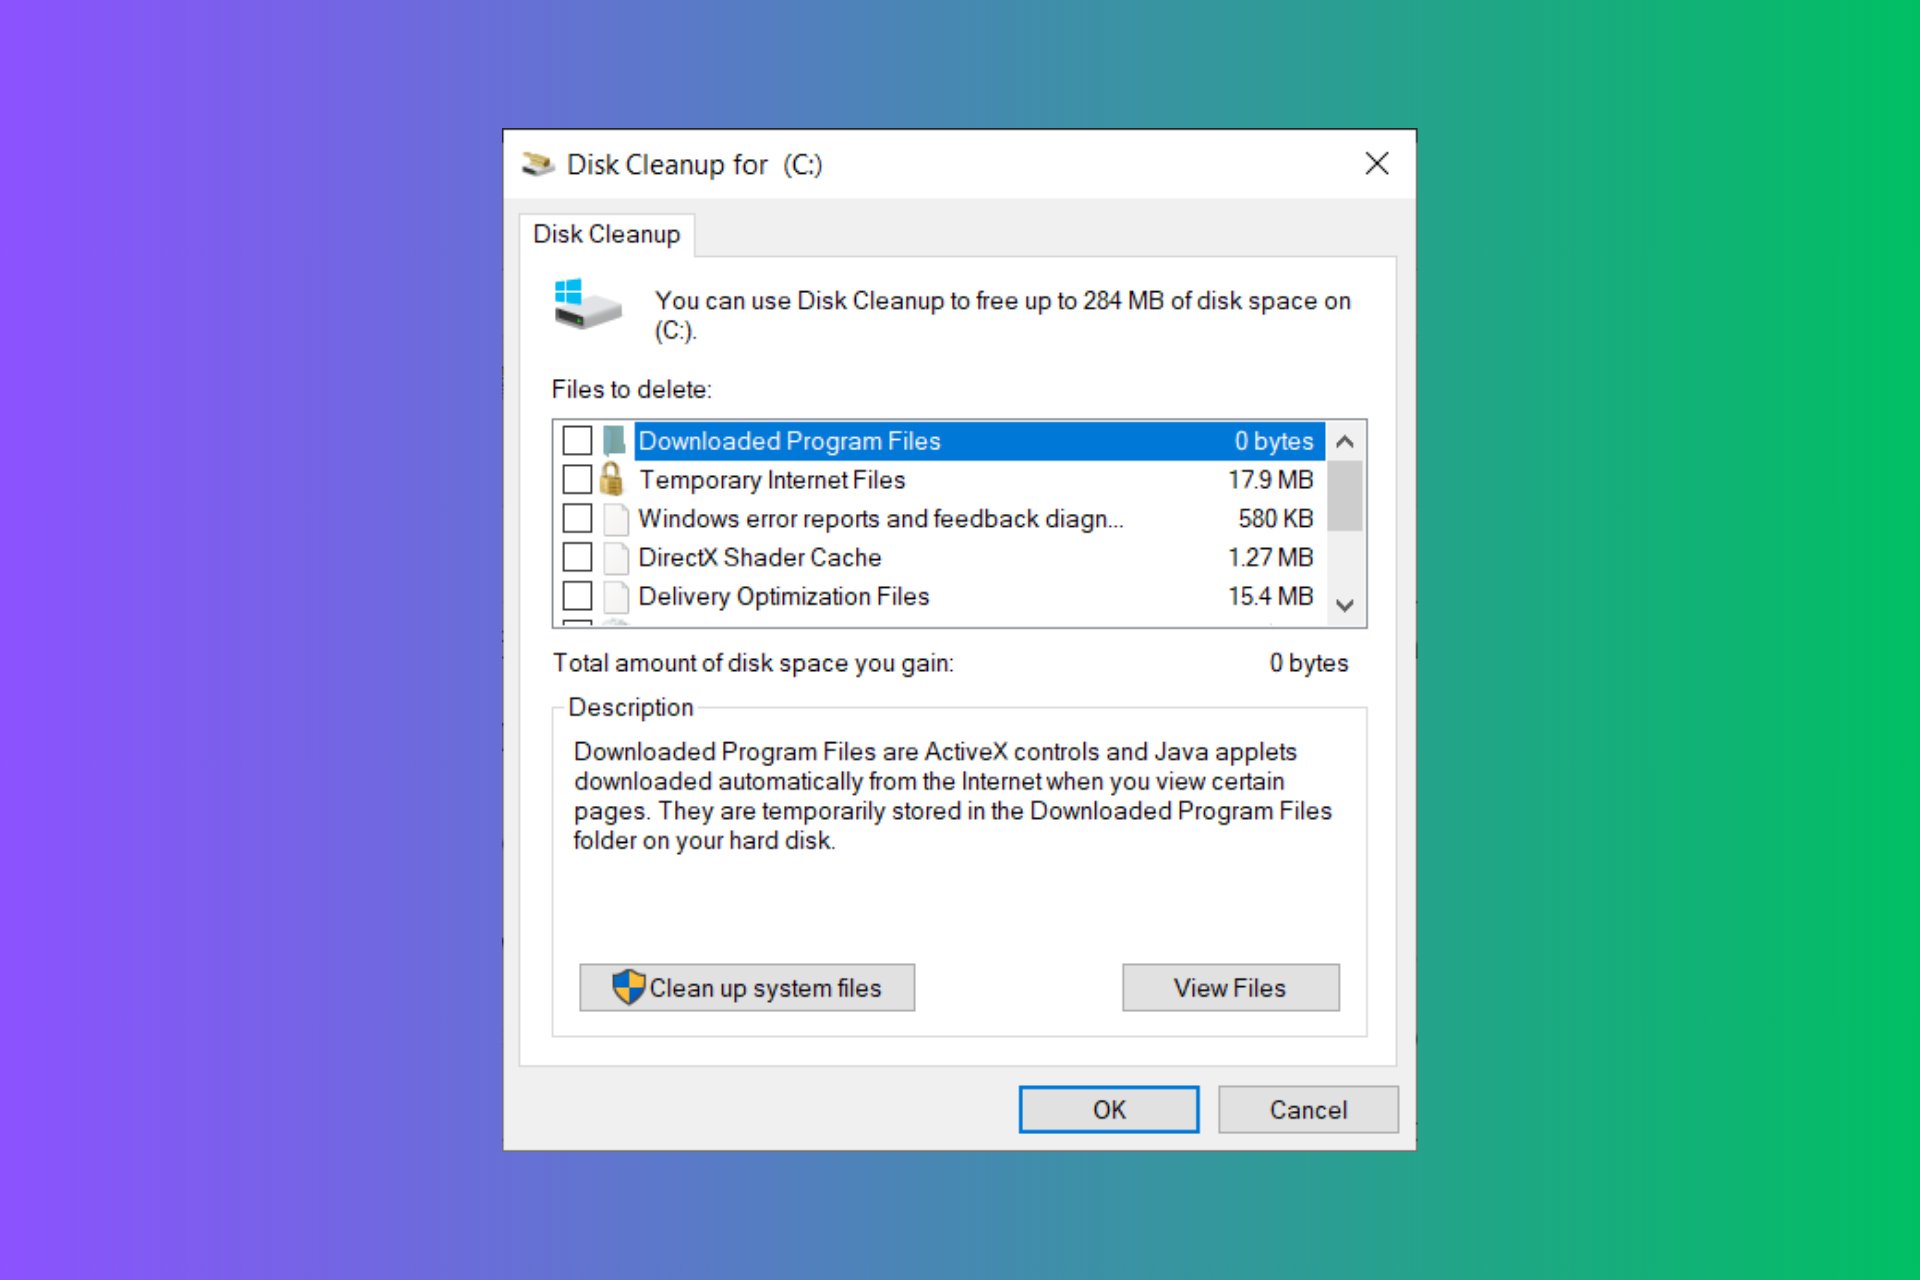
When you run Disk Cleanup, it will automatically list all the unnecessary files that can safely be removed and allow you to delete them, all within a matter of minutes!
When you select any file category from the list, Disk Cleanup shows a brief description, helping you identify which set of files may be useful.
Disk Cleanup in Windows 11
To run Disk Cleanup, press Windows + S to open Search > type Disk Cleanup > click on the relevant result > select the drive to clean > click OK > tick checkboxes for the files to be deleted > click OK > again run the utility and select the drive > choose Clean up system files > select C: drive > similarly delete any unnecessary system files.
Is it good to defrag your computer?
Yes, periodically defragging the computer will remove fragmentation of data sets on the storage drive!
Built-in Disk Defrag utility in Windows 11
To defragment a drive in Windows 11, press Windows + S to open Search > type Defragment and Optimize Drives > click the relevant result > select the drive to defragment > click on Optimize > wait for the process to complete.
Remember, fragmentation only occurs on HDDs in Windows PCs. As for SSDs and other operating systems like macOS, you don’t need to carry out defragmentation at all. Doing so won’t improve performance and can often prove counterproductive!
Should I Defrag or Disk Cleanup first?
You should first run Disk Cleanup and then defrag the drive. It will reduce the amount of data the OS has to defragment, reducing the time taken to complete the process.
Besides, for faster completion, schedule Disk Cleanup and Disk Defrag to run when you are not actively using the computer.
Should I use third-party tools for Disk Cleanup and Disk Defrag?
Generally speaking, most of us don’t need third-party tools either to clear disk space or defrag the drive. Windows offers built-in utilities, Disk Cleanup and Optimize drives, which can perform the function well!
However, if you want to perform advanced operations or modify the critical parameters, a third-party tool may come to aid. As for clearing disk space, take a look at our top picks for Disk Cleanup alternatives (includes free tools). Similarly, we have a curated list of the best defrag software for Windows.
You now know all about Disk Cleanup vs Defrag, the key differences, applications, after-effects, benefits, and set up. With this information, you will be able to make Windows 11 run faster than ever and improve the disk’s performance and life span!
How frequently do you run Disk Defrag and Disk Cleanup? Share with our readers in the comments section.
ReadyBoost is Microsoft’s feature that can boost performance on low-end PCs. If you can’t use this feature or you’re not happy with it, here are some ReadyBoost alternatives that you should try.
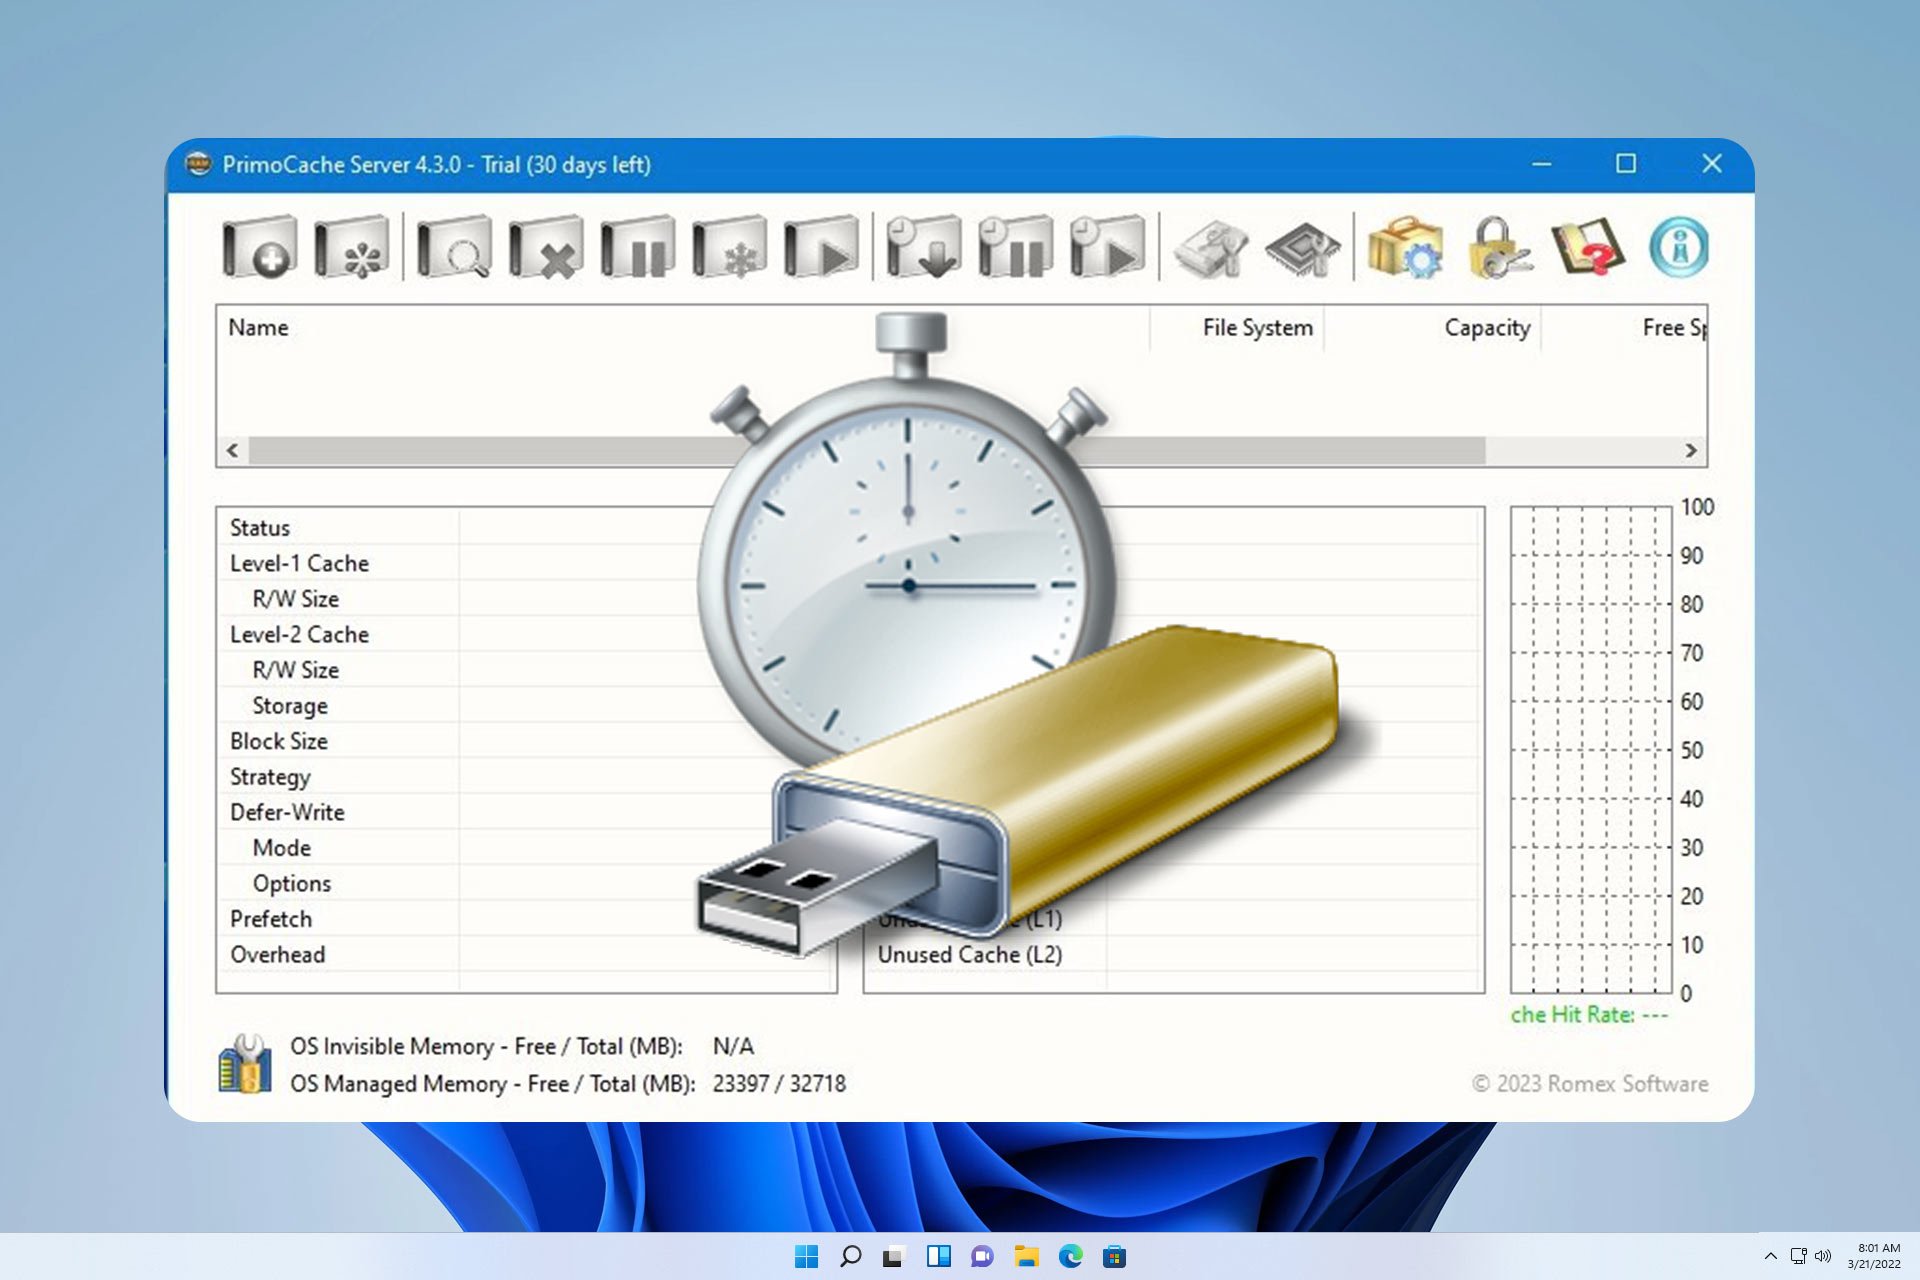
With this software, you can cache your frequently used files and allow your PC to access them faster than before. The software will improve your writing speed by storing the data temporarily in RAM or SSD before writing.
PrimoCache works with RAM and SSD cache allowing you ultra-fast access to large amounts of data. The software is also incredibly simple to use, so even first-timers will be able to use it without issues.
If you want a performance boost, be sure to give this software a try.
With GiMeSpace RAM Folder Pro you can easily store your temporary files in your RAM allowing you to access them up to 20 times faster.
In addition to faster performance, this software will reduce the number of write cycles that to your SSD thus prolonging its life. In addition to RAM, this software can also use VRAM for temporary storage.
GiMeSpace RAM Folder Pro offers some unique features that separate it from other tools on our list, so be sure to give it a try.
To ensure the optimal performance of your device, this application will empty and clear your cache automatically.
The software offers multiple profiles, and O&O CleverCache can optimize your configuration settings automatically.
There’s also a Mem-O-Safe feature available that will buffer files in the internal cache before writing thus improving your performance further. Overall, it’s a simple but powerful tool that might come in handy.
Keeping your Windows system running smoothly often involves regular disk cleanup. Automating this process can save you time and ensure your system remains clutter-free without manual intervention. Here’s how you can achieve silent disk cleanup using command line methods.
How do I run Disk Cleanup command line for silent execution?
1. Using the /VERYLOWDISK Switch
Press the Windows key, type cmd, then click on Run as administrator from the search results.
Enter the command: cleanmgr.exe /VERYLOWDISK
This command will clean up all files automatically and show a dialog with the amount of freed-up space, but does not require user interaction during the cleaning process.
This method helps clean up unnecessary files effectively without needing manual confirmation, making it ideal for automated scripts.
2. Using /SAGESET and /SAGERUN for Presets
Create a Preset for Disk Cleanup:
Open Command Prompt as an administrator.
Execute cleanmgr.exe /SAGESET:1
Select all desired cleanup options in the dialog box.
Click OK to save the preset settings.
Run the Saved Preset:
Use the following command to run the previously saved settings automatically: cleanmgr.exe /SAGERUN:1
This technique allows you to configure and reuse cleanup settings without any manual intervention on future runs.
3. Combining /VERYLOWDISK in a Script
Press Windows key, type Notepad, and open it.
Type or paste the following script: @echo off set rootkey=HKEY_LOCAL_MACHINE\SOFTWARE\Microsoft\Windows\CurrentVersion\Explorer\VolumeCaches for /f "tokens=*" %%K in ('reg query %rootkey%') do >NUL REG add "%%K" /v StateFlags0000 /t REG_DWORD /d 2 /f cleanmgr /sagerun:0
Save the file with a .bat extension, for example, cleanup.bat.
Now, right-click the batch file and select Run as administrator.
This script automatically sets all cleanup options and runs the Disk Cleanup tool without any user interaction, providing a fully automated solution.
4. Scheduling Disk Cleanup with Task Scheduler
Press the Windows key, type Task Scheduler, and open it.
Create a New Task:
In the Actions pane, click Create Basic Task….
Name your task and click Next.
Configure the task to run at your desired schedule (daily, weekly, etc).
In the Start a Program section, input cleanmgr.exe in the Program/script box and /SAGERUN:1 in the Add arguments box.
Scheduling Disk Cleanup with Task Scheduler ensures regular maintenance of disk space without manual initiation.
5. Using PowerShell for enhanced control
Press the Windows key, type PowerShell and select Run as administrator from the results.
Run the PowerShell Script:
Use the following script: $volumeCaches = Get-ChildItem "HKLM:\Software\Microsoft\Windows\CurrentVersion\Explorer\VolumeCaches" foreach ($key in $volumeCaches) { New-ItemProperty -Path "$($key.PSPath)" -Name StateFlags0000 -Value 2 -Type DWORD -Force | Out-Null } Start-Process -Wait "$env:SystemRoot\System32\cleanmgr.exe" -ArgumentList "/sagerun:0"
Save the script as cleanup.ps1 and execute it.
This PowerShell script gives you finer control over the cleanup process and can be easily integrated into larger automation frameworks.
6. Automate the Cleanup task using Group Policy
Press the Windows key, type gpmc.msc, and open Group Policy Management Console.
Create or Edit a Group Policy Object (GPO):
Navigate to the target OU (Organizational Unit).
Right-click and select Create a GPO in this domain, and Link it here….
Name your GPO and click OK.
Configure the GPO:
Right-click on the new GPO and select Edit.
Navigate to Computer Configuration > Policies > Windows Settings -> Scripts (Startup/Shutdown).
Right-click on Startup, select Properties, then Add.
Browse to your cleanup scripts such as cleanup.bat or cleanup.ps1 you’ve created in the previous solutions and add them.
Using Group Policy allows you to deploy the automated cleanup task across multiple machines in a domain environment, ensuring consistent disk space management.
By following these steps, you can automate the Disk Cleanup process in Windows, ensuring regular and efficient maintenance of your system’s storage without user intervention. Regularly check your automated tasks to ensure they run smoothly and adjust settings as needed to keep your system optimized.
Realtek Audio Console is a staple when it comes to adjusting your sound settings and getting the right balance of quality and optimizing your sound experience. However, this app is often plagued by a myriad of issues that can make it impossible to enjoy your music so alternatives are a much-welcome option.
When choosing a Realtek Audio Console alternative, ensure that it is compatible with your sound card and system and has the features needed to meet your sound needs.
EasyEffects formerly PuleseEffects is a top alternative and a worthy contender for the top spot largely because of its open source nature. This makes customization so much easier compared to other tools on this list.
Further, even for the less tech-savvy users, the interface is friendly and you can easily tweak the settings to your desired level without too many technicalities. The presets for different audio settings also come in handy when you want to switch from say music to gaming and so on.
It’s also widely compatible with a good range of hardware so you get to experience an immersive sound experience on any device.
Other additionalfeatures include:
Dynamic range compressor for sound consistency
Parametric equalizer for sound clarity across different playback devices
Test frequency option to test sound and adjust accordingly
FX Sound formerly DFX sound is a great alternative to Realtek Audio Console. It’s a fan-favorite and for good reason. First, it is free, easy to install and has no learning curve. Once downloaded, all you have to do is launch it and select one of the many effects to match your vibe.
Even though the presets are tailor-made for different sound settings, you’re still at liberty to customize them further to meet your needs.
So whether you’re playing a game, watching a movie and need sound clarity or want to bump to music with high bass, all these are achievable with a click of a button. You can also create and save your audio profile with its unique settings.
Another winning feature is that it is widely compatible. It works on different devices and with different audio formats.
The software also receives regular updates so you can rest assured that any bugs and glitches will be addressed promptly. The free version is comprehensive but if you’re looking for more advanced features, you can switch to a more powerful version.
If you thought an open-source audio enhancer was the icing on the cake, here comes one that can calibrate automatically. However, this feature is limited to the type of sound card on your device.
Of course, it also comes with equalizer presets which you can adjust to your liking. If the presets don’t tickle your fancy, you can easily create your own sound profile.
And it’s not labelled 3D for nothing. It has a 3D virtual surround sound that imitates a multi-speaker setup. Regardless of your sound output, you’re guaranteed an immersive experience.
This experience spreads to other apps too. RAC may be limited but with Boom 3D, you get to extend these great features to other apps. It seamlessly integrates with a wide range of playback apps. What’s even better, it’s available for Mac users too.
Dolby Atmos is a fantastic alternative to RAC, especially if you’re a large group of people who want to experience undistorted sound because it is supported across various devices.
When it comes to customization, Dolby Atmos goes a step further compared to the rest. You can customize your audio settings specifically to the content you want. This means if you’re watching a movie, you can set presets for that particular playback and keep other settings as is.
This versatility ensures you don’t have to keep switching from one sound profile to another. What’s even better is that Dolby Atmos integrates with a majority of streaming services and gaming platforms which makes these customizations so much easier.
If you’re low on storage space or your device tends to lag because of too many programs, then Equalizer APO is your go-to app. It is lightweight and has a low latency rate. This means when you apply any of its effects, the results are instant with no lags, even on lower-end hardware.
It is also widely compatible with multiple audio devices so regardless of your output device, you get to experience an immersive sound experience first-hand.
Another feature is that it supports various plugins like the VST that add additional sound effects. On top of that, there’s no limit on the number of filters you can apply. You can keep fine-tuning and adding or removing filters until you achieve your perfect sound profile.
Despite having all these features, it is also open source. So really, all the customization you need is at your fingertips.
These come in form of extensions so they won’t eat up your drive space. Hopefully, you get a chance to explore these options and test out their capabilities.
Try them out then compare with RAC. Are there any differences? Let us know in the comment section below.
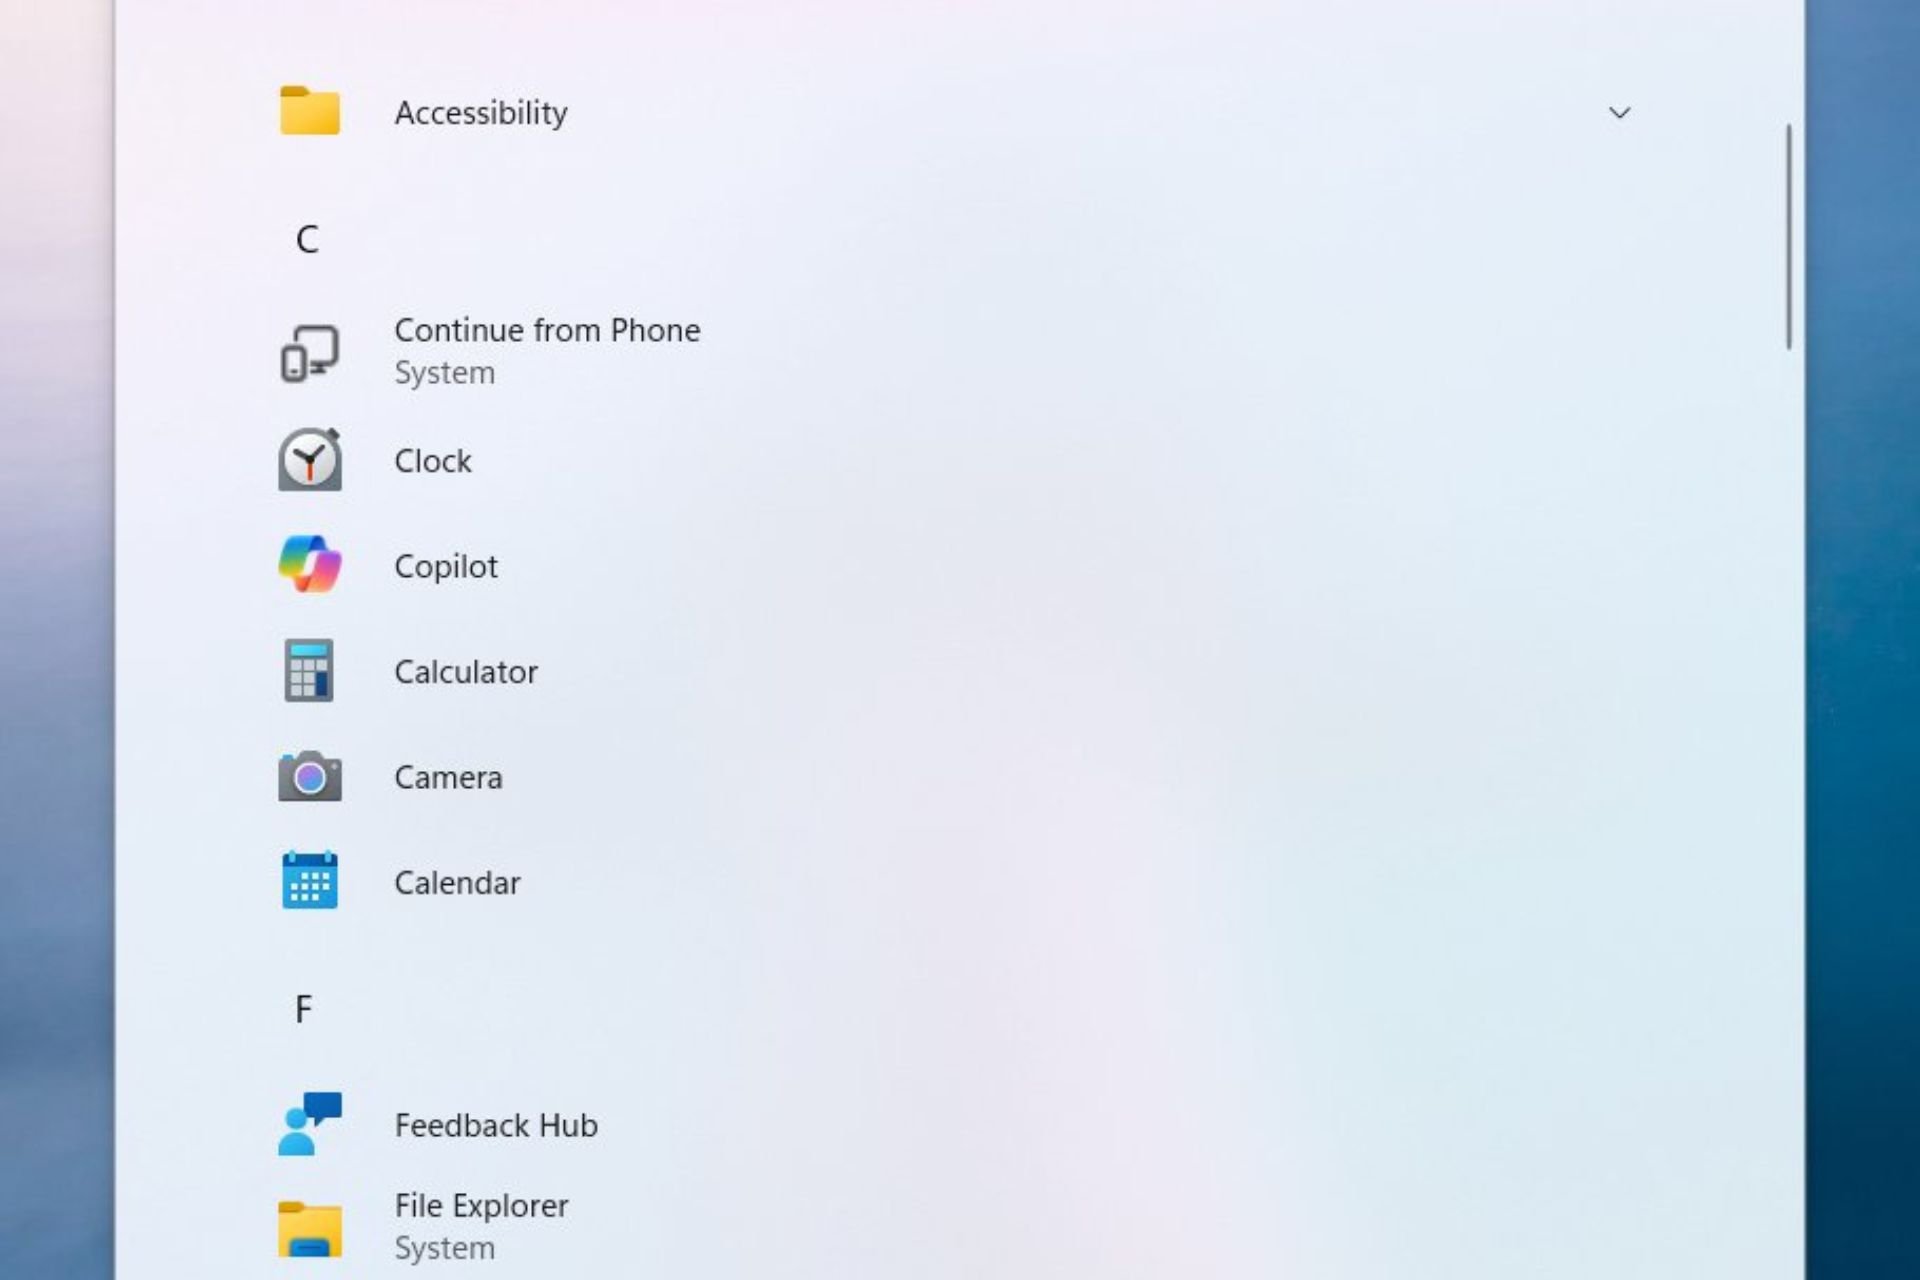
Do you sometimes work on your phone and then want to switch smoothly to your PC without losing what you were doing? Microsoft is creating a magic trick, especially for people like us. They are testing a fresh function named “Continue from Phone” for those using OneDrive on Windows 11.
Imagine you are modifying a file on your mobile phone while having coffee at the same time. You switch to your computer, and with only a few taps, the document moves there without disturbance.
With their sharp vision, the Windows 11 insider community observed this characteristic in the wild. It was discovered within the KB5039327 update for the Beta channel. Even if it’s not officially stated on the changelog, the reliable @phantomofearth found it out. Right now, it is like a ghost in a machine, operating silently without any visual proof of its existence yet. But the potential it holds is pretty exciting.
New in Beta 22635.3858: "Continue from Phone" (CrossDeviceResume, system component). Doesn't seem to open any window (yet?), just runs in the background. pic.twitter.com/y1fPq20Dog
The concept is straightforward but has a strong effect. You operate with a file in OneDrive on your smartphone, and then you switch to your PC, whereupon you can resume the work immediately. There is no requirement to send an email with the file or store a link; everything is smoothly united. But this feature is not present yet. It’s still being tested and is not fully functional.
But we must not overlook that Microsoft is not a novice in this field. They have been constructing connections between phones and computers for some time now. Do you recall the Phone Link application designed for iOS users? It’s just another small advancement in their long mission to simplify our digital lives. With the “Continue from Phone,” they move towards a completely linked experience.
Does the idea of transferring your work from one device to another without any interruption excite you? It may not be quite prepared yet, but it is certainly an aspect to anticipate. Perhaps, when it is functioning at its best, we will question how we managed before this tool existed.
Looking for google map alternatives fo windows that offer offline access, real-time traffic updates, or privacy-focused navigation? Whether you need turn-by-turn driving directions or community-sourced road alerts, these options will elevate your navigation game.
After testing over a dozen apps compatible with Windows, here are the top five that stood out for functionality, platform support, and unique features in 2025:
Here WeGo is one of the most dependable options if you’re looking to navigate without an internet connection. You can download entire country or city maps and use them seamlessly offline, which is ideal when traveling or working in remote areas. It also supports multiple transport modes, including public transit with real-time schedules, walking, cycling, and driving.
It’s easy to customize your routes by avoiding toll roads, ferries, and highways. You can even set vehicle-specific restrictions like speed caps. The interface is intuitive, and while it lacks robust live traffic data, the offline accuracy and smart routing features make it a solid Google Maps replacement for travelers and commuters alike.
MapFactor Navigator is perfect for users who prioritize full offline functionality. It offers downloadable OpenStreetMap data, turn-by-turn voice guidance, speed limit alerts, and flexible route planning. The offline maps are reliable and well-suited for both urban and rural navigation.
You can configure vehicle types, set route preferences, and avoid tolls or narrow roads. It’s also privacy-friendly with no mandatory sign-ins. Although it doesn’t provide live traffic, the depth of customization and true offline capability make it a reliable choice for data-conscious or remote users.
📥 OsmAnd – Best for Privacy-Focused Open-Source Navigation
OsmAnd is an open-source navigation app built on OpenStreetMap data. It offers offline maps, offline search, voice guidance, and navigation support for driving, walking, biking, and even hiking. The app also includes contour lines, points of interest, and topographic maps, making it a favorite for adventurous travelers and privacy-minded users.
With OsmAnd, you’re in control. It collects zero user data by default and offers layers, plugins, and customization options that more commercial apps don’t. While the interface can take some getting used to, its depth, offline flexibility, and strong privacy foundation make it a top-tier alternative.
CoMaps is a newcomer built by the open-source community as a privacy-friendly fork of Organic Maps. It features completely offline navigation, including voice-guided directions, route planning, and low battery usage. Designed to work seamlessly without any account or tracking, it’s ideal for users who value digital independence.
Though still growing in popularity, CoMaps is gaining traction due to its clean interface and efficient performance on Windows tablets and Android emulators. It lacks real-time traffic features but excels in simple, reliable routing without the noise of ads or unnecessary permissions.
🚦 Sygic – Best for Offline 3D Navigation & Traffic Alerts
Sygic is a powerful navigation app with premium features including 3D offline maps, real-time traffic powered by TomTom, speed limit warnings, and lane guidance. It’s visually rich, with a polished UI and worldwide coverage that works especially well on Windows tablets or emulators.
What makes Sygic stand out is the balance between offline usability and live updates. While basic features are free, premium upgrades unlock advanced tools like head-up display and dashcam mode. It’s ideal for users willing to invest in a more polished, feature-rich GPS experience.
Customization: Options for customizing routes and integrating with other applications.
Community engagement: Contributions and updates from a community of users or developers.
Additional features: Unique functionalities such as public transportation details, points of interest, and social features.
❓ FAQ
What is the best free Google Maps alternative for Windows?
Here WeGo and MapFactor Navigator are great free options with offline access and essential routing features. OsmAnd is also excellent if you value privacy and flexibility.
Which app offers the best offline experience?
MapFactor Navigator and OsmAnd both provide robust offline functionality, including offline search, turn-by-turn navigation, and downloaded maps by region or country.
Can I use these alternatives on a Windows PC or tablet?
Yes, most of these apps work well on Windows tablets or via Android emulators like BlueStacks or WSA (Windows Subsystem for Android). Some also offer web-based versions.
Which one is best for real-time traffic updates?
Sygic offers the most accurate real-time traffic thanks to its TomTom integration. If you want live road alerts, that’s your best bet.
Are these apps safer than Google Maps for privacy?
Yes. OsmAnd and CoMaps are privacy-first alternatives that don’t track your location, require sign-ins, or show ads.
While Google Maps is a powerful tool, it’s not the only option and it’s not always reliable or fast. I picked each Google Maps alternative for Windows while keeping in mind its distinct advantages and various user requirements. You can also use Windows Maps. I’m sure you’ll find one that best fits your needs while driving, walking, or public transport.
While it’s considered safe to run Disk Cleanup to clear storage space on the drive, some users have reported encountering a black screen either mid-way or after completion of the process!
A black screen after Disk Cleanup appears when critical system files or files responsible for booting Windows inadvertently get deleted during the process.
When you are stuck on a black screen, the first option is to wait and verify whether the cleanup utility is still running. For some, Disk Cleanup took 8-10 hours to run completely. Also, disconnect all non-critical peripherals, leaving just the mouse and keyboard, and then restart the computer.
What can I do if Disk Cleanup causes a black screen?
Tip
For all these solutions, you will have to access the Recovery Mode in Windows. If it doesn’t load, you will have to crash the OS thrice. To do that, turn on the computer, and as soon as the Windows logo appears, press the Power button to shut it down. Repeat this thrice, and on the fourth attempt, the OS will run a Startup Repair. If it doesn’t fix things, click Advanced options > Troubleshoot > Advanced options to access the recovery options.
1. Run the SFC scan and DISM
On the Advanced Options screen, click on Command Prompt.
Select your user account from the list and then enter the password for it.
Once the Command Prompt loads, paste the following DISM commands individually and hit Enter after each: DISM /Online /Cleanup-Image /CheckHealthDISM /Online /Cleanup-Image /ScanHealthDISM /Online /Cleanup-Image /RestoreHealth
Next, execute this command to run the SFC scan: sfc /scannow
Reboot the PC and check for improvements.
Running the DISM commands and SFC scan will replace all missing system files, which is most likely the reason you are getting a black screen after running Disk Cleanup. However, if the problem is more deep-rooted, the two may fail!
2. Perform a system restore
From the Advanced Options, choose System Restore.
Wait for System Restore to initialize, and then click on Next.
Pick a restore point from the list created before you ran Disk Cleanup (preferably the oldest), and click on Next.
Finally, verify the restore details and click on Finish.
Wait for the restore to complete, then boot Windows and verify whether it still shows a black screen.
3. Reset the PC
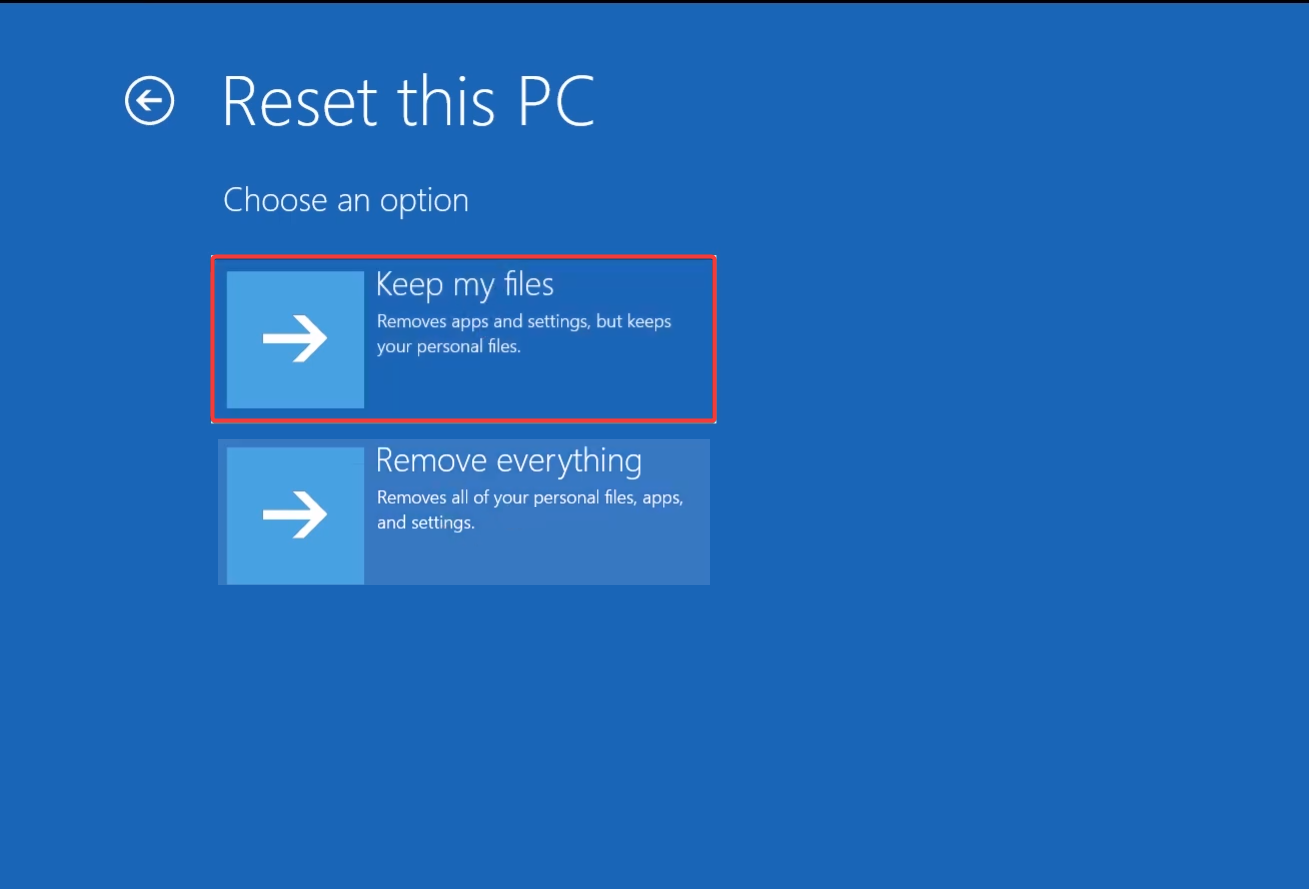
On the Startup Repair screen, click on Advanced options, then select Troubleshoot, and finally choose Reset this PC.
Choose the Keep my files option.
Follow the on-screen instructions to complete the process and then check for improvements.
If you still get a black screen after booting Windows, perform a reset again, but this time, choose Remove everything.
A system reset is an effective fix against all sorts of complex issues when you can’t boot Windows. It’s the same as reinstalling Windows, except that you won’t have to do so manually. Instead, Windows will automatically reinstall from the PC itself!
4. Manually reinstall Windows
If you can’t access the Recovery Mode and all other solutions fail to work, reinstall Windows 11. To do that, you will have to download the Media Creation Tool/Installation Media from Microsoft’s official website, and then create a bootable USB drive. All this will be done on another working PC.
Next, you simply need to connect the USB drive to the affected PC, boot through it, run the Windows Setup, and follow the on-screen instructions to complete the process.
In a few cases I checked, a BIOS update was installed while the Disk Cleanup utility was running, leading to BIOS corruption, which subsequently triggered a black screen on boot.
If that’s the situation with you, the only option is to reflash the BIOS. Again, it would require an external USB drive loaded with the BIOS (usually available for download on the manufacturer’s official website).
Since the process is different for each PC, I recommend you check the official sources for the exact steps. Even a small mistake here can render your PC unusable!
One of these fixes should have got the PC up and running from the black screen after Disk Cleanup. I would like to reiterate that Disk Cleanup is a safe built-in utility, and even though it triggered a black screen once, future occurrences are highly unlikely.
Besides, if you want a safer tool, discover our top picks for hard drive cleaners that will help you clear a significant amount of disk space in no time!
Which fix worked for you? Share with our readers in the comments section.
Christmas arrived early for many lucky Forza Horizon 4 fans. Xbox surprised some gamers by giving them free copies of the game. The reason? The game will soon be removed from the Microsoft Store and Steam.
Forza Horizon 4, made by Playground Games and loved by many since it came out in 2018, is ready to leave the Xbox Game Pass soon. This means you won’t be able to buy this game from digital stores any longer because it has reached its “end of life” status, mainly due to licensing agreements for music and cars used in the game coming up for renewal.
But if you’ve bought some fancy DLC while playing Forza Horizon 4 on Xbox Game Pass—big news! Xbox wants to give a high five with a free Standard Edition copy!
According to the official blog post, if you had a fully paid Xbox Game Pass subscription on June 25 and bought any DLC for the game, you could get a free copy of Conan Exiles. You should watch your Xbox Message Center now because they give out these copies in waves. If you have not got yours yet, do not worry. It might just be a matter of time.
If you played Forza Horizon 4 through Xbox Game Pass and purchased DLC content for it, worry not: by having an active, full-paid (not discounted) Xbox Game Pass subscription on 6/25 you will be eligible to receive a game token if you have purchased any extra content for Forza Horizon 4 through your Xbox Message Center. Codes will start to be delivered in the following days, please bear in mind that it might take a while before you get your token.
Forza
When people buy DLCs, they typically are fans of the game. Giving them Forza Horizon 4 helps in two ways: First, it avoids potential negative reactions from these purchasers because they will still have something new to play even if the game gets delisted.
Second and more importantly – this gift ensures that those who have invested their money into a title can continue enjoying it after its removal; this is a smart move from Xbox as it shows appreciation for players’ loyalty and financial support. But don’t expect this to become a regular practice for all games leaving the service soon.
People who get their free Forza Horizon 4 copy can still play the game, including its multiplayer feature, even when officially removed from the store on December 15th, 2024. One thing to keep in mind: The Festival playlist will end with Series 77 on August 22nd, and this might make some Xbox achievements more difficult to earn.
Unexpectedly, the game’s upcoming removal from the store and a big price reduction have caused renewed attention on Steam. This has pushed Forza Horizon 4 to rise in sales rankings and reach a fresh high for several players simultaneously. This situation is positive and negative for game fans because they see it becoming popular again while also getting ready to leave soon.
So, if you can get a free Forza Horizon 4 copy and have not checked your Xbox messages yet, what is stopping you?
Have you ever encountered a troublesome error message when attempting to update your Windows 11 or 10? You’re not the only one. Finally, Microsoft tackled a frequent problem that stopped people from updating their Windows systems and displayed the error code 0x80245006 for them. This error puzzled users and made them search for solutions on the Internet, but luckily, the solution was found.
The issue was not restricted to one part of Windows. Users encountered problems on Windows 10 related to the “Open with” dialogue on the taskbar and a multi-monitor setup where icons would jump between screens.
Meanwhile, even with Windows 11, there were some troubles. An update release that caused trouble was stopped because of problems, and people couldn’t download the June Patch Tuesday updates because they got hit with the feared 0x80245006 error.
The problem was noticed when users started talking about it on forums. Many tried fixing a Windows 11 issue but got stuck with an error while trying to update. Others suspected that some anti-virus update might have caused the problem, yet they could not update Windows either. However, Microsoft has clarified that these issues are now resolved.
In a Feedback Hub post, a Microsoft worker said the issue should be solved. Therefore, if you have been experiencing difficulties with the 0x80245006 error on your Windows device, maybe it is time to try updating again.
This should be resolved now – as always, please don’t hesitate to file a new piece of feedback if you continue experiencing issues.
Microsoft
If you have any continuing problems, do not hesitate to report them to this Feedback Hub. This gives a feeling of comfort, as Microsoft is handling these bugs to confirm our systems can keep running smoothly without any problems. Meanwhile, if you are still encountering the error, there are dozens of workarounds that you can try.
You’ve probably heard about the ReadyBoost feature at least once. If you’re not familiar, today we’re going to show you how to use ReadyBoost on Windows 7, so let’s get started.
How can I use ReadyBoost on Windows 7?
Enable it from My Computer
Connect your USB flash drive to your PC.
Go to My Computer, right-click the flash drive, and choose Properties.
Next, go to the ReadyBoost tab and check Use this device.
Set how much RAM you want to dedicate to this feature.
Click Apply and OK to save changes.
How to disable ReadyBoost on Windows 7?
Locate the ReadyBoost drive, right-click, and choose Properties.
Go to the ReadyBoost tab and choose Do not use this device.
Click on Apply and OK to save changes.
What does ReadyBoost actually do?
ReadyBoost works as an additional cache, and it stores frequently accessed data allowing you to quickly access it. This is especially true if you’re using hard drives and not SSDs.
Does ReadyBoost give you more RAM?
No, ReadyBoost doesn’t give you more RAM. It supplements it by giving you more cache on PCs with limited RAM.
What is the maximum size of ReadyBoost Windows 7?
You can have up to 256GB of Ready Boost with each drive providing up to 32GB of storage.
How big should a ReadyBoost drive be?
ReadyBoost drive should be up to three times larger than your currently installed RAM.
You can’t enable this feature if you have a large amount of RAM. ReadyBoost was designed only for devices with a low amount of RAM. If this is the case, the ReadyBoost tab will be missing from your PC.
Should I use ReadyBoost on SSD?
It’s not possible to enable ReadyBoost on SSD since it works only on systems that use regular hard drives.
Is ReadyBoost worth using?
On modern PCs with SSDs and a high amount of RAM, ReadyBoost can’t be enabled, since it doesn’t bring any performance improvement. It only might be worth using on devices with less than 2GB of RAM, but even the performance gain is negligible.
This feature is available on modern operating systems as well, and we have a guide on how to activate ReadyBoost on Windows 11, so don’t miss it.
Windows 11 has been making progress, finding its way into the operating system realm. Almost 30% of all Windows PCs are now using Windows 11—this is a big milestone for Microsoft’s newest OS, according to Statecounter. This percent shows an increase from the previous month’s market share which was at 27.67%.
In just June 2024 alone, this number went up to reach up until now highest point ever recorded: 29.71%! This is very interesting to observe, particularly because earlier in the year Windows 11 was the primary OS that faced a decrease in users during mid-cycle. However, it appears like it’s making a robust recovery.
Windows 10, even with its decrease, still rules the field at 66.1%. But it’s like slow-burn apple pie – people are moving from Windows 10 to 11 bit by bit because Microsoft keeps reminding them that they will stop supporting Windows 10 in October of 2025.
If we zoom out and observe the whole Windows market, as of July 1st in 2024, it shows that Windows 10 is leading. Then comes the recently launched Windows 11, while older versions like Windows 7 and 8.1 are still being used but they fall behind quite a bit.
Even more surprising is that there are some people who haven’t yet made the switch from ancient XP to newer systems – these folks make up just under one percent of total users; a small reminder about how diverse our ecosystem really can be!
The move towards Windows 11 is a part of growing PC and tablet shipments that are increasing. A report from Canalys predicts an optimistic outlook for US PC shipments to grow by 5% in 2024 and another increase of 8% in 2025. The announcement that Windows 10 support will end soon is helping to drive this growth, as it motivates people and companies towards newer devices that can run Windows 11.
The life of Windows 10 is a subject that has been debated for quite some time. As we move closer to the ending support date in 2025, many people are wondering what will happen with this operating system which was once very popular.
When you consider the necessities of UEFI, TPM 2.0, SecureBoot and other features for Windows 11 – it’s evident that shifting to the new OS isn’t only about liking one software over another but also considering if your hardware can handle it or not. Regarding businesses and consumers, the transition to Windows 11 is turning into a requirement rather than an option for ensuring security and performance.
The path that Windows 11 has taken from starting as a new rival to becoming an important participant in the OS market shows how technology is always changing. As it keeps getting updated and bettered, it’s getting nearer to being everyone’s preferred pick. In future time, we can observe changes in this balance along with fresh inventions.
Disk Cleanup is the go to app preinstalled on Windows that will help you free up the storage space. However, it comes with basic features, so there are actually a lot better alternatives for Disk Cleanup. Here are the tools we tested for you!
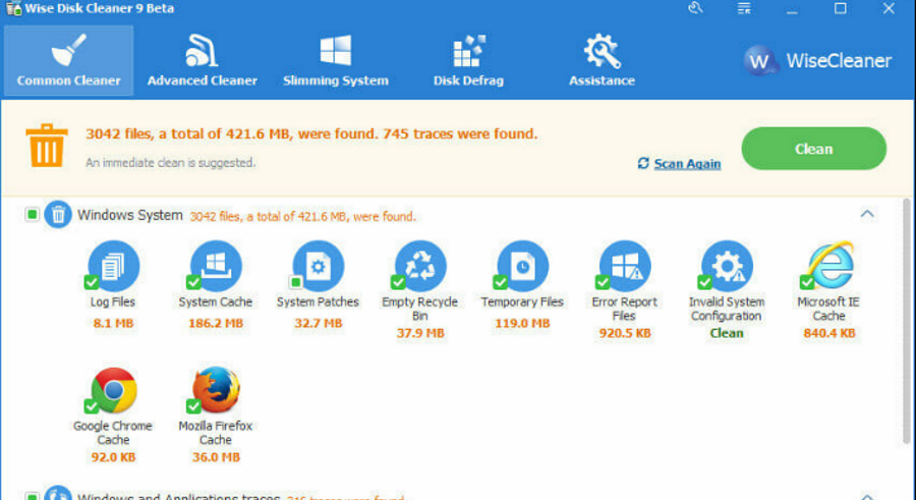
One of the best alternatives to Disk Cleanup is Wise Disk Cleaner. This tool can help you efficiently erase browsing history and cookies from any browser you may use in one go. You don’t need to get into the settings of each one anymore.
Of course, any residual system files, leftovers from upgrades, recycle bin files, they will all be deleted with just one click. Wise Disk Cleaner has also some other interesting feature such as a disk defragmentation tool if you still work with HDDs, or an online data removal app.
The app also assesses the system performance and offers assistance on how to improve it.
Wise Disk Cleaner
Remove clutter and keep your disk in top shape with this powerful tool.
CCleaner is a popular solution for cleaning out your computer’s hard drive. That’s because it provides great options for doing that and it’s fairly easy to use as well.
CCleaner, it has different ways to clean your hard drive. One is Drive Wipe. This feature helps to delete data fully from your hard drive. So, you do not need to be concerned about any signs of it remaining.
This software, it is only useful for erasing the empty part of your partitions. You use it to do this because you want to make sure there’s nothing left there.
CCleaner, for deleting stuff there are various options available to the user which have distinct numbers of passes. The more passes an option has, the better it is. But, this also means that it will take longer to complete the job.
Additionally, CCleaner has other great functions like the ability to fix registries in order to give users a complete system rejuvenation.
CCleaner
Employ powerful features to clean and maintain your computer health.
Shredit not only cleans your PC from useless files that take up drive space, but also ensures that they can never be read or even seen.
To be fair, this tool doesn’t identify those useless files by itself, it only deletes what you indicate it to delete. However, it can prioritize large numbers of files or individual files all the same.
Another useful feature of this tool is that it can erase even free space. Let’s explain this part a bit if it doesn’t seem to make sense. If you deleted a file, that’s not really erased. It’s still on the drive. You only marked that space as free so the system can overwrite it with new data. So, the data you simply deleted, can sometimes be restored. Shredit wipes out any traces of it so it can never be retrieved.
Of course, you get to decide the intensity of the process but it’s shredding capabilities are on par with multiple governmental standards when it comes to completely removing information from a drive.
Choose when Storage Sense runs (e.g., during low disk space, every day, week, or month) and which files to delete (e.g., temporary files, recycle bin files).
Click Clean now to immediately free up space.
Storage Sense is a built-in Windows feature that automates the process of deleting unnecessary files, ensuring your system runs smoothly without much manual intervention.
Regardless of the hard drive’s capacity, it will always become full at some point because there is more content on the internet to download than what manufacturers can fit into these devices.
And now you know that if Disk Cleanup doesn’t cut it anymore, there are many other alternatives, including some that we didn’t get to mention here. However, these listed ones are among the top choices overall. Every solution has its own unique aspects and qualities which may suit certain users better than others.
Now you know some great Disk Cleanup alternatives. Tell us about your thoughts in the comments below.
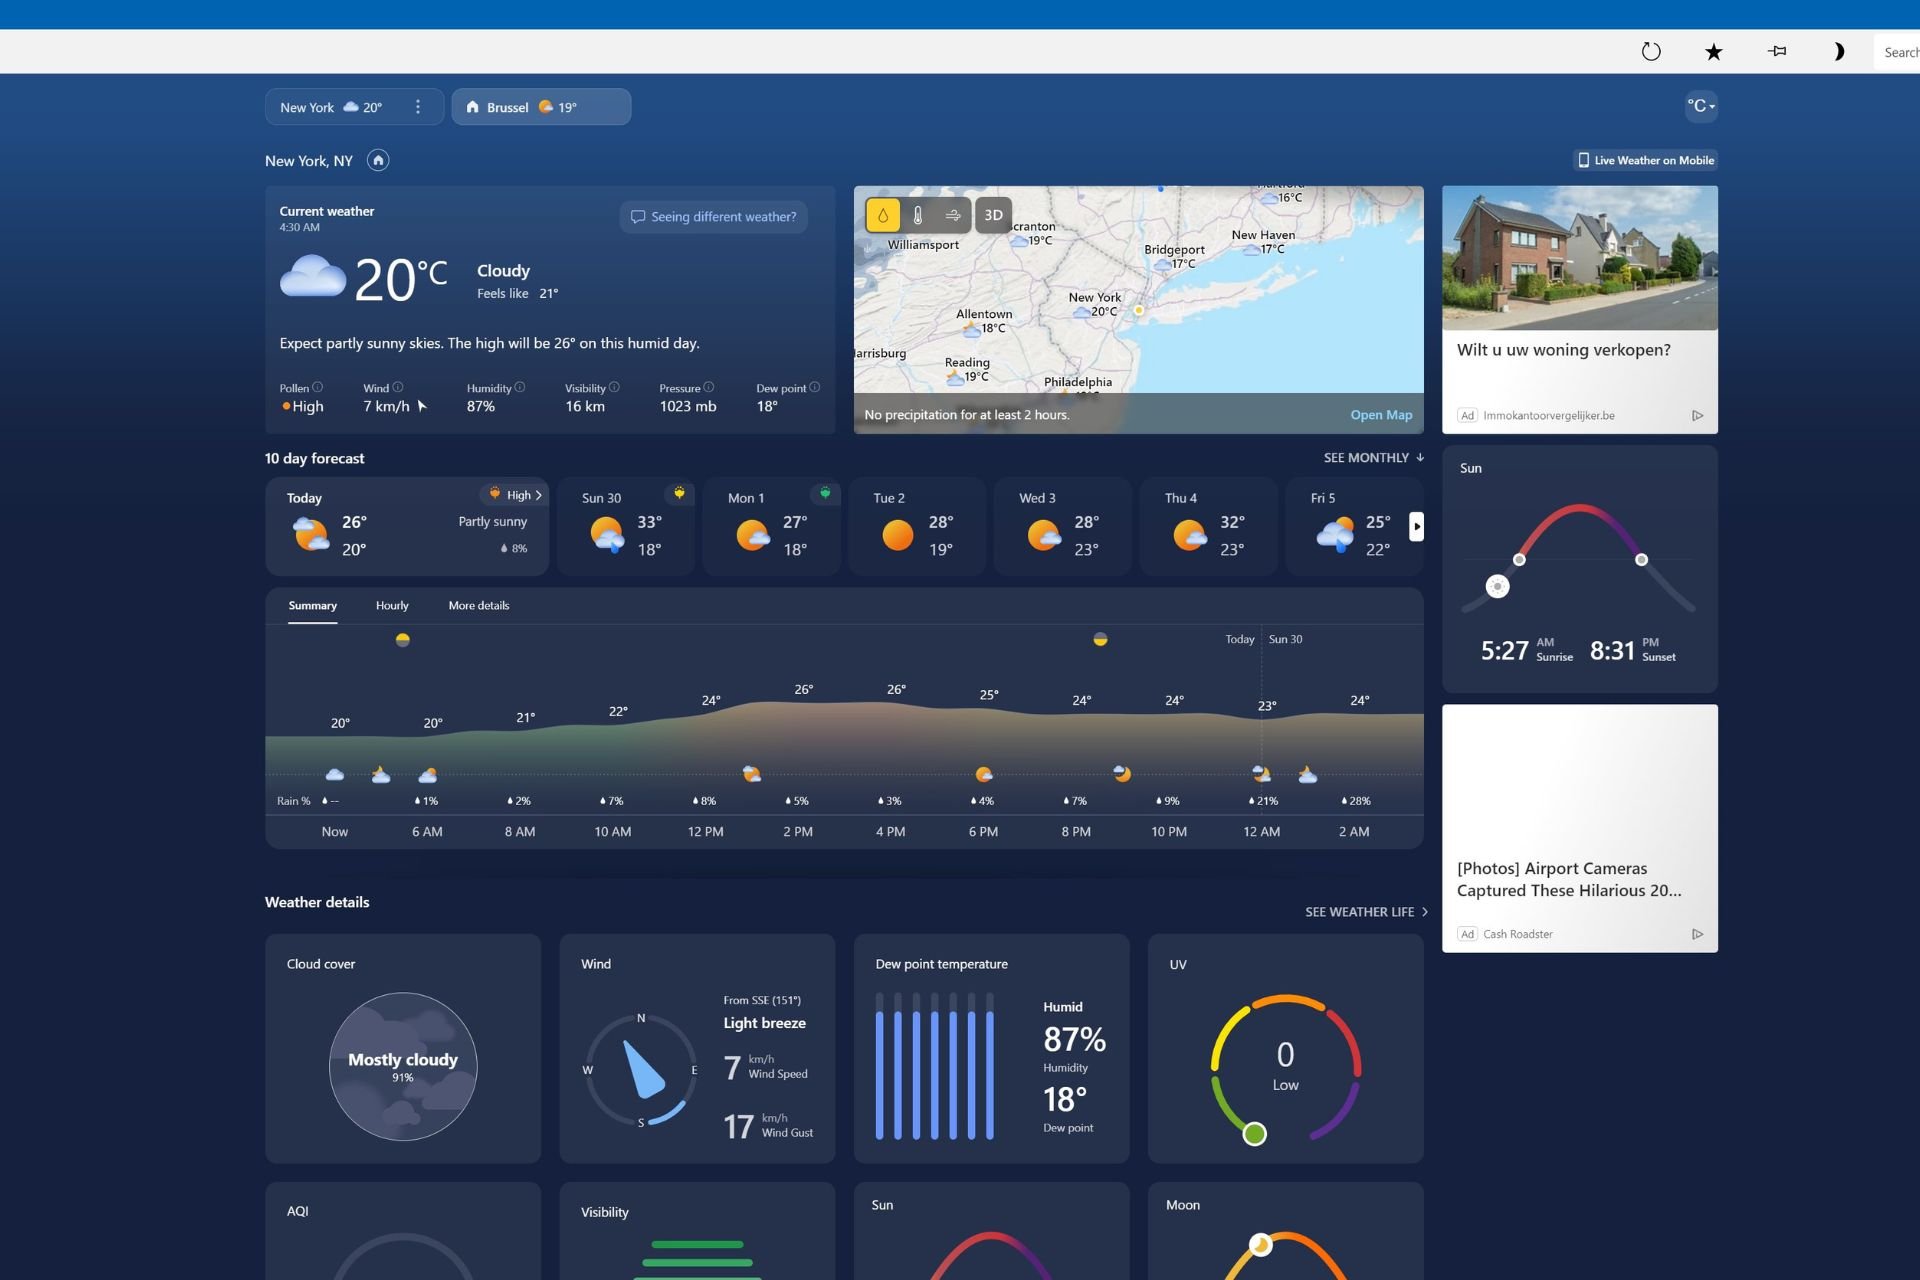
Microsoft appears ready to introduce a big update for its Weather app on Windows. According to @ChangeWindows on X (formerly known as Twitter), the best weather app in the world will get even better, thanks to dozens of new features.
Microsoft has begun rolling out a major update to the Weather app. Don't worry, your favorite ads are still there! Better yet, you'll now get even more! pic.twitter.com/lJtsFyDLSm
Firstly, the update is still being tested, so not everyone can see this yet. The design is getting an uplift. It’s more Fluid-like, with rounder buttons and a fresh light theme that’s pleasing to the eyes.
Now, a thing that could catch your attention is the chance to switch from Light to Dark themes immediately when you are in the temperature unit selector pop-up. It sounds convenient. But it seems some issues still need fixing because this change isn’t working as smoothly as we hoped yet.
Navigation is also being improved. A fresh navigation control will let you swiftly move between parts of the homepage without needing to scroll endlessly. And for people who prefer organizing in advance, the “SEE MONTHLY PLANNER” button is changed to a “SEE MONTHLY” button that scrolls downwards on this page rather than opening another one.
You'll also notice that there is now a navigation control on the right, it shows off the various sections on the home page. The home page has drastically expanded in this update. pic.twitter.com/hGHc8ghW4i
The “WEATHER INSIGHTS” section is being changed to “Weather details.” In this new section, the Weather app will provide information on Cloud Cover, Wind, AQI (Air Quality Index), Visibility, Dew point temperature, the Moon phase, and many others. Additionally, a new home page design includes a fresh set of controls for the Weather maps section.
Underneath that are weather details, replacing weather insights. This now shows various cards, getting rid of the old "Weather forecast", "Suggestions for your day" and "Monthy planner" cards.
Also note the quirky alignment between the title and the "See weather life" button. pic.twitter.com/MnJZKhPDFA
However, as all good things have a bad side, the update brings two more ad blocks to the Monthly part of the new homepage. Also, the last section, Weather Trends, will display historical weather data for a place that may be interesting to those who like statistics.
The other parts of the Weather app are the same as before. The update is being released slowly, so if you’re fortunate enough to be among those who’ve already got it, please share what you think about this new look. Is it refreshing, or do you yearn for the old layout?
You can share your experiences in the comments, and if you want to experiment with it, watch for the MSN Weather app update on the Microsoft Store.
This guide breaks down the best laptops for college students in various price ranges. If you’re one, don’t miss it!
To help you with your decision, we’ve assessed the features and user reviews of more than 50 models available on Amazon. After carefully considering everything from budget-friendly Chromebooks to powerful machines, we shortlisted only the seven best ones below. We also included extra options for engineering students and ones you can use for gaming sessions.
With up to 11 hours of energy storage in its Li-ion battery pack, Acer Aspire 3 is the perfect notebook PC to go to college with style. Its sleek design makes it visually aesthetic and attractive. No matter what program you’re working on, your peers will definitely admire your laptop’s appearance.
It packs the AMD Ryzen 3 7320U Quad-Core CPU to power average to medium-level software packages. You can count on better performance than Intel CPUs. It also includes a 128 GB NVMe SSD as the internal storage.
Although the storage capacity is on the humbler side, rest assured this technology greatly increases software performance. Moreover, the 8 GB LPDDR5 memory module ensures you can run multiple software simultaneously.
Pros
Cons
Temporal Noise Reduction for webcam delivers crisp digital videos in low-light conditions.
Not suitable for high-end software and game apps.
Free Windows 11 Home license for a lifetime.
Low internal storage space.
Acer PurifiedVoice boasts AI noise reduction technology for studio-quality voice.
Doesn’t come with a dedicated GPU.
Includes all the latest connectivity ports, like USB 3.0, USB C, HDMI, Wi-Fi 6, etc.
Its narrow bezels offer maximum display area for work and entertainment.
If you’re looking for a reliable laptop to run average software packages below the $200 mark, you can confidently go for this one. It includes an Intel Celeron N4020 CPU, Intel UHD Graphics, 64 GB eMMC storage, and 4 GB RAM configurations to run Windows 11 and Microsoft 365 apps smoothly.
You can also stream content in 4K thanks to the Intel UHD Graphics 600 shared graphics processing capabilities and memory. The eMMC technology is one of the fastest embedded internal storage technologies. It can access and process large datasets, HD images for graphics design, and play 4K movies seamlessly.
Pros
Cons
Lightweight notebook weighing only 3.24 pounds.
Not suitable for mass storage of program codes, software packages, big datasets, many movies, etc.
Long battery life, up to 10 hours.
Not suitable for rough use.
79% screen-to-body ratio for more screen area.
It might take a few minutes to launch mid-level to moderately-large apps.
HD speaker system with stereo sound and 720p HD webcam for comfortable online classes.
If you work mostly on a web browser, you can get an ASUS C423NA Chromebook available at a little over $100. It includes lifetime Google Chrome OS with free features and security updates for up to 10 years.
The smart combination of Intel Dual Core Celeron CPU, 64GB SSD, and 4GB DDR4 RAM makes the device perfect for long-time offline use. The battery lasts up to 10 hours. Moreover, it includes all the latest connectivity modules, like Bluetooth 4.0, dual-band Wi-Fi, USB-C port, etc.
Pros
Cons
Built-in antivirus.
Some users have reported that the actual battery capacity might be lower than the rated figure.
A higher internal storage version is available at a slightly higher cost.
Not suitable for gaming.
The anti-glare coating on the screen improves the visual quality from multiple angles.
The 4 GB RAM configuration might be slower than expected.
The ANPCOWER 2-in-1 Laptop boasts a 3.4 GHz Intel processor, 16GB RAM, and a 512GB SSD for smooth multitasking. It can also run demanding applications for graphic design, data analysis, big data processing, databases, etc. It features a 14-inch 2K touchscreen with vivid colors and a comfortable low-blue light mode.
Additionally, this versatile laptop weighs just 3.52 pounds, making it perfect for everyday carrying to college, library, and more. ANPCOWER offers a 3-year warranty and responsive customer support for superior after-sales support.
Pros
Cons
Multiple touch sensitivity for paint apps, blueprint apps, etc.
Battery life last only 5 hours.
The backlit keyboard technology allows you to see the keyboard in complete darkness.
Intel UHD Graphics isn’t suitable for high-end gaming.
Smooth multitasking.
TF or micro SD-based storage expansion slot. It can’t accommodate MMC or SD cards.
2K resolution for visuals within a 14-inch display screen.
If you’re looking for a notebook PC with large storage space as well as extended memory at an affordable price, you can check out the Lenovo ThinkPad T14’s refurbished unit. Its quality inspection and refurbishment process meets the stringent requirements laid down by the Amazon Renewed program. So, you can expect a perfect unit with no obvious signs of a second-user device.
The laptop includes the AMD Ryzen 5 PRO CPU along with a 1 TB SSD and 32GB RAM. Therefore, the device is suitable for mid to high-end software like Adobe Premier, Adobe Photoshop CS, AutoCAD, and more. Not to mention, you can run most apps simultaneously and store thousands of HD images, videos, datasets, etc.
Pros
Cons
Lock and unlock the device with fingerprint for maximum security.
Shared GPU memory and processor capability limit performance for modern PC games.
Includes AMD Radeon Graphics integrated into the main CPU.
It’s not a touch-enabled ThinkPad notebook.
It comes with an Ethernet LAN (RJ-45) port so you can connect to dated lab instruments.
It’s only compatible with micro SD cards.
Includes all the latest connectivity modules, like USB 3.2, USB 3.2 Type-C, Wi-Fi 6, Bluetooth 5.2, etc.
It’s a refurbished unit; hence affordable. The brand-new unit isn’t cost-effective for a college student.
Apple 2024 MacBook Air is the best notebook computer you can get if your spending plan falls in this category. The device is well-suited for learning, work, productivity, business, and entertainment. Also, you can seamlessly run almost any video game titles available in the App Store and Apple Arcade.
You can also use the Apple 2024 MacBook Air in AI and machine learning development projects thanks to its 16-core Neural Engine technology.
Furthermore, it packs a powerful 52.6-watt-hour Li-ion battery that can power the entire device for up to 18 hours if you just watch HD movies and TV shows on Apple TV in the offline mode. However, if you stream or work online continuously, the battery will last for up to 15 hours.
If you love to run and play Windows software and PC games, you can use an emulator software on your Mac. So, besides the apps from the App Store, you can also use Windows programs.
Pros
Cons
8-core CPU and 8-core GPU for extreme graphics processing.
This isn’t a cost-effective choice. You can get more app and PC game compatibility at the same price with a Windows 11-based laptop.
Backlit keyboard for easier navigation.
The display size is smaller than Windows 11 devices of the same price band.
MagSafe 3 charging port for fast charging.
Some users have reported Touch ID issues.
Supports up to two external monitors to extend the display area.
KingnovyPC Dual Screen 16-inch comes with dual-screen display technology. You can keep the auxiliary display folded and use the primary screen along with the physical keyboard. Alternatively, you can open both displays and get the virtual keyboard on the auxiliary display. Both of these screens are also touch-enabled.
This device is great for digital painting, blueprint drawing, app UI/UX designing, visualizing product packaging media, and more.
In addition, KingnovyPC Dual Screen packs an Intel i7-12th gen CPU, 32 GB DDR4 memory, and 1 TB M.2 SSD internal storage. Its graphics processing is powered by Intel Iris Xe and Intel UHD Graphics systems. It also includes an RJ45 gigabit LAN or Ethernet port so you can connect your notebook to high-speed routers, servers, or laboratory equipment.
Pros
Cons
Dual touchscreen at the price of one.
Doesn’t include a dedicated GPU for extreme PC gaming purposes.
Suitable for simultaneous execution of multiple program codes or applications.
It’s unfit for AI and machine learning projects.
Its internal storage can save thousands of HD images and videos.
M.2 SSD offers faster file copying and pasting within or external to the device.
As an engineering or technology student, you’ll need a specialized laptop. These devices come with extended memory, storage spaces, graphics processing units, and CPU bandwidth. Not to mention, you’ll also require durability, touch capabilities, a long-lasting battery, and more.
Though these notebook PCs have a gaming tag, they’re suitable for all sorts of high-end computing like big data processing, AI training, blockchain hosting, and more.
During my selection, I prioritized the following qualities:
College life & needs: Is your major writing-intensive? Do you expect to run high-end software packages? I’ve considered these preferences to choose the best laptop for you.
Budget: College can be a financial marathon. You may have to follow a strict spending plan for the whole month. So, I’ve listed some truly affordable devices that’ll get your job done without impacting your expense plan.
Portability: Lugging a heavy laptop around campus isn’t fun. So, I’ve researched and listed lightweight options with long battery life (8+ hours) so you can stay productive on the go.
Processor power: I’ve assessed multiple device options and their costs to pick the ones that offer the best processing capabilities at a reasonable price.
Memory:RAM (memory) allows you to run multiple programs simultaneously. I’ve listed those laptops that offer larger memory at an affordable price.
Storage space: Between assignments, movies, and music, storage fills up fast. So, I’ve also considered the storage capacity of the laptops before listing the best ones above.
Display decisions: A bright, high-resolution display is easier on the eyes for extended study sessions. I’ve only picked notebook PCs with the best visuals.
Software: I’ve ensured that most laptops come with a Windows operating system, Microsoft Office apps, etc., so you don’t need to spend separately on productivity tools.
Summary
These are the best laptops for college students, depending on your spending plan, workload, extracurricular activities, and entertainment needs.
So, which one did you like the most from the list? You can share with other readers by commenting below. Also, if you’ve bought and used one mentioned in this list, share your first-hand experience reviews too.
The Designer image editor used to frustrate users because it could only produce square images. But now, according to Derek Johnson, Director of Product for Microsoft Designer, the tool will support images in portrait and landscape orientations.
Excited to announce Microsoft Designer now supports landscape and portrait images, in addition to square!
This is incredibly useful when you need to create an image for everything from a presentation to a Reel, or even a wallpaper for your desktop or phone.
Excited to announce Microsoft Designer now supports landscape and portrait images, in addition to square! This is incredibly useful when you need to create an image for everything from a presentation to a Reel, or even a wallpaper for your desktop or phone.
Derek Johnson
This gives many options for creating desktop wallpapers, PowerPoint presentations, and more.
Alongside its new landscape format, Microsoft Designer was recently enhanced with the Frame Image tool. This tool allows you to include a customized frame created by AI on your images for added emphasis. The tool also has the Collage Creator, which enables blending up to ten images into one layout enclosed within a personalized frame.
Furthermore, Microsoft is making Designer an essential part of its ecosystem. Now, it’s integrated into the Windows Photos app for smooth photo editing. People who live in Teams chats and channels will be happy to see the Designer also present there. This integration means you can whip up images without ever leaving your conversation.
Microsoft Designer is becoming flexible and priceless. It has new size choices and functions, such as integration with other Microsoft products, which makes it easier for anyone to express their creative ideas.
We often need to use the Caps Lock emoji in Windows 11, but it’s not easily available, at least for most of us, thus complicating things!
The Caps Lock symbol is basically a lock, often also printed on the Caps Lock key on your keyboard, although it’s not the same for all manufacturers.
One quick search for the Caps Lock emoji, and you will come across several images of a lock, but finding the actual emoji is a challenge. The good news is that Windows 11 offers a built-in emoji keyboard with the Caps Lock emoji!
Press Windows + . to open the built-in emoji keyboard, and search for Lock.
Use the emoji that best suits the context.
When you search for a lock in the built-in emoji keyboard on Windows 11, it has one both in the locked and unlocked state, allowing easy depiction of cases where the Caps Lock is enabled and disabled.
Press Windows + S to open Search, type Microsoft Store in the text field, and click the relevant result.
Search for Emoji Keyboard, look through the available options and pick one that appears best and has a good rating. I choose Emoji Viewer.
Now, click on Get to install the Emoji Viewer app.
Once done, launch the app, search for Lock from the top right, then right-click on the relevant emoji, and select Copy.
You can now paste the Caps Lock emoji anywhere you like. Remember, it will appear the same as that copied from the built-in keyboard.
These are the two easiest ways you can find and use the Caps Lock emoji in Windows 10 and 11. Remember, with the built-in emoji keyboard, you also have access to thousands of GIFs, making the former a more favourable option!
Were you able to access and add the Caps Lock symbol? Share with us in the comments section.
Boosting your Windows 10 performance can be a game-changer, but only if your system is running from a HDD. ReadyBoost is a nifty feature that allows you to use a USB drive or SD card to speed up your system. If your system is installed on an SSD, ReadyBoost will make no difference. So, if ReadyBoost is not showing, that’s normal in this case.
How do I enable ReadyBoost in Windows 10?
1. Setting up ReadyBoost with a USB Drive
Plug your USB flash drive into one of the USB ports on your computer.
Click on the yellow folder icon on the taskbar to open File Explorer or press Win + E.
Under This PC in the left sidebar, locate your USB drive under the Devices and drives section.
Right-click on the USB drive icon and select Properties from the context menu.
Navigate to the ReadyBoost tab.
Windows will test the device to ensure it is compatible with ReadyBoost. Wait for this process to complete.
Select the option Use this device.
Use the slider to allocate the amount of space you wish to reserve for ReadyBoost. You can leave it at the default or adjust as needed.
Click Apply and OK to confirm your settings.
This will speed up your system by allowing frequently accessed data to be stored on the USB drive, which is faster to access than the hard drive.
2. Setting up ReadyBoost with an SD card
Place the SD card into your computer’s SD card slot.
Press Win + E to open File Explorer.
Locate the SD card drive, right-click on it and select Properties.
Go to the ReadyBoost tab and wait for Windows to test the device for ReadyBoost compatibility.
Choose Use this device from the options.
Use the slider to set the amount of space to reserve for ReadyBoost.
Click OK and then Apply to finalize the changes.
Using an SD card for ReadyBoost is especially convenient for laptops with a built-in card slot, as it can be left in the slot permanently.
Ensure your USB drive or SD card has at least 1GB of free space and does not exceed 32GB.
Format to NTFS:
Open File Explorer by pressing Win + E.
Right-click on the USB drive or SD card and select Format.
Choose NTFS from the File System dropdown menu and click Start.
Make sure the SuperFetch (SysMain) service is running:
Press Win + R to open the Run dialog box, type services.msc and hit Enter.
Find SysMain or SuperFetch in the list and ensure it is set to Automatic and running.
Delete external drive folders (if ReadyBoost is still not working):
Press Win + R, type regedit, and hit Enter.
Navigate to HKEY_LOCAL_MACHINE\SYSTEM\CurrentControlSet\Services\EMDMgmt
Delete all the folders within the EMDMgmt key.
Restart your computer and try enabling ReadyBoost again.
These troubleshooting steps ensure your device meets the criteria to be used with ReadyBoost, allowing you to utilize its full potential.
How do I disable ReadyBoost?
Press Win + E to open File Explorer.
Under This PC in the left sidebar, find the drive you’re using for ReadyBoost.
Right-click on the ReadyBoost drive and select Properties.
Go to the ReadyBoost tab in the Properties window.
Select the option Do not use this device.
Click OK and then Apply to free up the reserved space on your USB drive or SD card.
Disabling ReadyBoost will free up the reserved space on your device, allowing you to use it for other storage needs.
Why is the ReadyBoost tab not showing in Properties?
Well, the answer is pretty simple: because you’re using an SSD and not a HDD. The ReadyBoost feature takes advantage of the flash memory of your USB drive or SD card to boot up Window faster. However, if your system is installed on an SSD, ReadyBoost will not make any difference because your system is already booting from a fast storage device.
These solutions cover the most common steps for configuring and troubleshooting ReadyBoost in Windows 10, helping improve system performance by leveraging external storage devices for faster data access. To keep your system running smoothly, regularly check for Windows updates and ensure your external devices are in good condition.
If you have got the Notion app for Windows, chances are that it might not be working or is stuck on the loading screen. Many even reported getting a black or white screen with the Notion app in Windows 11.
For anyone wondering why Notion is not working on the PC, it mostly has to do with the app data, corrupt cache/cookies, misconfigured network settings, and issues with the chosen default browser.
Before we proceed, resize the Notion app window and check whether it now loads properly. For some users, opening the Notion desktop app from the website did the trick. Another workaround is to press Ctrl + R when stuck on a white screen with a loading/spinning wheel.
What can I do if the Notion Windows app is not working?
1. Clear the app data under Roaming and Local
Press Windows + E to open File Explorer, and navigate the following path, where Username is the active profile name:C\Users\Username\AppData
Press Ctrl + Shift + Delete to open the Clear browsing data window.
Select All time from the Time range dropdown menu, tick the checkboxes for Cookies and other site data and Cached images and files, and then click on the Delete data button.
Once done, launch the Notion app and verify if it now loads properly without displaying a black or white screen.
Locate the Notion launcher, right-click on it, and select Properties.
Go to the Compatibility tab, and tick the checkbox for Run this program as an administrator.
Click on Apply and OK to save the changes.
5. Set Edge as the default browser
Press Windows + I to open Settings, go to Apps from the navigation pane, and select Default apps.
Scroll down and click on Microsoft Edge from the list.
Click the Set default button and confirm the change.
I don’t personally encourage users to set Edge as the default browser, but many have reported that it resolves things when the Notion app is not working or loading in Windows. Besides, the new Microsoft Edge is far better, owing to a wide array of user-oriented features introduced in the browser!
6. Reinstall Notion
Press Windows + R to open Run, type appwiz.cpl in the text field, and hit Enter.
Select Notion from the list of apps, and click on Uninstall.
Follow the on-screen instructions to complete the process and then restart the computer.
Once done, download Notion from the official website and then install it using the setup (.exe file).
If uninstalling the app and reinstalling it doesn’t work on the first attempt, use an effective uninstaller tool to get rid of any leftover files and Registry entries, since these might trigger Notionapp issues in Windows.
7. Switch to Google’s DNS address
Press Windows + R to open Run, type ncpa.cpl in the text field, and hit Enter.
Right-click on the active network adapter and select Properties.
Choose Internet Protocol Version 4 (TCP/IPv4) from the list, and click on Properties.
Now, select the Use the following DNS server addresses option, and enter the following in the fields underneath:
Preferred DNS server: 8.8.8.8
Alternate DNS server: 8.8.4.4
Tick the checkbox for Validate settings upon exit, and click OK to save the changes.
As confirmed by many of the affected users, a DNS may block access to Notion, thus resulting in the app not working on Windows. For one, it was the Quad9 DNS blocking Notion. Also, if Google’s DNS is affecting the performance, I recommend using the fastest DNS server near you!
In case nothing else works, perform a system restore and revert the PC to an earlier configuration when the Notion app ran fine.
Which fix worked for you? Share with our readers in the comments section.
Microsoft will release new features for its Copilot for Microsoft 365 in July. According to the official blog post, this could change how people use and experience their suite of software products—from making tasks more efficient to making creative processes easier by using this artificial intelligence (AI) helper.
One of the most interesting features is the inclusion of Microsoft Designer AI art creator in Word and PowerPoint apps, which will be one of the new features. The platform was recently enhanced with an amazing feature that turns pictures into art, so this will most likely come to Word and PowerPoint as well.
You can ask Copilot to make an image or find it in Microsoft’s stock photography library, and now you have the ideal visual for improving your documents or presentations. It feels as if you possess a private graphic designer in your hand.
SharePoint users can look forward to Copilot in SharePoint Text v1. This feature guarantees to change the method of creating content on SharePoint sites and news posts. Do you require text that is modified in tone or made shorter? Copilot can help; it provides simple and fast changes to your text.
It’s worth mentioning that different Microsoft 365 subscription plans will also get access to Copilot. This involves Microsoft 365 Apps for business and enterprise, Microsoft Teams Essentials, Enterprise, and EEA, as well as specific plans like SharePoint Plan 1 and Plan 2, along with OneDrive for Business Plan 1 and others.
These new features will be available to all Microsoft 365 users mentioned above for $30/month paid annually.
What do you think about these new Copilot features? Are these fresh Copilot abilities something that excites you?
The KB5039302 update for Windows 11 versions 22H2 and 23H2 is quite cursed. At first, this update was removed from the market because it caused serious boot loops in systems that use nested virtualization software such as CloudPC or Azure Virtual Desktop.
For the first issue, though, Microsoft released a fix, and with it, they announced their plan to bring back the update on Windows Update and Windows Update for Business. So you can finally use CloudPC while your Windows 11 is updated to KB5039302.
Microsoft’s documentation says that update availability has restarted for most devices. But if you have a Hyper-V setup with virtual machines running on specific processors, then KB5039302 might not appear in your update queue still—this applies to those who were affected by the boot loop problem. It is interesting to note that users of Windows Home edition are less likely to come across this issue as virtualization in home environments isn’t so common.
It might be better to wait until Microsoft smooths all parts of this update. Who wants to handle a taskbar that is not working correctly or, worse yet, infinite restarts? Microsoft has accepted these problems, and they have noted a particular problem where the taskbar does not load on systems running Windows N editions.
If you are ready to jump into action, one way to confirm this is by checking for KB5039302. You can do this through the Settings app under Windows Update. But always keep in mind that sometimes, waiting with patience can be a good quality – particularly when talking about software updates.
Microsoft is working on it and assures us it will provide solutions in its next releases. So, perhaps it’s better to wait a bit before you hit that update button. After all, isn’t it smarter to give yourself more time and avoid a headache instead of rushing into things?
The recent updates for Windows 11 versions 22H2 and 23H2 have introduced more than just enhancements. In particular, the update marked as KB5039302 is getting much attention for a particular issue it causes.
Even though the patch made the native Windows RAR archive app one of the best in the world, it causes endless restarts on some systems and, more significantly, breaks the taskbar in certain editions of Windows 11—especially those ending with N (Windows N). For those who are not aware, this version of Windows does not have many media features, such as the Windows Media Player app.
After installing the June 2024 Windows preview update (KB5039302), released June 25, 2024, you are likely to face issues with the Taskbar. This issue is only expected to occur if you are using a Windows N edition device or if you turn off the ‘Media Features’ via Control Panel->Programs-> Programs and Features -> Turn Windows features on or off. N editions of Windows include the same functionality as other editions of Windows, except for media-related technologies, Windows Media Player, and certain preinstalled media apps.
Microsoft
Microsoft recognized these problems and noted that the bug impacts people on Windows N and those who manually disabled media features. Picture switching on your computer only to discover you cannot interact with the taskbar.
The taskbar, often used for navigation, might not work, but other parts of the UI and File Explorer could function normally. Microsoft is aware of this issue and assures a solution will be provided in an upcoming update. However, KB5039302 cannot be downloaded anymore; it’s similar to a product being recalled from store shelves.
For people who have been impacted, there is a way around it. You can temporarily fix the issue by removing KB5039302 from Settings’ Windows Update section. This short-term solution brings back operations until a long-lasting answer is provided.