Valheim developers are working continuously to release game patches that fix the numerous game bugs reported by players. The most recent patch released a few days ago included a fix for sudden disconnection.
Paradoxically, after applying the patch, many gamers faced even greater game lags and overloaded networks, or even router or network crashes. Luckily, Nexus mod developers have already jumped in with a new mod that fixes these issues.
The Remove network overload mod does exactly that since the latest game patch sends any new in-game information over the network instantly instead of a one-time.
This is what a gamers noticed after installing last week’s Valheim patch:
Prior to 0.146.11, I was able to host a dedicated server just fine. However, after the patch, I noticed that as soon as someone tried to join it, my entire internet went down. Wi-fi and ethernet, the entire house lost connection.
Copy the file valheim_reenable_nagel.dll (in the zip) into the game’s plugins files – Valheim/BepInEx/plugins.
And that should do it. The fix addresses only client computers, not the server ones as well (like the Plus mod does, for instance) since apparently the issue is caused by all those joining a server.
There was yet another method tried by a few users successfully, also as clients. Namely, they attempted to re-establish their connection to the modem by resetting the browser pings value.
Reset browser pings value
Open Steam Settings and go to In-Game option.
Reset Browser Pings / Minute to the lowest value (250).
We hope that these solutions will save the day for you to keep enjoying the captivating Valheim experience.
Note that the above-mentioned mod developers warn that after installing this one, desyncing or other issues such as crashes on the loading screen are still possible.
This mod only fixes the network overload by re-packaging smaller information packed into larger ones. So you might still experience massive lag while playing with your friends on a dedicated server.
Fortunately, until now there has been at least a tested fix for most bugs.
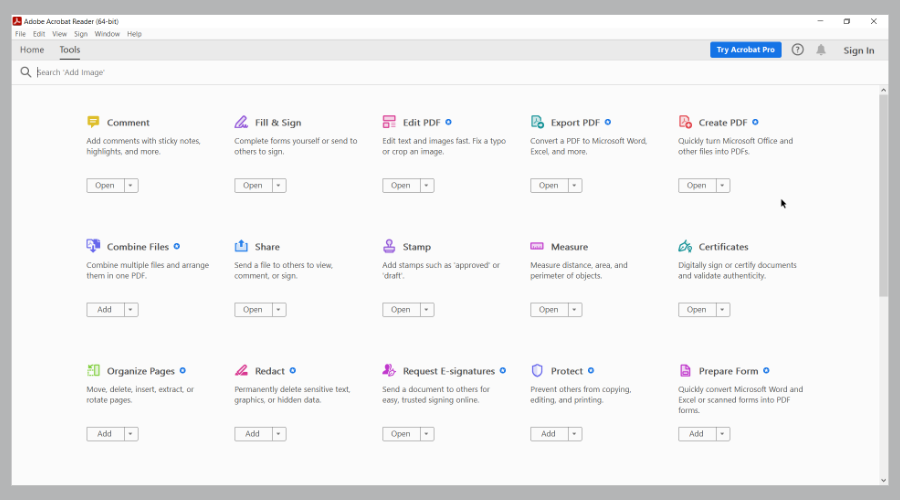
Like any other good software, Adobe Reader receives constant updates, new functionalities, and bug fixes. All of them are delivered via software updates.
For example, an error 109 dialog box error is shown to have been fixed in a hotfix patch. If this is your error or not, having the latest and greatest is a good idea.
Did you know that if a PDF file was created in a newer version of Adobe Acrobat Reader than the one you have installed, you might have trouble opening it? Another great idea to keep things updated.
We recommend you download the latest version of Adobe Reader in order to be sure you have it all working.
The process is quite simple thanks to the easy-to-use interface. Open Stellar and add your PDF file. You could also add multiple files since batch processing is available.
With the file(s) selected, click on the Repair button to start the process. After that, you can see a preview of the repaired file(s). If everything is ok, save the new file(s) and you are done.
3. Select the Repair installation option
Open Adobe Reader.
Click Help and select Repair Installation.
Restart Windows when Adobe notifies you to do so.
Adobe Reader includes a Repair Installation option that might come in handy for fixing the error 109. That setting repairs the software’s installation files.
4. Don’t open PDFs with the Adobe Acrobat DC Chrome extension
If you’re utilizing the Adobe Acrobat DC Chrome extension to open PDFs, save the PDF to a folder so you can open it with the Adobe Reader desktop software outside the browser.
Adobe’s browser extensions aren’t always as reliable as its standalone software for opening PDFs. A PDF will not open if there’s a corrupted browser plug-in.
5. Open the PDF with alternative software
If you’re sure the PDF is not in any way corrupted, try opening the document with alternative software.
That might not really be a fix for error 109, but we strongly recommend using alternative PDF software that might at least open the document.
Not only it will be able to open almost any kind of file you have on your computer, but you can also print and convert files from one format to another.
And if you might need to quickly edit a document or make small changes to a photo, you can do that right within this software.
The latest version provides light and dark themes alongside the new user interface making it a joy to use it.
It might be the case that there’s something up with the PDF file. If it didn’t download correctly (otherwise a partial download), the PDF might be corrupted. So, if you already downloaded the PDF, download it again.
Those are a few resolutions that might fix the Adobe Reader error 109 issue. We hope these recommendations from our list were helpful. For more suggestions, feel free to share it in the comments section below.
Video calibration software is used to enhance the quality of commercial video reproduction. Lots of great organizations established standards for the proper transmission and the display of video signals.
Sound calibration is able to remove unwanted coloration from your headphones and your studio speakers to get the highest-quality results.
There are a lot of video calibration programs out there, and we gathered five of the best ones on the market just to help you out and make your choice much easier.
Check out their most important features and decide which one will best suit your needs.
In today’s digital world, we are totally surrounded by various video calibrationsoftware tools to pick from. Adobe Premiere Pro is a powerful program that has been designed for just one purpose.
We are talking about giving you cutting-edge video editing features. Firstly, keep in mind that you can edit footage in any desired format. After all, it supports 8K videos and even higher.
Since immersing viewers in a unique virtual reality is often the goal of any video, Premiere Pro clearly comes with Immersive VR Support. It is easier than ever before to create unique stories in VR 180.
In fact, you have access to multiple tools that help you do more than just basic video editing.
Video calibration works flawlessly, you can enjoy faster ProRes HDR to master your media with ease and an extremely flexible interface.
Some other key features that you’ll most likely appreciate:
Multiple video effects at your disposal – keying, colorizing, and lighting, to name a few
Impressive color manipulation features
Quick Blur may be applied to very large areas
Simultaneous video editing is supported
Premiere Rush is part of the package; that’s a great all-in-one app that works across all devices
It interacts extremely well with other Adobe software products you may already use, including Photoshop, Adobe Audition, and After Effects
Adobe Premiere Pro
The industry-leading video editing software, Adobe Premiere Pro is a great tool that will enhance the quality of your videos.
DisplayCAL is a display calibration and profiling software that focuses on accuracy and versatility.
The program’s core is Argyll CMS, an open-source color management system used to take measurements, create profiles, calibrations and perform advanced color-related functionalities.
You will also have a test chart editor available and the opportunity to create synthetic ICC profiles with custom primaries and more.
It’s also worth noting the fact that this program is free software and you will be able to redistribute and modify it under the terms of the GNU General Public License.
Check out the best features included in the service:
You will be able to calibrate and characterize your display devices using one of the many supported measurement tools
The program supports multi-display setups and various options available for advanced users
The software includes a verification and reporting functionality that evaluates ICC profiles and display devices
You can create video 3D LUTs and optional CIECAM02 gamut mapping
The software comes with the support of colorimeter corrections for all kinds of devices for enhancing accuracy
Another great feature is the check display device uniformity through measurements
By using DisplayMate, you can calibrate your HDTV. To get things going, you will need to connect the HDTV to a PC running Windows, and this will be really easy to do.
Once you do this, your HDTV will be able to show your Windows Desktop, and then it will function as a huge PC monitor.
This will let you view all your Windows apps on your large screen HDTV, and it will also allow the program to fine-tune the picture quality for each of the HDTV inputs.
DisplayMate for Windows supports digital DVI and HDMI besides analog VGA, Component Video, Composite Video, and S-Video. You’ll be able to connect to any projector, monitor or HDTV.
Check out the essential features that come packed in the program below:
DisplayMate works by automatically showing the user a slideshow of specialized test pattern images
You can configure the program according to your needs and interests via the following modes: Novice, Express, Standard, and Complete
If you are a Novice user, the tool comes with the Novice Mode with a unique set of light and simple instructions and patterns
Most test patterns are designed for visual evaluation and adjustments by eye
The program comes with special suites for setting up, calibrating, adjusting, turning up and evaluating as well
ChromaPure is a video calibration software that comes with a fewgreat features. The software is designed to be familiar to anyone who has ever used a smartphone or a tablet.
All you have to do is to click on the buttons from the home page to open any of the modules that we have mentioned before.
Each one of the modules performs a different video calibration function as described.
Here are the best features of ChromaPure:
You have the option of Pre-Calibration which is where you take measurements of your display in the before state
The program’s interface is effortless to use
The Calibration button will lead you to the place where you will do your work
The Post-Calibration is where you will take another set of measurements just like the pre-measurements just to check your results after calibration
The program also includes the import and the export tools that will allow you to save session files and load them back into the program
The Software also comes with a lumens calculator
The raw data is simply a tool that helps you take single or continuous measurements
With this software, you will be able to remove unwanted coloration from studio speakers and headphones. Reference 4 includes three modules.
DAW plugin mode, is a reference sound combined with true zero-latency processing, it comes with calibration profiles, filter modes and predefines simulations for all users.
Systemwide app mode works at the OS level, and it calibrates all outgoing audio.
Room measurement software mode includes a user-friendly and streamlined process that is able to measure room acoustics, and the program will automatically locate the mic in your room.
With Reference 4, you will be able to measure the frequency response from any pair of headphones and the program will automatically locate the mic positioning via acoustic trilateration.
The tool calculates the acoustic power that is received by the listener in a defined listening spot or listening area.
The software also comes with three editions: Headphone edition, studio edition, and premium bundle. The headphone edition is best suited for sound creation on headphones.
The studio edition provides the full package to work on headphones and speakers from your studio.
The premium bundle includes the Reference 4 Studio Edition and the amazing pre-calibrated Sennheiser HD650 headphones.
These are the best five tools for calibrating video and audio. You can head to their official websites and check out more of their features and get the programs to test them yourselves just to see how they work.
These are all high-quality tools for calibrating audio and video that come packed with extremely useful features and user-friendly interfaces.
Producing movies isn’t always as glamourous as one might think. Actually, the hard work begins right after the shooting is over.
This is called the post-production stage and it consists of many different processes like editing the video part of the film, recording and editing the soundtrack with sound effects, and others.
Making a movie implies numerous different aspects that must be taken into consideration on top of editing the content like for instance budgeting, screenwriting, scheduling, and others.
Fortunately, the digitalization era comes with its built-in set of perks, and post-production software is one of them.
All these chores have gradually been transferred to video editing software solutions that operate on NLEs or non-linear editing systems.
And they do a spectacular job at it, thus rendering traditional post-production processes obsolete.
If you are considering adopting a newer digital workflow to ease up your workload, you should definitely take a look at the movie post-production software we have picked for you.
Which is the best software for movie post-production?
Boasting powerful tools, cross-integration with apps and services, and cutting-edge new features like the highly-praised Premiere Rush, Adobe Premiere Pro is the pinnacle when it comes to video editing.
A new all-in-one app that works across all devices, Premiere Rush allows you to take your editing platform wherever you are.
Plus, it integrates seamlessly with other apps and services from the Adobe Creative Cloud suite like Photoshop or After Effects and also with third-party extensions.
With automated tools and integrated workflows, the Premiere helps you craft footage while remaining on your timeline and edit it in any format, from 8K to VR.
Adding the fact that it has the best color grading options on the market, the Premiere practically turns any footage into a cinematic experience.
As always, Adobe invests a lot of resources into turning their software as user-friendly as they get, thus detailed tutorials and valuable insights accompany the Premier for your benefit.
Let’s quickly go through its key features:
Automatically reformat videos (accelerate your workflow and optimize footage for social media – square, vertical, 16:9, or in 4K resolution)
End-to-end VR 180
Instantly improve audio (accelerate audio mixing, dial down background noise and reverb with new sliders)
Time remapping to 20,000 percent (re-timing shots without nested sequences for bigger speed changes)
More drivers audited in System Compatibility report
Improved native format support (H264, HEVC, and ProRes including ProRes HDR)
Faster scrolling in the Media Browser and easier Media Cache management
Adobe Premiere Pro
Adobe Premiere Pro is the industry-leading video editing software for Tv, film, broadcasting, and social media.
Corel Video Studio allows its users to turn real life into memories in easy, fun, and creative ways.
The app has an intuitive video editor, including basic tools, video corrections, creative filters, and lots of other cool features that are easy to use.
The slideshow maker allows you to create movies in minutes by simply selecting a template and adding media to it.
Multicam can capture your screen and webcam simultaneously, and thanks to the DVD burner, you can keep the videos stored into DVDs.
Corel VideoStudio
Loaded with easy to use tools and with lots of fun features, Corel VideoStudio is your editor for everyday adventures.
Included in the Director Suite 365 by Cyberlink, the PowerDirector provides professional tools that allow you to edit videos without a steep learning curve.
Powered by a 64-bit TrueVelocity engine, the tool is one of the fastest and most comprehensive video editing software out there to support the latest video formats in up-to 4K resolution.
Advanced features such as impressive motion graphics, stylish effects and format support, plus access to an ever-growing library of plug-ins propel this post-production software in pole position effortlessly.
Let’s quickly go through its key features:
4K preview and editing tools
CPU & GPU performance boost
Chroma Key
Keyframe Motion Tracking and stabilize footage
Professional format and camera support (HEVC & VP9 10bit HDR10 & HLG, ProRes 10bit 4:2:2, and more)
Slow and fast motion effects
Correct Fish-Eye and color distortions
Power Director 365
PowerDirector 365 allows you to create compelling content with useful new effects, streamlined interface, and best-in-class editing tools.
With a simple drag & drop interface and powerful editing tools, Filmora is a modern, but easy-to-use video editor.
The software appeals to a broad audience thanks to its combo of user-friendly layout and advanced video editing capacities.
It supports all key standard HD videos including MP4, AVI, H261, H264, FLV, MKV, M4V, 3GP, and many more and more than 800 stunning effects.
Basic video editing options such as trimming, cutting, as well as pro abilities like control video and audio speed allow you to customize your films and take them to the next level effortlessly.
Let’s quickly go through its key features:
Basic and advanced video editing capacities
Color Grading features (like brightness, saturation, white balance or tint adjustments with one click)
Integrated video templates, Audio Library, filters, and text presets
Audio editing ability (allows you to mute the audio and remove the background noise with one click
Filmora 9
Bring your video to life by using Filmora, a software packed with awesome features.
With innovative features like the modern Metal engine, Final Cut Pro accelerates post-production allowing editors to work at a faster pace and deliver at the speed of light.
But accelerated performance is not at all the best that this post-production dedicated software has to offer.
Advanced color grading, HDR support, VR headset playback, and 360° video editing are merely a few of the features included in the Cut’s portfolio.
Last, but not least, the cross-integration facilities make the workflow even smoother as you can simply use all the extensions you need without leaving Final Cut Pro.
Let’s quickly go through its key features:
Multicam (automatically sync up to 64 angles of video with different formats, frame sizes, and frame rates)
Video noise reduction
Motion and Compressor (stunning effects and sweeping graphics including studio-quality 2D and 3D titles)
High Dynamic Range
Professional color grading tools (dedicated color inspector with color wheels, color curves, hue/saturation curves, and keyframes to adjust corrections)
360° editing (import and edit 360° equirectangular footage and apply blurs, glows, and other 360° effects)
Professional and beginner video editors alike need the best video editing software in order to carry out their post-production tasks.
Whether you’re after streamlining your workflow, achieving the finest stylish effects or integrating as many third-party extensions as possible, there is definitely something for you on our list.
Do let us know what was the tool that helped you bring your post-production workflow into the digitalization era.
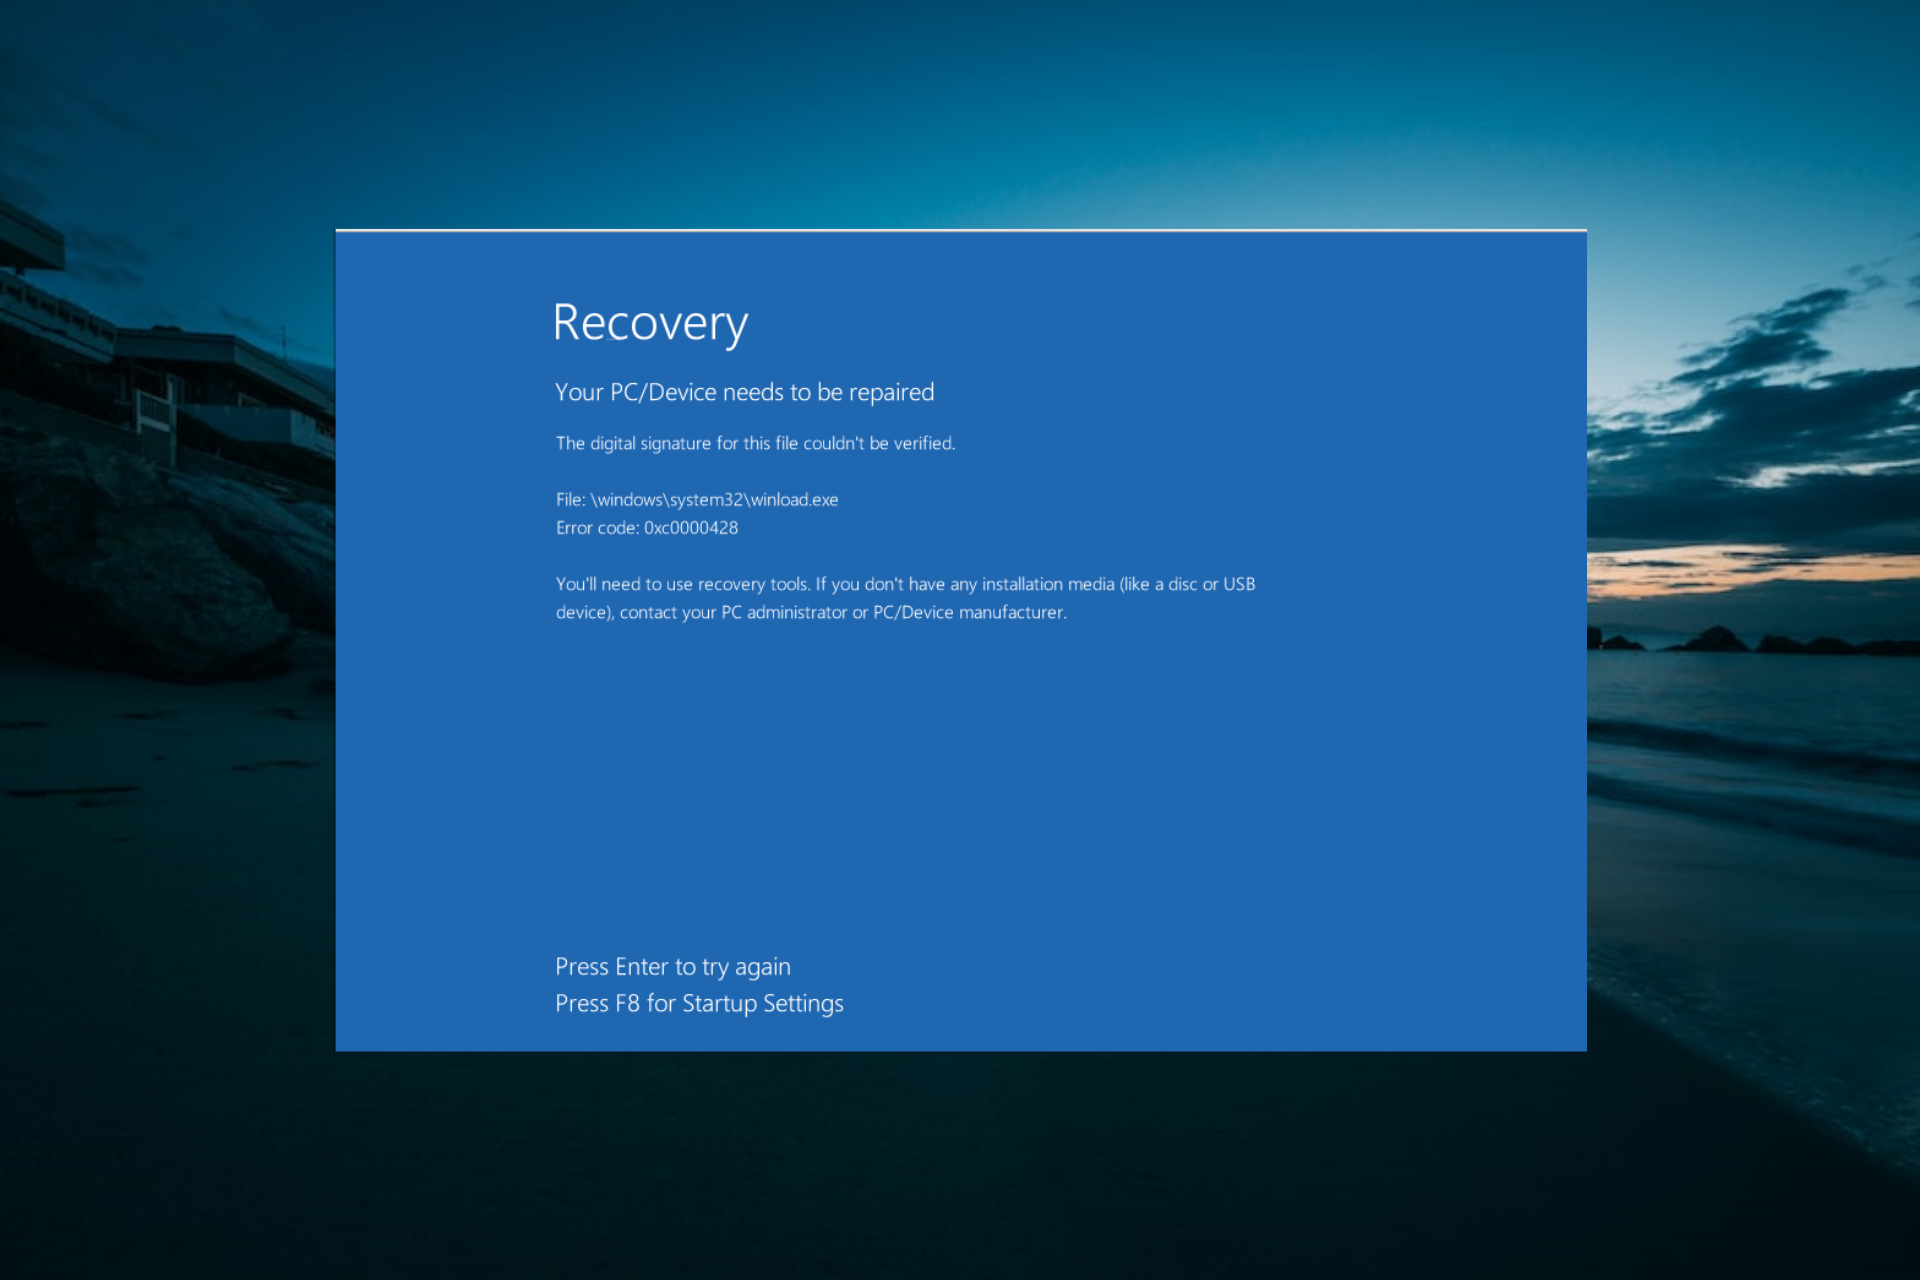
A digital signature is pretty much a permission. If Microsoft doesn’t recognize the permissions for the program, it will come up with a blue screen error saying The digital signature for this file could not be verified. This error is also known as Error Code 0xc0000428.
The digital signature is in place to secure software and prevent forgeries. This error usually occurs when third-party software is installed.namely, with newer software, it is possible that the digital signature has yet to be attained.
Why can’t I verify my digital signature?
If you are getting the Windows cannot verify the digital signature for this file error, it is likely due to a recent hardware or software change that might have installed a file that is signed incorrectly or damaged.
In some other cases, the file might be malicious software from an unknown source.
How can I fix the digital signature for this file couldn’t be verified error?
1. Perform a system restore
Hard restartyour computer and keep pressing F8 numerous times as the system is booting up.
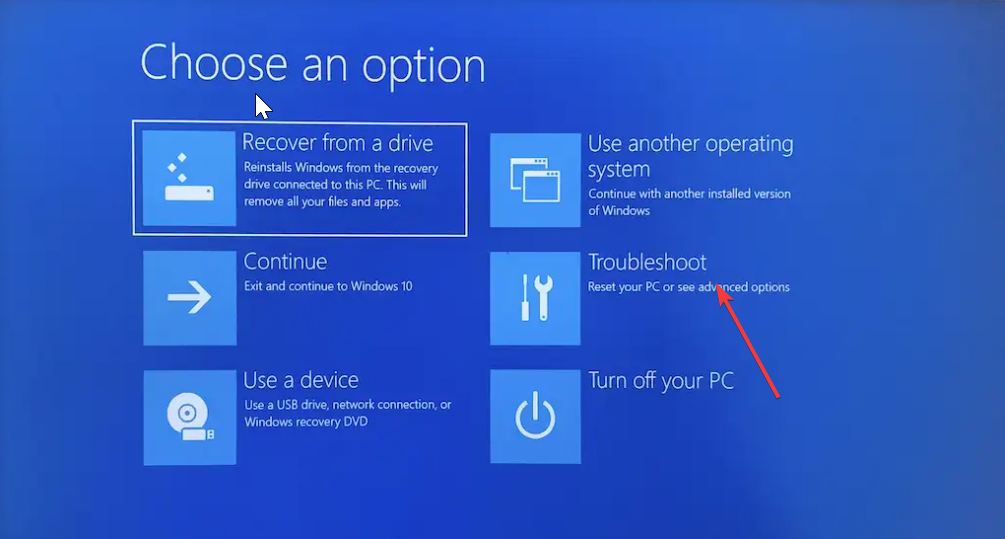
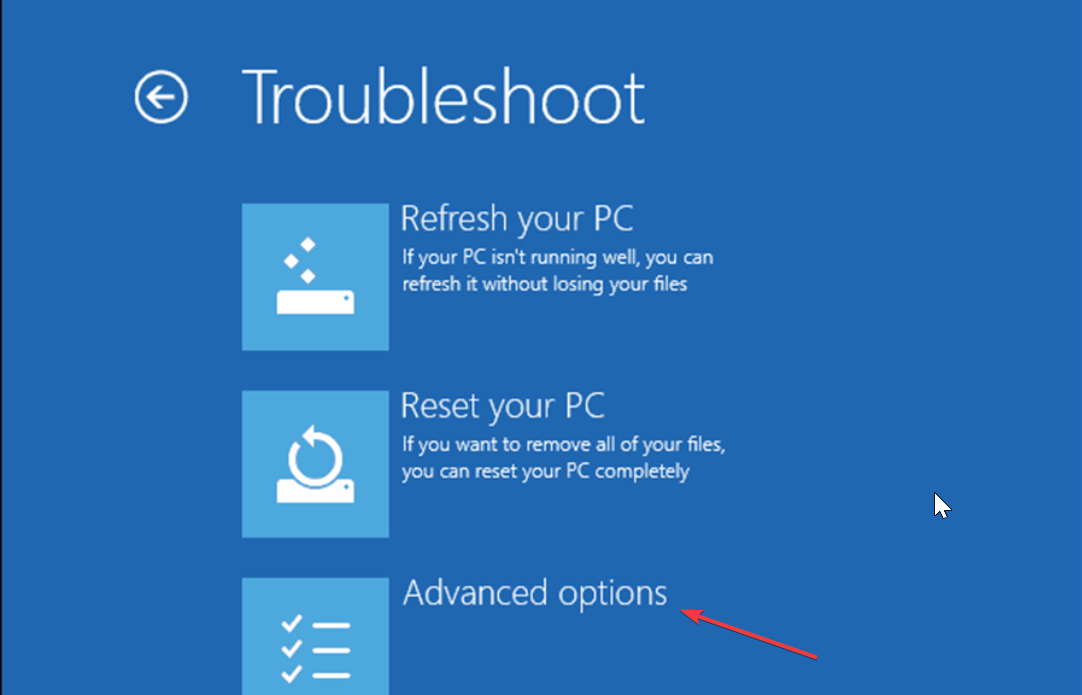
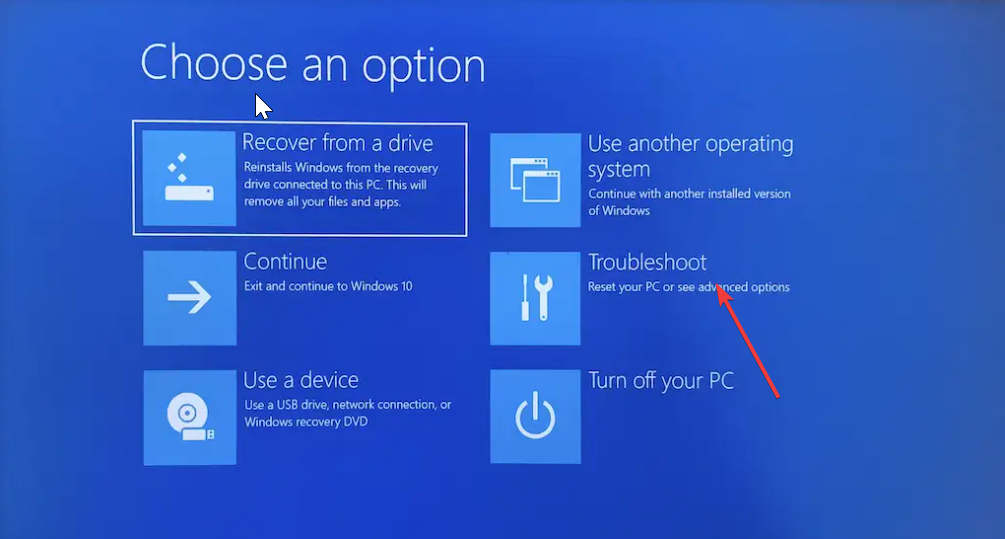
Select the Troubleshoot option.
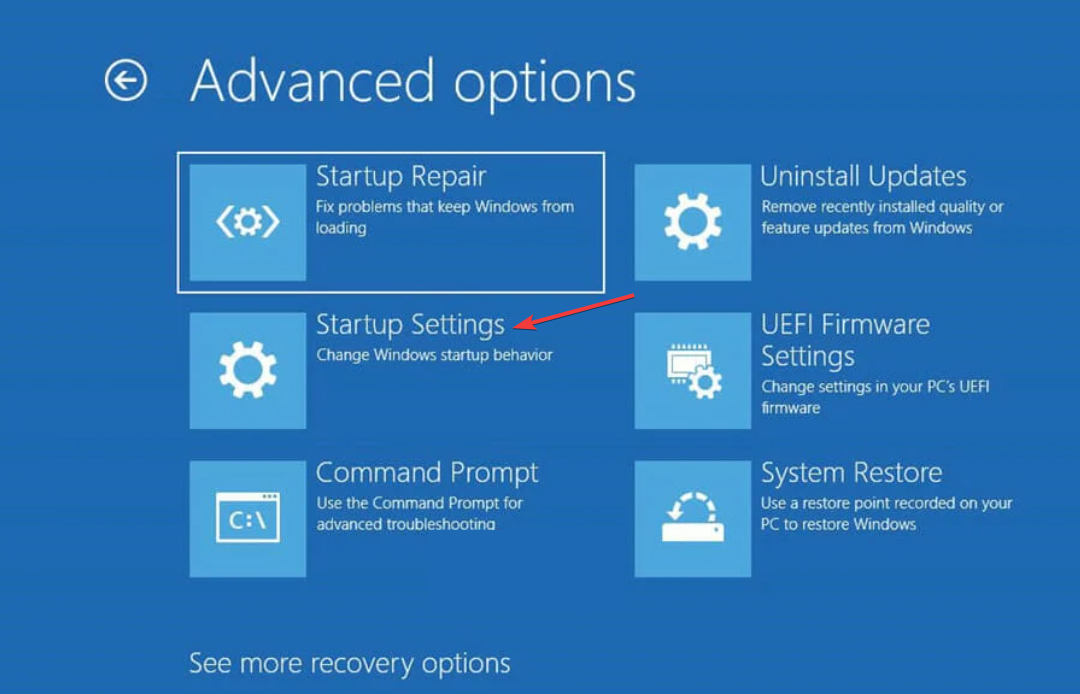
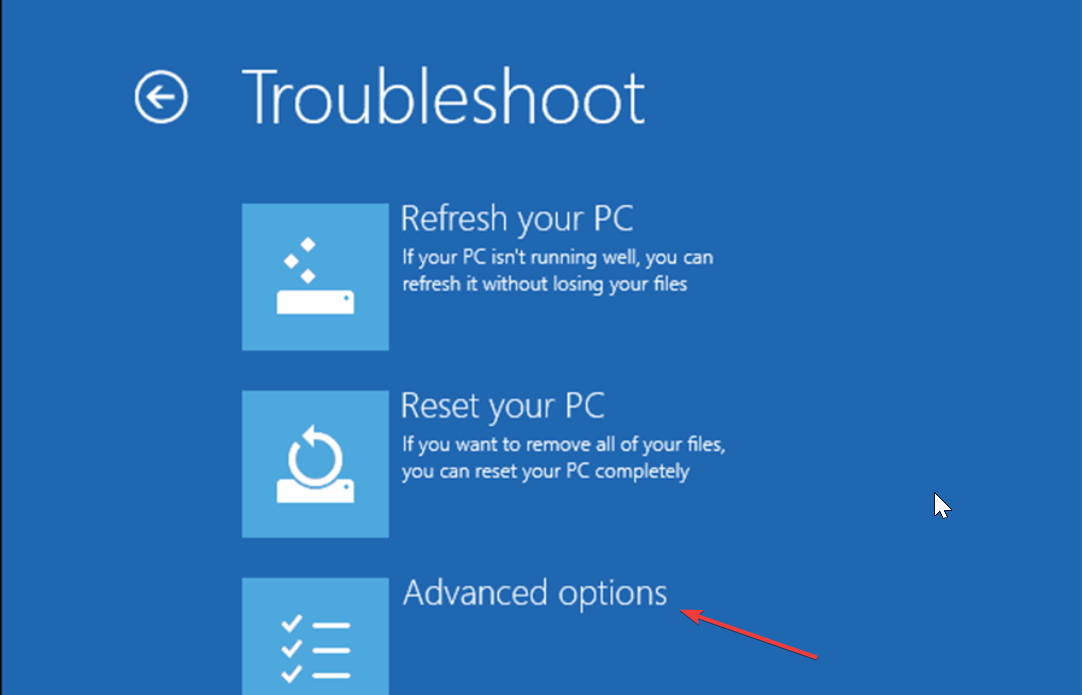
Now, click the Advanced options.
Choose Startup Settings and click the Restart button on the next page.
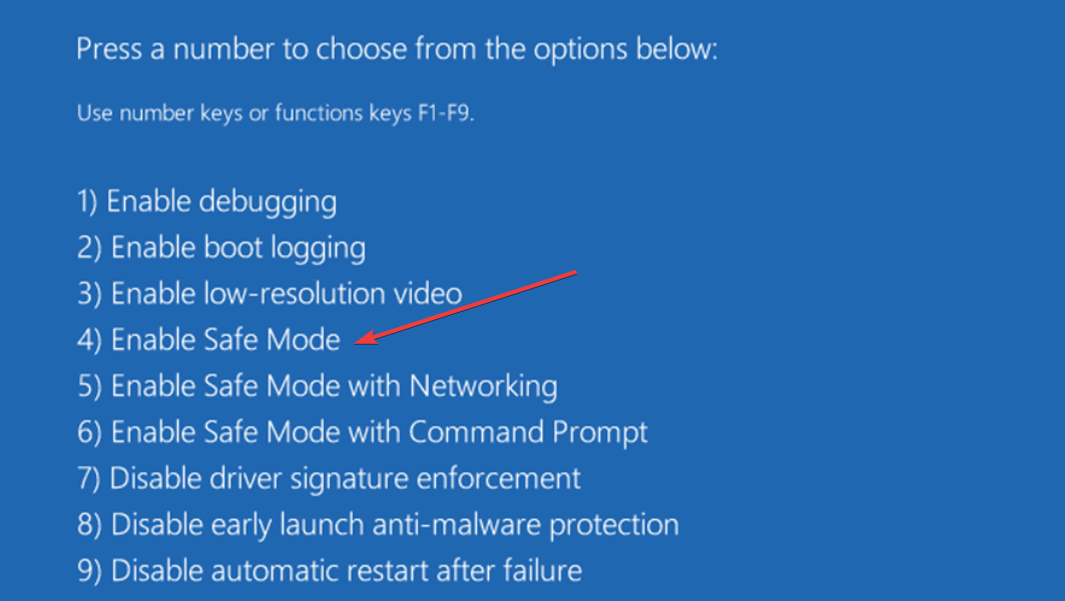
When your PC restarts, press the corresponding key to Enable Safe Mode or Safe Mode with Networking.
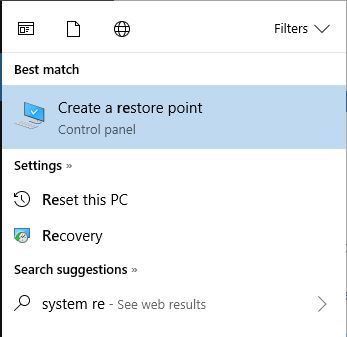
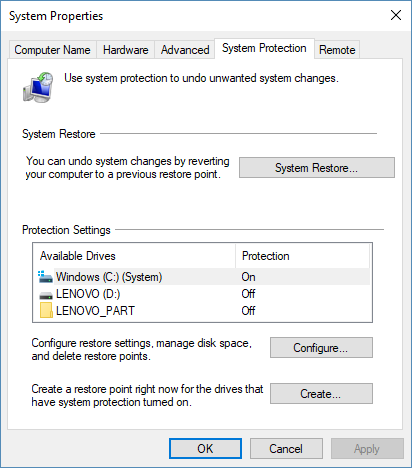
Click in the Search panel on the System Menu and type system restore.
Click on Create a Restore Point.
Click the System Restore button.
Now, click the Next button on the page that pops up
Select your preferred restore point and click the Next button.
Finally, click the Finish button and follow the onscreen instructions to complete the process.
This should eliminate whatever features were added with newer programs and make the system functional.
2. Repair boot manager
Insert your Windows 10 disc into the disc drive and restart the computer.
Press the F key that corresponds to your system recovery boot (if any).
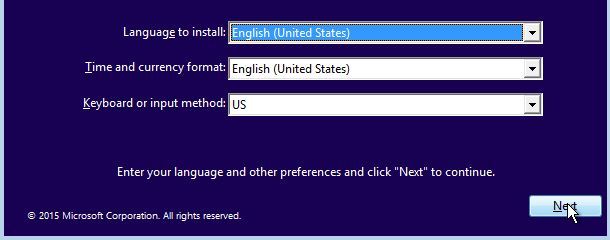
Adjust the language and the there settings accordingly and click Next.
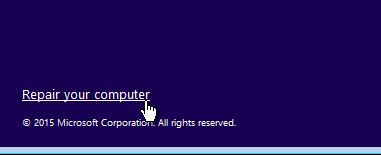
Click on Repair Your Computer in the lower right corner of the screen.
Click on Troubleshoot.
Click on Advanced Options.
Choose Command Prompt.
Choose an Account to Continue (Administrator).
Type the following commands and press Enter after each:C:Cd Bootattrib bcd -s -h -rbootrec / rebuildbcd
Perform a Startup Repair by starting Windows.
Navigate to the System Settings in the menu.
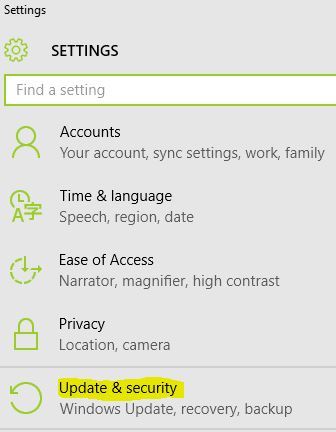
Click on Update and Security.
Click on Recovery.
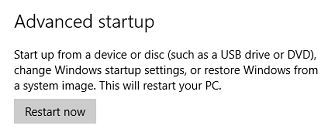
Under Advanced Startup, click on Restart now.
Click on Troubleshoot
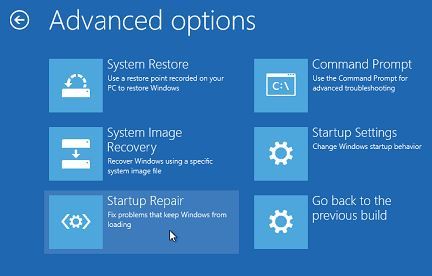
Click on Advanced Options.
Click on Startup Repair.
Select the User Name.
Enter the password for the account.
Once the repair is complete, the system will reboot, and the error should be cleared.
Press the Windows key + S and select Update & Security.
Select Recovery on the left pane.
At the bottom of the page, you should see Advanced startup with a Restart now button below.
Click the button and wait for the system to reboot.
Once the PC reboots, select Troubleshoot option.
Select Advanced options and click Startup Settings.
Find the Disable driver signature enforcement option and click F7 to enable it.
We hope that at least one of these methods helped, and we would be glad to hear which one. If you are also dealing with other issues like memory_corruption BSOD, check our detailed guide to fix it.
Also, if you know other ways to fix the digital signature issue, tell us in the comments.
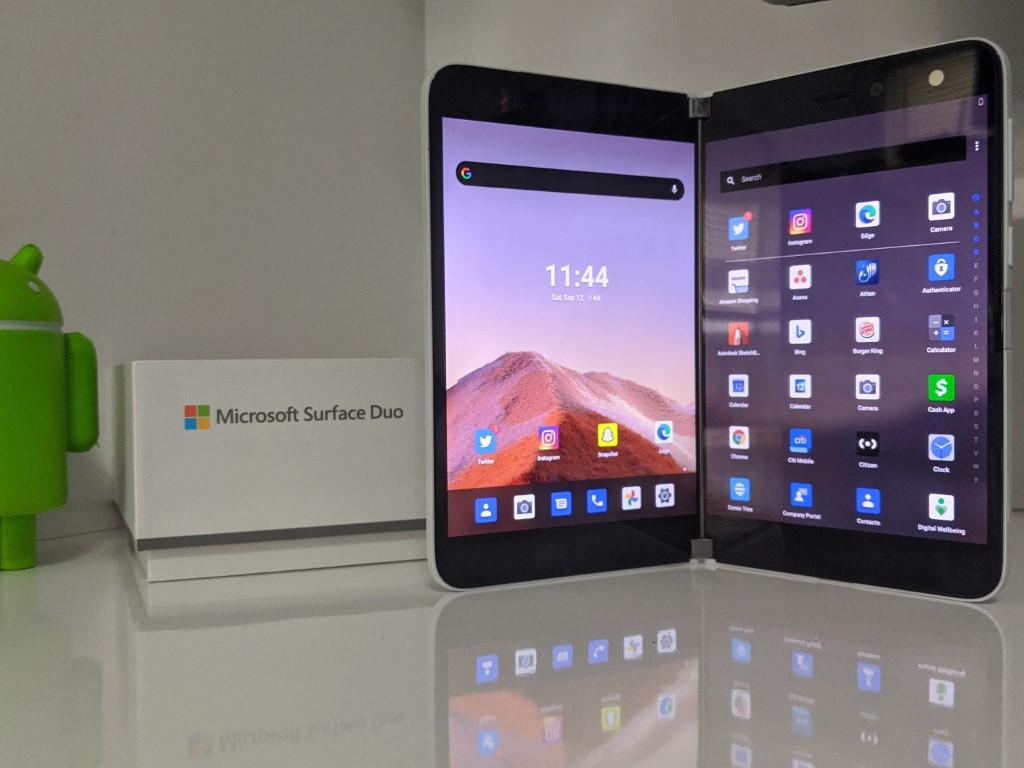
Microsoft’s dual-screen Surface Duo received praise for its premium design and productivity focus, even though it missed the mark on other important things like connectivity and picture quality. Surface devices have never been known for their top-of-the-line specs, but it’s safe to say that many early-adopters found the $1,400 launch price hard to justify considering the lack of NFC, 5G, and a competitive camera.
According to recent job listings spotted by Windows Latest, the successor to the Surface Duo could address some of the 1st-gen device’s shortcomings, especially the lackluster camera. One job listing for a Principal Android Camera System Architect/Engineer mentions the use of artificial intelligence and machine learning to improve picture quality.
The candidate will develop pipeline architect features that integrate output of the hardware ISP and supplemental image processing algorithms utilizing computational photography and AI/ML algorithms from various partners. Understanding the processing blocks (CPU, GPU and NPU) capability and optimizing feature integration for power/performance and seamless customer experience will be key. You will help define the camera architecture and work with partners and algorithm development engineers in the development of deep learning and AI features.
Google was probably one of the first manufacturers to use AI in a pretty big way to improve picture quality on its Pixel smartphones, and it has been quickly followed by other smartphone manufacturers. The Surface Duo’s slim profile likely didn’t allow Microsoft to put the best sensor in the first-gen device, but AI will hopefully be able to improve things in the Surface Duo 2. However, AI alone likely won’t do miracles when we see Samsung putting no less than 5 different sensors on the back of its Samsung Galaxy S21 Ultra.
Another job listing for a SW/FW Engineer mentions 5G connectivity, something that the first Surface Duo doesn’t support. Pretty much all high-end smartphones released last year had support for 5G, and it would be very surprising if the Surface Duo 2 didn’t include it. Here’s what the job listing says:
Job responsibilities will encompass working across a team of high impact individuals who are designing and coding RF drivers, RF board bring up including LTE and 5G technologies, factory tools, modem protocols, mobile operator certifications and PTCRB/GCF certifications on Surface Duo devices. The job is highly dynamic and involves working across various disciplines to successfully deliver the product with the Surface Duo experience and quality.
Microsoft’s Surface Duo has just started shipping in four new markets in addition to the US, and it could be some time before we see a Surface Duo 2. It certainly took some time for previous Surface products to really mature: The Surface Pro line only made a big leap forward with the Surface Pro 3, which came with a bigger screen and a slimmer design. It’s still early days for dual-screen devices like the Surface Duo, but the next version will need to really nail the fundamentals if Microsoft doesn’t want this product to end up like the Lumia line.
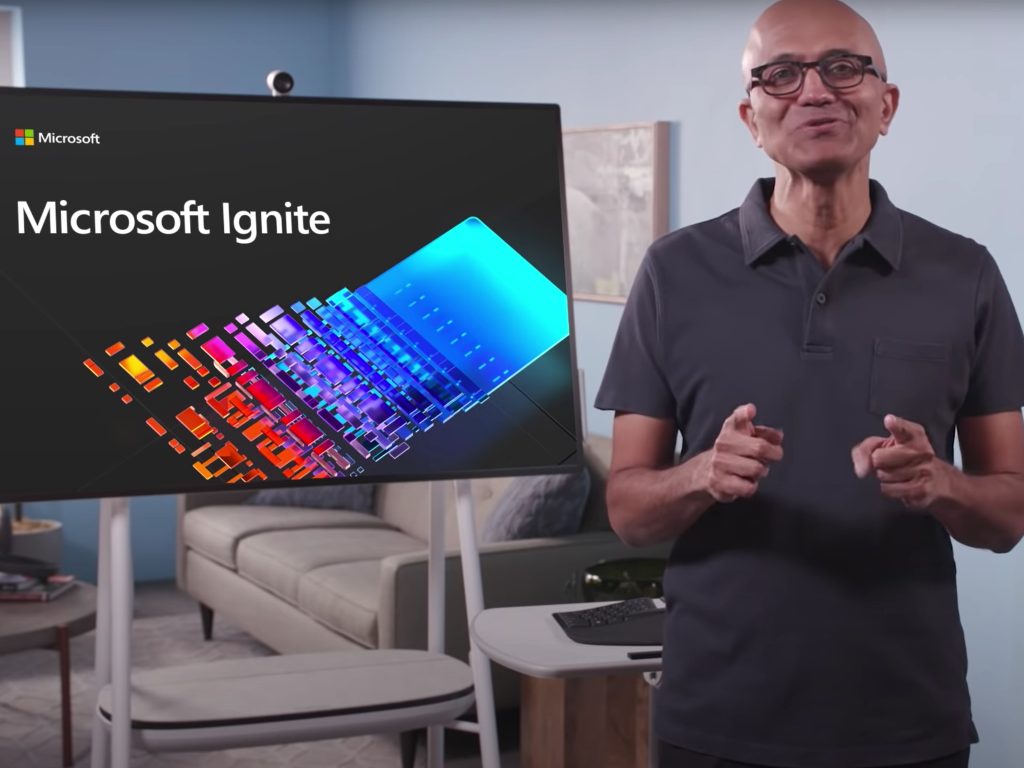
Microsoft’s annual IT and developer conference kicks off this week in an all-virtual form. It’s free for anyone to attend, which means you can sit in on virtual sessions to enjoy talks on Azure, Microsoft Edge, Windows, Mixed Reality, and more. Once you register, for free, you can add sessions to your schedule at any time by logging into the Ignite website and building your schedule. We’ve looked through the catalog and have included some of the most interesting for you below.
We also remind you that the opening keynote for Ignite is set for 8:30 AM PT on Tuesday, March 2, and also features Microsoft’s Technical Fellow – AI and Mixed Reality Alex Kipman. Of course, keep in mind that some sessions might not be announced, so best to keep your eyes peeled on the session scheduler for more as Ignite rolls on.
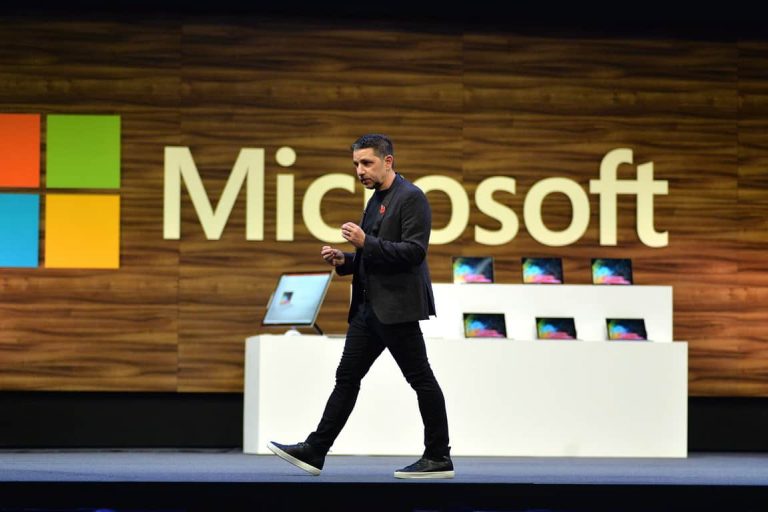
If you’re interested in Windows 10, then this session is not one for you to miss. Featuring Surface chief Panos Panay and Azure Edge + Platform CVP Roanne Sones, this session is all about how Windows is being used in modern work. Panos is set to talk about “the difference makers and recent Windows innovations for commercial customers and the IT community,” as well as “the features and innovations coming to life across Microsoft experiences and services” so this is one worth keeping an eye on.
Note that there are also separate breakout sessions for Windows 10, too. You can join Windows CVP Aidan Marcuss and pivotal members of the Windows, security, and endpoint management engineering teams in a separate“Engineer to Engineer Let’s talk Windows!” session on March 3 at 4:00 PM PT. And, for more Windows, you can join the connection zone and “Ask the Experts: Windows & Devices” session at 6:00 PM PT. This is your chance to have your Windows questions answered directly from Microsoft.
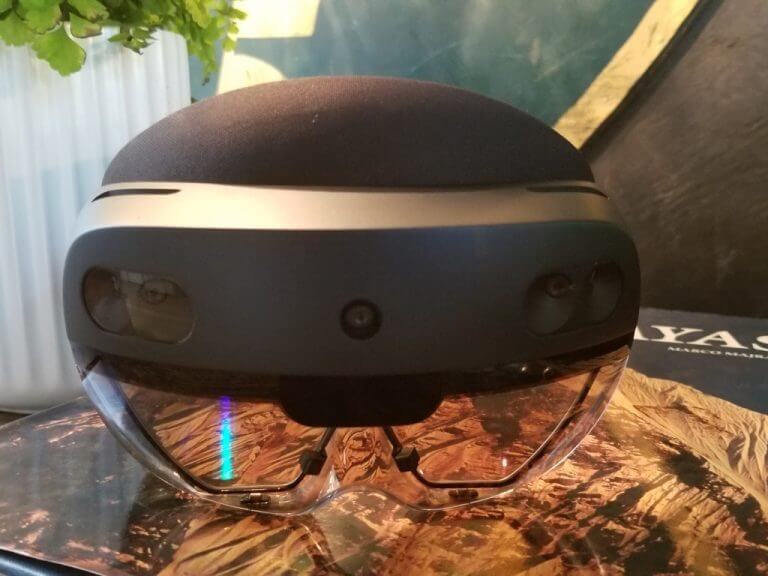
Interested in Mixed Reality after seeing Alex Kipman in the opening keynote? This session is all about Mixed Reality, and how it fits in with work. The notes for this session mention “Join us to learn more about our vision for the future of mixed reality.” so it’s likely that Microsoft could talk more about Windows Mixed Reality here, too.
This session will help you, as an IT admin understand how to roll out Microsoft Teams inside your organization. It’s set to discuss policies and security for Teams, how you can customize Teams to your organization, and a lot more.
Finally, is your company coming on board with Teams? Then this is another Teams session for you, too. Featuring Microsoft’s Westeon Lander and Jun Pak, this session is set to discuss how you can get the most out of Teams by integrating your apps and business processes into the workflows of employees. Topics include Power Platform and more.
One of the final topics on or list includes Microsoft Edge. If you’re hoping to learn more about Edge, then you won’t want to miss this session. It is set to feature Microsoft’s Colleen Williams and a look back at how far Edge has come over the past year. Also of note is a breakout session on Tuesday, March 2 at 1:00 PM PT. This one will discuss ” the latest security and productivity innovations” in Edge.
Stay tuned to OnMSFT for more!
While you’re in between Ignite sessions, you might want to keep tuned to OnMSFT. We’ll be watching these sessions right alongside you, and will keep you updated with all the latest news and information from the conference. Also, keep tuned to the OnPodcast next week, as we’ll be recapping the biggest news from the conference.
Do you want to forget about your daily problems and worries? Or maybe you just want to relax on your couch while enjoying a great evening along with your family?
Well, the best way in which you can do all that is by using a White Noise app right on your Windows 10 device.
What is white noise? Well, as the name suggests, it is a noise, or more likely a sound that is relaxing and comfortable for your ear.
By listening to white noise music you can relax your senses and you can forget about your problems. A white noise sound can be played also when you are sleeping as it will be a real “Sandman” for you.
Anyway, if you want to create a great ambiance and atmosphere in your own home, then you need to read the lines below.
During the present review I will tell you which White Noise apps to use on your Windows 10 tablet, laptop, or desktop.
Most of the tools are free distributed, so you can anytime test the software in order to see if the white noise sounds are helpful or not.
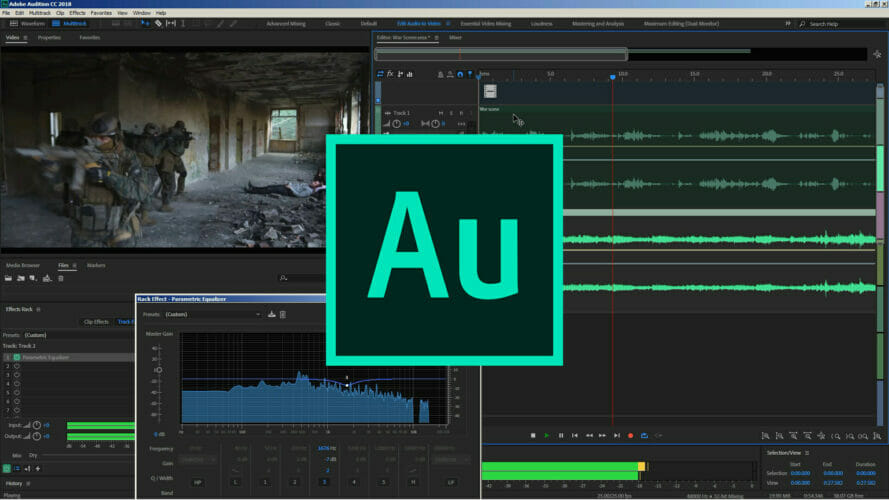
Adobe Audition is a professional audio tool that features a multitude of features that can help you make the most outstanding audio and create an atmosphere of utter relaxation.
Among its many functions, the Sound Generation tool is the one that most stands out thanks to its versatility.
You can use this tool to create sounds that imitate phenomena of nature or any other soothing musical element you can think of. It has advanced mixing features and lets you edit without altering the quality.
Great white noise generator
Professional mixing and editing abilities
Allows waveform editing view
Plug-in support for both official and user-created content
Adobe Audition
Create, mix and edit any type of sound in order to make some amazing relaxing white noise.
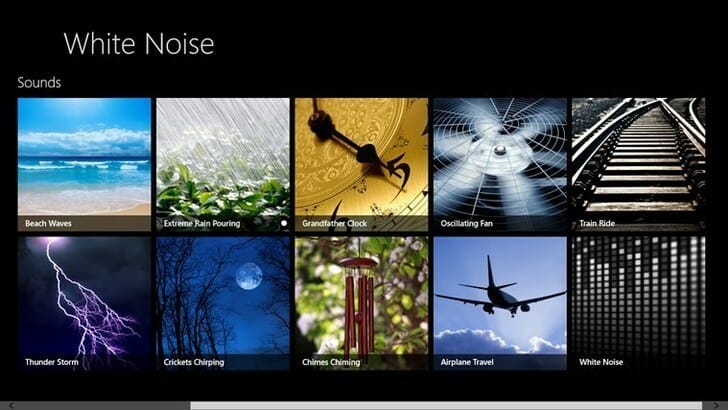
As the name suggests, White Noise is if you want, the classic white noise app available for Windows 10 devices. Among other features, White Noise includes over 50 HD popular sounds to help you sleep and relax.
With this app, you get wonderfully soothing sounds like heavy rain, ocean waves, crickets, or frogs by night, and many others.
Among the various benefits of using this app, we mention that it can help you improve your sleep, reduce your stress during the day and help you work better by helping create a relaxing mood for yourself.
You can try this app for free as you can anytime download it from Microsoft Store.
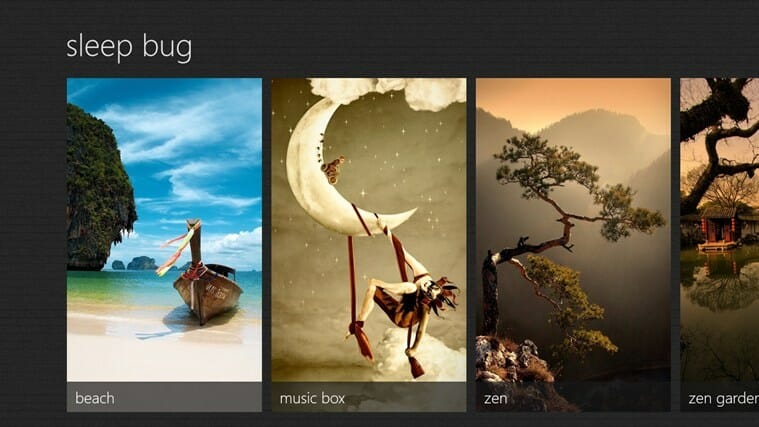
A great Windows 10 app that can relax you is Sleep Bug. The tool features more than 24 scenes, 83 audio effects, and over 300 different sounds, which will be perfect for anyone who wants to listen to white noise.
With this tool you also get 24 high-quality scenes with professional graphics, in addition time and date display and the ability to customize your video with your favorite sound effects.
Sleep Bug can be downloaded for free from Microsoft Store.
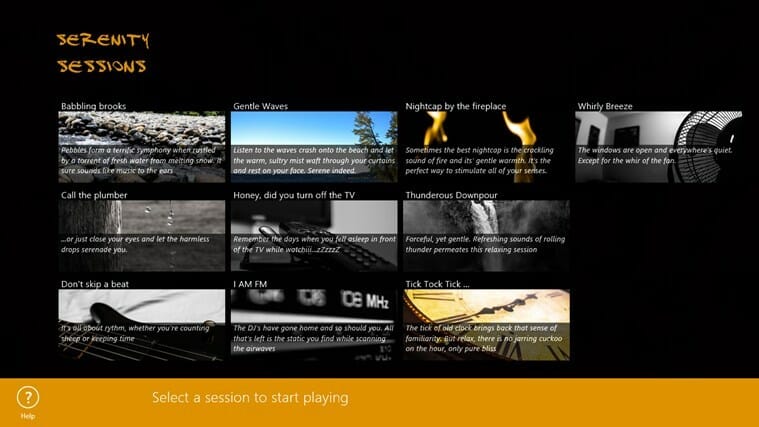
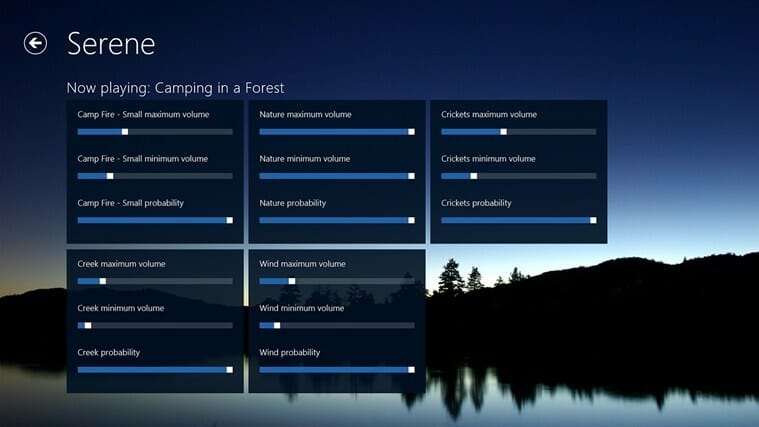
Another free distributed white noise app available for your Windows 10 device is Serenity. Basically the software is featuring a variety of very carefully hand-picked sessions with the most relaxing sounds.
Serenity provides a multitude of sound effects and images so you can create a versatile atmosphere to suit your every mood, from cascading waterfalls to abstract visual vortexes.
Thus relaxing by using Serenity will be achieved with ease, but test the app by downloading it from Microsoft Store.
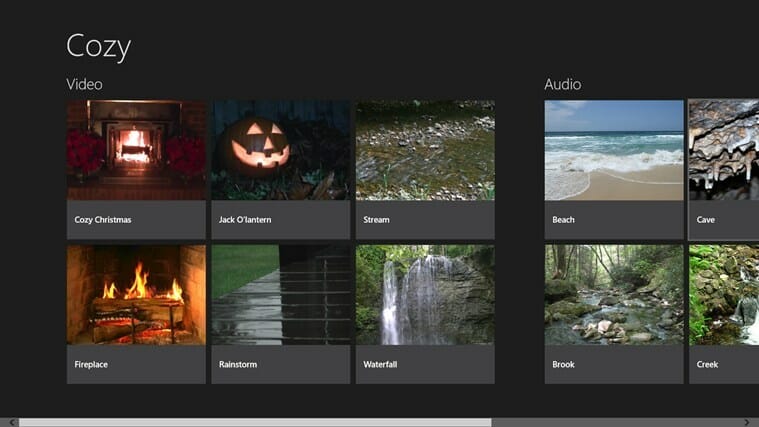
As the name suggests, Cozy is just great especially when you need to relax. You can enjoy this app alone or with your friend or family, as you can play different smooth sounds and white noise music.
Cozy offers you the complete experience of a soothing sound background combined with suitable visuals to set the atmosphere so you can relax, sleep or focus better on your work.
This white noise app for Windows 10 lets you custom-tailor ambient nature audio experiences, from rain and thunderstorms to peaceful forests and farms.
You can play a variety of sounds and ambiance music that can really make your day better. Mix your favorite nature sounds with amazing HD videos and create the most relaxing atmosphere.
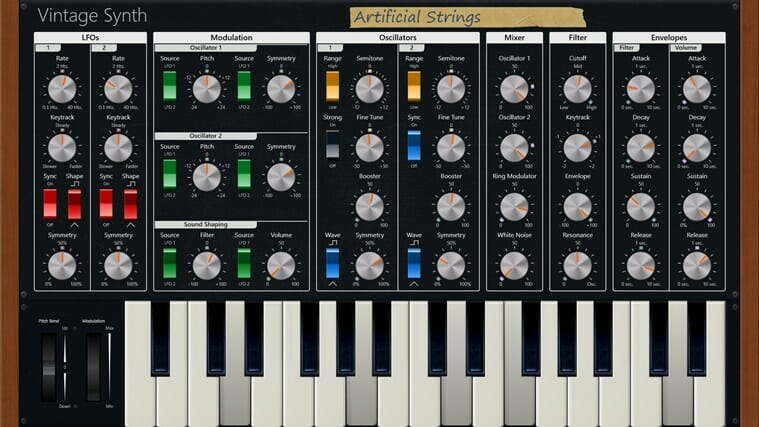
Even though this white noise app might seem a little bit too expensive for you (the tool is priced $3.99 on Microsoft Store), Vintage Synth might be the perfect choice for you, especially if you want to create your own sounds and music.
Create unprecedented sounds by using the numerous control knobs and enjoy many other dedicated features with this great white noise app for your Windows 10 device.
Perfect, now you know how to enjoy a great time with your family, or why not, alone.
The White Noise sounds that can be played by using one of the apps from above are also good for your health and for your spirit, as you can relax and think in perspective for finding better solutions to your problems.
Thus, do try the white noise therapy and then share your experience with us and with our readers by using the comments field from below.
Are you looking for a way to fix corrupt AVI files? Look no further as the Windows Report team will show you the best tools for the job.
An AVI file is a file that contains video and audio data in its format. Typically encoded within codecs such as Xvid and DivX, the AVI file format is one of the common forms of storing multimedia files.
AVI file format is popularly used for storing multimedia information and especially movies.
However, one major problem associated with AVI formats is that of corrupt AVI files. This could be caused by different reasons emanating from corrupt codex to incomplete ripping.
The article covers the following topics: how to repair broken AVI files and how to repair broken index AVI file.
What are the best tools to repair broken AVI files?
Stellar Repair for Video is at the top of our list for one reason only: it is good at what it does, and you don’t need to be an IT specialist to know how to use it.
Simply download and install it, launch it, select Add Video, Repair Video, and then wait for the program to finish.
Once it is done, you can preview the repaired video, so that you can see for yourself that everything is ok before you actually save anything.
All in all, it is great for any type of video format that may need repairing, not just AVI, so go ahead and try it.
Here are some of the perks of using Stellar Repair for Video:
Easy-to-use
Lightweight
Efficient video repair
Short video repair times
Supports all video formats
Stellar Repair for Video
Repair all of your AVI videos, and bring them back to their original stat with this amazing repair utility.
Our next entry shares the same theme as the first, whereas the software tool is made to be incredibly accessible to users of all experience levels.
To that extent, Kernel Video Repair is designed for those that want to get a job done fast without too much headache, thus allowing you to tend to other matters while the videos are being repaired.
Kernel Video Repair is very versatile in terms of what formats it supports, as it can pretty much repair issues with all video file types used nowadays.
More so, it can also be used to repair videos straight from the cameras, supporting all major brands like Canon or Nikon.
Here are some of the perks of using Kernel Video Repair:
Fast video repairs
Accessible to all users
Supports all major file formats
Doesn’t take too many system resources
Can repair files straight from the cameras
Kernel Video Repair
If you need videos to be repaired fast but without too much effort, then choosing Kernel Video Repair is your best choice yet!
This video repair tool is most useful if you’re dealing with corrupt or damaged AVI files. But of course, its healing powers extend to a much wider range of formats.
When it comes to the AVI format, in particular, you may be dealing with a no sound scenario or the video may not play at all.
While this can happen for several reasons, the solution remains the same. Install Recoverit and pick one of the 2 video repairing modes available: quick and advanced.
The process is as easy as uploading your damaged AVI file, launching the repairing mode of your choice, and saving the fixed result.
Here are some of the perks of using Recoverit:
Support batch repairing
Highly versatile and easy to use
Compatible wide a wide range of popular file formats
Repair videos from different sources
Recoverit
Dealing with corrupt or damaged AVI files? Have them fixed in no time with this best video repair tool!
This AVI repair utility is a handy tool for Windows users to fix corrupt AVI files. Jihosoft AVI Repair is developed with powerful algorithms and smart technologies that facilitate the repair process.
This tool is able to fix corrupted AVI files from both your internal system memory and external storage devices.
In addition, Jihosoft AVI Repair is small in size and can be installed on older PCs as it requires minimal system requirements from your computer.
The user interface is simple and file repairs can be started with only a few clicks. Also, AVI files can be previewed before repairing.
Jihosoft AVI Repair is a shareware that can be downloaded for free giving you access to its basic features. In order to get access to its premium features, you need to purchase it at a one-time fee.
Bandifix is a tool that is incorporated as part of the popular screen recording application Bandicam.
This tool allows you to access corrupt AVI files from your hard drive and attempt to bring back lost or corrupted AVI files.
Bandifix is free to use as this makes it handy, as a cheap method of reverting corrupted files.
However, you only need to get the Bandicam suite in order to access this utility tool. Moreover, the repair process has been confirmed to be simple and fast.
In addition, this software navigation tools have been simplified; hence, you can select the location of the corrupt AVI files and then commence the repair process.
Nevertheless, Bandifix is ideal for Bandicam users, while its major con is its absence as a stand-alone application.
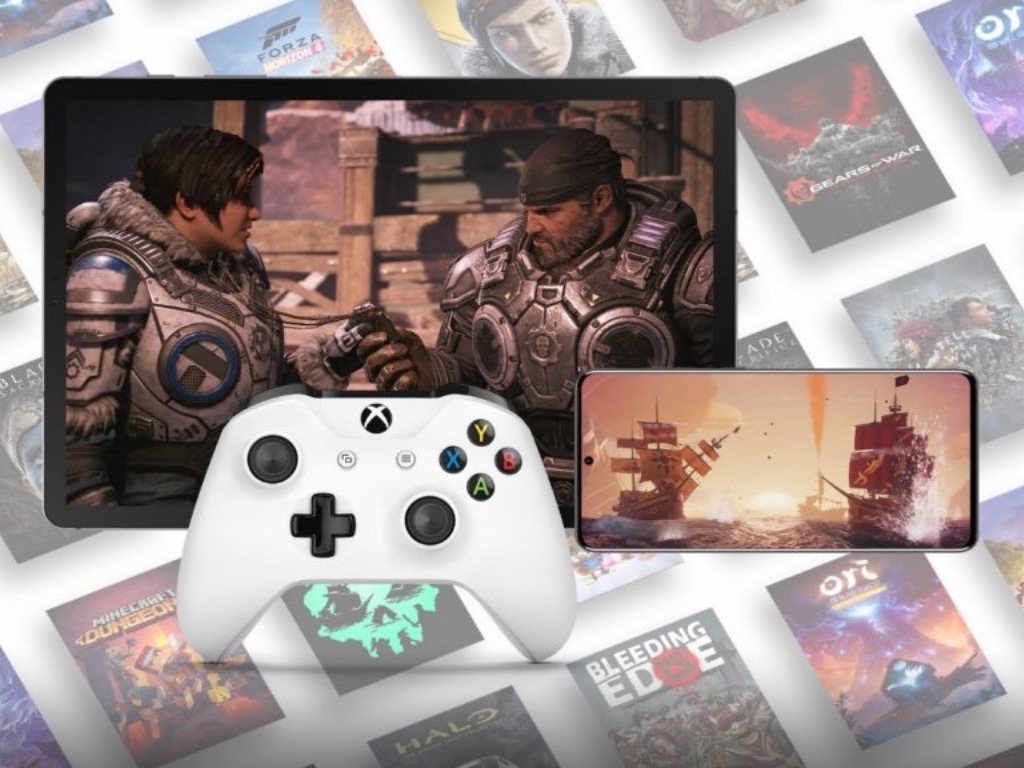
Microsoft is getting ready to increase the quality of its Xbox Cloud Gaming technology that will soon make the jump from Android to the web and Windows 10 PCs. According to The Verge, the Xbox Game Streaming app for Windows 10 that the company is testing internally can now stream Project xCloud games at 1080p, which is better than the 720p resolution currently supported by Xbox Cloud Gaming on Android devices.
The new Xbox Game Streaming for Windows 10 leaked a year ago, but it has apparently improved a lot since then. The latest version tested by The Verge supports both Xbox Cloud Gaming (Project xCloud) and Xbox Remote Play, which lets Xbox owners stream any games installed on their consoles. Notably, this app will support game streaming from Microsoft’s new Xbox Series X|S consoles, something that isn’t supported with the old Xbox Companion app for Windows 10.
scoop: here's a look at Microsoft's unreleased xCloud app for Windows. This app lets you stream Xbox games from an Xbox Series X / S console, or from xCloud. Full details here: https://t.co/ymyjQDmaeHpic.twitter.com/V3U3PXe7LO
According to The Verge, the latest version of the Xbox Game Streaming for Windows 10 that Microsoft is testing internally will also support touch controls on PCs, though that isn’t yet functional in the leaked version of the app. More and more cloud-enabled games now support touch controls on Android devices, and it will be nice to get the same touch experience on Windows 10 tablets.
We don’t know yet when Microsoft plans to make this Xbox Game Streaming generally available, but Microsoft is reportedly planning a gaming event later this month. “This event is about Microsoft’s vision for the future of gaming, so things like xCloud, Xbox Game Pass, and more ways to access Xbox,”The Verge’s Tom Warren said on Twitter. We’ll see what happens, but it’s really time for Microsoft to bring Xbox Cloud Gaming devices to more devices through the web and a dedicated Windows 10 app.
There was a time when only a select few were able to produce high-quality video footage.
This was due to the fact that such high quality demanded a steady hand and enough skill and experience to know how to hold and use the camera.
It is also worth mentioning that the video cameras used in those times were nothing like the ones available today in terms of features, quality, or stability.
What this all means is that you could immediately tell when a video product was of low quality because it lacked the masterful touch of a professional.
The video would be shaky and immediately labeled as poor or unprofessional quality.
We arrive in the present day, where everyone has a video camera. Here, people constantly record videos of different types and purposes. Vlogging is the most recent trend online.
Vloggers basically make a living out of recording themselves on a daily basis and posting that content to YouTube. This brings us to another important part of this story, which is YouTube.
The online platform has played a critical role in the evolution and popularization of video content, and it has made it extremely easy for anyone to upload and share videos.
And sure enough, the evolution of digital cameras and mobile phone cameras came soon after the popularization of YouTube, allowing everyone to film videos.
The quality of the videos became more and more jaw-dropping. Today, anyone in the world has access to the best video recording solutions which allow them to record video at insane quality standards.
The equipment is there, the software is there, and the online platform to distribute it all is also there. The only thing now on the user’s part is to make sure that the video isn’t shaky.
With so many quality enhancers surrounding the topic of video cameras, having a shaky video stands out in a negative way more than ever before.
Most devices come with integrated stabilizing software and hardware, but what about video content that’s already been filmed and looks to be having the jitters?
Here, we show you the top video stabilizer software available right now. If you’re looking to correct a shaky hand, consider these solutions for video stabilizer software.
When it comes to video stabilizing software, Adobe is in the spotlight. In fact, Premiere Elements is one of the most appreciated tools of its kind available on the market currently.
The price will obviously reflect the brand’s history and users that want to use this software will have to dig deeper into their pockets than for any other software from this list.
Premiere Elements’ strengths do not lie with overly complicated features or processes, but quite the opposite.
It’s a great pick for anyone that is looking to learn or get the gist of video editing.
While it might be a little harsh to call it software for beginners, that would be indeed the first term that pops into mind.
The reason for that is because Premiere Elements masters the basic and most needed features that are usually found within a video editor.
It does a great job with stabilizing video but also provides a set of rudimentary tools which can be successfully used by users to make their own videos.
Users that want to create their own video masterpiece can do so with the software’s simple yet efficient cut, join, trim, and other similar features.
Adobe Premiere Elements
With everything this pro-level video editing software has to offer, the result can only be amazing. Take shakiness out of your footage!
This video editing tool is one of the highest regarded solutions for making a shaky video meet the required quality standards, or in other words, get rid of its jitters.
With this software, users will be able to enjoy a wide array of functionalities such as the ability to edit Blu-Ray files.
That’s not something every video editor can boast, as Blu-Rays remain the staple in video image quality at the moment. You can add effects to your edited videos and share them on popular platforms.
The direct integration of platforms like Facebook makes the software even more attractive because they allow users to maintain connectivity with social media.
It also features support for dual audio tracking as well as non-destructive editing processes, which can be a great advantage under select circumstances.
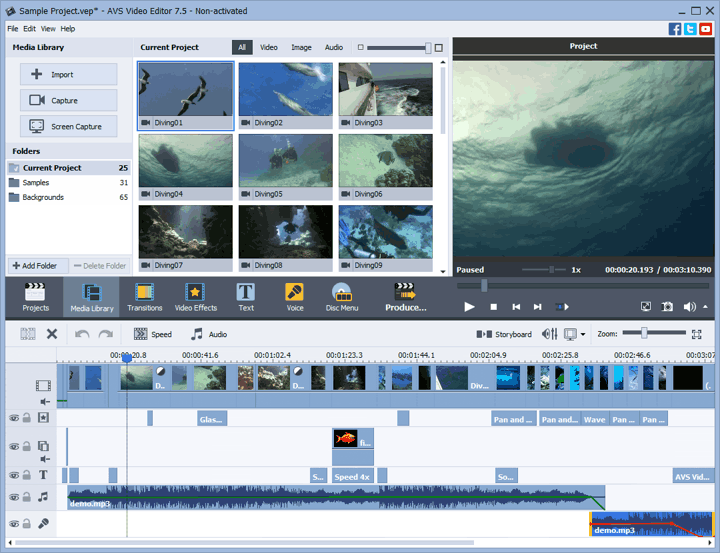
AVS Editor
Record, edit, and share your stunning video creations with no shakiness whatsoever with AVS, your end-to-end video assistant!
As you might have noticed, we have been going down this list by adding more and more easy-to-use options.
This solution for video editing is no different as Filmora offers a great experience in the form of a very easy to use interface that does its job fantastically.
Users that are looking to stabilize their video footage want nothing more than to be able to do it quick, easy, and effective.
Of course, it’s pretty hard to find such a winning trio in any kind of software, but Wondershare Filmora is definitely a good place to start in that sense.
The really easy to use interface is combined with a satisfying array of features.
When it comes to actually using the software, it’s literally as easy as dragging and dropping the video file in question onto the editing platform.
After that, you can stabilize your video footage with the click of a button, which makes Filmora one of the easiest to use programs for image stabilization out there.
Similar to the other solutions presented in this top, Filmora comes with more features and not just video stabilization.
It’s also a great platform if you’re looking to create your own videos as it provides the necessary tools to come up with professional-looking video content.
Filmora
Professional video editing at your fingertips – stabilize your footage to perfection with Filmora!
It has always made sense for hardware and software to move as a unit, meaning that the evolution of one also brings about the evolution of the other.
Today’s video editing software solutions are a clear example of how software can complement extremely advanced video and photo hardware and gear.
Those that are passionate about the video have the necessary tools to create stunning content. It is also obvious that advanced technology does not automatically eradicate human error.
However, this article is also proof that said human error can be corrected with ease with the help of the best video stabilizer software presented in this top.
Simply put, audio dubbing is when a previously recorded audio track is inserted into another medium. This technique is often used in the post-production part of a video or film.
It also has many other uses. For instance, recording over the spoken language of a foreign film into your language is also called audio dubbing.
There are many different audio dubbing software available for download, but the list below shows the best audio dubbing software on the market.
What are the best audio dubbing tools for Windows 10 PCs?
Adobe Audition CC easily makes it to the top of the list of the best audio dubbing software. Users of the software have enormous audio editing power.
You will be able to edit, mix, and create one of the best audio workstations on the market, as well as accelerate and improve your video and audio production.
Users can insert audio tracks into the desired video clip and use a wide variety of tools to edit and modify your audio track into a polished and pristine mix.
Adding sound effects, cleanups, and audio restoration is also possible. So this software really comes with everything you need to make your audio dubbing professional.
If you are someone who is easily intimidated by an intricate, complex editing tool, then you will not have to worry about Adobe Audition CC as it comes with in-depth training video guides.
With these training sessions you will quickly learn how to record, edit, mix and dub any audio tracks in a professional manner.
So, if you are looking for a highly reliable audio dubbing software for Windows, then you will want to consider Adobe Audition CC.
There is a free trial that you can download to give the program a try. Furthermore, there is a guaranteed money-back feature that you can use if you are not satisfied with the program.
Adobe Audition
Create, mix, edit, and restore your audio, video, or podcasting projects with the world’s most renowned tool.
The great thing about Magix Music Maker is that it is very user-friendly. The software features a visually engaging interface and system that is easy to navigate.
Furthermore, just because it looks simple does not mean it lacks powerful editing tools. In fact, Magix is a preferred tool among professional sound engineers.
You can easily edit and dub audio on Magix. Unfortunately, Magix is also not free. However, it is more than worth paying the price for this professional, easy-to-use audio dubbing software for Windows.
Magix Music Maker
A 3-step song maker tool, ideal for beginners, with all the features that you need to add some zest to your audio pieces.
Audacity is another free audio dubbing tool that is highly rated by both amateurs and professionals alike. The interface is very plain, but simple to use.
What it lacks in aesthetics, it makes up in functionality. For a program that is free of charge, Audacity is quite impressive.
The audio editing program offers many features such as the ability to manage multiple recording tracks, manage voice levels, record from microphone, record multiple channels.
Other features include import options, offers high-quality sound, draw tools, envelop tools, other edit tools, analysis tools, numerous plugins support, and much more.
Audacity also, of course, has the ability to audio dub.
With so many tools and features, it is not surprising that Audacity made it in the list of the best audio dubbing software for Windows. The best thing about it all is that this program is completely free.
n-Track is recordingsoftware that is highly popular, especially among professionals. While this program is primarily built for recording, it can also be used for audio dubbing.
The unique thing about n-Track is that it is available on pretty much all of the mainstream platforms. The software can be used not only on Windows, but also on Mac OS X, iOS, and Android.
Furthermore, there are numerous effects users have access to. There is even a drum sequencer module that will certainly be useful for musicians.
n-Track also supports a wide range of audio formats, so that you will most likely not have any compatibility problems.
Videos that have the MPEG or AVI format can be synced with an audio track. This means that n-Track has audio dubbing capabilities. Users also have numerous tools to edit and perfect the dubbing audio.
It is not surprising that so many professionals choose n-Track. Nevertheless, the software is quite costly and some versions may be in the three digits.
Yet, there are two types of n-Track software. An amateur can always choose the cheaper of the two first, then upgrade later once he/she becomes more accustomed to the program.
From professional productions to amateur video and audio editing, there are numerous uses for audio dubbing. Fortunately, you can choose one of the best audio dubbing software mentioned in this list.
Each of these programs will provide you the optimal tools needed to produce the ideal results for audio dubbing.
If you have any other suggestions or questions, don’t hesitate to leave them in the comments section below.
Blue Screen of Death errors can be quite problematic, and a prominent one is the VIDEO_TDR_TIMEOUT_DETECTED error. Like others before it, this issue is usually caused by hardware problems.
Irrespective of the cause, we will show you how to fix this issue in the comments below.
What is video TDR timeout detected?
TDR (Time Detection and Recovery) is a Windows feature for detecting issues with your graphics card response. Hence, if you get the VIDEO_TDR_TIMEOUT_DETECTED error, it means your graphics driver did not respond on time.
Below are some of the causes of this issue:
Outdated driver: Oftentimes, the MSDN bugcheck VIDEO_ENGINE_TIMEOUT_DETECTED error is down to a faulty or outdated graphics driver. The solution to this is to update your driver to the latest version.
Issues with the hard drive: Sometimes, this issue can also be due to problems on your hard drive. You need to repair these errors to solve the problem.
Outdated PC: In some cases, the video TDR timeout detected error can be due to an outdated operating system. The easiest way to fix this is to update your PC.
Speaking of this error, here are some similar issues that users reported:
0x117 video_tdr_timeout_detected: Sometimes, this error can have a certain number code assigned to it. However, you should be able to fix the problem by using one of our solutions.
Nvlddmkm.sys video_tdr_timeout_detected: This issue can sometimes be caused by your Nvidia drivers, and to fix the problem, update them to the latest version and check if that solves the issue.
Video_tdr_timeout_detected in Windows 7: This error can appear on other Windows versions; if you encounter it, you have to make a couple of changes in your registry to fix it.
Dxgkrnl.sys Microsoft corporation video_tdr_timeout_detected: Sometimes, a specific driver might be causing this error to appear. To fix the problem, update your drivers and check if that helps.
How can I fix Video TDR Timeout Detected?
Before proceeding to the fixes in this section, below are some troubleshooting steps to try:
Slightly overclock your graphics card.
Underclock your RAM.
Check the PC cooling system and remove dust.
Check for faulty hardware.
If this does not work, you can now explore the solutions below:
1. Use a third-party BSoD fixer
Blue screens are errors that can ruin somebody’s day at work or during light use of their device. It is important to prevent and repair such errors whenever possible.
Dedicated repair software can easily fix your system files by replacing them with fresh ones from their databases.
2. Update your graphic card drivers
Press the Windows key + X and selectDevice Manager.
Double-click Display adapters to expand it, and right-click your graphics card.
Now, select Update driver.
Finally, choose the Search automatically for drivers option and install all available updates.
One of the major causes of the VIDEO_TDR_TIMEOUT_DETECTED error is an outdated driver. If Windows could not find the latest drivers, you can go to the manufacturer’s website to download and install them.
Also, some users recommend downgrading your drivers if updating them does not work.
Alternatively, you can fix this driver issue for good with a dedicated updater in Outbyte Driver Updater.
This third-party program can automatically update any drivers easily. You just need to install it and let it run its course, and you’ll have the latest drivers installed in no time.
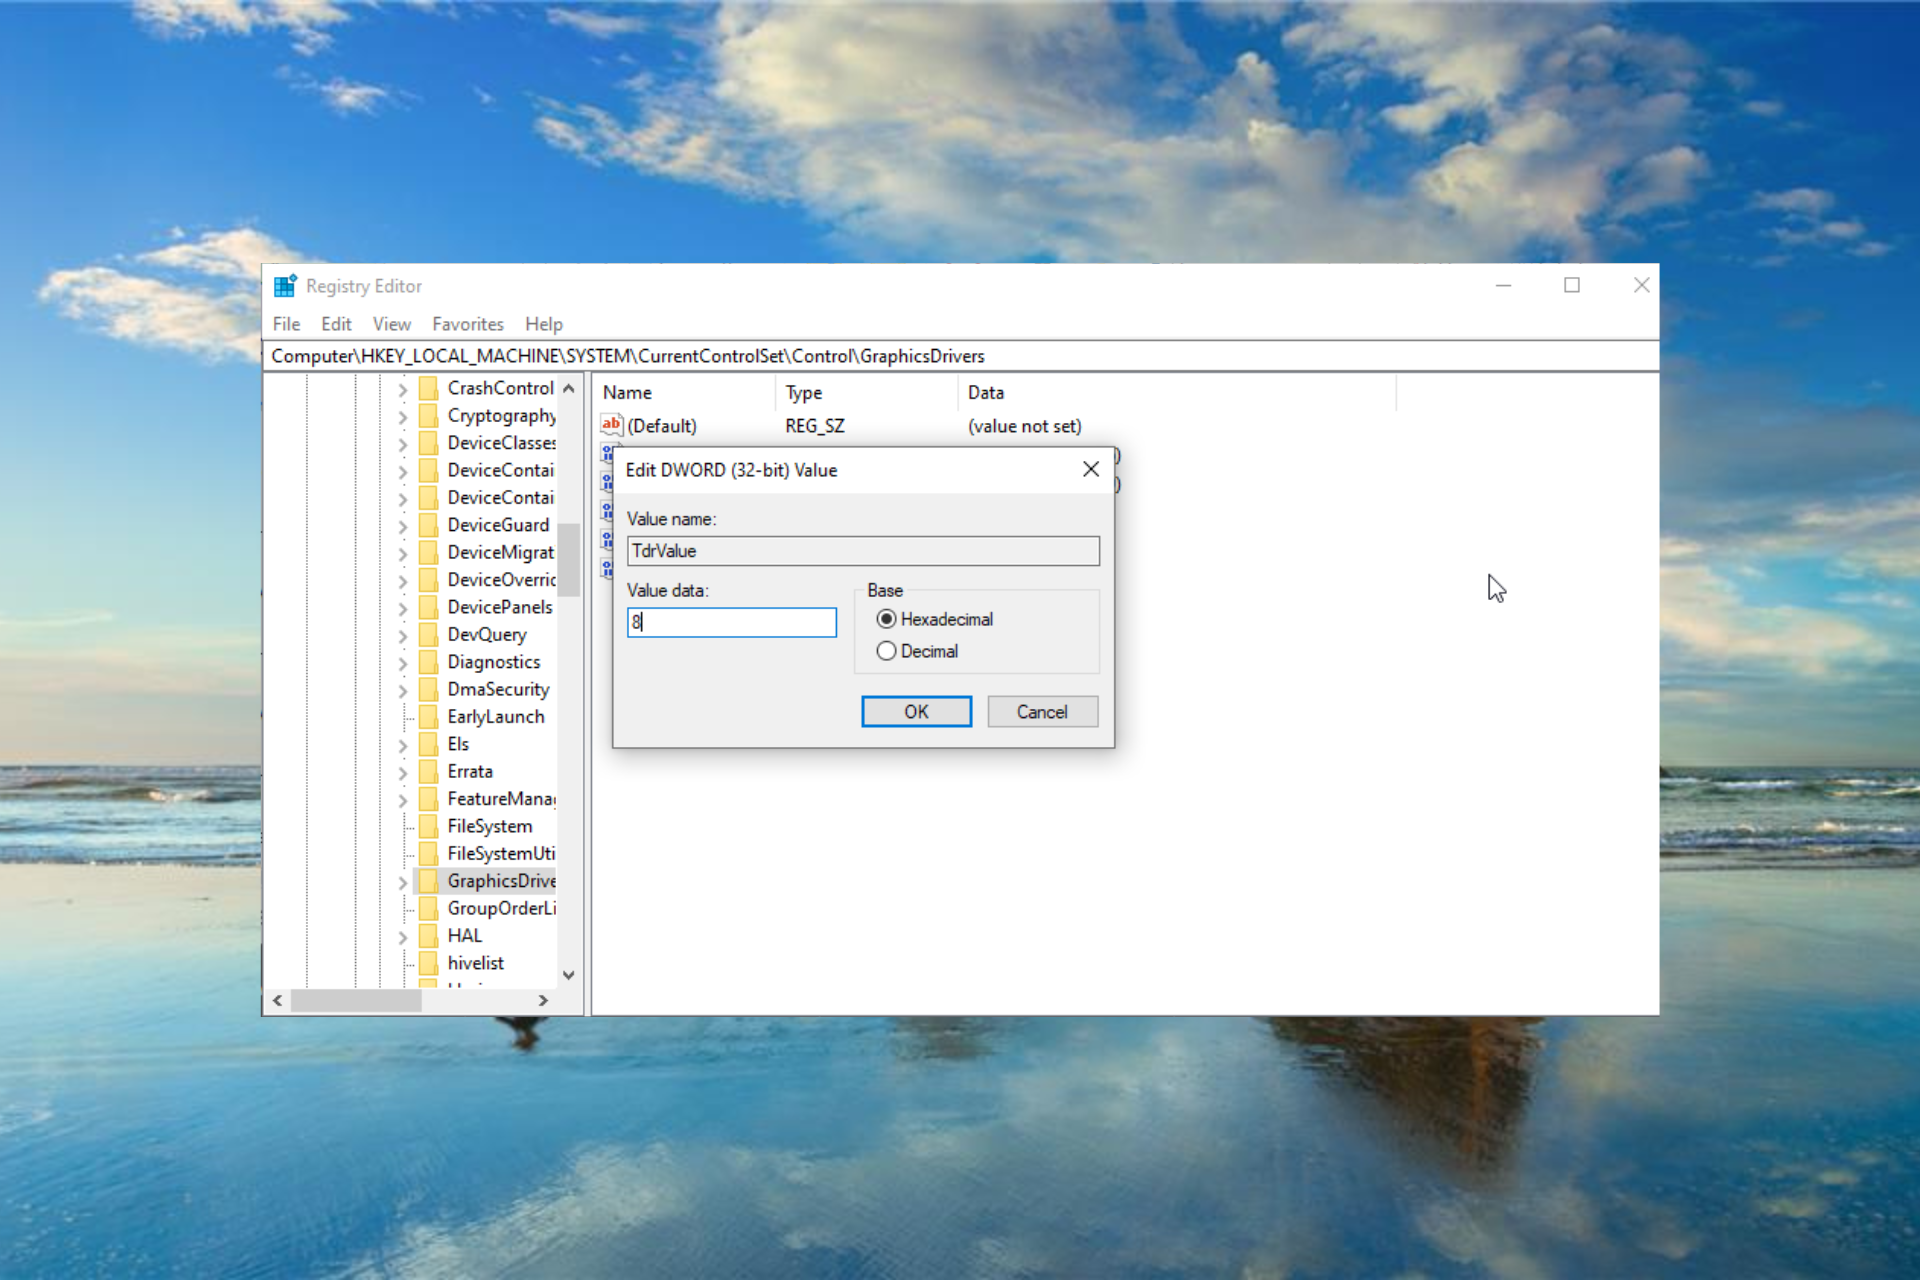
Press the Windows key + R, type regedit, and click OK.
Now, navigate to the path below in the left pane: HKEY_LOCAL_MACHINE/SYSTEM/CurrentControlSet/Control/GraphicsDrivers
Check if you have TdrValue DWORD in the right pane. If no such entry is available, follow the steps below to create it:
Right-click the empty space in the right pane and choose New > DWORD (32-bit) Value.
Enter TdrDelay as the name of the new DWORD.
Double-click the new TdrDelay DWORD and set its Value Data to 8 or even 10.
Finally, click OK and close the Registry Editor.
Windows has a special value in the registry called TdrDelay, and this value is designed to check how long it takes for your graphic card to respond.
So, if your graphic card doesn’t respond within the set time frame, it will crash and restart itself. You can fix the VIDEO_TDR_TIMEOUT_DETECTED BSoD error by changing the TdrDelay value.
Press the Windows key + I to open the Settings app and select the Updates & Security option.
Click the Check for updates button.
Finally, install all available updates, including the optional ones.
If your PC keeps crashing due to VIDEO_TDR_TIMEOUT_DETECTED error, the problem might be a missing update. So, you need to check for and update the latest patches on your PC.
5. Check the hard drive for bad sectors
Press the Windows key + S, type cmd, and click Run as administrator under Command Prompt.
Now, type the command below and hit Enter: chkdsk c: /r
Finally, press Y when prompted and the scan will start after restarting your PC.
In some cases, the VIDEO_TDR_TIMEOUT_DETECTED error can be due to corrupt files on your hard disk. What you need to do is to run the CHKDSK command.
6. Run the Memory Diagnostic tool in Safe Mode
Press the Windows key + I and select Update & Security.
Choose Recovery in the left pane and click the Restart now button under Advanced startup.
When your PC restarts, select Troubleshoot > Advanced options.
Now, choose Startup Settings.
Click the Restart button.
Press 4 or F4 when your PC restarts to Enable Safe Mode.
When your PC boots up, press the Windows key + R, type mdsched.exe, and click OK.
Finally, select Restart now and check for problems (recommended) and wait for the scan to start.
Sometimes, the VIDEO_TDR_TIMEOUT_DETECTED error can be due to issues with your RAM. The solution is to run the Memory Diagnostic tool in Safe Mode.
7. Perform a System Restore
Press the Windows key + R, type rstrui.exe, and click OK.
When System Restore window opens, click Next.
Now, select the desired restore point and click Next.
Finally, click the Finish button and follow the instructions on the screen to complete the restoration process.
If this error started appearing recently, it may be caused by a problematic driver or an update. To fix this error, we advise you to perform System Restore.
If you’re unfamiliar, System Restore allows you to restore your system and fix various problems. Once you restore the system, check if the problem is still there. However, keep an eye out for driver and system updates.
A game engine is a software development environment for game developers to build games without having to hard-code every instance of the game from scratch.
Modern game engines offer a highly customizable platform with many libraries, effects, and modules to create anything and everything from scratch.
Depending on the developer requirement, game engines come in multiple options and supports all or a few selected platforms.
For an individual and small team, there are free and open-source game engines with cross-platform support.
For large teams with complex game development projects, Unity and Unreal are among the top engines used by some of the major game studios in the industry.
If you are new to game development or looking to upgrade to a more advanced game engine, we have put together a list of game engines that will work irrespective of the platform offering flexibility and precise control over development.
Tip
Any cross-platform game development framework supports both 2D and 3D game development. They also allow you to import art and assets from third-party image editing platforms such as Maya and Photoshop to assemble and create scenes and environments for your project.
Adobe Photoshop
Create stunning visuals with the latest Photoshop version and further export them to your preferred game engine to unleash the adventure.
Price – Free / Premium version starts at $40 per month.
Supported platforms – Windows, Linux, Mac, Smartphone, and Console
From Electronic Arts to Ubisoft, Unity is one of the highly preferred game engines by some of the major game developers in the industry. Unity is the Unreal Engine of the mobile game development environment.
Unity comes in multiple plans. Beginning with the free personal plan for beginners, Plus plan for hobbyists, and Pro plan for professionals.
Unity offers a real-time flexible development platform not just for gaming but also for the automotive, animation, and cinema industry.
The developers get access to an all-in-one editor for designing immersive experiences and game worlds, AI pathfinding tools, efficient workflow with preconfigured game objects, and the ability to create a fast and intuitive user interface.
Unity supports all the industry-leading platforms including Windows, Android, iOS, Linux, game console and more. It is also one of the front runners in the VR gaming market.
Price – Free to use / Custom licensing on upfront fee is also available
Supported platforms – Windows, Mac, Linux, Smartphone, and Console
Unreal Engine arguably is one of the popular game engines in the world. With a portfolio that features Capcom, Activision, and Ubisoft, it is no wonder a top-class product when it comes to PC and console game development.
Unreal Engine has a unique pricing structure. Instead of charging an upfront fixed fee, the company offers the entire suite for free.
However, the developers are required to pay a percentage royalty fee on the gross revenue after the first $3000 (per quarter), which is a win-win for both the parties. Or you can opt for a custom license by paying an upfront fee and remove or eliminate royalty terms.
Unreal Engine is a full product suite and does not require additional third-party plugins to produce the game.
It offers features like Blueprint to create prototypes without coding, Sequencer to gain access to animation and cinematic tools, photoreal rendering in real time, lifelike animations, pre-designed templates and tons of learning resources.
Developers can extend the functionality by purchasing assets from the Assets Marketplace integrated into the game engine. Unreal Engine also offers a solid foundation to build VR contents on all the platforms.
Don’t like to pay an upfront fee or royalty? Try LibGDX. It might not be as sophisticated as Unity or Unreal Engine, but it is one of the best game development frameworks for independent developers and small teams building mobile and web games.
LibGD is known for its exceptional cross-platform compatibility, although it does not offer a one-click solution for everything, it is fairly easy to get started.
To use LibGDX you need a basic understanding of object-oriented programming. For anything else, refer to the online resources for beginners and ask in the community for any uncovered issues.
On the flipside, LibGDX doesn’t have any GUI which forces you to put in a lot of labor just to check the positioning of assets and game environment.
This is where engines like Unreal Engine and Unity shine the most with their simple drag and drop functionality and assets management.
LibGDX is an excellent game development framework for anyone with basic knowledge of programming and has a passion for learning the fundamentals of game development through a lot of coding.
Above all, it is free, which can be a driving factor for many novice game developers.
Supported platforms – Window, macOS, Linux, Smartphone, and Console
Godot Engine is another free and open-source cross-platform game engine with both 2D and 3D development support. It comes with all the tools to create your first mobile game and launch it on multiple platforms in no time.
Godot comes with hundreds of built-in nodes that help in the game designing process. If need be, developers can create custom nodes and editors to meet their requirements.
Other features offered by Godot include a flexible scene system, visual editor, friendly content creation pipeline, and persistent live editing to retain the changes even after stopping the game.
Godot is an excellent light-weight game engine packing enough punch to launch your game development carrier provided that you have worked with Python or C# / C++ before or ready to learn it from scratch.
Supported platform – Windows, macOS, Linux, Smartphone, and Console
CryEngine is a fully-featured game development engine with top-notch features to create a world-class gaming experience.
Similar to the Unreal Engine, CryEngine also uses the royalty-based pricing structure to generate revenue.
CryEngine offers state-of-the-art visuals with a Physically Based Rendering model. The Sandbox provides all the tools to create a stunning experience with a click of a button.
CryEngine allows you to design and develop lifelike characters and animations, built-in physics and audio solutions for life-life interaction, and real-time visualization, interaction, and immersion to enhance the gaming experience.
Cross-platform support means the game can be published on multiple platforms with some changes to the code.
All the game engines listed in this article offer advanced game development features to create stunning 2D/3D games for all the major platforms with ease.
What game engines to use is purely a personal choice, and once you master the framework, everything looks easy. Go through all the game engine recommendations in this article and see which software meets your requirements the most.
CGI (Common Gateway Interface) is a type of script file incorporated in website pages.
The CGI scripts are primarily for web forms and search boxes. For example, many developers add CGI scripts to pages that send out form data to email addresses.
The Common Gateway Interface files are essentially text documents that include scripts. Perl is the most common programming language for CGI scripts.
However, developers can also code them in C. All you need in order to open a CGI file is a text editor that supports this format.
How do I open a CGI file on my Windows PC?
1. Use Adobe Dreamweaver
IF you are serious about web development, then a great place to start is with Adobe Dreamweaver.
This web development platform is designed to easily get you started in visually creating web pages and as you progress, you can start working with scripts.
Using the simplified coding engine, you can easily get started in learning HTM or CSS and reduce errors thanks to the built-in visual aids.
However, if you want to skip all of that, there are thousands of templates you can use and modify to suit your website.
The pages you can create with Adobe Dreamweaver look stunning, and they change dynamically depending on what device you’re viewing them on.
Some of the features to look forward to when using Dreamweaver is the multi-monitor support, the live view editing, as well as the easy-to use UI.
This great software is also compatible with a multitude of formats such as HTML, CSS, JavaScript and many more.
Adobe Dreamweaver
Get a professional and easy to use tool that can help you open a multitude of formats especially CGI files!
Download the Notepad++ setup wizard to Windows. The software has 32 and 64-bit versions, so click Notepad++ Installer 32-bit x86 if you have a 32-bit Windows system.
Open the software’s installer from your browser’s download folder. Run through the setup wizard to install it, and open the program‘s window below.
Then you can click File, then access Open and select the CGI file to open in Notepad++.
There are numerous programs you can open CGI files with. Third-party software isn’t even required as you can open them in Notepad. However, the Notepad text editor doesn’t have any options or tools for scripting.
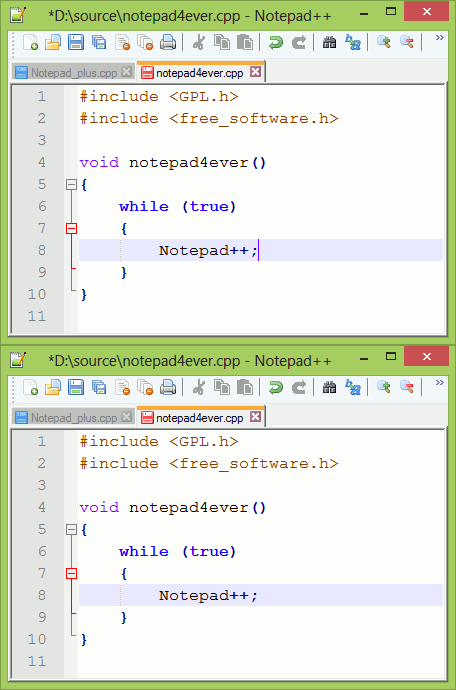
So if you’re wondering how to how to open a CGI file, Notepad++ is a much better text editor that supports this type of format. The best thing about Notepad++ is that it includes syntax highlight and folding.
As such, this is a great software for editing CGI scripts. It also has a customizable GUI and a tabbed UI design that enables users to open multiple files within one window.
First, open the PDF24 converter page in your browser. That converts CGI and other file formats to PDF.
Press the Choose file button, and then select the CGI file to convert.
Press Go to convert the file to PDF.
Click the Download button to save the PDF.
You can open the CGI script in Chrome by right-clicking its PDF and selecting Open with. Select to open it with the Google Chrome browser.
You can also open the document with alternative PDF software, such as Adobe Acrobat and Foxit.
You can also open CGI documents by using Google Chrome in order to convert your CGI file to PDF.
Chrome has its own PDF viewer that opens the documents in tabs. However, you can’t edit the documents in the browser unless you add an extension to it.
You’re not really opening the CGI file, but the PDF will include all its script. This is how you can convert a CGI file to PDF format.
So you can open a CGI file in Notepad++ and Chrome. Vim, EditRocket, and gVim are alternative software that also supports the file format.
If you need to edit the CGI script, open the file in Notepad++. Convert the CGI to PDF if you only want to share or print the file.
We’d like to hear more from you on this subject so drop us a comment in the dedicated section below.
Microsoft Visio is a diagramming and vector graphics application, part of the Office 365 family. It includes an online, web-based version, as well as APIs dedicated to developers. Visio can be used with the latest version of the most popular browsers
The app was launched in 1992 by Shapeware Corporation. Then, in 2000 it was acquired by Microsoft, which further improved it and added Visio Online, which allowed users to access the app from any of the supported browsers.
What is Microsoft Visio used for?
Visio is the ideal app for those who love working with diagrams, mind maps, or similar visuals and get their ideas together in a comprehensive graphic to ease their work.
The program includes a variety of network and flowchart templates, shapes, and connector tools.
Of course, the program is integrated with other Microsoft apps, including SharePoint. This makes it extremely easy to use Visio with your team and collaborate on various workflows, projects, and flowcharts.
For developers, Visio also includes JavaScript APIs, which allow access to embedded Visio Online diagrams in a SharePoint Online page. So developers can interact with Visio diagram elements, write custom handlers for mouse events, create visual mark-ups on the diagram canvas, and more.
How can I install and use Visio?
Currently, Visio comes in two plans; one of them is rather web-oriented, while the other includes desktop capabilities.
Key features of Visio Plan 1:
Visio web-version + 2 GB of OneDrive for Business cloud space
Dozens of professional templates, starter diagrams, and shapes
Integration with Microsoft Teams and any other Microsoft 365 app
Possibility to embed Visio diagrams into Power BI reports
Access to your work from almost anywhere, on any device.
Visio Plan 1
The diagramming app that makes ideas stick like nothing else thanks to the visually rich features it brings.
As you can imagine, Plan 1 is perfect for personal use, for both educational and professional purposes. Since it is available for use on a single device, if you need multiple use, you can get Visio Plan 2.
Key features of Visio Plan 2:
Use on up to five PCs + 2 GB of OneDrive for Business cloud storage
Exclusive options such as export to Microsoft Flow or Word, Excel data visualizer, and PowerPoint slide snippets
Auto-generation of org charts from data sources like Excel, Exchange, or Azure Active Directory.
Visio Plan 2
Get exclusive access to Visio’s awesome graphic capabilities and powerful integrations with all of Microsoft’s Office suite.
You directly access Visio web version by signing in with a work or school account. It doesn’t require installation, since it’s web-based.
However, your browser needs to be updated. Edge is a reliable Visio viewer tool, but so are IE 11, Chrome, Mozilla, or Safari 10+.
On the other hand, you can also use Visio for free. That is, the web version offers a limited access to basic Visio, in which you can only view files. You need a Microsoft account, though.
If you already have some experience with Visio, share it with us in the comments section.
People generally tend to believe that creating complex real-life 3D designs or virtual characters would be harder than creating 2D pixel art graphics, but the complexity of both these options is very similar in reality.
Creating 2D pixel art takes a lot more time because you have to design every pixel. Having a well-constructed plan is essential for good-looking results.
The planning of each element in your design will take a fair amount of time, and automating the process isn’t recommended because of the low-quality results.
In order to make the entire 2D pixel art creation far easier to deal with and handle, one of the best ways is to use vector graphics.
Vector graphics can be found inside the most powerful 2D design software, but not all of them allow you to use the vectors you created to transform them into pixel art.
In this article, we will explore some of the best software options that allow you to easily transform your vector graphics into sprites (2D pixel art), and can also automate most of the repetitive processes.
Adobe Illustrator is the software everyone thinks about when discussing vector drawing apps, and it has been a staple in the field since its release in 1987.
Since then, the software has evolved constantly, getting even more and more powerful as time passed. Adobe is one of the leaders of graphic design software, offering an all-encompassing suite called Adobe Creative Cloud.
Compared to any other software found in the Creative Cloud from Adobe, Illustrator is perfectly designed to deal with vectors, and so, extremely useful when it comes to creating 2D pixel art as well.
Adobe Illustrator CC has a powerful and intelligent properties panel that offers you the power to make the entire creation process faster, more streamlined.
You get instant access to different settings and controls of your project – tools, effects, and other options like the ability to rotate and skew your vector, and also modify stroke, color, and added effects.
Even though Illustrator doesn’t have the same amount of effects as there are in, for example, Adobe Photoshop, this software is very useful if you want to create the base of your 2D project design.
Even though the number of image editing tools and filters is limited, Illustrator makes up for it by offering you easy access.
This software also allows SVG color fonts, which now enable you to add multiple colors and gradients to a single glyph.
This gives you great freedom to customize and choose the best color gradients, size, slant of fonts for your project, faster and more efficiently.
If you want to see a step-by-step guide relating to how to create pixel art in this software, you can visit the official Adobe Illustrator help page.
Adobe Illustrator
For awesome graphics and stylish effects, edit your 2D project designs with Illustrator.
Corel Draw is an incredibly powerful graphics software that allows you to transform your 2D vectors into sprites. This software is designed to be used both by professionals and newbies alike.
This software has a wide range of features that allow you to use it in a great number of domains – tracing images, art, typography, illustration creator, etc.
Corel Draw was designed to simplify your access to its tools, and also in order for it to be automated by the use of in-app scripts. One of the best examples of useful tools is the ability to use the Symmetry tool.
This tool allows you to shorten the time that you spend aligning every aspect of your design, by composing a mirror image of your selected element that is synced up to the other part.
This feature is extremely useful if you’re trying to create symmetrical designs for human faces, animals, etc. You do the hard work on one side and then you are able to instantly produce a mirror image of it.
This process, obviously, reduces the creation process to half of the initial time, which makes it incredibly useful for big projects.
This software is compatible with all CAD and design software out on the market, allowing you to import and export your files with ease, and not worry about transforming formats manually.
If you want to explore a complete list of capabilities found in Corel Draw, you can visit the official Corel features page.
Corel Draw
All-in-one vector illustration, layout, pixel-based design, image & photo editing tools for any visual projects you might have.
Toon Boom is another great drawing and animation software that allows you to create 2D pixel art, but it requires that you have some experience in this domain.
This software is specifically designed to deal with 2D projects and has been used to create some of the most popular animated TV shows – The Simpsons, Bob’s Burgers, Rick, and Morty, etc.
Using the great spriting features found in this software allows you to create characters and animate them to your will.
Start designing your 2D pixel-based objects or characters by directly drawing in them. Import objects/character designs from other compatible software and then turn them into sprites, by using Toon Boom.
You can set custom levels to any of the brushes found in this software, allowing you to perfectly imitate the traditional paper and pencil environment.
Another very useful feature found in this software, allows you to draw your designs on paper, and then, by using the built-in scanning features, can transform it into digital work.
If you feel like you need a step-by-step guide that shows you how to create 2D pixel art using Toon Boom, you can check out the official Toon Boom Harmony tutorial webpage.
Gnu Image Manipulation Program (GIMP), is another great software tool that allows you to create 2D pixel art with ease. The tools feature found in this software cover your entire digital image creation process.
Because GIMP is open-source software, it constantly evolves with the help of the GIMP community.
People can send bug reports and solve any other issues the program might have, allowing this software to adapt to the users and not the other way around.
One of the best features of this software is that users can even create their own plug-ins from scratch and share them with the ever-growing GIMP community.
Here are some of the most notable features found in GIMP:
Edits images with a great range of quality tools – retouch, restore, etc.
Supports different programming languages – C, C++, Perl, Python, Scheme, etc.
It has 4 themes included that you can switch as you please
Can customize the size of icons to 4 different sizes
GEGL image processing
Multi-threading – uses multiple cores of your PC for faster processing speeds
LittleCMS v2 – can use ICC v4 color profiles – for easier management of colors
You can find a good set of tutorials that cover a wide range of topics – including how to create amazing 2D pixel art – on the official GIMP website.
Inkscape is another greatly useful software option that gives you a simple-to-use graphics application and contains all the tools needed for creating incredible vector graphics.
Even though Inkscape offers a great set of features, one of this software’s downsides is its lagging processes.
It can become frustrating after using it for a long time, but considering the tools that it contains, and the fact that it’s free, makes it is a good competitor for Corel Draw or Adobe Illustrator.
This software offers you a great number of pre-set filters that you can use to customize your 2D pixel art even further, and also gives you access to textures and overlays.
As you would expect from a graphic editing application, Inkscape also has the ability to use layers, can add shapes (both pre-made and created by you), and can also add text and fills to your project.
You can check out this post from the official Inkscape forums, to find out more about how to create 2D pixel art.
If you feel like you need a tutorial to help you get started using Inkscape, you can find a great set of guides on the official Inkscape tutorials page.
List, we explored some of the best software options on the market that allow you to create amazing 2D pixel art from the comfort of your own PC.
The features that all of these software options covers will surely get you started on your 2D creation journey. We even included links with tutorials from their official page, which will surely help you to start creating 2D art.
We would love to find out what your opinion is, and what software you chose from this list for your own use. Please feel free to let us know in the comment section found at the bottom of this page.
Adobe Photoshop might be one of the best image editors, but some users have said that it displays a message that reads could not print because of a program error.
This alert obviously pops up when they try to print photos with that application.
Users can still print some images with Photoshop. However, they can’t print photographs with the image editor when the program error arises.
In this article, we’re analyzing some easy solutions on how you can fix the problem regarding the Photoshop printing issue.
How do I fix Photoshop Program error?
1. Reset Photoshop’s Print Preferences
Users have widely confirmed that resetting Photoshop’s printer preferences fixes the program error. To do that, click File to open that menu.
Press and hold the Spacebar.
Then click the Print option when pressing the Spacebar.
Resetting the Photoshop print settings may be a solution when you encounter a message that says could not export the clipboard because of a program error.
If this solution doesn’t fix the problem check out the next solution.
2. Save the Photo as a New File
In addition, users can try saving the photograph as a new file to rewrite it. Click File and then select the Save As option.
Enter an alternative title for the file.
In addition, select an alternative file format for the photo.
Then press the Save button.
Trying to save the photo you are trying to print as a new file is also an efficient solution when Photoshop displays a message that says could not print because of a program error.
3. Check Print Settings
The image might not print due to some print settings. So, check the paper feed setting matches the actual paper in the printer.
Make sure the right paper size is selected. In addition, check the media type is correctly configured.
Checking the print setting is another viable option that can help you when you confront an alert in Photoshop that says could not export the clipboard because of a program error.
Note that not all printer drivers support 16-bit printing, so some users might need to deselect the 16 Bit Output option.
4. Print the photo with alternative software
This isn’t exactly a fix, but users might find they can print the same photos with alternative software.
You can bypass the print issue that you have with Photoshop by temporarily using another program such as Paint or Photos app.
The program error is usually more specifically a Photoshop issue, and users have confirmed they can still print the required photos with other software ok.
So, try printing the same photographs with the mentioned alternative programs and you will get the job done.
5. Install the latest version of Photoshop
It is possible to encounter this error due to corrupted install files in your photo editing software.
The easiest method to eliminate this possibility is by uninstalling the current program you are using and downloading it again from Adobe’s official page.
By doing so, you also ensure that you have the very last version of Photoshop available with all the latest patches and enhancements.
Adobe Photoshop
Trust this professional photo-editing software with built-in special effects to create high-quality visuals!
These are some of the resolutions that might fix the problem you encounter when Adobe Photoshop displays a message that reads could not print because of a program error.
Have you encountered this issue yet? Share your experience and impressions with us in the comments section below.
Adobe Photoshop is an industry-standard when it comes to image editing and manipulation software for the Windows platform.
In order to protect your work, Photoshop automatically locks the background, and if you wish to unlock the layer you will have to manually tell Photoshop to allow you.
However, some users have reported that they are not unable to work with any images due to a Not a PNG file error. If the user clicks on OK, the image doesn’t load into the Work area.
Locked layers ensure that you don’t accidentally make changes to original images or sections of your work. This is why any image you open is locked from the get-go, labeled a background layer.
Photoshop does not want you to accidentally ruin the original photo. That doesn’t mean that there aren’t ways to adjust locked layers, however.
How to unlock layers in Adobe Photoshop?
1. Update Photoshop to the latest version
Keep in mind that if you wish to benefit from the latest security patches, bug-fixes, and the latest features, you will need to update Photoshop regularly.
Adobe has added many features with each update Photoshop becomes better with each version.
It is important to download your software from official sources whenever possible. This way you protect yourself from malware attacks and ensure that your software is running smoothly.
To convert the background to a new layer that isn’t locked:
Select Layer, then New.
Choose Layer from Background.
Give the layer a name and select OK.
The new, unlocked layer will replace the background layer in the palette.
3. Unlock other layers
Open your image in Photoshop.
Make sure that the Layers panel is visible by clicking Windows at the top of the screen and checking for the checkmark to the left of the Layers option. If the checkmark is there, then the Layers panel is visible. If the checkmark is not there, then select the Layers option.
Select the locked layer by clicking it in the Layers panel.
Click the lock icon to the right of the layer name, then drag it to the trash can at the bottom of the Layers panel.
The lock icon should disappear, allowing you to freely edit the contents of that layer.
4. Rasterize or edit smart objects
Right-click on the smart object
Select Rasterize Layer
If you don’t wish to rasterize the smart object, then you can double-click and open it separately. Here you can make adjustments to it and when you save it, it will update in the main document.
Smart objects are extremely useful tools in Photoshop. They allow you to create a document within a document and add multiple effects and composites to a specific item rather than the entire document.
Those are some of the resolutions that might fix the program error for Photoshop users. Then users can print the photos they need to from Photoshop again.
If you just bought a GoPro camera and you’re looking for reliable software to edit your videos, you’ve come to the right place. In this article, we’re going to list the best software for GoPro videos.
You can use these tools to edit your GoPro videos on your Windows PC. We carefully the best software to edit GoPro videos, using a series of clear criteria: ease of use, features, user reviews, and more.
Adobe‘s software really don’t need any introduction. When you opt for a tool created by this company, quality is guaranteed, and this is valid for Adobe Premiere as well.
For GoPro videos, we recommend using two different tools, depending on your needs. If you’re a professional, go for Adobe Premiere Pro; for personal use, choose Adobe Premiere.
Adobe Premiere Elements is perfect for editing family-related videos and special events. The tool automates video organizing, allowing you to quickly find videos by the places, albums, and other criteria.
Of course, you can also edit the respective videos, remove unwanted footage, sharpen videos with the Haze Removal feature, fix color and lighting, etc.
Once you’re happy with the end result, you can share your creations on social media.
Adobe Premiere Elements
Elements is a great video editor whether there are home recordings or adventure-full GoPro action videos.
Adobe Premiere Pro lets you access and share all your videos across all your apps and devices. The software is the top-of-the-line choice in almost any graphics-related design.
You can use the software to edit any videos, including virtual reality and 8K footage in native format, in virtually any way. In addition, it has a wide variety of features that will greatly improve your result.
You will be able to transform your GoPro videos and pictures into pieces of art, adding effects and removing unwanted objects, correcting light and many other customization options.
Adobe Premiere Pro
This awesome tool can work even with 8K videos in any way, even virtual reality and that makes it a Pro software.
Corel VideoStudio Pro is a powerful and flexible video editor that you can use to turn your GoPro videos into truly amazing creations.
Even if you haven’t used this tool before, you’ll quickly get the hang of it thanks to its intuitive UI and learning resources.
If you need a GoProvideo editing software for personal use, then this is the perfect choice for you. It comes packed with a bevy of useful features that are more than enough for the needs of a regular user.
You can choose from over 1,500 filters and effects, edit multi-camera videos, change the video speed, edit HD and 4K videos for great-looking movies.
However, you should know that the tool doesn’t feature Hollywood-style effects, in case you had this requirement on your list.
Corel VideoStudio Pro supports the latest formats and technologies, including converting 360 videos to standard videos. If you’re a social media fan, this software will help you impress your friends with your videos. You can upload them directly to social media platforms or save them on a DVD.
Corel Video Studio Pro 2021
Corel is a guarantee when it comes to graphics and Video Studio Pro is an elite 4K video editor for higher standard results.
Wondershare, the creators of Filmora, proudly state that their product is the best video editing software for GoPro. Indeed, Filmora is one of the best GoPro video editing tools out there.
The software is easy to use, and offers a series of powerful video editing features that will let you edit your GoPro videos like a pro. Moreover, Filmora now provides options for action cameras, as well.
The music library allows you to edit your favorite audio content and embed it into your GoPro videos. Once you’re done editing your videos, you can then share them on social media platforms.
Filmora
Filmora is one of the best GoPro video editing tools that you can get your hands on and it’s not so expensive as other famous video editors.
DaVinci Resolve Studio is a very complex software for editing videos, including GoPro videos. The software brings hundreds of features to the table, and is perfect for professionals.
With so many options and features, it’s really hard to list the most important or frequently used ones.
But we’ll give it a try. If audio plays an important role in your GoPro videos, you’ll definitely love the Fairlight audio post-production tools.
You’ll be able to record, edit, mix, and master sound with full 3D audio space. However, the tool doesn’t accept MP3 audio tracks, so you’ll need to simply convert your audio files to .wav to use them on your timeline.
As far as the video editing features are concerned, >DaVinci Resolve Studio offers you a bevy of filters including automatic facial recognition and tracking that allow you to beautify faces.
The tool is also perfect if there are several persons editing the same GoPro video. The collaboration tools allow multiple users to work on the same video at the same time.
For more information about the whole array of editing features, check out DaVinci Resolve Studio website or watch the video below:
Not many GoPro users have heard of OpenShot, but it’s worth giving it a shot if you’re looking for a simple video editing tool.
OpenShot has a very friendly UI, is great especially for beginners, and most importantly, it’s a cross-platform video editor.
It offers a series of basic video editing tools, a powerful animation framework, and video effects. Time effects let you reverse, slow down or speed up your GoPro videos.
If you’re a complete beginner in editing your GoPro videos, you can install this software. If, on the other hand, you’re looking for a more complex and powerful tool, then download one of the editors listed above.
If you own a GoPro camera and you want to edit your videos, we guarantee you that the tools listed above will help you get the job done in no time. Feel free to give us some feedback in the comment section below.
Curve fitting software packages are specialized programs that apply curve fits to all your data sets. If you need to generate graphs, you can also use the built-in Windows 10 Office Excel.
However, if you want to create complex, scientific graphs you should use dedicated curve fitting software.
Adobe XD is a top vector-based user design tool that is usually known for creating user interfaces for both mobile and web apps.
Therefore, with the help of Adobe XD, you can easily create a curve by adding an anchor point where a curve changes direction. Then, you just need to drag the direction lines that shape the curve.
Keep in mind that the length and slope of the direction lines are the ones determining the shape of the curve.
Moreover, you can create a series of smooth curves by dragging the Pen tool from different locations. You may even draw straight lines followed by curves or two curved segments connected by a corner.
Add to the list many curve-fitting features that are readily available in Adobe XD. And as a quick tip, your system can display and print curves so much easier when you draw them using as few anchor points as possible.
Some of the Adobe XDkey features you’ll most likely appreciate using are:
Supports any type of files from Adobe Photoshop, After Effects, and Illustrator
Voice commands may be used to design apps
Mac OS and Windows compatibility
iOS and Android Adobe XD versions to let you preview the result of work on mobile
Compatible with custom plugins to help you gain additional uses
Adobe XD
Powerful and user-friendly set of tools to design websites and apps that fit any device and share your ideas with your team.
Prism is a popular curve fitting software developed by GraphPad. This tool combines scientific graphing, comprehensive curve fitting, statistics, and data organization.
Prism is a tool used mainly by scientists, undergraduate, and graduate students. This fact alone confirms it’s a highly reliable tool and offers a wide array of features that can meet the needs of all the users.
If you’ve never used Prism before, there’s no need to panic. The Learn feature and Prism’s online documentation plainly explain you the principles of the analysis.
They will help you better understand the processes and principles of nonlinear curve fitting so you can start using the software as fast as possible.
Prism is a useful pedagogical tool at the same same, teaching you what you need to know to analyze your data.
If you’re working on a project that involves several data experiments, Prism can record all your experiments, helping you to visualize the results in time.
SciDAVis is the short name for Scientific Data Analysis and Visualization, which is an open-source program for interactive scientific graphing and data analysis.
The tool generates 2D and 3D plots from data that is imported from ASCII files, entered by hand, or calculated using formulas. These plots can then be exported to several bitmap formats such as PDF, EPS and more.
The tool is primarily aimed at high-quality plotting of scientific data. It combines an intuitive, easy-to-use user interface with powerful features such as Python scriptability.
SciDAVis’ main advantage is its emphasis on providing a friendly and open environment for new and experienced users alike.
Thanks to good documentation on all levels, such as the user’s manual and tutorials, users can quickly learn to master the tool. Moreover, they can share their experiences on SciDAVis’ forums.
SigmaPlot is a complex data analysis tool that also supports curve fitting, allowing you to describe the shape and behavior of your data.
You can use this tool for simple curve fitting tasks, as well as for complicated curve fitting problems.
SigmaPlot’s Dynamic Fit Wizard helps you to find the best solution for complex curve fitting tasks, by automating the search for initial parameter values to find the best solutions.
In other words, the Dynamic Fit Wizard is actually a step-by-step guide through the curve fitting procedures, that also comes with an additional panel in which you set the search options.
This feature is recommended for tasks with three or more parameters and a large number of variables.
You can try SigmaPlot for free for 30 days or buy the tool for $100 from Systat Software.
TriLookup is an add-on for Microsoft Excel that adds eleven powerful lookup and interpolation worksheet functions to this program, offering enhanced functionalities.
You can use the add-on to perform interpolation and extrapolation from tables with one, two, or three independent variables.
TriLookup was launched in 2003 and has been used by universities and hi-tech companies ever since.
If you’ve never seen this tool before, you can use the online example spreadsheets that demonstrate the capabilities and the usage of the added functions.
Starting from version 3.0, there are two TriLookup versions available: TriLookup Lite, the freeware edition , and the standard TriLookup version.
Kintecus is a great tool to use if you work in the field of chemistry. You can use it to run chemical kinetics of catalyst reactor, and enzyme reactions, and model equilibrium of combustion and nuclear reactions.
Kintecus accurately displays real-life phenomena and reactions and the graphical interface is actually a collection of Visual Basic scripts implemented through an Excel interface.
However, some users are annoyed by the fact that the interface requires Excel, but if you don’t want to install Excel, you can also run Kintecus only in command line mode.
You can download the program for free by registering as an academic/educational user.
Gwyddion is a modular multiplatform software for scanning probe microscopy data analysis. It is a free software tool, allowing developers to further improve it.
Its main function is to analyze the height fields obtained by scanning probe microscopy techniques (AFM, MFM, STM, SNOM/NSOM).
Gwyddion supports more than 40 features such as force-distance curve fitting, volume force-distance curve fitting, location of peaks in graph curves, and more.
Unlike Kintecus, Gwyddion has a modern, intuitive user interface, allowing users to quickly analyze data and identify the main values.
All calculations are done in double precision, and Gwyddion native data format (.gwy) stores data in double precision, as well.
These are the best curve fitting software you can use on your Windows 10 computer. As you can see, some of these tools can be used for various fields, while others are field-specific.
If you’ve used other curve fitting tools that you think should be on this list as well, you can tell us more about your experience in the comment section below.
Welcome back to our Windows 10 news recap, where we go over the top stories of the past week in the world of Microsoft’s flagship operating system.
Microsoft may market upcoming Windows 10X as “The New Windows”
New leaks suggest that Windows 10X, Microsoft’s OS designed to take on ChromeOS and target the education market, could be marketed as “the new Windows.” Though it’s not clear what this may mean in reality, as it’s unlikely that this new OS from Microsoft would replace the six-years old Windows 10.
Microsoft rumored to be getting cozier with AMD for Surface Laptop 4 release
Whilst no details of any new Surface Laptop have been revealed so far, new hints are emerging that Microsoft could be making closer ties with AMD, with a possible new flagship device sporting a custom AMD Ryzen 5 3590 U Surface Edition CPU with 6 cores, 12 threads, and clocked at 2.20GHz, details of which were confirmed by a Geekbench listing.
Google’s ChromeOS slid pass macOS as it encroached on Windows market share in 2020
If you’ve recently visited the Windows Update menu in Windows 10, you noticed a new Optional quality update ready for installation.
Its full denomination is 2021-02 Cumulative Update Preview for Windows 10 Version 20H2 for x64-based Systems (KB4601382).
This KB comes in early from the usual Patch Tuesday release although it can fix a lot of bugs that will appeal to gamers in particular.
What is the new KB4601382 and what does it do?
As we mentioned above, KB4601382 is an optional quality update so you don’t have to install it we would recommend installing it because most of these fixes will also be included in the next Patch Tuesday from March.
This update is aimed at fixing more than 40 bugs but the most interesting ones cover graphics problems with rendering in games HDR monitors, colors, screen flickering, and more.
Here are some of the graphics bug fixes according to the Microsoft release:
Updates an issue in Advanced display settings that shows the incorrect refresh rates available for high dynamic range (HDR) displays.
Updates an issue that might cause video playback to flicker when rendering on certain low-latency capable monitors.
Updates an issue with screen rendering after opening games with certain hardware configurations.
What are the other updates addressed by KB4601382?
KB4601382 also addresses a lot of other issues like displaying unexpected screens during the Windows Out of Box Experience (OOBE) and fixes the problem that prevents inserting strings into the Input Method Editor (IME).
It also fixes problems with showing the correct Envelope media in the Universal Print queues and updates the support for hole punch and stapling locations for print jobs on certain printers.
These only scratch the surface because as we mentioned above, there are more than 40 fixes in this quality update so it’s worth giving it a shot.
To install the update, just type Windows Update in the search field in Windows 10 and click on the Windows update settings from results. The update should appear in the Optional updates section.
The update is also available to download from the Microsoft Update Catalog so you can’t miss it. Have you installed it yet? Did you experience any problems? Leave us a line in the comments section below.
Are you a Windows 10 PC owner stuck with a premium PDF reader with limited capabilities? How about 6 best free PDF reading software? This post is meant for you.
Portable Document Format (PDF) is a common file format that was developed by Adobe Systems in the 1990s for document presentation.
PDF files can contain items such as text, images, hyperlinks, interactive buttons, forms, embedded fonts, videos, and many more.
However, some PDF readers are available at a premium price though they come with extended features.
There is some free PDF reading software available that can work wonders compared to premium PDF readers.
This program enables you to view your PDF files in 3D. Soda PDF presents the PDF document with a real-life view.
You can view PDF files in regular modes, such as single, continuous, facing, and facing continuous for a better reading experience.
It is very easy to use because all you have to do is to upload your document or simply drag and drop it and the software will automatically open your PDFs.
It has a Side by Side feature that allows you to view and work on two documents simultaneously on the same screen.
You can also benefit from the Synchronous Scrolling feature with which you can scroll through both files at the same time or just use the Snapshot tool to screenshot a specific part of your active file.
Other noteworthy features of Soda PDF 3D Reader include:
Adobe Acrobat Reader DC has a free version and is a user-friendly PDF reading software. Adobe Reader, as its name suggests, is perfect for viewing and printing PDF files.
This tool supports different files such as Microsoft Office formats, Encapsulated PostScript, text, images, Autodesk Autocad, 3D files, MS Visio, and many more.
If you want to fill out PDF forms, you can do that as well. Adobe Reader enables you to navigate using outlines, links, and bookmarks. In addition, you can also use various viewer layouts, fit modes, and zooming tools within the program.
Moreover, this tool incorporates collaboration features like getting comments from different users on a shared online PDF.
As more people from the business industry spend more time on their smartphones, Adobe Reader adapted the application to mobile users.
Directly from your phone, you can edit, review, sign any PDF file and you can capture documents with your phone camera in order to save them as PDFs.
This application eases the process of collecting PDF files, as Adobe Reader is linked with Adobe Document Cloud in order to allow easy access to PDFs anywhere you are.
Adobe Acrobat Reader
What better way to get rid of all PDF-related issues than by using the world’s most well-known PDF editor and reader?
Although not a dedicated PDF reader per se, Icecream Ebook Reader is very much capable of opening PDF files too, since many Ebooks come in that format anyway.
The application has a very lightweight overall feel to it, and the system impact is minimum, so you can run it even on very dated PCs.
As for the PDFs, it can open them without a problem, supporting internal linking, images, and pretty much any elements included inside.
Besides, you can use it to track reading progress, add notes, translate text, use bookmarks, and more.
Icecream Ebook Reader
Read your favorite eBooks as well as any PDF that you need with the help of this extremely useful software tool.
Reader is a Windows built-in PDF reading software. This program has a user-friendly interface, and it is easy-to-use even by novice PC users. Reader is lightweight and only requires 15MB of your disk space.
Reader has the following amazing features:
View PDF documents
Fill out, save and send PDF forms
Print PDF documents
Search for phrases or words
Register comments and take notes
Support for TIFF and XPS files
However, the downside feature of Reader is its bookmark navigation which is very poor.
While working with the audio editors, you may come across the OMF file and wonder what’s an OMF file.
OMF is an audio file that is stored in a media format based on OMFI (Open Media Framework Interchange). If you received the file from a friend or colleague, you might want to know how to open an OMF file in Windows.
OMF does not work with a standard audio player, and you may end up with an error. This is due to the audio project saved in the OMF format consists of multiple audio tracks and its properties such as pan information, volume, and references to audio files.
In this article, we take a look at the best software that can open OMF files in Windows. Let’s get started.
What are the best software tools to open OMF files?
Adobe Audition is among the most popular audio editing, podcasting, and composition software. Just like other Adobe software, Audition also offers an intuitive user interface for intermediate level musicians as for advanced artists.
You will be able to fix audio content by adding sound effects, consulting the spectral frequency display and Diagnostics tab. It will ease considerably the audio editing workflow, so you will deliver a high-quality sound.
Not to forget about recording and editing high-quality podcasts as well as adding music clips from other scenes.
Being a professional audio mixing software, Audition supports the OMF file format, so it can open and export OMF files together with Final Cut Pro Interchange format
If we talk about managing of OMF files, Adobe limits the size of this file format to 2 GB. As well, Adobe Audition allows you to save the uncompressed audio file to AIFF or WAV and other formats.
Adobe Audition is included in Creative Suite, so it can perfectly work with Adobe Premiere Pro, in order to create a flawless work.
Adobe Audition
Create, mix, and design sound effects like a pro, thanks to its multi-featured interactive tool sets, so try it out now!
Avid Pro Tools is a freemium music composition tool and industry standard when it comes to collaboration and music creation. It is used by music, film and TV industry to create, compose and record, edit and mix audio in the studio.
The free version of the Pro Tools offers basic editing features. It also supports the OMF file format. Download and install Avid Pro Tools to open the OMF file.
Steinberg Cubase is one of the most popular music creation software used by professionals for creating all kinds of audio. Its unrivaled range of flexible tools allows you to explore and create the next masterpiece.
Needless to say, Steinberg Cubase also supports the OMF file format. You can import the OMF file into Steinberg Cubase to edit the audio file. It offers tools for composing, sequencing, beat making, recording, and audio editing work.
Avid Media Composer is another popular software from Avid and offers all the required to edit your audio as well as video files. If you have an Avid Media Composer, you don’t need to download Avid Pro Tools to open the OMF file in Windows.
Avid Media Composer offers advanced editing features with an intuitive interface so that both professionals and beginners, can create stunning videos with minimal effort.
Unfortunately, screen shaking is a problem in most survival games and Valheim is no exception.
If you look at the positive side, the camera shake adds a little bit of thrill to the game when a boss comes to play but for some users, this effect is too much:
Some games have a way to disable/reduce screen shake. I get awful headaches playing survival games where the screen shakes every time I harvest a resource.
Is there a way to reduce this in the game yet? I saw nothing obvious but sometimes people have some easy hacks like changing a value on an INI or something and I was hoping someone had advice for me?
The problem is that screen shaking can also occur for regular activities in the game like harvesting resources as the gamer above complains.
Fortunately, there is a simple solution for this and we are going to share it with you in this article.
How can I reduce the screen/camera shake in Valheim?
1. Turn off camera shake
Actually, the solution is extremely easy to apply, but it’s not where you would expect it to be. The game developers actually included a camera shake option in the Settings menu of the game.
So, to fix this problem go to Settings and click on the Miscellaneous option. Then turn off the camera shake setting. This will reduce or even eliminate the Valheim screen shake.
2. Install the Valheim Plus mod
The Valheim Plus mod adds a ton of improvements and features to the game, and also added a screen shake reduction option.
If you’re wondering how many computers can you install your Creative Cloud apps on, you found the perfect article.
We will discuss this entire concept, and we will also observe all the details of how to better manage your license buying funds in order to get the most out of the Creative Cloud Suite.
This set of applications from the Adobe suite covers a wide range of uses, including graphic design, video editing, web development, and also photography.
Quick Tip:
If you are eager to see what’s in the Creative Cloud Suite, then take a closer look at our suggestion.
The suite packs the best tools for photo and graphic design, video editing, illustration, UI & UX, 3D & AR, and social media.
Adobe Creative Cloud
The Adobe Creative Cloud suite is well-known across the globe, as it offers one of the best selections of creative apps on the market, to give it a try!
With such a great selection of apps available for a fast and easy download, there is no wonder why the suite from Adobe has so many fans.
In today’s article, we will answer a very important and pertinent question, that being How many computers can I install my Creative Cloud apps on? To find the answer, please read on.
How many computers can I install Adobe Creative Cloud on?
The Adobe Creative Cloud suite can install the containing software on two different computers at the same time. This applies even if you have two Windows computers, two macOS PCs, or one of the same kind.
This feature comes in very handy, especially if your work computer is a Mac, and your home PC is a Windows-based device.
If you try to install software on the third computer, then the Adobe Creative Cloud will ask you to deactivate one of the previously used computers.
This means that you will get to use the Adobe CC on the third computer only after one of the previously activated PCs is removed from the list, but that implies that you can re-activate the original PC once you’re done with the third PC.
This technique is only applicable in the case that you are not going to use the third computer very often.
If you do need to use the third computer often, then the best way of dealing with this would be to invest in another Adobe CC license and extend the number of PC licenses.
In today’s how-to article we explored some details of how the Adobe Creative Cloud licenses work, and we also found out how many computers can the contained software be installed on.
We hope that this guide was helpful in your situation and that you now understand how to use your Adobe Creative Cloud licenses optimally for the best performance.
Please feel free to let us know if you have any suggestions or opinions to share with us. You can get into contact with us by leaving a comment in the section found below this article.
Microsoft is currently experimenting with a new feature for its Edge browser, which will allow users to delete multiple saved passwords at once. This capability is available in the Edge Canary build 90.0.807.0 (or newer), as spotted by Reddit user Leopeva64-2.
The new Microsoft Edge comes with a built-in password manager that saves and syncs credentials across desktop and mobile devices. Currently, if a user wants to delete multiple passwords simultaneously, they have to do it manually one by one. To address this problem, the company has now added checkboxes next to saved passwords. It should enable users to delete multiple or all password fields directly from the Settings page.
Microsoft is also working on a new user-initiated search experience for autofill suggestions that should help users while filling out forms in the browser. It makes it easier to search for information on online forms that do not support the autofill functionality.
“Today, if you have your information saved on Microsoft Edge, autofill suggestions pop up automatically and help you save time while filling out forms. but in cases where autofill misses a form, or if you want to fetch that data in forms that don’t typically have autofill (like temporary forms) – you can explicitly search for your information and fill it easily,” the company explained on the What’s Next page.
This new autofill experience is available as a preview in the Microsoft Edge Canary and Dev channel today, and you’ll need to type a / in the search box to enable it. This feature will likely come to the stable channel of Microsoft Edge with version 90 in April 2021. If you want to know about other features coming to Edge, Microsoft has recently published a new roadmap info page for the browser.
Microsoft Teams is slated to get a host of new capabilities to improve the new built-in Polls feature in meetings, according to an update to the Microsoft 365 roadmap (via Neowin). These updates have been designed to enhance the Teams meeting experience and make virtual meetings more productive and engaging.
First off, the company is planning to introduce some general improvements based on user feedback. With this update, Polls in Teams Meetings will be adding support for external guests and an optimized mobile experience.
The AI-based poll question suggestion is another change coming soon to Teams meetings. This means that Microsoft Teams will leverage the Forms intelligence service’s power to suggest polls to users automatically. The feature will take into account the purpose of the meeting and the user’s historical poll data to offer poll suggestions.
Other upgrades concern making suggestions for the poll options. This should enable users to quickly create surveys to gather instant feedback on a particular idea during discussions. In addition, a new “open text” question type will let meeting organizers collect open-ended information from attendees either before, during, or after the meeting.
Microsoft is bringing the ability for poll creators to select one or more correct answers for multiple-choice questions. The Results card and the Forms site will display this correct answer to the participants after the voting session.
Lastly, Microsoft Teams will make it easier for the organizers to manage the polls data collected during Teams meetings. A new word cloud data insight feature will provide meeting hosts a quick overview of the most commonly used text phrases used by poll respondents.
Furthermore, if a user has created a poll, the app will automatically generate a summary report after a meeting has ended. This report will be shared with the meeting organizer, presenters, and teachers.
Microsoft Teams introduced the polling capability into Teams meetings back in November 2020. The roadmap listing indicates that most of these features will begin rolling out in March, and we hope to see these announcements at the Ignite 2021 conference next week. However, both the Correct Answer choice and word cloud data insight features are scheduled to launch in April this year.
Windows 10X, Microsoft’s Windows-based Chrome OS alternative, is expected to make its debut on education-focused devices very soon. In a series of tweets yesterday, the reliable Microsoft leaker “WalkingCat” first teased that “The New Windows” was coming next month, though he later backtracked to say that it’s coming, “but maybe not next month.”
The leaker later put the emphasis on the naming, suggesting that he may have seen “The New Windows” on official marketing materials for Windows 10X. If Windows 10X is definitely a new version of Windows that will be optimized for Chromebook-like devices, it won’t be a replacement for the soon-to-be six years old Windows 10 OS.
Previous reports suggested that the first Windows 10X coming this year will target the education market, with a consumer push to follow next year. At launch, Windows 10X won’t be able to run legacy Win32 apps natively, though support is expected to come at a later date. However, that shouldn’t be an issue for the education market where Chromebooks have been enjoying real momentum in recent years, especially in the US.
Microsoft’s main goal with Windows 10X is to create a lightweight version of Windows that is easy to manage for IT admins, and works great with Microsoft Store apps and web apps. The OS was initially announced for dual-screen devices like Microsoft’s Surface Neo, but Microsoft later changed its plans to optimize the OS for single-screen devices. The company will hopefully share more details about Windows 10X in the coming weeks as we get closer to the release of Windows 10 version 21H1.
This is a four part piece feature story on my Windows Development journey; the good, bad and ugly. This is Part 1 of my Windows development journey with the launch of Topen News Hub to Central News app.
I have been a developer for seven years using Javascript and C# on Visual Studio for UWP app development and it has been a bumpy ride in a rapid shift towards mobile first, web first, cloud first.
From humble beginnings
Windows App Studio
My Windows Development journey began on the fall of 2014 using Windows App Studio which eventually ended up getting shut down in December 2017. The app was an RSS news app prototype for Windows Phone 8.1 and Windows 8.1 called Topen News Hub in October 2014. It took me 20 minutes to download the package, load Visual Studio create an app package and ended up publishing it to the Microsoft Store that generated £100 of pounds of revenue. This is the time when I launched Freeman Technologies.
The Good
Central News app promo – Courtesy of Freeman Technologies
January 5th 2015, under Freeman Technologies I officially launched and rebranded Top News Hub to Central News app as a redesigned RSS app from Windows App Studio for free of charge. Then released Central News Plus+ two weeks later as an ad free premium RSS news app service for $1.29 at the Microsoft Store. It generated over 100 downloads, it was a great start for me to tap into the Windows development world.
The benefit of the app launch it was more discoverable and can find innovative ways to grab an app hungry Windows Phone community in forums like Windows Central, Reddit, and AppRaisin.
The Bad
The reviews was positive, however the functionality fell short compared to a plethora of RSS news apps in the Microsoft Store. For the app promotion to boost app downloads, it was a struggle to pitch my app and get major Windows app coverage from major Microsoft centric sites.
The Ugly
Another weakness was with the wrong outdated app business model, with the separate Paid app and free Lite version of the app where app makers of all platforms were moving towards to the Freemium model with ads, and in-app purchases for more functionalities and more feature set updates.
Summary
Launching the Topen News Hub app on Windows platform was an new experience for me entering into the Windows app world initially as a hobby that turned from a passion to a small business starting out with Central News app. I have learned so much with my Windows development experience, from many of the benefits, struggles, weaknesses and the mistakes of my apps I have published under the UWP ecosystem over the short span of 6 years.
Stay tuned for Part Two. Inspired by my Windows development journey? Learn more about Windows development here. Share your experience with Windows app development in the comments below!
The File is damaged and could not be repairederror message pertains to the Adobe PDF software (including the Adobe PDFReaderInternet Explorer add-on).
This error pops up when users try to open PDF documents (usually downloaded or uploaded) within Adobe Acrobat or Internet Explorer.
As a result, the Adobe software doesn’t open the PDFs and shows this error instead: There was an error opening this document. The file is damaged and could not be repaired.
As one might have guessed, the error highlights that the PDF is corrupted. If that’s a recurring situation for multiple documents, you will need to address the core reason instead of just repairing one corrupted file.
Preview your PDfs to see if the process was successful.
If the issue is not related to your PDF viewer, then you may be facing a damaged PDf file. If that’s the case, simply fix it using a third-party tool like Stellar PDF Repair.
Stellar Repair for PDF
Repair all of your PDF files and restore their properties with this straightforward tool.
Launch Run by pressing the Windows key + R keyboard shortcut.
Input appwiz.cpl in Run and click OK to open the uninstaller in the Control Panel.
Then select Adobe AcrobatReader, and click the Change button.
Select the Repair installation errors in the program option on the window shown directly below.
Then click the Next button.
Restart Windows after repairing Adobe Acrobat.
That’s how you can use the Repair installation option to fix Adobe Acrobat when the software throws out error messages such as File is damaged and could not be repaired error.
4. Erase temporary browser files
Press the Windows key + R keyboard shortcut to launch Run.
Input inetcpl.cpl in the text box and click OK to open the window shown directly below.
Press the Delete button on the General tab open the window in the snapshot below.
Select all the checkboxes on that window.
Press the Delete button to erase IE’s temporary files.
This File is damaged resolution is more specifically for Internet Explorer users who download documents or can’t open PDFs with that browser.
Some Internet Explorer users have confirmed that clearing that browser’s temporary files fixes the issue.
5. Download the PDF again
If the File is damaged and could not be repaired error only arises for a few specific PDF documents, try downloading the files again.
Those files probably got corrupted when downloading. So, delete the original PDF documents and download them again.
6. Open PDF Documents with alternative software
Remember that Adobe Acrobat isn’t the only PDF software for Windows. Users might find that alternative PDF software opens the files they need without any issues.
Try opening the documents with the freeware Foxit reader. Click the Free Foxit Reader Download button on Foxit reader’s webpage to add that software to Windows.
One, or more of the above fixes, might resolve The file is damaged and could not be repaired error, thus enabling users to open PDF documents again.
Which of these methods worked for you? Feel free to share your experience with us via the comments section below.
Abbyy Finereader will be terminatederror messages can pop up for any Windows software. When that error window pops up, the program will stop running.
Does that same error window often pop up on your desktop or laptop when running the Abby Finereader OCR software for Windows? If so, this is how you can fix the Abbyy Finereader.exe has stopped working error message.
Quick Tip:
If you don’t have the time to spend the next 10 minutes troubleshooting Abbyy Finereader, you can switch to Adobe Acrobat Reader DC.
It only takes one minute to download and install Acrobat Reader on your computer. Get it now to quickly resume working on your documents.
Adobe Reader
What better way to get rid of all PDF-related issues than by using the world’s most well-known PDF editor and reader.
Enter this line in the Prompt’s window, and press the Return key: DISM.exe /Online /Cleanup-image /Restorehealth
Then input the line below and press Enter to initiate the SFC scan, which can take about 20-30 minutes: sfc/scannow
When the scanning is complete, restart your desktop or laptop if the Command Prompt states that WRP repaired system files.
Check that there’s nothing up with any Windows system file. You can do that with the System File Checker utility in Windows 10 by pressing the Windows key + X hotkey and selecting Command Prompt.
2. Update Device Drivers
The Abbyy Finereader.exe has stopped working error might also be due to outdated or incompatible drivers. In this case, you can try updating your drivers manually.
On the Windows taskbar, enter device manager, and click Device Manager.
From the list select the category of the device you’d like to update,then select that particular device.
Select Search automatically for updated driver software.
Click Update Driver.
A great alternative is to update your drivers with a dedicated tool that can scan your computer and provide you with a detailed report of all the elements that need updating.
This software tool is not only a driver fixer but also a driver updater and replacer, and it is powered by an extensive online library that is constantly updated with the latest drivers straight from the manufacturers.
Thanks to that feature, you always know that you have the latest drivers at your disposal with just a click of a button. All you have to do is choose whether to update all of the drivers at once or one by one if you have reasons not to install certain drivers.
Running programs as an administrator can often kick-start software.
To run Abbyy Finereader as an administrator, right-click its .exe file or desktop shortcut and select Properties.
Select the Compatibility tab shown directly below.
There select the Run this program as an administrator option.
Click the Apply button, and select the OK option to close the window.
Running Abbyy FineReader as an Administrator is a rather simple solution that can help you solve the error. Start off by accessing the Properties menu and continue with the steps we described above.
4. Run older Abbyy Finereader versions in Compatibility Mode
There are lots of Abbyy Finereader versions for Windows. If you’re utilizing an older Abbyy Finereader version that predates Windows 10, it might not be entirely compatible with that platform.
As such, running Finereader in compatibility mode could feasibly fix the error.
To do that, open the Compatibility tab as outlined above; and select the Run this program in compatibility mode option.
Select an earlier Windows platform on the drop-down menu. Then press the Apply and OK buttons.
5. Clean Boot Windows
Press Run’s Windows key + R keyboard shortcut, type msconfig in and click OK to open the System Configuration utility.
Click the Selective startup radio button on the General tab and deselect the Load startup items option.
Select both the Load system services and Use original boot configuration checkboxes if they aren’t already selected.
Click the Services tab shown in the snapshot directly below.
Select the Hide all Microsoft services checkbox and press the Disable all button.
Select the Apply option then press the OK button to close the System Configuration window.
Select the Restart option on the dialog box that opens.
This error message can often be due to conflicting software. So clean booting Windows, which will remove superfluous startup software and third-party services.
This is another potential resolution for the Abbyy Finereader.exe has stopped workingerror message.
6. Remove your antivirus software from the Windows Startup
Right-click the Windows 10 Start button and select Task Manager. Alternatively, you can open that utility by right-clicking the taskbar and clicking Task Manager.
Select the Startup tab shown in the shot directly below.
Then select your anti-virus software, and press the Disable button.
You can turn your anti-virus software back on when you don’t need to open Abbyy Finereader by clicking Enable.
If Abbyy Finereader works fine when you clean boot Window, third-party antivirus utilities are the most probable conflicting software.
As such, after restoring Windows to the standard startup, try removing just your anti-virus software from the system startup instead.
7. Turn off DEP for Abbyy Finereader
Press the Windows key + X to open the Win + X menu.
Then you can click Command Prompt (Admin) to open an elevated Prompt window.
Input this command in the Prompt: bcdedit.exe /set {current} nx AlwaysOff
That will turn off the DEP when you press Enter.
Then run Abbyy Finereader in Windows.
You can turn the DEP back on later by entering the following line as in the snapshot below and pressing the Return key : bcdedit.exe /set {current} nx AlwaysOn
This error message can also pop up if Data Execution Prevention prevents programs from running. Thus, temporarily turning DEP off for Abbyy Finereader is a potential resolution.
These are a few resolutions that might fix the Abbyy Finereader.exe has stopped workingerror so you can utilize the software again. Some of the resolutions may also fix similar error messages for other software.
Click on the Advanced button and if it reads Paper Capture, this indicated that the initial document has been turned into a PDF with the help of an OCR software.
In order to choose the best authoring tool software, it is imperative to understand what authoring tools are.
Authoring tools, commonly referred to as eLearning authoring tools, are used to create, collaborate, integrate, and publish engaging and interactive content meant mostly for training and educational purposes.
The best authoring tool software lets you work with digitized elements, and/or learning objects to use in your training.
However, they take on more functions as you will discover while checking out our top picks for authoring tools. Authoring tools are important because content really is king, more so in the eLearning space.
To this end, trainers are constantly looking for creative and innovative ways of creating and publishing custom content that can be used on the Internet, in companies, or in CD-ROMs.
In other cases, there is a need for doing ‘crash courses’ or rapid eLearning, like in organizations where information needs to be deployed and thereby reducing training costs.
Authoring tool software can, therefore, be applied when you have large teams with varying skill sets, or for trainers who prefer blended training solutions that use a combination of both classroom and eLearning material, thus killing two birds with one stone.
If this sounds like what you’re looking for, here are our top picks for the best authoring tool software you can use right now.
This authoring tool software helps you author batches of content rapidly on an HTML5-based platform.
It is a desktop app available for Windows operating systems, touted as the most powerful authoring tool software in the industry, but it needs a lot of understanding to work with it.
However, you don’t need much technical ability to create interactive content as it uses wizards to guide you as you create and publish your content.
Its features include color palettes, slide master, responsive and interactive output, geolocation capability, powerful scripting functionality, and you can define group actions when working on multiple projects.
Adobe Captivate
You are about to enjoy a fully-featured set of tools to create highly interactive, ready-to-use training courses for desktop and mobile.
TalentLMS includes an extensive set of training tools that both businesses and independent professionals can use to perfect their training sessions and skills.
The course management features allow for course building from zero, using ready-made templates, and later on integrate previously used elements into new presentations.
They are easy to customize with your own logo and preferred themes, visually scalable, and fast-loading.
You can even extend your presentations into a personal homepage, exposing only a part of your work, for promotional purposes.
Furthermore, you can integrate your courses with over 200 services, among them Zapier, Shopify or Salesforce.
User-friendly dashboards will help you collect reporting data about user behavior to organize your eLearning strategy.
TalentLMS
Cloud-based intuitive training platform that suits both beginner and advanced trainers, packed with all the tools to create professional, scalable courses.
For those of you who don’t know, ProProfs Training Maker is an incredibly intuitive cloud-based learning management system that can meet most of your training requirements.
Designed with small businesses, large enterprises, educational institutions, and corporate trainers in mind, this tool offers course authoring, assessments, consolidated scores for each learner, as well as collaborative tools to encourage knowledge exchange.
Coding skills aren’t required in order to take advantage of all these. Quite the opposite, ProProfs Training Maker is very easy to use and customer support is always helpful.
Moreover, keep in mind that training courses can be created and accessed with ease from anywhere. You can actually do so by using a tablet or a mobile device even while on the go.
These are some key features that ProProfs Training Maker brings to the table:
Simplicity for all users
Real-time learning tracker
Quizzes, surveys, and polls integration to assess knowledge retention
This is a simple, intuitive authoring tool software designed to deliver high-quality learning with a faster response time.
With this tool, you can control the look and feel of your brand and content by creating templates and other material aligned to your brand guidelines.
You can design unique and engaging content using the Layout Designer feature, speed up and simplify content creation using the Team collaboration feature such that your team can comment and leave feedback within projects.
You can also create and update multiple versions of your content with the Variations Manager feature, translate content to multiple languages and track user data globally.
Even more, feel free to analyze and improve your content using the Analytics feature that captures detailed information about your content’s users such as their location, devices, time spent on the content and how they answer questions.
Other features include simple editing, HTML5 output which is modern and loads fast, browser support as far back as Internet Explorer 7, full responsiveness.
Future proof is included as well, meaning your content is safe and any changes are automatically updated, an Asset Library, Gamification and branching, superfast hosting, and free reviewing options.
This authoring tool software comes with the right apps and resources for you to create engaging and interactive content with high impact.
Its award-winning authoring apps include Storyline 360 and Rise, among a slew of other apps. Features include over 2 million course assets such as templates, photos, videos, icons, and characters.
With Articulate’s Storyline 360, you can develop custom engaging, high learning impact and interactive courses that can work on any device, plus novices and experts alike can use it too.
Articulate Rise app is useful for building responsive courses in the shortest time possible, but you need a web browser only and you’re well on your way to create the most beautiful courses for any screen.
Other features include the Articulate Review which hastens the project review process with feedback provided in a browser, live training online using live webinars, no coding required, and a user-friendly interface.
Some of the benefits you get with Articulate include an active online community where you can get tips, tricks, and share information, flexibility, and run your content on all devices.
This is an affordable, but powerful cloud-based SaaS authoring tool software which you can collaborate with anywhere, and at any time, plus it works with all browsers and operating systems.
Lectora offers benefits such as an intuitive interface, automatic file backup, zero installation, publishing to any learning management system (LMS), and it is easy to learn.
Features include a quiz builder, collaborative review tools, pre-made actions to create animations, flexible scripting, access to eLearning Brothers graphics and template library, and a 30-day free trial.
This authoring tool software lets you create your own online course with benefits such as simplicity, security, and it is fully available for free forever.
You can instantly create online courses, quizzes and forums then share or embed them to your course.
It is truly mobile so you can access your content from any modern device online, including your tablet or smartphone, meaning you can even create a course on these devices and preview in a browser.
Other features include an educational calendar where students can find all the courses, quizzes, and deadlines as assigned so they’ll not miss any updates, plus you can own your LMS and upload your contact list then everyone in it will join you on your LMS, which you’re fully in control of.
As its name rightly suggests, Easygenerator is an authoring tool software that is simple, easy to use, and generates custom content as it is cloud-based.
This tool is classified as a SaaS solution and lets instructional designers, or trainers in different subject matters to create engaging and interactive content with high impact.
It is affordable, future proof, simple to use when creating, designing and publishing your custom content, and is used in more than 120 countries globally.
You can try Easygenerator for free, and create beautiful courses fast, and easily, without the need for coding or installation.
It is also fully responsive, plus you don’t have to worry about hassles of the past like design, optimization, measuring results, or publishing to the correct standards.
All you need to do is focus on creating your custom content, and Easygenerator does the footwork for you.
At its core is a strong instructive framework that ensures learners get the best results through a standard objective setting and success measuring approach that uses assessments.
Its intuitive interface delivers a WYSIWYG (what you see is what you get) output, and there’s no need for scripting or programming with this software.
Other features include TinCan and SCORM-compliant content integrated in the tool, and conversion to mobile devices as it works in the cloud thus is responsive.
More benefits include content repurposing or reusing, predesigned smart templates, one-click publishing, advanced cloud infrastructure, a smart delivery team, and tracking learning progress.
This authoring tool software offers a single workspace with all the tools you need to work smarter what with its simple, intuitive platform that delivers high performance and gives you full control.
Features include an extensive template builder and library, built-in audio recording studio, easy to use interface with no coding requirements, drag and drop builder for custom designing.
Even more, get ready for interactive templates where you can add videos, quizzes, images, or audio, a resource library, plus responsive design for mobile and desktop, and built-in review system.
You can get the 15-day free trial version and test run it.
This is another powerful and rapid authoring tool software with a unique feature called ActivePresenter. This feature includes all tools you need to record, edit and create your custom content.
Other features include Smart Capture that lets you capture the screen with a mouse click or keypress, full-motion recording, software simulation, quiz building, mic and speaker recording.
You can also benefit from audio and video editing without quality loss, a variety of shapes to choose from, colors and effects, interactivity, video, and HTML5 export, as well as SCORM-compliant content which is widely supported by most LMS.
This is a social e-learning authoring tool software with real time collaboration capability, and a powerful environment free of programming so you can create your high quality, interactive content with embedded social media.
It is fully responsive, and you can create courses, quizzes, or games using your browser, or collaborate with your team to share ideas, assign tasks, and reuse content, then finally publish your creations to your LMS, HTML5, PDF, or desktop.
Other features include interactivity, real feedback, social embedding, assessments divided into sections or categories with unparalleled feedback options, and multi-language options.
It also helps you import to existing PowerPoint presentations, gamify quizzes or questions, has teamwork features, version control for your courses, reuse, review and assign tasks, among others.
CourseArc authoring tool software transforms the learning experience both in an educational set up or in your organization by making the learning process count.
It also transforms how you deliver training and other professional development, streamlines onboarding process, plus it is so efficient, saves you money, and increases engagement because it is interactive.
It is a digital content creation tool whose benefits include accessibility, ease of content creation, affordability, and transformation of your training activities.
This is a simple authoring software tool with fast and responsive features such as adaptive output, HTML5 authoring, reuse and sharing of content, real-time collaboration, plus you can publish to your LMS, or apps and also print the content.
If you need to create responsive content or simulations at the click of a button, this is your tool.
It has three authoring modes: Responsive, Tradition eLearning, and Software simulations, which let you deliver content anywhere, and any time.
It is cloud-based and accessible on any device whether it’s a PC, laptop, tablet, or smartphone.
You can quickly publish whatever you create as a web app, as a desktop package, document or to the dominKNOW mobile player to use it as a performance support tool.
Content can be reused so you don’t have to keep creating more versions.
Gomo is a really interesting elearning authoring software that packs a series of additional features, including hosting, analytics, and apps.
If you need a tool that can help you to create content within minutes, then Gomo Learning Suite is the right choice for you.
There are many content templates that you can choose from so we’re sure you’ll find one that meets your content creation needs.
The tool allows multiple authors to work on the same content which is perfect for collaboration purposes.
Another advantage is that this is a cloud based tool and there’s also a free trial available. So, go ahead and test Gomo to see if this tool can cover all your authoring and content creation needs.
Have you settled on an authoring tool software you want to use? Let us know your favorite and if you’ve used any before, share with us your experience in the comments section below.
Capturing screenshots in Windows is quite easy: you just need to press a single key and save the image or use a simple screen capturing tool.
However, capturing screenshots from web pages can be challenging because we often need to capture the whole page.
The best solution, in this case, is to use a third-party tool to take screenshots while browsing the Internet.
No browser offers users the option to save screenshots as PDF by default. But if you’re using Google Chrome or Mozilla Firefox, you can go to their extension store and install an extension that does just that.
Quick Tip:
Some lines of work require that you take screenshots of websites daily, so arranging your system to do that as smoothly as possible can be a lifesaver.
One way you can do this is to switch to a better browser, such as Opera One. It comes with plenty of built-in features, such as Snapshot, a dedicated tool that allows you to take screenshots of your web pages, edit them, and share them with ease in Opera’s integrated messengers.
Opera One
An excellent web browser that offers many useful tools, including the ability to save and print your web pages.
1. Download FireShot to save browser screenshots as PDF
An extension called FireShot allows you to save an entire webpage as PDF with just a few clicks. FireShot is available in the Chrome Webstore and Firefox’s Add-Ons page for free.
Once you’ve downloaded the extension, simply right-click anywhere on the page and select Capture Webpage Screenshot Entirely. The extension will immediately give you a few options for capturing a screenshot.
It allows you to capture only what’s visible, a specific section of the screen, and of course the entire web page.
When you choose what to capture, a new window will immediately show up. Here, you can save the screenshot as a PDF, as a regular image, or even print it.
You can also set a few hotkeys to take screenshots by simply pressing them. In fact, there is a hotkey for every option this extension offers: Last Used Action,Capture Visible Part, Capture Selection, and of courseCapture Entire page.
Fireshot is currently available in Google Chrome and Mozilla Firefox only, so if you want to save a screenshot to PDF Chrome, this is a great option.
2. Use Adobe Acrobat Reader for taking screenshots
If you often take screenshots and work with PDF documents frequently, we suggest using Adobe Acrobat Reader for saving screenshots.
The tool has a built-in Snapshot feature that lets you copy an area of a PDF as an image.
Keep in mind that this feature is only available within Acrobat Reader, you can’t use it to take screenshots on your browser.
How to use the Snapshot tool in Adobe Acrobat Reader
Navigate to the Edit menu > click on Take A Snapshot.
Select the area you want to copy.
A confirmation message will appear on the screen.
You can now paste the copied image into another application.
Will you use it to capture screenshots from your browser? Tell us in the comments below.
It can sometimes be annoying when you want to burn a CD or DVD and it interrupts right in the middle of the process.
There are a few methods that you can try in order to fix your Windows DVD burner and prevent any further damage when you try to burn a DVD or a CD. Follow the steps below in the order they are listed to fix the problem.
The Windows DVD burner application in Windows 10, might interrupt at some point in the burning process mainly because you have some corrupt system drivers or the DVD drive is not reachable via an assigned drive letter.
So, if your Windows DVD Maker cannot create DVD, here’s how you can fix the problem.
How do I solve Windows DVD maker unable to burn disks?
1. Use Adobe Premiere Pro
Before going through any of the troubleshooting steps written below, maybe you should consider using a third-party tool that can burn your DVDs.
Most often than naught, third-party tools greatly simplify the process of what they are tasked to do.
In the case at hand, a great tool to consider is Adobe Premiere Pro, a world-leading video editor that has all the tools to turn a simple video recorded on your mobile into a movie of near-Hollywood proportions.
Besides the fact that it can open any video format and edit in whatever way you see fit, you can also use it to then burn your work of art to DVD for safekeeping.
Move the mouse cursor over to the upper right side of the window, click on the Search feature and in the search dialog box write: Windows Media Player.
Click on the Apps feature and from the Apps menu, click on the Windows Media Player icon.
In the upper right side of the Windows Media Player app, click Switchto Library, then in the new window access the Burn tab.
Click Burn Options then click on the Data CD or DVD feature.
Now place a blank DVD or CD into the DVD Burner.
Now select the drive letter that corresponds with the DVD burner you placed the DVD in.
Drag and drop the items you wish to burn from the details panel to the list panel to make a burn list.
Now after you made the list you will need to left click or tap on the Start burn button.
Check to see if your burning process works in this application.
Some users have claimed that they fixed the problem in regards to burning a disc in Windows 10 by using Media Player. This is a rather easy solution to an issue that may seem more complicated than it actually is.
There are plenty of other third-party apps that you can use to burn a DVD if you are not fond of Windows Media Player. This applies when you want to use a converter that has additional video editing features, such as trimming an element, creating a DVD menu, adding music or a picture, and adding a subtitle.
3. Run the Hardware and Sound Troubleshooter
Hold Windows+R hotkeys to open the Run window, in the dialog box write control then press Enter.
Open Control Panel and in the upper search box type troubleshooter.
Left-click or tap on the Troubleshooter icon after the search has finished.
Under the Hardware and Sound topic left click or tap on the Configure a device feature.
Follow the instructions on the screen to finish the troubleshooting process.
Another solution for when you’re unable to burn a CD in Windows 10 is to run the Hardware and Sound Troubleshoother.
By performing this action you can ensure yourself that all multimedia hardware settings are in place, and thus there are no errors that can disrupt your recording process.
Note: you might be prompted by a window where you need to write your administrator account and password in.
4. Tweak your Registry
Reboot your Windows 10 operating system then log-in with your administrator account
On the Start screen press and hold Windows+R hotkeys.
In the run dialog box write regedit the line below and press Enter.
In the Registry Editor window double click on the HKEY_LOCAL_MACHINE folder.
In the HKEY_LOCAL_MACHINE folder open the SYSTEM folder then access the CurrentControlSet folder.
In the CurrentControlSet folder open the Control folder, then access the Class folder.
Now open the {4D36E965-E325-11CE-BFC1-08002BE10318} folder then on the right side pane left click on the UpperFilters registry, click Yes.
Click on the LowerFilters in the right-side panel and do the same steps as for the UpperFilters to remove it.
Reboot your operating system.
Try again your Windows DVD burner to see if the process works normally this time.
If you cannot burn a DVD in Windows 10 then applying some small changes to your System Registry may fix the issue, since this procedure followed by a system reboot can fix certain errors.
Note: Before doing the steps below you will need to make a backup copy of the system or at least your important documents and files that you might need later on.
5. Change EnumDevice DWORD
Press Windows+R hotkeys to open the Run window, type regedit, then press Enter.
In the Registry Editor window open the HKEY_LOCAL_MACHINE folder from the right-side pane, then access the SYSTEM folder.
Open CurrentControlSet, access the Services folder, then right-click on the atapi folder, then click on the New feature.
From the New submenu click on the Keyfeature, then as a name write Controller0 then press Enter.
Click the Controller0feature and click on the New option, from the submenu click on the DWORD(32-bit) Value option.
For the DWORD write EnumDevice, then press Enter. Click on the EnumDevice1 DWORD, then tap on the Modifyfeature.
Next to Value Datafeature write 1 then click OK.
Close the Registry Editor window and reboot your operating system.
Check again to see if your Windows DVD burner works for you.
Changing the EnumDevice DWORD is one option if you encounter issues burning a DVD. Simply start off by opening the Registry Editor and follow another few easy steps to complete the procedure.
In this article we presented you with all the efficient solutions you can apply if you’re unable to burn a DVD in Windows 10, because it fails in the middle of your burning process.
If you have further questions regarding this article, you can always write to us in the comments section of the page situated below and we will help you further as soon as possible.