Microsoft now allows Teams meeting organizers to download participant reports after a meeting

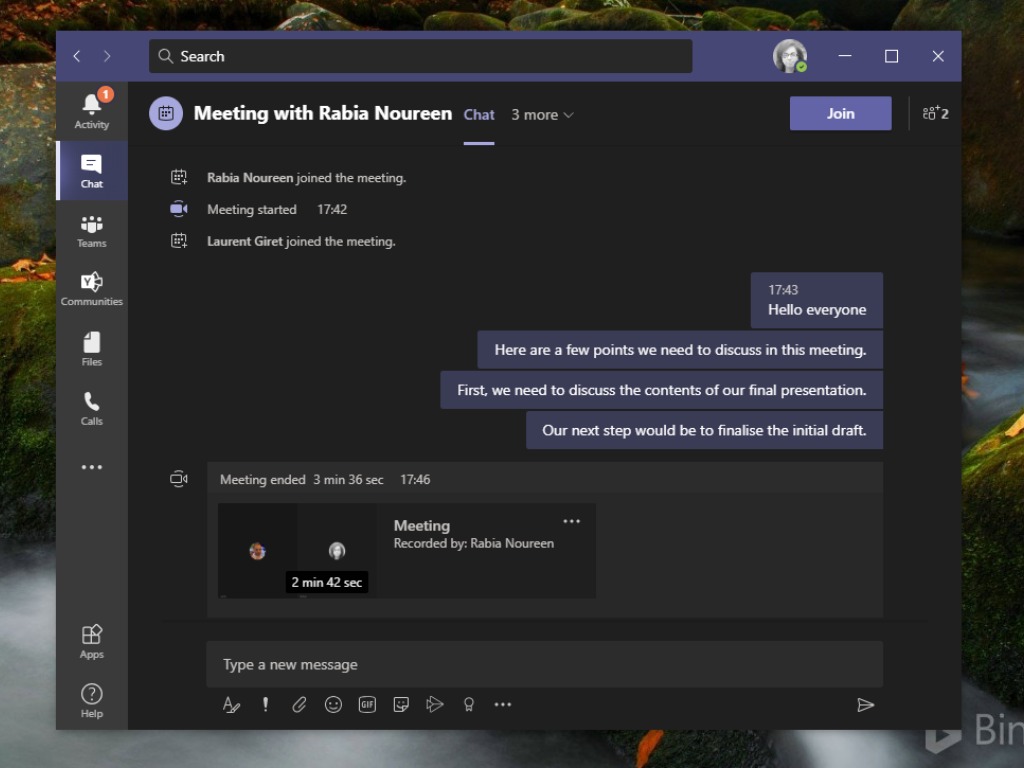
Microsoft Teams will now let meeting organizers download a list of participants in the app at the end of a meeting. In an update to the Microsoft 365 Admin Center message, the company noted that the feature is gradually rolling out to Windows 10, Mac, and the web clients.

As a reminder, the ability for meeting organizers to download a meeting attendance list in Microsoft Teams rolled out back in May 2020. Prior to the recent update, it was only possible to download the participant report while the meeting was in progress, and attendees were still present. However, this restriction has been removed in this release.

Notably, if the meeting participant reports are already disabled in your tenants, Office 365 admins will need to enable this feature in their organizations manually. To do this, run the following PowerShell cmdlet to turn on this feature:

Set-CsTeamsMeetingPolicy -Identity Global – AllowEngagementReport “Enabled”

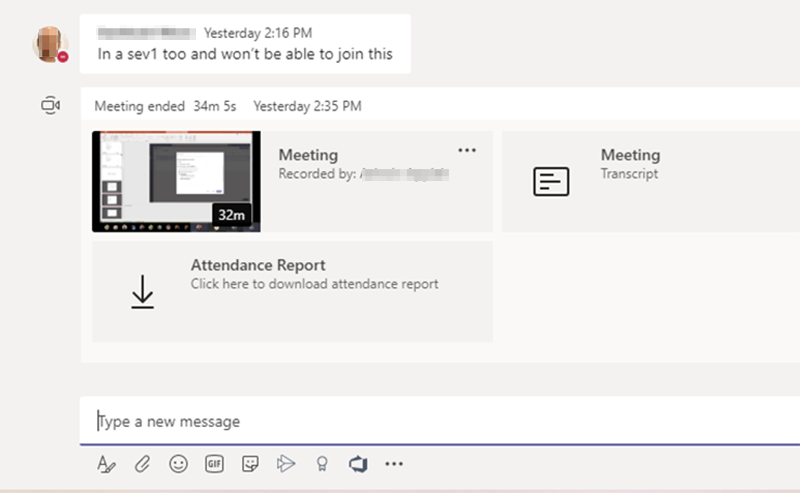
Once enabled, the meeting organizer will be able to access the list of participants after the meeting within the Meeting Chat. If the meeting is recorded, the app will automatically group the recording, transcript, and participant list in the meeting chat. Otherwise, only the participant list will be available to download.

Download participant list

The improved functionality for downloading participant reports is not the only update that Microsoft has recently brought to Teams. The company has also added new data into the report to make it easier for Teams meetings organizers to manage their attendance. The participant report now provides additional information such as duration, email address, meeting start time, and meeting title.

This new experience is really helpful in education tenants where teachers need to know who had attended their meeting. While the improved functionality began rolling out last week, it will be generally available by the end of this month.

Microsoft reveals new Xbox Series X/S launch trailer ahead of TV debut this weekend

Microsoft kicked off a global “Power your Dreams” ad campaign ahead of the launch of its Xbox Series X and Series S consoles on November 10, and today the company unveiled a new “Us Dreamers” launch trailer featuring Hollywood actor Daniel Kaluuya. The trailer will get its broadcast debut this weekend on Sunday Night Football around 5:30 PM PT.

The ad features Daniel Kaluuya experiencing an immersive gaming dream after picking up his Xbox controller. The music in the video is a catchy brand new track from Labrinth, a British musician who previously composed the score for the critically-acclaimed HBO drama series Euphoria.

“Power Your Dreams speaks to the idea that when we game – whether on console, PC or phone, we dream. Sometimes we dream about being someone else or about being our true selves. Sometimes we dream of an epic win with a group of friends or a solo adventure that challenges what we think we’re capable of. And sometimes we dream of first place or making this world a better place,” the Xbox team explained.

Microsoft opened pre-orders for its Xbox Series X and Series S consoles last month, and after seeing “record-breaking demand” the company promised to have more units available ahead of November 10. It’s good to see that the company’s global marketing campaign for the new console is still going strong, though with Halo: Infinite now being delayed to 2021, we have yet to see how other next-gen launch titles will run on the Series X.

FIX: Can’t find the FIFA 21 trial in the EA Play library

FIFA 21 is the latest in a long line of football manager games developed by EA Sports, a subsidiary of Electronic Arts.

Like every year, the hype grows as the game release date draws closer and closer, and pre-orders and early-access is something that everyone wants.

Well, that seems to be a problem this year since many FIFA 21 players reported that they are having a problem accessing the 10-hour trial of FIFA 21:

Hi I’m trying to download the 10 hour access so I can play it today at 4 when it’s released but when I search it up on my Xbox on ea play I can’t find fifa 21 can you help please so I can play the 10 hour access

Apparently, the problem itself is that the 10-hour trial doesn’t seem to appear on the EA Play gaming library, so naturally, players can’t access it.

We’ve researched the matter even further and have found a solution to this problem that has also been recommended by EA technical support as well.


Quick tip:

The Free trial of FIFA 21 will continue to be available even after the official launch of the game for everyone that wants to test it before they buy it.

However, if you’ve already decided on buying it, then take advantage of the best prices available!

  • 700+ teams
  • 30 official leagues
  • Unparalleled graphics
  • 17,000+ authentic players
  • Have a career in professional football and grow
  • Play as one of the best football teams of the 2021 season
  • Playing online can be a pain with an older PC

How do I install the FIFA 21 trial without EA Play?

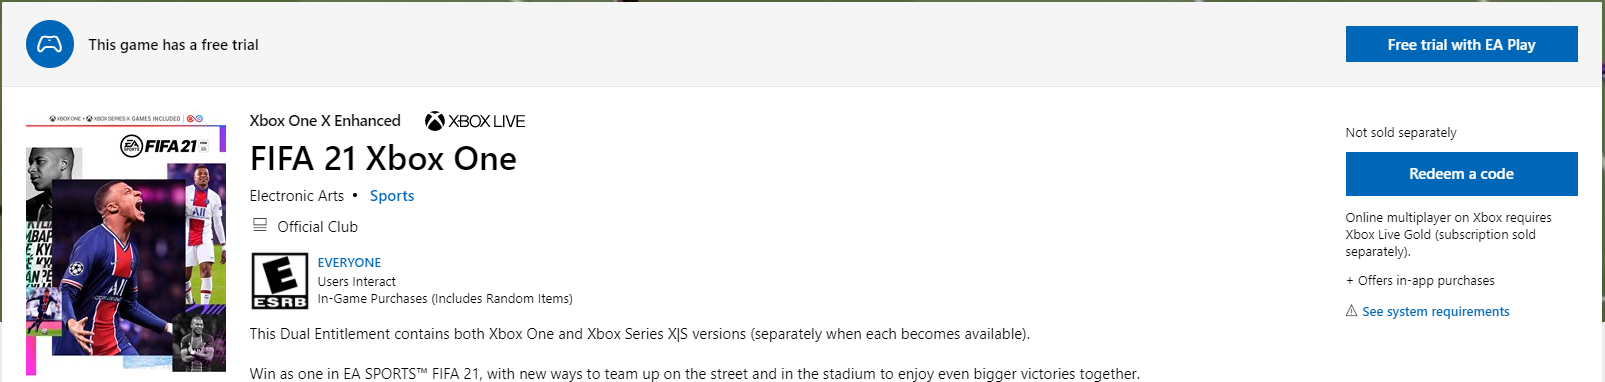
  1. Go to the FIFA 21 Microsoft Store page
  2. Log into your Microsoft/Xbox account
    • The account needs to have an EA Play Console subscription and has pre-ordered or pre-installed FIFA 21.
  3. Scroll down the page and click on the Free Trial with EA Play button
    • If you are taken to the EA Play subscription page, navigate back to the FIFA 21 Xbox One page
  4. The Free Trial with EA Play button should now be labeled Install on my devices
  5. Press Install on my devices
  6. Press the (…) button next to the Install on my devices button
  7. Click on Free Trial
    • If FIFA 21 is not installed on your console, simply follow the on-screen instructions to download it
    • If FIFA 21 is installed on your console, you should be able to launch and play the 10-hour trial without any issue
  8. Restart your console to apply the changes

By following these steps, you should be able to install the FIFA 21 10-hour trial without having to rely on the EA Play app.

Let us know if this solution worked for you, and tell us about your experience trying out FIFA 21 by leaving your feedback in the comments section below.


[wl_navigator]

FIFA 21 Gold Packs: What are the probability values?

Doing Squad Building Challenges is probably the best way of acquiring good players within FIFA 21.

These challenges become crucial once a new season starts, and players all around the world are planning on creating their ultimate Starter Team.

The problem is that besides all the grinding and the entire math they need to do to figure out good player positioning, players need to deal with the RNG aspect of pack drops.

For those of you who don’t know, RNG stands for Random Number Generator, which is basically, a gamer’s version of luck.

Players aren’t exactly thrilled about the RNG elements for FIFA 21 packs (known as pack weight), as they feel like good drops happen less often than before.

Never, ever known it to be this horrifically low at this point in the game in past years.

Every single pack is full of absolute ****. EA are getting worse which each passing day, they really are.

In the end, it all seems to be based around the luck you have, and even users are admitting it is just luck.


Quick tip:

With or without buying Gold Packs, it is undeniable that FIFA games are extremely enjoyable.

That being the case, get your hands on the latest entry and let the world know who the true champion is!

  • 700+ teams
  • 30 official leagues
  • Unparalleled graphics
  • 17,000+ authentic players
  • Have a career in professional football and grow
  • Play as one of the best football teams of the 2021 season
  • Playing online can be a pain with an older PC

What are the FIFA 20 Pack weight values?

It would seem that this is an age-old story that has been going on for years and years since FUT has been implemented. Then again, users shouldn’t be surprised at the apparent randomness of drops.

They are extremely low, as you can see from the official drop rates listed below:

Premium Gold Pack probabilities

  • 75+ 100%
  • 82+ 18%
  • 84+ 4.2%

This is a great decrease compared to last year’s Premium Gold Pack probabilities:

  • 75+ 100%
  • 82+ 19%
  • 84+ 4.7%

It would seem that not much has changed and the pack weights have stayed pretty much the same.

Some think that the drop chances are way too low.

Others think this is just EA trying and coerce players into giving up and paying real-life money for the packs.

Whether this is true or not, avid FIFA players that play the game for the fun of it won’t mind rarely getting good drops.

On the other hand, players fixated on certain builds and synergies will just have to farm over and over.

They may even have to spend some extra money if they really want to build the team of their dreams.


[wl_navigator]

FIFA 21 menus are lagging? Try these solutions

FIFA 21 is the latest entry in the long-lived FIFA game series.

However, like all of its predecessors, it is plagued by plenty of issues, especially those of a graphical nature.

All manner of problems form low FPS to black screens and crashes at launch have been reported.

Now, a new issue has been reported on the official forums.

Players have been reporting that they are experiencing lag in the FIFA 21 menu, both on the Xbox console as well as on PC.

Who the h*ll approved this? Is there even any quality testing? Who even asked for this? Why does it get worse every year??? It’s like the game is running on windows 98 i dont understand how this even happens. So slow and laggy i cant believe it

Because FIFA 21 is such a hot topic, we’ve decided to create this step-by-step guide to help you deal with lag issues efficiently.


Quick tip:

FIFA 21 is the biggest sports-oriented game on the market, and with all of its launch issues, it still manages to stay viable.

Get your hands on the game now and see what it is like to be a pro football manager!

  • 700+ teams
  • 30 official leagues
  • Unparalleled graphics
  • 17,000+ authentic players
  • Have a career in professional football and grow
  • Play as one of the best football teams of the 2021 season
  • Playing online can be a pain with an older PC

How do I fix FIFA 21 lag issues?

1. Update your video drivers

1.1 Update your video drivers with Windows Update

  1. Press Windows
  2. Select Settings (cogwheel icon near the bottom)
  3. Choose Updates & security
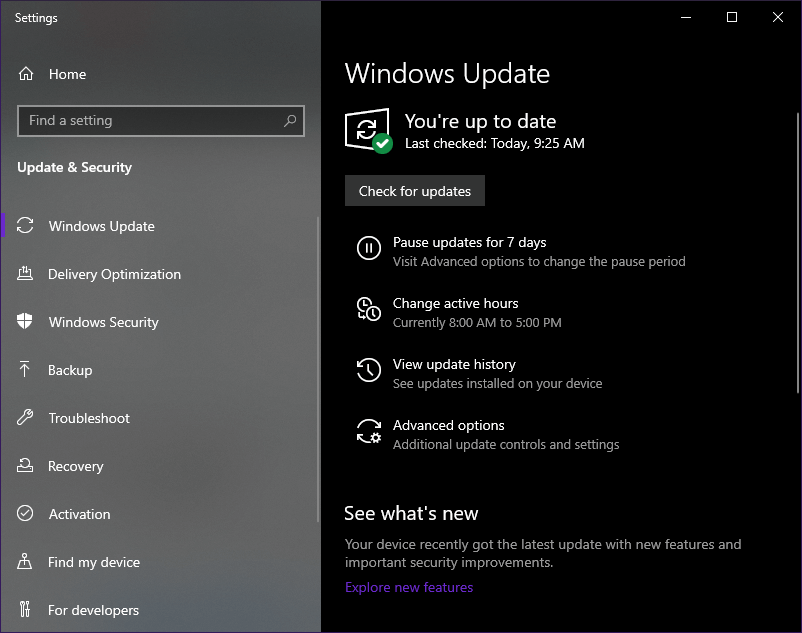
  4. Click Check for updates

FIFA 20 menu lag Windows check updates

1.2. Update your video drivers using the Device Manager

  1. Press Windows + X
  2. Select Device Manager
  3. Select Display adapters
  4. Right-click them and select Update driver
  5. Choose Search automatically for updated driver software
  6. Update driver automatically

FIFA 20 menu lag Update driver automatically

1.3. Update your video drivers from the manufacturer’s website

For a complete list of the most common video drivers, check out the links below:

Head over to your graphics card manufacture’s website and download the latest driver for your device

  1. Press Windows + X
  2. Select Device Manager
  3. Select Display adapters
  4. Right-click them and select Update driver
  5. Choose Browse my computer for driver software
  6. Browse for where you installed the driver in step 1
  7. Wait for it to update

1.4. Use a dedicated driver updater

Outbyte Driver Updater-Banner

All of the solutions listed above are viable, but using a third-party driver updater and fixer la Outbyte Driver Updater is the way to go if you want things to be done fast and efficiently.

Outbyte Driver Updater automatically update drivers

Not only will you not lose time going to each manufacturer’s website, but driver updaters will also always get you the latest version and the right driver for your hardware.

Besides, Outbyte Driver Updater can also fix the drivers you already have or the ones that are missing thanks to the online libraries that power it.

All in all, if you have any driver-related issue, then Outbyte Driver Updater is what you need.

Outbyte Driver Updater

Outbyte Driver Updater

If old or broken drivers are causing lag in FIFA 21, then Outbyte Driver Updater will fix that for you in no time at all!
Free trial Visit website


2. Check to see if your PC can actually handle FIFA 21

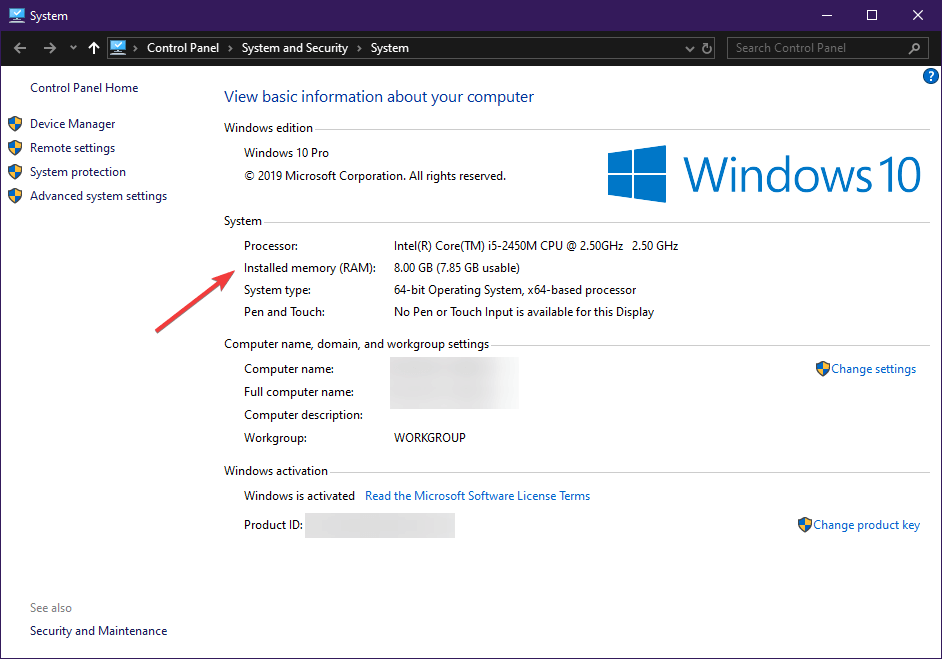
There are many players out there that aren’t aware of FIFA 21’s minimum system requirements.

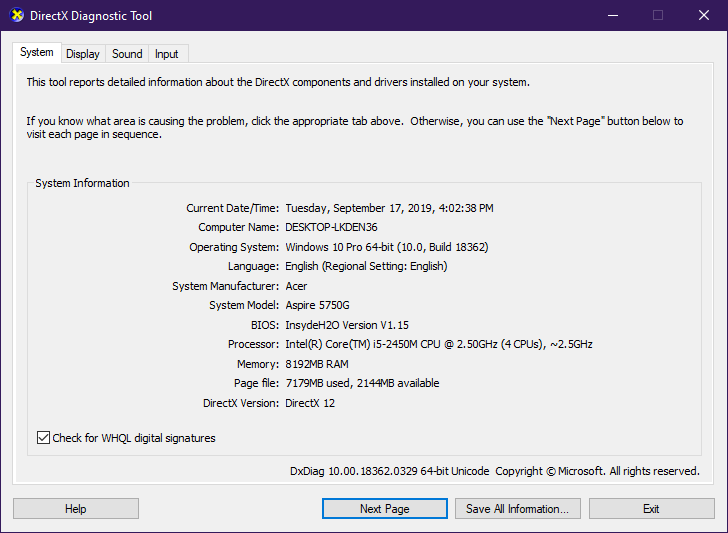
If you’re not exactly sure what the values are, head over to EA’s official website and check FIFA 21’s system requirements

FIFA 20 menu lag DxDiag


3. Close any background processes that may be causing the issue

  1. Press Ctrl + Shift + Esc
  2. Locate the process
  3. Select End Task
  4. Go back in-game and observe that the lag has disappeared.

Origin Help Center End Task

It would seem that the issue is caused by a background process belonging to the Origin client.

As such, switching it off will make the FIFA 21 menu lag disappear.


2. Turn on Directx12

  • Navigate to : Documents/fifa 21
  • Open fifasetup.ini
  • Change : “DIRECTX_SELECT = 0” to : “DIRECTX_SELECT = 1”
  • Then save, and try to launch the game.

This forces the game to launch using DirectX 11.


The methods listed above will also help you if you are experiencing black screen issues or crashes when launching FIFA 21.

Which one of these solutions did you try in order to fix your laggy FIFA 21 game? Let us know by leaving us some feedback in the comments section below.


[wl_navigator]

How to fix FIFA 21 black screen issues on PC

FIFA 21 is the latest entry in the FIFA games series, and it brings plenty of new features with it.

However, the series has a history of being plagued with bugs the first weeks of every new release’s launch.

A lot of players are reporting that every time they try launching their FIFA 21 game, their screen goes all black and nothing happens.

It seems that this problem is quite persistent, as the official forums are filled with people reporting this issue.

i donwloaded Fifa 21 yesterday but when i try to launch the game it opens but it’s just a blackscreen nothing really happen. I tried a lot of troubleshooting steps, i reinstalled and everything but still nothing.

As far as users describe the problem, the game simply launches into a black screen and doesn’t actually crash.

Usually, when a game behaves as such, it has something to do with the graphics card.

This article contains a list of possible solution which you can try if you are experiencing the same issues.


Quick tip:

Bugs and issues aside, FIFA 21 is really an amazing game, and the likeliness of these bugs happening to you are very slim.

Thus, go ahead and buy it, and join the pro-league of virtual football!

  • 700+ teams
  • 30 official leagues
  • Unparalleled graphics
  • 17,000+ authentic players
  • Have a career in professional football and grow
  • Play as one of the best football teams of the 2021 season
  • Playing online can be a pain with an older PC

How do I fix black screens in FIFA 21?

1. Update your video drivers

1.1 Update your video drivers with Windows Update

  1. Press Windows
  2. Select Settings (cogwheel icon near the bottom)
  3. Choose Updates & security
  4. Click Check for updates
Windows 10 Check for Updates

1.2. Update your video drivers using the Device Manager

  1. Press Windows + X
  2. Select Device Manager
  3. Select Display adapters
  4. Right-click them and select Update driver
  5. Choose Search automatically for updated driver software
Update driver automatically

1.3. Update your video drivers from the manufacturer’s website

For a complete list of the most common video drivers, check out the links bellow:

Head over to your graphics card manufacture’s website and download the latest driver for your device

  1. Press Windows + X
  2. Select Device Manager
  3. Select Display adapters
  4. Right-click them and select Update driver
  5. Choose Browse my computer for driver software
  6. Browse for where you installed the driver in step 1
  7. Wait for it to update</li>
Update driver manually

1.4. Use a third-party driver updater

Outbyte Driver Updater-Banner

You could try the methods mentioned above to update your drivers, but there’s always the chance of human error.

However, if you go for a third-party driver updater such as Outbyte Driver Updater, that will all go away.

Outbyte Driver Updater automatically update drivers

This is because Outbyte Driver Updater saves you the tame you would waste manually visiting each manufacturer to download the drivers.

More so, DirverFix always downloads the right driver, as well as the latest available version for it.

Lastly, the libraries that power Outbyte Driver Updater allow it to also handle missing or broken drivers on your system, allowing your PC to become 100% efficient form a driver’s point of view.

Outbyte Driver Updater

Outbyte Driver Updater

Old drivers, particularly the video card ones, are often the cause of black screen issues in many games. Solve the problem with Outbyte Driver Updater!
Free trial Visit website

2. Check to see if your PC can actually  handle FIFA 21

Run a Dxdiag by doing the following:

  1. Press Windows
  2. Type in dxdiag
  3. This will prompt  DxDiag to open, check to see if there’s a button that says Run 64-bit DxDiag
    • If it exists, click it
    • If it doesn’t, DxDiag will just run the 32-bit version by default
  4. Wait for the green bar on the bottom of the window to fully load.
  5. When the bar loading is finished, lookup your system’s information
FIFA 20 black screen DxDiag

While this may sound obvious enough, many players aren’t aware of FIFA 21’s minimum system requirements.

If that’s the case, head over to EA’s official website and check FIFA 21’s system requirements

If your system requirements are way below FIFA 21’s minimum requirements, the game won’t even load properly.

If you also experience problems with the companion app, see our dedicated fixes in this NFL Fantasy Football app not working guide to troubleshoot crashes and server issues.


3. Set the game to the lowest possible settings, and run it again

If the difference between your system’s specs and the minimum requirements isn’t too great, you could try running the game with the lowest possible video specs available.


4. Wait for a patch

Games are not always optimized upon launch, so keep a close eye on the Electronic Arts forums to see the latest FIFA 21 patch notes.


By following these steps you should now be able to play FIFA 21 properly without encountering any more black screens.

Lets us know which method you used that helped by leaving us a heads-up in the comments section below.


[wl_navigator]

Mortal Kombat 11 Ultimate will be a free Xbox Series X upgrade for Xbox One owners

A new version of Mortal Kombat 11, Mortal Kombat 11 Ultimate, has just been announced for both the Xbox One and Xbox Series X generations of Xbox consoles.

Mortal Kombat 11 Ultimate, like most “ultimate” editions of video games, will come with the base game and all of the post-launch downloadable content (DLC) that’s been released to date. In this case, that includes Kombat Pack 1, Kombat Pack 2, and Aftermath.

The Xbox Series X version of Mortal Kombat 11 Ultimate will feature a variety of improvements over the Xbox One version such as (dynamic) 4K resolution, improved graphics, and faster loading times.

As a welcome bonus, those who buy the Xbox One version will receive the Xbox Series X version for free.

Mortal Kombat 11 Ultimate is set to launch on Xbox One and Xbox Series X on November 17th and pre-orders will open on October 15th. Those who pre-order on Xbox will actually get the base game, Kombat Pack 1, and the Aftermath content unlocked on their Xbox One console immediately. The Kombat Pack 2 DLC, which features Mileena, Rain, and Rambo, will unlock on November 17th.

Kombat Pack 2 will be available to buy as a separate purchase for those that already own the base game and all of the other Mortal Konbat 11 content.

Digital pre-orders will also receive the Time Warriors Skin Pack on November 17th. This pack contains alternate outfits for Liu Kang, Noob Saibot, and Skarlet.

Are you planning to buy Mortal Kombat 11 Ultimate? Let us know why or why not in the comments below and then follow us on Pinterest and Facebook for more Xbox gaming news.

Microsoft to bring Xbox cloud gaming service to iPhone and iPads via web browsers

It’s no secret that the launch of Microsoft’s Xbox cloud gaming service on iOS devices has been delayed due to Apple’s strict App Store policies. Fortunately, Microsoft appears to have found a way around Apple’s rules by bypassing the App Store completely.

According to BI, Microsoft’s Phil Spencer has apparently told employees that they’re going to shift to a web-based solution to cloud gaming on iOS instead of relying on an app like the one that’s currently used on Android smartphones and tablets.

A 2021 release for Xbox cloud gaming on iOS is said to be expected.

Providing Xbox cloud gaming via a web browser may sound surprising to some at first but it’s actually entirely possible as seen by Google’s game streaming service, Stadia, which currently works within a web browser. Similarly, Amazon’s recently announced Luna game streaming service will also be available via web browsers on iOS devices when it launches in the near future.

The fact that so many video games will be fully available to iPhone and iPad users without the App Store will definitely put Apple in an interesting position. The tech giant is currently in a legal battle with Epic Games over the recent removal of the hit video game Fortnite from the platform but if Epic Games were to simply offer Fortnite via a cloud streaming service such as Xbox cloud gaming, Stadia, or Luna, Apple’s going to have very little power in the negotiations.

During the same meeting (via TV), Spencer apparently also mentioned a 2021 release for Xbox cloud gaming on Windows 10. It would be odd if cloud gaming didn’t come to Windows 10 devices by the end of next year as the app has already been spotted and is apparently in testing.

In addition to Android, iOS, and Windows 10, Xbox gaming streaming will also be launching on Xbox consoles though no release windows have been leaked or announced yet. Still, it would be incredibly odd if it doesn’t roll out to consoles by the end of 2021.

Are you excited for Xbox cloud gaming? Let us know why or why not in the comments below and then follow us on Pinterest and Twitter for more Xbox gaming news.

Xbox Game Pass Ultimate

FIX: This service is temporarily unavailable-ak1213

Many people use USPS for package delivery, but unfortunately, some of them reported This service is temporarily unavailable-ak1213 message while trying to track their order.

This can be a big problem for some, and in today’s article, we’re going to show you how to fix this problem once and for all.

How can I fix This service is temporarily unavailable-ak1213 error?

1. Use the mobile website

  1. Go to the USPS mobile website. You can do that in any web browser.
    USPS mobile this service is temporarily unavailable-ak1213
  2. Now enter the tracking number in the available field and press Enter.

You should now see the required tracking information. While this method works in any web browser, we suggest using Opera One for the best user experience.

Opera One is a lightweight and fast browser built on the Chromium engine, so it’s pretty similar to Chrome. In fact, it can even support Chrome extensions.

The browser has a built-in ad blocker, tracking protection, as well as a free unlimited VPN, so it’s a perfect choice if you want to protect your privacy online.

Other useful features:

  • Available on PC, Mac, Linux, iOS, and Android
  • Battery saver feature
  • Workspaces and tab Islands
  • Native AI and modular AI-ready design
  • Integrated messenger, Twitter, and Instagram

Opera One

Opera One is a lightweight Chromium browser that offers great security and privacy features.
Free Download Visit website

2. Use the mobile app

USPS mobile app this service is temporarily unavailable-ak1213
  1. Download the USPS Mobile app.
  2. After installing the app, open it, and enter your tracking number.

3. Disable proxy

  1. In Firefox, open the Preferences Or just visit the following page:
    about:preferences#general
  2. Scroll down to the Network Settings and click on the Settings button.
    network settings this service is temporarily unavailable-ak1213
  3. Select No proxy and save changes.
    no proxy firefox this service is temporarily unavailable-ak1213

In addition, you can also disable proxy system-wide by doing the following:

  1. Open the Settings app and go to Network & Internet.
  2. Now go to the Proxy tab and make sure that proxy is completely disabled.
    turn off proxy windows 10 this service is temporarily unavailable-ak1213

Users reported that this issue affects only Firefox, so if you’re using Firefox, be sure to try this solution. If the problem appears in other browsers, try to disable proxy for each browser.

4. Check antivirus settings

  1. Open your antivirus settings.
  2. Now look for HTTPS scanning or Secure connection intercept feature and disable it.
  3. After doing that, check if the problem is resolved.

Not all antivirus applications have these features, but Avast, Kaspersky, BitDefender, ESET, and many others have, so if you’re using them, be sure to check their settings.

5. Wait it out

It’s possible that there’s an issue with USPS servers, and that’s what’s causing the error to appear. Sadly, there’s not much you can do but wait for the USPS to fix the issue.

If you want, you can always contact them and let them know about the issue, so they can start working on it right away.

This service is temporarily unavailable-ak1213 error will prevent you from tracking your packages, but you should be able to fix it by using our solutions.

FIX: Dolphin Traversal Server connection error [Netplay]

If you’ve encountered a Dolphin Traversal Server connection error, here’s where you can find out more about this issue, and probably even learn how to fix it.

Many Dolphin users complained about getting a Traversal Server connection error message whenever they tried accessing Dolphin’s Netplay feature. The issue seems to be affecting more than just one user when it occurs.

What is Dolphin?

Assuming you don’t want to find more about the aquatic mammal, Dolphin is an awesome emulator for Nintendo‘s popular GameCube and Wii consoles. The emulator runs on Windows, Android, Linux, and macOS.

As you probably figured out by now, you can use Dolphin to play both GameCube and Wii commercial releases. Some would argue that Dolphin does more justice to these titles in terms of audio/video quality.

Is Dolphin legal?

Emulators are still in a somewhat gray area, but with Dolphin, things are quite different. The code of the emulator is perfectly legal, so this is good enough reason for Nintendo not to pursue it and take it down.

You can rip your own Wii or GameCube discs and play the games using Dolphin. Downloading pirated games and playing them on Dolphin, on the other hand, is not legal and you may get in trouble for doing it.

Dolphin Netplay lets you go multiplayer

If some of the games you own are intended to be played in multiplayer mode, Dolphin has you covered. The Netplay feature lets you set up online sessions with your buddies, as long as the GameCube or Wii title has a local multiplayer mode.

The advantage of using Netplay is that you don’t need a Wi-Fi connection or a Broadband adapter to connect with your friends.

However, note that while the GameCube Netplay feature should be free of errors, the same thing can’t be said about the Wii one.

How to fix the Dolphin Traversal Server connection error?

1. Forward the required ports

If you host a Netplay session, you must head to your router’s management page (default gateway in your browser) and make sure you forward the required ports. This will ensure that your friends can connect to your server.forward ports in your router
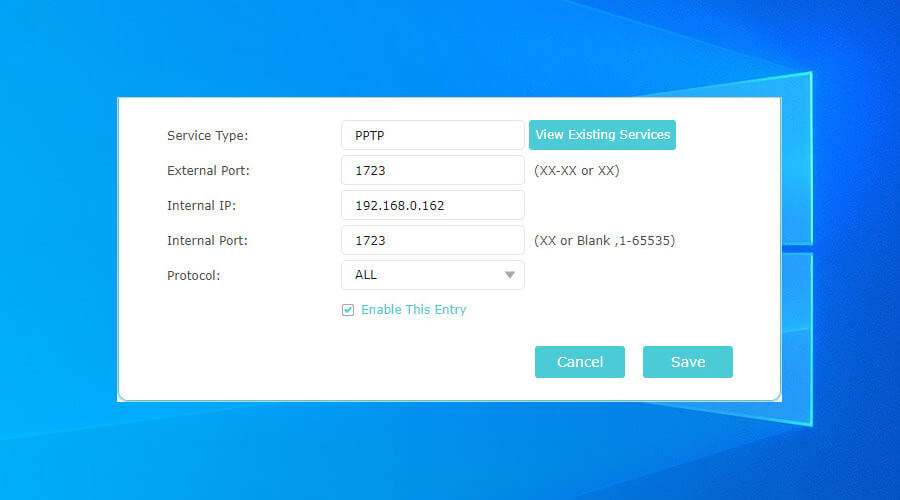
Note that you can use Direct Connect and Traversal Server as hosting methods. Reportedly, using Traversal Server might spare you the hassle of port forwarding, but that strictly depends on your router.

If this doesn’t seem to work, check if you’re not behind a double NAT.

2. Make sure you use the right Dolphin version

Getting the Traversal Server connection error might also mean you’re not using the right version of Dolphin. The latest versions usually comprise fixes for Netplay, which might curb the occurrence of the Traversal server error.

More so, you should check if you and your friends are using the same Dolphin version. By default, Dolphin won’t allow you to use different versions, so as to avoid compatibility issues and de-synchronizations.

3. Check your security software

Some security software (antivirus, firewalls) can get overzealous and block things they’re not supposed to. Check your firewall and make sure it doesn’t have any rules configured against Dolphin. If it does, just remove them.

The same goes for your antivirus. Some antivirus/antimalware services deem emulators as pure evil, so they keep them from being executed on the target computer. As a result, your ability to host/join Netplay sessions might be hampered.

Temporarily turn off your security software and try hosting/joining the Netplay session once more.

4. Use a VPN

  1. Purchase a premium VPN subscription (we recommend Private Internet Access)PIA
  2. Download the VPN installer on your PC
  3. Deploy the app on your computer
  4. Launch the VPN client
  5. Log into your account using your credentials
  6. Connect to a fast server (servers that are physically close are faster)
  7. Launch Dolphin
  8. Try accessing the Netplay feature again
  9. Check if there’s any improvement

Private Internet Access is an excellent VPN service brought to you by Kape Technologies. It’s one of the few VPN services that provides its customers with 24/7 live chat support.

Using a VPN can sometimes fix connectivity issues, especially if your connection is limited, even by accident. If, for instance, your ISP blacklists Dolphin servers or ports, you can easily bypass this limitation by using a VPN.

Private Internet Access

Private Internet Access

Getting the Traversal Server connection error in Dolphin? Private Internet Access could come in handy.
$2.69/mo. Buy it now

The same goes for network congestion. If there are a lot of users on your network, your connection can take a serious blow.

This, in turn, may impede your attempts to use some services, including Dolphin and its awesome Netplay feature.

It goes without saying that this fix won’t work every time. Sometimes, it’s actually the opposite, and you might need to switch your VPN server or close the service altogether to access certain services.

5. Flush your DNS

Cached data on your system can really mess up with your connectivity. To prevent that from happening, a little maintenance work is required from time to time.

For this scenario, flushing your DNS might just do the trick. If you have no idea what that means, don’t worry, we’ll show you exactly how to perform this task.

  1. Launch a CMD instance as administrator on your PC
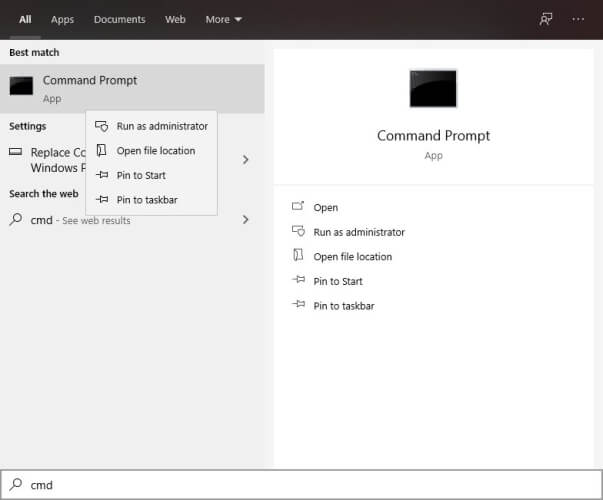
  2. Type the following commands, one by one, in this precise order:

ipconfig /flushdns
ipconfig /registerdns
ipconfig /release
ipconfig /renew
netsh winsock reset
exit

Now restart your PC, and once the boot sequence completes, launch Dolphin and check if there’s any improvement. Remember that flushing your DNS is not Dolphin-specific and could get you out of many more similar situations.

6. Wait it out

No service is perfect, and Dolphin might make no exception. Bugs, errors, and glitches happen from time to time, and you need to learn how to live with them. Until they get fixed, that is.

For instance, it so happens that a few years back, Dolphin’s Traversal Server feature had a bug, and got stuck in an infinite loop.

If that’s the case, you probably can’t do much about it, other than post on forums and ask what’s wrong.

Final thoughts on fixing Dolphin Traversal server connection error

To sum it up, if you planned on getting your game on with your peers on Dolphin and receive the infamous Traversal Server connection error, don’t despair just yet.

There are a few fixes that could bring you Dolphin’s Netplay feature back in no time. Although some of these suggested fixes might seem feeble, you may want to try them all out before calling it quits.

Sometimes, even as little as restarting your PC could fix a seemingly impossible issue.

Last, but not least, a VPN could save you from a lot of hassle, especially when it comes to connection issues.

However, note that these tools alone can’t do wonders, especially if the underlying issue is on your end, or on Dolphin’s developers’ side.

[wl_navigator]

FIFA 21 system requirements mistake ruined the game for many

Whenever a new AAA game is launched, the first thing on every PC  gamer’s mind is whether or not their hardware cand handle the new title.

That’s precisely why most games post a game’s minimum and recommended system requirements ahead of time so that everyone can have time to upgrade their PC.

The same thing applied to FIFA 21, as the system requirements have been posted for some time already.

However, a slight mistake in communication made it so that different platforms had different system requirements written on them.


EA posted lower system requirements by mistake

On EA’s answers page, users have been complaining that their game would crash at launch for no apparent reason:

I have it on PC and every time i open the game i see the loading screen and then the game shuts down, can someone give me any help? My PC is better that the recommended requirements for the game BTW.

Unfortunately, it seems that the issue was not hardware-related at all, but rather that players with lower system requirements attempted to launch the game.

An EA representative went on to clarify the situation:

First of all, sorry for taking so long to get back to you on the Minimum requirements mix-up. After investigation we can now confirm that the correct system requirements can be found on the Origin site here. The ones shared on help.ea.com & the steam client are incorrect at the time of this post and we are working with the concerned teams to get these updated.

We know that a lot of you have shared their DxDiags which allowed us to see that a lot of you are using the same processor.

Those who have AMD Phenom II processor are below requirements and will not be able to run this game.

The representative then provided links to the refund pages to all the platforms where players might have bought the game from, including Steam and Origin.


As of the writing of this article, the issue has not been dealt with yet, and the Steam page still displays the old, outdated minimum system requirements:

  • Requires a 64-bit processor and operating system
  • OS: Windows 10 – 64-Bit
  • Processor: Core i3-6100 @ 3.7GHz or AMD Phenom II X4 965 @ 3.4 GHz
  • Memory: 8 GB RAM
  • Graphics: NVIDIA GTX 660 2GB or AMD Radeon HD 7850 2GB
  • Storage: 50 GB available space

On the flip side, the Origin website has the correct minimum system requirements also displayed:

  • OS: 64-bit Windows 10
  • Processor (AMD): Athlon X4 880K @4GHz or Equivalent
  • Processor (Intel): Core i3-6100 @3.7GHz or Equivalent
  • Memory: 8 GB
  • Graphics card (AMD): Radeon HD 7850 or Equivalent
  • Graphics card (NVIDIA): GeForce GTX 660 or Equivalent
  • Online Connection Requirements: 512 KBPS or faster Internet connection
  • Hard-drive space: 50 GB

That being the case, if you too encounter similar crashes as described above, make sure that your PC meets the system requirements recommended by Origin, and not the ones on the Steam page.

The same goes for those that haven’t bought the game yet, as they should pay attention to the right system requirements.

For more bugs and issues that plague FIFA 21, as well as some solutions to some of them, check out this detailed article.


What’s your take on this interesting turn of events?

Let us know if you too needed to get a refund by leaving a message in the comments section below.


[wl_navigator]

Windows 10 might suggest tools depending on your interests

Microsoft released yesterday the Windows 10 Insider Preview Build 20231, available only for the users of Windows Insider.

The purpose is to allow developers to test a bunch of new features, mostly, that might be included in the upcoming OS October update, depending on their impact on performance and system reliability.

Windows 10 might focus more on your user experience

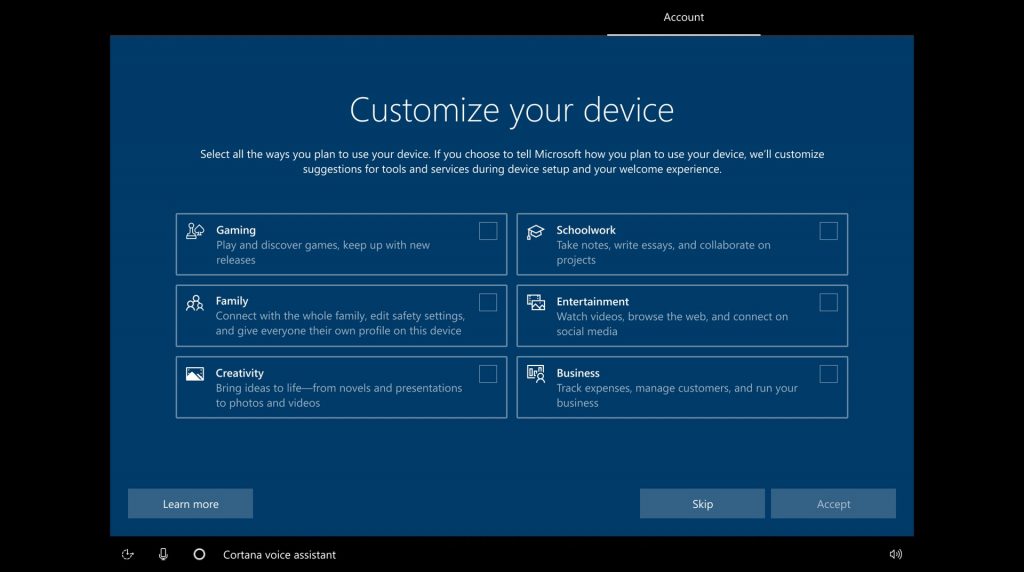
The important feature the build is testing is the option to choose upon Windows 10 setup how you plan to use your device.

If implemented, this option should pop up at every fresh installation or system reset.

insider preview Build 20231

This will allow Windows to prioritize and notify you of certain features and tools, depending on your interests.

Depending on your preferences, Windows will offer suggestions to help you stay up-to-date about new games, security tools, creativity, or business-related apps.

It’s possible that this will trigger other customized systems settings as well.

For enterprises

In the same line, Microsoft will make it easier for enterprises to set up automatic file associations.

As a result, IT admins can set which apps will automatically open various file types or links. For example, this makes it easy to set Microsoft Edge as your organization’s default browser, or always open PDFs in your organization’s preferred app.


drag your finger to move the cursor

Other notable improvements, only for Insiders, for now, include the possibility to view graphics card details, to see a Meet Now feature in the Taskbar, or to move the cursor via gestures on the touch keyboard.

Have you tested any of these features yet? You can share your intake on these changes in the comments section below.

[wl_navigator]

How to fix Baldur’s Gate 3 common bugs [PC & Stadia]

Baldur’s Gate 3’s Early Access was first launched on October 6 2020 at around 10 PM PST, and it literally broke records.

At first, Steam broke down because it couldn’t handle the sudden surge of purchases.

Afterwards, most streaming services like Twitch were overcrowded with people broadcasting Baldur’s Gate 3 walkthroughs.

Lastly, the CEO of Larian wanted to remind everyone that this is not the official launch of the game, but rather the Early Access, so bugs, issues and crashes are to be expected.

On that note, we’ve decided to create a list of the most common bugs and issues that players have been encountering.

Remember that the game is available on Google Stadia, Steam, and GOG, so some bugs and issues may only be platform-specific or console specific.


What are the most frequent issues in Baldur’s Gate 3?

1. Steam is overloaded

The surge of players either buying or playing Baldur’s Gate 3 is still high, even days after launch, so Steam-related issues seem to be quite common, such as long response times, or no responses at all.

Solutions:

Since this is a temporary issue that has nothing to do with the game itself, you have one of three options:

  • Buy the game from GOG if you’re a PC gamer
  • Wait a bit longer until the hype has lessened and try again
  • Try to buy and/or play the game at less active hours in your region

2. Steam purchases stuck on pending

This particular issue is somewhat related to the one above, and it may be caused by server overloads.

Solutions:

Besides the solutions mentioned above, there is a way to force Steam to handle your order faster:

  • Launch Steam
  • Right-click on the Steam button
  • Go to Settings and select View account details
  • Select View purchase history
  • Navigate to your Baldurs Gate 3 entry
  • Select Cancel purchase, and then confirm your choice

Doing this will cancel the purchase and allow you to rebuy the game and install it. Worked for me


3. Black screen/launch failure on Windows 7

Many Windows 7 users reported that they either get a black screen or a launch failure when trying to run the game.

Admittedly, even the game’s minimum system requirements state that you should be running Windows 10 as an OS if you want to run it.

Solutions:

In the case of this issue, the solution is pretty self-explanatory: the user needs to upgrade his OS if he wants to play Baldur’s Gate 3.

To learn more about upgrading your OS, check out this detailed article.


4. Multiplayer crashes when using Vulkan

Many users have reported issues with their multiplayer games during combat, as it can sometimes lead to crashes, but only if they are using Vulkan.

Solutions:

One solution that was confirmed to work for many was installing DirectX 11 instead of Vulkan


5. Multiplayer crashes the game on Stadia

While players have no problem playing the single-player mode while on Google Stadia, the same cannot be said bout those that want to play in Co-Op with their friends.

For some reason, multiplayer matches are plagued by frequent crashes.

Solutions:

Unfortunately, this issue can only be fixed via either a patch to Baldur’s Gate 3 or update to Google Stadia, both of which involve you having to just wait it out and avoid multiplayer games for a while.


This is a wrap-up of all of the most important bugs and issues that Baldur’s Gate 3 players have encountered so far.

Keep in mind that the game is still in Early Access after all and that such issues are to be expected, and not frowned upon.

In fact, you can even contribute to the game’s development with constructive feedback that can make the game’s Early Access period shorter, and the end-result better.


What bugs and issues did you encounter while playing Baldur’s Gate 3?

Don’t forget to let the developers know of them, and you can also share them with us in the comments section below as well.


[wl_navigator]

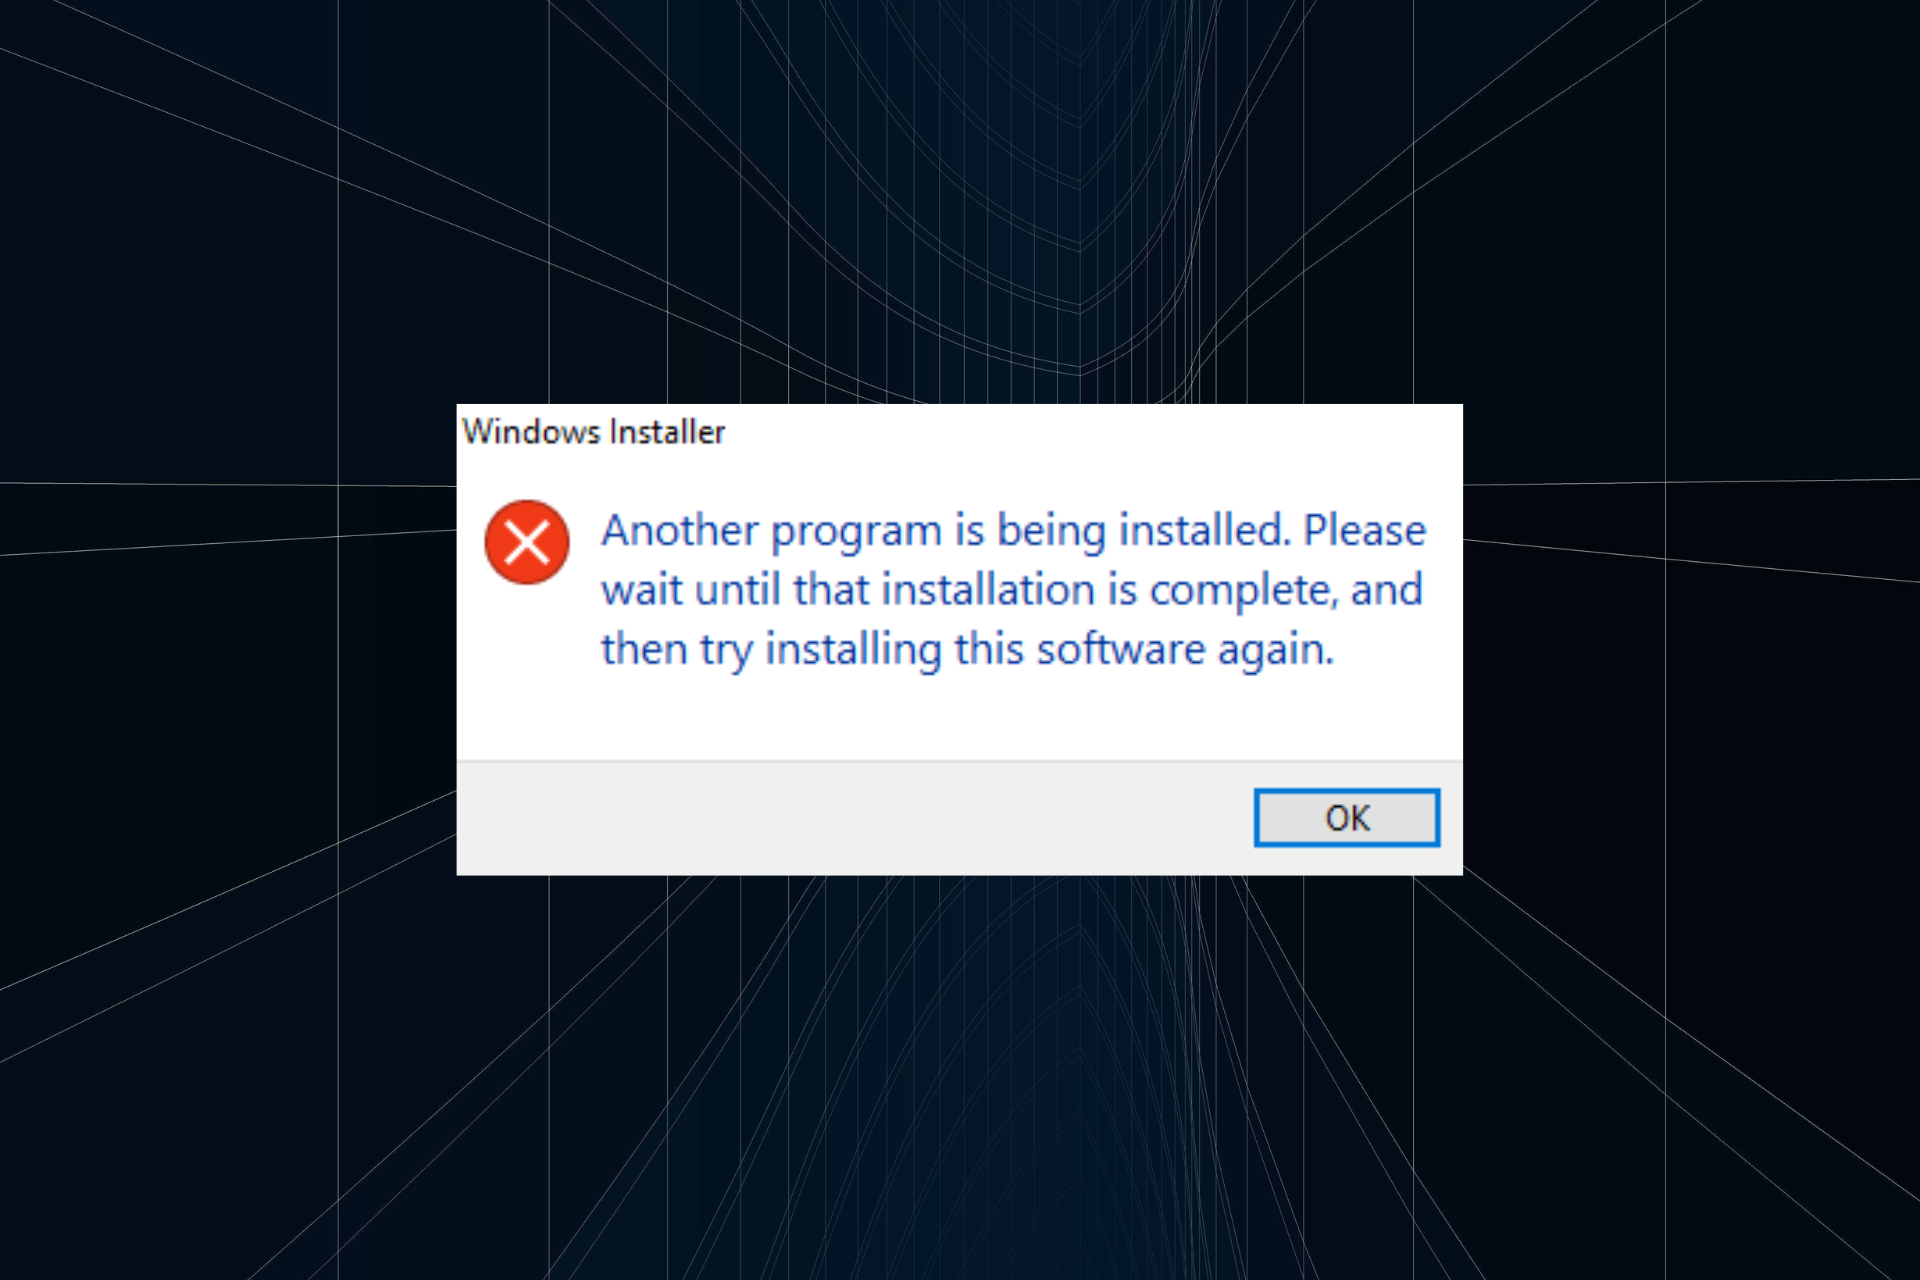
Another Program is Being Installed: 5 Methods to Stop It

Windows undoubtedly is a user-friendly operating system where most operations and functions are seamless. But an error message troubling many is, Another program is being installed. Please wait until that installation is complete.

The error message doesn’t highlight which other program is being installed, making it difficult to troubleshoot things. That’s why you need to follow a specialized approach, and we are here to help you with it. So, let’s find out how you can install the program!

Why does it say another program is being installed?

Here are a few reasons the error message appears:

  • An installation running in the background: In most cases, it turned out that another application was already running in the background, which triggered the error.
  • Conflicting applications on the PC: Sometimes, a third-party app can conflict with the functioning of the PC and lead to such errors.
  • Critical service not running: Windows requires a few services to be running in order to install programs, and if that’s not the case, you are bound to come across such errors.

How can I fix Another program is being installed error?

Before we move to the slightly complex ones, here are a few quick solutions to try:

  • Restart the computer and try installing the program.
  • Disable any third-party antivirus on the computer, and verify whether the Another program is being installed message still appears.
  • Make sure Windows is not installing updates in the background. In this case, wait for the process to complete.

If none work, move to the fixes listed next.

1. Terminate msiexec.exe in the Task Manager

  1. Press Ctrl + Shift + Esc to open the Task Manager, and navigate to the Details tab.task manager
  2. Locate the msiexec.exe process, select it, and click on End task.terminate to fix another program is being installed
  3. Once done, try installing the program that earlier threw the error.

2. Check the Windows Installer service

  1. Press Windows + R to open Run, type services.msc in the text field, and hit Enter.services
  2. Locate the Windows Installer service, right-click on it, and select Properties.windows installer
  3. Now, click on the Start button if the service is not running.start to fix another program is being installed
  4. Once done, click Apply and OK to save the changes and then install the program.

The Windows Installer service is critical when running the setup for programs. So check and make sure that the service is running. If the service was already running, stop and run it again.

3. Scan for malware

  1. Press Windows + S to open Search, type Windows Security, and click on the relevant search result.windows security
  2. Click on Virus & threat protection.virus & threat protection to fix another program is being installed
  3. Click Scan options.scan options
  4. Now, choose the Full scan option and click on Scan now.full scan to fix another program is being installed
  5. Wait for the scan to complete.scan

In some cases, it was a virus or malware that led to the Another program is being installed error in Windows 10. And running a full system scan should fix things. If Windows Security doesn’t work, use an effective third-party antivirus to scan for malware.

For instance, you can give TotalAV a try, as it is one of the most reliable options from third-party antivirus programs.

It can scan your entire system to detect any possible digital threats that can harm your PC, ultimately removing them and preventing them from entering your device in the future.

⇒ Get TotalAV

4. Uninstall conflicting applications

  1. Press Windows + R to open Run, type appwiz.cpl, and hit Enter.appwiz.cpl
  2. Choose a program installed recently, right before the problem first appeared, and click Uninstall.uninstall to fix another program is being installed
  3. Follow the on-screen instructions to complete the process.
  4. Check whether the problem is fixed. If not, uninstall other similar programs until the problematic one is found.

Oftentimes, a third-party application is responsible when you get the Windows Installer Another program is being installed error. Here, it’s best that you uninstall the app. For some, the app was Pinger, so check if you have it or identify the one in your case.

5. Perform a clean boot

  1. Press Windows + R to open Run, type msconfig in the text field, and then click OK.msconfig
  2. Go to the Services tab, tick the checkbox for Hide all Microsoft services, and click Disable all.disable services to fix another program is being installed
  3. Navigate to the Startup tab, and click on Open Task Manager.task manager
  4. Select any apps configured to launch at startup, and click on Disable.disable startup apps to fix another program is being installed
  5. Once done, head back now System Configuration, and click on OK.
  6. Click Restart in the confirmation prompt.restart
  7. When the PC restarts, try installing the program.

When a service or a background process triggers the error, performing a clean boot may help. Here, all the non-critical background services, drivers, and startup apps are disabled, thus eliminating any conflicts.

If this, too, doesn’t fix the Another program is being installed error, your last resort is to reinstall Windows. Though it will take time, the problem will be gone for sure. Besides, for the data, you can always use a reliable backup tool or move the files to external storage.

Before you leave, do not forget to check some quick tricks to boost Windows performance in no time.

Tell us which fix worked for you in the comments section below.

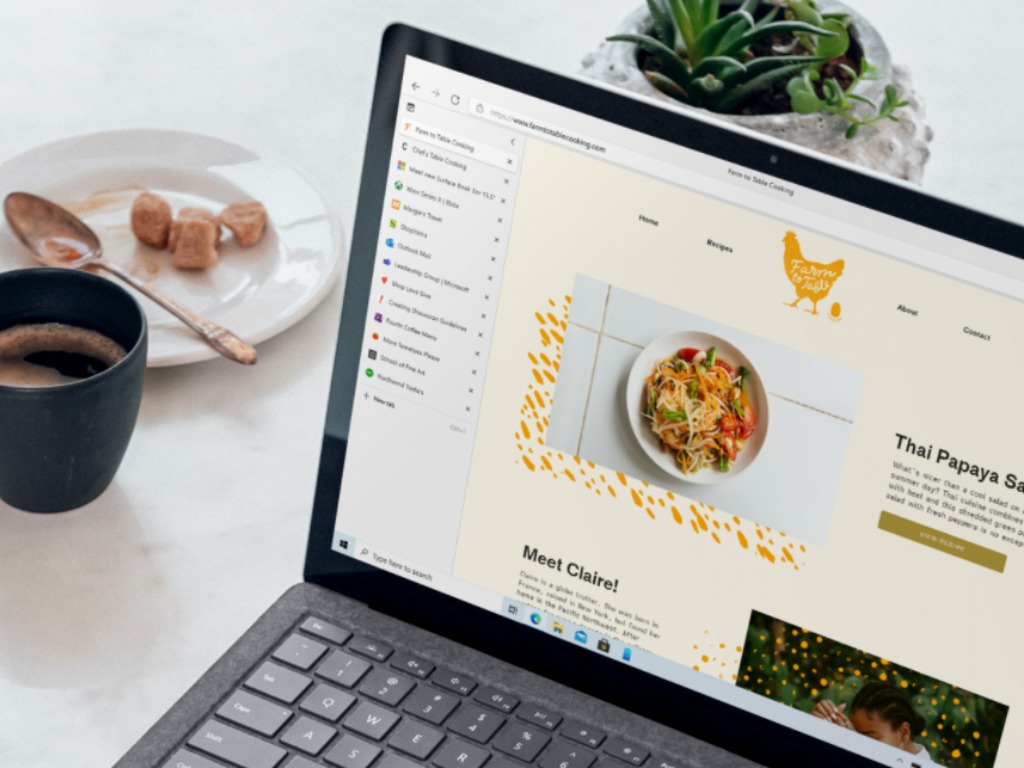
Microsoft Edge is getting built-in price comparison and Meet Now integration

Microsoft has just announced some important updates for its Edge browser with useful new features for the upcoming holiday season. First of all, the new Chromium-based browser a getting a built-in price comparison feature this month that will integrate with the existing Edge Collections.

To try it, you’ll need to add products to a Collection and then click “compare price to other retailers.” The browser will then display a list of prices for your items across online retailers with direct links to store listings. “This is just the beginning of the shopping journey. Microsoft Edge will continue to bring you features that help you save time and keep more money in wallet like more proactive price comparison and coupons,” wrote Liat Ben-Zur, CVP of Modern Life and Devices at Microsoft.

Animation of price comparison feature

The integration between Edge Collections and Pinterest that Microsoft announced earlier this year will also reach general availability this month. For Edge users who add regularly add items to their Collections, this integration will suggest related Pins at the bottom of the Collections pane, which can easily be added to a Collection. When enabled, the integration will also make it possible to export an Edge collection to a Pinterest board.

Animation of price comparison feature

In addition to these shopping-related features, Microsoft Edge is getting a bit more customisable this month with the ability to upload any picture to use as a background image in the new tab page. To customize the new Edge tab page, you’ll need to click the wheel in the top right corner and then click on custom page layout to see the upload button.

Animation of new tab page feature

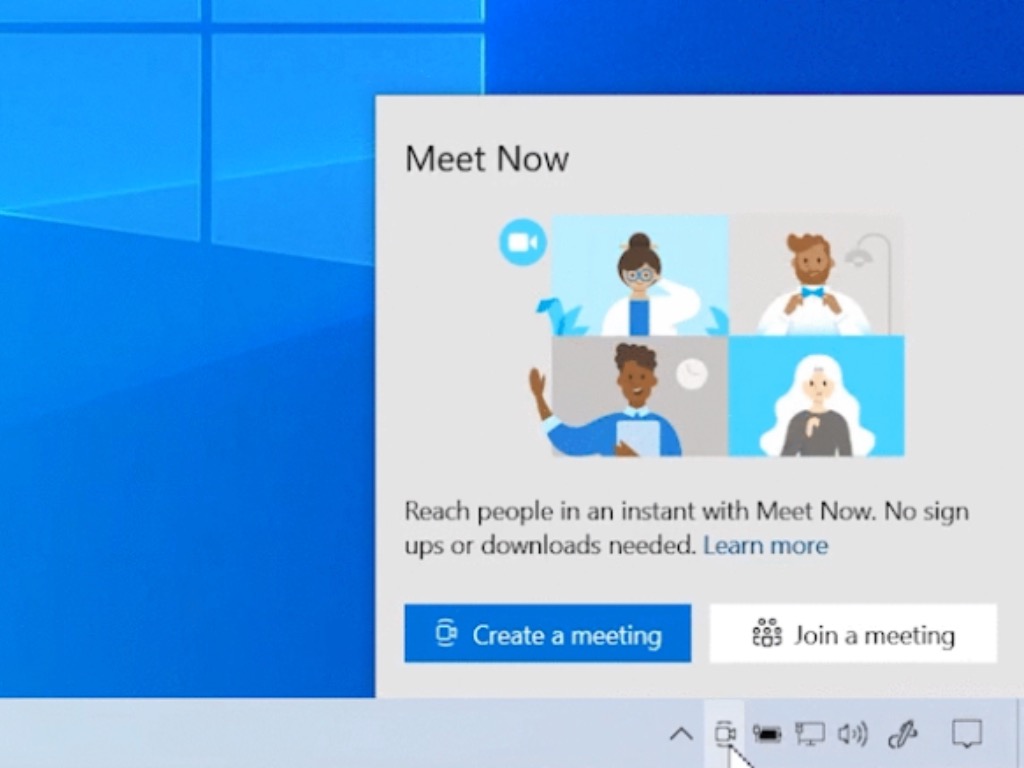
To help users stay connected with family and friends during the holiday season, Microsoft has also started rolling out a new Meet Now button on the new tab page that will help users quickly launch a Skype video call. “This experience will start to roll out to Edge this month, and will be available in Outlook on the web and on the Windows 10 taskbar in the coming weeks,” Ben Zur said today. Windows Insiders in the Dev Channel can now see this Meet Now button in the taskbar.

Skype Meet Now Button In Windows 10 Build 20221

Starting today, the built-in PDF viewer in Microsoft Edge will also let users quickly navigate PDFs using the table of contents. This has been a top-requested feature from users, and it should be really helpful for navigating really long documents using the web browser.

Animation of PDF table of content feature

The Web capture feature that is currently in testing with Edge Insiders will also help users to quickly capture online content without the need for a separate app. “We’ll add in an inking toolbar and the ability to capture full webpages with a single click in the upcoming releases,” Ben-Zur said today.

Animation of web capture feature

If you’d like a handy solution for chatting with your friends while watching a movie online together, a new Teleparty (formerly Netflix Party) browser extension can now do that with support for Hulu, Amazon Prime, HBO GO, Disney+, Netflix and more. You can install Teleparty from the Microsoft Edge add-ons site.

Last but not least, the company announced some Bing updates for the holiday season. In the US, Bing Rebates will display cashback offers right in the search results, and the company is also curating a list of deals on its Rebates offers page.

Animation of Bing Rebates feature

To take advantage of Bing Rebates on your purchases, you’ll need to join the Microsoft Rewards with your Microsoft account. Give with Bing, an extension of Microsoft Rewards that lets users donate points to causes they care about is also being expanded this month to support include over 1.4 million organizations across the globe.

What to do if VLC player is not finding Chromecast? [Solved]

VLC added Chromecast support to stream video and audio files from VLC media player on PC to your Chromecast connected to your TV. However, several users have reported the VLC player is not finding Chromecast issue.

Your VLC media player may fail to find your Chromecast if there is a temporary glitch with the media player. In other instances, it can also happen due to audio file incompatibility issues.

In this article, we explore a few troubleshooting steps to help you resolve the VLC player is not finding Chromecast issue in Windows 10.

How to fix VLC not casting to Chromecast? Try these solutions

1. Switch 2.4Ghz band

VLC player is not finding Chromecast

If your WiFi supports both 5Ghz and 2.4Ghz bands, try switching to only 2.4Ghz band. Some users have reported the Chromecast to have failed to cast from VLC media player when connected to a 5GHz network.

Switch to a 2.4Ghz network on your PC and TV, and then try casting from your VLC media player. Although, a temporary solution, it should work till you find a permanent fix.


2. Restart your Chromecast

VLC player is not finding Chromecast

If the issue persists or triggered again, try performing a power cycle. A power cycle will reset the device and fix any temporary problems occurring due to bad connection or configuration.

Disconnect Chromecast  from your TV. Reboot your Windows laptop. Reconnect Chromecast to your TV and then try casting again to see for any improvements.


3. Check your firewall

VLC player is not finding Chromecast

  1. Click on Start and select Settings.
  2. Go to Update and Security.
  3. Click on Windows Security.
  4. Open Firewall and Network Protection, and choose Public/Home/Private profile.
  5. Toggle the switch to turn off Windows Defender Firewall. Click Yes if prompted by UAC.

Once the firewall is off, turn off your Antivirus as well. You can disable it from the system tray. Try to cast your VLC media player to Chromecast and see if it works.

If it works, you can zero down the issue to Windows Defender Firewall blocking the VLC media player connection. Here’s how you can add the VLC player to the white list.

VLC player is not finding Chromecast

  1. Press the Windows Key + R.
  2. Type control and click OK.
  3. In Control Panel, go to System and Security.
  4. Open Windows Defender Firewall.
  5. Click Allow an app or feature through Windows Defender Firewall from the left pane.
    VLC media player not casting Chromecast
  6. Click the Change settings button on top.
  7. Scroll down and locate VLC media player.
  8. Check the both Private & Public boxes.
  9. Click OK to save the changes and close the Control Panel.

Note that, if you have a third-party security solution like Avast controlling your firewall, make sure to allow permission from Avast Firewall settings.

Make sure to enable Windows Defender Firewall and the Antivirus and then try casting to Chromecast. Adding the VLC media player to Windows Defender Firewall list should fix any issues caused due to your firewall.


4. Update VLC Media player

VLC media player not casting Chromecast

  1. Launch VLC media player on your PC.
  2. Click Help and choose Check for Updates.
  3. Download and install any update if available. If none available, you will see a ‘You have the latest version of VLC media player installed’ message.

If updating to the latest version did not work, try downgrading to an earlier version of VLC. You can download the previous version of VLC from the VLC releases page.

Cast via Chrome

VLC media player not casting Chromecast

  1. Launch Google Chrome.
  2. Click the three dots and select Cast.
  3. Select Chromecast from the devices list and select Desktop as Source.
  4. Launch the VLC media player and play any video that you want to cast.

While some quality may be lost, it should allow you to caste your VLC media player on your TV.

The VLC player is not finding Chromecast is a common problem and can occur due to a VLC media player glitch or firewall blocking the connection. Try the steps in this article to fix the problem for good.

[wl_navigator]

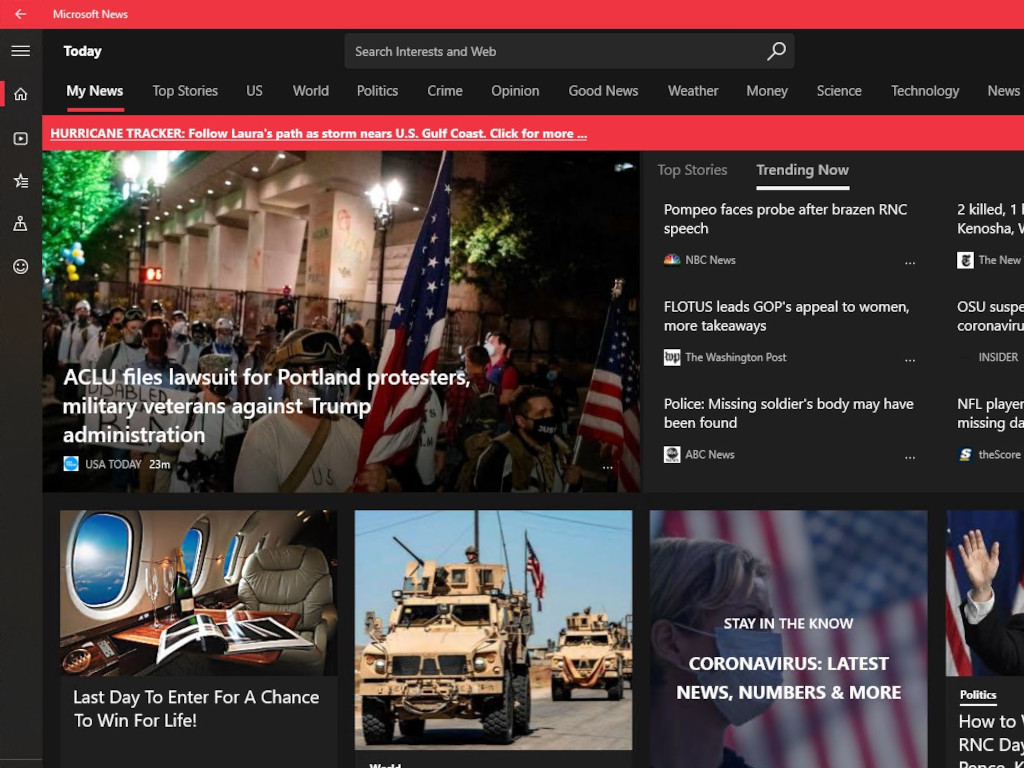
Microsoft News brings in over $1B in revenue for publishers

Following information on Microsoft’s efforts to support local newsrooms and journalism, the company is now releasing some numbers behind its more global efforts regarding the new industry.

Since 2014 Microsoft News (or more anecdotally known as the MSN app on devices) has attracted over 550 million monthly readers in 180 countries across 31 different languages and above all, returned $1B in “sustainable revenue” to the news industry as a whole.

In a new post on the Microsoft New Blog, the company is attributing its accumulative accomplishments within the new industry to a simple licensing and algorithmic combination.

  • License content from our worldwide community of over 4,500 media brands.  
  • Use a mix of algorithms and human insight to combine and curate that content into news feeds that power our experiences on the web, desktop, and mobile. 
  • Integrate high-quality advertising and share revenue with our publishing partners.  

As a result, MSN has been able to share its growing pot of $1B revenue with its 4,500+ global publishing network as well as power 170,000 unique pieces of content daily that cover a gambit of topics including sports, late-breaking global news, weather, pop culture, science, food, finance, and many more.

Going forward, Microsoft will continue to leverage its AI to assist in quicker and more thorough journalism as well as exploring emerging news topics such as eSports. Microsoft is also committed to continually reevaluate its publishing distributions to best support journalists and news outlets as a reward for high-quality content.

Full Fix: IPv4 properties not working in Windows 10, 7

Windows 10 has a lot to offer to its users, but unfortunately, there might be some bugs here and there. Some users report that they cannot change IPv4 properties in Windows 10.

If you’re setting up a network, that can be a big problem, but there are a few solutions that you want to check out. They apply to those using Windows 7 as well.

What to do if IPv4 properties don’t work in Windows 10?

1. Check your system for malware

If IPv4 properties aren’t working, the issue might be caused by malware. The problem can be caused by various toolbars and browser extensions.

So, if you’re using any suspicious extensions in your browser, be sure to remove it as soon as possible. In addition, it’s also a good idea to scan your system for malware.

There are many great antivirus tools, but if you want maximum protection that won’t interfere with your system, we strongly advise that you consider using Eset HOME Security Essential.

Eset is one of the most popular antivirus software, and for good reason. It has multi-layered protection, advanced machine learning, and additional security features that enable you to safely make online purchases or set parental controls.

It is suitable both for home use and business use. It is compatible with Windows, macOS and mobile Android devices.

⇒ Get Eset HOME Security Essential

2. Change the rasphone.pbk files

  1. Navigate to the following:C:\Users\yourusername\AppData\Roaming\Microsoft\Network\Connections\Pbkrasphone.Pbk\
  2. After you’ve found rasphone.pbk it’s a good idea to make a copy of this file and save it in a different folder in case you need to use it as a backup. This is entirely optional, but it doesn’t hurt to be a bit more careful.
  3. Right-click the rasphone.pbk and choose Open with. Then select Notepad from the list of suggested applications.Network properties not opening
  4. After you’ve opened this file with Notepad find the IpPrioritizeRemote and set its value from 1 to 0. Some users advise to also set IPInterfaceMetric to 1, so if changing IpPrioritizeRemote doesn’t work try changing IPInterfaceMetric as well.
  5. Now, all that you have to do is to save the changes and IPv4 properties should be working as usual.

Properties for connections are stored in PBK files, and there is usually one PBK file per user available. To enable IPv4 properties you need to find and manually edit the PBK file, so let’s get started.

3. Use Powershell to enable Split Tunneling

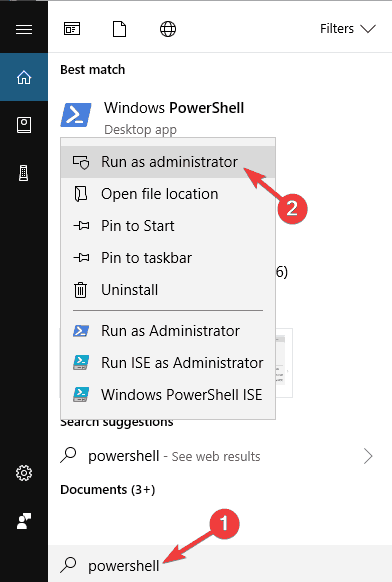
  1. Start Powershell. You can do so by typing Powershell in the search bar and right-clicking the Powershell icon and choosing Run as administrator from the menu.
    IPv4 not working Windows 7
  2. Enter the following command into Powershell and press Enter to run it (You should now get a detailed listing of settings for each VPN. Pay attention to the Name section and locate the name of your connection because you’ll need it in the next step):
    • Get-VpnConnectionIPv4 not working Windows 7
  3. Now, enter this into Powershell (Remember to change myVPN to the name of your connection that you’ve found in the previous step)
    • Set-VpnConnection -Name “myVPN” -SplitTunneling $TrueCannot access IPv4 properties
  4. Run that command by pressing Enter, and that’s it.

4. Set IPv4 properties manually via Powershell

  1. Run Powershell as administrator. If you don’t know how to do it, have a look at Step 1 in the previous solution.
    After the Powershell starts enter this:


    • set-DnsClientServerAddress -InterfaceAlias  “My Connection” -ServerAddresses 208.67.222.222,8.8.8.8,208.67.220.220,8.8.4.4IPv4 properties not opening
  2. It’s important to change My Connection to the name of your connection as well as IP addresses. Using the same IP addresses that we used in our example won’t work for you.

The next thing we’re going to try is another Powershell trick. Just use the above steps in that regard.

5. Use a different VPN client

This problem can occur while trying to configure a VPN. If IPv4 properties aren’t working with your current VPN, this might be a good time to consider switching to a different VPN client.

PIA is fully compatible with Windows 10, and it offers great features. So, if you’re having any problems with your VPN, we strongly recommend that you consider switching to this VPN service.

With encrypted Wi-Fi, P2P support, and SOCKS5 Proxy as part of the package, the connection is stable and you never feel a loss in bandwidth.

6 Install the missing updates

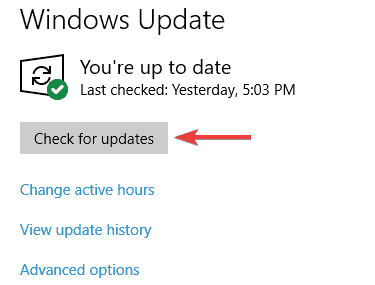
  1. Press the Windows Key + I shortcut to open the Settings app.
  2. Up next, go to the Update & Security section.
    Cannot access IPv4 properties
  3. In the right pane, click the Check for updates button.
    IPv4 properties not opening

According to users, sometimes problems with IPv4 properties can occur due to certain bugs on your system.

Microsoft is working hard to fix various issues, and they are frequently releasing Windows Updates, so if you want to be sure that your PC is error-free, it’s advised to keep your system up to date.

For the most part, Windows 10 automatically downloads the latest updates in the background, but sometimes you might miss an update or two.

However, you can always check for updates manually by doing as described above.

Windows will now check for any available updates and download them automatically in the background. Once the updates are downloaded, simply restart your PC to install them.

After your system is up to date, check if the problem is still there.

7. Disable Datamngr Coordinator service

  1. Press Windows Key + R and enter services.msc. Press Enter or click OK.
    IPv4 not working Windows 10
  2. Now look for Datamngr Coordinator service and double-click it to check it’s properties.
  3. Set Startup type to Disabled, and click the Stop button to stop the service. Now click Apply and OK to save changes.
    Cannot access IPv4 properties

According to users, if IPv4 properties won’t open, the issue might be the Datamngr Coordinator service. To fix the problem, it’s advised to disable this service completely.

After doing that, check if the problem is still there. Keep in mind that other services, such as Safety Nut Service, can cause this problem as well, so be sure to disable them.

8. Remove the problematic applications

According to users, sometimes a third-party application can cause IPv4 properties to stop working. To fix the problem, you need to find and remove this application from your PC.

Many users reported that applications such as Aztec Media caused this problem, so if you see any suspicious application on your PC, be sure to remove it and check if that solves the problem.

There are many ways to remove a problematic app, but the best one is to use one of these great uninstaller software tools.

In case you’re not familiar, uninstaller software is a special application that will completely remove the selected application, along with its file and registry entries.

As a result, there won’t be any leftover files or registry entries that can interfere with your system. There are many great uninstaller applications on the market, that’s true.

However, one of the best and simplest to use is Revo Uninstaller, so if you want to remove any problematic application from your PC, we suggest trying this tool.

9. Flush your DNS and reset your connection

  1. Start Command Prompt or PowerShell as administrator. To do that, press Windows Key + X to open Win + X menu and choose PowerShell (Admin) or Command Prompt (Admin).
    IPv4 properties not showing
  2. When Command Prompt opens, run the following commands one by one:
    • netsh winsock reset
    • netsh interface ipv4 reset
    • netsh interface ipv6 reset
    • ipconfig /flushdns

In some cases, issues with IPv4 properties can occur due to your connection. The simplest way to fix that is to reset your connection and check if that helps.

To do this, you just need to run a couple of commands by doing as described above. After running these commands, restart your PC and check if the issue is still there.

10. Modify your registry

  1. Press Windows Key + R and enter regedit. Now press Enter or click OK.
    Network properties not opening
  2. When Registry Editor opens, navigate to this key: HKEY_LOCAL_MACHINE\SYSTEM\CurrentControlSet\ControlNetwork
  3. Right-click the Network key and choose Export from the menu.
    IPv4 not working Windows 7
  4. Enter the desired name, choose a save location, and click the Save button. If anything goes wrong after modifying the registry, simply run the exported file to restore it.
    Cannot access IPv4 properties
  5. Right-click the Network key again, and this time choose Delete. Click Yes to confirm.
    IPv4 properties not enabled

In some cases, you might have to modify your registry if IPv4 properties aren’t working. To do this, you just need to follow the procedure described above.

After this key is deleted, the issue should be resolved and everything should start working again.

Getting an error while accessing the Registry? Count on us to solve the problem with the help of this quick guide.

Sometimes you might not be able to open IPv4 properties. This isn’t the only problem, and speaking of problems, here are some similar issues that users reported:

  • Network properties not opening – Sometimes you might not be able to open network properties. To fix that, be sure to install the latest updates and check if that helps.
  • IPv4 not working Windows 7, Windows 10 – This issue can appear on any version of Windows, and even if you don’t use Windows 10, you should be able to apply almost all of our solutions to other versions of Windows.
  • Cannot access IPv4 properties – If you can’t access IPv4 properties, be sure to scan your PC. Sometimes malware can cause this issue to appear, so be sure to perform a thorough scan.
  • IPv4 properties not opening, showing, enabled, available, detected, is disabled – There are various issues that can affect IPv4 properties, but you should be able to fix most of these issues by using one of our solutions.

We hope that these solutions were helpful to you and that you have managed to successfully set IPv4 properties in Windows 10.

If you are facing the IPv6 no internet access issue, check out this guide to learn the quick solutions.

If you have any questions, comments, or maybe some other solutions for this problem, just reach the comments section below.

How to fix VLC audio not working [Complete Guide]

VLC Media Player has all the features you need in a media player, but it is not exempt from its own share of issues – for various reasons, you may find that VLC audio is not working.

This media player is one of the most popular media tools for Windows computers. It’s easy to use and offers a neat interface.

However, without audio, you can’t enjoy your movies and other videos on VLC. If you’re currently experiencing this issue, then this guide is for you.

Some related issues include the following:

  • VLC audio stopped working – Undo recent changes made to your computer and update your drivers.
  • VLC not playing audio – Confirm that you didn’t mute the player. Fix it with this guide.
  • VLC audio track not working – Go to Audio > Audio Track and select a different track.

What can I do if VLC audio is not working?

1. Unmute VLC from the player interface

unmute player vlc audio not working

  1. Open VLC Media Player.
  2. Look on the player interface, to the left of the volume control, and ensure that there’s no red mark beside the speaker icon.
  3. If there is, click on the speaker icon to unmute the video.

2. Unmute VLC Media Player from the volume mixer

unmute vlc audio not working

  1. Open VLC Media Player and play a video that has sound.
  2. Right-click on the Volume icon on your taskbar and select Open Volume Mixer.
  3. Click on the speaker icon below the VLC mixer and ensure that it isn’t muted.
  4. Drag the volume slider for VLC Player all the way up.

3. Enable the sound device

  1. Click on the Start menu button.
  2. Search for Control Panel and open it from the results.
  3. Go to Hardware and Sound.
  4. Click on Sound.sound settings vlc audio not working
  5. Right-click on every sound device on this screen and hit Enable.
  6. Click on the Apply button to save it.
  7. Click Ok.

4. Re-enable VLC audio track

  1. Launch VLC Media Player and play a video.
  2. Ensure that the player isn’t on fullscreen mode.
  3. Click on the Audio menu.
  4. Go to Audio Track and disable it.vlc audio not working disable track
  5. Return to the Audio menu.
  6. Select Audio Track but enable it this time.

5. Reset the audio preferences of VLC Media Player

  1. Open VLC Media Player.
  2. Click on the Tools menu and select Preferences.
  3. Switch to the Audio section.
  4. Hit Reset Preferences at the bottom of the screen.vlc audio not working reset preferences
  5. Hit the Save button.
  6. Restart VLC Media Player.

6. Disable all enhancements

  1. Press the Windows key and search for Control Panel. Open it from the results.
  2. Click on Hardware and Sound.
  3. Select Sound.
  4. Right-click on a sound device and choose the Properties option.
  5. If you see the Enhancements tab click on it.
  6. Mark the Disable all enhancements checkbox.
  7. Hit the Apply button.
  8. Repeat steps 4 to 6 for every sound device in the Sound dialog box.

7. Modify VLC audio settings

  1. Launch VLC Media Player.
  2. Click on the Tools menu and go to Preferences.
  3. Click on the Audio section.
  4. Mark the Enable Audio checkbox.enable vlc audio not working
    NOTE: Enabling VLC audio can fix the issue, but if VLC audio still doesn’t work, continue with the steps below.
  5. Click on the Output module dropdown menu and change it to Automatic.
  6. Hit the Save button.

On switching the output module to select automatically, VLC will select the best fit for your system.

However, if VLC audio is still not working with the Automatic setting, go back to Step 5 and try again with each of the other options.

The fixes here will et you right back on track and bring back your VLC audio. If you try all of these, and your VLC audio is not working still, then update your VLC Media Player and audio drivers.

Did this solve your VLC audio issue? Feel free to tell us what you think in the comments section below.

[wl_navigator]

Forza Motorsport 7 arrives on Xbox Game Pass

Forza Motorsport 7 is now available to play free on Xbox One consoles, Windows 10 PC, and cloud streaming via Android devices for Xbox Game Pass and Game Pass Ultimate subscribers. Xbox Game Pass subscribers can also download some expansion packs available for Forza Motorsport 7 as an added bonus, such as the Hoonigan Car Pack and the Fate and the Furious Car Pack.

In Forza Motorsport 7, Xbox Game Pass Ultimate subscribers can race over 700 cars at 200 tracks in 30 amazing destinations throughout the globe. Dynamic race environments allow you to race in high wind, rain, and even snow! All of this while experiencing the Forza Motorsport 7 in native 4K resolution in HDR at 60fps.

As a reminder, gamers who have yet to try Xbox Game Pass can get their first month of Xbox Game Pass Ultimate for just $1. The Ultimate tier now includes Xbox Game Pass for Console, Xbox Game Pass for PC, Xbox Live Gold, plus access to over 150 Xbox One games on Android thanks to Microsoft’s new Cloud Gaming (Project xCloud) technology.


Xbox Game Pass Ultimate

Microsoft Edge Canary adds new Pin to Start Menu option for some Insiders

Microsoft has started testing a new Pin to Start Menu option on Microsoft Edge Canary, allowing users to pin sites to the Start menu for quick access. As Leopeva64-2 noticed, the experimental feature is currently available for some Insiders running the latest Canary build (87.0.662.0) of Microsoft Edge.

As a reminder, the Pin to Start Menu option was one of the nifty features available in the old Edge. The latest addition is a step towards making the switch from the browser’s legacy build to the new Edge seamless for users. The current implementation of this new capability is a pretty straightforward process, and it requires merely a couple of clicks. To pin your favorite sites to the Start Menu, follow the steps listed below:

  1. Navigate to the ellipsis menu, click “More tools,” and then select the Pin to Start option from the list.
  2. Now, enter a name to appear as the Start menu tile on the Pin to Start dialog box.
  3. Finally, click “Yes” to confirm the operation (when prompted).
  4. You may need to wait for a couple of seconds to see a new tile (containing your pinned website) in the Start menu.

The new Pin to Start Menu feature is a welcome change for users who rely on the Start menu for almost everything they do on Windows 10. Needless to say, having quick access to a couple of frequently used websites can save them some time and frustration. Keep in mind that the functionality is exclusively available in the latest Canary build, but it should soon make its way to the Dev channel.

FIFA 21 doesn’t launch on PC? Here’s what you can do

FIFA 21 is the latest entry in the FIFA game series, and it is set to come with a host of new features.

However, like all of its predecessors, FIFA 21 is plagued with a wide variety of issues from the very beginning.

One of the latest issues to reach the public forums is that some users can’t seem to launch FIFA 21 whenever they click it.

[…] Today morning I wanted to reinstall origin and FIFA 21 coz of some reason.

Apparently when I reinstalled origin and FIFA 21, the FIFA 21 Launcher opens, but when I click on Play the game just doesn’t launch.

Normally, when you try to access a game that is installed through Origin, the game platform launches first before the actual game.

However, as users described it further down the thread, nothing happens when they double-click the FIFA 20 icon.

A few solutions were found by both users and the EA staff, and this article is here to present them to you in a step-by-step manner.


Quick tip:

FIFA games have proven themselves over the years that despite being buggy, they are still worth it.

Get your hands on the latest entry in this franchise and join the pros on the virtual stadiums!

  • 700+ teams
  • 30 official leagues
  • Unparalleled graphics
  • 17,000+ authentic players
  • Have a career in professional football and grow
  • Play as one of the best football teams of the 2021 season
  • Playing online can be a pain with an older PC


How do I fix FIFA 21 if it doesn’t launch at all?

1. Update your device drivers

Outbyte Driver Updater-Banner
There are plenty of ways you can update your Windows drivers:

  • Use Windows Update
  • Use the Device Manager
  • Update the drivers from the manufacturer’s website

The third option, which happens to be the fastest as most secure as well, is using a third-party driver updater and fixer like Outbyte Driver Updater.

Outbyte Driver Updater automatically update drivers
Compared to the other 3 solutions mentioned above, using a dedicated driver updater means you will never download the wrong driver for your hardware model.

More so, you save time by not having to manually visit each manufacturer’s website to get the drivers.

The last reason why Outbyte Driver Updater should be your go-to solution is that it also fixes the drivers that you have, or detects the ones that are missing entirely.

Outbyte Driver Updater

Outbyte Driver Updater

This lightweight and portable tool will detect all of your missing drivers by itself, and update them as soon as possible.
Free trial Visit website

Want to update all of your drivers without a hassle? Try this driver updater that we’ve tested!


2. Make sure your Windows is updated to the latest version

  1. Press Start (the Windows key)
  2. Select the Settings button (the cogwheel at the bottom left of the Start menu)
  3. Scroll down the list until you see Update & Security
  4. Select Check for Updates in the new window, and let whatever updates are available to unfold

FIFA 20 won't launch check windows updates


3. Check to see if your hardware meets the minimum requirements

Check out FIFA 20’s minimum and recommended system requirements.

FIFA 20 for PC is indeed a resource-intensive game so, before trying looking for answers, check to see if your PC cand even run it.

You can head over to EA’s official website and check what are the minimum and recommended system requirements for PC.

Check out your own computer’s specs

  1. Press Start (the Windows key)
  2. Type in This PC
  3. In the new window, right-click on an empty space and select Properties

A window will open up and show you some basic information about your computer.

This includes RAM, Processor, the installed OS, etc.

FIFA 20 doesnt launch PC specs Basic
If you want a more detailed information sheet, you could try running a DxDiag, like this:

  1. Press Windows + R
  2. Type in dxdiagFIFA 20 doesnt launch DxDiag

A new window will open up. Wait for the green bar to fill up, and look at your PC‘s specs.

Switch between the System, Display and Sound tabs as these are the ones you will be most interested in.


4. Change the configuration file to run in DX12


  1. Go to your Documents folder
    • This PC\Documents\FIFA 21
    • C:\Users\[Your Username]\Documents\FIFA 21
  2. Open the fifasetup.ini file with Notepad or your preferred text editor
  3. Find DIRECTX_SELECT = 1
  4. Replace the 1 with a 0
  5. Save and close the file

If your PC‘s specs are way lower than FIFA 21’s minimum system requirements, this is most likely why the game won’t launch.

Xbox One and Xbox Series X versions of the Ride 4 video game are now live

The latest entry in the Ride video game franchise, Ride 4, is now live and ready to play on Microsoft’s family of Xbox One consoles.

Given that Ride 4 supports Smart Delivery, a feature that promises a free unlock of the next gen version for free when the same account uses a next gen console, the Xbox Series X and Xbox Series S versions are also live in the Microsoft Store.

Of course, an Xbox Series S or X console will be needed to play the next gen version but those who have pre-ordered one should be happy to know that Ride 4, and several other titles such as Marvel’s Avengers and Control Ultimate Edition, will be ready to do as soon as the console is powered on.

Here’s the official gameplay trailer for Ride 4:

Ride 4 is available in both a regular version and a Special Edition that comes with the base game, the Season Pass, and a Credits Multiplier.

Are you going to play Ride 4 now on Xbox One or will you wait until your Xbox Series X or S arrives? Share your thoughts with the community in the comments below and then follow us on Pinterest and Facebook for more Xbox gaming news.

RIDE 4
RIDE 4
Developer:
Milestone S.r.l.
Price:
$39.99


RIDE 4 - Special Edition
Developer:
Milestone S.r.l.
Price:
$69.99

Windows 10’s Slack app updates with improved file browsing and bug fixes

The official Slack app for Windows 10 devices updated to Version 4.10.0 today. This update contained a wide variety of bug fixes for errors relating to window resizing and switching workplaces and also improved the ability to find recently accessed files.

Here’s the full release notes:

What’s new

  • Use files? Us too! If you’ve recently used or linked to them on your device, Slack will be slicker at swooping them up and snatching them into your grasp in Slack.

Bug fixes

  • Sometimes, you could not exit full screen mode with escape on windows, which was wrong, because that’s literally what escape means. Now, it works.
  • We fixed some issues that caused window resizing of Slack to be difficult. We never want to be difficult.
  • Quickly switching workspaces caused problems. Switching workspaces should only cause opportunities, so we fixed that.
  • There were a few little bugs that caused crashes, like bugs do. We fixed those, and we’ll fix the next ones too.

Do you use Slack on your Windows 10 device or have you made the switch to Microsoft Teams or another service? Let us know in the comments below and then follow us on Pinterest and Twitter for more Windows 10 app news.

Slack
Slack
Price:
Free

FIFA 21 crashes at launch? Try this useful fix

A few players have reported on the official EA forums that they are having problems with FIFA 21.

It would seem that every time they launch the game, it simply crashes.

I have it on PC and every time i open the game i see the loading screen and then the game shuts down, can somenone give me any help? My PC is better that the recommended requirements for the game BTW.

EA support staff was quick to answer, and they gave a number of solutions that just might work.

These solutions, along with others, were included in this article that might help you bypass this issue if you are experiencing it as well.


Quick Tip:

If you haven’t bought the game yet, then there’s no time to waste! Get your hands on it as soon as possible and join the pros in the biggest football game ever!

  • 700+ teams
  • 30 official leagues
  • Unparalleled graphics
  • 17,000+ authentic players
  • Have a career in professional football and grow
  • Play as one of the best football teams of the 2021 season
  • Playing online can be a pain with an older PC


How do I fix FIFA 21 if it crashes at launch?

1. Update your device drivers

updated outdated drivers

There are plenty of ways you can update your Windows drivers:

  1. Use Windows Update
  2. Use the Device Manager
  3. Update the drivers from the manufacturer’s website
  4. Install dedicated driver downloading software

Additionally, you could try using a third-party driver updater or fixer to handle your problems, one like Outbyte Driver Updater.

Outbyte Driver Updater automatically update drivers

It works faster and it is more reliant than manually updating your device drivers, and you also know that it will also get the right driver for your hardware, and the latest version as well.

More than that, Outbyte Driver Updater will also detect broken or missing drivers, downloading and installing those too within a matter of minutes.

Outbyte Driver Updater

Outbyte Driver Updater

Game crashes are often caused by old or missing drivers, so fix these issues by taking care of your drivers at once!
Free trial Visit website

2. Check if your PC meets FIFA 21’s minimum system requirements

Many players aren’t aware of FIFA 21’s minimum system requirements.

If you don’t know them either, head over to EA’s official website and check FIFA 21’s system requirements.

Check your own system requirements by performing a DxDiag.

Also, keep in mind that there was a mistake when posting the minimum system requirements for FIFA 21 on Steam, so make sure you visit the official Origin website to see the real system requirements.


3. Modify your FIFA 21’s files

  1. Go to the following folder:
    • C:UsersUSERDocumentsFIFA 21
  2. Open the FIFA setup file using a text editor such as Wordpad
  3. Find the line that says :
    • DIRECTX_SELECT = 0
  4. Change that line to:
    • DIRECTX_SELECT = 1FIFA 20 Crash change line
  5. Save it and then try launching FIFA 21 again.

Keep note that you are modifying your game files.

This may cause irreparable damage to your game‘s installation and you may need to download and install it all over again.


4. Launch FIFA 21 without having your controller plugged in

This step is pretty straightforward. Simply connect your controller to the PC after FIFA 21 has launched.

Also, make sure that you aren’t using any knock-off controllers, or any controller emulators since those too have caused problems with FIFA games in the past.


5. Set the game to the lowest possible settings, and run it again

If your PC‘s specs aren’t too far off from FIFA 21’s minimum requirements, you could try launching it with all the settings set to the lowest possible values.

While gameplay won’t be as enjoyable, you will at least see whether your old gaming PC is to blame or not.

6. Be patient and wait for a patch

EA is quick to solve many of the issues that appear at launch, even if it may take some time.

If none of the solutions mentioned above work, simply wait to see what future FIFA 21 patches will bring.


By following these steps, you should no longer be experiencing crashes when trying to load FIFA 21.

Let us know which of these steps you’ve followed by leaving us a message in the comments section below.


[wl_navigator]
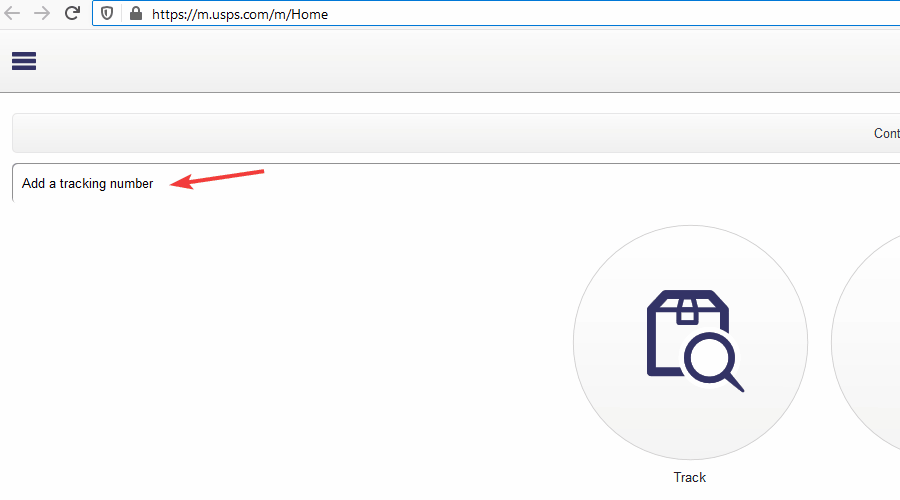
FIX: Error connecting to FIFA 21 Ultimate Team

With the early access to FIFA 21, a lot of gamers and fans of the series jumped on the hype train and downloaded the game, trying to play the trial.

FIFA 21 has a lot of new amazing features, but it also keeps the game modes from previous versions.

Unfortunately, it also has a lot of old and new problems. One of the most important ones is that a lot of players are reporting an error message when trying to access Ultimate Team:

Hi, I can play any online game mode with my account, but can’t play FUT 21 at all ! I’m using EA play, and when I go to ultimate team I get this error:
We are sorry but there has been an error connecting to FIFA 21 Ultimate Team
I’m sure something is wrong with my EA account. I tested my other account and it worked just fine. Please help me !

It seems like all the other game modes and features work as expected, the problem affecting only Ultimate Team.


Quick tip:

Each new entry in the FIFA franchise brought amazing new changes, and this applies to FIFA 21 as well.

Buy the game now and prove your worth on the online stadiums.

  • 700+ teams
  • 30 official leagues
  • Unparalleled graphics
  • 17,000+ authentic players
  • Have a career in professional football and grow
  • Play as one of the best football teams of the 2021 season
  • Playing online can be a pain with an older PC


How do I fix FIFA 21 Ultimate Team errors?

1. Reset your EA account password

  1. Go to EA’s page to reset your account password
  2. Log in with your EA account and the new password
  3. Navigate to the Securities tab
  4. You will be presented with a list of trusted devices
  5. Select each device and untrust each one of them
  6. Log into your console
  7. Make the PlayStation Plus or Xbox Live account your primary account
  8. Delete EA Play and EA-related games and settings
  9. Launch FIFA 21 like a regular game

2. Check your EA Play subscription

The FIFA 21 trial is only available for users with EA Play. This means that you have to have a valid subscription and a working account.

If your subscription has expired, FIFA 21 trial won’t work.

Multiple gamers confirmed that after renewing their EA Play subscription, the game worked as intended, without any errors.

So just go to the official EA Play website, log in to the account with your credentials, and then renew your subscription. After that, try to play FIFA 21 on your Xbox One console.


3. Play a Seasons game

The first workaround is the simplest, as well. The good thing is that it worked for a lot of FIFA 21 players.

If you’re getting the same error, just play an entire Seasons game. After that, quickly back out and go to the Ultimate Team (UT) panel and it should work.

After following this process a couple of times, only clicking on the Seasons panel and then quickly on the UT panel seems to solve the problem.

This solution worked for most gamers that encountered the error, so you can try it as it might work for you too.

Keep in mind that this is just a workaround and you’ll have to do it every time you want to access Ultimate Team.


3. Clear Alternative MAC address

fifa 20 can get in to ultimate team

  1. Press the Xbox button to open the guide.
  2. Navigate to Settings > Network Settings > Advanced Settings > Alternative MAC Address.
  3. Select Clear.
  4. After that, press the Xbox button on your console to shut it down.
  5. Unplug the power cord from the wall outlet and wait a minute or two.
  6. After that, plug in your power cord back into the wall outlet.
  7. Wait until the LED light from your power brick goes from white to orange.
  8. Then, press the Xbox button on your console to power it on.

4. Clear persistent storage

  1. Disconnect and reconnect your Xbox One from the Internet.
  2. After that, press the Xbox button to open the guide.
  3. Navigate to Settings > Blu Ray & Disc > Persistent Storage.ultimate team not working in fifa 20
  4. Select Clear Persistent Storage. Repeat the process three times.

After that, you can also power cycle your Xbox One console. To do that, just press the Xbox button on your console for 5 seconds while it is on, waits for the console to shut down, and power it back again by pressing the Xbox button.

We have to mention that different solutions worked for different users, as an official fix from Xbox or EA is not available. The first two workarounds had the most success, so be sure to try them first.

For any other suggestions or questions, feel free to reach for the comments section below.


[wl_navigator]

How to fix user authentication failed in TERA Online

If you’ve been playing TERA Online for a long time now, chances are you’ve encountered the infamous user authentication failed error message. Truth be told, no matter where you get this error, it can really throw you off.

Much so if you’re just trying to get your daily dose of relaxation from TERA Online and discover that you’re suddenly unable to do so.

Fortunately, this error is not exactly rare, and there are a lot of TERA Online players who’ve experienced it at least once before. This doesn’t just mean you’re not alone in this, it also means there are a few fixes worth checking out.

What is TERA Online?

TERA Online is an MMORPG released quite a while ago (2011 was its initial release in South Korea). It had a bunch of closed and open beta testing sessions before the official release.

The game has regular MMORPG features such as PVP, crafting, and questing, and uses a non-target battle system. This means that instead of clicking the target and selecting things to hit them with, you just fire away as you would in an action game.

More so, you’ll need to be quite skillful, considering that you’ll have to dodge enemy attacks actively. That’s TERA Online in a nutshell, although we skipped a lot of awesome features.

We’re not here to talk about TERA, but we can (hopefully) help you fix the user authentication error in the next few following sections.

How to fix TERA restricted account sign in error?

1. Try using a VPN

  1. Purchase a premium VPN subscription (we recommend Private Internet Access)TERA Online PIA VPN
  2. Download the VPN installer on your PC
  3. Install the VPN client on your computer
  4. Launch it and connect to your account
  5. Select a fast server (nearby servers are faster)
  6. Launch TERA Online
  7. Check if the problem still persists

The usability of a VPN in such issues has been widely debated. The general consensus is that more often than not a VPN will do the trick, as it does with many other connectivity issues.

Private Internet Access is a Kape Technologies product and also one of the few VPNs that offer 24/7 live chat support.

Note that if the VPN fix doesn’t work, you shouldn’t give up just yet. Disconnect from the server you chose, connect to another (preferably fast) one and try again.

Private Internet Access

Private Internet Access

Getting the User Authentication Failed error in TERA? Private Internet Access could help you fix this issue.
$2.69/mo. Buy it now

Network congestion is usually a quite decisive factor that determines the occurrence of connectivity issues. Thus, if the VPN server is overcrowded, you may want to try another one.

2. Try logging in with Facebook

Reportedly, users noticed that logging into their TERA Online account through Facebook seemed to work. Just use the game launcher and instead of logging into your TERA Online account, use your Facebook account to perform the operation.facebook banner

However, for this fix to work, you’ll need your TERA and Facebook accounts to be linked. This can be easily achieved on the Account Settings page on the TERA Online website.

Long story short: make sure your Facebook and TERA accounts are linked, then try to log into TERA with your Facebook account.

3. Avoid logging from multiple accounts

Apparently, TERA Online has this 24-hour block that applies to users who try logging in from several accounts on the same machine, in a short interval of time.

To prevent that from happening, only stick to one or two accounts. As far as we know, there’s no limit to log-in attempts from the same account, as long as you don’t switch IP addresses frantically between attempts.

Also, it would be a great idea to check if you were banned. Many users mistakenly believed this error had something to do with their bad connection when in fact, their accounts were in fact inaccessible due to bans.

Final thoughts on fixing TERA user authentication error

All in all, if you’re trying to log into TERA Online and receive the user authentication error, don’t panic. There are a few reasons why this could be happening, and a bunch of fixes for these reasons.

First and foremost, you should make sure that your account is not banned. Else, trying any of the fixes might be completely useless.

One of the most popular fixes for this issue is using a VPN. If using a VPN seems to be in vain, try switching servers between ditching this suggestion. It could save you a lot of time and hassle.

Last, but not least, you could try logging in with your Facebook account, as suggested by various users on the TERA Online forums.

[wl_navigator]
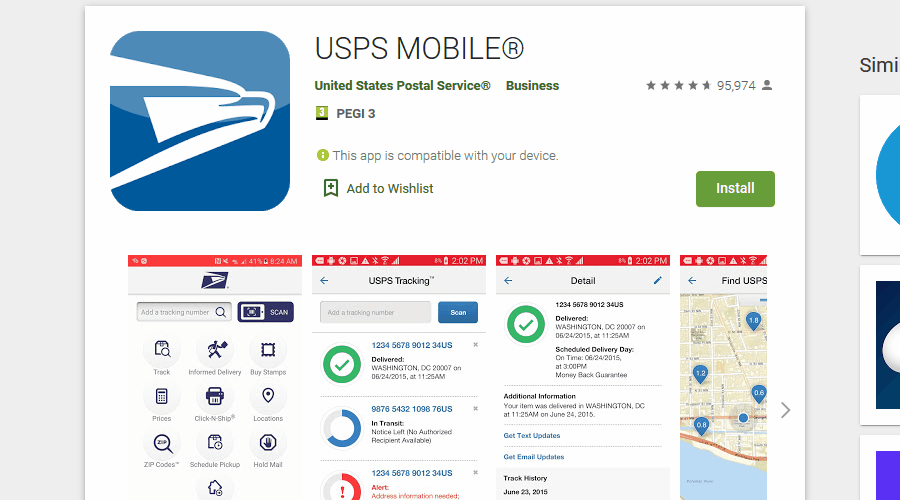
FIX: Your response to the invitation cannot be sent

Calendar apps are useful, but sometimes certain issues can appear, and many iOS users reported Your response to the invitation cannot be sent error message.

This issue can be a problem, especially if others are sharing their events with you, so in today’s article, we’re going to tackle this issue and show you how to fix it.

How can I fix Your response to the invitation cannot be sent error message?

1. Reset Calendar app

  1. On your iOS device go to Settings > Mail, Contacts, Calendars.
    mail contacts calendars your response to the invitation cannot be sent
  2. Now select the account that you use and turn the Calendars off.
  3. Wait for a few moments and turn the Calendar on again.
  4. Restart your iPhone and check if the problem is still there.

Several users reported that this method worked for them, so be sure to try it out. On some versions of iOS this setting is located in Settings > Accounts & Passwords or in Settings > Calendar > Accounts section.


2. Turn off the Calendar app

  1. To go to Settings on your iOS device.
  2. Now select Your Name > Cloud.
  3. Locate the Calendars app and disable it.
    Calendars disable your response to the invitation cannot be sent
  4. Wait for a minute or so, and turn it on.
  5. Restart your phone and check if that helps.

3. Update iOS to the latest version

  1. On your iOS device go to Settings > General > Software Update.
  2. If you see that a software update is available, tap it to download and install it.
    software update iOS your response to the invitation cannot be sent

Once your system is up to date, check if the problem is resolved. This has been an issue for a while, and Apple will most likely fix it for good via the software update.

Your response to the invitation cannot be sent error message can be problematic, but it can be fixed by resetting the Calendar app or by updating your iOS software to the latest version.

Did you manage to fix this problem? Feel free to share your solutions with us in the comments section.

[wl_navigator]
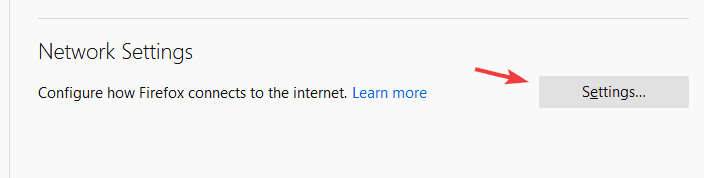
Stuck on Updating iCloud settings screen? We got fixes

iPhone is a great device, but some users reported that their device gets stuck on the Updating iCloud settings screen.

This issue can appear while restoring or updating your iOS device, and in today’s article, we’re going to show you how to fix this problem for good.

What can I do if I’m stuck on the Updating iCloud settings screen?

1. Check if Apple’s servers are running

  1. Visit the System Status page.
    system status updating icloud settings stuck
  2. Now check if all services are running properly.

In case there’s an issue with Apple’s servers, you’ll need to wait until the problem is resolved.

2. Check your Internet connection

  1. Make sure that your connection is stable.
  2. If your Wi-Fi connection is dropping, you might want to fix that or wait until your connection is stable before trying to complete the process.
  3. Alternatively, connect to a different, more stable Wi-Fi network.

3. Try Force restart

  1. Press and release the Volume Up.
  2. Now press and release the Volume Down.
  3. Press and hold the Side button until the screen turns off and on.
  4. Once the Apple logo appears, release the Side button.

4. Skip the iCloud setup

  1. Try to update your iOS.
  2. When you get asked to set up your iCloud account, select Skip.
  3. After the update process is finished, go to Settings > Sign in to your iPhone.
    Apple ID login updating icloud settings stuck
  4. Enter your login information.

5. Reset your network settings

  1. On your iOS device go to Settings > General.
  2. Go to Reset > Reset Network Settings.
    Reset network settings updating icloud settings stuck
  3. After resetting your network settings, try to perform the update again.

6. Try to update your device using iTunes

  1. Connect your iOS device to the computer using the USB cable.
  2. Start iTunes on your computer.
  3. Click the Device icon in iTunes.
  4. Click on Summary and then on Check for Updates.
    check for update itunes updating icloud settings stuck
  5. Now click Update to start the update process.

If you get stuck on the Updating iCloud settings screen, try restarting your device or skip the initial iCloud setup process. Did you manage to fix this issue? Let us know if our solutions were helpful to you.

FIX: The requested URL could not be retrieved on Windows 10/11

The requested URL could not be retrieved message can sometimes appear and cause problems while trying to visit certain websites.

The issue can be encountered no matter the browser you’re using and sometimes, the access denied notification adds to the error.

A few variations of the same issue are the following:

  • The requested URL could not be retrieved while trying to retrieve the URL/ connection reset by peer – The cause might be network glitches.
  • The requested URL could not be retrieved proxy/ VPN – It indicates that your proxy or VPN is causing the problem.

How do I fix The requested URL could not be retrieved error?

  1. Check your antivirus
  2. Disable your proxy
  3. Disable Windows Firewall
  4. Restart your router/modem
  5. Use Command Prompt
  6. Perform a Clean boot
  7. Install the latest updates

1. Check your antivirus

Usually, the mentioned error occurs due to your antivirus, as it might interfere with your Internet connection. 

Therefore, it’s advised that you check your antivirus settings as well as the firewall.

The simplest way is to temporarily disable the firewall. In case the issue is still there, you might have to completely disable your antivirus or remove it.

If removing the antivirus solves the problem, you should consider switching to a different antivirus solution.

So there are plenty of antivirus programs that can provide security for online browsing, including sensitive information like banking and online payments.

Thus you should act consciously and try out new best antivirus software for your Windows 10 computer.

2. Disable your proxy

  1. Click the Menu icon in the top-right corner.
  2. Choose Options from the menu.
    The requested URL could not be retrieved access denied
  3. Scroll all the way down to the Network Proxy and click the Settings button.
    The requested URL could not be retrieved while trying to retrieve the URL
  4. Set Configure Proxy Access to the Internet to No proxy or to Use system proxy settings.
  5. Click OK to save changes.
    The requested URL could not be retrieved VPN

Keep in mind that these instructions are for Firefox, but if you’re using a different browser, the process should be relatively the same.

After disabling the proxy, you just need to disable it on your system, as shown below:

  1. Press Windows Key + I to open the Settings app.
  2. Now navigate to the Network & Internet section.
    The requested URL could not be retrieved access denied
  3. Choose Proxy from the left pane. (In the right pane, disable all options.)
    The requested URL could not be retrieved while trying to retrieve the URL

After doing that, the proxy should be completely disabled on your PC and the problem will be resolved.

3. Disable Windows Firewall

  1. In the Search bar type firewall.
  2. Choose Windows Defender Firewall from the list.
    The requested URL could not be retrieved connection reset by peer
  3. Pick Turn Windows Defender Firewall on or off from the menu on the left.
    The requested URL could not be retrieved VPN
  4. Now you need to select Turn off Windows Defender Firewall (not recommended) for both Private and Public networks.
  5. Lastly, click OK button to save changes.
    The requested URL could not be retrieved Firefox

Now Windows Firewall should be disabled. If everything works properly afterward, enable the firewall once again and try to find which setting is causing the issue.

4. Restart your router/modem

In some cases The requested URL could not be retrieved message can appear due to certain glitches with your router/modem.

If that’s the case, we advise you to turn these off by pressing the Power button on each device.

Wait for about 30 seconds and power them back on. Wait for the devices to boot completely. After both devices boot, check if the problem is still there.

Several users reported that this method worked for them, so feel free to try it out.

5.  Use Command Prompt

  1. Right-click the Start button to open Win + X menu.
  2. Now choose Command Prompt (Admin) (or PowerShell (Admin) for older OS).
    The requested URL could not be retrieved Internet Explorer
  3. Run the following commands:
  • ipconfig /release
  • ipconfig /renew

After doing that, you should have a new IP address and the issue should be resolved. For the best results, be sure to use this solution after restarting your router.

6. Perform a Clean boot

  1. Press Windows Key + R. Now enter msconfig in the input field and click OK or press Enter.
    The requested URL could not be retrieved Internet Explorer
  2. Head over to the Services tab and check Hide all Microsoft services option.
  3. Now click the Disable all button.
    The requested URL could not be retrieved Chrome
  4. Go to the Startup tab and click Open Task Manager.
    The requested URL could not be retrieved access denied
  5. Right-click the first application on the list and choose Disable from the menu. (Do this for all startup applications.)
    The requested URL could not be retrieved while trying to retrieve the URL
  6. Next, go back to the System Configuration window.
  7. Click Apply and OK to save changes and restart your PC.
    The requested URL could not be retrieved proxy

Once your PC restarts, check if the problem is still there. If the issue doesn’t appear, then it’s certainly caused by one of your applications or services.

To pinpoint it, you need to enable services and applications one by one or in groups until you manage to recreate the problem.

Once you find the problematic application, it’s advised to remove it from your PC.

There are several ways to do that, but if you want to remove the application completely along with all of its files and registry entries we recommend using uninstaller software.

To download a proficient uninstaller solution, you might want to inform about the fittest uninstaller software for Windows 10 PCs.

7. Install the latest updates

  1. Open the Settings app and navigate to the Update & Security section.
    The requested URL could not be retrieved access denied
  2. In the right pane, click Check for updates button.
  3. If any updates are available, Windows will download them automatically and install them once you restart your PC.
    The requested URL could not be retrieved proxy

Once your system is up to date, check if the problem is still there.

As mentioned, The requested URL could not be retrieved message can prevent you from accessing certain websites. We truly hope that you solved the problem after reading this article.

If you used another way that we didn’t mention here, please share it with us in the comments and we will certainly update the solutions list.

[wl_navigator]
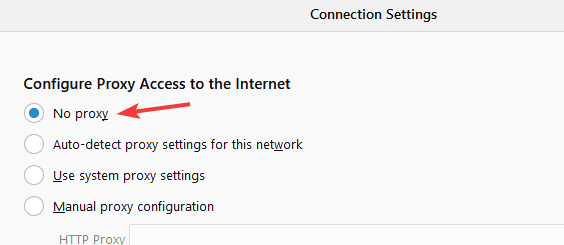
Hotel Wi-Fi is unsafe for your work, according to FBI

The FBI recently issued a PSA to inform teleworkers of the risks of using hotel Wi-Fi networks.

Reportedly, the Federal Bureau of Investigation noticed an increasing number of hotel remote workers.

While remote working from hotel rooms isn’t inherently bad, connecting to a hotel Wi-Fi network might subject you to certain security risks.

Some of the most serious ones include personal data thefts, or compromising work resources.


Hotel room teleworking is trending

Apparently, more and more US hotels started advertising room reservations during the daytime for those who seek a distraction-free environment.

This comes as a blessing for teleworkers who can’t seem to focus on their work environment while at home. On the other hand, the risks may outweigh the benefits in this situation, especially in lieu of appropriate security measures.

Unfortunately, when it comes to Wi-Fi networks, hotel management staff caters to the convenience of their customers, at the expense of their security.

As a result, not only is the Wi-Fi password available for everyone to see in the hotel lobby, but it also gets replaced quite rarely.


The risks of using hotel Wi-Fi networks

There are a few quite serious risks you may expose yourself to while using Wi-Fi networks in hotels:

  • Traffic monitoring  – Your network activity could be exposed to a malicious third-party
  • Evil Twin attacks – Cloning the hotel network, misleading clients to connect to the fake one instead
  • Man-In-The-Middle attacks – Intercepting and stealing sensitive information from one’s device
  • Compromising work  – Facilitating cybercriminals to steal work credentials or other similar resources
  • Digital identity theft
  • Ransomware

How do I reduce the risks of using hotel Wi-Fi?

1. Use a trustworthy VPN

You can purchase a premium VPN subscription plan, we recommend Private Internet Access, to encrypt network traffic.

A VPN can easily protect your privacy by encrypting traffic between your device and the VPN gateway.

This renders network monitoring tools and Man-In-The-Middle attacks useless.

However, you should still keep an eye out for Evil Twin attacks. More often than not, an Evil Twin network won’t be password-protected and will have a weaker signal.


2. Don’t use the hotel’s Wi-Fi

If you have a hefty data plan on your mobile device, just use that instead of the hotel’s Wi-Fi.

You can either create a hotspot on your phone/tablet or use USB to tether it and share your Internet connection.

Also, you may want to avoid using the auto-connect feature on your PC, to avoid it automatically connecting to the hotel’s Wi-Fi network or an unprotected Evil Twin one.


3. Keep it simple

If you’re there for work, make sure you stay focused and avoid logging in on too many websites.

That goes double for any website where you may input sensitive data, such as your SSN, credit card details, as well as other credentials.

Last, but not least, always check the security certificates of the websites you’re visiting. If you don’t see HTTPS, then it’s a no-go.


If you follow these steps, you shouldn’t have to worry about the dangers of working using a hotel’s Wi-Fi.

What’s your take on this latest development? Share your opinion with us in the comments section below.

[wl_navigator]
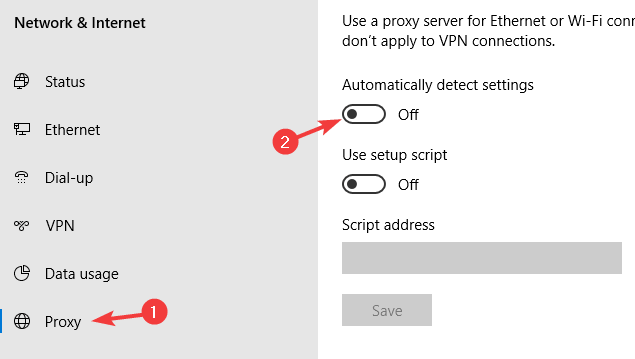
Microsoft makes it easier to find support articles and release notes for Windows 10 and Microsoft 365 services

Microsoft has just launched a new unified support site which should make it easier for users to find support and troubleshooting resources for Microsoft 365. In an effort to make the platform more inclusive, the company is bringing a series of improvements to Windows release notes, the Windows update history pages, as well as related resources.

As seen in the screenshot below, Microsoft is introducing a new URL structure for Windows release notes, which will now include the knowledge base (KB) ID. This change will let users find support articles by KB ID when using the search engine. There are also some under-the-hood changes for users who use different tools to find support articles using metadata. 

01_new-support-article-URL-structure.png

Furthermore, Microsoft is also adding convenient share controls at the bottom of all support pages to make it easier for users to share them on social media platforms, including Facebook and LinkedIn. 

Needless to say, this is quite a welcome approach, especially for power users who often need to look for technical information about Windows updates, troubleshooting guides, and more. However, you may need to wait a couple of months to see these enhancements, as they will begin to roll out to the general public in the coming weeks. 

Windows 10 Insider build 20231 adds new option to customize your PC during initial setup

Microsoft has just released the Windows 10 preview build 20231 for the Dev Channel, which brings two new improvements that will only be available to select Insiders. First of all, Insiders doing a clean install of the build 20231 (ISOs are available here) may notice a new page during the out of box experience allowing them to choose how they plan to use their PC.

The current list of options includes Gaming, Family, Creativity, Schoolwork, Entertainment, and Business, and each of them will suggest tools and services during PC setup. “This is the initial wave of work for this feature, and Insiders may notice different options presented in OOBE depending on what they select, however at this time Insiders will not notice any other configuration differences after exiting OOBE,” the Windows Insider team explained.

Windows 10 Build 20231 new customization options during OOBE experience

The second new feature in this build is the ability for IT admins to change app default file associations on a per-user or per-device basis. This feature will only be available for a subset of Insiders installing this build, and you can find the testing steps below:

  1. Generate Default Application Associations XML file by following this page.
  2. Manually modify the XML by adding 2 new properties:
  3. Add Version=”1″ to the DefaultAssociations tag.
  4. Add Suggested=”True” to any Association tag.
  5. Enable the group policy to set the default file associations by following this doc.
  6. Reboot or log in as the user.

Starting with this build, some Insiders may also notice a change to enable displaying graphics card information listed under Settings > System > About. The build 20231 also brings various bug fixes and known issues, and you can find the full list below:

Fixes

  • We fixed the vEthernet adapter disconnecting inside of the Windows Subsystem for Linux. Please see this GitHub thread for full details.
  • We fixed an issue that could result in your ALT + Tab order changing unexpectedly and leading you to switch to the wrong window.
  • We fixed an issue that could result in Action Center and notification buttons not being visible after switching between High Contrast Black and High Contrast White.
  • We fixed an issue where the “Show audio alerts visually” option under Settings > Ease of Access> Audio wasn’t functioning for incoming notifications.
  • We fixed an issue where if the PC was locked using with Narrator running, dismissing the lock screen wouldn’t announce the signed in username on the login screen.
  • We fixed an issue when using Narrator and logging in with Windows Hello, Narrator wouldn’t announce the error message if your face wasn’t recognized.
  • We fixed an issue resulting in audio and microphone glitches over Bluetooth for certain devices. As a reminder, when encountering issues in this space, please take a moment to capture a repro trace, as it helps the teams investigate. More details about capturing traces available .
  • We fixed an issue impacting Task View reliability.
  • We fixed an issue resulting in the Windows Hello setup camera preview in OOBE displaying in the wrong position if you rotated your device into portrait mode during setup.
  • We fixed an issue resulting in Settings hanging on launch for some Insiders.
  • We fixed an issue resulting in systemsettingsbroker.exe crashing for some Insiders.
  • We fixed an issue where the HideRecentJumplists MDM Policy wasn’t taking effect.
  • We fixed an issue that could result in duplicate cloud provider entries appearing in the File Explorer navigation pane.
  • We fixed an issue resulting in PDF previews no longer displaying in File Explorer.
  • We fixed an issue resulting in the touch keyboard unexpectedly dismissing after setting focus to the search box in File Explorer.
  • We fixed an issue where when typing with the Chinese Pinyin IME, if your text included an apostrophe, then after finalizing your composition by pressing Shift the result would display a garbled character.

Known issues

  • If you were one of the Insiders repeatedly entering a temp profile with the previous flight, please refer to the following forum post to get your profile back into a good state. If you were not impacted, this issue will not impact you in today’s flight.
  • We’re looking into reports of the update process hanging for extended periods of time when attempting to install a new build.
  • We’re working on a fix to enable live preview for pinned site tabs.
  • We’re working on enabling the new taskbar experience for existing pinned sites. In the meantime, you can unpin the site from the taskbar, remove it from the edge://apps page, and then re-pin the site.
  • We’re working on a fix for an issue where some Office applications crashing or missing after updating to a new build.
  • We’re working on a fix for an issue causing some devices experiencing a KMODE_EXCEPTION bugcheck when using certain virtualization technologies.
  • We’re working on a fix for an issue where after taking this build some users receive a Compatibility Assistant notification that “Microsoft Office is no longer available”. Despite the notification, Office should still be there and working fine.
  • We are working on a fix for an issue where selecting an IME candidate or hardware keyboard text prediction candidate may insert the candidate adjacent to the one selected.
  • We’re investigating an issue reported by some Insiders wherein the taskbar is obscuring the Power button in the Start menu. If this is happening on your PC, you may need to use the Windows key plus X menu to shutdown for the time being.

Last but not least, the Windows Insider team said today that all Insiders in Dev Channel will soon see the new Skype Meet Now in the Windows 10 Taskbar, as well as the recent change to enable moving the text cursor via gestures on the touch keyboard. That’s it for today’s Insider news, let us know in the comments if you think these new options to customize your PC during the installation of Windows 10 are a good idea.

How to manage file access with SharePoint in Microsoft Teams

When you add a file to your Microsoft Team’s file section, it becomes editable by everyone in Microsoft Teams, not just the creator of the file. There are plenty of times that you will want to share a document and make it editable to everyone, but there are certainly other times when you would prefer that not everyone had edit access to everything. For individual file permissions, it’s worth noting that all Microsoft 365 documentation is stored in SharePoint.

SharePoint, as the name suggests, allows you to share Word, Excel, and other files with your remote team within Microsoft Teams. Along with sharing, SharePoint allows you to group-edit and view the same document with your colleagues. SharePoint’s core functions are to act as a document management and storage system for your organization.

These instructions are for those looking to manage file access with SharePoint in Microsoft Teams.

Msteams1
Msteamsstep2
Step 3

1. Open Microsoft Teams, go to the “Files” Tab, and choose the “Open in SharePoint.”

2. Once SharePoint opens in Microsoft Edge, choose an existing file (or upload a new file) and choose the three vertical dot menu to bring up more options and choose Manage access.

Before adjusting access settings, you can organize your documents by learning how to create a folder in SharePoint to group related files more efficiently.

3. From the Manage access menu, you can change existing team members’ permissions, add and set new permissions for specific team members, or change the appropriate viewing privileges as needed; can view (cannot make changes) and can edit (make any changes).

4. Choose Grant Access at the bottom to confirm the file access settings in Microsoft Teams.

Once you complete the steps, you will be able to change the file permissions among users with SharePoint in Microsoft Teams. It is important to note that you will need administrator privileges on the Microsoft Teams account to change users’ file access in SharePoint.

Over the past year, we’ve been covering a lot of other Microsoft 365 related topics. We suggest you check them out over at our dedicated news hub. Some topics include how to use Microsoft Access, use Microsoft To Do with Outlook, and more. Also, feel free to let us know how you’re using Microsoft Teams and SharePoint by dropping us a comment below.

FIX: Disconnected from server reliable packet 1 not ack’d

Among Us is a multiplayer murder mystery game set in outer space. That game has quickly become one of the most widely played titles among Twitch streamers, which has led to a surge in Among Us Steam downloads.

The greatly increased number of Among Us players has strained the Among Us servers, as original server estimates for the game were relatively low.

Thus, server issues for Among Us have become more prevalent as the game’s player base has expanded.

An announcement on the game’s Steam page says:

We have decided to cancel Among Us 2 and instead put all our focus into improving Among Us 1… We have lots of things planned and we’re excited to bring new content to everyone as you continue to enjoy playing!

One of the most prevalent Among Us error messages states, You disconnected from the server. Reliable packet 1 (size=#) was not ack’d after #ms.

That error often arises as a consequence of server overload. However, there might be an issue with your Internet connection.

How can I fix the Among Us You disconnected from the server issue?

1. Check the server status for Among Us

InnerSloth Twitter page you disconnected from the server reliable packet 1 was not ack'd
First, try checking the server status for the game at InnerSloth’s Twitter page.

InnerSloth updates its Twitter page with posts about current Among Us server issues.

If you see that server issues are mentioned there, then you will most likely need to wait for them to be solved.


2. Play Among Us with a VPN

use-a-vpn
Because this error message appears sometimes because of the overloading of the servers in your local region, it is a very good idea to try and log into the game using a VPN service.

When it comes to this task, the best software option is by far Private Internet Access (PIA) VPN.

This powerful software can shift your online location quickly and efficiently, and beyond this, also protects you from any unwanted information gathering by third-parties.

To resolve this dreaded error message, simply click the download button below, install PIA, run it, change your location, and then try logging into the Among Us server again.

Private Internet Access

Private Internet Access

Resolve the annoying Disconnected from server error on Among Us servers by using this software to change your location today!
Get PIA Visit website

3. Check for internet connection issues with troubleshooters

  1. Open the search box in Windows 10 by clicking the Type here to search taskbar button for it.
  2. Type troubleshoot in the text box to search for Troubleshoot settings.
  3. Click Troubleshoot settings to open Settings as in the snapshot directly below.
    Internet Connections troubleshooter you disconnected from the server reliable packet 1 was not ack'd
  4. Click Internet Connections and Run the troubleshooter to open the window shown directly below.
    Internet Connections troubleshooter you disconnected from the server reliable packet 1 was not ack'd
  5. Select the Troubleshoot my connection to the internet option to check for any connection issues.
  6. You can open a Network Adapter troubleshooter, which might also resolve connectivity issues, by clicking the Run the troubleshooter button for it.

3. Change the server location manually

  1. Run the Among Us game.
  2. Click Online on the Among Us game menu.
    Among Us game you disconnected from the server reliable packet 1 was not ack'd
  3. Next, click the server button at the bottom right corner of the game’s menu to open the options shown directly below.
    Server options you disconnected from the server reliable packet 1 was not ack'd
  4. Then select a different server region on the menu from the one you usually play Among Us with. Select a region that has the biggest time gap with your time zone.
  5. Click the Find Game button on the Among Us menu.
  6. Select a game to join. With an alternative server region selected, the game might now start.

The resolutions above might be enough to fix the Reliable packet error for most Among Us players. Hopefully, Innersloth will get the game’s server issues more fully sorted with future updates.

[wl_navigator]

Microsoft awards $374k in bounties for Azure Sphere Security Research Challenge

Since 2003, the month of October has been recognized as National Cybersecurity Awareness month and after a three-month research challenge which dovetailed into the beginning of October, Microsoft finally awarded $374,300 to the global IoT security research community for finding vulnerabilities in Azure Sphere.

In what Microsoft dubbed the Azure Sphere Security Research Challenge, 70 researchers from 21 countries gathered to surface security exploits in the company’s Azure Sphere and over the course of 90-days the researchers found 40 exploits, 20 of which were considered “Critical or Important severity security vulnerabilities.”

According to the Microsoft Security Response Center blog, the company broke up the bounties into two high priority research scenarios that focused on the core of the Azure Sphere OS and then six general scenarios across various levels of Azure Sphere OS. In the end, Microsoft awarded the $374,300 bounty awards across 16 eligible reports.

“Many of the vulnerabilities found during the research challenge were novel and high impact and led to major security improvements for Azure Sphere in their 20.07, 20.08 and the latest 20.09 updates, which have been automatically pushed to Azure Sphere devices that are connected to the internet to help secure Azure Sphere customers. Security researchers from McAfee ATR and Cisco Talos reported some of the highest impact vulnerabilities in Azure Sphere, especially a full attack chain developed by McAfee ATR that exposed a weakness in the cloud and multiple weaknesses on the device including a previously unknown Linux kernel vulnerability.

Obviously, there are more details regarding the specific vulnerabilities and the various executions researchers used during the bounty program and most of that info can be found at Microsoft’s Azure Sphere team blog, here.

Microsoft’s Azure Sphere represents much of the company’s efforts into IoT and with new devices and sensors coming online daily that make use of IoT platforms, we should expect to see more dedicated bounty programs pop up throughout the year.