Host files aren’t working? Check out these procedures

Chances are you are trying to bind certain name strings to specific IP addresses to override other name resolution methods. However, the browser cannot find the host file or the recently made changes simply refuse to take effect. How do you get the hosts files to work properly again?

All changes to hosts should take effect immediately. You shouldn’t think of rebooting your browser, your PC or performing any extra steps. However, unexpected issues do arise from time to time.

So, if you’re not entirely sure how you can solve this problem, we’re going to help you out. Just as always, there are several ways to tackle the issue effectively. Let’s get started.

What can I do when Hosts files aren’t working?

1. Basic troubleshooting steps

hosts file troubleshooting

  • Make sure your hosts file is named correctly. Double-check that it is hosts and not host or anything related.
  • The same goes for the extensions chapter. It should have no extension (hosts, not hosts.txt). If you have configured Windows to hide known extensions, uncheck the option.
  • Other users running into the same issue confirmed the error was related to the line endings. Therefore, changing the line endings to Windows format could make a difference. Usually, it’s the white space that messes with things since it’s so difficult to notice.

2. Drop the old data and ping localhost

how to ping localhost
If the changes are done correctly, you should see the results immediately. In spite of that, do keep in mind that Windows caches name resolution data. Therefore, the old records may still be used for a while.

Your next step should be to fire up a command prompt and type: ipconfig /flushdns to drop the old data. Try to ping localhost and see if it uses the correct IP (it should match what you put in the hosts file).

If it does, your hosts file is fine and the issue is elsewhere. If not, then you know for sure that the file is bad. Pay attention to where it goes. It might try ipv6, so the hosts file itself is broken. Remove everything from it and leave only your entry.

If you’re having trouble accessing Command Prompt as an admin, then you better take a closer look at this guide.


You can’t flush the DNS resolver cache? Check out this guide and learn how to do it.


3. Recreate the file with default permissions

recreate file

  1. Create a new text file on your desktop.
  2. Copy and paste the contents of your current hosts file into the new file in Notepad.
  3. Save it.
  4. Then, rename it to hosts.
  5. Copy the file to your %SystemRoot%System32driversetc. directory, and overwrite the old file.

If Windows continues to ignore the host file, recreate it with default permissions.


4. Add exceptions to proxy/disable the automatic configuration script

Use automatic configuration script

  1. Follow this path Internet Explorer > Internet Options > Connections.
  2. Alternatively, press Windows key and type Configure proxy server.
  3. Click LAN settings.
  4. If everything is blank and Automatically detect settings is checked, then you aren’t using a proxy.
  5. If you do use one, you could add exceptions by returning into Connections > LAN settings.
  6. Click Proxy Server / Advanced next.
  7. You may now add your exceptions to the Exceptions text box.

If you have a proxy configured, the automatic proxy server configuration scripts can override the hosts file. One solution here is to configure it not to do this.

If you’d want, you can also disable the automatic configuration script. Just make sure to uncheck Use automatic configuration script.


Proxy server issues are pretty annoying. Make them a thing of the past with the help of this guide.


5. Check DNS address

check DNS address

  1. Enter into Network connections properties.
  2. Go to TCP/IP settings.
  3. Change the first DNS server to 127.0.0.1 (localhost).
  4. Make sure the second remains your actual DNS IP.

You could also try doing a few changes in the DNS address department. They aren’t a must but may help if something is badly configured.


6. Create a new hosts file

open Notepad

  1. Open Windows Explorer as Administrator.
  2. Delete the hosts file.
  3. Open Notepad as Administrator too.
  4. Then, create a new hosts file.

Are you still experiencing the same problem? In that case, another effective solution is to create a new hosts file. Start from scratch, then add entries.


It comes a time when you try to migrate your website from one host to another. You clearly want to make sure the website is working properly before changing the domain’s settings, yet those hosts files don’t work.

Although there is no quick fix to this problem, you can try out the above suggestions. Moreover, you can share your views, feedback, and other queries related to hosts files in the comments area below.

READ NEXT:

KB4532693 reported issues: PC freezes, update loops, and more

Microsoft just released the second round of major updates for the year 2020. These updates brought together an entire host of fixes and new features for Windows 10, as well as one final free update for Windows 7.

This round of updates was especially notable from a security standpoint, mainly because it brought fixes to over 99 CVEs that were found for both Adobe and Microsoft services.

However, where Microsoft fixed one issue it seems to have spawned another, as many users have been reporting a variety of problems after installing the latest updates.

KB4532693 is the one with the most problems, and it comes for those running Windows 10 version 1903 and 1909. Some of these issues are quite serious, so we will list them below.

Common issues brought by the February Patch Tuesday updates

1. KB4532693 disables CPU TPM and Bitlocker

Windows 10 version 1903 users have reported that after installing KB4532693 and KB4537759 that the TPM of their Intel CPU is no longer working, and this causes their Bitlocker to be disabled on their system drive:

in the device manager i get this error about the tpm device : This device cannot start. (Code 10)
{Operation Failed} The requested operation was unsuccessful.


2. KB4532693 is causing an install loop for Dell XPS 13 7390

Dell XPS 13 7390 users reported that their laptops are now stuck in an install loop when trying to install KB4532693 for Windows 10 version 1909.


3. KB4532693 is causing an install loop for Asus Maximus Hero VII

Some users that have Asus Maximus Hero VII motherboards have reported having issues with installing KB4532693 as it triggers an install loop.

problems with kb4532693,as its is configured to 30 5 an now back to finish,it only has an endless loup


4. KB4532693 terminates background applications

Users have posted on social media that KB4532693 is terminating their background applications out of the blue:

anyone else having weird problems with @microsoft windows 10 update – KB4532693 – seem to have instances when background applications suddenly stop/terminate for now reason, including Skype ?

This doesn’t seem to be a random fluke since later posts revealed that they were able to reproduce the issue on a second device.

Hoping @microsoft KB4532693 update can be removed – two laptops updated and having near identical problems – apps/background tasks suddenly ceasing/terminating for no logged or apparent reason.. including important ones like anti-virus software.


5. KB4524244 locks up PCs and fails to install

KB4524244 is a security update that applies along with the other updates, and it is currently available to all versions of Windows 10, from 1607 to 1909.

However, some users reported that trying to install this security update always fails, and it also leads to a PC freeze.

If you’re in the same boat and you’re looking to fix the issue, Microsoft representatives responded to this issue with a variety of suggestions, ranging from running the Windows Update Troubleshooter to stopping the Windows Update services altogether.

If the Troubleshooter stops before completing the process, fix it with the help of this complete guide.


6. The updates moved all user files in another folder

Probably the most bizarre bug of them all, users reported  that after installing the update they found all of their files moved in another folder:

When I closed doen my PC last night it started doing updates and was taking a long time so I left it and went to bed. This morning I logged on – no problems but I then realised (can’t remember how) that my files had all moved on to another folder in the c drive ending in .000.

7. The update may be hiding or deleting files

Users reported that ever since they installed KB4532693, they are either getting hidden or missing files:

In other words, all their files are gone with no way to restore them unless they had a restore point, which may unfortunately also be one of the files that disappeared.


These are the most important issues regarding KB4532693 reported by users so far. As you can tell, all of them break PC functionality in a severe way. That being the case, we should expect yet another out-of-schedule mini-patch in the near future.

Worst-case scenario is that Microsoft might leave the issues unresolved. If that is the case, users will have to wait until March 10 for the next Patch Tuesday updates.

What’s your opinion of the bugs reported for the February Patch Tuesday updates? Let us know if you encountered any other issues in the comments section below.

READ ALSO:

Microsoft updates Calendar with Windows 10 Insider build 19564 – available for all Insiders

Microsoft just released the latest 20H2 update for Fast Ring Insiders, coming in at version 19564. Along with an update to Graphics settings and the usual changes and fixes, the company also announced some changes to the Windows Calendar app, now available to all Insiders. Here’s what’s new:

  1. New themes: choose from over 30 different themes!
  2. Improved month view: Month view now includes an agenda pane that lets you see your day’s events at a glance.
  3. Simplified event creation: We’ve made it even easier to add an event to your calendar.
  4. Redesigned account navigation: We’ve collapsed the account navigation pane, leaving more space for your day’s events.       All of your syncing calendar accounts are now represented as clickable icons on the left.

In order to get the new version, once you’re on an Insider Ring (doesn’t have to be the latest update), just turn on the “Try the preview” toggle and you’ll be able to check out the latest look.

What do you think of the improvements to Calendar? Let us know in the comments below.

Twitter client Tweeten 5 is now available on Windows with ARM64 support

Tweeten, a popular Twitter client for Windows, macOS, and the web is getting a major update today. Tweeten 5, now available on the Windows 10 Microsoft Store, brings support for the ARM64 architecture, meaning that it will now perform much better on Windows 10 on ARM PCs like Microsoft’s Surface Pro X.

Tweeten 5 still looks like an enhanced version of Twitter’s own Tweetdeck app, but this latest version introduces a couple of new features and improvements, including the ability to choose a default download folder and restore default settings within the app. The GIF and video download experience should also be more reliable in this release.

If Tweeten 5 and its new ARM64 version are available on the Windows 10 Microsoft Store starting today, a standalone Windows version will also be available in the coming months. A macOS version is also coming at a later date, and developer Mehedi Hassan is asking users to “stay tuned” for a Linux release. You can read more about Tweeten 5 in the official blog post.

Tweeten
Tweeten
Developer:
Mehedi Hassan
Price:
Free

Microsoft’s busiest acquisition year will be under review following new FTC orders

Despite some very vocal protests from startups and even those in governing bodies regarding the monolithic nature at which the top five tech companies based in North America consume acquisitions, the US Federal Trade Commission has remained relatively hands-off about large technology purchases over the years.

However, that will seemingly change soon, as the FTC has just issued “Special Orders” calling for the examination of “Past Acquisitions by Large Technology Companies,” and its purview includes businesses such as Alphabet, Amazon, Apple, Facebook, Google Inc, and Microsoft.

As harrowing as it might seem for companies in the middle of mergers, the reality is that the new commission doesn’t seem to have any specific law enforcing jurisdiction, and most likely will not be overturning any current deals.

The FTC is looking into prior acquisitions that were not reported to antitrust agencies, in specific, deals that may fall under the Hart-Scott-Rodino Act.

The orders require Alphabet Inc. (including Google), Amazon.com, Inc., Apple Inc., Facebook, Inc., and Microsoft Corp. to provide information and documents on the terms, scope, structure, and purpose of transactions that each company consummated between Jan. 1, 2010 and Dec. 31, 2019.

The Commission issued these orders under Section 6(b) of the FTC Act, which authorizes the Commission to conduct wide-ranging studies that do not have a specific law enforcement purpose. The orders will help the FTC deepen its understanding of large technology firms’ acquisition activity, including how these firms report their transactions to the federal antitrust agencies, and whether large tech companies are making potentially anticompetitive acquisitions of nascent or potential competitors that fall below HSR filing thresholds and therefore do not need to be reported to the antitrust agencies.

Interestingly enough, the FTC’s new orders seem to focus specifically on unreported acquisitions between Jan. 1, 2010 and Dec. 31, 2019, to which companies such as Apple Google and Microsoft wade through several a year.

2019 was one of Microsoft’s busiest acquisition years to-date, the company spent $9.1 billion over the course of 20 acquisitions, many of which were lower profile purchases that will seemingly be reviewed under new FTC orders.

In a mad dash of low-key purchasing, Microsoft managed to snatch up IoT mincontroller Express Logic, education stack BrightBytes, and AI powered botmaker XOXCO to list a few.

Coincidently, or perhaps placating to current and future protestors, the FTC issued the orders the same day the long-awaited $26.5 billion dollar Sprint and T-Mobile merger was announced clearing both its own and Department of Justice hurdles yesterday.

5 best battery operated security camera [SD card, Monitor]

Security cameras can get you out of a lot of trouble and can provide you with the peace of mind that you diserve. There are a lot of features to consider when buying a security camera but the most important is the fact that it’s battery operated.

That saves you the hassle of laying out a cable to where you want to install the camera and a potential perpetrator will not be able to disconnect it.

That being said, let’s take a look at the best battery operated security cameras.

What is the best battery-powered security camera?

Battery operated indoor security camera with memory card: Hiseeu C10

  • Night vision
  • 1080p video with motion detection
  • 2-way audio
  • 6000 mAh battery for 120 days autonomy
  • Not compatible with all SD card brands

If you want a small security camera that will not bother you with any cables, Hiseeu C10 might be the one you’re looking for. It’s as big as an ostrich egg and can be placed on a wall with the supplied stand or it can sit on a table.

The 6000 mAh battery inside will power the camera for about half a year and after that you can just recharge it with the USB cable like any other mobile device. It detects motion at up to 10 meters and 130 degrees and it has either cloud or SD card storage.

It works better inside but you can also place it outside and it connect to your home Wi-Fi 802.11 b/g/n network.


Battery powered security camera with SIM card: Reolink Go

  • PIR motion sensor
  • 3G/4G LTE ready
  • Cloud/ SD card storage
  • Up to 33 feet night vision
  • 7800 mAh high capacity rechargeable battery
  • Only T-mobile Prepaid Card recommended

The Reolink Go outdoor security camera can be carried literally everywhere with you.

If the majority of the battery-operated security cameras still depend on the Wi-Fi signal, this one can connect using a 3G or 4G SIM card so you can even set it outside your tent while camping in the wild to capture the wildlife that paid you a visit the night before.

The 7800 mAh can power the camera a long time so you don’t need to worry about that but you will need an SD card to start using the camera.


Battery operated wireless security camera with monitor: Tonton Wireless

  • 2 cameras and monitor kit
  • PIR Sensor
  • Rechargeable battery
  • 32GB SD card preinstalled
  • 7-inch IPS touchscreen monitor
  • You might need to use higher capacity SD cards

If you want to install more than one camera at your home, you can consider the Tonton Wireless kit. It comes with two completely wireless, battery operated 2 MP cameras and a wireless 7-inch monitor where you will be able to see all the action.

The cameras come with PIR sensors, night vision and even come preinstalled with 32 GB SD cards so the only thing left to do is just to place the cameras and the monitor strategically.


Battery powered security camera with night vision: Heimvision HMD2

  • 1080P video with 2-way audio
  • Night vision
  • Magnetic base
  • IP65 weatherproof
  • Quick and easy setup
  • Doesn't work with Alexa

What is small, battery-powered, and can detect bodies in the night from up to 32 feet? Heimvision HMD2 is the answer to the riddle and it actually has a smart PIR sensor that can detect the difference between people and animals so it doesn’t trigger recording for any wondering racoon or squirrel.

The camera is extremely easy to install and it has a magnetic stand so you can change its position or location easily whenever you find a better spot.


Solar powered security camera: ieGeek Wireless

  • 1080P recording
  • Human motion detection
  • 15000 mAh rechargeable batteries
  • 4dbi antenna
  • IP65 waterproof
  • The angle of vision could be better

Let’s say that if you have a wall overlooking the sun at all times, you will never ever run out of power for the ieGeek Wireless security camera. Not only that it has 15000 mAh rechargeable batteries that will hold for up to a full year, but it also comes with a solar panel to recharge them.

Otherwise, the ieGeek comes with Full HD recording, night vision, 2-way audio, and real-time motion alert. The cable between the camera and the solar panel is 3 m long so it will give you a bit of flexibility in positioning them.


This was our selection with the best battery-powered security cameras. We tried to cover all the possible features that you might request from such a camera but if you have any other suggestions, don’t hesitate to write us in a comment below.

5 best cameras for amateur photographers

Any high-end smartphone on today’s market incorporates a performant camera, that can be considered good for amateurs.

However, it has limitations in design and settings, factors that can drive you to buy a dedicated camera.

Before getting one you should take into consideration some important features a camera should have.

An easy-to-use camera includes automatic modes so you won’t lose yourself through the settings. It also has to be compact and small, so you can take it with you wherever you go.

Look for a camera with at least 3X optical zoom and 24 Megapixels resolution.

The higher the zoom, the greater the versatility of the camera, and you will be able to capture objects at a greater distance.

What are the best cameras for amateurs?

Canon EOS Rebel T6 Kit

  • 1080/30p video capture
  • Continuously shooting at 3 fps for photographing moving subjects
  • ISO 100-6400, expandable to 12800 for low and difficult lighting conditions
  • Fixed LCD display

Canon EOS Rebel T6 Kit is a complete set that contains everything that you need to start as an amateur photographer.

The Canon EOS Rebel T6 is an entry-level DSLR with 18MP APS-C sensor that also features a DIGIC 4+ image processor. Combined, these two technologies gives you rich image quality with reduced noise.

Even more, the built-in Wi-Fi with NFC ensures that you have the ability to share images from your camera to a linked mobile device for instant online posting.

Canon EOS Rebel T6 Kit is a complete set that contains everything that you need to start as an amateur photographer.

The Canon EOS Rebel T6 is an entry-level DSLR with 18MP APS-C sensor that also features a DIGIC 4+ image processor. Combined, these two technologies gives you rich image quality with reduced noise.

Even more, the built-in Wi-Fi with NFC ensures that you have the ability to share images from your camera to a linked mobile device for instant online posting.

Canon EOS Rebel T6 is best for those looking for a smooth upgrade from a smartphone shooting to a digital camera.


Canon EOS Rebel T7i

  • ISO range of 100 to 25600 offers good shooting even in low light
  • Built-in Wi-Fi, NFC, and Bluetooth
  • 45-point all cross-type AF for accurate results
  • Does not have 4K video capabilities

A little more pricey than the previous model, EOS REBEL T7i  is one of the best cameras you can buy from Canon.

It comes with a 24.2 Megapixel CMOS (APS-C) sensor and the newer DIGIC 7 image processor that guarantee more detailed and colorful photos.

Rebel T7i has a high-speed continuous shooting rate of up to 6 fps making the shooting speed double compared with the Rebel T6 model. Furthermore, the 3.0-inch vari-angle touchscreen lets you capture the shot with ease.

If you don’t have a limited budget and want to invest from start in a quality camera, Canon EOS Rebel T7i is the right choice.


Nikon D5300

  • 5 frames per second continuous shooting
  • Compact and sleek design
  • Good battery life
  • The display is not touch-enabled

Nikon is another well-known brand when speaking about good quality cameras. The Nikon D5300 model is one of the best entry-level camera you can buy.

It comes with a built-in GPS feature that helps track your photos easily, create travel journals, and share your location when posting photos on Facebook.

The quality of the image is given by the new 24.2-megapixel image sensor, which is a recent design innovation allowing the camera to capture the purest, most lifelike images possible. 

Nikon D5300 is quite a functional and convenient device capable of delivering beautiful shots.


Nikon D3500

  • 24.7 Megapixels Resolution
  • Compact, comfortable design
  • Shooting speed of 5 fps
  • Only Bluetooth connectivity

Nikon D3500 is another great solution if you are a new photographer and don’t want to spend a lot of money on a dedicated camera.

The APS-C CMOS image sensor, which is 15X larger than those used in cell phones, creates sharper and clearer photos. You can make 1080 full HD videos by using this camera with monaural sound at the touch of a button.

It is also equipped with Guide Mode. If you want to learn while you shoot, turn on Guide Mode, and follow the simple on-screen guidance. This feature essentially teaches you the basics of photography, such as shutter speed, aperture, and exposure compensation along the way.

Nikon D3500 provides decent image quality, is quite easy to handle, and helps you learn the basics of photography.


Sony Alpha A6000

  • APS-C format with high resolution – 24 megapixels
  • Wi-Fi and Bluetooth connectivity
  • ISO range 100 – 25000 for low light photos
  • The LCD display is not touch-enabled

We may not think of Sony as a camera manufacturer, but we know from the Xperia phones series that it creates performant and quality products. Sony Alpha A6000 model is proof of this.

Alpha A6000 has a modern and stylish appearance combined with good ergonomics and high-quality performance. It is about half the size and weight of a typical DSLR camera, yet it has the same size APS-C image sensor as most of them.

Besides the design, it is one of the fastest on the market. It can shoot 11 photos in one second. The interchangeable lenses and E-mount system make the camera more versatile than almost any other camera.

Sony Alpha A600 is an affordable compact camera with great performance, for both amateur and advanced photographers.


There are plenty of cameras on the internet and choosing one can be a stressful task for an amateur. Any camera from the above list is a good option to start with.

If you keep in mind the most important features listed in this guide, you will be able to make the best decision.

[wl_navigator]

Samsung announces secretive new gaming partnership with Xbox and teases game streaming service

Earlier today during Samsung’s Unpacked 2020 event (via CNET), the company’s director of strategy, David Park, enthused the continuing relationship between Samsung and Microsoft and teased a new, untitled, cloud-base streaming service that he described as being “premium.”

It’s unclear if this just Microsoft’s Project xCloud streaming service, which is currently being tested on Android devices, or something separate but a Microsoft spokesperson did tell CNET in an email that, “Working with partners like Samsung is an important step in our Project xCloud journey and will help make game streaming more accessible for gamers” and to stay tuned for more information before the end of the year.

In addition to Android smartphones and tablets, Samsung is also a maker of computers and smart televisions so it would make sense for Microsoft to approach them in regards to adding support for their Xbox video game streaming service.

While this is purely speculation at this point, it would be pretty incredible to see Xbox game streaming launch with new Samsung TVs later in the year.

In other Android/Xbox cross-platform news, it was also announced today that the Xbox-powered Windows 10 video game, Forza Street, would be coming to Android devices soon.

Do you think this streaming service is Project xCloud or something more? Share your speculation in the comments below and then follow us on Pinterest and Twitter for more Xbox news.

Latest Patch Tuesday updates fix an astonishing 99 CVEs

Microsoft just released the second major round of updates for the year 2020, and they bring improvement and fixes for several features, including:

99 different CVEs were fixed by this latest update

Adobe products

The Adobe release for February includes five bulletins addressing a total of 42 CVEs in Framemaker, Experience Manager, Adobe Digital Editions, Flash, and Acrobat and Reader. It is worth mentioning that Framemaker alone needed fixes for 21 Critical-rated bugs.

Acrobat and Reader was second place with 17 CVEs associated with it, most of which were Use-After-Free (UAF) bugs. Third place was Adobe Digital Editions with 2 CVEs, and Flash Player with only one CVE.

Microsoft patches

The February security release consists of security updates that fixed 99 different CVEs for the following software:

  • Microsoft Windows
  • Windows Malicious Software Removal Tool
  • Microsoft Edge (EdgeHTML-based)
  • Microsoft Edge (Chromium-based)
  • ChakraCorepatch
  • Internet Explorer
  • Microsoft Exchange Server
  • Microsoft SQL Server
  • Windows Surface Hub
  • Microsoft Office and Microsoft Office Services and Web Apps

12 of these CVEs were listed as Critical, and the other 87 were classified as Important in severity.

Which were some of the most severe CVEs?

Some of the most important CVEs, out of which some were also exploited to a certain degree, are the following:

CVE-2020-0674

  • Scripting Engine Memory Corruption Vulnerability

CVE-2020-0688

  • Microsoft Exchange Memory Corruption Vulnerability

CVE-2020-0729

  • LNK Remote Code Execution Vulnerability

CVE-2020-0689

  • Microsoft Secure Boot Security Feature Bypass Vulnerability

CVE-2020-0662

  • Windows Remote Code Execution Vulnerability

These are the most important CVEs covered by Microsoft during the February 2020 round of Patch Tuesday Updates. For the next set of updates, users will have to wait until March 10.

How do I get the latest updates?

The updates are available via all known sources, which include:

  • Windows Update
  • Microsoft Update
  • Windows Server Update Services (WSUS)
  • Direct downloads on the Microsoft Update Catalog website

If you have any other questions or suggestions, don’t hesitate to reach for the comments section below.

Editor’s Note: If you want to know everything there is to know on Patch Tuesday, check out this in-depth guide.

Download Windows 7’s last free security updates

Microsoft started the year strong with the January 2020 Patch Tuesday updates. Besides the usual cumulative updates, that was also the last set of security updates for Windows 7, or so we thought.

On January 14, 2020, Windows 7 reached its end of support. Now, with the February 2020 Patch Tuesday updates, Microsoft released a new post-EOS update in the form of KB4537813 , which is a security-only update, and KB4537820 (monthly rollup).

KB4537813 comes with security improvements

This is a welcomed and unexpected turn of events that helps Windows 7 users keep their PCs running safely a little more than they initially thought.

While KB4537820 includes improvements and fixes that were part of KB4534310 released last month, KB4537813 comes as a standalone security update and it’s free for all Windows 7 users.

The full list of quality improvements and key changes include:

  • Security updates to Microsoft Graphics Component, Windows Input and Composition, Windows Media, Windows Shell, Windows Fundamentals, Windows Cryptography, Windows Hyper-V, Windows Core Networking, Windows Peripherals, Windows Network Security and Containers, Windows Storage and Filesystems, and Windows Server.

Of course, there are also some known issues:

  • After installing this update and restarting your device, you might receive the error, “Failure to configure Windows updates. Reverting Changes. Do not turn off your computer”, and the update might show as Failed in Update History.

This issue can appear on PCs running an unsupported ESU version or on PCs that don’t have an ESU MAK add-on key installed and activated.

To get past the problem, Microsoft recommends following all the prerequisites before updating and also make sure that your key is activated.

Download KB4537813 to improve Windows 7’s security

KB4537813 can be installed automatically through Windows Update by going into Settings > Update & Security. If you want to install the update manually, you can do so by downloading it from the Microsoft Update Catalog down below.

As a reminder, customers who have purchased the Extended Security Update (ESU) for on-premises versions can follow the procedures from KB4522133 to continue receiving updates after ESU.

What’s your take on this post-ESU security update for Windows 7? Leave your thoughts in the comments section below and we’ll continue the talk.

READ NEXT:

Download the Windows 10 February Patch Tuesday updates today

The second round of major updates for the year 2020 are here, and they are called the February Patch Tuesday updates. As always, this round of updates targets all major versions of Windows 10.

However, one thing worth mentioning is that despite reaching the end of its life back in January, this round of updates also comes with some small changes to Windows 7 as well.

The February security release consists of security updates for the following software:

  • Microsoft Windows
  • Windows Malicious Software Removal Tool
  • Microsoft Edge (EdgeHTML-based)
  • Microsoft Edge (Chromium-based)
  • ChakraCore
  • Internet Explorer
  • Microsoft Exchange Server
  • Microsoft SQL Server
  • Windows Surface Hub
  • Microsoft Office and Microsoft Office Services and Web Apps

Cumulative updates included in February Patch Tuesday Updates


Windows 10, version 1909

As usual, Windows 10, version 1909 and versions 1903  share a common core operating system and an identical set of system files. As a result, all major changes that apply to one version will be present in the other.

As far as issues are concerned, there is nothing worth mentioning out yet.

Cumulative update name:

Improvements and fixes 

  • Addresses an issue that occurs when migrating cloud printers during an upgrade.
  • Improves the installation experience when updating to Windows 10, version 1903.
  • Security updates to Internet Explorer, Microsoft Edge, Windows Fundamentals, Windows Cryptography, Windows Virtualization, Windows Network Security and Containers, Windows Server, Windows Management, Microsoft Graphics Component, Windows Input and Composition, Windows Media, the Microsoft Scripting Engine, and Windows Shell.

Known Issues

  • There are no known issues

[DIRECT DOWNLOAD LINK]


Windows 10, version 1903

Cumulative update name:

Improvements and fixes

  • Same as Windows 10, version 1909

Known Issues

  • There are no known issues

[DIRECT DOWNLOAD LINK]


Windows 10, version 1809

This cumulative update applies to Windows 10 version 1803 and bumps the OS Build to 17763.1039. Besides the other fixes, one notable new feature is that this release also contains updates for Microsoft HoloLens (OS Build 17763.1039) released on February 11, 2020.

Cumulative update name:

Improvements and fixes

  • Security updates to Microsoft Edge, Internet Explorer, Microsoft Graphics Component, Windows Input and Composition, Windows Media, Windows Shell, the Microsoft Scripting Engine, Windows Fundamentals, Windows Management, Windows Cryptography, Windows Virtualization, Windows Hyper-V, Windows Core Networking, Windows Peripherals, Windows Network Security and Containers, Windows Storage and Filesystems, and Windows Server.

Known Issues

  • Certain operations, such as rename, that you perform on files or folders that are on a Cluster Shared Volume (CSV) may fail with the error, “STATUS_BAD_IMPERSONATION_LEVEL (0xC00000A5)”. This occurs when you perform the operation on a CSV owner node from a process that doesn’t have administrator privilege.
  • After installing KB4493509, devices with some Asian language packs installed may receive the error, “0x800f0982 – PSFX_E_MATCHING_COMPONENT_NOT_FOUND.”

[DIRECT DOWNLOAD LINK]


Windows 10, version 1803

One noticeable feature of this cumulative update is that it marks the end of service for the Windows 10 Home and Pro editions. Thus, you should expect a new ste of updates in the near future that will force you to update to the next supported version available.

Cumulative update name:

Improvements and fixes

  • Security updates to Microsoft Edge, Internet Explorer, Microsoft Graphics Component, Windows Input and Composition, Windows Media, Windows Shell, the Microsoft Scripting Engine, Windows Fundamentals, Windows Management, Windows Cryptography, Windows Virtualization, Windows Hyper-V, Windows Core Networking, Windows Peripherals, Windows Network Security and Containers, Windows Storage and Filesystems, and Windows Server.

Known Issues

  • Certain operations, such as rename, that you perform on files or folders that are on a Cluster Shared Volume (CSV) may fail with the error, “STATUS_BAD_IMPERSONATION_LEVEL (0xC00000A5)”. This occurs when you perform the operation on a CSV owner node from a process that doesn’t have administrator privilege.

[DIRECT DOWNLOAD LINK]


Windows 10, version 1709

Windows 10, version 1709, reached the end of service on April 9, 2019, for devices running Windows 10 Home, Pro, Pro for Workstation, and IoT Core editions. This means that the devices running this version will no longer receive monthly security and quality updates.

If you do wish to continue receiving added protection, Microsoft recommends that you update to the latest version of Windows 10.

Cumulative update name:

Improvements and fixes

  • Security updates to Microsoft Edge, Internet Explorer, Microsoft Graphics Component, Windows Input and Composition, Windows Media, Windows Shell, the Microsoft Scripting Engine, Windows Fundamentals, Windows Management, Windows Cryptography, Windows Virtualization, Windows Hyper-V, Windows Core Networking, Windows Peripherals, Windows Network Security and Containers, Windows Storage and Filesystems, and Windows Server.

Known Issues

  • Certain operations, such as rename, that you perform on files or folders that are on a Cluster Shared Volume (CSV) may fail with the error, “STATUS_BAD_IMPERSONATION_LEVEL (0xC00000A5)”. This occurs when you perform the operation on a CSV owner node from a process that doesn’t have administrator privilege.

[DIRECT DOWNLOAD LINK]


Windows 10, version 1703

Windows 10, version 1703 has reached end of service for all editions. If you want to continue receiving security and quality updates, Microsoft recommends updating to the latest version of Windows 10.

Cumulative update name:

Improvements and fixes

  • Security updates to Microsoft Edge, Internet Explorer, Microsoft Graphics Component, Windows Input and Composition, Windows Media, Windows Shell, the Microsoft Scripting Engine, Windows Fundamentals, Windows Management, Windows Cryptography, Windows Virtualization, Windows Hyper-V, Windows Core Networking, Windows Peripherals, Windows Network Security and Containers, Windows Storage and Filesystems, and Windows Server.

Known Issues

  • There are no known issues

[DIRECT DOWNLOAD LINK]


Windows 10, version 1607

Windows 10, version 1607, reached the end of service on April 10, 2019, for devices running Windows 10 Home, Pro, Pro for Workstation, and IoT Core editions. This means that the devices running this version will no longer receive monthly security and quality updates.

Cumulative update name:

Improvements and fixes

  • Security updates to Microsoft Edge, Internet Explorer, Microsoft Graphics Component, Windows Input and Composition, Windows Media, Windows Shell, the Microsoft Scripting Engine, Windows Fundamentals, Windows Management, Windows Cryptography, Windows Virtualization, Windows Hyper-V, Windows Core Networking, Windows Peripherals, Windows Network Security and Containers, Windows Storage and Filesystems, and Windows Server.

Known Issues

  • After installing KB4467684, the cluster service may fail to start with the error “2245 (NERR_PasswordTooShort)” if the group policy “Minimum Password Length” is configured with greater than 14 characters.
  • Certain operations, such as rename, that you perform on files or folders that are on a Cluster Shared Volume (CSV) may fail with the error, “STATUS_BAD_IMPERSONATION_LEVEL (0xC00000A5)”. This occurs when you perform the operation on a CSV owner node from a process that doesn’t have administrator privilege.

[DIRECT DOWNLOAD LINK]


Windows 10, version 1507

Among all of the cumulative updates released this Patch Tuesday, this is the only KB to include a fix for an issue that would affect the implementation of a Group Policy

Cumulative update name:

Improvements and fixes

  • Addresses an issue that might prevent the “Turn off encryption support” Group Policy from being set correctly.
  • Security updates to Microsoft Edge, Internet Explorer, Microsoft Graphics Component, Windows Input and Composition, Windows Media, Windows Shell, the Microsoft Scripting Engine, Windows Fundamentals, Windows Management, Windows Cryptography, Windows Virtualization, Windows Hyper-V, Windows Core Networking, Windows Peripherals, Windows Network Security and Containers, Windows Storage and Filesystems, and Windows Server.

Known Issues

  • Certain operations, such as rename, that you perform on files or folders that are on a Cluster Shared Volume (CSV) may fail with the error, “STATUS_BAD_IMPERSONATION_LEVEL (0xC00000A5)”. This occurs when you perform the operation on a CSV owner node from a process that doesn’t have administrator privilege.

[DIRECT DOWNLOAD LINK]


Patch Tuesday list of CVEs

If you want to learn more about this month’s list of common vulnerabilities and exposures, you can check out the list below. Keep in mind that this is not the full list. If you want to know about this month’s 99 CVE, you can check out this article.

How do I get the latest updates?

The most common and secure method of installing the updates is via Windows 10‘s Windows Update feature. The latest updates should appear as available there as soon as they are released.

However, if you are only interested in a specific update, then all you need to do is visit the Windows Update Catalog, and enter the specific KB number. The download should start immediately, and you can then manually install the updates that you desire.

Other viable sources for updates include:

  • Microsoft Update
  • Windows Server Update Services (WSUS)

Note: Don’t forget to always have a backup of all of your data before performing a big set of updates like the ones on Patch Tuesday.

Editor’s Note: If you want to know everything there is to know on Patch Tuesday, check out this in-depth guide.

Download Adobe Patch Tuesday Updates [February 2020]

It’s Patch Tuesday time and Adobe leads the pack, again. While January 2020 Patch Tuesday wasn’t the biggest for Adobe, things seem to be different with this set of security updates.

It’s already common for Adobe to release its security updates a bit sooner. Now, with the February 2020 Patch Tuesday, the company patched a set of important vulnerabilities for almost all of its products.

Adobe products are affected by 40 CVEs

It seems like from the last security updates there are around 40 CVEs that could affect different Adobe products. These CVEs have severity ranges from Important to Critical.

Check out the full list with all the Adobe products affected:

Somewhat expected, Adobe Acrobat and Reader along with Adobe Framemaker have the most vulnerabilities.

While Experience Manager, Digital Editions, and Flash Player have priorities of 2 and 3 and were patched for Denial-of-service, Information Disclosure, and Arbitrary Code Execution, for Acrobat, Reader, and Framemaker things are different.

Adobe Acrobat and Reader have the most vulnerabilities

The last three have a priority rating of 2 and 3 also, but the majority of vulnerabilities are marked as Critical.

Besides the Arbitrary Code Execution and Information Disclosure, these products are susceptible to Memory Leak and Arbitrary file system write, which makes them more dangerous.

To keep your system safe, Adobe recommends to immediately update the affected programs to their latest version. This way, you can make sure that the mentioned CVEs can’t affect your PC.

Usually, Adobe product update automatically when a new update is detected. If you want to update your product manually, you can do so by choosing Help > Check for Updates.

Alternatively, you can also find the full installers with the latest version on Adobe’s website.

Don’t forget to leave us a message in the comments section below if you bump into any problems while updating and we’ll be sure to help you out.

READ NEXT:

Windows 10 Auto Login Not Working: 3 Ways to Fix it

If you find that the Windows 10 auto login is not working properly, you are not the only user experiencing issues. This is an extremely frustrating issue, especially if you used it before, and it worked just fine.

It seems that the problem appears after users apply the latest Windows 10 updates.  This issue occurs on both the x32 and x64 versions of the operating system.

So, while updating the PC should fix things in most cases, we have solutions even when it doesn’t. Keep reading to find out!

How do I fix auto login on Windows 10?

Before we move to the slightly complex solutions, try these quick ones:

  • If the Windows 10 auto login is not working after reboot, another restart should fix things.
  • When the Windows 10 auto login is not working after an update, a patch should be underway. Look for any newer OS versions and install them.

If none work, head to the fixes listed next.

1. Use the Windows AutoLogOn v 3.10 tool

  1. Download Autologon from Microsoft’s official website.autologon
  2. Extract the files.
  3. Run the setup designed for the architecture of the installed OS.
  4. Click Agree to accept the license terms.accept
  5. Fill out the required information, and click Enable to activate Autologon.autologon to fix windows 10 auto login not working

When Windows 10 automatic login is not working, the Autologon tool should help set things up! In case that sounds too complex or you don’t want to rely on third-party solutions, check the next two.

2. Use Registry Editor to enable the function

  1. Press Windows + R, type regedit, and press Enter.
  2. Click Yes in the UAC prompt.
  3. Paste the following path in the address bar and hit Enter: HKEY_LOCAL_MACHINE/SOFTWARE/Microsoft/WindowsNT/CurrentVersion/Winlogonpath
  4. Locate the DefaultUserName and DefaultPassword values. If one doesn’t exist, create them by right-clicking on the empty portion, hovering the cursor over New, and selecting String Value.string
  5. Double-click on each of the strings and set the Value date as your username and password for the respective strings (if you’re using a Microsoft account, add the Microsoft Account/<your email ID>).
  6. Double-click on AutoAdminLogon string, set the Value data to 1, and click OK.autoadminlogon to fix windows 10 auto login not working
  7. Close the Registry Editor and restart your Windows 10 PC.

When things don’t work, you can always set up auto login via the Windows 10 Registry by modifying a few entries. Just make sure to follow the steps as it is and not make any other changes.

3. Use netplwiz command to enable auto logon

Tip icon Tip
If you don’t find the Users must enter a user name and password to use this computer checkbox in User Accounts (netplwiz), a few quick changes to the Registry should do!
  1. Press the Windows +R, type netplwiz, and hit Enter.netplwiz
  2. Go to the Users tab, and uncheck the option Users must enter a user name and password to use this computer.
  3. Type your credentials inside the Automatically sign-in dialog, and save the changes.
  4. Restart your Windows 10 PC.

When the Windows 10 auto login is not working, the netplwiz utility should come to aid! You can easily enable automatic sign-in by checking the designated option.

That’s all for now! And remember, these solutions also work when the Windows 11 auto login is not working.

Before you leave, find out how to bypass the login screen when you forget the password.

If you want to share this information with us, feel free to use the comment section found below this article.

FIX: Corsair Utility Engine no device detected error

Corsair makes premium gaming gear for pro and casual gamers. To make the most of its products, the company also offers Corsair Utility Engine, a customization software for the Corsair products. However, some users have reported no device detected, please connect a device error with the software.

This error occurs after launching the Corsair Utility Engine software and the application fails to detect the connected Corsair devices.

If you are also troubled by this error, here are a couple of troubleshooting tips to help you fix Corsair Utility Engine no device detected, please connect a device error in Windows.

How can I fix CUE’s no device detected error?

1. Quit and relaunch CUE

no device detected

  1. Close Corsair Utility Engine if running.
  2. Click the small arrow icon in the taskbar.
  3. Right-click on the CUE icon and select Quit.
  4. Restart the computer.
  5. Start Corsair Utility Engine again and check for any improvements.

Quitting and relaunching  CUE after a restart has helped users with similar error fix the issue. Make sure you restart your computer before starting it again.


Looking for a new mechanical keyboard? Check out our recommendations in this article.


2. Unplug and replug the device

no device detected

  1. Quit Corsair Utility Engine if it is running.
  2. Unplug all the Corsair devices connected to your laptop.
  3. Restart your computer.
  4. Press and hold the Esc key on your keyboard and connect it to your computer.
  5. Launch Corsair Utility Engine and check for any improvements.

Removing and replugging the Corsair device while holding the Esc key in case of the keyboard has helped users resolve the issue.


3. Update the drivers

no device detected

  1. Press the Windows key on your keyboard to bring up the search.
  2. Type Device and click on Device Manager.
  3. Expand the Keyboard section.
  4. Right-click on the Corsair keyboard entries.
  5. Select Update Driver.
  6. When the how do you want to search for drivers window appears, click on Search automatically for updated driver software.
  7. Windows will now look for any pending driver update and download it.
  8. Wait for the installation to complete.
  9. Do this for all the keyboard entries.
  10. Now run the Corsair Utility Engine and check for any improvements.

Did you know that the majority of Windows 10 users have outdated drivers? Be a step ahead using this guide.

Update USB controller driver

no device detected

  1. Open the Device Manager.
  2. Expand the Universal Serial Bus Controller section.
  3. Right-click on Intel (R) USB 3.0 Host Controller and select Update Driver.
  4. Select Search automatically for updated driver software option.
  5. Windows will now scan the system for any pending updates and install them.
  6. If no update found, check the Intel or AMD website for new updates.

Windows can’t automatically find and download new drivers? Don’t worry, we’ve got you covered.


4. Check Corsair keyboard compatibility

no device detected

  1. If the issue is with your Corsair keyboard, make sure the keyboard is full RGB supported.
  2. Check the packaging of your keyboard to better understand the specifications.
  3. Not all the Corsair keyboards are full RGB supported.
  4. If your Corsair keyboard is not full RGB supported, then the Corsair Utility Engine may not show all the customization options.

The  Corsair Utility Engine No device detected, please connect a device error that can occur if your Corsair device is not supported by the software or if there are issues with the driver. Follow the steps in this article and see if that helps you resolve the error.

For any other questions and suggestions, reach for the comments section below.

READ ALSO:

Microsoft Teams-Outlook email integrations coming in March

Those of you that are part of companies that heavily rely on Microsoft products are familiar with Microsoft Teams and Outlook. One is Microsoft’s very own collaborative tool, while the other is a personal information manager that doubles as an email client.

Both of them are part of the Microsoft Office Suite, but at the same time, both of them are some of the few products that are actually truly free.

Both of these programs handle talking with others, scheduling tasks and other operations. Thus, it was only natural that away to link the two services directly would come to light.

Such is the story of how Microsoft plans to introduce Teams-Outlook Email Integrations in March.

The Teams-Outlook email integrations hits live in Q1 CY2020

Unfortunately, other than the announcement itself on Microsoft’s official forums, no other information was given.

Because of the ambiguity of the post, users started speculating about the new add-in’s functionality:

To use these new features you can use the already existing Teams Meeting add-in or will there be a new one?

Other users were more curious about the integration’s release date:

Any idea when this add-in will become available, it’s February 2020 and I can’t find a download link

Plans for this new tool first reached the general public when Microsoft published on their Microsoft 365 Roadmap page that this will be the only feature they are currently working on.

Some of the speculations were debunked since according to the Roadmap page, there will be nothing to download. All the new features will be automatically added as part of the next major Outlook update.

What does this mean for users?

Now that the two programs will be linked together easier, you will be able to work faster and more efficiently. This is especially when considering how the two programs complement some of each other’s cons.

Regardless of which, both of these programs are usually installed together on the same PCs anyway. Thus, linking them for better functionality should be second nature.

How do you think this new integration will affect workflow? Don’t hesitate to reach for the comments section below.

How to fix the can’t share printer error 0x00006d9 in Windows

Some Windows 7 and Windows Server 2008 R2 users have encountered the printer error 0x00006d9. It’s an issue that can occur when users select the Share this printer option.

The full error message states: Printer settings could not be saved. Operation could not be completed error 0x000006d9. As a result, users can’t share printers.

How can I fix printer error 0x00006d9?

1. Enable the Windows Firewall Service

  1. Microsoft’s official resolution for error 0x00006d9 is to enable the Windows Firewall Service. To do that, open Run by pressing the Windows key and R at the same time.
  2. Enter services.msc in the Open text box, and click the OK button. Then the Services window will open.
  3. Then double-click Windows Firewall to open its properties window.Windows Firewall Properties can't share printer error 0x00006d9
  4. Click the Startup type drop-down menu to select the Automatic setting there.
  5. Click the Start button (on the properties window).
  6. Select the Apply option.
  7. Press the OK button to close the window.
  8. In addition, make sure the firewall is enabled within the Control Panel. To do so, open Run again.
  9. Enter control.exe /NAME Microsoft.WindowsFirewall in Run, and click the OK button.Windows Firewall applet can't share printer error 0x00006d9
  10. Click Turn Windows Firewall on or off to open the options shown directly below.Turn on Windows Firewall settings can't share printer error 0x00006d9
  11. Select both the Turn on Windows Firewall radio buttons there.
  12. Click the OK button to exit.

2. Uninstall third-party antivirus software

  1. Some users might need to also uninstall third-party antivirus software to enable the default firewall in Windows 7. Open the Run accessory.
  2. Input ‘appwiz.cpl’ in Run and click OK to open the uninstaller window shown directly below.
    uninstaller window can't share printer error 0x00006d9
  3. Select your antivirus utility.
  4. Click the Uninstall button.
  5. Then click Yes to further confirm.

We recommend using a third-party uninstallation tool that removes the antivirus software automatically and efficiently.

With this type of program, every malicious ad/plug-in or residual file from the system connected to the antivirus service will be deleted completely. This will provide you with a clean PC and will contribute to the overall performance of your Windows OS.

So, uninstall third-party apps with the most efficient uninstaller programs capable of removing your antivirus and activating the default firewall.

3. Check that network discovery and printer sharing are enabled

  1. Make sure that both network discovery and printer sharing are enabled. First, open the Run accessory.
  2. Enter control /name Microsoft.NetworkAndSharingCenter in the Open box, and click the OK button.Network and Sharing applet can't share printer error 0x00006d9
  3. Click Change advanced sharing settings in windows to open the settings shown directly below.
    The Turn on network discovery setting can't share printer error 0x00006d9
  4. Select the Turn on network discovery option if required.
  5. Select the Turn on file and printer sharing setting if printer sharing isn’t enabled.
  6. Press the Save changes button.

Those are the confirmed fixes for error 0x00006d9. With that error fixed, you can then share your printer as required.

If you have any other questions or suggestions, leave them in the comments section below and we’ll be sure to check them out.

How to Easily Host Files on GitHub

GitHub is an extremely popular website among software developers for sharing code, yet don’t think of it as an exclusive place for them. GitHub just launched its beta Android app at last and you may also use it as a free file hosting service. So, don’t postpone learning how to host files on GitHub.

If you’re undecided, let us remind you that it stores file changes more efficiently and ensures file integrity better than other systems available. If you and your team constantly make changes to Word documents, for example, you could use GitHub as your version control system.

Do keep in mind that GitHub has a limitation for individual files of no more than 25 MB each. It is more than enough when planning to upload a few lines of code. The limit could prove insufficient if you want to go far beyond that, but at least there are no known bandwidth limits to worry about.

Now that you know what GitHub is capable of, in the following sections, we will teach you the process of hosting files on it.

How can I host files on GitHub?

1. Create a new repository for your files

  1. To get started with GitHub, go to github.com and sign-up for a free account.
  2. Click the New Repository button as it’s time to create a new repository for hosting your files. See this as a location where all the files for a particular project are stored. Each project has its own repository, and you may easily access it with a unique URL.
  3. Up next, give your repository a name. You may also add a description if wanted.add name and description
  4. Then, click the Create button.
  5. Your repository will be empty at this point, so click the Import Code button on the next screen to initialize the repository.Import Code button
  6. Paste the URL https://github.com/files.git into the repository field.
  7. Click Begin Import to create your very first GitHub repository for hosting files.

2. Upload your files to GitHub

  1. Click the Upload Files button to begin uploading some of your files.
  2. Drag one or more files there or choose them directly from the computer.choose your files
  3. Then, click Commit Changes to publish them on the web.

Once your files are uploaded, you might also want to learn how to clone a repository in GitHub so you can keep a local copy and manage updates more easily.

After you upload and publish changes, keep the repository tidy by learning how to delete a GitHub branch when a feature branch is no longer needed.

3. Get a downloadable version

  1. With the file already uploaded to GitHub, all you need to do is click the filename in the list and you’ll get the file’s URL in the browser’s address.
  2. Finally, just attach ?raw=true to the URL in order to get a downloadable version.
  3. Alternately, if you go to a public codebase, click on the green button that says Clone or Download.
  4. Then, select Download ZIP.
  5. All files will begin downloading to your computer, usually in your Downloads folder.
  6. Up next, open your Downloads folder and find the ZIP file that contains the entire repository content.
  7. Right-click it and choose the option that says Unzip or Uncompress.
  8. Also, select a folder where you want the files to end up.

Most public repositories can be downloaded for free, without even having a user account. Therefore, unless the owner of the codebase decides to check a box otherwise, the files can be easily packed into a zipped file. Then, just grab them into your computer.

As you can see, hosting files on GitHub is actually quite easy, even for non-developers. In just a couple of minutes, you can create your first repository, or upload some of your files. Then, downloading files from GitHub is just as easy too.

In case you need help with other GitHub issues, such as the fatal not possible to fast-forward aborting error message; read this guide to learn the solutions.

If you have any questions about this procedure, let us know in the comments area below.

First reactions to Microsoft’s Windows 10X / Surface Neo / Surface Duo announcements from Microsoft Developer Day

Microsoft pulled back some more of the covers on Windows 10X, Surface Neo and Surface Duo today during its online Microsoft Developer Day, with CVP for Windows Developer Platform Kevin Gallo hosting the festivities. While it’s still too early to fully digest all that was announced, here are some first reactions.

Boy, are Surface Neo and Duo buggy

The most glaring issue coming out of today’s event was the multiple times both Neo and Duo failed during demos. At one point, Gallo was showing off a simple “move Google Maps into both screens” task, but it froze up the Duo he was live-demoing on. Luckily, he had another Duo in his back pocket, but after just a minute or so, that device locked up too.

Now Microsoft is to be commended for getting these devices out in the open early, and having demos fail this early in the process is probably just par for the course. However, it’s still not a good look for what isn’t much more than some UI controls running on top of Android, in the case of the Duo. With Surface Neo, which also failed in demos, the brand new Windows 10X may have a bit more of an excuse, but these failures show that if nothing else, these devices are no where near ready for release.

Windows 10X Win32 Containers

Perhaps the most important news coming out of the event today involves Windows 10X and the revelation that Win32 apps will run on Windows 10X in containers, separate from the operating system. The new system will work similar to, and is actually based on the work Microsoft has done to get Linux to run on Windows via the WSL2 Windows Subsystem for Linux:

https://twitter.com/h0x0d/status/1227285210380804096

Running all apps, not only UWP apps but Win32 apps as well in containers means that not only do the apps run more securely, unable to write to the core operating system, but also makes it possible to streamline that core OS. Windows 10X will be able to update “in as little as 90 seconds,” and will significantly improve battery life.

Running in a container has a number of advantages, but some legacy Windows apps will have trouble running in this new system. Over the years, developers have pushed to get their apps to run as fast as possible, and to cut a corner here and there to get the most out of their applications. So, not every Win32 app will work on Windows 10X, but most will. Each of the three types of containers handled by Windows 10X (Win32, MSIX, or UWP) has their own advantages, as developer Ginny Caughey points out (click through to check out the thread):

Microsoft continues to insist Windows 10X is for dual screens only… why?

Faster, safer, quicker to update, and with most or all of the legacy crap removed. Those are features that are appealing to consumers whether they use dual screens or not, yet Microsoft continues to insist on locking down Windows 10X to dual screen devices. We get that Microsoft really wants dual screen devices to succeed, and to lead in the next generation of computing, but there are a number of downsides to dual screens, too (cumbersome, bulky, expensive, unproven, etc., etc.), and we continue wait for the other shoe to drop. So far, Microsoft is sticking to its dual screen guns, but we can’t see any reason why Windows 10X couldn’t run on a single screen tablet, other than having to go head to head with the iPad. There may be technical reasons why Windows 10X only works on as-yet unreleased devices, but we doubt there’s a technical reason why these devices need dual screens.

We’re not too worried about the buggy performances, it is early, and we’re glad that Microsoft is willing to suffer a few embarrassments in the cause of openness. We still have to hear how real world apps work in Win32 containers, or if developers will have to do a lot of work to get their legacy, but important apps to run (hint, they won’t). And we’re going to continue to hold out hope for a Windows 10X future beyond dual screens. Again, it’s early.

What do you think about Windows 10X, Surface Neo, and Surface Duo? Let us know in the comments below.

The Windows 10X emulator is now live, here’s what you need to get it to run

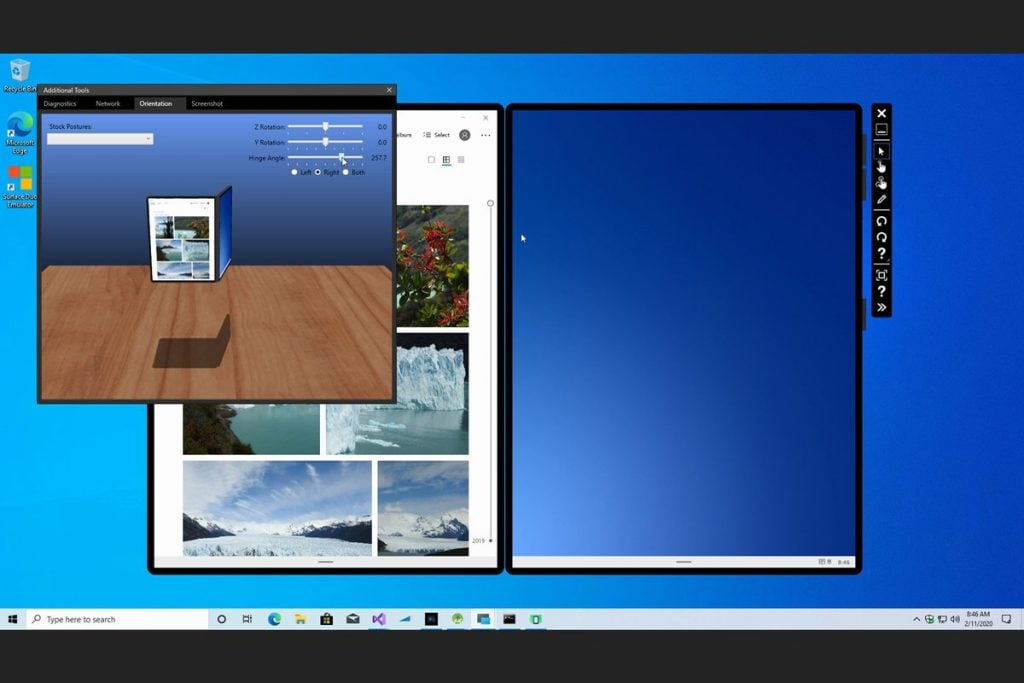
During Microsoft 365 Developer Day, the details on app development for Windows 10X were finally made available. Delivered through the Microsoft Emulator and Windows 10X SDK, developers can now code and test their apps for Windows 10X without owning a dual-screen device.

Anyone, though, is free to try it out on their own. Here’s what you need to get it to run if you want to get a feel for Windows 10X ahead of release.

Before you get started with even thinking about trying out Windows 10X, you need to meet a few software requirements. You’ll need to be a Windows Insider, and have the latest Windows Insider build. You’ll also need to have Visual Studio 2019 Preview and the Windows 10 SDK Insider Preview installed. You also need to make sure you’re running 64-bit Windows 10 Pro, Enterprise, or Education. The other software requirements are listed below.

  • In the BIOS, the following features must be supported and enabled:  Hardware-assisted virtualization, Second Level Address Translation (SLAT), Hardware-based Data Execution Prevention (DEP)
  • Ensure that the “Hyper-V” feature has been enabled on your system through Control Panel -> Programs -> Programs and Features -> Turn Windows Features on or off -> ensure that “Hyper-V” is selected for the Emulator installation to be successful.

There are also a few hardware requirements too. First off, your system needs to meet the specs below. You also need to have a device with an Intel processor, as AMD processors are not supported at this time. Nested virtualization is required to run Windows 10X in the emulator.

  • Intel CPU with at least 4 cores you can dedicate to the emulator (or multiple CPUs with a total of 4 cores)
  • 8 GB of RAM or more, 4 GB of RAM for the emulator
  • 15 GB of free disk space for vhdx + diff disk, SSD recommended
  • Dedicated video card recommended
  • DirectX 11.0 or later
  • WDDM 2.4 graphics driver or later

Once you meet these requirements, you can install the Windows 10X Emulator from the Microsoft Store. You also need to install the Emulator Image, as well. Additional directions on how to launch, run, and get started with the emulator are available here from Microsoft.

Tom Clancy’s The Division 2 is up to 95% off as part of this week’s Xbox sales

Tom Clancy’s The Division 2 is available right now for just $2.99 in the U.S. right now ($3.99 in Canada), a whopping 95 percent discount compared to its off-sale price. In other regions, the game is on sale for an 85 percent discount, which makes this the best time to buy the game if you’ve been considering the action RPG.

Tom Clancy's The Division® 2
Developer:
UBISOFT
Price:
Free

Numerous other game titles from Ubisoft, Capcom, and 2K are available for some great discounts. In addition to Tom Clancy’s The Division 2, Ubisoft has multiple Assassin’s Creed titles and DLC for up to 75% off, and Far Cry 5 is just $14.99 right now. 2K also has Borderlands 3 for half off, and all three editions of NBA 2K20 for 60% off. Capcom is also running its own publisher sale with a handful of titles of its own, including Resident Evil 2 for 67% off.

Assassin's Creed® Odyssey
Developer:
Ubisoft
Price:
Free

This week’s Deals with Gold offers are also available for those with an Xbox Live Gold or Game Pass Ultimate subscription. The Gold Edition of Hitman 2 is available for $29.99, 70 percent off its list price of $99.99. Grand Theft Auto V: Premium Online Edition & Great White Shark Card Bundle is also on sale for just $29.94, or 35 percent off.

The Spotlight sale also has a handful of titles available outside of the Publisher Sale, as well. These include two titles from Blizzard: Diablo III—Eternal Collection and Overwatch: Legendary Edition— each for for 67 percent off right now.

Which games are you looking at? Let us know what you think in the comments area below.

How to password protect notebook sections in OneNote on Windows, iOS, Android, and MacOS

OneNote is an excellent tool to take notes, but it also can be a great journaling app too. In this case, and in other instances, you might want to password protect a specific section of your notebook to keep it out of the hands of those who you don’t want to access it. In our latest guide, we’ll show you how you can protect those notebooks with a password.

Be aware, though, we’ll be talking about the OneNote app downloaded through the Microsoft Store, or your respected app store. We won’t be touching on OneNote 2016, which is still here to stay. You can easily password protect sections there too if you want by right-clicking the section tab and choosing Password Protect this Section. But, here’s a deeper look at how you can do this in the modern OneNote app.

The workflow of a password-protected section in OneNote

Before diving into how to password protect sections, we’ll touch on it changes your workflow. Once a section is password-protected, you’ll need to enter the password each time to unlock it. Although supported on iOS and Android, OneNote on Windows and MacOS don’t support fingerprint authentication. This means you’ll need to take a few extra sections to input the password in OneNote. Also, be aware that the password doesn’t encrypt your notebook like Bitlocker in Windows 10. It’s just there to make it harder for others to access as the notebook can’t be opened without the password. Lose the password, lose the notebook. With that explained, it’s time to move on!

On Windows 10

To password protect a notebook section in OneNote on Windows 10, you’ll first need to double click on the name of the notebook in the sidebar to open it. This will then open up a list of sections, and you can right-click on the one that needs protection. Once you do that, look for the option that says Password Protection. You’ll want to click that and choose Add Password. Enter in the password, and click OK. Your notebook section is now protected!

On MacOS

The process of password protecting a section of a notebook in OneNote on MacOS is a bit similar. Make sure you’ve double-clicked the section name in the sidebar and opened up the section of the notebook you want to add a password to. Once done, right-click the name of the section, and choose Password Protection. You’ll then want to choose to Protect this Section and enter your password and verify it.

On Android

As Android is a mobile platform, password protecting a section of a notebook in OneNote will be different. To do this, open up the section of the notebook you want to protect. You’ll then want to hold down the name of the section, till you see a bullet point. After that, head to the top right corner, and click the … menu. Choose to Protect Section and enter your password and click OK. When done, you can lock the section again from the … menu. When unlocking next time, you’ll be prompted to enter the password. You can also check the toggle to unlock with fingerprint next time to speed up the process.

On iOS

The process of password protecting a section in OneNote on iOS is a bit similar to Android, but there are more icons to help you understand the process. To begin, you’ll want to select the section you’d like to protect. You’ll then want to click the lock icon in the bottom right corner of your screen. Choose Protect This Section and enter your password. The section will automatically lock after a period of inactivity. You can unlock by tapping it and entering the password. Just like on Android, you can unlock by fingerprint by choosing the option the first time you unlock after putting in a password.

How do you use OneNote?

As we said before, OneNote is a fairly powerful tool. It has dark mode support, image features, and even integration in Microsoft Teams. OneNote is a topic we’ve covered extensively, so check out our news hub here for more. And, feel free to let us know how OneNote is working for you by dropping us a comment in the section below.

Microsoft backtracks on forcing Bing extension for enterprise Chrome users

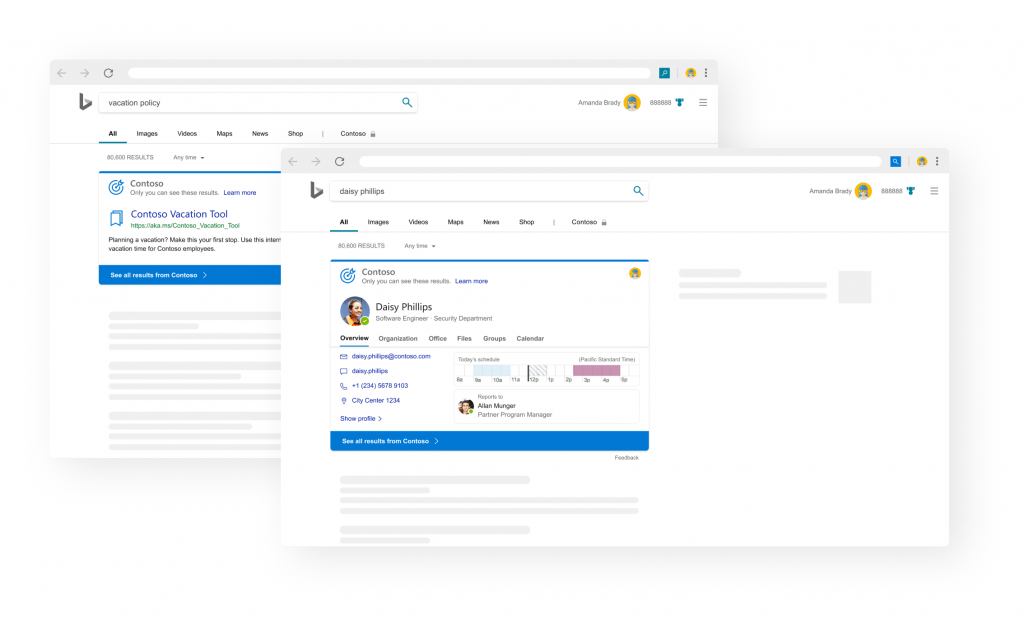
Microsoft has reversed its decision to automatically install Microsoft Search with Bing Chrome extension for Office 365 ProPlus users due to “customer feedback”. The forced installation extension would have changed the default search engine in Chrome to Bing, a move that was likely meant to show off the company’s Microsoft Search—a tool that gives employees quick access to company files, documents, and other data along standard Bing web results.

In January, Microsoft announced that beginning in Office 365 ProPlus version 2002, the company would automatically install the extension to change the default search engine. Although the company provided instructions on preventing the extension to be installed, this also meant extra work on the organization’s part.

Instead, Microsoft will make it so that organizations can choose to opt-in to the program itself. The company also noted that “in the near term, Office 365 will only deploy the browser extension to AD (Active Directory)-joined devices even within organizations that have opted in.” Users who do install the extension can still choose to set another search engine as the default if they so choose.

For now, Office 365 ProPlus version 2002 won’t ship with the Microsoft Search with Bing Chrome extension, so no changes to the user’s default search engine will be made. Microsoft says that it will provide a new timeline for the optional extension “over the next few weeks.”

What do you think about Microsoft’s decision? Feel free to leave your thoughts and suggestions in the comments area below.

IBM chooses another Microsoft competitor for its employees; Slack instead of Teams

Microsoft and Slack have been locked inside a metaphorical cage match over the future supremacy of productivity communications and today, IBM placed a large bet on Slack.

According to a Busines Insider report, IBM is going all-in with Slack to help support communications of its 350,000 employees in the near future.

IBM choosing a Microsoft competitor, while a tantalizing headline grabber, isn’t a new event. A few years ago, IBM and Apple made headlines as the former opted to shift 25% of its  537,000 active laptops from PCs to Macs.

On the face of it, the IBM contract is a huge get for Slack, especially as the company scales to continue competing with the likes of Microsoft Teams, but some of the details of the agreement have arguably subdued the news.

Powering modern communications one of the largest businesses worldwide is not only a validation of Slack’s ability to support and scale its solution but should be a relatively lucrative revenue stream that can counter Microsoft’s recent surge in the sector.

However, the reality is that Slack had already been supporting IBM employees as early as 2014 and has scaled to support 165,000 as 2019.

Furthermore, the company has yet to clarify which portion of the current 165,000 or future total 350,000 employees will be using a free or paid tier of the service.

While understandably proud of the full commitment from IBM Slack also seemingly attempted to underplay the news by not updating its fourth-quarter forecast to reflect its new agreement, a move that saw its shares soar 15% but ultimately fall 6% in after-hours trading.

Invalid email error message on Arc Games? Use this fix

A large number of users have complained on different online forums that their Arc Games launcher is telling them that their credentials are invalid.

This can be extremely frustrating over time, especially if you can’t wait to play the latest release of a game.

In today’s guide, we will explore the best steps you can take if you find yourself in this situation. Read on for more details.


Follow these steps to successfully log into Arc Games

1. Make sure you’re using the right credentials

You will need to make sure that the information you provide to log into Arc is not erroneous.

To successfully log in, you will need to use the credentials for your Arc account, and not your Steam log-in.

Even though this solution might seem obvious, some users have managed to solve the issue by making sure they use their Arc, and not Steam log-in information. It is worth a check, just to be sure.


2. Try the password recovery option

If the above message keeps appearing, and you’re sure you typed the correct information in, then the first step is to recover your account.

To do so, you will need to either visit the Arc website login page or click the option from the Arc launcher log-in screen.

An email will be sent to the account that you used to create the Arc username. After receiving this information, try to see if you can log in. If you still can’t do this, please try the next method.


Want to permanently delete your Arc Games account? Do this


3. Log in using the email address as a username

In the case of some users, using the email address they utilized for creating the account inside the username box has allowed them to log in normally.

Try this method out, and if you still can’t log in, follow the next possible solution.


4. Activate the option Stay logged in inside Arc

When faced with this same issue, some users have had success by simply ticking the box next to the option Stay logged in, while attempting to sign into their account.

The fact that this method worked points to the possibility of this being a server-side issue.


We hope that this guide has proven useful in your situation and that you managed to log into your Arc account without any problems.

If this guide helped you in any way, you can choose to let us know by using the comment section found below this article.

[wl_navigator]

Posted in Fix

Fix: Folder redirection doesn’t update to a new server

If you’re part of a work environment, it is not uncommon for you to be migrated once every few years from one server to another. This is usually done by the IT department, and migration is provided with all the setting changes that you would expect with them.

For example, folder redirection should be said as well, and in a large company, this can only be efficiently done via Group Policies.

However, some users have reported that their folder is redirecting them to an old location:

Right before I started working here, the DC was taken offline and replaced with a new Win2008 machine. All the shares were replicated to the new server and all group policy/AD settings changed reflect the new location. All users’ profiles were pointing to the new server but the My Documents folder redirection is still pointing to the old server on each workstation (all XP).

Thankfully enough, there is a fix to this issue, and we’ve arranged it into a step-by-step guide for you to follow.

How do I fix my folder redirection issue?

  1. Force update your Group Policy
  2. Press Windows + R
  3. Type in gpedit.msc
    • This will open the Group Policy Editor
  4. Create or modify a GPO that applies to the computers on which users who are affected by folder redirection policies log on
  5. Edit the GPO
  6. Under Computer Configuration, expand Administrative TemplatesGPO Computer Configuration
  7. Under Administrative Templates, expand System
  8. Right under System, select Group Policy
  9. Double-click the Folder Redirection policy processing setting
  10. Select the Enabled option
  11. Click to select the second checkbox.
  12. Exit the Group Policy Object Editor

Windows 10 doesn’t come by default with a Group Policy Editor. Read this article to find out how you can get it.

By following these steps, you should now be able to force a Group Policy update that will take into account all the changes that have been made. This will make it so that no folders will redirect you to an older location any longer.

Note: Since this step involves Group Policies, it is best if you let the System Admin perform the operation. This is because he will be performing this fix for multiple PCs at the same time.

If you know of any other way to solve this problem, share it in the comments section below so that other users can try it, as well.

RELATED ARTICLES YOU SHOULD CHECK OUT:

Fix: Sharing tab missing in folder properties

Whenever you are curious about the properties of a folder or file, the best course of action is to right-click it, and select Properties from the context menu.

context menu

As you can see, the context menu is made up of several tabs, namely:

  • General
  • Sharing
  • Security
  • Previous Versions
  • Customize

Unfortunately, some users have reported that their Sharing tab is missing from the context menu:

The issue is, on some folders (mapped drives in particular) the Share tab is missing. The Share tab is present on every other local folder I’ve reviewed, just not on the mapped drives and folders. I’ve tried four different “fixes” I’ve found online. The four fixes I’ve reviewed are below. Note that there were no changes I had to make as every recommended fix was already in the recommended state.

The lack of this tab makes it impossible for you to share it via Network Sharing, or set any permissions or privacy and protection settings to folders already on the network.

Thankfully enough, there are solutions to this problem, and you will find them in the guide below.

How do I make my Sharing tab appear again?

1. Enable Server and Security Accounts Manager

  1. Press Windows + R
  2. Type in services.msc and press Enter
    • This will open the Services Manager
  3. Scroll down until you find Server and Security Accounts Managerservices
    • If they are disabled, select them and choose Automatic as a Startup type
    • Additionally, right-click the services and select Start

2. Modify certain registries

2.1 Registry fix #1

  1. Press Windows + R
  2. Type in regedit and press Enter
    • This will open the Registry Editorregistry editor
  3. Go to the following key:
    • HKEY_LOCAL_MACHINE\SYSTEM\CurrentControlSet\Control\Lsa
  4. Double-click on forceguest DWORD and set its value to 0
  5. Reboot your PC

2.2 Registry fix #2

  1. Press Windows + R
  2. Type in regedit and press Enter
  3. Go to the following key:
    • HKEY_LOCAL_MACHINE\SOFTWARE\Microsoft\Windows\CurrentVersion\Shell Extensions\Blocked
  4. If you find {f81e9010-6ea4-11ce-a7ff-00aa003ca9f6} DWORD, double-click on it and delete it
  5. Reboot your PC

Don’t know how to use the registry editor? Check out this detailed guide for more information.

By following these steps, you should now be able to see the Sharing tab again whenever you open a folder’s context menu.

If you’re aware of another way to solve this problem, share it in the comments section below so that other users can try it, as well.

RELATED ARTICLES YOU SHOULD CHECK OUT:

What is a .tax file and how to open it on Windows 10

If you’re wondering what a .tax file is and how you can manage and open this filetype, then you’ve come to the right place. TAX files aren’t used by a lot of programs out there, which means they’re extremely rare.

You may have a bit of anxiety after finding them on your PC. The following is here to help you kill off those anxieties and tell you what exactly is a .tax file and how to open it.

What are .tax files?

If you’ve ever filed for tax returns, you know how exhausting it can be. Thankfully, there are software solutions out there to make filing for your taxes easier. One such solution is called TurboTax.

The TurboTax uses the .tax file for saving tax forms for filing purposes. Often, the .tax file is suffixed with the year of the filing. For instance, .tax2019 or .tax19 are used for tax returns in the year 2019.

It’s important to note that this software is made to generate tax returns for the United States of America. While anyone outside of the country can play around with the software for educational purposes, you cannot generate federal tax returns for any country outside of the borders of the US.

TurboTax is very easy to use and it is particularly welcoming to users with no prior tax experience or knowledge. Instead of giving you a form that you manually have to fill out, TurboTax presents a set of questions to answer about your life and then generates the tax form for you.

This eases the bureaucracy of tax filing. Once the tax form is generated, you can then read through it and make changes. TurboTax also allows you to contact the developers with any tax questions that you may have.

Building the tax form is a long process. You can save your progress when you’re tired and then continue with it once you feel you are ready. You can save the file with the .tax extension.

Since the IRS (as well as state taxing agencies) changes their forms every year, TurboTax makes sure that it’s updated with the latest forms. Nevertheless, whatever form it is, TurboTax will save it with the .tag extension (with tax year appended to it).


Looking for the best TurboTax deals? Check out this article and get yours right now!


How do I open a .tax file?

Using TurboTax to Open .tax files

  1. Download and install TurboTax if it isn’t already installed.
  2. Run TurboTax.
  3. Click on File (in the top left corner) and then select Open Tax Return from the sub-menu list.Open .tax file
  4.  Navigate to where the .tax(year) file is and open it.Navigate to tax return file

If you try to open it only to find that the file is corrupted or can’t be opened by TurboTax, we suggest that you delete it. Naturally, if it contains anyone else’s tax information, notify the user. If you can’t contact the user and the TAX file is on your computer, then you have every right to delete it.

For any more questions or suggestions, reach for the comments section below.

READ ALSO:

How to Setup Surround Sound on Windows 10 [Quick Guide]

It is no secret that a surround sound setup can greatly enhance the audio listening and media experience as it offers limitless audio and atmospheric possibilities. However, if you are trying to connect your Windows 10 system to the setup, you might encounter some obstacles.

Apart from meeting the minimum system requirements, the configuration can be a little tricky. In this article, we discuss how to configure and test surround sound on Windows 10.

How can I configure and test surround sound on Windows 10?

Update Sound Card Drivers

configure and test Surround Sound on Windows 10
  1. Press Windows Key + R to open Run.
  2. Devmgmt.msc and click OK to open the Device Manager.
  3. In the Device Manager, expand the Sound, video and game controllers option.
  4. Right-click on the sound card to which your surround sound 5.1 setup is connected.
  5. Select Update Driver.
  6. Click on Search automatically for updated driver software option.
  7. Windows will look for any pending driver updates and install them. Once installed, close the Device Manager.

If no updates are found, visit the sound card manufacturer’s website and check for the latest drivers. Updating the sound card is optional, you can proceed even if you don’t find any driver updates.

Did you know that the majority of Windows 10 users have outdated drivers? Be a step ahead using this guide.

Configure surround sound in Windows 10

configure and test Surround Sound on Windows 10
  1. Right-click on the speaker icon in the Windows system tray that you can access by clicking the arrow icon in the taskbar.
  2. Select the Sounds option. This will open the Sound Control Panel.
  3. If you don’t see the Sounds option, click on Open sound settings.
  4. Scroll down and click on Sound Control Panel under Related Settings.
  5. In the Sounds window, open the Playback tab.
  6. Select the Surround Sound enabled sound card among the list of audio devices and then click the Set Default button.
  7. Click on the Configure button.
  8. In the Speaker Setup window, choose 5.1 Surround from the Audio Channels list.
  9. Click Next to proceed.
  10. In the Customize your configuration window, check all the boxes for Optional Speakers option.
  11. Click Next to proceed.
  12. On the “Select full-range speakers” window, check the box next to the speakers in your setup.
  13. Click Next and you should see the “Configuration complete” screen.
  14. Click Finish to save the changes and close the Sound Control Panel.

2. Test Surround Sound in Windows 10

configure and test Surround Sound on Windows 10
  1. Open the Sound Control Panel. Refer to section 1-2 above for steps.
  2. Open the Playback tab.
  3. Select the Surround Sound enabled card and click on Configure.
  4. Make sure the speakers are on and you have set the volume accordingly.
  5. Click the Test button. Windows will play sounds via the newly set up speakers.
  6. If everything looks good, open up any video or audio streaming service and check the speakers with your favorite track.
  7. You can use this YouTube video which can give you a good idea if the speakers are working as they should.

Surround sound audio systems offer immersive gaming and movie-watching experiences. By following the steps in this article you can successfully configure and set up your surround sound setup on Windows 10.

If you want to learn how to enable Loudness Equalization on Windows, we have a separate guide for you.

If you have any other questions or suggestions, leave them in the comments section below and we’ll check them out.

Fix Epson printers’ 0xE errors in just a couple of steps

Some Epson printer users might encounter 0xE errors when they try to print. Those printer errors can have 0xE1, 0xE3, 0xE5, oxE8 and 0xE9 error codes, which the Epson printers show on their own displays.

The fixes for those 0xE errors are often much the same. These are some of the potential resolutions for fixing Epson printer 0xE errors.

How can I fix a 0xE error on my Epson printer?

1. Check if any paper is jammed in the printer

The 0xE errors are often due to printer paper jams. Thus, removing the paper stuck in the printer can often resolve those errors. If the printer has a removable paper tray, remove it to have a peek inside. Open the lid on the printer to check if there is any jammed paper.

If you see paper jammed in the printer, turn the printer off and unplug it. You can often pull stuck paper out from Epson printers by removing their duplexers. Press the tabs to detach the duplexer from the printer. Then remove the jammed paper from the duplexer.

2. Reset the printer’s ink cartridges

  1. Some users might need to reseat their printers’ ink cartridges to fix 0xE errors. First, turn on your printer.
  2. To reseat the cartridge for an Epson XP printer, press the home button on it.
  3. Select the Setup, Maintenance, and Ink Cartridge Replacement options on the printer’s display.
  4. Press the OK and Start buttons.
  5. Lift the printer’s scanner unit up when the display shows a replace ink cartridge message.
  6. Squeeze the tabs on each cartridge to remove them.
  7. Then reinsert the ink cartridges one at a time. Make sure they click back into place.
  8. Close the printer’s scanner unit after reseating the cartridges.

3. Clean inside the printer

  1. The 0xE errors can arise due to debris and dirt within the printer. To clean inside the printer, turn off and unplug it first.
  2. Then open the top cover on the printer. Look for and remove any debris, such as small scraps of paper, foam blocks, or paperclips.
  3. Next, wipe away dust inside the printer with a soft, clean cloth. If there’s a lot of dust, you can dampen the cloth with a detergent for more thorough cleaning.
  4. Wipe the encoder strip that runs along the printer just behind the carriage to clean it.
  5. Close the top of the printer.
  6. Then plug the printer back in and turn it on.

4. Scan for malware

The 0xE errors can also be due to malware. For this reason, scanning your PC with a powerful antivirus software is highly recommended.

We suggest you to use a third-party antivirus with multiple layers of protection because these are typically able to detect threats quickly and accurately.

Make sure to run a thorough, full system scan and allow your security tool to remove or quarantine all threats found. Then restart your PC and see if you still experience the error.

5. Replace incompatible ink cartridges

Some users might need to replace incompatible ink cartridges. Have a look through your printer’s manual for further details about cartridge compatibility to check if the cartridges might need changing.

If an ink reference card came with the printer, have a look at that. If replacements are required, replace them with official Epson cartridges for the printer.

So, that’s how you can fix 0xE errors for Epson printers. If the printer is still within warranty, you can also return it to Epson for repairs (or a replacement model if needed). However, try fixing the 0xE issue with some of the potential resolutions above first.

For any other questions or suggestions, don’t hesitate to reach in the comments section below.

Can’t shut down your Windows 7 PC? Try this

Despite officially being at the end of its life, Windows 7 is showing issues from the last update that Microsoft has delivered.

The last round of Patch Tuesday updates were also the last ones that would ever include Windows 7. Unfortunately, that update brought a really nasty bug that would replace a user’s wallpaper with a black screen.

Microsoft then released a series of off-schedule updates that would act as last-minute fixes for Windows 7. However, these came with their own fair share of issues.

For example, users have been reporting that they cannot shut down their Windows 7 PC since they are faced with the following error message:

You don’t have permission to shutdown and restart this computer 

As you can imagine, this is quite a serious issue, since not being able to restart your PC comes with a whole world of problems.

What makes matters worse is that this isn’t an isolated case since many more users are facing these problems and many don’t know what to make of it:
Is it a virus or Window 7 issue. Even we are facing it

How do I fix my Windows 7 shutdown issue?

Users found various workarounds to this issue, which involved enabling User Account Control (UAC).
  1. Press Windows + R
  2. Type in gpedit.msc
  3. Go to Computer Settings
  4. Choose Windows Settings
  5. Go to Security Settings
  6. Choose Local Policies
  7. Select Security Options
  8. Select User Account Control: Run all administrators in Admin approval and enable itUser Account Control: Run all administrators in Admin approval
  9. Press Windows + R
  10. Type in gpupdate /force
  11. Reboot your PC

Note: This fix only works for users of Professional, Ultimate, or Enterprise versions

For more information on how to enable User Account Control, check out this detailed guide.

By following these steps, you should now be able to restart and shut down your Windows 7 PC as normally. Alternatively, you could also uninstall the last update you applied to it.

No word on whether Microsoft will fix this issue, nor if anyone has figured out what is causing it. The only certain thing is that the problem came after installing the last WIndow s7 update.

For more information on the subject at hand, don’t hesitate to reach for the comments section below.

RELATED ARTICLES YOU SHOULD CHECK OUT:

Download Windows 7 KB4539602 to fix black wallpaper issues

Back in January when Microsoft released the last official Patch Tuesday Updates for Windows 7, they delivered a bugged patch that caused user’s wallpapers to be replaced by black screens.

This bug was not well-received, especially in the context of it being the last update Windows 7 was to ever receive. More so, general concern stemmed from the fact that no one really knew whether Microsoft would address this issue.

And even those that believed Microsoft would fix it was worried they would have to pay for the patch, as part of the Windows 7 Extended Support.

Microsoft fixed Windows 7’s black wallpaper issue

Thankfully enough, Microsoft released a cumulative update outside of the normal Update schedule called KB4539602 and, it fixed the black wallpaper bug.

This update supports 32-bit and 64-bit Windows 7 SP1, Windows Server 2008 R2, Windows 7 Embedded Standard Edition, and other related versions.

KB4539602 Changelog

Only one key change comes with KB4539602 :

  • Addresses an issue that might cause your wallpaper that is set to Stretch to display as black.

Prerequisites to download and install KB4539602:

  • You must have the SHA-2 update (KB4474419) that is dated September 23, 2019 or a later SHA-2 update installed
  • You must have the servicing stack update (SSU) (KB4490628) that is dated March 12, 2019 or a later SSU update installed.

The updates are available via all known sources, which include:

Have any other questions or suggestions regarding Windows 7 bugs that haven’t been fixed? Don’t hesitate to reach for the comments section below.

Editor’s Note: If you want to know everything there is to know on Patch Tuesday, check out this in-depth guide.

Microsoft wants you to replace Firefox with Edge

As you may know, Microsoft started out the year 2020 with a series of major changes:

Speaking of the latter, their campaign to convince users to switch to their newer browser has reached a new height. It seems that as of recently, users would get suggestions in their Start Menu to replace Mozilla Firefox with Microsoft Edge.

The suggestion was first spotted by a Redditor who went to comment on the ad, having to say the following about it:

This must be the most cringing suggestion text I have ever seen in win10.

edge over firefox

Users aren’t pleased with Microsoft’s suggestions

This is just another step in their effort to make more and more users use their Chromium-based browser. At first, Microsoft would urge users to stop using Internet Explorer also through the Start Menu.

This wouldn’t be much of a big deal since both products belong to Microsoft, and it is only natural that they would guide you to a better and safer option. However, the fact that they are now suggesting it as an alternative to a third-party browser is quite controversial.

Suggesting that your product is better than others without actually giving a name is a common practice. However, the fact that these ads are specifically targeted towards users of a certain browser is quite interesting.

User backlash was soon to follow, as everyone was eager to support the poster’s opinion. Some even went on and added that:

I would understand if it said ”Still using Internet Explorer” but that is just nasty

They even commented on how Microsoft suggests you switch to Edge when you use the Start Menu‘s search function to look for Internet Explorer.downlaod edge

Microsoft hasn’t commented on this decision, nor did it offer an explanation on why it has specifically targeted Mozilla Firefox users. Whichever the case, the suggestion was not well-received.

The only bright side is that disabling Start Menu suggestions is quite simple, so you don’t have to see such posts any longer.

What’s your take on Microsoft‘s latest move against Mozilla Firefox users? Share your thoughts in the comments section below and we’ll continue the talk.

Microsoft looks to bring the news right to the side of your desktop with Project Newsbar app

There are many ways you can get your news these days, but a new app for Windows 10 might soon help you grab all the latest news right on your desktop and at quick glance. As spotted by WalkingCat, and reported by MSPoweruser, Microsoft’s News Team is working on a project known as Project Newsbar.

As the name of the app suggests, Project Newsbar works as a sidebar in Windows 10. The app isn’t yet available for download, but you can currently install it with a workaround. Once installed, you’ll get a sidebar on the right side of your screen. As configured by default, this sidebar will take up roughly 10% of your screen space, and push all your other windows to the left side of it. However, you can tweak it to automatically hide when not in use, and appear only on hover. There’s also an ability to hide the bar for 90 minutes, too, to put it out of the way.

Inside the Newsbar, you’ll see a list of top stories from Microsoft News, complete with images and two arrows that will let you scroll through the feed. Clicking a story, meanwhile, will open it in your default browser and take you to MSN News. There’s also a set of settings that you can configure. These range from the position, which monitor you want it to be placed on, and if you want it to autostart.

As this app is currently not available in the Microsoft Store, it’s not certain if or when Microsoft will release it to the public. Still, it’s really cool to see Microsoft working on such a project, especially during an election year when misinformation and “Fake News” can be a huge problem.

Stop the eavesdropping: Here’s how to password protect Office 365 files

It’s easy to protect a file or a folder in Windows 10, but did you know that you can also password protect a specific Office 365 file, too? This might be useful if you’re sharing a file with confidential information, or if you want to stop eavesdropping and keep the document away from someone who you might not want to see it. In our latest Office 365 guide, we’ll take a look at how you password-protect files from the Microsoft Office apps.

In Microsoft Word

Password protecting a Microsoft Word document is easy. All you need to do is head to the File ribbon, click Info, Protect Document, and then Encrypt with Password. Once you do that, you can enter a password and press OK. Keep in mind that passwords are case-sensitive, and can be a maximum of 15 characters long. It’s also important to note that if you lose a password, Microsoft Word will not be able to recover it. Make sure you write down the password or save it somewhere you’ll be able to find it.

In Microsoft PowerPoint

Just like protecting a Microsoft Word document, protecting a PowerPoint is easy. All you need to do are click through a few menus. You’ll want to head into the File ribbon, and click Info. After that, select Protect Presentation, and then Encrypt with Password. You’ll then want to enter the password in the Password box and click OK. PowerPoint will prompt you to confirm the password, and then you’ll need to save the file to ensure that the password takes effect.

Please keep in mind, though, that password protection isn’t supported in PowerPoint for ODP files. You also won’t be able to co-author any password-protected file that someone else is currently working on as the file will show up in a read-only mode.

In Microsoft Excel

Password protecting a Microsoft Excel Spreadsheet is more of a complicated situation. To prevent others from accessing data, or moving it around in a spreadsheet, you can lock cells and protect the sheet with a password. This can be useful if you own a worksheet, but only want team members to add data in specific cells only, without touching anything else.

Keep in mind though, that Worksheet level protection isn’t intended as a security feature. Also, protecting a worksheet is not the same as protecting an Excel file or workbook with a password. This is why we’ll start first with password protecting an entire Excel document. You can do this by clicking the File ribbon and clicking Info. you can then choose to Protect Workbook and choose Encrypt with Password. You can then enter the password and click OK. 

In the event that you don’t want to protect an entire Excel document, you also can lock certain areas of an unprotected sheet. This ranges from not allowing others to see your formulas or ranges. You can do this by selecting the data range, right-clicking it, and choosing the Format Cells options. You’ll then want to clear the box where it says Locked. You’ll then need to keep the selection highlighted, and head to the Review tab. Choose Protect and then Protect Sheet and unselect what you want users to not edit.

Check out our other Office 365 guides for more!

This is just the latest entry in our ongoing Office 365 series. We’ve covered many other topics. The topics range from best keyboard shortcuts in Excel, our tips and tricks for Excel, and more. Do you find that protecting Office 365 files will be useful? Let us know in the comments below.

Millennials prefer PlayStation but Gen Z like Xbox more according to new study

Early stats from MBLM’s Brand Intimacy 2020 Study (via Yahoo), which will be fully released on February 14th, show that, while Millennials rank PlayStation as their number one brand, those in Gen Z (individuals born between 1995 and 2012 according to the study) chose Xbox.

What’s interesting about this study is that it’s not about video game brands but brands in general which just goes to show how much gaming has become a part of modern life. It’s unclear why Millennials (1981-1996) claim to have a more emotional connection to PlayStation over Xbox though it could likely be a response to having such strong memories of the first three PlayStation consoles throughout their childhood.

Those in Gen Z connecting more to the Xbox brand is curious as Sony’s consoles have generally outsold Microsoft’s recently. It’s important to remember though that this study isn’t about how profitable a brand is but by the strength of its emotional connection to consumers.

So, while PlayStation consoles may be selling better, the Xbox brand appears to be doing a better job of creating positive experiences for consumers to latch onto. This could be related to Xbox’s prominence on Windows 10 devices, the Xbox Game Pass subscription service, the rise of the Mixer streaming service, support for backwards compatibility, or even its fun Xbox-branded merch like the Xbox Onesie and the Xbox Lynx body spray.

Xbox could also just be on consumers’ minds more than PlayStation since Xbox has had a stronger presence at E3 recently and also revealed its Xbox Series X console while all consumers have seen of Sony’s PS5 is its logo.

Let us know what you think the reasons are for the difference in the comments below and then follow us on Pinterest and Twitter for more Xbox gaming news.

How to Add a Dark Notepad to Windows 10

Windows 10’s Notepad is the platform’s default text editor that some users utilize for batch files and other coding. Notepad is, however, a little basic, with only limited customization options for text. Some users would prefer to have a dark Notepad, with a black color scheme, but Windows 10’s default text editor doesn’t include any dark theme options.

Windows 10’s dark option for apps has no impact on Notepad. Users can still add a black background to Notepad by clicking Ease of Access and High contrast in Settings and selecting the Turn on high contrast > High Contrast Black options.

That, however, also changes the whole color scheme in Windows, which is not ideal. So, most users will probably prefer to add alternative third-party text editors with dark themes to Windows 10 instead.

Notepad and the High Contrast option how to make notepad dark

How can I add a Dark Notepad alternative to Windows 10?

Check Out the Black Notepad UWP App

The Black Notepad UWP app is a dark-themed version of the default Windows 10 text editor. Thus, it’s almost exactly the same as Notepad except for its alternative dark color scheme. Click the Get button on its MS Store page to add this app to Windows 10.

Black Notepad app how to make notepad dark

Add Black NotePad to Windows 10

Black NotePad is third-party text editor that retains the original features of Notepad. However, it’s not entirely the same as it includes additional options and features.

Black NotePad software how to make notepad dark

The most notable difference is its default dark theme that users can configure by clicking alternative color scheme options on its toolbar. Users can get this text editor by clicking Black NotePad on its Download Center page.

Customize the Theme for Notepad++

  1. Users can also select a dark theme for Notepad++ to add a dark Notepad alternative to Windows 10. To do so, click Download on that text editor’s download page to save its installer.
  2. Then open the Notepad++ setup wizard to install it.
  3. Next, open the Notepad++ window shown directly below.Notepad++ how to make notepad dark
  4. Notepad++ has a plain theme by default. To change that, click Settings > Style Configurator to open the window in the snapshot directly below.
    Style Configurator window how to make notepad dark
  5. Then select Deep Black on the theme drop-down menu.
  6. Users can also modify more specific UI element colors by selecting them in the Style box. Then click the color boxes to open palettes for them.
  7. Click the Save & Close button.
The dark theme for Notepad++ how to make notepad dark

Select the Notepad Alternative to be the Default Text Editor

  1. After adding one of the above software to Windows 10, configure it to be the default text editor. To do that, right-click a text file and select Open with.
  2. Click Choose another app to open an open this file window.The Choose another app option how to make notepad dark
  3. Click More apps > Look for another app on this PC if the text editor isn’t listed on the window.
  4. Then select the new text editor software in the Open with window.
  5. After that, the new text editor will be listed on the How do you want to open this file? window. Select the new text editor there, click the Always use this app to open .txt files option, and press the OK button.The open this file window how to make notepad dark

So, that’s how users can add a dark-themed Notepad alternative to Windows 10. After configuring one of those programs to be the default text editor, it will open all TXT files when you click them.

Did you know that you can change Notepad font, style, and size? That’s right, and we have a guide that shows you how to do that.