5 best data protection software to keep your files safe

Keeping files and folders unsecured on your device can be a huge opportunity for malicious threats and viruses.

Not only that, but it can also be the case that you are not the sole users of your PC, and perhaps you don’t want everyone having access to all your personal files.

Luckily there are several tools you can use in order to ensure you have some privacy on your device and also when browsing online.

In this guide, we will show you our data protection software to keep your files safe, so keep reading.

What are the best data protection software to keep files safe?

WinZip

WinZip is an extraordinary encryption software that allows you to password-protect your sensitive files.

The great thing about this tool is that it allows you to do more than just that, and it has some amazing features that will make it your number one choice.

One such great feature is that you can compress practically anything from images to folders and PDFs. 

Additionally, the integrated repair feature will not only keep your files secure and protected but also optimized.

You will be able to share, encrypt, backup all your files and folders, and share them in just a few seconds via email.

Moreover, if you are working with Dropbox, OneDrive, GoogleDrive then the WinZip integration will be perfect for allowing you to work on your documents directly in the folder.

Here are some of its key features:

  • Cleaner feature that identifies and deletes unused files
  • File Splitting options.
  • Password protection.
  • Supports multiple compression formats: Zip, Zipx, RAR, 7z, TAR, GZIP, VHD, XZ, and more.

”WinZip”

”WinZip”

”Keep
”Free”
&aff_sub2=Native” current_url=”true” button_text=”Get it now” image=”https://windowsreport.com/wp-content/uploads/2017/11/WinZip-button-210×160.png”]

IObit Protected Folder

IObit Protected Folder is another great software that will keep your files and folders safe. It’s an easy to use program with a user-friendly interface.

With this tool, you can protect any file or folder you want and set a master password for it. The only way someone else can access it is by using the same folder locker.

Not only is this tool protecting your sensitive data from being accessed by unauthorized users, but it will also keep them safe against malicious attacks.

Here are some of its key features:

  • Protection for all sensitive data and folders.
  • Locking files feature even when the PC is infected by malware.
  • Exclude list feature.
IObit Protected Folder

IObit Protected Folder

Lock and encrypt all your sensitive files in no time at all, with this versatile software. Get the best deal now!

Gilisoft Privacy Protector

Gilisoft Privacy Protector

Nowadays, encrypting sensitive files has become a must in order to keep informations safe from being accessed by unauthorized users.

Using a dedicated tool such is advised and in that matter, we think GiliSoft Privacy Protector is a great option.

With this software, you will be able to easily delete all your browsing history,  along with any third-party software traces.

Due to its second layer of protection, your documents, photos, videos, or audio files will not only be read-only or invisible. They will be kept private and out of reach for hackers or malicious software.

Another great feature of GiliSoft Privacy Protector is the option to create a Safe Space on your device for storing personal documents, videos, or sensitive files.

No one will ever know it’s there, you can turn it off and on as needed.

Gilisoft Privacy Protector

Gilisoft Privacy Protector

Keep your data confidential and secure at all times with this versatile tool. Get the best deal now!
Free trial Visit website

Gilisoft File Lock Pro

Gilisoft File Lock Pro

Any time you are using your device, for personal or professional purposes, the files you are working on and saving, if not protected, could be accessed by anyone.

GiliSoft File Lock Pro is a great tool for ensuring data privacy and protection against malicious threats.

You can use it to protect documents, files, folders, videos from your local or external USB drivers, memory card, pen drive, and network drive.

You can make your files and folders will be read-only, password protect them, hide or encrypt them.

Although it does a lot of complex things, this software’s interface is very easy to use and user friendly.

This amazing software brings a solid layer of protection for all your files and you can even create a secret folder on your USB external hard drive. 

All the GiliSoft File Lock Pro’s features provide a variety of security options to protect your data from unwanted access.

⇒ Get GiliSoft File Lock Pro

Folder Lock

folder lock software

This software is one of the best protection solutions for keeping your files, folders, documents, external USB drives, and even wallets with store credits protected.

With Folder Lock you can encrypt all your files in one folder, and include there all you need protected and set up a master password to open it.

Whenever you delete a file from your device, is not a guarantee that it cannot be recovered, therefore using the Shredding feature of this software is recommended.

It will not only shred the files but it will also shred the empty drive so that all the previously deleted files will never be recovered.

⇒ Get Folder Lock


There you have it. We hope this guide provided you with all the information you need to decide which data protection software is best in order to keep your files safe.

If you have any other questions, don’t hesitate to leave them in the comments section below.

[wl_navigator]
Get a sneak peek into the upcoming YouTube app for Xbox One

It seems that a YouTube app for Xbox One is under development and might be launched in the Microsoft Store.

In a series of tweets, Aggiornamenti Lumia and other users revealed a few photos of the app, as installed on their devices.

How can I see or test the YouTube app?youtube app xbox

The app is not available for the general public yet, but a few users running on Windows Insider managed to see the app in the Store and also install it via the appx file.

So for now, the app is probably still under development. As the pictures show, it is a UWP app, not a PWA.

Since it only takes up a few tens of MB, it will probably not be released as an application per see.

youtube app details

However, it promises an improved user experience when installed in Xbox One.youtube app in ms store

At this point, in order to watch YouTube on Windows users open the app in a web browser or via third-party apps. But the UWP should bring about new features.

For now, the tested app only has keyboard input.

It’s well known that Google has been trying to collaborate with Microsoft for some years now to develop a fully-featured YouTube app. Previous attempts on both sides to build an app for the Windows Phone have failed.

Neither Microsoft nor Google have confirmed anything about a possible soon-to-launched YouTube app yet.

Are you looking forward to such an app, though? Tell us your opinion in the comments section below.

[wl_navigator]
FIX: uTorrent stuck on connecting to peers & not downloading

UTorrent is one of the foremost BitTorrent software for downloading torrent files. However, some users can’t download torrents when the connecting to peers issue arises. When that error arises, uTorrent downloads get stuck on a connecting to peer status.

The uTorret software gets stuck on connecting to peers as the client can’t start a download for the required torrent file. The issue can be due to firewall and port settings or even ISPs that don’t permit you to utilize torrents.

If you need to fix uTorrent’s connecting to peers error, check out these resolutions.

What can I do if uTorrent gets stuck on connecting to peers?

1. Download torrents using a VPN connection

Some VPN (Virtual Private Network) software and connections might bypass restrictions for downloading torrent files.

This can increase performance and security, as it will be less likely to get targeted by phishing attempts when you use software that hides your IP address.

Some VPNs offer unlimited bandwidth, allowing you to download as much data as you need. Pair that with a large server coverage, and you get private and quick torrenting.

Make sure to use a VPN that gets constant updates so you benefit from the best privacy and security features. 

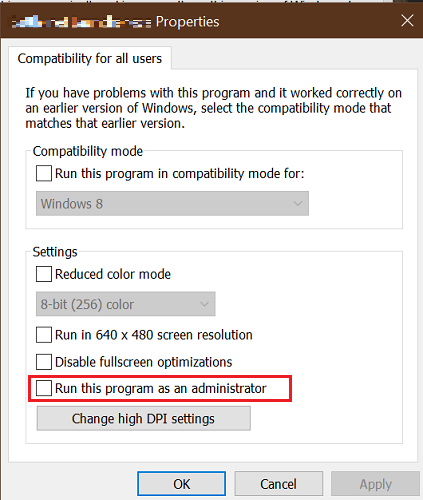
2. Run uTorrent as an administrator

  1. Open File Explorer (Windows key + E).
  2. Open your uTorrent software folder in File Explorer.
  3. Then right-click the uTorrent.exe to open its context menu.
    The Run as administrator option utorrent stuck on connecting to peers
  4. Select the Run as administrator option to open uTorrent with elevated privileges.

3. Delete the resume.dat files

  1. Open the window for File Explorer.
  2. Next, open your user folder in File Explorer.
  3. Select the Hidden items setting on the View tab.
    The Hidden items setting utorrent stuck on connecting to peers
  4. Open the AppData and Roaming subfolders from your user folder.
    Roaming subfolder utorrent stuck on connecting to peers
  5. Then open the uTorrent folder in the Roaming folder.
  6. Hold the Ctrl key and select the resume.dat and resume.dat.old files.
  7. Click the Home tab.
    The Home tab utorrent stuck on connecting to peers
  8. Press the Delete button to erase the resume.data and resume.dat.old files.

Note: Deleting those files will clear the torrent list in the uTorrent window. However, you can still resume downloads by manually opening torrent files from the uTorrent subfolder in Roaming.

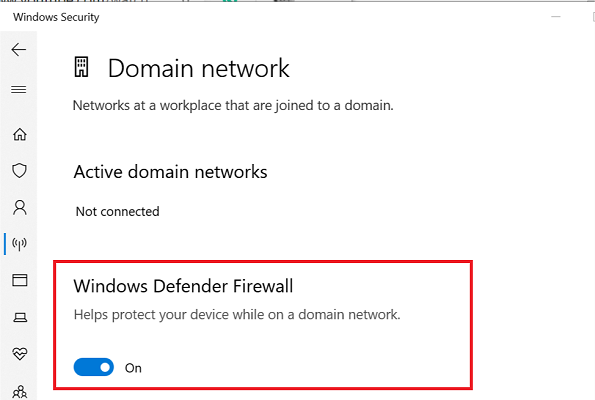
4. Allow uTorrent through the Windows firewall

  1. First, open Windows 10’s search utility by clicking the magnifying glass icon by the Start button.
  2. Type firewall in the search utility’s text box.
  3. Next, click Windows Defender Firewall to open that Control Panel applet.
    Windows Defender Firewall utorrent stuck on connecting to peers
  4. Click Allow an app or feature through Windows Defender Firewall to open the Allowed apps options shown directly below.
    Allow apps settings utorrent stuck on connecting to peers
  5. Select the Change settings option.
  6. Select the Private and Public checkboxes for uTorrent.
  7. Click the OK button.

5. Enable the port forwarding for uTorrent

  1. Open the uTorrent window.
  2. Click the Options menu.
  3. Select Preferences to open the settings window for uTorrent.
  4. Next, click Connection on the left to open the options shown in the shot directly below.
    Preferences window utorrent stuck on connecting to peers
  5. Select the Enable UPnP port mapping and Enable NAT-PMP port mapping options.
  6. Check the Add Windows Firewall exception option to select it.
  7. Don’t forget to click the Apply option.
  8. Click OK to exit.

6. Select forced protocol encryption

  1. Launch the uTorrent software.
  2. Click Options in uTorrent.
  3. Then click Preferences to open that window.
  4. Select BitTorrent on the left of the Preferences window.
    BitTorrent tab utorrent stuck on connecting to peers
  5. Select the Forced option on the Outgoing drop-down menu.
  6. Click the Apply and OK options to save settings and exit.

Those are some of the resolutions users have confirmed they’ve fixed the connecting to peers download error with. So, there’s a pretty good chance they’ll fix the issue for most users.

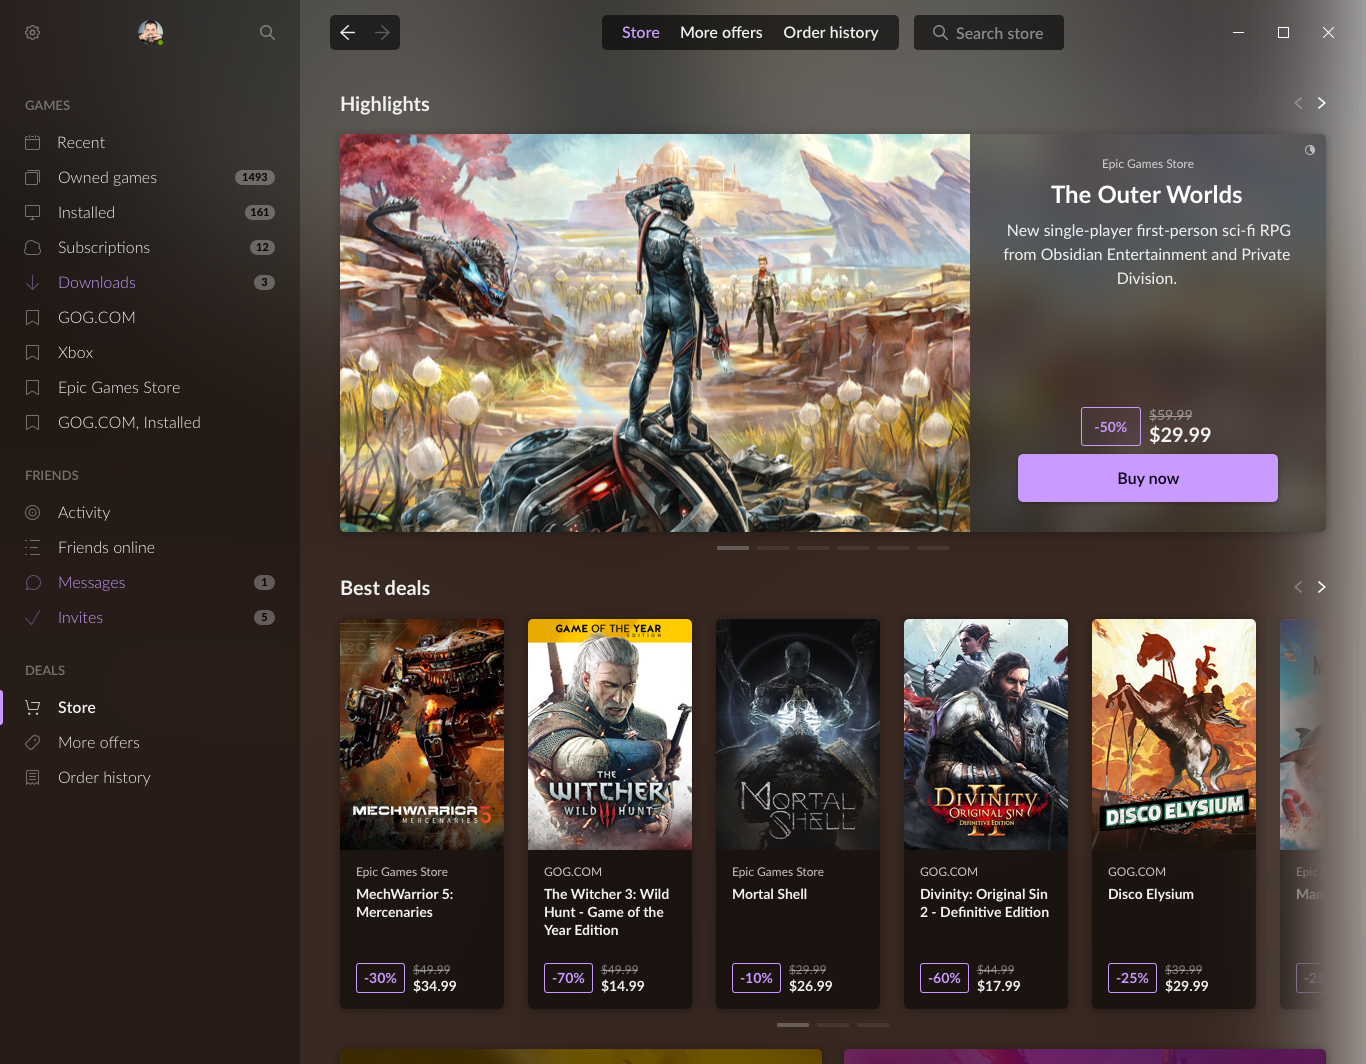
GOG Galaxy to feature enhanced Epic Games Store integration

Good Old Games has always been a trustworthy digital distribution platform, and many gamers fell in loc with their design, DRM-free policies, incredible discounts, and more.

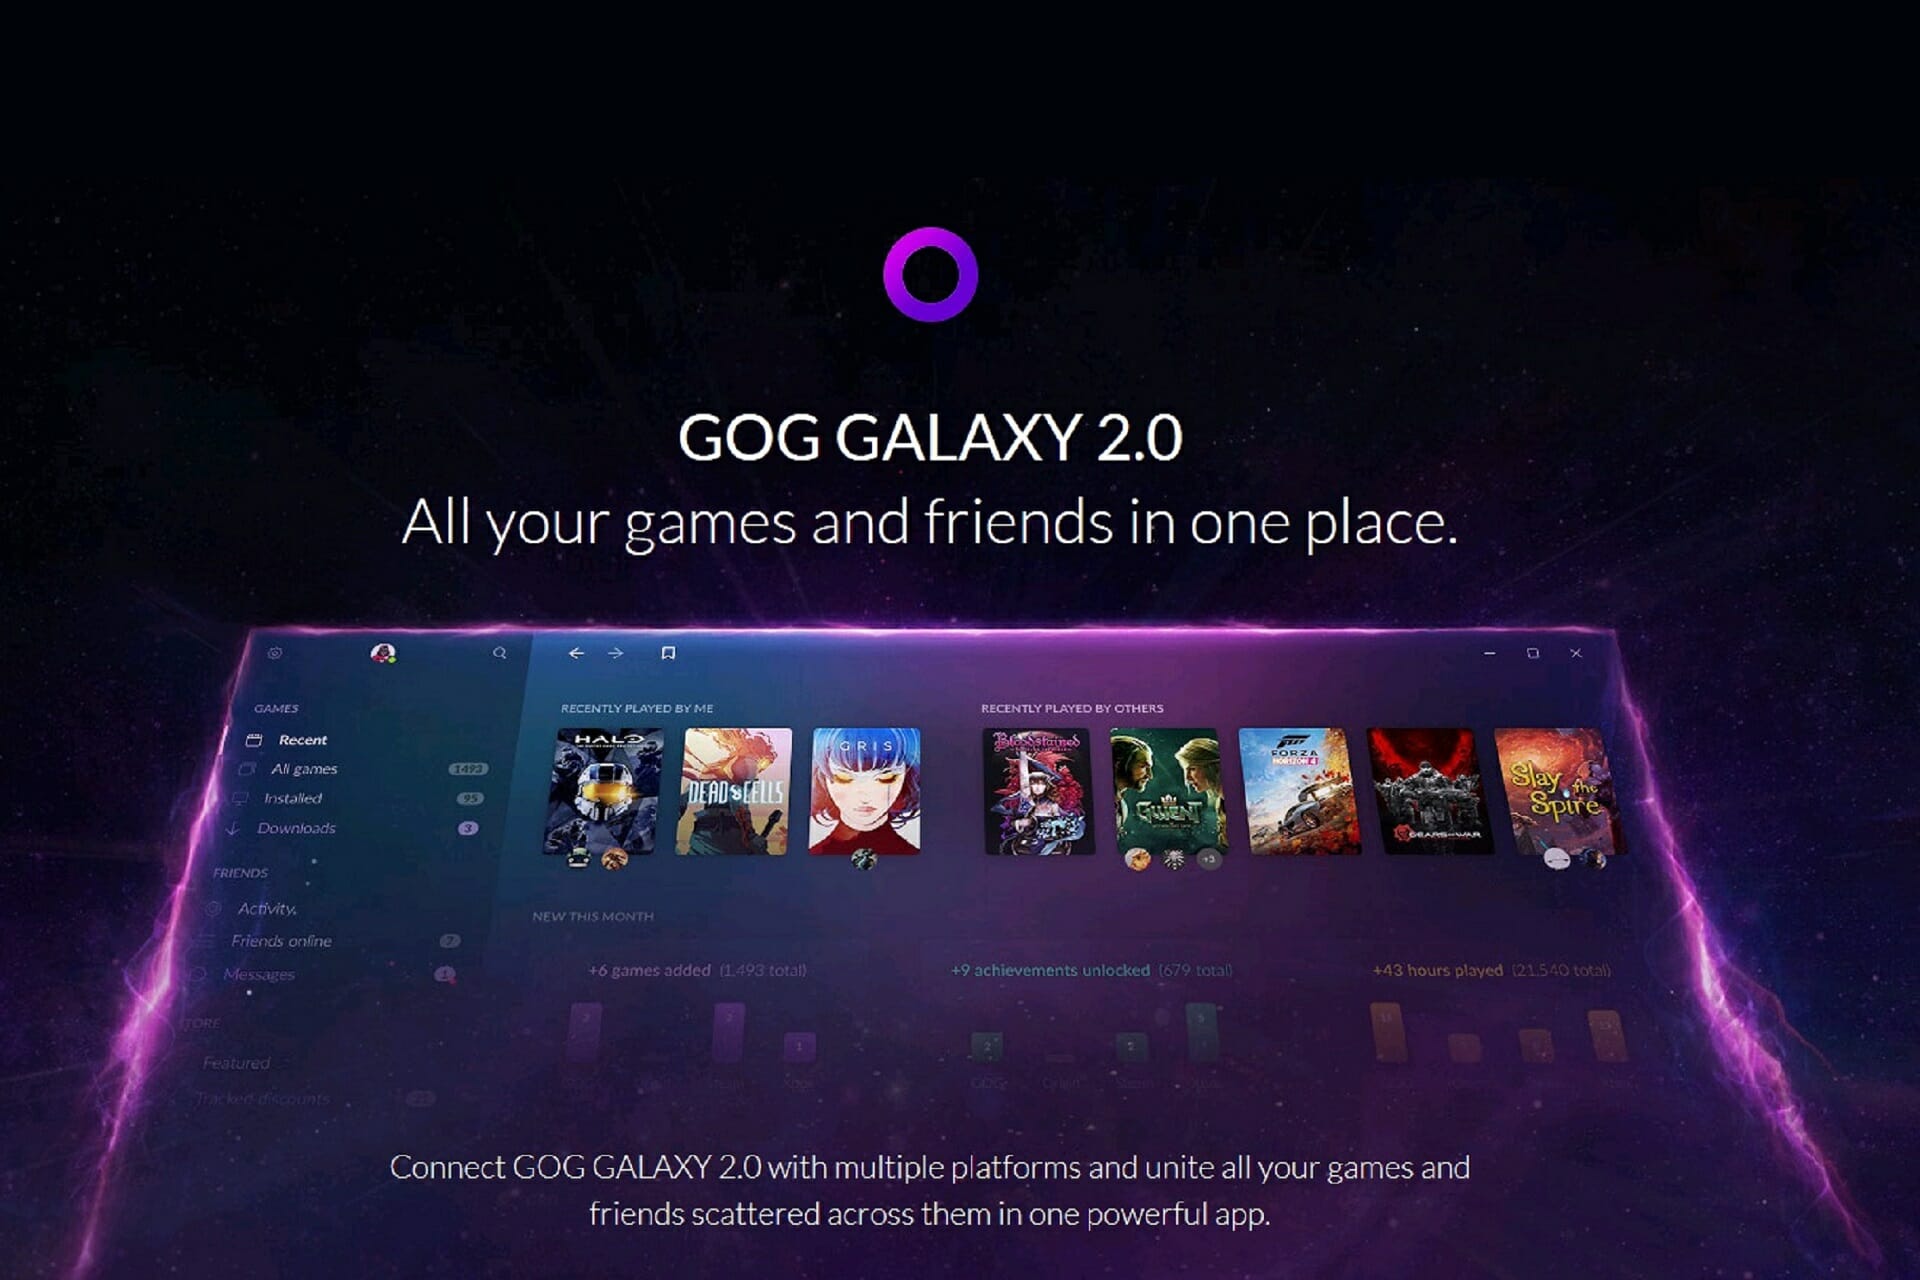
Well, their desktop client called GOG Galaxy has been through many changes since its inception, and their most recent iteration, GOG Galaxy 2.0, has been an immense success.

Of course, this tool is primarily a gaming library, but also a means to buy other games from their catalog, which makes it very similar to other similar tools, such as:


GOG Galaxy will soon feature EGS exclusives


A while ago, GOG Galaxy 2.0 included the ability to bring all of your libraries into the same window, so you wouldn’t have to stay with a lot of clients opened just to see what games you own.

Well, this was taken a step further today, since GOG representatives just announced that you can use GOG Galaxy to buy Epic games-exclusive titles as well.


However, the most interesting part is that they will be applying their world-famous refund policy to these titles as well:

Most importantly, all purchases are covered by our 30-days refund policy as well as 24/7 human support.

User feedback to this news was mixed. On one hand, some are concerned that the Epic Games titles will not be DRM-free like the ones from GOG‘s own catalog.

Gotta say, this feels like a step backward. I’m all for the single launcher life but GOG sells itself on being DRM free.

By adding the Epic launcher and running it in the background while playing EGS games, you’re enabling their DRM. Kinda hoping there’s something I’m missing here because otherwise this feels like the first step down the wrong path.

On the other hand, the GOG representative did specify that only a hand-picked selection of games will be chosen from the Epic Games Store.

This in turn could hint that they may have been referring to the titles that are DRM-free there as well.


All in all, this change is great news for those that like the idea of having a unified gaming library, and more platform integrations will be expected in the future.

Are you excited about this new change brought to GOG Galaxy?

Let us know how you think this will affect your gaming experience by leaving us your feedback in the gaming section below.

[wl_navigator]

Cool Instagram bio ideas anyone can use [Big List]

A creative Instagram bio helps you make that impact on first impression. This is essential if you are an influencer or a business trying to reach your audience on Instagram.

Most people decide whether to follow and engage with accounts after reading the bio. Depending on whether you want to show off or simply advertise your hobbies, there are plenty of cools Instagram bio ideas that anyone can use to make the right impact.

In this article, we have listed the best Instagram bio ideas to help you customize your profile and take your social media game a notch higher.

How do I find the best Instagram bio ideas?

Instagram bio ideas with emoji

Instagram bio ideas

  • ? Check out my latest blog post ?
  • Be ?ing in myself.
  • Welcome to my ?dom
  • ?but ?
  • ???. That’s it. That’s the bio.
  • I’m in ?saving mode.
  • ?: (twitter handle) ?: (snapchat handle) ?: (youtube handle)
  • Traveller ✈️ Book Lover ? Obsessed with tacos ?
  • We love all animals ? and donate a percentage of sales to marine life ?
  • ? Swipe for less
  • Cancer survivor ?️
  • My life with the ??
  • The world is ?. Let’s read them together.
  • Paradise found ?
  • Sweet like ?.
  • Obsessed with tacos ?
  • Personal Trainer ? Dancer ? Meditator ?
  • Currently hanging out in ??
  • ?colored glasses
  • Catch ✈️ not ?
  • Welcome to my ?dom.
  • Equal parts ? and ?.
  • ? Depends on the week
  • ? worry ? happy.
  • Traveller ✈️ Book Lover ? Obsessed with cheese ?.
  • ❤️ Lover not a fighter spreading ✌️all over the ?
  • Entrepreneur ➕ Globetrotter ➕ Motivational Speaker

Instagram bio ideas for girls

Instagram bio ideas

  • My standards are high… just like my heels.
  • I dress as if I’m about to see my arch-nemesis
  • My clothes might not change the world, but I sure will
  • Turning my dreams into my vision and my vision into reality
  • Sand in my toes and saltwater in my curls
  • I’m a woman with ambition and a heart of gold
  • Sometimes depressed, stressed…, but still well dressed
  • I’ll make you stop and stare
  • My clothes highlight my colorful life
  • I may be a fashionista but I’m not all about labels
  • Shopping is my therapy – hey, it’s cheaper ?
  • I shine from within so no one can dim my light
  • Happiness never goes out of style
  • “I need new clothes.” – Me, every damn day
  • My ex doesn’t go with my outfit
  • Money can’t be the root of evil since shopping brings people so much happiness
  • Smart. Strong. Silly. Straight up class act.
  • Who runs the world? ME.
  • Always give 100% — unless you’re donating blood.
  • Women can look beautiful in any outfit but the right outfit can make women become powerful

Vegan Instagram bio ideas

Instagram bio ideas

  • ? Believer ??Wife??‍♀️Mom?Actress?Vegan
  • Celebrating plant-based living with cookbooks ?Vegan
  • ❤️ Vegan Recipes ??‍??????
  • ??? Health, Healing, Love, & Travel ?Vegan
  • Follow me for a Wholesome plant-based lifestyle
  • ?Vegan ?Motivator | Gamechanger
  • ?Healthy and vegan versions of all your favorite foods
  • Simply Delicious Vegan Food ?
  • Recipe developer + dog mama ?Vegan
  • Recipe Developer?Food Photography? ?Vegan

Photography Instagram bio ideas

Instagram bio ideas

  • Seeing the world through my own lens
  • My camera = your window to the world
  • Cinematic & portrait photographer
  • Southeast Wedding Photographer
  • Photographer | HI-Cali | Events | Travel | Portraits
  • Do you see what I see?
  • Documenting my life and the things I love to see
  • Making photography easy. How to take pictures with an iPhone.
  • Photos around the world: my visual travel diary
  • “In photography, there is a reality so subtle that it becomes more real than reality.”
  • “The best thing about a picture is that it never changes, even when the people in it do.” — Andy Warhol
  • Wedding Photographer | Local + Destination Wedding
  • Your neighborhood photographer, specializing in [type of photography]

Now that you have seen the list, it is time to take your Instagram bio to the next level with unique and creative bios.

However, instead of merely copy-pasting the bios, make sure to add your own little touch. Your hobby, interest, profession, etc., goes a long way, setting you apart from others.

[wl_navigator]

Attackers might be trying to steal information

Modern web browsers like Chrome are all good until you start getting annoying errors. One such error is Your connection is not private.

The error throws a certain message for different users based on the Internet service they are trying to access.

If you are stuck with the Attackers who might be trying to steal your information from… warning, this guide will help you fix the issue on your web browser.

As I said, this error can be different based on the user. So, we have gathered all the errors and fixes related to the issue in this article.

Here are some of the most common error variations you may face:

  • Attackers might be trying to steal your information from mail.google.com
  • Attackers might be trying to steal your information from www.google.com
  • Attackers might be trying to steal your information from the localhost
  • Attackers might be trying to steal your information from myattwg.att.com
  • Attackers might be trying to steal your information from yts.am
  • Attackers might be trying to steal your information from lsapp.dev
  • Attackers might be trying to steal your information from iso.frontier.com

Alright, let’s dive right in and see how you can get rid of this cyber security problem.

How to remove steal information warnings?

  1. Scan for malware
  2. Flush DNS
  3. Change DNS server address
  4. Check your computer’s date and time
  5. Enable Password Protected Sharing
  6. Check your Internet Security Settings
  7. Clear browser cache and cookies
  8. Use Chrome’s built-in malware removal tool
  9. The problem can be on the server end

1. Scan for malware

If your PC is infected with malware, Google Chrome may throw this error when the malicious program tries to redirect browser requests to some insecure websites.

The best way to fix this is by running a scan using your antivirus program.

If you truly want to find the best protection for your PC, stop your search here. In this comprehensive article about the best virus and malware removal tools, you can make your choices.

It’s important to choose one that meets compatibility with other software in terms of security and unlimited encrypted traffic, so you can get the most of the anti-virus software.

After you have done the scan, go to the next steps for more safety measures.

2. Flush DNS

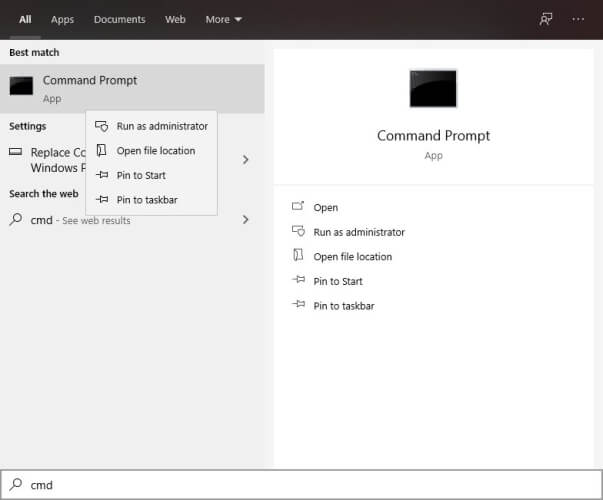
  1. Press Windows Key + X. Click on Command Prompt (Admin).
    Windows 10 Flush DNS
  2. In the command prompt, type the following command and hit Enter: ipconfig /flushdns
  3. The command will work with all the versions of Windows. Just make sure you open the command prompt as an administrator.

Windows caches IP address to speed up things that are similar to how cache works for apps. Sometimes cache may include bad results that lead to network-related problems.

For example, attackers might be trying to steal your information. One way to fix the issue is by flushing the DNS.

3. Change DNS server address

  1. Open Control Panel by pressing Windows Key + X.
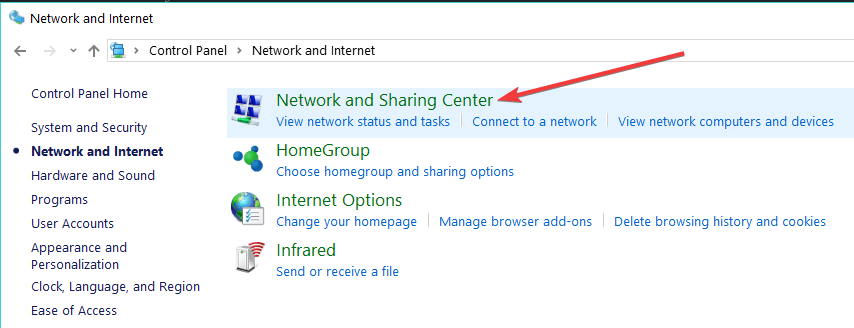
  2. Click on Network and Internet.
  3. Open Network and Sharing Center.Network and Sharing Center
  4. Open Change Adapter settings. (left pane)
  5. Right-click on your Wi-Fi or LAN connection and select Properties.
    Wifi properties internet sharing center control panel - fix attackers might be trying to steal your information from
  6. In the properties window, select Internet Protocol Version 4 (TCP/IPv4) and click on the Properties button.
    change dns server manually WiFi properties - fix attackers might be trying to steal your information from
  7. Select the Use the following DNS server address option.
    Change DNS server manually - fix attackers might be trying to steal your information from
  8. In the Preferred DNS Server and Alternate DNS Server field, enter a third-party address. For this guide, I have used Google DNS server.
  9. Enter the following DNS server one by one:
    Preferred DNS server:
    8.8.8.8
    Alternate DNS server: 8.8.4.4
  10. Click OK to save the changes.

If flushing the DNS doesn’t work, change the DNS server address manually. You can also use a DNS changer program to do the same.

You can’t open Control Panel? Take a look at this step-by-step guide to find a solution.

You can also use DNS Jumper

DNS Jumper - fix attackers might be trying to steal your information from

DNS Jumper is a free utility program for Windows OS that enables you to change the default DNS server with free third-party DNS servers.

It also has the option to find the fastest free DNS server. Download DNS Jumper, click on the Fastest DNS  button, then apply the DNS server.

4. Check your computer’s date and time

  1. Click Start and open Settings.
  2. Open Time and language.
  3. Turn off the Set time automatically option.
  4. Click on the Change button under the Change date and time section.
    Windows 10 change time and date settings - Fix attackers might be trying to steal your information from
  5. Set the correct date and time and click the Change button to save the changes.

Security-related network errors are common, and one of the reasons for this can be incorrect dates and time on the computer.

The modern web browser does block the users from accessing any websites thinking it is a phishing attack when the time, date, and timezone on the PC mismatch with its own servers.

You can check the time and date on the taskbar beside the Action Center icon. If the time and date are incorrect, do the following to correct it.

Just make sure you turn on the Set time automatically option before closing the Settings window.

5. Enable Password Protected Sharing

  1. Open Control Panel.
  2. Go to Network and Internet > Network and Sharing Center.
  3. On the left pane, click on Change advanced sharing settings.
  4. Look for Home or Work profile. If you don’t find them, look for All Networks and expand it.
  5. Scroll to the end and select the Turn on password protected sharing option.
    Turn on password protected sharing - fix attackers might be trying to steal your information from
  6. Click on the Save changes button.

If you have turned off password-protecting sharing in the network and sharing center for your network, the attackers might be trying to steal your information from error may occur.

Make sure that password-protected sharing is turned on to fix the issue.

6. Check your Internet Security Settings

Different antivirus programs offer different kinds of security and at times security programs may block all the SSL/HTTP connections to/from the network.

Avast Web shield - fix attackers might be trying to steal your information from

For example, if you are using Avast security, try to disable Webshield security or go to customization for Web Shield and turn off the HTTPS scanning option.

Check for similar settings in other security programs as well. If nothing works, disable the firewall temporarily.

Then, disable antivirus temporarily to see if that makes any difference.

7. Clear browser cache and cookies

  1. Click on Menu > More Tools > Clear browsing data.
  2. Select the time range and set it back to 1 day or 1 week, depending on when the error first occurred.
  3. Check Cookies and other side data and cached images and files option.
    Google chrome clear browsing data - fix attackers might be trying to steal your information from
  4. Click on the Clear data button to clear the cache.

The bad cache can cause Your connection is not private error in Google Chrome and other web browsers. Here is how to clear cache and cookies in Google Chrome and Edge.

8. Use Chrome’s built-in malware removal tool

  1. Open Google Chrome. Click on Menu and select Settings.
  2. Scroll to the end of the page and look for the Reset and Clean up section.
  3. Click on Clean up computer.
    Google Chrome reset and clean up - fix attackers might be trying to steal your information from
  4. Click on the Find button to begin the scanning process.
    Chrome clean up tool - fix attackers might be trying to steal your information from

Google Chrome comes with a built-in malware removal tool. The tool will check for any malicious software that might be affecting the browser and remove it.

The tool will scan and remove any harmful software from your computer if found.

9. The problem can be on the server end

If you are facing a connection not private error while visiting a particular website, the problem can be from the owner’s end.

In this situation, you can report the problem to the website administrator and wait for it to be resolved.

The connection is not private – attackers might be trying to steal your information error can be annoying, and we hope one of the mentioned solutions may have helped you resolve the issue.

Make sure to leave a comment if the problem persists or if you have found a new solution. We would try to update the article with any new information available.

Does Dropbox compress photos?

Dropbox is a popular file hosting service with its app available on across all the platforms. It offers all the essential features of a cloud drive utility including automatic file synchronization, personal cloud, and client software.

Messenger apps like WhatsApp compress media files to speed up upload and download speed. This is also true for other cloud storage apps like Google Photos.

But what about Dropbox? Does Dropbox compress photos?

How can I find out if Dropbox compresses photos?

Dropbox compress photos

If you read the Dropbox blog, it says:

When you open the app, photos, and videos from your iPhone or iPad are saved to Dropbox at their original size and quality in a private Camera Uploads folder.

However, this may not have been the case a few years ago. A simple search on the internet would bring up the results that do show file re-compression with Dropbox.

That said, in our testing, Dropbox doesn’t seem to re-compresses your photos before it uploads them to your account. And there are no visible changes in the image quality.

Dropbox compress photos

We uploaded an image to Dropbox with a file size of 4.47 MB and a disk size of 4.48 MB.

After uploading the photo and viewing the details on Dropbox, it shows the photo size as 4.48 MB, which is similar to the disk size shown on PC.

Downloading the same photo did not downgrade the image quality either. The downloaded file retained the same size and image quality.

After brief testing, we can say that Dropbox does not compress photos. Even if there is a compression or re-compression, it is not visible in the uploaded or downloaded images.

So, unlike other cloud services and messaging apps, Dropbox can be used to share media files without worrying about the loss of quality.

[wl_navigator]

How to fix Gog Galaxy white screen issue [Full Guide]

GoG Galaxy is a gaming client that allows you to purchase and play your favorite PC games on the same platform. It is popular as it allows users to customize game data storage and game update settings.

However, many users often find themselves unable to avoid the pesky GoG Galaxy white screen issue.

If you are facing this problem then fret not, and read our comprehensive guide below.

How can I fix the Gog Galaxy white screen problem?

1. Update Graphics Card Drivers

Update via Outbyte Driver Updater

Updating your drivers implies complicated steps like searching manually for all drivers on the specific producer’s website, comparing the versions to the ones that you think you need, and ultimately downloading them one by one.

Even these steps don’t ensure that you didn’t get one of them wrong, which in turn can cause your PC to malfunction.

To ensure that you don’t expose your PC to any risk of installing non-compatible drivers, and perform the entire process automatically, we recommend that you use Outbyte Driver Updater.

Simply download and run the software, and an automatic scan will start to identify the best drivers for your system.

Not only will find the right drivers for your components but it can actually increase the entire system performance by getting the latest manufacturer drivers.

After the driver installation process is completed, restart your computer and run GoG Galaxy again.

⇒ Get Outbyte Driver Updater

Update using the Windows 10 built-features

  1. Go to Settings, then double click on Updates and Security.
  2. Click on Windows Update in the menu on the left.
  3. Click on check for updates and download all new driver updates.

2. Uninstall and reinstall

  1. Navigate to Control Panel and double click on Programs and Features.
  2. Find GoG Galaxy and right-click on it.
  3. Select Uninstall.
  4. Go to your C drive (or GoG files location) and delete any remaining files.
  5. Download GoG installer.gog galaxy download
  6. Follow the prompt to install and stick to the recommended options. Do not customize download location.

3. Run an SFC scan

  1. Press Windows Key + X together and run Windows PowerShell (as admin).
  2. Type sfc /scannow and then Enter.
  3. Give the scan about 10 minutes to finish.

4. Turn off the Windows firewall

  1. Visit Control Panel and double click on Windows Defender Firewall.
  2. In the submenu to the left, double click on the Turn Windows Defender Firewall on or off option.
  3. Turn of the firewall for public and private networks.
  4. Run the GoG Galaxy to verify any change.
  5. Restore the firewall if no change is detected.

If the issue is fixed by turning off the firewall, this means that your firewall settings are somehow conflicting with the GoG galaxy launch. You may need to peruse your firewall properties.

5. Turn off Full Screen and change resolution

  1. Launch GoG Galaxy and select the game you want to play from the library.
  2. Navigate to the settings icon and click.
  3. Select Additional Executables and the Graphic Mode Setup.gog galaxy settings
  4. Make sure the Full Screen option is unchecked.gog galaxy fullscreen off
  5. Navigate to the Advanced Settings.
  6. Find the Window Resolution option and set it to 1280×768.
  7. Run GoG Galaxy to verify.

In this guide, we covered how to fix the GoG Galaxy white screen issue. Solving the problem can involve anything from changing your firewall settings to buying a new graphics card.

Feel free to try any of our 5 solutions and let us know which one worked for you in the comments below.

Furthermore, if you have a fix not included in this article, we welcome you to share your knowledge with us.

How to day trade Penny Stocks? [Guide & Best Tools]

Investors often get attracted to penny stocks because of their high volatility and low share prices.

That being said, sifting through penny stocks isn’t quite the baby steps to take for an investment portfolio.

According to the SEC (Securities Exchange Commission), penny stocks are securities that trade for less than $5 per share. Penny stocks are speculative in nature but they are also cheap and great for traders with not much capital. Useful steps to start day trading penny stocks:
  • Find a stockbroker: To start trading, you need a stockbroker. A simple search online will give you options, pick one who doesn’t have hidden charges.
  • Identify the best penny stocks: Use a market scanner to find a hot penny stock. Go for penny stocks with high volume.
  • Learn different strategies: Test different trading strategies and pick the best that works for you.
  • Practice risk management: They are known as “high-risk investment” for a reason, and they should be treated as such.
  • Execute multiple trades: Ensure you invest considerably in different penny stocks to diversify your trading portfolio.
The available software for trading penny stocks is called a trading platform. Most trading platforms come with all tools you will need to find, analyze, and make excellent risk/reward trades that will fit your need.

What are the best tools for day trading on penny stocks?

StocksToTrade

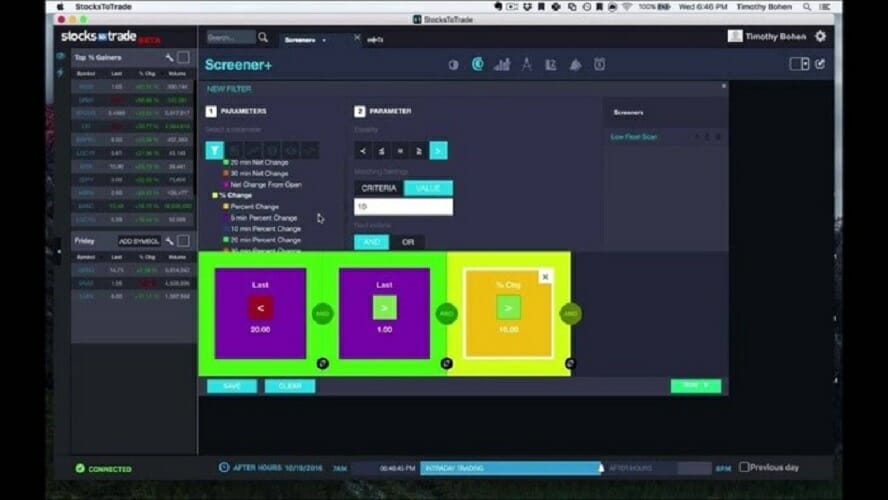
stockstotrade StocksToTrade is a unique trading platform that comes equipped with all the tools you will need for the modern market.

It is a one-stop platform that gives you access to news feeds, algorithmic trading analysis, charting analysis, and scanner stock in one place. To try them out, take advantage of their free trial before making a purchase.

⇒ Try StocksToTrade

Trading Alerts with Profit.ly

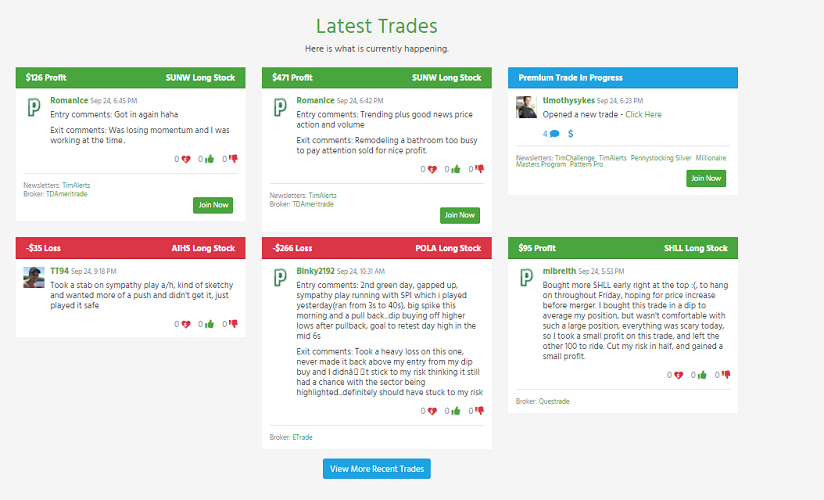
Profit.ly is a multifunctional tool that’s partly a social network, educational resource, and an analytical resource tool. You can find members’ experiences in the penny stock trading universe.

They share their entry and exit points and commentaries. Not only would you learn to trade with Profit.ly; you’ll also get advice, and know-how to implement them.

⇒ Try Profit.ly

Townsend Eze EMS

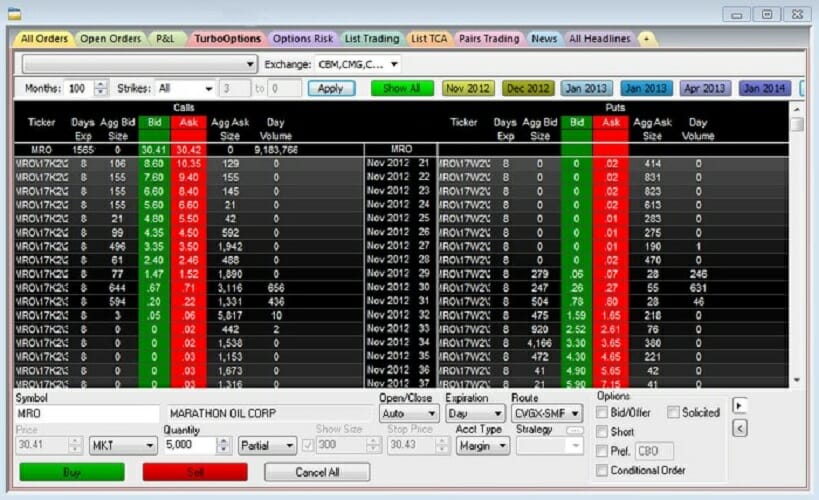
With over three decades under its belt, Eze EMS (formerly called Townsend RealTick) goes down as the best place to find reliable market data. It has an entirely customizable user interface and gives you access to custom tickers.

Joining a trading community is essential to succeed, Townsend RealTick can help out. The minimum funding requirement for Townsend RealTick is $10,000.

⇒ Try Eze EMS

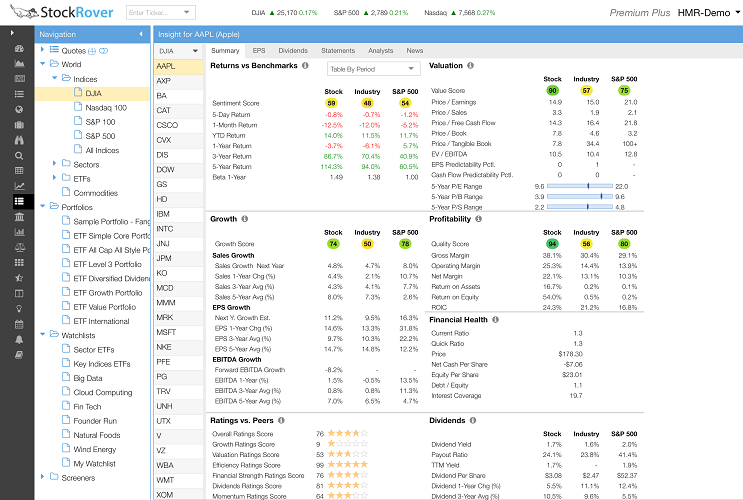
Stock Rover

Largely regarded as one of the best Penny stock trading tools, Stock Rover is modern and slick. It offers top-notch fair value and margin of safety.

With this tool, you get 10-year historical data for earnings, financial, Morningstart analyst ratings, and dividend database. An advanced feature of Stock Rover is that it lets you correlate your portfolio and screen and balance dividends.

⇒ Try Stock Rover

Jigsaw Trading

If you’re into book order trading, then you should consider Jigsaw Trading. This tool provides economic indicators, resiting orders, the accurate, current price for multiple stocks, and much more.

Jigsaw offers a unique Tape tool, which lets you measure volume and volatility at one glance. Compared to other similar Penny stock trading tools, Jigsaw is inexpensive and easy to jump on, thanks to the training courses it provides.

⇒ Try Jigsaw

Just like every traded stock, day trading penny stocks could sometimes cause a significant drawdown to your investment.

If you feel confident in your trading system, it’s definitely worth your time to educate yourself a little more on how to day trade penny stocks and go for it.

Despite the risks involved in stock trading, penny stocks certainly present amazing potentials.

[wl_navigator]

Xbox One, PlayStation 4, and PC crossplay comes to the hit Apex Legends video game next week

Apex Legends is finally getting crossplay next week on October 6th. The ability for players to play with others across Xbox One, PS4, and PC has been an often-requested feature ever since the game launched back in early-2019.

The crossplay functionality will technically be in beta testing but it will also be available for all players to try.

“Since the launch of Apex Legends, cross-play has been one of the most requested features from our players who want the ability to play with their friends on other platforms,” Apex Legends’ game director, Chad Grenier, said in a blog post. “During the cross-play beta, players will have full access to cross-play functionality while we collect data, test the feature at scale, and most importantly, listen to you, the fans, for feedback.”

Curiously, cross-saves still won’t be supported with this update. This means that, while gamers will able to play with their friends on other platforms, they still won’t be able to switch to another platform themselves and pick up where they left off.

The ability to carry progress between devices and platforms is a common feature supported by games such as Fortnite so its absence is a little odd here, especially with Apex Legends being in a similar genre.

This upcoming update will also add a new limited time mode, 24 new cosmetics, and new special offer bundles. More details on all of the above are available here.

Are you an Apex Legends player and are you looking forward to crossplay? Share your thoughts with the community in the comments below and then follow us on Pinterest and Facebook for more Xbox gaming news.

Apex Legends™
Apex Legends™
Developer:
Electronic Arts
Price:
Free

Star Wars: Squadrons video game is now live on Microsoft’s Xbox One consoles

The Star Wars: Squadrons video game is now live and ready to play on Microsoft’s Xbox One, Xbox One S, and Xbox One X consoles. The game will also be playable on the Xbox Series S and Xbox Series X consoles when they launch next month.

Unlike Star Wars Battlefront II which offered a wide variety of gameplay styles, Star Wars: Squadrons is a game dedicated purely to flying, allowing players get to fly as either New Republic or Empire pilots during a time set Just after Star Wars Episode VI: The Return of the Jedi and several years before The Mandalorian.

Star Wars: Squadrons supports crossplay between Xbox, PC, and PlayStation gamers in addition to 4K Ultra HD visuals when plays on an Xbox One X consoles (or the Xbox Series S and X).

Here’s the official game description:

Master the art of starfighter combat in the authentic piloting experience STAR WARS™: Squadrons. Buckle up and feel the adrenaline of first-person multiplayer space dogfights alongside your squadron. Pilots who enlist will step into the cockpits of starfighters from both the New Republic and Imperial fleets and fight in strategic 5 vs. 5 space battles. Modify your starfighter and adjust the composition of your squadron to suit varying playstyles and crush the opposition. Pilots will triumph as a team and complete tactical objectives across known and never-before-seen battlefields, including the gas giant of Yavin Prime and the shattered moon of Galitan.

Take control of starfighters such as the X-wing and TIE fighter. Customize loadouts and cosmetics, divert power between weapons, shields, and engines, while immersing yourself in the cockpit.

Learn what it means to be a pilot in a thrilling STAR WARS™ single-player campaign set after the events of Return of the Jedi. Seen from alternating perspectives between two factions, iconic and emerging leaders on both sides are battling for the galaxy. The New Republic fights for freedom. The Empire demands order. We need you to join the galaxy’s finest.

Have you had a chance to play Star Wars: Squadrons yet? Let us know if you’re enjoying it (or not) in the comments below and then follow us on Pinterest and Twitter for more Xbox gaming news.

STAR WARS™: Squadrons
Developer:
Electronic Arts
Price:
Free

How to add Steam, Xbox Live, and other game libraries to GOG

CD PROJEKT RED’s GOG platform has been a major hit with gaming enthusiasts, especially those that are fans of older titles, or those that love DRM-free games.

Their platform eventually spawned a desktop app called GOG Galaxy, which eventually grew and evolved into what we know today as GOG galaxy 2.0.

The platform is incredibly reliable, and it is no different than other digital distribution platforms such as Steam, Epic Games Store, Xbox Live, and more.

However, with so many platforms available, not many players are happy with having a dozen gaming libraries spread out across countless apps.

That is why GOG Galaxy implemented a way to integrate most other important platforms into its own allowing you to have all of your games within a single menu.

The supported platforms are the following:

With the possibility at hand, we will show you exactly how you can bring all of your gaming libraries together in GOG Galaxy 2.0.


How do I integrate other digital platforms into GOG Galaxy?

  1. Register to, download, and then install GOG Galaxy 2.0
  2. Launch GOG Galaxy
  3. Press the cogwheel button in the top-left corner of the menu
  4. Select Settings
  5. Go to the Integrations tab
  6. Click on Connect next to all the platforms that you want to add to GOG Galaxy
  7. You will then be prompted with a confirmation message asking you whether you agree to give GOG Galaxy access to your credentials
  8. Press Connect again
  9. Log into the targeted gaming platform to finish the integration.

Your Gaming library should now also include whatever titles were registered to your other platforms.

Things to remember when using this method:

You don’t need to worry about searching games now, since GOG Galaxy will also create separate tabs for each third-party platform.


Keep in mind that this integration is mostly visual since pressing the download button of a third-party game within GOG Galaxy will still cause it to install via its original platform.

In the screenshots below, pressing Install on Command & Conquer Tiberian Sun will still cause it to install via Origin.
You can disconnect GOG Galaxy at any time you want, and you can rest assured that GOG Galaxy will not store your third-party credentials in any way.


By following these steps, you should now be able to bring all of your gaming libraries together into a single menu, allowing you a better overview of what titles you’ve amassed over the years.

Do you think this feature is handy? Let us know how much you enjoy this game library centralization by leaving us a message in the comments section below.


[wl_navigator]
Where to stream Top Gear Specials online? [Full Episodes]

Top Gear is one of the most popular car shows. It’s overflowing with awesome car tests, stunts, and comedy. Thus, it makes sense that people from all around the world would want to watch it.

However, there’s been a lot of confusion regarding Top Gear, especially considering that it has new and old series. While younger members of the audience might prefer the newer version of the show, others prefer the old Top Gear trio.

Netflix had an on-off relationship with the show, which caused the whole uproar and confusion.

However, we have some good news: you can still enjoy classic Top Gear episodes presented by Jeremy Clarkson, Richard Hammond, and James May.

Where can I stream Top Gear episodes & specials?

Where to watch old Top Gear?

Currently, you can stream old Top Gear on Netflix. Around July, fans were shocked to discover that the show suddenly disappeared from the streaming platform. After receiving a lot of complaints, Netflix brought it back for its UK fans.

Thus, if you’re currently in the UK, all you have to do is create a Netflix account (if you don’t already have one), lookup Top Gear and start streaming at your leisure.

On the downside, Netflix didn’t bring back all the old episodes, so you may be out of luck if you were looking for a certain episode that’s not on the list.

Another great streaming platform that has a more complete collection (including old Top Gear episodes) is MotorTrend. However, you might need to use Amazon Prime Video Channels in order to get full access to the service.

The great news is that Amazon Prime/MotorTrend has all the seasons in store, so you won’t miss a thing.

Where to watch the new Top Gear?

Same as before. If you’re into that, you can watch the new version of Top Gear (US) on Netflix or MotorTrend. However, for the US version, we offer you a third option: BBC iPlayer.

Note that BBC iPlayer doesn’t offer any of the old Top Gear episodes. Thus, we recommend you to stick with the options above (i.e. Netflix or MotorTrend) if you want the whole Top Gear experience.

Where to stream Top Gear Specials?

Unfortunately, Netflix doesn’t offer you the ability to stream Top Gear Specials. It’s no surprise, considering that even some of the UK series’ episodes haven’t been added back.

However, Amazon Prime/MotorTrend seems to have the whole Top Gear Specials collection. There’s good news and bad news about this.

On the downside, you may need to sign up for two accounts. On the other hand, both Amazon Prime Video and MotorTrend offer generous trials.

How to stream Top Gear outside of the UK/US?

1. Use a reliable VPN service

  1. Purchase a CyberGhost VPN subscription planuse CyberGhost VPN to unblock Netflix
  2. Download and install the VPN on your PC
  3. Log into your account
  4. Connect to a UK/US server, depending on the streaming service
  5. Go to Netflix/Amazon Prime Channel/MotorTrend
  6. Look up the show
  7. Start streaming Top Gear

As we mentioned just earlier, you can watch the new version of Top Gear (US) on BBC iPlayer. You will still need a VPN connected to a UK server for that.

CyberGhost VPN

CyberGhost VPN

Want to stream Top Gear UK episodes? CyberGhost VPN can definitely help you do that.
$2.75/mo. Buy it now

Check out our guide to learn how you can stream BBC One live if you’re outside of the UK.

2. Use a Smart DNS service

Smart DNS Proxy, or other similar services, can help you bypass geoblocking restrictions without losing speed. These tools help you change your ISP-assigned DNS and strip any bit of location-revealing information from your requests.

The advantages of using a Smart DNS service instead of a VPN comes from not losing speed, which is kind of a big deal with online streaming.

A Smart DNS service doesn’t encrypt traffic, so it is definitely faster than a VPN, at the expense of your security/privacy.

3. Clear cached data

If you used the methods above and are still unable to stream Top Gear, maybe it’s time to do a bit of maintenance work on your system. First and foremost, make sure to clear any cached data and/or cookies from your browser.

Second of all, avoid to launch the browser and access any website after clearing the cache if your VPN isn’t running. Launch the VPN, connect to an appropriate server, then navigate to the streaming platform.

If you’re still having a hard time getting to stream Top Gear, flush your DNS. In order to do that, take the following steps:

  1. Launch an elevated CMD instance on your PC
  2. Type the following commands:

ipconfig /flushdns
ipconfig /registerdns
ipconfig /release
ipconfig /renew
netsh winsock reset
exit

Restart your computer and everything should be alright. Re-launch the VPN or Smart DNS tool, access your favorite streaming platform and you should be able to watch Top Gear without hassle.

Final thoughts on streaming Top Gear

All things considered, if you’ve been wanting to stream Top Gear (both US and UK) for a long time, now you can do it without too much hassle. Granted, there’s some confusion regarding the series, as well as the special episodes.

However, if you follow our instructions carefully, you should be able to start the stream effortlessly in no time.

Keep in mind that a VPN service will not only unblock geo-restricted websites, but it will also encrypt your traffic, keeping it away from prying eyes. A Smart DNS service will be faster, but your traffic will be exposed.

[wl_navigator]

We couldn’t update the System Reserved Partition

Updating your Windows system should be straightforward if you follow the right procedure. However, it’s not uncommon to run into errors. The one we’ll tackle here says We couldn’t update system reserved partition, with and it’s usually paired with the error codes 0xc1900104 or 0x800f0922.

This update error comes up due to a full System Reserved Partition (SRP). This partition stores your Windows system boot information. It’s normal for it to fill up because third-party security software, such as antiviruses write data to the System Reserved Partition.

To fix the issue,  you need at least 15MB of free space on the System Reserved Partition. Follow me as I walk you through the two steps to clear this partition and fix the We couldn’t update the System Reserved Partition issue.

How do I fix the We couldn’t update the System Reserved Partition problem?

1. Find out the partition style

We-couldnt-update-the-System-Reserved-Partition-find-partition-style

  1. Click on the Start button and search for diskmgmt.msc.
  2. Select Disk Management from the results.
  3. Right-click on the primary disk on which you have Windows and choose Properties.
  4. Go to the Volumes tab.
  5. Confirm the partition style.

NOTE: The partition style could either be a GUID Partition Table (GPT) or Master Boot Record (MBR). You will need this information for the next steps.


2. Delete font files

For GPT partition

  1. Click on the Start button and search for command prompt.
  2. Right-click on Command Prompt and hit Run as administrator.
  3. In the Command Prompt window, type in y: /s and press Enter.
  4. Type in y: and hit Enter.
  5. Type in cd EFI\Microsoft\Boot\Fonts and hit Enter.
  6. Type in del*.* and press Enter.
  7. Confirm the deletion.

For MBR partition 

Open Disk Management
  1. Press the Windows key and search for diskmgmt.msc.
  2. Click on Disk Management from the search results.
  3. Right-click on the System Reserve partition and click Change Drive Letter and Paths.
  4. Click on Add.
  5. Select drive Y and hit OK.
Open Command Prompt and run these commands
  1. Click on the Start button and search for command prompt.
  2. Right-click on Command Prompt and select Run as administrator.
  3. In the Command Prompt window, type y: and press Enter.
  4. Next, type the following commands and press Enter for each of them: cd Boot\Fonts takeown /d y /r /f icacls Y:\* /save %systemdrive%\NTFSp.txt /c /t  del*.* icacls T:\ /restore %systemdrive%\NTFSp.txt /c /t

If you got errors in the previous step, type in icacls . /grant system:f /t and hit Enter.

Change drive letter
  1. Return to Disk Management.
  2. Click on the Refresh button.
  3. Right-click on the reserved system partition.
  4. Click on Change the drive letter and paths.
  5. Choose the Y: drive.
  6. Click Remove and hit OK.

The first step was to determine if the System Reserved Partition is in the GPT or MBR partition style. After that, you have to follow the steps applicable to your partition style.

If your computer runs on Windows 8.1, 8, or 7, check out the steps recommended by Microsoft.

Once you clear the SRP, you’ll no longer see the We couldn’t update the System Reserved Partition error and can upgrade your Windows system.

[wl_navigator]

Among Us: The game you tried to join is full [Solved]

The game you tried to join is full. Check with the host to see if you can join next round. Got this error? Well, you are not alone. Among Us is reportedly showing this error when the player tries to join a match lobby.

The error, as the message indicates, is occurring due to the lobby you are trying to join being full. The error could also be triggered due to server issues.

In this article, we explore a few quick troubleshooting steps to help you resolve the game you tried to join is full error in Among Us.

How do I fix the Among Us the game you tried to join is full error?

1. Try to join again

The game you tried to join is full
The game uses complex algorithms to match players based on their ranking and KD and puts them in the queue. However, when there are many players in the queue, and the lobby is full, the game will show the error indicating the same.

The best thing you can do here is to try joining a new game again. At times, it may take more than a couple of tries to successfully match and join a lobby.

If that does not work, check to see if it is a server shenanigan. Changing to a less populated server can help you resolve the error as well.


2. Change Among Us server

The game you tried to join is full

  1. Launch the game on your PC.
  2. Click the little globe icon in the bottom right corner of the screen.
  3. Select a less popular server but make sure it is nearer to your region.
  4. Relaunch the game and check for any improvements.

While changing the Among Us server can help you fix the error, it is important to choose a correct server. Poor server selection can cause connection issues due to high ping.

If the issue persists, after changing the server to a different region, select your previous server again and see if that works.


3. Check for network issues

The game you tried to join is full
 

  1. Keeping the router and modem power on, unplug the power and Ethernet cable.
  2. Leave the router idle for a few minutes.
  3. Reconnect the power and ethernet cable to the router.
  4. Wait till the lights stop blinking and connect your PC to the network.
  5. Launch Among Us and check for any improvements.

Flush DNS and reset the network adapter

The game you tried to join is full

  1. Press the Windows key, type cmd.
  2. For Command Prompt, click on Open as Administrator.
  3. In the Command Prompt window, enter the following commands one by one and hit enter:
    netsh int ip reset
    netsh advforewall reset
    netsh winsock reset
    ipconfig /flushdns
    ipconfig /release
  4. Relaunch Among Us on Steam and check if the error is resolved.

The game you tried to join is full – check with the host to see if you can join next round error can occur due to server issues or if the game lobby is full. Try joining again or change the server region to fix the error and join the game again.

[wl_navigator]

Outlook Won’t Print the Entire Email [Quick Fix]

There have often been reports of printing issues via Outlook mail, and many users reported that Outlook won’t print the entire email on their PC.

Here’s how one user described this printing problem on the Microsoft Answers forum:

At the end of outlook email task bar the last item is –

” … “

A drop down menu gives me several options one of which is “print”.

I use this to display my full email (without my folders on left-hand side and without ab ad on the right-hand side.

Now I have windows 10 and try & display the whole email before printing, it goes to an Microsoft edge ad showing 2 devices only.

I can’t print my whole email.

This might be frustrating when you need to do some quick action but the printer is not printing the whole email.

That said, getting around the issue is quite simple and a few tweaks later, you can have your printer in your full command. Here is what you need to do to print the email with ease.

What to do if Outlook won’t print the entire email?

1. Update the printer’s driver

  1. You can do this by visiting the company website and see if there is an updated driver available for your printer. If it is, download and install the same.update driver device manager outlook won't print entire email
  2. You can also do this via Device Manager. For this, launch Device Manager (type Device Manager in the Cortana search box and select from the result shown).
  3. Locate the Printers section and expand it.
  4. Right-click on the printer and select Update driver. Follow on-screen instructions to update the printer software.

Alternatively, you can update your printer drivers automatically by using third-party tools such as Outbyte Driver Updater.

This effective program has a user interface that makes you feel comfortable and creates a restore point before updating any of your drivers.

That’s how the rather time-consuming procedure you often try to avoid becomes simple even for those who aren’t tech-savvy. Best of all, it installs quickly and always shows lots of detail on the drivers installed on your PC.

⇒ Get Outbyte Driver Updater

2. Change to black-and-white prints

  1. Click on the Print icon for the mail that you want to print.
  2. In the Print dialog box, click on More Settings link from the left pane.
  3. In the windows that open, navigate to Output options at the bottom.
    change printing settings outlook won't print entire email
  4. Select Monochrome from the Color mode drop-down box.
  5. Click on OK and then Print.

3. Change default printer to Microsoft XPS Document Writer

  1. Click on the Print icon for the particular mail that you want to print.
  2. In the Printer dialog box that opens, click on the Printer drop down box at the top left corner.
  3. Select Microsoft XPS Document Writer.
    set default printer microsoft xps document writer outlook won't print entire email
  4. Make sure that the All pages option is selected under Pages.
  5. Click on the Print button at the bottom.
  6. You should be able to print all right.

While the above should help you deal with the scenario when Outlook isn’t printing an entire email, here are some related resources for you to read.

Xbox series X canceled pre-orders are driving gamers mad

The launch of the Xbox series S and Xbox series X is just a few weeks away, but November 10 seems much closer than that.

This is especially the case if you are an Xbox enthusiast and have already pre-ordered the devices.

However, that enthusiasm might be cut short, especially if you pre-ordered from certain retailers.


Best Buy canceled Xbox series X pre-orders without notice

Many users have gone onto public forums expressing their confusion as to why Best Buy canceled their pre-orders of the Xbox series X console:

Check your preorder status. Just noticed Best Buy canceled and refunded my Series X preorder.

What makes the situation all the more awkward is that in some cases Best Buy refunded the users without actually confirming the pre-order cancelation:

This scared me. Best Buy charged my credit card but in noticed the other day my card was no longer carrying a charge from Best Buy but it still says I have it ordered.

The main cause of this issue seems to be the number of pre-orders that users made right as Best Buy went live with their Xbox series X.

That being said, even if the orders were made mere minutes apart, Best Buy most likely canceled the once made right after their stocks were officially depleted.

Users aren’t very pleased with this turn of events, since many stated that it would have been more logical to not have their pre-orders canceled, even if it did mean waiting a bit longer for a re-stock.

Yeah I don’t understand their thought process here or why people are having to fight over preorders, should just let everyone place orders and wait for their turn in line as stock gets filled.


All in all, this inconvenience indirectly affects Microsoft’s revenue for the Xbox series X launch, although dedicated Xbox gamers will probably order the console again once the stocks are filled.

Alternatively, they could always try to go to a different retailer, although not too many are available.

Don’t forget that the Xbox series S and Xbox series X consoles will become available on November 10, and that many new things await you as of that date.

These include:

Have you made an Xbox series X pre-order yet? Let us know if you were affected by this supply shortage by leaving us a message in the comments section below.


[wl_navigator]
Yakuza 0, Yakuza Kiwami 1 and 2 are free to play with Xbox Live Gold this weekend

Jonathon Stebel, Communications Manager, Sega of America announced this weekend’s Free Play Days on Xbox Wire. Starting now until October 4th, Xbox Live Gold can play Yakuza 0, Yakuza Kiwami, and Yakuza Kiwami 2 free all weekend long. Here’s Stebel’s take on what the Sega’s Yakuza series is all about.

“Yakuza is, at its core, a series about a bunch of very serious men doing very silly things. There’s no shortage of drama, intrigue, and genuinely emotional moments to keep you hooked. but you can also take a break with some of the most hilarious minigames and substories you’ll ever experience – build tiny cars and race in the Pocket Circuit Stadium, manage a Cabaret, compete in dance fights at the disco, and so many more. Each game also takes place in a painstakingly detailed recreation of a real Japanese city. Consider it the perfect virtual tourism experience.”

Yakuza 0 was added to Xbox Game Pass in February, followed by Yakuza Kiwami in April, and Yakuza Kiwami 2 launched on Xbox Game Pass at the end of July. As always, Xbox Live Gold members can download all three games through Xbox.com or via their console dashboard. The special Yakuza Free Play Days weekend is in preparation of Yakuza: Like a Dragon, landing on the Xbox Series X and Xbox Series S launch day on November 10, 2020. Yakuza: Like a Dragon is available for pre-order now and will also be available on other platforms, including Xbox One and Windows 10.

Yakuza 0
Yakuza 0
Developer:
SEGA
Price:
Free


Yakuza Kiwami 2
Yakuza Kiwami 2
Developer:
SEGA
Price:
Free


Yakuza Kiwami 2
Yakuza Kiwami 2
Developer:
SEGA
Price:
Free


Yakuza: Like a Dragon Day Ichi Edition

Wireless keyboard touchpad isn’t working [Logitech, RII]

A common issue with wireless keyboards is that the touchpad is not working or responding to touch input. Logitech, RII, and more users complain about this keyboard issue.

However, this could be the result of a connectivity glitch and can be taken care of easily. Refer to the below steps in that regard. Your wireless keyboard touchpad should work like new in no time.

What to do if the wireless keyboard trackpad isn’t working?

1. Update keyboard drivers

To correct the issue, make sure you are running the latest Windows iteration, as a driver mismatch can often lead to keyboard issues.

The same applies to your PC’s keyboard drivers. Therefore, visit the keyboard manufacturer’s site and see if there is a new driver available for the particular model you are using.

Up next, download and install the driver and check if the problem is still there. If you’re not particularly skilled in performing such procedures, you can use third-party tools such as Outbyte Driver Updater.

This lightweight program will automatically update all your drivers and it’s a matter of a few clicks only this time.

Moreover, Outbyte Driver Updater creates accurate drivers’ backups before making any changes. Therefore, if you ever change your mind, you can easily revert to an older version.

⇒ Get Outbyte Driver Updater

2. Check the batteries

A low battery charge could lead to wireless keyboard issues. So, try inserting the new batteries and see if the trackpad is responding to touch input.

3. Press the Fn + F8 keyboard shortcut

Some keyboards require you to press the keyboard key combo of Fn + F8 to toggle between the touchpad and keyboard controls.

If the aforementioned keyboard combination doesn’t work, you might want to check your manual and find the correct shortcut.

4. Re-sync your keyboard and the USB receiver

Try re-establishing the wireless connectivity with the USB receiver. You can do so by switching off the keyboard and/or the USB receiver if the USB receiver has a switch.

Alternatively, disconnect the receiver and insert it to a different USB port. It might also take a few minutes for the connections to stabilize, or so be patient.

After the connection is established, see if the trackpad is responding. You might also want to restart your computer as well to allow things to start afresh.

5. Verify signal interference

If the trackpad is working erratically, the cause might be a potential interference with another wireless device in the vicinity.

To minimize the interference, change the location, and see if the device is working properly. You can also disable other wireless devices and check if that helps.

6. Check with another PC

Lastly, check the keyboard by connecting to another PC. If it is still malfunctioning, the keyboard itself might be at fault. Get in touch with the manufacturer to remedy the issue.

There you go, these are a couple of solutions that you can try if your wireless keyboard trackpad isn’t working. Feel free to let us know in the comments section if our solutions worked for you.

New Skype Insider update brings Microsoft Teams’ Raise Hand feature

Microsoft announced the release of new Skype Insider update this week, which brings a couple of new features across all platforms. The biggest addition is a “Raise hand” feature for Skype video meetings, which will add an icon next to your name every time you raise your hand to notify other participants that you would like to speak.

“Very handy for classroom meetings, but you can also use it as a simple voting mechanism,” the Skype team said about this new Raise hand feature. Microsoft Teams, the company’s communication hub for Microsoft 365 got a similar Raise hand feature earlier this year, which was a top-requested feature from Teams users.

In addition to Raise hand, Background Blur is another feature that has is available on both Microsoft Teams and Skype. With this latest Insider update (version 8.65.76.73), the feature is now available for Android users after shipping first on Windows, Mac, Linux, and iOS.

This new Insider update also makes it possible to customize the reaction picker to pick up any emojis you prefer to use to react to messages. On iOS, Skype Insider has also gained direct Share support so you can easily share URLs, text, and photos with your recent Skype contacts right from the iOS Share menu.

The Skype Insider app for Windows, macOS, and Linux can be downloaded from this page, and an online version is also available here. The Android version can be downloaded from the link below, while the iOS version will require you to install Apple’s Testflight app and to visit this page from your iPhone and iPad.

Skype Insider
Skype Insider
Developer:
Skype
Price:
Free

Microsoft details how the new Edge has become more efficient with multi-process architecture

Microsoft’s new Chromium-based Edge browser improves browser security and reliability by using a multi-process architecture, the company said yesterday. Microsoft claims that this architecture has significantly reduced the amount of memory and CPU that its browser needs. 

For a while, we have known that Google Chrome is considered one of the biggest memory hogs, especially on Windows 10 PCs. Since the new Microsoft Edge is based on the same Chromium engine, the company wants to avoid its browser going in the same direction. 

In a lengthy blog post published yesterday, Microsoft dives into detail with Microsoft Edge’s multi-process architecture. The company explained how Microsoft Edge uses system resources and noted some major benefits of the multi-process architecture. 

More specifically, the Microsoft Edge browser is split into different processes, and all of them work together to give users customized browsing experience. The list of processes includes the browser process, renderer processes, GPU process, utility processes, crashpad handler process, as well as plug-in processes and extension processes. 

Here’s a look at a browser instance with four tabs open and two extensions turned on: 

Diagram showing browser processes in a single browser window

While the first benefit of this multi-process architecture is the lower resource usage, it also improves security, reliability, and resource accountability in terms of resource usage. This should be quite a noteworthy achievement, especially for those who spend most of their waking hours staring at screens. 

Microsoft is also continuing to work on reducing the amount of memory and CPU power the browser needs. “These solutions include providing websites and extensions developers with information to help them use fewer resources and helping users understand how their browsing habits can affect Microsoft Edge’s resource usage,” the company explained. 

Surface Fall 2020: Microsoft announces Designer Compact Keyboard and and other new accessories

Along with the slew of other Surface announcements Microsoft made today, including the Surface Laptop Go and Surface Pro X, the company is also introducing some new accessories. All these products have been designed to “outfit your new work or school spaces” perfectly.

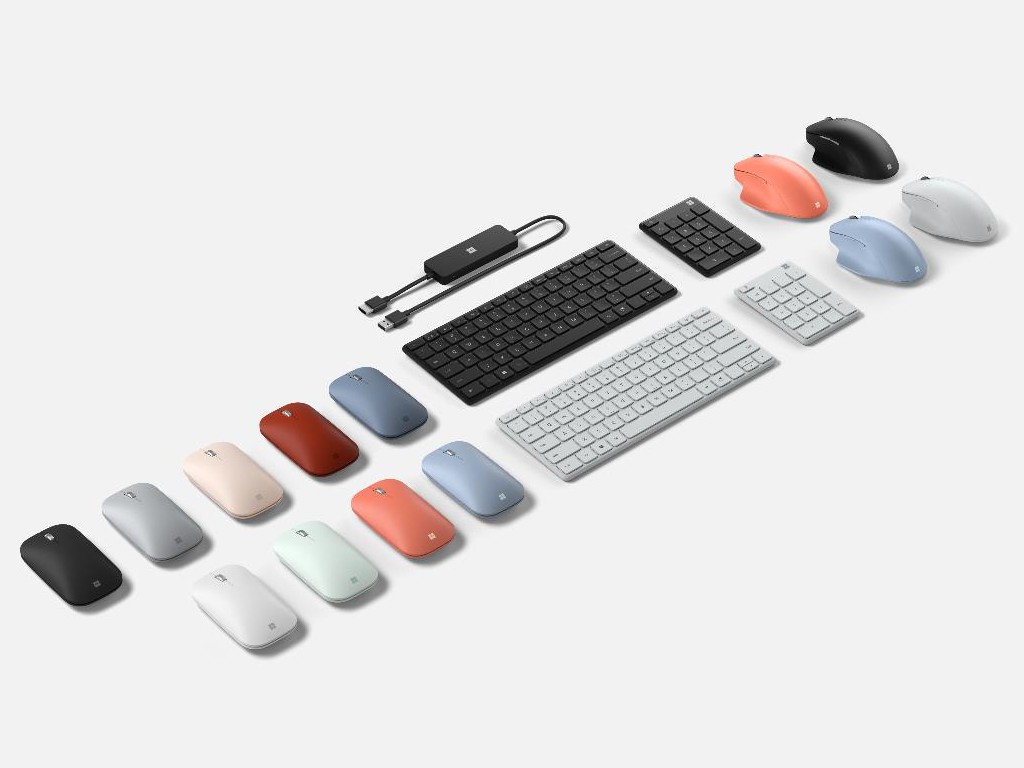
The most striking update is the Microsoft Designer Compact Keyboard, which features a narrow, slim, and elegant design with 2-year battery life. As far as what’s under the hood, the new Bluetooth keyboard allows users to switch between 3 devices seamlessly. It comes in two color options and will be priced at $69.99.

Then there’s the Microsoft Number Pad. This one is smaller, and it connects via Bluetooth. Through this device, Microsoft aims to “enable you to get the most out of your Surface or modern PC.” Microsoft’s new Number Pad costs $24.99. 

Microsoft also revealed a new Microsoft Bluetooth Ergonomic Mouse. This is a device designed to be your constant companion, thanks to the new comfortable ergonomic design. Like all of the other accessories announced today, it has a light and durable design. The Microsoft Bluetooth Ergonomic Mouse is available in various colors and, it will cost you $49.99. 

If the Surface Mobile Mouse isn’t exactly new, Microsoft is releasing a new color variant. In order to align with the new Surface Laptop Go, the company has announced that the Microsoft Modern Mobile Mouse is now available in Sandstone as well.

Finally, Microsoft introduced a new Microsoft 4K Wireless Display Adapter that supports 4K resolution, allowing you to extend your display to the big screen easily. The 4K Wireless Display Adapter will be available for $69.99.

Surface Fall 2020: Microsoft refreshes its ARM-powered Surface Pro X with new SQ 2 processor and Platinum finish

Microsoft has officially announced new Surface devices this morning, a new 12.5-inch Surface Laptop Go that starts at $549, and a better version of last year’s Surface Pro X featuring a brand new Microsoft SQ 2 processor for customers who need more power. The software giant has once again teamed up with Qualcomm to create this new custom-designed SoC which is “the fastest processor in its class” according to Microsoft.

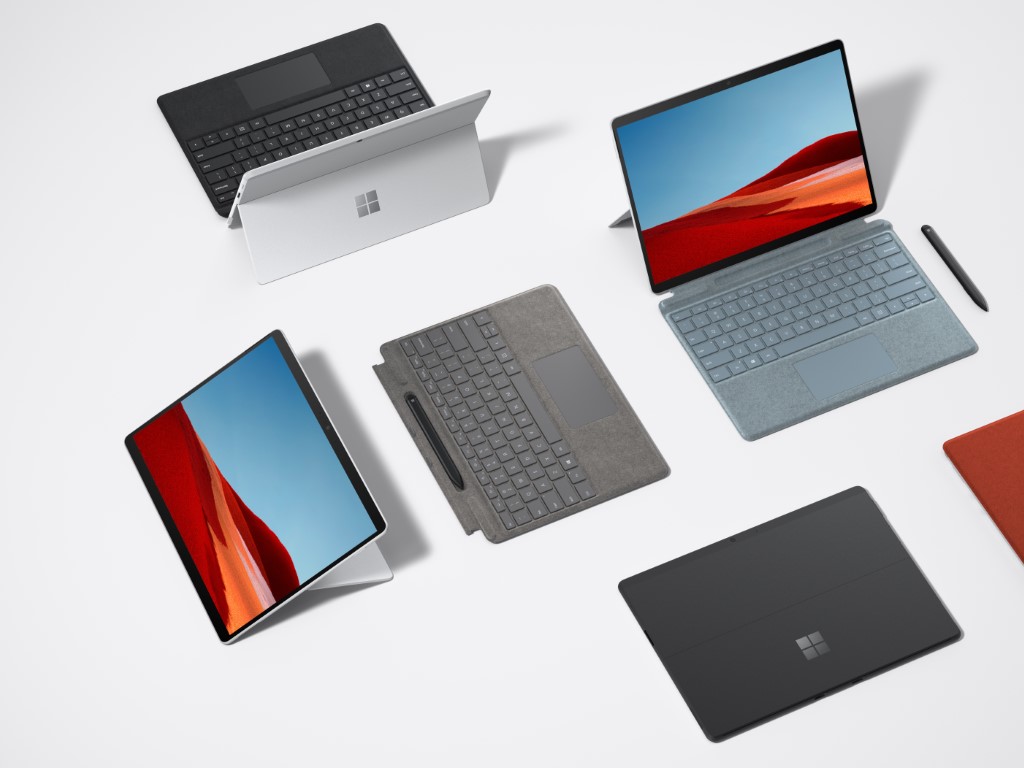
This new Microsoft SQ 2 processor, which will be coupled with a more powerful Adreno 690 GPU will only be available on the top end Surface Pro X SKUs with 16GB of RAM starting at $1499.99. The Surface Pro X with the existing SQ1 processor will keep its $999 starting price, and Microsoft is also adding a new Platinum finish as an alternative to the original Matte black color. Surface Pro X keyboards, which are still sold separately, are also available in three new colors, Ice Blue, Poppy Red, and Platinum, in addition to the original Black color.

It’s important to note that the Surface Pro X with the new Microsoft SQ 2 processor will retain the same design, 13” PixelSense Display, and ports as the original model with the SQ 1 processor, though the new chip should bring significant performance improvements to customers. Surface Pro X devices with the new SQ 2 processor also come with the same Qualcomm Snapdragon X24 LTE modem that supports Gigabit LTE speeds, so we’ll have to wait to see a 5G model.

Notably, Microsoft announced that all Surface Pro X devices should now deliver up to 15 hours of battery life thanks to “additional software improvements,” and the company is also promising more native apps coming soon to the platform including an ARM64 version of Microsoft Teams. Starting in November, Microsoft will also start testing support for x64 emulation with Windows Insiders, which should really help to fix the app compatibility issues on Windows 10 on ARM.

The Surface Pro X remains Microsoft’s thinnest Surface Pro tablet, and it’s also the first Surface tablet with two USB-C ports, a removable SSD, a Firmware TPM chip for enterprise security. “Surface Pro X is the thinnest and most connected 2:1 we’ve ever shipped and we’re excited to deliver these new experiences at a time when connectivity has never been more top of mind,” said VP of Surface Pete Kyriacou today.

The new Surface Pro X with the new Microsoft SQ2 processor is available for pre-order today in select markets at the Microsoft Store and other major retailers, and it will start shipping on October 13. Microsoft also announced this morning that Surface devices are now available in 11 new European markets including Bulgaria, Croatia, Czech Republic, Estonia, Greece, Hungary, Latvia, Lithuania, Romania, Slovakia, Slovenia.

Fix: Windows Live Mail error 0x8007007A on Windows 10/11

Error 0x8007007A may show up if you use Windows Live Mail to send and receive emails on Windows 10. This error usually roots from a conflict between One Drive and Live Mail.

More particularly, this error mostly shows up when users try to send images, which are uploaded from OneDrive, in their emails.

In this article, we look into some troubleshooting methods to resolve Windows Live Mail error 0x8007007A.


How do I fix Windows Live Mail error 0x8007007A?

  1. Switch your email server to another email client
  2. Delete Pending emails from Outbox
  3. Send Images as Attachment, not Album.
  4. Remove and reconfigure WLM account
  5. Fix Windows Live Mail

1. Switch your email server to another email client

The built-in email client that comes with Windows is decent. It has all the basic functionalities most people need.

But if you want more, or you simply have problems, errors , or bugs with it, it’s time to consider making a switch. You won’t lose any emails, and you will gain new features.

It’s a win-win situation if you choose MailBird – winner of Most popular mail alternative 2020.

  • Compatible with common email services such as Outlook, Gmail , and Yahoo as well as private services.
  • Easily add multiple emails accounts and see them in one unified Inbox
  • Integration with WhatsApp, Dropbox, Twitter, Facebook, Slack , and many more
  • Our favorite: LinkedIn lookup with the app

That’s it. The best alternative to your current email client.

Mailbird

Mailbird

The best email client for Windows
Free trial Visit website

2. Delete Pending emails from Outbox

  1. Find the Outbox on the left pane of the Windows Live Mail window.Fix: Windows Live Mail error 0x8007007A on Windows 10
  2. Select all pending emails that have Pictures attached as albums. (Make sure to keep a backup if it’s something important).
  3. Delete the selected emails.
  4. Compose a new email with text only. Try sending it.

The first thing to try in order to resolve error code 0x8007007A is to delete all pending emails from the Outbox of your Windows Live account.

This solution is particularly for those who getting an error even when trying to send a simple text email via Windows Live mail.

Error code 0x8007007A will most likely not appear anymore. If it does, move onto the next solution.


3. Send images as Attachment, not Album.

  1. On Windows Live mail, compose a new email.
  2. Click on the Attach File icon (the little paper Clip).
  3. Find the picture you want to attach & select it.
    • In case you want to send multiple images in the same email, follow the same steps and when selecting pictures, hold the Ctrl key while selecting the intended pictures.
  4. Once you’ve done this, and added the necessary body and subject to the email, simply send it.

The second thing to try is sending images as attachments and not albums. Doing this will almost certainly resolve Error code 0x8007007A. Follow these steps:

Hopefully this didn’t produce error code 0x8007007A. Just in case it did, move onto the next solution.


4. Remove and reconfigure the WLM account

  1. Open Windows Live mail and go to Tools.
  2. Find and open Accounts from the menu.
  3. Select the email address you intend to remove.
  4. Click the Remove button on the right side of the window.
  5. Click OK to confirm.Fix: Windows Live Mail error 0x8007007A on Windows 10
  6. Now to add your account again, open the same window (Tools > Accounts).
  7. Click the Add button, and select an email account.
  8. Click next and type in your email address, password and display name.Fix: Windows Live Mail error 0x8007007A on Windows 10
  9. Once you’re done, click Next and then Finish.

Removing and reconfiguring your Windows Live mail account could also help resolve error code 0x8007007A.

Try sending an email again. If error code 0x8007007A persists, move onto Solution 4 below.


5. Fix Windows Live Mail

  1. Open Control Panel.
  2. Go to Programs and Features.
  3. Find and select Windows Essentials.
  4. Click on the Uninstall/Change button on the top of the window.Fix: Windows Live Mail error 0x8007007A on Windows 10
  5. In the dialogue that opens, select Repair all Windows Live programs.
  6. Wait until the process completes. Once it does, restart your computer.
  7. Try sending the email again.

Hopefully one of these solutions worked for you. If it didn’t try contacting Microsoft Support.

Also, in case you have any additional troubleshooting steps you deem worth suggesting, feel free to do so in the comments section below. We more than welcome them.


[wl_navigator]

Lenovo ThinkSmart View: Great communications hub, wrong time

Starting at $349

Following the wave of Microsoft Teams’ adoption, Lenovo is introducing its revised Teams-centric dedicated communication hub, the ThinkSmart View.

The View is a dedicated Teams box that is designed to be an office (small or large) single point of chat communications and OnMSFT was given two to test out.

In July the View arrived at my doorstep in a pretty large box given the actual size of the product, but never the less receiving something in the mail has become a highlight of my day in this COVID-19 existence.

The Hardware

Out of the box, there was minimal setup with a single power cord connector and the sleekly designed device itself. The actual software setup for home use is a bit more complicated than just logging into your Teams account, as an admin needs to set up a network and issue credentials specific to the device.

The View is a matte black origami-like design full of triangular folds with the bulk of its weight spread across a semi-triangular base. There is a premium heft to the device that discourages continual movement or repositioning over an extended period. While it is no heavier than a Bluetooth speaker, because of its 1/3 glass construction makeup, I didn’t feel comfortable with handling it beyond my stationery desktop setup.

Thinksmart Origami View

The View houses a 5MP camera with Lenovo’s patented Privacy shutter, an 8-inch IPS display, a 10-Watt speaker system, and dual-array microphones with a manual mute switch and connects via Wi-Fi and Bluetooth technologies.

During my time with the View, I tried to run as many close-to-office-life simulations from my home office as possible to get a feel for how Lenovo’s ThinkSmart View would hold up in an actual conference room. Fortunately, at OnMSFT, we’re Teams enabled outfit, and converting my workflow to the View was painless and, in some cases, a pleasant addition.

Usage

It should be noted, much of what the ThinkSmart View offers can be had with a smartphone or PC from home, but in an office where traveling back and forth between the conference room and an office desk could be made cumbersome with extra hardware, a dedicated communications hub is welcomed.

Thinkview Desktop Cropped

The most important feature of the View is its ability to make and receive calls and from home my tiny home office on questionable Wi-Fi at times, it was exceptional. With dedicated calls, voicemail, and calendar icons that sit in the bottom left corner of the screen throughout most interfaces, making a call was intuitive and easy to accomplish.

Pairing it via Bluetooth to your smartphone or PC also helps with establishing call continuity so you can pick up and end calls across devices.

Once on a call with the View, the audio was also surprising. Instead of the tinny sounds pumped out by laptops, the 10-Watt full-range speaker with 2 passive tweeters the View produced loud and clear audio, and testing on the receiving end the audio picked up by the 360-degree microphone array proved to be similarly unobstructed.

Thinkview Call Cropped

The interface of the View is broken up into three parts that include a dialer screen, a call screen, and a calendar screen. As far as previous chats or shared files, there is limited support for those interfaces, but the bulk of the View’s use cases rely on quick calls and video meetings that leverage a company’s Teams network.

Summary

In a world where several mainstream consumer devices are being outfitted with Zoom support, new Teams dedicated communications hubs feel like a natural progression. However, the Lenovo ThinkSmart View is not as consumer-friendly as say a Google Nest Hub or Amazon Echo and seems to shine more at a conference table than on a home desk.

Thinksmart Desktop Cropped

Prior to social distancing mandates, conference rooms were in need of simplified tools that mitigated the number of fail points during meetings and the ThinkSmart View helps massively in that department. Unfortunately, the conference room has quickly evolved to be practically whatever device can host an app and a decent webcam, and in that world, the ThinkSmart View becomes a super niche device at a steep price point. For the enterprise, a $350 communications hub is par for the course, and one that abstracts the growing clutter of chat apps has a place in business, however, I just think it’s bad timing for the ThinkSmart View to be rolled out.

How to stream NBC Sports online on laptop [Live Streaming]

If you’re on the go and you want to keep up-to-date with the latest news in sports, or even watch live events, then you may be no stranger to NBC Sports. More so, you may already have considered streaming this service on your laptop.

While this idea might sound great on paper, there are some potential drawbacks. For once, streaming NBC Sports outside of the US may appear downright impossible, especially if you lack the right tools for the job.

But don’t worry, we have a few tricks up our sleeves to help you stream NBC Sports from anywhere in the world.

How to watch NBC Sports without cable?

1. If you have a TV subscription

  1. Purchase a Private Internet Access VPN subscription plan.PIA
  2. Download, install and launch the VPN client
  3. Connect to a US server
  4. Head over to the NBC Sports website
  5. Select any event you want to watch on your laptop
  6. Click the Verify Now button to remove temporary access limitationVerify NBC Sports TV provider
  7. Select your TV provider from the listNBC Sports provider list
  8. Click the Full Provider List button if you can’t find it
  9. Log into your TV provider’s website to continue

Note that you won’t be able to stream NBC Sports if your TV subscription doesn’t include NBCSN.

Private Internet Access

Want to remove NBC Sport’s geo-restrictions? PIA could come in handy.
Free Trial Visit Website

Furthermore, you won’t need to pay extra for the service, you just log in on the NBC Sports website with the same credentials you use on the website of your provider.

2. If you don’t have a TV subscription

If you don’t have a TV subscription, you’ll need to do one of the following things:

Either you purchase a TV subscription plan and use it to remove the time limit on NBC Sports, or
Purchase an NBC Sports Gold subscription plan

Assuming that you’ll go with our second suggestion, here’s what you need to do:

  1. Buy a premium VPN subscription plan (we strongly recommend PIA)
  2. Download and install the VPN on your PC
  3. Launch the VPN and connect to a US server
  4. Go to the NBC Sports website
  5. Purchase an NBC Sports Gold subscription plan

Note that NBC Sports Gold lets you purchase different subscription plans based on the sport you prefer. This service comprises the following passes, for both live and on-demand events:

  • PGA Tour Live
  • Indycar Pass
  • Cycling Pass
  • Track Pass
  • Pro Motocross Pass
  • Premier Lacrosse Pass
  • Supercross Pass
  • Supercross + Pro Motocross Package
  • Rugby Pass
  • Track & Field Pass
  • Philly Pass
  • Blazers Pass
  • Figure Skating Pass
  • Snow Pass
  • Speed Skating Pass

You can also purchase multiple sports passes if you’re interested in several sports events. Note that the NBC Sports Gold is already available in the following countries and doesn’t require a VPN:

  • Austria
  • Canada
  • Denmark
  • Germany
  • Ireland
  • Italy
  • Japan
  • Luxembourg
  • Netherlands
  • Spain
  • Sweden
  • Switzerland
  • United Kingdom
  • United States of America

However, you should also know that the content might be different depending on the country you’re accessing it from.

Final thoughts on streaming NBC Sports online

All things considered, if you’re looking for ways to watch NBC Sports online, even from outside the United States, there are a few methods you could use.

If you have a TV subscription, you can simply log in to the NBC Sports website using the same credentials as for the provider’s website. However, note that even then, the service might not be available without a VPN.

If you need an alternative, use Sportzfy TV on PC to watch all your favorite sports content. You can also try some Streameast alternatives, in case the popular platform doesn’t show your favourite sport or competition.

If popular services are unavailable, you can also check our CrackStreams not working guide for troubleshooting tips and streaming alternatives.

Alternatively, you could purchase an NBC Sports Gold plan, which enables you to watch your favorite events, both live or on-demand. On the downside, this too might require you to use a VPN such as PIA.

How to burn MKV files to DVD [Windows 10 & Mac]

If you have downloaded MKV files to your computer or already had a few files and trying to burn it to a DVD, you would need two things. A DVD writer and a DVD burner.

Not all DVD players support MKV format. This is where burning MKV files to DVD come in handy. You can burn MKV files to DVD using DVD ripper tools.

In this article, we explore how to burn MKV files to DVD on Windows 10 and Mac quickly burn large MKV files to DVD.

How do I burn MKV files to DVD in Windows 10?

WinX DVD Author

burn MKV files to DVD

WinX DVD Author is one of the best DVD ripper tools available for Windows 10. The tool is completely free to install and use. It allows you to burn all videos, including MKV file, to a DVD.

Additionally, you can create a menu, insert substiles to your videos, set aspect ratio, and supports encoding systems like PAL and NTSC DVD.

WinX DVD Author supports various input formats, including MP4, VOB, FLV, MOV, and ISO. Additionally, the built-in YouTube download manager helps you to download YouTube videos directly from the app menu.

  • Supports multiple input formats, including MKV
  • Built-in YouTube video download manager
  • Ability to add external subtitles with .srt files.
  • Basic video editor to trim and crop video parts.
WinX DVD Author

WinX DVD Author

Easily burn MKV files to DVD by using this powerful and easy to use software!
Free trial Visit website

Nero Burning ROM

Nero Burning ROM is yet another popular DVD ripping software that can help you convert MKV files to DVD. You can burn music and data to your preferred disc types such as CD, DVD, and Blu-ray as well as add some security to your disc with SecureDisc 4.0 feature

The built-in Gracenote technology helps retain the original album cover and integrate them into the audio file. So, you can browse your playlist without having to recreate it again.

  • Enables copying MKV files to DVD.
  • SecureDisc 4.0 to encrypt your disc data.
  • Nero CoverDesigner to create unique arts for DVDs.
  • Supports multiple audio and video formats.
Nero Burning ROM

Nero Burning ROM

Burn MKV files to DVDs in Windows 10 with this easy to use software option!
Free trialVisit website

Aiseesoft Burnova

burn MKV files to DVD

If you have large MKV files like movies in MKV format, you can burn them to a DVD using Aiseesoft Burnova. Burnova is a premium DVD ripper that can burn MKV video to DVD disc, folder and ISO image file.

To burn MKV to DVD, launch Aiseesoft Burnova. Drag and drop the MKV file to the timeline. Use the edit button to rotate, crop, clip, or add effects to the video. Next, work with the preformatted templates and click Start.

  • Burn MKV videos to DVD.
  • Offers customized output files.
  • Ability to add track and subtitles
  • Basic video editing tools to crop and add effects.
Aiseesoft Burnova

Aiseesoft Burnova

This powerful software ensures the transformation of your MKV file to DVD is done smoothly without loss of quality.
Free trial Visit website

AnyMP4 DVD Ripper

burn MKV files to DVD

This excellent DVD ripper enables you to rip and burn MKV files to DVDs, folders, and ISO image files. AnyMP4 DVD Ripper supports over 500+ digital video and audio formats, including MKV, MP4, MOV, AVI, MP3, etc.

AnyMP4 DVD Ripper can rip original DVD to MPG format without losing quality. It can also clone an uncompressed ISO file and folder without disturbing the original structure.

Like other DVD rippers, AnyMP4 DVD Ripper also offers a few additional features, including the DVD customization option. You can add subtitles, audio track, add filters and adjust effect, add watermark, crop, rotate, merge and cut videos with the built-in video editor.

  • Convert MKV to DVD, folder, and ISO image files.
  • Built-in video editor for DVD customization.
  • Built-in GIF maker, video compressor, and metadata editor.
  • Supports 500+ digital video and audio formats.
AnyMP4 DVD Ripper

AnyMP4 DVD Ripper

This powerful software can transform MKV to DVD with just a few clicks of the mouse!
Fee trial Visit website

DVDFab

burn MKV files to DVD

DVDFab is a feature-rich all-in-one video and DVD solution. Using the tool, you can decrypt, copy, rip and burn DVD, convert audio and video to a different format and remove DRM and Cinavia encryptions.

To burn MKV to video, launch DVDFab. Open the Creator tab and then select the DVD creator. Drag and drop your MKV file to the timeline.

Clicking the wrench icon will bring the up advanced settings menu. Here you can add a title, choose the output format and video quality, and select encoding format and aspect ratio. Click Save to save the changes.

Next, select any of the preformatted templates. Clicking on Set Menu will show more customization options. Click the Start button and then choose the DVD as your source.

DVDFab

DVDFab

This easy to use software transforms MKV to DVD very fast, and the interface is easy to use. Try it now!
Free trial Visit website

The best way to burn MKV to DVD is to use DVD ripper tools like WinX DVD Author.

These apps come with all the necessary tools to not only convert and burn the MKV files but also allows you to make minor adjustment such as adding subtitles to your video.

Explore the apps and let us know your favorite tool in the comments.

You can improve the quality and compatibility of your MKV files before burning them by using MakeMKV software, which creates clean MKV videos from your DVDs and Blu rays for smoother conversion and DVD authoring.


[wl_navigator]

The file size exceeds the limit allowed and cannot be saved

System errors can be a big problem, and many users reported ERROR_FILE_TOO_LARGE errors on their PC.

This error usually displays the following message: The file size exceeds the limit allowed and cannot be saved.

Today we’re going to show you how to fix this error on Windows 10.

How do I fix the file size exceeds the limit allowed error?

1. Use WinZip as a file compression tool

Perhaps the easiest, and the first-on-the-list solution, is to try and compress the respective file or files with a dedicated tool.

WinZip is the most popular app in this segment, with more than one billion users.

With WinZip, you can compress most major formats, such as Zip, Zipx, RAR, 7z, TAR, GZIP, VHD, XZ, and more, so you won’t have any trouble quickly shrinking the size of any file to get rid of or avoid the above-mentioned error.

In case you need further features, WinZip helps with finding, opening, editing, moving, and sharing the files stored on PCs, networks, or cloud services.

It conveniently comes with Dropbox, G-Suite, or OneDrive integrations.

”WinZip”

”WinZip”

”Try
”Try
&aff_sub2=Native” current_url=”true” button_text=”Get it now” image=”https://windowsreport.com/wp-content/uploads/2017/11/WinZip-button-210×160.png”]

2. Modify your registry

  1. Press Windows Key + R and enter regedit. Press Enter or click OK.
  2. Optional: Modifying the registry comes with certain risks, and if you don’t modify it properly you can cause system stability issues to occur. To prevent any potential problems, it’s important to backup your registry. To do that, click on File > Export.
    Select a safe location for your backup. Enter the desired file name, select All as Export range and click on Save.
    After exporting the registry, you can use the exported file to restore everything to the original state if anything goes wrong.
  3. In the left pane navigate to the following location HKEY_LOCAL_MACHINESYSTEMCurrentControlSetServicesWebClientParameters
  4. Locate FileSizeLimitInBytes DWORD in the right pane and double click it.
  5. In the Value data field enter 4294967295 and click OK to save changes.
  6. Close Registry Editor.

After doing that, you just need to restart your PC and the issue should be resolved.

By modifying the registry you’ll change the maximum file size to 4GB. Instead of restarting your PC, some users are recommending restarting the WebClient service. To do that, follow these steps:

  1. Press Windows Key + R and enter services.msc.
  2. Locate the WebClient service and restart it.
  3. Close the Services window.

After you restart the service, changes will be applied and the file size limit will be removed.

3. Scan your PC for viruses

Several users reported that this error can occur due to malware infection.

That’s why we strongly advise you to perform a detailed scan using a dedicated anti-malware program.

To perform this efficiently and get a detailed report of your system’s health status, you should use powerful anti-malware tools. Hence, you can select the best antiviruses for Windows 10.

4. Configure your SharePoint storage

Few users reported that The file size exceeds the limit allowed and cannot be saved message appears with files located in the SharePoint folder.

To fix this issue, users are suggesting configuring your SharePoint storage so it can save larger files.

Apparently, SharePoint has a storage limit, but you can easily change it. After doing that, you should be able to save files without any issues.

5. Set a file size upload limit

  1. Login to SharePoint’s Central Admin and navigate to Central Administration > Application Management > Manage Web Applications.
  2. Select the applications you want to change and click on General Settings.
  3. Once the General Settings opens, you’ll see Maximum upload size value. Change that value to 2047 MB and save changes.

After performing these steps, the error message should be gone.

6. Change the SharePoint web.config file

  1. Open Internet Information Server console on server desktop.
  2. Open the Websites tree and select the desired website. Select Open in Explorer View option.
  3. Locate web.config file in the folder.
  4. Create a copy of that file and use it as a backup in case anything goes wrong. Open the original web.config file with Notepad (or any other text editor).
  5. In the Notepad text, locate the <httpRuntime maxRequestLength=”51200″ /> line and change it to <httpRuntime maxRequestLength=”204800″ />.
  6. Repeat these steps for each server in SharePoint.

7. Increase the machine-level request setting

  1. Open the SharePoint Administrative Command Prompt.
  2. Enter the following command: %windir%system32inetsrv appcmd set config -section:requestFiltering -requestLimits.maxAllowedContentLength:209715200
  3. You should receive a confirmation message after applying this command.

As seen, The file size exceeds the limit allowed and cannot be saved error usually affects SharePoint users. We truly hope that using one of our solutions has been helpful.

We’d appreciate it if you’d tell us which solutions you tried or if you have further suggestions on this topic.

FIX: Dropbox Zip file is too large to download

When the Zip file you receive through a download link exceeds the Dropbox download file limit, occurs the ZIP file is too large to download error message.

Dropbox has a one GB download limit for its folder/file downloads. Thus, Dropbox users can’t download Zip files that exceed one GB directly from their web accounts.

This maximum one GB limit also applies to shared links whether the person downloading the Zip has a Dropbox account or not. So that’s probably why the Zip file is too large.

In order to help you address this, we prepared a list of the most applicable solutions. If you’re having a hard time resolving the issue at hand, make sure to check them out below.

How do I fix the Zip file is too large to download error?

1. Split the Zip into smaller parts

  1. Download and run WinZip.
  2. Open the software, and right-click the Zip you need to split.
  3. Select Split file, and enter a size volume for the split files.
  4. Press the … button, and select to split the file to your My Dropbox desktop folder, if you’ve installed the client software. If you haven’t, you can upload them to Dropbox.com instead.
  5. Press OK.
  6. Set up shared links for each of the split files so the recipient can download them.

If it’s somebody else who can’t download the shared Dropbox Zip, you could also split the Zip up into smaller parts so that they can download each of the smaller files instead.

Splitting the Zip into smaller parts is a great way to cut it down to size for somebody to download from a Dropbox link, and that might also come in handy for uploading files to cloud storage.

Alternatively, adding the client software to Windows will enable you to open the Zip via the synced desktop Dropbox folder.

2. Check your hard disk storage space

  1. Press the File Explorer button on the Windows 10 taskbar.
  2. Click This PC to open an overview of devices and drives.
  3. The C: drive has a bar beside it that shows you your storage space.
  4. You can check if there’s enough HDD storage space for the Zip to download.

If the Zip file you’re trying to download from Dropbox doesn’t eclipse one GB, then your hard disk might not have sufficient space for it.

3. Add the Dropbox desktop software client to Windows

zip file too large to download
  1. Download Dropbox.
  2. Start the Dropbox installer to add the software to your desktop or laptop, and run it.
  3. Open the shared Dropbox folder link again and press the Add to my Dropbox option.
  4. Press Open instead of Download for the shared Zip in Dropbox.com.
  5. Click that button to open the Zip in File Explorer.

The Dropbox desktop client software doesn’t have the same download limit restrictions as Dropbox.com.

With that, you, or whoever you’re sharing the Zip with, can select an Add to my Dropbox option on the shared file preview.

Once you’ve added the Zip to a Dropbox account, it will automatically sync with the Dropbox folder on PC from which you can open it.

Don’t forget to tell us whether one of the steps gets you through the problem. You can do so in the comments section below.

There are numerous services online, and we covered all sorts of issues in our Web apps Hub, so we encourage you to check it out. Software errors are less dreadful if you’re using our expert advice in the Troubleshooting section.

How to split files in Windows 10

Windows 10’s File Explorer doesn’t include any split file options. They would be handy as users constantly look for ways to cut a file down into smaller pieces.

This is essential for backing up and sending larger files, and there are numerous third-party software packages available for Windows 10 that enable you to split files into smaller parts. 

Just take a closer look at our top picks below.

How can I split files in Windows 10?

1. Splitting files with WinZip

install WinZip
Since you’re here, you probably need to install a great and easy-to-use tool for splitting files. WinZip isn’t just a modern looking application; it’s simply the perfect one for this job.

Besides the fact that it supports a variety of different archive types, it always protects your data with banking-level encryption.

Rest assured that this isn’t the only advanced feature that’s waiting for you. Users also appreciate the easy management of files not only on their PC but on network and clouds as well.

As for simple procedures such as splitting files and zipping them, you can’t find any other tool with a better overall speed.

”WinZip”

”WinZip”

”Looking
”Free
&aff_sub2=Native” current_url=”true” button_text=”Get it now” image=”https://windowsreport.com/wp-content/uploads/2020/09/winzip-logo-210×160.png”]

2. Splitting files with Icecream PDF Split & Merge

  1. To easily split and merge unlimited files, click Merge to begin the procedure.time to click Merge
  2. Then, click Add file or easily drag and drop the file you have in mind.
  3. While in PDF Split & Merge, type a new name for the selected file.
  4. Press the Merge button and you’re good to go.green Merge button

If you’re looking for a powerful tool to easily split files in Windows 10, you’ll probably love Icecream PDF Split & Merge.

Do note that it comes with many advanced features, such as strong encryption or 50+ languages support. In spite of that, it doesn’t forget the basics, either.

With drag-and-drop support for arranging files with ease, passwords for both Split and Merge modes, and Windows/Mac OS compatibility, it’s definitely worth downloading (if you don’t have it already.)

Icecream PDF Split & Merge

Icecream PDF Split & Merge

Splitting files in Windows 10 is incredibly intuitive when using Icecream PDF Split & Merge. Ready to try it out?
Get it free Visit website

3. Splitting documents with PDF Splitter Joiner

  1. First, download the PDF Splitter Joiner tool for Windows 10. try out PDF Splitter Joiner
  2. With this software, you can split text documents, videos, and audio files. Click the Splitter tab and press the Input File button to select a file to split (or select the File Splitter Joiner option from file context menus). Note that file sizes must eclipse one megabyte.
  3. Next, press the Output Folder button to choose a folder to save the split files in.
  4. Then choose how to split the file. Click Split Equal Parts to split the file into equal-sized parts. Enter how many files to split the file to.
  5. Alternatively, you could select the Split Volume option. With that, you can specify the approximate size of each of the split files. For example, a 10-megabyte video would split into 10 files if you entered 1 MB there.
  6. Press the Split button to cut up the file.
  7. The split files will save to the selected output folder.
  8. Open that folder in File Explorer.
  9. Open one of the file segments by right-clicking it and selecting Open with from the context menu.
  10. Then, select to open it with a suitable software package. For example, you can play audio and video files with Windows Media Player.

4. Splitting text documents with HJ-Split

  1. If you need to split text documents less than one megabyte, grab HJ-Split.
  2. Unzip its zipped folder by opening it in File Explorer and selecting Extract all.
  3. Enter a path for the extracted folder. You can open the window shown below from the extracted folder.
  4. Click Split to open the options below.split documents3
  5. Press the Input File button to select a text document to split.
  6. Press the Output button to select where the split files will save to.
  7. Enter a value in the Split file size text box. For example, to split a 4KB file in two exactly you would enter 2 there.
  8. Then, press the Start button to cut the file up. Note that the software works best with TXT files, so if you can’t open the split files in a word processor convert the original document’s format to TXT before splitting it.
  9. Open the split documents by right-clicking them and selecting Open with. Choose suitable software to open the document with. It’s best to select the default file format packages.

5. Splitting PDFs with PDF Shaper

  1. If you need to split a PDF document, download PDF Shaper. More precisely, click the Download button under PDF Shaper Free to save the setup wizard and install the software. Open the program’s window below.split documents5
  2. Click Content > Split to open the window in the snapshot below.split documents4
  3. Click the Files tab and press Add to select a PDF to split.
  4. Select the Options tab, and enter a value in the Split by the number of files box. That’s the number of split files you’ll get.
  5. Then, press the Process button to split the PDF.

So those are four great software tools you can split files up with. Those programs enable you to split up audio, video, text documents, and PDFs.

Then, you can also join files together with HJ-Split or PDF Splitter Joiner and not only.

[wl_navigator]

Best FIPS 140-2 encryption software for Windows 10/11

FIPS, also known as  the Federal Information Processing Standard, is an official accreditation program that allows software to be included in categories based on the cryptographic power each of them has.

This enables you, the user, to easily choose between the levels of protection that you feel you need for your company, just by checking the FIPS 140-2 accreditation validation level.

Using this type of software enables you to protect your company from any third-party interests, maintain confidentiality, and also the integrity of the information stored on your servers/PC hard-drives.

For these reasons, in today’s article we will discuss some of the best software options that support FIPS 140-2 encryption on Windows 10, to ensure you’ll never be exposed to any risks online.

What is the best software that offers FIPS 140-2 encryption?

WinZip

WinZip is our top pick when it comes to software that enables you to easily use FIPS 140-2 encryption, and it’s by far the best option on the market at this point in time.

This powerful software is incredibly easy to use because of its intuitive user interface, but don’t let that fool you into thinking that the capabilities are not up-to-par with the latest innovations.

Hiding behind its apparent simplicity, WinZip contains an absolute powerhouse of features that will make other software options get out of its way from the start.

Besides the ability to encrypt files by using the FIPS 140-2 encryption, this software enables you to compress large files without loss of quality, can split archives and merge them, add watermarks to images, and even convert files to PDF.

The incredible versatility contained in this easy to use and small-sized software can leave anybody speechless, but it also contains some other useful features:

  • Works perfectly on Mac, Windows, and Linux OSs
  • Full compatibility with Dropbox, GoogleDrive, and SkyDrive
  • Can easily add links to files via email, IM, and social media
  • Amazing compression quality and processing speed

”WinZip”

”WinZip”

”Compress
”Free
&aff_sub2=Native” current_url=”true” button_text=”Get it now” image=”https://windowsreport.com/wp-content/uploads/2017/11/WinZip-button-210×160.png”]

ESET Endpoint Protection

The Endpoint Protection software from ESET is another very good software option to encrypt your files and folder with a FIPS 140-2 standard.

Beyond the capability to encrypt files easily and efficiently, this powerful software also offers great anti-phishing support and has one of the best detections rates on the market.

One of the most important and useful features that Endpoint Protection contains it’s its ability to be controlled remotely from anywhere on the planet. All you have to do if you’re on vacation is to remember the log-in details for your account and log into the software to change any sort of settings for your PC back home.

Because of this constant connection, you also get notified of any pushing attempts or logins while you’re away from your PC.

Here are some other useful features found in this powerful software:

  • Allows you access to useful forensics tools
  • Software firewall
  • Network attack protection
  • Full support for Microsoft Hyper-V and VMWare ESXi (local), and Microsoft Azure, Amazon Web Services (public cloud)
  • Very easy setup
ESET Endpoint Protection

ESET Endpoint Protection

Encrypt your database with the FIPS 140-2 standard with ease by using this incredibly powerful software.
Free trial Visit website

McAfee Total Protection

McAfee Total Protection not only offers you top-of-the-range FIPS 140-2 encryption, but it’s packed in a beautifully designed and easy to understand user interface to top it off.

This great software protects you from a wide range of viruses, malware, spyware and ransomware attacks, while also protecting your privacy online.

The native encryption features of this software ensures full functionality on Mac OS X File fault, and also Microsoft BitLocker on Windows, so you never have to worry about this elements no matter what platform you use.

Some other useful features:

  • Driver encryption
  • File encryption
  • Easy native encryption management from one hub
  • Automated encryption process
  • Advanced identification and verification of multifactor authentication

⇒ Get McAfee Total Protection

We hope that these software options have given you the chance to make an informed decision about the best FIPS 140-2 encryption software on the market.

Feel free to share your opinion with us by using the comment section found below this guide.

[wl_navigator]

FIX: Zip file not found or no read permission error

Encountering the Zip file not found or no read permission error can be very annoying, especially if you’re trying to archive a file from a  folder that is supposed to work.

The error appears whenever you try to use the right-click sub-menu to compress a folder easily. Here is what one user had to say about this problem on the Microsoft Answers forum:

Since upgrading to Windows 10 I have not been able to create a zipped folder using the explorer options Send to and Compressed (zipped) folder. The error given is File not found or no read permission.

This error is occurring for folders off the root directory C: however does not seem to occur for subfolders.

To find out more about the resolution for this error, read through the entirety of this guide.

How can I fix the Zip file not found or no read permission error on Windows 10?

1. Use WinZip


This powerful software resolves this problem once and for all by replacing the common sub-menu with one made by WinZip.

The feature that stands out the most is the versatility and ease of use of the user interface, allowing you very quick access to any option.

Amongst the plethora of features included in this simple software, you get amazing processing speeds for creating, merging, and splitting archives, like no other software on the market.

It is also worth mentioning that this software enables you to also encrypt your files, and works seamlessly with OneDrive, Dropbox, and Google Drive.

To resolve the pesky Zip file not found or no read permission issue, all you have to do is follow these steps:

  1. Download and install WinZip.
  2. Navigate to the folder/file location on your hard-drive.
  3. Select the file/files you want to add to the archive.
  4. Right-click the selection and hover over the WinZip option.
  5. Choose Add/Move to zip file.
  6. Follow the on-screen instructions to create the archive easily.

”WinZip”

”WinZip”

”Resolve
”Free
&aff_sub2=Native” current_url=”true” button_text=”Get it now” image=”https://windowsreport.com/wp-content/uploads/2017/11/WinZip-button-210×160.png”]

2. Create a new User Account

  1. Click the Start menu and choose Settings.
  2. Select Accounts, and then click the Other User Accounts option.
  3. Choose Add an Account.
  4. Type a user name and press Next.
  5. Click Finish.

Note:  After this process is completed, you can simply log out of the account you’re currently using, and log into the new one you just created.


3. Close any files open in another program


Some users have mentioned that the issue was caused by a file opened in another program that’s found in the directory in which you’re trying to create the zip file.

To resolve this issue, you can simply make sure to close all the software running in the background, or make sure that the location is not in use.


4. Restart your PC


Even though it might seem like a solution to easy to be true, sometimes the issue mentioned in this guide is caused by some registry files that haven’t been properly refreshed.

For this reason, and because users had good feedback about this method, restarting your laptop/PC, and then attempting the same steps that cause the error might result in the files being archived without issues.


5. Re-install Windows


In the case of some users, it seems that the problem was caused by the way they installed Windows 10.

If you know that you upgraded to Windows 10 from the previous Windows OS, and didn’t perform a clean install, this might be causing the issue.

Even though this is more of a workaround, this method can save you hours of trouble, even though it implies waiting for the Windows installation process to complete.


We hope this guide helped resolve this issue once and for all.

If you have any suggestions, or if you simply want to share your experience with us, don’t hesitate to use the comment section found below this guide.

[wl_navigator]

FIX: Among Us keeps disconnecting on PC

Among Us is a popular multiplayer game on both PC and handled gaming devices like smartphones. However, with the popularity, the game is causing some issues as it keeps disconnecting on PCs.

The disconnection issue usually occurs due to poor internet connection. Fortunately, you can fix most of the connectivity issues by performing a few quick troubleshooting steps.

In this article, we explore a few troubleshooting steps to help you fix the Among Us keep disconnecting on PC issues and get you back online.

What can I do if Among Us keeping disconnecting on Windows 10?

1. Change server region

Among Us keeps disconnecting
  1. Launch Among Us on your PC.
  2. Click the little Globe button in the right corner of the game.
  3. Go through all the servers available and select the one that you think is less populated.

While this is a preferred solution for server error on Among Us, it should also fix any connection issue occurring due to server outage. It is a bit of trial and error, so try to select different regions to find the best one for you.

A great and more convenient alternative would be to use a private network equipped with features dedicated to gamers, respectively a Gamers Private Network (GPU).

This service optimizes game connection data, without changing your network settings or masking your IP address. Moreover, its advanced technology reduces latency, packet loss, and ping, enhancing your Among Us gaming sessions exponentially.

WTFast

Play Among Us without interruptions or lag with this fast and advanced VPN service!
Try it now Visit website

2.  Run Windows network troubleshooter

Among Us keeps disconnecting
  1. Press the Windows key + I.
  2. Click on Update & Security.
  3. Open the Troubleshoot tab from the left pane.
  4. Scroll down and click on the Additional troubleshooters’ link.
  5. Click on Internet Connections.
  6. Click on the Run the troubleshooter button.
  7. The troubleshooter will scan for the issues and recommend some fixes.
  8. Apply the fixes and check for any improvements.

3. Clear DNS cache

Among Us keeps disconnecting
  1. Press the Windows key, and type cmd.
  2. Right-click on Command Prompt and select Open as Administrator
  3. In the Command Prompt window, enter the following command and hit enter one by one.
    netsh int ip reset
    netsh advfirewall reset
    netsh winsock reset
    ipconfig /flushdns
    ipconfig /release
  4. Wait for the success message and close the Command Prompt.

Restart the computer and then launch Among Us on Steam and check for any improvements.


4. Change DNS server

Among Us keeps disconnecting
  1. Press the Windows key + R.
  2. Type control and click OK.
  3. Click on Network and Internet.
  4. Open Network and Sharing Center.
  5. From the left pane, click on Change adapter settings.
  6. Right-click on your network adapter and select Properties.
  7. Scroll down and double-click on Internet Protocol Version 4 (TCP/IPv4).
  8. Select Use the following DNS server addresses option.
  9. Enter the following DNS server address in the Preferred and Alternate DNS server field:
    8.8.8.
    8.8.4.4.
  10. Check ‘Validate settings upon exit.’
  11. Click OK to save the changes.

Now restart your computer. Launch Steam and check if the disconnection issues in Among Us is resolved. If it continues, check your home network for connection problems.


5. Troubleshoot home network

Game disconnects on PC

If you don’t have a stable connection, it can cause the game to disconnect from the server. Use speed testing tools to check if you have a stable connection. A quick power cycle can fix several issues with the network router.

  1. Make sure the router is powered on.
  2. Disconnect the power cord and ethernet cable from your router.
  3. Leave the device idle for a few minutes.
  4. Reconnect the cables and wait till the lights stop blinking.
  5. Connect your PC to the network and try to launch Among Us.

The Among Us keeps disconnecting on PC problems can be triggered due to server issues. You can fix the problem by changing the game server or using a public DNS server address.

You can also follow our guide on how to play Among Us on Windows to confirm your setup and avoid basic configuration issues before you start troubleshooting disconnects.

Do let us know which method helped you resolve the problem in the comments.

[wl_navigator]

FIX: Among Us keeps crashing & freezing on PC?

Among Us is a popular multiplayer social deduction game available on multiple platforms. However, several PC users have reported the game to be crashing and freezing when launching and playing.

The crashes and freezes can be triggered due to a glitch in the game or Steam issues.

If you are also experiencing the Among Us keeps crashing and freezing on PC issue, here is how to fix it with a few quick steps.

What can I do if Among US keeps crashing and freezing on PC?

1. Verify integrity of Steam files

Among Us keeps crashing

  1. Launch Steam from the desktop.
  2. Open the Library tab from the top menu.
  3. Right-click on Among Us from the left pane.
  4. Select Properties.
  5. In the Properties window, open the Local Files tab.
  6. Click on Verify Integrity of Game Files.
  7. Steam will scan and validate the game files. And fix any issues with the game files.

Click the Close button and then close Steam. Relaunch Steam and launch Among Us to see if the issue is resolved.

Verifying the integrity of game files should help if you are encountering the ‘You are running an older version of the game, please update’ error.

If the problem persists, try updating your Steam client to see if that resolves the issue.

Among Us keeps crashing

  1. Launch Steam.
  2. Click on Steam and select Check for Steam client updates.
  3. Download and install the available update.
  4. Relaunch the app and open Among Us to check for any improvements.

2. Disable Max FPS limit

Among Us keeps crashing

  1. Launch Nvidia Control Panel.
  2. Open Manage 3D Settings option.
  3. Go to Programs Settings.
  4. Select Among Us from the list.
  5. Here, you have to disable the Max FPS limit option.

Setting the right FPS value is a bit of a trial and error to find which value works best for your GPU, and the game works without crashing. Change the value a few times to find the right FPS limit for Among Us.

Change power management settings.

Among Us keeps crashing

  1. Open Nvidia Control Panel.
  2. Go to Manage 3D settings and click Program Settings.
  3. Select the game and change the following settings:
    Set Power Management to Prefer Maximum Performance
    Set Texture filtering to High Performance
    Next, Set Vertical Syn to On
  4. Close the control panel and check for any improvements.

GPU Overclocking

In some instances, the freezing issue is triggered when launching the game on a GPU overclocked machine. If you are running an OC version of GPU, check if it is overclocked.

Reverting to the default GPU frequencies should help fix any crash issues. If you are unwilling to mess with your GPU frequencies, limiting the Max FPS output should fix the issue.


3. Run in compatibility mode

Among Us keeps Freezing

  1. Right-click on the game’s exe file.
  2. Select Properties.
  3. Open the Compatibility tab.
  4. Under the Setting section, check Run this program as an administrator.
  5. Click Apply and then click OK to save the changes.

Run the game again and check for any improvements. Check your antivirus and firewall if it is blocking the connection.

Disable firewall and antivirus

Among Us freezing issues

  1. Press the Windows key + I.
  2. Click on Settings.
  3. Go to Updates & Security.
  4. Open Windows Security.
  5. Click on Firewall and network connection.
  6. Open your currently active network profile.
  7. Toggle the switch to turn off Windows Defender Firewall.

To disable your antivirus, right-click on the antivirus icon from the system tray and select the available option to turn off antivirus.

Launch Among Us and check if the problem persists. Make sure to enable the firewall as well your antivirus once you are done troubleshooting the problem.

The Among Us keeps crashing & freezing on PC issue can occur due to GPU overclocking or game incompatibility. Follow the steps in the article one by one to fix the error. Make sure to leave a comment if you have a tip to fix this error.

[wl_navigator]

How to edit saved passwords in Chrome

Google Chrome lets you easily log in to websites by auto-filling your login details. The desktop version didn’t offer a way to edit passwords, yet things are about to change.

We had seen the code change and now, Chrome is finalizing its work on a new feature to give you the opportunity to edit any of the previously saved passwords.

Since the project is almost complete and Google developers are solving the identified bugs, users can already start testing it in the Chrome Beta builds.

Doing so is rather convenient, especially when Google Chrome remains the ideal choice in terms of browsers when it comes to protecting your privacy.

No saved password is ever exposed. More precisely, it protects your private data from anyone else who uses your personal computer, as well as from other threats on the Internet.

How to save passwords on Chrome?

Google Chrome, like pretty much any other browser in the market, lets you save the username and password for certain websites that you frequently visit.

If that’s your intention as well and you need a quick reminder, you simply need to open a window or tab in Chrome and click on your profile in the top-right corner of the screen.

You may now select Passwords, then toggle on the Offer to save passwords option.

Offer to save passwords
You can now start saving all passwords to your Google account and later on, if you happen to change your mind, edit them with ease.


Google Chrome is not saving passwords? Count on us to solve the problem.


How can I edit previously saved passwords in Chrome?

  1. Start the procedure by downloading the Chrome Beta for Desktop.
  2. Install it into your PC.
  3. In the address bar, type the following and press Enter: chrome://flags/#edit-passwords-in-settings
  4. Enable to Edit passwords in Settings.
  5. When prompted, relaunch the browser.
  6. With the browser restarted, go into this page: chrome://settings/passwords
  7. While here, click on the three vertical dots menu next to your saved credentials.
  8. Select Edit password and you’re free to make the desired changes.

In the past, all password changes on the desktop browser included deleting the previously saved credentials and then logging back into a site with the new password.

Fortunately, things are about to get a lot easier. This Google Chrome feature to edit saved passwords will be released along with Chrome 86.

Since it goes to Stable in the next few days, it’s just a matter of waiting. Let us know if you’re excited about the upcoming feature in the comments area below.

[wl_navigator]

How to bypass & unlock DVD region codes the easy way

If you ever bought a DVD from another region and it shows incorrect region code when playing, it is most likely region locked. So, how do you bypass DVD region codes?

Similar to OTT platforms, some multimedia contents like the TV shows, Movies, and videos can be region restricted. Since the DVD content is region restricted, you can only bypass this restriction by ripping DVDs to digital files.

In this article, we explore how to bypass & unlock DVD region codes with ease on your Windows and Mac system.

How can I change the region code on DVD?

1. Rip region-locked DVDs using a ripper tool

Region locking makes no effect while ripping or playing back the final rip. It only impacts physical disc playback.

The ability to rip them is dependent on your disc drive and the discs themselves. If your drive can read them, you’re ready to go; however, many drives are region locked and can not read discs from another region.

A DVD ripper utility allows you to unlock encrypted and region-locked DVDs by converting DVD contents to other formats.

Apart from converting DVD to MP4, a DVD ripper can be used to back up the DVD collection and also Rip DVD for playing on iPhone and Android devices.

When you put a disc into some drives, you can change the region, but be careful because the number of times you can change is typically limited in hardware, and you may be stuck in an area you don’t want.

2. Change DVD player region code

  1. Make sure the DVD player is powered on.
  2. Next, open the DVD tray, but don’t insert a DVD yet.
  3. Press the Setup button the DVD player remote.
  4. Go to Preferences and then choose Region on the screen.
  5. Depending on the region the DVD is locked to, select Region 0/9.

If you only see Region 0/8, it means your DVD Player does not support another region apart from the one that comes under Region 1-8.

When changing the region, it is important to note that most of the DVD players have limitations on changing the region. In most cases, you can change the region for about five-times.

Once you have exhausted the limit, your DVD player will automatically set the last region as the default region.

DVD Region Codes:

  1. R1 – Canada, the U.S., and its territories.
  2. R2 – Japan, Europe (such as the UK), South Africa, the Middle East (including Egypt), and Greenland.
  3. R3 – South East Asia, and East Asia (including Hong Kong).
  4. R4 – Australia, New Zealand, the Pacific Islands, Central America, Mexico, South America, and the Caribbean.
  5. R5 – Eastern Europe, Russia, India, Africa, North Korea, and Mongolia.
  6. R6 – China.
  7. R7 – reserved for unspecified special use.
  8. R 8 – Special international venues for air and oceanic travel.
  9. R 0, 9, or Region ALL — worldwide.

3. Use region DVD hack codes

You can also use DVD hacks to region unlock your DVD. To perform this hack, you need to access hack codes for your DVD player, depending on the DVD maker. Here’s how to unlock the DVD region for Samsung DVD players.

  1. Power on the DVD player and make sure the tray is closed without disc.
  2. Press the Repeat button on the remote.
  3. Enter one of the following codes depending on the region you are in:
    R1 – 29334
    R2 – 38767
    R3 – 56732
    R4 – 76884
    R5 – 53814
    R6 – 24462
  4. If you are in Region 2, enter 38767, followed by the region code 1-6 for the DVD you have.
  5. You can also press 9 if you want to make the DVD player region-free.

So, these are the three ways to bypass DVD region codes for your region-locked DVD. While WinX DVD Ripper Platinum offers an easy way to bypass the region restrictions, other methods are useful if you want to use the DVD itself.

[wl_navigator]