Microsoft Teams for desktop is getting language-aware spellchecking support this month

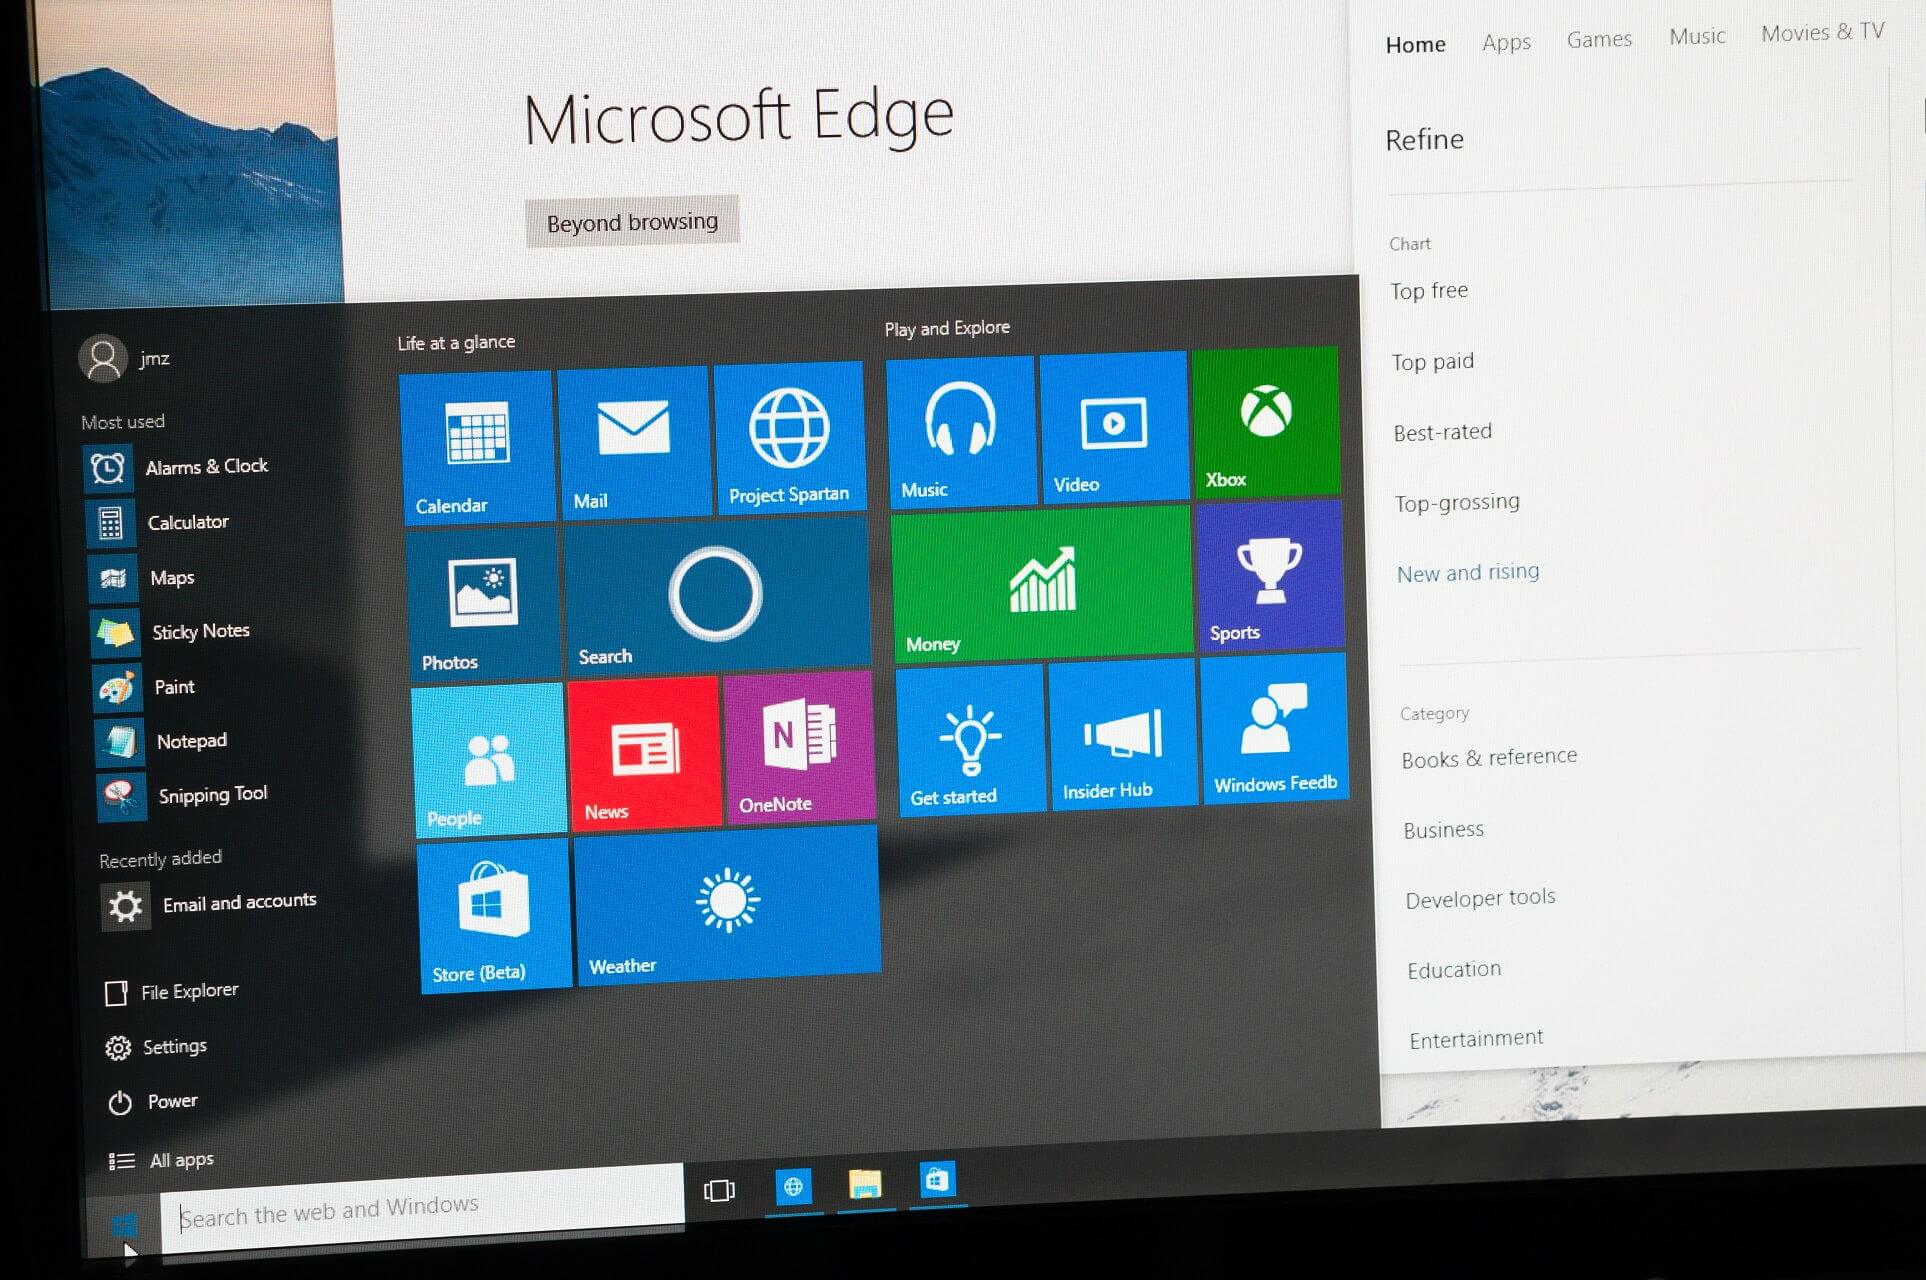
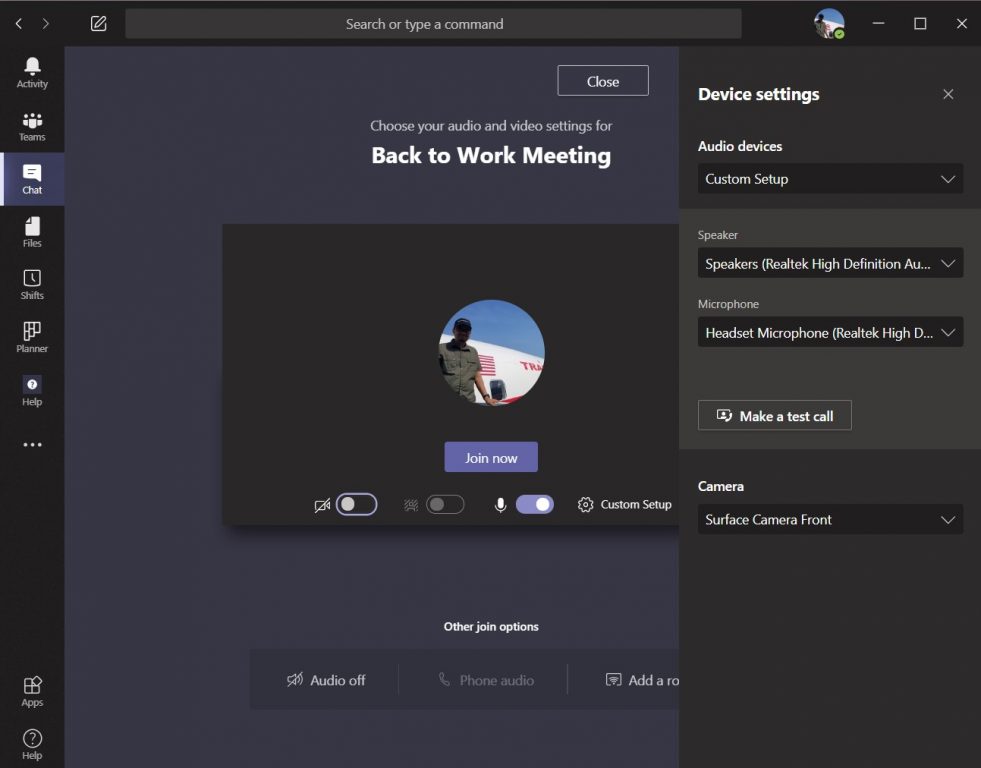
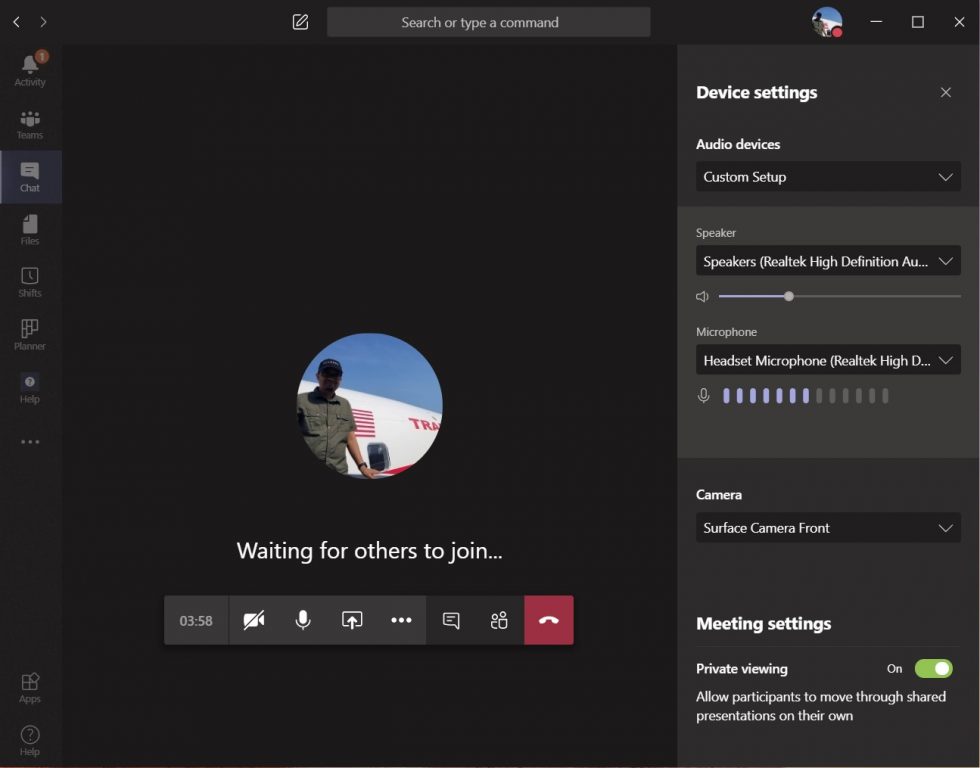
To make it easier for users to communicate using multiple languages with each other, Microsoft is introducing language-aware spellchecking support in Microsoft Teams. The company took to the Microsoft 365 Admin Center this morning to announce that the feature will initially be available at the end of June for the Windows Desktop client only, and its general availability is expected by the end of July.

Over two years in the making now, this is a key improvement to the existing Teams Desktop spellchecking feature, as Microsoft Teams could only provide proofing in the English language. The new functionality should make it “language-aware” in order to improve the overall Messaging experience for bilingual & multilingual users across the globe.

Once the new spellchecking experience rolls out, users who chat in different languages will see spellchecking relevant to the language they will be currently using while typing a message. Microsoft said that the feature will use their active keyboard language settings as default, but as soon as the user switches their keyboard language, spellchecking will automatically switch to the relevant language.

According to Microsoft, message language auto-detection is completely client-side, and your messages won’t be stored on any web server. However, the Redmond giant didn’t provide a firm deadline for language-aware spellchecking support for Linux and Mac Desktop clients and noted that it’s currently under investigation.

Seeing the Twitter internal server error? Try these methods

One of the most frustrating aspects of any app is vague errors that don’t point toward a cause or a solution. When it comes to Twitter, users reported getting an annoying Internal Server Error message on various instances.

It seems that the app crashes mostly when it’s used in a faulty browser, with the least number of incidences happening in the Android Twitter app.

Check out our best web browsers list for an exceptional Twitter experience.

On the other hand, users complained of getting this error when trying to perform basic actions such as tweeting anything, opening DMs, uploading images, or uploading videos.

The problem is nonetheless relatively widespread and inconsistent in terms of reproduction patterns. As a result, the error can occur whether you are using Firefox, Chrome, or Internet Explorer and whether you are based in the US or Japan.


What can I do if Twitter returns an Internal Server Error?

The short answer is you can’t do much, unfortunately.

Twitter‘s general explanation for the Internal Server Error is that something is broken and that it is usually a temporary error. So you can only be patient and retry several times until you are successful.

General troubleshooting recommendations also include clearing browser cookies&cache, resetting the app or log out and fully close the app, then log back in. However, any of these proved of little help.

Additionally, Twitter is usually responsive and notifies users if their servers are down or something similar on the official Twitter page. So be sure to check for notifications – as mentioned, the error doesn’t usually affect the login process, but other processes.

If Twitter’s servers look fine but certain UI actions still fail (for example, the Show button won’t expand tweets), try this related fix: Twitter Show Button Not Working.

When it comes to photo or video uploading (sometimes this also applied to change your profile photo), it seems that Twiter can sometimes be picky about the size of the respective media. So try to repeatedly resize or adjust until you manage to upload.

Contact Twitter support

In the end, if nothing proves helpful, we recommend reporting the issues directly to Twitter, via their support page, with all the necessary details.

If the error occurs in a developer environment, there’s a separate forum dedicated to developer errors as well.


Have you found other solutions to the Internal server error message on Twitter? If so, please let us know in the comments section below.


[wl_navigator]

How to get a DisplayFusion License Key at the Cheapest Price

We live in an age where multi-monitor setups are a common thing, especially in business environments, or on gaming setups.

As such, new ways of organizing yourself while using such setups can greatly improve the setup’s potential for increasing productivity.

That being said, no software tool on the market is better at helping you achieve this than DisplayFusion.

The article below will show you exactly what you need to do in order to get DisplayFusion at the cheapest price possible so that your increase in work productivity doesn’t come at too much of a cost.

What is DisplayFusion?

In simple terms, DisplayFusion is a software app that can enhance your multi-monitor experience. It does this by adding new and unique features that can make multiple monitors feel like one, while also providing you with better controls.

These come in the form of customizable hotkeys, multi-monitor taskbars, or title bar buttons.

Note: For more detailed information on this amazing tool, check out our in-depth DisplayFusion Review.

How do I get the best deals for DisplayFusion?

1. Use a VPN to check for price differences

One way of getting the best deals on anything you buy online is to use a VPN and check the prices from different locations.

For example, if you log in from Europe and notice that it costs €25, and if you use a VPN set for the USA and notice that a program costs $25, buying it from the US is actually better after conversion.

As such, a solid VPN service can end up saving you some serious money in the long run, especially when it comes to large purchases.

If you want a VPN service that can easily allow you to access better DisplayFusion prices, there are various VPN tools you can choose from but we recommend ExpressVPN.

It can offer thousands of servers distributed in 94 countries worldwide. So, you have unlimited possibilities for the best offers out there.

By choosing ExpressVPN software you can switch locations constantly to access and benefit from blocked services around the globe.

Therefore, you should take action using a valuable VPN solution to catch fortunate prices for DisplayFusion.

ExpressVPN

Easily access thousands of servers and find the best price for DisplayFusion.
Free Trial Visit Website

2. Wait for seasonal sales and coupons to buy it

2.1 Download the program when a sale is on

Display Fusion is known for its occasional sales during which they cut prices by around 50%. This means that for a limited time only, you get to enjoy any of the DisplayFusion packages at half the price.

Note: Keep in mind that these sales are temporary, but they do happen several times a year. As such, make sure to visit their website to check out whether a sale is happening or not.

2.2 Upgrade to a paid license whenever a sale is on

  1. Launch DisplayFusion Trail version
  2. Select the License Key tab
  3. Choose Buy a License
  4. Choose one of the offers

DisplayFusion can be tested using a trial version. While a trial does imply that you can use it indefinitely and also benefit from updates, there are plenty of features hidden behind a paywall.

As such, simply download DisplayFusion whenever you can and simply upgrade to the licensed version whenever a sale is on.

By following these tips, you should be able to get the best prices for DisplayFusion and enjoy the most of what your multi-monitor setup has to offer.

For more tips and tricks on how to get the best price for certain products and services, leave us a message in the comments section below.

For features, setup tips, and pricing basics, see our DisplayFusion guide before hunting for discounts.

Microsoft releases new Xbox Series X console ad highlighting 120fps gameplay and confirmed games

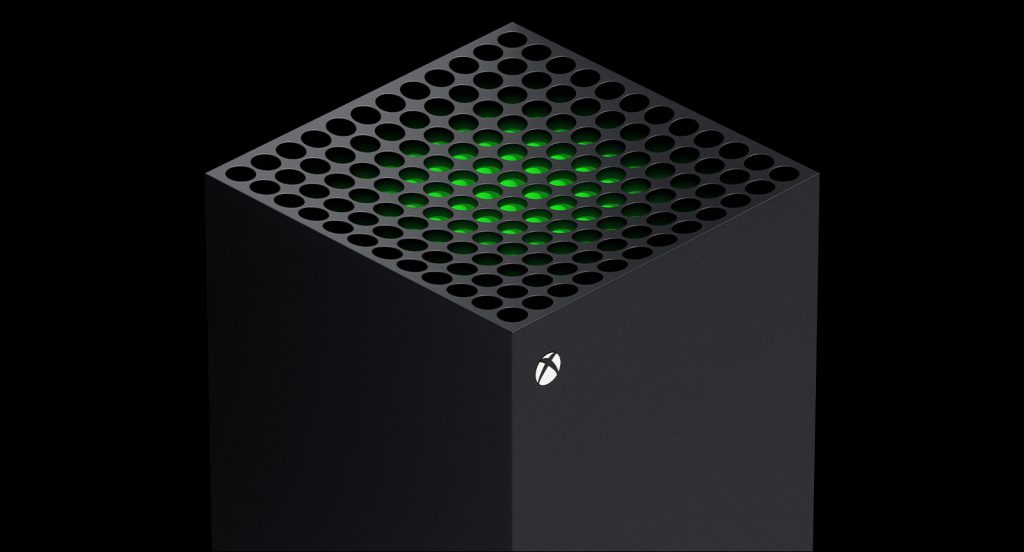
Microsoft today released a new commercial for their upcoming Xbox Series X video game console focusing on the Optimized for Xbox Series X badge that will accompany some titles on the platform.

This ad, which can be watched below, and an accompanying blog post remind gamers that not all new video games will earn this badge, only titles that take full advantage of the Xbox Series X hardware and aim for 4K resolution and at least 60fps (frames per second) will qualify.

Emphasis on the Xbox Series X’s capability for 120fps is also made with DiRT 5 being one such game that will support this framerate.

“DIRT 5 is a fast, action-packed amplified off-road racing game and being able to play it with 120fps options on Xbox Series X is incredible,” Codemasters’ David Springate is quoted as saying in the blog post. “The power of Series X means that the game looks stunning at 60fps, and we’re also able to offer amazingly smooth, responsive gameplay at 120fps while still looking gorgeous. Racing fans know frame rate is king and DIRT 5 will deliver on this. Players will experience the strongest sense of speed and responsiveness at the highest frame rate. It’s such a great, smooth experience – I hadn’t experienced another racer like it.”

A list of confirmed Optimized for Xbox Series X titles has also been released. They are as follows:

  • Assassin’s Creed Valhalla
  • Bright Memory Infinite
  • Call of the Sea
  • Chivalry 2
  • Chorus
  • Cyberpunk 2077
  • Destiny 2
  • DiRT 5
  • FIFA 21
  • Gears 5
  • Halo Infinite
  • Hitman 3
  • Madden NFL 21
  • Marvel’s Avengers
  • Outriders
  • Scarlet Nexus
  • Scorn
  • Second Extinction
  • The Ascent
  • The Medium
  • Vampire: The Masquerade – Bloodlines 2
  • Yakuza: Like a Dragon

This list is expected to grow as more Xbox One titles are upgraded by developers and additional games are created with the Xbox Series X console in mind.

Are you excited for the Xbox Series X? Is framerate important to you? Share your thoughts with the community in the comments below and then follow us on Pinterest and Twitter for more Xbox Series X news and check out all of our latest Xbox news coverage here.

How to move Overwatch to another drive [FULL GUIDE]

When it comes to multiplayer first-person shooters, Overwatch is one of the best-known names.  In the game, two teams of six players compete for control points on a map. Players love it for its mixture of unique characters, engaged in dynamic action. Graphics is excellent and maps abound in stunning details, mad ein the same quality you would expect from a typical Blizzard game.

However, for different reasons, you may have to move Overwatch to another drive. This article deal with that. We have a full guide on how to move Overwatch to another drive.


How can I move Overwatch to another drive?

1. Use a dedicated software solution to transfer Overwatch

pc-mover-logo

  1. Install PC MOVER on both of your computers.
  2. Verify that the new PC has the same Windows version as the old PC or a new one.
  3. Check that the new PC has enough drive space for transfer.
  4. Run PC MOVER on both of your PCs.
  5. Connect your PCs. If your computers are on the same WiFi or wired network, they’re connected.
  6. Otherwise, use either Laplink Ethernet cable or Laplink USB cable.
  7. Once the PCs are connected, start the wizard on the old computer to find the new PC.pc mover old pc
  8. On the new PC, click Analyze PC.
  9. After the analysis is done, you choose what to transfer. We recommend you to choose the STANDARD option as this allows you to select the applications to transfer.pc-mover-type-transfer
  10. In Transfer Summary, go to Applications and check Battle.net and Overwatch.
  11. Click Start Transfer.
  12. Wait for the transfer to finish.
  13. When all is done, restart your new PC and you can play Overwatch on it without the need of reinstalling it.

Following these steps, you can transfer OVERWATCH to a new PC with PC MOVER doing all the hard work. It relieves you of the complication of reinstalling Blizzard’s client and Overwatch. It also saves you a lot of time you can now spend playing your favorite games.

More about PC MOVER

Let’s talk a little more about PC MOVER. It gets you rid of all the headaches when moving to a new PC. It is the only software that can move your applications, files, and even user settings fast and reliable.

You can move from a PC to another PC or from an old operating system to a newer one. Moreover, the process is automatic after you install PC MOVER on both computers. It is also useful when you need to extract data from a hard drive on a broken PC. Or to restore old PC images to new operating systems.

Applications are transferred in a ready-to-use manner. This way you don’t need to install them from scratch. You don’t need kits or license numbers that you’ve already lost a long time ago.

In the moving process, you can select what PC MOVER transfers. You can choose the applications or folders that you want to transfer. There are many PC MOVER versions available.

You can find a free version in Microsoft Store which is great for small home jobs. However, we strongly recommend the Professional version. It has all the features and it includes free transfer assistance.

PC MOVER supports USB3.0, so you don’t have to worry about speed. It comes with an Ethernet cable or a USB cable to connect the source and destination computers.

Take our word for it and use PC MOVER whenever you need to make transfers between computers.

PC MOVER Professional

PC MOVER Professional

PC MOVER Professional is the best choice for moving content between two computers. Whether you need to move your whole drive or just files or folders, PC MOVER Professional is the best product money can buy.
$59.95 Get it now!

2. Move OVERWATCH to another drive by copying the installation folder

  1. Go to the location where Overwatch is installed.
  2. Move the installation folder to the new location using Cut+Paste.
  3. After that, start Battle.Net launcher. Check this article if you encounter problems starting Battle.Net.
  4. Now, Battle.Net assumes that Overwatch is uninstalled. You need to hit the install button.
  5. Change the installation folder to the new location.
  6. Wait a few minutes until the process is over.

This solution works only if the new drive is on the same computer as the one where OVERWATCH is already installed.


3. Clone your entire driverandom overwatch pic 2

Use this only solution only in special circumstances. For instance, when you upgrade from hard-disk to SSD. This way you copy the content of an entire drive to another drive. However, you don’t have the option to choose what to copy. It is going to clone everything from the operating system to the last file.

By following these steps and by using the right tools, you should be able to easily transfer your Overwatch game from one drive to another without the need for a reinstall. In fact, the methods above can be used for pretty much any game.

Let us know which method you prefer by leaving us a message in the comments section below.


[wl_navigator]

AdBlock spoils the fun for YouTube users on Edge, Windows 10

Adblock boasts an inerasable record when it comes to getting rid of those intrusive ads and pop-ups on websites.

To do its job right, the browser extension has to tell the difference between the content you want to view or read and any potentially unwanted material. It has always done that until recently when it started to indiscriminately block everything you want to watch on YouTube, according to some user reports.

Adblock for YouTube bug

Microsoft has revealed that its media team received reports regarding a possible Adblock bug.

Apparently, the browser extension is preventing YouTube videos from playing. So, if you try loading a video, you end up on a black screen.

This problem is affecting both AdBlock Plus and Adblock for YouTube extension users.

We’ve heard that a number of users who have the AdBlock (Plus) or Adblock for YouTube extensions installed are running into errors on YouTube videos. If you’re experiencing this bug, you will likely encounter a black screen on the video player when attempting to load a video on YouTube.

Specifically, some Windows 10 and Edge users are also experiencing the issue.

The root cause of the bug remains unknown even as Microsoft looks into it. While Adblock appears to be the main suspect here, Chromium-based browsers could also be the culpable party.

That’s why Microsoft is also seeking feedback from users that are encountering the problem without Adblock installed.

According to some reports, other Chromium-based browsers may be having a similar glitch. That wouldn’t be surprising considering that they share the same source code engine.

Meanwhile, Microsoft proposes disabling Adblock in your browser to temporarily solve the YouTube video problem.

If that doesn’t work, try this guide with eight potential fixes for YouTube videos not playing in Windows 10.

Have you encountered the YouTube video error in any other browser besides Microsoft Edge? Kindly let us know via the comments section below.

[wl_navigator]

NVIDIA GPU drivers for Windows 10 get DoS bug fix

GeForce RTX may have just received a new game-ready driver with full DirectX 12 Ultimate support. But it’s also on the receiving end of an NVIDIA GPU drivers security patch.

It’s one of the NVIDIA graphics cards recently affected by a Denial of Service (DoS) vulnerability. Other GPUs whose drivers got a security update are Quadro, Tesla, and NVS.

NVIDIA GPU drivers security flaw

Security updates for NVIDIA GPU drivers are now available. You should consider downloading the patch if you use any of the affected GPUs on Windows and Linux.

While this is not a remote code execution threat, it’s severe enough to warrant fixing without delay. With one of the bugs, an attacker requires physical access to the target device to initiate the process of breaching the GPU’s firmware.

After initial access, they can deploy scripts that give them elevated access to protected system components or resources. Likewise, this could pave the way for a DoS attack.

NVIDIA GPU Display Driver contains a vulnerability in the NVIDIA Control Panel component, in which an attacker with local system access can corrupt a system file, which may lead to denial of service or escalation of privileges.

The latest fixes for NVIDIA GPU driver vulnerabilities come at a time when drivers and firmware are already an important cyber attack vector.

For example, researchers recently demonstrated the Thunderspy vulnerability in Thunderbolt firmware. Attackers can exploit it to spy on a system, steal data, or execute arbitrary code within the system kernel.

It may take more than just the typical antivirus software to detect and stop malware that exploits firmware or driver design flaws. For that reason, Microsoft has been proposing extra reinforcements with hardware-backed or secured core security.

In the meantime, the company just added a firmware scanner to the Microsoft Defender ATP security tool.

Any views or questions about common Windows 10 driver/firmware security flaws? Feel free to let us know via the comments section below.

[wl_navigator]

New GeForce Game Ready driver supports ray tracing  

NVIDIA released a new GeForce Game Ready driver, which supports multiple DirectX Ultimate capabilities, including ray tracing.

In case you’re wondering what ray tracing is, it’s a rendering technique that generates hyper-realistic, cinema-quality lighting effects in video games. Also, it’s one of the advanced technologies that Microsoft’s Xbox Series X features.

NVIDIA GeForce Game Ready driver

The GeForce Game Ready driver version 451.48 is available for download.

According to NVIDIA, the driver comes with full support for DirectX 12 Ultimate.

With the release of today’s new GeForce Game Ready driver, DirectX 12 Ultimate and its features are fully supported on GeForce RTX GPUs on Windows 10 operating systems using version 2004 or newer.

While Windows 10 2004 brings many impressive fresh features, only a few of them are gaming-focused. But gamers have something to smile about DirectX 12 Ultimate, which comes with the new OS.

The application programming interface (API) boasts support for all next-gen graphics hardware features. So, besides, ray tracing, it supports sampler feedback, variable rate shading, and mesh shaders technologies.

There are dozens of video games that utilize techniques like ray tracing, for example, The Medium. Microsoft highlighted some of those during its first Xbox 20/20 event.

DirectX 12 Ultimate is also a piece of amazing news from the perspective of developers. Not only does it harmonize graphics across devices, but it also accelerates games development.

As a unifying standard, it enables developers to optimize their titles for next-gen experiences. For example, there are Xbox Series X-optimized games even before the next-gen console launches.

Similarly, GPU makers are now able to create DX 12 Ultimate graphics cards that are ready for next-gen games. Of course, GeForce RTX is a perfect case in point.

So, if you buy a console or PC with a DX 12 Ultimate GPU today, you can be sure that it offers day-of-launch support for video games.

What do you feel about the GeForce RTX GPU and its new Game Ready driver? Feel free to let us know via the comments section below.

[wl_navigator]

100% Packet Loss: What Does It Mean And How to Fix It?

100% packet loss is an extreme situation that may even render you unable to access the Internet. A broad range of factors can cause it, and it can be located everywhere throughout your connection or just on specific nodes.

However, even if it sounds bad, it doesn’t mean it’s the end of the world. Fortunately, nowadays, we have the necessary tools to identify the location of the issue and troubleshoot it effectively.

But first, let’s do a quick recap.

What does 100% packet loss mean?

Packet loss is a phenomenon that occurs whenever packets of data that you send or receive never make it to their destination. The amount of packets that are lost within the session is translated into percentage values.

So, for instance, you send 100 packets, but only 84 reach the destination point. By subtracting them out of the total, we have 14 data packets that get lost on the way. Thus, we can say that we have a 14% packet loss.

100% packet loss occurs whenever no packet that you send makes it to the destination. As a result, there’s no response from the server we pinged (or attempted to send the requests to).

What causes 100% packet loss?

Here’s where things get a bit complicated. Packet loss can be caused by a lot of factors. For instance, even old Ethernet cables or outdated network adapter drivers can lead to packet leaks.

On the other hand, it seems one of the factors outweighs them all: network congestion. More often than not, you’ll find that being on an overcrowded network can lead to packet loss, and the bad news is that you can’t do much to prevent it.

But that mostly applies for less severe cases of packet loss (i.e. when it’s not 100%). A 100% packet loss is, as we’ve said earlier, severe, as it means there’s absolutely zero connectivity between two of the nodes on the network.

How to test packet loss?

  1. Launch an elevated instance of CMD (administrator rights)
  2. Run a ping on google.com (or any other site you’re comfortable with)
  3. Write down the IP address of the site you chose
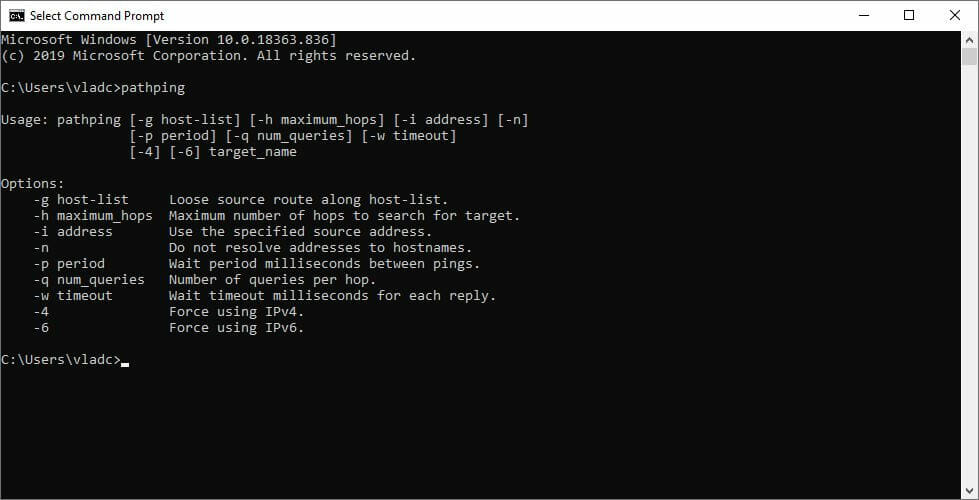
  4. Run pathping x.x.x.x (replace x.x.x.x with the IP you jotted down earlier)
  5. Wait for the test to come to an end
  6. Check the packet loss value for each hop in your connection
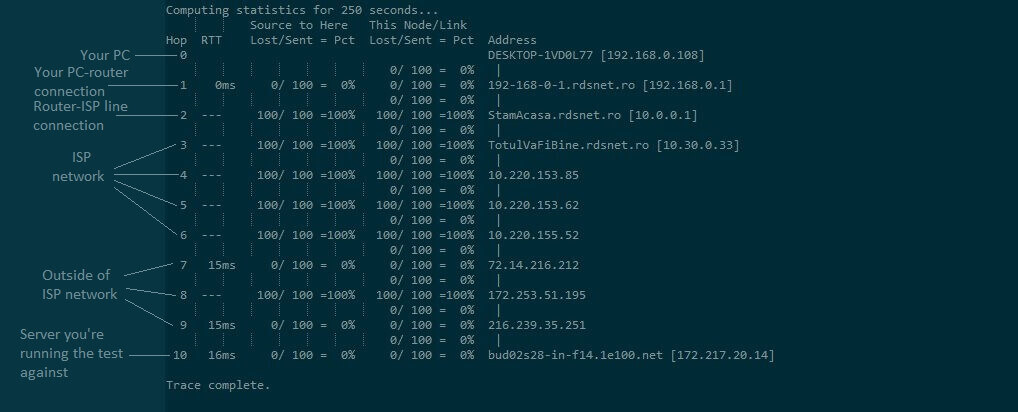
Results of pathping

Each hop in your connection is related to a part of your route. As the hop number increases, your connection strays further away from the device you tested. Check the screenshot below.
For instance, the first hop will always be your PC, and the last one will be the destination server (i.e. google.com, if you used our example).

Any hops in between the source and destination will either belong to your ISP, the upstream network distribution company, and relay servers.

How do I fix 100% packet loss?

1. Use a VPN

  1. Download and Install ExpressVPN.expressvpn download page
  2. Launch ExpressVPN and log into your account.
  3. Connect to a fast server (low ping one).
  4. Check if the problem still persists.

Often, your ISP can cause a 100% packet loss situation by either throttling your bandwidth, blocking you, or having improper network routing. It’s easy to see whether your ISP is the cause or not during the test.

ExpressVPN

Reduce packet loss and secure your internet connection with this professional VPN solution.
Check Price Visit Website

Just use the screenshot above to check whether the packet loss occurs on your ISP’s side.

However, note that not even using a VPN can help you if your Internet connection is completely down. Sometimes an ISP might cut your connection for various reasons (maybe you’re late with the payment).

In this situation, not even a VPN can help you, otherwise, a VPN can help reducing packet loss.

2. Troubleshoot your connection manually

  • First thing first, call your ISP and ask them if they know anything about it
  • Check every component of your home network if the test shows 100% packet loss on your side
  • Contact the destination server’s owner if the tests show there’s something wrong with it
  • Switch to wired instead of wireless (Wi-Fi packet loss occurs more often)
  • Restart your router and/or modem
  • Rule out your router by plugging your PC straight to the modem or home line
  • Check if your firewall or security software isn’t blocking your connection attempts
  • Rule out any malfunctions in your network configuration
  • Make sure there’s actually a route between you and the destination server, if possible

Sometimes your network routing might impede you from accessing a certain service or website. In those cases, running a pathping test will often return confusing results, such as an unreachable ping destination host, but no packet loss.

You can often fix 100% packet loss

All things considered, 100% packet loss might be an extreme connectivity issue, but it can be fixed nevertheless. More often than not it’s caused by your ISP, which will be glad to assist you in solving it. You have to give them a call.

Other times it can be caused by improper routing, or even DDoS attacks if you’re unfortunate enough.

Using a VPN might help if there seems to be an issue on your ISP’s side of the connection. However, note that it won’t do much if your ISP has completely cut down your connection (for not paying your subscription).

Last but not least, VPN use can sometimes worsen things, especially if it comes with a built-in firewall. Make sure you have all the right facts before deciding to invest in a VPN for attempting to fix 100% packet loss.

Top 5 VPN to Fix Raft Multiplayer Lag & Make It Run Smoother

If you’re experiencing Raft lag, you can use a VPN to fix it.

Raft is an oceanic survival game that you can play solo or with your friends in co-op or PvP mode. You can explore an open world and hone your crafting skills to build a floating home while steering clear of sharks. Play it on Steam.

Some users encounter Raft lag spikes in multiplayer mode, which can become really annoying. If you’re also facing this scenario, you can try to reduce lag in various ways, like downloading the latest hotfixes, minimizing your graphics settings, or using a wired connection instead of Wi-Fi.

play the Raft game on Steam

However, if these fixes fail, you can use a VPN to improve your ping and make your game run faster. Raft doesn’t currently have dedicated servers, so it relies on a peer-to-peer network. That means you have to host a game server or join an online session hosted on someone else’s PC.

Why is Raft so laggy?

Raft multiplayer lagging issues could be the result of network congestion, incorrect IP configuration settings over Wi-Fi or Ethernet, jitter, bandwidth limitations, a poor distance between the host and client, double NAT, or ISP throttling.

  • Raft stuttering, freezing, running slow is a result of poorly optimized PC specs like graphics card drivers and minimum requirements not met for the game:
    • OS: Windows 7 or later
    • Processor: 2.6 GHz Dual Core or similar
    • Memory: 4 GB RAM
    • Graphics: GeForce GTX 500 series or similar
    • DirectX: Version 11
    • Network: Broadband Internet connection
    • Storage: 6 GB available space
    • Additional Notes: 64-bit operating system is required
  • Raft lagging or showing lag spikes appear because of large rafts on survival mode so their servers are unable to handle it. You are however able to build much larger rafts on creative mode because the devs were aware that there would be large rafts built-in creative.
  • Raft high ping in multiplayer mode is due to a bad server response. The easiest way to fix this is to use a VPN to change your location and try on a different server to connect.

While Raft may become more optimized in terms of connections in the future, there is no telling how far that optimization will be.

We recommend using a VPN with split tunneling or port forwarding under more server locations for Raft until they are able to optimize the connection or you are able to increase your internet strength.

You may not have as much lag in other similar games because they are all server-based, so each of your online friends is connected to a server. On the other hand, with Raft each of the people who join the world is connecting to the host of the world.

If the distance between your PC and the remote machine is too great, this can lead to Raft server lag. But if you connect to a Raft VPN server that’s closer to the remote PC, you reduce the distance and subsequently speed up your connection. It’s also possible to fix packet loss with a VPN.

Is Raft poorly optimized?

They do need to work on performance issues and optimization as they continue to add things to the game that require larger builds, but it’s slowed down horribly.

Currently, you can use a mod to effectively disable physics at the cost of some drawbacks, such as being unable to navigate islands with your raft, but it significantly improves FPS.

The reason Raft runs poorly with this is because the larger the raft, the more physics the game has to calculate, slowing down your system. It’s very unique in that regard, because in most other games, the structures you build stand still, rather than moving across a vast sea.

Do you go faster with more engines in Raft?

The speed of the Raft is determined by the number of engines and foundations. The theoretical speed increases as more engines are added to the raft, each engine adds the value 2.

However, because there is a hard cap, the speed will never exceed a cap of 2.5 and will never fall below the lower limit of 1.5. Only when the engines are overburdened will the speed be zero.

If the limit of 110 foundations per engine is exceeded, the engines become overburdened.

What are the best VPNs to fix Raft lag?

Private Internet Access – Best to fix packet loss

Fixing the lag in Raft is possible with Private Internet Access (PIA). Developed by Kape Technologies, PIA offers a huge network of servers. As such, you can connect to multiple countries until you find the best VPN server for Raft.

Private Internet Access is the only VPN on this list with native port forwarding, which is an essential feature for hosting game servers with a VPN. Plus, you can choose from static and dynamic IP addresses, as well as use private DNS servers.

PIA offers an easy Raft lag fix, whether you’re trying to play the game on Windows, Mac, or Linux. It provides you with high-speed VPN servers for Raft, together with excellent security features. You can also use it to fix Xbox packet loss.

More about PIA:

  • +3,300 VPN servers in 48 countries
  • Allows up to 10 simultaneous connections
  • No logs
  • 24/7 live chat support
  • 30-day money-back guarantee (no free trial)

Private Internet Access

Quickly and easily fix Raft multiplayer lag with the help of this VPN.
Check price Visit website

NordVPN – Best to use for the double VPN

NordVPN can easily reduce Raft lagging in multiplayer mode, thanks to its speedy VPN servers that can fix network congestion. It’s a VPN service operated by Tefincom & Co., which comes packed with numerous VPN servers.

With the help of NordVPN, you can minimize jitter and make your Internet connection faster. It gives you the possibility to configure custom DNS servers for Raft, secure your browsing sessions with CyberSec, as well as to access blocked sites by evading geoblocks.

If you’re having trouble trying to eliminate Raft game lagging because your VPN gets blocked by Steam, you can connect to NordVPN’s obfuscated servers to take care of this problem. Plus, it has a kill switch that turns off your VPN right away should you need it.

More about NordVPN:

  • +5,100 VPN servers in 59 countries
  • Supports 6 simultaneous connections
  • No logs
  • 30-day money-back guarantee (no free trial)

NordVPN

If your Raft game is laggy, use NordVPN to reduce high ping and speed up your connection.
Check price Visit website

ExpressVPN – Best to bypass ISP throtling

It should come as no surprise that ExpressVPN one of our most tested VPN for gaming to fix Raft multiplayer lag and make it run smoother. It has the best combination of features, security, and speed, making it an excellent choice in almost any situation.

ExpressVPN’s apps are already configured to prevent DNS leaks, so you won’t have to worry about them. After you sign up for the service, you can also test for DNS leaks on the official website.

Low ping is essential for competitive online gaming. ExpressVPN can connect you to a server that is closer to your game’s servers for lower latency and smoother connections.

More about ExpressVPN:

  • Speed test to find the fastest VPN server location
  • Connect to over 3000 servers in 94 countries
  • Unlimited bandwidth for never-ending optimal network speed 
  • Bypass internet throttling
  • RAM-powered memory storage
  • 30-day risk free money-back-guarantee

Indeed, the ability to change your virtual location is very useful in online gaming. You will be able to connect to foreign game servers that are normally inaccessible to you using ExpressVPN. But, if this provider is so popular in the gaming world, it is primarily due to its connection speeds.

ExpressVPN

Reduce high pings in Raft and connect to an optimal server to bypass ISP throttling.
Check price Visit website

Surfshark – Best to use for DDoS protection

Surfshark is another great option for gaming VPN that supports Linux, Mac OS, and Windows on the desktop for Raft, with apps, plugins, and services for almost every piece of connected hardware you can think of to protect.

Android and iOS mobile devices, Xbox and PlayStation video game consoles, and Amazon FireTV and Apple TV smart TV platforms are also supported. Nonetheless, the service allows subscribers to protect an unlimited number of devices, making it a great value in a highly connected home.

Surfshark also includes a list of optimized servers for P2P, Gaming, MultiHop, allowing you to select one based on your needs rather than going on a wild goose chase. We tested their VPN app on both PCs and consoles, and it performed admirably.

More about SurfsharkVPN:

  • Best protocols for gaming
  • Strong encryption
  • Multi-hop connections
  • Extended servers worldwide
  • Whitelister
  • Camouflage Mode
  • CleanWeb against trackers

Surfshark is also an excellent solution for players who frequently play on unsecured servers, particularly competitive multiplayer games.

It is far safer to play on such servers without revealing your IP address, and Surfshark provides you with complete anonymity in this case.

Surfshark

Stay under camouflage mode and get access to optimized servers for gaming to reduce lag in Raft.
Check price Visit website

CyberGhost VPN – Best to use for the gaming servers

CyberGhost VPN is another excellent choice for fixing Raft game lag. Owned by Kape Technologies, this VPN service can fix Wi-Fi packet loss if you can’t switch to wired mode to improve your connection speed.

If your network bandwidth is limited and you can’t afford to redirect all network traffic through VPN, then you can turn to CyberGhost’s split tunneling feature to create whitelists or blacklists and route only Raft gaming traffic through VPN.

You can easily fix Raft lagging issues using the fast VPN servers provided by CyberGhost VPN. It also offers exclusive DNS servers, DNS leak protection, anti-hacker protection, and a malware blocker for browsers.

More about CyberGhost VPN:

  • +6,500 VPN servers in 89 countries
  • Up to 7 connections using the same account
  • No logs
  • Up to 45-day money-back guarantee (1-day free trial)

Cyberghost VPN

Eliminate Raft lag issues by turning to this fast and secure VPN
Check price Visit website

Moreover, if you are still wondering how to make raft less laggy and run smoother and give Raft FPS boost you can adjust the graphics in Raft, and it doesn’t look too bad on the low settings. Increase FPS for Raft low-end PC by adjusting them and it will run better.

How to make Raft run better?

Firstly, make sure to download the official hotfixes and restart Steam before launching Raft. Secondly, lower your in-game graphics settings. Thirdly, use NVIDIA Control Panel to optimize your GPU for PC performance.

It’s important to remember that this is the very first release of Raft. As the Early Access period comes to an end, it’s likely that developers will continue to work on updates and optimization.

Head over to our VPN Troubleshooting area to quickly fix any VPN-related errors. To see how to reduce lag and packet loss in other games, join our Gaming VPN Hub.

To summarize, using a VPN is the best way to fix Raft lag and packet loss. You just need to connect to a VPN server that’s in the same region as the remote PC hosting the game server.

If you’re having issues trying to pick the best VPN for Raft, we suggest going with ExpressVPN.

Microsoft Defender ATP for Ubuntu, Debian, and more arrives

It’s no secret that Microsoft Defender ATP was meant for multi-platform use cases.

While it started out as Windows Defender Advanced Threat Protection, it was eventually going to come to non-Windows platforms, step by step.

Already, there’s a Microsoft Defender ATP version for Android devices in public preview. And now, Linux server distributions are the latest to gain the support of the antimalware tool.

Microsoft Defender ATP for Linux

Microsoft recognizes that the vast majority of its customers use multiple platforms, a good number of which don’t run on the Windows Operating System (OS).

So, the Redmond-based company wants to offer Defender ATP as a centralized security management tool across as many platforms and devices as possible. This is why the antivirus solution for Linux is now generally available.

As a Linux user, you’ll be able to scan and resolve threats via a command-line interface (CLI).

The CLI supports several critical commands and functions. For example, threat lets you configure threat management policies, while connectivity troubleshoots cloud connections. On the other hand, edr is for configuring endpoint detection and response.

 This initial release delivers strong preventive capabilities, a full command line experience on the client to configure and manage the agent, initiate scans, manage threats, and a familiar integrated experience for machines and alert monitoring in the Microsoft Defender Security Center.

While there are hundreds of Linux distributions out there, Microsoft Defender ATP supports only a handful. These are:

  • RHEL 7.2+
  • CentOS Linux 7.2+
  • Ubuntu 16 LTS, or higher LTS
  • SLES 12+
  • Debian 9+
  • Oracle Linux 7.2

You can use any Linux configuration management tool, such as Puppet or Ansible, to deploy Defender ATP.

Apart from that, you may want to uninstall any third-party antimalware tool on your system. It just so happens that deploying such products along with Defender ATP may compromise system performance and trigger some bugs here and there.

Have you got started with Microsoft Defender ATP for Linux yet? As always, you can share your experience via the comments section below.

[wl_navigator]

Microsoft Edge Dev update improves for developers and admins

After they added a whole website for extensions and they had an enterprise sync services update,  the development team behind Microsoft Edge launched the new Microsoft Edge Dev 85.0.552.1.

The new update available only for Insiders comes with a few new features and a lot of reliability fixes.

What’s new with the Microsoft Edge Dev update?

The three new features are addressed mainly to developers and admins.

First improvement is adding a New Tab Page Search Box management policy. Another is to add support for the Auto Open Allowed for URLs management policy for upstream Chromium.

At last, they’ve added support for the Auto Open File Types management policy from upstream Chromium.

Microsoft Edge Dev 85.0.552.1 brings a ton of fixes

And when we say a ton, that’s a lot. We’ve counted 9 reliability fixes and 15 behavioral fixes.

We will list here only the reliability issues here, as they appear on the release notes:

  • Fixed an issue where the browser sometimes does not open.
  • Fixed a crash on startup.
  • Fixed a crash when printing.
  • Fixed an issue where opening the Read Aloud voice options list crashes the browser.
  • Fixed an issue on Mac where entering fullscreen mode in an installed app or website crashes the browser.
  • Fixed a crash when importing data from other browsers.
  • Fixed an issue where certain 4K video content, such as that encoded using HEVC, doesn’t play properly.
  • Improved the reliability of importing passwords from other browsers.
  • Fixed an issue where adding items to a Collection sometimes fails, and instead, the loading spinner is shown indefinitely.

Known issues with the new Microsoft Edge Dev 85.0.552.1

Unfortunately, the new Edge Dev update also comes with 7 know issues.

For instance, if you use some ad-blocking extensions, you may experience playback errors on Youtube.  To fix this, disable the extension.

Also, if you use the extension for the Kaspersky Internet Suite, you may sometimes see webpages like Gmail fail to load. Make sure you install the latest update of the extension to fix this.  

Read about all known issues in the release notes.

What do you think about the latest versions of Edge? What is your experience with Microsoft Edge? Tell us all about it in the comments section below.

[wl_navigator]

Windows 10 May 2020 Update removes defer feature updates setting for Pro, Education, and Enterprise users

Back in 2019, Microsoft introduced the ability to defer Windows 10 feature updates using Windows Update settings for up to an entire year. As a reminder, the feature was introduced for both Home and business users to refrain their PCs from attempting automatic upgrades during the selected period.

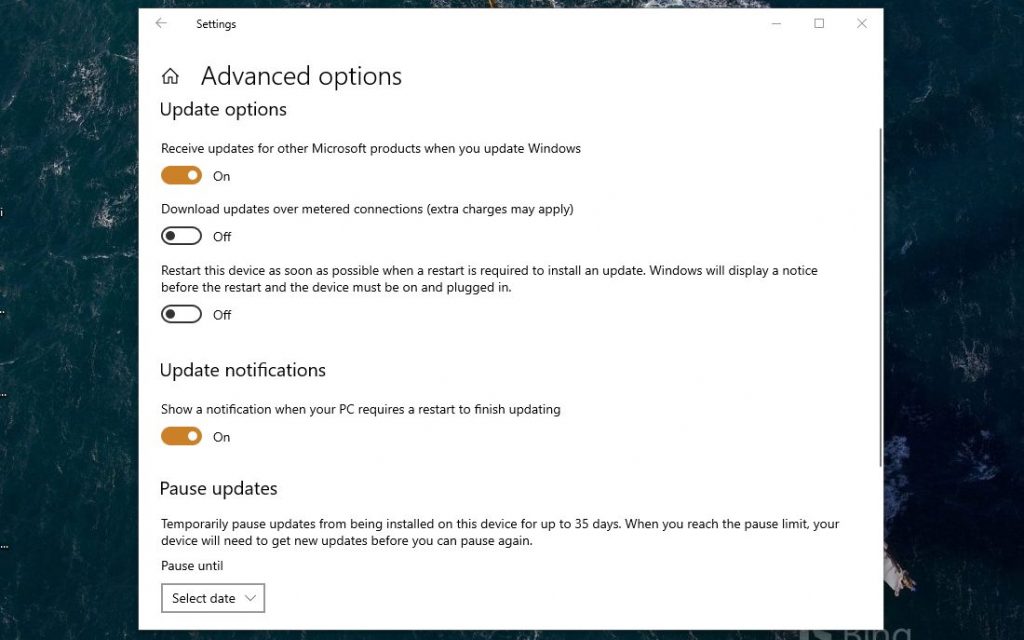
However, WindowsTimes noticed that the feature has been removed beginning with the Windows 10 May 2020 Update, and Microsoft confirmed the change in an update to the Windows 10 2004 documentation for IT Pros from June 23 (via Neowin): The manual setting to defer feature updates has been removed from the “Advanced options” section in Windows Update for users currently running Windows 10 Pro, Education, or Enterprise editions “in order to reduce confusion.”

Microsoft said that it’s now up to the IT Admins to manually configure update deferrals in the Group Policy for everyone in their organization. “If you wish to continue leveraging deferrals, you can use local Group Policy (Computer Configuration > Administrative Templates > Windows Components > Windows Update > Windows Update for Business > Select when Preview builds and Feature Updates are received or Select when Quality Updates are received),” the company explained.

This move is quite surprising considering that thousands of users generally use this option to suspend quality updates for a specific period. By removing the option from Settings, and hiding it inside the Group Policy Editor, Microsoft probably wants to push more people towards the Windows 10 May 2020 Update. Did you notice the change on your PCs? Let us know in the comments down below.

Windows 10 Insider Build 20152 brings more bugs than fixes

It’s been only a week since the last Insider Preview Build and we welcome a new one, Windows 10 Insider Preview Build 20152 in the Dev Channel (Fast ring).

Although the new Windows 10 update comes to solve some problems, it also comes with a lot of known issues and no new features.

What is new in Windows 10 Insider Preview Build 20152?

There are 4 fixes coming with the new Insider Preview Build 20152:

  • Until now, if you tried to reset your computer, the system was removing Notepad.  Microsoft apparently solved that issue and they recommend that if you’re facing the situation to reinstall Notepad via Optional Features in Settings.
  • They also fixed an issue where the Continue button after the Windows needs space to continue dialog didn’t show up.
  • Apparently, sometimes, the Windows Update icon was not showing up in the taskbar notification area when an update was ready for a reboot. They also fixed that issue.
  • They also fixed a bug from IME. Now, IMEs will show the correct typing status (ON or OFF) and the IME mode indicator from taskbar is working fine now.

Windows 10 Insider Preview Build 20152 has plenty of known issues

Unfortunately, there are still a lot of known issues coming with Insider Preview Build 20152 but that is expected from a Dev Channel preview build.

Let’s see some of the more important ones:

  • Some systems to crash with a HYPERVISOR_ERROR bugcheck.
  • For some, the update to a new build is taking a lot of time.
  • Sometimes, Notepad doesn’t reopen files that were automatically saved during a PC restart. However, you can still recover your documents from %localappdata%\Notepad.

Don’t install Insider Build 20152 if you have an Xbox controller

Just after the release of the Windows 10 Insider Preview Build 20152, we’ve recorded cases of users who experienced this issue.

Apparently, a user got a BSoD referencing xinputhid.sys when he turned his controller on just after installing the new update.

Looks like the Xbox 1 wireless driver is borked with this update. I get a blue screen referencing xinputhid.sys whenever I turn my controller on. Oof.

So if you really want to use your Xbox controller, don’t install the latest Windows 10 Insider Preview Build 20152.

What can I do to avoid the BSoD error after installing Insider Build 20152?

If you care more about the new update, then make sure you disconnect your Xbox controller from your computer and leave things like that until the new update.

Otherwise, you may be triggering the BSoD with the error code 0xc1900101. 

Have you had this problem? Tell us about your experience in the comments below. That might help other users to avoid it.

You can check all the release notes from Windows Blog.

What do you think about the new updates from Microsoft? Please let us know in the comments section below.

Next-gen “Lockhart” Xbox appears in Developer documentation

New traces of Microsoft’s next-gen “Lockhart” Xbox has once again been spotted, this time in official developer documentation. Twitter user @XB1_HexDecimal, who found traces of Lockhart in Windows 10 earlier this month, shared yesterday some screenshots of the Microsoft Game Development Kit mentioning a “Lockhart Profiling Mode” (via Windows Central)

According to previous reports, Lockhart will target 1440p gaming with a 4 teraflops GPU, but the cheaper SKU will still include an SSD and an AMD Zen 2-based CPU, just like on the Xbox Series X. As seen in these new leaked screenshots, Microsoft has created tools allowing developers to optimize their Xbox games for Lockhart and “Anaconda,” which is the codename for the Xbox Series X.

If Microsoft has never discussed Lockhart so far, VentureBeat journalist Jeff Grub reported earlier this month that the Xbox team was planning to finally announce it in June, but the official reveal could have been delayed to August. However, with Sony recently announcing a discless PlayStation 5 Digital Edition that will be just as powerful as the regular PlayStation 5, a cheaper but much less powerful Lockhart (4 teraflops vs. 10 teraflops for the discless PS5) may start to make less sense.

We’ll see what happens in the coming weeks, but the more Microsoft waits to announce Lockhart, the more difficult it will be for the company to prevent any more leaks. That’s assuming Lockhart hasn’t been ultimately cancelled, as it has been the case for previous Microsoft products such as the Surface Mini.

Office for Windows will soon show smart save reminders for unsaved documents

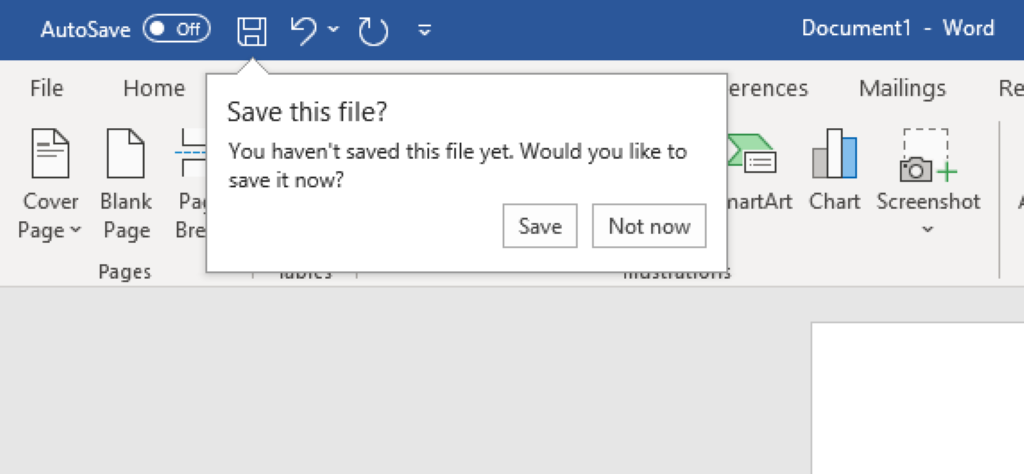
Microsoft is currently working a new feature for Microsoft Office users on Windows called smart save reminders, which will help remind you to save your new unsaved documents and avoid losing your work (via WinCentral). The feature is already live in Microsoft Word for Office Insiders using version 2006 Build 13001.10000 or later, and it intelligently prompts them to save their work when they start working on a new file.

According to Microsoft, the smart save feature basically uses machine learning to determine your likelihood of saving a particular file, and then displays a reminder below the Save button. The AI analyses a couple of attributes including how much content you’ve added to the file, or how much time you’ve spent working on the file before displaying the prompts.

It is worth noting that Microsoft’s Office apps already have an AutoSave feature for Microsoft 365 subscribers, but these new reminders are a good alternative for everyone else. The feature has been specifically designed for users who often forget to save their files, and potentially risk losing their work due to unforeseen circumstances.

If you’re an Office Insider who has any suggestions about this feature, we invite you to provide your feedback by going to Help > Feedback in Word, also don’t forget to Add #SmartSaveReminders in your feedback.

Fix: Set up OneDrive for file recovery options [Warning]

OneDrive is one of the best-known cloud storage services alongside Google Drive and Dropbox.

Windows 10 includes a built-in OneDrive client app that syncs your folders and files so you can open them from File Explorer. In many situations, OneDrive runs automatically at startup.

Using a cloud storage space is extremely useful, but using OneDrive comes with some risks.


Why am I being asked to set up OneDrive for file recovery?

Windows Defender warning: Set up OneDrive for file recovery options in case of a ransomware attack

The pop-up regarding the recovery options in case of a ransomware attack from Windows Defender can be very annoying, especially over long periods of time. It seems that this pop-up appears whenever users open their PC up.

This pop-up appears because the setup process for the OneDrive app hasn’t been completed successfully. Follow these steps to resolve  it:

  1. Click Set Up OneDrive.
  2. Enter your email address, and click Ok.
  3. The File Explorer will appear.
  4. Right-click the OneDrive folder, and select Scan with Windows Defender.
  5. After the scanning process is completed, the green checkmark should be present.

What is the file recovery option in OneDrive?

The file recovery option in OneDrive allows you to retrieve a file or folder from the cloud, in case something happens to it on your PC (it gets corrupted, you accidentally deleted it etc.).

But for this, it is necessary that you sync your PC with OneDrive by logging into your Microsoft account, as shown below.

Afterward, whenever you need to use the file recovery option, you can go to your OneDrive account and get the necessary file from there.


Are OneDrive files safe from ransomware?protect onedrive files

If you choose to benefit from the OneDrive Windows client app, you should know that most ransomware attacks can recognize you stored data as essential data from your personal PC.

Since ransomware behaves like legitimate software, it can read your data, encrypt it, and write it back to your OneDrive deleting the original. The ransomware attacks behave as if you, the administrator, would have encrypted the files.


Why do I get the Setup OneDrive for file recovery warning?

As a result, the Windows Defender Security Centre will keep warning you to set up OneDrive for file recovery in case of a ransomware attack.

The notification comes with a yellow triangle warning sign, showing the mentioned message, and it keeps popping up in the notifications area, every time the computer reboots.

Here, you can choose to Cancel or open it. Canceling the notification will not help, as the warning will still show each time you restart the computer. So it’s better to address it.


How do I protect OneDrive from ransomware?

1. Sign in to OneDrive

The simplest solution would be to just follow the on-screen prompts and Set up OneDrive.

You should know that this step actually implies a two-factor authenticating process in which you signing into your Microsoft account. So no actual protection is offered, only easy access to your cloud-stored files in case of a ransomware attack.

Additionally, when trying to sign in you might get a warning that You’re already syncing a personal OneDrive on this computer. Unlink that account to add a new one.

In this case, you should take a look at the nest step.


2. Unlink & relink OneDrive

  1. Right-click on the OneDrive icon in the QuickMenu area, and click Settings.
  2. Select the Account tab, and click Unlink this PC and follow the prompts.
  3. Fully close OneDrive, again by right-clicking on the icon in the Quick Menu area and selecting Close OneDrive.
  4. Then type Windows Defender Security Center in the search bar and click on Virus & threat protection.
  5. Here, you will see the yellow warning again, so retry the signing in steps mentioned in the first solution.
  6. Additionally, in the Ransomware protection area, make sure to toggle ON the Controlled folder access 

This is a method that should refresh the link between your system and OneDrive, and cancel the nagging notification.


3. Scan OneDrive using Windows Defenderscan onedrive with Windows Defender

  1. Open File Explorer.
  2. Right-click the OneDrive folder and select Scan with Windows Defender. 
  3. After the scan is complete, the notification should disappear.

This is just a one-time action, though, and it can be applied whether you are actively using Windows Defender or third-party antivirus software.


Looking for truly free antivirus software? Check out this list!


Of course, you can just unlink your computer, as shown in the second step, and continue using another cloud storage option. This way you will keep your important data to a location that is not connected to your OS, protected with another set of credentials.

And this would probably be the safest method, after all.

But many prefer to also keep OneDrive, just as a second option. If that is the case, there are a few other things that you can try to manage the OneDrive client.

Care to give us your opinion on this topic? Please use the comment section below.


[wl_navigator]

Error 1711: What does it mean and how to fix it

Error 1711 is a general installation issue that can arise when users try to install or update software in Windows. The issue can arise when users try to install MS Office applications, iTunes, WinZip, and other software. It is an MSI Microsoft installer error that stops software installation. The error 1711 message states this:

Error 1711. An error occurred while writing installation information to disk. Check to make sure enough disk space is available.

This issue can arise even when users have a reasonable amount of hard drive storage space available. Thus, freeing up disk space, as hinted by the error message, isn’t always the resolution. There are a few potential fixes for Windows Installer error 1711.


How to fix error 1711 in Windows 10

1. Delete msi.tmp files in the Installer folder

  1. Some users have confirmed they were able to fix error 1711 by deleting msi.tmp files within their Installer folders. Open File Explorer, which you can do with the Windows key + E hotkey.
  2. Open the Windows > Installer folder in File Explorer.
    Installer folder Error 1711
  3. Select all the msi.tmp files in the Installer folder by holding the Ctrl key.
  4. Click the Delete button on the Home tab.

2. Defrag the hard drive

  1. Error 1711 can be due to a fragmented HDD. To find the Defragment and Optimize drives utility, open the search utility by pressing the Windows key + S keyboard shortcut.
  2. Type defrag in the search box.
  3. Click Defragment and Optimize Drives to open that utility.
    Optimise Drives window Error 1711
  4. Select your primary HDD partition, and click the Optimize option.
  5. Thereafter, wait for the utility to complete the defrag, which might take a while.

3. Download the installation file again

Error 1711 can also be due to a corrupted MSI file download. So, try downloading the MSI setup file again. Then install the software with the new MSI.


4. Clear the Temp folder

  1. If you don’t have much hard drive storage available, try clearing the Temp folder. To do that, open Run with the Windows key + R keyboard shortcut.
  2. Type temp in the Open box, and click the OK button.
    Temp window Error 1711
  3. Press the Ctrl + A key combination to select everything in the Temp folder.
  4. Click the Delete button.

5. Clean the system files

  1. In addition, try clearing superfluous system files with the Disk Clean-up utility. Open the Run window.
  2. Input cleanmgr in the Open box, and click the OK option.
    The Disk Clean-up window Error 1711
  3. Next, click Clean up system files.
  4. Select all the checkboxes on the Disk Clean-up tab.
  5. Press the OK button.

6. Reregister the Windows Installer

  1. Registering Windows Installer is another confirmed fix for error 1711. Launch the Run accessory.
  2. Type msiexec /unregister in Run’s Open text box and click OK to unregister Windows Installer.
    Run accessory window Error 1711
  3. To reregister Windows Installer, enter msiexec /regserver in Run and click OK.

7. Fix Error 1711 for MS Office

Error 1711 can often arise when users try to update an installed MS Office suite. Office users might be able to fix error 1711 by uninstalling Office in Windows 10. Then users can reinstall the latest Office version.

Press the Windows key + R hotkey to launch Run. Then you can enter appwiz.cpl in Run and click OK to open the uninstaller window. Select your MS Office suite and click Uninstall to remove it. Thereafter, install the latest Office version as outlined on Microsoft’s Office support page.


Those are some of the resolutions users have fixed error 1711 with. So, there’s a good chance they’ll resolve error 1711 so that you can install or update the required software.


[wl_navigator]

Outlook for web gets send later button, excites users

Outlook for web is getting a send later button, and users on Twitter are excited about it.

The new feature comes in handy when you just want to compose a message and schedule it for sending later. There are many times you want to do that for different reasons, such as proper timing.

Users react to Outlook for web getting send later feature

Mike Tholfsen, Microsoft Product manager, revealed the new Outlook button via a tweet.

So, if you’re an Outlook on the web user, you can now schedule your mail messages to be sent at a future date or time.

Based on a sample of user reactions on Twitter, the send later button should change life in the office for many Outlook for web users.

For example, one user responds:

Woah!!! Did I just read this correctly? Scheduling mail from the web? Perfect for those who like to work outside core hours but do not require others to respond then…..thanks.

Another excited user adds:

Yeah! I’ve been using this feature in the app, but in web will be much more convenient!

Yet, this one quips, rather casually:

Is this so you can pretend to work late?

Gmail has had this feature for a while now.

Of course, some users are wondering whether the send later button is coming to Outlook for desktop anytime soon. Well, it’s been there since 1997!

That’s not surprising, though, since Microsoft tends to add new features to its different versions of Outlook separately.

We already wrote about the new text prediction feature for Outlook.com and Outlook on the web, for example. Similarly, we expect Outlook for Windows to start supporting cross-device email signature syncing this month.

Are you excited about the new send later button in Outlook for web? Tell us what you think in the comments section below.

[wl_navigator]

Microsoft Defender ATP now catches Android malware

As a cross-platform solution, Microsoft Defender ATP is central to the security of Windows 10 and Office 365 apps and data. Now, Microsoft just announced the availability of an Android version of the tool in public preview.

Microsoft Defender ATP for Android

This tool must be doing a great job, at least from Microsoft’s perspective. That can explain why it keeps getting additional security roles and features.

For example, Microsoft recently added a new Unified Extensible Firmware Interface (UEFI) scanner to Defender ATP. The tool should now be able to scan and thwart driver or firmware-level security threats in Windows 10.

In addition, the security feature now powers the new Safe Documents tool for scanning and detecting unsafe Office 365 documents.

And now it gets to scan and stop different types of cybersecurity issues that affect Android device users.

According to Microsoft, you’ll be able to view alerts and incidences on a single dashboard that the Android Microsoft Defender Security Center offers.

This feature comes at a time when more and more enterprises are letting their remote workforce access company IT systems via their mobile devices, including smartphones.

All events and alerts will be available through a single pane of glass in the Microsoft Defender Security Center, giving security teams a centralized view of threats on Android devices along with other platforms. These capabilities empower enterprises to enable strong security while ensuring their employees remain productive working on their Android devices.

The new Microsoft Defender ATP for Android offers the following features:

  • Online protection: Blocks unsafe online connections and stops phishing attacks via emails, text messages, or websites.
  • Anti-malware tool: Prevents potentially malicious apps from installing on your Android device.
  • Sensitive data protection: Blocks compromised devices from accessing sensitive data, such as Office 365 apps, assets, or files.

Let’s hope that Microsoft Defender ATP for Android arrives in general availability soon enough.

What do you think of the new security tool for Android? You can always share your opinion via the comments section below.

[wl_navigator]

Chivalry: Medieval Warfare Packet Loss: How to Fix It?

Chivalry: Medieval Warfare is a popular multiplayer hack’n’slash game many players enjoy worldwide. It’s set somewhere in the Middle Ages and, as you expect, focuses heavily on medieval warfare.

The combat focuses mainly on melee weapons such as swords, maces, and clubs but also features ranged weapons. For instance, use longbows, ballistae, or catapults to wreak havoc on your enemies or use boiling oil pots.

There’s no way around it: Chivalry: Medieval Warfare is a fantastic game, especially if you’re a Middle Ages enthusiast. However, given that you can only play it online, this game faces many technical challenges occasionally.

Connectivity-wise, to be more specific. Namely, at certain points, you might have to tackle high latency, jitter, and even the hated packet loss, although it’s not a must that you’ll encounter these issues.

What is packet loss in Chivalry: Medieval Warfare?

Leaking packets in Chivalry: Medieval Warfare is the same as with any other online service or game. Packets of data that you transmit through your connection never make it to their destination.

As a result, the server throws a desync your way, manifesting as sluggish in-game movement, responsiveness, rubberbanding, and, in severe cases, even disconnections.

However, keep in mind that almost every time packet loss is caused by network congestion. This means that the best way to improve packet loss is often waiting for it to pass. That’s the good news and also the bad news.

How to check for packet loss in Chivalry: Medieval Warfare?

  1. Launch CMD in administrator mode
  2. Use netstat to identify the game server’s IP address
  3. Run the pathping x.x.x.x command (replace x.x.x.x with the IP address you found earlier)CMD pathping
  4. Locate the node (hop) that seems to be leaking packets

Depending on your results, the location of the packet leak can be one of the following:

  • Your home network
  • Your ISP’s network
  • The game server

How to fix packet loss in Chivalry: Medieval Warfare?

1. Use a VPN

  1. Download and install Private Internet Access.
  1. Log into your account.
  2. Connect to a fast, low-ping server.
  3. Launch the game.
  4. Check if the problem still persists.

Private Internet Access is a great all-around VPN solution from Kape Technologies. It’s well-known that VPNs can improve packet loss, but their usability doesn’t stop there.

You can also use this VPN to improve ping, give your online privacy a much-needed boost, secure your connection, and even circumvent geoblocking. Besides, Private Internet Access VPN helps in fixing the Chivalry 2 login error.

Private Internet Access

Use this reliable VPN solution to enhance your gaming experience and avoid any possible error.
Free Trial Visit Website

2. Manually troubleshoot your connection

  • Always use wired instead of wireless when possible (Wi-Fi packet loss happens more often)
  • Try connecting straight to your modem or home line (bypass your router)
  • Check and fix any faulty component of your network (PC, cables, drivers, software, router)
  • Avoid peak hours if you think network congestion is the culprit
  • Call your ISP and ask them to look into the matter
  • Contact Chivalry: Medieval Warfare’s support team if you suspect there’s something wrong on their end
  • Upgrade your Internet subscription if possible
  • Restart your router if you haven’t done it in a long while

Chivalry: Medieval Warfare packet loss can be improved

All things considered, you can probably fix packet loss in Chivalry: Medieval Warfare if you’re patient enough. Mainly because network congestion is one of the main causes, and there’s no better fix for it.

Unless you’re a network administrator and know your way around properly managing subnets.

If patience is something you can’t afford, try using a VPN. However, note that it will only work if your ISP is actively throttling your bandwidth.

When everything else fails, you could try getting your hands a bit dirty with manual troubleshooting.

Worst case scenario, you end up performing some much-needed maintenance on your network, which is actually recommended from time to time.

Windows 10 LSASS security feature crashes for some users

Patch Tuesday updates, which come only once a month, typically address multiple Windows 10 security issues. The latest such updates arrived on June 9, 2020, and delivered 139 CVE fixes.

But they also left a trail of OS and app bugs, some of which affect Windows 10 users to date.

Lately, some users have been complaining about their PCs crashing on login after installing some of the June 9, 2020 updates. Microsoft has acknowledged the issue, which it attributes to the failure of the Local Security Authority Subsystem Service (LSASS) file.

The Windows 10 LSASS problem

LSASS is responsible for enforcing Windows 10 security policy. The service verifies your credentials when you try logging into Windows, and it also handles password changes.

Considering lsass.exe is vital to the Windows 10 sign-in process, it’s going to interfere with access to your PC if it crashes. That’s the nightmare some users are facing after installing certain Patch Tuesday updates.

They have to reboot their PCs as a result.

The Local Security Authority Subsystem Service (LSASS) file (lsass.exe) might fail on some devices with the error message, “A critical system process, C:\WINDOWS\system32\lsass.exe, failed with status code c0000008. The machine must now be restarted.

Microsoft has linked the bug to at least four different updates, namely:

KB4557957: This one has had other issues before, including freezing your PC.

kb4560960: It too had a couple of issues, including a now-resolved printing bug.

kb4567512: Microsoft released this optional update on June 16, 2020 to fix a printing issue. Well, the update is now associated with the LSASS bug.

KB4567523: Also a non-security update released to fix the printer problem.

It’s a shame that there’s no ready workaround for the LSASS issue forcing users to reboot their PCs. Microsoft though said it’s developing a fix that should come out in a future update.

Has the lsass.exe bug affected you yet? Kindly lets us know or ask any question via the comments section below.

[wl_navigator]

HotS packet loss: What is it and how to fix it?

HOTS, short for Heroes of the Storm, is a crossover MOBA game released by Blizzard Entertainment. The game lets you choose your favorite Blizzard character, team up and fight the opposing group of players.

Although we’ve called it MOBA, Blizzard holds HOTS to other standards and considers it a hero brawler. There’s a weekly rotation of free champions, but mostly you’ll have to buy characters you want to play with.

The game is based on a freemium model, with most purchases revolving around cosmetic items such as skins and mounts. However, you can also purchase heroes from the roster with real money, so it’s not entirely F2P.

It’s true that you can grind for the heroes you want, but it can take quite a lot of time to complete your roster.

What is packet loss in HOTS?

Packet loss acts up the same regardless of where you may encounter it. Even in HOTS, it happens whenever data packets you send or receive never make it to their destination.

As a result, there’s a desync between you, the server, and the other players, which might put you at a disadvantage. The effects of packet loss are quite severe, especially if the leak doesn’t happen in a short burst.

You rubberband, the game starts moving slowly, and it seems you’re just mashing buttons for nothing, as your character sticks into place. The final blow is when the server disconnects you from the game if the packet loss is more serious.

Although there are many other connectivity issues you might encounter in HOTS such as high ping, or jitter, packet loss is by far the most annoying one.

Mostly because it has a lot of potential causes, ranging from network congestion to old Ethernet cables (yes, really) and that there’s no immediate magic fix for it.

How to test packet loss in HOTS?

1. Use Windows’ pathping tool

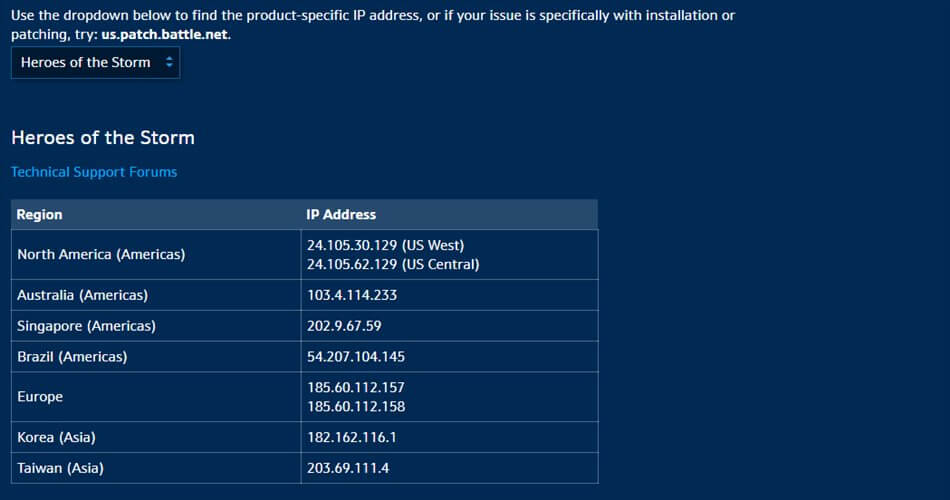
  1. Go to Battle.net’s article on pathping
  2. Scroll down and click the dropdown menuHOTS pathping
  3. Select Heroes of the Storm
  4. Write down the IP address of the server you’re interested in
  5. Launch CMD
  6. Type pathping x.x.x.x (replace x.x.x.x with the IP you previously wrote down)
  7. Wait for the test to finish
  8. Locate the node (hop) that’s leaking packets

2. Use Blizzard’s Looking-Glass tool

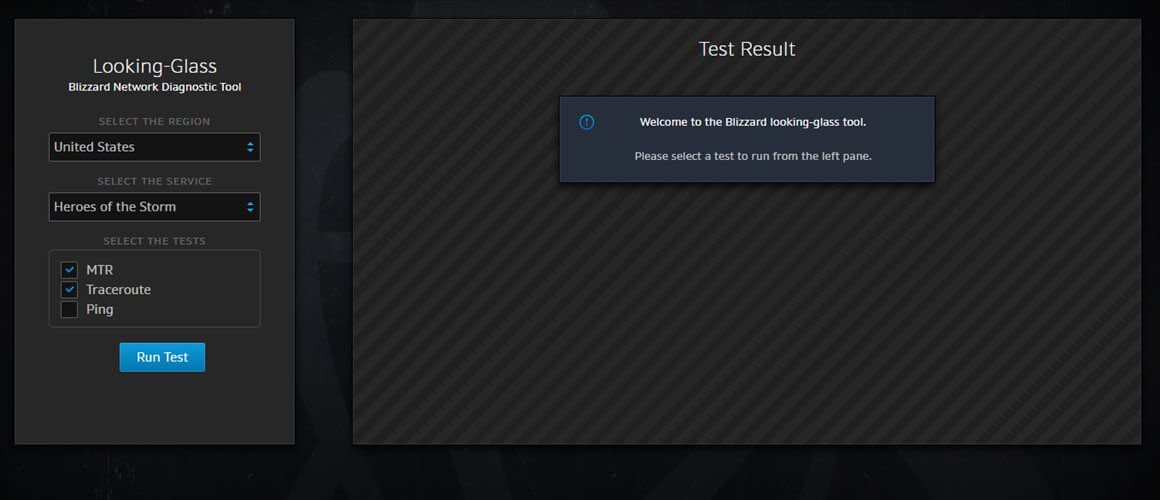
  1. Go to Blizzard’s Looking-Glass website
  2. Select the region from the combo menu
  3. Choose Heroes of the Storm from the service menu
  4. Make sure to check at least MTR in the tests section
  5. Click the Run Test buttonLooking glass HOTS
  6. Wait for the test to be completed
  7. Check the results in the Test Result section on the right
  8. Take a look at the hop that seems to be leaking packets

How to fix HOTS packet loss?

1. Use a VPN

  1. Download Private Internet Access
  2. Set it up on your PC and launch itPIA HOTS
  3. Log into your account
  4. Choose a fast server (low ping) and connect to it
  5. Run either of the tests above
  6. Check if the packet loss improved

Private Internet Access is an excellent VPN service from Kape Technologies that can take care of several problems, including packet loss.

Using a VPN such as PIA can boost your connection by improving ping and packet loss, especially if your ISP throttles your bandwidth.

Private Internet Access

Private Internet Access

Leaking packets in HOTS? Use PIA to fix it.
$2.85/mo. Buy it now

However, it can do so much more for your online privacy and give your connection that much needed security boost. Last, but not least, it can help you circumvent geo-restrictions without significant efforts.

2. Perform some manual troubleshooting

  • Restart your router and modem
  • Use a wired connection instead of wireless (Wi-Fi packet loss occurs more often)
  • Check and repair any faulty component including cables, drivers, hardware components, firmware
  • Make sure your firewall/antivirus doesn’t block or restrict HOTS
  • Upgrade your Internet subscription if you can
  • Avoid peak hours
  • Call your ISP if you notice something wrong on their end during the tests
  • Contact Blizzard if their server returns bad results during the tests

You can fix HOTS packet loss sometimes

To sum it up, even if packet loss in HOTS is one of the most annoying issues you could ever encounter in this game, you can fix it sometimes.

The most effective way to get rid of packet loss would be waiting since leaking packets is caused by network congestion most of the time.

However, if you can’t afford the luxury of time, try using a VPN or performing some manual troubleshooting.

Keep in mind that using a VPN will only improve packet loss (and ping, as a bonus) if your ISP throttles your bandwidth or has improper network routing.

[wl_navigator]

Chrome’s Lite mode to sync with your OS-level data caps

The Google Chromium team is fine-tuning Chrome’s Lite mode to start adhering to your data usage limits, regardless of your OS. Currently, the feature doesn’t sync with users’ data-saving settings in Windows 10, Android, and iOS.

Chrome’s Lite mode to sync with your data usage settings

It just so happens that some of the content on a typical web page isn’t always necessary or useful despite the fact that it could affect your browsing experience. Whether you’re researching a topic, reading news online, or simply checking out antivirus solutions or other software; not everything that loads up is vital.

That’s why Google introduced Lite mode in Chrome—to enable you to use less mobile data while browsing the web. On top of that, the pages you visit may load faster when you’re browsing with Lite mode. Plus, despite carrying less content, the pages retain their appearance and feel, interestingly.

However, a member of the Chromium team recently pointed out that Lite mode doesn’t toggle with the user’s OS-level data saving configurations.

For example, if you turn on Data Saver on your Android smartphone, Lite mode in Chrome remains off. That’s because the two features aren’t in sync with respect to your data saving preferences.

Windows 10 has a similar feature, metered connections, which lets set a data limit on your cellular internet.

Now, according to the Chromium team member, Lite mode should at some point sync to all these operating systems, including iOS.

Eventually, I’d assume all of these OS features would put Chromium into Lite mode, in respect of the user’s system level setting they’ve indicated preferences for.

It looks like Google is making good progress in this respect since the feature is already in the Canary build of Chrome.

Maybe Google will eventually introduce a PC version of Lite mode in Chrome because, currently, there’s none!

Have you ever used Chrome’s Lite mode? You can share your experience by leaving a message in the comments section below.

[wl_navigator]

You can now watch native Prime Videos on Windows 10

It’s been almost 4 years since we’ve heard that Amazon might work on an Amazon Windows 10 app. And we’re not talking about the Amazon Shopping app which wasn’t so successful.

Soon, if you have a Windows 10 device and want to watch Amazone Prime Video, you will have an app for that.

Amazon Video has an app on every platform, including on Xbox, where it even got 4K UHS support.

How can I watch Amazon Prime Video in Windows 10 app?

The new Universal Windows Platform (UWP) version of Prime Video is already in the Microsoft Store in a preview form.

If you click on the link, you are redirected to the Microsoft Store.

After you download the app and launch it, you will enter the sign-in process by specifying your country.

Amazon prime video country

Next, you will be prompted for your e-mail address (or your phone no.) and then the password.

Of course, if you don’t have an Amazon account, you can always do so by pressing the Create your Amazon account button below.

Amazon prime video login

That’s it, enjoy the app!

Enjoy Amazon prime video app

What can you watch in the Windows 10 Amazon Prime Video app?

Here’s an excerpt from the Microsoft Store description of the app:

Watch movies and TV shows recommended for you, including Amazon Originals like The Boys, Hunters, The Marvelous Mrs. Maisel, Tom Clancy’s Jack Ryan, and much more.

App Features:

  • Download videos to watch offline – anywhere, anytime.
  • Rent or buy thousands of titles including new release movies, popular TV shows, and more (not available in all countries/regions).
  • With Prime Video Channels, Prime members can subscribe to more than 150 premium and specialty channels like HBO, SHOWTIME, STARZ, and Cinemax. Only pay for the channels you want, no cable required, cancel anytime (not available in all countries/regions).
  • With X-Ray, view IMDb information about the actors, songs, and trivia for videos as you stream.

Windows 10 Amazon Prime Video screenshot

What do you think about the new Windows 10 Amazon Prime Video app? Share your thoughts in a comment below.

[wl_navigator]

Microsoft Launcher gets support for landscape mode in latest Beta update

Microsoft has released a new Microsoft Launcher v6 beta build for Android users (via Android Police), which brings a handful of new features along with numerous fixes to improve your home screen experience. The new version delivers a fresh look for the Microsoft Feed and a landscape mode support. Let’s dive into each of these additions in detail.

Some of the changes in this new beta build were originally introduced in the separate Microsoft Launcher preview app that has been rebuilt from scratch for Surface Duo. First off, Microsoft Launcher v6 brings the much-anticipated landscape orientation support, a welcome change for users who prefer to use their phones that way. Many other Android launchers already offer landscape mode support, so it’s nice to see the Microsoft Launcher finally catching up.

Another notable change is a redesigned Microsoft Feed which now features better spacing between the tiles/cards and a blurred background. Finally, the recent update brings a bunch of new wallpapers to brighten up your home screen. To access these wallpapers now, head over to the Microsoft Launcher settings, and then check the Bing and Microsoft folders to apply them.

Microsoft Launcher feed
Credits: Android Police

As usual, you can register for the Microsoft Launcher Beta program by visiting the app listing in the Google Play Store and then tapping on the “Join the Beta” link.

Microsoft Launcher
Microsoft Launcher
Price:
Free

How to create a custom video, speaker, and audio setup in Microsoft Teams

There comes a time where the webcam, speakers, or microphone on your PC might not be good enough for your conference calls. Your microphone might not be of good quality, your speakers might sound horrible, or you might just want to use a microphone that will better highlight your voice. In these cases, you might end up plugging in an external peripheral to your PC via USB or Bluetooth.

In some cases when you want this, you might still want to hear the audio from a meeting on your PC speakers, but use your microphone on your headset — or vice versa. To get this working right, you’ll need to head into Teams and pick and choose your audio, video, and speaker settings to create a custom setup.

The process is relatively easy, and in this guide, we’ll explain how you can go about doing that.

Before a call

To create a custom setup before a call or as you join the call, you’ll want to click the PC Mic and Speakers settings cog under your video feed. After you click that, you’ll see an option for Audio Devices. Click the down arrow box in this field, and then choose Custom Setup. This will switch away from using your PC’s microphone and speakers and pick and choose your own setup.

Next, head to the fields underneath. In the Speaker box, click the down arrow and choose the device or peripheral you want to use for your speaker. In our case, we’re keeping the default Realtek speakers for our Surface. After that, you can head to the Microphone box, click the down arrow, and choose the microphone you want to use. We’ll be using our Headset. You also can change the webcam by clicking the down arrow next to Camera and choosing another camera, too.

When satisfied, you can test out your setup to see if it works for you. Simply click the Make a test call button. This will call Microsoft’s Teams Echo service, where you can say a message and have it played back to you to see if everything works. At the end of the call, you’ll get a list of your call results, showing a list of everything you choose, and if it worked.

During a call

You not only can create a custom setup before a call, but you also can do it during the call too. This might be a case where you want to switch things up after you realize your call isn’t sounding or going the way you want.

To do this, simply hover your mouse over the middle of the screen, and then click the . . . more actions option. From there, click the Show device settings option, and then choose Custom Setup from the drop-down box under Audio Devices. You can then choose the speaker and microphone or webcam you want to use in the boxes that show up under that.

You’ll be able to see feedback from your microphone, to see if it works. Try increasing the volume on your PC or Mac to test that, too. When satisfied, click the (X) next to Device Settings to close the window, and join your call.

Other ways to change settings

These are just two ways to create a custom setup in Microsoft Teams. You also can change the settings before any calls by heading to your profile icon, clicking the Settings option, then choosing Devices. From here, under Audio Devices choose Custom Setup and then pick your speaker, microphone, and camera as we explained above.

As we always remind you, this is just our latest Microsoft Teams guide. We’ve extensively covered the topic over the past few months, and have tips about chats, search, and so much more. Check out our news hub for all the latest Microsoft Teams and Microsoft 365 news and information.

Lenovo ThinkPad Yoga L13: An IT Pro’s alternative in a pinch

Lenovo is back with an addition to its L-series lineup of laptops with the ThinkPad L13 which offers mid-level performance and specs for  IT pros on a budget. Starting at $677 (not accounting for partnership or wholesale discounts) a small-to-medium-sized business can outfit its IT staff and arguably its in-office employee base with a fleet of L13’s that offer a customary productivity experience.

For a little under $700, customers get a convertible device with an i3 Intel Core 10th gen processor, 4GB DDR, 128GB SSD PCIe storage, integrated Intel UHD graphics, and a 13.3 FHD touchscreen display. However, for a few hundred more dollars businesses can upgrade to the specs I reviewed that make the L13 the pitch hitter purchase I think makes more sense for staff on a relative budget.

The Design

The L13 comes with typical industrial ThinkPad design elements that include the matte black finish, u-shaped chicklet style keyboard, infamous red-nipple, dual button trackpad clickers above the trackpad itself, 80-20 screen to body ratio bezels and patented three-point 180-degree hinge mechanisms for full 2-in-1 convertibility. While the L13 lacks the refining touches of say a ThinkPad X1 Carbon or the commercial polish of the Ideapad lineup, it does offer some improvements on the company’s traditional SMB offerings.
The L13 Yoga weighs roughly 3 pounds but its rigid chassis eliminates any flex in the frame when pressing on the body, keyboard, or screen. While most of the parts are soldered on, there are easily accessible screws under the body for battery replacements or storage upgrades, after the fact. The L13 won’t win any design awards anytime soon, but its understated design adds to its no-nonsense look that works well when tossing it into a non-descript satchel or backpack for on-the-go IT troubleshooting.

As part of the design, Lenovo opted to keep to its tried and true industrial style that also enables a breadth of connecting options that include a full HDMI port (that’s awfully convenient when working from home on and HDMI monitor), dual USB-A ports, micro-SD card slot, 2 USB-C gen 1 power delivery, display, and data transfer ports and a traditional headphone and mic combo.

The Guts

The L13 offers up to 4 different spec customizations that include 10th Gen Intel Core i3, i5, and i7 processors as well as varying storage and memory options. The unit I was given came with an Intel Core i5-10310U processor with Pro and up to 4.40 GHz and Turbo Boost spread across 4 cores and 8 threads. Memory on my L13 topped out at 8GB DDR4 2666Mhz, while storage maxed at 512GB. The remaining specs aren’t much to write home about such as the 720p HD webcam, 13.3 FHD touch display, or the integrated Intel UHD graphics chip that stuttered on almost every game I attempted to play, including the measly Streets of Rage 4 for Xbox Game Pass members.
However, in everyday use as a work-from-home device the L13 services pretty well. The Cometlake chipset onboard took care of most of the computational tasks and needs I had but its throttled graphics performance often rendered the machine sluggish at times unlike an Icelake chip might have done. I was able to run several Office 365 applications such as Word, PowerPoint, and Excel while also pushing a VPN connection and populate several Google Ads accounts in open Chrome tabs long before I saw any processing slow down. Yet, when I would open up GIMP for some quick spot-check graphics work, I would have issues transitioning in and out of apps, load times would sometimes double and some applications lost all responsiveness and would require a restart.
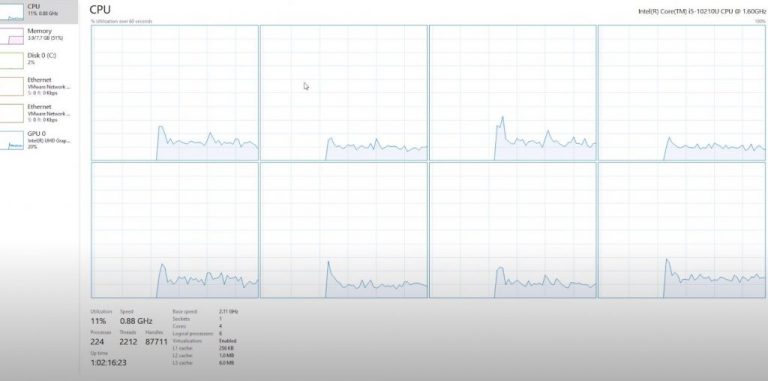
In an 8 hour workday from start to finish, I could regularly get the fans whining noticeably loud and heat up my makeshift work desk several times, but for the typical spot-fixing and VM workflow of an IT crowd, the higher end L13 models should fare decently in day-to-day use.

Pen, Keyboard & Bio authentication

Lenovo seems to have made it a practice to squeeze as much value into the box of each purchase and continues to do so with the L13. Customers get, out of the box, the dedicated pen that sits housed in a little silo near the bottom front of the keyboard, a relatively snappy fingerprint reader for extra security and webcam shutter switch for added privacy. Each of these extra features work very well. The dedicated pen is useful for doodles, highlighting figures in charts, and even navigating parts of Windows when the device is in tablet mode. I’m not sure how much use an IT professional will get out of the pen, but regular employees might enjoy the convenience when document signatures are needed or they forget their notebooks at their desks during meetings. The convenience factor of using the pen is also extended to its rechargeable nature. Customers no longer need to hunt for their coveted AAA battery stash, as placing the pen back into its discrete housing also recharges it.
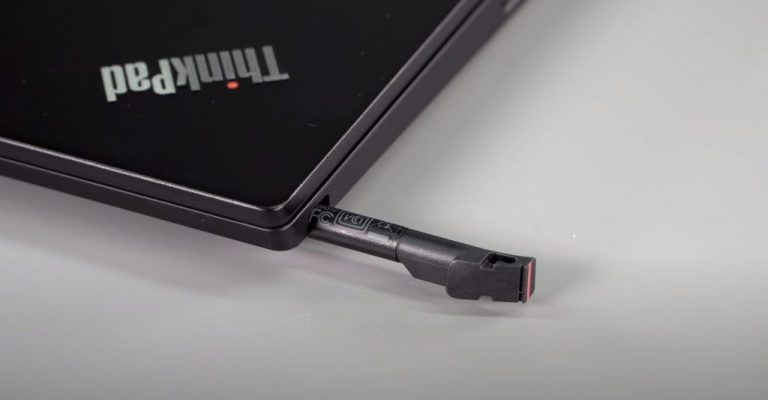
 

As for the keyboard, it’s a standard Lenovo ThinkPad keyboard. The rigidity of the chassis makes for a nice typing experience devoid of mushy button presses or flex points in the center mass. Key travel is springy and the U-shaped chicklet design was a nice contour for my rather chubby digits. Spacing was nice and the sound of key presses was understated in a good way, there was also a two-step backlighting setting for keyboard making it a convenient choice for late-night typing. The trackpad was ok, there are points near the corners where more pressure needed to be applied to register a click, or oftentimes multiple taps were necessary to get an action done. I haven’t really found a use for the red nipple in any of my tests or reviews, but it’s there for customers who make use of it, it feels sturdy and moves the mouse around the screen as I suspect it’s supposed to.

Regarding the fingerprint reader and webcam shutter, they’re both usable. Personally, I would rather have had the option for an IR that made use of Windows Hello during this time of COVID-19 and work from home, but the fingerprint reader was serviceable and fairly reliable. There were some instances in which I need to touch my finger to the reader several times from different angles, but it would eventually grant me access.
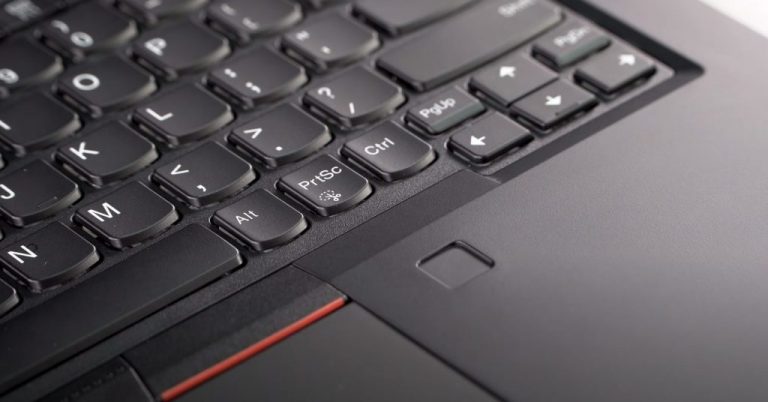
The webcam shutter came in handy in allowing me to join a call with video but grant me some extra seconds to tidy up a background or center my video better. The webcam shutter also makes for a foolproof way to make sure you’re not on camera when you don’t want to be regardless of what conference software list you as.

Summary

I used the L13 as my main workstation while I worked from home, and it did everything I needed to. Occasionally, there was bit of a bog down when flipping back and forth between VM environments, but I blame that mostly on me also running some rather unstable Windows 10 Insider builds. All in all, Lenovo’s ThinkPad L13 is a great device for its price. I don’t know what kind of wholesale deals SMB’s get for devices like this, but I could see an entire office outfitted with these laptops and get the most out of its convertible build, processing power, and built-in security features. The one thing I didn’t mention during my review earlier was battery life, and that’s because it’s nothing to write home about, literally. I saw 5 to 7 hours off the plug, but when working from home, that gets a bit skewed as I believe it would be when working in an office, eventually. The L13 wasn’t a road warrior for me, but when used as a stationary workstation it shined. The quick charge feature was also a reason I didn’t have to point out battery life because within an hour of charging I was back up and running, rarely missing a beat.
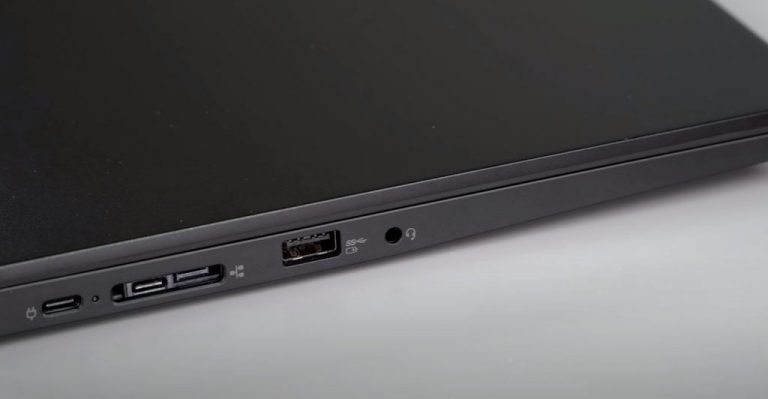
 

Who is the L13 for?

I’d recommend it to anyone looking for the bare minimum, in a good way. The L13 isn’t a designer laptop, but it has everything a user would need to get their work done such as a decently vibrant touch screen, pen for notetaking, ok battery life, latest chipsets for a boost in processing output for more demanding Office 365 tasks, and a plethora of I/O for connectivity. There is very little to be negative to be discussed about this laptop. I think any business looking to outfit its IT staff or single pro would benefit in handing them an L13. It’s lightish, portable, and gets the job done for under $1,000.

Recommendation: Buy, but with office-oriented uses in mind.

How to convert between units using a Windows 10 PC

Need to convert between units? There’s no need to head to the internet while working on your PC. Instead, open Windows 10’s Calculator app to use the built-in quick conversion features.

With Windows 10, Microsoft made Calculator into far more than a simple arithmetic tool. Click the hamburger icon in the top-left to switch between the calculator’s modes.

Unit conversions in Calculator on Windows 10

The options available are comprehensive – whether you’re looking for length, weight, temperature or even currency, Calculator has you covered. There’s even options for converting units of time, power and data.

Unit conversions in Calculator on Windows 10

Chances are that you’ll be able to use Calculator to convert between any commonly used sets of units. Select the appropriate category and then enter your two values. You can change the selected units using the dropdowns below the value.

Unit conversions in Calculator on Windows 10

With this example, we’re converting miles per hour into kilometres per hour. We can also see the result if we convert into nautical knots, or even aeronautical mach units.

Calculator automatically remembers your last used conversion category. Next time you use the app, it will return you into that section. Expand the hamburger menu and click the “Standard” option at the top to return to the regular mathematical calendar.

Facebook Gaming won’t replace the Mixer tab on the Xbox One console’s dashboard

With the recent announcement that Microsoft’s Mixer video game streaming service would be closing next month and a strong push for streamers to jump over to Facebook Gaming, many Xbox One owners naturally began to wonder if a Facebook Gaming tab would replace the Mixer one on the console’s dashboard.

The company’s Larry Hryb (aka Major Nelson) responded to this concern on Reddit by saying, “If you are asking if the current Mixer integration in the dashboard is just going to become Facebook gaming. The answer is no.”

While this does confirm that the Mixer tab won’t simply be swapped out for a near-identical Facebook Gaming one, this doesn’t necessarily mean that Facebook Gaming won’t have a presence going forward. In fact, Phil Spencer recently hinted that support for more streaming platforms could be coming to the Xbox One and presumably the Xbox Series X.

Hryb elaborated on Spencer’s statement in another Reddit comment which teases some of the changes that are in store for streaming on Xbox consoles. “Built-in broadcasting from Xbox One will be temporarily disabled in the transition after July 22 so we can build it into a more social experience for Xbox players,” he wrote. “In the meantime, players can stream their gameplay from Xbox One using the Twitch app or by connecting to a PC and streaming via software such as OBS or XSplit.”

No ETA was given for the new “social experience” but it’s probably safe to assume that it’ll be ready in time for the launch of the Xbox Series X console, which will use the same or at least a similar dashboard as Xbox One, later this year.

How would you prefer to see streaming implemented on Xbox consoles? Share your thoughts with the community in the comments below and then follow us on Twitter and Pinterest for more Xbox news.

Twitter updates on Windows 10 and web with List cover photos and quick DM feature

An official list of recent and upcoming changes for the Windows 10 and web experience of Twitter has been published.

While most users would have noticed the scheduled tweet feature by now, the addition of cover/banner images for Twitter Lists went live just this week and the quick access to DMs is currently being tested with a very small group of users.

You can read all about it and the other changes to the Twitter PWA here:

New

  • DM Quick Access: We’re testing ways to allow you view and send DMs without having to navigate to the DM inbox. Starting with a small % globally, we’re allowing users to view their DM inbox and conversations through a docked drawer when using Twitter in widescreen.
  • Drafts: Not quite ready to send that Tweet? You can now save it as a draft, or schedule it to send at a specific time – all from the Tweet composer! See it in action
  • Lists: Customize Lists you own by adding a banner image. You can upload and preview the image through the edit list flow.

Updated

  • Internet Explorer 11 support: twitter.com no longer supports Internet Explorer 11. Please see this Help Center article for a list of supported browsers.
  • Lists: Find new accounts to add to your Lists quickly with the suggested accounts tab. Find it under manage members when editing your List.
  • Navigation: You can now use a middle mouse button to open links in new tabs quickly and easily.
  • Retweets with comments: After launching the Retweets with comments timeline last month, we’ve made some updates! We’re now including counts for Retweets with and without comments on all timelines. We’re also testing a variation on the “Retweets” label on the Tweet detail page to make it more obvious when there are Retweets with comments, so keep an eye out!

Fixed

  • Account Registration: Fixed an issue preventing movement through the registration flow when attempting to reuse a previously entered password.
  • Emoji Picker: Fixed an issue where opening the emoji picker on Firefox broke the Tweet and DM composers.
  • Lists: Twemoji will now render properly on the List detail screen.
  • Media Upload: Attempting to upload media we don’t support or non-media files will no longer leave you in a bad state.
  • Media Upload: Fixed a bug where videos could fail to upload randomly sometimes.
  • Tweet Compose: Using the Cmd/Ctrl + Enter keyboard shortcut when the composer is in an invalid state will no longer attempt sending the Tweet.
  • Tweet Compose: When adding Tweets to a thread you’ve started on mobile, the composer will no longer scroll you too far up the thread.
  • User Profile: Previously, if a user’s Name and Display Name were the same, the “Follows you” indicator on the user’s profile page or profile hovercard wouldn’t be shown. It will now display.

Do you use the Windows 10 Twitter app or do you prefer a third-party solution? Share your recommendations with the community in the comments below and then follow us on Twitter for more Windows 10 app news.

Twitter
Twitter
Developer:
Twitter Inc.
Price:
Free

Bridge games online that you can play in your browser

Playing cards have always been a favorite activity between friends.  Bridge is one of the best-known card games. It needs four players, a deck of cards and a lot of fun. What better way to spend a rainy afternoon than playing bridge with your friends? But what are you going to do if you can’t gather all in one place? Simple. Just read this article and choose one of the websites that offer online bridge games. We strive to bring you all the information you need to make the best choice.

Use a dedicated gaming browser for your Bridge games

However, to play online bridge you need a browser. And though all browsers can serve pretty well for this purpose, our strong recommendation is Opera GX. Opera GX is the best browser for online games. It is meant to be very fast and it opens into a split of a second. It features a rich gaming theme, completely integrated with Razer Chroma. You don’t have to worry about resources management. With Opera GX you set the amount of RAM that this browser uses so you don’t affect other tasks you have open. Opera GX allows you to set it a network bandwidth limit. This way you can let other applications use the bandwidth. Opera GX is built around the concept of security. It comes with a VPN with unlimited bandwidth. Its built-in ad-blocker takes care of unwanted ads. You are always connected to your friends during online gaming sessions thanks to Opera GX’s Messenger. The latest news in the gaming industry is accessible through GX Corner. All of your favorite games are found here, very well organized. So, trust us and try the best browser for games, Opera GX and you are not going to be disappointed.


Editor's choice
Opera GX browser logo
  • Best gaming browser
  • Resource controller
  • Custom UI
  • Twitch integration
  • Free VPN included
  • Ad-blocker

Best online Bridge games to have fun

Bridge Base Online

Bridge Base Online has a community of more than 250000 players. It comes with a rich, interactive interface. They present themselves as a social club, also. You can choose to play for free, without becoming a member. If you want, you can decide to become a member and enjoy the full experience and benefits.

Tournaments winners and best players receive BBO points. They also host ACBL tournaments, where winners receive masterpoints. Though Bridge Base Online is more of a social club for passionate bridge players, all players are welcome to learn and have fun.

⇒BridgeBaseOnline

Bridge Doctor

Bridge Doctor has a simple interface but very rich content. If you want to learn how to play bridge, then this is the right place. It features Bridge lessons right on the first page of the website. Once you become a member you can start playing.

Choose to play practice games against the computer. Or you can join a game against human players. If you have a paid membership plan, you can create your own game and call your friends to share the fun.

⇒Bridge Doctor

Bridge Club Live

Bridge Club Live focuses on players with extensive knowledge of Bridge game. You need to become a member and pay a fee to be able to play. They organize regular tournaments and even tournaments for professional players. The graphics are quite good and pleasant.

Though this site has more of a professional look, you have the option of playing a live game with your friends.

⇒Bridge Club Live

OK Bridge

OK Bridge has a history that starts in 1989. You can see it has a long experience from the way it is built. Simple, but with a lot of features for avid bridge players. They have a teaching and practice section for new players. You can become a member and play for free.

Or you can pay for a subscription plan and participate in one of their daily tournaments. Best players receive Masterpoints.

⇒OK Bridge

24-7 Bridge

24-7 Bridge is the fastest and simplest way to play Bridge in your browser. Once it loads, all you need is a click and you can start playing. The whole interface is built around a bridge table. Your teammate is a computer, as are your opponents. It’s a very good place to practice Bridge or just to relax.

⇒24-7 Bridge

These are our recommendations for websites on which you can play Bridge in your browser. In our view, you have the best experience playing Bridge when you are using Opera GX.

Please share with us your thoughts in the comments section below.


[wl_navigator]

Microsoft Edge sync feature ships to more enterprise users

Microsoft Edge started gaining sync capabilities a while back when you could only sync basic settings and things like passwords across your signed-in devices.

The Chromium-powered browser has continued to get both consumer-focused and enterprise-oriented features, though. It recently received the ability to sync extensions across multiple devices, for example.

Well, starting today, Microsoft 365 Business Premium users can enjoy Edge enterprise sync services.

Microsoft Edge enterprise sync services

The Edge enterprise sync services update is automatically rolling out to new M365 Business Premium users. So, if you subscribed to the cloud-based managed IT service in May 2020 or later, you don’t have to do anything to activate the sync feature.

However, older subscribers (before May 1, 2020) may have to sign out of their browser and sign back in to activate syncing. Microsoft recommends the steps below to get the feature working in Edge:

To sign out of Microsoft Edge, make sure you have your profile with your Business Premium account active, then select the Sign Out button in your profile settings. Then, sign back in with the Sign In button. Within a minute or two, sync should be working as expected.

From now on, M365 Business Premium users can sync their browsing data and have a uniform experience across all their logged-in devices.

In addition, syncing Collections should enhance your productivity in the workplace since you can always pick up your content research where you left off each time you sign in to a synced device. Plus if you sync your passwords, signing in becomes a breeze so you can quickly get started on your business account every time you boot your device.

Previously, not all Azure Active Directory (Azure AD) account owners could access the Microsoft Edge sync feature.

Are you an M365 Business Premium user? Or, better still, are you able to sync your Microsoft Edge browsing data? Feel free to leave your feedback in the comments section below.

[wl_navigator]

Some users decry new weather tile in Windows 10 Search

Apparently, Microsoft is slowly pushing a weather tile to the Search UI in Windows 10. But some users are not happy with the server-side update that started rolling out a few days ago.

While the OS has a built-in weather app, the latest alternative is ideal for users that seek real-time weather updates.

New weather tile in Windows 10 search

You’ll soon be able to access the weather forecast for your location in the Search pane of Windows 10.

Some insiders have started receiving the server-side update, such as Reddit user Vendetta_47, who shared a screenshot of the feature to the Windows 10 Subreddit. The user said that they’re on version 1909 in the release preview channel.

In addition, the new weather tile in Windows Search is rolling out to all users in the coming days. You can try rebooting your PC to see if the feature is available already.

However, it seems that some users didn’t receive this news too well, based on their feedback on Reddit.

For example, this user argues that weather updates are sometimes an abuse of AI.

All of these companies are obsessed with AI, and what do we see from the fruit of most of this labor? Weather. It’s always weather. These companies are obsessed with the weather, am I the only one who doesn’t check the weather 24/7?

Others are eager to use the new weather tile in Windows search, though. One such user reports that the feature isn’t getting their location right.

But it appears you can manually set your location to receive more accurate and relevant weather information. Simply navigate to Settings>Privacy>Location.

It’s not uncommon for Microsoft to use Windows Search for purposes other than its core function. Just the other day, some users reported encountering Microsoft Edge recommendations when looking upChrome or Firefox via the Windows 10 Search UI.

What’s your take on the new Windows 10 Search weather tile? You may reach for the comments section below to leave your feedback.

[wl_navigator]

3 best VPNs to fix Green Hell lag spikes and reduce ping

If you’re experiencing Green Hell lag or high ping, using a VPN can help eliminate this issue.

Green Hell is a survival game with an open world that takes place in the Amazonian rainforest. Available for Steam, it features single-player mode and online co-op for those who want to team up with other players. There’s even a story mode for co-op.

However, some players have trouble with the online co-op version due to Green Hell lag spikes and latency issues. If you’re one of them, you can use a VPN to improve your ping and refine your online gaming experience, no matter what platform you’re using.

Most VPN users know they can hide their IP address and encrypt their traffic by connecting to a VPN server. But few are aware that they can speed up their Internet connection and optimize their network traffic for gaming. It’s also possible to minimize packet loss with a VPN.

What are the best VPNs to fix Green Hell lag?

Private Internet Access

PIA is the best Green Hell VPN

When it comes to eliminating Green Hell sudden game lag, you can’t go wrong with Private Internet Access (PIA). Developed by Kape Technologies, PIA has a wide range of network servers optimized for gaming that you can use to redirect your network traffic through VPN.

You can easily host game servers with PIA, thanks to the fact that it has native support for port forwarding. Furthermore, you can use static or dynamic IP addresses, enable split tunneling, choose between the OpenVPN and WireGuard protocols, and use exclusive DNS servers.

PIA supports SOCKS5 and Shadowsocks proxy servers, a kill switch, together with an ad and malware blocker for browsers. Plus, it can fix Wi-Fi packet loss. If you ever stumble upon any technical issues with this Green Hell VPN, you can contact 24/7 live chat and ask for assistance.

More about PIA:

  • +3,300 VPN servers (48 countries)
  • 10 connections at the same time
  • No traffic logs
  • 30-day money-back guarantee (no free trial)
Private Internet Access

Private Internet Access

If you need a quick Green Hell lag fix, turn to PIA for assistance.
$2.85/mo. Buy it now

CyberGhost VPN

use CyberGhost VPN to fix Green Hell lag

An alternative solution for dealing with Green Hell lag spikes is by using CyberGhost VPN. It’s a fast and secure virtual private network solution owned by Kape Technologies, which you can use to evade geoblocks and optimize your network traffic for gaming.

If your bandwidth is limited, you can create whitelists or blacklists to isolate the Green Hell VPN connection from other applications, thanks to CyberGhost’s support for split-tunneling mode.

CyberGhost VPN can fix Green Hell co-op lag using private DNS servers to speed up your Internet connection. It supports OpenVPN, an ad and malware blocker for browsers, an emergency kill switch, and DNS leak protection. You can also use it to fix Xbox high packet loss.

More about CyberGhost VPN:

  • +6,500 VPN servers (89 countries)
  • 7 simultaneous connections
  • No identifying logs
  • Up to 45-day money-back guarantee (1-day free trial)
CyberGhost VPN

CyberGhost VPN

Whenever Green Hell becomes laggy, use this dependable VPN service to reduce your ping and improve your gameplay.
$2.75/mo. Buy it now

NordVPN

use NordVPN to reduce Green Hell ping

If your VPN connection is refused by the remote host, it’s time to use NordVPN to get past this issue and fix Green Hell multiplayer lag. That’s because this VPN solution has obfuscated servers to make your VPN traffic look like typical HTTPS while repairing network congestion.

Owned by Tefincom & Co., NordVPN provides you with fast VPN servers spread across the entire globe. If you’re not sure where to begin, you can connect to the recommended server to get the best possible Internet speed and minimize jitter.

NordVPN is an excellent Green Hell VPN solution, thanks to the fact that it uses OpenVPN to encrypt your data traffic. It supports custom DNS servers, an ad and malware blocker (CyberSec), and a kill switch ready to turn off your VPN when required.

More about NordVPN:

  • +5,100 VPN servers (59 countries)
  • 6 connections at once
  • No logs
  • 30-day money-back guarantee (no free trial)
NordVPN

NordVPN

Easily fix Green Hell lag and ping issues by resorting to this powerful VPN app.
$3.49/mo. Buy it now

To sum up, you can use a premium VPN solution to effortlessly fix Green Hell lag spikes, high ping, latency issues, packet loss, and other connectivity issues.

By routing your Internet traffic through VPN servers, you can reduce the distance between your computer and the remote server, resulting in better speed.

[wl_navigator]

Bitdefender update patches Safepay error handling bug

The Bitdefender is one of the most popular antivirus solutions for resolving different types of cyber threats, including data theft, ransomware, and distributed denial of service (DDoS) attacks.

But it’s got its own inherent security flaws as cybersecurity researcher Wladimir Palant revealed recently.

Notably, Bitdefender’s Safepay had a bug that malicious actors could have exploited in remote code execution (RCE) attacks.

Bitdefender fixes Safepay bug

Palant brought the Safepay issue to the attention of Bitdefender, which swiftly released an update with a security fix.

Safepay is a browser security component that should protect your online transactions, including banking and e-shopping. Its objective is to put your browser activity in a sealed environment, making the theft of your personal information difficult.

It is ironic, then, that the same antivirus component meant to protect your browser could have been breached by cybercriminals.

Bitdefender has since released an advisory on the Safepay bug it patched:

Improper Input Validation vulnerability in the Safepay browser component of Bitdefender Total Security 2020 allows an external, specially crafted web page to run remote commands inside the Safepay Utility process. This issue affects Bitdefender Total Security 2020 versions prior to 24.0.20.116.

The HTTPS error handling issue in Safepay

The CVE-2020-8102 flaw in Safepay has something to do with the way Bitdefender handles HTTP connections.

According to Palant, the antivirus tool handles HTTP error certificates instead of leaving that task to the browser. So, when the solution encounters a suspicious security certificate, it offers the user the option of exiting to safety or proceeding to open the web page in question.

But the URL in the browser’s address bar remains the same, which appears to be the root cause of the RCE vulnerability.

For example, a hacker could load a malicious page in the Safepay by first presenting a valid certificate on initial request before changing to an invalid one from the same server. The vulnerable browser won’t stop the suspicious page behavior.

Thankfully, Palant’s is only a proof of concept (PoC), which is no evidence that some bad actors actually tried to exploit the RCE bug in Safepay.

As always, you’re welcome to leave any suggestions or questions in the comments section below.