How to use “slide to shut down” on any Windows 10 device

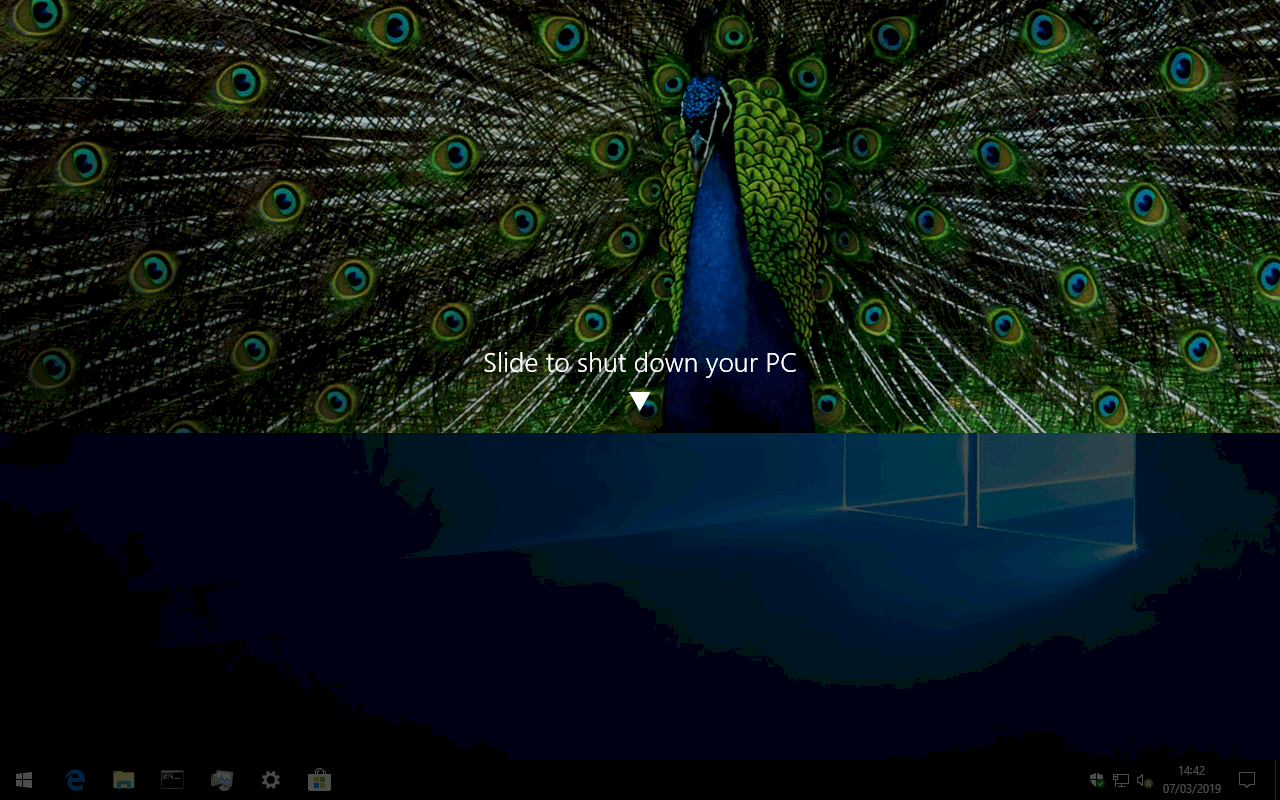
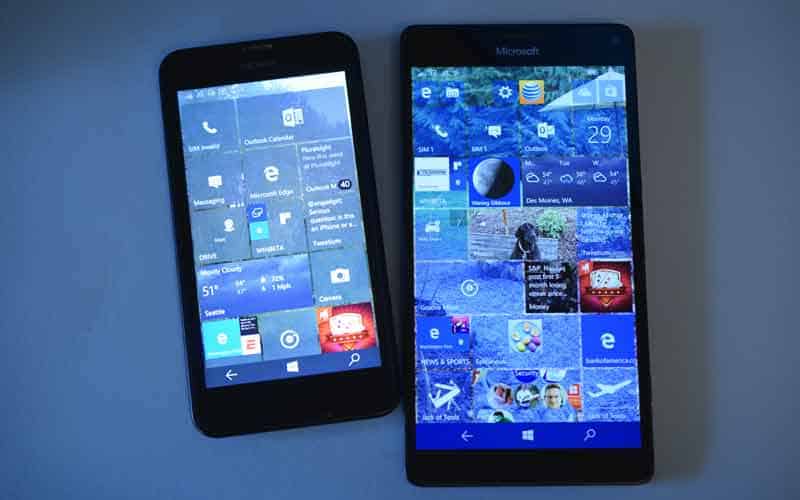
Windows 10 tablets and phones have a “slide to shut down” interface which appears automatically when you long-press the power button. This screen, as the name implies, allows you to quickly turn off your device by swiping an overlay downwards.

Unless you’ve got a touchscreen device with a physical power button, you’ll likely never see this screen. It’s not exposed within the rest of Windows’ power options and there’s no built-in setting to enable it. There’s nothing to stop you using it with a mouse though, should you wish to have another shutdown option. This guide will show you how to assign a shortcut key to “slide to shut down” so you can use it on any device – whether it meets the usual hardware requirements or not.

The Slide to Shut Down screen is provided by its own program – SlideToShutDown.exe. Consequently, accessing the interface is as simple as launching the program. It’s located inside Windows’ System32 folder, which means you should be able to find and run it by typing “SlideToShutDown” directly into the Start menu.

Typing this name will quickly become tedious if you use the feature regularly. Instead, create a new link to the program on your desktop. You can then assign a keyboard shortcut to the link, letting you invoke the interface from anywhere within Windows.

To get started, launch the Run utility by typing “Run” into the Start menu. In the box which appears, type “system32” (without the quotes) and press Enter. The System32 folder will appear in File Explorer. You should take care here since this directory contains thousands of important Windows system files.

Scroll to or search for “SlideToShutDown.exe”. Next, right-click the file and choose Send to > Desktop (create shortcut). You can now use your new desktop shortcut to invoke the Send to Shut Down interface.

Finally, assign a keyboard shortcut to your link. Right-click the shortcut on your desktop and choose “Properties.” In the “Shortcut key” input field, press the keyboard shortcut you want to use – we’re using Ctrl+Alt+S, but you can assign whichever sequence works best for you. Click Apply and then OK to close the properties window.

You should now be able to display Slide to Shut Down at any time using your keyboard shortcut. In our case, pressing Ctrl+Alt+S from anywhere in Windows launches the overlay. You can then click or tap and drag downwards to shut down your device, as if you were using a Windows phone or tablet.

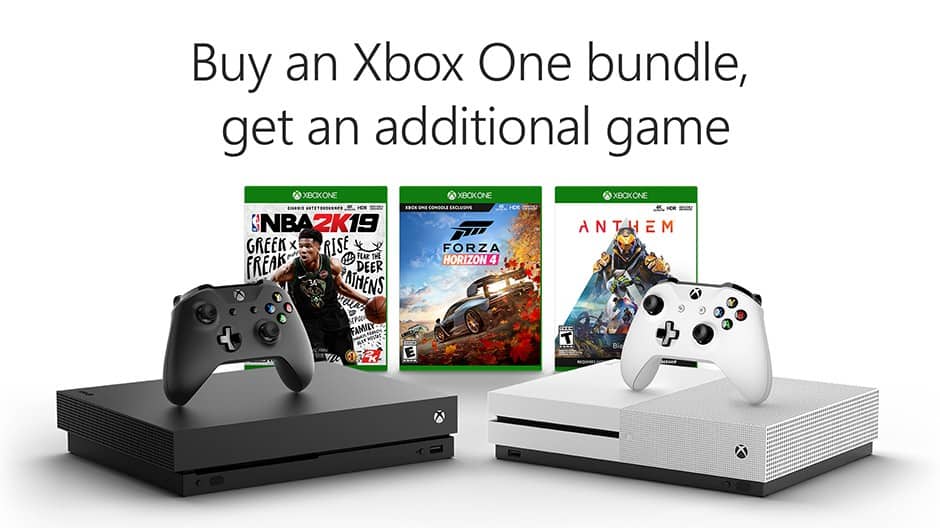
Deal: Get an addition free game of your choice with the purchase of an Xbox One bundle

For a limited time, Microsoft will be offering a free bonus game when you purchase an Xbox One bundle on the Microsoft Store or other participating retailers in the US. The free games you can choose include the brand new Devil May Cry 5, Metro: Exocus, Anthem, or the upcoming Tom Clancy’s The Division 2.

If you choose to purchase an Xbox One bundle on the US Microsoft Store, the company is also currently offering a bonus Gears of War 4 digital code with all Xbox One S and Xbox One X bundles. Please note that the Xbox One X Robot White Special Edition 1TB console is still on sale at $399 ($100 off), and the same bundle with a black Xbox One X is similarly priced. All Xbox One S bundles are currently at $299, so if you can afford the additional $100 for the much more powerful console you probably won’t regret it.

The US-only promotion kicks off today, March 8 and will last through March 16. Let us know in the comments if you plan to take advantage of this sale to buy a new console.

EA opts for ‘fan events’ over an official E3 2019 presence

Electronic Arts studio is joining a growing list of non-participants in this year’s E3 gaming convention.

According to an EA press release regarding the resurrection of EA PLAY, the studio confirms that it will be skipping its traditional press conference held during E3, and instead is opting for multiple live streams that will happen during the first two days of the conference.

Under the guise of “less talk more play,” EA is choosing to pre-empt E3 by hosting its own events before and during the normal E3 schedule with the first event starting Friday Night, June 7, 2019.

It all starts this year on Friday night, June 7, 2019, with an all-new EA PLAY kickoff event. We’re skipping the press conference this year and are replacing it with multiple live streams that will air during the first two days of the event, bringing you more of what you’ve told us you want – more gameplay and insights from the teams making the games.

Weekends are meant for play, and this year we’ve moved the EA PLAY fanfest to Saturday, June 8 and Sunday, June 9 where players will get hands-on with our games. We’ll also have content creators streaming live from our Creator’s Cave in the Hollywood Palladium providing gameplay content to our players viewing online. EA.com will be the home for all online EA PLAY content. Players can get behind-the-scenes with our games via exclusive gameplay reveals, developer talks and breaking news.

As if seeing EA’s game roster first hand and being able to test out some of the games in development were not enough, EA is also making their events ‘free for all to attend.”

While the events are free, fans will still need tickets to enter. Tickets for the various events will be available starting next month, April 2019.

With another high profile studio exiting the gaming conference, it’s becoming incumbent that Microsoft have enough of gaming story and deliverables to carry much of the show this year.

Can’t sync emails on Windows 10/11? Here’s how to fix it

Not being able to sync your emails on Windows 10 can be a big problem, especially if you relay on email for communication. Although this can be a major problem, there’s a way to fix it.

Are you frustrated or stuck trying to sync emails on your Windows device or computer? Worry no more because we’ve got solutions to help you fix it.

The digital age has come with a myriad of benefits including being able to view and respond to emails via multiple devices, besides your computer.

But what happens when you cannot sync emails on your Windows device or PC?

Usually, it may seem as easy as clicking or pressing the sync tab and expecting the process to continue, but sometimes, there are situations that call for different solutions to getting all your messages.

Here’s how you can sync emails on Windows when it doesn’t seem to be working.

Having Windows 10 mail sync problems? Try these solutions

  1. Run App troubleshooter
  2. Change privacy settings to enable syncing
  3. Change Mailbox Sync settings
  4. Remove the email account then add it back
  5. Reconfigure your account
  6. Run a System File Checker scan
  7. Manually reinstall missing FOD Package
  8. Run Windows Update troubleshooter
  9. Download the latest version of Windows 10
  10. Check your security software
  11. Turn off Windows Defender Security Center
  12. Check Advanced Mailbox settings
  13. Check Two-factor authentication
  14. Check account settings if they’re outdated

Solution 1 – Run App troubleshooter

  1. Right click Start
  2. Select Control Panel
    control panel emails won't sync
  3. Go to the top right corner and change View by option to Large icons
    large icons emails won't sync
  4. Click Troubleshooting
    troubleshooting email can't sync
  5. Click on View all option on the left panel
    view all emails won't sync
  6. Select Windows store Apps
  7. Follow the instructions to run the app troubleshooter

Check whether you are able to sync emails again. If not, go to the next solution.


Solution 2 – Change privacy settings to enable syncing

  1. Click Start
  2. Select Settings
    start menu open emails won't sync
  3. Click Privacy
    settings app sync emails
  4. Select Calendar on the left pane
    calendar sync emails
  5. Turn on Let apps access my Calendar
    let apps access my calendar emails won't sync
  6. Go to Choose apps that can access calendar
  7. Ensure that access for App Connector and Mail and Calendar are on

Does this let you sync emails again? If not, try the next solution.


Solution 3 – Change Mailbox Sync settings

  1. Click Start
  2. Select Settings
  3. Select Accounts
    settings accounts sync emails
  4. Click your account to edit settings
  5. Click Change Mailbox Sync Settings
  6. In the Download Email from menu, choose any time
  7. Click Done
  8. Click Save

Check whether you are able to sync emails again. If not, go to the next solution.


Solution 4 – Remove the email account then add it back

You can try to confirm if you remove the email account from Mail App, then add it back again to resolve the sync emails issue.

  1. Click Start
  2. Type Mail in the search field box
  3. Click the Mail app to open it
    mail app search sync emails
  4. At the bottom of the left pane, click the Gear icon
  5. Select Manage Accounts
  6. Choose the account you want to remove
  7. Select Delete account from this device
  8. Add the account back again

You can remove your account and then add it again using advanced setup if you still cannot sync emails after the above process.

The option to delete the email account will be disabled if you’re using the account with the Microsoft account ID you’re logged into.


Solution 5 – Reconfigure your account

You will have to first change the Microsoft account into a local account, then change it back to a Microsoft account.

This helps the email account to sync emails in Mail app.

Here’s how to do this:

  1. Click Start
  2. Select Settings
  3. Click Accounts
  4. Under Your Account on the left pane, select Sign in with Local Account instead
  5. Follow the same steps to switch back the account to a Microsoft account

When you switch back to the Microsoft Account, enter your credentials correctly.


Solution 6 – Run a System File Checker scan

A System File Checker scan checks or scans all protected system files, and then replaces the incorrect versions, with the genuine, correct Microsoft versions.

Here’s how to do this:

  1. Click Start
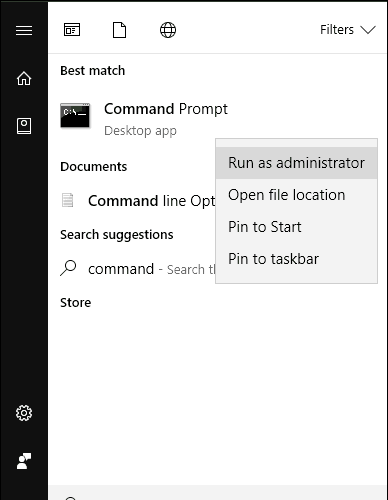
  2. Go to the search field box and type CMD
  3. The Command Prompt app will be listed in the search results
  4. Right click and select Run as Administrator
    command prompt can't sync emails
  5. Type sfc/scannow
  6. Press Enter
  7. Restart your computer

If you still can’t sync emails after this scan, try the next solution.


Solution 7 – Manually reinstall missing FOD Package

Sometimes after upgrading your Windows Build, you may experience problems with Mail for Windows 10 such as your email accounts not syncing new emails, or inability to view email settings, or you just cannot create new email accounts.

This happens because one of the main components for email functionality is a Function-on-demand (FOD) package that may have been removed.

Here’s how to manually reinstall the missing FOD package using Command Prompt:

  1. Click Start
  2. In the search field box, type CMD
  3. Go to Command Prompt on the search results and right click on it
  4. Select Run as Administrator
  5. Click Yes to let the app make changes to your computer or device
  6. At the command prompt, enter this command:

dism /online /Add-Capability /CapabilityName:OneCoreUAP .OneSync~~~~0.0.1.0

  1. Press Enter
  2. The reinstall will start. If there is no progress, press Enter again
  3. Once reinstall is complete, you’ll be prompted to reboot your computer. If not, restart it yourself
  4. After restarting, confirm the account can sync emails in the Mail app.

If your account doesn’t sync emails correctly, try the following:

  1. Click Start
  2. In the search field box, type Mail
  3. Select Mail app from search results
    mail app sync emails
  4. Go to Settings
  5. Click Manage Accounts
  6. Select the account to edit its settings
  7. If Account Settings dialog is available, then the component was installed successfully
  8. If your account still can’t sync emails, delete it then add it back again in Mail App by clicking Settings>Manage Accounts>Select account>Delete account from this device>Delete

Once the account is deleted or removed, select Add account to add it back again.


Solution 8 – Run Windows Update troubleshooter

Sometimes you can’t sync emails if your computer can’t find the correct IP address when trying to resolve a URL for Windows Update website, or for Microsoft Update website.

This error, usually coded as 0x80072EE7, may occur if the hosts file contains a static IP address.

Windows Update troubleshooter resolves any issues that prevent you from updating Windows.

Here are the steps to fix this by running Windows Update troubleshooter:

  1. Click Start
  2. In the search field box, type Troubleshooting
  3. Click Troubleshooting
    troubleshooting emails won't sync
  4. Click View all in the left pane
    view all sync emails
  5. Select Windows Update
    windows update
  6. Run Windows Update Troubleshooter and follow the instructions on the screen

windows update troubleshooter sync emails
Does this let you sync emails? If not, try the next solution.


Solution 9 – Download the latest version of Windows 10

If your Windows 10 version is outdated, then Mail and Calendar apps may not work properly, making you unable to sync emails.

Here’s how to find out if your Windows 10 is the latest version and download updates:

How to determine if Windows is outdated:

  1. Click Start
  2. Select Settings
  3. Click System
  4. Click About
  5. Note the numbers near Version and Build
  6. Go to Windows 10 release information and check the recommended version and build that shows ‘Microsoft Recommends’. If the recommended one is higher than your current version or build, download the latest version.

How to download the latest Windows version

  1. Ensure you’re connected to the internet
  2. Click Start
  3. Go to the search field box and type Updates
    check for updates emails won't sync
  4. Click Check for Updates
  5. Go to Windows Updates
    windows update sync emails
  6. Click Check for updates
    check for updates emails won't sync
  7. Try and install the updates shown

If you still cannot update it, do the following:

  1. Go to Microsoft website and click Download Windows 10
  2. Select Update Now
  3. At the bottom of the page, click Run when asked what to do with the file download
  4. Follow the instructions in the Update Assistant and restart your computer if prompted to

Solution 10 – Check your security software

Firewalls and your antivirus program software may prevent you from being able to sync emails and even calendar events.

It isn’t recommended to permanently turn the security software off, but doing this temporarily will check if it is the actual cause preventing you from syncing emails.

If your computer or device is connected to a network, the network’s policy settings may prevent you from turning off your firewalls and antivirus software.  If you disable your antivirus program, do not open any email attachments or click links in messages from unknown people.

Immediately after you’re done fixing connection error, re-enable your antivirus and firewall.


Solution 11 – Turn off Windows Defender Security Center

This is a free security software included in Windows 10. If you’ve not installed any other security software besides this one, turn off Windows Defender Security Center temporarily by doing the following:

  1. Click Start
  2. Open Windows Defender Security Center
  3. Select Fire and network protection
  4. Choose a network profile
  5. Turn off Windows Firewall for the network profile you’ve chosen
  6. Repeat the same for each profile

If you’re able to sync emails, allow the Mail and Calendar apps through the firewall by doing the following:

  1. Click Start
  2. Open Windows Defender Security Center
  3. Select Fire and network protection
  4. Click Allow an app through firewall
  5. Click Change Settings
  6. In the list of allowed apps and features, check the box next to Mail and Calendar
  7. Check the box in the Private and Public columns
  8. Click Ok

Repeat these steps to re-enable the firewalls for each profile.


Solution 12 – Check Advanced Mailbox settings

If your email account is Google, Yahoo Mail, iCloud, IMAP or POP3, check the settings from the advanced mailbox settings to ensure it is configured to the email provider’s specification.

If you’re using Outlook, Office 365 or Exchange account, advanced mailbox settings won’t be there unless you set up the account using advanced set up.

Follow these steps to check advanced mailbox settings:

  1. Click Start
  2. Type Mail in the search field box
  3. Click the Mail app to open it
    mail app sync emails
  4. At the bottom of the left pane, click the Gear icon
  5. Select Manage Accounts
  6. Click Change Mailbox sync settings
  7. Select Advanced mailbox settings
  8. Confirm that your incoming and outgoing email server addresses and ports are correct
  9. If your email provider doesn’t need authentication, uncheck the box next to Outgoing server requires authentication
  10. If your email provider requires separate authentication for sending emails, uncheck the box next to Use the same name and password for sending email then provide the outgoing server username and password

You can also change the following settings where applicable:

  • If your provider needs SSL for incoming mail, check the box next to Require SSL for incoming email. For outgoing email, check the box next to Require SSL for outgoing email.
  • Confirm that your Contacts server, and Calendar server addresses are correct.

Note: If you’re using Exchange account that needs advanced settings, remove it, then add it back using the advanced settings.


Solution 13 – Check Two-factor authentication

The two-factor authentication function protects your account from being infiltrated by outsiders or unknown people.

It’s a means of protecting it from others accessing or signing into it, by verifying your identity using a password, plus a second method like your contact or security information.

Mail and Calendar apps on Windows 10 do not support the two-factor authentication, so if it is turned on for your account, create an app password for the account, which will be used instead of your normal password for apps that don’t support two-factor authentication.

Check with your email provider on how to do this.


Solution 14 – Check account settings if they’re outdated

If your account settings are out of date, this can be due to an incorrect password.

Here’s how to fix this:

  1. Go to Mail app
  2. Go to the notification bar at the top of the app
  3. Click Fix account
  4. Update your password
  5. Enter the new password
  6. Select Done

For Gmail or iCloud, you’ll need to go to the respective websites to change your password.

Any luck with these solutions? Let us know in the comments section below.


RELATED STORIES TO CHECK OUT:

Xbox One’s NBA LIVE 19 video game is now live in the EA Access Vault

The NBA LIVE 19 video game joined the EA Access Vault today which means that all EA Access subscribers can now play the full game for free, well, if you don’t count the EA Access subscription fee that is.

NBA LIVE 19 came out on Xbox One in mid-2018 and is the latest in the NBA Live series of basketball video games. It supports local multiplayer for up to four players and online multiplayer for up to 10.

Here’s the official game description:

NBA LIVE 19 redefines the way you play a basketball game. 1v1 Everywhere featuring Real Player Motion gives you control in every possession, providing you the ability to change momentum in any game and dominate your opponent. Pursue basketball glory with the freedom to create your path in the return of THE ONE. Build your squad of superstars, legends, and cultural icons to join your quest for greatness on courts across the globe in the League, The Street World Tour and your ONE COURT where you customize your rules and your line up reign. Defend your court and challenge the Community to be the ONE.

To celebrate its addition to The Vault, EA Access members who play NBA LIVE 19 between March 7th and the 19th will unlock Devin Booker and some in-game Nikes.

Do you have EA Access? Share your favorite game in The Vault with the community in the comments below and then follow us on Pinterest for more Xbox gaming content.

The app was not found in the store. ?

Chromium Edge won’t be available for 32-bit Windows 10 PCs

Microsoft announced toward the end of 2018 that it will turn Edge into a Chromium-based browser.

The software giant is ditching that browser’s EdgeHTML rendering in favor of the Google Chromium engine, which underpins Chrome, Vivaldi, and Opera.

Users are still waiting for the first preview of the new Edge. However, a new support document highlights that the first Chromium Edge previews will not be compatible with 32-bit Windows platforms.

A new support document page titled “Microsoft Edge Insider builds: Troubleshoot install and updates” has emerged on Microsoft’s website.

That page lists some error message resolutions for Microsoft Edge Insider builds (Edge Canary and Edge Dev). The support document page also states:

Check your operating system. Microsoft Edge Insider builds are currently only available on Windows 10 (64-bit). Other versions of Windows are not supported at this time.

So, the first Microsoft Edge Insider builds will be exclusively for 64-bit Windows platforms. Microsoft is excluding 32-bit Windows users from the testing phase of Chromium Edge at least. Nor has the software giant made it clear if its flagship browser will support 32-bit Windows at all.

Those users who are not sure if their platforms are 32 or 64-bit Windows can check via the Control Panel. In Windows 10, press the Windows key + Q to open Cortana.

Then enter ‘system’ in the search box. Click System to open the window in the snapshot directly below. The system type detail tells users if their platforms are 32 or 64-bit Windows.

The emergence of an official Edge support document also highlights that the first preview version of the new Chromium browser might roll out soon.

Some of the first screenshots of Edge Canary and Dev already leaked. One screenshot includes a New Tab page open in the browser that shows that Chromium Edge will include extensions and a profile picture to right of the URL bar much the same as Chrome.

Another screenshot includes the new Microsoft Edge Store that will include a larger repository of extensions for the browser.

Microsoft has not confirmed when it roll out the first Chromium Edge preview build. However, the software giant might showcase the new Edge at May’s Build Developer conference.

When the big M does release a Chromium Edge preview build, it will be not be a part of the Windows Insider Program. However, users will still need a compatible 64-bit Windows platform to run the browser.

RELATED STORIES TO CHECK OUT: 

KC Lemson, who started the Ninjacat meme, steps away from Microsoft

KC Lemson, who in her 21 years at Microsoft worked on Outlook, Exchange, Windows Phone, Windows, and Surface, is stepping away from the company. In a blog post today on LinkedIn, Lemson made the announcement:

I’ve decided it’s time for me to try something new: not working. Or to rephrase it in the standard corporate lingo: I’ll be on an extended leave of absence for the foreseeable future, during which time I will be pursuing some personal projects and spending more time with my family. I’ll still be in the GAL and on email occasionally, but I’ll be focusing on the non-Microsoft part of my life after this week.

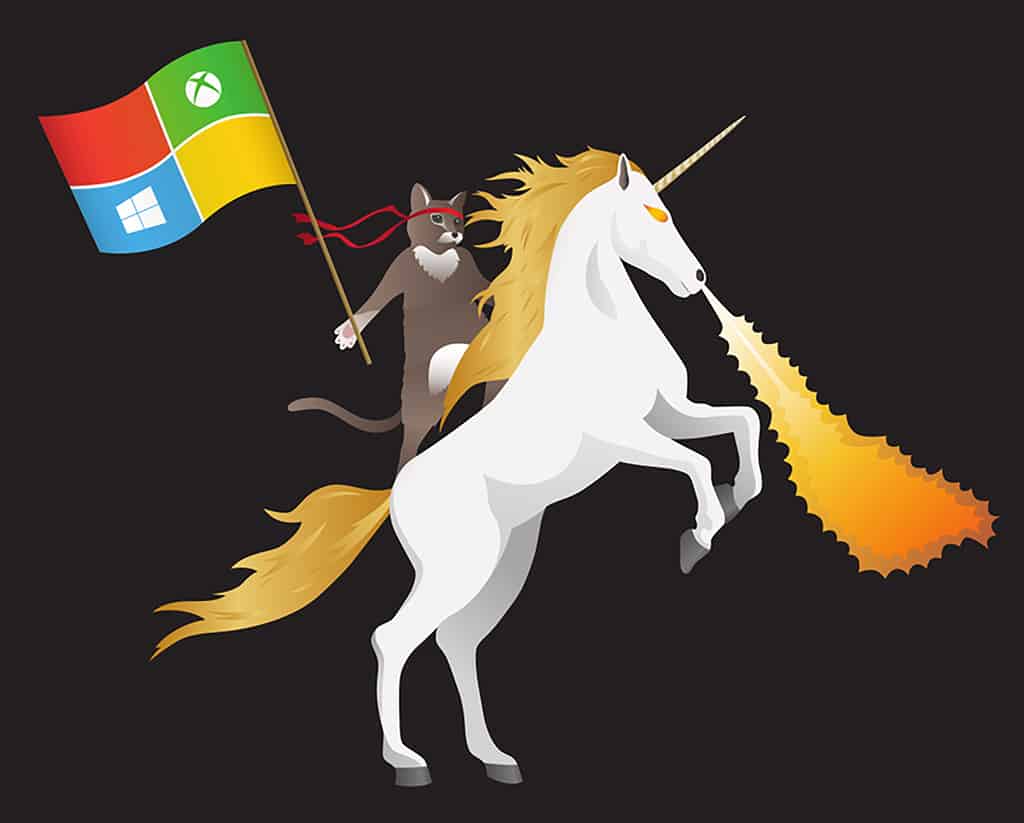
Lemson has done a lot in her time at Microsoft, but is perhaps best known, at least outside the company, for social media presence. She seems to keep popping up, as a Microsoft Life post in 2018 reported, in memes like Bedlam cards, an iconic photograph of 7,000 Microsoft employees forming a Seattle Seahawks “12” on a soccer field in Redmond, and most notably for bringing to life the Microsoft version of Jason Heuser’s iconic “Welcome to the Internet.” As Lemson tells it in a 2016 post on Raymond Chen’s The Old New Thing blog, as with much of what comes out of Microsoft, the ninjacat started as a PowerPoint slide:

In mid 2014, a couple of us in that team were working on a presentation about what would later become known as Windows 10, and as a joke we made a slide that started with this image (that made the rounds of social media in 2013) and then animated it into a slide full of “kittens and puppies and rainbows and unicorns” with a design that was inspired by the amazing Welcome to the Internet image by Jason Heuser.

Like most memes, things kind of took on a life of their own from there, especially after Tom Warren at The Verge wrote about a ninjacat sticker he’d seen on a Microsoft employee’s laptop. Warren called it “the perfect example of a company with a bit of personality.”

Like anyone who’s attended Microsoft’s various conferences and events over the years, we’ve run across KC Lemson and been handed our share of stickers, always with a smile and a laugh. We wish her all the best, just stay off the email and enjoy life!


Chrome update to fix video quality issues in low resolution settings

A recent playback quality and colour bug on Windows was reported by a user on Chromium Gerrit. The OP observed aliasing and colour issues in the video.

He said that when the video was played at a low resolution, like 144p and it was not occluded, aliasing/pixelation was observed.

But, surprisingly, the effect vanished when the mouse hovered over the screen. A similar sort of issue affected colors. In the lighter colour sections of the video, when the mouse was moved over the screen or the screen was scrolled down, the colour of the video changed.

What was reported, is discussed below.

How to reproduce the problem

This section deals with the problem in the quality and colour of the video and the changes that occurred in the quality and colour of the playback when the mouse was moved over the video.

Aliasing:

  1. Navigate to sample video https://www.youtube.com/watch?v=w4wvgbnzhlA&list=RDded49w9Fr4k&index=3
  2. Set the quality to 144p.
  3. Make sure the video is not occluded. E.g. the mouse is not hovering over the video and the page is not scrolled down at all.
  4. Observe pixelation/aliasing on the video.
  5. Move the mouse over the video.
  6. Observe the aliasing goes away.

Colour:

  1. Navigate to sample video https://vimeo.com/302312473
  2. Skip to a section of the video that is lighter in color, e.g. 1:24.
  3. Observe the colour of the video.
  4. Mouse over or scroll down on the page to partially cover the video.
  5. Observe the colour changes on the video.

This was a strange thing observed. It was expected that the video should not be pixelated when not occluded and the video colour should not change when it was not occluded.

But the results were opposite to the anticipations and the video quality was dramatically worse when the mouse was not over the video. Whether this problem was with Flash or HTML5? It was with HTML5.

This issue was observed in:

  • Chrome version: 72.0.3626.119 Channel: stable
  • OS Version: 10.0
  • Flash Version: 32.0.0.142


Reportedly, this issue of video upscaling can be solved by calling SetBitmapInterpolationMode() to change the interpolation mode to linear.

Improve the video upscaling quality in low-resolution mode on Windows This is done by setting interpolation mode to linear indirect composition visual. The visual default is the nearest mode and the quality is not good. The upscaling quality improves after calling SetBitmapInterpolationMode() to change the interpolation mode to linear.

It is reported that this bug has been fixed in the stable release of Chrome. But one user reports that he still observes this issue.

I am still seeing the behaviour on the stable release of Chrome. Has the finch change taken effect on the stable branch yet?

The upcoming Chrome update will reportedly fix this issue for good.

Do you face a similar issue? Why not let us know in the comments below?

RELATED STORIES TO CHECK OUT:

Get ready to use Windows 10 on Nintendo Switch 

There is one curious developer who is getting closer to creating a method for running Window 10 on Nintendo Switch. Judging by the current results, it seems like he will soon succeed in his efforts. 

Recently, some pictures revealing attempts to install Windows 10 ARM version on Nintendo’s hybrid console were leaked by a Twitter user.windows 10 nintendo switch

Most of the problems that were encountered by the developer have been documented on Twitter. The recent status update made by the developer revealed the Windows boot logo on the console.

The user also mentioned that the project is currently in the development stages and he’s planning to work on the memory part primarily. As the functionality of the current development is still unclear, tweaking the device to run the Windows 10 might take some time.

If you are a developer and interested in contributing to the project, you can simply check out the GitHub project to work on the current UEFI firmware.

You might not be convinced by the idea of Windows 10-powered Nintendo Switch. One advantage is that you can easily switch to a large screen by docking it to a monitor or television.

As quick reminder, Microsoft is also experimenting to enhance the usability of Windows 10 ARM on lower-powered ARM-based SOCs. So, this third-party attempt to run Windows 10 on Nintendo Switch is not surprising at all. Not if we take into account the recent rumors suggesting that Microsoft is bringing Xbox Game Pass and app to Nintendo Switch.

Although the idea seems great, it is still unclear that either the touch screen work with the OS and the performance of certain apps is also yet to be seen.

It is going to be interesting to see how the developer forces the hardware and software to work against its specifications. It is just a matter of time to wait and watch how the developer overcomes these issues.

RELATED POSTS TO CHECK OUT:

Sniper Elite 4 system requirements for PCs: Check them before your buy it

Sniper Elite 4 could be the largest and most advanced World War 2 shooter ever built. As a player, your main mission is to liberate wartime Italy from the grip of Fascism. The game relies on tactical third-person combat, epic longshots across complex levels that will challenge even the best players.

Sniper Elite 4 takes players to ancient forests, mountain valleys and colossal Nazi megastructures. Stay alert because enemies are hiding everywhere. You will fight alongside the brave men and women of the Italian Resistance in order to defeat a new threat with could halt the Allied fightback in Europe.

Encounter hours of gripping gameplay in huge campaign levels with hundreds of enemies, vehicles and high-ranking Nazi officers to hunt. Forge your own path to your objectives, uncover new sniper nests, find secret side missions, collectibles and more!

Sniper Elite 4 arrives on February 14, which makes an interesting present idea if your significant other is a gamer. If you’re planning to buy it, don’t forget to check the system requirements. Make sure your computer is capable of running Sniper Elite 4 in order to avoid severe technical issues.

Sniper Elite 4 minimum system requirements

  • OS: 64-bit Windows 7, 64-bit Windows 8.1 or 64-bit Windows 10
  • Processor: Intel CPU Core i3-2100 or AMD equivalent
  • Memory: 4 GB RAM
  • Graphics: AMD Radeon HD 7870 (2GB) or NVIDIA GeForce GTX 660 (2GB)

Sniper Elite 4 recommended system requirements

  • OS: 64-bit Windows 7, 64-bit Windows 8.1 or 64-bit Windows 10
  • Processor: Intel CPU Core i7-3770 or AMD equivalent
  • Memory: 8 GB RAM
  • Graphics: Nvidia GPU GeForce GTX 970 / AMD GPU Radeon RX 480

For more information, check out the trailer below:

You can already pre-load the game in order to play it as soon as it goes live on Steam.

RELATED STORIES YOU NEED TO CHECK OUT:

Custom Captain Marvel Xbox One X console is up for grabs

In honor of Captain Marvel’s cinematic debut this weekend, Marvel Studios and Microsoft’s Xbox gaming division have collaborated on a custom console sweepstakes for fans.

Xbox is thrilled to be celebrating one of Marvel Cinematic Universe’s most powerful heroes, timed with the movie’s much anticipated release tomorrow. If you’re a fan of Marvel, this sweepstakes is your opportunity to game in style with Captain Marvel at your side on the world’s most powerful console.

The newly offered console skin takes its design from the marketing material used throughout the Captain Marvel promotions, with the gold star front and center on both the Xbox One X body and that of the controller.

For a chance to win the console, the Xbox team is asking fans to visit the Xbox Twitter channel to view the console and sign up for a chance to get their hands on it. Presumably, details, terms and conditions and rules of eligibility can be found here as well. Fortunately, there appears to be no purchase necesary to win.

Microsoft to discuss the desktop apps of tomorrow and more during March 14 Windows Developer Twitch Workshop

If you’re looking to learn more about developing Windows apps, Microsoft has just announced a free Windows Desktop Developer Workshop that will be live-streamed on Twitch on March 14. The event will kick off at 8AM PST with a session about Windows Developer XAML Tooling for WPF & UWP, and the other sessions will cover the following three themes:

  • Productivity: Productivity for existing developers focused on Visual Studio XAML tooling and design pattern framework libraries
  • Desktop Apps of Tomorrow: Looking forward to how you can get started exploring the latest technology for your desktop application such as .NET Core 3, XAML Islands, MSIX and Windows 10 APIs
  • Extending Your Skills: Reusing skills with Xamarin.Forms for mobile apps and DevOps for desktop applications

All sessions will allow some interactivity through Twitch chat, and in case you can’t make it for the event the full workshop should be uploaded on the Visual Studio YouTube Channel later this month.

Microsoft continues investment in clean energy, backs Ohio wind farm

As if yesterday’s announcement of Microsoft investing in a 74-megawatt solar project in North Caroline wasn’t enough, it doesn’t seem to be ready to stop there. The tech giant has increased its renewable energy portfolio even further with two 15-year purchase agreements with EDP Renewables. The investments will provide even more renewable energy for the company, thanks to the new 125-megawatt Timber Road IV Wind Farm. Microsoft’s general manager for Energy and Sustainability, Brian Janous, explains:

“Bringing new wind projects online, particularly in states with relatively few projects but strong potential for growth, delivers both economic benefits and environmental progress in the near term and well into the future. We are constantly looking for opportunities where our corporate demand can not only be met but can also accelerate the transition to renewable sources. EDPR has done great work in Ohio, and we’re pleased to partner with them to grow this market.”

Microsoft explains that the new Timber Road IV Wind Farm is powerful enough to power as many as “36,000 average Ohio homes.” In addition to creating about 200 full-time construction jobs and seven permanent jobs, the company promises that more than $1 million will be invested though annual property taxes and land leases.

The new project in question is the fourth of the Timber Road Wind Farms in the Ohio state, all owned by EDP Renewables. Altogether, the four wind farms equal to about 392 megawatts of energy generation, with the three older farms already powering 76,000 farms.

Given the amount of investment Microsoft has made in just the pas couple days, it seems the company is putting its focus on the environment into overdrive. This is definitely an important step, especially given the fact that renewable energy doesn’t seem to be a top priority in the Trump Administration.


Microsoft to release first Xbox One 1910 (19H2) build to Skip Ahead Xbox Insiders today

Xbox Insiders on the Skip Ahead ring are about to receive a first build from the new “19H2” development branch today. Head of the Xbox Insider program Brad Rossetti announced the “huge leap forward” today, though we don’t have any details about new features coming in the 1910 update for the Xbox One.

Now that Skip Ahead Insiders will get early access to 1910 builds, Microsoft will continue to test the next Xbox One update (1904) with Preview Alpha and Beta Insiders. This new system update will introduce several new features including a virtual mini keyboard, a new Restart console button on the Power menu, as well as a revamped Xbox Messaging experience with Message Requests.

The Xbox One 1904 update is expected to ship next month alongside Windows 10 19H1, and it’s interesting to note that Skip Ahead Xbox Insiders are now getting access to 19H2 builds while Skip Ahead Windows Insiders are already testing the Windows 10 20H1 update that will ship in the first half of 2020. This is all a bit confusing, but the Windows Insider team previously said that 19H2 builds for Windows 10 would come later this Spring once the 19H1 update is almost ready.

It’s likely that this first Xbox One 1910 build won’t bring any new features, but we’re waiting for the Xbox Insider team to share more details. We’ll update this post if there’s anything interesting in the release notes.

Update: The release notes are now live and as expected, this first 1910 build brings no new features but various fixes for Blu-ray playback, Party Chat, and My Games and apps. The build will be available to download today at 2PM PST.

Microsoft announces new 74-megawatt solar project in North Carolina

Microsoft is expanding its investments in renewable energy, and has partnered with Invenergy to set up a 74-megawatt solar-powered project in North Carolina. While the panels will be owned by Invenergy, Microsoft has made an undisclosed purchase agreement with the company to make itself the only consumer of the energy for the next 15 years. Microsoft’s general manager for Energy and Sustainability, Brian Janous, explained that:

“When we invest in renewable energy, we are investing in the future — enabling sustainable growth of our business, of the clean energy sector and the local communities that benefit economically from Microsoft’s commitment to sustainability. Our work with companies like Invenergy is an integral step toward our goal of enabling a clean energy future for everyone. We are pleased our partnership will bring new solar resources to the PJM region.”

Microsoft cites not just its commitment to preserving the natural environment, but also the fact that the construction of the project to create as many as 500 jobs. More than $20 million will be invested into the local economy though tax and lease payments, and from the employee wages.

It’s expected to begin operation later this year, and will bring the Microsoft’s total renewable energy portfolio to a whopping 1.3 gigawatts. It’s a good investment for the company, one that will please environmental advocates and create jobs, as well as benefit itself by providing it sustainable energy.

Microsoft Teams users can now access Yammer without leaving the app

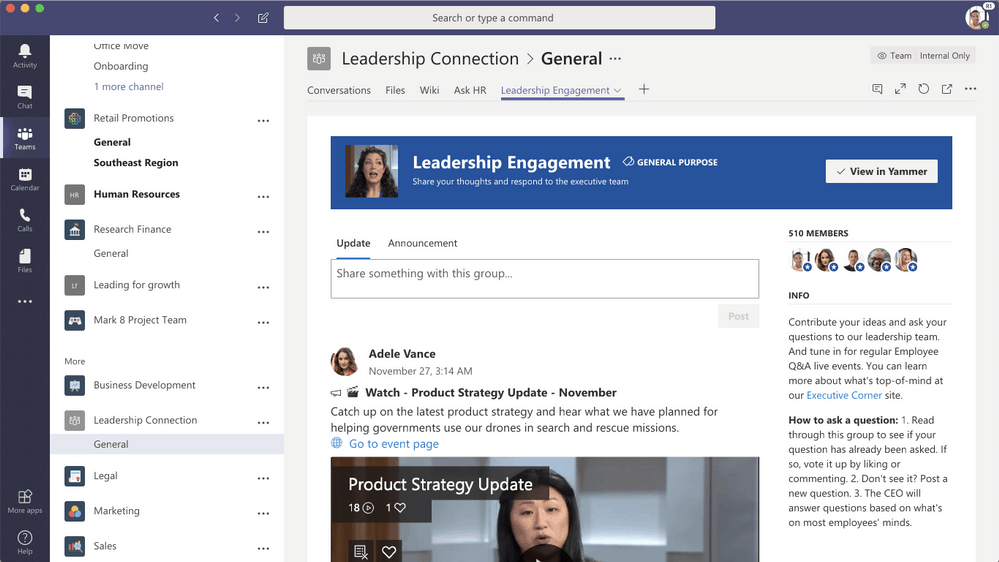
Microsoft Teams is consolidating its status at the main communication hub in Office 365 with a new Yammer integration. This week, Microsoft announced that it’s now possible to add a Yammer group as a tab in a Teams channel, making it possible to access the enterprise social network without leaving the app.

“Yammer and Microsoft Teams together help get employees the right information at the right time. Using the two efficiently together, employees have a place for their questions and answers in Yammer, while the core team gets alignment on their responses in Teams,” the Yammer team explained.

As of today, the Yammer tab in Teams is only available on the web and desktop. To add a Yammer Group to a Teams channel, you’ll have to select + on the tab bar, select the Yammer tab and then the Yammer group you want to add. From then, you’ll have to choose wether you want to show messages from a Yammer group, or a specific Topic feed. Be aware that you can only select one Yammer group or topic per tab, but you can add more Yammer tabs to a Teams channel if needed.

You may have missed it, but Microsoft released a Yammer native app for Windows and Mac some time ago. However, being able to access Yammer right from Microsoft Teams is probably more convenient, especially since you can share a Yammer conversation in your Teams channel. You can learn more about how to get started with this new Yammer tab in Teams on this support page.

How to Fix Print Queue Not Clearing in Windows 10 and 11

If the print queue is not clearing in Windows 10 or 11, you may notice that new documents won’t print and old ones won’t delete.

This common issue causes a stuck print queue and error messages like “Cannot delete print job.” Here’s how to fix it quickly using automated tools, manual methods, and advanced solutions.

Step-by-Step Guide to Fix Printer Queue Not Clearing on PC

1. Use a Batch File or Manual Method to Clear the Print Queue

This is the fastest and most reliable fix for when you’re unable to clear the print queue:

Option A – Batch File (Automated)

Open Notepad and paste this code:

@echo off
echo Stopping Print Spooler...
net stop spooler
echo Deleting print jobs...
del /Q /F %systemroot%\System32\spool\PRINTERS\*.*
echo Starting Print Spooler...
net start spooler
echo Print queue cleared.
pause

Save it as ClearPrintQueue.bat and set Save as type to All Files. Then right-click and Run as administrator.

Option B – Manual Clear

  • Press Windows + R, type services.msc, and press Enter
  • Right-click Print Spooler > Stop
  • Navigate to C:\Windows\System32\spool\PRINTERS
  • Delete all files inside that folder
  • Return to Services > Start the Print Spooler

2. Use Command Prompt to Force Delete a Stuck Job

If the job won’t clear manually, try this:

net stop spooler
del %systemroot%\System32\spool\printers\* /Q
net start spooler

This works even if the document won’t delete from the print queue on Windows 11.

3. Cancel All Documents via Printer UI

  • Go to Control Panel > Devices and Printers
  • Right-click your printer > See what’s printing
  • Click Printer > Cancel All Documents

This is a quick soft reset if jobs are hanging.

4. Run the Windows Printer Troubleshooter

  • Press Windows + I to open Settings
  • Go to System > Troubleshoot > Other troubleshooters
  • Run the Printer troubleshooter

This tool can detect and fix issues like a print queue not clearing or driver conflicts. If you’re still facing issues, check out how to fix a printer that won’t print on Windows, especially if the issue extends beyond stuck jobs.

5. Reinstall the Printer Driver

  • Open Device Manager
  • Expand Printers, right-click your printer > Uninstall device
  • Restart your PC — Windows will auto-reinstall the correct driver
  • Alternatively, download the latest driver from the manufacturer’s site

Driver issues are a common cause of printing errors. Follow our guide on how to install HP printer drivers on Windows 11 or update any driver in Windows 10 to fix persistent errors.

6. Set the Printer to Offline Then Back Online

  • Go to Control Panel > Devices and Printers
  • Right-click your printer > See what’s printing
  • Click Printer > Use Printer Offline
  • Wait a few seconds, then uncheck it

This can help reset a frozen spooler connection. It’s also useful if you’re unable to print from Microsoft Edge on Windows 10, as browser-printing issues can sometimes stem from queue conflicts.

7. Restart PC and Printer

If nothing else works, restart your Windows device and the printer itself. This clears temporary errors and resets the spooler service connection.

FAQs

How to clear the print queue in Windows 11 automatically?

Use a batch file to stop the spooler, delete jobs from the PRINTERS folder, and restart the service.

Why can’t I delete a document from the print queue?

The spooler might be frozen or the job corrupted. Use the batch file or Command Prompt for force removal.

How do I show the print queue on this computer?

Go to Control Panel > Devices and Printers > Right-click your printer > See what’s printing.

What causes stuck print jobs?

Driver corruption, printer offline mode, or a locked spooler service are the most common causes.

With these fixes, you can solve any issue where a document won’t delete, a print queue stays stuck, or you’re unable to print due to a blocked job in Windows 10 or 11.

How to empty Recycle Bin when shutting down your PC

Emptying the Recycle Bin is like eating junk food. We don’t really pay attention to the process until it takes too much space. Luckily, you can get rid of the Recycle Bin junk with just a few clicks, which isn’t exactly the case with weight loss, though.

But why even bother and not eliminate the effort at all?

If you’re like me, emptying the Recycle Bin is not even in the back of your mind. In fact, I’m almost positive you’d be surprised what treasures your Recycle Bin hides if you open it right now.

But there’s a little trick that will make you forget about the Recycle Bin forever. Yes, you can set your Recycle Bin to empty automatically when you shut down your computer. And here’s how:

How to empty Recycle Bin automatically in Windows 10

All you need to do to make the Recycle Bin empty on every shutdown is to create a script that which automate this task. But before we start, keep in mind that doing this is only possible in Windows 10 Pro, because the Group Policy Editor is involved in the procedure.

On top of that, you’ll also need to be logged in with an administrator account.

If you meet all the ‘pre-requisites’, let’s carry one with the task. Here’s what you need to do:

  1. Right-click Desktop, go to New > Text document. 
  2. Paste the following command in the document: PowerShell.exe -NoProfile -Command Clear-RecycleBin -Confirm:$false
  3. Now, go to File > Save As, and name it by choice, but also add the .bat extention (example: empty recycle bin.bat).

That’s it for the script. Now, every time you run this file, it will empty the Recycle Bin. However, it still won’t do it automatically, as you’ll have to open it every time.

That’s where the Group Policy Editor comes into play to automate the task. Here’s what you need to do:

  1. Go to search, type gpedit.msc, and open Group Policy Editor (or Edit Group Policy).
  2. Browse the Group Policy Editor to the following location: Computer Configuration > Windows Settings > Scripts > Shutdown
  3. In the Shutdown Properties window click Add.
  4. Now, go to browse, and select the script you just created.
  5. Save the changes.

That’s about it, the script is ready and set, and now every time you reboot your computer it will empty the Recycle Bin automatically. You won’t have to worry about the Recycle Bin ever again.

Just keep in mind to make sure you don’t delete any important documents or files, because they’ll be lost forever when you restart your computer.

If you want to remove this functionality, just head back to the Group Policy Editor and remove the delete the script.

RELATED STORIES YOU NEED TO CHECK OUT:

What’s AAct.exe? Should I remove it or not?

An advanced user can easily make a distinction between a rogue process and a regular system process. Less experienced users usually find out about them when it’s too late.

However, the process we’ll be talking about today is there on users own accord. It’s the part of the KMS Activation suit and it’s, you guess, illegal.

If you’re bothered with it working in the background, check the explanation below and find out how to remove it for good.

What’s AAct.exe anyway?

If you had any fears that this process is a malicious one, you were completely right. Although, it’s negative effects aren’t as obvious at first, the AAct.exe process is a part of the KMS activator used to obtain an illegal license for Windows 10. This, on its own, is something we couldn’t advise. Even though it looks simple to avoid the KMS (Key Managing Services) and not spend a dime on the legal license, chances are your cracked system won’t work as intended.

The said process will run in the background only when whitelisted, as antimalware applications (Windows Defender included) should prevent it from running. However, if it’s still active, make sure to disable it as it will, eventually, lead to larger infection or completely destabilize the system.

We don’t condone pirating software, but disabling AAct.exe might lead to losing the licensing, so have that in mind as well. In general, KMS only works with a certain iteration of Windows 10. Hence, don’t expect, say, a Creators Update KMS Activator to work on the latest iteration of Windows 10.

Should I remove AAct.exe from my computer?

If this .exe file is causing various technical issues, then yes, you should remove it.

Steps to remove AAct.exe

Now, if it’s already there and you’ve seen some negative effects it has on performance, remove it immediately. Firstly, we’ll need you to uninstall KMS Activator if you’ve decided to install it.

The next step would be to scan for malware and remove all possible threats remaining. Have in mind that this applies only if your system is still fully functional.

If not, there’s hardly anything you can do but start from a scratch. And, the next time, in order to avoid AAct.exe, consider legally purchasing Windows 10.

Here’s how to remove the KMS Activator from Windows 10:

  1. In the Windows Search bar, type Control.
  2. Open the Control Panel.
  3. Choose Uninstall a program.
  4. Uninstall the KMS Activator application and restart your PC.

And this is how to scan for malware with Windows Defender (you can use any third-party antivirus as well):

  1. Open Windows Defender from the taskbar notification area.
  2. Choose Virus & threat protection.
  3. Choose Scan options.
  4. Select Windows Defender Offline Scan.
  5. Save everything you’re doing as this mode will restart the PC.
  6. Click Scan now.scan with windows defender

After that, you shouldn’t see the said process on your PC anymore. The easiest way to check is the Task Manager.

With that being said, we can conclude this article. Don’t forget to tell us about your issues with the AAct.exe process and how you deal it in the comments section below.

RELATED STORIES YOU SHOULD CHECK OUT:

Microsoft Quantum Network pushes forward quantum computing research

Microsoft officially announced its Microsoft Quantum Network recently at its inaugural Startup Summit. The Startup Summit event was organized at Microsoft’s headquarters and was attended by the representatives of the 16 startups.

The tech giant used the platform to demonstrate its quantum-related technologies.

The network is basically a community of organizations and individuals that collaborate with each other globally to enhance quantum computing. 

As far as AI and modelling are concerned, Quantum computing aims to beat all the conventional solutions that are available so far.

Due to its unique capabilities, Microsoft is interested to be a pioneer in developing quantum applications and a scalable quantum computer. 

Network Partnerships with HQS & Rahko

Microsoft took advantage of the platform to announce the partnership with two new companies, Rahko and HQS Quantum Simulations.

The quantum machine-learning company Rahko is known for developing scalable quantum chemistry solutions that are specific to the quantum computers. The second one HSQ has established itself for developing quantum algorithms.

These algorithms are developed for the prediction of molecular properties for the pharmaceutical and chemical industries. 

There is a difference between classical computing and quantum computing. It uses Quantum bits to efficiently perform complex computations. It excels traditional computers by solving a lot more complex problems. 

The company plans to enhance collaboration between the renowned quantum computing experts that are working all over the world. 

Last year the Redmond giant has been working hard in the field of quantum computing. As part of its Quantum Development Kit the company has released a new programming language named Q#.

This language has been specifically developed for quantum workloads. Microsoft has also collaborated with academic institutions and researchers.

Initially, the company plans to use Microsoft Azure for offering quantum computing.

It’s worth mentioning that based on the specific customer needs, the technology will allow the users to switch quantum computing and traditional computing.

Visit Microsoft’s official site if you are interested in exploring in details regarding the Microsoft Quantum Network. 

RELATED ARTICLES YOU NEED TO CHECK OUT:

FIX: LG Soundbar Bluetooth not pairing / working

Bluetooth speakers are great since they allow you to get enhanced sound quality from your laptop.

One of the more popular Bluetooth speakers is the LG Soundbar. Despite the great features that this gadget has to offer, it can encounter various issues on Windows 10.

Here are some problems that users reported:

  • LG Soundbar quit working – This can occur if your system is out of date.
  • LG Soundbar keeps going quiet – This problem can be related to your sound settings, so be sure that your Bluetooth speaker is selected as the default audio device.
  • LG Soundbar Bluetooth not pairing – Your drivers might be the problem. To fix the issue, reinstall and update Bluetooth drivers and check if that helps.

Keep reading below to find a more detailed list of solutions on these issues.

What can I do if the LG Soundbar Bluetooth isn’t working?

  1. Try using a cable connection
  2. Update your drivers
  3. Remove problematic updates
  4. Update the speaker’s firmware
  5. Move your laptop closer to the speaker
  6. Make sure that your speaker is set as the default output device
  7. Check for the latest updates
  8. Run the built-in troubleshooter
  9. Roll back or reinstall your Bluetooth drivers
  10. Restart the Bluetooth Support service
  11. Make sure that Bluetooth is enabled
  12. Remove your Bluetooth device and try to pair it again
  13. Replace your Bluetooth adapter or try a different speaker

1. Try using a cable connection

If Bluetooth isn’t working while using the LG Sound Bar, using a cable connection could be a solid workaround.

It’s true that a cable connection defies the whole purpose of a Bluetooth speaker, but at least try using it until you manage to fix the problem.

2.  Update your drivers

As mentioned above, one of the common causes of LG Soundbar problems is an outdated Bluetooth driver.

As expected, to fix the problem, it’s advised to update your drivers to the latest version.

Updating drivers imply that you visit your laptop manufacturer’s website and download the latest Bluetooth drivers for it.  This also applies if you’re using a Bluetooth adapter.

However, since downloading drivers manually can be a bit tedious, especially if you don’t know exactly what components you should get, use a dedicated tool like Fortect Driver Updater to help you.

This is the surest way to automatically update your drivers with just a couple of clicks and also install the correct software.

Besides, once you have Fortect Driver Updater, you can scan your system every once in a while to inspect the status of all drivers and keep your device healthy.

⇒ Get Fortect Driver Updater

3. Remove problematic updates

  1. Open the Settings app and navigate to the Update & Security section.
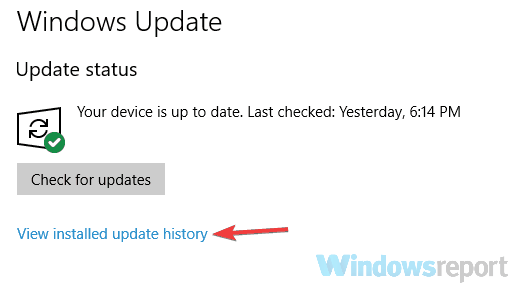
  2. Now click the View update history option.
    view update history LG Sound Bar problems
  3. You should now see a list of updates. Navigate to the Uninstall updates.
    remove updates LG Sound Bar Bluetooth problems
  4. Find recent updates from the drop down list and double-click them in order to remove them.
    uninstall updates bluetooth problems

After removing the updates, check if the problem is still there.

Several users reported that removing recent updates fixed the problem for them, but bear in mind that Windows 10 has a tendency to install the missing updates automatically.

In order to prevent this issue from reappearing, you can block Windows 10 from installing updates automatically. If you want to go for this solution, don’t forget to manually check for updates all the time.

4. Update the speaker’s firmware

Bluetooth issues can also be related to the speakers’ firmware.

Sometimes updating the firmware will fix various problems with your speaker.

To see how to properly update your speaker firmware, be sure to check official instructions on the LG Music Flow app and follow them carefully.

Although the procedure is relatively simple, firmware updates can cause permanent damage to your PC, especially if you don’t perform it properly.

In order to avoid any potential problems, follow the instructions carefully, and use extra caution.

Once you update your speaker’s firmware, the Bluetooth problem should be gone.

5. Move your laptop closer to the speaker

According to a few users, keeping the laptop an inch away from the speaker reestablished the Bluetooth connection.

Alternatively, you can connect to your speaker from a greater distance as long as your lid isn’t completely open.

Keep the lid at less than a 40-degree angle and the problem with the connection should be resolved.

This is a peculiar solution, but it has worked for some users, so you might want to try it as a workaround.

6. Make sure that your speaker is set as the default output device

  1. Open the Settings app.
  2. Navigate to the System section.
    system section LG Sound Bar problems
  3. Make sure that your speaker is paired with your PC.
  4. Navigate to the Sound section in the left pane and make sure that your Output device is set to your Bluetooth speaker.
    output device bluetooth problems

After making these changes, check if your speaker is working properly.

7. Check for the latest updates

  1. Open the Settings app and navigate to the Update & Security section.
  2. Now click the Check for updates button in the right pane.
    check for updates LG Sound Bar problem
  3. Windows will check for available updates and download them in the background.

Once the updates are downloaded, simply restart your PC in order to install them. After updating your system, check if the problem with the LG Sound Bar is still there.

8. Run the built-in troubleshooter

  1. Open the Settings app and navigate to the Update & Security section.
  2. Select Troubleshoot from the left pane. In the right pane, select Playing Audio and click the Run the troubleshooter button.
    troubleshoot LG Sound Bar problems
  3. Follow the instructions to complete the troubleshooter.

Once the process finishes, check if the issue is still there.

If so, try running both Hardware and Devices and Bluetooth troubleshooter and check if any of these troubleshooters fixes the problem.

Unfortunately, there are times when the Troubleshooter stops out of the blue. See this exhaustive article on getting this tool back on track.

9. Roll back or reinstall your Bluetooth drivers

  1. Open the Device Manager by pressing Windows Key + X.
  2. Locate your Bluetooth adapter on the list and double-click it to open its settings.
  3. Go to the Driver tab and click Roll Back Driver button.
    roll back driver LG Sound Bar
  4. Follow the instructions on the screen to complete the rollback process.

If the Roll Back option isn’t available, you need to reinstall the driver. To do that, just do the following:

  1. Locate the Bluetooth adapter on the list, and right-click it. Choose Uninstall device from the menu.
    uninstall device LG Sound Bar
  2. Once the confirmation menu appears, click on Uninstall.
    uninstall confirm LG Sound Bar
  3. Once the driver is removed, click the Scan for hardware changes icon and it will install the default driver.
    scan for hardware changes Bluetooth problems

After the default driver is installed, check if the problem with your Bluetooth speaker is still there.

10. Restart the Bluetooth Support service

  1. Press Windows Key + R and enter services.msc. Now press Enter or click OK.
    services run dialog bluetooth problems
  2. On the list locate and double-click the Bluetooth Support Service.
    bluetooth support service LG Sound Bar
  3. Set the Startup type to Automatic.
  4. If the service isn’t running, click the Start button to start it.
  5. If the service is running, stop it temporarily and restart it. Now click Apply and OK to save changes.
    startup type automatic LG Sound Bar

After doing that, check if the problem with Bluetooth service is still there. If you have multiple Bluetooth Support services, be sure to repeat the steps for all these services.

11. Make sure that Bluetooth is enabled

  1. Go to the Settings app and navigate to the Devices section.
    devices section LG Sound Bar
  2. In the left pane, go to the Bluetooth & other devices section and enable your Bluetooth adapter. (If the adapter is already enabled, turn it off and wait for a couple of moments and then turn it back on again).
  3. After doing that, try to connect again.

If you’re using a laptop, you might have a keyboard shortcut that allows you to easily toggle Bluetooth on or off.

In addition, be sure that you’re properly pairing your speaker. Some Bluetooth devices require you to turn them on and then press the Pair button to pair them with your PC.

Lastly, be sure that Airplane mode feature is disabled.

If you have Airplane mode enabled, all your wireless communication will be disabled, including Bluetooth, so it’s advised to disable it.

To do that on your laptop, you can just use a dedicated keyboard shortcut.

12. Remove your Bluetooth device and try to pair it again

  1. Open the Settings app, navigate to the Devices section, and choose Bluetooth & other devices from the left pane.
  2. In the right pane, locate your Bluetooth speaker, select it, and choose Remove device.
    remove device LG Sound Bar problems

After removing the speaker, try to pair it again with your PC and check if that solves your problem.

13. Replace your Bluetooth adapter or try a different speaker

If you keep having issues with LG Sound Bar, perhaps the problem is related to your Bluetooth adapter. Not all adapters are compatible with Windows 10 and other speakers, and if you’re having issues connecting to LG Sound Bar, perhaps your adapter is the problem.

If your adapter is working with other Bluetooth devices, perhaps you might want to consider getting a different Bluetooth speaker.

Problems with Bluetooth and LG Sound Bar can be quite annoying, but we hope that you managed to fix most of these problems by using one of our solutions.

[wl_navigator]

New revenue sharing model for Microsoft Store apps finally goes live

The wild west days of striking gold in a curated app store have seemingly long passed as developers are experimenting with more ways to incrementally squeeze profit from their programs and services on platforms they have little control over. Most app store arbiters have, in some fashion, highlighted the reality of the modern-day app developer at conferences, in press releases or emails directly to developers.

When it comes to the Microsoft Store, the company decided it was best to give developers a larger portion of revenue earned from their app in the Store. While great on the face of it, the problem was that Microsoft offered its solution almost a year ago during its BUILD developer conference. Since its announcement, the increased revenue share increase that Microsoft promised had yet to materialize, that is until yesterday, March 5, 2019.

As of 24 hours ago, Microsoft updated its store policies and set into place a revenue share distribution in favor of developers of up to 95% revenue on app sales. The much-needed update to the revenue split for developers is long overdue but developers need to read the fine print before celebrating.

According to the updated App Developer Agreement developers could potentially shave 10% right off the top of their new increase if their app or services isn’t accessed using a deep link to navigate to. Any Microsoft driven traffic becomes ineligible for the full 95% split. Some of the details to the new terms can be found in a screenshot grabbed by @ductionist and highlighted by Windows Central.

Despite the relatively generous revenue split, it remains to be seen how Microsoft can convince developers to create new Windows 10 app experiences, let alone port their old iOS, Android or Mac apps to the Store. There are a couple of plates in the air for Microsoft regarding new operating systems and efforts to push Progressive Web app development that may dovetail with new revenue split news at the company’s developer conference in a couple of months.

Inside Xbox is coming on March 12 with “exciting” Halo: MCC news

It’s been about a month since the last Inside Xbox episode, and now the details regarding the next episode have been officially revealed to be March 12 at 2 P.M. And according to the Xbox team on their blog, the livestream will feature “exciting news” for Halo: The Master Chief Collection. While the blog post doesn’t really reveal or even hint as to what’s to come for the four-games-in-one package, rumor has it that the series will make its way to PC users later this year.

But if that’s not enough, the show will also feature info on DayZ, One Piece: World Seeker, as well as the Xbox Game Pass service. Also worth mentioning, we should also expect more details on the Age of Empires series. We’re not exactly sure what’s going to be announced, but the developers promised “some very exciting announcements” relating to the franchise.

If you’re not yet familiar, Inside Xbox is a monthly episodic series offering “exclusive news, content, reveals, interviews and footage” relating to new games and announcements for the Xbox console. Microsoft recommends using their own Mixer to livestream the March 12 event on the official Xbox channel, but those who prefer another platform such as Twitch or YouTube are welcomes to stream from there.

Microsoft brings Azure to Africa with two new datacenters in South Africa

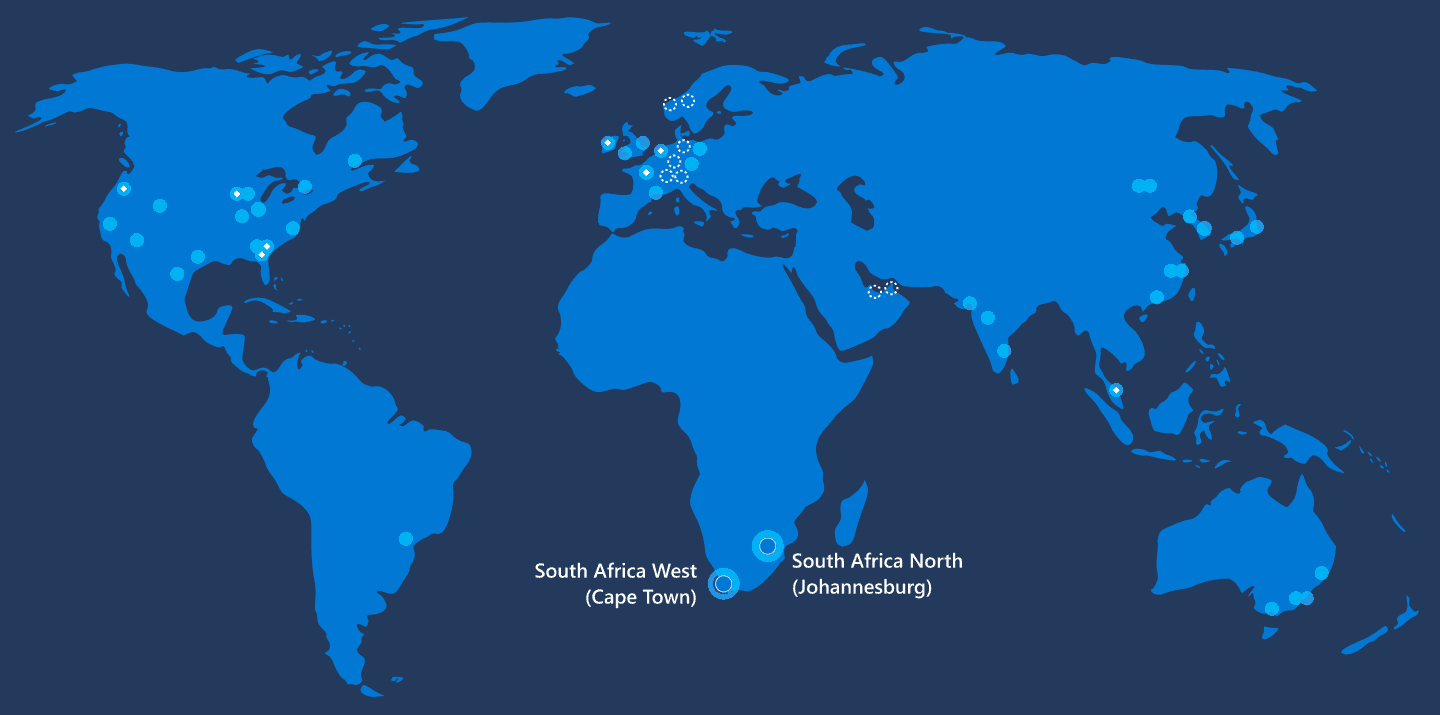
Microsoft has opened two new Azure datacenters in South Africa, located in Cape Town and Johannesburg, giving organizations within the country access to the services it has to offer. The company also claims to be “first global provider to deliver cloud services from datacenters on the continent,” according to a new Azure blog post.

Besides being able to increase innovation and help stimulate more advanced technological development within the country, Microsoft also claims this will create as many as 112,000 new jobs over the next four years. Multiple organizations have already signed on to be able to use Azure resources, including Nedbank, the Peace Parks Foundation, eThekwini water, among others.

While Azure might be the first major player for the country and its surrounding neighbors, Microsoft also plans to bring the other two core products on the Microsoft Online suite to the table—starting with Office 365 in the third quarter and then bringing Dynamics 365 to businesses before the year’s end.

It’s definitely nice that Microsoft is focusing on driving innovation and job creation for other countries. Hopefully, this will entice other companies to follow its lead and bring come competition to the surrounding areas.

Skype Windows app will soon let you merge incoming calls into an ongoing call

Microsoft is continuing to bring back features from its now-deprecated classic Skype app to the new cross-platform client. Yesterday, the company announced that Skype Insiders on Windows can now try merging incoming calls into an ongoing call, which was one of the top requested features for the new Skype desktop app.

The ability to merge an incoming call to an existing call is an essential feature for “prosumers,” including podcasters and radio hosts willing to bring in callers during a live show. For now, the feature is only available in the standalone Skype Insider app for Windows, which is different from the Skype Windows 10 app available in the Microsoft Store. You can download the Skype Insider app on this page, and it also works on Windows 7 and 8 PCs.

Microsoft’s new Skype app may still lack other classic Skype features like a more compact layout and the ability to customize notifications, but the company did introduce some useful additions in the new app like call recording or automatic background blurring in video calls. You can share the feedback with the team and help the team prioritize new features on the Skype Ideas website.

Can I Set an Alarm on my Computer: Do it on Windows 10

Did you ever want to use your Windows 10 PC as a personal alarm clock? You must have wondered if you can set up the computer as an alarm clock. You are not alone; we all have!

And you can set an alarm on Windows 10. Even better, you can use it as a dedicated alarm clock, the only condition being that the PC must be turned on when the alarm is supposed to ring.

But if you don’t want to PC to remain turned on, there is a solution that will come in handy. Keep reading to find out!

How do I set an alarm on my Windows 10 computer?

1. Use the built-in Alarms & Clock

  1. Open Search, type alarms & clocks, and click on the relevant result.alarms and clock use PC as alarm clock
  2. From here, you can edit the alarm that is already created. Just click on the entry displayed and choose when to set the alarm, for how long, and so on.set alarms windows 10 use PC as alarm clock
  3. If you want to add and customize a new alarm, click on the + icon located at the bottom-right corner.
  4. Follow on-screen prompts for setting a new alarm time, entering a new name for the newly created alarm, choosing when to repeat this new setup and the alarm, or applying a new sound for your new notification.
  5. When done, click on the Save button.

When you want to set up an alarm in Windows 10, it’s best to use the dedicated Alarms and Clock app that comes built-in.

2. Create a new task and run it through VLC player

Tip icon Tip
Before you proceed, make sure to install VLC Media Player.
  1. Click on the Search field, type task scheduler, and click on the entry with the same name.task scheduler use PC as alarm clock
  2. From Task Scheduler, click on Action and choose Create Basic Task.
  3. Complete the field by following on-screen prompts.create a basic task use windows 10 as alarm clock
  4. In the Start a Program field, enter the path to VLC and also the path to the music or video you want to play at the end.
  5. Make sure that in the Add Arguments path (there is where you enter the path to music and video files), there is no space included.
  6. In the end, make sure you check the Open the Properties dialog for this task when I click Finish option.
  7. In the new window, switch to the Conditions tab and check the Wake the computer to run this task field.

Use this method if you want to run a video or a specific sound as your alarm notification. Also, this solution can even wake your Windows 10 computer from sleep mode, so you don’t have to worry about any other things.

3. Use third-party alarm applications

If the previous methods didn’t work, you can always download a third-party alarm clock software. We already covered some of the best alarm clock software for Windows 10.

All these applications offer great features, so feel free to choose any. So make sure to check the curated list and install one that seems the best.

That’s all for now! You now know how to set up an alarm on a Windows 10 computer in no time. Before you leave, find out how to speed up your Windows 10 PC.

For any queries or to share the app you used to set up an alarm, drop a comment below.

Just Cause 4 is now available in Xbox Game Pass on Xbox One

Just Cause 4 is the latest major video game title to join Xbox Game Pass’ library of playable games. The game launched in December 2018, just three months ago, and is the fourth entry in the popular Just Cause series that follows the character of Rico Rodriguez on a variety of adventures with heavy action and explosions.

Here’s the official game description and trailer:

Just Cause 4 is a huge open world game full of stunts, destruction, and conflict – buy now and for a limited time only receive bonus content – the Deathstalker Scorpion Pack containing customized gear crafted by Rico Rodriguez himself.

Welcome to Solís, a huge South American world home of conflict, oppression and extreme weather conditions. Just Cause 4 sees rogue agent Rico Rodriguez land in Solís to hunt down the truth about his past, at any cost. Strap into your wingsuit, equip your fully customizable grappling hook, and get ready to bring the thunder!

Xbox Game Pass is Microsoft’s subscription service that gives members around 100 full Xbox games to play in exchange for a monthly fee.

Are you an Xbox Game Pass subscriber and will you play Just Cause 4 now that it’s part of the service? Share your thoughts with the community in the comments below and then follow us on Pinterest for more Xbox gaming content.

Just Cause 4 - Standard Edition

Unauthorized changes blocked: 3 ways to remove these notifications

Some users might spot “Unauthorized changes blocked” notifications at the bottom right corner of the Windows 10 desktop. Those notifications inform users that Windows Defender’s Controlled FolderAccess has blocked an app modifying a folder.

So, the notifications appear when Controlled Folder Access is turned on.

Although Controlled Folder Access prevents unauthorized folder changes from unwanted programs (i.e. virus), it might also block some valid apps modifying folders.

One user stated: “Suddenly, I can no longer download photos from my SD card using the port on my laptop and my Photoshop Elements 15. I get the following messages: ‘Unauthorized changes blocked.’”

This is how users can turn off Controlled Folder Access to remove the “Unauthorized changes blocked” notifications.

How do I turn off Controlled Folder Access alerts?

1. Turn Off Controlled Folder Access via Windows Defender

  • To turn off Controlled Folder Access in Windows 10, press the Windows key + Q keyboard shortcut.
  • Enter the keyword ‘Windows Defender’ in the search box.
  • Click Windows Defender Security Center to open the window shown directly below.

  • Click the Virus shield icon on the left of the window.
  • Then click Ransomware protection to open the settings shown directly below.

  • Now toggle the Controlled Folder Access option off.

— RELATED: Microsoft adds direct KB links in Windows 10 error notifications

2. Turn Off Controlled Folder Access With PowerShell

  • Alternatively, users can turn off Controlled Folder Access With PowerShell. To do so, open Cortana’s search box.
  • Enter the keyword ‘PowerShell’ in the search box.
  • Right-click PowerShell and select Run as administrator to open it.

  • Then enter ‘Set-MpPreference -EnableControlledFolderAccess Disabled’ in the PowerShell, and press the Return key.

3. Permit Apps Through Controlled Folder Access

Users can also permit specific apps through Controlled Folder Access. That will ensure the “Unauthorized changes blocked” notification doesn’t appear for trusted software. This is how users can allow apps through Controlled Folder Access.

  • Open the Cortana app by clicking the Type here to search button.
  • Input ‘Windows Defender’ in the text box, and click Windows Defender Security Center to open it.
  • Click the shield button.
  • Click Ransomware protection > Allow an app through controlled folder access to open the options shown directly below.

  • Then click Add an allowed app to open the window in the snapshot directly below.

  • Select a program to permit through Controlled Folder Access, and press the OK button. The WDSC window will then list software excluded from CFA as in the snapshot below.

So, removing “Unauthorized changes blocked” notifications in Windows 10 is straightforward and doesn’t require any registry hacks. Remember that Controlled Folder Access can also block unauthorized folder access from suspicious apps.

Therefore, it might be better to keep CFA on and add software exclusions to it.

RELATED ARTICLES TO CHECK OUT: 

Download Movie Guide app to turn your PC into a movie database

After reviewing some gaming and educational Windows 8 and Windows 10 applications, it’s time to move to entertainment with a movie application for Windows 8 and Windows 10 called Movie Guide.

Watching movies on your Windows 8 and Windows 10 device will be one of the most active things you’ll be doing and while we wait for IMDB to release a compatible application with the newly released Windows 8 and Windows 10 ecosystem, we will review Movie Guide now!

If you can’t wait to try out this app, you can simply follow the link below to download it on your machine right now.

movie guide review for windows 8

Review: Movie Guide for Windows 10

With Movie Guide you are able to discover over 69’000 movies and even more actors with all their details. You can directly watch movie trailers, find similar movies or just browse through one of the specifically composed lists for now-playing, popular, upcoming or top-rated movies.

Currently, Movie Guide has a 3.5/5 rating in the Windows Store, but like I said with many apps before, this is going to change as more people will download and rate the application.

Currently, with an impressive number of more than 70,000 movies in their database, Movie Guide is a Windows 8 and Windows 10 movie application that seriously challenges the official IMDB app. o watch.

Movie Guide’s way of arranging actor, director’s information is sometimes similar to Wikipedia, as you can see from the images. You can see movie trailers inside the applications, ratings for those movies, synapsis and even similar movies.

Movie Guide: Almost as good as IMDB

Just as with the well-known IMDB, you have watchlists along with lists with movies you have seen and have made a good impression on you. It’s obvious that a lot of work has been put into this application since every movie features a background picture related to the movie itself.

So, why doesn’t Movie Guide have a better rating if it’s that great? Well, plenty of users have reported that the application requires Flash to run and sometimes that can be buggy, even if the installation has been performed.

Also, many have reported that the application sometimes moves too slow and using it with a mouse and keyboard isn’t pleasant. We can only hope developers are listening to these complaints.

Everything is peachy with Movie Guide application for Windows 8 and Windows 10 but there’s a big drawback: there are no user-submitted reviews.

For example, when I go on IMDB, what interests me most is what other users think about a movie. Most of the time, those reviews are more accurate than official reviews of the movie, which is why I hope its developers include this in future versions.

To summarize, here’s what Movie Guide for Windows 8 and Windows 10 can do:

  • Be your reliable movie guide
  • Watch movie trailers
  • Find similar movies
  • Make watchlists and lists with your favorite movies

RELATED STORIES TO CHECK OUT:

Xbox Game Studios rumored to be buying another studio, this time Relic Entertainment, home of Age of Empires 4

Microsoft is rumored to be looking onto acquiring Relic Entertainment, a Canadian game development company known for their work on the upcoming Age of Empires 4 game. The rumor comes from a well-known leaker who goes by the name of Klobrille on Twitter. As noted by Game Rant, the user has built his reputation by accurately leaking accurate info such as the development of Age of Empires 4 prior to the E3 2016 event.

Such an acquisition could make sense for Microsoft, especially given the collaboration between the two companies for the development of the Age of Empires series. The Redmond giant also acquired numerous other companies last year including Playground Games, Undead Labs and Ninja Theory as announced during E3 2018. Perhaps the acquisition of Relic Entertainment could be announced at this year’s event, which interestingly won’t see anything from Sony this year.

One thing is for sure, there will be a segment for the Age of Empires franchise during one of the Inside Xbox this month, which the team says will include “exciting announcements” about the game. The developers encourage those interested to check out the official Xbox Mixer page to livestream the event next time the video becomes available.

That upcoming no-disc Xbox “Maverick” reportedly has a name, ready for pre-orders in April

Apparently, the new upcoming no-disc Xbox “Maverick” will go by the name of “Xbox One S All-Digital Edition.” As noted in a report by Windows Central, the new Xbox One S All-Digital Edition naming will be used when the console is available for pre-order, starting sometime in April 2019. Xbox Maverick was first reported on by Brad Sams, along with Scarlett, Lockhart, and Anaconda being other Xbox codenames being mentioned.

The Xbox One S All-Digital Edition would be the first disc-less console by Microsoft. Currently, Microsoft sells the Xbox One S and Xbox One X. No confirmation on what the new All-Digital Xbox console will look like, although it may just be an Xbox One S without a disk drive. In addition, Windows Central notes that Microsoft is looking to offer a custom Fortnite Xbox console too, but no official word from Microsoft on whether this is true or not.

Microsoft may be updating its Xbox console lineup for a disc-less gaming and streaming future. With the Xbox Maverick being available for pre-order in April 2019, we could see next-gen Xbox consoles being revealed later this year. Microsoft is also working on bringing Project xCloud, its own cloud game-streaming service, to the masses.

Mrs. Trump visits Microsoft to talk child safety online

Despite the seemingly constant barrage of personal attacks Donald Trump engages in with journalists, heads of state or private citizens via Twitter, the First Lady persists with her anti-cyber bullying campaign.

Thanks to a report from GeekWire, we have glimpse into a recent visit from the First Lady Melania Trump who sat with Microsoft president Brad Smith to discuss how the two could leverage their respective influences and resources to help address online safety and accessibility.

Mrs. Trump visited Microsoft’s office in Redmond to learn how the company’s online efforts could presumably work to help promote her Be Best campaign.

Part of the Be Best campaign is directed at raising awareness of online well-being for children as well as partially addressing the opioid epidemic sweeping dense populations through the US.

During her 30-minute visit, Mrs. Trump was met by Smith as well as Microsoft VP Dave McCarthy, head of Xbox Phil Spencer, Microsoft safety officer Jacqueline Beauchere, and chief finance officer Amy Hood.

Microsoft executives showcased some Xbox related hardware and software that empowers parents to protect their children’s gameplay online as well as other company tools that help protect kids while on the internet, to which Trump added, “We need to educate the parents as well. Maybe some of them, they don’t even know about it and they just let their kids play. This is very, very informative.”

Microsoft President Brad Smith, First Lady Melania Trump, and Microsoft CFO Amy Hood discuss the ‘Be Best’ campaign. (GeekWire Photo / Monica Nickelsburg)

Smith also addressed the seeming hypocrisy of Mrs. Trump’s visit to discuss her Be Best anti-cyber bullying campaign amid her husbands online behavior with a diplomatic response issued later.

“We’ve always said that we’ll partner where we can, we’ll stand apart where we should. We have days when we disagree with this administration, just as we’ve had days where we’ve disagreed with other administrations, but today was a day where we could stand together to underscore an important message.”

The short visit looked to address the valley between parents and their children regarding the transparency of online activity. When children and parents keep an open dialogue about activities and protections taken to ensure a better well-being online, the easier it is to identify instances of malfeasance and cyber bullying by both parties.

In the marketplace, will Windows Lite be the next big thing, or just more of the same?

All the talk in Microsoft-watching land is about Windows Lite, Windows Core OS, Centaurus, Pegasus, and Andromeda. That may seem like a lot, but they’re all related. The idea apparently is to pare down Windows into a “core OS,” and then build experiences on top of it, including a pared down OS for Google Chrome-like devices (Windows Lite, or if you prefer code names, Santorini), a foldable tablet like device, bigger than a phone but with foldable pixie dust sprinkled on it (Centaurus), those Chrome killer laptops (Pegasus), and even the long rumored “Surface Phone,” Andromeda.

This is all exciting talk, and to be sure we’ll spend a lot of time here at OnMSFT.com bringing you the latest on this new initiative, but there’s a problem: all of this has been tried before in the marketplace, to not much success.

Way back in the days of Netbooks (lightweight, cheap laptops running Linux), Microsoft scrambled and got a flavor of Windows XP running on them in order to “kill” the Chromebooks of the time. That worked, for a while.

We all know what happened to Microsoft’s disastrous foray into mobile computing leading to the eventual death of Windows Phone, and while Microsoft Surface can be considered a success, it really hasn’t put much of a dent into Apple’s iPad. Windows 10 S has been another attempt to cut into Chromebook’s education market, but from all indications it’s withered on the vine. In fact, Microsoft has been chasing, and demeaning, Chromebooks for a long time:

Sure, it makes sense, a lot of sense, for Microsoft to cull out the core of Windows and build everything on top of that core: Surface Hub, HoloLens, Windows 10 itself, “Windows Lite,” laptops, foldables, and well, everything else. But as intelligent as an engineering solution that is, is it really going to mean much in the marketplace?

Chromebooks have a solid foothold in education, and a new device from Microsoft, whatever it’s running, isn’t going to magically change that. Same for iPads – the Apple ecosystem is firmly entrenched, and a new Centaurus device, while cool in its Microsoft-ish way, won’t cause Apple fans to throw out their iPads and their iTunes and their AirPods. Of course we have yet to see the third party pushes, the marketing efforts, and the actual overall cool factor of these new devices, but this isn’t the first time that Microsoft has tried to retake a market they once dominated, but frankly don’t anymore.

We’re heading into some exciting times for Microsoft, and could be hearing more about Windows Core OS and “Windows Lite” as soon as at Build in early May. It’s going to take a lot longer than that, however, for Microsoft to even begin to unseat Chromebooks or iPads, or even to (shudder) think about attacking the mobile space once again.

Download Evernote App for Windows 10/11 [Link and Review]

If you are on the lookout for a reliable note-taking app for your Windows 10 device, then Evernote should be among the best to take into consideration.

We have given a thorough review of the Windows 10 Evernote Touch app that you can read below to get a clear idea of what this app can do for you.

The second review is here after we reviewed Wikipedia for Windows 10. Now it’s time to review the Evernote app for Windows 10, one of the best note-taking software solutions out there.

We had the pleasure of talking with Phil Libin, the CEO of Evernote. We have used Evernote on Android, iOS, and on a laptop and personal computer, and we can say that we’re very pleased with it. Now, let’s see what Evernote for Windows 10 brings to the table.

evernote gif

Evernote app update for Windows 10

In 2016, Evernote received a new major update. The app now includes new features as:

  • Pulling up your notes by selecting Notebooks so you can group all of them into a single stack
  • The trash section now allows you to access your deleted items easier
  • The left sidebar can be reduced to a thin strip (in case you need some extra space)
  • Business and Personal sections introduced
  • A new search algorithm was added so you can find notes easier

Download Evernote for Windows 10

So, if you need a productivity-oriented note-taking app, Evernote is the right tool.

Evernote helps you focus on what matters most and have access to your information when you need it. Input typed notes or scan handwritten notes. Add to-do’s, photos, images, web pages, or audio … and it’s all instantly searchable. Organize notes any way you want and share with anyone. And Evernote syncs across your devices so your information is always with you, everywhere you go.

Review of the Evernote app

Evernote app

You know who the biggest rival and opponent of Evernote is, right? Yes, Microsoft’s very own OneNote software, is part of the Microsoft Office suite.

So, can Evernote be a worthy rival to OneNote and other note-taking apps or will they have to convince us with the next version?

Users should be aware that the Evernote application for Windows 10 is mostly optimized for a touch experience, so if you still want to use your mouse and keyboard with it, maybe you should stick with the desktop version.

Evernote is deeply integrated with Modern UI (the new name for the old Metro), and it will seem very natural at use, after you get used to it.

It might take you a while to get used to it, especially if you’re new to the Windows 10 game, but you’ll find it quite light and responsive in time.

The big tiles will seem useful for some, while others would have preferred more, smaller tiles. One of the basic features is the Swipe gestures:

  • Semantic zoom – somehow, it’s similar to the function with the same name in Wikipedia, allowing you to tap and jump to any grouping inside the app that you want.
  • App bar and Navigation bar – bring down the Application and Navigation bars that allow you to create notes, sync, and navigate to other application sections.
  • Charm bar – allows you pull the Charm bar where you can change the settings and perform searches.
  • Snap view – want to minimeze Evernote or share the screen with another application? Simply swipe from the left.
  • Swipe on objects – allows you to select multiples notes at the same time.

Evernote for Windows PCs – a smooth note-taking application

Evernote windows 10 app

We will try and confront the Evernote application with the OneNote from Microsoft in a future review, so that you could see which will better suit your needs.

One funny thing about Evernote is its age rating of 12+. In Evernote for Windows 10 everything is organized using Notebooks and Tags.

Here’s how the team at Evernote explains the Notebook and Tag view:

The Notebook View displays your notebooks however you like. You can view your list fully expanded or collapsed into Stacks. You can collapse or expand the list from the Charm Bar. We also indicate which of your notebooks are shared by displaying an icon inside of Shared Notebooks. Use the Semantic Zoom feature to zoom out of the notebook list to go directly to the items you want. The App Bar also lets you add a new notebook, if you’d like.
———————————————————————————————————
If you rely on tags to organize your notes, then you’ll love the Tag list in Evernote. For the basic use case, you can tap on a tag, then view the associated notes. For more precise results, notice that when you tap and tug on a tag to select it, certain other tags in the list grey out, while others don’t. The tags that stay visible are the ones that you’ve used together with the selected tag. Now, if you tap on a second tag, you’ll be able to quickly jump to a list of notes that are tagged with both.

How to use the Evernote app on a PC

Evernote templates

When you open your Evernote application for Windows or RT, you will see a horizontally scrollable list. There you will find the Nav, App, and Charms bar.

Your Evernote notes can capture text, images, video, web clips, web pages, and much more. One drawback with the current version of Evernote for Windows 10 is that you can only edit plain text, meaning rich formatting isn’t yet supported.

If you’re unfamiliar with Evernote, you should know that once you create, save, or update a note, it gets synced with all your other devices where your Evernote account is installed.

If you’ll ever encounter an error, you can always ask their support or go on the Forums.

If you don’t want to learn how to use Evernote on your own, you might want to try out the official guide from the website. You will learn the following after completing the guide:

  1. Navigate Your Account
  2. Create & Edit a Note
  3. Sync Your Account
  4. Browse Notes
  5. Organize Notes
  6. Search Notes
  7. Share Notes

What I didn’t like about Evernote for Windows 10 was that many times, I had the feeling that a lot of space wasn’t properly used and that there was a lot of free space that could’ve been better optimized.

Maybe this is why Evernote has only a 3 out of 5 rating.

Evernote for Windows 10 is built with the core meaning of tiles and leverages the power of Windows 10. Using Evernote, you can Auto-synchronize notes amongst your devices, use it for research (using the Wikipedia application for it, as well), and even use it as a virtual whiteboard.

We will update this review of Evernote for Windows 10 if new versions are available.

Download Wikipedia App for Windows 10/11 [Link and Review]

Wikipedia app is one of the best apps for Windows 10. Curious to learn more about this app? Read this extensive review below.

wikipedia windows 8 app

If you are looking for the biggest free encyclopedia to download on your Windows 10 tablet or laptop, you should be glad to hear that Wikipedia has its own official Windows app in Microsoft Store.
One of the most awesome Windows 10 applications that you can currently try in the Microsoft Store is, without a doubt, the Wikipedia application. I think it’s the best education application in the whole white world.

What else can beat a huge, always-growing library of knowledge, and all for free? There are more than 20 million articles about anything you’d like to read.

Wikipedia is the free encyclopedia containing more than 20 million articles in 280 languages, and is the most comprehensive and widely used reference work humans have ever compiled.

If you’ve been using Wikipedia until now only on the web, don’t be too surprised by the big difference in the Windows 10 application.

RT users should not worry; this Wikipedia app works just the same on ARM, x64, or x86 devices.

This means that the experience will be just the same whether you’re on a Windows RT or Windows 10 device.

Currently, the application has a 4 out of 5 ratings, rated only by 600 persons. As Windows 10 versions will become more popular, expect that number to increase a lot.

Curious to get a first-hand experience with the Wikipedia app? Follow the download link below and install it on your PC.

wikipedia windows 8 review

Update to Wikipedia app for Windows 10

Since 2012, Wikipedia app has evolved. Now it has a proud 4/5 rating on Microsoft store. Here are some of the new features :

  • The new “explore feed” feature shows trending articles right on the home screen
  • The app was equipped with a word processor for editing/formatting/changing constantly evolving content
  • You can now use an integrated voice search feature
  • You can use Wikipedia app in nearly 300 languages

Review of the Wikipedia app

The first difference that you’ll encounter will be the main screen. There, just like you can see in the picture below, you will find the importance of the day in history, featured articles and pictures, and the articles recently updated by users across Wikipedia.

You will find Wikipedia under the Books&Reference category, but here’s a direct link to it (you’ll find it at the end of the article, as well).

Be sure to check out this article and bookmark it if you like because we will be constantly updating it as more versions of the Windows 10 Wikipedia app will appear.

For now, it’s the first version, and it’s only natural that there are issues.

One of the biggest changes you’ll notice with this application is that you can pin articles to your Start screen for a later read, which will be quite useful to users.

I always didn’t have enough patience to finish reading articles on Wikipedia, especially since there were a lot of other tabs open. Let’s hope that this feature will help me finish all my articles.

Like many other apps optimized for the touch experience, you’ll notice that the Wikipedia application is shinier and somehow, the user experience feels more natural.

Maybe it’s because Windows 10 is the biggest change since 1992, or Wikimedia has just done a wonderful job.

I don’t know what the reason is, but I like the Windows Wikipedia application much more than any other application, be it for Android, iOS, Windows Phone or even the website itself.

Early reviews find Wikipedia a very useful app

You’ll find especially helpful the quick search feature, since it will seem so easy to discover the subjects and stories that you’re interested in. But when it comes to the application’s formatting, there are ups and downs. Here’s what Ryan Matthew Pierson with the LockerGnome had to say about this:

If the primary image has a long caption, that caption will carry over to the second column of the magazine-like arrangement. On some articles, it creates a white space that could easily be filled in by something else. When you drag the application to a side panel, everything seems to snap into place and you get an incredibly cool (and useful) resource along the side of the screen. This makes one of the more important features of Windows 8 that much more useful.

What’s awesome about this is how easily everything is set up. You can change a page’s language if you’re uncomfortable with English. The easiest part is to search in Wikipedia, you have to start typing and that’s all. Wikipedia will then find the article and deliver it to you.

One issue that Wikipedia app currently has is with large screens, as reported by TechWhack. Softpedia has also a good opinion about the Windows 10 optimized Wikipedia:

The app makes ample use of tiles; the home screen is entirely made up of tiles leading to either photos or articles. The article view is catered to Windows 8 as well. You’ll see the page layout customary to Windows 8 apps, the entire thing is quite slick. Even the infobox has been hidden away to leave room for the text and the photos. The app integrates with the global search feature in Windows 8 as well. There’s support for sharing features, you can snap it to the side of the screen and there’s even a pinch to zoom feature to quickly get to the section list. And just like the Android one, the app is open source.

Main features of the Wikipedia application

Although nothing can beat and match your experience with an application, you still need to know what you’re getting on the tablet. So, let’s summarize just what can Wikipedia on Windows RT and Windows 10 do for you:

  • Search – the app integrates almost unseemingly inside Windows 8 and Windows 10 and allows you to search either from the Wikipedia application or actually right from the Windows 8 global search widget.
  • Share – if you’ve used Wikipedia on Android and iOS, then you know you can share Wikipedia articles on social media or email. But the new sharing system in Windows 8 and Windows 10 really makes that a pleasure.
  • Snap – snap is like minimizing an application in a previous Windows version, only that the Wikipedia applications automatically flips to a single-column view. Imagine working on a history project and having the Wikipedia app in your sidebar. Absolutely terrific.
  • Semantic zoom – we have reported that Wikipedia app might not be that awesome on large screens, but you should know that by using semantic zoom on large articles, you can go to any section of the article that you want.
  • Pin articles – using the right-click function you can pin certain articles to your main screen for a later read.

So, have you installed the Wikipedia app on your Windows computer? Tell us more about your experience in the comments below.

Anthem video game is apparently causing console crashes on Xbox One and PS4, EA is investigating

Things are apparently not going so well for Anthem, BioWare’s new online RPG released last month on Xbox One, PlayStation 4 and PC. The game received worse reviews than Mass Effect: Andromeda, BioWare’s previous game that was also plagued with issues at launch, and Anthem is unfortunately not faring any better on the technical front.

Yesterday, Kotaku reported that many PlayStation 4 players have been complaining that Anthem can cause their consoles to randomly shut down. Worse, one PS4 owner claimed on Reddit that his console has been completely bricked following a shut down that happened while he was playing Anthem.

Forbes video games journalist Paul Tassi, who recently reviewed Anthem on Xbox One X, said that he experienced similar shut down issues while playing the game on Microsoft’s console. He explained:

Like the PS4 crash, my crashes on Xbox didn’t just restart the console, they act like someone yanked the cord out of the wall completely. My Xbox is usually on “sleep” mode as in, when it’s off, it’s not really off as you can boot it quickly to get back to what you were playing. But both times when Anthem crashed during a mission and shut off the console, it was off off, as in the entire console had to restart from scratch. Xbox does not do the disk-checking animation like PS4 does when it shuts off involuntarily, but it was a similar situation. I have literally never seen this happen with any game on Xbox before, and thought it was bizarre, but didn’t think too much of it until I saw what a widespread problem it apparently was.

The good news is that EA has already acknowledged these shut down issues and has asked affected gamers to share their crash data reports with the company. Still, this is terrible PR for the company and we hope the company will be able to quickly provide a fix.

Anthem isn’t the only game to have shipped in a broken state over the past couple of months. Fallout 76 was a huge disappointment for Fallout fans, forcing developer Bethesda to quickly discount the game and offer some free DLCs to early adopters. EA’s situation with Anthem is more worrying as this is a brand new IP from BioWare, a talented studio that doesn’t really have a lot of experience with Destiny-like loot shooters. Anthem received praise for its beautiful graphics (the game runs in 4K on Xbox One X), but most reviews have pointed out the insane loading times, repetitive missions, and lack of true solo mode.

EA and BioWare took quite a big risk with Anthem, but in this “games as a service” era the game could look quite different in the near future. Have you been disappointed by Anthem so far, and do you think BioWare can still fix the game? Let us know in the comments below.