Ford and Xbox trick out a custom F-150 Raptor for Forza Motorsport 7

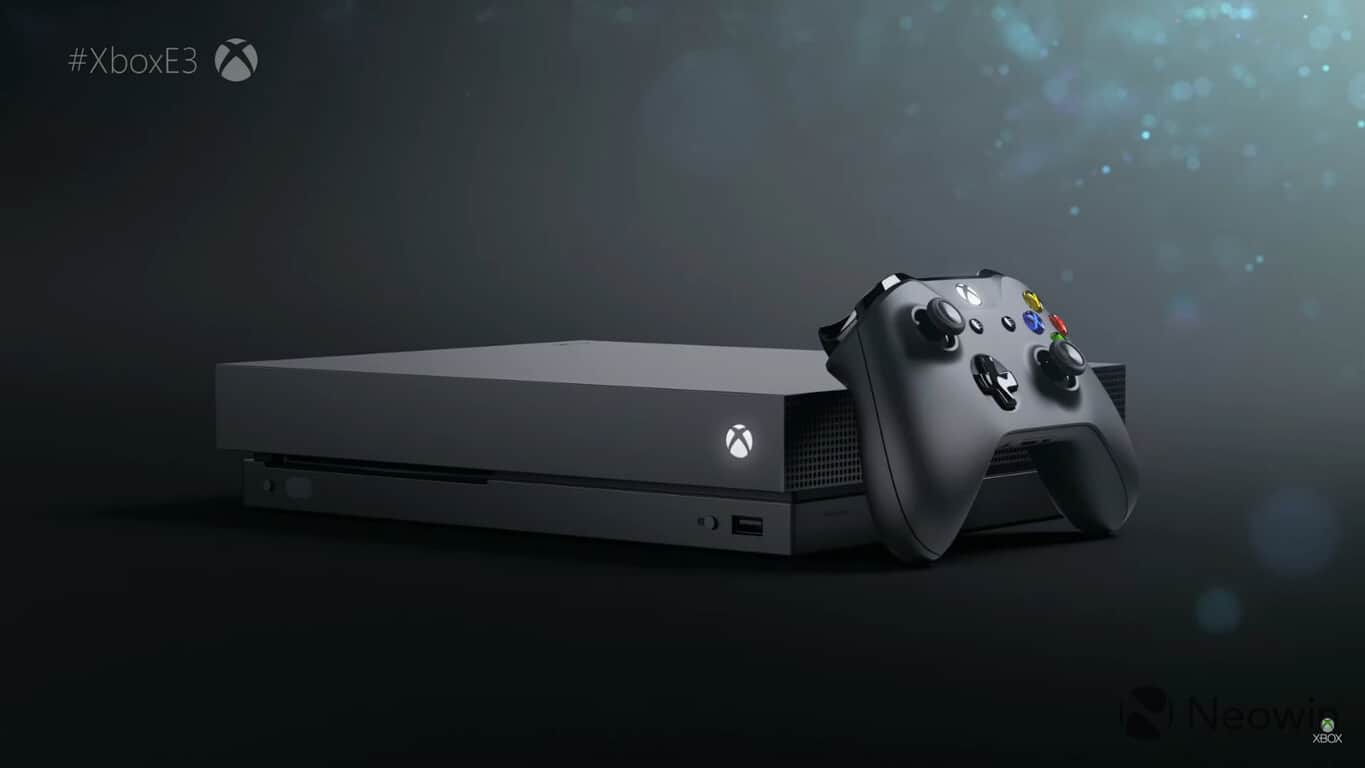
Celebrating the upcoming launch of the Xbox One X, Microsoft has teamed up with Ford to trick out an F-150 Raptor in Xbox One X colors. The custom Ford Raptor will be on display at the SEMA Auto Show in Las Vegas, and a digital version will be available early next year for everyone to enjoy in Forza Motorsport 7.

Some of the features on the Ford F-150 Raptor include custom wheels, bumpers, chase rack and LED lighting in Xbox’s signature green. Also on board are unique graphics, paint, and upholstery inspired the Project Scorpio code name. Performance wise, the vehicle includes Fabtech six-inch lift kit, upgraded Alcon brakes, Addictive Desert Designs intercooler and Ford Performance Borla exhaust.

Mike Humphreys, Senior Director, Business, and Partnerships for Forza Franchise, Turn 10 Studios remarked on this unique Ford vehicle:

“We have long enjoyed and valued our partnership with Ford Performance and feel privileged to work with them on the incredible F-150 Raptor, an iconic American legend…The Ford Raptor is built on top of another iconic legend, the Ford F-150 pickup, resulting in technical excellence and off-road innovations that make it a Forza fan favorite.”

The relationship between Microsoft and Ford go far back, and Forza 7 is home to the most extensive collections of Ford vehicles ever. Keep tuned for more information, and be sure to purchase Forza 7 so you can have a chance to drive this unique car for yourself!

Microsoft makes Outlook.com spooky for Halloween

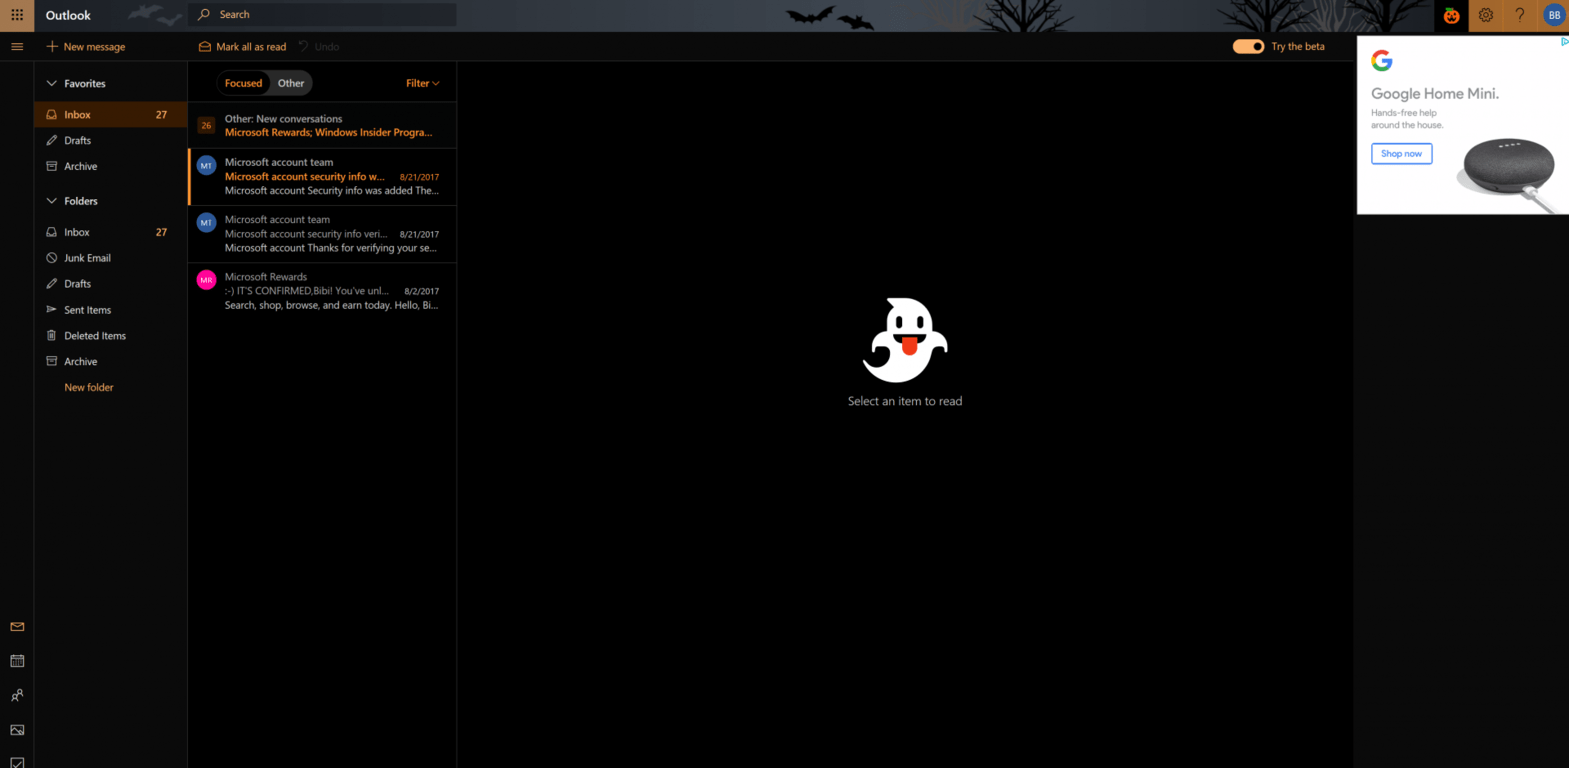
Halloween is just two days away here in the United States, and Microsoft wants to make sure you’re festive for the moment. The company is making the inboxes of Outlook.com beta users spooky for Halloween, complete with ghosts and a dark theme.

The spooky features are turned on by pressing the orange pumpkin next to the settings icon on the top right-hand side of Outlook.com beta. This turns on a dark mode, and add a ghost to the right-hand side of the UI when no emails are open. The toggle also adds bats to the search bar for an even spookier experience.

These Haloween themed features are cool but are still not nearly as impressive as when the company last transformed Outlook.com beta for Talk Like a Pirate day. Feel free to check it out for yourself, and if you so happen to enjoy the dark theme, also consider voting on it to keep it permanent!

Windows 10 users may soon be able to purchase Surface hardware via Microsoft Store app

We already know that Microsoft recently rebranded the Windows Store to the Microsoft Store, but turns out there are likely more changes ahead. Judging from recent leaks, Windows 10 users may soon be able to purchase Surface hardware via the Microsoft Store app on Windows 10 PCs (via Windows Central.)

Discovered by the well known Microsoft leaker WalkingCat, a user can right now type a specific command into the Windows 10 run dialog box and get to a hidden area of the Microsoft Store app to purchase Surface hardware. With the hidden area still including support for Windows Hello at checkout, and other Microsoft account features, it is evident that Microsoft will soon be using the Microsoft Store app to sell much more than games and apps.

https://twitter.com/h0x0d/status/924082552050106369

Again, since the use of a run command is necessary, please be aware that this feature is not publicly available on the Microsoft Store app as of yet. It’s not certain when Microsoft will officially roll out an update to enable this feature, but it might as well be coming soon now that it has come to light.

Windows 10 news recap: in-depth look at Surface Book 2, reports of a foldable Windows 10 on ARM device and more

Welcome back to our Windows 10 news recap. We are continuing the trend of our weekly “Windows 10 news recap” series where we go over the top stories of the past week in the world of Microsoft’s flagship operating system.

Microsoft reportedly working on a foldable Windows 10 on ARM device

New reports point to Microsoft working on a foldable Windows 10 on ARM device. This device is expected to be in the tablet form factor, although, may pack some phone capabilities and be pocketable. There’s no specific details known about the device, such as specifications, but rumours of Microsoft working on foldable devices are not new, and in fact the company has multiple patent filings for foldable devices.

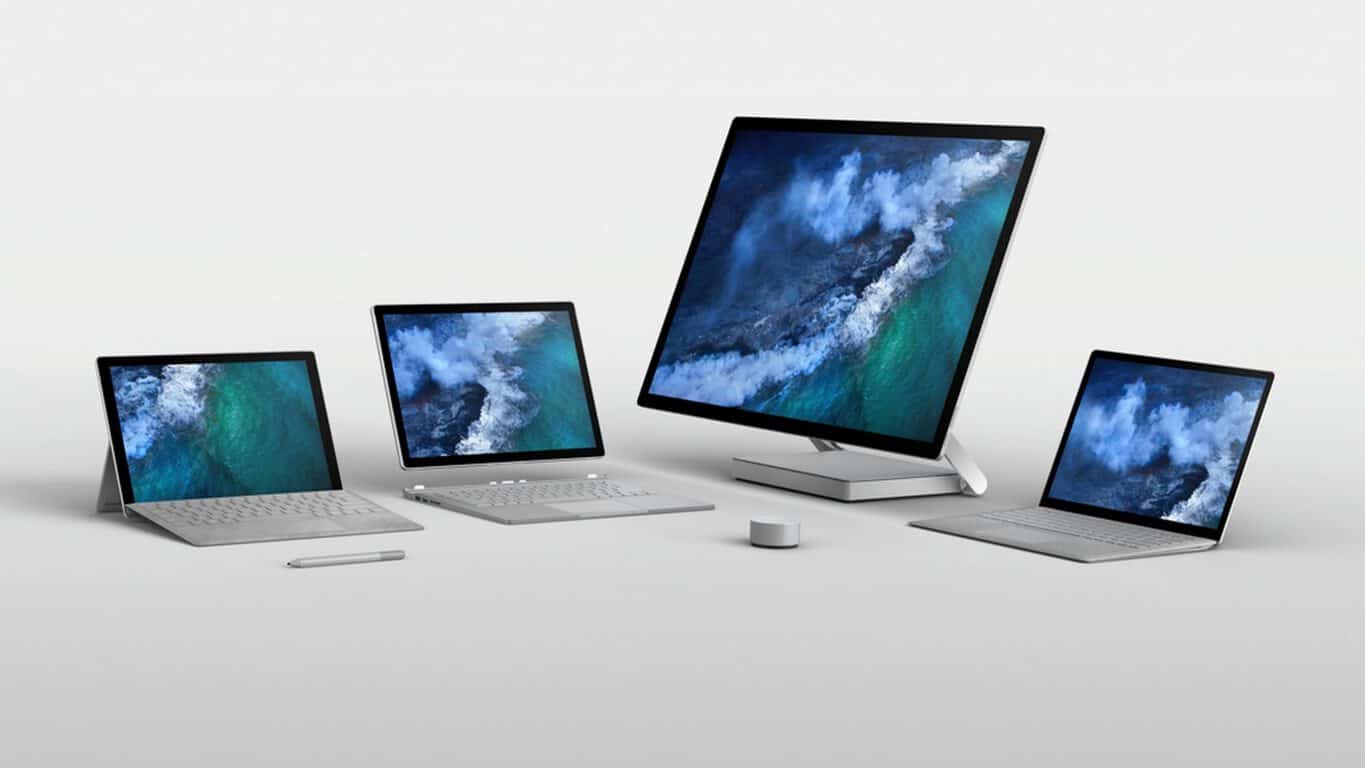
Microsoft offers in-depth look at Surface Book 2 design in new video

With the upcoming release of the Surface Book successor, Surface Book 2, Microsoft is giving an in-depth look at the device in a new video.

Consumer Reports decision to not recommend Surface hardware is “still in effect,” no exception for Surface Book 2

Despite the Surface Book 2 being released shortly, Consumer Reports is sticking to its guns and will not recommend Surface hardware to consumers, with the Surface Book 2 being no exception.

That’s it for this week. We’ll be back next week with more Windows 10 news!

Xbox news recap: Microsoft stops production of Kinect, Original Xbox Backward Compatibility launches and more

Welcome to our weekly Xbox news recap series, where we go over the top stories of the past week in the world of Xbox. Let’s get started.

Microsoft stops production of the Kinect

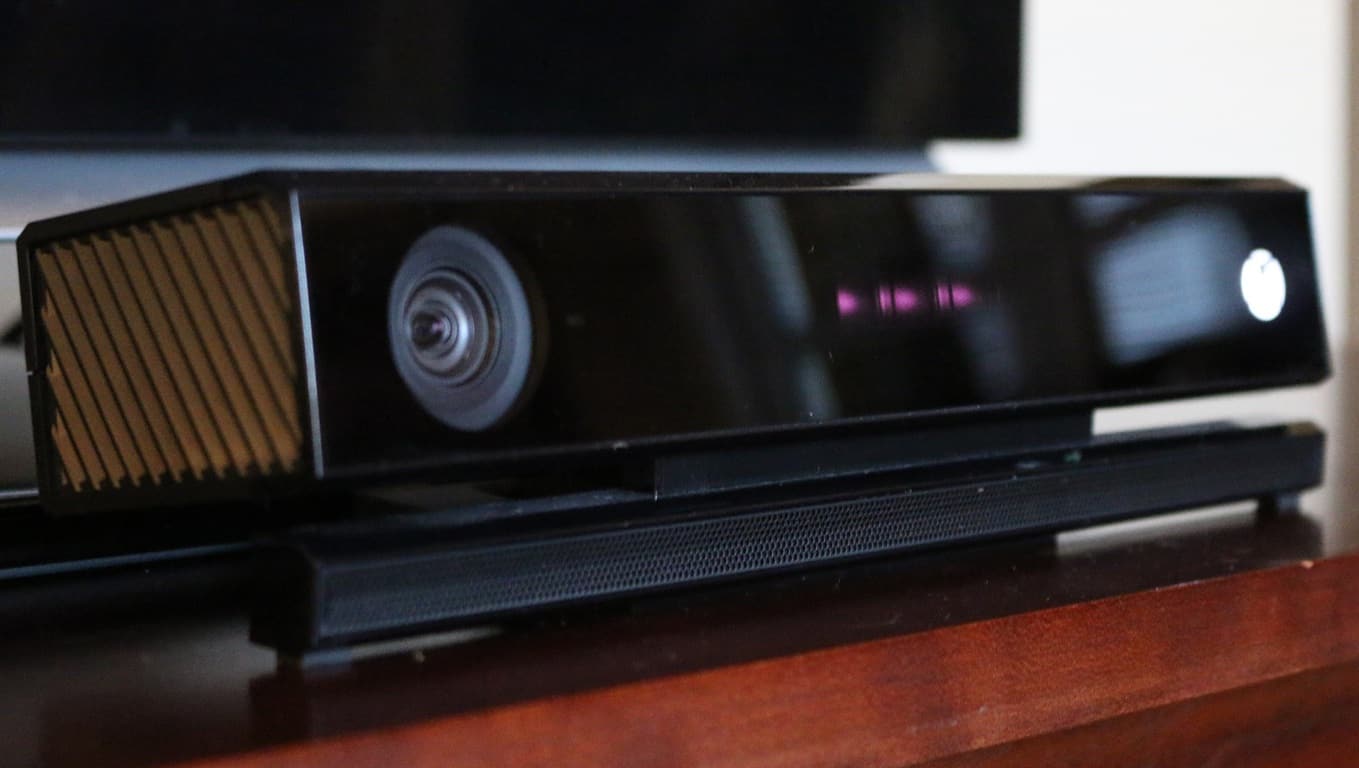
The Kinect was never a success – not in the way that Microsoft had been going for, anyways. While it found a niche for use with some small subset of experimental artists, and the Kinect technology found a lot of use in future products, the gaming peripheral was one of Microsoft’s biggest flops. Finally, Microsoft is giving up on the peripheral, ceasing all production. The Xbox One will continue to support the Kinect, but Microsoft isn’t going to try to push this device off shelves anymore.

Original Xbox Backward Compatibility is here

We’ve been waiting for this one since the launch of the Xbox One, and it’s here. You can now buy and play original Xbox games on the Xbox One. Games available at launch include Star Wars: Knights of the Old Republic, Fusion Frenzy, Red Faction 2, Psychonauts, and more. Like the Xbox 360 Backward Compatibility, you can expect more titles to be added to the list of games that are supported. These original Xbox games are mostly going for $10 a pop, so they’re an affordable trip down memory lane for gamers that are interested.

Fuzion Frezny on the Xbox One

ID@Xbox has generated more than $500 million

ID@Xbox, Microsoft’s push to give indie developers the means to produce better games, has been a huge success. The program has now collectively made $500 million after 4 years, marking up a sizable chunk of Xbox revenue. After the sudden plummet of public opinion that happened after Microsoft fumbled the announcement of the Xbox One, the ID@Xbox program was instrumental in helping to turn public opinion back towards the Xbox team, and show that they had the gamers’ best interests at heart.

Ori and the Blind Forest: Definitive Edition on Windows 10 and Xbox One

Microsoft opens the “Stay n’ Play” mini hotel experience

Can’t show up to PAX this year, but live in the Sydney area? You may have caught wind of the “Stay n’ Play” mini hotel experience. This “hotel” is going on between November 3rd and November 5th, and gives people a chance to stay the night and play with the Xbox One X. The experience is complete with 4K TV’s, a nice sound system, and – most importantly – an Xbox Onesie to take home with you and brag about to your friends.

Thanks for joining us. To keep up to date with all the latest Xbox news, keep a close eye on our Xbox One tag.

Dummy’s guide: Switch to low textures to boost your gaming experience

So, you’ve just downloaded your latest game through Microsoft Store or steam and you are ready to start it up and have some fun.

However, when your game starts it feels slow and choppy. Plus, you also find that the graphics aren’t exactly easy on the eyes, because of low textures.

Does this scenario sound familiar to you? If so, then the simple tips below can help you get the most out of your games.

You will first of course need to visit the display settings in your game. These settings can usually be accessed on the main menu of your game.

In this article, we will discuss what each type of display setting does and how to change them to help make your game look and run better. Let’s get started with the first and most important setting.

How to fix texture issues in games

Low texture quality

In a nutshell, textures are skins that  are put on 3D models and environments. Perhaps one of the most obvious and popular examples of low textures is the Minecraft game from Microsoft.  

Minecraft looks great, but without proper textures in other games they will look plain and boring. Textures add the details and aesthetics in a game. Perhaps, you are playing an open world game and notice the flowers on the trees and your footprints in the sand. These graphic perks are all present because the game utilizes good textures.

Of course, it is important to note that the more intricate the textures are in a game, the more demanding it will be on your computer. Specifically, texture quality requires Dedicated Video Memory or VRAM.

So, if your graphics card does not have the required amount of VRAM for the game you are playing, then you will probably experience irregular stuttering or short “freezes” in your gameplay.

Best way to change texture quality

So, obviously you will want to have the best quality textures possible in your game. High textures can make your game far more immersive and beautiful then low textures. It may even seem like you are playing an entirely new game, when you are playing on the highest textures.

However, as I mentioned above that high textures could possibly cause performance issues. Therefore, if your game freezes every now and then, then it is recommended to lower your texture quality in your game’s settings.

On the other hand, if your game is running smoothly, then you can try turning your graphics higher to see whether or not your computer can handle it.


Resolution

Basically the resolution of your game or display shows how many pixels can be present in your game’s images. Having high resolution is very important as it will significantly affect the quality of the game’s images.

Fortunately, most modern monitors will allow you to play your games in at least 1080p or 720p. However, your game’s setting may not be configured to the optimal resolution setting.

It is important to change your game to the highest resolution possible as it will significantly affect how your game would look. For example, higher resolutions means your game will look smoother, sharper, and just more attractive in general.

However, turning your game’s resolution up will put the more stress on your computer, namely your graphics card. So, if your game starts running at a general low FPS, then you might want to change the resolution of your game.

Some monitors are capable of displaying 4k resolutions. However, this will be extremely demanding on your GPU. So, you will want to make sure you have the proper hardware before you put your game into 4k resolution mode.

How to best change resolution settings

game resolution

If your GPU can handle it, then try running the game to the resolution of your display monitor. In other words, if you have a 1080p monitor, then run your game at 1920×1080.

If you have a 4k resolution then run your game at 3840×2160. Of course, if you have an old monitor, it might only be able to display resolutions below 1080p properly. 

Since the resolution of a game has the most impact on your computer, changing it can make a previously unplayable game become passable.


Anti Aliasing

Anti Aliasing is another important tool that is used to make your game look better and smoother. To understand how this works, let me explain what aliasing is in the first place.

Aliasing happens when your game produces pixelated images that look really unnatural and unpleasant. It causes certain 3D objects in the game to have rough edges or it creates spikes on lines that are supposed to be straight.

With anti-aliasing, your game will look smoother, more natural, and have less “edges” on 3D objects.

There are numerous types of anti-aliasing. However, for simplicity’s sake we won’t go into the different types here. It is only essential to know that anti-aliasing has a similar affect to your game as the resolution quality. Turning it up will mainly affect the GPU in you computer.

What type of anti-aliasing settings should I use?

Anti-aliasing is a very useful tool, so it is important to have the correct setting.

Typically, games will offer you anti-aliasing levels that end with 2x, 4x, or 8x. Generally, 4x is the gold standard as 8x only offers slightly better images, but signficantly decreases performance. On the other hand, 2x usually isn’t enough to make your images smooth.

AA is important, but high resolution is essential for a good looking game. So, it is advised that you first put your resolution to the appropriate quality, then start adding AA if the game is stable enough.

It is also recommended that if your game is not operating properly to completely disable AA. Turning off AA may cause your images to look a little rough on the edges, but it will certainly give your computer a powerful speed boost.


FXAA

FXAA game

I mentioned above that there are many types of anti-aliasing out there. Well FXAA or Fast Approximate Anti-Aliasing is a special type of AA that deserves special attention.

Most modern games will have this option, as it is quite useful. The reason why it is so useful is because it barely affects your computer’s performance, but fixes the jagged, pixelated problem of aliasing.

However, the way FXAA fixes the issue is that it makes things a bit blurry. Obviously, it comes down to personal preference. Maybe you dislike jagged 3D models so much that you do not mind images that are a little bit more blurry.

On the other hand, people who enjoy sharp images might not like FXAA. Personally, I prefer using normal AA. If your computer can handle the game on AA 4x setting, then it is recommended to use normal AA instead of FXAA.

On the other hand, if you are having FPS issues, then you may want to try FXAA.

Speaking of FPS issues, follow the instructions listed in these troubleshooting guide to fix the problem:


Field of View

Ok, so changing the field of view of your game won’t affect the performance or graphics much. However, it can be used to gain a slight competitive advantage over your opponent.

Let me explain, field of view increases how much you can see on your screen. Basically, if you increase the FOV you will be able to see more of your surrondings at a given moment. However, this will make objects in the center of your screen look smaller.

So, obviously you do not want to turn your FOV too high or too low. A higher FOV may give you more visual knowledge of your surroundings in a shooting game, but it will make objects smaller, which will be harder to aim at.

The level of FOV really comes down to personal preference, as turning it up or down won’t affect your computer’s performance.


Anisotropic Filtering

This type of filtering makes your textures in the distance more sharp and aesthetically pleasing.

Without Anisotropic Filtering, objects in the distance will look less detailed and more blurry even if the images infront of your game character is crisp.

So it is important to turn on this setting. If you purchased a recent GPU, then it will probably be able to handle most games at AF 16x.

However, if you are getting a significant loss of FPS, then you can try lowering your Anisotropic Filtering down to 2x. There will still be a noticeable difference, even if the AF settings are turned down to 2x.


VSync, Refresh Rate, and triple buffering

The refresh rate shows how many times your screen refreshes graphics per second. In other words, most modern monitors are 60Hz monitors. This means the max amount of FPS you can see on these monitors is 60.

So, even if your game is showing FPS higher than 60, you are still only seeing 60 FPS. However, there are of course modern monitors that have 120Hz or higher.

Sometimes, if your in game FPS is higher than what your monitor can handle, then there will be screen tearing. This means your graphics will sometimes look like it has been teared in two.

Screen tearing is obviously does not give a good gaming experience, so that’s why the VSync feature is used to sync your monitor refresh rate to your GPU output.

Using VSync will eliminate screen tearing. However, if your game drops below 60 FPS, then VSync will automatically set your game to 30 FPS. This will reduce performance significantly.

It is quite a complicated issue that the “triple buffering” feature tries to address. However, many games do not have the triple buffering feature.

It is recommended that you use VSync if your game’s FPS is always a good deal higher than 60 FPS. On the other hand, if you get frequent drops of FPS in your game, then you may want to turn VSync off.

Summary

It may take a few tries before you get the perfect setting for your game.

However, after experimenting a bit and using the information above, you should be able to change your settings in a such a way that you will get the perfect balance between performance and graphics quality.

Read also:

 

Slack unveils interactive screen sharing for desktop users

Slack began its experience with messaging services and later, its developers added audio, video calls, and finally screen sharing. Now, the team at Slack revealed its latest feature: an improved screen sharing feature with interactive capabilities.

Sharing your screen with Slack

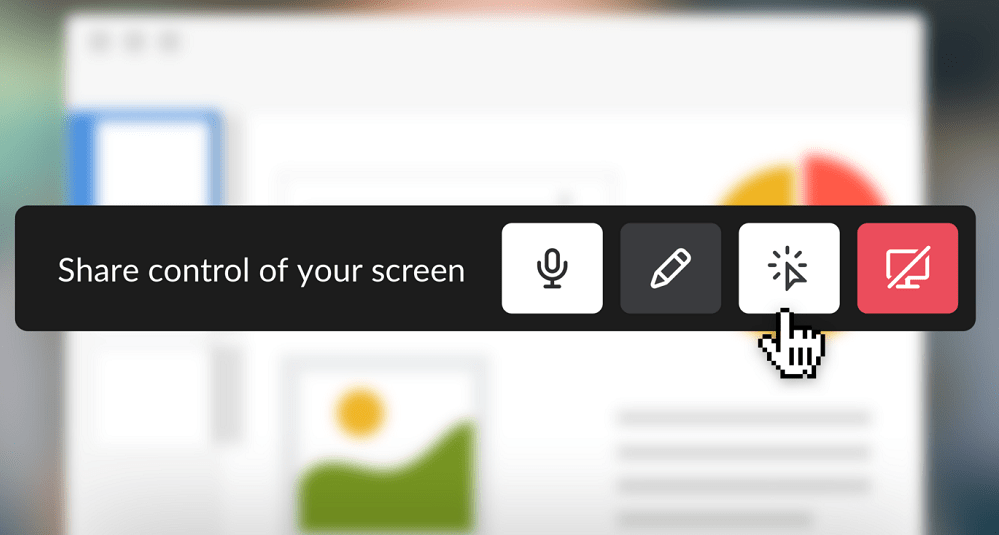
In order to share your screen with other users with Slack, click the Share control of your screen button during your Slack call. This way, all participants will receive their very own cursor along with the ability to type, edit, scroll, and click through the contents of the shared screen.

Participants limited to just viewing the screen can be included as well and can temporarily draw over the shared screen. For instance, if they want to point out a particular mistake made in an Excel cell, they can just draw over that specific cell to bring everyone’s attention to it.

To be able to share the control of a screen, though, a paid Slack plan is required and the latest version of the deskltop app must be downloaded.

Get Slack for Windows

Slack interactive screen sharing windows 10

Slack for Windows creates alignment and shared understanding across your team to help increase productivity and reduce stress. Slack brings all your team’s communication at the same place, giving everyone a shared workspace where conversations can be organized and accessible. In addition, you will not have to go to every meeting to stay in the loop since Slack builds a searchable archive of your team’s conversations, decisions, and work.

The app makes it possible for everyone to get their hands on knowledge, integrating with all kinds of enterprises and products available.

RELATED STORIES TO CHECK OUT:

Minecraft celebrates today’s Stranger Things Season 2 release with new skin pack

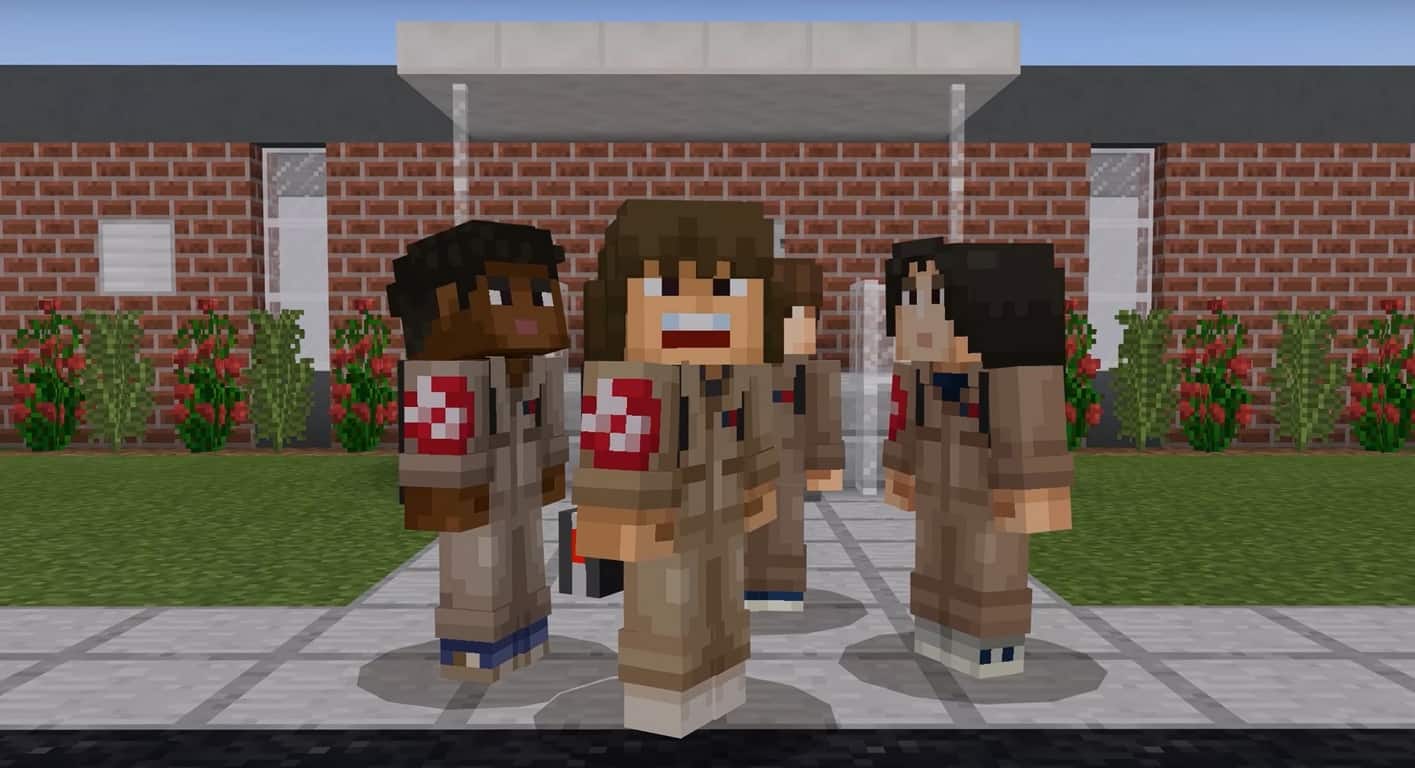
Today, Mojang released a special edition Minecraft skin pack just in time for the premiere of Stranger Things, Season 2. The hugely-popular Netflix series is available to watch starting today. With Halloween just around the corner, Minecraft is celebrating with a special Stranger Things skin pack. Be warned, Stranger Things Season 2 spoilers may appear in the video below.

The Stranger Things skins pack features skins for all your favorite characters, including Mike, Dustin, Lucas, Will, Eleven, Joyce, Hopper and many more. For now, many of us don’t know what will happen in Stranger Things Season 2 as all our favorite characters try to survive the 1980’s and investigate what’s going on in The Upside Down.

This is the latest Minecraft skin pack available with more in the pipeline for Thanksgiving, Christmas, and beyond.

The Stranger Things Minecraft skin pack is available for download now.

Get Minecraft on Xbox One or Windows 10 from the Microsoft Store.


Minecraft for Windows
Developer:
Microsoft Studios
Price:
Free

Game gifting coming to Xbox Insiders today, more new features promised

As we’re getting closer to the holiday season, the Xbox team announced today that game gifting from the Xbox store is now available for Xbox Insiders. Some Alpha Insiders discovered the option a couple of weeks ago, and it’s definitely a great addition to complement the recent Fall update for the Xbox One.

The ability to gift digital Xbox games will hopefully be available for everyone in the coming weeks, assuming Microsoft wants to capitalize on the holiday season to drive game sales. Xbox’s Mike Ybarra also teased that other features are coming soon to Xbox insiders. Back at E3 2017, Microsoft unveiled a massive revamp for Xbox avatars that is excepted to launch later this Fall, and we hope that’s still in the pipeline for this year.

Are you looking forward to gift games to your friends and family, or do you still prefer to purchase physical games? Let us know below.

More Fluent design changes discovered in Windows 10 RS4

The Windows 10 Fall Creators Update introduces elements of Microsoft’s new Fluent Design language on the Action Center and Start Menu, but turns out there is still more to come. Noted by Rafael Rivera on Twitter, more Fluent Design changes are reportedly coming to Windows 10 in Redstone 4, particularity in the settings menu.

https://twitter.com/WithinRafael/status/923830984495132677

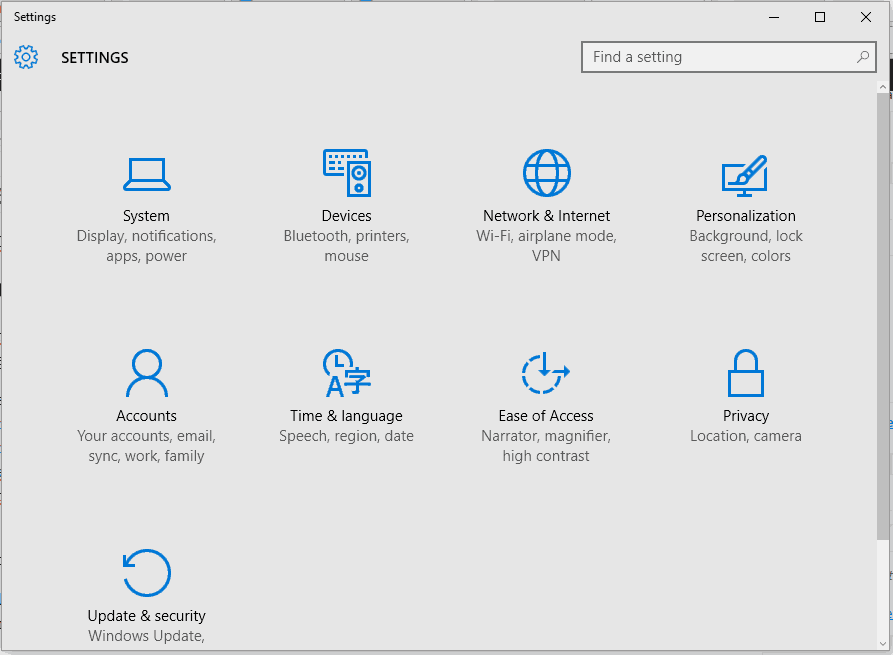
Seen in the featured image above, future Redstone 4 builds will apparently have a reorganized Windows Settings menu. Judging from the leaked image, text and icons in the home page of the Windows 10 settings menu appear to be much smaller, cleaner and refined compared to what is currently seen in the Fall Creators Update. Additionally, images show the sidebar in the settings menu will pick up an acrylic look, complete with a reveal effect, letting you see through what is happening underneath.

It’s not clear when Microsoft plans to roll out these changes to new insider builds, but the company already worked on adding some more touches of Fluent Design to the start menu with the very first Redstone 4 build. Still very exciting news, and coupled with the news of a redesigned Outlook app, more Fluent Design might as well be on the way soon to other core parts of Windows 10 in the near future.

Metal Gear Solid V, Halo Wars DE, Resident Evil HD and more to joins Xbox Game Pass in November

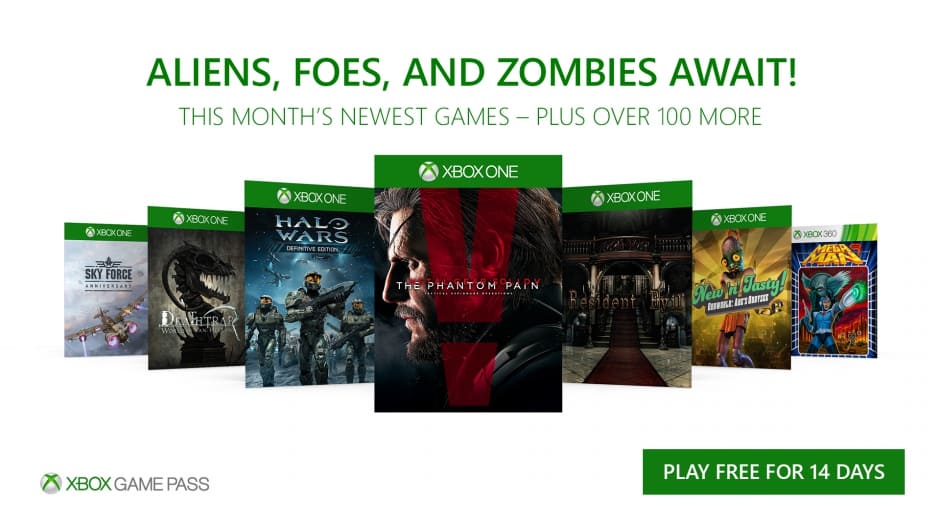
Microsoft’s Xbox Game Pass is shaping up to be a great way to enjoy some of the best Xbox One games at a very reasonable cost. In November, the gaming subscription service will pick up seven new excellent titles such as the critically-acclaimed Metal Gear Solid V: The Phantom Pain. Other additions include Halo Wars: Definitive Edition, Resident Evil HD, Oddworld: New ’n’ Tasty, The World of Van Helsing: Deathtrap, Sky Force Anniversary as well as the Xbox 360 game Megan Man 9.

Metal Gear Solid V: The Phantom Pain was the final work of Director Hideo Kojima for publisher Konami, and one of the best blockbuster titles released in 2015 along with The Witcher 3. The action-adventure stealth experience will likely become the best title available on Xbox Game Pass since its launch in June of this year, and starting next month you’ll be able to play it for $9.99 a month instead of buying it for $19.99 on the Microsoft Store.

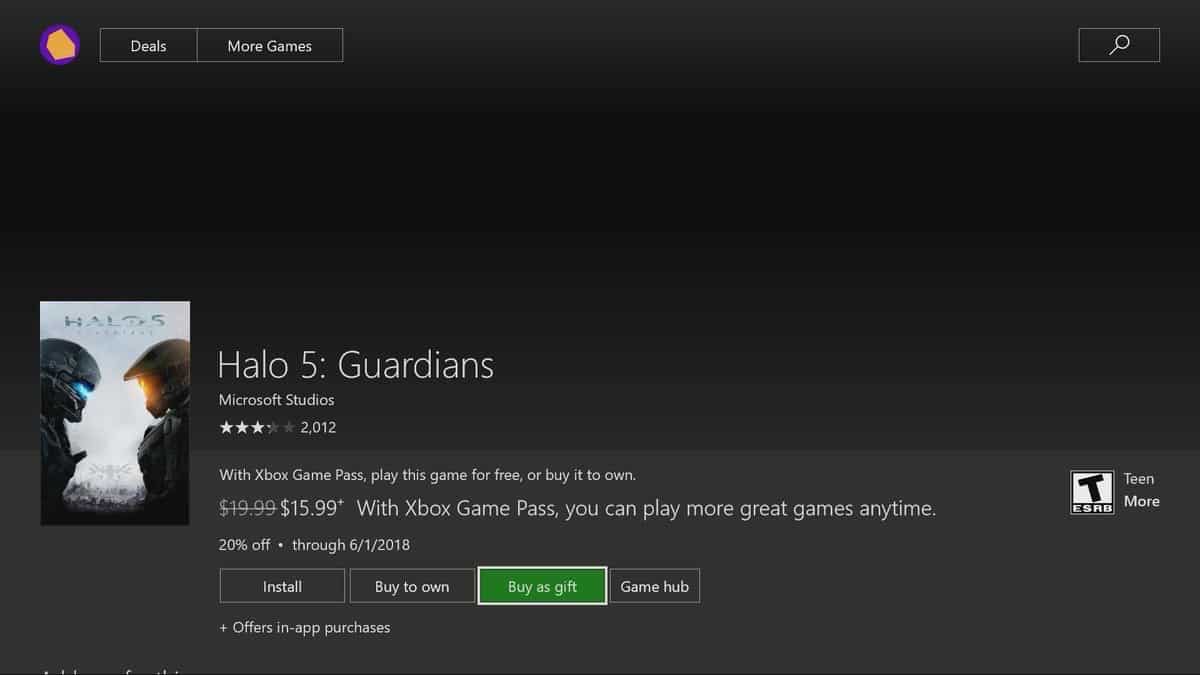
The other additions are also nothing to sneeze at, especially the remastered titles Resident Evil HD and Halo Wars: Definitive Edition. If you didn’t try Xbox Games Pass yet, we remind you that you can play for free on your Xbox One for 14 days. The catalog includes over 100 Xbox One and Xbox 360 games including Halo 5: Guardians, Dead Rising 3, ReCore: Definitive Edition, State of Decay, Mad Max and many more popular titles.

Microsoft announced its FY2018 Q1 earnings yesterday, and Xbox Games Pass likely contributed to Gaming revenue growing 1% year-over-year. “Xbox software and services revenue grew 21 percent driven by continued momentum in digital distribution and strong game title performance,” Microsoft’s quarterly report noted.

Developer version of Opera now supports Chromecast

As many already know, there is a developer version for the popular browser Opera and recently, an important change was made to it allowing for Chromecast support.

This makes things a lot easier for people using Chromecast as well as Opera since the process is a lot more convenient.

Chrome no longer required

Before this change, people had to use Chrome in order to send videos from YouTube to their TVs. Now, users can simply use Opera for the same since it features the Chromecast option as well.

Enabling the feature

Those excited to start using the Chromecast feature in Opera should know that it doesn’t come enabled by default, but can be enabled from Settings. Users need only go to the Settings page and look for the Browser section.

There, under User Interface, there is the option to Enable Chromecast Support. This will activate the Chromecast feature and let users start enjoying their Chromecast in association with the Opera browser.

How it works

chromecast opera browser

While it was already mentioned that the feature allows people to send YouTube videos to their TVs, it’s important to note that the Chromecast option is capable of a lot more.

It also encompasses other browser tabs and even projects the entire desktop, if the user wants to do that. It can be quite handy for many different situations.

Other new things in the update

The update that brought the awesome Chromecast feature to Opera users also contains some other goodies users might be interested in. Among them is the support for Bitcoin, Ethereum, Litecoin and Bitcoin Cash, which for some is a major deal.

Such impressive implementations pretty much leave other additions in the shadow, such as the fact that Opera has been tuned to handle itself a lot better against crashes.

Handling crashes

The new Opera will isolate the problem when the browser is about to crash, and instead of terminating the entire browsing session, it will mark every other tab for reload while leaving out the tab that prompted the crash.

This helps a lot with not losing important work or progress, and it just makes Opera an overall safer and more reliable browser.

These are some pretty nice features and they are available in the developer version of Opera. This version of the browser is available for download right now, and people interested in acquiring these new features are free to download and install it.

RELATED STORIES TO CHECK OUT:

Microsoft launches Updater tool for Windows Phones

Microsoft has largely abandoned its Windows Phones after the all-conquering Android has swept it aside. As such, the software giant is no longer developing hardware but is still supporting both the Windows 8.1 Phone and Windows 10 Mobile platforms with updates. Its most recent release is a new Over-the-Cable Updater for Windows mobile users.

The Over-the-cable Updater app enables Windows Enterprise users to update their devices faster. Previously, Windows Mobile users had to install each update individually to fully update their handsets.

However, with the Over-the-cable Updater, they can now update to the very latest version of Windows without installing previous release build updates.

The Windows Device Recovery Tool was similar to the Over-the-cable Updater app in that you could update Windows Phone platforms directly to their latest versions with the WDRT until Microsoft removed that app’s update options.

Now, the WDRT only reverts Windows back to its original version. The OTC Updater is effectively a replacement for Windows Device Recovery.

To utilize the Over-the-cable Updater tool, you’ll need to add the OTC Updater software to a Windows PC with Net 4.0 and a phone USB driver installed. Press the Download button on this website page to add the software to Windows. Then, connect your Windows Mobile to the PC via USB cable and unlock its PIN lock if it has one. Please note that the device needs to be in Airplane mode and be running Windows 8.1 or Windows 10.

With the OTC Updater, you can update some Windows Mobiles to the Windows 10 Fall Creators Update when Microsoft releases it for handsets. As such, Windows Phone users should not toss away their handsets just yet.

Fall Creators Update breaks Flexx 11: Here’s how to fix it

The Netxbook Flexx 11 is a small detachable Windows 10 tablet perfect for users who don’t need to run complex tasks on their devices.

If you’re planning to upgrade your Flexx 11 tablet to Windows 10 version 1709, however, you should know that you may encounter various driver issues after you install the update. Oftentimes, after install the webcam won’t work, audio will be wonky, the touchscreen is unresponsive, and more. All these bugs will quickly make you regret hitting the upgrade button.

The good news is that you can quickly fix this problem! But first, here’s how one user describes this issue on Microsoft’s forum:

Had problems after Installation of windows 10 fall creators update. Touchscreen inop, sd card reader inop, Web cam inop, audio inop. Came here to see if I was alone in this situation or not. Obviously I’m not alone. went through the recommended process updating through device manager. To no avail. […] for some reason windows generic drivers for these intel chips don’t work very well. this is the second time I have had this happen. For some reason windows drivers on these chips don’t recognize the sd, the audio speakers, touchscreen, or the web cam. The wifi on my PC worked on both occasions. Don’t forget Intel makes the chips. Microsoft makes the os. and the manufacturer just put’s the hardware together. […]

How to fix Flexx 11 issues on the FCU v1709

Although Flexx 11 is often affected by various driver issues after users install its latest updates, there is a solution that always works.

Go to Intel’s website and download Intel’s driver updater. Run the tool and all your driver issues should be history now.

As a quick reminder, you can fix driver issues using Windows 10’s dedicated troubleshooter. Here are the steps to follow:

  • Go to Settings > Update & Security
  • In the left-hand panel, select Troubleshoot
  • In the new window, select the troubleshooter that best suits your needs.
windows 10 troubleshooter

You can also update your drivers using the Device Manager. Problematic drivers usually have a yellow exclamation mark.

Right-click the driver that you want to update and then simply click the ‘Update driver’ option.

update flexx 11 driver

Instead of performing this action by yourself, we recommend using an automated software that downloads and installs the latest drivers for your PC, without harming your device or user data.

⇒ Get Fortect Driver Updater

We hope the solutions listed above help fix the driver issues that you may have encountered on your Flexx 11 tablet after upgrading to Windows 10 Fall Creators Update.

RELATED STORIES TO CHECK OUT:

Fix: Not enough System Reserved Partition space for Fall Creators Update

Windows 10 Fall Creators Update is finally live. And while millions of people around the world are downloading the latest Windows 10 version, there are some users who have problems with it. One of the issues that recently emerged is the problem with the System Reserved Partition. Namely, one user said he’s not able to download the FCU, because he doesn’t have enough space on the System Reserved Partition.

So, if you’ve encountered this issue as well, we’ve prepared a solution for the problem. Even if you haven’t encountered this issue, and just stumbled upon this article, I recommend reading it, because you’ll learn something about the way your system works that you might not know before.

I don’t have enough System Reserved Partition space for the Fall Creators Update

Obviously, this problem occurs because your System Reserved Partition is too small for all the files the Fall Creators Update is trying to put on it. And you probably don’t even know it. It is recommended to have at least 450MB of free space in order to install the Fall Creators Update.

So, if you already know what the System Reserved Partition is, and what is it used for, you can move on to the solution immediately. But, if you’re confused, and wondering what the hell is the System Reserved Partition now, don’t worry, we’ll get to that in a second.

What is the System Reserved Partition

So, let’s start with explaining what the System Reserved Partition is. Chances are, you’ve been using your computer, and Windows on it, for years now, without having a clue there’s such thing as the System Reserved Partition on your hard drive.

When you install a fresh copy of Windows on your computer, it automatically creates the System Reserved Partition. This partition usually stores the Boot Manager and Boot Configuration Data. As you probably can tell yourself, these tools are used by your computer when booting. Your computer starts the bootloader, which boots your system from your primary boot device (usually your hard disk). 

As this partition stores sensitive data, Windows doesn’t assign a letter to it to prevent harmful actions from users. So, you’re not able to see it as other partitions. The only way to access the System Reserved Partition is through the Disk Manager.

Resize System Reserved Partition

The default size of the System Reserved Partition is 450MB. Which is just enough for Windows 10 Fall Creators Update. So, you probably resized it somehow. Or some program disrupted it. Anyway, we’re not going to investigate the cause here. Let’s just show you how to solve the problem.

To be able to install the Fall Creators Update, you’ll need to resize your System Reserved Partition back to 450MB. And here’s how to do that:

  1. Create system repair disc (make sure you create a system repair disk before moving on, just to be safe).
  2. Now, download EaseUs partition manager.
  3. Install and launch the program, and select the partition where Windows 10 is installed.
  4. Click Resize/Move.
  5. Under Decide size and position, use the knob and drag to the left until you allocate the desired amount of disk space. As we said, you should aim for 450MB
  6. Now, look at the Unallocated Space Before: field to see how much space has been unallocated. Once there’s enough, release the knob.
  7. You will now see an unallocated amount of disk space. Click OK and restart your computer.

Now that you created the desired amount of unallocated space, you need to allocate it to the System Reserved Partition. And here’s how to do that:

  1. Go to Search, type disk management, and open Create and format hard disk partitions
  2. Select the System Reserved partition, right-click it and click Extend Volume.
  3. Select the Unallocated space, click Next and then Finish.

That’s about it, after doing this, you should have just enough space on your System Reserved Partition to install the Fall Creators Update.

If you have any comments, questions or suggestions, just let us know in the comments below.

RELATED STORIES YOU NEED TO CHECK OUT:

Why WindowsReport.com was born and why are you here

Howdy friend!

I’m so glad that you are here, on the homepage of WindowsReport.com.

You probably have come across our content after searching for a specific fix to one of your annoying problems or maybe after reading one of the many articles we’re doing.

We want to give you a bit of background of who we are and what is it that we do.

Our mission as online publishers is to provide professionally curated and originally created content in the following fields:

  • various technical problems (like how to fix your broken laptop keyboard or that dizzying BSOD error you got)
  • lists, best of, buying guides (like advice on how to buy a new laptop; which are the most efficient storage devices and so on)
  • tech news of importance to PC and Microsoft users (everything which might have an impact on how you interact with your PC and other Microsoft product, but not limited to that)

We encourage you to return and bookmark our homepage if you are a PC user, and if you’re looking to become one.

We’re committed to be as informative as possible and we invite you to interact with us in the following ways:

  • send us emails on how we can improve on our contact page (you will also see our whole team there)
  • speak with us on Facebook
  • leave a comment on this article.

WindowsReport.com is in the middle of a design change, where we try to remove the amount of ads and put the content in front, where it deserves to be.

Obviously, we still need money to fuel our operations, so that’s why we are partnering with software makers.

We are not here for a couple of months, and we won’t be able to establish ourselves as a name without your help.

Thus, we want to thank you for being our readers and we assure you that we will only produce high-quality content.


There is a plethora of Windows 8, Windows 10 apps to be explored in the Windows Store and not too many websites that one could trust and rely on. We here at Wind8apps strive to find only the best Windows 8, Windows 10 apps and share them with you. Many visitors land here after searching for “win 8, 10 apps” or “wind 8, 10 apps”. Once you’re here, I hope you’ll enjoy the apps that we have discovered!

why was windows8apps.com born
On a conquest to digest Windows 8, Windows 10 applications

Update – Wind8Apps has become WindowsReport.com

A brand new chapter has started for us back in the end of 2015 when we decided to rebrand from Wind8Apps.com to WindowsReport.com/ We also have a brand new look so I hope you will enjoy the new aspect and identity. Our mission has slowly become one where we offer the best fixes in terms of various PC issues, but also to keep up with the latest news. 

It’s 23 October and the world is waiting for the Windows 8 launch that is bound to happend on 26 October. Currently, there aren’t too many Windows 8, Windows 10 applications available on the market but we, at Wind8apps.com are sure that their number will increase in the near future. Just look at how many Windows 8, 10 tablets and hybrids are out there! I am almost sure that, for the first time, the iPad will face a serious enemy.

Windows 8, Windows 10 applications – we’ll explore them together

Definitely, Android is its biggest enemy for now, but Windows 8, Windows 10 on tablets/hybrids/laptops/desktops will be like nothing else, I can guarantee you that. It might not be that awesome in the first 3 years (that’s the worst scenario possible) but it will surely pick up. And boy, when it will pick up, it will be one helluva fight. iPad, Android tablets and Windows 8, Windows 10. Thus, we decided to create windowsreport.com, so that you could be part of the Windows 8, Windows 10 revolution. We will test applications and let you know if they’re good or bad.

We will also share tips and news in the future, if we’ll consider them worthy for our audience that we’ll gradually build up. Wind8apps.com was born because Windows is part of our daily lives, and I’m referring here to those that use it, be it at work or home. For the first time, Microsoft has decided to make such a big change and we want to be your guide into the world of Windows 8, Windows 10 apps.

PC Doesn’t Turn On After Overheating: Step-by-Step Fixes

If your PC doesn’t turn on after overheating, the issue is often linked to hardware damage, a triggered thermal protection feature, or residual heat affecting internal components. This guide walks you through the most effective ways to troubleshoot and get your system running again.

Why a Computer Won’t Turn On After Overheating

When a computer won’t turn on after overheating, it’s usually because internal safety mechanisms have shut down the power to prevent further damage. Overheating can cause:

  • CPU or GPU thermal throttling and auto-shutdown.
  • Damage to the power supply or motherboard.
  • Melted or degraded thermal paste reducing heat transfer.
  • Triggered BIOS/UEFI thermal protection settings.
  • Short-circuited components from excessive heat.

Understanding the cause is key to ensuring your PC won’t overheat again in the future.

1. Wait for the cooldown

For starters, you should wait for some time and try again. Most of the time, it’s hard for constant exposure to high temperatures to damage your PC.

Basically, your motherboard is programmed to shut down in case of abnormally high CPU or GPU temperature as a precaution measure. With that in mind, there’s a cooldown period after which your PC will start normally.

On the other hand, if you’re still unable to start your PC after, let’s say, 15 minutes or so, we are sad to inform you some part of the hardware is probably fatally damaged.

Our guess is that motherboard, GPU or CPU are critically affected by the constant exposure to high temperatures. In this case, there’s nothing else you can do but to contact your service and replace the affected components.

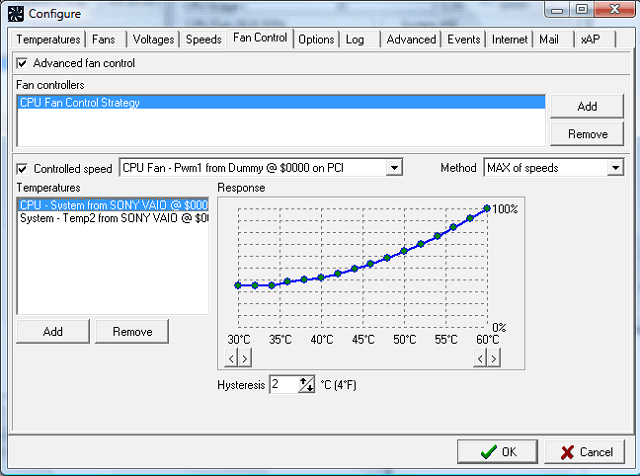
2. Software tweaking with SpeedFan

There are two ways to protect and upkeep your PC in regards to high temperatures. Firstly, let’s take a look at software part. Most PCs will track temperature and regulate coolers on their own, but you can boost them manually, as well.

By using a third-party software you can manipulate fans and monitor temperatures on both your PC and laptop. And, by adding an extra power to coolers, avoid the overheating issue.

The first program that crosses our mind is highly-regarded SpeedFan.

SpeedFan is a nifty and small tool that grants you total control over your cooling system. With it, you’ll be able to regulate fans speed manually or use the advanced automatized feature and let it work its magic.

pc won't turn on after overheating

You can download SpeedFan for free by following this link. And if you’re not satisfied with what it has to offer, make sure to check this article for viable alternatives.

3. Hardware

Now, let’s move to a hardware part and give you an insight on that, too. Extra coolers are always welcomed. Most of the time, your PC configuration comes with CPU, power supply, and GPU coolers respectively.

But, as you can see for yourself by a simple glimpse on the back side of the computer case, there are empty compartments for extra coolers. If you’re an avid gamer, make sure to add some of those in order to reduce heating substantially.

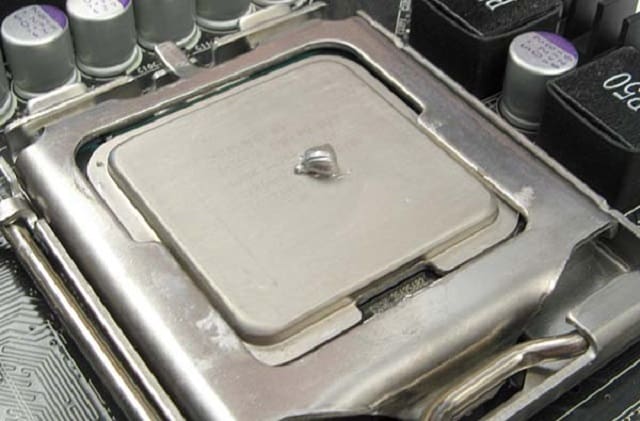
Moreover, you should probably change your thermal paste. This gum-like grease has an important role in keeping the heat flowing from the heat source (CPU) through the heat sink.

pc won't turn on after overheating

Over time, it will lose its original state and won’t provide your CPU with needed protection. So, make sure to change it and look for improvements. If you’re not sure how to do it, inform yourself in order to avoid additional issues.

That should do it. Don’t forget to post your questions or suggestions in the comments section below. We’ll be glad to hear from you.

FAQs

Why won’t my laptop turn on after overheating?

Thermal protection may have shut it down, or heat damage may have affected the battery or motherboard.

Can overheating permanently damage a PC?

Yes, prolonged overheating can destroy internal components, especially the CPU, GPU, and motherboard.

How do I prevent overheating in the future?

Keep your PC clean, ensure good airflow, replace thermal paste when needed, and avoid blocking vents.

Grab your free Thor and Hulk Xbox avatar items here

Marvel has just released two free promotional Xbox Avatar items for gamers to grab and add to their collections. Each item is based on the new movie, Thor: Ragnarok, and lets male and female gamers dress up as Thor or be accompanied by the Hulk. Here’s both items on my own Xbox Avatar.

Thor: Ragnarok Xbox Avatars

Both items can be grabbed here and here though they may not be available in all regions. Companies often release free items as a way to build hype for their product launches. Marvel even released a special Spider-man: Homecoming a few months ago.

Do you like these sort of items? Let us know your favorites in the comments below.

How to enable and configure the Controlled Folder Access for Windows 10

Last month Microsoft had announced a Controlled Folder Access feature that would allow users to control the access to certain folders. With this in place, ransomware and other variations of malware will not be able to access and modify the protected folders.

The new feature will also let admin give access to the “Controlled Folder” for selected people. The news is that the “Controlled Folder Access” feature is up and running for Windows 10 users.

Needless to say, the Controlled Folder Access is an important feature to have especially when you want your private files to stay at an arm’s length from the attackers. In this segment, we will guide you through the necessary steps required for setting up Controlled Folder Access.

Activate and setup Controlled Folder Access on Windows 10

  • Go to the Start menu and type “Windows Defender Security Center” in the search bar
  • Alternatively, you can also head over to the “Windows Defender” menu and select “Open Windows Defender Security Center” button.
  • Once the “Windows Defender Security Center” menu opens select the “Virus and Threat protection” menu from the left bar. In the next step select “Virus & threat protection settings” from the main window.
  • Scroll down until you see the “Controlled folder access” and this can be enabled via the toggle button.
  • Set up the “Controlled folder access” by selecting the “Protected folders.” It is here that you can select all the folders that you would want to protect from attacks.

The Controlled Access also comes with an option that allows users to whitelist a particular app. In order to do this select the second option which reads out “Allow an app through Controlled folder access.”

With this in place, the whitelisted app will be able to modify, edit and add/delete files from the protected folders.

The Controlled Folder Access has been tested against some of the common ransomware samples like the Cyptomix and thankfully the new feature guarded the protected files against the attack.

On the flipside, this also means that the unprotected folders are exposed to attacks and the Controlled Folder Access is not a full-fledged replacement for an anti-malware security suite.

RELATED STORIES TO CHECK OUT:

How to choose the color filter accessibility option in Fall Creators Update

Windows 10 Fall Creators Update heralds with a slew of new features that are not just exciting but also productive. Microsoft has announced a couple of new accessibility features for the Windows 10 Fall Creators Update.

The color filter is one such feature that makes it easier for people with color blindness to use the Windows 10.

The feature will help users with color blindness detect the difference between colors and work with traditional applications that use color elements. Windows 10 makes use of light sensitivity and works with all the usual applications and user interface.

The best part, however, is that the color filters are built at the system level and will work with any desktop application.

In this segment, let us have a look at steps involved to activate the Color Filters

  • Open the settings menu
  • Select “Ease of Access”
  • Choose “Color & High contrast”
  • Under the “Color Filters,” click on Apply color filter toggle
  • In the drop-down select the color filter that you need to use

The color filters are available in Greyscale, Invert, Greyscale Inverted, Deuteranopia, Protanopia, and Tritanopia. The Color Filter will be applied to the entire Windows 10 and you should be able to see it on third-party apps as well. Hopefully, the new Color Filter feature should be handy for users with color blindness.

That apart one can always enable/disable the color filters on Windows 10 by using “Windows key+Ctrl+C” shortcut instead of opening the settings menu. The Color Filter is available starting with the Windows 10 Fall Creators Update (version 1709). Color Blindness affects 2.7-million people which translate to about 4.5% of the world population.

That being said this is not the first time that Microsoft has introduced a feature to help people with color blindness. Microsoft Garage had come up with something called as “Color Binoculars” to help users with color blindness by employing a more distinguishable color combination.

Apps missing on Fall Creators Update? Here’s how to fix it

Microsoft’s latest major update, the Fall Creators Update, was recently released to general acclaim. However, there are clear signs the update isn’t perfect, the most prominent being misplaced apps.

According to many users that provided feedback after installing the update, many apps appear as installed in the Microsoft Store, but in reality they’re missing from Windows 10.

Microsoft is on it

Microsoft caught wind of this problem early and is currently working on solving the problem. So far, it’s known that apps are missing from the Start menu and that searching for them using Cortana doesn’t give any results.

While Microsoft is still trying to find a permanent solution, a band aid of sorts has been provided for the public.

Here is how users can fix the bug if they experience this problem.

How to fix missing apps on Windows 10 version 1709

1. Repair or reset your apps

Navigating to Apps & Features from Apps (under Settings) will give users access to the Advanced Options for most apps. Clicking on this option will open the possibility of either repairing or resetting that app.

windows 10 apps troubleshooter

Repairing and then resetting if repairing didn’t work is the first thing that users should try for apps that don’t appear in their Apps.


2. Re-install your apps

Another solution, albeit a bit more drastic than the first, is for users to re-install the apps that cause problems. First, they need to uninstall them from the system completely and then install them once again.

uninstall app windows 10 FCU v1709

This should solve any problems regarding apps not appearing as available even though they’re installed.


3. Use PowerShell

This might be beyond what’s comfortable for regular users but it’s a good way to try and fix the problem. Following a few simple steps is also not very complicated and users that don’t regularly play around with PowerShell shouldn’t worry.

  1. The first step is to access Windows PowerShell. The easiest way for that is to search for PowerShell in Cortana.
  2. Once you locate the app, Run as Administrator.
  3. Next, there are a couple of commands that need to be typed out in the PowerShell window. Here they are:
  • reg delete “HKCUSoftwareMicrosoftWindows NTCurrentVersionTileDataModelMigrationTileStore” /va /f
  • get-appxpackage -packageType bundle |% {add-appxpackage -register -disabledevelopmentmode ($_.installlocation + “appxmetadataappxbundlemanifest.xml”)}
  • $bundlefamilies = (get-appxpackage -packagetype Bundle).packagefamilyname
  • get-appxpackage -packagetype main |? {-not ($bundlefamilies -contains $_.packagefamilyname)} |% {add-appxpackage -register -disabledevelopmentmode ($_.installlocation + “appxmanifest.xml”)}

After typing all these commands and finishing the process, users should be able to see and use all apps normally.

The best thing would be for Microsoft to provide a universal fix but until that happens, users at least have a couple of ways in which they can carry out their business without having to worry about this bug.

Sure, it’s inconvenient to have to go through all these settings, but it’s better than not having access to those apps at all.

RELATED STORIES TO CHECK OUT:

Gamers get a free night with the Xbox One X in “Xbox Stay n’ Play” hotel

Gamers around the Sydney area unable to go to PAX will be excited to know that the Xbox One X is coming to them instead. The Xbox Stay N’ Play, a mini-hotel experience, is selling reservations to spend a night with the newest console.

At Pirrama Park, Pyrmont from Friday, November 3 to Sunday, November 5, four suites will be booked throughout various day sessions and even overnight. each room is decorated in a theme: Forza Motorsport 7, Assassin’s Creed Origins, Call of Duty, and (of course) Minecraft. What’s mind-blowing is that the reservations were handed out for free on a first come, first serve basis.

Overnight suites include:

  • 8pm check-in and 8am check-out using your Xbox Gamertag (registrations will be available on site)
  • A private themed suite for you and 1x friend to play the Xbox One X, ahead of launch
  • Super high resolution 4K HDR televisions for super sharp and smooth gameplay
  • Dolby Atmos enabled headsets for crystal clear, cinema quality immersive audio
  • Selection of Xbox One X Enhanced Games, available from our Gold Standard concierge
  • Xbox Onesies to sleep in and take home

Daytime suites include:

  • Two hours of unlimited gameplay in bookable blocks from 8am until 8pm
  • One two hour gameplay spot available per person per day. Additional bookings will be removed.
  • A private themed suite for you and 1x friend to play the Xbox One X, ahead of launch
  • Super high resolution 4K HDR televisions for super sharp and smooth gameplay
  • Dolby Atmos enabled headsets for crystal clear, cinema quality immersive audio
  • Selection of Xbox One X Enhanced Games, available from our Gold Standard concierge
  • Guests should arrived at least 10 minutes prior to their experience start time.

With only four suites open for three days/two nights, it’s no surprise that they’re sold out already. But fans will still be able to visit the Stay N’ Play Lobby between 8 a.m. and 8 p.m. throughout the weekend, and that doesn’t even require a reservation.

Windows 10 Fall Creators Update fixes DirectX 9 memory allocation bug

The memory allocation problem is a persistent present since the days of Windows 8, showing how important an impact it had on the way memory was allocated by Windows to games.

Prior to Windows 8, memory was freely allocated to games depending on availability and requirements. That changed when people updated to Windows 8, 8.1, and more recently Windows 10.

The change specifically meant that the system would only allocate a maximum of 4GB of VRAM regardless of any other criteria. Being locked before this fixed amount caused problems for many gamers.

Fall Creators Update to the rescue

After a very long wait, it would seem that Microsoft has rolled back this change with the implementation of the Fall Creators Update.

The problem resided at the stem of the Direct3D API but has now been fixed so that it gives a more accurate reading of available memory.

Unfortunately, it doesn’t look like similar fixes will be made available for Windows 8.1, so the best course of action for those looking to solve this issue is to just upgrade to Windows 10.

It’s a big deal

For someone that doesn’t have more than 4GB of VRAM, this problem can seem unimportant. Machines with more than 4GB of VRAM are generally regarded as being upper echelon and most consumers don’t have such issues.

However, due to the way that machines with 4GB or less utilize a combination of RAM and VRAM, this problem affects those users as well.

Overall, any Windows 10 gamer should look to update to the new Fall Creators Update and receive this very important benefit.

The problem is older than most think

While the problem originated with the beginning of the Windows 8 era, it would seem that it has originated as a result of the developers trying to fix the already existing issue in Windows 7.

Here is what the Senior Software Engineer for Direct3D, Jesse Natalie, had to say about the situation dating as far back as Windows 7:

“This API was available on Windows 7, however it did not behave reasonably in the face of GPUs with more than 4GB of VRAM. During the Windows 8 timeframe, we noticed the trend in memory would lead to an overflow of several 32bit values across the graphics API surface area, so there was a concerted effort to sanitize and clamp rather than allow overflow. The clamp for D3D9 was just applied too early, resulting in allocation failures instead of just clamped reporting.”

It certainly took a while but it definitely seems like Microsoft has managed to put an end to this issue. Windows 10 has proven to be a real turning point for gaming with Windows in general, with Microsoft taking a deep interest in providing a great platform for gamers.

RELATED STORIES TO CHECK OUT:

Xbox first video gaming brand to join WiSA, plans integration of hi-def wireless audio

Xbox is the first video gaming brand to join WiSA (The Wireless Speaker and Audio) Association. WiSA is an industry group that is dedicated to bringing hi-def wireless audio products to the home theater market. The Xbox announcement was made a few days ago by WiSA in a press release.

WiSA President Tony Ostrom was excited to announce the addition of Xbox to WiSA:

“We are excited to welcome Xbox and have them work alongside our speaker brand members to increase the in-market system offerings that can be created through the interoperability of WiSA technology. Xbox delivers a fantastic gaming experience with premier audio alongside a significant amount of content into the homes of consumers, including TV shows, movies, and music. Together, we can create simple, high-performance audio solutions through the integration of high-definition wireless audio for all Xbox fans.”

By joining WiSA, Microsoft should be able to work with the home theater community more easily to create a more immersive 4K gaming experience to compliment the Xbox One X.

Microsoft, GE announce IoT partnership, plan to “go to market together”

At GE’s Minds + Machines conference today it was announced that GE will start using the power of Microsoft Azure to build powerful apps. The change takes effect on November 30th, meaning North American customers and developers using GE’s Predix (an application development platform for the Industrial Internet) will soon have expanded capabilities in the next few months.

Kevin Ichhpurani, GE Digital’s executive vice president in charge of ecosystem and channels, believes that Predix developers will be able to “benefit from a network of Azure regions sprinkled all over the globe.” Since many GE customers are already Microsoft customers, Ichhpurani also remarked that the “the intent is to go to market together.”

The plan is for the Predix-Azure combination to expand into additional markets next year. According to Kevin Dallas, Microsoft’s corporate vice president of business development, Intelligent Cloud, there are other benefits, including optimized operating, the ability to work with real-time data, and build apps without switching platforms:

We are bending the productivity curve … [for industrial customers] looking to digitize their products, be it a jet engine or an elevator…The notion of shipping a machine and not being able to communicate with it and gain insight into how it’s being used is a thing of the past.

Developers using GE’s Predix long called for closer integrations with Microsoft’s Azure, so this is great, especially since most companies already use Azure to store data and run enterprise software. Again, possibly another win in Microsoft’s wallet, especially after GE recently announced it would be ditching Microsoft hardware.

Primary Display’s Adapter Doesn’t Support NVIDIA 3D Vision [Fix]

Dealing with video graphic cards problems while using your Windows 10 system is a real bummer. Depending on the error you experience you might not be able to use specific programs or play your favorite games.

However, in most situations, these issues can be quickly addressed since we are talking about a software malfunction. So, if you just got the primary display’s adapter does not support Nvidia 3D vision error message, don’t panic.

Follow the guidelines below and learn how to quickly resolve this problem.

Understanding the problem

Before applying the steps below, ensure your device or computer can get 3D vision within the standard display. The Nvidia 3D protocol requires a certain screen resolution and a special monitor, or else you cannot enjoy the actual 3D vision, even if the installed graphic card offers built-in support for this feature.

If your monitor or display cannot support 3D vision, you must connect an external monitor via an HDMI connection.

Otherwise, the error message is most likely caused by a corrupted driver.

What can I do if the display’s adapter won’t support NVIDIA 3D vision

1. Apply Windows updates

The reason why you might receive the ‘Primary display’s adapter does not support NVIDIA 3D vision’ message is because you are running an outdated OS version.

So, first of all, check if there are any Windows 10 updates waiting for your approval:

  1. Press Win+I hotkeys for bringing up System Settings.Display's adapter won't support NVIDIA 3D vision
  2. From there choose Update & Security.
  3. From the next window choose Windows Update from the left panel.Display's adapter won't support NVIDIA 3D vision
  4. And choose to apply the pending updates if there is such.
  5. Remember to restart your computer in the end.

2. Update graphic drivers

Most likely, your graphics card driver is not updated, and that’s why you are experiencing these problems. Therefore, try to automatically update these drivers:

  1. Right-click on the Windows Start button.
  2. From the list that will open choose Device Driver.Display's adapter won't support NVIDIA 3D vision
  3. Find the Nvidia drivers from Device Driver.
  4. Extend the Nvidia entry and right-click on the graphic driver.
  5. Choose Update.
  6. In the end restart your Windows 10 system.

3. Uninstall and reinstall the Nvidia drivers

If the problem is still there, you need to manually remove and install the graphic drivers again. This will definitely fix the ‘primary display’s adapter does not support Nvidia 3d vision’ error message.

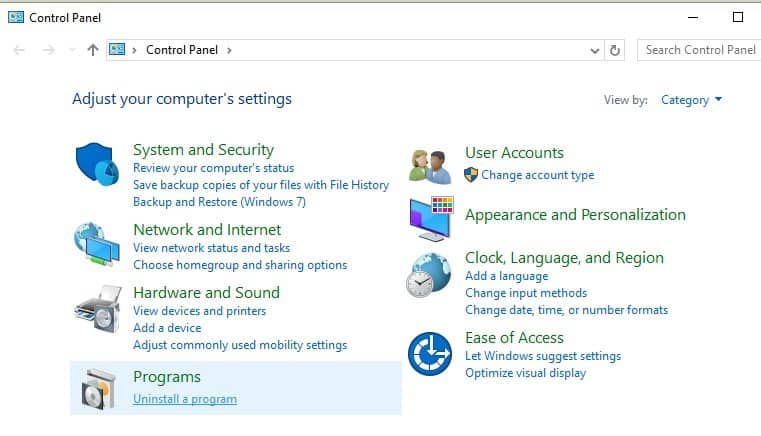
  1. First of all, uninstall everything that’s related with Nvidia. You can do that by accessing Control Panel – right-click on the Windows Start button and select Control Panel. Then from Control Panel switch to Category and under Programs click on Uninstall. Just remove the programs associated with Nvidia.The exclusive semaphore is owned by another process
  2. Next, go to Device Manager again. Find the Nvidia entry and right-click on the graphic driver; choose uninstall and then restart your computer.
  3. Go to your C drive and look for any Nvidia left files – you should first go to Control Panel – > Appearance and Personalization – > Show hidden files and folder – > switch to View tab – > select Show hidden folders, files and drivers. Make sure you delete any remained Nvidia files before doing anything else.
  4. Now, access your manufacturer official website and download the latest drivers available for your system. Install these drivers manually by following on-screen prompts.
  5. Then, restart your Windows 10 device as the problem should have been fixed.

If the ‘Primary display’s adapter does not support NVIDIA 3D vision’ error message remains, return to this tutorial and use the comments field below.

Try to describe your problem and the background situation in detail so we can find a better solution for your issue.

Also, if you encounter a different troubleshooting method that might resolve this malfunction, share it with us, and we will update this tutorial accordingly.

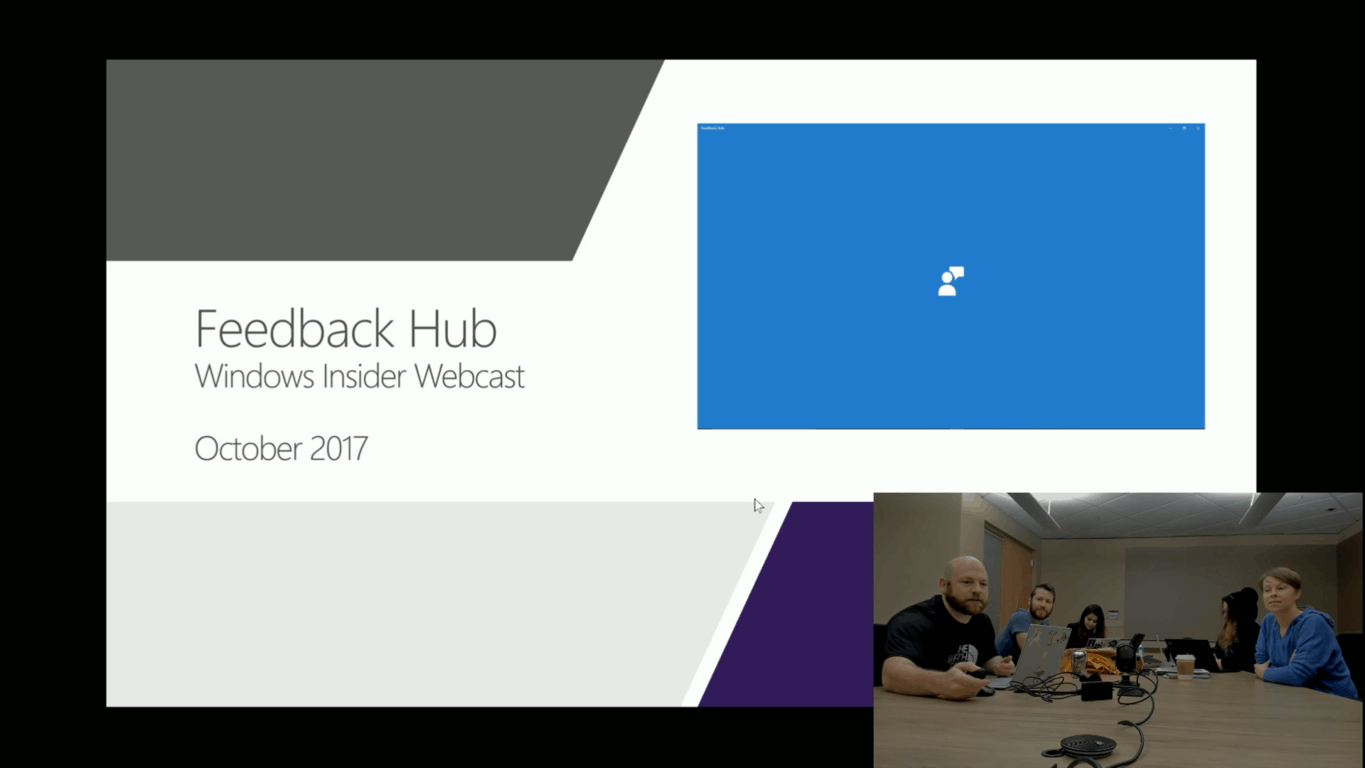
Latest Windows Insider Webcast is available as VOD… just watch it in Microsoft Edge, mmkay?

Yesterday, on October 24th, the Windows Insider team held a webcast themed towards the Feedback Hub. If you so happened to miss it live, we’d like to remind you that you can now watch it as Video On Demand on Mixer.

As usual, the webcast featured Dona Sarkar, Jason Howard, and Jen Gentleman, three of the key figures in the Windows Insider Team. Although Brandon LeBlanc was a bit late to enter the webcast, also introduced was Jura Clapman, the Feedback Hub PM, and Devin Sinha, a program engineer working on the Feedback Hub.

The highly requested Feedback Hub webcast session mainly covers the methods in which Microsoft handles feedback in Windows 10. Topics discussed include: keeping old feedback, what comes across when feedback is sent, and the general processes behind the Feedback Hub. There’s also a little bit of talk on the history of the Feedback Hub, why feedback matters, and feedback flow and tips for submitting good feedback to Microsoft.

Feel free to check out the full video now on demand, but please consider watching it in Microsoft Edge. As crazy as it sounds, if you do otherwise, you might end up in a kerfuffle…

https://twitter.com/Ihebdjebbar/status/923015538187440129

…Similar to how a Windows Insider criticized Dona Sarkar for watching the webcast in Google Chrome. Should the Windows Insider Team do more to “eat the dogfood?” Sound off in the comments below.

Sway for Windows 10 gets an update with new templates and Featured Sways

Microsoft recently released an update for Sway on Windows 10 and it’s packed with a bunch of new features. This month’s update brings the Sway app closer to the web experience with Embeds for Office 365 accounts, Audio recording, new templates and featured Sways, and much more.

We begin with embeds for Office 365 accounts. According to Microsoft, in addition to the pre-existing ability to add images, videos, and maps, Office 365 users can now insert Office documents stored on OneDrive, OneDrive for Business, or SharePoint into a Sway.  Secondly, Sway users can now brand a sway to their company or design by using a custom color palette.

You can read up on this new branding feature and what else is new by checking the changelog below:

  • The color palette algorithms offer a variety of options that also meet legibility guidelines—so your Sway’s design not only looks good but is thoughtful and inclusive. We created this feature for users who work on brands. If you are creating a Sway with a brand color, now you can generate multiple styles that all meet your branding guidelines.
  • Audio Recording: Now, you can record your voice directly in the Windows app to make your Sway more interactive and engaging. For more information on how to record audio in Sway.
  • Print and Export: In Sway for Windows 10, simply go to the … menu in the top right and select Print or Export to print your Sway or export it to a Word or PDF document. Print and Export gives you the convenience of sharing a paper copy or offline version of your Sway.
  • Save as Template: For frequent content creators, the Save as Template feature allows you to start creating a Sway and then save it as a template—so you can reuse that content again and again.
  • New templates and features Sways: On the My Sways page, we refreshed the templates and featured Sways. You can get inspired by a featured Sway or start from a template curated by the Sway team. We included templates for an internal newsletter, an external newsletter, a how-to, and a business presentation.

Also new in the update in Sway for Windows 10 is view counts. Sway authors on Windows 10 can now directly see how many people have viewed their Sway. Great to see all these new features as Microsoft is clearly working to improve the Sway experience. If you’re not already using Sway, you can find it via the link below.

Sway
Sway
Price:
Free

Ronda Rousey to play Assassin’s Creed: Origins on Mixer’s Xbox Live Sessions

Microsoft has just announced Ronda Rousey as the next celebrity to take part in Mixer’s Xbox Live Sessions. Rousey is a mixed martial artist, model, and actress, and will be playing Assassin’s Creed: Origins on Thursday, October 26 at 6 p.m. PT.

As always, those who tune-in to the livestream on Mixer will have chances to submit questions to Rousey, as well as win prizes. She will be joined by Microsoft Studios Community Manager Rukari Austin who will be hosting this episode of Xbox Live Sessions.  Ronda Rousey remarked on having a chance to play Assassins Creed: Origins in the Xbox Live Sessions:

“I’m always up for a physical and mental challenge, so I was pumped when I was asked to join Xbox Live Sessions to see the power behind the new Xbox One X and play one of the most anticipated video game a day before its release, for all my fans to tune in and watch… I have always enjoyed playing games and am definitely impressed by the storyline and visuals of Assassin’s Creed Origins.”

Assassin’s Creed: Origins launches on October 27, 2017. The game is the tenth major installment to the Assassin’s Creed Series and is set in in Ancient Egypt during the Ptolemaic period. You can learn more about the game by visiting the link below and catch up on previous Xbox Live Sessions by checking out our previous coverage.

Assassin's Creed® Origins
Developer:
Ubisoft
Price:
Free

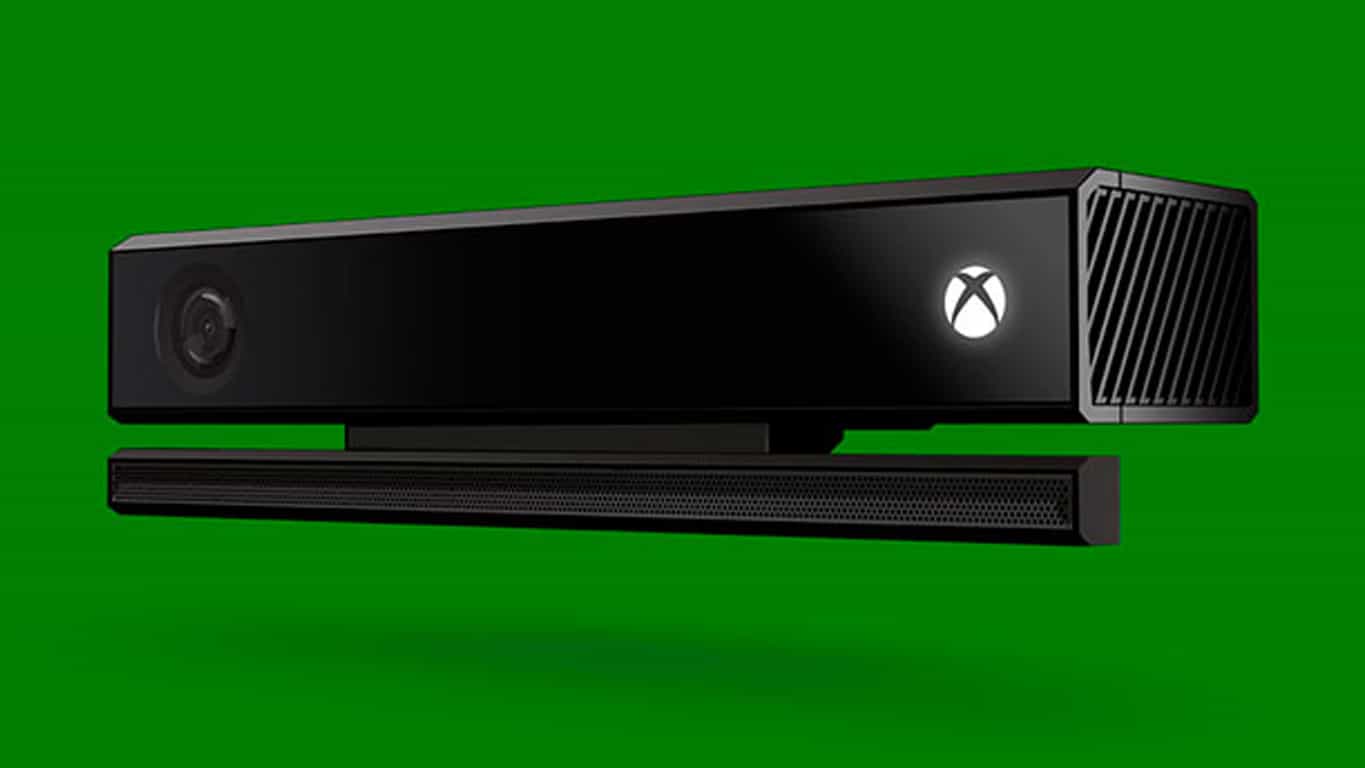
RIP Kinect: Microsoft stops manufacturing the motion sensing Xbox accessory

Gamers have always had a love and hate relationship with Microsoft’s Kinect motion-sensing accessory, but soon it is about to be put to rest. Fast Co Design has learned that the Kinect is officially dead, as Microsoft has plans to stop manufacturing the device (via The Verge.)

Although Microsoft will continue to support Kinect on Xbox, the company will stop selling it once existing stocks have been sold out at retailers. Spanning two generations on both the Xbox One and the Xbox 360, the Kinect reportedly sold 35 million units since its debut in 2010, but that’s apparently still not enough to keep the Kinect alive.

The Kinect was never well embraced by consumers and gamers, mainly for privacy-related concerns. In fact, due to its unpopularity, Microsoft was forced to unbundle it from the Xbox One, and only support it on Xbox One S via an adapter. This was addressed by Alex Kipman in an interview with Fast Co Design:

“Trust is something you earn in drops and lose in buckets…I’d say Kinect started the process in 2010 in having to earn drops of trust. Any number of [bad] events in the world, each one, you lose a bucket.”

Kinect technology, though, is living on in some other Microsoft products especially on HoloLens, and with some Windows Hello cameras. Clearly, Kinect benefited research and development at Microsoft, helping build future products. And, let us not forget all the cool uses developers have found for Kinect, including for scanning the jaws of a T-rex, live performances, a display in the Crayola Factory, and fighting Alzheimer’s disease.

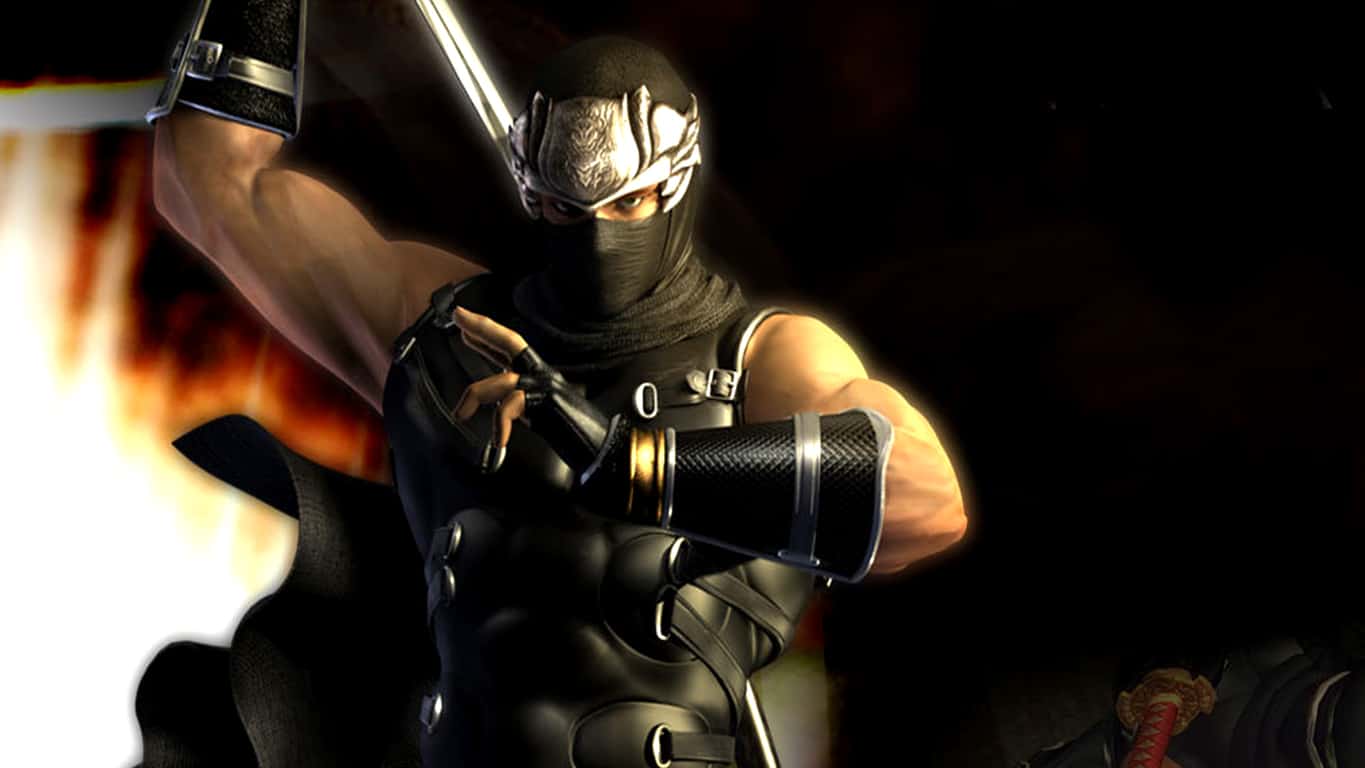
OG Xbox’s Ninja Gaiden Black not available on Xbox One in all regions

While there was a lot of hype surrounding the release of 13 original Xbox video games on the Xbox One yesterday, the launch has also disappointed due to the unfortunate fact that not all of them are available in every Xbox region.

One example is Ninja Gaiden Black, one of the most-anticipated games out of the 13 title, which cannot be purchased in regions like Australia and New Zealand due to the fact that it was never originally released in those countries. The game hasn’t been rated by the relevant ratings boards and to launch it on Xbox One in 2017, Microsoft would need to pay to have it reviewed.

To add salt to the wound, Ninja Gaiden Black is also being made playable for free for Xbox Games Pass subscribers from today with many gamers in regions like the United States already downloading their copies to their consoles.

In addition to Ninja Gaiden Black, six other games out of the OG Xbox backwards compatibility line-up also aren’t showing up in the console’s store, four of them also unavailable in several regions. Listings for Star Wars: Knights of the Old Republic, Dead to Rights, Red Faction II, BloodRayne 2, and The King of Fighters Neowave are completely absent though fortunately Star Wars: Knights of the Old Republic and BloodRayne 2 are available in the web store and can be purchased for the Xbox One there.

Are you disappointed by the number of OG Xbox games that aren’t available globaly? Share your thoughts with the community in the comments below.

Here’s how to free 30GB of storage space after installing the Fall Creators Update

Microsoft released Fall Creators Update after lots of hard work, bringing many new features to the operating system.

Windows 10 version 1709 came with lots of general improvements including new privacy and security options, OneDrive Files on Demand, My People, improvements to Cortana and Edge and much more.

On the other hand, such a significant update definitely requires a large download and the files that Microsoft places on your system will not be removed afterward.

This means that this vast update might be responsible for taking an enormous part of your free hard drive space. We are talking about tens of gigabytes. But, fortunately, there’s a solution for reclaiming this space.

Get back around 30GB of your hard drive space

The process is not complicated at all. All you have to do is click Start and type Disk Cleanup. Then, right-click the Disk clean-up entry, and select Run as administrator. You have to make sure that your system drive is selected and then click OK.

This tool will calculate the amount of space that you will be able to regain. Click on the Clean up system files button. Select your system drive once again and click the OK button once more.

This tool will recalculate your space savings, but this time it will also include a new option called Previous Windows installation(s). This will include the files that have been created during the installation of the Fall Creators Update.

They take around 30GB of space. Check the box and also the Temporary Windows installation files. Click OK to remove the backed up data and regain your missing space.

The second option for regaining your hard drive space

The other solution to get back your hard drive space is to enable Storage Sense on your Windows 11.

  • Open Settings and go to System – Storage.
  • Under Storage Sense, click Change how we free up space.
  • On the next screen, click select the Delete previous versions of Windows option.
  • Click Clean now.

This feature is also available on Windows 10, and we have a guide how to enable Storage Sense on Windows 10 as well.

You can try any of these two solutions, and you’ll regain a lot of hard disk space.

RELATED STORIES TO CHECK OUT:

How to remove the 3D Objects folder from Windows 10

The Creators Update previously pushed 3D apps to the OS, and the latest Fall Creators Update pushed even more 3D related content to the operating system.

Some users may find this useful, but lots of desktop PC users find this feature unattractive.

A new 3D Objects entry

After the installation of the Fall Creators Update, if you open File Explorer on Windows10, you will notice a new 3D Objects entry after opening This PC in Explorer.

It will be the first folder that is displayed under folders, and it’s empty by default. Judging by its name, this is the default storage location for 3D objects on the device. It’s similar to how the Documents folder is the default storage location for documents.

This folder will take up enough space, and if you don’t use it, you might want to consider removing it. We’ll show you how to do this.

Removing the 3D Objects folder using the Windows Registry

Unfortunately, you can’t just select the folder and delete it. It’s impossible to remove all 3D related apps that get installed with the Windows 10.

Before following the steps to perform the delete process properly, you are advised to create a System Restore Point, just as a backup plan, in case something goes wrong. Then, follow the steps below:

  • Use the Windows-R key to open the run box.
  • Type regedit.exe and hit Enter.
  • Confirm the UAC prompt that Windows displays when you launch the Registry Editor.
  • Go to HKEY_LOCAL_MACHINESOFTWAREMicrosoftWindowsCurrentVersionExplorerMyComputerNameSpace by pasting the address into the address field.
  • Locate {0DB7E03F-FC29-4DC6-9020-FF41B59E513A}.
  • Right-click on the entry.
  • Select Delete.
  • Go to HKEY_LOCAL_MACHINESOFTWAREWow6432NodeMicrosoftWindowsCurrentVersionExplorerMyComputerNameSpace.
  • Locate {0DB7E03F-FC29-4DC6-9020-FF41B59E513A}.
  • Right-click on the entry.
  • Select Delete.

3D Objects will be removed from This PC in the File Explorer. You don’t need to restart your computer.

RELATED STORIES TO CHECK OUT:

Computer Slowdown: Why it Happens and How to Fix It

After purchasing a laptop or PC, you may experience a computer slowdown over time (sometimes while it’s still brand new), and there are many reasons for this.

The computer slowdown issue may come up due to viruses, damaged system files, full disk with no space, or even conflicts between third-party applications.

If you’re experiencing a computer slowdown regardless of the operating system, here are some solutions to fix the problem.

How to fix slow PC performance?

1. Perform System Maintenance Troubleshooter

This resolves most of the common system problems.

Take these steps to perform the System Maintenance troubleshooter:

  • Click Start
  • Go to the search field box and type Troubleshooting
  • Click on Troubleshooting
  • Click on System and Security
slow game loads
  • Click on System Maintenance
system maintenance windows 10
  • Click Next
  • Follow the instructions to run the system maintenance troubleshooter.

2. Perform a Clean Boot

Performing a clean boot for your computer reduces software-related conflicts that can bring up the root causes of the computer slowdown.

These conflicts can be caused by applications and services that start running in the background when you start Windows normally.

How to perform a clean boot

To successfully perform a clean boot on Windows 10, you have to be logged on as the administrator then follow these steps:

  • Go to the search box
  • Type msconfig
  • Select System Configuration
  • Find Services tab
  • Select Hide all Microsoft services box
disable microsoft services
  • Click Disable all
  • Go to Startup tab
  • Click Open Task Manager
game crash
  • Close Task manager then click Ok
  • Reboot your computer

You will have a clean boot environment after all these steps are carefully followed, after which you can try and check if you still experience the computer slowdown issue, or if the problem is gone.

3. Run a System File Checker scan

Here’s how to do this:

  • Click Start
  • Go to the search field box and type CMD
  • Select Command Prompt
game crash
  • Right click and select Run as Administrator
  • Type sfc/scannow
  • Press Enter
  • Restart your computer

If the computer slowdown issue persists, try the next solution.

You can make this process easier by using a specialized third-party repair tool. This software will allow you to automatically fix any broken system files right after scanning your computer comprehensively.

4. Install drivers in compatibility mode

Follow these steps to install in compatibility mode:

  • Download the latest driver from the manufacturer’s website
  • Save it on your local disk
  • Right click on the set up file of the downloaded driver
  • Click Properties
  • Click Compatibility tab
  • Check the box next to Run this program in Compatibility mode
  • Select the Operating System from the drop down list
  • The driver will install, then check its functionality.

5. Boot in Safe Mode

Safe mode starts up your computer with limited files and drivers but Windows will still run. To know whether you’re on Safe mode, you’ll see the words at the corners of your screen.

If the issue of computer slowdown persists, check whether it occurs while your computer is in Safe mode.

Follow these steps to start your computer in Safe Mode:

  • Click on Start button
  • Select Settings – the Settings box will open up
  • Click Update & Security
  • Select Recovery from the left pane
slow game loads
  • Go to Advanced options
  • Go to Advanced Startup
  • Click Restart now
  • Select Troubleshoot from the choose an option screen, then click Advanced options
  • Go to Startup Settings and click Restart
  • Once your computer restarts, a list of options will come up.
  • Choose 4 or F4 to start your computer in Safe Mode

A quicker way to get into Safe Mode is to restart your computer and then do the following:

  • From the Choose an option screen, select Troubleshoot>Advanced options>Startup Settings>Restart
  • Once your computer restarts, a list of options will come up.
  • Choose 4 or F4 to start your computer in Safe Mode

If the computer slowdown issue isn’t there while in Safe mode, then your default settings and basic drivers are not contributing to the issue.

How to exit Safe Mode:

  • Right-click Start button
  • Select Run
  • Type msconfig
  • A pop up will open
  • Go to the Boot tab
  • Deselect or uncheck Safe Boot option box
  • Restart your computer

6. Run disk clean up

Before doing this, ensure you have sufficient disk space on Windows drive.

Here’s how to run disk clean up:

  • Click Start
  • In the search field box, type disk cleanup
  • The disk cleanup drive selection box will appear.
  • Click OK to set off the disk space calculation process
  • Go to Properties>Tools>Error checking

Check the box and click Run.

Note: this process cleans up files associated with your user profile. You can also use it to clean up files on your computer. Any infected data files may only be cleaned by completely deleting the file, meaning there’s a chance you may lose data.

7. Perform a System Reset

Performing a reset allows you to choose which files you want to keep or remove, and then reinstall Windows.

Here’s how to get started:

  • Click Start
  • Click Settings
  • Click Update & Security
  • Click Recovery on the left pane
  • Click Reset this PC
  • Click Get started and choose an option either Keep my files, Remove everything, or Restore factory settings

Note: all your personal files will be deleted and settings reset. Any apps you installed will be removed, and only pre-installed apps that came with your PC will be reinstalled.

8. Turn off visual effects

Disabling some visual effects can help speed up your computer. You can choose the visual effects to turn off, or let Windows choose it for you.

Here’s how to do this:

  • Right click Start
  • Select Control Panel
  • Search for Performance Information and Tools
  • Click Performance Information and Tools
  • Click Adjust visual effects
  • Grant permissions or type your password if prompted to, or click Continue
  • Click Visual Effects tab
  • Click Adjust for best performance
  • Click Ok

Note: you can use a less drastic option by selecting Let Windows choose what’s best for my computer.

9. Use Performance Troubleshooter

The Performance Troubleshooter automatically finds and fixes problems, checking issues that cause computer slowdown, thereby affecting your computer’s performance. Such issues include number of logged in users, or multiple programs running simultaneously.

Here’s how to do this:

  • Right click Start
  • Select Control Panel
  • Search for Troubleshooter
  • Click Troubleshooting
  • Go to System and Security
  • Click Check for performance issues

This can also help if you encounter the error_no_more_search_handles issue.

10. Change the size of Virtual memory

If you get warnings of low memory (virtual), you need to increase the minimum paging file size. Windows sets the initial minimum size equal to the amount of RAM on your computer, the maximum equal to thrice the amount of RAM. If you get such warnings, increase both minimum and maximum sizes using the steps below:

  • Click Start
  • Type Advanced System Settings in the search field box
  • Open View Advanced System settings from the search results
  • Click Advanced tab
  • Under Performance, click Settings to open the Performance Options dialog box
  • Under Advanced tab, go to Virtual Memory then click Change
  • Clear the check box for Automatically manage paging file size for all drives
  • Under Drive (Volume Label), click the drive with the paging file you want to change
  • Click Custom size
  • Type a new size in MBs for both Initial size (MB) or Maximum size (MB)
  • Click Set
  • Click Ok

Tips on how to prevent a computer slowdown

  1. Check your computer speed

If you experience computer slowdown, you could get a hardware upgrade such as a new hard disk or faster video card. Using the Windows Experience Index tool, you can check and rate your computer’s speed.

This rates your computer on five components rating each with a number, and an overall base score (ranges from 1-7.9). If your computer rates below 2 or 3, you may need a new computer (depending on the tasks you need it for).

  1. Add more memory

Consider adding more RAM to your computer in the event of a computer slowdown so as to speed it up, and deliver optimal performance. You can also use Windows ReadyBoost, which lets you use storage on some removable media devices like flash drives, to speed up your computer.

  1. Close System Tray programs

To do this, right click on the Taskbar>Properties>Customize>Select which icons appear on the taskbar. From here you can switch apps to ‘on’ to show them permanently on the right side of the taskbar, or move items to system tray popup (like Network or Volume).

You can also click Turn System Icons On or Off to remove icons entirely.

  1. Restart regularly

Do this once a week especially if you use it daily. Restarting clears memory and checks that errant processes and services that run are shut down. It also closes software running on your computer, not just those on your taskbar.

It also fixes mysterious performance problems that are hard to pinpoint. Keeping many programs open bogs down your computer, and leads to low memory.

  1. Disable Startup Programs

Right click the taskbar and click Task Manager to launch it. Click the Startup tab and disable startup applications that you don’t use. Windows will let you know which apps slowdown your computer’s startup process.

  1. Disable or reduce animations

To do this, right click Start>System>Advanced System Settings>Settings>Adjust for best performance (or select Custom to disable individual animations you don’t want). You can uncheck Animate windows when minimizing and maximizing to disable the animations.

  1. Lighten web browser

To do this, go to the Extensions or Add-ons manager on your web browser and remove what you don’t need. Consider enabling click-to-play plugins. You can prevent content such a s Flash and others from loading so as to reduce the use on CPU time.

  1. Scan your computer for adware and/or malware

As mentioned previously, viruses can cause computer slowdown. If malicious software is slowing it down and running in the background, scan your computer with a strong antivirus program, and also scan with Malwarebytes, which locates potentially unwanted programs usually ignored by antiviruses.

Such programs sneak into your computer and install other software you don’t need.

  1. Free up disk space

Run the Disk Cleanup tool to free up some space on your hard drive if it is completely full, because this contributes to computer slowdown.

  1. Defragment your hard disk

The latest versions of Windows does this automatically by defragmenting mechanical hard drives in the background.

SSDs or solid state drives don’t need defragmentation, though Windows will optimize them, which is okay.

  1. Uninstall programs you don’t need or use

Go to your computer’s Control Panel and uninstall programs you don’t use or need. This speeds up the machine because those programs run in the background and these processes slow down your computer. This also saves space on your hard drive, and improves your computer’s security.

Note that your laptop may also become slow after formatting because everything has been restored to default settings. If so, the same solutions apply. If you’re having trouble with starting up your PC, we can help out.

Let us know if any of the solutions we shared worked for you.

Power icon disappears from Windows 10: Here’s how to restore it

Is the power icon missing on your computer? We’ve got solutions. When you check your computer and find the power icon missing, or have mysteriously disappeared, there are things you can do to resolve the issue.

Here are the tried solutions to help you get your power icon back again.

Power icon missing on Windows 10 [FIX]

1. Run a System File Checker scan

A System File Checker scan checks or scans all protected system files, and then replaces the incorrect versions, with the genuine, correct Microsoft versions.

Here’s how to do this:

  1. Click Start
  2. Go to the search field box and type CMD
  3. Select Command Prompt
    game crash
  4. Right-click and select Run as Administrator
  5. Type sfc/scannow
  6. Press Enter
  7. Restart your computer

If the power icon still isn’t showing, try the next solution.


2. Run DISM tool

If the issue of the power icon disappearing persists, run the DISM tool, or Deployment Image Servicing and Management tool.

The DISM tool helps fix Windows corruption errors when Windows Updates and service packs fail to install due to corruption errors, like if you have a damaged system file.

Here’s how to run the DISM command on your PC to check if it helps you when you can’t install Windows 10:

  1. Click Start
  2. In the search field box, type CMD
    game crash
  3. Click Command Prompt in the search results list
  4. Type Dism /Online /Cleanup-Image /CheckHealth and press Enter.
  5. Type Dism /Online /Cleanup-Image /ScanHealth and hit Enter again.
  6. And then Dism /Online /Cleanup-Image /RestoreHealth

Once the repair is complete, reboot your computer and check if the power icon comes back.


3. Check if Universal Plug and Play is enabled

Here’s how to resolve this:

  1. Log off
  2. Sign in using your current user account
  3. Restart your computer
  4. Open My Network Places
  5. Check if UPnP enabled devices to exist in your network and if it is enabled
  6. Opt to hide icons for networked UPnP
  7. You can also uninstall UPnP from the Add/Remove Windows Components

4. Check your Local Computer Policy settings

Sometimes the power icon may disappear or be grayed out due to your computer’s Local Computer Policy settings.

To resolve this issue, do the following:

  1. Right-click Start
  2. Select Run, and type gpedit.msc
    power icon
  3. Click Ok or Press Enter
  4. Click User Configuration
    power icon
  5. Select Administrative Templates
    power icon
  6. Click Start Menu and Taskbar
    power icon
  7. Double click Remove and Prevent Access to the Shut Down, Restart, Sleep and Hibernate commands
    power icon
  8. Select Non configured or Disabled
  9. Close Group Policy window

Did this work for you? If not, try the next solution.


5. Check and modify the registry

You can also modify the registry, but you’d have to be careful because your computer may be damaged if you do this incorrectly. For added protection, back up the registry prior to modifying it. Restore it in case a problem occurs.

Take these steps to check and modify the registry:

  1. Click Start
  2. In the search field box, type regedit.exe
  3. Press Enter
    power icon
  4. Grant permissions if prompted for administrator password or confirmation, or click Allow or Continue
  5. Locate and click this registry subkey: HKEY_CURRENT_USER\Software\Classes\LocalSettings\Software\Microsoft\Windows\CurrentVersion\TrayNotify
  6. Go to the Details pane
  7. Click IconStreams registry entry
  8. Go to Edit menu > Click Delete > Click Yes
  9. On the Details pane, click PastIconsStream registry entry
  10. Go to Edit > Click Delete, then click Yes
  11. Exit the Registry Editor
  12. Restart Explorer.exe
  13. Press CTRL+SHIFT+ESC
  14. Under Processes tab in Task Manager, click explorer.exe > Click End Process twice
  15. Under File menu, click new Tasks (Run)
  16. Type explorer, then click Ok
  17. Exit Task Manager
  18. Once the Explorer.exe restarts, right click on the clock, then select Customize Notifications Icons
  19. Ensure the Power is set to Show icon and notifications
  20. Click Turn system icons on or off
  21. Ensure Power is set to On
  22. Click Ok
  23. Close the Control Panel

We trust these solutions were of help to you. If not, kindly share with us your experience in the comments section below.

RELATED STORIES TO CHECK OUT:

Windows 10 free upgrade is still available two years after the offer ‘expired’

If you’re running Windows 7 or Windows 8.1 and you recently decided to upgrade to Windows 10, we have a good piece of news for you: the free upgrade offer is still valid.

Yes, you read that right, you can still download Windows 10 on your computer for free.

As a quick reminder, Microsoft initially said that Windows 7 and Windows 8.1 users would be able to install the latest OS version on their devices for free within the first 12 months following Windows 10’s release.

Fortunately, you don’t have to shell out $119 to get Windows 10 because the free upgrade offer is still valid.

Download Windows 10 for free in 2017

windows 10 laptop

All you need to do in order to install Windows 10 at no extra cost is go to Microsoft’s accessibility site and hit the download button. It’s that simple. Follow the on-screen instructions that the upgrade assistant displays and you’ll be able to use the latest OS version in less than one hour.

However, the only catch is that your computer needs to run the genuine Windows 7 or 8.1 package in order to download the update.

Microsoft won’t verify if or you are using assistive technologies or not, and will let you download Windows 10 without spending one single penny.

The Fall Creators Update hasn’t ended the free upgrade offer

Many users expected Microsoft to close the free upgrade loophole as soon as Windows 10 version 1709 arrived. That didn’t happen and the offer is still available today.

It appears that Microsoft isn’t planning to block this loophole anytime soon. Obviously, the company is aware that users who don’t rely on assistive technologies do use this loophole to upgrade for free. This is actually beneficial for Microsoft, allowing the company to increase the Windows 10 user base.

The Redmond giant has indeed confirmed that it would close this loophole sometime in the future, but has yet to confirm the exact date.