Copilot and other AI tools may be branded under the Microsoft Intelligence category

Copilot had a very bumpy but steep evolution, mostly upwards, because Microsoft included it in all possible apps. They even made sure that laptops and PCs get the Copilot+ branding. Now, Paul David Hewson shared on X a caption from a Windows 11 appprivacy.adml file that puzzles everyone.

The highlighted part points at a Windows Intelligence feature that obviously hints at Apple Intelligence. The file is designed to instruct other apps to allow or deny access to Windows Intelligence: Let Apps Access Windows Intelligence.

Some specialists suggest a possible rebranding of Copilot as Windows Intelligence, but that is highly unlikely because it will dilute all the brand awareness around the Copilot name. However, this new feature or category might be the name given to all the Microsoft AI-related tools.

That would certainly be a clever way to ultimately allow Recall work on your PC. You will Let Apps Access Windows Intelligence and this way, provide access to all AI features.

However, isn’t Windows Intelligence a too blatant referral to Apple’s AI bot? We don’t yet know what Windows Intelligence is and whether it will ever be implemented so we’ll keep an eye on the developments. We’ve learned about this from TechRadar.

What do you think about Windows Intelligence? Let us know in the comments below.

Fix: ERROR_BAD_THREADID_ADDR 159 (0x9F)

The ERROR_BAD_THREADID_ADDR Windows system error, with code 159 (0x9F), affects actions in applications and folders and is usually caused by corrupted system files, outdated drivers, conflicting applications, and a buggy Windows update.

The error message reads, 159 (0x9F) The address for the thread ID is not correct.

Before you proceed to the solutions, restart the PC, install all pending Windows updates, and reinstall the affected application. For most of you, this should do the trick!

How can I fix ERROR_BAD_THREADID_ADDR?

1. Update all the drivers

  1. Press Windows + X to open the Power User menu, and select Device Manager.
  2. Expand the different entries here, right-click on the devices listed underneath, and select Update driver.update driver to fix ERROR_BAD_THREADID_ADDR
  3. Click on Search automatically for drivers and wait for Windows to install the best locally available version.search automatically driver
  4. After updating all the drivers, restart the PC to apply the changes.

If you haven’t updated the drivers on the PC in a long time, it’s time you do because, for 2 out of 5 users, outdated drivers were the reason behind ERROR_BAD_THREADID_ADDR 159 (0x9F).

Also, in case Windows can’t find a better version, go to the manufacturer’s official website, look for the new releases, and then manually install the latest driver.

2. Uninstall conflicting apps

  1. Press Windows + R to open Run, type appwiz.cpl in the text field, and hit Enter.
  2. Select an app you believe is conflicting with Windows or any that was downloaded/updated recently, and click on Uninstall.uninstall app to fix ERROR_BAD_THREADID_ADDR
  3. Follow the on-screen instructions to complete the process.
  4. Now, restart the PC and check for improvements.

Often, third-party apps interfere with Windows and its applications, triggering the ERROR_BAD_THREADID_ADDR The address for the thread ID is not correct system error. If a quick removal doesn’t work, use a top-rated software uninstaller to clear any leftover files and Registry entries, which might still be causing conflicts.

3. Repair the corrupted system files

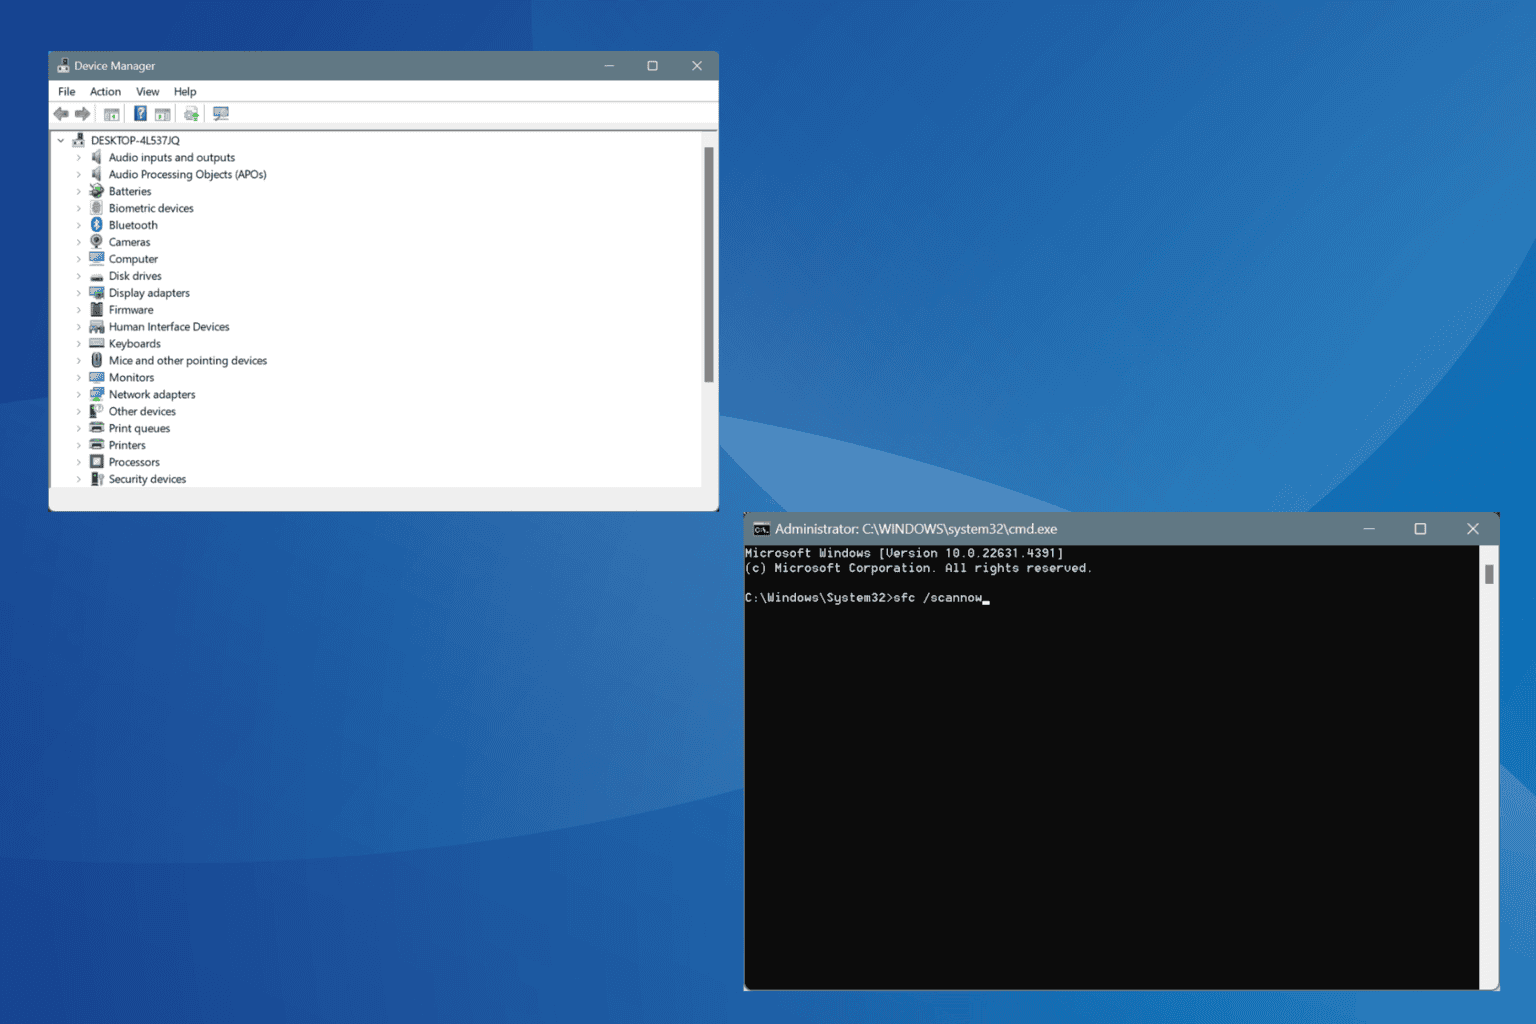
  1. Press Windows + S to open Search, type Command Prompt, and click on Run as administrator.cmd
  2. Click Yes in the UAC prompt.
  3. Paste the following DISM commands individually and hit Enter after each: DISM /Online /Cleanup-Image /CheckHealth DISM /Online /Cleanup-Image /ScanHealth DISM /Online /Cleanup-Image /RestoreHealth
  4. Next, execute this command for the SFC scan: sfc /scannowsfc scan to fix ERROR_BAD_THREADID_ADDR
  5. Finally, reboot the PC and verify whether the ERROR_BAD_THREADID_ADDR system error is fixed.

Corrupted system files are just as likely to trigger Windows system errors. To fix this, you must run the DISM (Deployment Image Servicing and Management) and SFC (System File Checker) scans to replace all affected files with their cached copies stored on the PC.

4. Uninstall buggy Windows updates

  1. Press Windows + I to open Settings, go to Windows Update from the left pane, and click on Update history.update history
  2. Scroll down to the bottom and click on Uninstall updates.
  3. Click the Uninstall option next to the last downloaded update.uninstall update
  4. Again, click Uninstall in the confirmation prompt.
  5. Finally, restart the PC, and verify whether the system error is resolved. If not, you may uninstall more updates.

5. Perform a system restore

  1. Press Windows + S to open Search, type Create a restore point, and click on the relevant result.
  2. Click on System Restore.restore to fix ERROR_BAD_THREADID_ADDR
  3. Select the Choose a different restore point option, if available, and click Next.
  4. Pick the oldest restore point from the list and click on Next.restore point
  5. Verify the restore details, click Finish, and confirm the change.

A system restore will revert any recent changes to the PC responsible for ERROR_BAD_THREADID_ADDR. If this, too, fails, the last option is to reinstall Windows.

Before you leave, discover expert tips to improve performance on Windows and enjoy a streamlined, error-free experience!

For any queries or to share more fixes with our readers, drop a comment below.

Xbox Introduces AI-Powered Support Virtual Agent for Insiders that will help you fix your most urgent issues in seconds

Xbox has announced the launch of the Support Virtual Agent, a new AI feature designed to help Xbox users resolve their support-related issues more efficiently.

In a blog post, Xbox says the Support Virtual Agent can quickly retrieve information from support.xbox.com to address questions related to Xbox consoles and games. Initially, the feature was available to Xbox Insiders in the United States, with English as their preferred language. They can start testing the Support Virtual Agent by visiting support.xbox.com while signing in to an account registered with the Xbox Insider Program.

Xbox is seeking feedback from insiders trying out the Support Virtual Agent. Participating users can rate the agent’s responses using a thumbs-up or thumbs-down button and provide feedback directly via an “Give feedback” option at the bottom of the page.

To access the Support Virtual Agent, Xbox Insiders must navigate to the “Contact us” page on support.xbox.com, sign in with their Xbox Insider Program account, and click the “Ask a question” button. The Support Virtual Agent will then launch in a new browser window, enabling users to ask questions via text or voice.

If the Support Virtual Agent can’t resolve the problem, users can request to speak with a live support agent during Xbox Support’s regular hours of operation.

During the preview, Xbox Insiders can switch between two different Support Virtual Agents using a menu accessible via an ellipsis icon.

The feature is being rolled out to select Xbox Insiders on support.xbox.com starting November 4, 2024.

To facilitate the launch of the Support Virtual Agent, Xbox Insiders are encouraged to join the Xbox Insider subreddit, where Xbox staff, moderators, and fellow Insiders are available to answer questions.

Xbox Insiders can also submit feedback about the program and its features via the Xbox Insider Hub app.

In other news, Xbox now lets users search for games using Natural Language. That means you can describe the games you want to play using any words you want, and Xbox will take your input and show you recommendations.

With KB5045885, Microsoft has decided to disable the recently-introduced Gamepad keyboard in Windows 11

Microsoft has just released Windows 11 Insider Preview Build 26120.2213, or KB5045885, to Windows Insiders in the Dev Channel.

This build includes several bug fixes and improvements, many of which are rolling out to users now.

Microsoft is starting to roll out a new change that hides the IME toolbar when apps are in full-screen mode for those with the IME toolbar enabled and typing in Chinese or Japanese.

The new Gamepad keyboard layout for the touch keyboard has been temporarily disabled in this build to address some issues. This feature will come back in a future build.

This build includes the following bug fixes and improvements, as you can see below:

  • Start menu: Fixed an issue causing some Insiders to see an unexpected amount of spacing between items in the Start menu apps list. Fixed an issue where the ability to pin/unpin apps to and from the Start menu was unexpectedly unavailable for some people.
  • File Explorer: Fixed an issue that was causing the items in the navigation pane to become very spread out (with unexpected padding between each item) for some people. Fixed an underlying issue causing RAW images taken in portrait mode to display thumbnails unexpectedly in landscape mode.
  • Taskbar: Fixed an issue where the X button to close an app window from the taskbar wasn’t working for some Insiders. Fixed an issue on secondary monitors for left-aligned taskbar users, where the widget’s text in the taskbar might overlap the date and time.
  • Dev Drive: Fixed an underlying issue that could prevent Dev Drives from being accessible within WSL after the latest flights.
  • Other: Fixed an underlying issue that could lead to DISM /StartComponentCleanup not working correctly, getting stuck at 71% and showing error 6842. Fixed an underlying issue causing the Get-WindowsCapability command to get into a state sometimes where it would fail unexpectedly until rebooted your PC. Fixed an issue where rotation info about JPGs couldn’t be queried via APIs (for example, via PowerShell).

Fixes for Everyone in the Dev Channel

  • General: Fixed an underlying issue leading to some games not launching in the previous flight.
  • Task Manager: Fixed an issue causing Task Manager to show a 0 count for apps and processes.
  • Network: Fixed an underlying issue impacting DHCP. Unexpected duplicate options would fail lease acquisition, which could cause DHCP to not get an IP address, leading to Wi-Fi not working. Fixed an issue where DirectAccess wasn’t working and might stay stuck in a connecting state.

Microsoft is investigating an issue where your desktop background may not show correctly sometimes with multiple monitors, showing big black areas.

You can read KB5045885’s full changelog here.

Edge Incognito Shortcut: What is it & How to Use it?

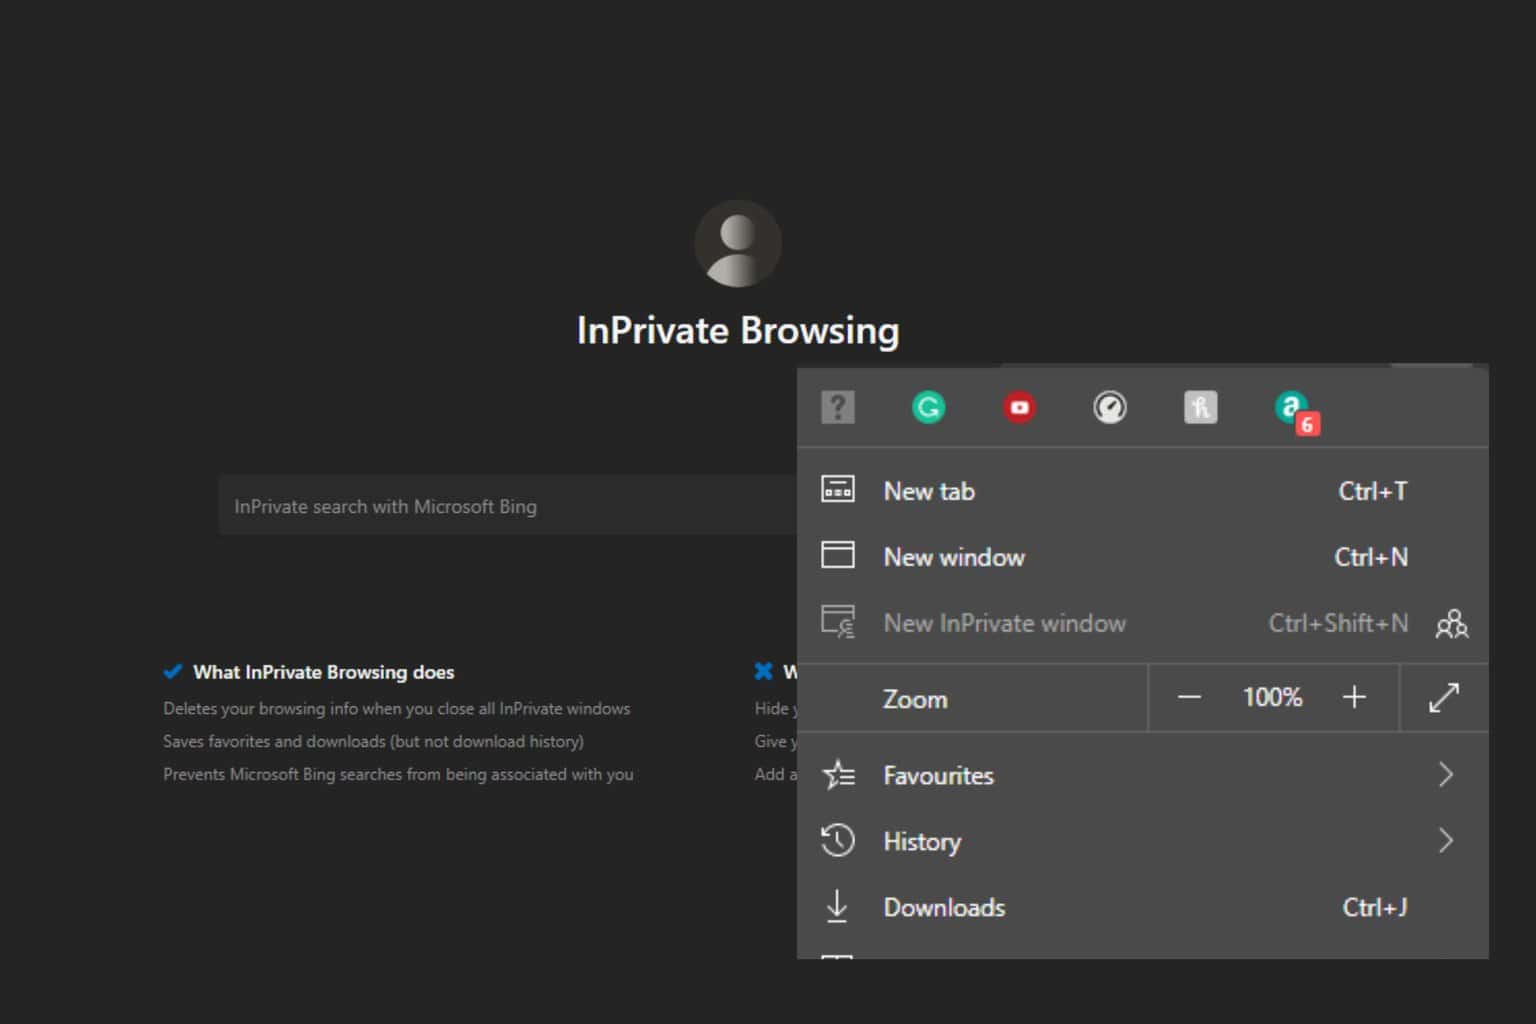
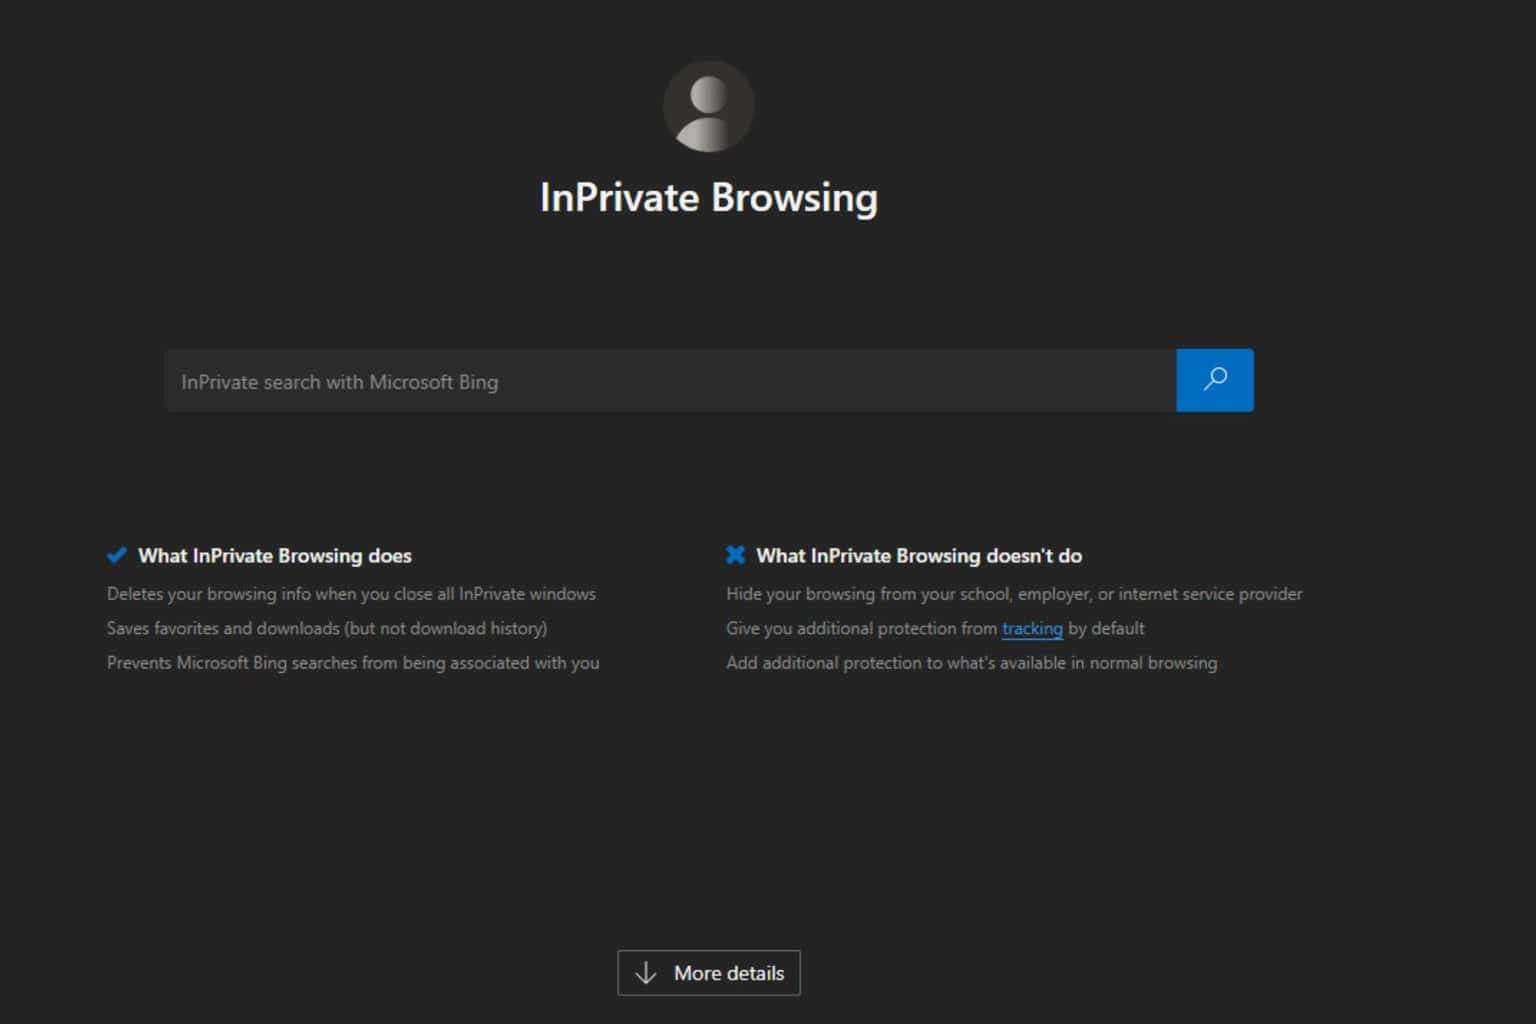
Many use the private browsing feature on their PCs, and if you want to quickly access it, today we’re going to show you how to use the Edge Incognito shortcut.

What is the shortcut for Edge Incognito mode?

Since Edge is a Chromium browser, it uses Ctrl + Shift + N to access the Incognito mode, just like most Chromium browsers.

How to make Edge Incognito shortcut?

  1. Locate the Edge desktop shortcut.
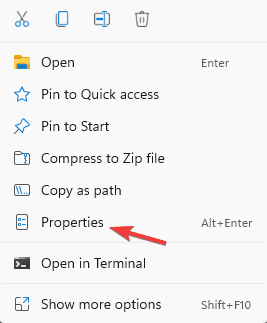
  2. Right-click it and choose Properties.
    properties context menu
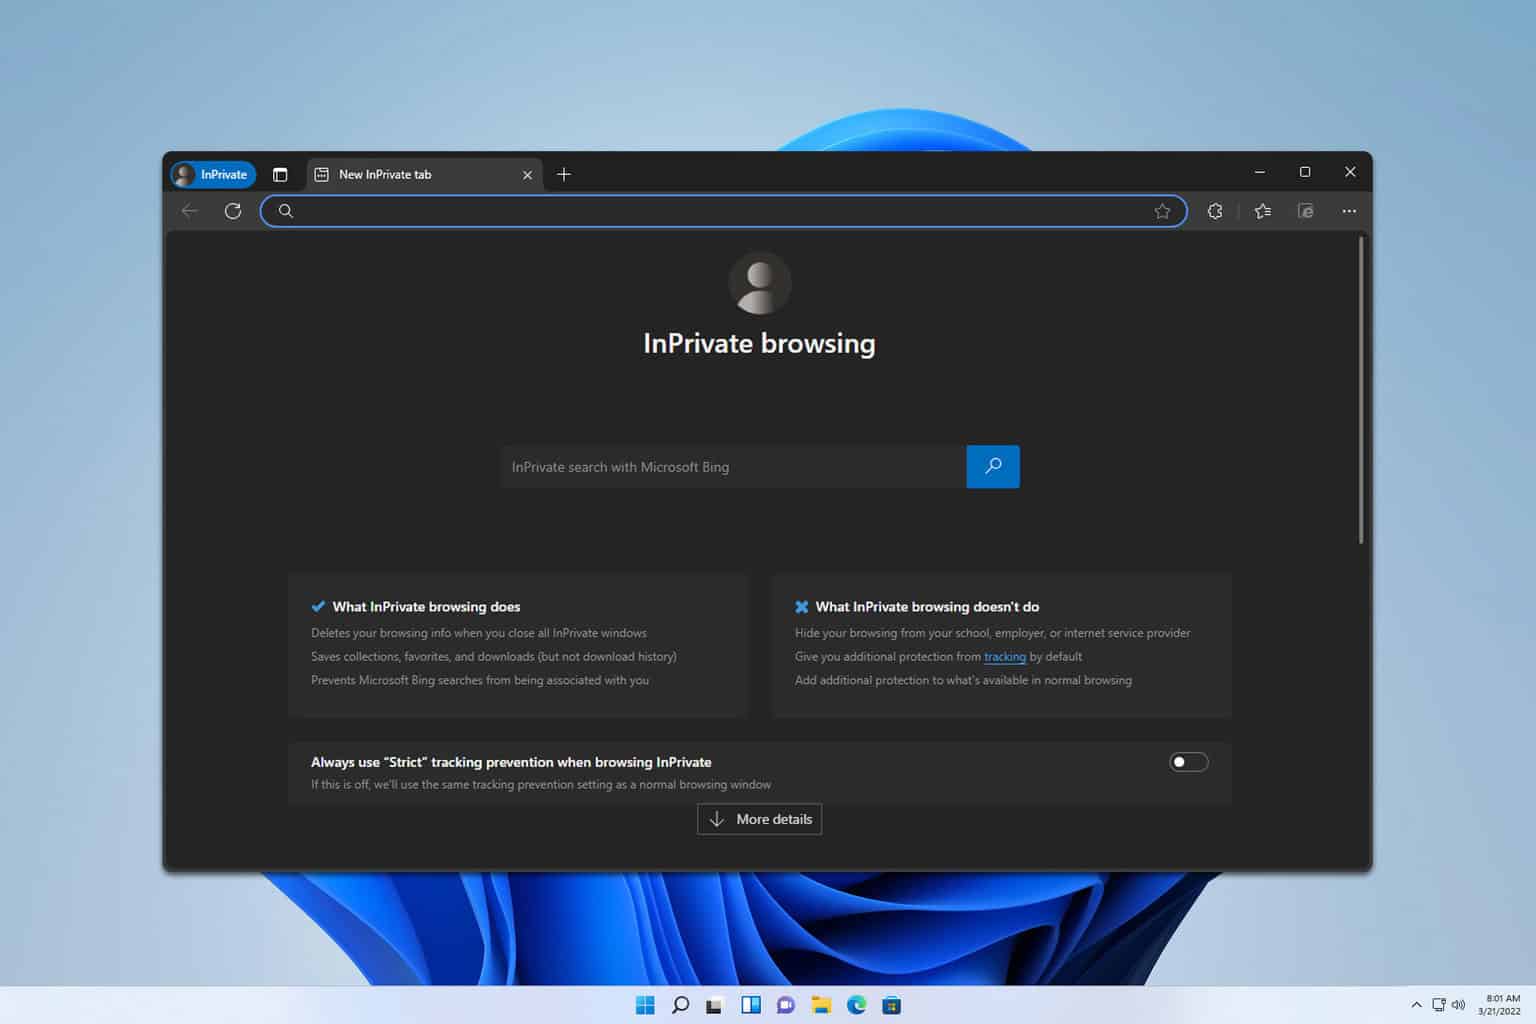
  3. In the Target field, add space and enter -inprivate after quotes.
    inprivate edge shortcut
  4. Save changes.

Now if you want to start Edge in Incognito, you can use this desktop shortcut.

How do I disable Incognito in Edge?

Since Edge is integrated into Windows, it has policies that you can change to disable Incognito mode. For detailed instructions, visit our guide on how to disable Microsoft Edge Incognito mode.

How to open Edge in Private Mode by default?

This can be done by adjusting your group policy settings or Edge settings. We have detailed instructions in our guide on how to always start Edge in Incognito mode, so don’t miss it.

How to view Microsoft Edge’s InPrivate browsing history?

This isn’t possible by default since Edge doesn’t keep any records. However, you can use third-party extensions to force Edge to temporarily keep track of private browsing history.

How do I enable incognito extensions in Microsoft Edge?

This can be done right from the Extension page in Edge. All extensions can be set to run in private mode simply by checking Allow in Private checkbox. To learn more, our guide on how to allow Edge extensions in InPrivate mode will give you all the answers.

As you can see, the Edge Incognito shortcut is the same as the one for other Chromium browsers, so you should be able to use it without any issues.

Mso20win32client.dll is the Faulting Module: 7 Ways to Fix it

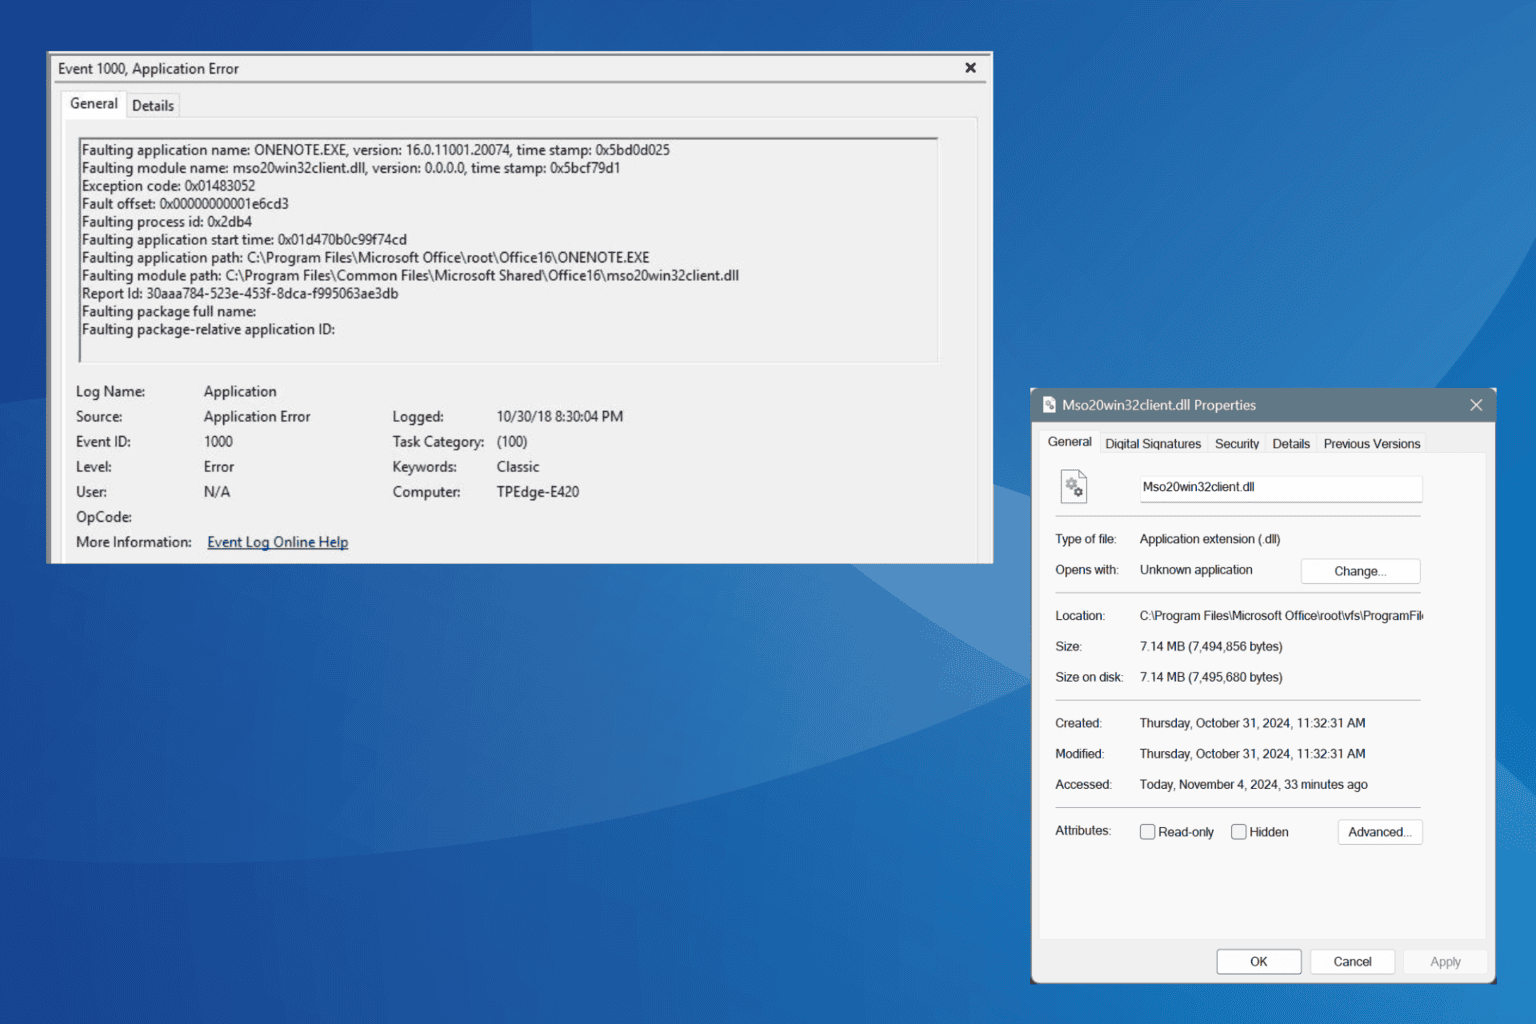
Often, when you try to run a Microsoft Office app, say Outlook, Excel, Word, PowerPoint, or OneNote, or perform an action within it, the app crashes. Upon launching the Event Viewer to check the crash logs, you find Mso20win32client.dll as the Faulting module name.

The Faulting module path, as listed in the crash log, is: C:\Program Files\Common Files\Microsoft Shared\Office16\mso20win32client.dll

But when heading to the location, there’s usually no DLL by the same name. If you are, too, facing this issue, first re-login into Microsoft Office and install any pending updates for both the OS and Microsoft Office. In most cases, this alone will fix the crash triggered by Mso20win32client.dll!

What can I do when Mso20win32client.dll crashes Microsoft Office?

1. Run with administrative privileges

  1. Press Windows + S to open Search, type Microsoft Word (or the Office app crashing in your case), right-click on the relevant result, and select Run as administrator.run as administrator to fix Mso20win32client.dll
  2. Click Yes in the UAC prompt.
  3. When the app launches, verify whether the Mso20win32client.dll error is fixed.

2. Delete the Office cache and credentials

  1. Launch the affected Microsoft Office app, click on the File menu on the top left, and select Account.
  2. Click on the Sign out option and confirm the change. sign out
  3. Now, press Windows + S to open Search, type Control Panel, and click on the relevant result.
  4. Click on User Accounts.user accounts
  5. Click on Credential Manager and then select Windows Credentials.
  6. Look for any Microsoft Office credentials, expand them, and click on Remove.delete credentials to fix Mso20win32client.dll crash
  7. After deleting all the saved Microsoft Office credentials, press Windows + E to open File Explorer and navigate to this path, where Username is the active profile name: C:\Users\Username\AppData\Local\Microsoft\Office\16.0
  8. Now, delete all folders here which end with Cache in their name.delete cache
  9. Finally, relaunch the affected Microsoft Office app, sign in with the login credentials, and verify whether the Mso20win32client.dll Office crash is fixed.

3. Run Microsoft Office in Safe Mode

Running Microsoft Office apps in Safe Mode will temporarily get rid of the Mso20win32client.dll error. To do that, either hold Crtl and then click on the app in the Search menu or use the /safe parameter.

Here’s how you can open different Office apps in Safe Mode from the Run (Windows + R) command:

  • Microsoft Word: winword /safe
  • Microsoft Excel: excel /safe
  • Microsoft PowerPoint: powerpnt /safe
  • Microsoft Outlook: outlook /safe
opening word in safe mode
Launching Microsoft Word in Safe Mode

4. Uninstall conflicting programs

  1. Press Windows + R to open Run, type appwiz.cpl in the text field, and hit Enter.
  2. Select any recently downloaded or updated app from the list, and click on Uninstall.uninstall app
  3. Follow the on-screen instructions to complete the process.
  4. Finally, restart the PC and check for improvements.

In the past, Office apps like Microsoft Excel crashed due to Mso20win32client.dll when Sticky Password was installed. At the time, adding Excel to the list of exclusions in Sticky Password did the trick. But it could be another app in your case. So, remove any that you suspect of triggering the crash!

If a quick removal doesn’t work, use a top-rated software uninstaller to delete the app cache, leftover files, and Registry entries, which may still cause conflicts post-uninstall.

5. Create the DisableSupportDiagnostics DWORD

Tip icon Tip
Since this method requires you to edit the Registry, it’s wise to create a restore point beforehand. This will allow you to revert the changes, in case things don’t go as planned.
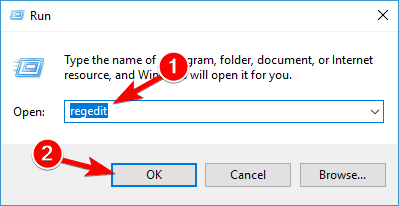
  1. Press Windows + R to open Run, type regedit in the text field, and hit Enter.
  2. Click Yes in the UAC prompt.
  3. Paste the following path in the address bar and hit Enter: HKEY_CURRENT_USER\Software\Microsoft\Office\16.0\Outlook\Options\Generalregistry path
  4. Right-click on the empty space, hover the cursor over New, select DWORD (32-bit) Value, and name it DisableSupportDiagnostics.
  5. Double-click on the DisableSupportDiagnostics DWORD.
  6. Enter 1 under the Value data field, and click OK to save the changes.DisableSupportDiagnostics to fix Mso20win32client.dll
  7. Finally, reboot the PC and verify whether the Mso20win32client.dll Outlook, Excel, or Word crash is fixed.

6. Disable OneDrive

In several instances, OneDrive was the reason behind the Mso20win32client.dll crash. Here, you have two options: quit OneDrive or sign out of your account. I prefer the latter since it proved helpful in 4 out of 5 cases.

signing out of OneDrive
Signing out of OneDrive on the PC

To sign out of OneDrive, select the app’s entry in the system tray, click on the gear icon, choose Settings > navigate to the Account tab > click on Unlink this PC > confirm the change.

7. Repair Microsoft Office

  1. Press Windows + R to open Run, type appwiz.cpl, and hit Enter.
  2. Select Microsoft 365 from the list, and click on Change.microsoft office repair
  3. Click Yes in the UAC prompt.
  4. Select the Quick Repair entry, click on Repair, and once it’s done, check for improvements.quick repair to fix Mso20win32client.dll
  5. If a Quick Repair doesn’t work, select Online Repair the next time, and click on Repair.online repair to fix Mso20win32client.dll
  6. Once done, you shouldn’t face Microsoft Office crashes anymore.

The built-in repair functions offered by Microsoft Office come in handy when fixing crashes due to Mso20win32client.dll in Excel, Word, Outlook, or PowerPoint.

In case the issue persists, it’s best that you contact Microsoft support since the problem, in all likelihood, lies at their end.

Before you leave, discover expert tips to make Microsoft Office run faster and get better performance!

For any queries or to share which fix worked for you, drop a comment below.

Start Chrome Incognito From The Command Line [How to]

If you’re an advanced user, you might want to start Chrome Incognito from the command line. This is simpler than you think, and today we’re going to show you a few ways to do that.

How do I open Chrome in Incognito from the command line?

Use Command Prompt

  1. Press the Windows key + S and type cmd. Select Open.
    CMD and Open
  2. Run the following command: start chrome –incognito
    chrome incognito cmd
  3. Press Enter.
  4. The Chrome Private browsing will now start from the command line.

If you want to open Chrome to a specific URL from the command command line, use the following command:

start chrome --incognito "windowsreport.com"

chrome incognito cmd url

If you want to open a URL in another Incognito window, run this command:

start chrome --new-window --incognito "windowsreport.com"

It’s pretty simple to start Chrome Incognito from the command line, as long as you use the Chrome command line options.

How to open Chrome through Command Prompt?

To do this, you can use the same commands, but be sure to omit the –incognito parameter.

As you can see, the only way to achieve this is to start Chrome from the command line with parameters. If you want to take this to another level, you can use the information from this guide and make automated scripts.

If you want to learn more, we have a great guide on what to do if Chrome Incognito mode is grayed out. Many users reported that Chrome Incognito keeps popping up, but this can be fixed by following the steps from our other guide.

Lastly, don’t miss our guide on what to do if Chrome Incognito tabs disappear for more information.

How to Allow Screenshots in Chrome Incognito Mode

Chrome’s incognito mode is a great option for leaving no trace behind of your browsing history but in case you need a screenshot, this would be an uphill task.

You can take screenshots on Google Chrome but this feature is not allowed in Incognito mode. The main reason behind Chrome not allowing screenshots is for your security and privacy. Some browsers may allow but Chrome has stringent restrictions.

How do I get Chrome to allow screenshots in Incognito mode?

1. By using Chrome flags

1.1 Chrome desktop

  1. Type chrome://flags into the address bar and press Enter.
  2.  Type “Screenshot” in the search bar. Enable the flags for Desktop Screenshots.Enable Desktop Screenshots

  3. Click the “Relaunch” button to restart Chrome and apply the changes.Relaunch Chrome


Unfortunately, the flags feature for taking screenshots on Chrome’s desktop version was discontinued. The workaround would be to install a previous version of Google Chrome.

However, you can still use apps like ShareX or even Windows built-in Snap tool to take screenshots of your private tabs on Chrome.

1.2. Chrome Android

  1. Launch your Google Chrome browser and open a new tab.
  2. In the address bar, type and navigate to the following location: chrome://flags/ 
  3. You’ll be directed to the Experiments tab.
  4. In the search bar, type and enter Incognito screenshots.
  5. Click on the drop-down menu next to Incognito screenshots and ensure it is set to Enabled.
  6. Next, click on the Relaunch button that appears at the bottom of Chrome, which will prompt a browser restart.
  7. Now once you switch to Incognito mode and you attempt to take screenshots, you will no longer get the this app does not allow screenshots message.

2. By installing an extension

  1. Launch your Chrome browser and go to the Chrome Web Store.
  2. Search for screenshot extension and select one of your choice. We’ll use Lightshot for this example.
  3. After selecting, click Add to Chrome.
  4. Click Add extension if prompted.
  5. Next, click on the ellipsis near the top right, hover the cursor over Extensions, and select Manage Extensions from the flyout menu. Alternatively, you can go to: chrome://extensionsmanage extensions
  6. Now, click the Details button under the extension you want to enable in Incognito mode.
  7. Finally, enable the toggle for Allow in Incognito.
  8. Tap on the extension button, select Lightshot, and capture your screen.

3. By using Developer tools

  1. Launch your Chrome browser, click on the three ellipses at the top right corner then select More tools>Developer tools.
  2. Click on the Device toolbar.
  3. Hover over to Dimensions then select the size of your desired screenshot from the drop-down menu.
  4. Next, click on the three ellipses of the device toolbar and select Capture screenshot.
  5. After taking the screenshot, the tool automatically saves it in Downloads. Tap the download icon at the top right of your screen to access it.

Aside from screenshots on private mode in Chrome, you can also take screenshots on your smart TV. And once you get them, if they’re not in a widely supported format, we show you how to convert your screenshots to JPG format or save your screenshots as a PDF.

That’s a wrap from us but if you have any other ways to allow screenshots in Incognito mode on Chrome, we’d like to hear about them. Drop us a line below.

3 Best Windows XP Graphics Cards for Gaming

If you’re nostalgic about Windows XP gaming and you’re looking for the best Windows XP graphics card, you won’t need to go too far because we’ve got a great selection right here. The cards below were hundreds of dollars, but now they are priced below $80.

What is the best Windows XP graphics card?

1. NVIDIA GeForce GTX 750 TI

  • 2GB GDDR5
  • Direct X12 640SP
  • PCI Express 3.0×16 Interface
  • HDMI, DVI-D, VGA
  • The fan is mostly running at full speed all the time

Back in the time, this NVIDIA GeForce GTX 750 TI with 2GB of GDDR5 memory goodness was on the pinnacle of performance. Now, we’ve found it for less than $80 and yes, it’s still great for Windows XP if you want a retro taste at gaming.

The card uses the good old PCI Express 3.0×16 interface and runs with a single fan. It comes with HDMI, DVI-D and VGA ports for whatever new or old monitor you might be using.

The bottom line is that this card will smash any game from the Windows XP era at full detail if you pair it with 4GB of RAM and a dual core or a quad core CPU.

2. ASUS GeForce GT 730

  • 2GB GDDR5
  • DVI-D, D-Sub, HDMI 1.4a, HDCP 2.2
  • PCI Express 3.0×16 Interface
  • Silent, but easily getting hot

Another Nvidia graphics card that will run any XP games of the era is GeForce GT 730. It also comes with 2 GB of GDDR5 memory but it doesn’t have a fan.

So, if you’re looking to create a silent system, this might be the one you’re looking for. However, this card is also getting pretty hot and you should clen it regularly because it’s catching a lot of dust.

As for the ports, you have everything you might be looking for to connect it to any monitor (DVI-D, D-Sub, and HDMI).

3. GIGABYTE AMD Radeon HD 7850

  • 1GB GDDR5
  • PCI-Express 3.0 Crossfire Ready
  • DVI, HDMI, 2x Mini-DisplayPort
  • Occupying 2 slots

If you want to use an AMD graphics card, Radeon HD 7850 would be more than capable to run any Windows XP era game. Although it has only 1 GB of GDDR5, this card is crossfire ready and comes with 2 miniDP ports that can accommodate more displays and more modern ones too.

Obviously, you also have the DVI and HDMI connectivity options. However, you will need a suitable tower PC to fit this card because it occupies 2 slots on the motherboard.

All these cards have Windows XP drivers so they will work perfectly in your older systems. And if you want to know what to play, here’s our list of the best Windows XP games.

So, we conclude here our list of the best Windows XP graphics cards. If you have any other suggestions, let us know in the comments below.

Error Lock Failed 167 (0xA7): How to Fix it

Error_Lock_Failed usually comes with the following error message: 167 (0xA7) Unable to lock a region of a file. This is an obscure error, but if you ever encounter it, this guide will show you how to fix it.

How can I fix Error_Lock_Failed?

1. Adjust the rma.ini file

  1. Open the rma.ini file.
  2. Next, add the following to the [Misc] section: "PerfWorkMode=3"
    PerfWorkMode=3
  3. Save changes.

This will force the Remote Monitoring Agent to use External mode and that will hopefully fix the error.

Some users suggested using OneByOne mode. To do that, follow these steps:

  1. Open hostmon.ini file.
  2. In the [Misc] section, add the following: "PerfWorkMode=1"
  3. Save changes.

2. Other solutions to try

  1. Change your policy and allow users to sign in with a temporary profile.
  2. Educate users to sign out of their session properly before starting a new connection.

The best course of action depends on your organization and system administrator. Do keep in mind that this method only works with profile log errors.

The Error_Lock_Failed is an obscure error that usually affects developers and system administrators, so it’s unlikely that you’ll ever encounter it as an end user.

However, if you do, you should be able to fix it with our solutions. There are other similar errors you can encounter, and we wrote about ERROR_NOT_LOCKED and ERROR_DRIVE_LOCKED recently.

You might also be interested in our ERROR_LOCK_VIOLATION guide for more information regarding lock errors.

5 Ways to Enable Edge Incognito Mode if it’s Greyed Out

Your Microsoft Edge browser may fail you when you want to switch to incognito mode and find it greyed out.

For the most part, it could be an outdated browser version, your school/work has disabled the incognito mode or some parental controls have been enforced. Similarly, some features like the incognito mode may be missing if you’re using a cracked version of the Edge browser.

How can I enable the incognito mode in Edge if it’s greyed out?

1. Disable parental controls

  1. Press Windows key + R and enter services.msc. Next, click OK.
     services.msc run window
  2. Locate Parental Controls and double-click it.
    parental control services window
  3. If the service is running, click the Stop button. Next, set the Startup type to Disabled. Lastly, click on Apply and OK to save changes.
    disable parental control service

Remember that disabling parental controls also clears all other restrictions so if you’re sharing your PC with users whose browsing activity needs to be monitored, they will be erased.

2. Enable Incognito mode

2.1 By using the Group Policy Editor

  1. Hit the Windows + R key to open the Run command.
  2. Type in gpedit.msc and hit Enter to open the Group Policy Editor.gpedit.msc and click OK to open the Group Policy Editor. - Can’t Turn Off Real-Time Protection on Windows 11
  3. Navigate to the following path: Computer Configuration\Administrative Templates\Windows Components\Microsoft Edge.
  4. Select Edge and double-click on the Allow InPrivate browsing option.
  5. Check the Enabled option and click on Apply then OK to effect the changes.

If you don’t have access to these settings, contact your IT department and request them to lift the restrictions so that you can browse privately on your Edge browser.

2.2 By using the Registry Editor

  1. Before you start making any changes, ensure you back up your Registry or create a restore point as some changes can make your PC unstable.
  2. Press the Windows + R keys and type regedit. Click OK or press Enter to start Registry Editor.
    Windows 10 CD drive not reading discs
  3. When Registry Editor starts, navigate to the following key in the left pane: HKEY_LOCAL_MACHINE\SOFTWARE\Policies\Microsoft\Edge
  4. If unavailable, right-click on an empty space, choose New, and then Key then name it as Edge.
  5. Similarly, on the right pane, right-click on an empty space and select New > DWORD (32-bit Value) then name it as InPrivateModeAvailability.
  6. In the right pane locate InPrivateModeAvailability entry. Double-click on it and in the Value data entry enter 0 to enable incognito mode in Microsoft Edge.
  7. Reopen the browser and when you click on the three ellipses at the top right corner, the New InPrivate window option should be active.

3. Repair Microsoft Edge

  1. Click on the Start Menu icon and open Settings.
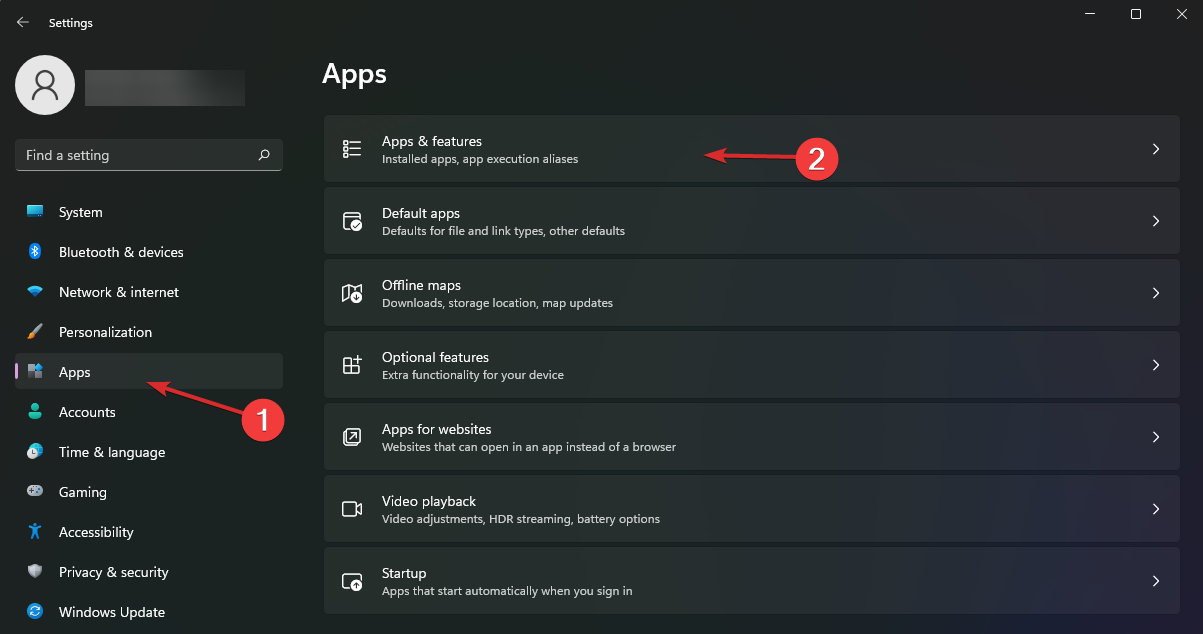
  2. Select Apps, then Apps & features.
  3. Under App list, search Microsoft Edge.
  4. Click on the three dots next to Microsoft Edge and select Modify.
  5. Select Repair. Repair Microsoft Edge to fix error code.

4. Reset Microsoft Edge

  1. Open Microsoft Edge and click on the three horizontal ellipses at the top right corner.
  2. Click on Settings.
  3. Select Reset settings and hit Restore settings to their default values.
  4. Confirm Reset in the dialog box that appears.

5. Reinstall Microsoft Edge

  1. Hit the Windows key and select Settings.settings windows 11
  2. Click on Apps on the left pane then select Apps & features.
  3. Locate Microsoft Edge, click on the three ellipses, and select Uninstall.
  4. Confirm Uninstall in the dialog box that pops up.
  5. Remember to uninstall any software remnants to achieve a clean install.
  6. Now go to the Microsoft Store, search for Microsoft Edge and click Install.

Elsewhere, you may also find that Chrome’s incognito mode is greyed out so feel free to check out our article on how to get it back.

Once you land in the private browsing mode, you can also enable Edge extensions in InPrivate mode and enjoy their functionality without being tracked. And if you’re enjoying browsing privately, you can tweak your settings to always start Edge in incognito mode.

Feel free to explore other browsers’ private modes and compare their features. This way, you can get the most out of your private browsing session.

That’s all we had for this article but if you have any additional thoughts or comments, let us know in the comment section below.

The Silent Hill 2 Remake Photos Puzzle was finally solved and it shocked the entire community

It’s been almost a month since Silent Hill 2 Remake was released. The game, available on Windows PCs and PlayStation 5, has received overwhelmingly positive reviews from critics and players alike and has also been praised for bringing the once-popular survival horror back to the mainstream.

For those who played the original Silent Hill 2 – which is still available on Windows PCs – you know just how many puzzles this beloved game has. Silent Hill 2 Remake doesn’t shy away from them but brings additional ones, such as the Photos Puzzle.

This one, already touted as very hard, required players to find a series of photos scattered throughout Silent Hill. Many of them can be found in remote areas, and they feature a number, a message, and, obviously, a photo of a certain situation related to this game series.

Well, after almost one month of thousands of hours spent deciphering the puzzle, it has been solved. This Reddit user, specifically, found all the Photos, read all the clues, and came up with the answer.

YOUVE BEEN HERE FOR TWO DECADES

As stated by the Reddit user, this is the message you’ll get if you solve this puzzle on your own. More specifically, you’ll get to that message if you count things within each photo, count that number across the message found on each of these photos, and get a letter from each.

For example, the first photo has six windows and the message “SO MANY PEOPLE HERE.” The letter would be the Y in “many” since it’s the sixth one.

You can check out the Reddit post for a deeper explanation of this fascinating puzzle.

The solution to the puzzle was then validated by Bloober Team’s Mateusz Lenart, the Creative Director and Lead Designer of Silent Hill 2 Remake. On X, he said he was afraid the Photos puzzle might be too hard to decipher.

? I knew it wouldn’t stay hidden for long! (There was a theory in our company that the puzzle might be too hard ?) I really wanted to make it subtle when I was painting those photos…
I think the timing couldn’t be better for you to solve it.
Congratulations!

So, what does the YOUVE BEEN HERE FOR TWO DECADES mean? Some agree it might play into a loop theory that says that James Sunderland, the game’s main character, has been trapped in Silent Hill for decades. Others agree the puzzle might refer to the players and the community, who have been waiting for the Silent Hill 2 Remake for 2 decades. Either way, it’s a fun Easter Egg.

Silent Hill 2 Remake has been critically and commercially successful, shocking many—both the Silent Hill community and the critics—especially after the franchise’s poor reception of the latest game of this franchise – The Short Message, released earlier this year.

It is said to be a contender for Game of the Year. It sold over 1 million copies in just three days, making it the most successful release of the beloved horror franchise.

Bloober Team, the studio responsible for the game, said they’re open to working on remakes of the other original Silent Hill games: Silent Hill, Silent Hill 3, and Silent Hill 4: The Room. Needless to say, after the success of Silent Hill 2, we’re excited.

Have you collected all the Photos yet?

OS_DATA_TAMPERING BSoD 0x00000155: How to Fix it

The OS_DATA_TAMPERING BSoD, with error code 0x00000155, appears when Windows detects an attempt to tamper or modify critical system files. Subsequently, the PC automatically shuts down to prevent data integrity.

The underlying causes for OS Data Tampering include outdated drivers, malware infection, corrupted system files, applications that compromise the security of Windows, and hardware malfunction.

Before you proceed, restart the computer, install any pending Windows updates, and disconnect all non-critical peripherals and hardware. For most of you, these basic fixes should do the trick!

How can I fix the OS_DATA_TAMPERING blue screen error?

Tip icon Tip
If you get the OS_DATA_TAMPERING BSoD upon turning on the PC, boot Windows into Safe Mode and then proceed with the solutions listed below.

1. Update all the drivers

  1. Press Windows + X to open the Power User menu, and select Device Manager.
  2. Expand the different entries, right-click on the devices listed underneath individually, and select Update driver.update driver to fix OS_DATA_TAMPERING
  3. Click on Search automatically for drivers and wait for Windows to install the best locally available version.automatic driver search
  4. Similarly, update the other drivers, then reboot the PC and check for improvements.

Outdated or corrupt drivers may give Windows the impression of data tampering, triggering the OS_DATA_TAMPERING blue screen. In this case, updating the drivers should quickly fix things!

If Windows can’t find a better version, I recommend going to the manufacturer’s official website, looking for the new releases, and then manually installing the latest driver.

2. Scan the PC for malware

  1. Press Windows + S to open Search, type Windows Security, and click on the relevant result.
  2. Click on Virus & threat protection.windows security
  3. Click on Scan options.
  4. Select the Full scan entry, then click on Scan now, and wait for the malware scan to complete. It typically takes 15-30 minutes.malware scan to fix OS_DATA_TAMPERING

If the built-in Windows Security can’t detect any malware behind the OS_DATA_TAMPERING crash, you may consider using an advanced antivirus solution to run a series of scans and eliminate the active threats.

3. Uninstall recently added programs

  1. Press Windows + R to open Run, type appwiz.cpl in the text field, and hit Enter.
  2. Select any recently downloaded program(s) from the list and click on Uninstall.uninstall app
  3. Follow the on-screen instructions to complete the process, then restart the PC and check for improvements.

4. Repair corrupted system files

  1. Press Windows + R to open Run, type cmd, and hit Ctrl + Shift + Enter.command prompt
  2. Click Yes in the UAC prompt.
  3. Paste the following DISM commands individually and hit Enter after each: DISM /Online /Cleanup-Image /CheckHealth DISM /Online /Cleanup-Image /ScanHealth DISM /Online /Cleanup-Image /RestoreHealth
  4. Next, run this command for the SFC scan: sfc /scannowsfc scan to fix OS_DATA_TAMPERING
  5. Finally, reboot the PC and check for improvements.

If corrupted system files are triggering the OS_DATA_TAMPERING BSoD, running the DISM (Deployment Image Servicing and Management) and SFC (System File Checker) scans will replace all such files with their cached copies, fixing the error.

5. Perform a clean boot

  1. Press Windows + S to open Search, type System Configuration, and click on the relevant result.
  2. Navigate to the Services tab, tick the checkbox for Hide all Microsoft services, and click on Disable all.disable all
  3. Go to the Startup tab, and click on Open Task Manager.
  4. Select any non-critical program that reads Enabled under the Status column, and click on Disable.disable startup appps
  5. Go back to System Configuration, and click on Apply and OK to save the changes.
  6. Click Restart in the confirmation prompt.clean boot to fix OS_DATA_TAMPERING

A clean boot loads Windows with only the required programs, services, and drivers. If, upon reboot, the OS_DATA_TAMPERING error is fixed, re-enable the services and programs disabled earlier individually. When the BSoD reappears, the component enabled last is problematic and must be removed.

6. Inspect the Disk and RAM for issues

6.1 Fix disk issues

  1. Press Windows + R to open Run, type cmd, and hit Ctrl + Shift + Enter.
  2. Click Yes in the UAC prompt.
  3. Paste the following command and hit Enter: check /r
  4. If asked to schedule the scan when the PC next restarts, press Y, hit Enter, and then reboot the computer.check disk to fix OS_DATA_TAMPERING

The Check Disk (CHKDSK) utility allows you to repair minor issues with the hard drive, including bad sectors, which may be responsible for the OS_DATA_TAMPERING blue screen.

6.2 Check the RAM

  1. Press Windows + R to open Run, type mdsched.exe in the text field, and hit Enter.
  2. Click on Restart now and check for problems.RAM testing
  3. After the PC reboots, check the mdsched.exe logs and look for any RAM-related issues.

If Windows Memory Diagnostic can’t find any problems, I recommend using Memtest86+, an advanced open-source RAM testing tool that will run a series of scans on individual RAM modules and detect even the smallest of issues. In case any problems are found, replace the malfunctioning module!

7. Reinstall Windows

When nothing else works against OS_DATA_TAMPERING, the last option is to reinstall Windows. Since this may lead to data loss, you should move any critical files to external storage beforehand.

To reinstall Windows, connect a formatted USB flash drive to another working PC > go to Microsoft’s official website > download the Media Creation Tool > use it to create a bootable Windows USB > plug in the flash drive to the affected PC > change the boot order to the flash drive > load Windows setup and proceed with the reinstallation.

reinstall Windows to fix OS_DATA_TAMPERING
Reinstalling Windows via a bootable USB

One of these solutions must have helped you fix the OS_DATA_TAMPERING blue screen. Before you leave, discover the causes of BSoD, and take suitable measures to prevent them from reappearing!

For any queries or to share more fixes with our readers, drop a comment below.

Copilot Agents are coming to Microsoft Teams group chats

Copilot agents, those little AI models built to complete certain tasks, will soon be available in Teams group chats. According to a recent entry in the Microsoft 365 Roadmap, the Redmond-based tech giant is set to release them in December.

Here’s what the entry says:

Now users can discover and add Copilot agents to group chats in Teams to extend Microsoft Copilot to their flow of work.

Microsoft announced Copilot agents together with Copilot Studio, a platform that allows organizations to build their own Copilot models, taking into consideration their specific infrastructure and line of work.

Hoping to change the way business is done and help AI get adopted faster in the work field, Microsoft says these agents are safe and can only be used inside the organization.

The company recently announced its release, and Copilot agents are currently being rolled out to customers worldwide.

Setupapi.dll is Not Found or Missing: 3 Ways to Restore it

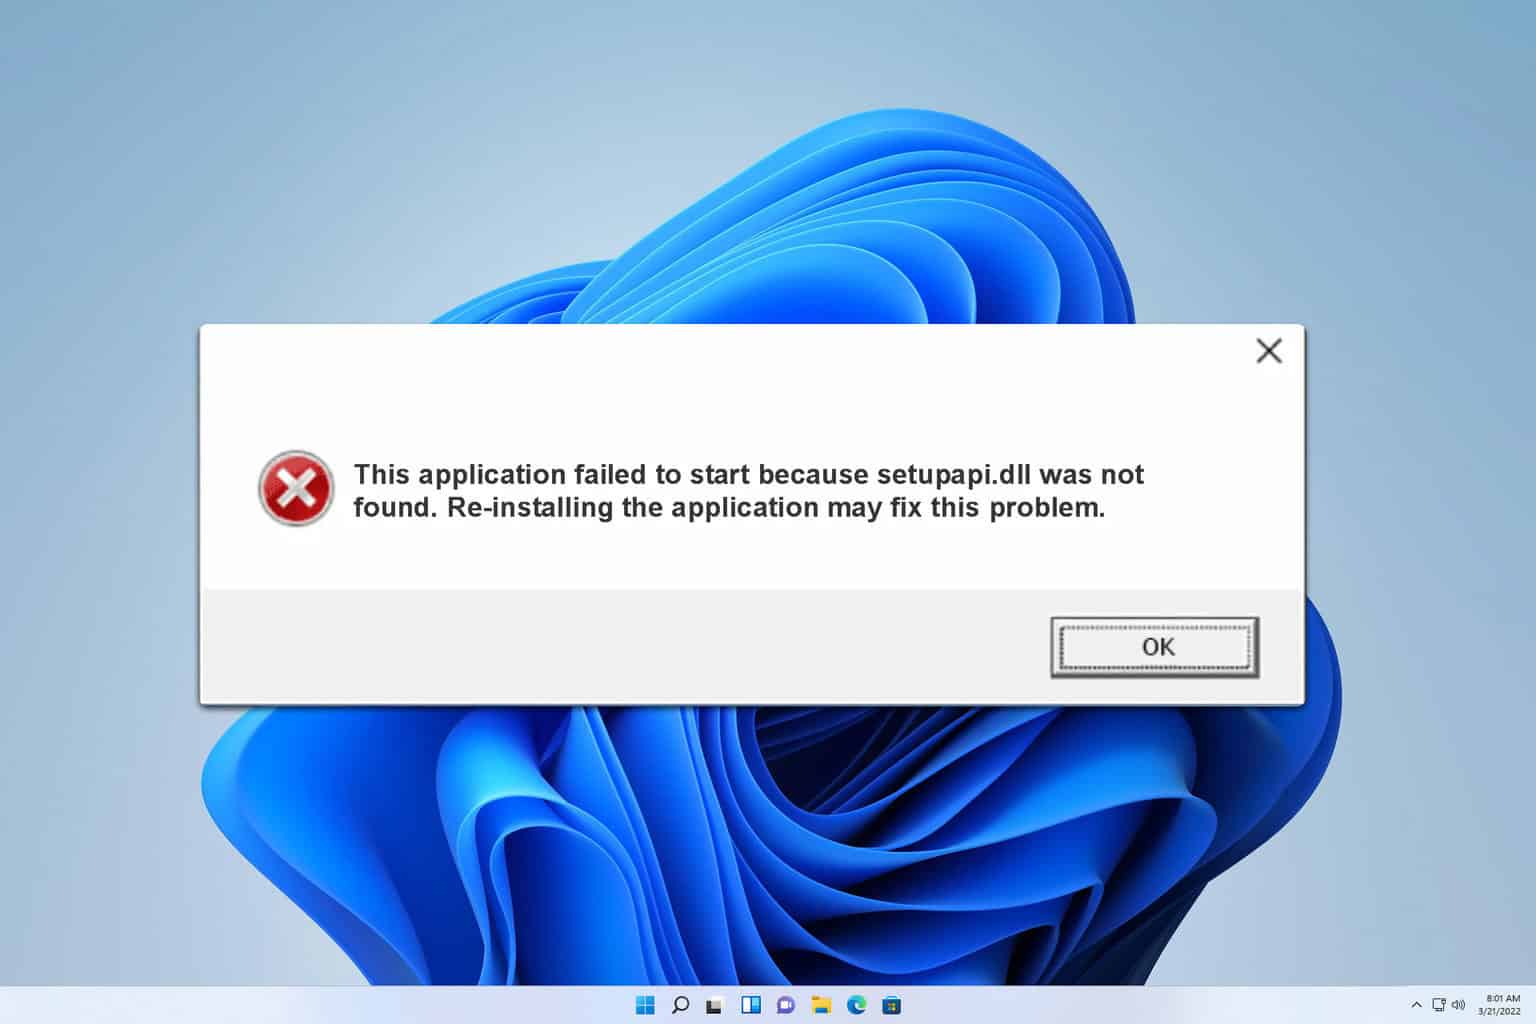
Sometimes you can encounter a Library not found setupapi.dll message, and this can be a major issue since this error will prevent basic Windows components from running, so let’s see how we can fix this error.

What is Windows Setup API?

This is a system component that handles general setup functions and device installation functions on Windows.

What can I do if setupapi.dll is missing?

1. Use System Restore

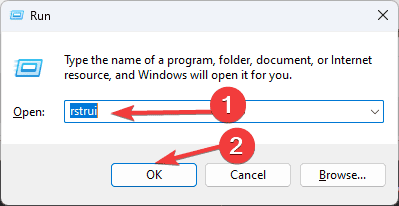
  1. Press the Windows key + R and type rstrui.
    rstrui command run window
  2. Next, select the restore point you wish to revert to.
    system restore select restore point
  3. Select it, click Next, and follow the instructions on the screen.
  4. Once the system is restored, check if the problem is gone.

A few users were unable to boot to Windows due to this error, and if this happens, you need to access Safe Mode and run System Restore from there.

2. Run SFC and DISM scan

  1. Press the Windows key + S and type cmd. Choose Run as administrator.
    CMD elevated - libxml2.dll
  2. Run the following command and wait for it to finish: sfc /scannow
  3. If the issue is still there run the following commands:
    dism /online /cleanup-image /scanhealth
    dism /online /cleanup-image /checkhealth
  4. If either of them detects an issue, run dism /online /cleanup-image /restorehealth

Keep in mind that some of these commands might take a while, so don’t interrupt them.

3. Reset Windows

  1. Back up your important files from the system drive.
  2. Press Windows key + I and go to System and then Recovery.
  3. Select Reset PC in Reset this PC section.
    reset this pc
  4. Choose the Keep my files option.
    retain files
  5. Follow the instructions and wait for the process to finish.

For detailed instructions, check our dedicated guide on how to factory reset Windows 11.

As you can see setupapi.dll is an essential Windows file, and if it’s missing, the only option is to restore your installation or repair it.

We also have guides on missing version.dll and msdia80.dll, so don’t hesitate to check them out.

Our latest guide covers difxapi.dll was not found issue, so be sure to visit it for more information.

How to Fix the ERROR_MAX_THRDS_REACHED BSoD

The ERROR_MAX_THRDS_REACHED error has the value of 164 (0xA4) and it indicates that the maximum number of threads that can be created in the system has been reached. This can happen due to various reasons, such as insufficient system resources, outdated drivers, or malware infections.

Sometimes, a simple restart can resolve the issue by clearing temporary system states and freeing up resources. Another quick solution is to close unnecessary processes from Task Manager.

How do I fix ERROR_MAX_THRDS_REACHED?

1. Update the device drivers

  1. Right click the Start button and select Device Manager.
  2. Expand the categories one by one and right-click on each device and select Update driver.
  3. Also, keep an eye out for any driver that has a yellow exclamation mark next to it. That means the component is not working correctly.
  4. Follow the prompts to update all your device drivers.

This can be really time consuming. It might be a lot easier to use a dedicated driver updater tool that will do all that automatically. We also recommend using Fortect, a specialized tool in dealing with corrupted system files and fixing BSoD issues like this one.

2. Increase Thread Limit

  1. Press Win + R, type regedit, and press Enter to open the Registry Editor.
  2. Navigate to HKEY_LOCAL_MACHINE\SYSTEM\CurrentControlSet\Control\Session Manager\SubSystems
  3. Find the Windows key and double-click it.
  4. In the Value data field, look for the SharedSection parameter.
  5. Increase the second and third values (e.g., change 1024,20480,768 to 1024,30720,1024).
  6. Click OK and restart your computer.

Make sure to make a Registry backup before making the changes in case something goes south.

3. Run SFC and DISM scans

  1. Click the Start button, type cmd and select Run as administrator from the results.
  2. Type sfc /scannow and press Enter. Wait for the scan to complete.
  3. Then, type DISM.exe /Online /Cleanup-image /Restorehealth and press Enter. Wait for the process to finish.

Running SFC and DISM scans is a pretty helpful method to fix the system and dealing with BSoD errors.

4. Perform a clean boot

  1. Press Win + R, type msconfig, and press Enter.
  2. Go to the Services tab, check Hide all Microsoft services, and click Disable all.
  3. Go to the Startup tab and click Open Task Manager.
  4. Disable all startup items and restart your computer.

This solution will help you boot your PC with a minimum number of services so you can troubleshoot the ERROR_MAX_THRDS_REACHED BSoD and look at its causes.

You might also learn more about the issue if you’re checking the BSoD error log. If the BSoD occurs when you’re playing games, check the highlighted link for our guide with tested solutions to fix it.

These steps should help you resolve the ERROR_MAX_THRDS_REACHED error. If nothing works, inspect the hardware components for any signs of damage and reseat the RAM modules on the motherboard.

Windows 11’s market share reaches 35%, growing 5% in the last three months

Windows 11 has reached a notable point in the busy world of technology. For the first time since it was launched in October 2021, this operating system has surpassed the 35% market share milestone in October 2024, growing 5% in just three months.

According to the latest Statcounter data, Windows 11 reached its highest percentage ever, 35.58%, marking a rise of almost 5 points in just three months. On the other hand, Windows 10 has fallen to 60.95%.

Windows 10, which will be nearing its end of life in approximately a year, will probably see a quicker decrease in market share. However, the Extended Security Update program and services by third parties such as 0patch are ready to maintain Windows 10 for many years. Plus, the Redmond-based tech giant announced a fee of $30 for those who want to get ESU for 1 year. The company says this decision will help users transition to Windows 11 better.

Regarding Windows 11, the excitement around Copilot+ PCs and news of additional ARM-powered devices from Qualcomm and its partners might help this system attract even more users. This could be especially true since we are nearing back-to-school time.

However, even with these advancements and urging for newer versions, it’s interesting to see that some older Windows versions still have a particular spot in the hearts of many users. Windows 7, for example, maintains its position as the third most popular Windows version, having a 2.62% market share.

Close behind are Windows 8.1 and Windows XP, with shares of 0.19% and 0.28% respectively. This continuing use of older operating systems shows the wide-ranging demands and choices of Windows users worldwide.

Remember that even though Statcounter’s reports help understand the direction of market trends, they aren’t exact. Only Microsoft can give you the most exact data on how much their operating systems occupy in markets. However, this company does not reveal detailed information about market division.

Windows operating systems have changed a lot over time, and the phrase “the only constant is change” seems appropriate. Windows 11’s market share shows how much people are moving towards more modern, safe, and efficient computing experiences.

However, seeing older versions tells us that Microsoft has difficulties getting users to accept the newest technology while offering improvement opportunities. Suppose you favor the advanced aspects of Windows 11 or keep using an older edition for particular motives.

In that case, the variety among Windows operating systems shows that our digital society has different user requirements and tastes.

Error Code 2738 in Epic Installer: 3 Ways to Fix it

Sometimes you might encounter Epic Games installer error 2738, and if this happens, you won’t be able to access your games. This can be a major problem, but there are a few solutions you can use.

How can I fix Epic installer error code 2738?

1. Completely uninstall McAfee

  1. If you’re using McAfee Antivirus, disable it and try to run the setup again.
  2. If that doesn’t help, uninstall the software.
  3. Download the McAfee Removal Tool and run it.

Once the software is removed, check if the problem is gone. Keep in mind that you need to use this method if you have ever had McAffee installed on your PC.

We also have a guide on how to remove McAfee from Windows 11, so check it out for detailed instructions.

2. Modify the registry and register VBScript

  1. Press the Windows key + S and type cmd. Choose Run as administrator.
    CMD elevated
  2. Run the following command:  reg delete “HKCU\SOFTWARE\Classes\Wow6432Node\CLSID\{B54F3741-5B07-11CF-A4B0-00AA004A55E8}” /f
  3. Next, run c:\windows\syswow64\regsvr32 vbscript.dll

A few users reported that they managed to fix the problem simply by using Step 3 without having to modify the registry, so be sure to try that first.

3. Diagnose the setup

  1. Open the Command Prompt as shown earlier.
  2. Next, navigate to the directory where your setup file is stored using the cd command. We’ll use Downloads as an example: cd C:\Users\WindowsReport\Downloads
  3. Lastly, run the following command, just make sure that the name of the msi file matches the one from your directory: msiexec /i EpicGamesLauncherInstaller.msi /lv log.txt
    msiexec log
  4. When the setup fails, go to the log.txt file and look for any errors.

While this method won’t fix the problem, it will give you additional information, so you can research the problem on your own.

These are just some of the methods that you can use to fix Epic installer error code 2738 on your PC. If you find a different method that works for you, feel free to share it with us in the comments section.

This isn’t the only issue you can encounter, and we wrote about Epic Games installer invalid drive error and Install failed error code: II-E1003 in our previous guides, so don’t miss them.

How to Fix There was a Problem Starting Sbavmon.dll

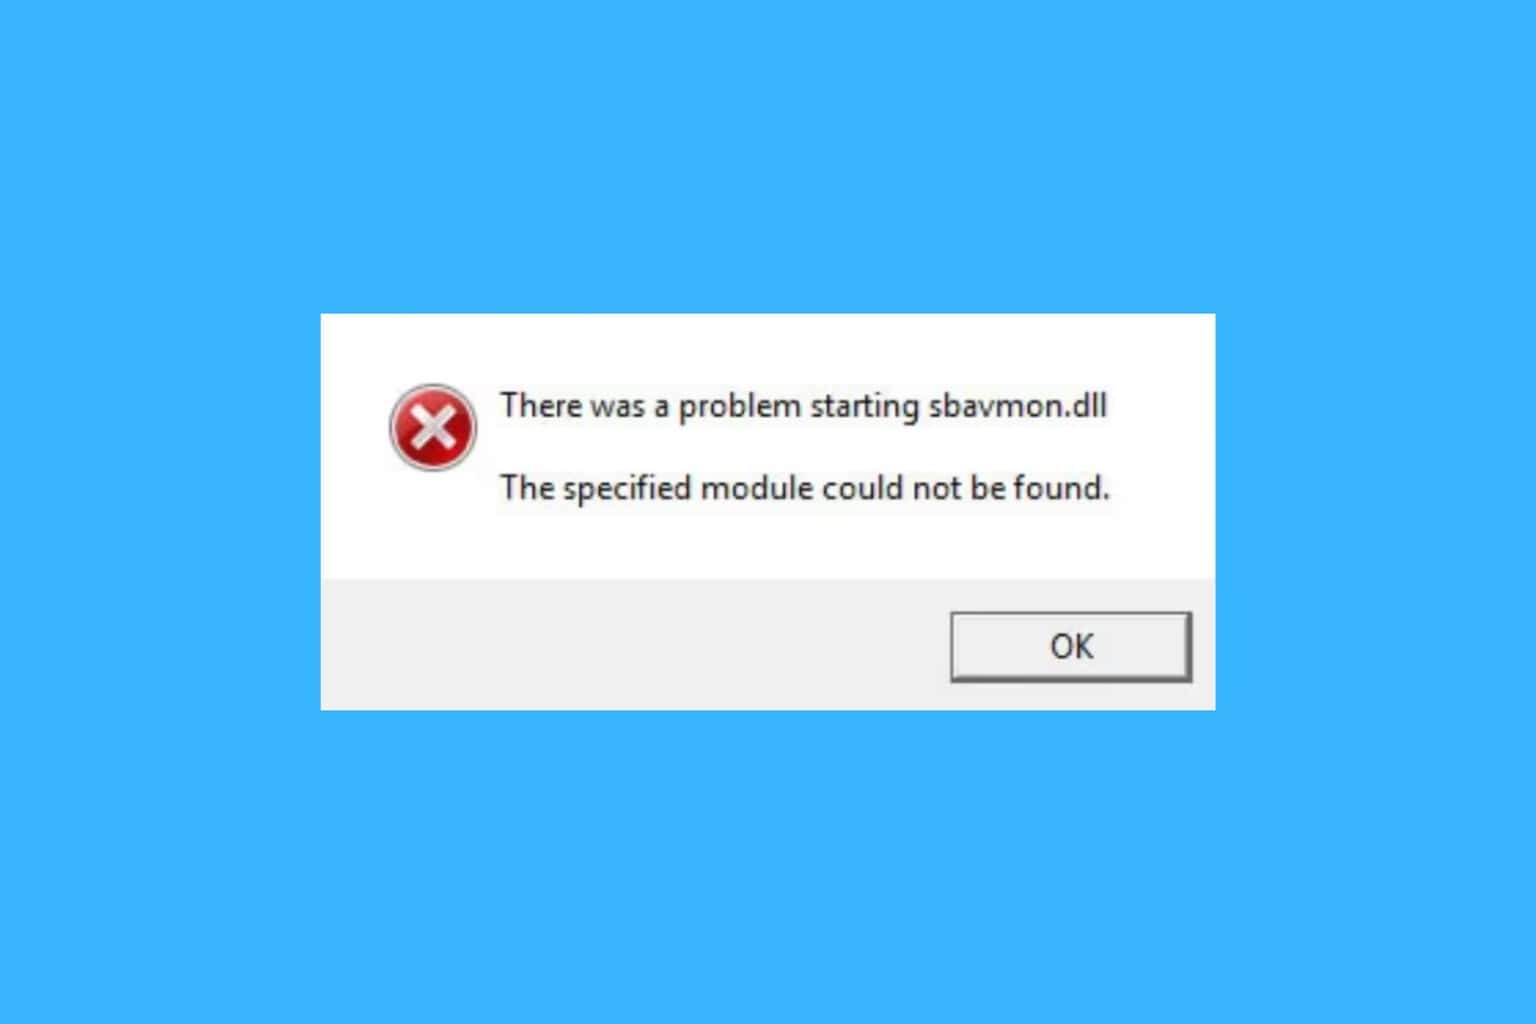
Many users found the error message There was a problem starting sbavmon.dll the specified module could not be found after booting. This error usually happens after a Windows update. The missing sbavmon.dll is part of the Creative SB AVStream Monitoring Utility app. So if you have a Creative sound card, you should reinstall its driver.

What do I do if There was a problem starting Sbavmon.dll?

1. Download the driver from Creative Labs

  1. Open the browser of your choice and go to the Creative Labs support website.
  2. Select your product from the list and download the driver for your system.
  3. After the download is completed, double-click the installer and follow the instructions on the screen.
  4. Restart your PC and see if the problem has been fixed.

Downloading the right software and driver for your Creative soundboard is the best way to fix the sbavmon.dll missing error.

2. Update the driver in Device Manager

  1. Right-click the Start button and select Device Manager.
  2. Expand the Sound, video and game controllers section.
  3. Right click the Creative device and select Update driver.
  4. Here, you can try the first option, Search automatically for drivers.
  5. If the system doesn’t find any new drivers, select the second option instead, Browse my computer for drivers and point the location of the driver you downloaded in the first solution.

3. Copy the DLL from Windows.old

After you performed the Windows update, you probably still have the sbavmon.dll file in the Windows.old folder on your PC.

Open the folder, go to the System32 folder, and copy the sbavmon.dll file and paste it into the C:\Windows\system32\ folder on your PC. Restart your PC and see if that fixed the There was a problem starting sbavmon.dll the specified module could not be found error.

To conclude our guide, to fix this error, you can either download the correct driver from the manufacturer’s website, try updating the existing driver or simply copy the existing DLL into the right folder.

There are also dedicated tools such as Fortect, that are specialized in fixing DLL issues. We recommend this app because it can fix this problem with only a few clicks.

We hope that you managed to fix the There was a problem starting sbavmon.dll error using our solutions above. For any questions or suggestions, feel free to use the comments section below.

ERROR_SIGNAL_REFUSED 156 (0x9C) [Solved]

The ERROR_SIGNAL_REFUSED Windows system error is encountered when a program/process refuses to respond to a signal sent by the operating system. The error message reads, 156 (0x9C) The recipient process has refused the signal!

The underlying causes behind Error Signal Refused include processes that are not responding, corrupted system files, misconfigured Registry, or recent changes to the PC. Before you proceed, restart the PC and install all pending Windows updates.

How can I fix ERROR_SIGNAL_REFUSED?

1. Terminate the affected process

  1. Press Ctrl + Shift + Esc to open the Task Manager.
  2. Select the affected process or any that’s not responding, and click on End task.end task to fix ERROR_SIGNAL_REFUSED
  3. Once done, relaunch the process/program and verify whether ERROR_SIGNAL_REFUSED 156 (0x9C) is fixed.

2. Repair the corrupted system files

  1. Press Windows + S to open Search, type Command Prompt in the text field, and click on Run as administrator.command prompt
  2. Click Yes in the UAC prompt.
  3. Paste the following DISM commands individually and hit Enter after each: DISM /Online /Cleanup-Image /CheckHealth DISM /Online /Cleanup-Image /ScanHealth DISM /Online /Cleanup-Image /RestoreHealth
  4. Next, run this command for the SFC scan: sfc /scannowsfc scan to fix ERROR_SIGNAL_REFUSED
  5. Once done, reboot the PC and check for improvements.

If the corrupted system files are triggering ERROR_SIGNAL_REFUSED The recipient process has refused the signal system error, running the DISM (Deployment Image Servicing and Management) and SFC (System File Checker) will get things running in no time!

3. Reinstall the affected program

  1. Press Windows + R to open Run, type appwiz.cpl in the text field, and hit Enter.
  2. Select the program throwing error 156 (0x9C) from the list, and click on Uninstall.reinstall app
  3. Follow the on-screen instructions to complete the process and then restart the PC.
  4. Now, reinstall the program from the official website or Microsoft Store.

If there’s a problem with the program’s current installation, you might receive ERROR_SIGNAL_REFUSED, and a reinstallation should fix things. In case a quick removal doesn’t work, use a top-rated software uninstaller to delete any leftover files and Registry entries.

4. Delete conflicting entries from the Registry

Tip icon Editor’s tip
Before you proceed, I recommend creating a restore point, which will allow you to revert the changes in case things don’t work out or you inadvertently delete other keys.
  1. Press Windows + R to open Run, type regedit in the text field, and hit Enter.registry editor
  2. Click Yes in the UAC prompt.
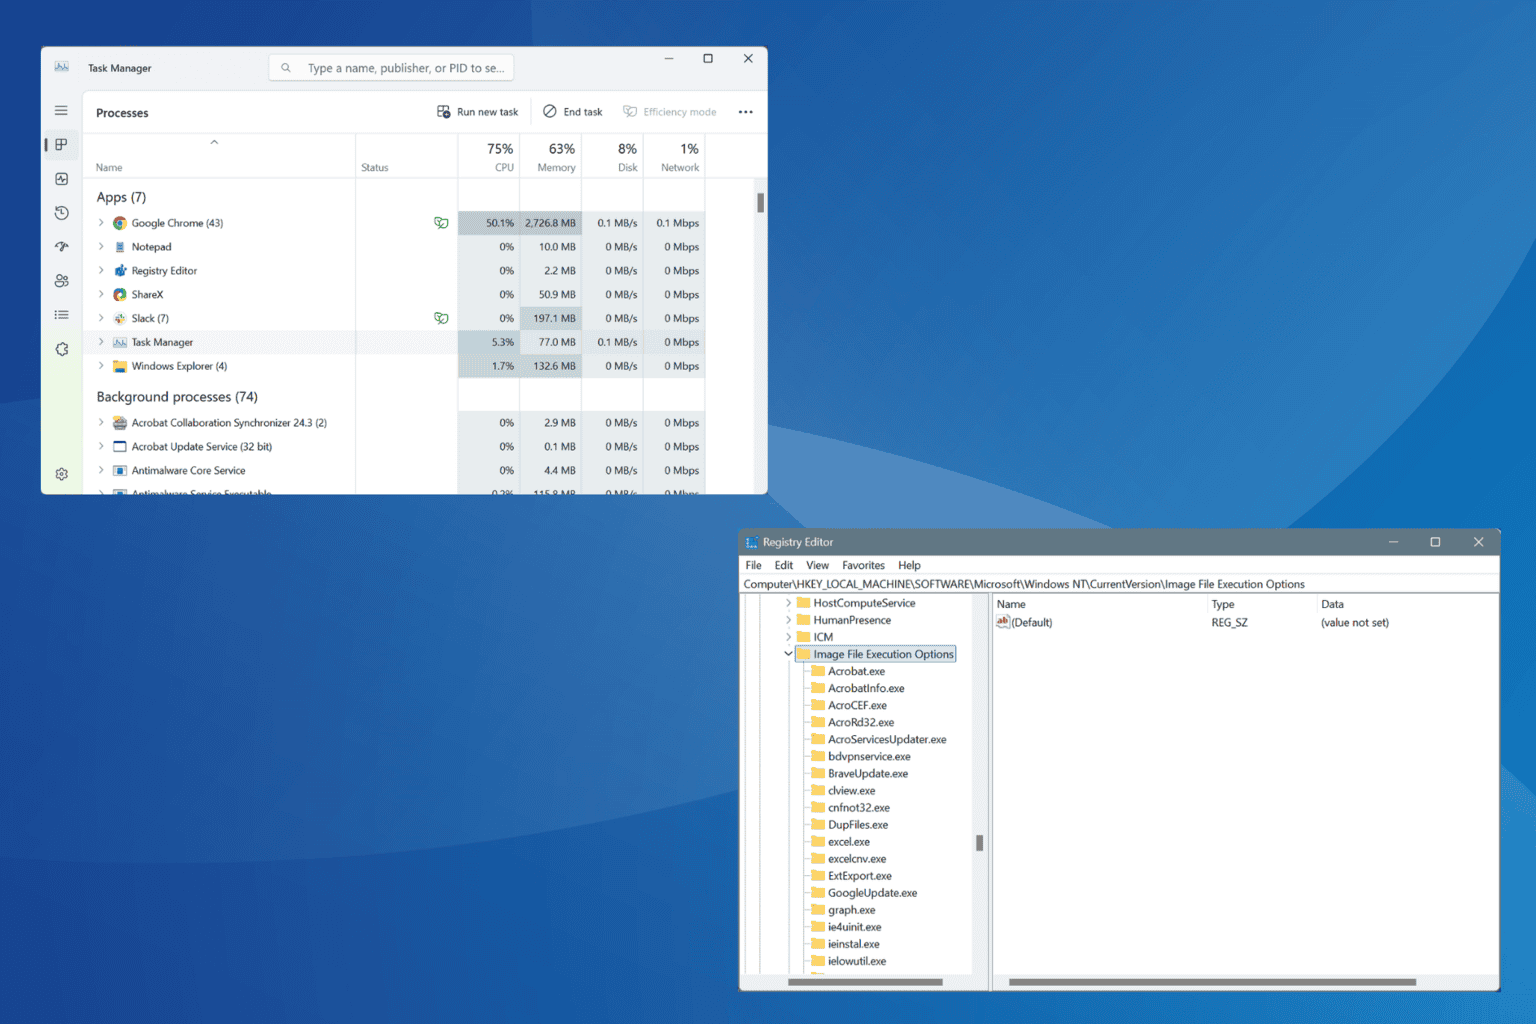
  3. Paste the following path in the address bar at the top and hit Enter: Computer\HKEY_LOCAL_MACHINE\SOFTWARE\Microsoft\Windows NT\CurrentVersion\Image File Execution Optionspath
  4. Now, under the Image File Execution Options key, look for any entry for the affected program, right-click on it, and select Delete.delete key
  5. Click Yes in the confirmation prompt.
  6. Now, reboot the computer and verify whether ERROR_SIGNAL_REFUSED disappears.

5. Perform a system restore

  1. Press Windows + S to open Search, type Create a restore point, and click on the relevant result.
  2. Click the System Restore button.system restore to fix ERROR_SIGNAL_REFUSED
  3. Select the Choose a different restore point option, and click on Next.
  4. Pick the oldest restore point from the list or one created before the issue first appeared, and click on Next.oldest restore point to fix ERROR_SIGNAL_REFUSED
  5. Finally, verify the details, click on Finish, and confirm the change. The restore will take 15-30 minutes.

If a recent change to the system caused ERROR_SIGNAL_REFUSED in Windows, a system restore will allow you to revert that change and get things up and running. Just make sure to choose a restore point created before the first occurrence of the error.

Before you leave, discover expert tips to improve the performance of a Windows PC and prevent such errors from reappearing! We also have a new guide on Error_No_Signal_Sent, so don’t miss it for more information.

You might also be interested in our latest ERROR_RECEIVE_PARTIAL_EXPEDITED article. For any queries or to share more fixes with our readers, drop a comment below.

Windows Server 2026 and System Center 2026 have entered general availability

Windows Server 2025 is now generally available. Microsoft announced that the latest version of the Server operating system is also a long-term servicing channel (LTSC) release. It will be supported for 10 years until October 2034.

The company says Windows Server 2025 delivers security advancements and new hybrid cloud capabilities in a high-performing, AI-capable platform.

Some other noteworthy Windows Server 2025 features and improvements include:

  • GPU virtualization improvements, including support for Multi-Instance GPU, which is now generally available
  • Improvements to the performance of virtualized SQL Server instances through the use of Persistent Memory
  • Improvements to the performance of hyper-converged infrastructure (HCI) systems using the Windows Admin Center
  • Enhanced security for Linux guests running on Windows Server 2025 Hyper-V hosts
  • Enhancements to the Windows Admin Center management tool
  • Support for the next-generation Intel Ice Lake processors

Like Windows 11 24H2, Server 2025 will receive updates via checkpoint cumulative, a new way to deliver the latest updates.

Microsoft has confirmed three known issues that customers should be aware of. An English language-related bug during installation, a problem affecting CPUs with more than 256 threads/logical processors, and a ‘boot device inaccessible’ startup error in iSCSI (Internet Small Computer Systems Interface) environments.

Microsoft says users can work around the high core count issue for the CPU issue simply by limiting the number of cores to 256 or below.

Windows Server 2025 is now available to download from the Volume Licensing Service Center (VLSC). The Evaluation Center offers a free 180-day trial to try the server release.

Microsoft has also published a complete list of compatible CPUs for Windows Server 2025. The list includes modern Xeons, but it’s worth noting that you won’t necessarily need a server-grade CPU to run Server 2025. Many modern Pentium, Core, and Athlon CPUs should do just fine.

5 Best Windows Handhelds For Gaming on The go

The popularity of handheld PCs is rising, and if you’re looking to get one, today we’re going to show you the best Windows gaming handheld you can get.

What is the best Windows gaming handheld to buy?

1. ASUS ROG Ally X – Best overall

  • AMD Ryzen Z1 Extreme up to 5.10 GHz
  • 24GB LPDDR5, 1TB NVMe
  • 7-inch HD IPS 120Hz touchscreen display
  • Dolby Atmos support
  • Expensive

This handheld runs on Windows 11 Home, and it’s powered by AMD Ryzen Z1 Extreme CPU with 8 cores, 16 threads, 24MB cache, and up to 5GHz boost. As for GPU, it uses AMD RDNA.

Regarding the memory, there’s 24GB LPDDR5 RAM in dual channel mode and 1TB NVMe storage which should be enough for most gaming needs.

The device comes with a 7-inch full HD IPS display with 10-point multi-touch and 120Hz refresh rate. It delivers 500nits brightness and 7ms response time.

Regarding connectivity, there’s an audio jack, one USB 3.2 Gen 2 Type-C port with DisplayPort and power delivery support, and a single USB-C Gen 4 port. Lastly, there’s also one UHS-II microSD card reader.

ASUS ROG Ally X offers amazing specs and with an 80WHrs battery, it should provide you with hours of intense gaming.

2. Lenovo Legion Go – Amazing screen

  • 8.8-inch 2560×1600 144Hz screen
  • AMD Ryzen Z1 Extreme, RDNA graphics
  • 16GB LPDDR5X memory, 512GB NVMe
  • Detachable controllers
  • The battery could be better

The first thing you’ll notice about Legion Go is its 8.8-inch 2560 x 1600 IPS screen. The display offers a 144HZ refresh rate, so it’s perfect for fast-paced gaming.

As for the hardware, it offers AMD Ryzen Z1 Extreme with RDNA graphics and 16GB 7600MHz LPDDR5X memory. As for storage, there’s 512GB NVMe available.

Regarding connectivity, there are two USB-C 4.0 ports with support for Power Delivery 3.0 and DisplayPort 1.4, headphone and microphone combo jack, and WiFi 6E support.

Lastly, there’s a 2-cell 49.2WHr battery with Super Rapid Charge support and the controllers have a capacity of 900mAh. Overall, it’s a great gaming device, especially if you want a larger screen.

3. Asus ROG Ally Z1 Extreme – Solid performance

  • AMD Ryzen Z1 Extreme CPU, integrated Radeon graphics
  • 16GB LPDDR5X RAM, 1TB PCI SSD storage
  • 7-inch 1920×1080 120Hz refresh rate
  • USB 3.2 Gen 2 Type-C DisplayPort 1.4 / DC input combo
  • Comes with bloatware

Similarly to the latest model, the original Asus ROG Ally comes with AMD Ryzen Z1 Extreme 3.30GHz CPU with 24MB cache, 8 cores, and 16 threads. As for graphics, it uses integrated Radeon graphics.

As for RAM, this device has 16GB LPDDR5X and 1TB of PCI SSD storage. The display is 7-inch, and it delivers 1920×1080 resolution at a 120Hz refresh rate. It also has a 7ms response time and FreeSync Premium.

Regarding the connectivity, there’s a headphone and microphone combo, a single USB 3.2 Type-C port, and a microSD card reader. The device supports 65W charging and it has a 4-cell 40WHr battery.

Even though it offers less RAM than the latest model, it still packs a punch, and if you need a Windows gaming handheld, it’s still a great choice.

4. GPD Win 4 – Comes with built-in keyboard

  • AMD Ryzen 7 8840U CPU, 780M GPU
  • 32GB LPDDR5X RAM, 1TB M.2 NVMe
  • 6-inch full HD 60Hz display
  • Built-in keyboard
  • Expensive

If you’re looking for something different, then GPD Win 4 might be just what you need. This model is powered by AMD Ryzen 7 8840U and it uses 8 cores and 16 threads, with speeds up to 5.1GHz.

The GPU is 780M GPU with 8CUs and 2700MHz frequency. Regarding the memory, there’s 32GB LPDDR5X RAM at 7500 MT/s and 1TB M.2 NVMe 2280 SSD.

The screen is 6 inches, and it supports both HD and Full HD resolution at 60Hz. We also have to mention that GPD Win 4 has a hidden keyboard beneath the display that you can use.

Overall, this is a powerful device, and if you need a physical keyboard, then it might be the right choice for you.

5. Zestioe AYANEO Air Plus – Small size

  • AMD Ryzen 7 6800U up to 2.7GHz
  • AMD Radeon 680M GPU
  • 16GB LPDDR5, 1TB storage
  • 6-inch screen, full HD screen
  • 46.2Wh battery
  • Customer support isn’t the best
  • Not as powerful as other models

This model comes with AMD Ryzen 7 6800U CPU up to 2.7GHz and AMD Radeon 680M graphics. Regarding the memory, there’s 16GB LPDDR5 RAM and 1TB of storage.

As for the screen, Zestioe AYANEO Air Plus uses a 6-inch screen H-IPS screen, and it supports full HD resolution at 368ppi, and 400 nits brightness.

There are two USB 4 Type-C ports, available as well as support for PD.30 64W fast charge. In terms of battery, this model has a 46.2Wh battery. Overall, this is a decent device, so you might want to check it out.

Picking the best Windows gaming handheld isn’t an easy task, but if you want a reliable handheld from a reputable manufacturer, then go for ASUS ROG Ally X.

If you’re looking for something different, you might be interested in the best Windows game consoles. For gamers who want to game right out of the box, don’t miss our guide on handheld game consoles with built-in games.

The list of supported processors for Windows Server 2026 is here, but Microsoft says they’re just a prerequisite

Microsoft Windows Server 2025 and System Center 2025 are now available for general use, and Microsoft has shared a list of supported processors for Windows Server 2025.

Windows Server 2025 now supports Intel’s second through fifth gen Xeon Scalable Processors (SP), Xeon 6 SP processors, Xeon E and D series chips, and several modern Pentium CPUs. On the AMD front, Windows Server 2025 has been certified with AMD’s EPYC 7002, 7003, 8004, 9004, and 9005 series chips, but notably not with any Hygon CPUs.

In a support document, the company notes that the list of supported processors is only a prerequisite for system certification and doesn’t itself determine support. Microsoft will evaluate and update the list as new appropriate processors become available.

Microsoft has been testing compatible hardware and software for certification since May and last provided an update on the testing process in September.

The complete list of supported processors for Windows Server 2025 is available in the links below:

  • 2nd Gen Intel Xeon Scalable Processors
  • 3rd Gen Intel Xeon Scalable Processors
  • 4th Gen Intel Xeon Scalable Processors
  • 5th Gen Intel Xeon Scalable Processors
  • Intel Xeon 6
  • Intel Xeon D Processor 9 (17xx, 18xx, 21xx, 27xx, 28xx)
  • Intel Xeon E Processor (23xx and 24xx)
  • AMD EPYC 7xx2
  • AMD EPYC 7xx3
  • AMD EPYC 4xx4
  • AMD EPYC 8xx4
  • AMD EPYC 9xx4
  • AMD EPYC 9xx5

You can find the support document here.

Windows 10 KB5044273 and KB5045594 cause apps launch failure

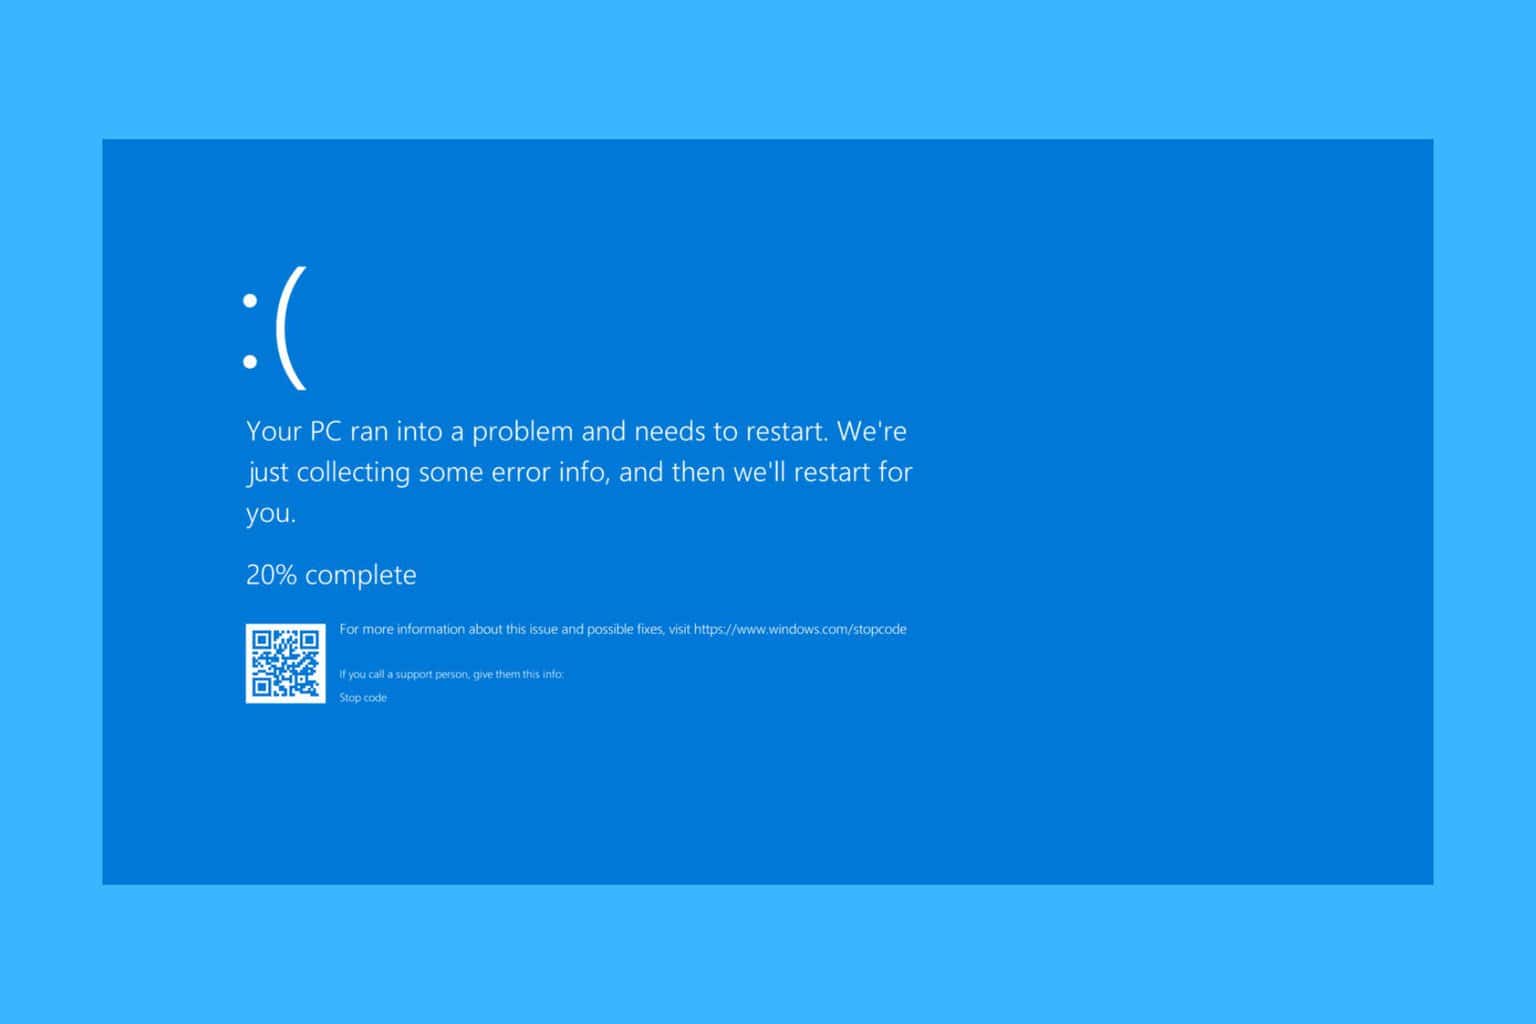
Windows 10 continues to have a lot of buggy updates even though in less than a year, it will be obsolete. The KB5044273 patch was launched in the October Patch Tuesday, but even now, users have problems installing it. KB5045594 was released at the end of October and it seems that it causes the same problems.

Some users who managed to install the patches ran into other issues because they found out they can’t launch certain apps such as Quick Assist, Microsoft Teams, Windows Narrator, and more.

Microsoft managed to fix the problem with KB5045594 by using the using Known Issue Rollback (KIR). So, if you somehow installed it, got to Windows Update > Update History > Uninstall updates and uninstall it. If not, the update will disappear from the list of updates.
With Windows 10 KB5044273, things are a bit complicated because Microsoft didn’t issue any rollbacks. Some users who managed to install it had problems running auto starts for Wallpaper Engine and TranslucentTB.

Microsoft also confirmed that after you install KB5044273, you may experience issues with Narrator, Teams and Quick Assist crashes. In another twist, the patch may also cause a black screen when logging into Azure Virtual Desktop (AVD).

The Redmond giant is working for some patches which will hopefully will be included in the Windows 10 November 2024 Patch Tuesday.

Do you have issues with KB5044273 and KB5045594 on Windows 10? Let us know in the comments below.

With KB5045889, Microsoft introduces a new Windows Hello experience to Windows 11

Today, Microsoft revealed a new update for Windows 11 Insiders. Windows 11 Insider Preview Build 22635.4440 (KB5045889) is now available in the Beta Channel.
One of the most significant changes in KB5045889 is a modernized Windows Hello experience. Microsoft says it’s updating the visuals to align with Windows 11’s modern design standards. The Windows Hello passkey creation experience has also been overhauled.

Microsoft says the new Windows Hello experience will be coming to Windows 11 “gradually.” It’s now available to Windows Insiders in the Beta Channel. Windows Hello is Microsoft’s biometric authentication platform. It’s used to sign into Windows using a fingerprint, face, or PIN.

In addition to the Windows Hello update, KB5045889 includes the following changes, improvements, and fixes:

  • General improvements and fixes that improve the overall experience for Insiders.
  • Microsoft has temporarily disabled the new Gamepad keyboard layout for the on-screen keyboard in Windows 11 to address some issues. The feature will be restored in a future build.
  • A fix for an underlying issue causing touch keyboard crashes and preventing the IME candidate window from appearing for some Insiders.

Microsoft notes that the features and improvements it’s testing might not ship and could be removed or replaced. Some features might only come to certain regions initially, with broader availability later.

You can read KB5045889’s full changelog here.

In other news, the Redmond-based tech giant recently updated the Windows 11’s Beta Channel with new options for Dynamic Lighting.

Microsoft effectively retired the Paint 3D App and starting today, you can’t access it anymore

Microsoft has chosen to retire the Paint 3D app. First released in 2017 when Windows 10 Creators Update came out, the Paint 3D app promised to revolutionize how we create digital art by introducing us to a third dimension straight from our Windows devices.

At that point, its goal was simple: offer an updated and modern version that allows users to create three-dimensional works of art within this iconic software program.

But, even with its lofty aspirations and fair response from people who tried it out, it seems that Paint 3D could not fully win over the majority. According to famous Windows enthusiast @phantomofearth, Microsoft has decided that on November 4, Paint 3D will be removed from the Microsoft Store, and no more updates are planned for this software.

This action is not entirely unexpected. Some time ago, Microsoft ceased to include Paint 3D as a default application on fresh Windows devices. However, for users who depend on it for their 3D modeling requirements, this news may feel somewhat painful to them in some way or another.

The app, famous for its sleek appearance and ability to produce 3D art without any hassle, was a step forward in making 3D modeling more user-friendly. Yet, not many people hopped on.

Then, you may ask, what comes now? For someone who has become fond of Paint 3D, the immediate question is where to go for their 3D modeling requirements. Microsoft recommends exploring other complex 3D modeling programs such as Autodesk 3ds Max or Blender that deliver significantly more intricate tools and functions for individuals prepared to elevate their 3D artistry.

Curiously, Paint 3D is leaving, but the classic Microsoft Paint app has been getting some attention from its creators. Updates have come in with layers, transparency, and even AI-fueled features – giving fresh energy to this decades-old program.

Microsoft Places will be generally available in the 365 Platform in November

Microsoft Places, a new AI-powered workplace app meant for flexible workers, will finally be released in November 2024 as a Microsoft 365 app. After being teased earlier this year and previewed publicly over the summer, the app will see a general release next month, according to the latest entry in the Microsoft 365 Roadmap.

It will be released on the Mac, Android, iOS, Desktop, and Web platforms, and you can integrate Microsoft Places in Outlook, Teams, the 365 platform, and Copilot.

Here’s what the entry says:

Microsoft Places is an AI-powered workplace app for flexible work, empowering hybrid employees to foster in-office collaboration and leveraging insights into space optimization. Places intelligently allows you to coordinate your hybrid team to make the most of in-office days, modernize how employees make connections, and optimize space management with occupancy and utilization data.

At the same time, the Microsoft 365 Roadmap also reveals that Places will be enhanced with Intelligent suggestions in calendar and Workplace Presence. The first capability will allow users to organize meetings and book rooms for them quickly.

The description reads:

Intelligent suggestions will appear in calendar peek cards and the Places people pages when users have actions to complete to organize their day. Users will be prompted to “quick book” rooms for in-person meetings and desks for in-office days. They will also see recommendations to update their work location to “Office” when needed for in-person events.

The second one works similar to Work Hours and Location (which was recently updated to display the building you’re working from). It will prompt Microsoft Places to let you check in to the office in Outlook or Teams, confirm your work tasks, receive important reminders, and even check on who has come to the office or not.

The description reads:

With Workplace Presence, employees will have the ability to check in to the office in Outlook, Teams, and Places to confirm their work plans, receive check-in reminders, and view others nearby and who planned to come in. #newoutlookforwindows

The Workplace Presence will also be an automatic capability, and it will automatically update the location of the nearby coworkers. The option can be enabled/disabled at will via the Places settings menu in Microsoft Teams. Here’s what the entry says:

With Workplace Presence, you can discover coworkers who are in office nearby. Location will be automatically updated to “office” when we detect that an employee is on site, signaled by the connection of their laptop to a known peripheral, e.g. a known or company-managed monitor in a corporate office, or on a bookable desk. Users can enable/disable “Auto-update my location when detected in the office” via the Places settings menu in Teams.

Another interesting feature that Microsoft Places will provide focuses on managers, called Team Guidance. With it, managers will be able to communicate effortlessly the schedule for mandatory office presence. This schedule will also require managers to provide reasons for employees to come to the office when it’s mandatory. Here’s what the entry says:

With team guidance in Places, managers communicate which days their team should plan to be in the office and what the priorities are for each in-office day. Providing a purpose for team days in the office gives you another reason to come into the office.

As you might know, Microsoft Places is integrated with Copilot. You can use the AI capabilities to schedule your work hours and maintain proper flexibility in your work. In fact, you’ll be able to use Copilot to access Space Analytics, and with it, you’ll be able to see pragmatic data on the rate of occupancy, desk usage, room bookings, and so on.

Microsoft will provide this feature in two versions: one with Copilot, and one without Copilot, and you can use whichever you want. The one with Copilot, however, will summarize all the data for you, and the AI model will have it available for you in just a few seconds. For a manager, this is a game changer.

Here’s what the entry says:

In space analytics, use Copilot to analyze and explain key data points and trends in your space utilization graphs. It compares current utilization metrics such as occupancy, desk usage, and room bookings against previous time periods (e.g. last month, last quarter), highlighting important changes and trends.

These new capabilities are coming to the Microsoft 365 app this month.

Are you excited about this new platform coming in November? What’s your take on Microsoft Places?

The new Microsoft People app (Microsoft 365 Companion) for Windows 11 will manage contacts from Outlook

If you don’t remember Microsoft People, it was a Windows 10 app was a mix of a social network and contact list that was not very popular and finally abandoned. Well, it seems that Microsoft is giving it another try as an executable of the new People app for Windows 11 was leaked on X by WalkingCat.

Is it Microsoft 365 Companion or Microsoft People?

There is a bit of a confusion with this app because when you run the executable, you get the icon of Microsoft 365 Companion, just like in the caption above.

However, after it starts, the app shows up as People (Preview). We’re pretty accustomed with such conundrums from Microsoft and because this was actually leaked, the Redmond giant probably didn’t settled for a definitive name yet.

Why is Microsoft People being revived?

While the People app was dropped for Windows 11, you could still access it within the Mail and Calendar. But Outlook New replaced Mail and Calendar and it doesn’t have a contact management tool, one of the aspects that the users complain about and try to uninstall Outlook New.

So, probably, Microsoft People will fill in that requirement. When we tried logging in, we found out that you can only do so if you’re a Microsoft 365 customer with work or school account.

Also, the app is only 2 MB and it seems it’s designed around the Outlook for Web UI. If Microsoft decides to push the pedal on this app, you will be able to sync and create meetings right from Microsoft People. We can imagine that you might also call contacts using Microsoft Teams or see the files you shared with a contact, just like you could do in the Windows 10 app.

Will the new Microsoft People or Microsoft 365 Companion app turn back users who don’t want Outlook New? Tell us what you think in the comments below. We’ve found about this from Windows Latest.

Api-ms-win-crt-filesystem-l1-1-0.dll Missing: How to Download it

The api-ms-win-crt-filesystem-l1-1-0.dll file, developed by Microsoft and a key part of Windows, is required for running several games and apps. If the file is missing, it’s usually due to an app inadvertently deleting the DLL, incorrect path, corrupted system files, or missing Visual C++ Redistributables.

When it’s not found, the error message reads, The program can’t start because api-ms-win-crt-filesystem-l1-1-0.dll is missing from your computer. Try reinstalling the program to fix this problem.

Before you proceed, boot the PC in Safe Mode, then back in normal mode, and install all pending Windows updates. For most of you, these alone should fix the missing DLL error!

How can I fix api-ms-win-crt-filesystem-l1-1-0.dll is missing error?

1. Manually replace the DLL

The api-ms-win-crt-filesystem-l1-1-0.dll file is stored in one of the following paths: C:\Windows\System32 C:\Windows\System32\downlevel

api-ms-win-crt-filesystem-l1-1-0.dll
api-ms-win-crt-filesystem-l1-1-0.dll under downlevel in System32

So, if the DLL is missing, go to the same location on another PC running the same OS iteration and architecture (32-bit or 64-bit) > copy the file to a flash drive > connect the flash drive to the affected PC > move the DLL to the paths listed earlier, whichever one works > then restart the computer.

2. Install the latest Visual C++ Redistributable packages

  1. Press Windows + R to open Run, type appwiz.cpl in the text field, and hit Enter.
  2. Select the Visual C++ Redistributable packages listed here individually, and click on Uninstall.uninstall redistributable
  3. Follow the on-screen instructions to complete the process.
  4. After uninstalling all the packages, restart the PC.
  5. Now, go to Microsoft’s website, and download the latest Visual C++ Redistributable package. Remember, for 32-bit Windows, you only need the x86 version, while for 64-bit Windows, you will need both the x64 and x86 packages. download
  6. Run the downloaded setup(s) and follow the on-screen instructions to complete the installation.reinstall to fix missing api-ms-win-crt-filesystem-l1-1-0.dll

If you have far too many Visual C++ Redistributable packages that are outdated or corrupted, apps and games like Resident Evil 7 will throw the missing api-ms-win-crt-filesystem-l1-1-0.dll error. So, you simply need to remove the others and only install the latest package(s).

3. Repair the corrupted system files

  1. Press Windows + S to open Search, type Command Prompt, and click on Run as administrator.command prompt
  2. Click Yes in the UAC prompt.
  3. Paste the following DISM commands individually and hit Enter after each: DISM /Online /Cleanup-Image /CheckHealth DISM /Online /Cleanup-Image /ScanHealth DISM /Online /Cleanup-Image /RestoreHealth
  4. Next, execute this command to run the SFC scan: sfc /scannowsfc scan to fix missing api-ms-win-crt-filesystem-l1-1-0.dll
  5. Finally, reboot the PC and check for improvements.

Since api-ms-win-crt-filesystem-l1-1-0.dll is a protected system file, when it’s missing or corrupted, running the DISM (Deployment Image Servicing and Management) and SFC (System File Checker) scans will restore the DLL.

4. Scan the PC for malware

  1. Press Windows + S to open Search, type Windows Security in the text field, and click on the relevant result.
  2. Click on Virus & threat protection.windows security
  3. Click on Scan options.
  4. Select the Full scan entry and click on Scan now.malware scan to fix missing api-ms-win-crt-filesystem-l1-1-0.dll
  5. Wait for the scan to complete. It typically takes 15-30 minutes.

5. Temporarily disable the installed antivirus

In case you have a third-party antivirus installed on the PC, temporarily disable it or uninstall the app, and verify whether the api-ms-win-crt-filesystem-l1-1-0.dll not found error is fixed.

If the error message now disappears, your antivirus was conflicting with Windows and preventing the detection of the DLL. So, it’s best that you leave it disabled/uninstalled and use the built-in Windows Security or switch to a top-rated antivirus solution.

6. Reinstall the affected app

  1. Press Windows + R to open Run, type appwiz.cpl in the text field, and hit Enter.
  2. Select the affected app from the list, and click on Uninstall.reinstall app to fix missing api-ms-win-crt-filesystem-l1-1-0.dll
  3. Follow the on-screen instructions to complete the process, and then restart the PC.
  4. Finally, reinstall the app from an official source, say the developer’s website or Microsoft Store.

If a quick removal doesn’t do the trick, use an effective software uninstaller to delete any leftover files, app cache, and Registry entries, which might still be triggering conflicts with the OS.

7. Perform an in-place upgrade

  1. Go to Microsoft’s official website, select the OS edition and language, and then download the Windows 11 ISO.download
  2. Now, double-click the ISO file and select Open in the confirmation prompt.
  3. Run the setup.exe file.setup.exe
  4. Click Yes in the UAC prompt.
  5. Click on Next to proceed.
  6. Review Microsoft’s license terms and click on Accept.
  7. Make sure the setup reads, Keep personal files and apps, and click on Install.in-place upgrade to fix api-ms-win-crt-filesystem-l1-1-0.dll
  8. Wait for the in-place upgrade to complete. It may take 45-90 minutes.

An in-place upgrade will certainly fix the api-ms-win-crt-filesystem-l1-1-0.dll not found Windows error, and you should be able to run the affected app/game. The best part is that you won’t lose any personal files or installed programs.

If the error message persists, the last option is to reinstall Windows.

Before you leave, discover what to do when DLLs are missing in Windows and prevent such errors from reappearing!

Which fix worked for you? Share with our readers in the comments section.

Signature Line Greyed Out in Microsoft Word: How to Fix it

Some users reported that the signature line is grayed out in Microsoft Word, and this can make using digital signatures impossible. However, a few solutions might be able to help you.

Why is the signature line greyed out in Word?

This issue appears if the document is coauthored or protected.

What can I do if the signature line is grayed out in Microsoft Word?

Before trying anything else, try creating a new document and check if you can add a signature line. If you can, it means there’s no issue with Word.

1. Make sure that the document isn’t coauthored

  1. If using SharePoint, ensure that the document isn’t being authored by multiple people at the same time.
    coauthored
  2. Go to the Review tab and click on Restrict Editing.
    restrict editing word
  3. Next, select Stop Protection.
     stop protection word
  4. You’ll need to provide a password to unlock the document.

2. Add the signature line manually

  1. Go to the Insert tab and choose Text Box. Select the desired design.
    insert textbox word
  2. Set the text box where you want your signature to be.
  3. Next, type several underlines in the text box.
    textbox signature
  4. Double-click the text box shape outline and set Shape Outline to No outline.
    no outline word

This is just a workaround, and it can be used if you need to use a manual signature or if you want to digitally sign a document without using Word.

It’s uncommon to see the signature line greyed out in Microsoft Word, but if this issue occurs, be sure to remove protection and ensure that the document isn’t coauthored.

If you want to learn more, we have a great on how to add a signature line without X and a guide on how to add a signature in Microsoft Word that you should check out.

Also, did you know that you can insert multiple signature lines in Word? That’s right, and we have a guide that shows you how to do that.

How to Fix The MSVCR120_CLR0400.DLL Could Not Be Located Error?

Many of our readers have complained about encountering msvcr120_clr0400.dll missing from their Windows 11, 10, 8, or 7 computers when launching apps like PUBG, Fortnite, Skype, Rocket League, Adobe Photoshop, Adobe After Effect, Remote Desktop Manager, Epic Games Launcher, GTA 5 / GTA V, Minecraft, Valorant, Skyrim, COD Battlefield, Red Dead Redemption 2, Cyberpunk 2077 or Apache.

The issue usually occurs if you accidentally delete the DLL file, the system files are damaged, or the drivers are corrupted.

What is MSVCR120_CLR0400.DLL?

The msvcr120_clr0400.dll (Microsoft C Runtime Library) file associated with Microsoft Visual Studio 2013 is a critical component that ensures the Windows apps function properly.

To fix it, restart your computer and make sure Windows is updated to the latest version. Before proceeding with the steps below, run a malware scan using reliable antimalware software.

How can I fix the MSVCR120_CLR0400.DLL could not be located error?

1. Use a reliable third-party DLL fixer

One of the quickest ways to get the DLL file and resolve this error is to copy the DLL file (C:\Windows\System32\) from a healthy computer running on the same version of Windows. Then, paste it into the affected computer at the exact location.

However, if you cannot find the file, we suggest using a third-party DLL fixer tool, as it can help you recover the missing DLL file without any hassle. To use it, download and install the tool, then run it to restore files & fix the problem.

2. Reregister the DLL file

  1. Press the Windows key, type cmd in the search box, and click Run as administrator to open Command Prompt with elevated rights.CMD elevated - msvcr120_clr0400.dll
  2. Type the following command to reregister the MSVCR120_CLR0400.DLL and hit Enter: regsvr32 MSVCR120_CLR0400.DLL
  3. Click OK when prompted and restart your computer.

If the DLL is in your device but you see this error, try registering it again. This can refresh file registration within Windows and resolve the missing DLL file problem.

3. Repair/Reinstall the affected app

  1. Press Windows + I to open the Settings app.
  2. Go to Apps, then click Installed apps.Apps - Installed apps - msvcr120_clr0400.dll
  3. Locate the affected app, click the three dots icon, and choose Advanced options from the context menu.Advanced options - msvcr120_clr0400.dll
  4. On the following page, go to the Reset section and click the Repair button. This will try to repair the app without removing app data from your device.Repair - msvcr120_clr0400.dll

If repairing the app didn’t help, or the option is unavailable, try reinstalling it. For that, follow the steps below:

  1. Go to the Installed apps list in Settings again.
  2. Navigate to the affected app, click the three dots icon, and choose Uninstall. Uninstall (2) - msvcr120_clr0400.dll
  3. Click Uninstall again and follow the on-screen instructions.uninstall confirmation app - msvcr120_clr0400.dll
  4. Next, go to the app’s official website and click Download to get the executable file. Double-click the file to install the app.
  5. Once complete, restart your PC.

4. Run SFC & DISM scans

  1. Press the Windows key, type cmd in the search box, and click Run as administrator.  CMD elevated - msvcr120_clr0400.dll
  2. Copy & paste the following command to restore/repair the Windows system files and press Enter:sfc/scannowSFCSCANNOW CMD
  3. Wait for the scan to complete, type the following command to scan the Windows image for corruption and repair it using the Windows Update, and hit Enter:Dism /Online /Cleanup-Image /RestoreHealthRestore health
  4. Once the scan is executed, reboot your PC to let the changes take effect.

Read more about this topic

5. Perform a System Restore

  1. Press the Windows key, type control panel in the search box, and click Open.     
  2. Select Large icons for View by and click Recovery.Recovery Control PaneL
  3. Click Open System Restore.Open system restore
  4. Select Choose a different restore point on the System Restore window, and click Next to proceed.Next Choose a different restore point - msvcr120_clr0400.dll
  5. Select a restore point created from the available restore points before encountering this missing DLL error and click Next.Choose a point - msvcr120_clr0400.dll
  6. Click Finish.Finish

Your device will restart, and Windows will restore the system settings to the selected version. If you see the System Restore didn’t complete the error successfully message, the reason could be conflicting programs or a driver error. We recommend you check out this detailed guide for solutions.

6. Download the DLL file from a third-party website

Note icon NOTE
If nothing worked for you, you can download the DLL file from a reliable third-party website, like DLL-FILES, which is verified and tested by WR experts.
  1. Click the DLL-FILES website to access the MSVCR120_CLR0400.DLL page, then click the Download button.
  2. Double-click the downloaded folder, then locate and copy the .dll file.
  3. Navigate to this path and paste the copied file. Don’t forget to replace C with the system drive letter of your device if it is not C for you: C:\Windows\System32\
  4. Restart your computer to confirm the changes.

This is how you can fix the MSVCR120_CLR0400.DLL could not be located error. However, if you face the same issue due to any other DLL file, you can check out this guide to quickly recover it.

Eager to learn more about the causes of missing DLL files on Windows, we have a separate guide for you. You can also fix a similar issue with the wowarmhw.dll missing error guide.

Before you go, don’t forget to check out our latest guide on what to do if Invagent.DLL is missing from your computer. We also have a new guide on Amdihk64.DLL not signed so don’t miss it to learn more about DLL files.

If you have any suggestions or questions about this DLL issue, feel free to mention them in the comments section below. We are happy to help.

How to Fix The Libxml2.DLL Missing Error?

If you are facing the Libxml2.dll not found or missing error, it could be due to virus infection, file being accidentally deleted, corrupted system files, or outdated drivers.

To begin with, you can run a malware scan using a trusted antivirus tool and check the recycle bin if you have accidentally deleted the file. Before proceeding with the steps below, ensure your Windows is updated to the latest version.

How can I fix the Libxml2.DLL missing error?

1. Use a third-party DLL fixer

If you have more than one Windows computer with the same version, the quickest way to fix any DLL error is to copy the DLL file from (C:\Windows\System32\) and paste it at the exact location on the affected PC.

However, if you can’t navigate to the Libxml2.DLL file location, we recommend using a third-party DLL fixer tool. It can help you restore the DLL file and fix the problem. To use it, download and install the tool, then run it to fix all DLL-related issues.

2. Reinstall the driver

  1. Press Windows + R to launch the Run console.Device Manager - Libxml2.DLL
  2. Type devmgmt.msc and click OK to launch the Device Manager app.
  3. You will get the system components list, go to each category, click it to expand, look for the driver with a yellow triangle and an exclamation mark, right-click it, and choose Uninstall device from the context menu.Unistall device - libxml2.dll
  4. Click Uninstall again to confirm.
  5. Go to Action, then select Scan for hardware changes to reinstall the driver.Action scan for hardware changes

If you have more than one problematic driver, repeat these steps. You can also reinstall drivers from the manufacturer’s website.

3. Repair/Reinstall the affected app

  1. Press Windows + I to open the Settings app.
  2. Go to Apps, then click Installed apps.Apps -Installed apps - libxml2.dll
  3. Locate the affected app, click the three dots icon, and select Uninstall from the context menu. Uninstall - libxml2.dll
  4. Click Uninstall again and follow the on-screen instructions.uninstall confirmation app
  5. Next, to reinstall, use either the official website or Microsoft Store.

4. Reregister the DLL file

  1. Press the Windows key, type cmd in the search box, and click Run as administrator to open Command Prompt with elevated rights.CMD elevated - libxml2.dll
  2. Copy & paste the following command to reregister the Libxml2.DLL and hit Enter:regsvr32 Libxml2.DLL
  3. Click OK when prompted and restart your PC.

If the DLL file is in the system but you face the error, you can try registering it again. The file registration will refresh, thereby fixing the missing DLL file issue.

5. Run SFC & DISM scans

  1. Press the Windows key, type cmd in the search box, and click Run as administrator to launch Command Prompt with elevated prompts.CMD elevated - libxml2.dll
  2. Click Yes on the UAC prompt.
  3. Type the following command to repair the Windows system files and hit Enter: sfc/scannowSFCSCANNOW CMD - libxml2.dll
  4. Wait for the scan to execute, copy & paste the following command to scan the Windows image for corruption and fix it using the Windows Update, and press Enter: Dism /Online /Cleanup-Image /RestoreHealthRestore health
  5. Once the scan is complete, reboot your PC to let the changes take effect.

6. Perform a System Restore

  1. Press Windows + R to launch the Run console. rstui  
  2. Type rstrui and click OK to open the Device Manager app.
  3. Select Choose a different restore point on the System Restore window, then click Next.Next Choose a different restore point
  4. Choose the restore point from the list of available restore points created before encountering the missing DLL error and click Next.Choose a point - libxml2.dll
  5. Click Finish.Finish

Your device will restart, and Windows will try restoring the system settings to the selected version. If you see the System Restore didn’t complete the error successfully message, it could be due to conflicting programs or a driver error. We recommend you check out this detailed guide for solutions.

6. Download the DLL file manually

Note icon NOTE
The last resort to get the DLL file is to download it from a reliable third-party website, like DLL-FILES, which WR experts verified and tested.
  1. Click the DLL-FILES website to access the Libxml2.DLL page, then click Download.
  2. Double-click the downloaded folder, then locate and copy the .dll file.
  3. Go to this path and paste the DLL file. Don’t forget to replace C with the system drive letter of your device if it is not C for you:C:\Windows\System32\
  4. Reboot your computer to save the changes.

This is how you can fix the Libxml2.DLL missing or not found error. However, if you face the same issue due to any other DLL file, this guide can help you quickly recover it.

If you want to learn more about the causes of missing DLL files on Windows, we have a separate guide. You can also fix a similar issue with the wowarmhw.dll missing error guide.

Before you go, don’t forget to check out our latest guide on what to do if you see the Amdihk64.DLL is not signed error on your computer. We also have a new guide on MSVCR120_CLR0400.DLL could not be found, so don’t miss it to learn more about DLL files.

Our latest guide will explain to you what to do if difxapi.dll is missing, so don’t hesitate to check it out.

If you have any suggestions or questions about this DLL issue, feel free to mention them in the comments section below. We’re happy to help.

How to Disable Microsoft Edge Incognito Mode

Microsft Edge’s incognito mode allows you to browse securely without leaving a trace behind. However, in some school/work settings, you may need to keep an eye on users’ browsing history hence the need to disable the incognito mode.

For some users, it’s about browsers remembering your browsing history in incognito mode. This beats the purpose of private browsing so you’re better off switching to a privacy-focused browser instead.

How do I deactivate incognito mode in Microsoft Edge?

1. By using the Group Policy Editor

  1. Hit the Windows + R key to open the Run command.
  2. Type in gpedit.msc and hit Enter to open the Group Policy Editor.gpedit.msc and click OK to open the Group Policy Editor. - Can’t Turn Off Real-Time Protection on Windows 11
  3. Navigate to the following path: Computer Configuration\Administrative Templates\Windows Components\Microsoft Edge.
  4. Select Edge and double-click on the Allow InPrivate browsing option.
  5. Check the Disabled option and click on Apply then OK to effect the changes.

2. By using the Registry Editor

  1. Before you start making any changes, ensure you back up your Registry or create a restore point as some changes can make your PC unstable.
  2. Press the Windows + R keys and type regedit. Click OK or press Enter to start Registry Editor.
    Windows 10 CD drive not reading discs
  3. When Registry Editor starts, navigate to the following key in the left pane: HKEY_LOCAL_MACHINE\SOFTWARE\Policies\Microsoft\Edge
  4. If unavailable, right-click on an empty space, choose New, and then Key then name it as Edge.
  5. Similarly, on the right pane, right-click on an empty space and select New > DWORD (32-bit Value) then name it as InPrivateModeAvailability.
  6. In the right pane locate InPrivateModeAvailability entry. Double-click on it and in the Value data entry enter 1 to disable incognito mode in Microsoft Edge.
  7. Reopen the browser and when you click on the three ellipses at the top right corner, the New InPrivate window option should be greyed out.

You can reverse-engineer these steps if the InPrivate browsing mode is greyed out and you wish to reactivate it. Once you do, you can even tweak the setting to always start Edge in incognito mode.

Once you’re in incognito mode, you can also enable extensions in Edge private mode so that you don’t miss out on these perks. For those who want to quickly start a private browsing session, there’s a handy Edge Incognito shortcut you can use.

If Opera is your browser of choice, you can also disable its incognito mode by following our guide. That’s all from us but do let us know of any additional thoughts you may have on this topic down below.

How to Download & Install Twitch Adblock on Firefox

Ads on any platform can significantly degrade the viewing experience so if this is the case on Twitch, we let you in on a secret on how to install an adblocker on your Firefox browser.

Ads generate revenue for creators however, during a live stream on Twitch, you may miss out on critical parts if an ad interrupts you. Some ads are also repetitive which ends up as negative marketing.

How do I install the Twitch adblocker on my Firefox browser?

  1. Launch your Firefox browser and go to the Firefox Browser add-ons website.
  2. Search for Twitch adblock, and select it from the search results.
  3. Next, click Add to Firefox. The extension is free so you won’t have to purchase anything.
  4. The extension will be downloaded and installed. Click Add to allow the extension to access browser tabs, and browser activity during navigation.
  5. If you wish for the Twitch adblock to work incognito, place a checkmark on Run in Private Windows and click Add.

One downside of installing the Twitch Adblock is that you may experience a browser slowdown or Twitch keeps buffering. In the worst-case scenario, adblockers may stop working on Twitch.

Some extensions also tend to downgrade the video quality so while watching Twitch, keep an eye on these small but significant changes.

You can enable hardware acceleration on Twitch to enhance your viewing experience but even then, you may get an error that your browser doesn’t support video playback on Twitch. If so, feel free to try another browser.

Luckily, Twitch adblocker is not the only extension that keeps the ads at bay on your Firefox browser. You can explore the extensions library and try with as many adblockers until you get what you’re looking for.

And to enhance your overall experience on Twitch, we’ve also curated a list of the best Twitch extensions.

Avastip.dll Missing? Here’s How to Fix it

Avastip.dll is a component of the Avast security software and is critical in the real-time scanning of your system against malware.

It is, therefore, an important DLL file so if it is missing or causing problems, you need to fix any issues to avoid leaving your device vulnerable to attacks.

1. Use a DLL fixer

If you’re not up to guessing the correct way to fix a DLL error, using a DLL fixer can help you fix any avastip.dll-related issues. A dedicated DLL fixer is a quick and reliable tool to address any corrupt, damaged or missing DLL files.

2. Run DISM and SFC scans

  1. Hit the Start Menu icon, type cmd in the search bar, and click Run as administrator.cmd-run-admin-w11 unexpected kernel mode trap windows 11
  2. Type the following commands and press Enter after each one:DISM.exe /Online /Cleanup-Image /Restorehealth sfc /scannow

3. Scan for viruses

  1. Press the Windows key, search Windows Security, and click Open.
  2. Select Virus & threat protection.
  3. Next, press Quick scan under Current threats.
  4. If you don’t find any threats, proceed to perform a full scan by clicking on Scan options just below Quick scan.Scan options
  5. Click on Full scan, then Scan now to perform a deep scan of your PC.Full Scan Scan Now
  6. Wait for the process to finish and restart your system.

4. Re-register the DLL file

  1. Hit the Windows key, type Command Prompt right-click on it, and select Run as administrator.cmd-run-admin-w11 unexpected kernel mode trap windows 11
  2. Type the following command and press Enter:
    regsvr32 avastip.dll
  3. This command registers the missing DLL file. However, if more than one DLL file is not registered, you can use the following command:
    for %1 in (*.dll) do regsvr32 /s %1

5. Update the Avast app

  1. Click on Start, type control, and click on Control Panel to open it.
  2. Go to Programs and select Programs and Features.
  3. Select Avast from the list of installed apps and click on Remove/Change.
  4. In the Avast Setup windows, click the Update button.
  5. Click Next and follow the on-screen instructions to install updates.
  6. Reboot the computer and check for any improvements. 

Unfortunately, there may be a bug in the latest Avast antivirus causing compatibility issues. If so, you can revert to the old version as you wait for a more stable one to be released.

6. Repair Avast Antivirus software

  1. Right-click the Start button, type the control panel, and click Open.
  2. Click on Uninstall a program under Programs.
  3. Locate and click the Avast antivirus, then click on Uninstall.
  4. Once the Avast Setup wizard appears, select Repair.
  5. Hit Yes to confirm the action and click Done.
  6. Restart your PC.

7. Uninstall the Avast antivirus with Utility

  1. Go to Avast’s official website and download the avastip.dll file.
  2. Press Windows + R to launch the Run dialog box, type msconfig, then press Enter.
  3. Navigate to the Boot tab and check the box for Safe boot. Click Apply, then OK.
  4. Right-click on the downloaded .exe file and select Run as administrator from the drop-down.
  5. Click Uninstall at the bottom of the screen to remove Avast and clear all files.  
  6. Ensure you uninstall all instances of the Avast app and clear any remnant files before you install a clean one.
  7. Download the latest version of Avast and check if the problem persists.

Additionally, if you have any other security software installed, it may be conflicting with Avast so consider disabling it. If none of the above solutions proves helpful, consider contacting Avast support for more information on the avastip.dll issue.

Aside from missing DL files, you may also run into another error where the avastui.exe file is missing or even Windows blocking Avast antivirus so head on over to our article to see how to address such issues.

Avast may seem like it is plagued by endless errors so if you feel it is too overwhelming, we recommend that you try other security tools that are little to almost error-free. To that effect, we have a rich list of antivirus software with a lifetime license so feel free to choose one for your device.

Another file associated with Avast is Gaming_spy.dll, and we dedicated an entire guide to it, so you might want to check it out.

Have you been able to resolve this issue? Let us know which solution worked for you in the comment section below.

Error Is Subst Target 149 (0x95): How to Fix it

Error_Is_Subst_Target  error is a developer error, so it’s unlikely that you’ll encounter it as an end user. However, if you do, the steps from this guide should help you fix the issue.

How can I fix Error_Is_Subst_Target?

Adjust your code

  1. Open your code.
  2. Replace the _tpm.Create method with the _tpm.LoadExternal, like this: pubHandle = _tpm.LoadExternal(TPMT_SENSITIVE::NullObject(), eccTemplate, TPM_HANDLE::FromReservedHandle(TPM_RH::_NULL));
    tmp loadexternal
  3. Save changes.

This is an obscure error, and it happens when using an external key with the TPM for verification and other purposes.

With the _tpm.LoadExternal, TPM will use a key generated outside of the TPM to perform cryptographic operations.

This can come in handy if the key can’t be generated on the TPM or if you need to migrate a key from another source.

Error_Is_Subst_Target usually comes with the following message: 149 (0x95) An attempt was made to join or substitute a drive for which a directory on the drive is the target of a previous substitute.

You can encounter both, but in our experience, it’s more likely that you’ll encounter the error message instead of the error code.

As previously mentioned, this is an obscure error that usually affects developers, so it’s not likely that you’ll encounter it.

This is just one of many developer errors, and we wrote about Error_Label_Too_Long and Fatal_Abnormal_Reset_Error in our previous guides.

We also covered Error_System_Trace, so don’t miss it for more information.