Search Engine Wars: Brave Browser’s Promotion takes aim at Google and Bing

Brave is promoting its privacy-focused search engine, Brave Search, with new messages in the Brave Nightly version. These banners target users who don’t use Brave Search by default, highlighting its independence and privacy features compared to Google and Bing.

Brave Search has been available for some time now and serves as the default search engine in the Brave browser for both regular and private browsing modes. Brave offers Google, Bing, DuckDuckGo, Startpage, and Qwant as alternative search engines.

Today, in the Nightly version of Brave, we noticed a banner promoting Brave Search that appears when you set a search engine other than Brave as the default.

The banner uses a catchy slogan: “Don’t Google it. Can’t Bing it. Just Brave it. Brave Search doesn’t profile you and is 100% independent.” It offers the option to “Try Brave Search”, or dismiss the message.

Brave search promotion targeting Google and Bing
Brave Search promotion. Image Credit: Windows Report

In addition to targeting Google and Bing, Brave seems to be preparing to take on DuckDuckGo as well with two different search promotions displayed from the address bar (although not yet live for all users).

Brave doesn’t leave DuckDuckGo

“Ditch the Duck. Brave Search doesn’t track you, your queries, or clicks. And (unlike DDG) it’s not just Bing in disguise.” Brave asks to “set Brave as default” or “Try brave search”.

Brave Search promotion taking on DuckDuckGo
Brave Promotion targeted against DuckDuckGo. Image Credit: Windows Report

Another promotion promises “better results” with Brave Search, citing that “Brave Search is independently verified to have better results than Bing (or Bing clones like DuckDuckGo).”

Image Credit: Windows Report

Brave Search promotions targetting Google, Bing, and DuckDuckGo are being tested in the Nightly verison of Brave browser.

Here’s a quick comparison of these search engines to help you decide which one to use:

Brave Search: Built into the Brave browser and emphasizes privacy. Unlike DuckDuckGo (which uses Bing results), Brave Search has a system to find information without tracking you. Brave Search is a good option for those who want strong privacy and good search results.

DuckDuckGo: Known for its focus on privacy. They don’t track you or store your information. However, they rely on Bing for search results, which might concern some users.

Google: The most popular search engine, offering features like local results and answer snippets. However, Google collects a lot of user data, which some people dislike.

Bing: Microsoft’s search engine with features similar to Google, including a rewards program. Bing’s privacy practices are better than Google’s, but not as good as DuckDuckGo’s.

The best search engine depends on your needs. If privacy is most important, DuckDuckGo is a good choice. If you don’t mind some tracking in exchange for features, Google might be better. Bing offers a middle ground, and Brave Search is a new option that focuses on both privacy and good results.

The Windows Company Portal app will get a new intuitive design, says Microsoft

If you’re a manager who uses the Windows Company Portal app daily, we have some interesting news (or downright bad, depending on your perspective).

The platform will get a revamp, or, as Microsoft puts it, a new design. According to the latest entry to the Microsoft 365 Roadmap, the new look should be implemented next month, in August 2024, and it will improve user experience across the platform.

Additionally, the Redmond-based tech giant says this new design will make the Windows Company Portal app an intuitive experience, guiding users to the places they need to take action.

With the updated design, users will see improvements in user experience for the Home, Devices, and Downloads & updates pages. The new design is more intuitive and highlights areas where users need to take action.

Microsoft

Unfortunately, as with all updates within the Microsoft 365 Roadmap, we don’t have images of how it will look. However, as August approaches, the Redmond-based tech giant will make official announcements with it.

The Windows Company Portal app is a platform within Microsoft Intune, which was recently updated to support a new way to roll out Windows feature updates.

Microsoft has been making things easier for managers everywhere. Similar to that feature, this one is available to all Intune desktop users.

0x87DD0033 Xbox Error Code [Solved]

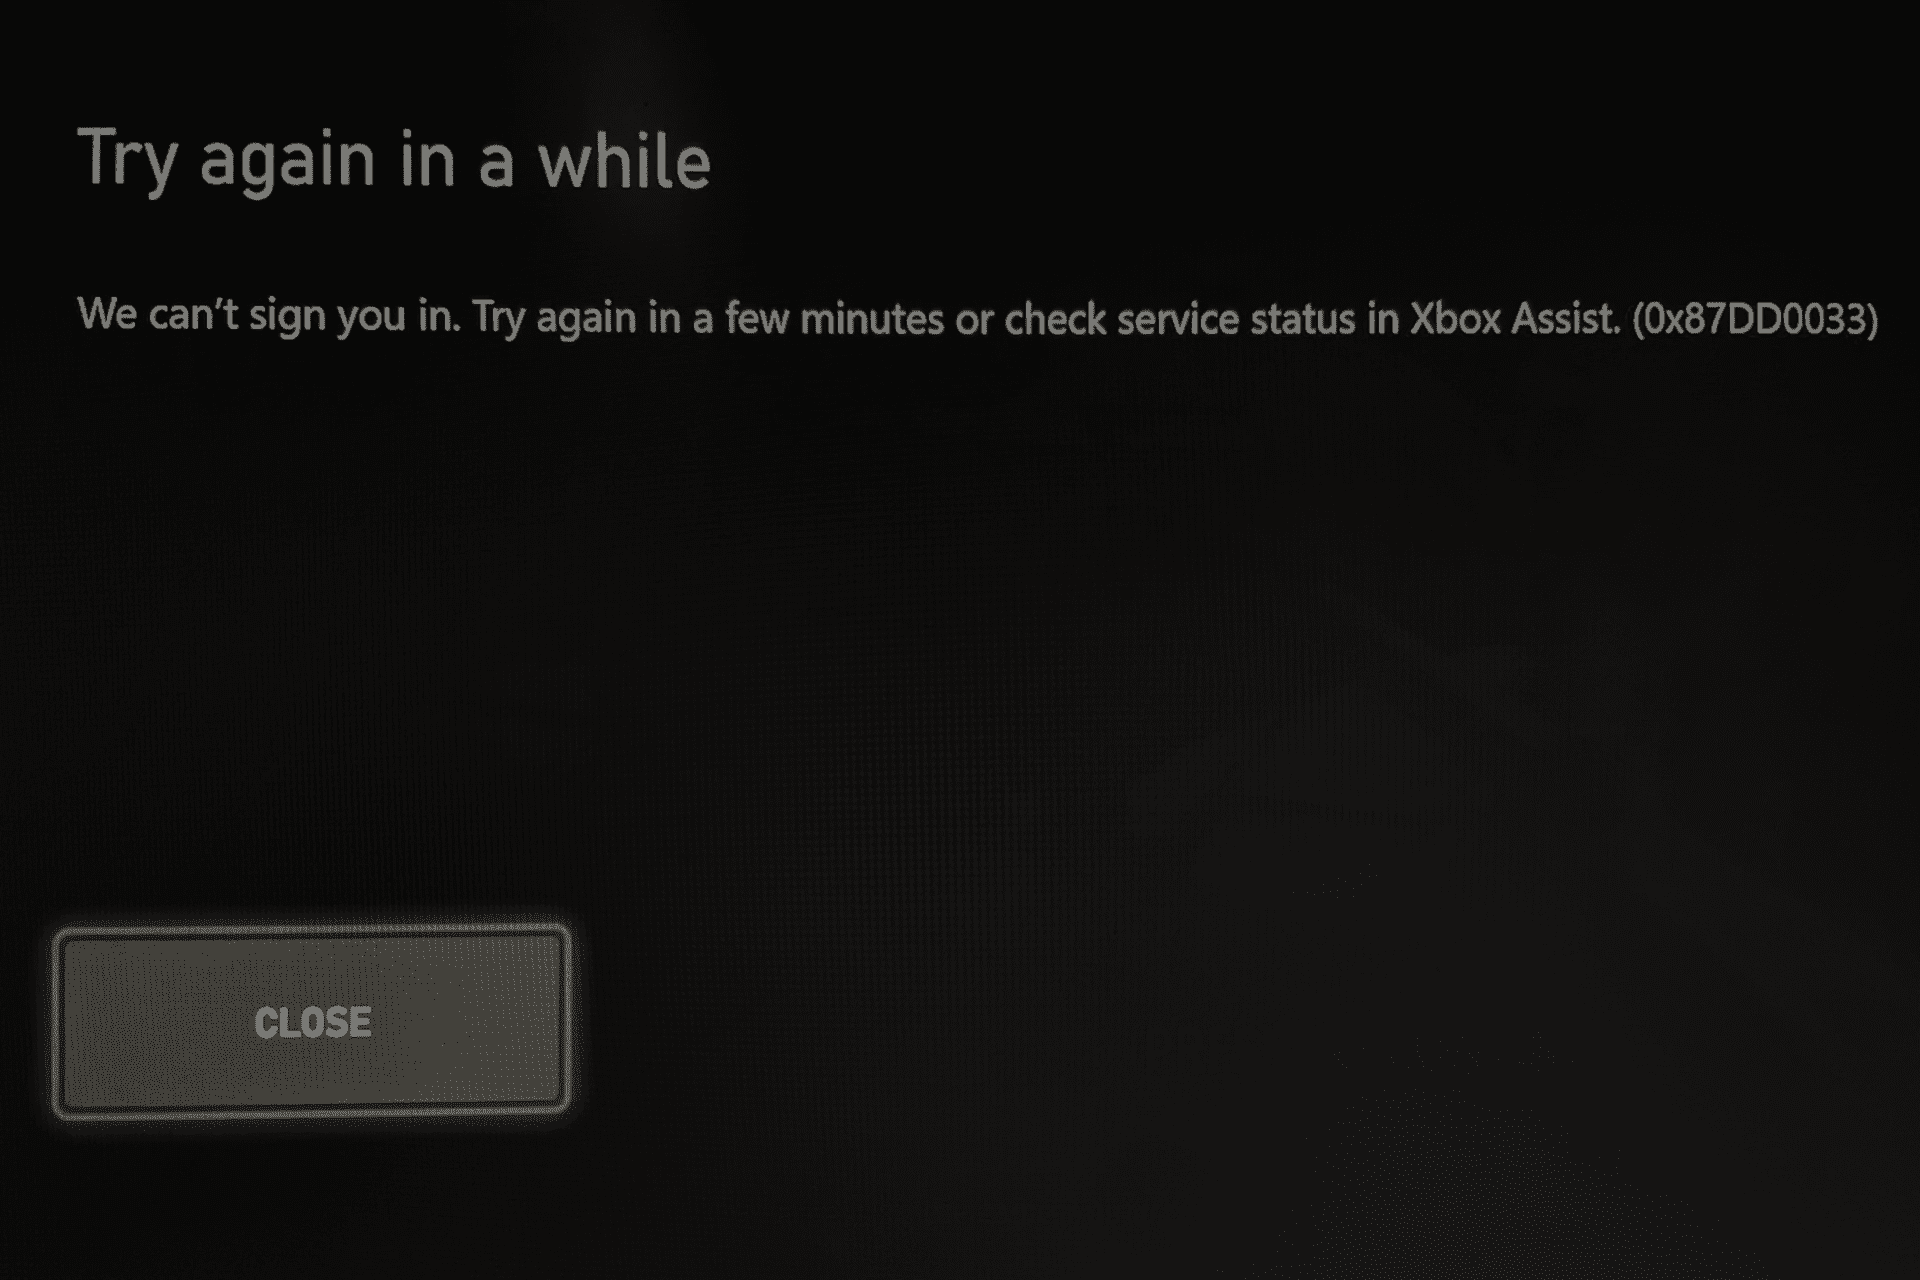
Recently, thousands across the globe reported getting the 0x87DD0033 error on Xbox, along with a message that read, Try again in a while. We can’t sign you in. Try again in a few minutes or check service status in Xbox Assist.

The issue with both the Xbox console and Xbox PC app was faced globally, including in countries like the USA, Canada, Mexico, the UK, Denmark, and Belgium, amongst others.

Xbox quickly acknowledged the global outage and confirmed that it was working on a resolution. Within a few hours, services were back up and running for most. However, a few were still unable to play Xbox games due to 0x87DD0033. If you are one of those, our solutions might help!

How do I fix the 0x87DD0033 Xbox sign-in error?

1. Check the Xbox server status

Since 0x87DD0033 indicates a server outage, you should first check the Xbox server status on the official website. When it happened last, the website showed a Major Outage for Sign-in services. It also mentioned that features and games requiring sign-in won’t be available during the outage.

You could also use a third-party monitoring service like Downdetector, where users report outages in real time. The last time, i.e., on July 3, 2024, you will find a spike in Xbox Live outage reports.

2. Restart the console/PC

If the Xbox Live services are up and running, but you keep getting 0x87DD0033 every time you try to sign in or play a game, restart the console/PC and check for improvements.

In case that doesn’t work, press the Power button to turn off the console, then unplug it from the power source for 30 seconds, reconnect the console, and power it on.

3. Switch to another network

If you are connected to the home Wi-Fi network, switch to Ethernet. Wired connections are usually more reliable and recommended by experts for gaming.

When that doesn’t work, connect to mobile data. Connecting to a mobile hotspot often helps get rid of such issues in no time!

4. Clear the Xbox cache

  1. Open the Settings on your Xbox console, go to System, and then select Console Info.
  2. Now, select Reset.
  3. Finally, choose the Reset and keep my games & apps option.clear cache
  4. Wait for the reset to complete, reboot the console, then try launching the affected game and check for improvements.

5. Contact Xbox support

When none of these work, the last option is to contact Xbox support. They will either share a more comprehensive list of solutions or provide a timeline as to when the servers will be up and running.

Given that the 0x87DD0033 Xbox error is linked to a server outage on Xbox’s end, there isn’t much you can do except wait for Microsoft to resolve things!

Before you leave, discover our expert tips to boost the download speed in the Xbox App.

Did these fixes work for you? Share with us in the comments section.

The First Descendant Out of Video Memory Error: 6 Tested Fixes

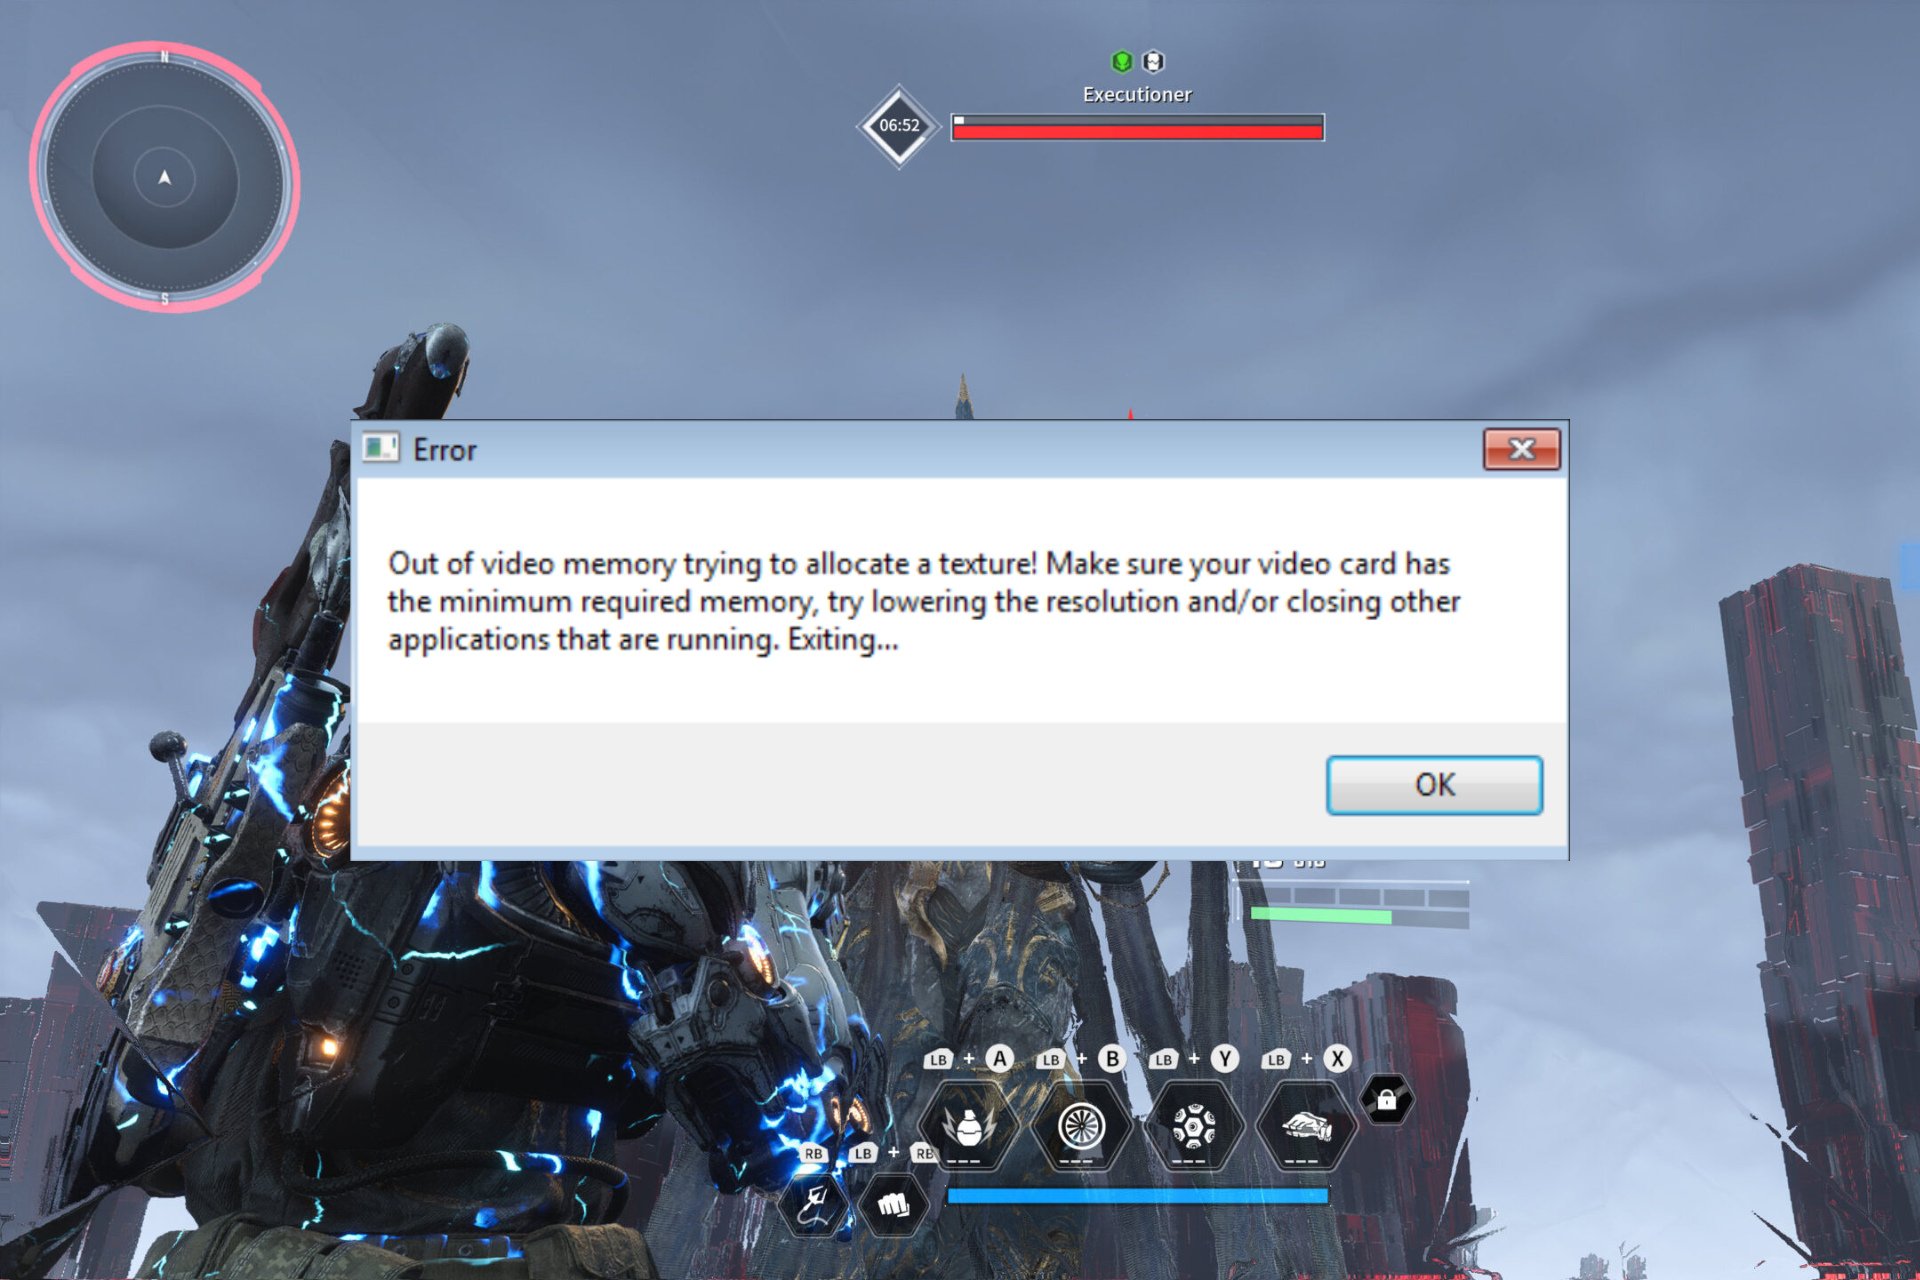
Running into the Out of video memory error while playing The First Descendant can be incredibly frustrating, especially when you’re in the middle of an intense gaming session. Luckily, there are several solutions you can try to fix this issue and get back to enjoying your game.

How do I fix the Out of video memory error in The First Descendant?

1. Disable the Ray Tracing and Nvidia DLSS options

  1. Open The First Descendant game.
  2. Go to the Settings menu and navigate to the Graphics tab.
  3. Turn off Ray Tracing by switching the setting to Off.
  4. Under the Performance section, click on Additional Options.
  5. If you have an Nvidia card, turn off Nvidia DLSS.

Disabling Ray Tracing and Nvidia DLSS reduces the demand on your GPU, which helps to prevent the Out of video memory error.

2. Limit the CPU performance

  1. Download and install Intel Extreme Tuning Utility (XTU) from Intel’s website.
  2. Open Intel Extreme Tuning Utility and locate the Performance Core Ratio setting.
  3. Reduce the Performance Core Ratio by a few values (e.g., from 55x to 54x).
  4. Save the changes and restart your computer.

Lowering your CPU’s performance core ratio can help stabilize your system and reduce memory errors caused by high CPU demands.

3. Update the graphics drivers

  1. Right-click on the Start menu and select Device Manager.
  2. Expand the Display Adapters section, right-click on your graphics card and select Update driver.
  3. Choose Search automatically for updated driver software.
  4. Follow any on-screen instructions to install updates, then restart your computer.

Updating your graphics drivers ensures that your GPU is running the latest software, which can fix bugs and improve performance.

4. Match the system specs with the game requirements

  1. Check The First Descendant’s minimum GPU requirements on its Steam page.
  2. Ensure your GPU meets or exceeds the minimum requirement (e.g., GeForce GTX 1050 Ti or AMD Radeon RX 570).
  3. If necessary, consider upgrading your GPU to at least a GeForce RTX 2060 or AMD Radeon RX 5600XT.

Ensuring your hardware meets the game’s requirements can prevent running out of video memory by providing sufficient resources to the game.

5. Adjust the Virtual Memory settings

  1. Open Control Panel and go to System and Security.
  2. Click on System and select Advanced system settings on the left panel.
  3. Under the Performance section, click Settings.
  4. Navigate to the Advanced tab and click on Change under Virtual memory.
  5. Uncheck Automatically manage paging file size for all drives.
  6. Select the drive where your game is installed.
  7. Choose Custom size and set Initial size (MB) and Maximum size (MB) to values recommended by your system.
  8. Click Set and then OK, then restart your computer.

Adjusting virtual memory settings can provide more swap space for your system to use, which can help mitigate memory allocation errors.

6. Check for game updates

  1. Open the game launcher (e.g., Steam, Epic Games Store).
  2. Go to the library or My Games section.
  3. Find The First Descendant, right-click on it and select Check for Updates or Update game.
  4. Install any available updates, then restart the game.

Developers often release patches to fix bugs and improve performance, including memory-related issues. Luckily, a recent update fixed this issue.

Other useful fixes for the Out of video memory error in The First Descendant

  • Close background programs – Open Task Manager and close the non-essential processes to free out the memory.
  • Update the BIOS – Visit the manufacturer’s website and find the latest BIOS update. This will hopefully optimize the system performance and resolve possible memory problems.
  • Run the game as Administrator – Running the game as an administrator can resolve permission issues that might lead to memory errors.
  • Monitor system performance – Monitoring your system performance can help you identify any resource bottlenecks and take appropriate actions to address them.

By following these steps, you should be able to resolve the Out of video memory error in The First Descendant and enjoy a smoother gaming experience.

Google Maps Slow on Windows 10 – How To Run It Smoothly Again

Is Google Maps slow on Windows 10? It’s a fairly common issue, but manageable. 

Many users face sluggish performance due to outdated software, hardware limitations, or browser issues. Fortunately, this guide can help you get Google Maps running smoothly again.

Before we begin, try out these quick fixes:

  • Restart your computer and browser.
  • Clear browsing history & cookies.
  • Uninstall & reinstall the browser.
  • Check Internet speed.
  • Update your computer and browser.

If these don’t work, read on for more detailed solutions!

How To Fix Google Maps Being Slow on Windows 10

Follow these instructions to resolve this issue for good:

Install the Latest Version of DirectX

Installing the latest version of DirectX can boost the performance of graphics-intensive applications, including Google Maps. Your system needs to be optimized for handling complex visual tasks.

  1. Press the Windows icon + R to open the Run dialog box.
  2. Type dxdiag and press Enter.
Type dxdiag
  1. Check if you’re running the DirectX 12 version (the latest) in the DirectX Diagnostic Tool. 
Check the version
  1. If you aren’t running the latest version, download it.
Download DirectX
  1. Follow the on-screen instructions to install DirectX.

Adjust Hardware Acceleration Settings

You can enable hardware acceleration in your browser to offload tasks to your GPU. This adjustment ensures that your computer’s resources are used efficiently to process the visual data Google Maps requires.

  1. Open Google Chrome and click the three-dot menu in the top-right corner.
click the three-dot menu
  1. Go to Settings, then click System.
System
  1. Toggle on Use hardware acceleration when available.
Use hardware acceleration when available

Restart your browser for the changes to take effect.

Disable Browser Extensions

Browser extensions can slow down your browsing experience and affect the performance of Google Maps. Disabling unnecessary extensions can free up resources.

  1. Click the three-dot menu in Chrome, tap Extensions, then select Manage Extensions.
Manage Extensions
  1. Disable each extension by toggling off the switch next to it.
Disable extensions

Restart your browser and test Google Maps.

Reset Your Browser

Resetting your browser can resolve underlying issues causing Google Maps to not work properly. This step restores your browser to its default settings, eliminating potential conflicts.

  1. Open Chrome, click the three-dot menu, scroll down, and tap Settings.
Settings
  1. Click Reset settings and select Restore settings to their original defaults.
Restore settings to their original defaults
  1. Confirm by clicking Reset settings.
Reset settings

Reset All Flags

Resetting all Chrome flags can help if experimental features or settings are impacting performance.

  1. Open Chrome, type chrome://flags/ in the address bar, and then hit Enter.
  2. Click Reset All at the top of the page.
Reset All

Restart your browser and confirm if Google Maps is fast again.

Terminate Unwanted Processes on Task Manager

Freeing up system resources by terminating unwanted processes can improve the performance of Google Maps.

  1. Press Ctrl + Shift + Esc to open Task Manager and go to the Processes tab.
Processes tab
  1. Identify and right-click on unnecessary processes, then select End task.
 End task

Check if your Google Maps speed has improved.

All things considered, these tips will help you fix Google Maps being slow on Windows 10. Follow this guide for a smoother, more efficient navigation experience. Feel free to share which solution worked for you in the comments!

If all else fails, you can always try an alternative service that might run faster.

This isn’t the only problem you can encounter, and we wrote about what to do if Google Maps location is wrong on your PC or if 3D is not working in Google Maps on PC, so you might want to check it out.

How to Make Microsoft Word Change to Light Mode

Struggling with Microsoft Word’s dark mode? You’re not alone. Many users find it challenging to switch back to light mode, especially when working for extended periods. Here’s how you can easily make Microsoft Word light mode on various platforms.

How do I change Microsoft Word to light mode?

1. Change the Microsoft Word theme to White

  1. Open Microsoft Word.
  2. Click on the File tab located at the top-left corner of Microsoft Word and select Options.
  3. Click on the General category on the left-hand side.
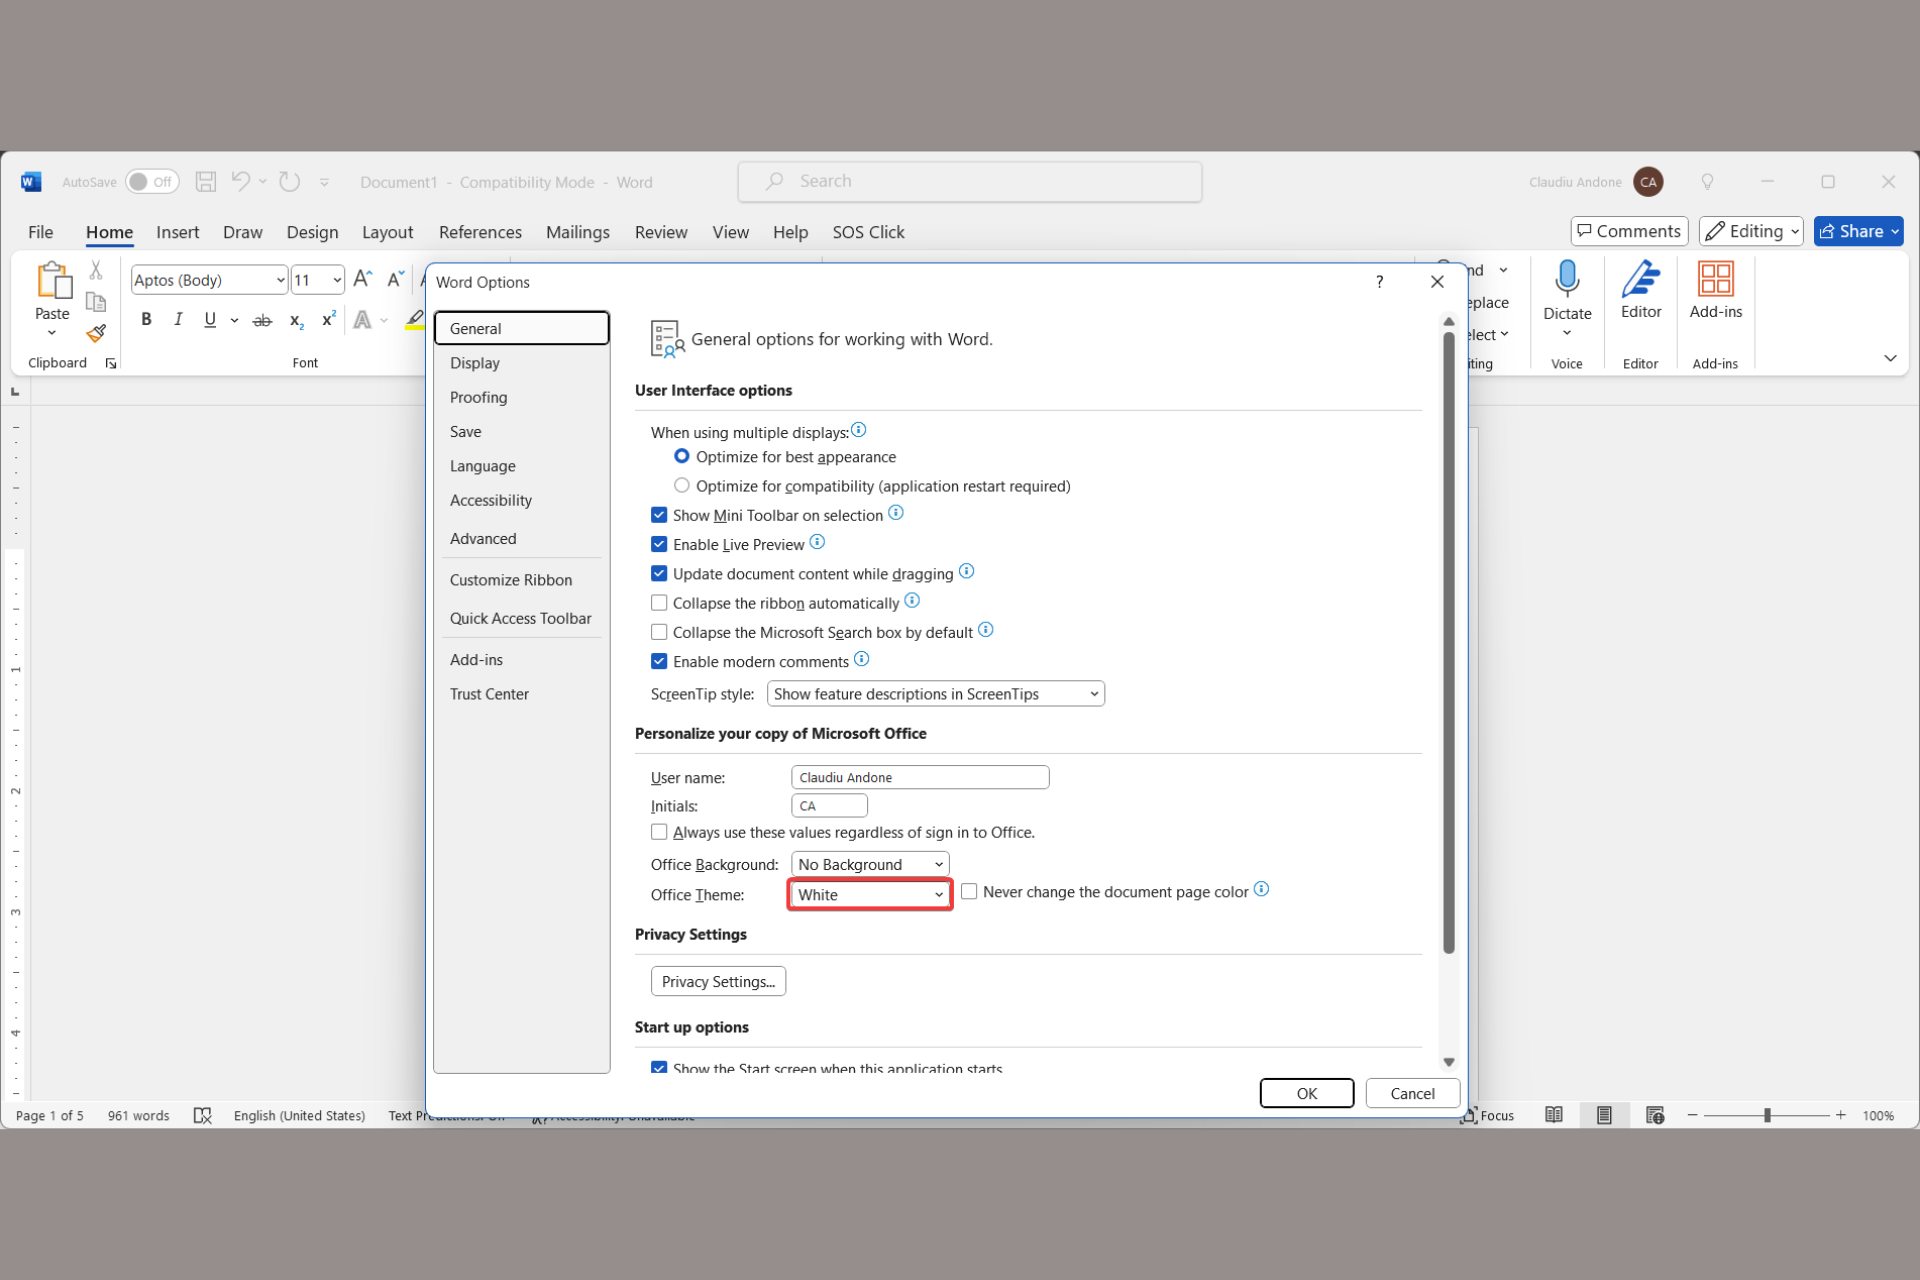
  4. Under the Personalize your copy of Microsoft Office section, find the Office Theme drop-down menu.
  5. Select White from the drop-down options.
  6. Click OK to apply the changes.

Switching to the Light theme offers a brighter and more visually comfortable interface, making it easier to work with documents for extended periods.

2. Set the page color to white while keeping Word in Dark mode

  1. Launch Microsoft Word from your Start Menu or Applications folder.
  2. Click on the File tab at the top-left corner and select Options from the menu.
  3. In the Word Options window, select General on the left sidebar.
  4. Under Personalize your copy of Microsoft Office, find the checkbox Never change the document page color.
  5. Check this box and click OK to save the changes.

By keeping the page color white while using dark mode, you can enjoy a darker interface without affecting the document’s readability or print appearance.

3. Change Microsoft Word to Light Mode on the Web version

  1. Open your web browser, go to office.com and sign in with your Microsoft account.
  2. Click on Word to open an online document.
  3. In the ribbon at the top of the page, click on the View tab.
  4. Click on the Dark Mode button to toggle it off.

Turning off dark mode here will switch the document background to white, making it easier to work with and visually clearer.

How do I turn off Microsoft Word Dark Mode on Mac?

  1. Open Microsoft Word on Mac.
  2. At the top menu bar, click Word, then select Preferences from the drop-down menu.
  3. In the Preferences window, click on General.
  4. Under Personalize, locate the Office Theme drop-down menu.
  5. Choose the Light theme.
  6. Close the Preferences window to apply the changes.

Switching to the Light theme helps reduce eye strain, especially in well-lit environments, making it easier to read and edit documents.

These simple methods will help you make Microsoft Word to light mode or customize it in a way that suits your preferences best, ensuring a comfortable and efficient working environment.

Do you know how to remove highlights in Word? If not, the highlighted guide will provide all the information. Also, if you want to add a watermark to a Word document or set up two columns, we can help out.

If you have further questions, don’t hesitate to use the comments below and let us know about them.

Save more than $2000 on this Lenovo ThinkPad P15v laptop

Have you ever seen a deal that made your eyes pop out from surprise? This Lenovo ThinkPad P15v deal cuts the usual price of $2,949 to just $899. As we inch closer to the 4th of July, Lenovo has given us a shockingly low cost for this model—that’s right, a whopping $2,050 off!

Why is this deal worth your attention? Because the ThinkPad P15v has an Intel Core i7-12700H processor. It’s not just a regular processor; it is a strong one in the middle to upper range that will work well for all your productivity tasks, like handling Excel sheets or doing some graphic design. Also, we have the NVIDIA T1200 graphics card. It may not be at the very high end, but it is still an entry-level professional card that can manage graphical rendering and simulation work.

You may wonder about multitasking. The laptop is equipped with 16GB of DDR5 Memory. If you keep many tabs open or like to run numerous apps simultaneously, this laptop will not struggle. Also, it has a fingerprint reader, which provides more security for people who require it, particularly in sectors with stringent privacy rules.

The ThinkPad P15v is another model with a 15.6-inch FHD display that can emit up to 300 units of peak brightness. This allows for comfortable use in different lighting situations without causing eye strain.

Hence, for those looking for a good-quality laptop in the middle price range to use at work or school, Lenovo’s deal with its ThinkPad P15v on the 4th of July is surely a good choice. And if you’re not yet decided or want to see more choices, no problem: many other nice deals on laptops are available.

You can get it here.

Microsoft introduces Windows 365 Cross-region Disaster Recovery, a Recall-like tool designed to keep Cloud PCs intact during disasters

Microsoft recently announced the general availability of Windows 365 Cross-region Disaster Recovery, a sort of Windows Recall for Cloud PCs.

In the official announcement, Windows 365 Cross-region Disaster Recovery is an add-on feature to improve Cloud PCs’ resilience. The idea behind this inventive solution is to create “snapshots” of Cloud PCs and keep them in far-away places. If there’s a disaster, these snapshots can be restored quickly onto Cloud PCs at the chosen location. This reduces the time it takes for business and data to be available.

We are excited to introduce Windows 365 Cross-region Disaster Recovery, a Windows 365 add-on feature that creates “snapshots” of Cloud PCs. These snapshots are placed in customer-defined, geographically distant locations, and they can be recovered to Cloud PCs running in the selected location during a disaster recovery event.

Microsoft

This feature’s main feature is its ease and availability. While other disaster recovery solutions may require a tech expert to set up, Windows 365 Cross-region Disaster Recovery is simple for everyone.

This feature has been created so that even individuals possessing only basic or no prior experience in disaster recovery can configure it within minutes. And if something goes wrong, the time to restore is a few simple clicks away, usually no more than five minutes. It’s a whole new level of change.

This feature is like a blessing for organizations that function in strongly regulated sectors or those with crucial geographic distance requirements between main and backup locations. It’s about fulfilling the regulations and providing peace of mind. The ability to handle disasters well and bounce back fast in your digital workspace is priceless.

You may ask yourself, “How can I obtain this for my organization?” To get it, you need an add-on license. This is available in the United States with Windows 365 Enterprise SKUs and costs $5 per user monthly. The price might change depending on your location, so it is recommended to contact sales for precise details.

A concern might arise about the backup’s geographies and regions: Are there any limits? The answer is basically no. You can use any geography or region where Windows 365 is offered as your backup region. Yet, the regions for Cloud PC users are chosen with care. The concept of data sovereignty must be considered.

For the technically curious, the restore time objective (RTO) is four hours for Cloud PC tenants having up to 50,000 Cloud PCs in a region. The restore point objective (RPO) depends on how frequently the point-in-time restore snapshots are taken. As deployments increase, Cross-region Disaster Recovery is expected to perform better with an RTO of four hours.

Windows 365 Cross-region Disaster Recovery is a clever and useful method that gives you an effective plan for safeguarding your organization from disasters or crises. It’s beneficial for businesses in highly regulated industries and those who want their digital workspaces to be secure no matter what happens.

Moreover, this solution has been designed to be easy to use and set up, providing a quick yet robust way of protecting assets against various risks. Now, it is time to think about the next step—how could this solution benefit your organization?

WAB.dll Missing Error in Outlook: 5 Ways to Fix it

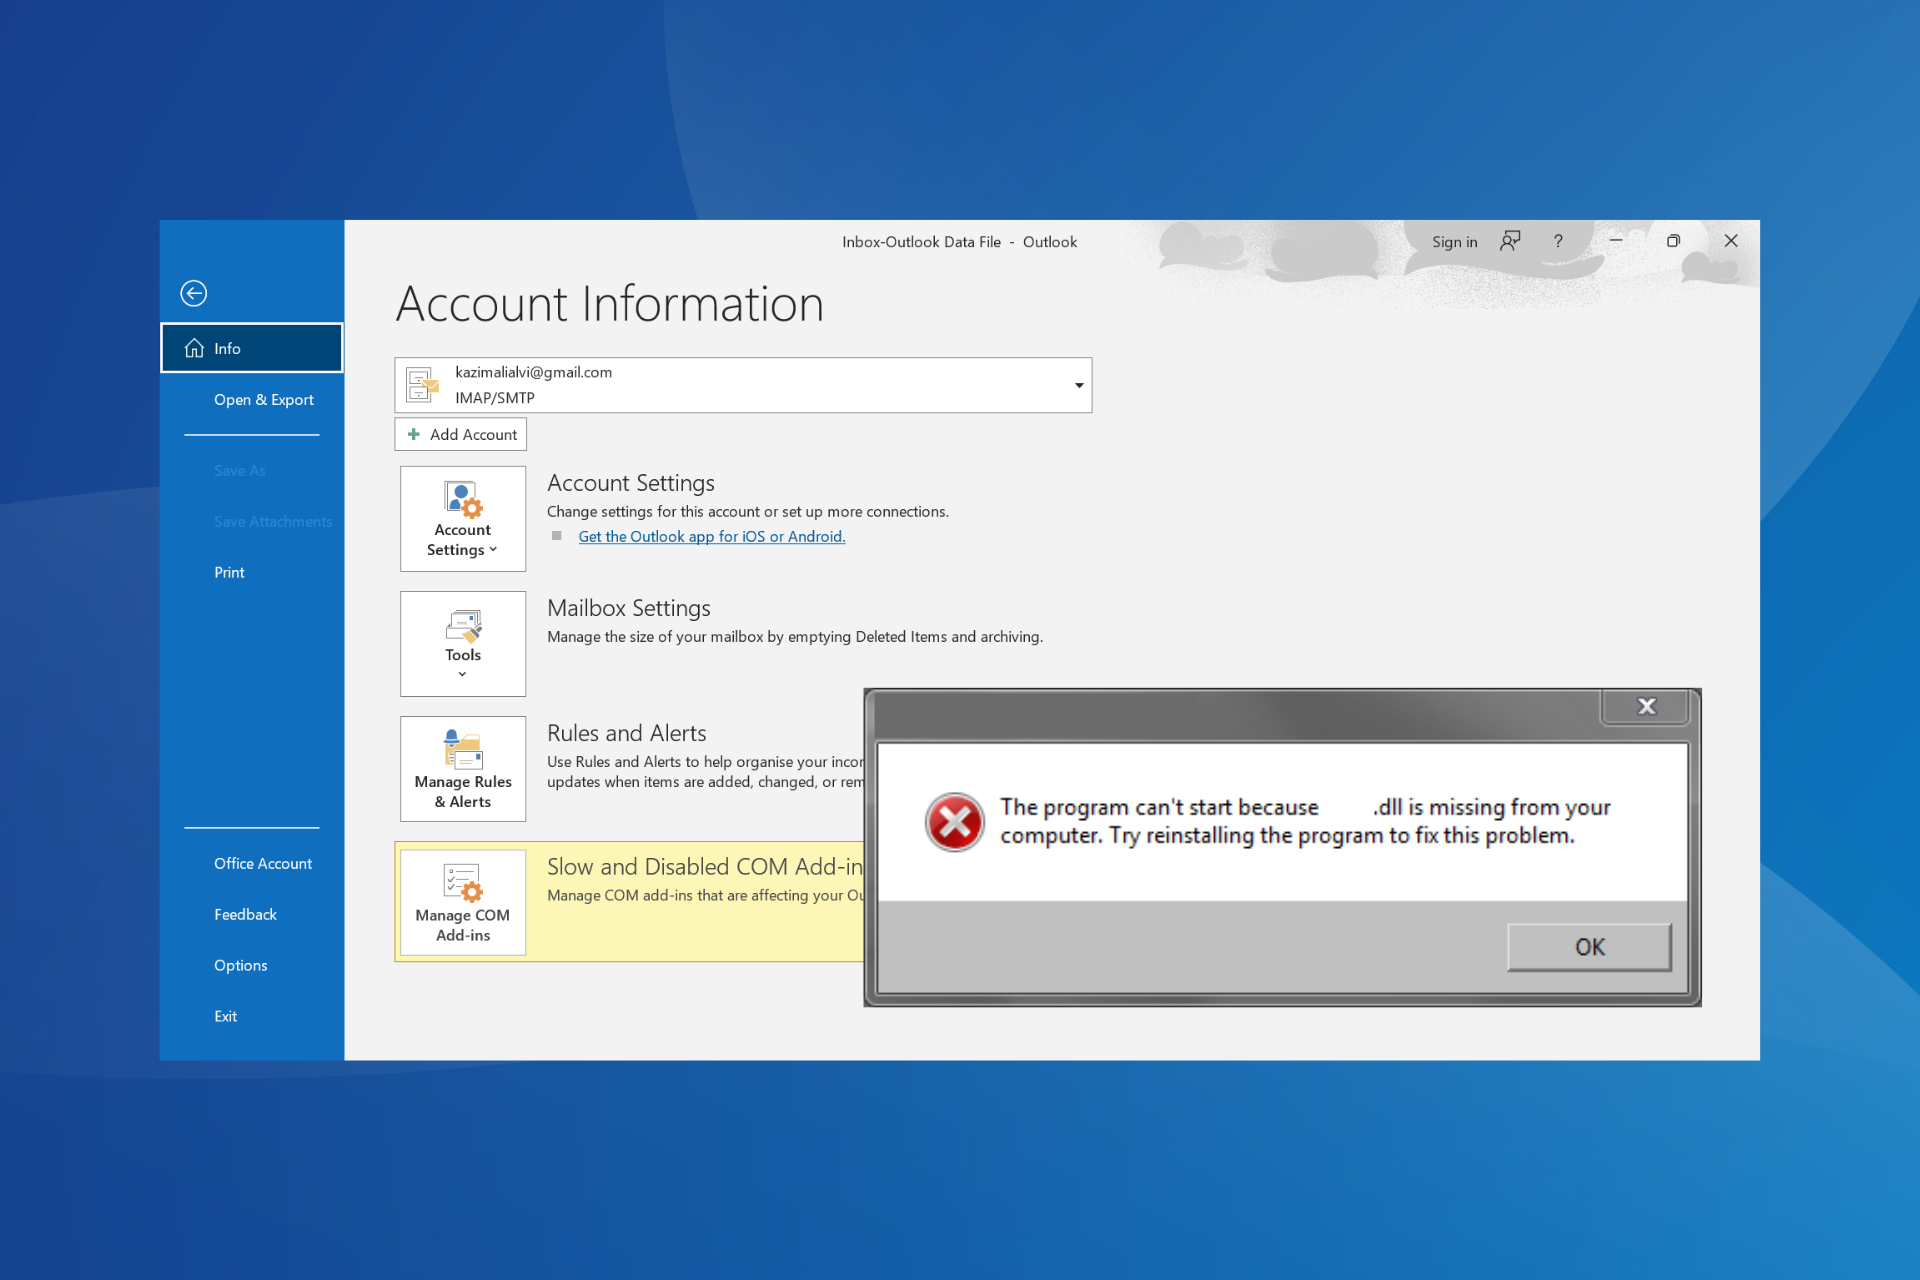
Often, when you try to open Outlook or send an email, it throws an error highlighting that wab.dll is missing. The error message reads, Microsoft Outlook: An error occurred while attempting to open Windows Address Book. Unable to find the WAB DLL.

WAB here stands for Windows Address Book and the DLL file is developed by Microsoft.

The error was usually encountered years ago when Internet Explorer was still a thing, but a few still get it from time to time. And given that most of the available information is outdated, you have a hard time fixing it. So, let’s walk you through the solutions that work now!

What can I do if wab.dll is missing in Outlook?

1. Re-register wab.dll

  1. Press Windows + R to open Run.
  2. Paste the following command in the text field and hit Enter:regsvr32 wab.dllregister DLL to fix wab.dll missing outlook

If the WAB.dll file is already stored on the computer but isn’t registered, running the command will do that, getting rid of the missing DLL error in Outlook.

2. Use a DLL repair tool

When registering wab.dll throws an error, it’s likely that the file is missing or has misconfigured permission. In such a case, I recommend that you use an effective DLL repair tool!

A reliable tool will identify any missing DLLs on the PC, download a fresh copy, and save it in the required folder automatically.

3. Move the DLLs and modify the Registry

3.1 Move the DLLs to System32

  1. Press Windows + E to open File Explorer, and go to the following path:C:Program FilesCommon FilesSystem
  2. Select wab32.dll and wab32res.dll, and press Ctrl + C to copy them.move wab32.dll
  3. Now, go to the following path and press Ctrl + V to paste the two DLLs:C:WindowsSystem32System32 folder
  4. Restart the PC, then relaunch Outlook and check whether it now works properly. If not, follow the steps listed next.

3.2 Modify the Registry

  1. Press Windows + R to open Run, type regedit in the text field, and hit Enter.registry editor
  2. Click Yes in the UAC prompt.
  3. Paste the following path in the address bar and hit Enter:ComputerHKEY_LOCAL_MACHINESOFTWAREMicrosoftWABDLLPathregistry path
  4. Right-click on the Default string, and select Modify.
  5. Paste the following in the Value data field and click OK: %CommonProgramFiles%Systemwab32.dlladd path to fix wab.dll missing outlook
  6. Restart the computer, then relaunch Outlook and check for improvements.

4. Manually replace the wab.dll file

When wab.dll is missing or corrupt, and, as a result, you can’t use Outlook, manually copy the DLL file from another PC and then move it to the System32 folder on the affected device!

Before moving the DLL, make sure the other PC has the same OS architecture as the affected one to avoid running into compatibility issues.

5. Repair Microsoft Office

  1. Press Windows + R to open Run, type appwiz.cpl in the text field, and hit Enter.
  2. Select Microsoft 365 from the list of apps, and click on Change.microsoft office repair
  3. Click Yes in the UAC prompt.
  4. Choose Online repair, and then click on the Repair option.online repair to fix wab.dll missing outlook
  5. Wait for the repair to complete, then restart the PC, and the wab.dll error in Outlook should be fixed!

When nothing else works, a repair of Microsoft 365 (Microsoft Office) will do the trick and help you get rid of the wab.dll missing error in Outlook 2000.

While you are fixing things, discover our top tips to speed up Microsoft Office when it’s running slow! Moreover, if you can’t encrypt or sign your messages, we have just the guide for you.

Which fix worked for you? Share with our readers in the comments section.

PowerToys 0.82 introduces PowerRename, allowing you to utilize random characters when renaming files

Microsoft has just updated PowerToys to version 0.82, which includes many new characteristics and enhancements that promise to improve the user experience even further.

One of the important updates is a fresh feature added in PowerRename, enabling users to utilize random characters along with UUIDs when renaming files. This will greatly assist those who desire extra adaptability and command in managing their file names.

Additionally, the update shows substantial enhancements in the Paste As JSON feature. It now handles CSV delimiters more effectively and allows conversion from ini files, making it more useful for users and increasing its attractiveness.

PowerToys 0.82 also fixed many crashes reported before and UI problems after shifting to WPF UI on Color Picker and PowerToys Run.

Additionally, dozens of alterations have been made to improve PowerToys’ performance and correct issues with different parts, such as Advanced Paste or Quick Accent.

For people who are excited to try these enhancements themselves, updating to PowerToys 0.82 is simple. You can do it by using the Settings menu or downloading the installer from GitHub.

With its ongoing development, PowerToys shows Microsoft’s dedication to providing users with robust and flexible instruments that meet different requirements and likings. Some of its features, such as the customizable Calendar, are available in Windows 10/11.

You can read the full PowerToys 0.82 changelog here.

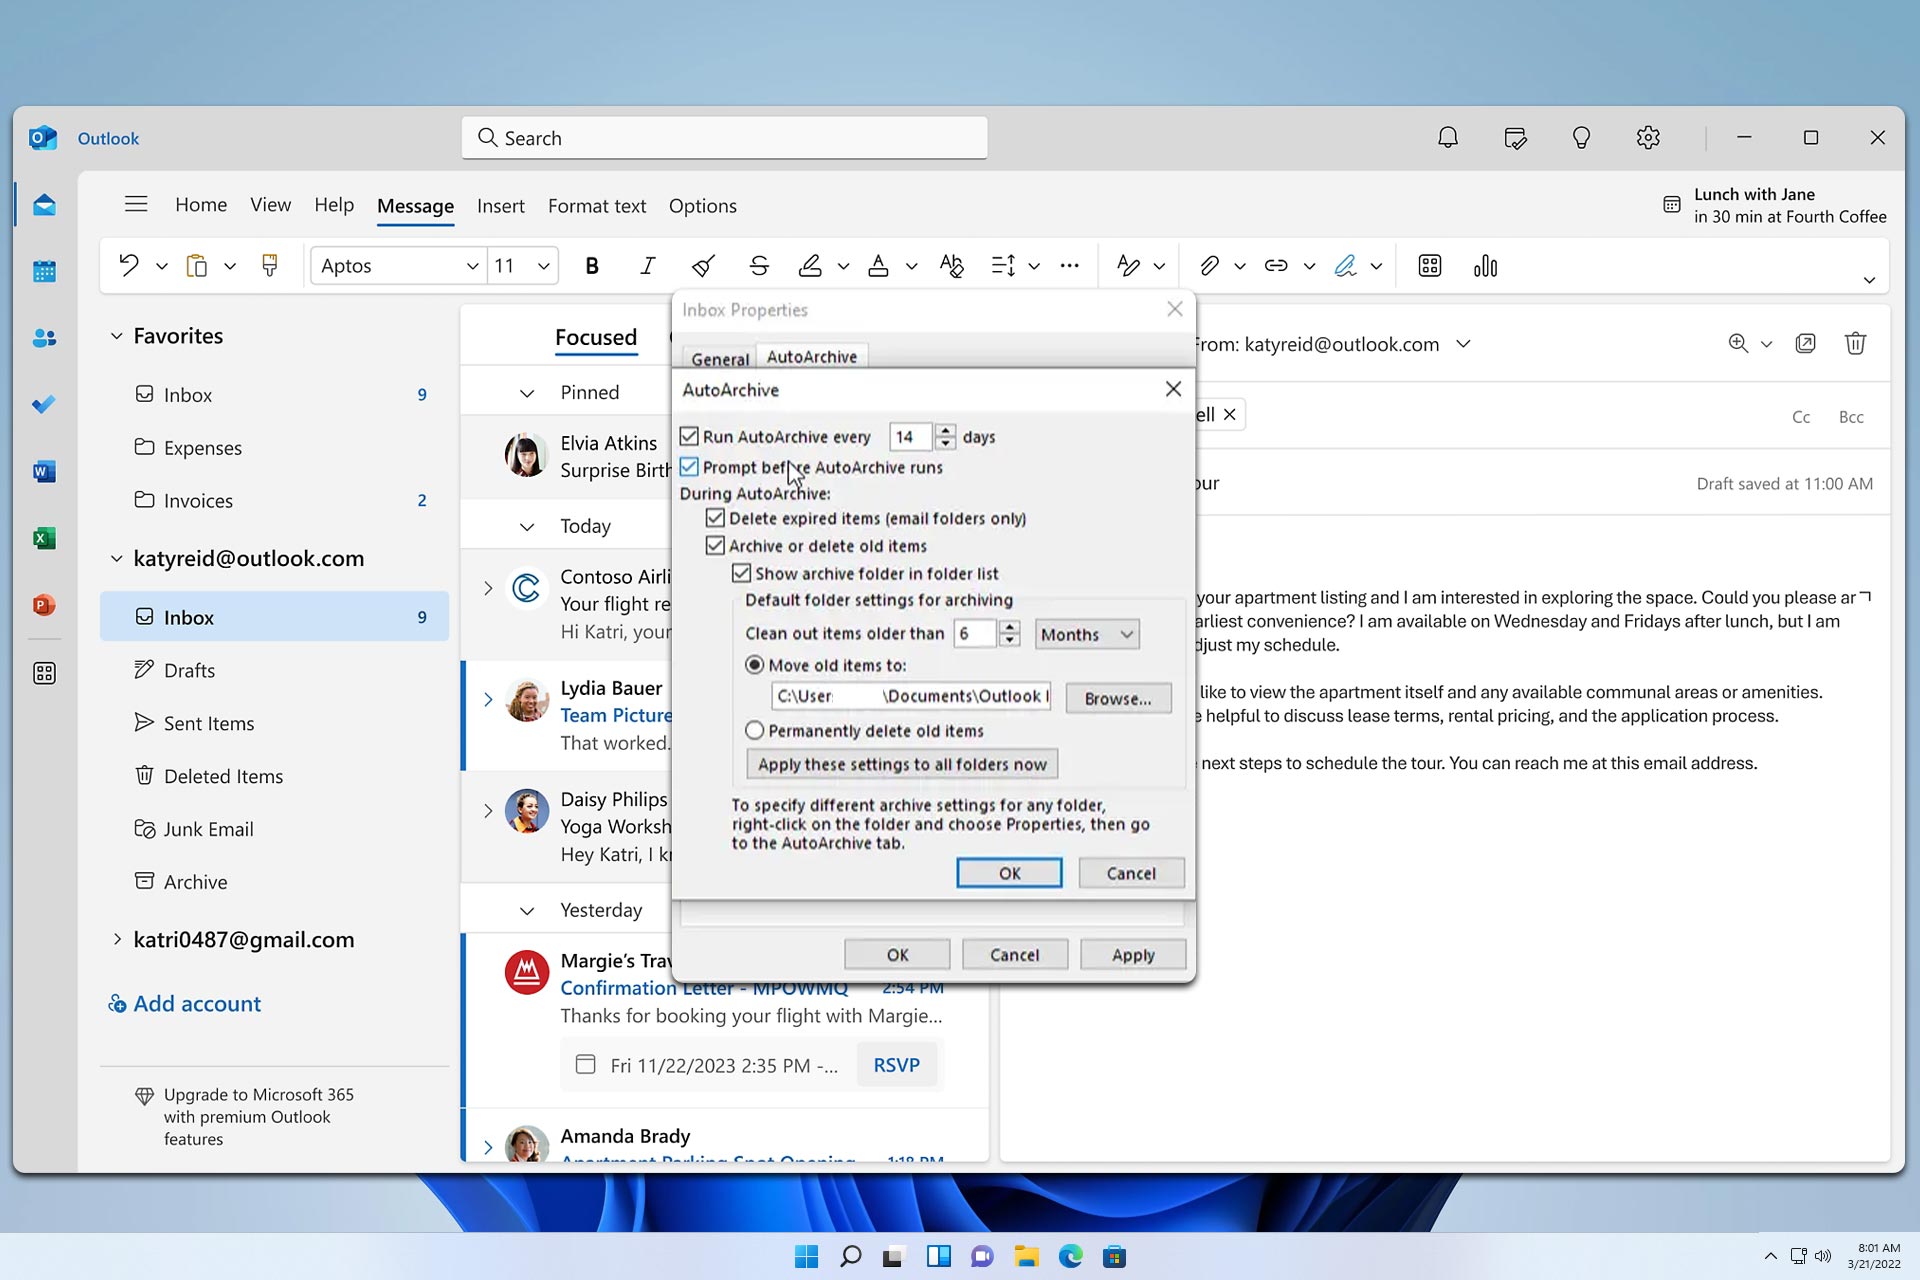
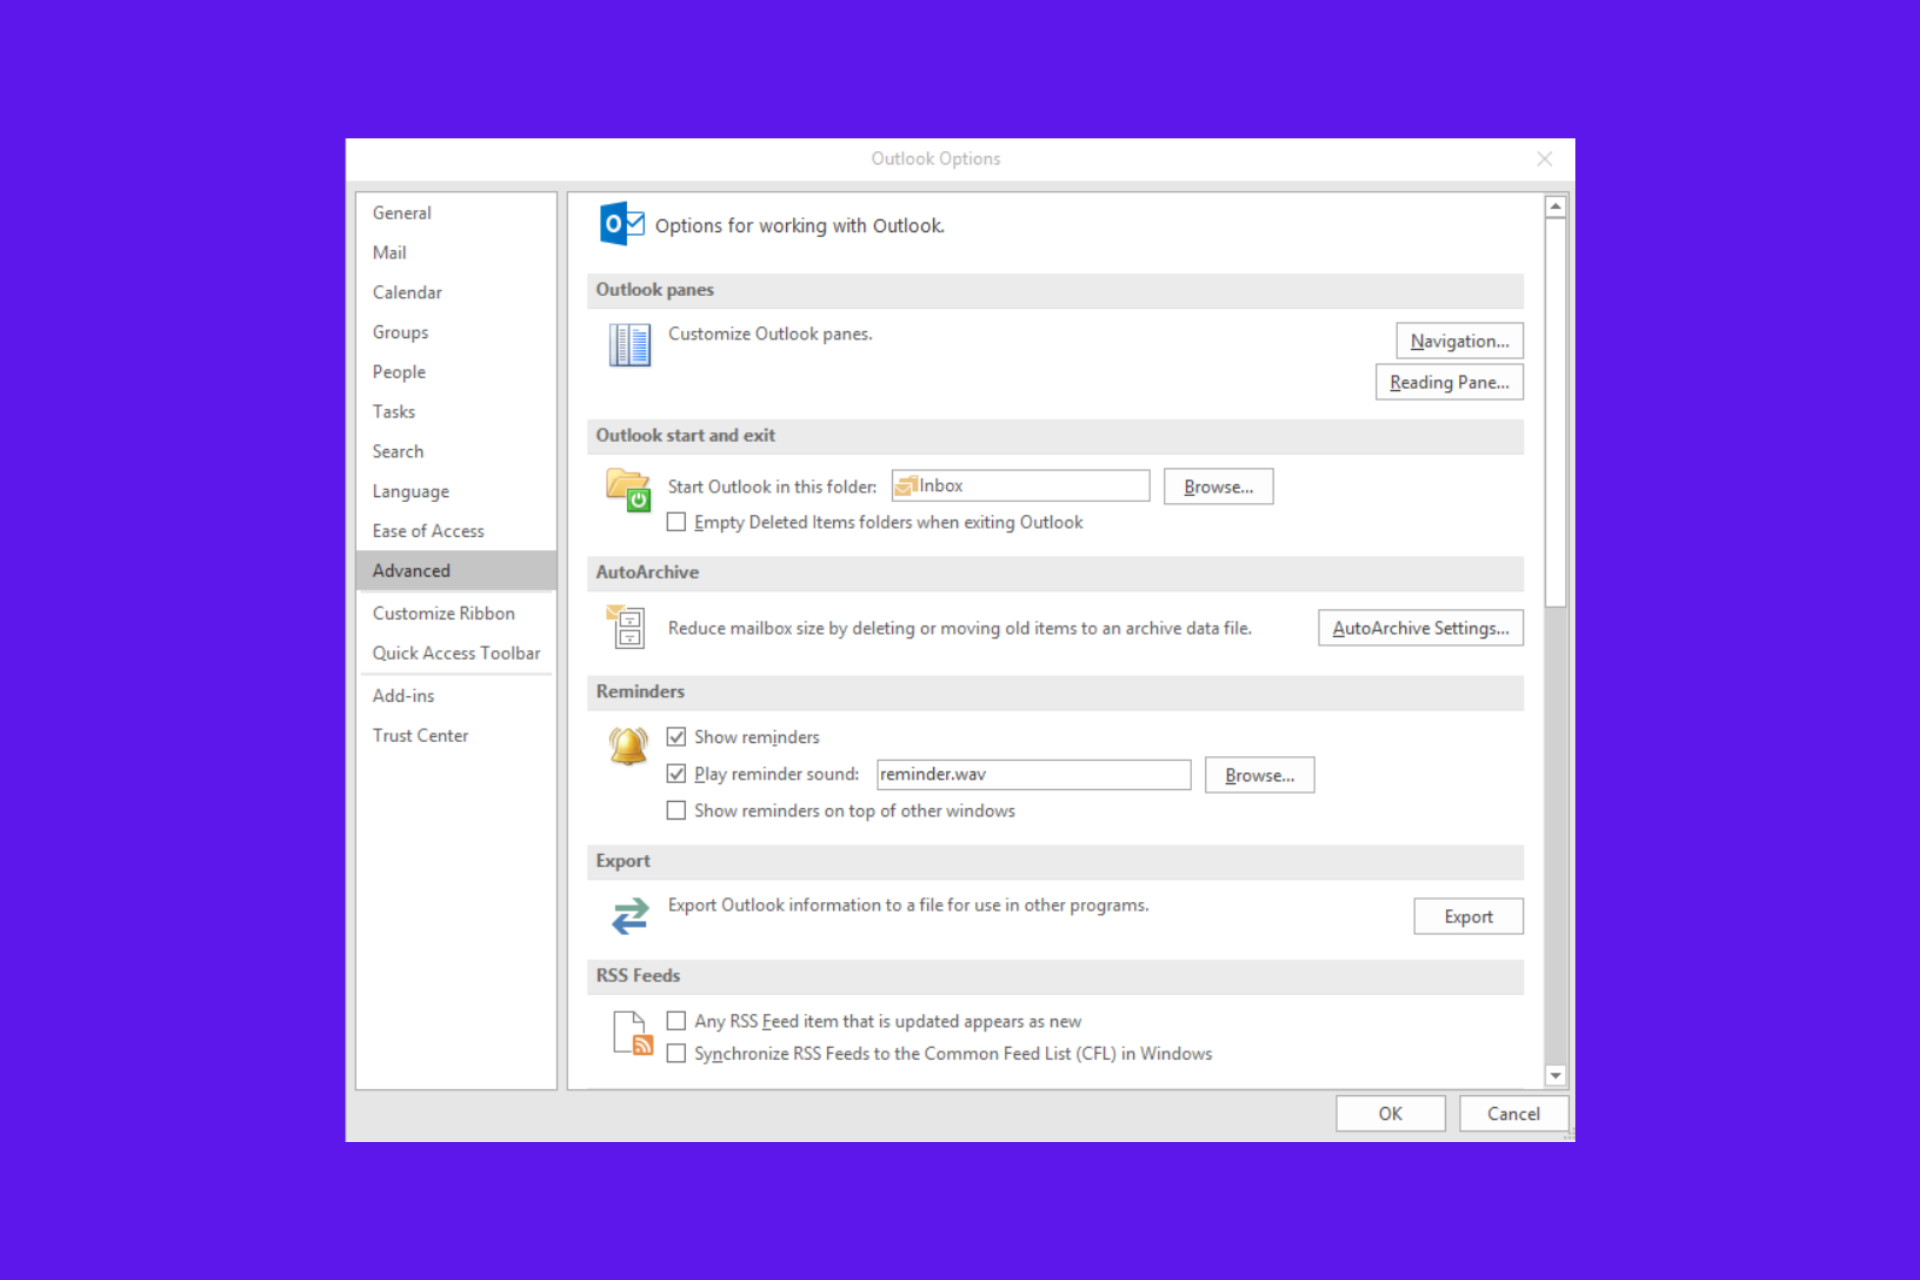
How to Apply AutoArchive Settings to Subfolders in Outlook

Outlook has an archive feature, but many are wondering how to apply AutoArchive settings to subfolders in Outlook. Today we’re going to show you how to do that.

How can I apply AutoArchive settings to subfolders in Outlook?

Set AutoArchive settings manually

  1. In Outlook, right-click the desired subfolder and choose Properties.
  2. Next, go to the AutoArchive tab.
    autoarchive settings outlook
  3. Configure your settings and save changes.
  4. Repeat the same steps for other subfolders.

How do I AutoArchive a subfolder in Outlook?

To automatically archive a subfolder in Outlook, you need to manually enable this feature for each subfolder since AutoArchive settings aren’t applied from the parent folder to the subfolder.

Does Outlook archive subfolders?

Outlook can achieve subfolders, but to use this feature you need to select Archive this folder and all subfolders in the archive settings.

Does Outlook archive keep folder structure?

Yes, Outlook archive will keep the same folder structure, so your emails will remain organized.

Where does auto archive go in Outlook?

Archived emails will be stored in a separate PST file. This file is usually located in the Documents directory, but you can change its location from settings.

Does Outlook archive folder delete emails?

No, emails from the archive folder are never deleted, and they will remain on your PC until you manually remove them. To restore your messages, we have an entire guide dedicated to recovering archived messages in Outlook, so don’t miss it for additional information.

As you can see it’s not possible to apply AutoArchive settings to subfolders in Outlook, so you’ll need to configure each subfolder manually.

To learn more about this feature, we have a great guide on how to archive Outlook emails, as well as an article on Outlook AutoArchive settings that will provide you with additional insight.

Microsoft enhances Excel for the web with a new look, significantly streamlining productivity

Microsoft has revamped its web version of Excel with a newer, subtle, and modern look that matches the overall aesthetics of the Windows 10 theme. In a blog post, the Redmond-based tech giant says the revamp is not only for design purposes but also brings in many new functions that aim to improve user experience. It makes spreadsheet handling easier to understand and quicker with less effort involved.

Fast action is vital in data control. Microsoft has enhanced the speed at which you can resize rows and columns in Excel’s web version. It now allows smoother adjustments by merely clicking and dragging, making the process quicker.

Adding new rows and columns has been softer. Just by hovering over a cell and clicking on it, you can insert additional data points, which makes organizing your spreadsheet as easy as pie.

But what if there are moments when you want to view everything together? Microsoft has an answer for this as well. Displaying hidden rows or columns is now easy with just one click, giving you a quick look at your complete set of data. And if you are scared of going through lots of data, don’t worry. The update brings a more straightforward method to freeze panes, ensuring important information stays visible regardless of your position in the spreadsheet.

There is also an improvement in organization and ease of reading. The ability to drag and drop elements within your worksheet makes it easier to rearrange data. Likewise, highlighting important cells will quickly improve the visibility of key information.

These improvements are coming for everyone who uses Excel on the web, the same way the other improvements were added in the last months, such as the copy/paste feature, comment filtering, and the ability to share links to sheets.

They ensure a better and smoother experience when working with spreadsheets. Whether you are analyzing data or managing projects by arranging timeframes, these updated features will make your tasks in Excel on the web more straightforward and more pleasant.

You’ll no longer be able to access your Outlook email unless you do this

Microsoft recently announced Outlook users that the platform’s current authentication method will be changed, and so will the way users access their Outlook emails. A while ago, the Redmond-based tech giant said it would let go of its basic authentication method to create a stronger, more secure one.

In a blog post, Microsoft says this step aims to increase safety and ensure that users’ emails and private information stay away from “bad actors.”

However, this modification doesn’t just affect Outlook; it also affects those who are still utilizing Hotmail.com and Live.com for their email accounts; it seems that Microsoft is pushing people to update their Outlook to the newer version by sending them almost threatful-sounding emails.

A user on official Outlook forums was so concerned that they thought it was a scam email and wanted to know if that was the case.

I received this email. It looks like a scam. Do I need to do anything?

Update your sign-in technology before September 16th, 2024 to maintain email access.
The safety and security of your information is top priority for Microsoft. To help keep your account secure, Microsoft will no longer support the use of third-party email and calendar apps which ask you to sign in with only your Microsoft Account username and password. To keep you safe you will need to use a mail or calendar app which supports Microsoft’s modern authentication methods. If you do not act, your third-party email apps will no longer be able to access your Outlook.com, Hotmail or Live.com email address on September 16th.
What do you need to do?If you are receiving this email, you are currently using an email or calendar app that uses a less secure authentication method to connect to your Outlook.com email account. You will need to upgrade your third-party mail and calendar app to a version which supports modern authentication methods.
Microsoft provides free versions of Outlook for your PC, Mac, iOS, and Android devices which can be easily downloaded and connect to your email account. Using an updated version of an Outlook application will ensure you are connecting in the most secure way.
How can you set up your Gmail, Apple Mail, or other third-party mail application?Various non-Microsoft applications will have their own steps for connecting to your Outlook.com email account using modern authentication methods. See our help article – Modern Authentication Methods now needed to continue syncing Outlook Email in non-Microsoft email apps. However, you may need to contact the creators of those applications to provide you with instructions. In many cases, simply removing and re-adding your account with the latest version of that application will configure it to use modern authentication methods.

If you’re receiving such emails, you should know they’re legitimate. They’re a heads-up for the change that’s about to come in September when Outlook’s authentication methods will be updated to fit the newer security concerns.

To keep access to your Outlook emails, you must update your third-party mail and calendar app to a version that supports the newer authentication methods. You can even update the new Outlook since the new version supports the new authentication methods.

In case you’re wondering, here is how to access your old Hotmail sign in.

KB5039299 to Windows 10 now lets users move Copilot around the desktop

Microsoft has launched another update for Windows 10, KB5039299, unrelated to security. This update focuses on resolving problems related to the taskbar, jump lists, and more. You can get it now from the Settings app or Microsoft Update Catalogue.

This update tackles an issue that could prevent an app’s jump list on the taskbar from functioning correctly. A second problem, linked to the default Japanese Input Method Editor (IME), makes the candidate window unresponsive when not anticipated.

KB5039299 finally makes Copilot behave like an app in Windows 10. This means you’ll be able to undock it, resize and move it, and even snap it out of a window. The update comes months after the Redmond-based tech giant introduced it in Windows 11.

* New! We are advancing the Copilot experience on Windows. It is now pinned to the taskbar and will behave like an app. This gives you the benefits of a typical app experience. For example, you can do things like resize, move, and snap the window. PLEASE NOTE: Managed commercial devices will not receive this new experience. This includes devices not running Windows 10 Home and are managed by an IT administrator.

Microsoft

There is a solution to the problem that could happen when you right-click on certain apps. Instead of performing the task selected from their context menu, a dialog box for “Open with” appears, requiring you to specify how you would like the file opened.

This problem might impact any app that has tasks within its context menu. KB5039299 also relates to a recognized problem in Windows 10, where, among other indications, the icons on the taskbar and Start menu may cease functioning.

Here’s KB5039299’s full changelog:

Highlights:

  • This update addresses an issue that affects an app’s jump list on the taskbar. Completing actions from that list might fail.A jump list is a menu that appears when you right-click an app on the taskbar or Start menu. It gives you quick access to recently or frequently used app items.
  • This update addresses an issue that affects the default Japanese Input Method Editor (IME). The candidate window stops responding when you do not expect it. Then, it goes back to a former composition state at random.
  • This update addresses a known issue that might occur when you right-click some apps. Instead of running the task you choose from the context menu, an “Open with” dialog appears. It asks you, “How do you want to open this file?” This issue might affect any app that has tasks on a context menu. This issue also affects the icons on the taskbar and Start menu.

Improvements:

  • This update addresses an issue that affects MSIX applications. When you install them from an HTTPS URI, they fail to open. This issue occurs when the download of the application is not complete. This damages the package.
  • This update affects mobile device management (MDM). When you enroll a device, the MDM client sends more details about the device. The MDM service uses those details to identify the device model and the company that made it.
  • This update addresses an issue that affects Direct Composition batched presentations. A brief flash of triangles or boxes show on the screen. This issue affects browsers, like Microsoft Edge, and other apps.
  • This update brings Country and Operator Settings Asset (COSA) profiles up to date for certain mobile operators.
  • This update addresses an issue that might stop your system from resuming from hibernate. This occurs after you turn on BitLocker.
  • This update addresses an issue that affects Windows Defender Application Control (WDAC). The issue copies unsigned WDAC policies to the Extensible Firmware Interface (EFI) disk partition. It is reserved for signed policies.
  • This update addresses an issue that affects a folder context menu. When you choose the command that removes items, the command adds items instead. This occurs when a third-party service implements a sync feature.

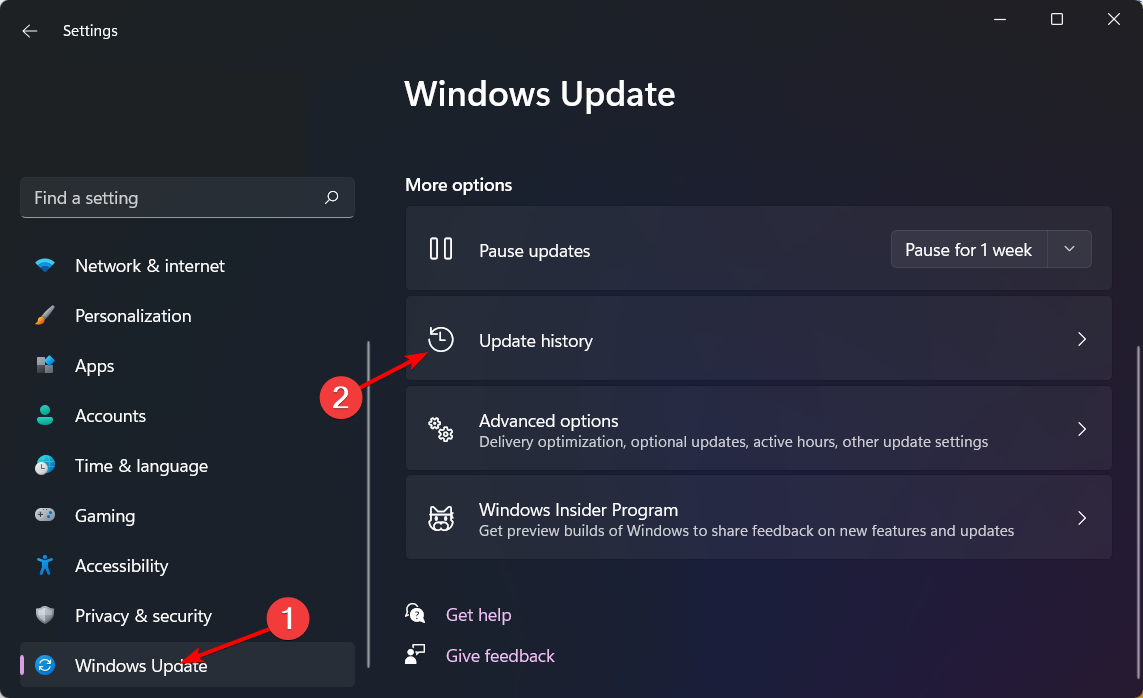
If someone wants to set up the newest non-security update for Windows 10, they can do so by visiting Settings > Windows Update, clicking on “Check for updates,” and choosing the “Download and install” option under the KB5039299 listing. Another way is to get this update from the Microsoft Update Catalog.

5 Best MSConfig Alternatives to Improve PC Startup and Performance

Managing startup programs is crucial for optimizing your Windows system’s performance. While MSConfig is a handy tool, there are several alternatives that offer more features and control. Here are the top 10 best MSConfig alternatives to help you manage your startup programs effectively.

What is the best MSConfig alternative for PC?

1. Autoruns

  1. Download Autoruns from the official Microsoft Sysinternals website.
  2. Extract the downloaded ZIP file.
  3. Open the folder and double-click Autoruns64.exe for the graphical interface.
  4. Review and manage startup items from various sections, including logon, scheduled tasks, and services.

Autoruns provides detailed information about auto-starting locations, making it easier to manage startup programs comprehensively compared to MSConfig.

2. WhatInStartup

  1. Download WhatInStartup from the NirSoft website.
  2. Extract the downloaded ZIP file.
  3. Run the WhatInStartup.exe file.
  4. Manage startup programs by enabling or disabling items directly in the interface.

WhatInStartup is user-friendly and allows you to control startup programs effectively with a simple interface.

3. Process Explorer

  1. Download Process Explorer from the Sysinternals website.
  2. Extract the ZIP file and run the procexp64.exe application.
  3. Use the search bar to find specific processes or DLLs.
  4. Manage processes by right-clicking and selecting actions like Kill Process or Suspend.

Process Explorer offers advanced features to identify and manage processes with more depth compared to MSConfig.

4. Task Manager Deluxe (TMX)

  1. Download Task Manager Deluxe from the MiTeC website.
  2. Unzip and run the portable application.
  3. Use the Startup tab to manage auto-start programs.
  4. Explore the various process and network monitoring features available.

TMX provides a clutter-free interface and real-time monitoring, making it a powerful alternative to MSCONFIG.

5. Daphne

  1. Download Daphne from the official website.
  2. Install and run the application.
  3. Use the options to kill processes immediately, politely, or on a schedule.
  4. Set process priority, affinity, and manage process windows from the interface.

Daphne offers unique features like scheduled process termination and alpha transparency settings, providing versatile process management.

Additional Windows tools that can replace MSConfig

Windows Task Manager

  1. Press Ctrl + Shift + Esc to open the Task Manager.
  2. Click More details at the bottom left if it’s not expanded already.
  3. Navigate to the Startup tab.
  4. Right-click on startup items and choose to enable or disable them.

The built-in Windows Task Manager’s Startup tab provides a quick and simple way to manage startup programs, though it lacks the depth of other alternatives listed here.

Services.msc

  1. Press Win + R, type services.msc, and press Enter.
  2. Review and manage services by right-clicking and selecting Properties.
  3. Change the startup type to Automatic, Manual, or Disabled as needed.

The Services management console provides detailed control over Windows services, which can be crucial for system performance and startup management.

These alternatives to MSConfig provide various levels of control and detail, ensuring you can choose the one that best fits your needs for managing startup programs and system processes.

If you still want to use MSConfig, here’s how you open it on Windows 10. Also, did you know that you can change the number of processors in MSConfig?

For any other questions or suggestions, hit the comments section below and let us know.

Apply Button Greyed Out in MSconfig: How to Restore it

Many users reported that the Apply button is greyed out msconfig, and this can prevent users from switching to different startup modes. Luckily, this can be easily fixed.

What can I do if the Apply button is greyed out msconfig?

1. Enable the services manually

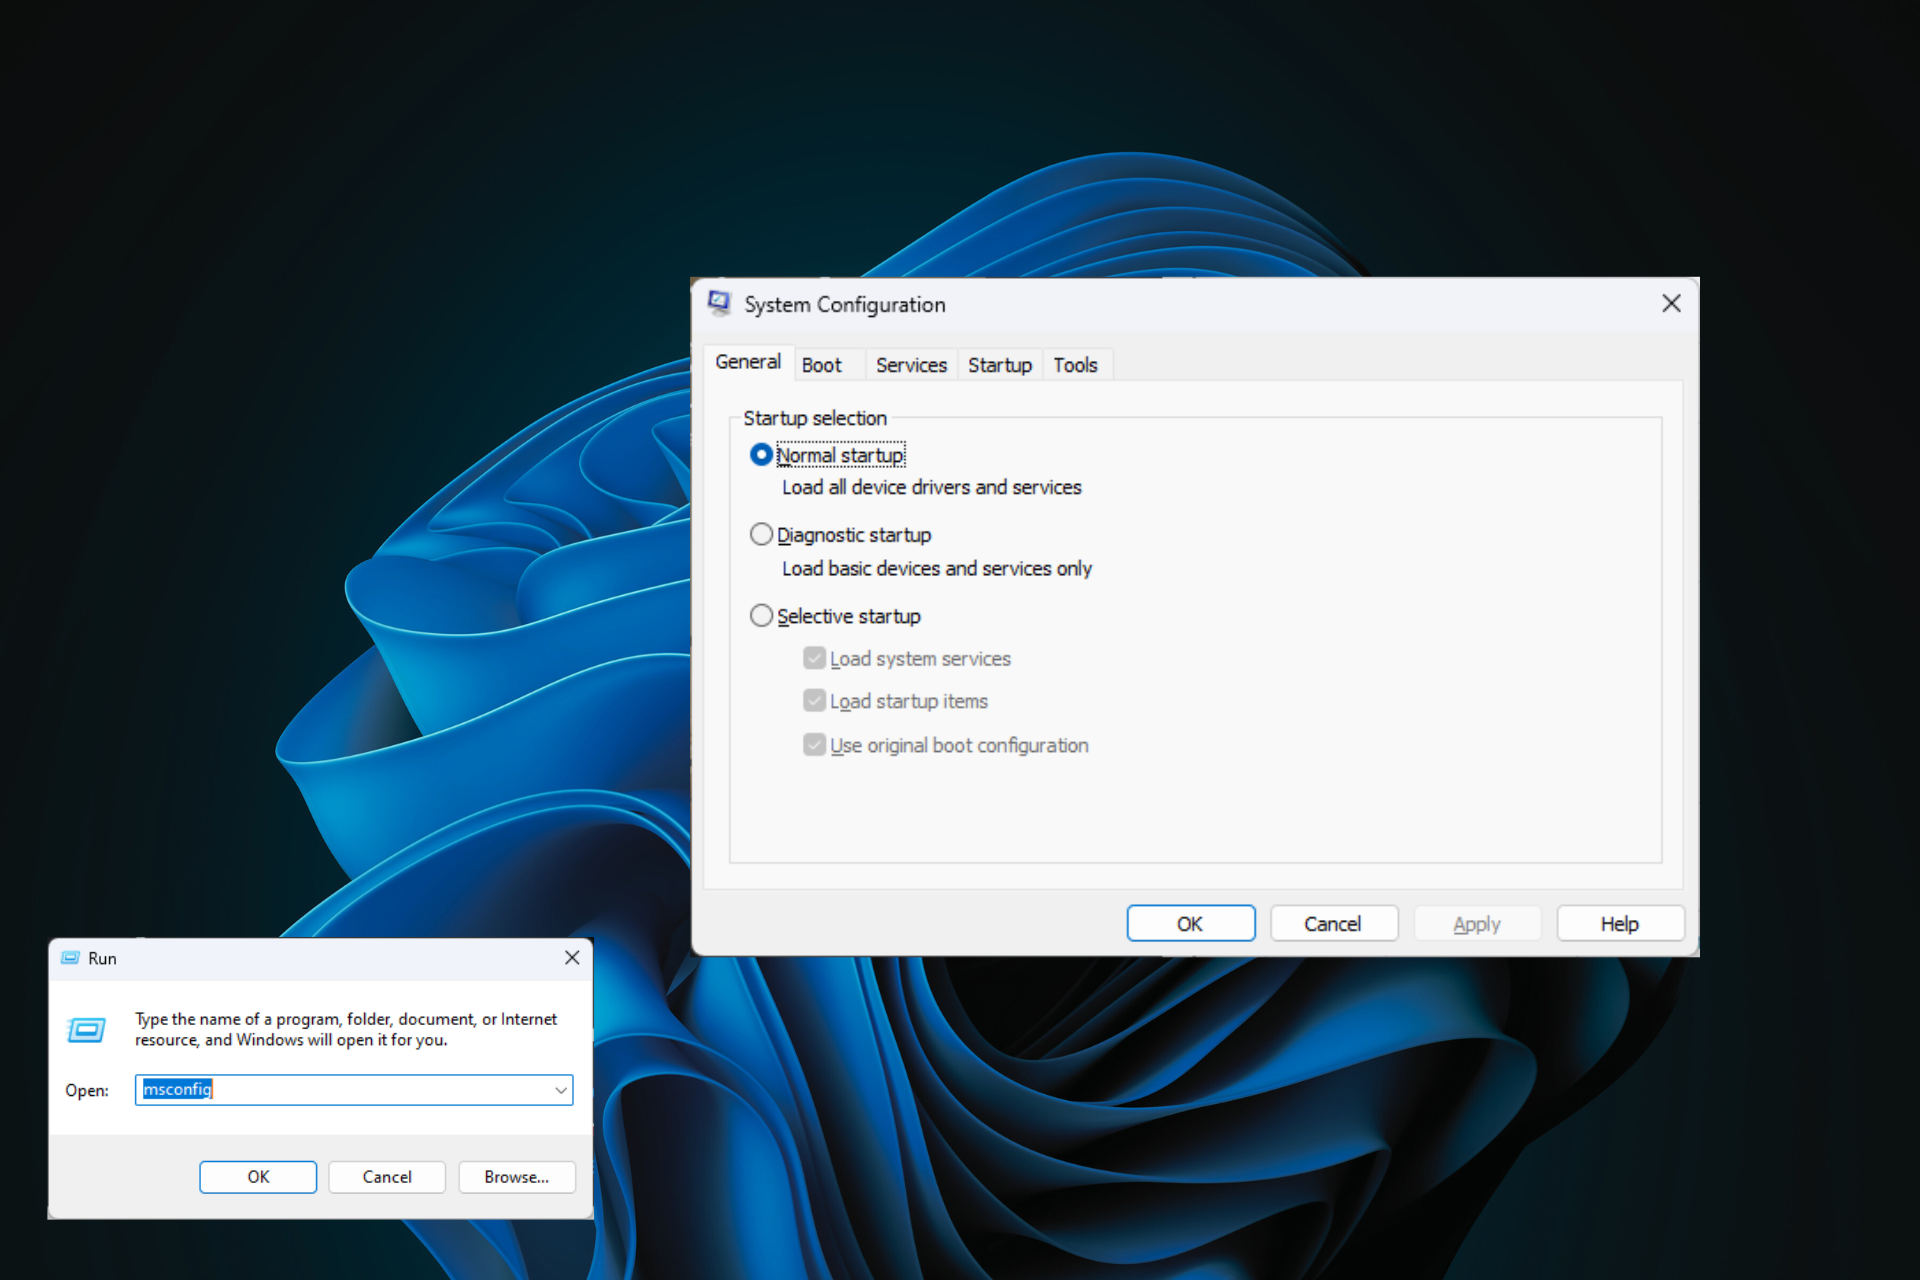
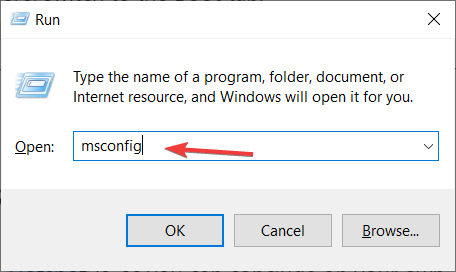
  1. Press Windows key + R and type msconfig.
    msconfig run window windows 11
  2. Navigate to the Service tab and click on Enable all. Click on Apply and OK.
    services tab enable all button
  3. If that doesn’t work, click on Disable all and then Enable all.

2. Disable advanced options

  1. Open msconfig again.
  2. Go to the Boot tab and click on Advanced options.
     boot advanced options msconfig
  3. Make sure that all options are disabled.
    boot advanced options all disabled

What are the 3 startup types on msconfig?

  • Normal startup – Loads all startup services
  • Selective startup – Lets you choose if you want to load startup items, system services, and boot configuration. Windows might revert to this startup type if you make any changes to startup settings
  • Diagnostic startup – Loads only the most basic drivers and services

If the Apply button is greyed out msconfig this is a minor problem that usually doesn’t cause any trouble and you can fix it by disabling or enabling certain settings.

To learn more about this tool, we have a great guide on how to open msconfig on Windows 11 and what to do if you disable all services in msconfig.

Many also reported that MSConfig keeps reverting to selective startup, but this can be easily fixed as well.

Lastly, did you know that you can change the number of processors in msconfig? If not, maybe should learn more about this feature.

Xbox Live suffered an outage for approximately 6 hours

Xbox Live suffered an outage earlier today, leaving many gamers unable to access their Xbox profiles. The problem started around early afternoon, and news about it rapidly spread on websites such as Downdetector. Microsoft quickly recognized the issue, informing people they were looking into its origin.

The outage was more than just a little problem; it went on for many hours, making gamers very frustrated and interested in knowing what happened. The Xbox Support team was working hard; they kept giving updates on social media and their status page. However, understanding the exact reason behind this situation took some time. It’s a situation that underlines the susceptibility of even the strongest online services and how they can affect a community that used to be connected.

When afternoon turned to evening, the Xbox team ended the quiet with good news: they solved the outage. Gamers were again allowed to join Xbox Live and continue playing from where they stopped.

However, what led to this digital problem? Little information was available, so one could only guess and remember the difficulties in managing worldwide online services.

According to this Reddit thread, the incident took about 6 hours to fix, a time when Xbox users could not play their games.

Xbox Live hasn’t suffered any outages recently, so this is relatively new for the community. Other Microsoft services, such as Microsoft 365, often experience outages, but considering that the productivity platform is frequently heavily hacked, users there are accustomed to it.

The service should be up and running again. Have you been impacted by this outage? What was your experience with it?

Devices and Printers Freezing in Windows 10 [Solved]

Often, when trying to add a printer or reconfiguring the connected ones, you find that Devices and Printers is freezing or crashing in Windows 10. This happens when the required services are not running, conflicting third-party apps are installed, the Registry has problematic entries, or the user profile is corrupt.

But more often than not, I have found that if the Control Panel freezes when I click on Devices and Printers, it has to do with missing services. So, let’s get straight to the fixes!

What can I do if Devices and Printers is freezing or crashing in Windows 10?

  1. Press Windows + R to open Run, type services.msc in the text field, and hit Enter.
  2. Scroll down to the Bluetooth Support Service, right-click on it, and select Properties.service properties
  3. Choose Automatic from the Startup type dropdown menu, click on Start under Service status, and then on Apply and OK to save the changes.run Bluetooth Support Service to fix devices and printers freezing windows 10
  4. Similarly, enable the following services and any other with Bluetooth or Printer in their names:
    • Bluetooth User Support Service
    • Device Association Service
    • Print Spooler
    • Printer Extensions and Notifications

Although some services don’t appear directly related to the Bluetooth functionality or printers, enabling them fixes things if the computer freezes when trying to print in Windows 10. One such is the Bluetooth Headphone Support service, as confirmed by a user in Microsoft forums.

2. Uninstall conflicting third-party applications

  1. Press Windows + R to open Run, type appwiz.cpl in the text field, and hit Enter.
  2. Select any third-party app/driver related to Bluetooth and printers or downloaded around the same time the issue first appeared, and click on Uninstall.uninstall
  3. Follow the on-screen instructions to complete the process.
  4. Finally, reboot the computer and check for improvements.

The most common one I found triggering issues with Devices and Printers in Windows 10 was ToolKitInstaller/DriverToolkit by Megaify Software, and uninstalling the app fixed things!

3. Update the printer drivers

  1. Press Windows + X to open the Power User menu, and select Device Manager.
  2. Expand the Printers entry, right-click on the connected printer, and select Update driver.update printer driver to fix devices and printers freezing windows 10
  3. Choose Search automatically for drivers and let Windows find and install the best locally available version.update driver
  4. Once done, restart the computer to fully apply the changes.

Updating the printer drivers can help if the Devices and Printers window keeps freezing on Windows 10. If Windows can’t find a better driver, I suggest you check the manufacturer’s website, locate the latest version, and manually install the driver!

4. Delete corrupt registry entries

Note icon NOTE
This solution requires you to make changes to the Registry Editor. It’s a complex process, and any mistakes on your part can affect the PC’s stability. So, I recommend you create a restore point beforehand so that you can always revert the PC to the previous stable configuration.
  1. Press Windows + R to open Run, type regedit in the text field, and hit Enter.registry
  2. Paste the following path in the address bar and hit Enter:HKEY_LOCAL_MACHINE\SOFTWARE\Microsoft\Windows NT\CurrentVersion\Print\Providers\Client Side Rendering Print Providerpath
  3. Now, right-click on the Client Side Rendering Print Provider key from the navigation pane and choose Delete.
  4. Click Yes in the confirmation prompt.

If this doesn’t work, check the error logs and verify it lists any related to Registry keys.

For instance, a user found this error log, Windows detected your registry file is still in use by other applications or services. The file will be unloaded now. The applications or services that hold your registry file may not function properly afterwards, followed by several Registry keys related to the installed printer. And deleting them did the trick!

5. Repair the corrupt system files

  1. Press Windows + S to open Search, type Command Prompt, then right-click on the relevant result and select Run as administrator.
  2. Click Yes in the UAC prompt.
  3. Paste the following DISM commands individually and hit Enter after each: DISM /Online /Cleanup-Image /CheckHealth DISM /Online /Cleanup-Image /ScanHealth DISM /Online /Cleanup-Image /RestoreHealthdism command
  4. Once done, execute the following command to run the SFC scan: sfc /scannowsfc scan to fix devices and printers freezing windows 10
  5. Finally, restart the computer and verify whether you can access Devices and Printers without it crashing or freezing.

If it’s the corrupt system files to blame for the computer freezing when trying to print, running the DISM commands and SFC scan will help, replacing all corrupted files with their cached copy!

6. Perform an in-place upgrade

  1. Go to Microsoft’s official website, and download the Media Creation Tool for Windows 10.
  2. Run the downloaded file (MediaCreationTool.exe) and click Yes in the UAC prompt.
  3. Click Accept to agree to Microsoft’s license terms.license terms
  4. Choose Upgrade this PC now and click on Next.in-place upgrade to fix devices and printers freezing windows 10
  5. Wait for Windows 10 to download and then proceed with the in-place upgrade.download

An in-place upgrade takes a few hours to complete but is highly effective against issues with built-in Windows components and features. The best part is that you don’t lose any stored files, applications, or configured settings!

7. Create a new user profile

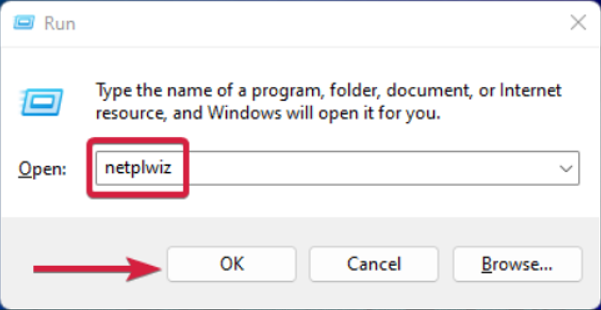
  1. Press Windows + R to open Run, type netplwiz in the text field, and hit Enter.
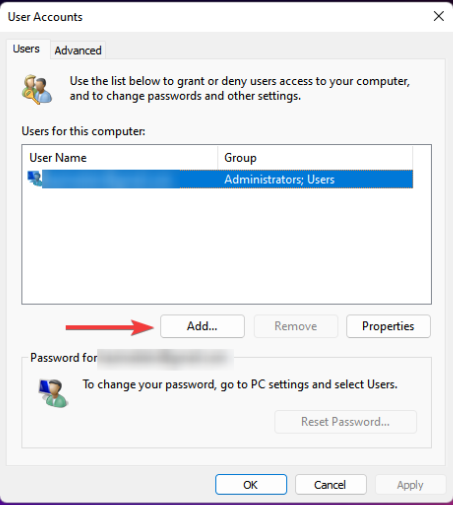
  2. Click on Add.add user profile to fix devices and printers freezing windows 10
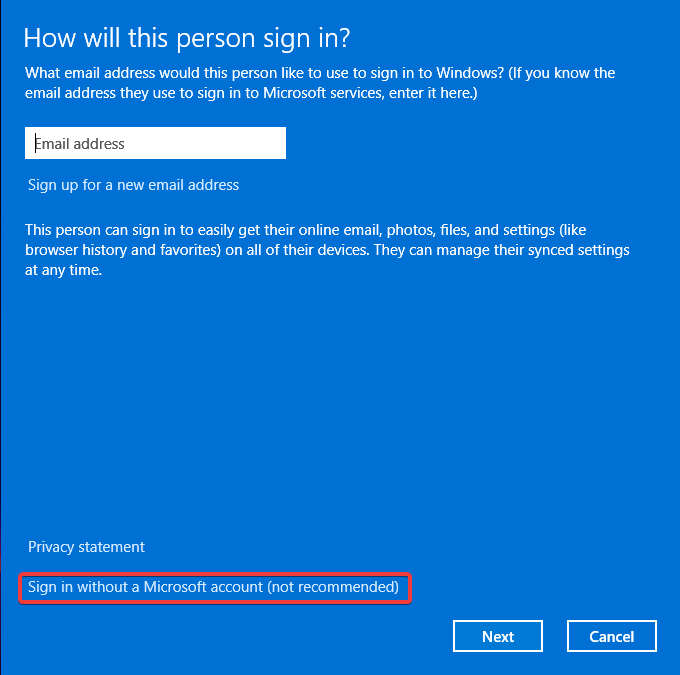
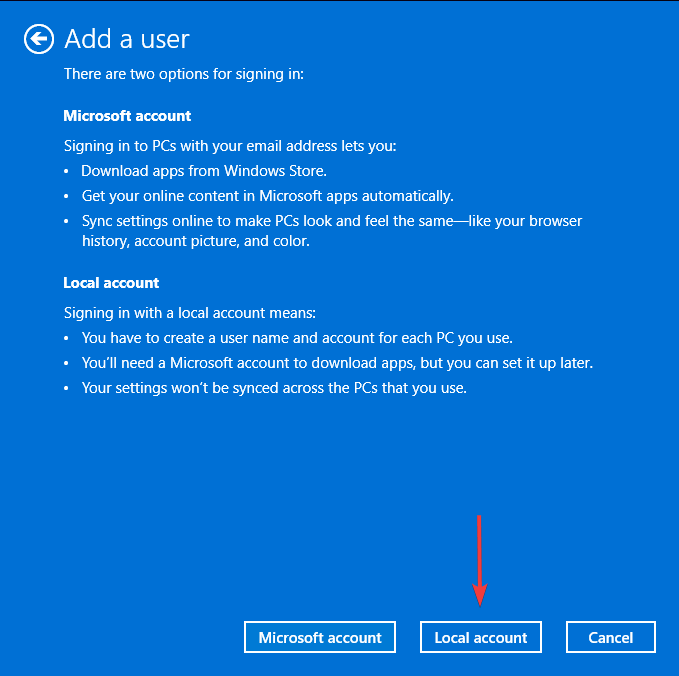
  3. Click on Sign in without a Microsoft account and then on Local account.
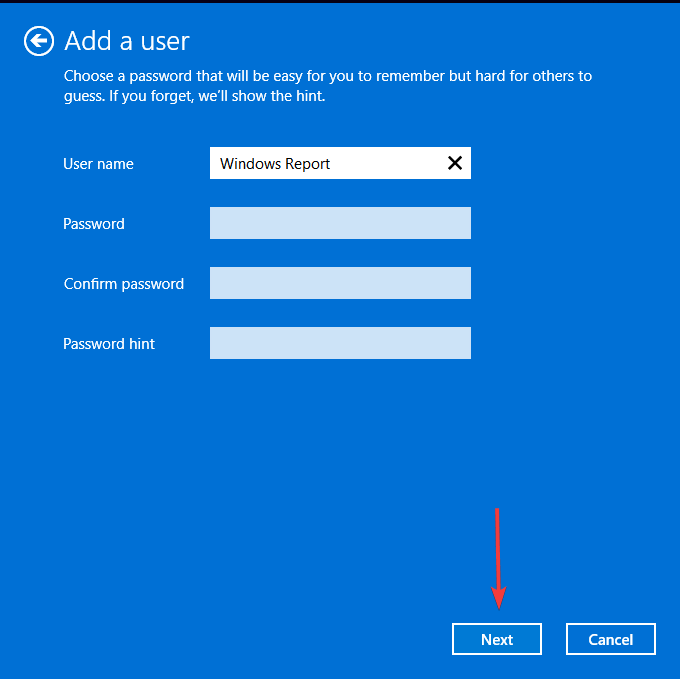
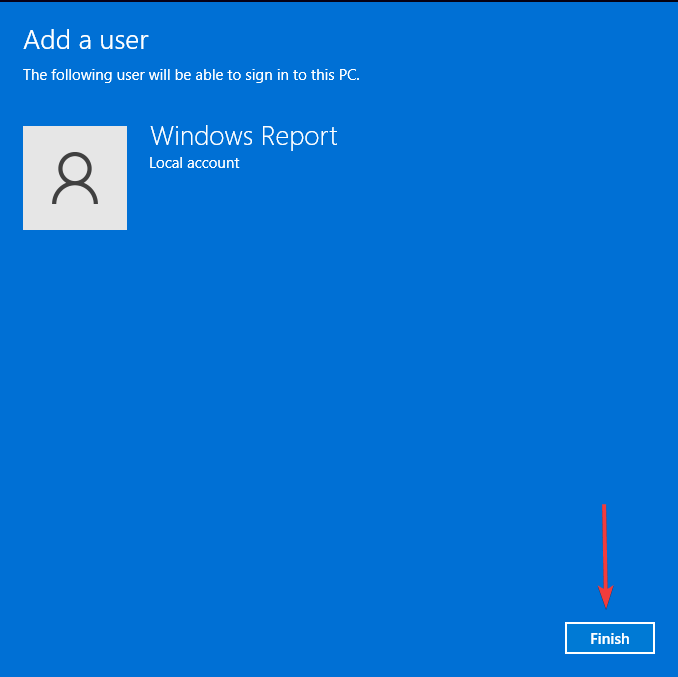
  4. Enter a username for the new profile and a password (not mandatory), then click on Next and Finish to complete account creation.new account
  5. Once done, select the new user profile and click on Properties.properties
  6. Go to the Group membership tab, choose Administrator, then click Apply and OK to save the changes.set as administrator
  7. Finally, sign in to the new user profile on Windows 10, install the printer and relevant drivers, and the Devices and Printers window shouldn’t freeze anymore. If so, you can move the data between the profiles using an external storage solution.

As a last resort, you can create a new local user account on Windows 10, as it had helped quite a few users when the Control Panel or Devices and Printers froze while printing. You can also add a shortcut to your printer for ease of access.

And while you are here, discover some quick tips to make Windows print faster than ever!

Which fix worked for you? Share with our readers in the comments section.

You can finally change the sound of your Microsoft Teams notifications

Do you remember when we told you you’ll soon be able to change the sound of your Microsoft Teams notifications? Maybe, for Microsoft Teams users on Windows and the web, your wish could now come true. Microsoft has finally launched a feature that allows users to adjust the sound of their notifications. This makes it possible to differentiate an urgent message from a normal ping even without looking. Just imagine—knowing what’s essential and what’s not only by the sound!

In a blog post, Microsoft says people using Teams Public Preview, trying out this feature is easy. You just need to click on three dots in Teams to find settings and go to the Notifications and Activity menu. Then, personalize your notification sounds with eight options for regular notifications and four more for urgent messages that require immediate attention.Microsoft Teams notification sound

But what if you are right there, deeply focused or in a meeting, and an important thing shows up? A checkbox for that permits sounds even when you’re set as busy or in a meeting. It’s similar to having your helper who understands precisely when to break your concentration and when to keep quiet.

This feature’s release is currently limited, though. To use it, you must either be part of the Teams Public Preview or a Microsoft 365 Targeted release user. And if you’re thinking about when it will be accessible for everyone or on other platforms, then you’ll have to wait until Microsoft announces the release of the feature there, as well.

To use this feature, you must be a member of the Teams Public Preview or Microsoft 365 Targeted release and use the new Teams client for Windows of web.   

Microsoft

Have you considered that a sound could arrive one day to make your work life somewhat easier? It feels like with the fresh custom sound notifications on Microsoft Teams, we are nearing towards creating our digital workplace environment slightly more customized and significantly better at productivity.

What are your thoughts on this?

How to Open MSConfig in Windows 7 [Run, CMD Command]

If you’re looking to tweak your startup programs or troubleshoot your system, knowing how to open MSConfig on Windows 7 is essential. Here are some quick and easy methods to access this powerful tool.

How do I open MSConfig in Windows 7?

  1. Click the Start button on the taskbar.
  2. Type msconfig or system configuration in the search box.
  3. Press Enter or click on the System Configuration in the search result.

This method is quick and easy, especially if you’re already used to using the Start Menu’s search function.

2. Using the Run dialog box

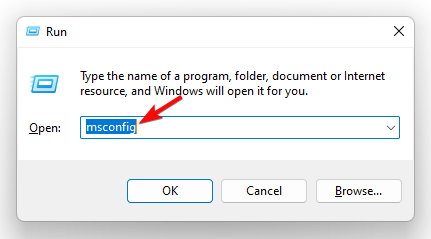
  1. Press the Windows + R keys simultaneously to open the Run dialog box.
  2. Type msconfig and press Enter or click OK.

Using the Run dialog is one of the most straightforward ways to open msconfig, suitable for users who prefer keyboard shortcuts.

3. Using the Command Prompt

  1. Click the Start button type cmd in the search box.
  2. Right-click on Command Prompt and select Run as administrator.
  3. In the Command Prompt, type msconfig and press Enter.

This method is great if you’re already working in the Command Prompt and want to switch quickly to msconfig. Of course, you may also use PowerShell in exactly the same way.

4. Using Control Panel

  1. Click the Start button and select Control Panel.
  2. In the Control Panel, select View by: Small icons or Large icons to see more options.
  3. Click on Administrative Tools.
  4. Double-click on System Configuration.

Opening msconfig via the Control Panel is beneficial for users who may not be as familiar with shortcuts or command lines.

5. Using File Explorer

  1. Open File Explorer by clicking its icon on the taskbar.
  2. Navigate to This PC and then go to Local Disk (C:) (or the drive you have Windows installed).
  3. Open the Windows folder and then the System32 folder.
  4. Locate and double-click on msconfig.exe.

This method might be more involved, but it’s helpful if you want to know exactly where the executable file is located.

Each of these solutions provides a different way to open msconfig based on what you might find easiest or most convenient. You might also be interested in finding out how to open MSConfig in Windows 10.

Did you disabled some services in MSConfig accidentally? Click the highlighted guide to learn how to get them back.

If our guide helped you open MSConfig on Windows 7, let us know in the comments below.

How to Import Mbox to Outlook & Transfer Your Emails

If you’re switching from one email client to another, you might experience some compatibility issues. This is exactly what happened to users who tried to import mbox file to Outlook, and in today’s guide, we’ll show you how to fix that.

Can Outlook import MBOX format?

No, Outlook doesn’t have native mbox support and to import it you need to convert it into a PST file or convert each email into an EML file and then import it.

How can I import mbox to Outlook?

1. Use an online converter

  1. Visit the Aspose page.
  2. Drag and drop your mbox file.
    mbox to pst online convertor
  3. Wait for it to convert and download it.
  4. Drag and drop the downloaded file to Outlook to import it.

Do keep in mind that some of these services might not be 100% safe, so do the necessary research before using them.

2. Use Thunderbird

  1. Visit the Thunderbird download page and install it.
  2. Open Thunderbird, go to Tools and choose Add-ons and Themes.
     add-ons and themes thunderbird
  3. In the search bar type import and press Enter.
    importexporttools search thunderbird
  4. A new tab will appear. Start typing import and choose ImportExportTools NG from the list.
    impotexporttools ng dropdown thunderbrid extensions
  5. Click on Add to Thunderbird.
  6. After the extension is added, go to Tools. Choose ImportExportTools NG and then Import mbox file.
    import mbox file thunderbird
  7. Next, choose Import One or More MBOX Files and select your mbox file.
  8. After that, mbox file will be added as a separate folder.
  9. Restart Thunderbird, choose Tools and then ImportExportTools NG. Select Export all messages in the folder and choose EML format.
    eml format export thunderbird
  10. Lastly, select all messages from the destination directory and drag and drop them to Outlook.

This is a more complex solution, but it works, and it doesn’t require you to rely on third-party services. In case the problem is still there, you can consider using a third-party mbox to PST file converter.

Which email client opens MBOX files?

Mbox format is used by Thunderbird, Apple Mail, IncrediMail, SeaMonkey, Sylpheed, and several other email clients.

To learn more, we have a great guide on the most common email file formats. Since PST is being used by Outlook, you might be interested more in finding the location of Outlook PST file in Windows 11.

Before you go, don’t miss our guide on how to convert PST to OST file for more useful information.

5 Ways to Open MSConfig in Windows 11

MsConfig is a command used to open the System Configuration window. It allows you to change Windows boot settings and the startup app actions. Opening it is very simple, and we will discuss three ways to launch System Configuration using the msconfig command on Windows 11.

How can I access Msconfig in Windows 11?

1. Using the Run command

  1. Press Windows + R to open the Run window.Run window Msconfig in Windows 11
  2. Type msconfig, click OK, or press Enter to open the System Configuration window.
  1. Press the Windows key + S to open Windows Search.
  2. Type msconfig and click System Configuration from the list of options.Windows Search - msconfig windows 11
  3. This will open the System Configuration window.

3. Using the Command Prompt

  1. Press Windows, type command prompt or cmd.
  2. From the list of options, select Command Prompt and click Run as administrator.Command Prompt - Run as admin - Msconfig in Windows 11
  3. Type the following command and click Enter: msconfigmsconfig
  4. You will get the System Configuration dialog box.

If you are well-versed in Terminal or like PowerShell better than Command Prompt, you can use it to open the System Configuration window.

4. Using the File Explorer window

  1. Press Windows + E to open the File Explorer window.
  2. In the address bar, type msconfig and press Enter.msconfig file explorer
  3. This will launch the System Configuration window.

5. Using the Task Manager

  1. Press Ctrl + Shift + Esc to open the Task Manager.
  2. Go to the Run new task option from the top of the window.Run a new task
  3. Type msconfig and click OK or press Enter.

To conclude, you can open the System Configuration window using the Run command, Command Prompt, File Explorer, and Windows Search.

Once you have opened the System Configuration, you can change the Startup mode and boot options, enable or disable Services, and manage Startup items.

In case you want to learn more about removing startup programs on Windows, we have a separate guide for that.

If you cannot open msconfig, you can check out our You don’t have sufficient privileges to run the System Configuration guide for more information.

Do keep in mind that sometimes the Apply button might be grayed out in msconfig, but that can be easily fixed. Many users also reported that MSConfig keeps reverting to selective startup, but we have a guide that tackles that issue.

If you have any suggestions or questions, please leave them in the comments section below, and we will be happy to answer.

Microsoft releases KB5041137, the first recovery update for Windows 11 24H2

Microsoft surprised many when it released the Windows 11 24H2 (2024 update) on the Preview Channel within the Windows Insider Program in May. Because the patch was so new, the Redmond-based tech giant didn’t have a recovery update for it until now: KB5041137 is the initial recovery update for this fresh version of Windows.

This is not an ordinary patch; it serves as a lifesaver if you encounter unexpected problems with the new update and need help getting out of a tight spot.

KB5041137 is a type of Safe OS Dynamic Update, which mainly focuses on increasing the strength of WinRE (Windows recovery environment). Why is this important? It’s simple: even if an operating system seems perfect and advanced in every way possible, there’s always some possibility that things may not work as planned or expected.

And when such situations arise – because they will at one point or another – having a strong recovery environment like WinRE can make all the difference between small issues turning into big problems.

But what exactly does this update do? It is an enhancement for WinRE in Windows 11, version 24H2. So, if your device has a problem and requires recovery, the process should be better now due to KB5041137’s improvements. It’s a bit like having a safety measure, making sure you can get back your system efficiently when required.

Dynamic Updates, including this one, are a little different. They are not pushed through Windows Update, but you can download them manually from the Windows Update Catalog website. This may appear to be an additional process, but it is advantageous. Users can use these updates when they want, ensuring they are prepared for them and do not interfere with their work process.

Compatibility is not an issue. The update is available in versions for both Arm64 and AMD64 devices, ensuring that most Windows 11 users can enjoy its enhancements regardless of their device’s architecture.

Although the surprise launch of Windows 11 24H2 was unexpected for some people, Microsoft had prepared earlier by releasing KB5041137. If you ever encounter trouble while experimenting with the new patch, use the recovery update to fix it.

How to Sync Outlook Notes With iPhone

When you sync notes between Outlook and iPhone, you can quickly access them on both the PC and iOS device!

When I looked up the process, there wasn’t any reliable information available on the web, with most suggesting using a third-party tool. However, you don’t need one, as the functionality is native to iOS and can be set up in less than a minute.

Let’s find out how you can sync and access Outlook notes on your iPhone!

How can I sync Outlook notes with my iPhone without iTunes?

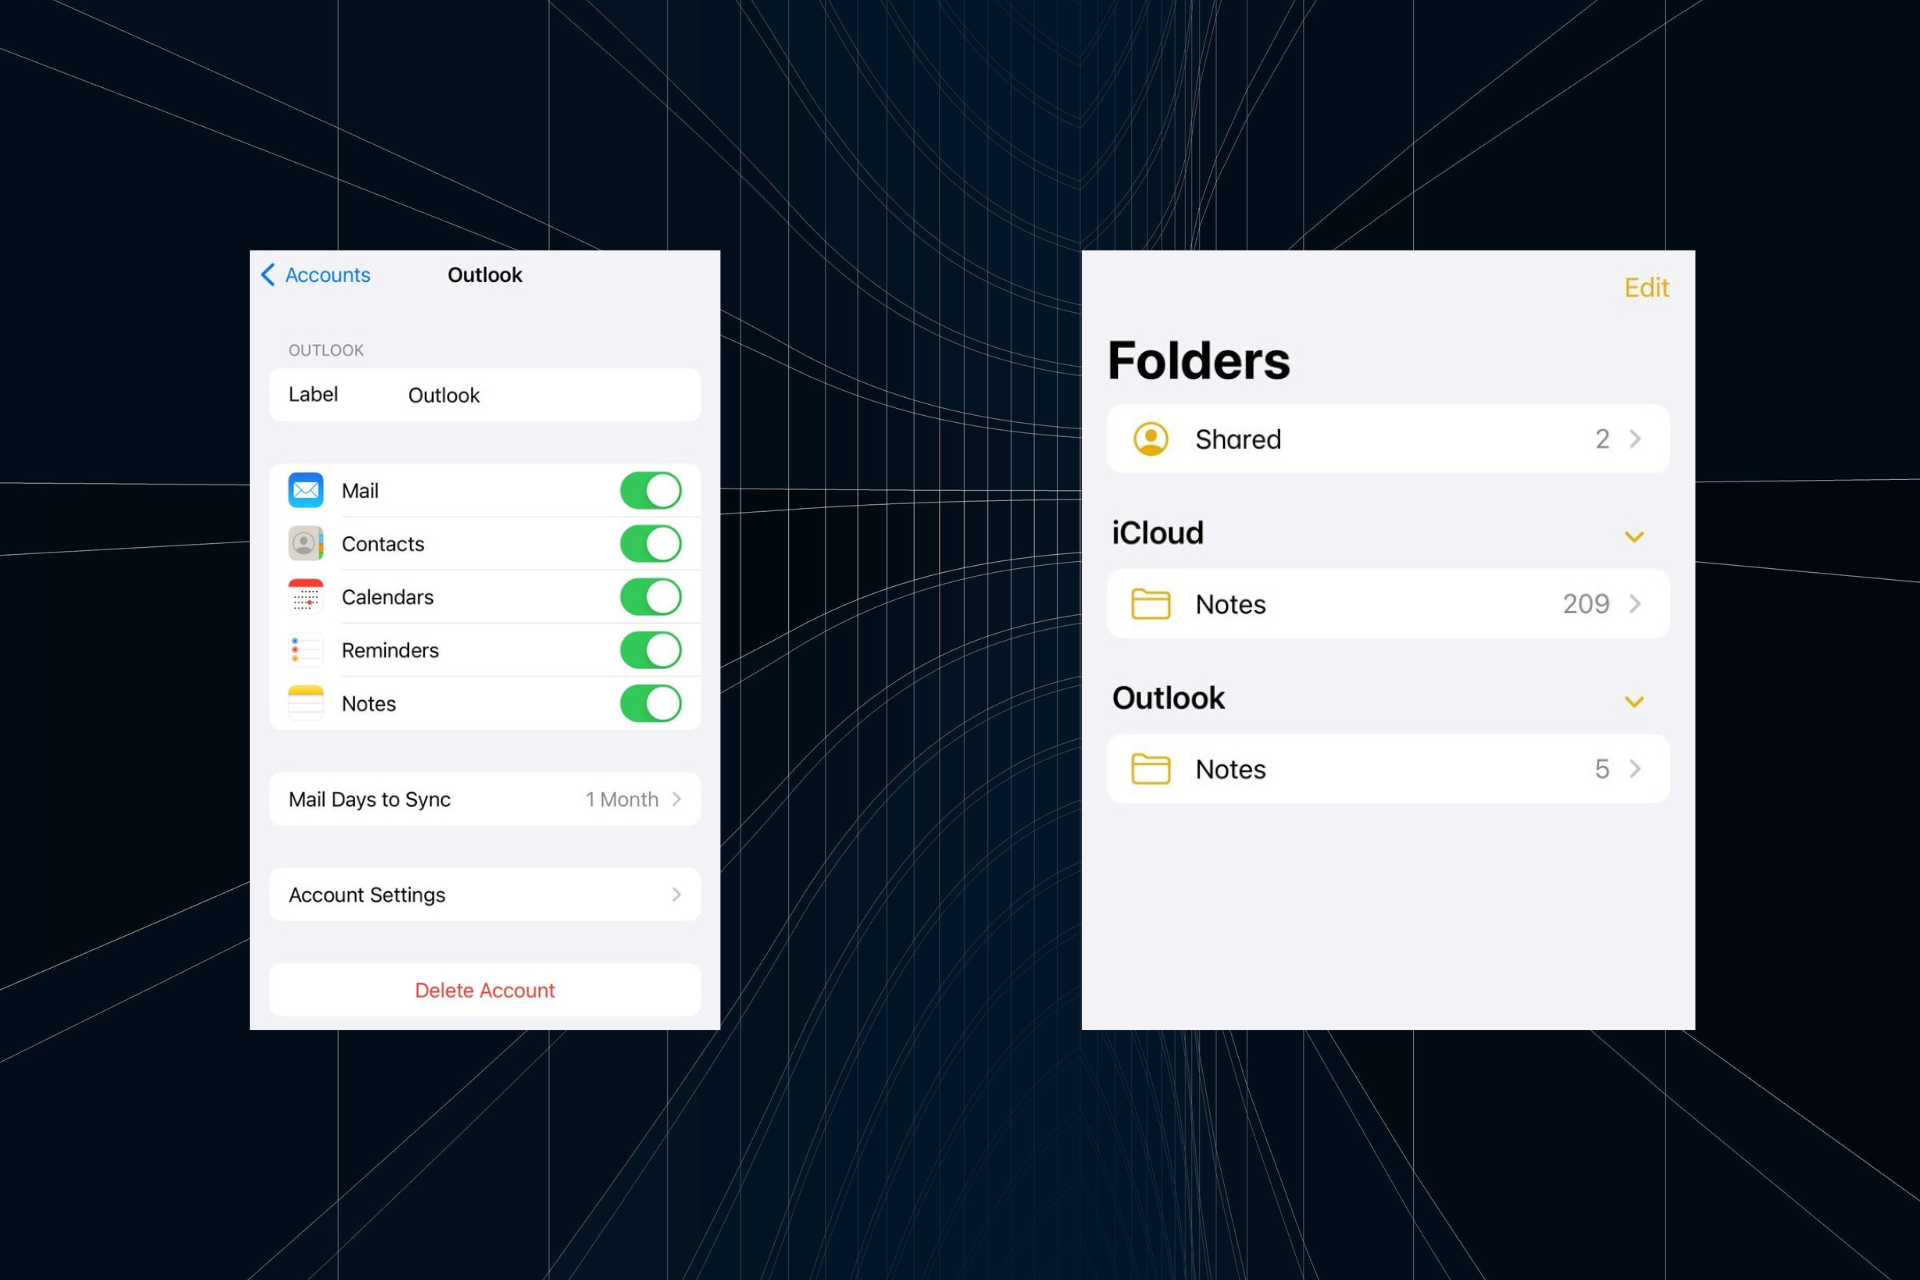
  1. On your iPhone, open the Settings app, scroll down and go to Notes.settings
  2. Tap on Accounts.notes
  3. Now, tap on Add Account, if the Outlook account has not already been added.
  4. Choose Outlook.com from the list of options.outlook.com
  5. Enter the email address and the code you received to add the Outlook account.
  6. Now, enable the toggle for Notes and then tap on Save.enable to sync outlook notes with iphone
  7. Wait for a few seconds, then open the Notes app on your iPhone, tap on Folders at the top left, and select Outlook. All your Outlook notes will now appear in the iPhone’s Notes app.outlook notes on iPhone

This way, you can add an Outlook account on iOS and sync notes without using iTunes. When I synced Outlook notes with iPhone, any changes made on one reflected in real-time on the other.

There’s no reason it shouldn’t be the same at your end as long as Outlook has been set up correctly, you have an exchange account, and both devices have access to a fast Internet connection.

What can I do if my iPhone doesn’t show synced Outlook notes?

  • Check the Outlook account settings: Open Settings > go to Notes > choose Accounts > select Outlook > enable the toggle for Notes (re-enable if already enabled) > check for improvements.
  • Re-add the Outlook account: Open Settings > go to Notes > select Accounts > choose Outlook > tap on Delete Account > tap on Delete from My iPhone to confirm > re-add the Outlook account > check for improvements.
  • Update iOS: If there are any pending iOS updates, install them.
Outlook

You should now have all the Outlook notes synced and accessible on your iPhone. Similarly, you can import Outlook contacts to iPhone!

A few users reported that Outlook notes are missing, but we have an entire guide dedicated to this issue, so don’t hesitate to visit it for more solutions.

Were you able to sync Outlook notes with the iPhone? Let us know in the comments section.

Windows 11 is three percent away from being the most popular Windows version on Steam

Windows 11 is becoming more popular in the changing world of operating systems. This is especially true among gamers who use Steam services. It’s interesting to observe how this new OS is moving closer to surpassing Windows 10 as the top pick for the gaming community. The most recent data from Valve’s Steam Hardware & Software Survey shows that Windows 11’s popularity continues to increase rapidly. But let’s dive a bit deeper, shall we?

In June 2024, the market share of Windows 11 increased by 0.55 points to reach a total of 46.63%. It is now less than 3% behind Windows 10, which went down slightly, losing a total of -0.93 points. This movement shows an increasing favor for Windows 11 among Steam users even though there remains a small advantage towards Windows 10, with its user base at around 49.42%. It is quite fascinating that even the earlier versions, such as Windows 7 and 8.1, are still somewhat in use, although on a very limited scale.

96.61% of survey participants use Windows to play games on Steam. This shows how Microsoft’s OS holds a powerful grip over the gaming market. Linux and macOS stand far below, with 2.08% and 1.31%, respectively. This information is not only numbers but also a treasure trove for developers who wish to improve their games on recognized platforms.

Regarding hardware, the survey shows what gamers like and choose. For those using Steam, Intel is at the top in the processors market, with a percentage share of 66.80%, followed by AMD, which has 33.15%. Regarding CPU cores, six are the most frequent – they can be found in about 32.63% of systems surveyed. The survey gives an overview of different components used by PC gamers. Among those who use Steam as their gaming platform, Intel dominates the processor market with a percentage share of 66.80%.

In second place, we have AMD at around 33.15%. Regarding CPU cores specifically for gaming purposes, six seem to be most common among these users, accounting for approximately one-third or more than thirty-two point sixty-three percent (32+63%). Almost half of gamers think 16GB is the most liked option for memory. As for the GPU model, Nvidia’s RTX 3060 stands first.

What about the display resolutions? The survey shows that 1920 x 1080 is still the most common, with 57.47% of gamers using it. However, higher resolutions such as 2560 x 1440 are becoming more popular, too – this shows how much people in our community want better graphics and to be more immersed when they play games.

This rise in Windows 11 usage among Steam users signifies a change in the operating systems they prefer. It also shows how much the gaming community’s needs and desires have transformed. However, with Windows 10’s impeding EOS, Windows 11 is starting to be a choice for all users: its market share has grown 30% in June alone.

So, people might be finally ready to migrate to Windows 11.

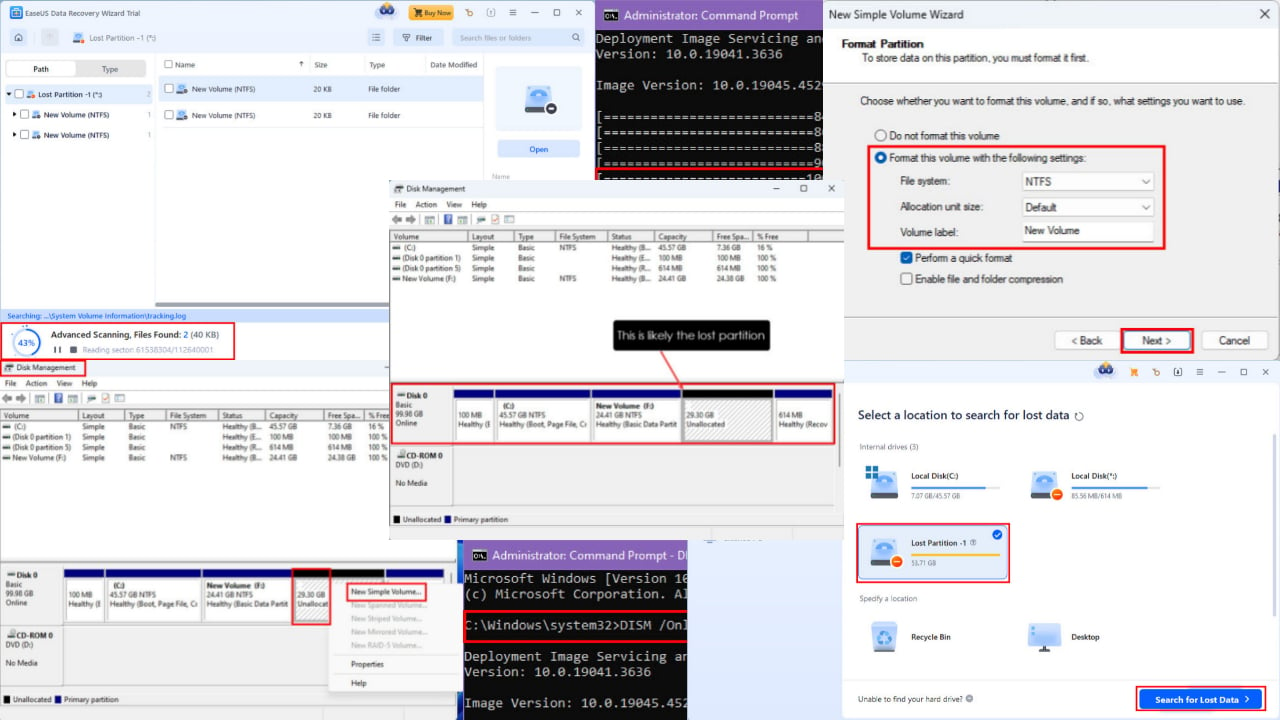
Windows 10 Disk Management Recovery – How To Recover Files

Does Windows 10 Disk Management recovery actually work? Let’s find out below!

The Windows 10 Disk Management tool allows you to manage your internal storage drives. It also controls how you can use removable USB and HDD/ SSD storage.

Find below the tried and tested methods to recover lost partitions or system files. Also, learn if the tool works efficiently as a recovery tool or if you need specialty third-party software for partition and file recovery.

What Is Windows 10 Disk Management Recovery?

Windows 10 Disk Management tool

Windows 10 Disk Management is a built-in tool for advanced storage operations, but it doesn’t offer any partition or system file recovery services.

You’ll find a Recovery Partition linked to the Windows OS installation drive. You’ll notice it doesn’t have a drive letter. Also, the Windows File Explorer tool won’t show this partition in the This Computer or Computer window.

Windows 10 Disk Management Recovery

Windows 10 uses the Recovery Partition to recognize the current operating system, configurations, and customizations for OS recovery purposes. It automatically accesses the Windows 10 Disk Management Recovery Partition files in the event of major failures, like BSOD, HDD issues after a power outage, and more.

Microsoft has continued the same functionalities and features of Windows 10 Disk Management in Windows 11. Therefore, you won’t find the recovery feature for this tool in Windows 11 as well.

Recreate a Lost Partition Using Windows 10 Disk Management

This tool will allow you to recreate the lost partition. However, when you create a new partition from an unallocated disk space, Windows 10 must format it using NTFS or FAT file systems. In this stage, you’ll lose the content of the lost partition.

Here’s how to use it:

  1. Right-click on the Windows Start Menu or Flag to access the Power User context menu.
  2. Click on the Disk Management tool.
Power User
  1. The Disk Management app will open.
  2. You should see separate ribbons for each disk. For example, Disk 0, Disk 1, etc.
  3. Inside the disk ribbon, you should see navy blue and dark-colored boxes. These are the partitions in the selected disk.
  4. You should see a box in the ribbon with a dark strip and a text saying Unallocated. That’s the lost partition.
Disk ribbon
  1. However, if there was an existing Unallocated disk space, the recently lost partition would be merged with that one.
  2. Let’s assume there was no Unallocated disk space in your SSD or HDD.
  3. Then, click on the Unallocated box, right-click, and choose the New Simple Volume option.
New Simple Volume
  1. The New Simple Volume Wizard will pop open. Click Next.
Simple volume wizard
  1. Click Next again on the Specify Volume Size window.
  2. The Unallocated space will automatically show the drive letter of the previously lost partition in the Assign Drive Letter or Path dialog.
  3. Click Next to choose the auto-selected drive letter.
Assign Drive Letter
  1. You’ll now see the Format Partition dialog. Enter the relevant information in fields, like Volume label, File system, etc.
Format Partition
  1. Click Finish on the next screen.
Finish creating partition
  1. The previously lost partition will now show up in the File Explorer tool.

Although you’ve recreated the lost partition, it’ll be empty since the partition wizard has formatted the drive.

At this stage, don’t create any new files or paste different files in this newly-created partition. You’ll need to use a third-party file recovery tool to get back recoverable files of the lost partition. If you start copying files in the new partition, old files will get overwritten and might get lost forever.

Recover a System File

There are no commands or functionalities to force system file recovery using Windows Disk Management. However, you can run the following commands if you suspect a system file has been deleted accidentally. Still, keep in mind that Windows 10 won’t allow you to delete any critical system files.

Run SFC Scan

  1. Open the Windows 10 terminal by searching for Command Prompt in the Start Menu, then right-click on it and select the Run as administrator option.
open cli
  1. Type the sfc /scannow command in the terminal window and press Enter.
  2. The SFC scan command will start and can take some time to complete. It should take anything between 10 minutes to up to an hour depending on the size of the Windows 10 installation partition.
run sfc
  1. Don’t interrupt the scanning session while it’s running.

Once the scan is over, the Command Prompt tool will display the outcomes. Here are some possible results:

  1. Windows Resource Protection found no integrity violations: System files are okay, and no action is needed further.
  2. Windows Resource Protection found corrupt files and successfully repaired them: You’ve recovered lost system files.
  3. Windows Resource Protection found corrupt files but was unable to fix some of them: Run DISM.

If you see the third message, move on to the next method.

Run DISM Scan

  1. Open the Windows 10 CLI with elevated rights just like in the previous method.
  2. Enter the following command in the terminal and hit Enter:
DISM /Online /Cleanup-Image /ScanHealth
DISM 1
  1. It might take a while to finish the initial scan.
  2. When CLI shows any issues with the system files after the scan, run the following command:
DISM /Online /Cleanup-Image /RestoreHealth
DISM 2
  1. Windows 10 will attempt to restore corrupted system files online.
fixing files
  1. If everything works well, the restoration should be successful as shown below.
fixed successfully

Use a Third-Party App To Recover a Lost Partition

The most convenient way to recover a lost partition is by using a specialty data recovery app, like EaseUS. You can download and install the tool for free.

However, you’ll only get a free evaluation. If you like what you see, you can buy a license key and then it’ll let you recover lost partition data.

Here’s how to use it:

  1. Launch the app using the Desktop or Start Menu shortcut.
  2. It should open the Hardware Disk window.
  3. If there are any accidentally deleted partitions on the SSD or HDD, you’ll see the Lost Partition notification for the respective drive.
  4. Select that drive, like Lost Partition 1, and hit the Search for Lost Data button in the bottom right corner.
Search for Lost Data
  1. The app will start automatically scanning for the lost files.
start scanning
  1. Click Go to Recover once scanning is over.
Go to Recover
  1. If you’re on an activated EaseUS version, you’ll see the option to choose a drive where you want to save the recovered files from the lost partition.
  2. Follow the on-screen instructions.

Summary

Unfortunately, there’s no Windows 10 Disk Management recovery option for your old partitions or system files. However, you can create a new one with the tool and then use third-party software, like EaseUS to recover the deleted files. For system files, you must use SFC and DISM commands.

If the article helped you or you wish to submit feedback, feel free to comment below!

The third time’s a charm: KB5038575 in the Dev Channel is once again stopped from rolling out

Microsoft had to stop distributing new updates to the KB5038575 patch (which received a second string of updates in June) in the Dev Channel because of unknown problems, according to the latest edit in the official changelog.

UPDATE 6/30: We have temporarily paused the enablement of these features to investigate a few issues reported by Windows Insiders. We plan to begin the enablement again shortly.

Microsoft

Microsoft had a few interesting developments, such as better narrator improvements, voice access support, a new account manager within the Start menu, and even some fresh emojis. But just when we were about to test these features for ourselves, Microsoft decided to halt progress. They didn’t spill the beans on what exactly went wrong, leaving us all wondering.

Microsoft pulling back an update is not uncommon. One week ago, they needed to retract a non-security update because it created problems for computers running virtualization software. It’s unpleasant to imagine switching on your computer only to be trapped in a never-ending cycle of restarts.

Keep in mind that there is a risk each time these updates happen. But there is no need to fret. Microsoft is dealing with it, and we expect to see those fresh characteristics in KB5038575 shortly. Let’s hope for a successful introduction during the next attempt.

Outlook AutoArchive Settings Explained & How to Use

Managing your Outlook mailbox can be a daunting task, especially when it starts to get cluttered. AutoArchive is a handy feature that helps keep your mailbox organized by automatically moving old items to an archive folder. Keep in mind that the New Outlook doesn’t have AutoArchive settings. This guide is useful if you’re using the Classic Outlook app.

How do I enable and set up Outlook AutoArchive?

1. Enable and customize AutoArchive in Outlook

  1. Open Outlook and click on the File tab.
  2. Select Options from the menu.
  3. In the Options window, go to Advanced.
  4. Under the AutoArchive section, click on AutoArchive Settings.
  5. Check the box that says Run AutoArchive every [n] days.
  6. Enter the number of days (e.g., 14) to specify how often AutoArchive should run.
  7. Configure other settings such as:
    • Prompt before AutoArchive runs (recommended if you want a reminder before AutoArchive runs)
    • Delete expired items (to delete expired emails instead of archiving them)
    • Archive or delete old items (to set specific behaviors for archiving or deleting)
    • Show archive folder in folder list (to make the archive folder visible in the Navigation Pane)
    • Clean out items older than (to specify the age of items that should be archived)
    • Move old items to (to select the folder where archived items should be stored)
    • Permanently delete old items (to delete old items permanently without archiving)
  8. Click OK to save the settings.

This solution helps you prevent your Outlook mailbox from getting cluttered by automatically moving old items to an archive folder based on your chosen settings.

2. Adjust AutoArchive Settings for individual folders

  1. Open Outlook and right-click on the folder you want to customize.
  2. Select Properties from the context menu.
  3. Go to the AutoArchive tab in the Properties window.
  4. Choose one of the following options:
    • Do not archive items in this folder (to exclude the folder from AutoArchive)
    • Archive items in this folder using the default settings (to use the default AutoArchive settings)
    • Archive this folder using these settings (to customize the settings for this specific folder)
  5. If you choose to customize, configure the settings such as Clean out items older than and Move old items to or Permanently delete old items.
  6. Click OK to save the changes.

This solution allows you to have different AutoArchive rules for specific folders, giving you more control over what gets archived and when.

3. Manually archive items in Outlook

  1. Open Outlook and go to the File tab.
  2. Click on Tools and then select Clean up old items.
  3. In the Archive dialog box, select Archive this folder and all subfolders.
  4. Choose the folder you want to archive.
  5. Specify a date under Archive items older than.
  6. Click Browse to select a different location if you don’t want to use the default location for the archive file.
  7. Optionally, check the Include items with “Do not AutoArchive” checked box to include those items.
  8. Click OK to start the archiving process.

This method is useful if you need to manually archive certain items at a specific time rather than waiting for AutoArchive to run. In New Outlook, you just need to click the Archive button on the top menu. The emails will go right into the Archive folder on the left pane.

4. Change the location of the archive file

  1. Open Outlook and click on the File tab.
  2. Go to Open & Export and select Open Outlook Data File.
  3. Browse to the location where your archive file is stored, select it, and click OK.
  4. To move the archive file to a different location:
    1. Close Outlook.
    2. Move the archive file (archive.pst) to the new location.
    3. Open Outlook, click on File > Open & Export > Open Outlook Data File.
    4. Navigate to the new location and select the archive file.
  5. To update the AutoArchive settings:
    1. Click on the File tab, go to Options and then Advanced.
    2. Under AutoArchive, click AutoArchive Settings.
    3. Update the Move old items to path to the new location.
    4. Click OK to save the changes.

Moving the archive file to a different location helps in organizing your archived data better and managing storage effectively.

5. Understand the Aging Periods of Outlook items

  1. The aging period for Outlook items is determined as follows:
    • Inbox and Drafts: 6 months (default)
    • Sent Items and Deleted Items: 2 months
    • Outbox: 3 months
    • Calendar, Tasks, Notes, Journal: 6 months
  2. To adjust these periods, go to File > Options > Advanced > AutoArchive Settings.
  3. Customize the Clean out items older than setting for the specific folder.

Knowing the default aging periods helps you understand when items will be moved to the archive, allowing you to plan your archiving strategy accordingly.

6. Troubleshoot AutoArchive issues

  1. If AutoArchive is not running:
    • Ensure the Run AutoArchive every [n] days box is checked in the AutoArchive Settings.
    • Verify that AutoArchive is not overridden by an Exchange Server policy.
  2. If specific items are not being archived:
    • Check if the Do not AutoArchive this item property is set on the item.
    • Ensure the item’s modified date is older than the archive date.
  3. If the archive file is corrupted:
    • Use the Inbox Repair Tool (scanpst.exe) to repair the archive file.
    • If repair fails, create a new archive file.

Troubleshooting these common issues ensures that your AutoArchive process runs smoothly and efficiently.

7. Set AutoArchive for specific conditions

  1. Open Outlook and go to the File tab.
  2. Select Options and then Advanced > AutoArchive Settings.
  3. In the AutoArchive Settings window, configure specific conditions such as:
    • Delete expired items (only for email folders)
    • Move old items to (specify the folder for archived items)
  4. Apply these settings to all folders by clicking on Apply these settings to all folders now.

By setting specific conditions, you can tailor the AutoArchive process to meet your exact needs, ensuring that only relevant items are archived or deleted.

Regularly reviewing your AutoArchive settings can help maintain an organized mailbox and prevent storage issues. Keep these tips in mind to make the most out of Outlook’s AutoArchive feature.

And while you’re still on the job of organizing, here’s our guide on how to get a unified Inbox view in Outlook. You might also be interested in how to get Copilot in Outlook.

Before you go, don’t miss our guide to learn how to apply AutoArchive settings to subfolders in Outlook.

For any questions you might have, hit the comments below and tell us about it.

How to Run as a Different User Without a Password

Many users want to know how to run as different user without a password, and in today’s guide we’re going to show you a few simple ways to do that, so let’s get started.

How do I run as a different user without a password?

1. Allow accounts to have blank passwords

  1. Press Windows key + R and type secpol.msc. Click OK.
    secpol msc run window 
  2. Next, go to Local Policies and select Security Options.
    security options local security policy window
  3. Locate Accounts: Limit local account use of blank passwords to console logon only and double-click it.
    accounts local limit account use of blank passwords
  4. Set it to Disabled.
    limit local account use of blank passwords disabled
  5. Lastly, change the password to blank for the user account you want to use.

While this is a simple solution, it’s a security risk and it should only be used on home computers.

2. Use savecrd parameter

  1. Open Command Prompt.
  2. Type the following command, but be sure to replace WindowsReport and the path of the application: runas /savecred /user:WindowsReport “C:\Example\test.exe”
    runas savecred command in Terminal
  3. When asked, enter the credentials.

The credentials will now be saved and you won’t have to enter them again.

How do I always show run as a different user?

  1. Press the Windows key + R and type regedit. Click OK.
    Regedit run window
  2. Navigate to the following key: HKEY_CLASSES_ROOT\exefile\shell\runasuser
    runasuser path in registry editor
  3. Next, locate the Extended value, right-click it and choose Delete.
    extended delete registry
  4. Delete the Extended value in the following keys as well: HKEY_CLASSES_ROOT\cmdfile\shell\runasuser
    HKEY_CLASSES_ROOT\batfile\shell\runasuser
    HKEY_CLASSES_ROOT\mscfile\shell\runasuser
    HKEY_CLASSES_ROOT\Msi.Package\shell\runasuser

As you can see, it’s easy to run as a different user without a password, and you just have to change the security policy or save the credentials of the other account.

To learn more about this feature, check how to use Run as a different user on Windows 11. If you ever encounter Access denied with Run as user command, we have a special guide that addresses that.

Copilot will be able to summarize inked notes in OneNote, and it’s a game-changer

Picture yourself writing fast in a meeting or lecture with your notebook full of handwritten notes. How wonderful would it be if those scribbles could turn into neat digital text by magic? This is now possible for users of OneNote who are part of the Microsoft 365 Insiders program.

A fresh attribute in OneNote for Windows is the ability of the Copilot AI assistant to scrutinize handwritten notes. This could be a turning point for those who appreciate the sensation of pen on paper but desire digital convenience.

Before, Copilot could only show its skills on typed text in OneNote. But admit it, there’s a special charm and adaptability to writing notes by hand. Whether it’s a fast sketch for better understanding or points noted down that comes quicker than your typing pace, this fresh characteristic is here for all.

According to the official blog post, Microsoft has provided two easy methods for activating Copilot in your inked notes in OneNote. Firstly, you may click the Copilot icon in the OneNote app’s ribbon or select and tap on your handwritten notes directly to view what Copilot suggests for summary, rewriting, or a To-Do list from your scribbles.

People who want to experiment with this characteristic can find it on OneNote for Windows Version 2404 (Build 17628.20006) or later. However, there is a condition – currently, only Microsoft 365 Insiders can access Copilot for inked notes in OneNote.

The timing for when all users will get the feature has not been revealed yet; however, given how quickly Microsoft has been including fresh functions in OneNote recently, we can assume this might happen soon enough.

Insiders have witnessed numerous new features in the last few weeks, such as Loop components and an interactive ink tutorial. They also introduced a fresh Eyedropper tool, which allows you to personalize pen colors straight from images or notes.

What are your thoughts? Are you eager to witness your handwritten notes being transformed into OneNote?

Solved: Run as Different User Option Missing in Windows 11

We can appreciate how the run as a different user option in Windows comes in handy especially when you don’t want to interfere with profiles but what happens when it’s missing?

Potential reasons behind this anomaly have to do with permissions. It’s either your UAC settings have been reconfigured, or the system administrator has placed certain restrictions. On the other hand, a Windows update could also be behind it or some corrupt system files.

However, before you jump to troubleshooting, ensure the run as a different user feature is on your Windows edition as not all support this functionality.

What can I do if the run as a different user option is missing?

1. Restart the Secondary Logon service

  1. Press Windows + R to open the Run dialog box.Services RUn command - destiny 2 stuck on initializing
  2. Type services.msc and click OK to open the Services app.
  3. Locate and double-click Secondary Logon to open its properties.Secondary logon
  4. For Startup type, select Automatic from the drop-down menu.Automatic
  5. Click Apply and OK to save the changes, then reboot your PC.

2. Uninstall recent Windows update

  1. Press the Windows + I keys simultaneously to open Settings.settings windows 11
  2. Navigate to Windows Update, then go to Update history.windows-update-history logitehc unifying not working
  3. Click on Uninstall updates.uninstall-updates-w11 computer-recognize-logitech-unifying-receiver
  4. Select the most recent update, then click Uninstall.

Some Windows updates can alter system settings and interfere with previously working features. If this is the case, rolling back an update should restore the run as a different user option if it was missing.

3. Run DISM and SFC scans

  1. Hit the Start Menu icon, type cmd in the search bar, and click Run as administrator.cmd-run-admin-w11 unexpected kernel mode trap windows 11
  2. Type the following commands and press Enter after each one:DISM.exe /Online /Cleanup-Image /Restorehealth sfc /scannow

In case a Windows update or even a virus has corrupted some system files, it is possible that some features were caught up in the mix. Running a system file checker scan can repair these files and restore the run as a different user functionality that was missing.

4. Adjust UAC settings

  1. Press the Win + R keys to launch the Run console. Then type msconfig in the search bar and hit Enter to open the System Configuration window.
  2. Next, go to the Tools tab in the System Configuration window, select Change UAC Settings, and press Launch.Change UAC Settings
  3. This will open the User Account Control Settings window. Here, move the slider on the left to Never notify, and press OK to save the changes.set UAC to never notify

If your UAC settings are too high, you may be restricted from accessing some system functionalities especially if you’re not using an administrator account. Lowering these settings can allow you to access the run as a different user option.

Remember to adjust your UAC settings back to a secure level as disabling it exposes your system to security risks.

5. Use the Group Policy Editor

  1. Hit the Windows + R keys to open the Run command.
  2. Type gpedit.msc in the dialog box and hit Enter to open the Group Policy Editor.GPEDiT.msc -Windows Remediation Service Failed to Start?
  3. Navigate to the following location: User Configuration/Administrative Templates/Start Menu and Taskbar
  4. Double-click on Start Menu and Taskbar and select Show “Run as different user” command on Start.
  5. In the new window, check the Enabled box then click Apply and OK to save changes.

6. Use the Registry Editor

  1. Remember to create a restore point or backup the registry before making any edits.
  2. Hit the Windows + R keys to open the Run command.
  3. Type regedit in the dialog box and hit Enter to open the Registry Editor.
  4. Navigate to the following location: Computer\HKEY_CURRENT_USER\Software\Policies\Microsoft\Windows\Explorer
  5. Double-click on ShowRunAsDifferentUserInStart, set the Value data as 1 then click OK to save the changes.

7. Create a new user profile

  1. Press Windows + R to launch the Run console, enter netplwiz in the text field, and click OK.
  2. Click Add in the User Accounts window.
  3. Select Sign in without a Microsoft account (not recommended).
  4. Click on Local account button.
  5. Enter a username and password (optional) for the new user account, and a hint, in case you set a password. Once done, click on Next.
  6. Click on Finish to create the Local account.

A corrupt user profile may prevent you from accessing some features. While checking for corrupt profiles, also ensure your user profile is not disabled. Creating a new profile helps you isolate the issue whether it is profile-based or system-based.

8. Perform a System Restore

  1. Press the Windows key, type Control Panel, and click Open.control-panel-search fallout new vegas runtime error
  2. Select Large icons as View by and click Recovery.Recovery Control Panel Advrcntr6.dll
  3. Click Open System Restore.Open system restore
  4. Select Choose a different restore point and click Next.Next Choose a different restore point
  5. Now select the restore point and click Next. Choose a point
  6. Click Finish to restore the previous settings, and Windows will restart.Finish Restore point

Note that even run as administrator may fail to work or greyed out at times but we’ve already covered how to fix it in our detailed guide. Moreover, if the Run as Different User option isn’t working properly, we’ve got you covered.

In future, as an administrator, consider making all programs available for all users. This can help address permission issues.

That’s a wrap but do let us know if you’ve been able to fix this issue. And if you have any other solutions not mentioned here but worked for you, drop us a comment down below.

How to Transfer IncrediMail Emails to Outlook

Transferring your emails from IncrediMail to Outlook can seem daunting, but with the right tools and steps, it becomes a straightforward process. Whether you prefer using specialized software or manual methods, this guide will walk you through the best solutions to make the transition as smooth as possible.

How do I export my emails from IncrediMail to Outlook?

1. Manually export emails from IncrediMail to Outlook

1. Exporting Emails from IncrediMail

  1. Launch the IncrediMail application on your computer.
  2. Choose the email messages you want to export to Outlook.
  3. Click on File in the menu and select Save As… from the dropdown.
  4. Select Mail (.eml) as the file type and save the emails.

Repeat these steps for each email you wish to transfer. This process is feasible for a small number of emails.

2. Importing EML Files into Outlook

  1. Navigate to the folder where the EML files are saved.
  2. Right-click on an EML file and select Open with > Outlook.
  3. Click on the Move button in the Ribbon. Choose the folder in Outlook where you want to store the email.

Repeat the process for each EML file. This method is manual and time-consuming but works well if you have a limited number of emails to transfer.

Manually exporting and importing emails can be tedious but is viable for small-scale transfers without needing third-party tools. However, even if the tools below will cost you a few bucks, they do the job a lot faster.

2. Using SysTools IncrediMail Converter

  1. Download and install SysTools IncrediMail Converter.
  2. Follow the on-screen instructions to install the software on your computer.
  3. Open the SysTools IncrediMail Converter.
  4. Click on Add File and select the IncrediMail data files (IMM, IML, IM, DB) from your storage.
  5. Click Open to load the files into the tool.
  6. The tool will display a preview of your IncrediMail emails and contacts.
  7. Verify the data to ensure all required items are loaded.
  8. Click on the Export button and select PST as the export format to be compatible with Microsoft Outlook.
  9. Click on the Browse button to select a destination folder where the converted PST file will be saved.
  10. Click on the Export button to initiate the conversion process.
  11. Wait for the process to complete. The duration depends on the volume of data being converted.

This software provides a seamless and quick migration from IncrediMail to Outlook, even supporting bulk conversions. It maintains data integrity and is compatible with the latest Windows versions.

3. Using RecoveryTools IncrediMail Mail Migrator

  1. Download and install RecoveryTools IncrediMail Mail Migrator.
  2. Open the Mail Migrator tool.
  3. Click on Add Files and select the IncrediMail data files.
  4. Choose Outlook PST as the export format for compatibility with Microsoft Outlook.
  5. Click on Browse to select where the PST file should be saved.
  6. Use advanced filters if you want to convert specific emails or folders.
  7. Click on the “Convert” button and wait for the migration process to complete.

This method simplifies the transfer process and supports bulk conversions, making it efficient for large volumes of data. The tool also offers advanced filters for selective data migration.

4. Using BitRecover IncrediMail Converter Wizard

  1. Download and install BitRecover IncrediMail Converter Wizard.
  2. Open the BitRecover IncrediMail Converter Wizard.
  3. Click on Open and import your IncrediMail data files (IMM, IML, CAB, DB).
  4. Choose PST from the list of saving options.
  5. Click on Browse to select the folder where the PST file will be saved.
  6. Click the Convert button and monitor the live status conversion report until the process is complete.
  7. Open Microsoft Outlook.
  8. Go to File > Open > Import and select the PST file you saved.

BitRecover IncrediMail Converter Wizard is a reliable tool that ensures the preservation of folder structure and email components, making the transition to Outlook smooth and efficient.

5. Using Kernel IncrediMail Recovery Software

  1. Download Kernel IncrediMail Recovery.
  2. Install and launch the software.
  3. Click on Select File and choose the IncrediMail data files (IMH, IMB, IMM).
  4. The software will display a preview of your data. Select the data you wish to convert.
  5. Select PST as the output format for Outlook compatibility.
  6. Click on Browse to choose the folder where the PST file will be saved.
  7. Click on the Export button. The software will begin converting your IncrediMail data to PST format.
  8. Open Microsoft Outlook and use the Import feature to add the PST file to Outlook.

Kernel IncrediMail Recovery simplifies the exporting process and supports converting corrupted IncrediMail files as well, ensuring a comprehensive recovery and transfer to Outlook. You can also check out some other alternatives.

By following these solutions, you can ensure a smooth transition from IncrediMail to Outlook. As you’ve noticed, the manual process can be very time consuming but by using the tools above, the process goes automatically and smoothly.

Microsoft announces VBS Enclaves, a new and better way to protect apps from being hacked

Microsoft has introduced a new security capability in Windows 11 called VBS Enclave. Based on virtualization-based security (VBS), this characteristic intends to provide more safeguarding, particularly for third-party applications.

VBS Enclaves can be seen as a kind of Dynamic Link Library (DLL) file that protects important operations and secrets in an application’s memory space. Here’s how it works.

According to the official announcement, the VBS Enclave creates a Trusted Execution Environment (TEE) inside the host application. This environment isolates crucial parts of the program to protect them from outside dangers.

A VBS enclave is a software-based trusted execution environment (TEE) inside a host application. This is a revolutionary change in our security model for the application, allowing an app to protect its secrets using the power of VBS, from admin-level attacks.

Microsoft

The isolation occurs by utilizing Virtual Trust Levels (VTLs), and the enclave operates at an elevated privilege level that cannot be reached in a normal operating environment. It’s similar to having a secure room built into your application where you can keep your important data safe from being seen by others who might want to look at it without permission.

The Windows Hyper-V hypervisor, which creates this separate and special space called VTL1, makes all of this possible. It’s different from the normal Windows environment we use daily – VTL0. Anything inside VTL1 stays safe because it’s not affected by lower privilege levels. It’s a fancy method to hide the good parts, making the application work normally.

As for the prerequisites, there are some things you need to do before you can use VBS Enclaves. First, your device should have VBS/HVCI enabled (the default setting in Windows 11 and later). Second, make sure that the operating system on it is running Windows 11 or later versions; alternatively, if using a server computer, then choose Windows Server 2019 onwards as well.

Last but not least important – Microsoft has shared details about creating their own VBS enclave via a webpage, providing information that will help developers better protect their apps by utilizing this technology.

In this age of digital systems, the need for security is very high. Threats from cyberspace are becoming more advanced and clever, so having an extra layer can help stop them. Developers can make applications that provide users peace of mind, knowing their data is protected. For others, it means confidence that their daily applications are working hard to keep their information secure.

Microsoft’s start of VBS Enclaves is a big move forward in cybersecurity. It gives an application its safe area where important data and functions can be kept away from dangers outside. This offers more security to those who create and use the application.

Darkest Dungeon II is finally coming to Xbox Series S/X

Darkest Dungeon II, which has enthralled PC players with its tough turn-based RPG mechanics, is ready for big entrance on Xbox One and Xbox Series X|S platforms for those who love all things related to Xbox on July 15.

This coincides with its launch on PlayStation 4, PlayStation 5, and Nintendo Switch, simultaneously making it available across all major consoles. The excitement can be felt by many gamers looking forward to exploring this game’s dark and captivating world through their beloved Xbox devices.

Darkest Dungeon II is not an ordinary game; it is a continuation that pledges to raise the rogue-like involvement with its polished and bettered turn-based combat system. The creators from Red Hook Studios have carefully improved all aspects of this game, from stats up to rules, to bring forth an entirely fresh Token System that aims to make every choice more important than ever.

However, what makes this game truly distinct are its heroes, who will remain in your memory for a long time —each with their sad beginnings waiting to be discovered. When players discover new skills, paths, and items, the game becomes more engaging with its story and rules.

The Altar of Hope is a unique feature of the game. It is a large system that provides upgrades and boons for each expedition. Players can decide what matters to them while preparing for their assaults on the mountain.

Another interesting aspect is the Affinity System, which tracks relationships between heroes as they bond or irritate each other during their journey. This method complicates the gameplay because handling heroes’ stress and relationships becomes crucial for keeping the team intact until the final stages.

People excited to start this dark adventure can pre-order Darkest Dungeon II and get a 15% discount from the Xbox store. With this, you will also be buying Oblivion Edition, which includes the main game and The Binding Blade DLC pack.

This additional content introduces two extra heroes, and a fresh, moving boss creature called The Warlord, making the game’s world more exciting.

Darkest Dungeon II promises to be a tough but fulfilling experience, with its tactical intricacies, engaging narrative, and elegantly eerie game setting. If you’re not convinced, read our comprehensive review. Whether you have played the first game many times or are new and want to know what it’s like walking through these gloomy passages, we eagerly await July 15th.

ReadyBoost is Not Working: 5 Tested Solutions to Fix

ReadyBoost can be a lifesaver for those with older systems, but it can be frustrating when it doesn’t work as expected. First, make sure you have a compatible flash drive or SD card and check if you have over 4 GB of RAM. Also, if your system is installed on an SSD, ReadyBoost won’t work because your flash storage is faster than a USB drive.

1. Verify the system requirements

  1. Open the Start Menu by clicking the Start button on your Taskbar.
  2. In the search bar, type System Information and press Enter.
  3. Check the total amount of RAM installed on your computer. If your computer has more than 4GB of RAM, ReadyBoost may not be necessary as your system already has adequate memory.

ReadyBoost is designed to enhance systems with low memory. If your system already has sufficient RAM, enabling ReadyBoost might not provide any noticeable performance improvements, which is why Windows may disable it by default.

2. Format the USB drive or SD card

  1. Plug your USB drive into your computer, or the SD card into its dedicated slot.
  2. Open File Explorer by clicking on the folder icon in the Taskbar or by pressing Windows + E.
  3. Locate your USB drive or SD card under This PC, right-click on it and select Format.
  4. Choose the NTFS file system from the dropdown menu.
  5. Click Start to format the drive.

Formatting the USB drive to NTFS can resolve compatibility issues with ReadyBoost. This ensures the drive meets the performance requirements necessary for ReadyBoost to function properly.

3. Enable the ReadyBoost service

  1. Press Windows + R to open the Run dialog, type services.msc and press Enter.
  2. Scroll down and locate ReadyBoost, right-click on it and select Properties.
  3. Change the Startup type to Automatic.
  4. Click Start to initiate the ReadyBoost service.
  5. Click Apply and then OK.

If the ReadyBoost service isn’t running, your USB drive won’t be tested or used for ReadyBoost. Setting the service to start automatically ensures it will be ready to use when you plug in compatible hardware.

4. Check Disk Speed

  1. Download and install HD Tune from the official website.
  2. Open HD Tune and select your USB drive from the dropdown menu.
  3. Run the speed test to check the read/write speeds of your drive.
  4. Ensure the speeds meet the minimum requirements for ReadyBoost (2.5 MB/s read speed).

ReadyBoost requires a minimum read speed to function properly. If your USB drive does not meet these requirements, it will not work with ReadyBoost. Speed testing your drive ensures it meets the performance criteria.

5. Delete the ReadyBoost cache file

  1. Plug your USB drive into your computer.
  2. Open File Explorer and locate your flash drive under This PC.
  3. Enable hidden files by clicking on View in the top menu and checking Hidden items.
  4. Locate the ReadyBoost.sfcache file on your drive.
  5. Right-click on the file and select Delete.
  6. Eject and reinsert your USB drive and try setting up ReadyBoost again.

Sometimes, the ReadyBoost cache file can become corrupted, preventing ReadyBoost from functioning correctly. Deleting the old cache file forces Windows to create a new one, potentially resolving any issues.

By following these steps, you should be able to troubleshoot and fix any issues with ReadyBoost if it’s not working.

You may also check our guide on how to enable and use ReadyBoost on Windows 10, or learn what to do if the ReadyBoost tab is missing from Windows 11.

Use the comments section below if you have questions or additional suggestions.