Fix: Error playing this video when streaming on Hulu

The worldwide popular Hulu service is not short on streaming errors. This is not to say the service is unreliable, only that this is to be expected from time to time.

Hulu errors are numbered, most of the time, for easier reference.  Also, the developer offers practical troubleshooting solutions for most errors, and no expert knowledge is required.

The Error playing this video message is commonly received when the service encounters a problem with the Internet connection or when your device is not working correctly.

Alternative messages for the same error:

  • Error playing this video
  • Sorry, we encountered an error playing this video. Please try restarting the video or selecting something else to watch
  • Error code: 3(-996)

How can I fix the Error playing this video on Hulu?

1. Check Internet connectivity

  1. Turn off all devices connected to your home network.
  2. Close all background apps or other programs.
  3. Then, connect your device to the router using an Ethernet cable.
  4. Also, place the modem or router near your device.

2. Deactivate your device

To deactivate your device, navigate to your Hulu account page and remove your device by logging out completely.

Then, you can log back in by re-entering your credentials. Launch Hulu again and see if the problem is solved.

3. Perform a power cycle

To help improve streaming conditions, switch off your devices (including modem and router). Wait a few minutes, then switch them back on and see if it helps.

4. Update the Hulu app

If you’re streaming videos while using Hulu on an Android device, repeated error messages might pop in because the app is outdated.

You’re likely to run into the webpage is not available error numerous times, even when using an outdated browser. To fix this, go to Play Store, find the Hulu app, and click on Update, if available.

5. Clear cookies and cache

On devices running on Windows, Android, or iOS, cached data is usually found in the storage/privacy section of the Settings menu.

For Windows, use a dedicated PC cleaner software to clean temporary or unwanted files. Such tools will scan your PC and find unnecessary files that take up space for no reason.

They are easy to use and safe. Most of them display a list of all clutter found and let you pick what you want to remove and what you want to keep, so there’s no risk of losing important data.

On Apple TV you have to uninstall and reinstall the Hulu app.

For Xbox One see the following steps:

  1. Go to Menu.
  2. Choose My Games and Apps > Apps.
  3. Highlight the Hulu.
  4. Hit menu on your controller.
  5. Tap on the Manage Apps > Clear saved data.

For Roku:

  1. Select Home in the main menu.
  2. Then, on the remote controller press Home 5 times + press Up + press Rewind 2 times + press Fast Forward 2 times.
  3. It should take a few seconds to clear the cache.

If you have used other workarounds to fix the streaming problem on Hulu, feel free to leave a comment below.

  • 3.0 Mbps for the Hulu streaming library
  • 8.0 Mbps for live streams
  • 16.0 Mbps for 4K content
  • What is Hulu error code P Dev 320?

Hulu error code P Dev 320 is a streaming error that can appear on any device anytime you use the service. To resolve this issue, explore the Hulu error code P Dev 320 guide.

Check out the Hulu Hub from our website, where we provide solutions for more errors Hulu users encounter.

In addition, in the video streaming dedicated section on the website, you might find some helpful articles.

Fix error 0x80070057: The parameter is incorrect

The parameter is incorrect is a fairly frequent error message that pops up for some users when attempting to copy a file or folder from a PC to USB drive or external hard drive.

When that happens, an Error Copying File or Folder window opens stating, The parameter is incorrect or Drive is not accessible, the parameter is incorrect. Consequently, the file or folder doesn’t copy to the storage device.

This might just be due to your target drive not having enough storage space, a corrupted file system or that the file you’re attempting to copy exceeds the maximum file size the external drive can store.

Let’s see how you can fix error 0x80070057, the parameter is incorrect when copying files to an external drive.

How to fix parameter is incorrect on Windows 10

1. Check the Amount of Space on the External Storage Device

First, check how much space is available on the USB drive or external hard disk. You might not have enough storage space for the file you’re copying.

You can check available drive storage space in File Explorer by right-clicking the pertinent drive and selecting Properties. That opens the window directly below which shows both free and used space.

Alternatively, if you need a USB flash drive or an external hard disk with a bigger storage capacity, here are some suggestions:

2. Compress or Split up a Larger File


If there’s enough storage space on the external drive, check the size of the file that isn’t copying. Does it eclipse four GB?

If so, that’s probably why you can’t copy it to the external storage device. Lots of USB sticks, and other storage drives, still have the FAT32 file system that supports file sizes up to four GB only. So you can’t save files larger than four GB to FAT32 external storage.

If the file is larger than four GB, you might be able to fix the parameter error by reducing the file’s size. You can do that either by compressing or splitting it up into smaller pieces. 7-Zip is a freeware utility that you can both compress and split files with.

Click either the 32 or 64-bit Download link on this website page to save the software’s installer to Windows. Once you’ve installed the utility, you can compress and split four GB files as follows.

  • Open 7-Zip in Windows.
  • Browse to the folder that includes the file you need copy.
  • Right-click the file you need to compress, and then select 7-Zip > Add to archive to open the window directly below.
  • Select a compression format from the Archive format drop-down menu. Zip has one of the best compression ratios.
  • Press OK to close the window and save the archive, which saves in the same folder as the original file.
  • To split a file, right-click it and select Split file. That opens the window shown directly below.
  • Select a value to split the file by from the Split to volumes, bytes drop-down menu.
  • You can also choose a path to save to by pressing the … button.
  • Press OK to split the file.
  • When you need to merge the files together again, select them, right-click and click Combine files to open the window below. Press OK to merge the files together.
  • When you’ve compressed or split the file you need to copy, it must be less than four GB. If so, copy the archive, or split files, to the external storage drive.

Feel free to check out this guide to learn what are the best file compression tools for PC.

3. Convert the Storage Device to NTFS

Alternatively, you can convert the storage device to NTFS, which is a file system that supports single files larger than four GB. You can convert external storage drives to NTFS with a partition manager software such as Mini Tool Partition Wizard, Paragon Partition Manager or AOMEI Partition Assistant.

Download the tool of your choice and run the installer on Windows. Run through the setup wizard to add the software to Windows. Then convert the storage drive to NTFS as follows.

  • First, plug the storage drive to convert to NTFS into your desktop or laptop.
  • Open the Partition Manager window.
  • Then you can right-click the required disk drive and select Convert to NTFS.
  • A pop-up dialog box will open. Press OK and click Apply to convert the storage drive to NTFS.

4. Format the Drive to NTFS

Or you can convert the storage drive to NTFS by formatting it. However, formatting drives also erases their files. So if you need to keep the drive’s content intact, back it up before formatting.

Then format the storage device to NTFS as follows:

  • Insert the USB stick or external hard drive to format into a desktop or laptop.
  • Open the File Explorer window.
  • Now you can right-click your external drive, and select Format from the context menu to open the window in the snapshot directly below.
  • Select NTFS from the File system drop-down menu.
  • Press the Start button to format the storage drive.

5. Fix the Drive’s File System

If you can’t copy files less than four GB to the external drive, your storage device might have a corrupted file system. You can fix storage drives with the Check Disk, or Chkdsk, tool in Windows.

That’s a tool that scans file systems on drives, and Check Disk provides repairs for anything that needs fixing. This is how you can scan storage drives with Check Disk.

  • Insert the USB stick or external hard drive into a suitable slot on PC.
  • Open File Explorer and right-click your USB stick or external hard drive to open the context menu.
  • Select Properties on the Context menu.
  • Click Tools to open the tab in the shot below.
  • Press Check to open the window below.
  • Press the Scan and repair drive button to scan the external storage.
  • If the scan reveals anything, Windows will present a repair option to fix the external storage with.

How to fix incorrect parameter errors depending on the programs they occur on

If you’re getting this error on particular programs, such as incorrect format parameter errors, there are specific methods that you can use to fix it.

1. Fix: Failed to properly assess the disk. The parameter is incorrect

This error is specific to Windows 7 and usually occurs when doing a Windows Experience Index performance scan. Many users confirmed that third-party antivirus tools such as Avast and AVG trigger this error. To get rid of this error code, you can either temporarily disable your antivirus or install a new antivirus solution.

Fix 7Zip: The parameter is incorrect

If you’re getting incorrect parameter errors on 7-Zip, this indicates there’s a problem with the RAR format. Make sure you’re using the latest 7-Zip version and the tool supports the respective RAR file format.

Fix Virtual Disk Manager: The parameter is incorrect

The parameter is incorrect on Virtual Disk Manager usually occurs when you assign a new drive letter. To fix this issue, first back up your data, and try removing the partition, reboot your machine, and change the drive letter and path. Once you’ve done that, add the virtual partition again.

Fix Microsoft Word: The parameter is incorrect

This error can also affect the Office Suite and particularly Microsoft Word. The error occurs when users try to open documents in Word.

To fix incorrect parameter errors on Microsoft Word, repair the Office installation folder from Settings > Apps > Apps & features > Microsoft Office. Select Change and let the tool automatically repair Office.

Fix diskpart has encountered an error: The parameter is incorrect

This error occurs due to two main reasons: the file system of the partition got corrupted or the volume encryption driver has been changed. Sometimes, this error indicates that data might have been lost.

To fix diskpar incorrect parameter errors:

  1. Run chkdsk /f /r. For detailed instructions, check out this guide.
  2. Uninstall the USB controller
  3. Check your USB connection and port
  4. Remove writing protection from ComputerHKEY_LOCAL_MACHINESYSTEMCurrentControlSetServicesUSBSTOR. Locate the Start key and change the value data to 3.

Those are a few effective fixes for external drives with parameter errors. In most cases, The parameter is incorrect error is usually due to the drives’ four GB file restriction. So the best fix is probably to convert the storage drive to NTFS.

Windows 10 Camera app gets new Fluent Design icon with latest update

Microsoft has started rolling out a new icon for its Camera app on Windows 10, which is now live in the latest version of the app (2020.127.20.0). The revamped icon is inspired by Microsoft’s Fluent Design guidelines, and it follows other redesigned icons such as Alarms & Clock, Weather, Photos, Mail and Calendar as well as Paint 3D.

Just like all other icons which received a fresh coat of paint recently, the new Camera app icon uses a blue background by default. This means that it will ignore your Windows 10 accent color and probably mess with your beautifully-organized Start Menu, but we can’t always have nice things, right?

While the revamp of app icons in Windows 10 has been happening for the past couple of months, Microsoft initially announced its plans to update their various app icons back in December 2018. However, the rollout is taking quite some time, and the software giant has since expanded on this idea by bringing Fluent Design to mobile devices, starting with the Office apps last year in December. Do you like the new Windows 10 Camera app icon? Let us know in the comments section below.

Windows Camera
Windows Camera
Price:
Free

Microsoft announces Open Data Campaign

Today, GeekWire reported on Microsoft’s efforts to breakdown the data divide by committing itself to share the vast troves of data that are created each day and making it easier to access. The newly announced initiative called the Open Data Campaign is designed to start a much-needed conversation about how the world uses data and is starting with a series of initiatives to help organizations of all sizes realize the benefits of data and the technologies that it powers.

According to Microsoft’s blog post, about 100 companies collect more than 50% of all data generated online and around half of all people with technical AI skills work in the technology sector, giving these same 100 companies an advantage of others and creating a data divide that Microsoft believes poses a serious challenge to society. The Open Data Campaign is a direct response to that data divide and is designed to give organizations, governments, and businesses of all sizes the ability to realize the full of value of the data being generated.

Microsoft’s Open Data Campaign is based on a three-step approach that is designed to help Microsoft create a principled course moving forward, open up new collaborations and make data sharing easier and safer by doing the following:

  • First, Microsoft is publishing new principles that will guide how Microsoft itself approaches sharing our data with others.
  • Second, Microsoft is committing to take action by developing 20 new collaborations built around shared data by 2022. This includes work with leading organizations in the open data movement like the Open Data Institute and The Governance Lab (GovLab) at the New York University Tandon School of Engineering. And we’ll seek to lead by example by making our Microsoft social impact initiatives “open by default,” beginning with sharing data on broadband access from our Airband initiative and combining it with data from others to help accelerate improvements in broadband connectivity.
  • Finally, the company is investing in the essential assets that will make data sharing easier, including the required tools, frameworks and templates.

Microsoft has indicated that they are already seeing some early successes in tackling some of the world’s biggest challenges including COVID-19 and climate change. In support of open data, over the last year, Microsoft has released a series of campaigns including last year’s announced Data Dignity team who focused on giving users more control over their own data. Microsoft will become a founding partner of the Open Data Policy Lab at NYU. Anyone can learn more about Microsoft’s new campaign and the need for open data by visiting their “Closing the Data Divide” microsite, and in the upcoming weeks, Microsoft plans to release more details to help cities around the world share data.


Microsoft may reveal next-gen Xbox “Lockhart” very soon

It’s been quite some time since we last heard about “Lockhart,” the second next-gen Xbox console that could be a low-cost alternative to the Xbox Series X, previously known as “Project Scarlett.” So far, Microsoft never confirmed the existence of Lockhart, though a Kotaku report from last December confirmed that it was still in the pipeline.

According to previous leaks, Lockhart is expected to be a disc-less console that would be less powerful than the Xbox One X, but still deliver a next-gen experience thanks to its faster CPU and SSD. Back in February 2019, a report from French website jeuxvideo.com, which pretty much accurately predicted the Xbox Series X specs, said that Lockhart would feature a similar custom-designed AMD Zen 2 CPU coupled with a custom Navi GPU delivering 4 teraflops of computing power. This same report also mentioned 12GB of GDDR6 RAM for Lockhart (4GB less than Xbox Series X), as well as 1 terabyte of fast NVMe storage.

Today, Jez Corden from Windows Central has shared more information about this Lockhart SKU, which could be unveiled as soon as next month as the replacement for the Xbox One X. “We’re expecting Lockhart to be a 4TF “entry-point” to next-gen gaming, and it should effectively replace the Xbox One X. This system is designed to be affordable but will offer aspects of a next-gen experience currently unavailable to past-gen consoles, presumably in the form of NVME loading speeds and perhaps some limited ray-tracing,” explained Corden.

According to Corden, Lockhart could now be tested at home by Microsoft employees, just like Xbox Series X. “Recently, we heard Lockhart is entering take home stages for Xbox employees to get their hands on the system and begin providing feedback and testing. The timing would indicate to me that rumors of upcoming showcases in early May are likely accurate,” Corden said.

Microsoft has yet to announce anything about an Xbox event in May, but with E3 2020 being cancelled in June, the company is now free to hold the replacement for its E3 press briefing a bit earlier. Interestingly, Corden also heard that Microsoft could soon reveal a new Xbox Wireless headset which would support both Bluetooth and Microsoft’s proprietary Xbox Wireless protocol for maximum compatibility. “It could be Xbox’s answer to the Surface Headphones, albeit with some of the more “premium” features stripped out,” said Corden.

We’ll see what happens next month, but May could indeed be a busy period for Microsoft. The company is also expected to unveil new Surface devices very soon, including Surface Book 3, Surface Go 2, as well as a new Surface dock. It remains to be seen if Microsoft will keep its Xbox and Surface announcements separately, but the ongoing coronavirus has recently forced the company to hold digital-only events, as we’ve seen with the recent Microsoft 365 event and Inside Xbox episode.

Microsoft Teams to show 9 conference participants at once

Up to 250 people can participate in a Microsoft Teams meeting. But only four can appear on a video conferencing screen at once.

Well, that is about to change as Microsoft is working on extending that limit to nine participants.

Microsoft Teams to display up to 9 video conferencing participants simultaneously

Soon you will be able to see up to nine Teams video conferencing participants at once. That will come to pass if a recent Tweet by Microsoft is anything to go by.

The company made a similar promise last week in response to concerns over the inability of participants to see each other during Teams video meetings.

Then, Alex, a Microsoft Teams engineer, responded that the tech giant was working on extending the limit beyond just nine.

We will start rolling out our first update to view nine participants simultaneously by the end of April. In parallel we are continuing work to increase this limit even further. Stay tuned!

Teams user concerns

Team users calling for the increase of video chat participants that appear on the screen are eyeing much more than just collaboration.  They are asking for the ability to see each other and the reactions of others, which can enhance the effectiveness of business communications.

A typical application would be learning where teachers or instructors would like to see everyone in their class. Unfortunately, you cannot see 30 or so members of your class at once via Teams for now.

It is also critical for users to appreciate the fact that a video-intensive conferencing session has higher hardware and bandwidth requirements.

Teams’ competition

Teams recently attained 44 million daily users, partly thanks to the COVID-19 global pandemic. But the platform faces stiff competition from Zoom when it comes to video conferencing.

As at now, Zoom supports up to 49 thumbnail displays of conference participants on a single screen. So, Microsoft has a long way to go before catching up with its main rival.

Nine, though, would not be bad for Teams customers that can only see a maximum of four participants at once currently. You may expect the feature to be available in the next one or two weeks as Microsoft promised.

Xbox One’s Spotify app updates with a new UI for easier music navigation on consoles

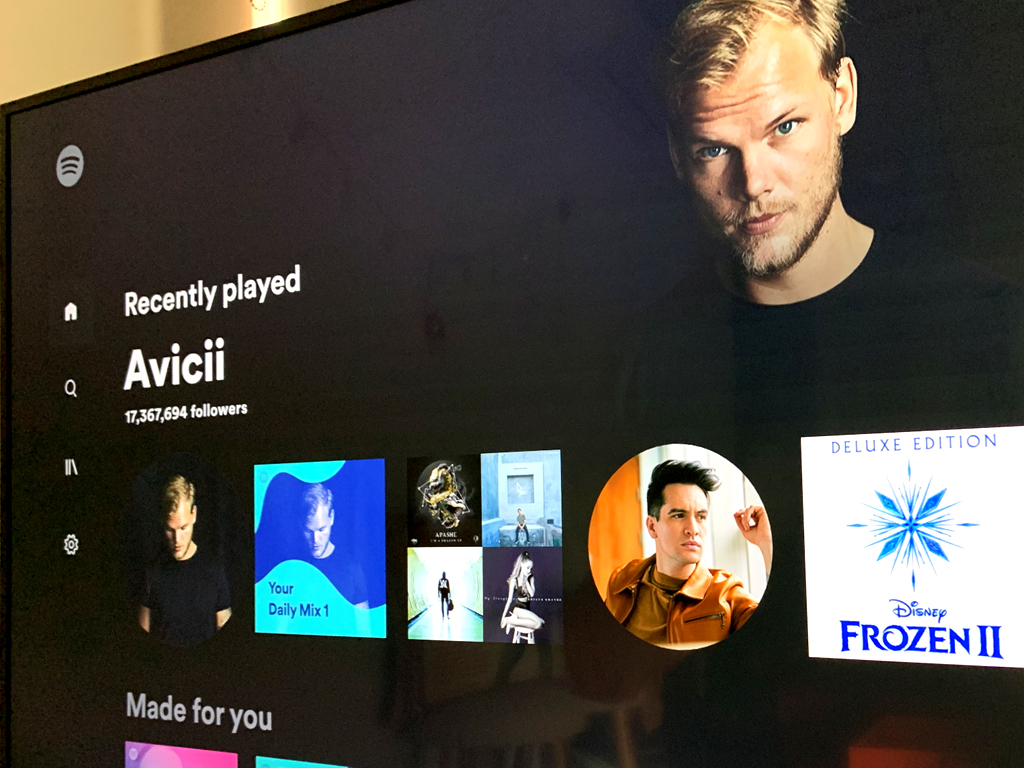
The official Spotify app for Microsoft’s Xbox One consoles updated today with a rather surprising new design that’s much closer to the Windows 10 and mobile apps.

This new app retains its original play experience but the main navigation (see above image) now features a side menu of the left side similar to the Netflix and YouTube apps and a wider variety of previously played songs, artists, and playlists to choose from. The support for podcasts has also been improved.

Of particular note is the dynamic background which changes as the user selects different tiles. Overall, this new app makes it much easier to find content than before with the old Spotify design and looks a whole lot better visually on a TV screen.

Do you use the Spotify app on your Xbox One console? Let us know if you like these changes in the comments below and then follow us on Pinterest and Twitter for more Xbox news.

Spotify Xbox - Music and Podcasts

4 compilers to turn a programming language into another

In order to transform the computer code from one programming language to another, you will need to use specialized computer software.

These programs transform the code written in a high-level programming language to a lower level language (machine code, object code, etc.), and allows you to create executable files.

In order to be able to get access to the features offered by compilers, you will need some software that allows you to install the compilers and run them.

This type of software is called IDE (integrated development environment).

And besides helping you transform a source programming language into a target language, this type of software also offers a good range of useful tools to use when programming.

Top 4 compilers to use on Windows 10

Code::Blocks

CodeBlocks - compilers for win 10

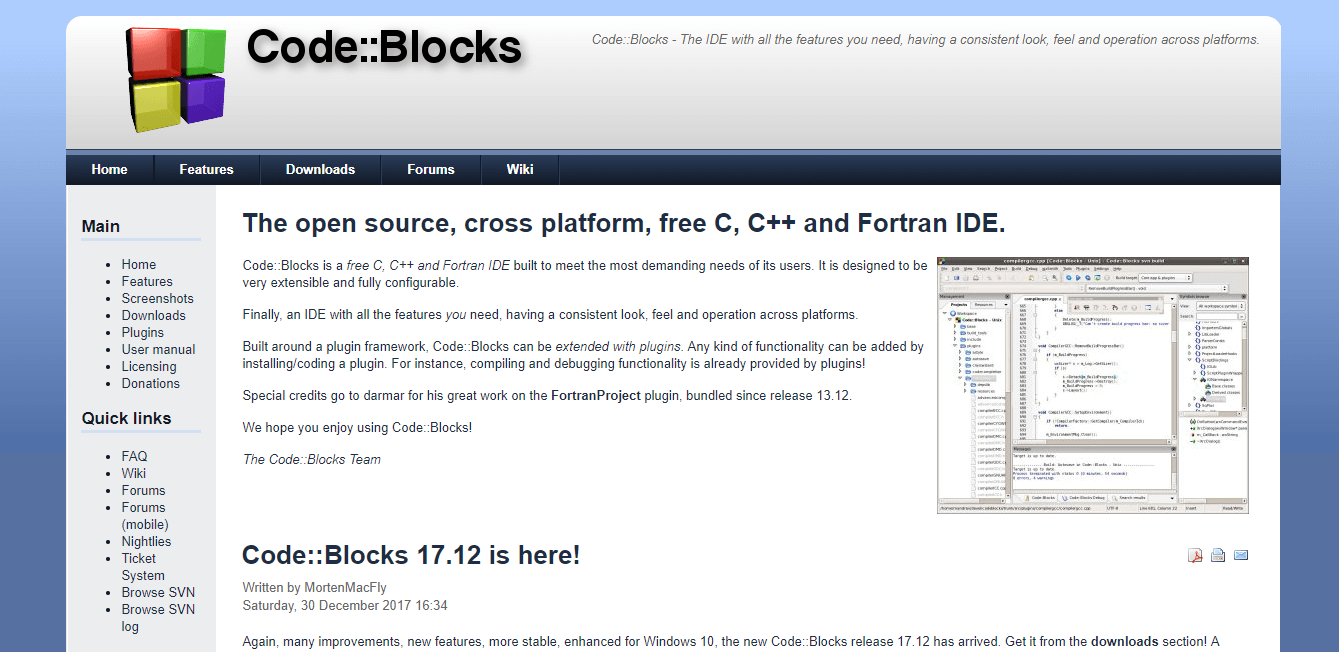
Code:: Blocks is a great integrated development environment that can be used freely for different programming languages – C, C++, Fortran, etc.

With the wide range of features and the incredibly easy to understand user interface, CodeBlocks is one of the best compiler software available on the market in 2019.

Because this software is built around a plugin framework, the wide range of features CodeBlocks contains can be extended even more by the use of plugins.

You can find plugins that fit your needs perfectly, and can even create your own if you’re feeling up to the task.

Having its infrastructure built around plugins, CodeBlocks allows you to extend and improve the capabilities of your software without needing to change any lines of code in this software’s source code.

Because anybody can contribute to the plugins database, over time, the number of available plugins has increased considerably.

Check out the list of plugins.

Once you downloaded and installed Code: Blocks, it will automatically scan your system to find any supported compilers.

If you already have compilers installed on your PC, Code: Blocks will configure them to be used. This software can also configure compilers that were not found on the PC.

Here are some examples of the compilers Code:: Blocks supports:

  • GCC (MingW / GNU GCC)
  • MSVC++
  • Clang
  • Digital Mars
  • Borland C++ 5.5
  • Open Watcom

You can find a good list of details about the supported compilers and how to install them on the Code Blocks page.

Here are some of the best features found in Code::Blocks:

  • Can access your computer’s extra cores for parallel builds
  • Can create multi-target projects
  • Supports the importing of MSVC workspaces and projects
  • Imports DEv-C++ projects
  • Great interfaces for GNu GDB, MS CDB
  • Support for code and data breakpoints
  • Great code folding for C, C++, Fortran, XML, etc.

Visit the official FAQ, or have a look at the official forums for more information.

⇒ Download CodeBlocks

Microsoft Visual Studio

Microsoft Visual Studio - compilers for windows 10

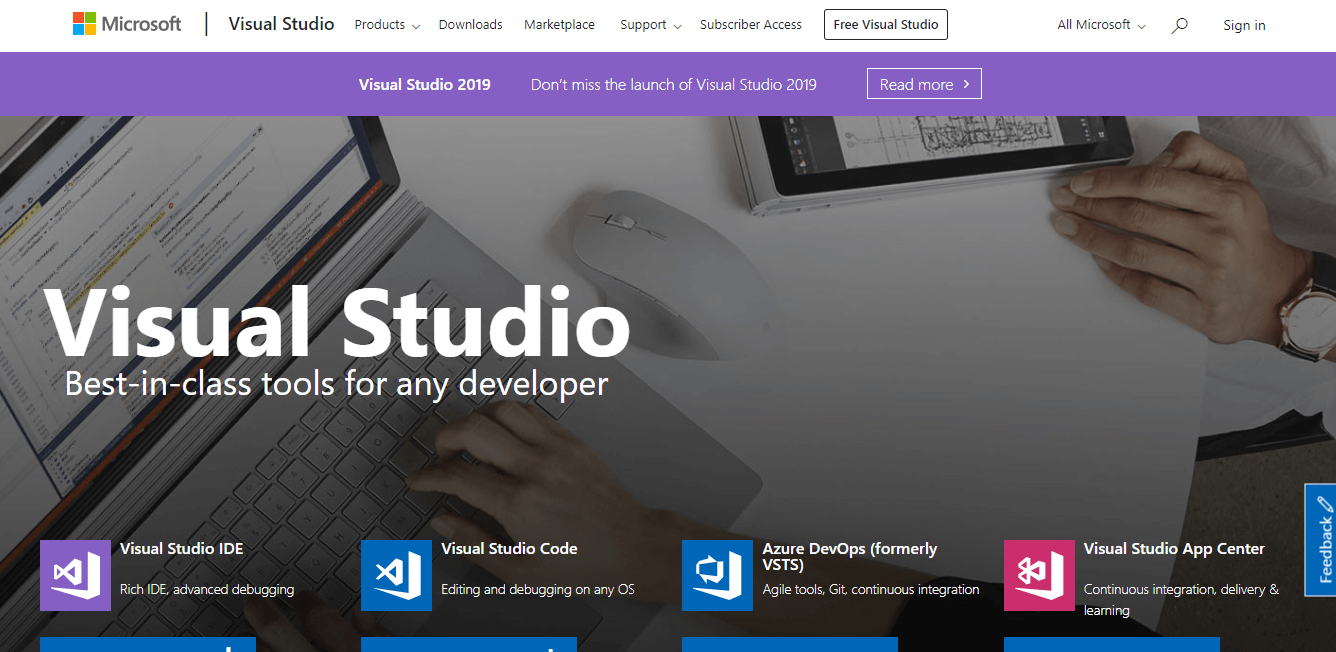
A close contender to CodeBlocks, Visual Studio from Microsoft is another great software option that allows you to use compilers to transform source programming language to a target language.

This software was built in such a way that it allows users to experience the full power of this software by using the great looking user-interface.

It can be used to create console and graphic user applications, Windows Forms, WPF applications, websites, and web services, etc.


Looking for the best Software to Use For Linear Programming? Here are the best options.


Because this software was built by programmers, for programmers, it is extremely easy for you to get amazingly accurate results and improve your programming efficiency as well.

One of the best features of Visual Studio is its ability to easily zoom into any details you choose – call structure, related functions, etc.

Some other notable features of Microsoft Visual Studio:

  • Great debug features – allows you to quickly fix bugs across a variety of programming languages
  • Can use profiling tools to diagnose performance – directly from the debugging window
  • Greate test tools that allow you to create high-quality results – plan, execute, and monitor every stage of the test, and create professional tests status reports
  • Works with GitHub, Azure DevOps
  • Features can be extended by choosing one or more plugins from the store
  • Great templates that can be customized without any limits

Here are some examples of decompilers that can be found on the Microsoft Visual Studio Store:

⇒ Download Microsoft Visual Studio

Netbeans by Apache

NetBeans - compilers for win 10

Netbeans is another good software option that can help you transform a programming language into another, giving you the opportunity to create a wide range of applications in Java, JavaScript, HTML5, PHP, C/C++, etc.

Even though this software doesn’t have the power of the 2 previously presented software options, it is still a very useful software, and it’s completely free to use.

Netbeans allows you to quickly edit any source code to fit your project’s needs and can be set up so it automatically highlights source code both syntactically and also semantically.

Here you can find some very useful information regarding how to configure NetBeans to use C/C++/Fortan.

You can find a wide range of other useful tools by visiting the official Netbeans Plugins Store.
Click here to learn how to use NetBeans.

⇒ Download NetBeans

Tiny C/C++ Compiler

Tiny C Compiler - compiler for win 10

As the name suggests, this is a very small compiler for C/C++ programming language that can execute code anywhere you need to. This compiler generates x86 computer code that can compile, assemble and link elements easily.

Here are some of its best features:

  • Any sort of C dynamic library can be used without the editing
  • Full ISOC99 compliance with the ability to compile itself
  • Optional memory and bound checker
  • Easily compile and execute C source without the need to use linking or assembly

⇒ Download Tiny C/C++ Compiler

Conclusion

In this article, we explored some of the best software options on the market that allow you to create, edit, and also manage every aspect of the process of compiling a base programming language into another.

If you want a fully-featured software option that covers all your needs and also offers you a comprehensive and good looking user interface, you might want to start with Code:: Blocks, or Microsoft Visual Studio.

If you need a fast compiler that does not take too make hard-drive space but still gets the job done, you could try Netbeans or Tiny C/C++ Compiler.

We would love to know what software you chose to work with and how it performed for you. Please feel free to let us know in the comment section below.


Yammer app: new features for collaboration

Yammer has recently informed its users through a blog post that the Windows 10 versions of the app has received some new features. Find below more details about this if you’re using the service.

Dubbed as the enterprise social network, Yammer for Windows 10 is a tool for easy access to conversations that are happening across your company.

yammer windows 10
It’s pretty much similar to Lync for Windows 10, only that it lacks the traditional look and feel of an instant messenger.

Besides Windows 10 the Windows Phone, Android, and iOS versions of the Yammer app have also received updates.

Yammer is the enterprise social network for your company that connects you to the people, projects and information you need to get work done.

Discover new company conversations, share ideas with your team, ask questions and respond to updates with this easy-to-use app. Yammer Feed for Windows 8 is designed for the new Windows 8 Experience and is optimized for touch devices.

However, this update doesn’t target the official Yammer app in the Windows Store, but the desktop Windows 10 edition, so it’s not aimed at those using Yammer on Windows 10, or Windows 10, touch devices.

The updated version of Yammer for desktop Windows 10 users brings access to Group Feeds, new notifications, and live tile functionality, as well as the new  Snap option, that lets you snap the Yammer app to the side of the screen.

Now, multitasking is really possible! Follow the links below to download whichever version of Yammer suits you better, the desktop or the touch one.

Yammer key features in Windows 10

Yammer is a great collaboration tool that can help you boost your business and create more engagement among your employees.

It helps you increase transparency in your company and actively engage your employees and collaborators.

This tool is part of Office 365, and allows users to access and manage documents, share notes, as well as organize responsibilities and work tasks.

The fact that 85% of Fortune 500 companies use Yammer confirms the usefulness of this tool.

FIX: CCleaner error when opening files for writing

When you want to clean up or optimize your computer for better performance, there are many tools available that can help you do the job, and well at that.

One of these tools is CCleaner, arguably one of the world’s most popular ones that clear out temporary files clean your Registry and erase browser history among many other tasks.

CCleaner is also compatible with Windows operating system, and has a great user interface, support for Chrome and Internet Explorer, plus added support for programs like BitTorrent, AVG antivirus, Audacity and others.

In short, it is the ultimate tool for cleaning your system, but you still have to make a full system backup and create a new system restore point prior to using it.

Like any other software, CCleaner also has troubleshooting issues that bring up errors in its installation and usage, like the CCleaner error opening file for writing.

This error is associated with installation problems when using the tool if you’re trying to install it without being logged in as an administrator.

Check out the known solutions to resolve the CCleaner error opening file for writing.

How do I fix CCleaner error opening file for writing

  1. Retry running the installer
  2. Log in as an administrator
  3. Use CCleaner Portable

1. Retry running the installer

ccleaner error opening file for writing

If you run the installer, you may get a dialog box when a previous version of CCleaner is running. First, make sure to download the right installer from the official webpage. Then proceed with the process and in case the message shows again, wait for a few seconds and click Retry.

If this doesn’t get it back up and running again, try the next solution.

⇒ Get CCleaner

2. Log in as an administrator

As mentioned earlier, the CCleaner error opening file for writing may be caused when you try to run CCleaner without being logged in as an admin. In this case, you can log in as admin and run it, or contact your system admin for help with this.

If you were able to log in as an administrator and this worked, you can carry on using CCleaner on your system, if not, try the next solution.

3. Use CCleaner Portable

CCleaner Portable is the perfect tool when you need to clean your system on the go or want to carry it elsewhere to do a cleanup on another computer system. This version lets you carry it in your USB flash drive and use it anywhere, though it may have limited functionality if you’re not using an administrator account.  Once installed, you can run CCleaner without logging in as an admin, but it may not clean certain files and folders.

Did this help resolve the CCleaner error opening file for writing? Share your comment in the section below.

⇒ Get CCleaner Portable

FIX: Failed to lock profile on Fortnite

Fortnite is one of the biggest Battle Royale games currently on the market, and it was developed by Epic Games and released in 2017.

It’s been the target of many bugs, issues, and user complaints, but they were quick to patch fix up every single time.

Players around the world are complaining that they are having issues with Fortnite:

I started a new account because I was bored, and after every mission I have to close the game and verify in the fortnite settings so that I can play another mission. This just repeats itself over and over.

As the user describes it, the game seems to forget your profile details between matches.

This forces you to log out after every mission and log back in.

Other users have it more severely, as it forces them to uninstall and reinstall the game.

How can I fix the user authentification error in Fortnite?

Some users claim that you don’t need to reinstall or restart Fortnite.

Apparently, if you just go back to Select Mode and pick Save the World or any other Solo content, the issue should be fixed.

This should be considered more of a workaround the issue, as Fortnite is a multiplayer game.

This means that denying players core game modes inadvertently leads to them leaving the game.

Admittedly, there is no known cause as to why this issue is occurring.

As such, the standard solution is to wait until Epic Games releases a new patch that will fix this issue.

If you’re not the patient type, you could just try playing Fortnite‘s solo game modes instead.

For those of you that are also experiencing this issue, please contact Epic Games customer support for more help.

If you haven’t tried it yet, you’ll need to download the Epic Games Launcher first.

Once that is done, you are all ready to prove who’s the king of the Island.

  • How do you fix fortnite error?

The first thing you should try when you see an error on Fortnite is to simply restart your computer. You might also need to reinstall Fortnite. Here’s how to uninstall it in just a few steps.

[wl_navigator]

How to set up automatic weekly backups in Dropbox

In an age of cloud storage, a service such as Dropbox is probably known by everybody. However, for those of you that aren’t familiar with it, Dropbox is a file hosting service that offers cloud storage, file synchronization, personal cloud, and client software.

This means that you can extend your storage capacity using it, with the extended space being in an online environment.

The advantage of this type of service is that if your hard drive ever crashes, the data stored on the cloud is unharmed.

That being said, it should come as no surprise that these types of services are quite popular.

However, Dropbox does have it’s own limitations. For example, While you may think that to be the case, Dropbox is not an automatic backup service that you can use.

This means that data needs to be uploaded manually, and it won’t come as much use in case of an OS crash.

However, there are a few things that you can do to set up automatic backups in Dropbox.

How do I set automatic backups in Dropbox?

Use Handy Backup

  1. Open Handy Backup
  2. Click Create on the main panel to create a new backup task
  3. Select your dataset for backing it up
  4. Select the Dropbox plug-in .
  5. Click on Create a connection
    1. The program will open a Dropbox account interface so you can enter your credentials
  6. Enter your Dropbox account data in the appearing dialog window.
  7. Give Handy Backup access to your Dropbox
  8. Continue creating a new backup task.
  9. Give your task a name and finish the task creation wizard.

Handy Backup is a dedicated Dropbox plug-in that you can use to copy your data to a Dropbox account as a backup vault, or from this account to another place such as backup to Google Drive.

Handy Backup features a restoration tool that you can use to return Dropbox backups to their original places or set a new location to restore these data. This tool can also be used to copy or move files and folders from backup to any location you need.

Most importantly, Handy Backup allows creating synchronization tasks for Dropbox. This includes relatively complex tasks such as making Dropbox sync Google Drive on a given date.

These tasks often operate with an API of related storage, and this makes it so that they don’t use Dropbox’s sync folder or utility.

⇒ Download Handy Backup

Use Acronis True Image

  1. Start Acronis True Image.
  2. Click Backup.
  3. Click Add backup to add a new backup
  4. Click backup source icon, and then select the type of items you want to back up:
    • Disks and partitions
    • Files and folders
  5. From here you can select a specific disk or partition that you want to back up
    • You can also select files and folders
  6. Click backup destination icon, and then select a destination for the backup
    • This is where you can select Dropbox as the backup destination
    • You need Acronis True Image Advanced or Premium to be able to back up to Acronis Cloud.
  7. Click Back up now or select another start time option

⇒ Download Acronis True Image


By following these steps, you should be able to set up automatic backups of your Dropbox files on a weekly basis.

There are other tools that can perform this task as well, but we’ve decided to include the top ones exclusively.

Know of any other solution that we may have missed out on? Let us know by leaving us a message in the comments section below.


[wl_navigator]

2 Best Xbox Controller Software for PC

Are you searching for the best software for your Xbox controller on a Windows PC? Windows Report has got you covered in this post.

There has been a steady rise in gamers over the years. Casual gamers and professionals have participated in both online and offline gaming. This has also been made more popular with the advent of Steam, which allows the purchase of games at half the cost of the equivalent console.

Nevertheless, the major issue many PC gamers experience is the controller issue. Unlike console gaming, where a particular controller works for all types of games, PC gaming is a lot more dynamic, with different brands of controllers available in the gaming market.

Nowadays, several PC games come with support for different types of controllers but still heavily favor the use of Microsoft’s Xbox controllers – especially for Windows 10 PC users. However, without an Xbox controller, Windows users may be unable to play such games at high standards.

For instance, the Microsoft Xbox 360 controller would play any PC game when plugged in directly, which is not possible with a PS3 controller. This is where an emulator comes in, as it helps to simulate the Xbox controller on your PC, making it possible to run games without the default controller.

If you are searching for such a tool, keep reading this post. We’ll list two of the best Xbox controller software below.

What are the best tools to emulate an Xbox controller on Windows?

TocaEdit Xbox 360 Controller Emulator

TocaEdit Xbox 360 Controller Emulator is one of the best software for Xbox controllers on Windows PC.

This software enables gamers to efficiently configure their default Xbox controller settings and access different games.

The emulator comes in two distinct versions, which are 32-bit and 64-bit version compatible. So, download and install the one that suits your operating system version.

Installation is fast as the installation file is lightweight in size. On installation, the software opens to a simple window. To configure, you need to plug in your controller and launch the software, which detects the controller. Configure the buttons to your preference and click Save.

TocaEdit Xbox 360 Controller Emulator was tested with over 30 games and worked adequately. Suffice it to say, it is the best software for Xbox controllers on Windows PC currently available.

⇒ Download TocaEdit Xbox 360 Controller Emulator

Xbox 360 Controller for Windows

best software for xbox controller

Xbox 360 Controller for Windows is a solution offered by Microsoft to help users configure their settings perfectly. The controller setup is less than 10 Mb and installs in quick time.

The user-friendly interface allows users to configure their Xbox 360 controller settings based on their preferences. However, the tool cannot be used for other controllers, which is a limiting factor.

However, it’s a handy application if you have an Xbox 360 controller. Nevertheless, this is one of the best Xbox controller software for Windows PCs. Plus, it’s free to download from the Microsoft website.

⇒ Download Xbox 360 controller for Windows

Using the Xbox controller software can also help prevent issues like Controller acting like a mouse, for more details, read this guide.

Have you used any of the best software for the Xbox controller on the Windows PC we mentioned above?

Feel free to share your experience with us by commenting below.

Download Hitman 2 almost for free [This Month Only]

Hitman 2 (2018 video game)

Hitman 2 is the follow-up of the 2016 Hitman release, and it resumes Agent 47’s traveling/assassination story in a slightly different manner. Among the most notable differences between the two titles is that Hitman 2 is not episodic, as opposed to its predecessor. In other words, you can play levels in any order you see fit, as it won’t affect your experience too much.

Locations are another key comparable element between the two releases. Hitman 2 lets you explore 6 new locations: Miami, Hawke’s Bay, Mumbai, Santa Fortuna, Whittleton Creek, and the Isle of Sgaig. However, you’re not here to read about the game, you want to get it “almost for free,” so let’s show you how to do just that.

Editor’s note: Hitman 2 refers to the 2018 version of the game, and not the second installment in the original Hitman series, which was released in 2002 and was also called Silent Assassin.

Part of the April 2020 Humble Choice

Granted, this is an awesome game. And we can all agree that almost nothing worth having comes for free. Long story short, there’s no way to download it for free at the time being, but we can teach you how to get the best deal on it.

The April 2020 Humble Choice subscription includes Hitman 2, and you can have it for as little as $15. All you have to do in order to grab this awesome deal is subscribe to Humble Choice, and choose between the Basic and Premium plans. You can have the former for $15, and the latter costs only $5 more ($20).

April 2020 Humble Choice list

If you don’t know what Humble Choice is, take a look at our comprehensive Humble Bundle review.

Explanation: although Humble Choice has 3 plans (Lite, Basic, and Premium), only two of them (Basic and Premium) offer you access to the curated list of games.

Once you’ve purchased the subscription, you can choose 3 or 9 games (depending on your plan of choice) from the list, including Hitman 2.

Note: This is a limited time offer, and you won’t be able to access it after the April 2020 edition of Humble Choice comes to an end. However, if you decide to keep your subscription, you’ll be eligible for up to 20% off discounts on certain titles in the Humble Store, which may include Hitman 2 if the timing’s right.

Humble Bundle Monthly: best deals + free games

Humble Bundle Monthly: What is it?

Whether you’re a hardcore gamer, or just like hoarding awesome titles in your virtual library, we have some exciting news for you. Humble Bundle is an online platform where you can get a lot of games, but also books, comics, and even software, for a bargain price.

If you’re already familiar with this service, it’s time to get down to business. You can grab Humble Bundle’s awesome deals in various ways: you can either wait for your desired titles to show up in bundles, purchase a Humble Choice plan, or check out the Humble Store.

Humble Monthly vs Humble Choice

It’s no longer a secret; Humble Bundle has been here for a long while and has already built some solid reputation. If you feel a bit nostalgic (much like we do) you’ll surely remember there was a time when you could pay as little as $12 per month in exchange for a lot of games. We refer to this pleasant time as the “Humble Monthly” era.

However, times have changed and Humble Monthly has grown into what today we know as Humble Choice. It’s similar, but not exactly the same. There are three different plans, and you can choose the games you get to keep. As a result, there’s no longer a standard $12 monthly payment, as each plan is priced differently and offers you a different amount of content.

Note: if you have a Humble Monthly (classic) plan since before the Humble Choice came to be, you can keep using it. However, if you cancel it (unsubscribe), you will lose it forever. To make matters worse, there’s no way to revert to the Classic plan once you’ve unsubscribed.

How does Humble Choice work?

Even if you miss the good ol’ days when you paid a flat $12 monthly fee for games galore, many users argue that Humble Choice is fairer to the average consumer. The cheapest option ($5) grants you access to a DRM-free game catalog, whereas the most expensive plan ($20) lets you choose 9 titles every month from a 10+ selection of curated games.

Additionally, as long as you’re a subscriber, you get some generous discounts off certain titles in the Humble Store. Thus, the Lite and Basic subscriptions grant you a 10% off discount, while the Premium plan can shave up to 20% off your purchases.

One thing that’s worth mentioning is that unlike the bundles section, Humble Choice doesn’t offer anything besides games. At least not for the time being, anyway. Long story short, this monthly subscription was designed with gamers in mind, and will probably stay that way.

Humble Choice May 2020

Another important, yet somewhat obvious piece of info we didn’t cover is that the list of curated games changes each month. So there are slim chances you’ll get to see the same game in different selections.

May 2020 Humble Choice games

May 2020 games:

  1. Jurassic World Evolution + Jurassic World Evolution – Deluxe Dinosaur Pack
  2. XCOM 2 + XCOM 2: Reinforcement Pack and XCOM 2: Resistance Warrior Pack
  3. Rise of Industry
  4. Niche – a genetics survival game
  5. Warhammer 40,000: Gladius – Relics of War
  6. The Swords of Ditto: Mormo’s Curse
  7. WARSAW
  8. Heave Ho
  9. MO:Astray
  10. Neoverse
  11. Chess Ultra
  12. Horace

May 2020 extras:

  1. Rainy Season – DRM-free game
  2. Fae Tactics Sneak Peek – DRM-free game

Note: depending on your Humble Choice plan, you’ll be able to pick 9, 3, or no games at all from this compilation. The Premium plan lets you choose 9 games for keeps, the Basic one allows 3 game grabs, while the Basic plan only gives you access to the Humble Trove. Which brings us to the next part of our article:

Humble Trove: Free & DRM-free games

The Humble Trove is a nice touch to the Humble Choice plans. It’s only fair that Basic plan subscribers get something besides store discounts, right? Joke aside, regardless of the plan you wish to purchase, Humble Bundle offers you free access to the Humble Trove.

Logo Humble Trove
Presentation Humble Trove
Thus, the Trove is but a collection of DRM-free games that you can download on your PC and play for free. That being said, as long as you’re a Humble Choice subscriber, you’ll always have access to this catalog.

If you cancel your Humble Choice subscription you won’t be able to access the Trove again. On the bright side, you’re free to play the games that you’ve already downloaded to your PC before your subscription expired.

Humble Trove’s contents [updated April 2020]

We’ve compiled a full list of the games you’ll find in the Humble Trove. We’re always updating the list with the latest additions, so you can rest assured that we won’t miss any title, regardless of its “freshness.” Therefore, without further ado, here are the Humble Trove titles, sorted from newest to oldest (appearance):

  1. When Ski Lifts Go Wrong
  2. Divinoids
  3. Snake Pass
  4. Etherborn
  5. Space Routine
  6. Card Quest
  7. Tales From Off-Peak City Vol. 1
  8. The Flame in the Flood
  9. Unparallel
  10. Race The Sun: Challenge Edition
  11. Dear Esther
  12. Balconing Simulator 2020
  13. Arrog
  14. Operator
  15. Runestone Keeper
  16. The Whispered World Special Edition
  17. Valhalla Hills
  18. Broken Sword 5 – the Serpent’s Curse
  19. Roman Sands
  20. Shady Knight
  21. Blackguards
  22. Broken Sword 4 – The Angel of Death
  23. Chaos on Deponia
  24. DON’T GIVE UP
  25. Broken Sword 3 – the Sleeping Dragon
  26. Kind Words
  27. Anna’s Quest
  28. Broken Sword 2 – the Smoking Mirror
  29. macdows 95
  30. Deponia
  31. Broken Sword: Director’s Cut
  32. MirrorMoon EP
  33. Once Upon A Crime In The West
  34. Avadon 3: The Warborn
  35. Avadon 3 Hintbook and Bonuses
  36. A Short Hike
  37. Tokyo 42
  38. FOTONICA
  39. Avadon 2: The Corruption
  40. 20 Minute Metropolis
  41. Wheels of Aurelia
  42. Overture
  43. Avadon: The Black Fortress
  44. Tacoma
  45. SanctuaryRPG: Black Edition
  46. after HOURS
  47. Roombo: First Blood (Justice Sucks)
  48. Epistory – Typing Chronicles
  49. Renowned Explorers: International Society Complete Edition
  50. Frozen Synapse
  51. vApe Escape
  52. Orwell: Keeping an Eye On You
  53. Reus
  54. Ollie & Bollie’s Outdoor Estate
  55. Tumblestone
  56. Dungeon Souls
  57. Hacknet
  58. The Bridge
  59. Gemini Rue
  60. ETHEREAL
  61. SOMA
  62. Woten
  63. The Sexy Brutale
  64. Amnesia: A Machine for Pigs
  65. Stumblehill
  66. Deadlight
  67. Satellite Reign
  68. The Penumbra Collection
  69. Subserial Network
  70. Star Wars™: X-Wing Alliance™
  71. STAR WARS™ Rebellion
  72. Knight Club
  73. Lyric Sonata
  74. Indiana Jones® and the Fate of Atlantis™
  75. The Incredible Machine Mega Pack
  76. Drawkanoid
  77. Star Wars™: X-Wing vs TIE Fighter – Balance of Power Campaigns™
  78. Fortune-499
  79. Hitchhiker
  80. THOR.N
  81. Crescent Bay
  82. Fallen Enchantress: Legendary Heroes
  83. Wilmot’s Warehouse
  84. Copoka
  85. Getting Over It with Bennett Foddy
  86. Keyboard Sports
  87. Trine Enchanted Edition
  88. Volantia: Kingdom in the Sky
  89. Tiny Echo
  90. Elephant in the Room
  91. 2000:1: A Space Felony
  92. Jawns
  93. Yojimbrawl
  94. Gunmetal Arcadia Zero
  95. Spoolside
  96. Uurnog
  97. Quiet City
  98. A2Be – A Science Fiction Narrative
  99. Kimmy

As you can see, there’s plenty enough titles to keep you entertained for days, weeks, or even months if you’re not a fan of speedruns. If you feel that’s not enough, you can purchase a Basic, or Premium subscription plan, for 3, respectively 9 more games each month, aside from the Trove’s content.

Multi-windows chat support starts rolling out in Microsoft Teams

Last month, we learned that Microsoft is working on a better messaging experience, allowing users to pop out chat conversations into separate Windows. Some users took to Twitter to announce that multi-windows chat support in Microsoft Teams is already live. The new messaging experience is apparently gradually rolling out to Windows users running Microsoft Teams version 1.3.00.9267, so you may not see it yet. Unfortunately, we’re not seeing it here on the various Windows 10 PCs we checked.

Once the update is available on your PC, you can pop out multiple chat windows by any of these methods: First of all, navigate to the Chat tab, right-click on any chat to open its context menu, and then click “Pop out chat” to move the chat into a separate pop-out window. Secondly, you can hover to a chat in the recent chat list and then click the “pop out” button (which appears when you hover on a chat).

Interestingly, multi-Window Chat support would be helpful for schools and large companies who need to monitor many fellow meeting participants at the same time. the new pop will enable them to keep important conversations going while they are either attending a webinar or a meeting in Microsoft Teams.

Microsoft first announced the multi-Window Chat support for Microsoft Teams last year at Ignite. While the Microsoft 365 roadmap confirmed recently that the feature would be first available for Windows users in early April, with Mac and Linux users to follow “in the coming weeks.”

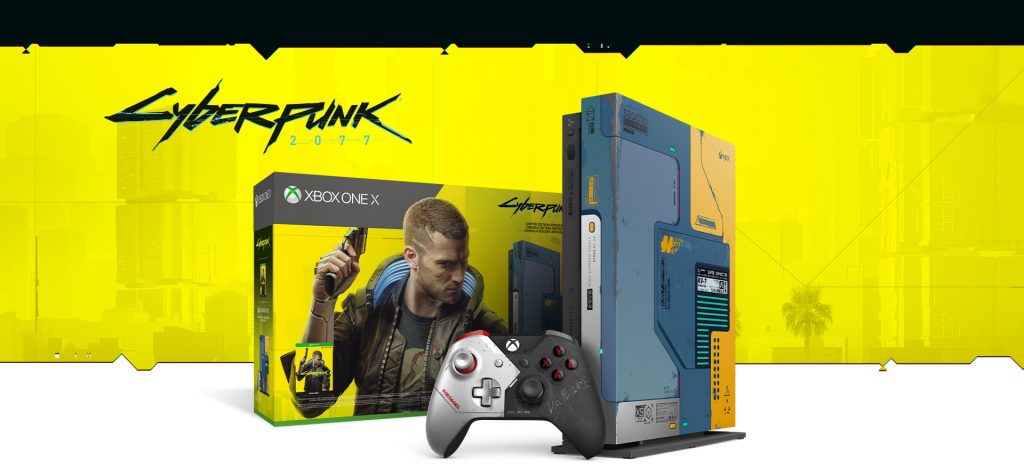
Xbox One X Cyberpunk 2077 Limited Edition will be available in June in limited quantities, controller available now

If the Cyberpunk 2077-themed Xbox One X leaked a couple of days ago, Microsoft has confirmed today that it will be available in June in limited quantities. Actually, the Xbox team emphasized that this will be the last Xbox One X limited edition console to be released, and only 45,000 units will be manufactured.

Just like the Xbox One X Gears 5 Limited Edition console before it, the Cyberpunk 2077 Limited Edition console will come with a stand as the vertical position is really best to admire the Xbox team’s attention to detail. Indeed, this console has laser etchings and LED light on front, custom panels on top, and an “No future” graffiti underneath that glows in the dark.

The console will also come with a digital copy of the game ahead of its September release, as well as a matching Cyberpunk 2077 Limited Edition Xbox Controller, which is available to purchase separately for $74.99 starting today. This one is definitely a looker with its metallic look graced by some subtle scratches. The Xbox team’s goal was to create “a half natural and half cyber-enhancement design inspired by the breathtaking character, Johnny Silverhand.”

Also available today is the Cyberpunk 2077 Xbox Pro Charging Stand is available today for $49.99 USD, while the Seagate Cyberpunk 2077 Special Edition Game Drive and the Steelseries Arctis 1 Wireless for Xbox Johnny Silverhand Edition headset will be available in June 2020.

Cyberpunk 2077, from the developers of the critically-acclaimed RPG The Witcher 3 is definitely one of the most-anticipated games of the year. Microsoft seems to enjoy a special partnership with developer CD Projekt Red, and the Cyberpunk 2077 segment of Microsoft’s E3 2019 presser featuring Keanu Reeves was definitely one of the highlights of the annual trade show last year. CD Projekt Red has already announced that Cyberpunk 2077 will get a free update to optimize the game for Microsoft’s upcoming Xbox Series X, but the Xbox One X will likely be the best console to play the very ambitious game when it’s released on September 17, 2020.

Cyberpunk 2077
Cyberpunk 2077
Developer:
CD PROJEKT RED
Price:
$29.99

Windows 10 version 1909 users are seeing WiFi issues, BSODs, and lost data after installing April Patch Tuesday

Last week, Microsoft released April Patch Tuesday updates for all supported versions of Windows 10. The fourth round of updates was notable from a security standpoint, especially because the build 18363.778 (KB4549951) for Windows 10 version 1909 improved security in all Microsoft Office products.  But, at the same time, Microsoft seems to have spawned a plethora of other issues with this release.

More specifically, according to multiple user complaints posted on Microsoft Community forums (via Windows Latest), the build 18363.778 introduces numerous unexpected complications such as WiFi issues, BSODs and data loss (listed below).

Blue Screen of Death

When Microsoft shipped the build 18363.778, it didn’t acknowledge any issue in this release. However, emerging reports suggest that the buggy patch may cause the dreaded Blue Screen of Death error message on Windows 10 PCs. Several users noted on Microsoft Community forum [1, 2, 3] that updating their OS resulted in the BSoD error:

I have been without the use of my computer since the latest Windows 10 update occurred for me on the night of April 15, 2020. It made my computer totally unusable. The only thing I was able to get after signing in on Thursday morning was the blue screen of death. The computer would not boot up and it would not go into safe mode. I could not get it to do anything.

WiFi connectivity issues & more

In addition, some reports have also emerged that the new update breaks WiFi connectivity and even leads to data loss:

All files in Documents more than 1 week old are deleted without notification or moving to the Recycle Bin. No restore available, no help, no live chat, no nothing.

For now, the only reliable way to get rid of these frustrating issues is to uninstall the build 18363.778 (KB4549951) from your Windows 10 device. However, since the patch brings patches some important security vulnerabilities, the uninstallation is only recommended if you’re experiencing serious problems.

If you’re in that group and noticed similar issues on your PC, sound off in the comments down below.

How to Back-up and import worlds in Minecraft on Windows 10

Updated: 3/29/2023

Importing and exporting worlds can be useful for many things, whether you want to share a copy of your world with a friend, or if you want to make backups of your worlds for safekeeping.

It’s also important to create backups for world saves before installing pre-release versions of Minecraft. Worlds opened or modified in pre-release versions of Minecraft can destroy them, and compatibility with release versions of the game is never guaranteed.

Whatever your reasons for doing so may be, creating backups of worlds in Minecraft for Windows 10 is very easy. 

Minecraft (Bedrock) for Windows 10

The Bedrock edition of Minecraft for Windows 10 has built-in export/import functions that make it especially easy to create backups of worlds.

Minecraft for Windows 10 will export worlds to a single file using the .MCWORLD file format. You can upload, send, or share your exported MCWORLD file anywhere you’d like.

To Export an MCWORLD file:

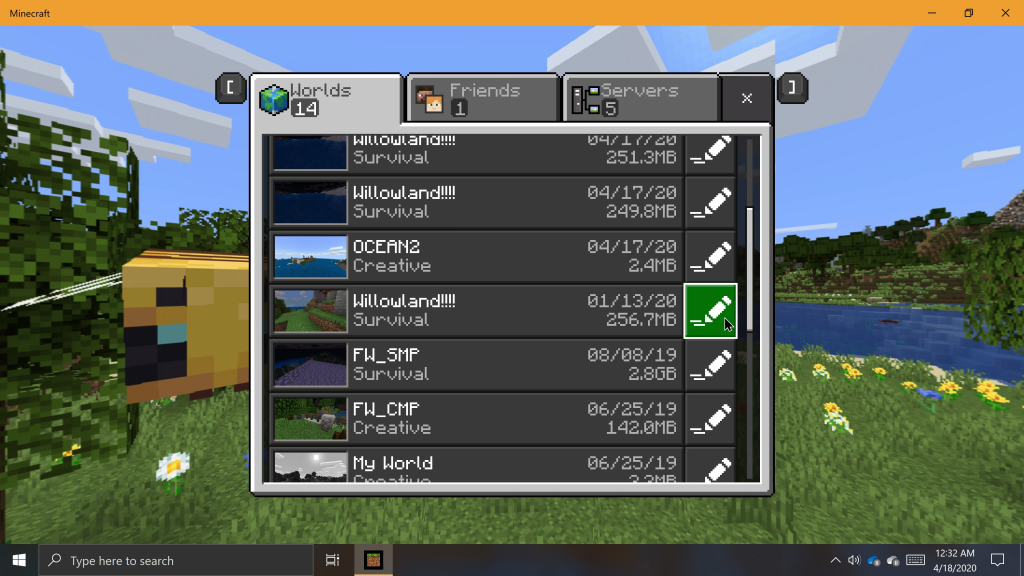
To Export an MCWORLD file, navigate to the world list and locate the world you want to export. To the right of the worlds name on the world list, click the “edit” button.

Scroll to the very bottom of the “Game Settings” pane on the right and click “EXPORT”. A File Explorer window will appear. Navigate to where you want a copy of your world saved, give it a name, then click “Export”.

Minecraft will let you know when it finishes exporting a copy of your world. Exporting may take some time, depending on how big your world is.

minecraft export

To Import an MCWORLD file:

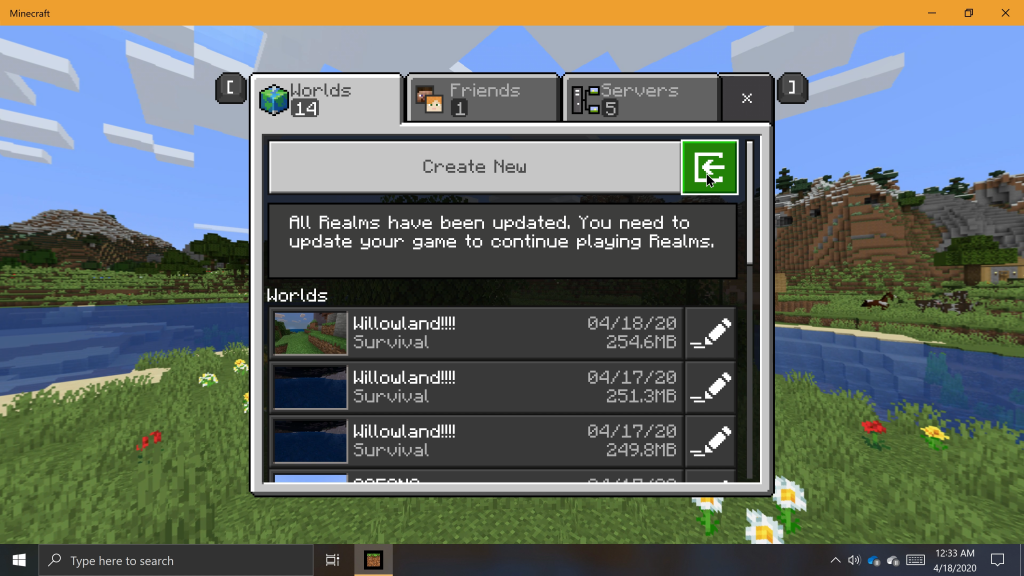
When you’re ready to import a world back into the game, navigate to the world list from the title screen. Click on the “Import” Button to the right of the “Create New” button. A File Explorer window will appear.

Navigate to where you have an MCWORLD file saved to your PC, click it, then click “Import”. Again, it may take some time to import your world.

minecraft improt
minecraft improt

Minecraft Java Edition (Windows 10)

The process of creating world backups is a little different in Minecraft Java Edition. In this version of the game, you have to navigate to the game’s directory and manage world saves directly. Because of this, you don’t have to launch the game when importing or creating backups of worlds.

How to locate Minecraft Java Edition World Saves:

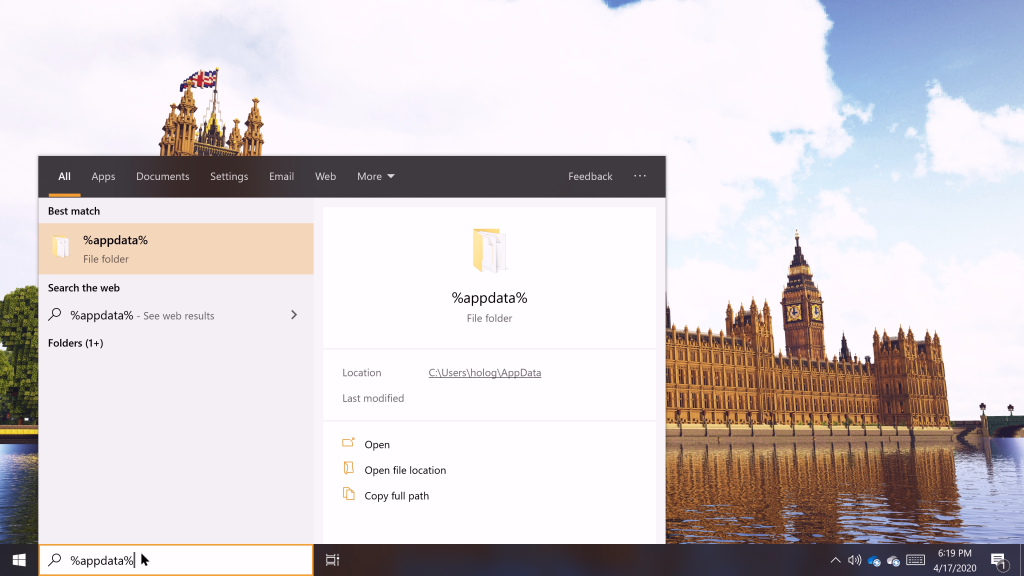
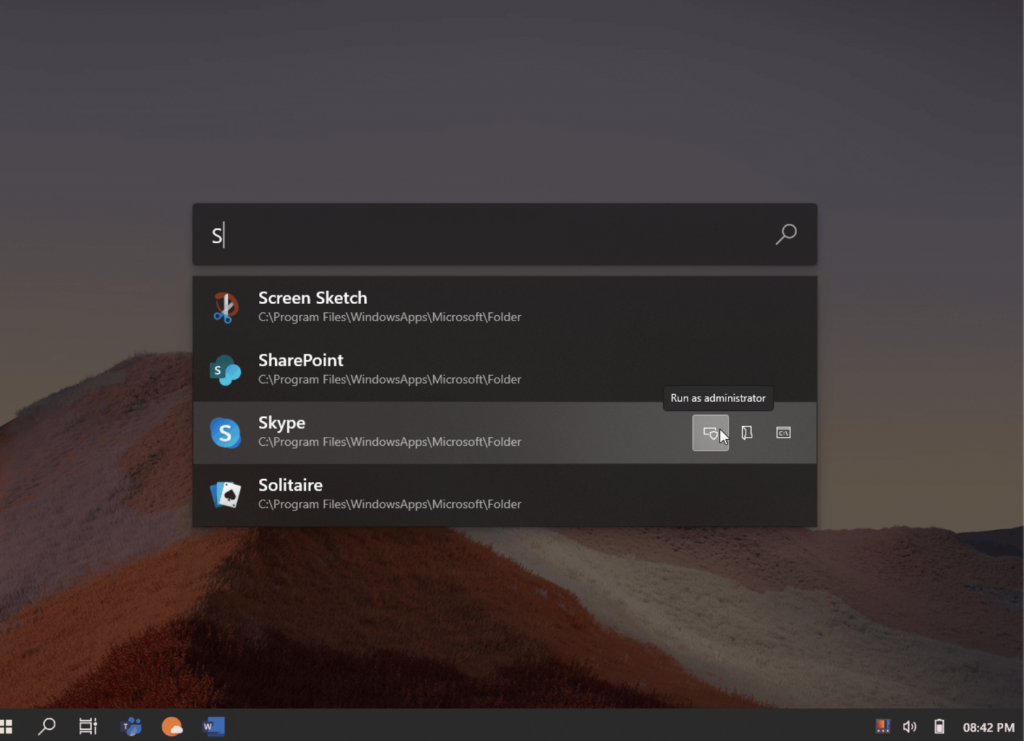
You can use Windows Search to locate the Minecraft Java Edition Saves folder. To do this, click the Windows Search box on the taskbar. Type “%appdata%”, then click on the folder that appears in the search results.

In the File Explorer window that appears, navigate to the “.minecraft” folder, then to the “saves” folder. Now that you’re in the saves folder, you can see all your Minecraft worlds listed as folders.

appdata
appdata

To create a backup, right-click a folder and select ‘copy’. Next, navigate to a different location on your PC where you want to save the copy. Then, right-click a blank area in the window and select ‘paste’.

A copy of your Minecraft world will be created in the new location, which may take some time, depending on how large your world is. To load a backup world, simply place the world folder you want to import into the saves folder.

It’s always a good idea to create backups of worlds that are important to you, just in case something happens. For extra precaution, I would recommend uploading your backups somewhere outside of your PC, such as with removable media or in the cloud.

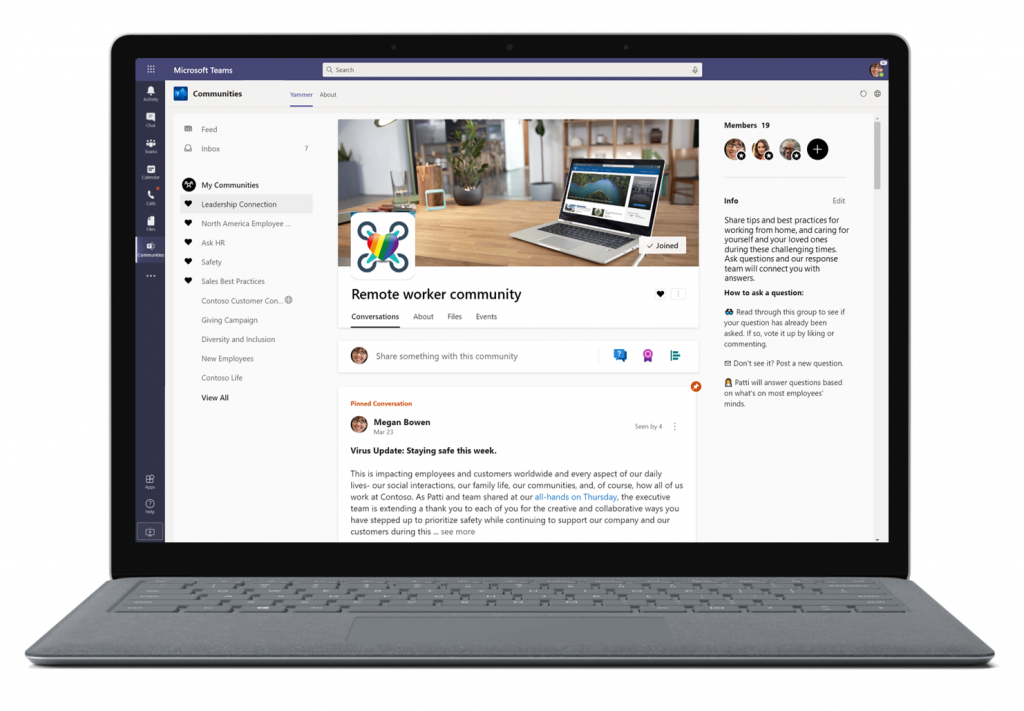
Microsoft Teams gets a long-promised Yammer app called Communities

Yammer, the enterprise social networking service that Microsoft acquired back in 2012, received a fresh coat of paint last November. During Microsoft’s Ignite conference, the company also announced a new Yammer app for Microsoft Teams called “Communities,” which would bring Yammer communities and conversations right within the team collaboration hub.

This Yammer Communities app is now available starting today in the Teams App Store, and it can be pinned to the app’s left sidebar for quicker access. For now, the app is only available on the desktop and web version of Microsoft Teams, though Microsoft plans to bring it to the Teams mobile apps for iOS and Android as well.

“The new Yammer app for Teams keeps everyone connected to what’s happening in their communities conversations, share announcements, attend live events, and connect with coworkers just as you would in the Yammer web or mobile apps,” explained Murali Sitaram, General Manager, Yammer and Office 365 Groups. It was already possible for Microsoft Teams users to add a Yammer group as a tab in a Teams channel, but thanks to this new Yammer Communities app, access to the full Yammer experience is just one click away.

Animated image of the Microsoft Teams app.

“By bringing Yammer into Teams, we want to make it easier for leaders and communicators to quickly and effectively communicate with their teams and organizations, even when they need to work apart. We’ll continue to create a more seamless Yammer communities experience within Teams, including unifying notifications and search and bringing the Yammer app to Teams mobile,” Sitaram said today.

How to use Minecraft not enough items mod

Minecraft is one of the most well-known voxel-based games out there, and it shows no sign of getting older or losing any users.

However, the game is constantly updated with mods. A popular one is Not Enough Items (NEI)(versions 1.12.2, 1.7.10, and more)


How do I use the Not enough items mod? 

1. Download and Install Forge

Download and install forge

Before you install Not Enough Items you will first need to install Forge Mod Loader. You can go install the Forge from here.

After you have Forge installed and running, you can continue with the next steps.


2. Download Not Enough Items, CodeChickenLib, and Just Enough Items

For NEI to work you will need to download and install 2 more compatibility mods.  First, let’s download Not Enough Items. You can download NEI by clicking here.

This will take you to CurseForge, the site that will be hosting all of the mods we are going to be downloaded. Once you’re on this site, click on the Files tab, and then select the version of Not Enough Items you are going to install.

If you want to play with Not Enough Items in Minecraft 1.7.10, you will need to select the 1.7.10 version of NEI. Once you have identified the desired NEI version, click the little download arrow next to the version name.

That will start the download. You make need to keep the file.

Now let’s download NEI’s compatibility mods. First, CodeChickenLib by clicking here. and then Just Enough Items on Curse Forge, by click here. Use the same methods that you did for Not Enough Items to get the compatibility packs downloaded.

Also, make sure that all 3 downloaded packs have the same version. Once all files are downloaded, it’s finally time to move on to getting everything installed.


3. Install Not Enough Items, CodeChickenLib, and Just Enough Items

install compatibility mods

  1. Press Win key + R to open Run window.
  2. In the search box type,  %appdata%. This will launch the Roaming folder on your computer.
  3. At the very top of this folder, you will see a folder called .minecraft. Open this folder, and search for mods folder. If you don’t have one, just create a new folder.
  4. Now, take Not Enough Items, CodeChickenLib, and Just Enough Items and drag and drop them into this folder.

After you’ve done that, the mods are installed. We aren’t quite done yet though, we will still need to make sure that we have the right version of Forge.


4. Open The Minecraft Launcher and Select The Forge Profile

forge launcher

In order to select the correct version of Forge, we need to open up the regular Minecraft launcher that we allow know and love. From here, we can click the up arrow next to the Play button.

From there, find the profile titled Forge. Click it, and then, click the big green Play button. Minecraft should then launch with Forge and Not Enough Items installed.

Not Enough Items is now installed. You can now build stuff, or install some other cool mods. One of the great things about NEI is that it has extensive mod support that allows you to build and setup different things in the mods that you have installed.

Now that you have NEI working, you might also want to try out experimental builds. Check this Minecraft D1 guide to learn more about snapshots and early versions.


It appears in-game whenever the player’s Inventory or other GUI that contains an inventory is opened and allows a player to view crafting recipes and usages of the majority of the items in the FTB Modpacks.

The GUI of the mod can be quickly enabled and disabled with the O key by default.


[wl_navigator]

Best Cricut Maker bundles

If you like to craft, I’m sure you already heard of the Cricut Maker machine. You probably have seen a lot of fancy images on the internet and wondered how in the world do they cut those intricate designs.

Then you wanted to do the same things yourself but didn’t know where to start. We have been in this position, and now we are here to help you.

What is a Cricut machine? A Cricut machine is a die-cutting machine used for various projects, and scrapbooking, mainly. You can use it to cut so many things. From vinyl to paper, plastic and even hard materials like wood and heavy leather.

Of course, you also need a dedicated software solution to get the most out of your Cricut machine and create amazing patterns.

There are over 100 materials that you can use on your Cricut. The sky is the limit. All of this is possible because of the rotary blade, which glides smoothly across the material resulting in the perfect cut.

The machine can be used even as a printer. An accessory slot makes it possible for the machine to draw the design for you.

There are several Cricut products, but the two lines that they still update and promote are the Explorer Airline and the Cricut Maker. We compiled the best list of Cricut machine bundles that you can buy right now.

2 Cricut Maker bundles to fuel your hobby

Cricut Maker Machine bundle for beginners

buy Cricut Maker Machine bundle beginners

If you’re a beginner and this is the first time you’ve used a Cricut Machine, we recommend getting this impressive bundle.

So, what’s in the package for you? You’ll get a brand new Cricut Maker machine, as well as a rotary blade and a fine point pen.

Additionally, there are plenty of patterns included in this bundle, which makes it the perfect choice for beginners:

  • A USB cable and power adapter which definitely will come in handy.
  • 50 free ready-to-make projects
  • 25 sewing patterns that you can get directly from Cricut’s website.
  • Plenty of materials for your first project so you don’t need to go shopping as soon as the package arrives.
  • 12 exclusive vinyl designs, as well as 2 heat transfer vinyl designs.

  ⇒Get this bundle now

Cricut Maker Machine bundle Explore Air 2

buy cricut explore air 2

This bundle includes a Cricut Explorer Air and it was created for beginners.

The bundle includes an iron-on vinyl, adhesive-backed vinyl, and a pen set. It’s perfect for personalizing gifts, wall signs, t-shirts, pillows, and such. You can use the pen set to write messages on envelopes, paper invitations, labels, and gift tags.

The bundle comes with some additional items, perfect both for beginners and more advanced users. Yes, you don’t have to go shopping for various items to use the machine at its full capacity.

The package includes:

  • A German carbide premium blade is already installed.
  • An accessory adapter — also already installed.
  • A USB cord and US Standard Power Cord. Compatible with laptop and desktop computers and devices with USB Type-A ports
  • Built-in wireless Bluetooth. A useful feature if you want to cut wirelessly. Just make sure your machine is within 10 feet of your computer and connected to it via Bluetooth.
  • Cricut Tool Kit.

⇒ Get this bundle now

So, these are the hottest Cricut bundles of the moment. Let us know which one you picked.

FIX: Nexus Mod Manager not opening

Nexus Mod Manager is a great utility for modding games. However, that software doesn’t always open for some users. Users can’t utilize NMM when it doesn’t open for them.

If you’re among the users who needs to fix Nexus Mod Manager not opening, check out the resolutions below.


This is how you can fix Nexus Mod Manager not opening

1. Move the Nexus Mod folder out of Program Files

  1. Some users have been able to fix NMM not opening by moving the Nexus Mod folder out of Program Files (or Program Files x86).
  2. Press the Windows key + E keyboard shortcut to open File Explorer.
  3. Then open the Program Files folder that includes Nexus Mod Manager.
  4. Next, left-click the Nexus Mod folder and hold the left mouse button.
  5. While holding the left mouse button, drag the Nexus Mod folder onto the C: drive on the left of File Explorer.
    • When a Move to text box appears, let go off the left mouse button to move the folder out of Program Files to the root C: drive directory.
      Move to text box nexus mod manager not opening
  6. Alternatively, you can move the Nexus Mod folder onto the desktop instead.

2. Run Nexus Mod Manager as administrator

  1. After moving the Nexus Mod folder, configure the software to run as administrator.
    • Open the Nexus Mod folder.
  2. Then right-click the Nexus Mode Manager’s EXE file to select Properties.
  3. Select the Compatibility tab on the window that opens.The Run this program as an administrator option nexus mod manager not opening
  4. Select the Run this program as administrator option there.
  5. Click the Apply button to apply settings.
  6. Then press the OK button to close window.

3. Turn off third-party antivirus software

If you have third-party antivirus software installed, that might be blocking Nexus Mod Manager files. To fix that, right-click your antivirus utility’s system tray icon to open a context menu for it.

There you can usually select a disable option of some kind that will turn of the antivirus shield when selected. After disabling the antivirus utility, try launching Nexus Mod Manager again.

The Avast antivirus context menu nexus mod manager not opening


4. Delete the Black_Tree_Gaming folder’s user.config file

  1. A lot of users have fixed NMM not launching by deleting the user.config file for the Nexus Mod Manager software.
  2. To do that, open File Explorer’s window.
  3. Then open this folder path in File Explorer:
      • C:/Users/Your name/AppData/Local/Black_Tree_Gaming/NexuxClient.exe…/.


  4. The NexusClient.exe folder includes a series of version subfolders. Select to open the version subfolder with the most recent date.
    NexusClient.exe folder nexus mod manager not opening
  5. Then right-click the user.config file to select the Delete option.

5. Clear the Black_Tree_Gaming folder

  1. Alternatively, clearing the Black_Tree_Gaming folder might also resolve the issue.
    • You can do that by opening this path within File Explorer:
      • C:UsersyourusernameAppDatalocalBlack_Tree_Gaming.
  2. If you can’t find the AppData folder, click the View tab in File Explorer.
    • Then select the Hidden items check box.Hidden items check box nexus mod manager not opening
  3. Before deleting anything, back up the Black_Tree_Gaming folder.
  4. Then select everything within Black_Tree_Gaming folder by pressing the Ctrl + A hotkey.
  5. Click the Delete button on the Home tab.

6. Reinstall Nexus Mod Manager

  1. As a final fix, reinstall Nexus Mod Manager.
  2. Launch the Run accessory (press the Windows key + R hotkey).
  3. To open the uninstaller window, enter appwiz.cpl in Run and click OK.
    The uninstaller nexus mod manager not opening
  4. Select Nexus Mod Manager in the software list.
  5. Click Uninstall and Yes to remove the software.
  6. Restart Windows after uninstalling Nexus Mod Manager.
  7. Thereafter, open the download page for Nexus Mod Manager to get the latest version.
  8. Reinstall the software with the downloaded setup wizard.

A lot of users have fixed Nexus Mod Manager not opening with the resolutions above. Note, however, that NMM is no longer supported. Vortex is the replacement mod manager software from Nex Mods that gets updated.


[wl_navigator]

FIX: Minecraft Realms could not invite the provided name

Are you getting the Minecraft realms could not invite the provided name error? Playing Minecraft with friends can be a bit tricky sometimes. Minecraft Realms simplified the way we invite and play with friends online using the multiplayer feature.

However, sometimes, when you try to send an invite to a friend, you find that Minecraft realms invite is not working. Here’s what to do.

What to do if Minecraft realms invite is not working?

1. Update Minecraft

1.1 How to update Minecraft on Xbox

  1. On the Xbox One dashboard, select My Apps & Games.
  2. At the top left side of the screen, select Games and choose Minecraft.
  3. On of your Xbox One controller, press the menu button to reveal the menu.
  4. You will see Manage Games & Add-ons from the menu options. Clicking on it will open the Games page.
  5. Next, look to the left-hand pane and select the Update option.
  6. If the update fails to begin downloading automatically, press A on your controller to start downloading.
  7. If asked to select an installation region and verify the update, make sure to do so.
  8. Finally, wait for the updating to complete, and you should be able to invite friends as usual.

1.2 How to update Minecraft on PC

  1. Log on to https://account.mojang.com/me. When prompted to log in, do so with your Minecraft account.
  2. Under Minecraft for Windows, click on Redeem.
  3. The next step is to sign in to your Microsoft account.
  4. On the Redeem page, hit Next and confirm.
  5. Finally, launch Microsoft store on your computer, search for Minecraft, and install it.

2. Make sur eyou invited players to your realm properly

  1. Tap on the Minecraft icon and launch the Game.
  2. On the next page, click on the green Play button.
  3. After that, click on the third option labeled Minecraft Realms.
  4. Next. Select the wrench icon at the top right of your Minecraft Realm server screen.
  5. The first option on the left corner is the player button.
    • Click it to continue.
  6. Next, you hit Invite Player.
  7. After that, the Name field is where you will type in the USERNAME  of the player you wish to invite.
  8. When you are done typing the name, finally, hit Invite Player to send an invite.

Most times, errors resulting in the Minecraft realms could not invite the provided name error is usually caused by typing wrong usernames of friends you wish to add to your realm.

Make sure to always check usernames properly before sending out invitations to friends, so you can avoid getting the Minecraft realms could not invite the provided name, Which can be frustrating.

Best HDR merge software for stunning photography

HDR photographs, also known as High-dynamic-range, is a technique used in photography and films to reproduce a greater dynamic range of luminosity than what is possible with typical digital imaging or photographic techniques.

This feature is most commonly used in cameraphones and they usually result in stunning imagery.

However, one step further beyond HDR photos is merging HDR photos in order to create even greater pieces of work. These include panoramic views, 180 or 360-degree photos, and more.

That being said, we will be looking over some software tools that we consider to be the best when it comes to merge HDR photos.

We will be judging based on how common the program is, how easy HDR merging is done, how seamless the end result looks like, and other important criteria.

What are the best software to merge HDR photos?

Adobe Photoshop

Adobe photoshop

Adobe Photoshop is probably the world’s most famous image editor, and you can use it to adjust pretty much every aspect of a digital image.

In the case at hand, Adobe Photoshop is perfectly capable of handling HDR images as well, including the process of merging them.

The program has been around for so long that everyone is bound to know the UI in one form or another, so adjusting to it is easy for every user.

Besides, once you get an Adobe Photoshop license, you will open yourself to an entire world of possibilities as far as image editing is concerned.

Here are some of Adobe Photoshop’s main features:

  • Professional raster-based image editor
  • Familiar UI for Adobe users
  • Constantly updated
  • Full support for plug-ins
  • Handles HDR image editing without issues.

⇒ Get Adobe Photoshop

Aurora HDR

Probably the newest entry on our list in terms of the launch date, Aurora HDR is yet another tool that proves that you don’t need a rich history in order to be efficient.

Like the beefier entries on our list, Aurora HDR gives you the ability to use layers and masking features like in Photoshop. This, in turn, is very helpful in developing the perfect HDR image and then merging them afterward.

More so, if you’re looking to process a lot of photos without having to tweak each image at a time, then you’ll be glad to know that Aurora HDR also supports batch editing.

Here are some of Aurora HDR’s main features:

  • Compatible for both Windows and Mac
  • Supports batch processing
  • Realistic HDR images
  • Easy-to-use
  • Light on your CPU

⇒ Get Aurora HDR

Adobe Lightroom

If you love Adobe Photoshop but are discouraged by the UI, then maybe a simpler variant that is more beginner-friendly is what you need.

That being said, the first product that should come to mind is Lightroom Classic

Lightroom Classic is super basic with only three options when it comes to handling HDR images. However, results can be very realistic and pleasing.

Admittedly, the lack of tweaking options means that while the results are indeed great, they cannot compare to what the first entries from our list can do.

Here are some of Lightroom Classic’s main features:

  • Entry-level HDR image editor
  • Provides great results with a minimum effort
  • Light on your system’s resources
  • Familiar for those used to Adobe Products
  • Compatible if the other Adobe products.

⇒ Get Adobe Lightroom

Luminance HDR

Compared to the other entries on our list, Luminance HDR is a much newer software product. However, don’t let that fool you into thinking it is not good.

The highlight of this tool is that it is extremely easy to use thanks to the build-in drag-and-drop feature and that it is also free of charge.

The only visible downside to this tool is that the processing speeds for images are a bit slow, although this is only noticeable if you use another premium tool by comparison.

Here are some of Luminance HDR’s main features:

  • Entry-level HDR image editor
  • Free of charge
  • Many automated tools
  • End-results are quite good
  • Doesn’t load your CPU during processing

⇒ Get Luminance HDR

Photomatix Pro

Photomatix Pro is a software tool that has been around for over 10 years, and for good reason. Those of you looking for a software tool that looks and feels simple and clean should go for Photomatix Pro without a second thought.

However, the over-simplification of the menu and toolset did nothing to affect the way the images look after conversion, as they look as if professional photographers took them.

Finally, you’ll love knowing that you can also use it on both Windows PC and Mac.

Here are some of Photomatix Pro’s main features:

  • Simplistic UI
  • Realistic HDR images
  • Can easily handle HDR image merging
  • Works on Windows PC and Mac
  • Dedicated to HDR imaging

⇒ Get Photomatix Pro

Thanks to the tools mentioned above, you should be able to create and then merge HDR images in order to create fantastic works of digital art.

Not only will these tools compensate for the lack of professional physical equipment, but they can allow you to generate images that would otherwise be impossible using normal environmental settings.

Windows 10 news recap: Halo 2 Anniversary beta invites being sent out, machine learning utilised to identify security bugs, and more

Welcome back to our Windows 10 news recap, where we go over the top stories of the past week in the world of Microsoft’s flagship operating system.

Microsoft to introduce PowerToys launcher for Windows 10 in May

A new report suggests that a new update for PowerToys is being prepared that includes a Mac OS style Spotlight launcher, making it easier find apps and files on a Windows 10 PC.

PowerToys Launcher
concept design for PowerToys Launcher UX

Microsoft starts sending invites for first Halo 2 Anniversary beta on PC

Invites for the Halo 2 Anniversary beta on PC have started to be sent out this week. Members of the Halo Insider program who have opted into PC flighting will receive an email with the invite.

Microsoft is using machine learning to identify security bugs during software development

In order to help Microsoft identify security bugs and resolve them before public release of software, the company is employing machine learning to find security bugs.

Machine Learning APIs

That’s it for this week. We’ll be back next week with more Windows 10 news.

How Does Humble Bundle Work & Is it Worth It? [Review]

Humble Bundle is an online platform where you can buy digital products such as games, software, books, audiobooks, and even comic books if you’re into that. There’s a huge collection of content you can explore, and all of it comes at great prices.

If you’re looking for a bargain, Humble Bundle could cover your needs in more than just one way:

  1. Wait for a cool bundle to appear.
  2. Take a look at the Humble Store (has major sales frequently).
  3. Purchase a Humble Choice subscription plan.

Initially, this service relied heavily on providing gamers with bargain deals, but not too long ago, it generously expanded the range of products it covers. Now you can get books, comic books, software apps, games, and even bundles that have a bit of each.

Is Humble Bundle legit?

It’s rare to stumble upon something as good as Humble Bundle and not raise an eyebrow. Humble Bundle is 100% legit and safe, I might add, as it works tightly with various publishers to get huge discounts on products that are bundled up and provided to you at a next-to-nothing price. There’s nothing fishy about it.

Humble Bundle has been around since November 24, 2010, so it has certainly passed the test of time. It also works with many charity organizations and has offered hundreds of bundles.

How does Humble Bundle work?

It’s quite simple. This platform collaborates with publishers to receive discounts for various games, books, software, comic books, and audiobooks, which are subsequently bundled up and brought to you. You decide how much you want to pay for the content, but there’s a catch.

Every bundle has several tiers (usually 3 is the magic number), and each can be unlocked for a price.

  1. The Pay What You Want tier can be unlocked by paying at least $1, but it will bring you the least amount of content
  2. The Beat the Average tier will bring you the first-tier content, along with additional items
  3. The highest tier unlocks everything in the bundle, and more often than not, it comes with bonus items
Payment Tiers in Humble Bundle


After deciding which bundle you’re willing to pay for, you can choose where your money goes. Remember earlier when we mentioned charity organizations? Here you can decide what percentage of your payment goes to charity, how much of it goes to developers, and the amount Humble Bundle gets from it.

Where your money goes Humble Bundle


If you’re among the top contributors, your name, Twitter account, or even a message will be included on a leaderboard. However, you can be humble and let your contribution be anonymous.

If you feel extra generous, you can purchase entire bundles as gifts. You have to select the appropriate option during the check-out and type the gift recipient’s email address. Humble Bundle lets you make the gift anonymous and even create a gift link if you don’t feel like using email.

Includes DRM-free content

Another fact worth mentioning is that Humble Bundle purchases usually include DRM-free content. This can mean games, ebooks, Android games, soundtracks, and even audiobooks.

To access it, you need to explore your library carefully. If this type of content is available, you’ll see it under the main title (e.g. you can find a game’s soundtrack next to its download button in your library).

Sometimes, you can even find multiple editions of the same game. For instance, Humble Bundle could allow you to redeem your game on Steam, but also throw in a download link for its DRM-free edition.

Supports multiple platforms

Regarding games, most bundles offer keys that you can use to redeem the content on the popular Steam platform. Although this might happen a lot, you need to pay attention, as sometimes Humble Bundle offers keys for Origin, uPlay, or even PlayStation.

Another thing you should know is that once in a blue moon, certain bundles might not be available for the region you’re currently residing in. For that reason, you might want to double-check if you’re eligible to use the bundles’ content before you jump head-first and buy them.

Is Humble Bundle worth it?

Is rain wet? From our standpoint, Humble Bundle is a gem, given that not only does it bring an outstanding variety of content to your virtual doorstep at a next-to-nothing price, but it also lets you feel better about yourself by giving you the chance to make generous donations.

If you take a bit of time to do a little research, you’ll understand why we’re absolutely hooked on this service (and why you’ll be joining us soon). In the Bundles section there’s an overview of bundles that are currently available.

Hover your mouse cursor over any of the bundles, check out their real value, and compare that to the price you can have them for. Now ask yourself: is Humble Bundle worth it? We’re sure you’ll find the right answer, too.

Humble Choice subscription

If we’re anything alike, you’ll be glad to know that Humble Bundle also lets you use a subscription-based service called Humble Choice. It brings you a variety of games each month and, depending on your subscription type, you could select some of them for keeps. Forever.

Once upon a time, it was called Humble Monthly and offered a monthly collection of games for only $12. You could keep all the games in the collection, and subscribers would even receive early access to some of the games.

However, Humble Monthly has been revamped and is now what we know as Humble Choice. Unlike its predecessor, Humble Choice offers three subscription types: Lite, Basic, and Premium. The plans are as follows:

  • Humble Choice Lite – $4.99 / month
    • Lets you access the Humble Trove
    • Grants you up to 10% off purchases you make in the Humble Store
  • Humble Choice Basic – $14.99 / month
    • Allows you to choose up to 3 games every month
    • Lets you access the Humble Trove
    • Grants you up to 10% off purchases you make in the Humble Store
  • Humble Choice Premium – $19.99 / month
    • Allows you to choose up to 9 games every month
    • Lets you access the Humble Trove
    • Grants you up to 20% off purchases you make in the Humble Store 

The Humble Trove and Humble Store

Now you may be wondering what the Trove is, considering that it’s included in all the subscription plans upstairs. It’s quite simple, actually: Humble Trove is a catalog that comprises more than 90 DRM-free games and Humble Originals.

Every month, Humble Bundle adds new titles to that catalog. The games within the Trove can be downloaded and played at any time, but there’s a catch: you must have an active Humble Choice subscription.

Now enter the Humble Store. Even if you’ve lost the opportunity to buy the perfect bundle or purchase a Choice subscription at the right time, there might still be hope.

The Humble Store is exactly what it sounds like a store where you can buy each title individually. As Murphy’s law dictates, it’s unlikely that you’ll find exactly the game you’re looking for at half-price.

However, if you’re patient enough, you can find a lot of sales and low-price opportunities in the Humble Store, as well. Subscribing to Humble Bundle’s newsletter can also help if you forget to check the website regularly.

Double Dragon and six other console classics are now available for Xbox One

Double Dragon is a classic beat ’em up video game series that was developed by Technōs Japan and released as an arcade game in 1987. The series features twin martial artists, Billy and Jimmy Lee, as they fight against various adversaries and rivals, and went on to become hugely popular.

The franchise is now the property of Arc System Works, the company that ported the original Double Dragon to the Sega Master System console in 1988.

Arc System Works has now launched standalone versions of Double Dragon (1987), Double Dragon II: The Revenge (1988), Double Dragon III: The Sacred Stones (1990), Renegade (1986), River City Ransom (1989), and Crash’n the Boys Street Challenge (1992), and Super Dodge Ball (1988) for Xbox One.

The games are also available for the Nintendo Switch and PlayStation 4 will follow shortly.

Double Dragon

Here are the links to the seven games:

The legendary NES original game that sparked worldwide fame involves rescuing your girlfriend and using your legendary fighting style to make your way through the street thugs.

Podcast Downloader for Windows: Best to Use in 2026

Podcasts are audio files that are the digital equivalent of radio shows. Thus, they’re digital radio shows (but can also be videos) distributed via the web with RSS feeds.

Podcasts update subscribers with all the latest content from websites and blogs. There are now hundreds of thousands of podcasts that you can subscribe to and play with desktop, laptop, mobile and tablet apps.

Podcatchers, or podcast managers, are software with which you can download and manage podcast RSS feeds. Some podcast programs are also more general media players that play video and music.

Although podcast apps are more prevalent on Apple platforms, there are still some great podcatchers for Windows.

What is the best podcast software for Windows 10?

iTunes

itunes podcast software

Apple was among the first to embrace podcasts in its multimedia software. So the iTunes media player is perhaps the best-established podcatcher for both Apple and Windows.

Probably the best-known podcast software on our list is iTunes. This is an extremely popular media player, but it can be used to play podcasts.

As for the features, here are a few notable ones:

  • Full-fledged multimedia player
  • More than 250, 000 podcasts are available
  • Ability to subscribe to new podcasts by entering their URL
  • Organize podcasts according to their genre, length, etc.
  • Smart playlist feature
  • Speed indicator feature that allows you to adjust podcast playback speed

iTunes

Organize your podcasts and stream your favorite content with this industry-leading software!
Visit website Try it now

Pocket Casts Desktop

Pocket Casts Desktop podcast software windows

If you’re looking for podcast software for Windows, then Pocket Casts Desktop might be perfect for you. This is a Windows Universal app, so you’ll need Windows 10 to run it.

Regarding the features, here are a few notable ones:

  • Sleek and friendly user interface
  • Ability to search and organize podcasts
  • Can create favorite podcasts and access them quickly
  • Ability to see new releases or podcasts in progress
  • Synchronization with your Pocket Casts account
  • Ability to create playlists

Pocket Casts

Listen to the latest podcasts and create playlists with this flexible podcast software for Windows!
Visit website Try it now

Grover Podcast

grover podcast podcast software

Grover Podcast is another podcast software for Windows that you need to try. Regarding the features, here are a few notable ones:
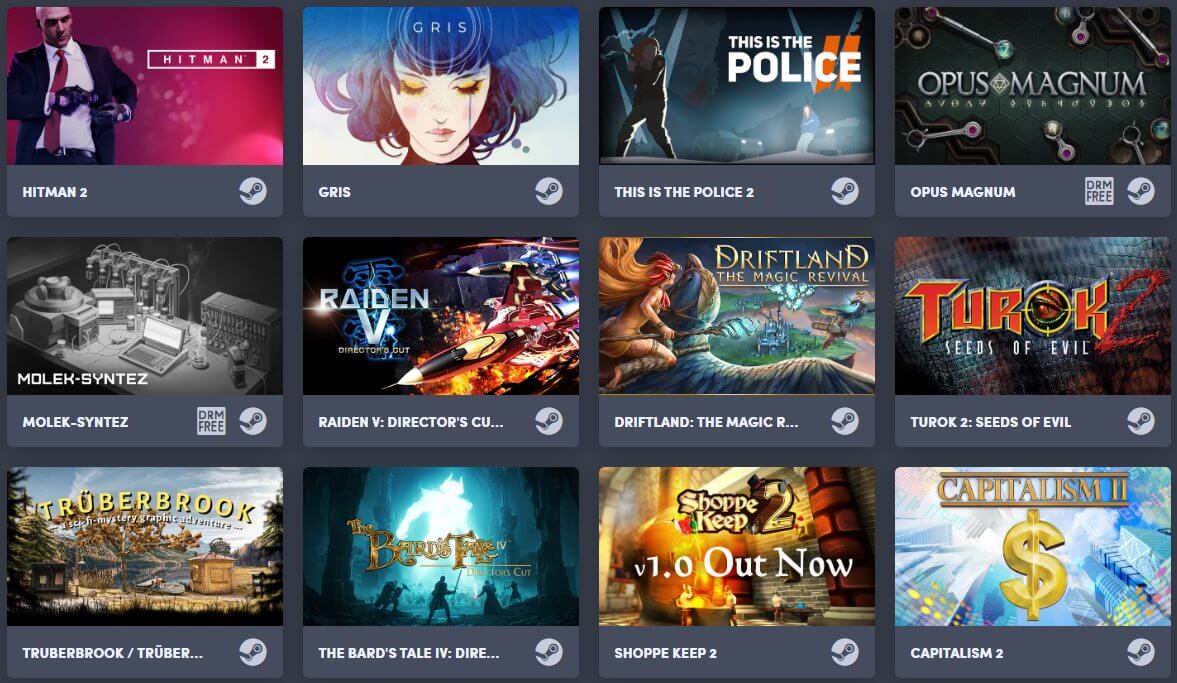
  • Ability to stream podcasts directly from the app
  • Search feature that allows you to find and subscribe to podcasts easily
  • iTunes API integration
  • Ability to remove podcasts that you listened
  • Notifications for new podcasts
  • Auto download of new podcasts
  • Drag and drop support for easy podcast organization
  • Full integration with system audio playback
  • Ability to import and export OPML files

Grover Podcast

Stream podcasts directly from the app and import the files you want with Grover Podcast!
Visit website Try it now

Juice

juice podcast software

If you’re looking for a free podcast software, you might want to consider Juice. This is an open source application, and as for the features, here are few notable ones:

  • Completely free
  • Supports multiple media players
  • Can easily manage podcasts
  • Built-in directory with thousands of podcasts
  • Centralized feed manager
  • Auto cleanup and authorization

⇒ Get Juice

gPodder

gpodder podcast software free

Another open-source podcast software that you might want to try is gPodder.

This application is available on all major desktop platforms, and as for the features, here are a few notable ones:

  • Available on Windows, Linux, and MacOS
  • Completely free
  • Simple and friendly user interface
  • Can download podcasts from RSS, YouTube, Atom, Vimeo, and XSPF feeds
  • Automatic notifications for new releases
  • Ability to discover new podcasts
  • Can add new podcasts simply by pasting the URL
  • Ability to import podcasts from OPML file
  • Can extract podcasts to OPML file
  • Device synchronization

⇒ Get gPodder

Miro

micro podcast software

Another great multimedia software that can also play podcasts is Miro. This is another free podcast software, and it’s available on multiple platforms.

Regarding the features, here are a few notable ones:

  • Full-fledged multimedia player
  • Will work with your music library as soon as you start it
  • Ability to convert files
  • Synchronization with Android devices and Kindle Fire
  • Buy music from Amazon MP3 right from the application
  • Ability to download any video or audio format
  • Can convert any video
  • Ability to share media on the same Wi-Fi network
  • Easy to use interface

⇒ Get Miro

Those are six of the best podcatchers for Windows and other platforms.

All of the above programs have great options and features for downloading and organizing subscribed podcast feeds, but Grover Podcast, Miro, and iTunes are the best all-in-one podcatchers for both podcast subscription and playback.

If you have any other questions or suggestions, feel free to reach for the comments section below.

Microsoft releases patch for latest Fast Ring build to improve “overall reliability”

Microsoft has released today a patch for its latest Fast Ring build (19608) that was released just two days ago. This build 19608.1006 (KB4557426) “contains a single fix to improve overall reliability of the OS,” the Windows Insider team said today, and that’s pretty much all the details we have.

If you had yet to install the preview build 19608, this was another minor update for Fast Ring Insiders which brought the ability to search the lists of file types, protocols, and apps when setting a default app in the Settings apps. This new Windows 10 build also fixed various issues affecting Task Manager, Sticky Notes, the Snip & Sketch app, as well as the Windows Update history page.

In addition to this minor patch, the new Windows Insider lead Amanda Langowski also posted her first post on the Windows Insider blog today. Despite the promising “Moving the Windows Insider Program forward” title, her post did not include any information about what’s coming next after the Windows 10 May 2020 Update, which is now available for Release Preview Insiders.

“As the leader of the Windows Insider Program, I’ll be behind the scenes a little more than past leaders, but still working tirelessly on enhancing our listening systems, feature previews and engagement opportunities,” Langowski said today. “My goal is to connect you more to the passionate and unique folks that design, code and monitor the quality experiences you most care about and provide clarity on how your feedback is informing the way we build amazing experiences for all our Windows 10 customers,” she added.

Like many of you, we’d really like to know if the 20H2 update coming later this year will be another “service pack” release like the November 2019 Update (19H2) was last fall, or if we can expect a more substantial update. Anyway, the latest builds that have been shipping to Fast Ring Insiders these past couple of weeks are still not labelled “20H2.” Back in December, the Windows Insider team explained the Fast ring would now be used to test new features that may not end up in the next Windows release, but we haven’t really seen anything significant from this new development branch so far.

Microsoft to introduce PowerToys launcher for Windows 10 in May

According to The Verge, Microsoft PowerToys is getting ready for another update that will include a new Spotlight-like launcher for Windows 10. The PowerToys launcher project initially started out as an effort to replace Win+R back in May 2019 and give users the ability to easily search their apps and files across Windows.

With the new PowerToys launcher, users will have a utility that goes beyond the Windows standard Start menu, which pushes users into Bing and the Edge browser, and instead, users will be able to customize searches, search across Windows, and launch cmd prompts, Regedit, PowerShell instances and more.

Designer Niels Laute, or @niels9001 on GitHub, created a PowerToys UX concept design that he shared on his blog to demonstrate current and upcoming PowerToys including a launcher with functional UI using Microsoft’s Fluent Design experience.

The post also mentions that Microsoft is actively working with the open-source community and apps like Wox (another launcher for Windows) to integrate plugins, as well helping to find a new name for the Win+R project. Some possible names already suggested include Power Toys Run, Power Toys Engage, Power Run and your writer’s favorite Microsoft PowerToys Advanced Run 2020 Professional Power-User Edition for Windows 10.

With PowerToys recent update in early April that added 4 new utilities including Fancy Zones and Image Resizer, it seems that the project is continuing to gain momentum with frequent updates to the GitHub repo and engagement from the community.  While Win + R is a relic of old Microsoft, PowerToys represents the best of the new Microsoft that builds upon Windows foundation and lets users quickly create prototypes, customize Windows and create a customized Windows experience unique to each power user.


Hands-on with Minecraft Dungeons: is it Minecraft for the rest of us?

Minecraft developer Mojang was one of Satya Nadella’s first big acquisitions after the Microsoft veteran took the reins of the company back in 2014. In hindsight, this $2.5 billion deal was a brilliant move. Indeed, the software giant acquired what has since become the most popular video game of all time, with 180M copies sold and 480 million players as of November 2019.

Minecraft is available on all platforms today, and it’s also being used by teachers as a vehicle for learning. The game remains incredibly popular with kids, and you can also find tons of gameplay videos on YouTube, or gamers streaming it live on Twitch.

Still, there are probably a lot of consumers and gaming enthusiasts who never got into Minecraft. How could a game with such dated (some would say hideous) graphics remain so popular after all these years? Well, the Mojang’s game is finally getting ray-tracing support on Windows 10 this year (a beta is now available), but there’s no denying that Minecraft is still not a game for everyone. It’s quite difficult to get started without reading tutorials, and unlike other game genres, the sandbox game isn’t something that’s immediately fun and gratifying.

As you may know, Microsoft recently showed that it’s willing to push Minecraft in other directions, starting with the AR game Minecraft Earth last year. This one didn’t exactly set the world on fire as Pokemon Go did years ago, but Minecraft Dungeons, a new Minecraft-themed dungeon crawler to be released on May 26, could be a whole different story. We went hands-on with the closed beta this week, and it does seem to provide the immediate sense of fun that regular Minecraft still lacks.

The most accessible Minecraft game ever?

Minecraft Dungeons has often been compared to Blizzard’s Diablo series, and there’s definitely some truth to that. It’s a dungeon crawler, which is playable in solo or multiplayer with up to 4 people. During the campaign, you’ll have to complete different levels that are procedurally generated, and the world map in the beta includes 9 different biomes in total.

Except for the tutorial, only two missions are available in the closed beta, and they happen in two different biomes called “Creeper Woods” and “Pumpkin Pastures.” Before starting a mission, though, you’ll first have to create your character: There are no character classes in Minecraft Dungeons, so the only way to customize your character is by choosing a skin, and then finding loot.

Once you’ve chosen your character skin, you’ll start in a village where you can choose your mission, and you can also find merchants in the village for trading emeralds earned during missions in exchange for randomized loot. The two missions in the closed beta are pretty straightforward, and I finished them in a couple of minutes. You’ll be given mission objectives such as freeing villagers, and of course, you’ll find a lot of Minecraft-themed monsters along the way: zombies, spiders, and skeletons are all there, though the evil villagers (“illagers”) will probably offer a better challenge.

To be clear, there’s no building or crafting in Minecraft Dungeons. You’ll just have to kill monsters again and again and find better loot to upgrade your equipment and capabilities. You can also equip three artifacts that give you special abilities, with each of them having a cooldown period. As an example, I found a flaming quiver giving me burning arrows, as well as magic boots giving me a speed boost for a couple of seconds.

The progression system in Minecraft Dungeons is quite different from the one in Diablo: instead of unlocking new active and passive abilities with every new level, you’ll unlock enchantment points for your gear. As an example, I used an enchantment point to unlock a chain enchantment for my weapon, which gave me a 30% chance to chain close enemies and keep them bound for a short time. I also used another point to unlock a potion barrier enchantment for my armour, allowing me to take 90% less damage for a short duration when using healing potions. Moreover, I upgraded my bow with a multishot enchantment giving me 20% chances to fire five arrows at once.

Personally, I think a Diablo-like class system with clearly differentiated characters probably offers more depth and replayability, but the loot and enchantment system in Minecraft Dungeons should still provide lots of customization options and possibilities. Because Minecraft Dungeons has been designed as a family-friendly game (for ages 10 and up), the gameplay is quite easy to understand, and the game itself is pretty easy, too: there’s no game over, and when you die you’ll just respawn not far from the monster that killed you.

Is it fun to play?

I only played the Minecraft Dungeons closed beta in solo, and I did find the game more fun than regular Minecraft. Dungeons plays great with a controller (mouse and keyboard controls are also supported on Windows 10), and even though you often end up mashing the attack button and the right trigger for shooting arrows, killing monsters feels satisfying. The game uses the popular Unreal engine, and even though Mojang artistic direction may not please everyone, Minecraft Dungeons does look pretty unique.

Again, there are just two levels you can play in this closed beta, and you can complete them multiple times in higher difficulties to gain more valuable loot. Creepers, the common green mobs that follow you around and explode when they’re really close to you, are still as dangerous as ever, though unlike in regular Minecraft, their explosions won’t create huge holes into the ground.

The same can be said for TNT crates, which are pretty rare to find but very effective for quickly dispatching enemies. It’s pretty fun to see enemies flying around after a TNT explosion, but again, what would have caused a huge crater on the ground in regular Minecraft doesn’t affect the procedurally generated Dungeons levels in any way, unfortunately.

The lack of crafting and building mechanisms also seem to be a missed opportunity. A game like Fortnite made building a key element of the gameplay for protecting yourself from others and accessing special areas, but Minecraft Dungeons has none of that. It’s possible that the game could become repetitive pretty quickly, especially if multiplayer is only restricted to a co-op mode.
A promising casual game Xbox Game Pass

Overall, if you’re a hardcore Diablo III fan, it’s clear that Minecraft Dungeons doesn’t play in the same category. Keep in mind that this is just a $20 game, and for that price, it does seem to offer a decent amount of fun. Minecraft Dungeons should be great filler content for Microsoft’s Xbox Game Pass service, and it already seems much more interesting than previous Xbox Game Studios titles such as Bleeding Edge or Crackdown 3.

Minecraft Dungeons will also be released on PlayStation 4 and Nintendo Switch next month, and Mojang plans to enable cross-play multiplayer at some point. Unfortunately, the Xbox One version won’t support Xbox Play Anywhere, so you’ll have to purchase the Windows 10 separately or play it for free with Xbox Game Pass for PC.

If you want to get access to the private beta on Windows, you can still sign up on this page. If you’re selected, you’ll also get three invite keys to send to your friends while the closed beta is still live.

Minecraft Dungeons
Minecraft Dungeons
Developer:
Xbox Game Studios
Price:
Free

Fix: XPS option is not enabled error

Printer errors such as The job was not printed because the XPS option is not enabled. Contact System Administrator to enable XPS on this device are not uncommon, especially when you are trying to connect to the printer via Wi-Fi.

This specific issue is usually related to class drivers or system conflicts. This is extremely inconvenient, so in this guide, we’ll show you a few potential fixes for the error.

What to do if the job was not printed because the XPS option is not enabled?

1. Reconnect the printer’s power supply

remove power cord

The first thing you’re going to try is to turn the printer off and remove the power cord from the wall outlet. Then, pull out the power cord from the power supply.

After one minute, reconnect the power cord into the power supply and then plug the power cord into the outlet. You may turn the printer back on and see if the issue persists.


2. Download the PS driver for your device

uncheck option

That error typically means a class driver is being used on Windows 8 or Windows 10. Luckily, there is an easy fix if you’re still seeing it after reconnecting the power supply. You need to determine if you are using a class driver, so check the installed printers.

If there is one that is XPS, or a Class Driver, uninstall or remove it. Up next, navigate to the support page for your machine and select the Drivers & Downloads tab. Download the PS driver for your device.

Then, make sure that Query the printer and automatically select the driver to use is not checked when installing the driver. If it is checked, note that you will not be asked to use the driver you just downloaded and extracted. Finally, you may restart your computer and print.


3. Enable XPS option on your PC

enable XPS

  1. Quickly open the Control Panel.
  2. Click on Programs next.
  3. Click on Turn Windows features on or off.
  4. In the Windows Feature, look for XPS Service. After finding it, just click the checkbox next to it.
  5. Click OK.
  6. Wait until the configuration process completes.
  7. Once done, go to Control Panel > Devices and Printers and check if the Microsoft XPS Document appears.

Your printer does not support XPS unless you paid for that feature. The Microsoft XPS Document Writer (MXDW) is a print-to-file driver that steps in when it comes to enabling a Windows application to XPS files.

Follow these steps to enable the XPS option on your Windows 10 PC connected to the printer.


4. Update the printer driver software

update driver software

  1. In the search box on the taskbar, enter Device Manager.
  2. After that, select Device Manager.
  3. Select a category to see names of devices, then right-click the printer you’d like to update.
  4. Select Search automatically for updated driver software.
  5. Finally, just select Update Driver.
  6. If any updates are available, they will be downloaded automatically in the background. Once the updates are installed, check if the problem is still there.

One aspect that doesn’t usually get much attention is updating the printer driver software. Printer drivers are software programs, and their function is to convert the data you command to print to the form that is specific to the installed printer.

Even if Windows 10 usually installs the missing updates automatically, it cannot hurt to look for any missing updates by following the above steps.


5. Use the troubleshooter to fix all emerging problems

fix all emerging problems

  1. Press the Windows logo key + R keyboard hotkey to open the Run dialog box.
  2. Type control in the Run dialog box and hit Enter.
  3. In the Search box in Control Panel, type troubleshooter.
  4. Up next, click Troubleshooting.
  5. Under the Hardware and Sound item, click Use a printer.
  6. Enter an administrator password or provide confirmation when prompted.
  7. Press Next and let the troubleshooter scan for problems.
  8. Fix all emerging problems.

If you can’t get rid of this error, using the troubleshooter might help to solve the problem. This will restart your printer and drivers and check for any errors. Your printer must be connected during this procedure.


If you’re trying to print and encounter the XPS option not enabled error, we’ve listed some solutions on how to fix it. If you found our article useful, feel free to let us know by leaving a comment below.

Also, keep in mind that there are various other posts on printers. Just use the search function to find the articles you need to fix your printer issues or take a peek here.

[wl_navigator]

Digital pre-orders open for the new Spongebob Squarepants video game on Xbox One

SpongeBob SquarePants: Battle for Bikini Bottom: Rehydrated is now available for digital pre-order and pre-download on Xbox One consoles ahead of its June 24th release date.

The game is a remake of the classic SpongeBob SquarePants: Battle for Bikini Bottom which originally came out on the original Xbox console way back in 2003. Versions were also released on Windows, PlayStation 2, GameCube, and the GameBoy Advance.

In addition to getting a massive graphical overhaul, this new Rehydrated version of the game will also feature 2-player multiplayer, extra game content, and a new horde mode.

Here’s the full game description and trailer:

Are you ready, kids? The cult classic is back, faithfully remade in spongetastic splendor! Play as SpongeBob, Patrick and Sandy and show the evil Plankton that crime pays even less than Mr. Krabs. Want to save Bikini Bottom from lots of rampant robots with your mighty bubbles? Of course you do! Want to underpants bungee jump? Why wouldn’t you! Want to join forces in a brand new multiplayer mode? The battle is on!

GAME FEATURES

  • Play as SpongeBob, Patrick and Sandy and use their unique sets of skills
  • Thwart Plankton’s evil plan to rule Bikini Bottom with his army of wacky robots
  • Meet countless characters from the beloved series

REMAKE FEATURES

  • Faithful remake of one of the best SpongeBob games ever created
  • High-end visuals, modern resolutions and carefully polished gameplay
  • Brand new horde mode multiplayer for up to two players, online and offline
  • Restored content that was cut from the original game like the Robo Squidward boss fight and more

Were you a fan of the original or will this be your first time playing SpongeBob SquarePants: Battle for Bikini Bottom? Share your thoughts with the community in the comments below and then follow us on Pinterest for more Xbox gaming content.

Let’s cross this one off your list [Disable alert]

We all know that Microsoft wants Windows 10 users to install the latest updates on their computers as soon as they’re available.

To make sure that users don’t forget to regularly update their machines, the OS displays a series of messages on the screen, inviting users to check for updates.

We’re sure that many of you have already encountered the following messages:

  • The newest Windows feature update is here
  • What’s new in this update
  • Windows Feature Update is ready to install
  • Let’s cross this off your list
  • We’ve got an update for you
  • Important updates are pending.

Of course, if you’re busy working on your computer, you definitely don’t work to be interrupted by update invites.

As a matter of fact, many Windows 10 users prefer to wait for a few days or even weeks before installing the latest updates.

Windows update issues are quite frequent, so users prefer to postpone the updates in order to buy more time for Microsoft to identify and fix potential bugs.

windows feature update
Another issue is that these update pop-ups tend to behave in a pushy manner. More specifically, there is no little X button in the upper right corner to allow users to get rid of them.

The pop-up window roughly displays two options: update now or update later. But getting rid of the alert for good is not an available option.

Moreover, users are also bothered by the fact that the pop-up takes control of the desktop, preventing them from accessing their running apps.

Of course, there are also security concerns as well. When something pops out of the blue on your screen, the first thought that crosses your mind is a malware infection.


Looking for the best tools to solve Windows update issues? Here are the best options.


Let’s cross this one off your list

let's cross this off your list windows 10
Among all these update notifications, this one really got our attention.

There are many user reports suggesting that the OS installed bloatware after this update message appeared on the screen.

What’s even more annoying is that the alert sometimes appears on the screen every five minutes, as users report on Microsoft’s forum.

This is popping up every 5 minutes.  The update actually installed Candy Crush Soda Saga!!!

This usually happens if your game updates are enabled in the Windows Store.

Update alerts also pop up if you have yet to upgrade to the Fall Creators Update (Windows 10 version 1709). Microsoft explains that:

Windows 10 Fall Creators Update is available since October last year, some computers only started getting this message because of the staggered distribution dates.

Indeed, if you really don’t want to update your computer, you should cross these alerts off your list.

Fortunately, there are few quick solutions that you can use to disable Windows 10 update notifications.

So, if the Windows 10 update alerts are bothering you, keep reading this article to learn how you can get rid of them.


Windows update is turning itself back on? Here’s what you need to do!


How to disable Windows 10 update alerts/notifications

  1. Disable automatic Windows Store app updates
  2. Defer  updates from Settings (Windows 10 Pro)
  3. Block Windows 10 updates on Windows 10 Home
  4. Stop the Windows Update Service

1. Disable automatic Windows Store app updates

Make sure that your Windows 10 Store update settings are turned off.

If these settings are turned on, your computer will automatically download game updates — and devs roll them out quite frequently, as this user reports.

my computer downloaded 19 updates for two days running nonstop of GAMES they’re pushing.

windows store updates
Remember that user who said that his computer update alert actually downloaded Candy Crush Soda Saga?

Most likely, he had uninstalled the game but didn’t completely remove game leftovers.

As a result, Windows 10 quickly displayed an update pop-up and reinstalled the game alongside the latest Candy Crush Soda Saga updates.


Epic guide alert! Everything you need to know about uninstalling Windows 10 Update Assistant!


2. Defer updates from Settings (Windows 10 Pro)

Windows 10 Pro allows you to defer major updates for up to 365 days. Yes, this means that theoretically, you’ll get rid of these annoying update notifications for a whole year.

Here are the steps to follow:

  1. Go to Settings > Update & security
  2. Now, go to Advanced optionsadvanced update options
  3. In the new window, enable the options that allow you to block updates:
    • you can defer feature updates for up to 365 days
    • you can block security updates for up to 30 days
    • you can pause all updates for up to 7 days

block windows 10 updates
3. Block Windows 10 updates on Windows 10 Home

If you’re running Windows 10 Home, you don’t have too many options to block or pause updates. So, you need to show Windows that your system is not technically capable of downloading the latest updates.

To do this, set your computer on a metered connection.

  1. Go to Settings > Network & Internet
  2. Now, go to Change connection propertiesset internet metered connection
  3. Toggle Set as metered connection on.

metered connection windows 10
4. Stop the Windows Update Service

You can use this quick solution to stop the Update Service on all Windows 10 versions.

  1.  To to Start > type ‘run’ > launch the Run window
  2. Type services.msc > hit Enter
  3. Locate the Windows Update service > double click on it to open itstop windows update service
  4. Go to the General tab > Startup Type> select Disableblock windows update service
  5. Restart your computer.

This is actually one of the safest methods to use if you want to block Windows updates. No updates should be installed on your computer until you turn the Windows Update service back on.


Important Updates are pending: here’s a handy guide on how to disable the pop-up.


Conclusion

we've got an update for you
We hope that this article cast some light on the annoying Windows 10 feature update notifications that the OS sometimes displays on its own.

The four solutions listed above will help you pause or block updates for a while. If you’re running Windows 10 Pro, you can defer updates for up to 365 days.

However, none of the methods listed in this article allow you to permanently block updates.

Speaking of blocking updates, keep in mind that Microsoft regularly rolls out new patches and hotfixes to improve system performance and stability, as well as patch security vulnerabilities.

Blocking updates also means exposing your computer to threats. So, think twice before deciding to block Windows 10 updates.

You can tell us more about your Windows 10 update experience in the comments below.

FIX: The serial number you entered has been revoked Adobe

Adobe Creative Cloud users describe the following situation: whenever they try to open any product, it asks them for their serial number. Doing so makes no difference as they keep getting the same error.

The error message states: The serial number you have entered has been revoked. This product cannot be licensed.  Please contact customer support.

If that’s happening to you as well, you do know that your version is licensed and no one denies it. However, ignoring the problem won’t make it go away.

Panicking over the situation is not recommended either. What you can do instead and is to follow the below solutions to correct the issue as soon as possible.

What can I do if getting Serial number has been revoked?

1.  Get the latest Adobe Creative Cloud version

download Adobe Creative Cloud

You’re most likely getting this error because you have older software. A glitch in the validation checking service is causing the Serial number has been revoked error message to pop up over and over again.

As unpleasant as it is, at least you know what’s the easiest fix to apply – downloading and installing the most recent Adobe Creative Cloud version.

This will not only bring new and enhanced features but will also help you get rid of any serial number inconveniences.

⇒ Download Adobe Creative Cloud


2. Confirm that you have an authorized product

There are times when completely genuine customers experience a glitch in the validation checking service.

However, there are also unfortunate situations regarding unauthorized copies or anti-piracy systems that get false positives from time to time.

Users share over forums how they’ve dismissed the first notification and waited for the second one to shop up.

This notification should include a link to the Adobe landing page, with a unique ID number to use as a reference and a number to contact the Adobe Genuine Helpline to call for assistance.

You can do the same as it is the easiest way to confirm that you truly have genuine software.


3. Disable the Adobe Genuine Software Integrity Service

Adobe Creative Cloud users have confirmed a quick tip that helped them get past the Serial number has been revoked issue.

They’ve simply turned off the Adobe Genuine Software Integrity Service under Control Panel/Administrative Tools. You may also try to check if that helps.


You can’t open Control Panel? Take a look at this step-by-step guide to find a solution.


After following all the steps mentioned above, you should no longer see the Serial number has been revoked error.

Remember to keep your distance from shady methods of selling invalid or counterfeit software. As always, if you have any other suggestions or questions, leave them in the comments section below.

[wl_navigator]