Windows 10 Creators Update brings new Bash/Windows Subsystem features

The Windows 10 Creators Update is now firmly in our hands, having started its deployment earlier this week. The update has plenty of new features, however, if you aren’t the creative type who would enjoy things like Beam streaming and 3D painting, it might not strike your fancy. But Microsoft’s Rich Turner might have something more interesting for you.

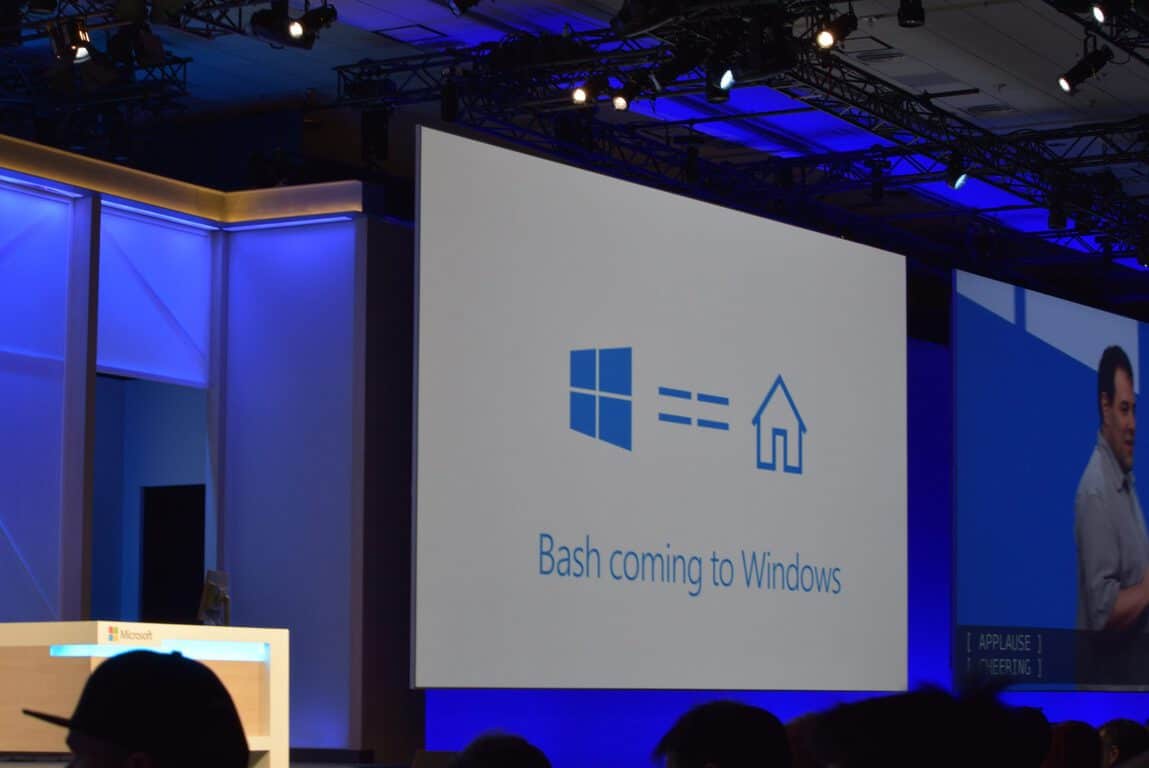
Bash/WSL – some additions that came to the Windows command-line family back during the Anniversary Update – now has a frankly overwhelming number of improvements that are shipping with the Creators Update.

Here’s a brief list of what’s new in the Creators Update:

  • More compatibility
  • Ubuntu 16.04 support
  • Ifconfig & network connection enumeration support
  • Ping & ICMP network support
  • File change notification support (INOTIFY)
  • Windows <-> Linux Interop
  • UNIX and Netlink Socket improvements
  • TCP socket & IPv6 improvements
  • Miscellaneous WSL Improvements
  • Windows Console & Command-Line Improvements

There’s a whole lot more in the blog post documenting the new update, including some in-depth explanations about each and every addition. This new update is massive for people who want to get started with bash, and most certainly proves that the team behind it has responded positively to a significant amount of feedback.

What’s more, the blog post ends by promising even more changes coming in the future. The dev team seems to have gone into overdrive with the launch of the Creators Update – we’ll see if they can keep up the pace going forward.

Yooka-Laylee issues: Game crashes, skipping music, and more

Yooka-Laylee is an open-world platformer that allows gamers to explore huge, beautiful worlds, and meet many funny characters in the vein of classic platformers like Banjo-Kazooie. Players can guide the game’s heroes through a variety of puzzles and challenges in their search for Pagies, the golden bounty that unlocks stunning new worlds.

Yooka-Laylee features oddball characters, hulking bosses, minecart challenges, arcade games, quiz shows, as well as quite a few bugs. In this article, we are going to list the most common Yooka-Laylee issues reported by players.

Yooka-Laylee Game Bugs

  • Music skips

For some reason after a bit of playing the music starts to skip, i don’t know why
i am going to assume this is just some sort of coding bug, (hopefully this problem get’s fixed soon since this doesn’t happen in any other game i have played)

  • Yooka-Laylee randomly crashes

What the hell? I played 7 hours yesterday with no problems in the slightest. And now I start it up today and it crashes as soon as I collect a Pagie.
Then I restart the game and it just starts chugging and taking up 100% of my CPU. What happened?

  • Controller won’t work
Can’t use controller? If I have it plugged in it hangs at start menu, if I don’t have it plugged in it’s running normally. Anyone know of a fix?
  • FPS issues

Anyone else getting bad frame rate issues? Before you say it, no, it’s not my computer. I can run other game on max setings with no issues. Is there a fix? Is it being patched?

  • Yooka-Laylee won’t launch

Game is downloaded but won’t launch, says it will release at a future time? I […] have reloaded steam multiple times, have reinstalled game twice, have reset PC twice.

Have you played Yooka-Laylee? Did you experience any bugs?

RELATED STORIES YOU NEED TO CHECK OUT:

Throwback Thursday: Watch Bill Gates introduce Windows 3.1 in this 60 second clip

As we all must know by now, Windows 10 has been touted by Microsoft as the most secure and efficient operating system available. There’s no doubt by its users that Windows has become a more polished and efficient system. However, before there was Windows 10, 8, 7, Vista, and so on, there was Windows 3.1.

Originally released publicly in April 1992, Windows 3.1 follows 3.0 with improvements to the MS-DOS based platform. It has a good run until December 31, 2001, when support for the Windows 3.1 OS was retired.

Just in case you’ve forgotten (or have never seen) Windows 3.1, here is a video of Bill Gates himself to introduce it.

As the description of the video explains, this was the beginning of a 3-hour long tutorial on VHS. “In this video, you’re going to see the future: Windows,” the younger Gates promised in standard definition. But it looks like he wasn’t too far from the truth.

This week we are celebrating the rollout of Windows 10 Creators Update with the promise of Redstone 3 to come. Windows continues to lead over competitors as the most used operating system, and looks to be doing so for the foreseeable future.

How to enable MSN Weather’s Dark Theme

Windows Insiders in the Fast Ring are in for another treat from Microsoft: The software titan has rolled out a slew of fresh updates for the UWP MSN apps in the Windows Store, bumping up their software version to 4.20.933.0.

The update includes support for the dark theme in the MSN Weather app.

On top of the dark theme, users also have three other options, such as the white theme and the system’s theme of choice. The MSN News and the Sports apps have also received minor bug fixes.

Last year, Microsoft updated the MSN News, Sports and Money apps with the dark theme option.

The Weather app is currently the only MSN app that has an option for a transparent Live Tile. It is not clear when Microsoft plans to add Live Tile to the three other apps.

Microsoft has recently rolled up its sleeves in order to provide updates to a bevy of apps that ship with Windows 10 for Insiders.

Some apps, however, are not getting the same attention Microsoft is paying to other apps in terms of the dark theme consistency. So, it’s good to see the MSN Weather app receive the dark theme, even it is a tad late at that.

How to enable dark theme on MSN Weather

  1. Type Weather in the Start Search box to open the Weather app.
  2. Click the Settings icon located at the left bottom corner of the app.
  3. Under the General tab, you’ll see three options to change the theme:
    Light
    Dark
    Windows default
  4. Select Dark.

The latest update to the Weather app for Windows 10 PC and Mobile is now available to download from the Windows Store for Insiders on the Fast Ring.

RELATED STORIES YOU NEED TO CHECK OUT:

Xbox updates, inspired by fans, start rolling out to all users today

Microsoft is on a roll when it comes to their Xbox community. Yesterday, an Xbox One Insider discovered the self-service refund, which is turning out to be quite a hit with gamers. Today, Major Nelson announced that an update will be rolling out for Xbox One. But this isn’t just any update, many of the additions are highly fan-requested features.

The first in line are new features in the Profile and Activity Feed. Now users will be able to visit another person’s profile and select the “Join broadcast’ button to instantly jump into the stream. The Activity Feed is also seeing a bit of a rework, offering users the chance to hide individual posts or pin them at the top of the feed. Furthermore, posts are now able to be filtered according to game, Club, or friends making it easier to sift through the chaos.

It looks like Clubs and the LFG tools introduced last year are what really got the meat of the update though. Here is the list:

  • When you create an LFG post, as the owner you will be able to see new vetting cards that include hero stats from gamers interested in joining your party. Hero stats are contextual to the game you’re playing, showing you relevant stats like kill/death ratio, rank, or score.
  • Achievement hunters, this one is for you! You will be able to search LFG posts from the Achievements tab, related to the Achievement you’re trying to finish.
  • We’re adding the number of open LFG posts to the Game Hub and Club Hub headers.
    Have you made a successful LFG post that you want to create again? Now you can see previous LFG posts that you have created, participated or shown interest in, and can copy them to create new posts.
  • When creating an LFG post, see all the recent tags you’ve used and easily select them.
    Club owners and admins will be identified and labeled in their text posts to better help them stand out and manage their community.
  • Club owners and admins can pin a post at the top of their Club feed.

The update also rolls out with the long overdue Xbox One/Xbox 360 filter in My Games and Apps. Gone are the days when users had to scroll through lists of both generations of games, some of which including way too many titles in similarity.

It’s clear the Xbox team are striving to be the consumer-oriented model that drives gaming communities. No wonder Sony PS4 players are at an unrest. Maybe they could use a UserVoice forum?


FISA requests on par with previous reporting period, says Microsoft in latest transparency report

Microsoft today released their most recent biannual transparency reports on the Microsoft Transparency Hub. The reports which cover the Law Enforcement Requests Report, U.S. National Security Orders Report and Content Removal Requests Reports show that Law enforcement and FISA requests are on par with previous reporting periods.

Overall, the reports cover July to December 2016. According to Microsoft, the latest Content Removal Requests Report also details requests to remove content from governments, copyright holders and individuals subject to the European Union’s “Right to Be Forgotten” ruling. The company has also disclosed a National Security Letter (NSL) which was received from the Federal Bureau of Investigation (FBI) in 2014, that sought data belonging to a customer of the company’s consumer services. A few highlights, which were all selected by Microsoft, from the latest transparency report can be seen below.

  • During the latter half of 2016, Microsoft received a total number of 25,837 legal requests for customer information from law enforcement agencies. This brings the total number of requests from law enforcement for 2016 to 61,409, which is a decrease from 2015, when requests totaled 74,311.
  • A majority (71 percent) of the law enforcement demands Microsoft received during this period continued to come from a handful of countries, led by the U.S., United Kingdom, France and Germany.
  • For the latest Foreign Intelligence Surveillance Act (FISA) data reported (which is January – June 2016), Microsoft received 0-499 FISA orders seeking content disclosures affecting 12,000-12,499 accounts, compared to the 0-499 FISA orders seeking disclosure of content impacting 17,500-17,999 accounts reported for the previous period. We received 0-499 National Security Letters in the latest reporting period, which remains unchanged from the previous period.

Microsoft continues to believe that “transparency is essential to accountability and building trust in technology.” The company notes that they are “committed to upholding these principles in our practices and our reporting,” and invites you to visit this website to learn more about the transparency efforts.

Update:

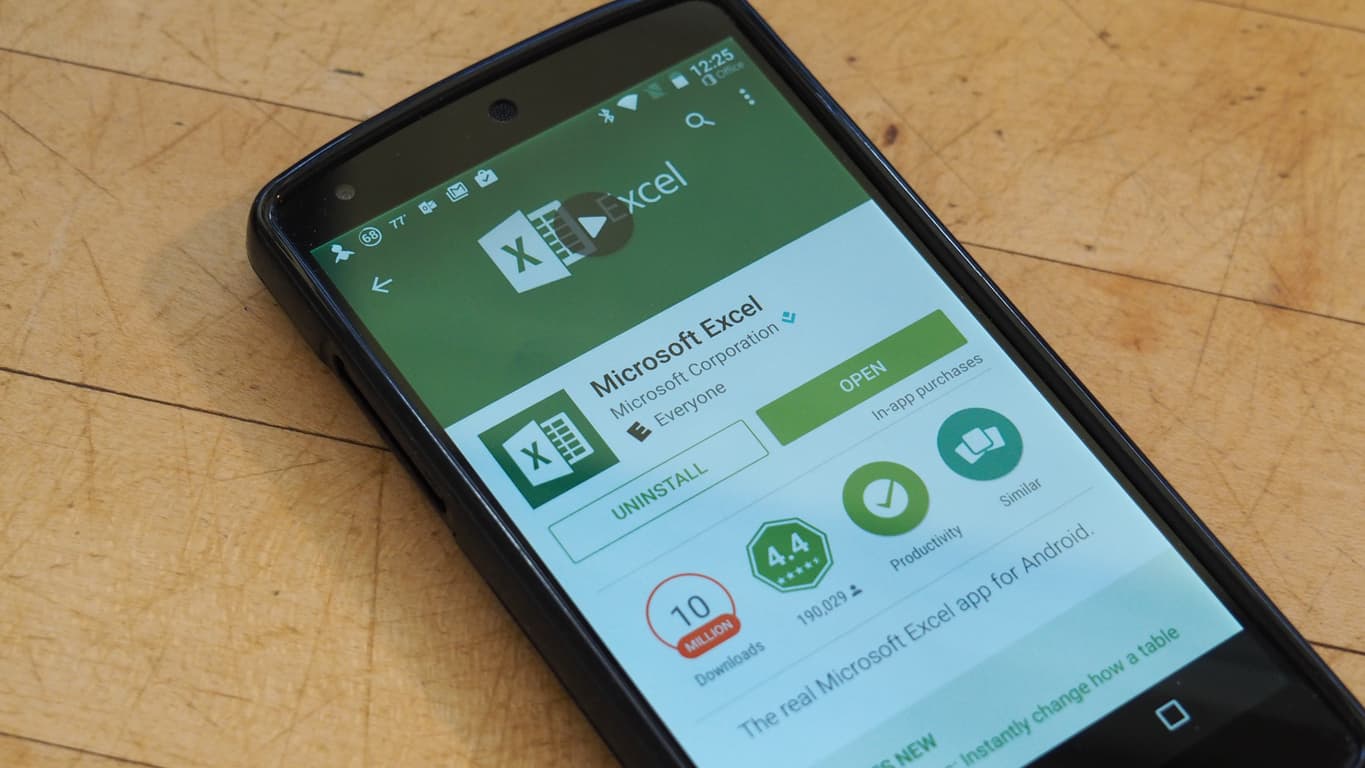
Excel-like “KAYAK at Work” lets you book a vacation while appearing productive

With the warmer months finally arriving in our half of the globe, many people area plotting their vacations, maybe even when they shouldn’t be. According to a statement from KAYAK, the trip booking service, 57% of trip bookings are actually done mostly during the standard workday.

So KAYAK decided that they didn’t want anyone getting busted for not being productive while they are at work, thus their new spin-off site: KAYAK At Work. The site looks similar to a Microsoft Excel spreadsheet to give an illusion of actually doing work instead of booking a trip.

“We created KAYAK At Work to help people search for travel, something they’re already doing at the office, covertly while also looking more productive while doing it,” David Solomito, vice president of KAYAK’s North America marketing, told the Observer.

The page offers very basic search functions to plan your next trip. Even the results fit in with the basic Excel mask that is properly titled as the “Travel Problem Solved Report.”

While it’s not very convincing up close and personal, KAYAK at Work might fool some of your neighboring cubicle companions that you are working. Interestingly, the guy who built Windows Solitaire apparently had the same idea back in 1988, although Microsoft never implemented his “boss key.”

New Xbox game refund policy is an early hit with gamers, and Sony PS4 fans are jealous

The Xbox community was excited to learn yesterday that Microsoft would be bringing the ability for self-service refunds to Windows 10 and Xbox One digital purchases. This announcement has spread like wildfire across the gaming community, even in areas that you’d least expect.

In case you missed it, yesterday, an Xbox One Insider discovered that Microsoft will be implementing their own digital refund policy, letting users return most games with a specific list of criteria. Games that have been bought within 14 days, played for a maximum of two hours, and at least played once will be eligible. This consumer-based announcement tends to favor purchasing games to try them out and feeling safe enough to return them if it doesn’t meet standards. Of course, if it is abused, accounts will be blocked from using the service.

Now, the Xbox One announcement is now the top voted Reddit post of all time on the r/PS4 subforum. The request is aptly titled, “Let’s put the pressure on Sony to implement something like this as well.”

Micolash explains in the post that such a refund service would be a benefit for everyone involved.

This is the kind of forward thinking customer-centric thinking that helps all users. No dealing with customer service, no hassle, easy. Someone buys something on your account? Game is buggy or broken? Trailers really misleading? Simply refund the game (not season pass or DLC) yourself within 14 days as long as you haven’t played it for more than 2 hours.

Consumers of Sony PS4 have their own refund policy in which they are not allowed to download or try the game if they want a refund. With over 46.7 thousand upvotes within only twenty hours, it looks like the PS4 community is in unrest.

Some of the Reddit user responses are optimistic, hoping for the change in refund policy. “That would be a nice feature,” says one person on the top comment with over 3000 upvotes. Others seem to be settled that Sony won’t base their change off the Xbox One announcement. One devoted fan of Sony shared from their experience:

It would be, but it won’t happen. I’ve owned every home console Sony has ever put out and still have them all set up in my entertainment center (If I could get my hands on a black dev-kit PSX my entertainment center would be as black as an emo’s soul.) Sony has had some pretty abysmal policies with refunds, especially chargebacks (even when accidental.)

Many Xbox One Reddit users seem to be supporting the request made to Sony by PS4 users. As Todd2r puts it:

Honestly, this is a win for all gamers so I can see why it’s a hot topic over on the ps4 side. We are all gamers and just want to be treated fairly. Hopefully, Sony does the same thing, and I think they will, and they get it done soon for PlayStation gamers.

It’s worth noting that Xbox One isn’t the first to implement this service-friendly refund. Other digital markets such as Steam and Origin have similar self-service refunds with guidelines very close to these. The idea is that gamers will spend more money to try games they are on the fence about instead of not making the purchase at all.


Microsoft could soon be bypassing local power companies in Washington State, buying its own power

Microsoft is known for its powerful software, including both Powerpoint, and Power BI, but if the company has its way, it might soon be known for buying its own power as well. According to a new report from the Associated Press, Microsoft could soon bypass the local power companies in Washington State by buying its own power.

The AP report shows that thanks to a new deal with Puget Sound Energy, Microsoft will be able to buy its own power on the open market. Though the settlement must first be approved by the Washington Utilities and Transportation Commission, Microsoft first filed for the deal on Monday. The Redmond giant also expects that with this deal they would “provide more flexibility and enable it to support more carbon-free power in the state.”

Terms are not exactly clear, but the AP reports that Microsoft would pay a $23.6 million exit fee to PSE to ensure other ratepayers are not harmed by the move, ultimately making sure that the utility would return that money to customers.  Microsoft is also known for its commitment to clean energy and was recently awarded as NA Wind Deal of the Year. The company also revealed that it has plans to shift to 50% renewable energy use by 2018.

Head of Xbox Phil Spencer promises Project Scorpio unveiling at E3 in June

Project Scorpio, the latest gaming console for Microsoft, has been making a lot of headlines since Eurogamer finally revealed its full specs last week. Since then, we learned a lot of interesting details about Project Scorpio dev kits yesterday, but we’ve yet to see what the final product looks like, or what it will cost.

As it turns out, it seems that Microsoft won’t reveal the final Project Scorpio design in the press. Xbox head Phil Spencer announced today on Xbox Wire that “we’re excited to unveil Project Scorpio and the amazing game experiences it powers at E3 this June.” As a reminder, Microsoft will hold its much-anticipated media briefing on Sunday, June 11th at 2PM PDT and we’ll be there to cover it live.

“Ultimately, we know you care most about great games, whether they be exclusive, multiplatform, independent or AAA,” explained Spencer. “We are proud of the diverse lineup of games coming this year that will only be playable on Xbox One and will play better on Project Scorpio,” he added. It’s true that Project Scorpio will really need great games to get traction from consumers (and developers), and we hope that the Xbox team will bring its A game at E3 to delight Xbox fans .

Office Insiders on the Slow ring welcome Collaborative Editing in Excel

Users on the Office Insider Slow ring have just received several new features for their Microsoft Office apps with Build 17.8067. With this new build of the Office apps on Windows Mobile, Insiders will now be able to insert links to files and websites in Excel, Word, and Powerpoint as well as collaborate on files in Excel. Excel has also been given added support for files that contain ink.

The Office apps on Android have also updated to Build 16.0.8027.1002 with the same updates as Windows Mobile.

Collaborative Editing essentially allows for more than one user to work on a single document at the same time with all changes being synced through the cloud. “You and your colleagues can open and work on the same Excel workbook,” Microsoft explains. “This is called co-authoring. When you co-author, you can see each other’s changes quickly — in a matter of seconds. And with certain versions of Excel, you’ll see other people’s selections in different colors.”

Have you been waiting for Collaborative Editing? Let us know in the comments below.

How to install Windows 10 Creators Update from an ISO file

Windows 10 Creators Update is here, available to all eligible users. Of course, the most popular way to obtain the new update is through Windows Update. However, due to a couple of reasons, not everyone is able to get the Creators Update using this method.

If you’re among those who haven’t received the Creators Update yet, and you can’t wait to try it, there are a couple of alternative ways to install the new major update for Windows 10. We’ve already shown you how to download the update manually, but you can also do it directly from an ISO file.

Installing the Creators Update from an ISO file is also useful if you want to install it on another computer, without a reliable internet connection. So without any further ado, let’s see how to install the Creators Update for Windows 10 directly from an ISO file.

How to install Creators Update using an ISO file

As you’re just updating your system, and not installing the fresh copy, the whole process shouldn’t be so complicated. So, here’s exactly what you need to do:

  1. Before you start, make sure your computer meets minimum system requirements for the Creators Update
  2. Now, if you already have an ISO file, move on to step 7
  3. If you don’t have an ISO file, navigate to this page, and download the Media Creation tool for your version of the system
  4. Follow the on-screen instructions from the installation wizard to acquire the ISO file (Remember, don’t select “Upgrade now“)
  5. Wait for the tool to download the ISO file
  6. Once you’ve obtained the ISO file, move it to another computer by using a flash drive, or any other media
  7. Now, just open the ISO file, and the update process will start
  8. Wait while setup is initialized
  9. Select Download and install updates, and click Next
  10. Choose what files and settings you want to keep, and follow further on-screen instructions
  11. Wait for the update to install
  12. Once the process is done, your computer will automatically restart, and lead you through final finishing steps

There you go, after the installation is done, you’ll have the fresh Windows 10 Creators Update installed on your computer.

If you have any comments or questions, let us know in the comments below.

RELATED STORIES YOU NEED TO CHECK OUT:

Windows 10 KB4015217 bugs: Install fails, black screen issues, and more

Microsoft rolled out cumulative update KB4015217 for the Windows 10 Anniversary Update on Patch Tuesday, bringing a long list of bug fixes and improvements for various areas of the OS.

As expected, KB4015217 also brings issues of its own. In this article, we’re going to list the most common KB4015217 bugs reported by users, as well as their corresponding workarounds, if available.

Frequent KB4015217 issues

KB4015217 won’t install

Many Windows 10 users are still struggling to install KB4015217 on their computers. For some users, the install process gets stuck at a certain percentage (usually at 95%), while for others it stops with an error code.

Hi, I am also having a problem installing Cumulative Update for Windows 10 Version 1607 for x64-based Systems (KB4015217). It failed with an error message which I failed to note and have tried again but it has stuck on 95% again.

I will note the error if it appears this time ! The other updates have installed OK. Not had a problem before but the last update took an age to install.

The good news is that the update install process continues in the background. Many users have confirmed that KB4015217 apparently remains stuck at 95% for around two hours, but eventually installs.

Sound issues

Users reported that KB4015217 also causes various sound issues. If you’re experiencing sound issues after installing this update, use the workarounds listed in our dedicated article on how to fix sound problems on PC to fix them.

Windows 10 is slow

If your OS is slower than usually, you’re not the only one to have experienced such issues. Users report that Windows is much slower after they installed the Patch Tuesday updates: windows fade in and out slowly and menus take several seconds to appear.

Since then my computer is much slower, sound is choppy, even system sounds, window fade in slowly and fade out slowly when closed.
Programs are affected. Sub menus take several seconds to pop/slide out.

I went to advanced system settings and turned off all the visual effects. That helped a lot, but the sound is still choppy, and if I go to Start/Settings, windows still fade in slowly when opened and fade out slowly when closed.

Black screen

Some users have also experienced black screen issues after installing KB4015217. This bug prevented them from actually using their computers for a while. The good news is that the black screen magically disappears in less than one hour.

I got it installed, and now I have nothing but black screens. It goes to the the welcome screen and shows my picture and a pretty picture in the background and then it goes to a black screen I have a cursor and it responds to krys from the keyboard at least control alt delete but I can do nothing except shut down, the computer is completely ruined.

These four bugs are the most frequent KB4015217 problems reported by users. If you’ve come across other issues, use the comment section below to tell us more about your experience.

RELATED STORIES YOU NEED TO CHECK OUT:

Unable to activate Windows 10 Creators Update [Fix]

Windows 10 Creators update is finally here, bringing with it improvements that serve to revitalize Windows 10’s most criticized features in software like its Edge browser. However, like previous major upgrades to Windows, we also get a fair share of issues. Even though the new version was tested with Insiders for a long time, a few problems have emerged after installation. It seems that an activation issue is one of them, with some users losing their license after the upgrade. To make things even worse, they were unable to activate Windows 10.

Luckily, we prepared a few workarounds so you can address this issue. So, if you have a hard time with the installation, these are the steps worth trying out.

How to resolve Creators Update activation issues

Use a digital license

As you’re probably aware, your activation license key is linked with your Microsoft Account. Moreover, you’ll be able to activate purchased Windows 10 in a few easy steps by logging with your Microsoft Account. So, if you’ve linked your Microsoft Account to your digital license, follow these instructions to activate Windows:

  1. Navigate to Settings.
  2. Open Update & Security.
  3. Click Activation.
  4. Under Add a Microsoft Account, click Add an Account.
  5. Enter your email and password and log in.
  6. Now your Windows 10 copy should be activated.

However, if you’re still experiencing an issue with the activation procedure, check the other solutions.

Troubleshoot the issue with the Activation Troubleshooter

If the digital license activation failed, you can run the Activation Troubleshooter within the Activation tab. This tool will check for activation conflicts and hopefully resolve them. This is the way to run it:

  1. Go to Settings.
  2. Open Update & Security.
  3. Click on Activation.
  4. Click on Troubleshooter.

This will start the procedure and the tool will look for your license. If the license is available, the system will be automatically activated after the process is finalized.

Disable 3rd-party antivirus

Another known culprit for the activation issue is an antivirus. Since Windows 10 offers Windows Defender, a built-in security solution, additional software can cause a conflict and prevent some of the essential parts of the Creators Update from downloading/installing, resulting in a loss of the license. So, before you check for updates, disable any third-party anti-malware software at least until the installation procedure is finished.

Moreover, you can disable both Windows Defender and Windows Firewall, as well. However, it’s highly advised to enable them again after you successfully install the Creators Update and activate it. Follow these instructions to disable Windows Defender and Windows Firewall:

  1. Open the Windows Defender from the Notification area.
  2. Click on Settings.
  3. Toggle off Real-time protection.
  4. Now, navigate to Control Panel.
  5. Click System and Security.
  6. Click on the Windows Firewall.
  7. Select Turn Windows Firewall on or off from the left side.
  8. Turn off Windows Firewall for both Private and Public networks and click OK.
  9. Try activating Windows again.

After you’ve disabled both features, any possible conflicts should be resolved. On the other hand, if you’re unable to activate Windows, check the steps below.

Install the appropriate edition

Make sure to install the appropriate edition of Windows 10 you’ve already purchased. Simply put, you can’t activate Windows 10 Enterprise if you own Home Edition. So, if you made a mistake and installed a wrong version, your only solution is to reinstall your system.

To check for details about the installed Windows Edition, follow these steps.

  1. Go to Settings.
  2. Open Update & Security.
  3. Click on Activation.
  4. You should see a detailed explanation about your Windows version, edition, and architecture.

Use the Command Prompt to force the activation

If the standard troubleshooting procedures were not successful, you can use the Command Prompt to reset and force the activation process. This is the procedure you should follow:

  1. Right-click Start and run Command Prompt (Admin).
  2. In the command line, type the following command and press Enter:
      • SLMGR.VBS –REARM
  3. Now, restart your PC, insert your Activation key (Settings > Update & Security > Activation) and open Command Prompt (Admin) again.
  4. In the command line, type the following command and press Enter:
      • SLMGR.VBS –ATO
  5. Restart your PC again. That should resolve your issue.

However, if you’re unable to insert your license key in a standard way, you can use the Command Prompt to force the process:

  1. Right-click Start and open the Command Prompt (Admin).
  2. Type the following command in the command line and press Enter.
      • SLMGR.VBS -IPK XXXX-XXXX-XXXX-XXXX
  3. Instead of XXXX-XXXX-XXXX-XXXX insert your license key.
  4. Restart your PC and check if the procedure has resolved your issues.

Perform a clean install with the Media Creation Tool

At the end, if all of the workarounds above were unsuccessful, your best bet is to perform a clean reinstall. In order to do so, you’ll need the Media Creation Tool that can be obtained here. Additionally, you’ll need a USB or DVD for ISO file of the Windows Setup.

If you have any remarks or questions about your activation or if the activation problem is still there, let us know in the comment section below. 

RELATED STORIES YOU NEED TO CHECK OUT:

Manually Install Windows 10 Updates by Force [How to]

Keeping your PC up to date is important, and sometimes you must install Windows 10 updates manually.

This is especially important if you’re eager to try a feature update that hasn’t yet been delivered or if Windows Update is not working properly.

Luckily, if you’re not patient enough to update your Windows 10 in a standard way, there’s a handy alternative. Two of them, to be exact. And today, we’ll show you how to use them to your advantage.

Can I download Windows 10 updates manually? Yes, it’s possible to download Windows 10 updates manually. Microsoft has several tools available that you can use for this purpose.

You need to download them, and they will download and install the latest build, all while keeping your files.

How to manually install Windows 10 updates?

1. Use Windows Media Creation Tool

  1. Visit Windows 10 download page.
  2. Download Media Creation Tool.
  3. Backup your data from system partition and save your license key.
  4. Open the application and choose to Upgrade this PC now.
  5. After the installer is ready, choose to Keep personal files and apps.
  6. The PC will restart a few times, and you’re good to go.

Media Creation Tool was introduced with Windows 10 to make the life of an average user much easier.

You can use it to upgrade your system, create ISO files, prepare a bootable USB or, in this case, forcefully download a feature update.

The process is quite simple, but it will take a couple of hours to finish. Namely, the tool will download the complete installation of Windows, so it may take some time, depending on your internet speed.

That way, you’ll surpass the standard Update and get the latest update as soon as possible.

2. Use Windows Upgrade Assistant

  1. Navigate to Microsoft’s official site and click the Update Now button.
  2. This should start the download of Upgrade Assistant.
  3. Double-click to start the tool.
  4. It will check for the current version and available updates.
  5. Once the check-up is finished, click Update Now in the client tool.
  6. Follow the instructions. Keep in mind that the process may last some time.
  7. After the download and installation are complete, your PC should restart.

The Windows 10 Upgrade Assistant is the second tool you can use to force an update to your PC. Compared to the Media Creation Tool, this utility focuses only on downloading and installing feature updates quickly and efficiently.

It’s part of the package introduced in the good old days when the free upgrade from Windows 7/8.1 was available.

And after the procedure, you’ll have the latest feature update up and running. After the process, you might want to clear the Windows Update cache.

If you upgraded to Windows 11, learn how to retrieve the Get the latest updates as soon as they’re available option if it’s missing.

We also have a guide on how to update Windows 10 offline, so don’t miss it for more useful information. For detailed steps on accessing Microsoft Update Catalog, check our guide on how to access Microsoft Update Catalog properly.

That’s it. If you have any questions regarding the subject, don’t forget to tell us in the comments section.

If you’re on Windows 10 or stuck on an older version, you can also force the latest Windows 11 update directly using the Installation Assistant.

The Plex app doesn’t work with Windows 10 Creators Update [FIX]

Plex is among the popular apps on Windows 10 that help you organize video, music, and photo collections for instant access on any device. However, the app does not seem to work properly for some users who installed the Windows 10 Creators Update.

[UPDATE] Plex contacted us about this matter, providing our readers with a quick workaround to fix the problem.

‘For those having an issue with getting Plex to work with the Creators Update, here’s what your readers can do if they’ve upgraded Windows and run into this problem: look for the windows.old directory, go to syswow64, copy the mfplat.dll file from there and paste it into the c:\windows\syswow64 directory. Launch Plex again and you should be good to go.

Appears Microsoft is working on an update to this issue, but wanted to pass along the above workaround, in case it helps your readers who are running into this issue.’

A Plex user posted the following on the Plex forums:

Plex doesn’t seem to be working on a clean install of the latest Windows 10 update (dubbed the Creators Update).

Plex works via my browser, so I know my server is working. It also worked prior to clean installing the creators update.

Anyone have any idea why this is? Where does Plex store its log?

As of this writing, it remains unclear whether the issue is related to the Windows Media Feature pack not being available for the Creators Update. The user says the app worked on the Creators Update previously via an update from the Anniversary Update. There was also an attempt to install the media feature pack on an N version of Windows, but to no avail:

I have tried installing the media feature pack I’m on an N version of Windows) but despite installing successfully, it doesn’t make any difference. A Microsoft support rep said there will be a feature pack for the creators update next week, so maybe that will help?

Are you using the Plex app for Windows 10? Did you encounter any issues after installing the Creators Update? Share your thoughts in the comments below.

RELATED STORIES YOU NEED TO CHECK OUT:

Xbox Game Pass Alpha rolls out to more Xbox One Insiders

Looking to get your hands on some free games, and help Microsoft develop the future of Xbox while you’re at it? If you’re on Preview Ring 3 of the Xbox Insider program, you’ll get your chance. This ring of insiders is getting access to the Xbox Game Pass – Microsoft’s new game “vault” service, which opens up access to tons of games for a monthly subscription (via Windows Central.)

You’ll only be getting a small portion of the hundreds of games offered in the Game Pass – only about 30 – but it’s enough to get the gist of the program, and you won’t have to pay the subscription as long as you’re part of the preview group.

Just go to the Insider Content tab on your Xbox One and check off the Xbox Game Pass Preview section to get access to your new games. While they won’t stick around forever – unless you end up subscribing when the service goes live – they’re definitely games worth playing. Go ahead and send out any feedback to the Xbox team to make sure the Game Pass becomes the best it can be!

How to disable Windows 10 Creators Update upgrade notifications

With the coming arrival of the Creators Update, Microsoft has begun setting the stage for it a few days in advance with the help of an in-OS notice reminding users and asking them if they’d like to download once it’s available.

While this notification is meant to help people prepare for the Creators Update and more easily install it, it might not be what everybody wants. Companies or enterprises, for instance, might want to disable this notification because they want complete control over when and how their employees update to the new update.

Luckily, Microsoft acknowledges this possibility and mentions that users who don’t want to see the notification will be able to disable it through the operating system’s registry.

How to turn off the Creators Update upgrade notice

In order to do this, users need to access Windows’ Registry Editor. This is done by running the regedit command. Next, they need to use the address bar to enter a specific line:

HKLM\SOFTWARE\Microsoft\WindowsUpdate\UX\Settings

Completing the final steps

Users must navigate to the right panel and use the New>DWORD (32 bit) option from the right click menu. It has to have the name HideMCTLink. Next up, HideMCTLink needs to be double clicked and the value 1 needs to be attributed to it.

After that, users should be all set. The only thing remaining now is to restart the system. Upon re-boot, the OS will not longer present the notification which might have annoyed a lot of people. On a brighter note, it’s great that after months of testing on the Insiders platform, the Creators Update is finally ready to roll to the public.

RELATED STORIES TO CHECK OUT:

Fan requested “Self-Service Refunds” spotted by Xbox One Insider

An Xbox One Insider shared on Reddit their find in the latest announcements. According to the provided images, Microsoft is introducing a self-service refund feature.

For many gamers, this is a blessing. Oftentimes, particularly in an age when we have games in early access and preview programs, we find ourselves dissatisfied with a game but are saddled with the purchase. With this Self-Service Refund feature, no longer will the buyer have to beware. At least, that is, when it comes to Xbox One and Windows 10 games/apps.

Neowin cites the full announcement:

You’ve spoken; we’ve listened. In support of offering gamers the freedom of choice, we’re making changes to the Microsoft Store purchase experience by offering customers a simple way to instantly return digital products like games and apps through account.microsoft.com.

When a game or app leaves you wanting more, we’re here to help. Self-service refunds on Xbox One and Windows 10 provide a quick, simple way of returning a digital product.

To request a self-service refund:

  1. Navigate to account.microsoft.com and sign-in.
  2. From the top menu bar, select Payment & billing > Order history.
  3. Navigate to a purchased game or app, and select Request a refund.

Please note the below conditions for requesting a self-service refund:

  • Games and apps are eligible for self-service refunds within 14 days of purchase if you have less than 2 hours of play time across all accounts.
  • DLC, season passes, and add-ons are not eligible for self-service refunds.
  • The game or app must be downloaded and launched before requesting a self-service refund.
  • You must wait for at least 1 day after the game or app’s release before requesting a self-service refund.
  • Certain Windows 10 apps may not be eligible for self-service refunds.
  • Microsoft reserves the right to block access for users who abuse self-service refunds.

This service is similar to other digital markets such as Steam and Sony’s PlayStation Store. Both of which have 14-day refund policies, except in Sony’s case, it is only allowed if the game hasn’t been downloaded yet. Microsoft looks to be taking a smarter ‘Try it before you buy it’ approach with restrictions excluding DLC, season passes, add-ons, in-game purchases, and select titles that haven’t been specified.


Windows 10 Creators Update installation stuck [Fix]

The Creators Update is finally obtainable trough the Windows Update feature. The long awaited major build improves a lot of things while maintaining the primary idea behind Windows 10 at the same time. With the more creative approach, users around the world should be satisfied with offered innovations.

However, it’s hard to see the changes for yourself if you’re unable to download the given update. Namely, numerous users around the globe reported that the installation process gets stuck, as they’re unable to download and install the Creators Update properly. If you’re one of them, follow the instructions below to resolve this issue.

What to do if Windows Creators Update gets stuck in Windows 10

Make sure you have enough space

First thing first. The Creators Update takes around 10 GB of storage space in the system partition. So, it’s highly advisable to delete or transfer any non-system files to other partition in order to make the space for the latest update.

Another thing you should consider before updating is the cleanup of the temporary files. Namely, those are not space-consuming as one would imagine, but they can interfere with the update and create unusual problems. In order to perform a cleanup of your system partition, you can use a 3rd-party tool or a built-in system tool called Disk Cleanup. We’ll walk you trough the Disk Cleanup procedure, so follow the instructions below.

  1. In the Windows Search bar, type Disk Cleanup and open the Disk Cleanup tool.
  2. Select System partition.
  3. Under Files to delete mark Temporary files (or any other file type from the list) by checking the box.
  4. Click OK and the wait until the process is done.

Additionally, you can delete certain System files safely by following these steps.

  1. In the Windows Search bar, type Disk Cleanup and open the Disk Cleanup tool.
  2. Select System partition.
  3. Click on Clean up system files and check the boxes in front of files you want to clear.
  4. Click OK and the wait until the process is done.

Disable Firewall and Antivirus software

Another Windows element that is widely acclaimed as the main culprit for update-related issues is a 3rd-party antivirus. Norton and McAfee are the first suspects, but even others aren’t trouble-free. So, in order to troubleshoot some of the update issues, your first step can also be disabling antivirus and that goes even for Windows Defender to some extent. If the problem is persistent, the uninstallation is the only viable solution.

Once you’ve disabled or uninstalled the troublesome antimalware software, you can try and disable the Windows Firewall temporarily. That can be done by following these instructions:

  1. In the Windows Search bar, type Windows Firewall and open it.
  2. Select Turn Windows Firewall on or off.
  3. Disable Windows Firewall for both private and public networks.
  4. Confirm selection and try updating again.

If you’re still unable to download Windows Creators Update or the installation is stuck, move on to the next steps on the list.

Restart Windows Update Services

Windows Update Services can be the culprit for this update issue. For no apparent reason, Windows Update Services may halt or perform poorly. You can use a batch file that will do this for you or do it manually. The thorough explanation related to this specific script can be found here.

On the other hand, if you’re used to a manual approach, these instructions should help you restart WUS by hand:

  1. Right-click Start Menu and run Command Prompt (Admin).
  2. In the command line type the following commands and press Enter after each:
    • net stop bits
    • net stop wuauserv
  3. Now, close the Command Prompt and navigate to C:WindowsSoftwareDistribution.
  4. Backup this folder and delete everything inside.
  5. Restart the PC and try updating again.

If you performed this steps but to no avail, try out additional steps.

Install Update with Media Creation Tool

Besides the standard installation trough over-the-air Windows Update, you can obtain the Windows Creators Update trough the Media Creation tool, as well. This may take a bit more effort but it proved as a more reliable way on many occasions. This is how you can download and install Creators update with the Media Creation Tool.

  1. Download Media Creation Tool here.
  2. Backup your data from system partition and save your license key.
  3. Start the tool and choose to Upgrade this PC now.
  4. Accept the license terms.
  5. After the installer is ready, choose to Keep personal files and apps.
  6. The PC will restart few times and you’re good to go.

Have in mind that this process can be lengthy so prepare for waiting.

Clean reinstall your system

If the previous steps fall short, the last one should completely eradicate all update issues. With the previously mentioned Media Creation tool you can create an ISO file or a bootable USB. Once you’ve done that, it’s easy to reinstall the system. The detailed instructions can be found in this article. However, don’t forget to backup your data and license key. Additionally, we strongly advise you to perform clean reinstallation instead of an upgrade.

This should be it. Another step that is not exactly a solution but is an integral part of any Windows-related doings is patience. Sooner or later, you’ll be able to enjoy the improvements and features of Windows Creators Update.

If you have any questions, remarks, or alternative solutions we are looking forward to hearing from you.

RELATED STORIES YOU NEED TO CHECK OUT:

Logitech Brio Webcam fails to work after Creators Update [FIX]

The Creators Update is breaking many things, with the Logitech Brio Webcam being one of them. Users report that everything goes well after installation until the time to use Windows Hello in combination with the Logitech Brio webcam comes along. Logitech has already confirmed that absent video content and/or an undetected webcam are possibilities due to this issue and explained that the bug comes from the way that the Creators Update loads webcam drivers, with the device listed as Unknown in the Device Manager screen. Luckily, there’s a solution to this mess — follow the troubleshooting steps listed below.

How to fix Logitech Brio Webcam issues

You need to launch Device Manager, go to the BRIO/Unknown section with a yellow exclamation icon, and navigate to Update Software. Then, you have to choose the option saying Let me pick from a list, go to Show compatible hardware > USB Video Device and then click Next in order to complete the install.

This means the webcam will use generic Windows 10 drivers instead of the dedicated software developed by Logitech. This is not exactly the most convenient solution, but it seems to be the only way to continue using the webcam until new drivers are released.

On the other hand, it seems that the Creators Update can be installed smoothly on most devices and such bugs only occur because certain vendors haven’t yet updated their drivers for the release of Microsoft’s newest OS.

Have you encountered any other Logitech Brio Webcam issues on Windows 10 Creators Update? Use the comment section below to tell us more about your experience.

RELATED STORIES TO CHECK OUT:

Remedy’s next game after Quantum Break won’t be an Xbox exclusive

Remedy, famous for Quantum Break on Xbox One, has announced that their next game won’t be an Xbox exclusive. The company is instead developing their Northlight technology for PlayStation 4 consoles, and will “release the game on a wider range of platforms” (via Neowin.)

The announcement was made in a blog post, revealing that Remedy Entertainment saw a revenue of €16.4 million (about $17.4 million USD), a year-on-year revenue growth of 19.4% and an operating profit of €3.9 million ($4.14 million). This is mainly fueled by the release of Quantum Break in spring 2016 and the revenues generated by Remedy’s existing game portfolio. Remedy addressed the move to publishing on both Xbox and PS4:

Created exclusively for Microsoft, Quantum Break was the biggest entertainment production to come out of Finland at the time of its release. Currently Remedy is developing a sequel to one of the most popular games in the world in cooperation with the Korean publisher Smilegate, whose long-time success CrossFire gathers 650 million registered users and over one billion dollar yearly revenues. Remedy is also working on a game project codenamed P7. The company’s strategy is to release the game on a wider range of platforms, which is why Remedy is developing its Northlight technology also for PlayStation 4 consoles.

Ultimately, this move by Remedy could contribute to Sony’s upper hand over Microsoft, as many believe that Xbox struggles to pick up hit AAA exclusive titles. Sony currently has exclusive titles such as Uncharted: The Lost Legacy and The Last of Us Part II in the pipeline for PS4. Though they have not been very specific, Microsoft, meanwhile, has State of Decay 2, Crackdown 3, Forza Motorsport 7 and Sea of Thieves planned for Xbox. What’s next for Microsoft without Remedy as Xbox exclusive publisher? Let us know in the comments below.

Xbox Project Scorpio dev kits to begin shipping in the next few weeks – here’s what they look like

Last week, we finally got the final specs of Project Scorpio, the next gaming console for Microsoft after Eurogamer published their exclusive reveal. It seems that Microsoft is becoming quite open about the development of its new console, as the company also invited Gamasutra to show them Project Scorpio dev kits. These dev kits don’t look like the real console that will ship to consumers later this year, and they actually have slightly different specs, too.

First of all, the GPU in Project Scorpio dev kits includes 44 customized compute units running at 1172 Mhz and delivering 6.6 teraflops of computing power (Project Scorpio only has 40 CUs delivering 6 teraflops). Additionally, the dev kits have 24GB of GDDR5 memory instead of 12GB, a more powerful power supply and an additionnal 1TB SSD. On the front, the dev kits also feature a real-time clock, an OLED screen with navigation buttons plus five programmable screens.

Project Scorpio dev kit in front of previous Xbox dev kits.

Kevin Gammill, Microsoft’s group program manager for Xbox Core Platform explained why Project Scorpio dev kits have beefier specs than the final console:

At a high level, it’s much easier for a game developer to come in higher and tune down, than come in lower and tune up. Or nail it. That just rarely happens. Our overarching design principle was to make it easy for devs to hit our goals: 4K, 4K textures, rocksteady framerates, HDR, wide color gamut, and spatial audio.

The Xbox team also shared additional details about Freesync 2 and HDMI 2.1 support on Project Scorpio, hinting that Microsoft is currently talking with TV manufacturers. “This is new technology we expect to see coming to displays over the coming years,” explained Jason Ronald, head of the Xbox Advanced Technology Group. “We want to make sure Scorpio is set up to take advantage of it when it comes out.”

Microsoft will start shipping the first Project Scorpio dev kits to developers in the coming weeks. When Project Scorpio will be released to the public later this year, it will be possible for consumers to convert the new console into a dev kit, something that is already possible to do with current Xbox One consoles. However, game developers looking to get access to the more powerful Scorpio dev kit will first have to become a partner developer, which they can do by joining the ID@XBOX program.

Microsoft confirms May event, coming on May 2nd (we’ll be there)

Word is filtering out that Microsoft has indeed confirmed a hardware event, widely expected to introduce new Surface devices, for May 2nd.

Microsoft has posted the details of a live stream under the title “May Event,” with a #MicrosoftEDU hashtag, and a promise of a link to a livestream, beginning at 9:30am ET / 6:30am PT on May 2nd:

Why the event is tagged this way, and whether or not it has to do with the possibility of a new “Windows Cloud” clamshell device, remains to be seen, but we’ll bring you all the details as they become available.

A bit of an update: The event is scheduled for a venue in New York City, and we’ll be there to bring you all the latest, stay tuned!


Windows 10 Creators Update breaks Windowed G-Sync [FIX]

NVIDIA’s G-Sync display technology takes your gaming experience to the next level. This tool synchronizes display refresh rates to the GPU in your GeForce GTX-powered PC, reducing screen tearing, stutter and input lag. As a result, game scenes appear instantly, objects look sharper, and gameplay is very smooth.

Recent user reports have revealed that Windows 10 Creators Update breaks windowed G-Sync Mode. More specifically, games on Windowed and Borderless Windowed are affected by severe stuttering, with the FPS rate constantly jumping from 50 to 100. Switching back to full screen fixes this problem.

Here’s how one user describes this issue:

it seems like Creators Update breaks Windowed G-sync. I installed driver 381.65 and run it with both AU and CU (with DDU after installing CU). Good performance during benchmarks but after I benched and went on to play some Overwatch, I found some issues with G-Sync and CU.

In short, Windowed G-Sync seem to be broken and when you play a game on Windowed/Borderless Windowed, it’s stuttering and FPS jumped from 50-100 all the time. Didn’t happen with the same driver version with AU before I updated.

How to fix Windowed G-Sync bugs

  1. Go to Start > type Control Panel > select the first result and launch the app
  2. Go to System and Security > select Power Options
  3. Select the “Choose what the power buttons do” option
  4. Click “Change settings that are currently unavailable”
  5. Uncheck “Turn on fast startup”
  6. Restart your computer.

Unfortunately, other gamers have reported that the Creators Update OS broke their G-Sync in full screen as well: “Dark Sousl 3 and Quake Champions are littered with tearing and it says G-Sync is enabled.”

Currently, there is no fix for G-Sync issues on full screen, but NVIDIA has already acknowledged this problem and its engineers are working on a fix.

RELATED STORIES YOU NEED TO CHECK OUT:

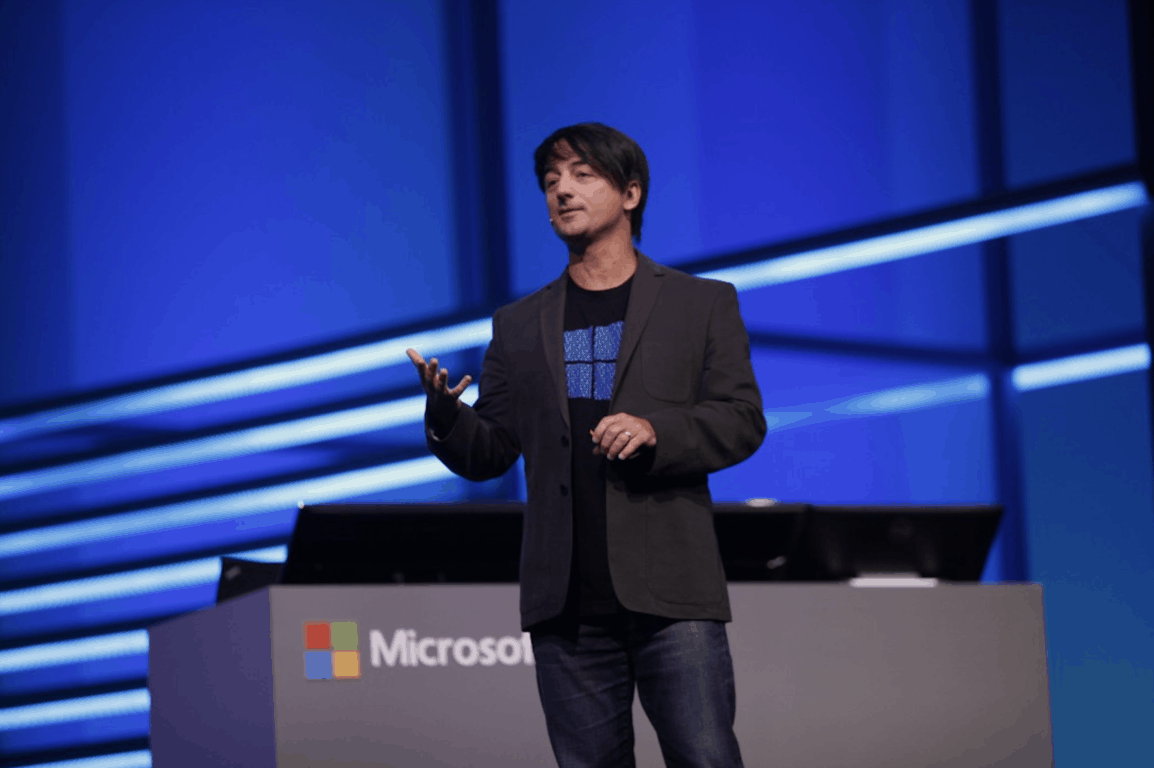
Joe Belfiore, back at Microsoft, feels “righteous” about Edge, advocates for education

Last Fall, Joe Belfiore, Corporate Vice President in Microsoft’s Operating Systems Group came back to Redmond after nearly a year of sabbatical leave. Until now, the exec had stayed very quiet and didn’t talk publicly except for a single tweet published back in November. Yesterday though, Belfiore finally made his public comeback just as Microsoft started rolling out the Windows 10 Creators Update. The exec gave an interview to Mashable and also started tweeting again:

In the interview, the former Windows Phone evangelist reveals that it was a “great experience” to travel the world with his family for almost a year. “I came back with a new perspective on the broad audience Microsoft serves,” he explained, and the experience also gave Belfiore unique look on how Microsoft evolved during his absence. “The improved collaboration and customer focus has been really refreshing,” he noted.

Belfiore addressed the state of Microsoft Edge in the interview, which is one of the projects that he worked on over the past few years. While Microsoft has improved Edge significantly with the Creators Update, Belfiore acknowledged that “in the browser scheme of things, we have room to grow.” However, the exec revealed that Microsoft has no plans to port Edge on other mobile platforms for now. “We want to put customers first and it’s not something we have plans for” he explained. “We’ll put investment where there are high value experiences.”

Moreover, Belfiore shared that ditching the Internet Explorer brand after so many years was the right thing to do for Microsoft. “We’re not second-guessing that. It takes educating people, but I feel righteous about it,” he said, adding that Microsoft was “playing a long game” against its competitors.

Other highlights of the interview include Belfiore’s new role as the education advocate in the Windows team. This isn’t officially reflected in his job title, but Belfiore is now in charge of improving Microsoft’s education efforts, in a context where Chromebooks are increasingly challenging Windows PCs. “We have made giant progress in Windows 10 on Creators Update,” said Belfiore, noting that the OS now “takes less memory and hard drive space, which lets the price of devices come down.”

However, the exec didn’t address the recent rumours about Windows 10 Cloud, which could be Microsoft’s most serious response to Chromebooks. As Microsoft is rumoured to hold an early May event in addition to the Build 2017 developer conference, we’re also wondering if we’ll soon see Belfiore back on stage. The exec is a great presenter and used to be recognised as the face of Windows Phone back in the day, so we definitely hope to see him more in the coming weeks.

Learn how to cook with Skype’s new “Heston bot”

Have you ever wanted to become a master chef or have your own personal chef to guide you in the cooking of your meals? Well, if you’re a cooking pro or a new to the kitchen cooking noob, you might want to check out Skype’s first ever food-inspired “Heston bot.”

The Heston bot provides cooking tips, seasonal menus, and personal anecdotes directly from legendary Chef Heston Blumenthal. Skype believes that the bot will “empower you to think differently about food,” by making cooking “a fun and immersive experience that evolves as your skills do.” Heston bot will also deliver to you new recipes based on different seasons and themes, meaning you will never get bored with the same recipes. And, for added fun, you can stay tuned during the weeks in between episodes for additional bursts of cooking info, stories, and chats from Heston.

To get started with Heston Bot, you can simply search for “Heston Bot” in the Skype Bot Directory, read the bot’s profile and terms, and then click “Add to Contacts.” You must be running the latest Skype app for Windows, Mac, iOS, Android, or the web to enjoy the experience, so be sure that you’re fully updated!

Running a website as a desktop app on Windows 10/11 [How to]

Web applications are extremely useful, but sometimes you might want to turn a specific website into a desktop application. By doing so, you can start a certain website without opening a new tab in your browser, something that can be rather useful. This is how to do so on Windows 10:

How do you run a website as a desktop app on Windows 10?

How to – Running a website as desktop app

Solution 1 – Use Add to desktop option

Most modern browsers allow you to run your favorite websites as desktop applications. To do that, visit the desired website and choose the Add to desktop option. To do that in Google Chrome, follow these steps:

  1. Navigate to the website you want to convert to a desktop application.
  2. Click the Menu button in the top right corner and choose More tools > Add to desktop.
  3. Enter the name for the shortcut. Check Open as window option and click on Add. It’s important to check the Open as window option or else the shortcut will just open a new tab in your browser.
  4. After doing that, locate the newly created shortcut on your desktop and double click it.
  5. Your website will now open in a new window and you’ll be able to use it as a regular application.

After doing that, you can pin the shortcut to your Taskbar or move it anywhere on your PC.

Solution 2 – Create a Chrome shortcut

According to users, you can run a website as a desktop application by creating a new Chrome shortcut. To do that, follow these simple steps:

  • READ ALSO: Internet Explorer in Windows 10 Fixes Issues With Low-Space and Temp Files Extraction
  1. Create a Chrome shortcut on your desktop.
  2. Optional: Change the name of the shortcut to the website name. This step isn’t mandatory but will allow you to easily differentiate your web application from regular Chrome shortcut.
  3. Right-click the newly created shortcut and choose Properties from the menu.
  4. Go to the Shortcut tab and locate Target field. In the Target field, add –app=https://websitename.com. Click Apply and OK to save changes. Be sure not to delete anything from the Target field.
  5. Now simply run the newly created shortcut and you’ll start the desired website as an application.

This solution offers the same results as the previous one but has few extra steps and doesn’t require you to visit the website or open Chrome at all. This solution is perfect for advanced users that want to quickly run their favorite websites as desktop apps. If you’re a novice user, you might want to skip this solution.

Solution 3 – Use Chrome’s apps page

According to users, you can easily run any website as a desktop application by using Chrome’s apps page. This process is relatively simple and you can do it by following these steps:

  1. Open Chrome and navigate to the website that you want to run as an application.
  2. Bookmark the website. The easiest way to do that is to select the name of the website in the address bar and then drag and drop it to the Bookmarks bar. If Bookmarks bar isn’t available, press Ctrl + Shift + B to show it.
  3. Now, open a new tab and navigate to chrome://apps. Once that tab opens, drag and drop your latest bookmark from the Bookmarks bar to the list of applications below.
  4. Now, right click the newly added application and check Open as window option from the menu. Right-click the application again and choose the Create shortcuts option.
  5. Select the desired location for a new shortcut and click OK.

After doing that, you can start the selected website as an application from your Desktop.

Solution 4 – Use App Studio

Microsoft has its own service that allows you to convert any website to a Universal application with ease. Do the following:

  1. Navigate to https://appstudio.windows.com. Click Start now.
  2. Log in with a Microsoft account and create your profile.
  3. Click on Hosted Web App.
  4. Enter the name of your application and click Start now.
  5. In the Base Url field, enter the name of the website you want to convert.
  6. Optional: Make changes and choose which capabilities you want to have in your app.
  7. Once you’re done, click the Finish button and follow the instructions to download your application.

App Studio is a useful service that can easily convert any website into a Universal application. This service offers a wide range of features, so we encourage you to explore it and discover all of its possibilities.

Solution 5 – Use Nativefier

If you want to convert a website into a desktop app, you might want to consider using Nativefier, a command line tool that might not be suitable for novice users. To use this tool, you need to have Node.js installed and run $ npm install nativefier -g command to download this tool. The tool is relatively simple to use. To convert a website into a desktop app, you need to enter $ nativefier “https://websitename.com”.

We have to mention that Nativefier allows you to create cross-platform applications, so you can run them on Windows, macOS, and Linux. This tool can easily convert any website into an .exe file which makes it incredibly useful. However, this application requires Node.js, so it might not be suitable for basic users. If you’re a developer and familiar with Node.js, be sure to try Nativefier.

Solution 6 – Use Applicationize

Running a website as a desktop app is relatively simple and you can easily convert any website by using Applicationize. To do that, follow these steps:

  1. Navigate to the Applicationize website.
  2. Enter the address of the website that you want to convert.
  3. Optional: Configure additional options such as app icon, app title, custom frame color and the ability to open links as popups.
  4. After doing that, click Generate & Download Chrome Extension button.
  5. Now you need to open Chrome and navigate to chrome://extensions tab.
  6. Open File Explorer and locate the downloaded file. Drag and drop the file to the chrome://extensions tab in Chrome.

After doing that, the extension will be installed and you can access it by navigating to chrome://apps page. From there, you can create a desktop shortcut by following Steps 4 and 5 from Solution 3.

Solution 7 – Use WebDGap

Another service that can help you convert a website to a desktop application is WebDGap. This service has a simple user interface and can easily convert almost any website to a desktop app. To do that, follow these simple steps:

  1. Navigate to the WebDGap in your browser.
  2. Choose Convert Site button.
  3. Enter Application name and the URL of the website that you want to convert. Click the Apply button.
  4. Now upload an image that you want to use as an icon.
  5. Select the desired platform.
  6. The conversion process will now start.
  7. After the conversion is completed, you’ll be asked to download your application as a .zip file.
  8. After you download the file, open it. Extract the contents to the desired folder and run the nw.exe file. If everything is in order, you’ll see the desired website available in a new window.

WebDGap is an amazing service that allows you to convert any website to Windows, macOS, Linux or Chrome application. The service is incredibly simple to use, so even the most basic users should be able to use it. It’s also worth mentioning that this service is completely free, so you can use it without any restrictions.

As you can see, running websites as desktop applications is relatively simple. If you use Google Chrome, you can easily convert any website into a desktop app. If you want to save a website as a .exe file, we suggest that you try WebDGap service.

READ ALSO:

Custom Gamerpic testing begins for Xbox One/Windows 10 users

Microsoft’s Larry Hyrb has taken to Reddit to announce that the company has begun testing custom Xbox Gamerpics internally and that the new functionality will soon roll out to Xbox Insiders followed by the eventual public launch.

“We announced that this feature is coming earlier this year, but we’re starting to test this internally,” Hyrb’s brief post reads. “After that it will roll out to Xbox Insiders before we release to everyone. No ETA on when each roll out will take place, but if you want to see what they look like…you can check out my profile on Xbox Live.”

Hyrb’s current Gamerpic is that of the new Project Scorpio graphic which is assumed to be an image that he uploaded himself. Gamerpics have until now been a preselection of images provided by Microsoft or a user-created image made from taking a screencap of their 3D Xbox Avatar. The static images are used to represent Xbox users across the Xbox Live network on the Xbox One console and Windows 10 devices. Custom Gamerpics will essentially allow users to upload any image they want to represent themselves online in much the same way profile images are chosen for social networks like Facebook, Twitter, and Pinterest.

Will you use a custom Gamerpic or are you planning to stick to the traditional images? Let us know in the comments below.

Default app icons are wrong after Windows 10 Creators Update [FIX]

Many Windows 10 Creators Update users have reported that the default Windows 10 app icons are broken after the upgrade. More specifically, all apps feature the same image, as you can see in the image above.

Of course, this is not a major issue as all the apps are fully functional. However, some users may be annoyed by the fact that the default Windows 10 apps display wrong icons. It is worth mentioning that only Mail and Edge feature the right app icons.

Simply selecting the app again from the list won’t fix this problem. Fortunately, one resourceful user has come up with a solution to restore the right default app icons.

Fix: Windows 10 default app icons are wrong
1. Go to Apps & features > search for every default app one at a time. They are Maps, Groove Music, Photos, and Films & TV.

2. Once you’ve located the app, click on Advanced options.

3. Select Reset and confirm.

This action may delete data stored on your computer. Keep in mind that the apps and live tiles may need to reconfigure themselves when you first launch them again.

The reset does affect the individual app settings. Don’t forget to reopen Maps and grant location access and set a default location in case you rely on those features. Also, check the Mail app to see if your account is still working.

It appears that this issue with the Windows 10 default app icons occurs only on computers that upgraded from the Anniversary Update OS to Windows 10 Creators Update. Insiders report that they haven’t encountered this problem.

I think this only happens on PC’s that were upgraded from AU to CU (without Insider builds in between). I used Insider builds and I don’t have this issue but when I upgraded my mothers PC from AU, it does have it.

Have you encountered this issue after upgrading to Windows 10 Creators Update? Did you upgrade from AU to CU or from an Insider build to CU?

RELATED STORIES YOU NEED TO CHECK OUT:

Smurfs: The Lost Village available for HoloLens soon

Augmented reality games are something of a new genre in the gaming world and are quickly gaining more fans across the globe simply because they introduce people to new technology that interesting and novel to most.

Until now, there have been a limited number of games made available so far that use this technology, with the most popular being Pokemon GO. The mobile app game was introduced some time ago and fans absolutely loved its combination of legendary franchise and AR features.

Introducing the Smurfs

Adding to the AR titles that will be available, The Smurfs: The Lost Village is an upcoming video game that uses the HoloLens. The headset is necessary to play this augmented reality video game which puts players and Smurfs, in the same room. Thanks to augmented reality, those wearing the headset will be able to see and interact with them as they jump on furniture in the home. The game itself revolves around the idea of building one’s own Smurf village and fight off the evil and life-sized Gargamel.

There might be problems for some

While it all seems cool and promising, the new Smurfs game will ultimately require players to have the HoloLens headset, which right now costs about $3000 for the Development Edition.

Players will be able to choose how much they want to play The Lost Village, although the possibilities will be significantly limited to most average households which don’t have that kind of money for a augmented reality headset like HoloLens.

RELATED STORIES TO CHECK OUT:

Users confirm the Creators Update increases battery life by 20%

Devices running Windows 10 Anniversary Update have long been plagued by battery issues and Microsoft has pushed out many hotfixes over time, eliminating the majority of the elements causing excessive battery drain.

Fortunately, according to user reports, the Creators Update keeps batteries cooler and reduces battery drain. This is an excellent piece of news for all Windows 10 laptop and tablet owners who have been plagued by battery issues. In other words, if you want to boost your device’s battery life, install the Creators Update.

Users confirm that the Creators Update increase battery life by around 20%:

I use my surface mainly to watch some movies or shows after I get back from the gym at night. I used to be able to only watch a movie and a half before it would die.

Now, I’m able to watch about 9 or 10 hours of video before the battery is depleted. I’ve changed nothing other than updating it. It’s close to being as good as my old surface 2 RT in battery life.

Another user confirms that his computer’s battery only dropped 3% after viewing YouTube clips for 20 minutes:

How did Microsoft achieve this? It appears that the secret is the recently nerfed connected standby, as users confirmed they no longer receive sleeping notifications.

Have you upgraded your computer to Creators Update? Did you notice any battery improvements? Use the comment section below to tell us more about your experience.

RELATED STORIES YOU NEED TO CHECK OUT:

Farewell Windows Vista: Microsoft ends support for its unpopular OS today

Microsoft just ended support for Windows Vista. Starting from today, the infamous operating system will no longer receive security patches, non-security updates, or any other kind of support.

“Microsoft has provided support for Windows Vista for the past 10 years, but the time has come for us, along with our hardware and software partners, to invest our resources towards more recent technologies so that we can continue to deliver great new experiences,”the company said.

Windows Vista will be remembered as the least popular operating system Microsoft has ever released. Announced as a futuristic operating system back in 2007, Windows Vista quickly stumbled and fell. A few characteristics of Windows Vista that made this OS so unpopular among users and critics were its demand for a considerably more powerful PCs along with the quick release of its vastly more popular successor, Windows 7. Today, Windows Vista is only used by 0.72% of users worldwide according to NetMarketShare. So, we can safely say nobody will really miss this operating system.

Microsoft ended commercial support for Windows Vista back in 2012. However, extended support for the second service pack end today. The only feature that will continue to receive security updates in Windows Vista is Microsoft Security Essentials — and even that is only “for a limited time”.

What are your thoughts about Windows Vista’s unceremonious end? Will you miss it or do you not care? Let us know in the comments below.

RELATED STORIES YOU NEED TO CHECK OUT:

How to uninstall Windows 10 Creators Update

Windows 10 Creators Update is finally available to all users. Even though Microsoft officially released it today, there are some users who already run the latest Windows 10 version on their computers. Mostly because of the early availability through Windows Upgrade Assistant.

However, not everyone is as satisfied with the Creators Update as Microsoft hopes for. There are some users who, let’s say regret installing the new update. Two main reasons are dissatisfaction with offered features, or due to some system issues. Either way, these users would certainly like to roll back to the previous version, and uninstall Windows 10 Creators Update.

If you’re among them, we’ve prepared you a detailed guide on how to delete the Creators Update from your computer, and pick up where you left off with the previous version.

How to uninstall Windows 10 Creators Update from your computer

Here’s exactly what you need to do to roll back from Windows 10 Creators Update to the previous version of the system:

  1. Go to the Settings app
  2. Go to Update & security > Recovery
  3. Find the Get back to the previous version of Windows 10 option, and click Get Started
  4. Answer the question why you want to roll back, and click Next to continue
  5. Windows will offer you to check for updates one more time, which is also going to be your last chance to cancel the roll back
  6. Now, just go through the wizard, follow instructions, and click Go back to earlier build
  7. The roll back will start, and once it’s done, you’ll get to the previous version

That’s about it. If you change your mind eventually, you can always get back to the Creators Update by updating your current version of the system. And if you want to prevent the update from appearing again, check out this article.

If you have any comments, questions, or suggestions, feel free to let us know in the comments below.

RELATED STORIES YOU NEED TO CHECK OUT:

AMD problems after Windows 10 Creators Update install [FIX]

Microsoft has started rolling out Windows 10 Creators Update to the general public and lo and behold, the new OS has already triggered a few technical issues. One of the casualties of this new update are the latest AMD drivers, which turns out are not fully optimized for the update. Players are reporting that games often crash after installing the update, beginning with a black screen that blocks the game and then an unresponsive computer. Users can’t even launch the Task Manager to close the affected programs.

Here’s how one Creators Update user describes the issue:

After installing the new creators update I always had crashes when starting games. I use two R9 290X in Crossfire. This happened also with GRW- when starting via uPlay it loaded the Cloud-Data and the small starting-image was shown, then black screen and- nothing. Couldn´t even switch between applications or open the task manager.

Those problems occured when Radeon Crimson 17.4.1 was installed.

How to fix AMD bugs on Windows 10 Creators Update

It appears the culprit is actually the latest AMD Radeon Crimson driver. Users confirm that after installing the Crimson 17.3.1 driver from March, all apps, programs, and games now run smoothly on machines running the Windows 10 Creators Update.

In addition to this solution, try disabling the Xbox Game DVR feature as well:

  1. Open the Xbox app. The app is pinned to the Start menu by default. You can also open it through apps.
  2. Sign in. Then, go to Settings and select GameDVR.
  3. Switch off the “Record game clips and screenshots using Game DVR” option.

RELATED STORIES YOU NEED TO CHECK OUT:

How to fix game crashes and other issues on Windows 10 Creators Update

Windows 10 Creators Update offers players a whole new gaming experience. Microsoft’s latest OS introduces Game Mode, a new feature that enhances your computer’s gaming performance. In others words, Windows 10 now comes with its own build-in gameplay booster, eliminating the need for third-party programs.

Speaking of games, many Windows 10 Creators Update players have already confirmed that this OS boosts game FPS by 4% on average.

Unfortunately, the Windows 10 Creators Update gaming experience has been a bumpy ride for many players. More specifically, games often crash or are affected by various other issues on Windows 10 Creators Update.

I just updated to the Windows 10 Creators Update (Version 1703, Build 15063), and Forza Horizon 3 no longer loads. When I start the game, I see the Playground Games and Turn 10 Studios animations, and then I get to the screen that has the slideshow of cars and says “Press Enter/A to Continue”. When I hit to continue, it says “Loading, Please Wait”, and then nothing ever happens. […] the game says “Loading, Please Wait” indefinitely.

It appears that the culprit is the Xbox Game DVR, a tool that allows players to record and share game videos and screenshots. The Creators Update enables the Xbox DVR by default.

Windows 10 Creators Update game crashes [FIX]

  1.  Open the Xbox app. The app is pinned to the Start menu by default. You can also open it through apps.
  2. Sign in > go to Settings > select GameDVR.
  3. Switch off  the “Record game clips and screenshots using Game DVR” option.

If disabling the game DVR doesn’t fix these issues, update your graphics drivers. Use the links listed below to download and install the latest graphics driver updates:

RELATED STORIES YOU NEED TO CHECK OUT:

Posted in Fix