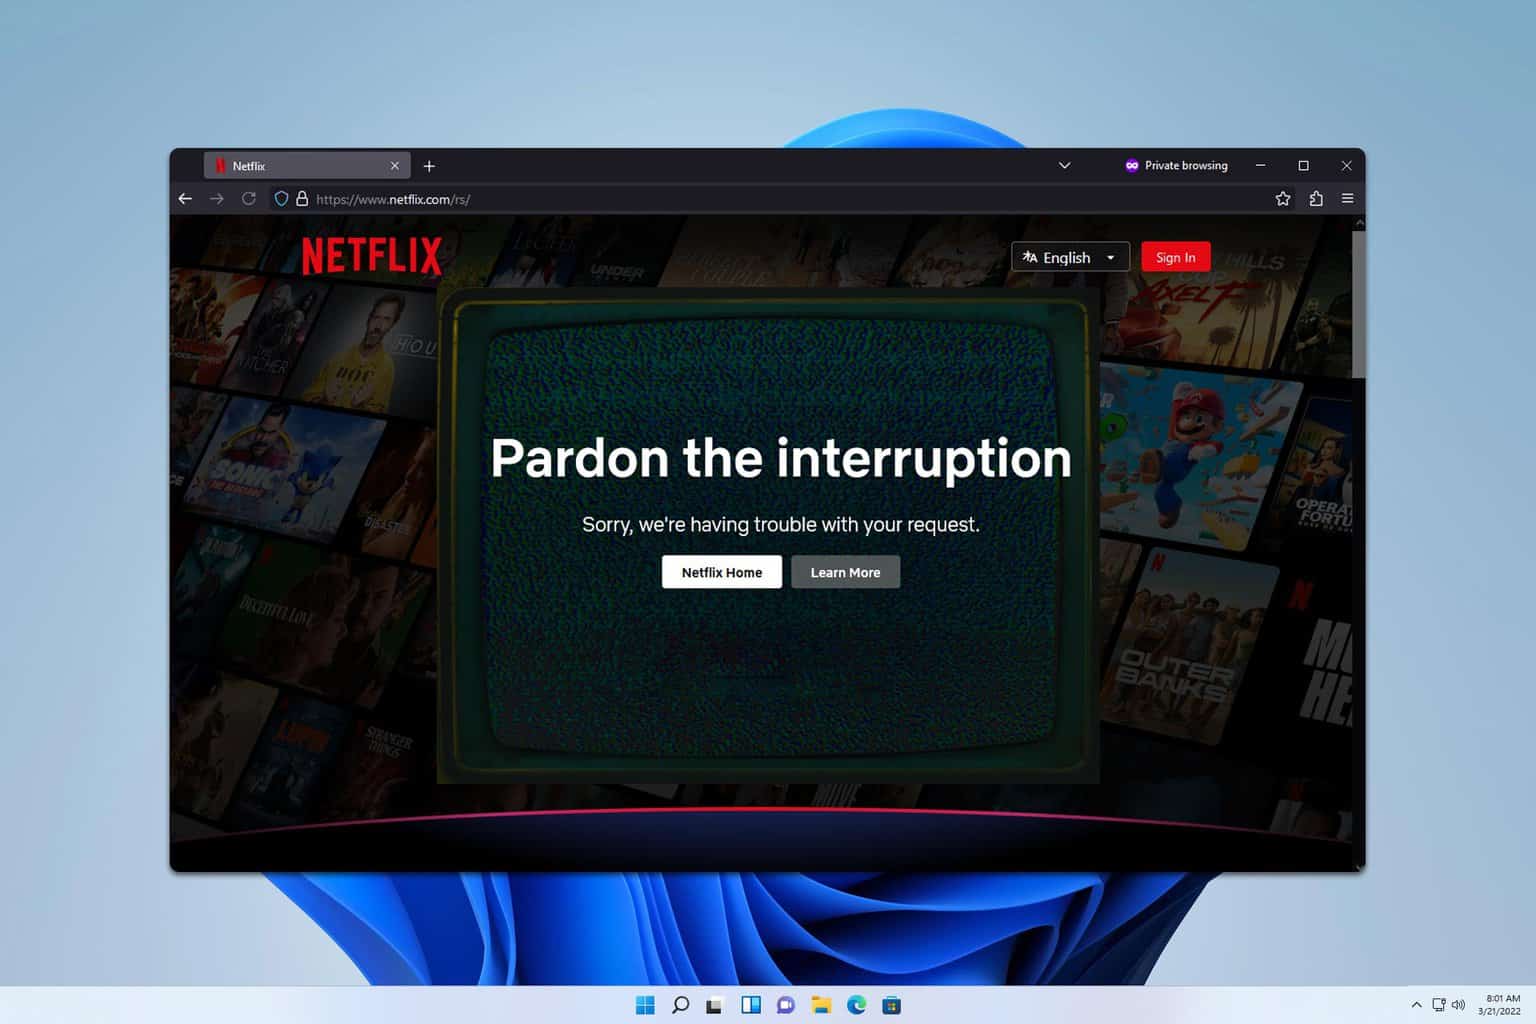
According to users, Netflix is not working on Firefox, and this is a problem since they can’t watch their favorite content anymore. This can be a major problem, but it can be easily fixed.
Why does Firefox not play Netflix?
Outdated plugins or certain browser settings can cause this issue to occur.
What can I do if Netflix is not working on Firefox?
1. Update Widevine
In Firefox, press Ctrl + Shift + A to open the Extensions tab.
Go to Plugins and select Widevine.
Click the Cog icon and choose Check for Updates.
Once the Widevine is updated check if Netflix is still not working on Mozilla Firefox.
2. Temporarily disable playing of DRM content
Click the Menu icon in the top right and choose Settings.
Locate Play DRM-controlled content and disable it.
Restart the browser.
Repeat the same steps and enable Play DRM-controlled content again.
A few users reported that they had to connect to the mobile hotspot to update the necessary plugins.
3. Disable resistFingerprinting
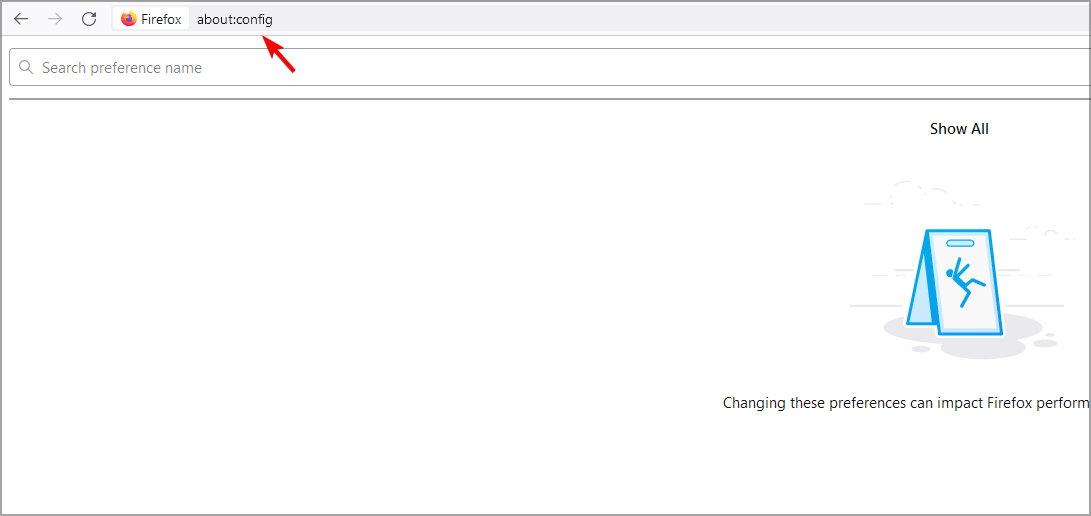
In the address bar enter about:config.
Look for resistFingerprinting.
Set privacy.resistFingerprinting to false and save changes.
Click the uBlock Origin icon and click the Power button.
Refresh the page.
5. Enable DNS over HTTPS
Open Settings in Firefox.
Go to Privacy & Security.
Locate DNS over HTTPS section.
Try experimenting with different options.
6. Reset Firefox
Click the Menu icon and then choose Help. Select More troubleshooting information.
Select Refresh Firefox.
Follow the instructions on the screen to complete the process.
Keep in mind that this will remove all your extensions and customizations. If this doesn’t help and Netflix is still not loading or opening on Firefox, you need to create a new profile in Firefox or reinstall it.
Netflix supports Firefox 111 or newer, but for the best performance, it’s advised to keep your browser up to date at all times.
These are just some of the solutions that you can use if Netflix has stopped working on Firefox. This isn’t the only issue, and we covered Netflix M7353-5101 and Netflix F7701-1003 in earlier guides, so don’t miss them.
Chrome users who rely on extensions such as UBlock Origin, which runs on the old Manifest Version 2 and is no longer supported, can breathe a sigh of relief, at least for a while longer. Google has introduced a temporary flag aimed at developers that allows users to continue using these extensions until the Chrome 139 release in June 2025. This provides a much-needed reprieve as users adjust to the transition to Manifest V3.
Manifest V2 is the older version of the Chrome Extensions platform. Extensions using this version have a continuous background page, consuming resources even when not actively used, and can execute remotely hosted code, posing security risks.
Manifest V3 is the newest version of the Chrome Extensions platform. It brings several updates, such as using Service Workers instead of background pages, which only run when needed to save resources. Extensions must now have all their JavaScript included within the package, which makes them more secure. Also, the new Declarative Net Request API improves performance and privacy by replacing the older, slower webRequest API.
Google is discontinuing Manifest V2 in favor of Manifest V3 for reasons of performance, security, and better privacy.
The company already allows enterprises to run Manifest V2 extensions for a year using a policy called “ExtensionManifestV2Availability“.
A reprieve: Chrome Users Can Still Use Manifest V2 Extensions
Google is now introducing a flag called “Allow legacy extension manifest versions,” which allows developers to maintain their Manifest V2 extensions until June 2025.
This flag lets users load legacy (unsupported) manifest versions as unpacked extensions. Here’s the flag description:
“Allows extensions with legacy (unsupported) manifest versions to be loaded as unpacked extensions. This should only be used for maintaining legacy extensions and will be removed in the future. – Mac, Windows, Linux, ChromeOS, Lacros.”
Users can continue to use their preferred Manifest V2 extensions by manually enabling this flag. However, this is a temporary solution. Once the policy supporting this flag is removed, the flag will no longer work, and users will need to transition to Manifest V3 extensions.
The temporary flag provides a reprieve for users and developers, allowing time to adjust to the new extension system. Users are encouraged to start exploring Manifest V3 alternatives on the Chrome Web Store sooner rather than later.
Error_Pipe_Busy is a common developer error and it’s followed by 231 (0xE7) All pipe instances are busy message. If you ever encounter this issue, today’s guide will show you how to fix it.
How can I fix Error_Pipe_Busy?
1. Check your code
Open your code.
Ensure that there are no typos on any of the paths on the target host.
Ensure that the client doesn’t try to connect twice. To do that, use DisconnectNamedPipe to disconnect from the previous client.
Use ConnectNamedPipe() after CreateNamedPipe() or DisconnectNamedPipe(). Remember to use it before trying any I/O operations.
2. Keep calling WaitNamedPipe and CreateFile in a loop
Open your code.
Ensure you’re using WaitNamedPipe and CreateFile in a loop, like this: repeat hPipe := CreateFile(...); if hPipe = INVALID_HANDLE_VALUE then begin if GetLastError() = ERROR_PIPE_BUSY then begin if not (attempted too many times) then begin if WaitNamedPipe(...) then Continue; end; end; end; Break; until False;
We also have a new guide on Error_Pipe_Local message, so don’t hesitate to check it out. For more information regarding developer errors, take a look at our ERROR_EAS_DIDNT_FIT guide.
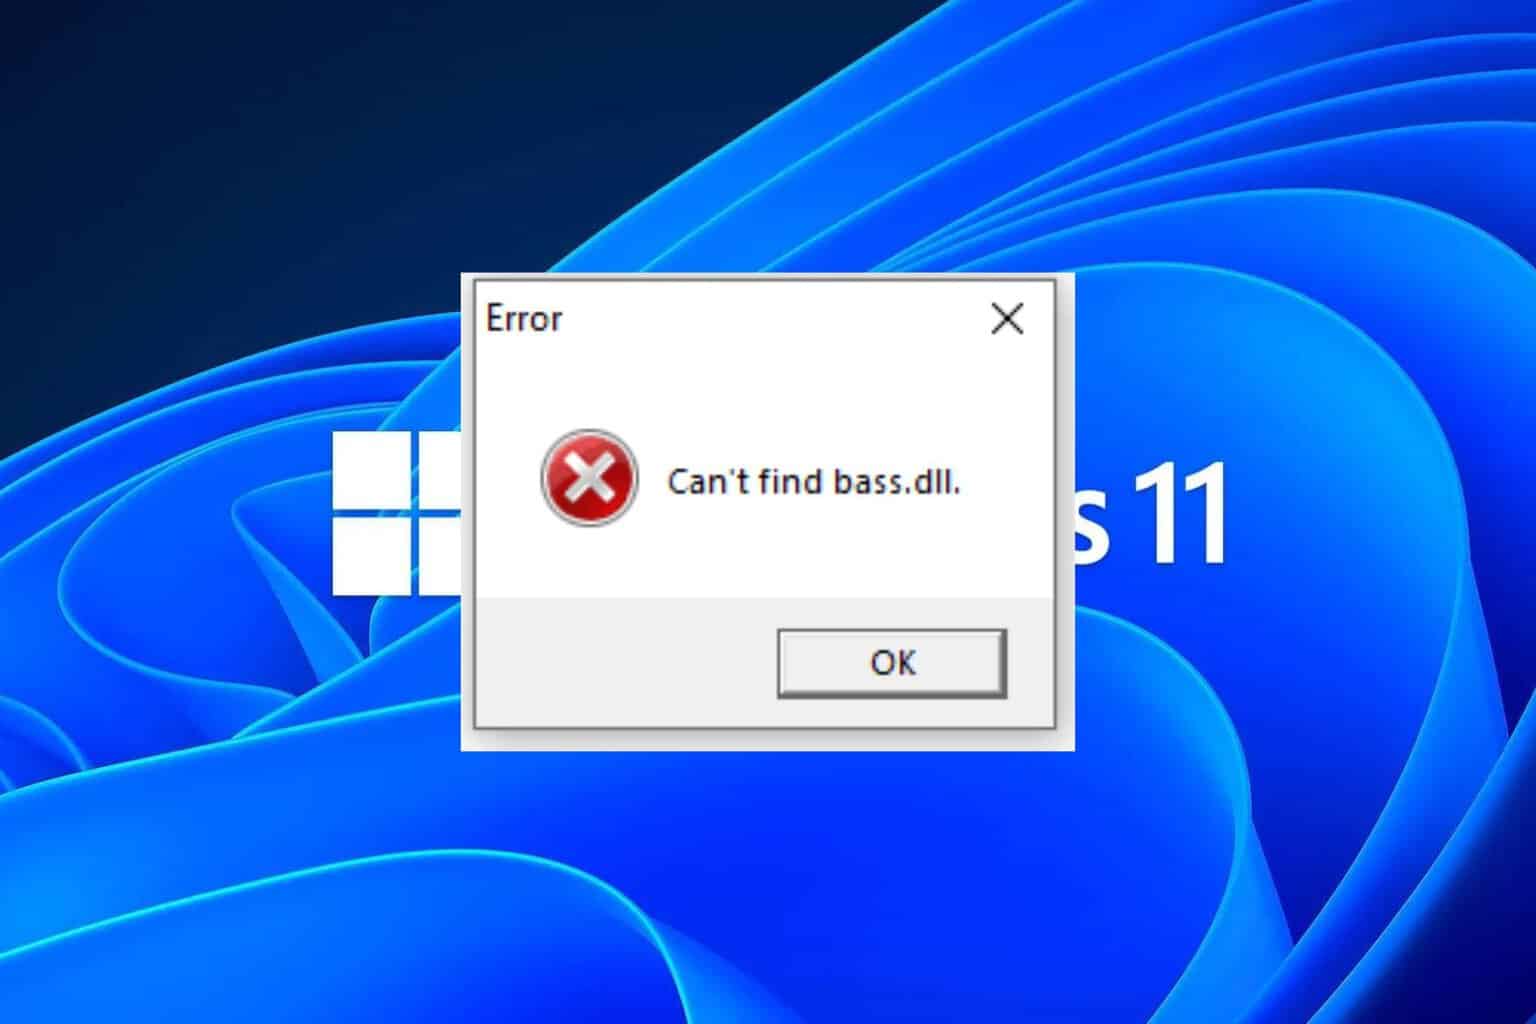
Bass.dll is a critical file related to the Bass software that is responsible for audio processing and ensures you have high-quality audio for playback.
If you encounter any bass.dll-related errors such as can’t find bass.dll or bass.dll is missing and the related application cannot be opened, it is possible this critical file is missing, has been deleted or corrupted. Most users experienced this issue while playing games and the sound was absent.
There are also other reasons why there may be missing DLL files on your Windows 11 so check out our detailed article and rule out other triggers.
How do I fix bass.dll missing in Windows 11?
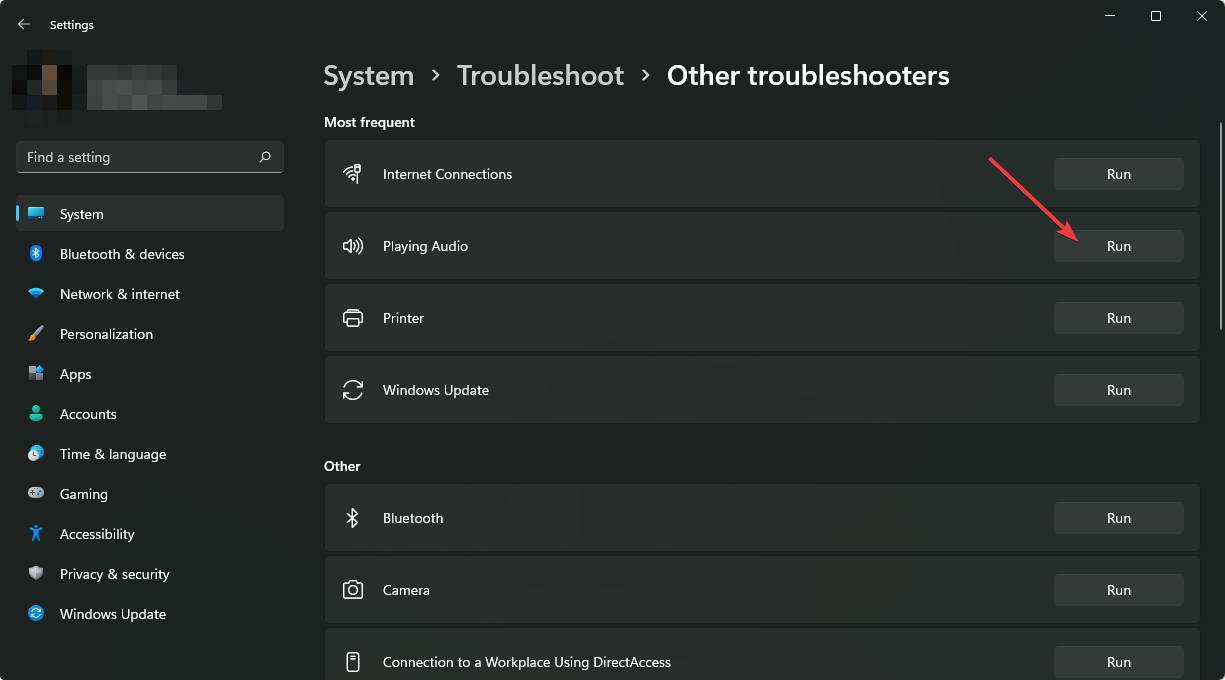
1. Run the audio troubleshooter
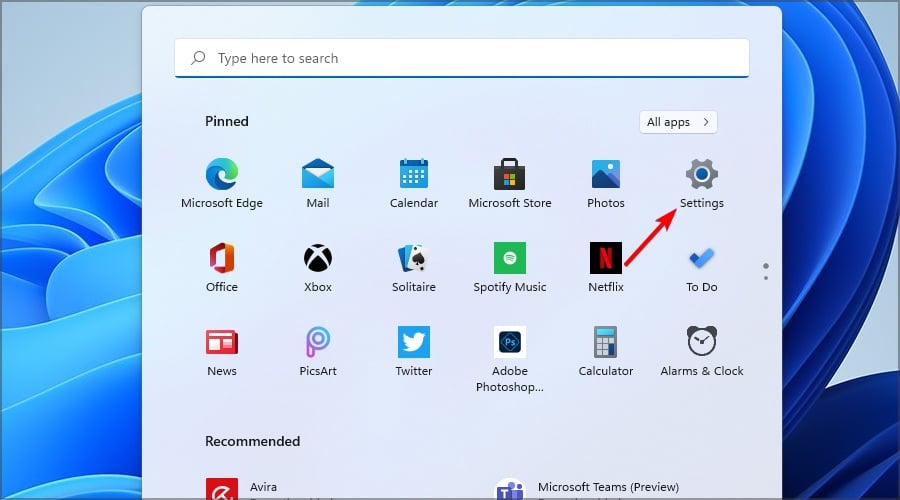
Press the Start Menu key and select Settings.
Click on System on the left pane, then Troubleshoot on the right pane.
Select Other troubleshooters.
Locate the Playing Audio troubleshooter, and click on the Run button next to it.
2. Reinstall audio drivers
Hit the Windows key, type Device Manager in the search bar, and click Open.
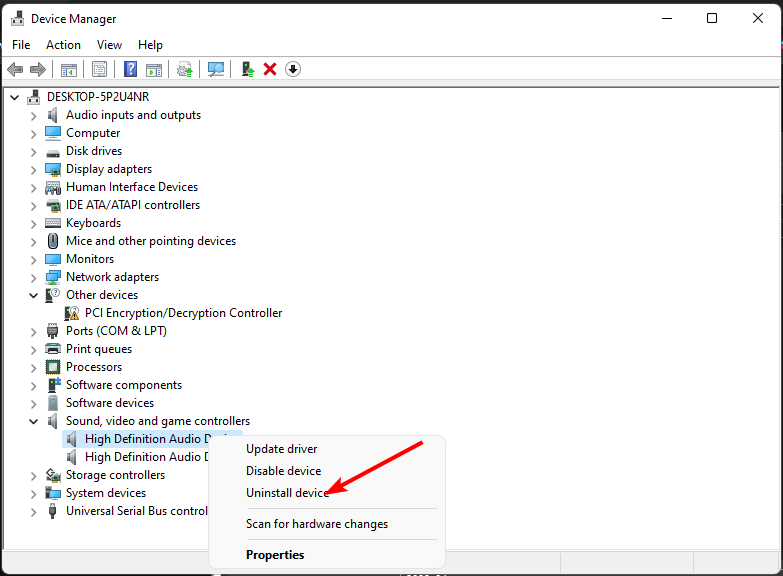
Navigate to Sound, video, and game controllers to expand, right-click on your audio device, and select Uninstall device.
Confirm on Uninstall.
Restart your device, and the drivers will automatically reinstall themselves.
3. Update audio drivers
Hit the Windows key, type Device Manager in the search bar, and click Open.
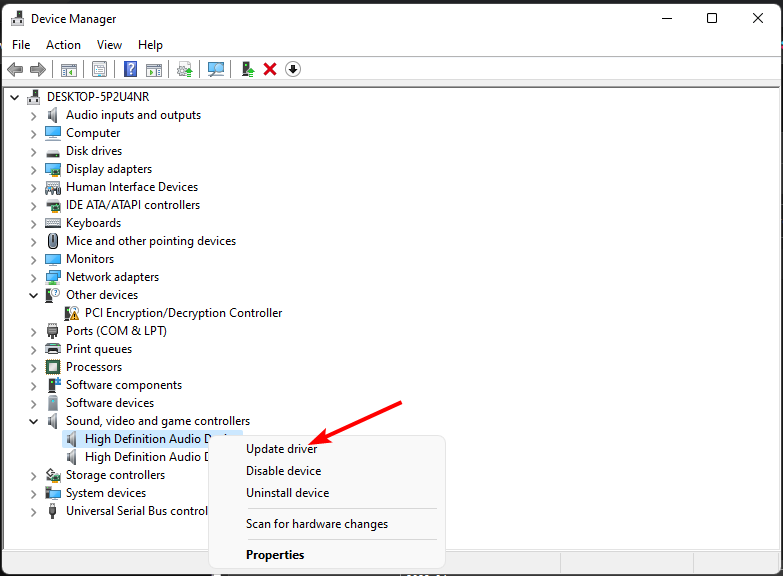
Navigate to Sound, video, and game controllers to expand, right-click on your audio device, and select Update driver.
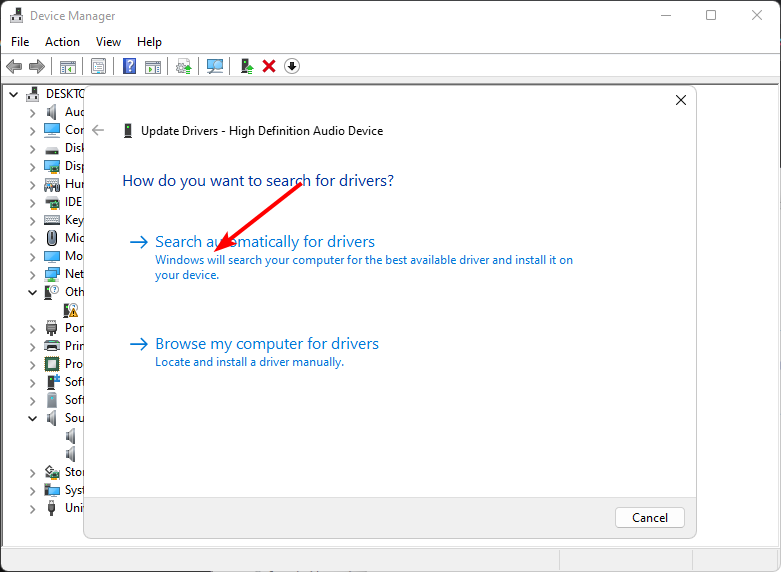
Select Search automatically for drivers.
Restart your PC and try reconnecting.
4. Re-register the DLL file
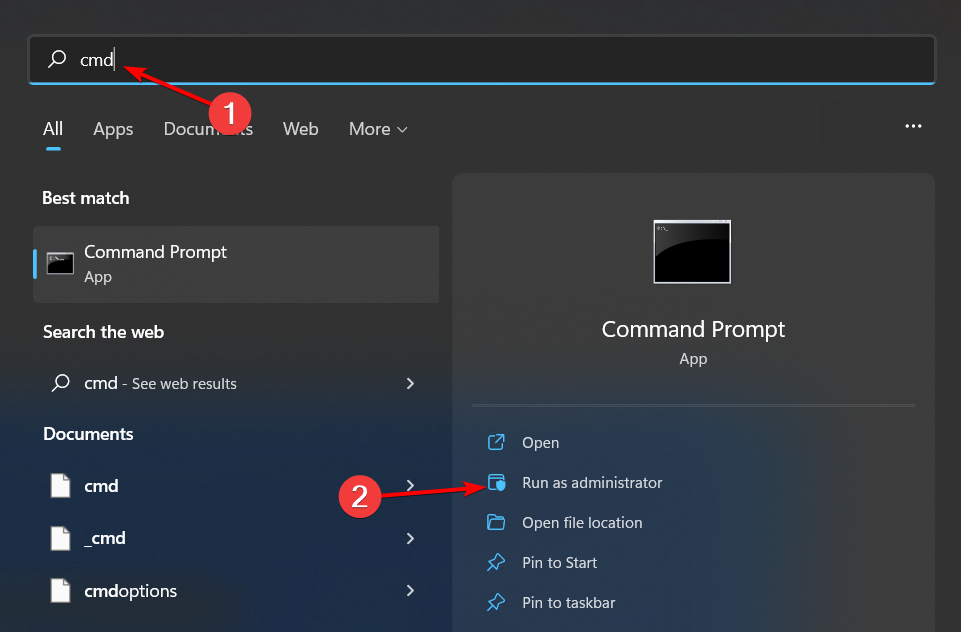
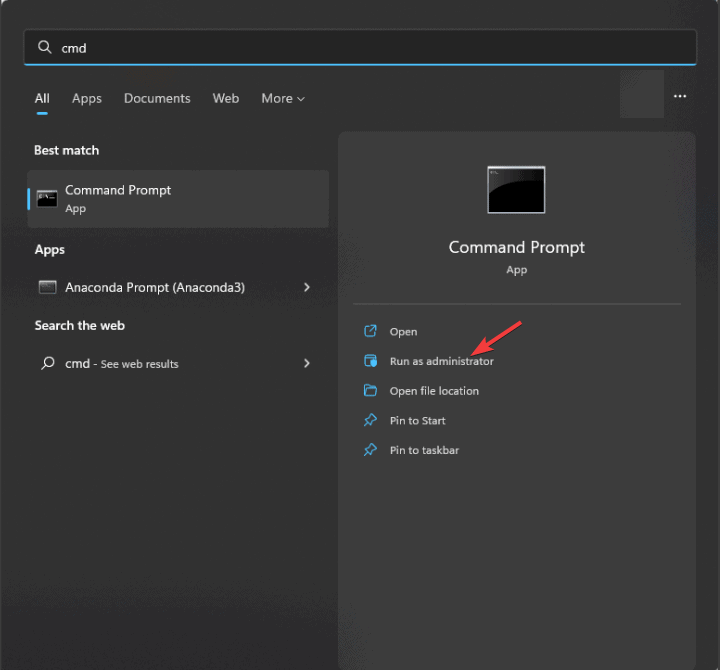
Hit the Windows key, type Command Prompt right-click on it, and select Run as administrator.
Type the following command and press Enter: regsvr32 bass.dll
This command registers the missing DLL file. However, if more than one DLL file is not registered, you can use the following command: for %1 in (*.dll) do regsvr32 /s %1
5. Download the DLL file manually
Visit the Un4seen website, search bass.DLL, choose an appropriate option, and click Download.
The downloaded file will be in a ZIP file. Right-click on the ZIP file and select Extract all.
Choose the extract location and click on the Extract button.
Wait for Windows to extract files and a few new folders and files will appear.
Double-click the downloaded folder to open, locate, and copy the bass.dll file.
Press the Windows + E keys to open the File Explorer.
Navigate through the following path and paste the file: %WINDIR%\, %WINDIR%\System32\ and %WINDIR%\SysWow64\
Close your File Explorer and try to launch the game and see if the error persists.
Press the Windows key, search Windows Security, and click Open.
Select Virus & threat protection.
Next, press Quick scan under Current threats.
If you don’t find any threats, proceed to perform a full scan by clicking on Scan options just below Quick scan.
Click on Full scan then Scan now to perform a deep scan of your PC.
Wait for the process to finish and restart your system.
7. Reinstall the BASS software and affected game
Go to the Windows Search Bar and type in Control Panel.
Under Programs, select Uninstall a Program.
Find BASS, right-click on it, and select Uninstall. Repeat the same for the affected game.
Reinstall these programs and see if the error persists.
8. Perform a System Restore
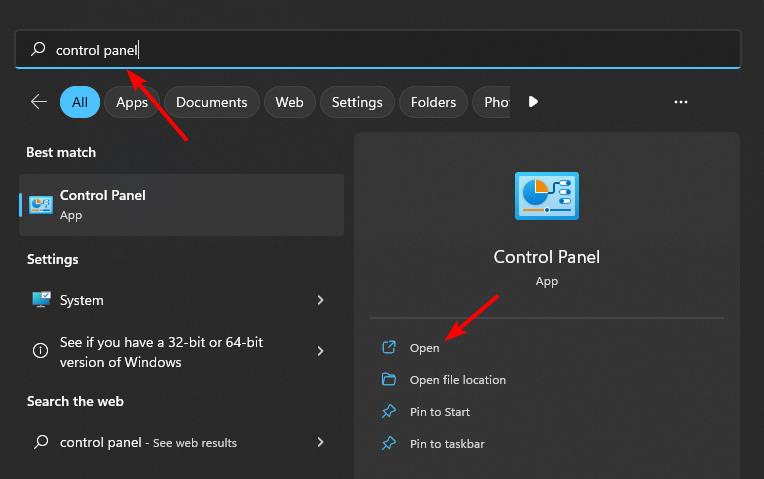
Press the Windows key, type Control Panel, and click Open.
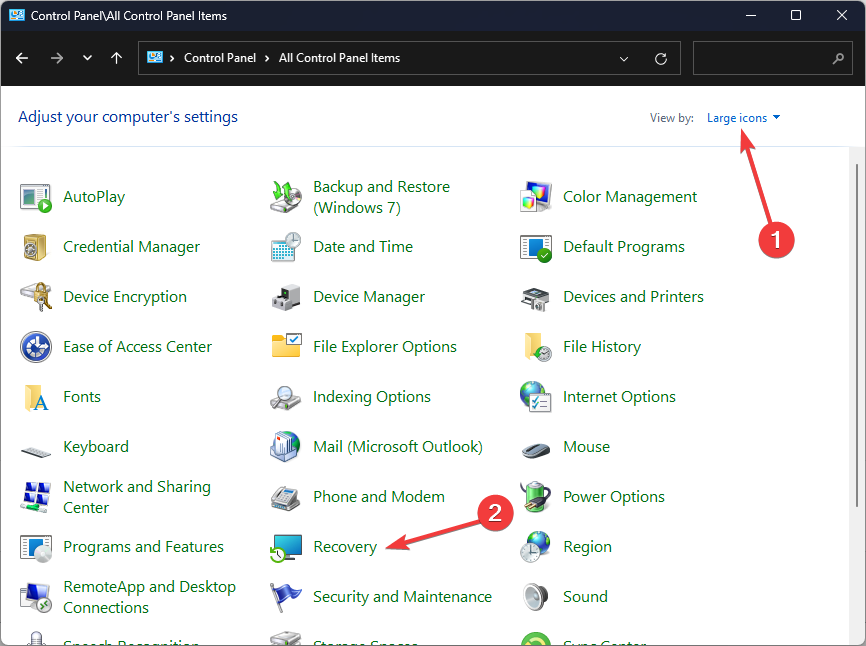
Select Large icons as View by and click Recovery.
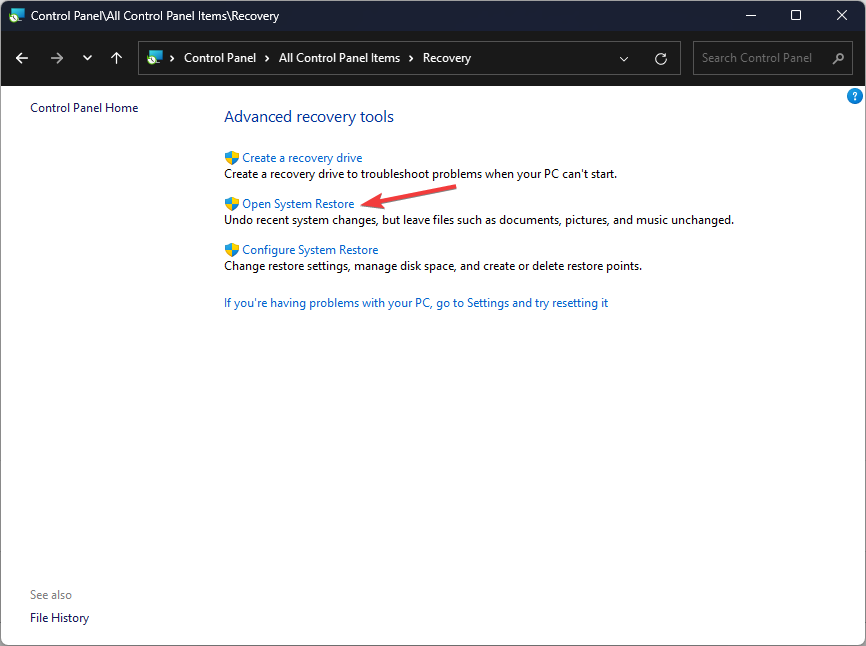
Click Open System Restore.
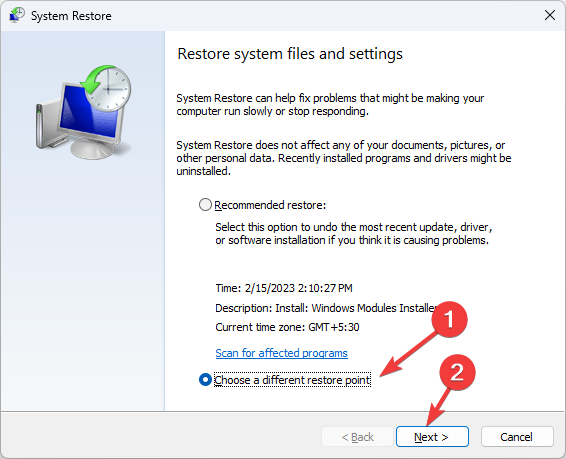
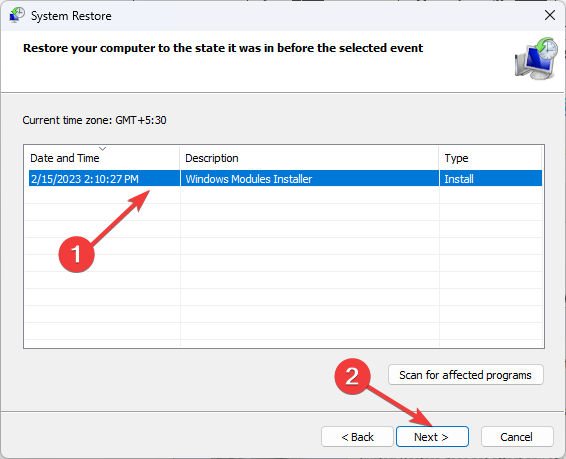
Select Choose a different restore point and click Next.
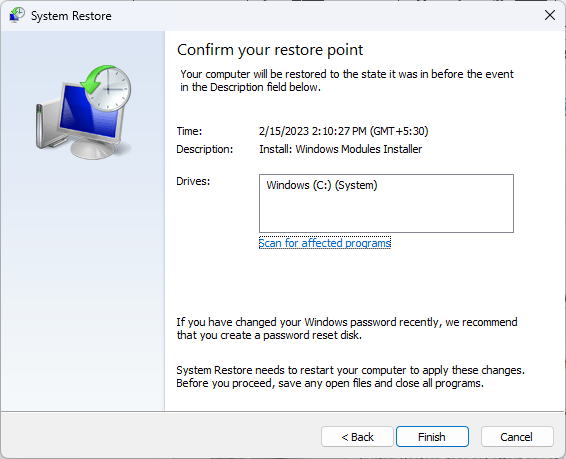
Now select the restore point and click Next.
Click Finish to restore the previous settings, and Windows will restart.
If you’re out of luck with these solutions, you can try a dedicated DLL fixer for a quick solution. Most non-system DLL errors are due to compatibility issues and these tools do a great job in fixing it. You can also try other audio editing software that do a similar job as BASS audio.
It’s a wrap but do let us know if you have any other solutions in the comment section below.
Telegram is a widely known social app but most users like it for its privacy so if you’re looking to bring its functionality to your Windows 11 desktop, we explore the easy ways to download it.
Downloading Telegram on your Windows 11 device simply means you want to extend its functionality on a larger screen. The good thing is it syncs messages in real-time so you won’t be missing out. Further, you can still use it on your phone and desktop simultaneously.
As for system requirements, as long as you have enough RAM since the app is approximately 160MB and when you factor in cache and all the files you’ll be receiving, you need enough storage space for it to run smoothly.
Most third-party sites have the legitimate Telegram app for Windows 11, but some also bundle malware in these apps, so you need to do your due diligence if you go this route. Windows 10 users can get their Telegram app too and we’ve discussed how to download it in our article.
Should you face any issues during the installation such as Telegram download stuck, we have a dedicated fix for this. And once launched and Telegram is not working, check out how to fix it.
Microsoft’s latest move signals a clear intent to steer Edge users toward its native add-on store. The company has removed the direct link to the Chrome Web Store in Edge Canary’s appearance settings to encourage users to explore and adopt extensions from its platform, Edge Add-ons Store.
The Switch to Chromium
Microsoft has switched Edge to the Chromium engine from EdgeHTML to make the browser more powerful and compatible with more extensions and themes, similar to Google Chrome.
Initially, Microsoft warned Edge users about the risks of installing extensions from the Chrome Web Store, with a message in the settings: “Extensions installed from sources other than the Microsoft Store are unverified, and may affect browser performance.”
Later, Microsoft changed the warning to a friendly note: “Chrome extensions and themes work in Microsoft Edge.” This made it clear that users could use Chrome’s extensions and themes.
Making Customization easy: direct Links to the Chrome Web Store
Microsoft also added a link to the Chrome Web Store in Edge’s settings, with a message like, “You can also find great extensions at the Chrome Web Store,” which was later changed to, “Didn’t find one you want? Discover more themes in the Chrome Web Store.” This helped users find more customization options.
Image credit: WindowsReport.
Microsoft Plans to reduce Edge dependence on Chrome Extensions
By October 2024, Edge had its add-on store, and it had grown significantly, offering more themes and extensions. Today, we noticed that Microsoft has started testing the removal of the link to the Chrome Web Store from Edge’s settings in the Canary version to promote its store more.
Edge Canary without Chrome Web Store link. Image Credit:WindowsReport.
Why the Shift?
Microsoft’s decision to move away from the Chrome Web Store may be influenced by several factors, amidst the ongoing browser wars with Chrome:
By focusing on its store, Microsoft can ensure better quality and security of extensions, leading to a faster and safer browsing experience.
If developers make extensions just for Edge, it will result in a more lively and creative collection of add-ons. Reducing reliance on Chrome’s extensions helps Microsoft establish a stronger, more independent identity for Edge.
Microsoft Edge has come a long way. With its improved add-on store, it offers users a great browsing experience with plenty of extensions and themes to choose from. By prioritizing its add-on store and focusing on security, performance, and user experience, Microsoft aims to create a more competitive browser in the ongoing browser wars.
You can still manually visit the Chrome Web Store in Edge and install Chrome extensions and themes. However, Microsoft has made discovering the Chrome Web Store a little more difficult with this change. This is an A/B test in Canary. We have to wait and see if Microsoft makes this change permanent.
The ERROR_TOO_MANY_MODULES system error, with code 214 (0xD6), appears when a program or DLL attempts to load DLLs beyond the maximum permissible limit. The message reads, Too many dynamic-link modules are attached to this program or dynamic-link module.
Common causes for Error Too Many Modules include the presence of a high number of active background processes, corrupted system files, and improper app installation. Before you proceed, reboot the PC and install all pending Windows and app updates!
How can I fix the ERROR_TOO_MANY_MODULES system error?
1. Terminate non-critical processes
Press Ctrl + Shift + Esc to launch the Task Manager.
Individually select all non-critical processes from the list and click on End task.
Once done, relaunch the affected program and check for improvements.
2. Repair corrupted system files
Press Windows + S to open Search, type Command Prompt in the text field, and click on Run as administrator.
Click Yes in the UAC prompt.
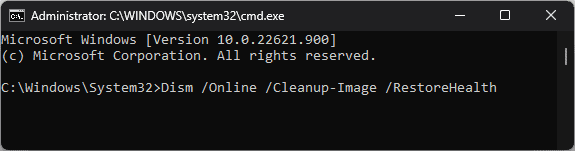
Paste the following commands one at a time and hit Enter after each: DISM /Online /Cleanup-Image /CheckHealthDISM /Online /Cleanup-Image /ScanHealthDISM /Online /Cleanup-Image /RestoreHealth
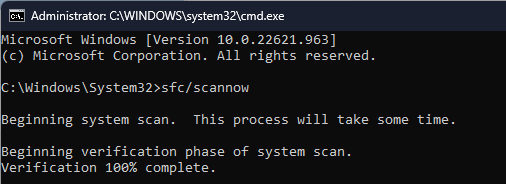
Next, execute this command for the SFC scan: sfc /scannow
Finally, reboot the PC and verify whether the system error is fixed.
If your PC has corrupted system files, it may have trouble relaying information to the active programs, which ultimately leads to ERROR_TOO_MANY_MODULES 214 (0xD6).
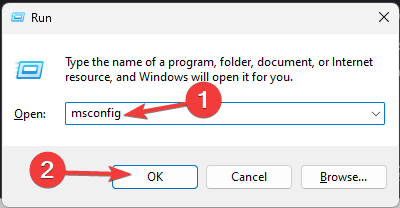
Press Windows + R to open Run, type msconfig in the text field, and hit Enter.
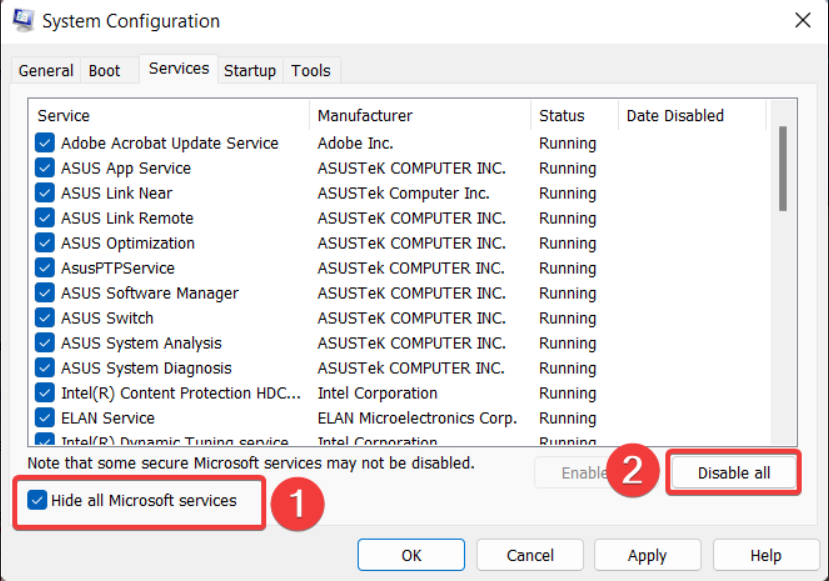
Go to the Services tab, tick the checkbox for Hide all Microsoft services, and click on Disable all.
Now, navigate to the Startup tab, and click on Open Task Manager.
Individually select any non-critical apps that read Enabled under the Status column, and click on Disable.
Go back to System Configuration, and click Apply and OK to save the changes.
Click Restart in the confirmation prompt.
After Windows loads in a clean boot environment, verify whether the ERROR_TOO_MANY_MODULES (Too many dynamic-link modules are attached to this program or dynamic-link module) system error is fixed.
If yes, re-enable the previously disabled services and startup apps one at a time, and as soon as the error reappears, the component reconfigured last is the underlying cause. So, remove it right away!
4. Reinstall the affected program
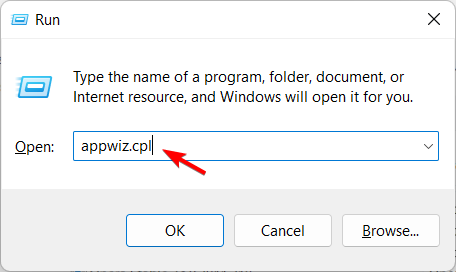
Press Windows + R to open Run, type appwiz.cpl in the text field, and hit Enter.
Select the affected app from the list, and click on Uninstall.
Follow the on-screen instructions to complete the process, and then reboot the PC.
Finally, reinstall the app from an official source, say the developer’s website or Microsoft Store.
If a quick removal doesn’t work, it’s likely that the app left behind files, cache, or Registry entries that are still conflicting with Windows. So, I recommend you use a top-rated software uninstaller to wipe all traces of the program before reinstallation!
5. Perform a system restore
Press Windows + S to open Search, type Create a restore point, and click on the relevant result.
Click the System Restore button.
Select the Choose a different restore point option, if available, and click on Next.
Pick a restore point created before the issue first appeared or the oldest one, and click Next.
Verify the details, click on Finish, and confirm the changes.
Wait for the restore to complete. It will take 15-30 minutes.
If a recent change is triggering ERROR_TOO_MANY_MODULES, a system restore will allow you to revert that and get the PC back to a stable state.
Remember, more often than not, the Error Code 214 (0xD6) Too many dynamic-link modules are attached to this program or dynamic-link module message arises due to the application itself, and reinstalling it will fix things.
Before you leave, discover expert tips to make your Windows PC faster than ever and enjoy streamlined performance!
For any queries or to share which fix worked for you, drop a comment below.
The TTM_FATAL_ERROR bug check with a value of 0x0000019B indicates that the Terminal Topology Manager, which is responsible for managing display and graphics resources in a system, has encountered a fatal error. This error appears when there are issues with the graphics card or graphics driver or if there is a conflict within the display system configuration.
First, check for Windows updates and ensure no updates are pending. Also, make sure your system is not overheating; if it does, clean the dust from your system and check the cooling system. Next, if you have a dedicated graphics card, test it on another device.
How can I fix the TTM_FATAL_ERROR on Windows 11?
1. Update the graphics driver
Press Windows + R to open the Run console.
Type devmgmt.msc and click OK to open the Device Manager app.
From the list of system components, look for Display adapters and click it to expand.
Right-click the graphics driver and select Update driver from the context menu.
Click Search automatically for drivers and follow the on-screen instructions to complete.
Restart your computer once done.
If Windows fails to find the correct driver version, you can head to the manufacturer’s website and install the latest version. Alternatively, you can download and install a reliable driver updater tool to ensure that all the system device drivers are up to date.
In case this doesn’t help and you already have the latest version of the driver installed, follow these steps to reinstall the driver:
Relaunch the device manager, click Display adapters to expand, right-click the graphics driver, and select Uninstall device from the context menu.
Once uninstalled, go to Action, then select Scan for hardware changes to reinstall the driver.
2. Run SFC & DISM scans
Press the Windows key, type cmd in the search box, and click Run as administrator to launch the Command Prompt with administrator rights.
To scan and repair the damaged system files, copy & paste the following command and hit Enter: sfc /scannow
Wait for the scan to complete, type the following command to restore the Windows system image via Windows Update, and press Enter: Dism /Online /Cleanup-Image /RestoreHealth
The scan will take some time; once it is successfully complete, restart your computer to let the changes take effect.
3. Disable the Fast startup option
Press the Windows key, type control panel in the search box, and click Open from the list of options.
Select Category for View by and click Power Options.
Click the Choose what the power button does option from the left pane.
Click the Change settings that are currently unavailable link.
Now, under Shutdown settings, remove the checkmark next to Turn on fast startup (recommended).
Click Save changes to confirm the changes.
4. Modify the power settings
Press Windows + I to open the Settings app.
Go to System, then click Power & battery. (on laptop), or Power (on PC).
Under the Power section, look for Power mode, then click the dropdown menu next to it to choose a different power plan.
Select Best Performance from the dropdown menu for the Plugged-in and On battery options.
5. Restart your computer in a clean boot environment
Press Windows + R to open the Run console.
Type msconfig and click OK to open the System Configuration window.
Go to the Services tab, place a checkmark next to Hide all Microsoft services, and click the Disable all button.
Switch to the Startup tab, and click the Open the Task Manager link.
On the Task Manager window, click each Enabled item one by one and select Disable, then close the window.
Back on the System Configuration window, click Apply, then OK.
Click Restart to save the changes.
Once your computer is in clean boot, try enabling these services and startups one by one to narrow down the reason for the TTM_FATAL_ERROR message. If nothing seems to have been causing the issue, reverse engineer the steps to reboot your PC in normal mode.
6. Restore your PC to an older version
Press Windows + R to open the Run window.
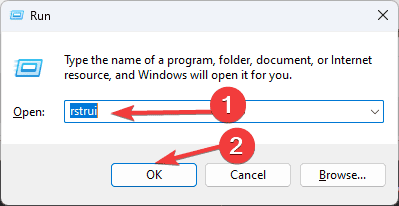
Type rstrui and click OK to open the System Restore window.
Select Choose a different restore point and click Next.
Choose the oldest restore point from the list or the one created before you encountered the TTM_FATAL_ERROR BSoD error, then click Next.
Click Finish to initiate the process.
Windows will restart and restore your computer to the selected version. If System Restore is not complete, and you see the System Restore is not working message, don’t forget to check out this detailed guide for solutions.
If you don’t have restore points or have disabled the system restore point creation process, you can try resetting your PC. The process will take longer and mostly removes your apps and data from the device, so first, take a backup and proceed.
In conclusion, to fix the TTM_FATAL_ERROR, you need to update or reinstall the graphics driver, run the SFC & DISM scan to repair the corrupted system files, restart your PC in a clean boot environment, disable the fast startup option, or restore your PC to a previous version.
If you encounter BSoD errors way too often, you must know the reasons for their occurrence. Check out this guide for more information. Another error that users have encountered is ERROR_FATAL_APP_EXIT, but we tackled this in another guide.
Did we miss a step that helped you fix this BSoD error? Share it with our readers in the comments section below, and we will add it to the list.
The KERNEL_STORAGE_SLOT_IN_USE bug check with a value of 0x00000199 indicates that the storage slot can’t be freed as it is in use. This error usually occurs when there is a conflict between hardware drivers, missing or corrupted system files, or third-party software issues.
To begin with, restart your computer, as this will resolve temporary glitches if present. Then, check for Windows updates, as they could have patches to fix the kernel storage issues, and run a malware scan using a reliable antivirus tool. You can also check for BIOS/UEFI firmware updates.
How can I fix the KERNEL_STORAGE_SLOT_IN_USE error?
1. Update the device drivers
Press Windows + R to open the Run window.
Type devmgmt.msc and click OK to open the Device Manager app.
You will get the list of system components; click each category one by one to expand and look for a problematic driver with a yellow triangle and an exclamation mark inside.
Once located, right-click the driver and select Update driver from the context menu.
Select Search automatically for drivers, then follow the on-screen instructions to complete the process. Repeat these steps if there is more than one problematic driver.
Windows will try to find the best version of the driver; however, if it fails, head to the manufacturer’s website and install the latest version. Alternatively, you can download and install a reliable driver updater tool, to ensure that all the system device drivers are up to date.
If the device drivers are already up to date but you are still experiencing the issue, you need to reinstall the affected drivers.
Launch the Device Manager again, expand the category, right-click the driver, and select Uninstall device from the context menu.
Click Uninstall to confirm the changes.
Go to Action, then click Scan for hardware changes.
2. Run SFC & DISM scans
Press the Windows key, type cmd in the search box, and click Run as administrator from the list of options to launch Command Prompt with elevated rights.
To scan and repair the corrupted system files, type the following command and hit Enter: sfc /scannow
Wait for the scan to complete, then copy & paste the following command to repair the system image files and press Enter: Dism /Online /Cleanup-Image /RestoreHealth
The scan will take some time, wait for it to execute successfully, then reboot your PC to let the changes take effect and see if you get the KERNEL_STORAGE_SLOT_IN_USE error again.
3. Scan for disk errors
Press the Windows key, type cmd in the search box, and click Run as administrator from the list of options to launch Command Prompt with elevated rights.
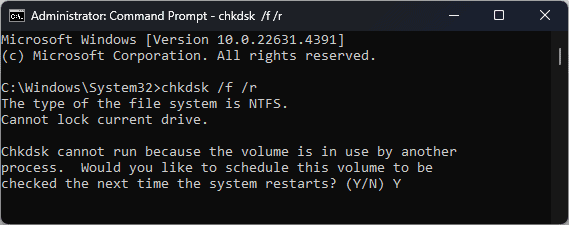
To find and fix the disk errors and bad sectors on RAM, type the following command and hit Enter: chkdsk /f /r
If your device is in use, you will be prompted to schedule a restart on your computer; type Y and hit Enter to proceed.
Restart your computer. The scan will start and look for bad sectors on your RAM. If issues are found, try resetting your RAM and rerunning the scan. If the problems persist, you need to replace the faulty RAM.
4. Restore your PC to a previous version
Press the Windows key, type control panel in the search box, and click Open from the list of options.
Select Large icons for View by and choose Recovery.
Click the Open System Restore link.
Select Choose a different restore point in the System Restore window and click Next.
Select the one created before the KERNEL_STORAGE_SLOT_IN_USE error appears from the list of available restore points and click Next.
Click Finish.
Windows will restart and restore your computer to the selected version. If you see the System Restore did not complete successfully message, it could be due to conflicting device drivers or corrupted system files, read this guide to learn more.
5. Reset your Windows
NOTE
Before resetting your PC, back up all essential data, such as documents, photos, videos, and any app or game data you want to preserve.
Press Windows + I to open the Settings app.
Go to System, then click Recovery.
Under Recovery options, locate Reset this PC, then click the Reset PC button.
You will get two options on the Choose an option screen: Keep my files and Remove everything. Select any of them.
Choose Cloud download or Local reinstall from the How would you like to reinstall Windows screen.
On the Additional settings screen, check the settings that you chosen. You can click Change settings to change any of them. If not, then click Next to proceed.
On the Ready to reset this PC screen, click Reset.
During the process, the system files will be reinstalled, and your PC might restart several times, so you need to wait some time. If you delete drivers and apps or change the settings, you must reinstall apps, update drivers, and reconfigure settings.
In conclusion, to fix the KERNEL_STORAGE_SLOT_IN_USE error, update the device drivers, run the SFC & DISM scans, scan your disk for errors, restore your PC to the previous version, or reset your computer.
If you usually see BSoD errors on your computer, you must learn the reasons for the issue; check out this guide for more information. Did you see a BSoD error after the Windows upgrade? If yes, you can scan for malware on your device or read this guide to learn the solutions.
We also have a guide on ERROR_EA_TABLE_FULL, so you might want to check it out before you leave.
If you have any questions or suggestions about this BSoD error or BSoD in general, feel free to mention them in the comments section below. We will be happy to help!
Error_Exe_Cannot_Modify_Strong_Signed_Binary is a developer error, and it’s pretty rare, so you most likely won’t encounter it. But if you do, this guide can help you fix it.
How can I fix Error_Exe_Cannot_Modify_Strong_Signed_Binary?
1. Update Windows and all drivers
Press the Windows key + I to open the Settings app.
Navigate to the Windows Update section.
Click on Check for updates.
If any updates are available, they will be downloaded automatically in the background.
In addition to your system, it’s important to update your motherboard, GPU, and other drivers. We have a guide on how to update drivers on Windows 11, feel free to visit it for detailed information.
2. Scan your system
Press the Windows key + S and type cmd. Choose Run as administrator.
Type sfc /scannow
Wait for the scan to finish.
Run the following commands to scan your system: DISM /Online /Cleanup-Image /CheckHealth DISM /Online /Cleanup-Image /ScanHealth
If the DISM scan reports any issues, run the following to repair them: DISM /Online /Cleanup-Image /RestoreHealth
Keep in mind that each of these scans can take a while, so don’t interrupt them.
When it opens, go to the Services tab. Check Hide all Microsoft services. Click on Disable all.
Click on Apply and OK but don’t restart your PC yet.
Press Ctrl + Shift + Esc to open Task Manager.
Go to the Startup and disable all apps by selecting them one by one and clicking Disable.
Restart your PC.
If the issue doesn’t appear, repeat the steps from above, but this time enable services and startup applications in groups until you find the culprit.
4. Restore your system
Press the Windows key + R and type rstrui.
Select the desired restore point and click Next.
Follow the instructions on the screen to complete the process.
If the Error_Exe_Cannot_Modify_Strong_Signed_Binary appears even after restoring your system, you might have to factory reset Windows 11 as the last option. If the issue is still there, there’s likely a hardware issue, so inspect your hardware.
Error_Exe_Cannot_Modify_Strong_Signed_Binary is a developer error, and it comes with the following error message: 218 (0xDA) The image file %1 is strong signed, unable to modify.
This is an obscure error, but if you ever encounter it, try all the solutions from this guide and let us know which one worked for you.
The VIDEO_DWMINIT_TIMEOUT_FALLBACK_BDD Windows live dump, with error code 0x00000187, indicates that Windows is having trouble using the IHV (Independent Hardware Vendor) driver and employed BBD (Basic Display Driver) to ensure an uninterrupted display functionality.
This affects the display quality and performance, and is usually caused by an outdated, corrupt, or incompatible graphics driver or corrupted system files. Remember, VIDEO_DWMINIT_TIMEOUT_FALLBACK_BDD is not a blue screen error but only a live dump is generated.
Before you proceed to the solutions, reboot the PC, install any pending Windows updates, and, if possible, remove and reconnect the graphics adapter. For most of you, these basic checks should fix the problem.
How can I fix VIDEO_DWMINIT_TIMEOUT_FALLBACK_BDD?
1. Reinstall the graphics driver
Press Windows + X to open the Power User menu, and select Device Manager.
Expand the Display adapters entry, right-click on the affected graphics adapter, and select Uninstall device.
Tick the checkbox for Attempt to remove the driver for this device, and click Uninstall.
Finally, reboot the PC, and Windows will automatically install a fresh copy of the driver.
2. Update the graphics driver
Press Windows + S to open Search, type Device Manager in the text field, and click on the relevant result.
Expand Display adapters, right-click on the affected graphics adapter, and select Update driver.
Click on Search automatically for drivers to let Windows install the best locally available version.
Finally, restart the PC to apply the changes and check for improvements.
Updating the graphics driver can help quickly fix VIDEO_DWMINIT_TIMEOUT_FALLBACK_BDD in Windows 11. Besides, if Windows can’t find a better version, go to the manufacturer’s website, find the new releases, and then manually install the latest driver!
3. Roll back the graphics driver
Press Windows + R to open Run, type devmgmt.msc in the text field, and hit Enter.
Expand Display adapters, right-click on the affected graphics adapter, and select Properties.
Go to the Driver tab and click the Roll Back Driver button.
Pick a reason for rolling back the update, and click Yes to confirm.
Once done, reboot the computer to apply the changes.
If the Roll Back Driver button is greyed, check the manufacturer’s website for the previous driver version and then install it.
4. Repair the corrupted system files
Press Windows + S to open Search, type Command Prompt, and click on Run as administrator.
Click Yes in the UAC prompt.
Paste the following DISM commands individually and hit Enter after each: DISM /Online /Cleanup-Image /CheckHealthDISM /Online /Cleanup-Image /ScanHealthDISM /Online /Cleanup-Image /RestoreHealth
Next, run this command for the SFC scan: sfc /scannow
Finally, restart the PC for the changes to come into effect.
The steps listed below are for Windows 11. If you are running the previous iteration, learn how to perform an in-place upgrade on Windows 10.
Go to Microsoft’s official website, select the OS edition and product language, and download the Windows 11 ISO.
Double-click the ISO file, and then select Open in the confirmation prompt.
Run the setup.exe file.
Click Yes in the UAC prompt.
Click on Next to proceed.
Review the license terms and click on Accept.
Make sure the setup reads, Keep personal files and apps, and then click on Install.
Wait for the in-place upgrade to complete. It may take 45-90 minutes.
An in-place upgrade is akin to reinstalling Windows, and you don’t lose any personal files or installed apps, making it the preferred choice when dealing with VIDEO_DWMINIT_TIMEOUT_FALLBACK_BDD.
If this, too, fails, you must contact the graphics card manufacturer or visit a local repair shop because, at this point, it’s most likely a hardware-related problem to blame.
It seems Microsoft might enhance Copilot, or its Windows Intelligence capability, for that matter (if the Redmond-based tech giant decided to rename its AI models again) with complex prediction capabilities that would have the model predict pretty much anything—from weather to the state of political affairs, wars, to your blood glucose, and overall physical health.
The prediction capabilities were unveiled in a recently published patent titled Generative Future Predictions Based on Complex Events. The technology uses a system that gathers data over time and information about related events to train an AI model to predict the future accurately. This document discusses making accurate predictions based on numerical data (quantitative predictions).
The system gets data that changes over time (temporal data) about a specific system from a first source. This could be anything from financial data to weather patterns to machine performance metrics. It also gathers information from a second source on complex events that could impact the system. These events might include economic changes, major news events, or sudden equipment failures.
The system then uses generative networks to train a model. Generative networks are artificial intelligence that can generate new data samples. Here, they help find patterns between the temporal data (from the first source) and the complex events (from the second source).
The model is trained iteratively, meaning it undergoes multiple learning rounds to improve its accuracy. With each round, the model refines its ability to understand how the temporal data and complex events are related.
This tool will then control and refine predictions. It helps the model make sense of data sequences over time, improving its ability to predict future events based on past data.
By combining these steps, the system creates a powerful tool for making accurate predictions about various other systems. This could be used in many fields, such as predicting stock market trends, forecasting weather, and anticipating machine maintenance needs, but it could also accurately predict whether your health is going to get better or worse.
Theoretically, it can be used to predict a machine’s viability, meaning the system will tell you just how long your PCs/devices will last.
It’s worth noting that this technology, while patented, might not even see the light of day for obvious reasons, but it is an important clue when talking about Microsoft’s vision of a useful AI. The Redmond-based tech giant has patented similar technologies before. Earlier this year, we discovered that the tech giant was thinking about an AI capable of predicting natural disasters, and it patented the technology.
Now, the company is considering enhancing this AI model to predict not just disasters but virtually any context that can be measured and observed through pragmatic data.
What do you think? Will you use Microsoft Copilot when it becomes a complex AI prediction system?
Error_Checkout_Required error comes with the following message 221 (0xDD) The file must be checked out before saving changes. The issue affects developers for the most part, but if you ever encounter it, this guide will show you how to fix it.
How can I fix Error_Checkout_Required?
1. Ensure Windows is up to date
Click on Start and select Settings.
Go to Windows Update and click on Check for updates.
Windows will download any available updates.
2. Check your MySQL tables
Log in to your server.
Run the following command: CHECK TABLE my_table QUICK;
If no errors are found, run this instead: CHECK TABLE my_table EXTENDED;
If any errors are found, research on how to fix them.
Select the desired restore point and click on Next.
Follow the instructions on the screen.
Once the system is restored, check if the problem is gone.
Error_Checkout_Required is an obscure error, and it’s unlikely that you’ll encounter it as an end user, but if you do, you can always try the suggestions from this guide.
Microsoft has decided to return the iconic MSN brand by reintegrating it into its news services, effectively replacing the modern ‘Microsoft Start’ it introduced a few years ago.
The change means that the web homepage and apps that were previously under the Microsoft Start banner are now once again branded as MSN, complete with the old-school butterfly logo updated for the modern era.
Last week, users noticed a new MSN logo in Microsoft Edge, making many believe the old MSN is returning. Articles on the Microsoft Start website were also redirecting to MSN.com, signaling that Microsoft was in the process of rebranding its content services as MSN.
The return of MSN isn’t a complete surprise. Microsoft never entirely killed off the MSN brand, with the MSN.com homepage remaining online even after Microsoft rebranded many MSN services to Microsoft Start in 2021. Still, the return to MSN marks a complete reversal of Microsoft’s previous decisions, with Microsoft pulling back content services from the Microsoft Start branding and to MSN.
It’s not clear if Microsoft will rebrand the Microsoft Start apps on iOS and Android as MSN, but the content served within those apps is likely to be rebranded as MSN.
Microsoft first introduced Microsoft Start—then called Microsoft News—in 2019. In 2021, Microsoft expanded it into a platform for multiple types of content, including news, games, and video, with the goal of making it a super app that could handle any media.
MSN was first launched in 1995 and was once synonymous with the internet for many people. In the 90s and 2000s, MSN was also the brand used for many of Microsoft’s consumer internet products, including MSN Messenger (later Windows Live Messenger), MSN Hotmail (later Windows Live Hotmail and Outlook.com), and MSN Search (later Live Search, Windows Live Search, and eventually Bing).
Today, MSN is a news aggregator website and a suite of MSN-branded apps for weather, money, sports, and more. The MSN.com homepage is still the default in Microsoft’s Edge browser, and users can access MSN services directly from the Windows 10 and Windows 11 Taskbar.
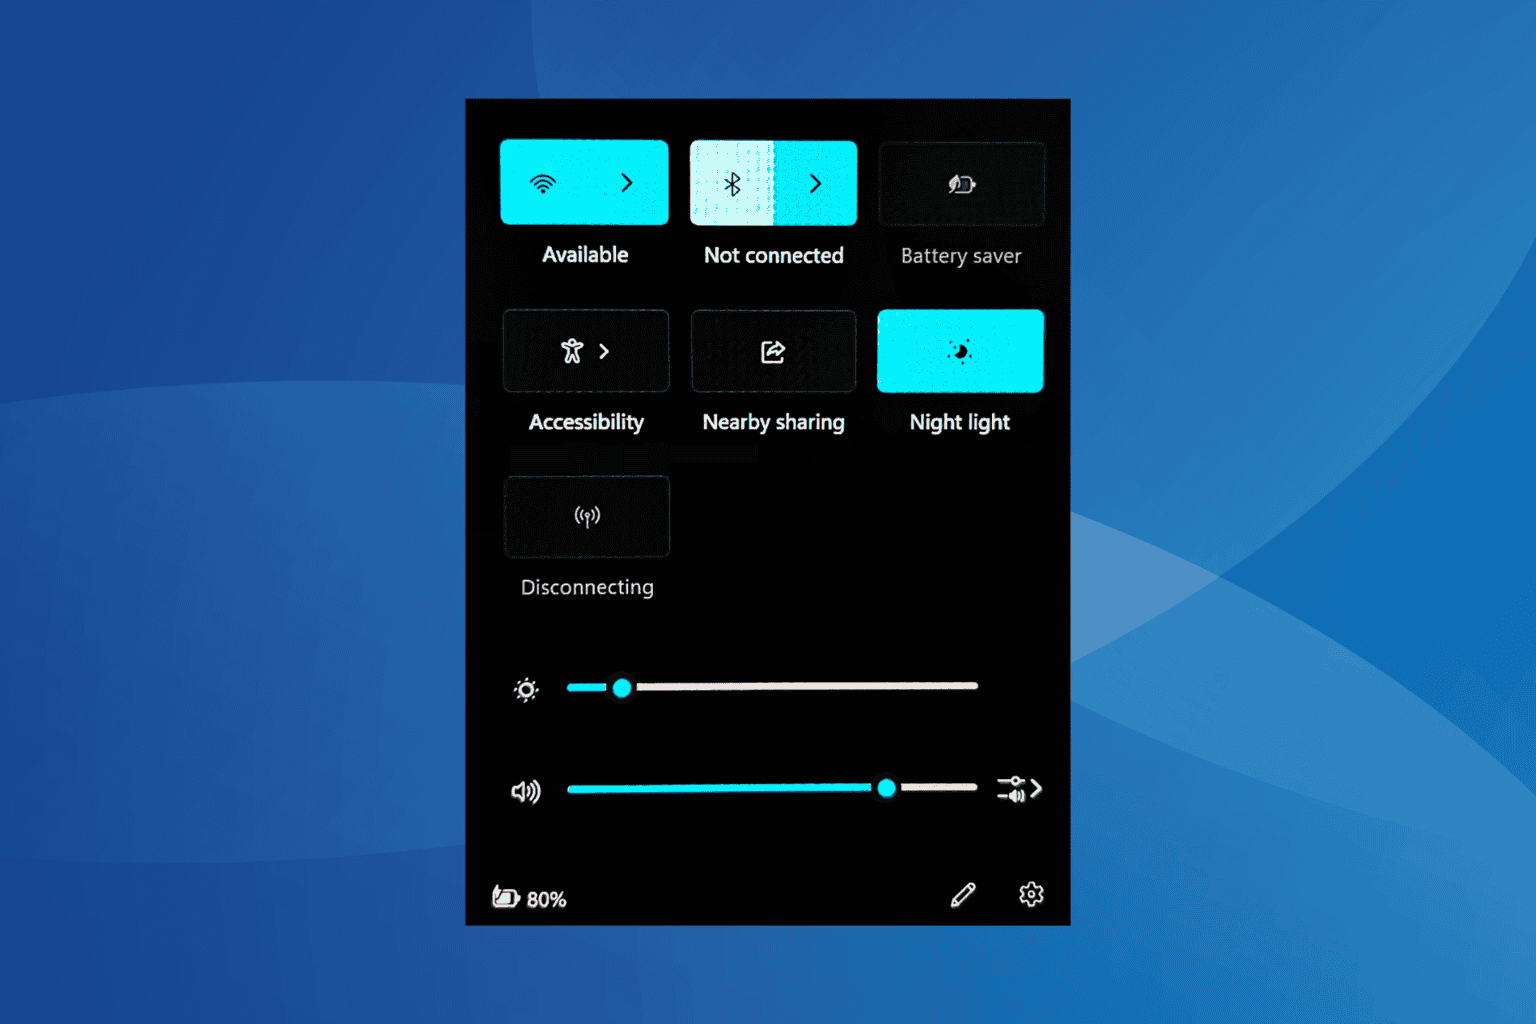
When your Windows 11 mobile hotspot is stuck on disconnecting in the Quick Settings section, it’s usually due to misconfigured firewall settings, outdated, incompatible, or corrupt wireless driver, problematic network settings, or a buggy Windows update.
Restarting the computer provides a temporary reprieve from the issue, but it’s a recurring thing for many, indicating that the problem lies with other aspects.
Before you proceed, reboot the PC, install all pending Windows updates, and, if possible, remove and re-insert the network adapter into the computer. For most of you, this should fix the issue!
What can I do if the Windows 11 mobile hotspot is stuck on disconnecting?
1. Reset Windows Firewall settings
Press Windows + S to open Search, type Windows Defender Firewall, and click on the relevant result.
Select the Restore defaults option from the left pane.
Click the Restore defaults button and confirm the change.
Finally, reboot the PC and verify whether the Windows 11 mobile hotspot is still stuck on disconnecting.
2. Update the network adapter’s driver
Press Windows + X to open the Power User menu, and select Device Manager.
Expand the Network adapters entry, right-click on the wireless adapter, and select Update driver.
Click on Search automatically for drivers and wait for Windows to install the best locally available version.
Restart the computer to apply the changes.
If outdated drivers are to blame for Windows 11 mobile hotspot disconnecting, updating the network drivers will do the trick. In case the OS can’t find a better version, go to the manufacturer’s official website, locate the new releases, and then manually install the latest drivers!
3. Roll back the wireless adapter driver
Press Windows + S to open Search, type Device Manager, and click on the relevant result.
Expand the Network adapters entry, right-click on the wireless adapter, and select Properties.
Go to the Driver tab, and click on Roll Back Driver.
Pick a reason for rolling back the update or specify one in the text field, and click Yes to confirm.
Reboot the PC and check for improvements.
If the Roll Back Driver option is greyed out, either the driver wasn’t recently updated, or Windows didn’t store the files for the previous version. In this case, note the current version, find the last one on the manufacturer’s website, and then install the driver.
4. Install a generic driver
Press Windows + R to open Run, type devmgmt.msc in the text field, and hit Enter.
Expand Network adapters, right-click on the wireless network adapter, and select Update driver.
Click on Browse my computer for drivers.
Next, click on Let me pick from a list of available drivers on the computer.
Pick any driver that reads Microsoft next to its name, and click on Next.
Finally, reboot the PC to apply the changes and verify whether the Windows 11 mobile hotspot is still stuck on disconnecting and reconnecting.
5. Reset the network settings
Press Windows + I to open Settings, go to Network & Internet from the navigation pane, and click on Advanced network settings on the right.
Click on Network reset.
Click the Reset now button.
Again, click Reset in the confirmation prompt.
Once done, restart the computer and check for improvements.
6. Edit the Registry
Tip
The steps below require making changes to the Registry, which is a critical part of Windows. So, I recommend you create a restore point beforehand so that you can always revert the changes in case of any inconsistencies.
Press Windows + R to open Run, type regedit in the text field, and hit Enter.
Click Yes in the UAC prompt.
Paste the following path in the address bar and hit Enter: HKEY_LOCAL_MACHINE\SOFTWARE\Policies\Microsoft\Windows\Network Connections
Look for the NC_ShowSharedAccessUI DWORD on the right. If you can’t find it, right-click on the empty part, hover the cursor over New, select DWORD (32-bit) Value, and name it NC_ShowSharedAccessUI.
Double-click on the newly created DWORD.
Enter 1 under the Value data field, and click OK to save the changes.
Once done, reboot the PC and verify whether the Windows 11 mobile hotspot stuck on disconnecting problem is resolved.
7. Uninstall recent Windows updates
Press Windows + I to open Settings, go to Windows Update from the left pane, and click on Update history.
Scroll down and click on Uninstall updates.
Click the Uninstall option next to the last downloaded update.
Again, click Uninstall in the confirmation prompt.
Restart the computer and check for improvements. In case the problem remains unresolved, uninstall other recent Windows updates.
If the Windows 11 mobile hotspot is stuck on disconnecting after update, uninstalling recent Windows updates should get things running in no time.
When this, too, fails, the last option is to reinstall Windows. It will clear any software-based inconsistencies. If the mobile hotspot issue reappears, the network adapter is to blame. For that, visit a local repair shop.
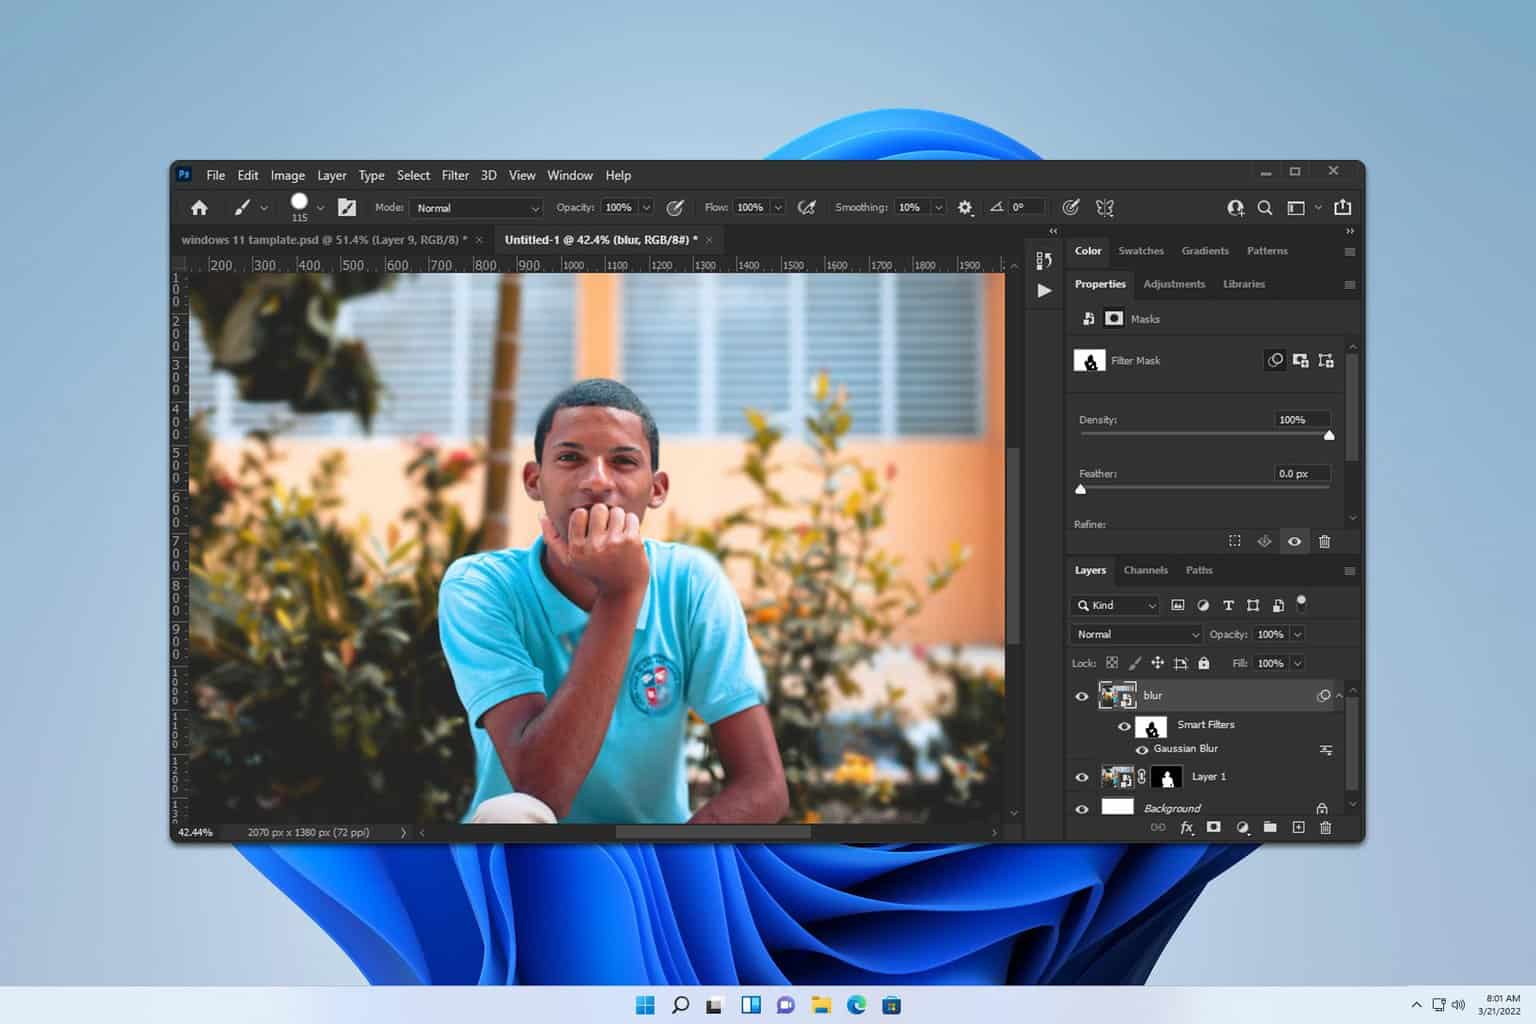
Firstly, select your object. You can do that with any of the available selection tools. Object Selection Tool is the easiest to use, but others might be better depending on the image.
Once selected, press Ctrl + Shift + I invert your selection.
Go to Filter and expand Blur. Select Gaussian Blur.
Adjust the blur value and click OK to save it.
These are the basic methods you can use to blur the background in Photoshop, and it’s up to you to experiment with them until you get the perfect results.
To learn more, we also have a guide on how to unblur images in Photoshop, so you might want to check it out.
If you’re not a Photoshop user, you can just as easily blur the background in GIMP in just a few simple steps.
Microsoft has officially announced the arrival of Spyro Reignited Trilogy on Xbox Game Pass starting November 12. The popular remaster of the classic PlayStation-era Spyro games was teased by Xbox Game Pass earlier in the week with a video clip featuring a chest from the game.
The trilogy, which features three of the original Spyro adventures with redone visuals and quality-of-life improvements, will be available across all of Xbox Game Pass’s platforms. This means that subscribers can play it on Xbox Series X, Xbox Series S, Xbox One, PC, and via the cloud.
Originally released for PlayStation 4 and Xbox One back in 2018, it has since come to PC and Nintendo Switch, too. We can’t say we’re too surprised to see it come to Xbox Game Pass, though; not only has the arrival of the Crash Bandicoot N. Sane Trilogy been teased for Game Pass, but Activision has been weirdly stealthy about the game’s release on PC and other platforms, too.
The Spyro Reignited Trilogy has had a bit of a tumultuous time in terms of its availability: it was announced for PS4 and Xbox One, then came to PC and Switch later, but it was then de-listed from several digital storefronts, including Steam, only to return to Steam in 2021.
Now, though, it’s finally coming to Xbox Game Pass, so those who haven’t yet had a chance to play through Spyro the Dragon, Spyro 2: Ripto’s Rage, and Spyro: Year of the Dragon might soon be able to do so as part of their subscription.
If you use Outlook predominantly on your mobile phone, then you should know that Microsoft will make it easier for you to compose emails by allowing you to add another email as an attachment to the one you’re writing.
This new feature will make it easier to refer the recipient of your email to another important email in the conversation. You can do so by tapping on your mobile phone, so you’ll no longer have to use Outlook for Web for that.
According to a recent entry to the Microsoft 365 Roadmap, the new feature will impact iOS and Android devices, so you won’t have to worry that iPhone users won’t see your email properly and vice versa.
Now while you are composing in Outlook for iOS or Android, you can use the same attach option you already know to select and attach emails to your mail.
The entry says the new option to attach emails in the mail in Outlook for Mobile should be rolling out this month and should be generally available to all users by the end of the month.
Speaking of email attachments, Outlook was recently enhanced to allow users to find them without opening the emails.
The HYPERGUARD_VIOLATION Windows blue screen, with error code 0x0000018C, appears when the Windows kernel detects corruption in the critical kernel code or data.
Common causes for the Hyperguard Violation blue screen include corrupted or incompatible drivers, conflicting apps, corrupted system files, and malware infection.
Before you proceed to the solutions, restart the PC, disconnect all non-critical hardware, and install any pending Windows updates. For most of you, these basic checks should do the trick!
Press Windows + X to open the Power User menu, and select Device Manager.
Expand the entries here, individually right-click on the devices listed underneath, and select Update driver.
Click on Search automatically for drivers to let Windows install the best locally available version.
After updating all the drivers, reboot the PC to apply the changes.
Driver issues are one of the most common causes behind the HYPERGUARD_VIOLATION bug check in Windows. So, your primary approach should be to update all the drivers.
If Windows can’t find a better version, I recommend you visit the manufacturer’s website, locate the new releases, and then manually install the latest driver!
2. Roll back recent driver updates
Press Windows + R to open Run, type devmgmt.msc in the text field, and hit Enter.
Double-click on the entries here, individually right-click on the device(s) listed underneath, and select Properties.
Go to the Driver tab, and click on Roll Back Driver.
Choose a reason for the roll back or enter one in the provided field, and click Yes to confirm.
Finally, reboot the PC and verify whether HYPERGUARD_VIOLATION is fixed.
If the Roll Back Driver option is greyed out for a device, it indicates that either the driver wasn’t updated recently or Windows didn’t store the files for it. In this case, you must install an older version from the manufacturer’s website.
3. Repair the corrupted system files
Press Windows + S to open Search, type Command Prompt, and click on Run as administrator.
Click Yes in the UAC prompt.
Paste the following DISM commands individually and hit Enter after each: DISM /Online /Cleanup-Image /CheckHealthDISM /Online /Cleanup-Image /ScanHealthDISM /Online /Cleanup-Image /RestoreHealth
Execute this command to run the SFC scan: sfc /scannow
Once done, restart the computer to apply the changes.
Press Windows + R to open Run, type appwiz.cpl in the text field, and hit Enter.
Select any app that was recently downloaded or updated, and click on Uninstall.
Follow the on-screen instructions to complete the process, and then restart the PC.
If a quick removal doesn’t fix HYPERGUARD_VIOLATION, there must be some leftover files, app cache, or Registry still conflicting with Windows. Here, it’s best that you use a top-rated software uninstaller to completely wipe all traces of the program.
5. Scan the PC for malware
Press Windows + S to open Search, type Windows Security, and click on the relevant result.
Click on Virus & threat protection.
Click on Scan options.
Select the Full scan entry and then click on Scan now.
Wait for the malware scan to complete. It usually takes 15-30 minutes.
6. Test the RAM modules
Press Windows + S to open Search, type Windows Memory Diagnostic, and click on the relevant result.
Click on Restart now and check for problems.
After the scanning is complete, check the mdsched logs and look for issues with the RAM.
When Windows Memory Diagnostic can’t find any problems, I recommend you use Memtest86+, an advanced open-source tool that runs a series of scans on individual RAM sticks and detects even the smallest of issues.
If any problems are reported during the scan, it’s best to replace the malfunctioning module because a failing RAM is a common reason behind HYPERGUARD_VIOLATION.
7. Reinstall Windows
When nothing else works, you can always reinstall Windows to rule out all software-based conflicts. Before you proceed, move any critical files on the PC to external storage to prevent data loss.
To reinstall Windows, connect a USB flash drive to another PC > go to Microsoft’s official website > download the Media Creation Tool > use it to create a bootable Windows USB > plug in the USB into the affected PC > change the boot order to the flash drive > run the Windows setup > proceed with the installation.
Reinstalling Windows from a bootable USB
If even a reinstall fails to fix the HYPERGUARD_VIOLATION Windows blue screen error, you must contact the system manufacturer or visit a local repair shop. Because, at this point, it’s most likely a hardware malfunction to blame.
Before you leave, discover all the causes of BSoD and take measures to prevent these from reappearing!
For any queries or to share which fix worked for you, drop a comment below.
Good news for those using Microsoft Planner’s tasks and dependencies in their work: The Redmond-based tech giant announced it will increase their number per premium plan. The new limit is increased to 3000 tasks and 2000 dependencies per premium plan.
According to a new entry to the Microsoft 365 Roadmap, those with a premium plan can create and manage up to this new number of tasks and dependencies.
Create and manage up to 3,000 tasks and 2,000 dependencies within a Microsoft Planner premium plan.
The new increase will impact Microsoft Project and Planner and will be released in February 2025. Tasks and dependencies are usually used in Planner to streamline workflows, assign workloads, and hasten a project’s development.
A single project can usually have hundreds of Planner tasks if it’s complex, but they can also reach thousands if the project is big.
The new update will ensure Planner can be used in all situations, regardless of their infrastructure.
In other news, Microsoft finally added the Board view in My Tasks for Planner, and the new update will help users organize their tasks faster and easier.
After releasing the October 2024 Patch Tuesday updates for Windows 10 and 11, Microsoft quietly installed KB5001716 on Windows 10 and Windows 11 systems. This update includes a new user interface (UI) for Windows Updates in Windows.
With KB5001716, however, Windows may attempt to download and install feature updates to your device if it is approaching or has reached the end of its support for your currently installed Windows version. Feature updates offer new functionality and help keep your device secure.
The update was available for manual download starting October 10, 2024, but KB5001716 is being force-installed on many Windows 10 and 11 systems without users’ consent.
The update is being installed on systems with the following OS versions:
When this update is installed, Windows may attempt to download and install feature updates to your device if it is approaching or has reached the end of support for your currently installed Windows version. After this update is installed, Windows may periodically display a notification informing you of problems that may prevent Windows Update from keeping your device up to date and protected against current threats. For example, you may see a notification informing you that your device is currently running a version of Windows that has reached the end of its support lifecycle, or that your device does not meet the minimum hardware requirements for the currently installed version of Windows.
As per the report, Microsoft wants to give the impression that the update is being installed to improve the Windows Update experience. However, it is mostly about pushing users to Windows 11, or at least that’s the perception Microsoft is pushing.
The company has been heavily criticized for this move, and rightly so. Users should have the right to choose which OS they want to run on their PCs, and if they want to upgrade, they can do so via the Windows Update settings.
As per Microsoft, the KB5001716 update is not available on Windows Server Update Services (WSUS), Windows Update for Business, or Windows Update.
However, the company did the same with the Windows 10 KB4023057 update and later made it available on WSUS and other update channels, so it’s possible that Microsoft will do the same with KB5001716.
Sometimes when you try to start Minecraft, you might get a Bad video card drivers error. This will prevent the game from running, but there are a few methods you can use to fix this issue.
How can I fix the Minecraft Bad video card drivers error?
Before we try anything else, ensure that Minecraft and Java are up to date. Also, try disabling mods and check if that helps.
1. Change TLauncher settings
Open TLauncher.
Next, click the Cogwheel icon.
Click on Settings and locate Java Path.
Enter the following path: C:\Program Files (x86)\Java\your-version-of-java\bin\javaw.exe
Save changes.
Now you know how to fix Bad video card drivers Minecraft error on TLauncher on Windows 10. Keep in mind that you need to use the exact Java path in step 4 for this solution to work.
2. Ensure that your graphics card is enabled
Press the Windows key + X and choose Device Manager.
Locate your graphics card on the list.
If it’s disabled, right-click it and choose Enable device.
Users reported that this error appeared because their Intel HD Graphics 4000 was disabled, but after enabling it, the problem was gone.
Press the Windows key + S and type advanced system settings. Select Advanced system settings.
Click on Settings in the Performance section.
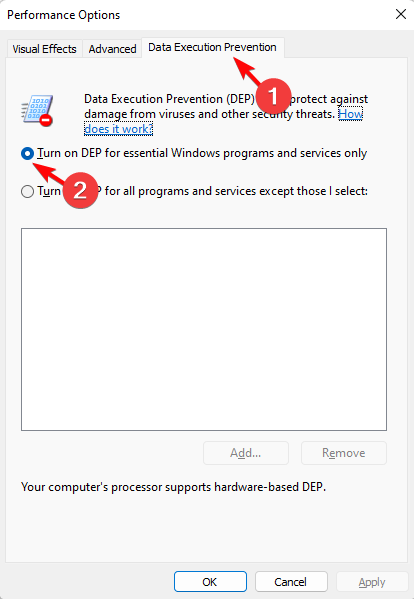
Next, head over to the Data Execution Prevention tab.
Ensure that DEP is enabled.
Click on Add and add the Minecraft file. You can find it at C:\Program Files\Minecraft\Minecraft.exe
Add other exe files from the Minecraft directory.
Save changes.
Minecraft error Bad video card drivers can appear on both Windows 10 and Windows 11, but regardless of the version you’re using the solutions are the same.
Microsoft is looking to overhaul the Settings page for default apps in the Windows 11 24H2 update and introduce a new default app picker for Windows apps. To put it mildly, the current UI is not particularly user-friendly, especially for less tech-savvy users. The company wants to change that with a more intuitive interface.
Microsoft is also investigating a more robust way to display default app choices. As part of the Windows 11 24H2 update, Microsoft has added a default app section to the Settings app.
The section allows users to set default apps on a per-extension basis rather than dig through the Settings app and the Control Panel to set or unset their chosen app.
The company now wants to make setting default apps in Windows 11 a bit easier to understand. As Albacore, a Windows enthusiast, discovered, the default apps section is being overhauled with the Windows 11 24H2 update.
Configuring default apps is getting an overhaul. It's a mess of placeholders and broken viewmodels at the moment, all very early. pic.twitter.com/C3Pg7Pm9MK
Currently, though, the page is filled with placeholders like half-baked ViewModels and misaligned text descriptions. The change was noticed on Windows 11 24H2 build 26120.2213, released recently under KB5045885.
As you can see in the image above, the text appears to have been updated. The Default Apps selection page now says, “Set a default for a file type or link type.” Hence, it is unclear what the final product will be like after the overhaul.
On November 11, 2024, VMware announced that its powerful desktop hypervisor products, VMware Fusion and VMware Workstation, will be accessible for free. This change, applicable to commercial, educational, and personal users, marks a significant shift in VMware’s strategy.
The paid versions, previously known as Workstation Pro and Fusion Pro, are no longer available. However, for customers under a commercial contract, VMware ensures that service and support will not be impacted until the end of the contract term.
The free versions of the hypervisor tools now include all the previously included features in the paid versions. Standard support via VMware’s support portal or support team will continue for the duration of existing commercial customers’ contracts.
Once the contract period ends, while customers can still use the product, the ability to file support tickets for troubleshooting will cease. Instead, VMware plans to provide access to a wide range of online resources, such as documentation, user guides, and community forums, to assist these users.
For new users that are onboarded under the free model, VMware has introduced a few new resources:
Community Access: Access to a community of users to share insights, tips, and solutions.
Extensive Product Documentation: Detailed documentation to maximize the use of VMware’s tools.
Knowledge Base Articles: A rich library of articles on everything from troubleshooting to advanced features.
In the announcement, VMware says it remains committed to investing in new features, usability improvements, and other enhancements. The company aims to maintain high stability, performance, and security standards while optimizing its offerings and delivering even more value.
By making Fusion and Workstation accessible, VMware hopes to grow its user base and gather insights that will help the company evolve its products to better meet customer needs.
What do you think about VMware’s move to make its hypervisor tools accessible to everyone? Are you planning to start using Fusion or Workstation now that they’re available at no cost?
Minecraft error B-0010 can appear on various platforms such as PS5 or Switch, and this issue will prevent you from playing the game, so let’s see how we can fix it.
How do I fix error code B-0010 in Minecraft?
As a workaround, you can try enabling mobile data or using shared mobile data to bypass this error.
1. Reinstall Minecraft
On your Switch, go to System Settings.
Select Data Management and select Software.
Locate Minecraft on the list.
Go to Check for Corrupt Data and wait for the scan to finish.
Next, choose the option to reinstall the software.
Wait for it to download the game again.
If you’re getting Minecraft error code B-0010 on PS5 or any other platform, try deleting the game and downloading it again to fix this issue.
2. Check Auto update unload packs settings
Go to Settings and select General.
Choose Auto update unlocked packs.
Select On with Wi-Fi or Mobile data.
Check if the problem is resolved.
Minecraft Bedrock error code B-0010 will prevent you from using certain features of the game, but you should be able to fix it by following the instructions from this article.
The SECURE_KERNEL_ERROR BSoD (Blue Screen of Death), with code 0x0000018B, appears due to a fatal error in the secure kernel of Windows.
Common causes for the blue screen error include corrupted system files, outdated or incompatible drivers, the presence of malware, conflicting apps or services, and an improper Windows install.
Before you proceed, reboot the PC, install all pending Windows updates, and disconnect any non-critical hardware. For most of you, this should quickly fix things!
How can I fix SECURE_KERNEL_ERROR blue screen on Windows?
1. Repair the corrupted system files
Press Windows + S to open Search, type Command Prompt in the text field, and click on Run as administrator.
Click Yes in the UAC prompt.
Paste the following DISM commands individually and hit Enter after each: DISM /Online /Cleanup-Image /CheckHealthDISM /Online /Cleanup-Image /ScanHealthDISM /Online /Cleanup-Image /RestoreHealth
Once done, run this command for the SFC scan: sfc /scannow
Finally, reboot the PC and check for improvements.
Press Windows + S to open Search, type Turn Windows features on or off, and click on the relevant result.
Now, uncheck the Hyper-V option if the checkbox is ticked, and click OK to save the changes.
Reboot the PC and verify whether the Secure Kernel Error blue screen is fixed.
3. Update all the drivers
Press Windows + X to open the Power User menu, and select Device Manager.
Expand the different entries here, individually right-click on the device listed underneath, and select Update driver.
Click on Search automatically for drivers and wait for Windows to install the best locally available version.
Similarly, update the other drivers and then reboot the PC to apply the changes.
If you haven’t done so in the recent past, updating the drivers will help fix SECURE_KERNEL_ERROR in no time. Because, in 2 out of 5 cases, a driver-related file was responsible for the BSoD!
When Windows can’t find a better version, go to the manufacturer’s website, locate the new releases, and manually install the latest driver.
4. Scan the PC for malware
Press Windows + S to open Search, type Windows Security, and click on the relevant result.
Click on Virus & threat protection.
Click on Scan options.
Select the Full scan entry and click on Scan now.
After the scan is done running, restart the computer and check for improvements.
5. Perform a clean boot
Press Windows + R to open Run, type msconfig in the text field, and hit Enter.
Go to the Services tab, tick the checkbox for Hide all Microsoft services, and click on Disable all.
Go to the Startup tab, and click on Open Task Manager.
Select any app here that reads Enabled under the Status column, and click on Disable.
Go back to System Configuration and click Apply and OK to save the changes.
Finally, click on Restart in the confirmation prompt.
After Windows loads in a clean boot state, verify whether the blue screen error is fixed.
If the SECURE_KERNEL_ERROR BSoD doesn’t appear again, one of the apps or services disabled during the Clean Boot was the underlying cause. So, again, launch System Configuration, re-enable each component one at a time, and restart the PC after each.
As soon as the Windows blue screen reappears, the last enabled component is to blame, and you will have to completely remove it.
6. Reinstall the Virtual Machine software
Press Windows + R to open Run, type appwiz.cpl in the text field, and hit Enter.
Select the affected virtual machine software that’s throwing the BSoD, and click Uninstall.
Follow the on-screen instructions to complete the process and then reboot the computer.
Finally, reinstall the software from an official source.
In the past, VirtualBox repeatedly threw the SECURE_KERNEL_ERROR bug check due to compatibility issues. If a reinstall doesn’t work, perhaps you may consider switching to another top-rated Virtual Machine for Windows!
7. Perform an in-place upgrade
NOTE
The steps listed here are for Windows 11. If you are running the previous iteration, learn how to perform an in-place upgrade on Windows 10.
Double-click the ISO file, and select Open in the confirmation prompt.
Run the setup.exe file.
Click Yes in the UAC prompt.
Click Next to proceed.
Review Microsoft’s license terms and click on Accept.
Make sure the setup reads, Keep personal files and apps, and click on Install.
Wait for the process to complete. It may take 45-90 minutes.
If an in-place upgrade, too, fails to fix SECURE_KERNEL_ERROR in Windows 11, the last option is to reinstall Windows. Since it might lead to data loss, I recommend moving any critical files from the system file to external storage.
To get that extra adrenalin from playing Minecraft, mods are the key ingredient but what happens when there’s an error during mod loading?
A mod failing to load during launch could be caused by a myriad of issues. It’s possible that it’s not compatible with the game, is outdated or missing some key dependencies. Also, downloading mods from unofficial sources could prevent them from loading.
How do I fix the Minecraft error during mod loading?
1. Launch the game without mods
Press the Windows key, type Minecraft and click Open to open the Minecraft launcher.
Go to the Installations tab from the top menu.
Click the New Installation option.
Type in a name for the installation and, go to Version, select the latest release from the drop-down. If you are confused about which one to choose, like the one that starts with the word release.
Click Create.
Next, go to the Play tab and choose the installation you created to play.
Launching Minecraft without mods will help you isolate the problem whether it’s a game issue or a mods issue. If the game loads successfully, try deleting the mods one by one until you find the culprit.
2. Delete Minecraft mods
Hit the Windows + E keys to open File Explorer.
Input the keyword %appdata% in the search box.
Next, click %appdata% to open the folder in the screenshot directly below.
Click the .minecraft folder to open it.
Then open the mods subfolder.
Press the Ctrl + A hotkey to select all the Minecraft mods in the folder.
Click the Home tab shown directly below.
Then click the Delete button to erase the selected mod files.
You can later reinstall the mods and try launching Minecraft then see if they’re loading or the error persists.
3. Run Minecraft in compatibility mode (and as an administrator)
Hit the Windows + E keys to open File Explorer.
Open your Minecraft folder in File Explorer and click the Game subfolder in your Minecraft folder.
Select the Compatibility tab shown in the snapshot directly below.
Select the Run this program in compatibility mode option.
Select Windows 7 on the Compatibility mode drop-down menu.
Then click the Run this program as an administrator checkbox to select that option.
Click the Apply option to save the new settings.
Click OK to leave the window.
If the issue of Minecraft error during mod loading occurs because of compatibility issues, running the program in compatibility mode can mimic a previous version that was compatible with that particular mod and allow it to load next time.
4. Allocate more RAM
Launch the Minecraft Client.
Head to the Installations tab from the top.
Select Minecraft Dungeons from the left side.
Click on the 3-dot icon next to Minecraft Dungeons game on the right side.
Select Edit from the drop-down.
Click on MORE OPTIONS.
Under the JVM ARGUMENTS, you will find a line of text.
Change the amount of RAM that Minecraft Dungeon can use after Xmx. For example, Xmx4G means Minecraft Dungeons will use 4GB of RAM.
Click Save and check if this fixes the low FPS issue or not.
Mods are known to add more features therefore bulking up the game. Minecraft would require more RAM to accommodate all these mods to run optimally. If you’re low on RAM, adding more can help the game manage the mods better and fix the loading issues.
Check compatibility – Always check whether your device meets the system requirements before installing a mod. Your current Minecraft edition plays a part so ensure both are compatible.
Download reliable mods – With many mods available, not all of them are legitimate. Ensure you’re downloading from trusted and official sources to avoid such issues.
Check for updates – As you update your Minecraft game, also check for mod updates to ensure they are compatible.
Keep mods at a minimum – As much as mods enhance your gameplay, too many may cause issues or some game inconsistencies. You can use a mod manager but sometimes they too, can disappoint you when they’re not working. If you’re looking for some top mods for Minecraft, we think these are a must-have.
Hopefully, one of these solutions has helped you load your mods in Minecraft while playing. To address other common Minecraft errors, check out our comprehensive article.
That’s it from us but if you have any additional thoughts or solutions, let us know in the comment section below.
The LOADER_ROLLBACK_DETECTED is a BSoD that usually comes with the value of 0x00000196. The error message states that the version of the OS loader does not match the operating system. The issue might be caused by hard drive errors, or hardware changes, system file corruption or problematic Windows updates.
How do I fix the LOADER_ROLLBACK_DETECTED BSoD?
1. Run SFC and DISM scans
Press the Windows key, type cmd in the search box, and click Run as administrator to launch Command Prompt with administrative rights.
Type the following command to scan and repair the corrupted system files and press Enter:sfc /scannow
Wait for the command to execute, copy & paste the following command to repair the Windows OS files, and hit Enter:DISM /Online /Cleanup-Image /RestoreHealth
Once the scan is complete, restart your computer to confirm the changes.
2. Scan the hard drive for errors
Press the Windows key, type cmd in the search box, and click on Run as administrator.
Then type the following command and press Enter: chkdsk C: /f /r.
Once the process is done, restart your computer and check if the issue is fixed.
3. Repair the Master Boot Record (MBR)
Turn off and turn on your computer 3 times until you see the automatic repair screen.
Then click Troubleshoot > Advanced options > Command Prompt.
In the Command Prompt window, type the following commands and press Enter after each one:
The MBR is a software that runs before the operating system and instructs the machine how to boot from the hard disk. If the MBR is damaged or corrupted, it can trigger the LOADER_ROLLBACK_DETECTED BSoD error.
4. Restore Your System to a previous point
Press Win + R to open the Run console, type rstrui and press Enter.
In the pop-up System Restore window, click Next.
In the next window, choose a restore point that has a date prior to the BSoD error started occurring and click Next.
Then follow the on-screen instructions to complete the system restore process.
This should restore your system to a working condition and resolve the LOADER_ROLLBACK_DETECTED BSoD error.
So, now you know how to fix the LOADER_ROLLBACK_DETECTED BSoD. If you have any suggestions or other solutions leave a comment below.
The KERNEL_PARTITION_REFERENCE_VIOLATION bug check with a value of 0x0000018E indicates a kernel mode issue in which a partition violation occurs in the system. This is usually related to corruption in the virtual partitions or partition management and is caused by faulty hardware, corrupted system files, or outdated drivers.
To begin with, update BIOS/UEFI firmware and check for Windows updates. Then, if there is a virtual partition, check the disk integrity. Also, if you use external drives, reseat or reconnect them to fix connection issues.
How can I fix the KERNEL_PARTITION_REFERENCE_VIOLATION error?
1. Run the Windows memory diagnostic tool
NOTE
Before running the scan, make sure you have closed all the apps and all your work is saved.
Press the Windows key, type memory diagnostic in the search box, and click Open from the list of options.
Click Restart now and check for problems.
Your device will restart and check for problems.
Windows will scan your RAM for errors or faults that cause system performance issues. If issues are detected, you may need to reseat the RAM and run the scan again. If the issue persists, the memory is faulty, and you may need to replace it.
2. Scan your disk for errors
Press the Windows key, type cmd in the search bar, and click Run as administrator to launch Command Prompt with elevated rights.
To check for disk errors or bad sectors, type the following command and hit Enter: chkdsk /f /r
If the disk you want to scan is in use, you will be prompted to schedule the scan after restart, type Y, and press Enter.
Restart your computer, and the scan will start at boot.
3. Run the SFC scan
Press the Windows key, type cmd in the search bar, and click Run as administrator to launch Command Prompt with administrator rights.
To check and repair corrupted system files, copy & paste the following command and hit Enter: sfc /scannow
Wait for the scan to complete, then restart your computer.
4. Update the device drivers
Press Windows + R to open the Run console.
Type devmgmt.msc and click OK to open the Device Manager app.
You will get the list of system components. Click on each category one by one to expand and look for a problematic driver (one with a yellow triangle with an exclamation mark)
Right-click it and select Update driver from the context menu.
Click Search automatically for drivers, and Windows will try to find the latest version of drivers. YOu can repeat these steps if you have more than one problematic driver.
If Windows cannot find a suitable driver for your device, go to the manufacturer’s website and download the driver. Alternatively, you can download and install a reliable driver updater tool to install the latest version of drivers.
Locate the app, click the three-dot icon, and select Uninstall.
Click Uninstall again to confirm the choice.
6. Restore your computer to the previous version
Press Windows + R to open the Run window.
Type sysdm.cpl and click OK to open the System Properties window.
Go to the System Protection tab and click the System Restore button.
On the System Restore window, select Choose a different restore point and click Next.
From the list of available restore points, select the one that was created before the KERNEL_PARTITION_REFERENCE_VIOLATION error appeared and click Next.
Click Finish.
Windows will restart and restore your computer settings to the selected version. If the System Restore fails to extract the original copy, you should disable the antivirus and try again; read this guide to learn more about it.
7. Reset your PC (Last resort)
NOTE
Before resetting your PC, back up all important data, such as documents, pictures, videos, and any application or game data you don’t want to lose.
Press Windows + I to open the Windows Settings app.
Go to System, then click Recovery.
Under the Recovery options, locate Reset this PC and click the Reset PC button.
On the Choose an option screen, select either Keep my files or Remove everything.
Select Cloud download or Local reinstall from the How would you like to reinstall Windows page.
On the Additional settings screen, check the settings that you selected. If you want to change any of them, click Change settings. If not, then click Next to proceed.
On the Ready to reset this PC screen, click the Reset option.
The Windows system files are reinstalled, and your computer might restart several times. If you choose to delete apps and drivers or change the settings, you need to reinstall apps, update drivers, and reconfigure settings.
In conclusion, to fix the KERNEL_PARTITION_REFERENCE_VIOLATION error, you can run the SFC scan, Windows memory diagnostic tool, scan your disk for errors, uninstall recently installed apps, restore your PC to the previous version, or reset your computer.
If you often face issues related to BSoD and want to learn the reasons for the issue, read this guide to learn more. In case you see a BSoD error after the Windows upgrade, you can scan for malware or check out the solutions mentioned in the guide.
If you have any questions or suggestions about the BSoD error, feel free to mention them in the comments section below.
The SECURE_FAULT_UNHANDLED bug check (0x18D), with the error code 0x0000018D, typically means that the system has faced a security-related issue, usually involving hardware features like Trusted Platform Module or Secure Boot. This error often occurs when there are corrupted system files, faulty device drivers, or problems handling security-related processes.
To begin with, update BIOS/UEFI firmware, ensure Secure Boot is turned on, and check for Windows updates. Now, check the Event Viewer to get detailed logs of the error so you can better understand it.
How can I fix the SECURE_FAULT_UNHANDLED error?
1. Check for TPM issues
Press Windows + R to open the Run window.
Type tpm.msc and click OK to open the Trusted Platform Module (TPM) Management on Local Computer.
Locate the status and ensure it says, The TPM is ready for use.
2. Run the Windows memory diagnostic tool
NOTE
Before proceeding with the steps, make sure all the apps are closed and save all your work on your computer.
Press Windows + R to open the Run console.
Type mdsched.exe and click OK to open the Windows Memory Diagnostic tool.
Click Restart now and check for problems.
Your device will restart and check for problems.
The tool will scan your RAM for errors and faults that cause system performance issues. If issues are found, try reseating the RAM and rerun the scan. If the problem persists, it means the RAM is faulty, and you may need to replace it.
2. Scan for disk errors
Press the Windows key, type cmd in the search box, and click Run as administrator from the list of options to launch the Command Prompt with elevated rights.
To scan and repair the bad sectors on your disk, copy & paste the following command and hit Enter: chkdsk /f /r
If the disk you want to scan is in use, you will be prompted to schedule the scan after restarting. Type Y and press Enter.
Restart your computer, and the scan will start at boot time.
3. Update the device drivers
Press Windows + R to open the Run window.
Type devmgmt.msc and click OK to launch the Device Manager app.
You will get the list of system components. Click on each category one by one to expand and locate a problematic driver. (one with a yellow triangle with an exclamation mark)
Right-click it and select Update driver from the context menu.
Click Search automatically for drivers, and Windows will try to find a suitable version of the driver. You can repeat these steps if you have more than one problematic driver.
If Windows cannot find the latest driver for your computer, visit the manufacturer’s website and download the driver. Alternatively, you can download and install a reliable driver updater tool to ensure all the device drivers are up to date.
Press the Windows key, type cmd in the search box, and click Run as administrator to launch the Command Prompt with elevated rights.
To scan and repair the corrupted system files on your computer, type the following command and press Enter: sfc /scannow
Wait for the scan to execute, copy & paste the following command to repair the Windows system image files and restore corrupted system files via Windows Update and hit Enter: Dism /Online /Cleanup-Image /RestoreHealth
The scan will take some time to complete; once done, restart your computer to let the changes take effect.
5. Restart your computer in a clean boot environment
Press Windows + R to open the Run window.
Type msconfig and click OK to open the System Configuration window.
Go to the Services tab, place a checkmark next to the Hide all Microsoft services, and then click the Disable all button.
Switch to the Startup tab, and click Open Task Manager.
On the Task Manager window, select all the Enabled items one by one, and click Disable, then close the window.
Back on the System Configuration window, click Apply and OK.
Click Restart to save the changes and reboot your PC.
Now, your computer will restart without third-party startups and services; try enabling them one by one to understand which software or service conflicts with your computer’s functioning. If none are found at fault, reverse engineer these steps to restart your computer normally.
6. Reinstall Windows on your computer
NOTE
Before following the steps below to fix the error, back up your important data. You also need a USB drive with 8 GB of free space.
Once the mediacreation.exe file is downloaded, double-click to open it and click Yes on the UAC prompt to grant permissions.
On the Windows 11 Setup guide, click Accept to agree to the license terms and agreements.
Plug in your USB drive, select the USB flash device option, and click Next.
Choose the language, edition, and architecture, then click Next.
Select the USB device and click Next.
Follow the on-screen steps, click Finish, and remove the USB device safely.
Reinstall Windows
Plug your USB drive into the affected computer, then press Windows + E to open the Windows File Explorer.
On the USB drive’s root directory, look for setup.exe file and double-click it, then click Yes.
Select Change and choose any of these options as per your preference:
Keep personal files and apps – Keeps personal data, apps & settings
Keep personal files only – Preserves data & settings, but apps are deleted
Keep nothing – Deletes all the settings, data, and apps.
Once selected, click Install to reinstall Windows 11 on your PC.
Your PC will restart several times and then take you to the login screen. Log in to your computer, check for Windows updates, and configure your device.
In conclusion, to fix the SECURE_FAULT_UNHANDLED error, ensure Windows is up to date, run the SFC scan, look for bad RAM sectors, update all device drivers, restart your PC in clean boot, or reinstall Windows.
The MICROCODE_REVISION_MISMATCH Windows blue screen, with error code 0x0000017E, appears when processors have an inconsistent microcode loaded. In most cases, the BSoD appears after updating the Windows or BIOS.
This happens if the current BIOS version or motherboard is out-of-date, BIOS settings are misconfigured, or an incompatible/buggy Windows update is installed. As for MICROCODE_REVISION_MISMATCH on VMware, there was a bug in one of the software’s versions, which triggered the BSoD on a virtual machine.
How can I fix MICROCODE_REVISION_MISMATCH?
1. Reinstall VMware
Press Windows + R to open Run, type appwiz.cpl in the text field, and hit Enter.
Select VMware from the list of programs, and click on Uninstall.
Follow the on-screen instructions to complete the process and restart the PC.
Now, reinstall the latest version of VMware from the official website.
A few versions of VMware, including 17.5.1, triggered the MICROCODE_REVISION_MISMATCH blue screen in Windows 11. To fix things, get the latest VMware version with the patch for the bug!
Also, if a quick removal doesn’t work, use a top-rated software uninstaller to wipe all traces of the program and proceed with the reinstall.
2. Uninstall recent Windows update
Press Windows + I to open Settings, go to Windows Update from the navigation pane, and click on Update history.
Scroll down to the bottom and click on Uninstall updates.
Click the Uninstall option next to the recently downloaded update.
Again, click Uninstall in the confirmation prompt.
3. Disable Secure Boot in BIOS
For many users, disabling Secure Boot from the BIOS helped quickly fix the MICROCODE_REVISION_MISMATCH BSoD in Windows. The process for it differs for each manufacturer, and you should find the exact steps on the manufacturer’s official website.
Disabling Secure Boot
If this doesn’t work, disable Fast Boot in the BIOS and then verify whether the blue screen is resolved.
4. Reset the BIOS
Turn off the PC, then power it on, and as soon as the display lights up, press the F1, F2, F10, F12, Del, or Esc key, depending on the system manufacturer, to access the BIOS.
Once in the BIOS, look for any option that reads Default, Load Defaults, Reset, and select it.
Choose the appropriate response in the prompt to confirm the reset.
Finally, boot Windows and check if the MICROCODE_REVISION_MISMATCH blue screen disappears.
5. Update the BIOS
If you got the BSoD after a BIOS update like many others, getting a newer version from the manufacturer’s official website will do the trick.
Remember, updating the BIOS is a critical process. Any interruptions during this time can render the PC unusable, and you will have to reflash the BIOS. So, make sure the computer is connected to a stable power source.
6. Reinstall Windows
If the previous solutions failed, you can reinstall Windows to eliminate all software-based conflicts triggering the MICROCODE_REVISION_MISMATCH BSoD. Before you proceed, I recommend moving all critical files to external storage to prevent data loss.
Reinstalling Windows from a bootable USB drive
To reinstall Windows, plug a formatted USB flash drive into a working PC > go to Microsoft’s official website > download the Media Creation Tool > use it to create a bootable Windows USB > connect the USB drive to the affected PC > change the boot order to the flash drive > run the setup and install Windows again.
7. Contact the manufacturer’s support
When nothing else works, the last option is to contact the manufacturer’s official support. They will know if the BIOS/motherboard is compatible, whether it can handle the microcode version, and suggest dedicated fixes that directly tackle and fix Microcode Revision Mismatch on their product.
I recommend this as the last resort because getting a reply from the support team can often take days. In the meantime, you can use official forums, and see if other users can help you.
Before you leave, discover all the causes of BSoD and take the necessary steps to prevent these from reappearing!
Which fix worked for you? Share with our readers in the comments section.
For many, the Synaptics touchpad comes as an additional peripheral to secure devices so if you get the tpfhid device code 19 and your touchpad becomes unresponsive, you’ll not be able to use it.
From the device manager, the error code is usually indicated that there was a problem with the Registry. It is possible that the registry entries related to the specific drivers have been corrupted, or there have been significant system changes that have caused incompatibility issues with the drivers.
How do I fix the Synaptics TPFHID device code 19 error?
1. Run the Hardware and Devices troubleshooter
Hit the Windows key, type cmd, and select Run as administrator.
Type the following command and hit Enter: msdt.exe -id DeviceDiagnostic
In the Hardware and Devices dialog that appears, click Next.
The tool will start scanning for any problems with your hardware and recommend a fix. After it is done, try again and check if the device code 19 error persists.
2. Uninstall and reinstall the Driver
Press the Windows and R keys simultaneously to open the Run dialogue box. Type devmgmt.msc and click OK.
In Device Manager, expand the category Mice and other pointing devices.
Right-click on the Synaptics SMBus TouchPad and select Uninstall device.
Check the box that says Delete the driver software for this device. Click Uninstall.
Restart your PC to complete the uninstallation process.
Right-click the Start button and select Device Manager.
Now, click on View and select Show hidden devices.
Next, expand the Human Interface Devices category, right click on the Synaptics touchpad driver and select Update driver.
Select Search automatically for drivers, or if you already downloaded a driver for your system, select the Browse my computer for drivers and point the location on your laptop.
Alternatively, you can go to your device’s manufacturer’s official page–in this case the HP Driver Support page HP Driver Support.
Enter your HP model number and download the latest Synaptics TouchPad driver compatible with your version of Windows.
Install the downloaded driver and reboot your computer.
Press the Windows button, type regedit, and press Enter to open the Registry Editor.
Open this registry path: Computer\HKEY_LOCAL_MACHINE\SYSTEM\ CurrentControlSet\Control\Class
Identify what GUID subkey class in the registry corresponds to the hardware device you need to fix error code 19 for on Microsoft’s System-Defined Device Setup Classes page.
Press the Windows key, type Control Panel, and click Open.
Select Large icons as View by and click Recovery.
Click Open System Restore.
Select Choose a different restore point and click Next.
Now select the restore point and click Next.
Click Finish to restore the previous settings, and Windows will restart.
Apart from the synaptic tpfhid device code 19, you may also run into code 10 where the device fails to start or code 24 where the device is not present.
Once you get your Synaptics driver to work again, ensure that all touchpad settings are available for optimal performance. We also have a list of some of the must-have Touchpad gestures to enhance your productivity so make sure to check them out.
We come to a close at this juncture but keep the conversation going in our comment section by letting us know which solution helped you out or share any other tips you may have.
Windows 11’s Energy usage within the Settings page will get a new graph that showcases energy consumption habits and their impact on your device’s battery.
Spotted by Insider enthusiast Albacore (@thebookisclosed on X), in the latest Insider builds of Windows 11, the capability will use battery data to display the level of consumption throughout the day.
Windows 11 will be getting an energy usage graph to complement the existing battery level graph ⚡?? The feature is still in early development w/ battery level data being used for both graphs. The design is already a little different though ?️ pic.twitter.com/eahs7olua3
Users will better understand what’s causing their batteries to drain energy. The new graph will also feature a new design, blue stripes that will get shorter depending on the level of consumption, as you can see in the featured image above.
For now, even though the new Windows 11 Energy usage graph is in development, it still contains important details that should give us a clue about what to expect: it showcases energy usage and battery level, and the graph can be customized to showcase the last 24 hours.
At the same time, it also gives users details on screen time, and it will cumulate the total time spent with the screen on or off.
Internally this is referred to as the “Emission Monitor” curiously enough
The new graph in Windows 11’s Energy usage page is now available in the Windows Insider Program, which means it will probably be released in a few weeks.
The WIN32K_SECURITY_FAILURE is a stop error with the value of 0x00000197. It is typically associated with the win32k.sys file, a crucial component of the Windows kernel that handles the GUI functions in Windows. The error may be caused by problematic drivers, system files corruption, software conflict, but also hardware malfunctioning. However, you should also start by running a full scan using a third-party antivirus.
How do I fix the WIN32K_SECURITY_FAILURE BSoD?
1. Update the graphics driver
Right-click the Start button and select Device Manager from the list of options.
From the list of components, locate and click Display adapters to expand it.
Right-click the graphics driver and select Update driver from the context menu.
Click Search automatically for drivers and follow the on-screen instructions to complete.
Windows will try to find the best version available; if it fails to do so, go to the manufacturer’s website and get the latest driver version.
Alternatively, you can use a reliable driver updater tool to ensure all the drivers are up to date.
2. Run the Windows Memory Diagnostic tool
Press the Windows key, type windows memory diagnostic in the search box, and click Open from the list of options.
Click Restart now and check for problems.
The system will now restart and check for memory issues during boot.
Once the scan is complete, you can log in to your computer as usual and see the results. If issues are found in the scan, you might need to reseat your RAM and rerun the scan. If you see the errors again, think about replacing the malfunctioning RAM module.
3. Run the SFC scan
Press the Windows key, type cmd in the search box, and click Run as administrator from the list of options.
To repair or restore the missing or corrupted system files, type the following command and hit Enter: sfc /scannow
Wait for the command to execute, and restart your computer to let the changes take effect.
4. Disable hardware acceleration
Press Windows + I to open the Settings app.
Go to System, then click Display.
Scroll to locate Related settings, and click Graphics.
Under Default settings, click Change default graphics settings.
On the next screen, locate Hardware accelerated GPU scheduling and toggle off the switch to disable it.
Restart your computer to let the changes take effect.
You can also try disabling hardware acceleration in the apps associated with this crash. Just look in theirs settings and identify the graphics section.
In conclusion, to fix the WIN32K_SECURITY_FAILURE error, you can ensure all the CPU components are properly seated, then ensure Windows is up to date, then run the SFC scan, memory diagnostic tool, update graphics driver, disable hardware acceleration, etc.
Windows Intelligence is apparently real, and Microsoft is preparing it for Windows users, especially those using Windows 11.
Insider enthusiast Albacore (@thebookisclosed on X) found out that the Redmond-based tech giant is actually developing a new Settings page for it right within the Privacy & Security panel.
Placeholder page for what will eventually become Windows Intelligence settings. Should let you toggle WI system-wide, then user-wide, as well as browse recent activities that tapped into WI resources. pic.twitter.com/iuKjZZfiRh
You can see above in the featured image how the Settings page for Windows Intelligence looks currently.
Placeholder page for what will eventually become Windows Intelligence settings. Should let you toggle WI system-wide, then user-wide, as well as browse recent activities that tapped into WI resources.
It’s worth noting that Windows 11 already has a Settings page for Copilot and Recall, and the insider insists the new Windows Intelligence page is separate from Recall.
The WORKER_THREAD_RETURNED_WHILE_ATTACHED_TO_SILO comes with the error code 0x0000019A. This error points out that a worker thread attached to a silo and did not detach before returning. This issue has the roots in driver corruption or malfunctioning or system-related file corruption.
How can I fix WORKER_THREAD_RETURNED_WHILE_ATTACHED_TO_SILO?
1. Update the device driver
Right-click the Start button and open Device Manager.
You will get a list of system components. Click on them one by one to expand the category, and look for a driver with a yellow triangle and an exclamation mark inside it.
Once located, right-click the driver and choose Update driver from the context menu.
Click Search automatically for drivers and follow the on-screen prompts to complete the process.
Of course, if Windows cannot find a driver for your device, you can download it manually from the manufacturer’s website.
The quicker and easier alternative is to use a reliable driver updater tool. They scan your system and fix driver issues automatically.
2. Run SFC and DISM scans
Press the Windows key, type cmd in the search box, and click Run as administrator to launch Command Prompt with administrative rights.
Type the following command to scan and repair the corrupted system files and press Enter: sfc /scannow
Wait for the command to execute, copy & paste the following command to repair the Windows OS files, and hit Enter: DISM /Online /Cleanup-Image /RestoreHealth
Once the scan is complete, restart your computer to confirm the changes.
3. Restore your computer to the previous version
Press the Windows key, type control panel in the search box, and click Open.
Select Large icons for View by, then click Recovery.
Click the Open System Restore link.
On the System Restore window, select Choose a different restore point and click Next.
Choose the restore point created before the WORKER_THREAD_RETURNED_WHILE_ATTACHED_TO_SILO appeared, then click Next.
Click Finish to initiate the process.
In conclusion, to fix the WORKER_THREAD_RETURNED_WHILE_ATTACHED_TO_SILO BSoD error, you can update device drivers, run system scans or restore your computer to a previous point. If the solutions don’t help you, there is also the option of resetting Windows to default settings.
If you have any suggestions or questions about the error, feel free to mention them in the comments section below.